DIY Thread: Steering Wheel/Quick Release/Hub *HIGH RES PIC CONTENT*
After doing quite a bit of research on the this install, some of the instructions were confusing and even conflicting with each other. Additionally, some of the newer steering wheel kits being made available are a bit different from some of the DIY pdf's found on this site. On my previous car, the instructions were pretty straight forward. I thought it would be nice to create a DIY thread for the greater good of the NSX community.
There are numerous vendors you can pick up these parts from. Hopefully the vendor you choose gives you everything- including all the RESISTORS to bypass the airbag light (who wants that annoying airbag light anyways)? Now there are other CHEAPER quick release products out there, but I'm going to warn you that those products are all replicas of the original works bell product. DO NOT confuse these products with lesser quality knockoffs. Do you really want to take a chance with an important safety product? Get the Real deal works bell. Click HERE for more info on Works Bell, their quality, and R & D.
*This process involves NO splicing, No drilling, etc. SRS light will NOT come on and your Horn WILL work. You can revert back to OEM later on if you chose too.
***NOTE: This is a DIY for those who do NOT care to have cruise control***
Let's get started.....
Step One:
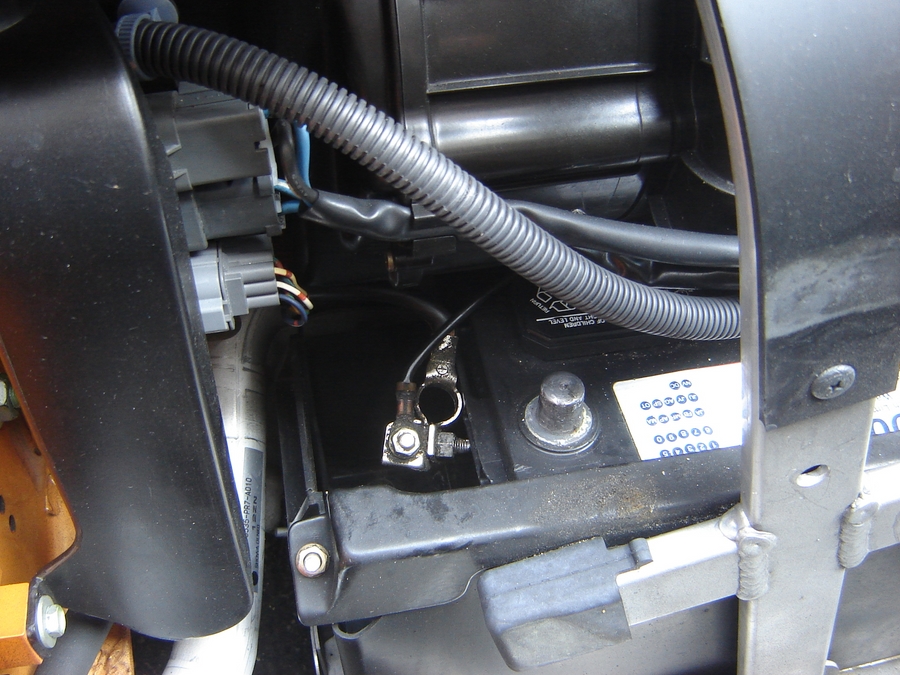
Disconnect Battery (removing negative terminal shall suffice).
Step 2: Remove screws from bottom of steering column.
Step 3: Undo clip and remove panel.
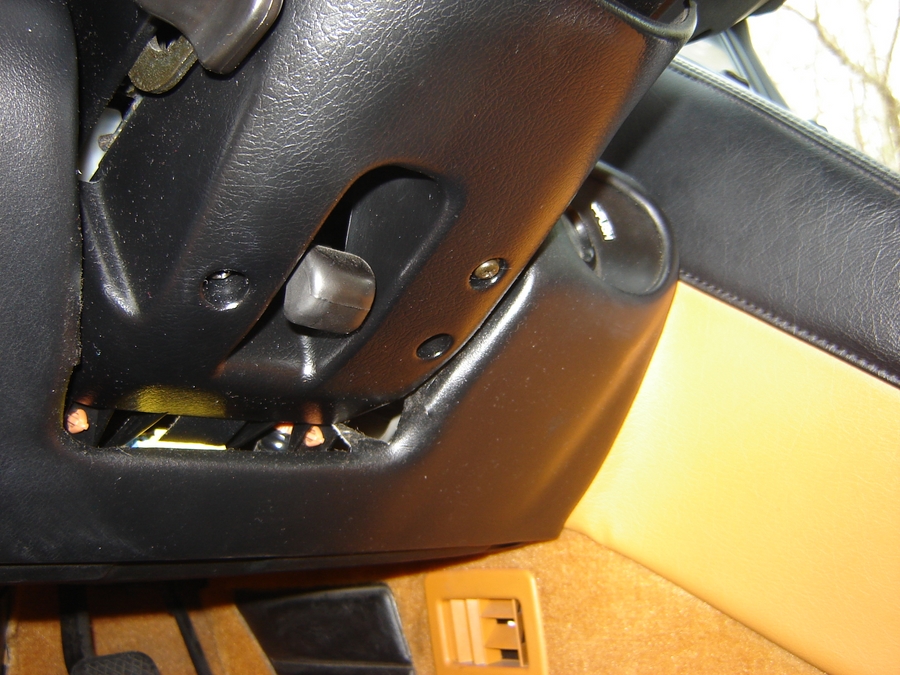
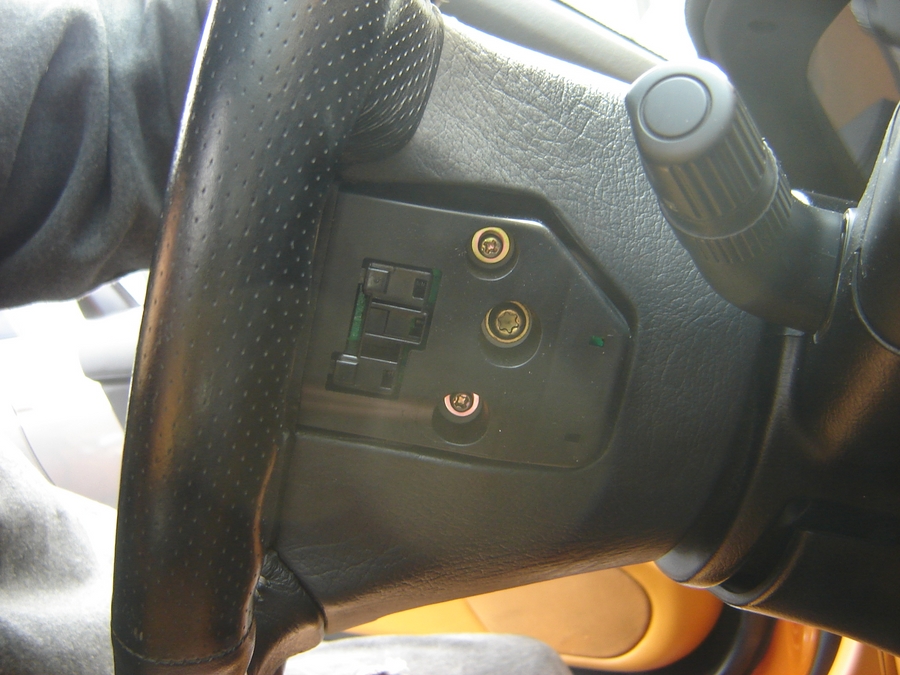
Step 4: Use a torx bit to remove the torx bolts from the bottom sides of the steering column
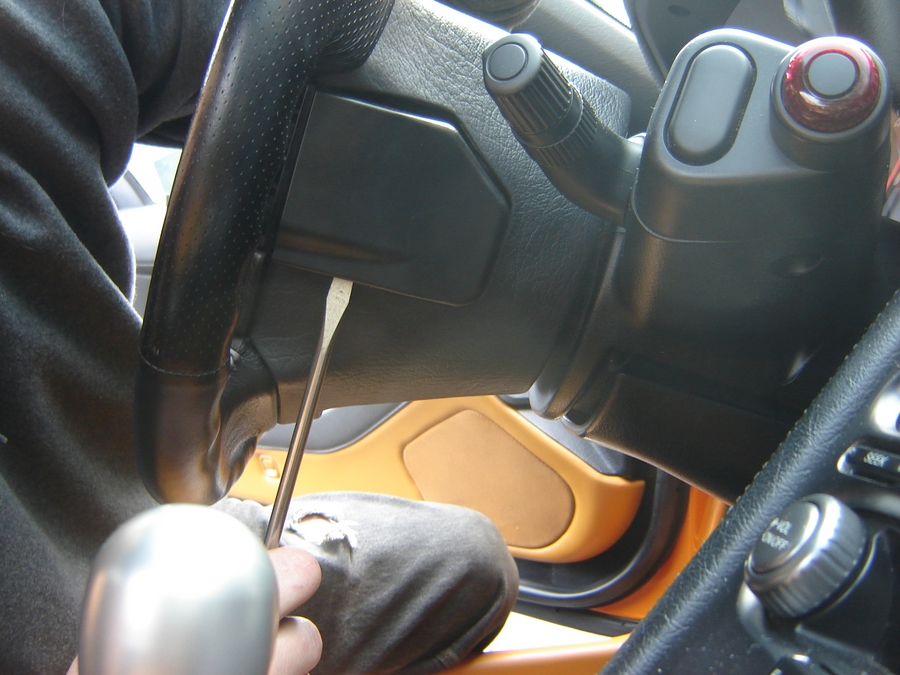
Step 5 carefully pry off panel on right side of steering column to reveal another torx bolt. Remove this Torx bolt as well.
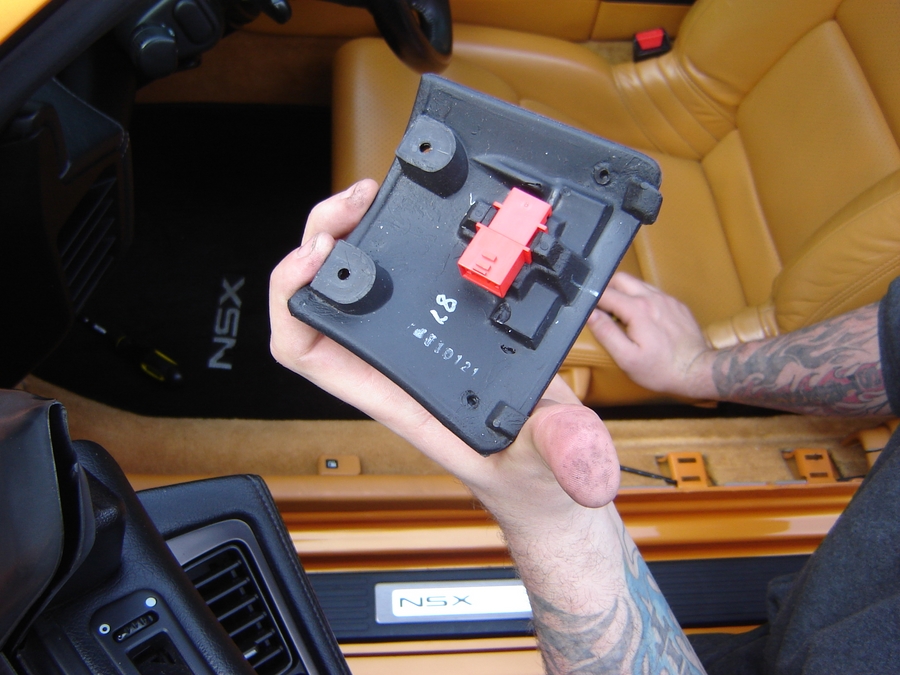
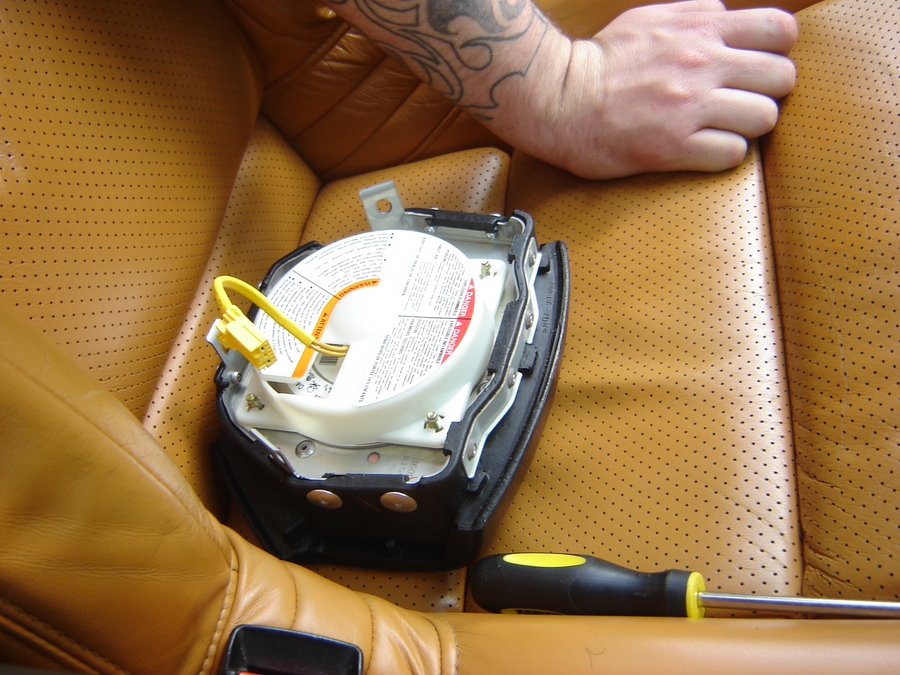
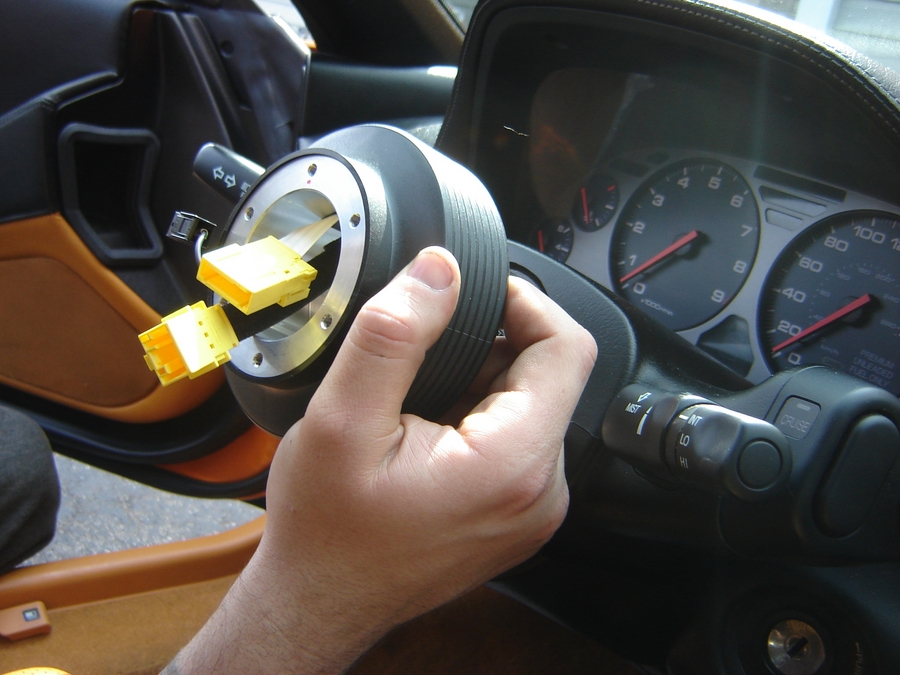
Step 6: with these bolts gone, the airbag should slide right out.
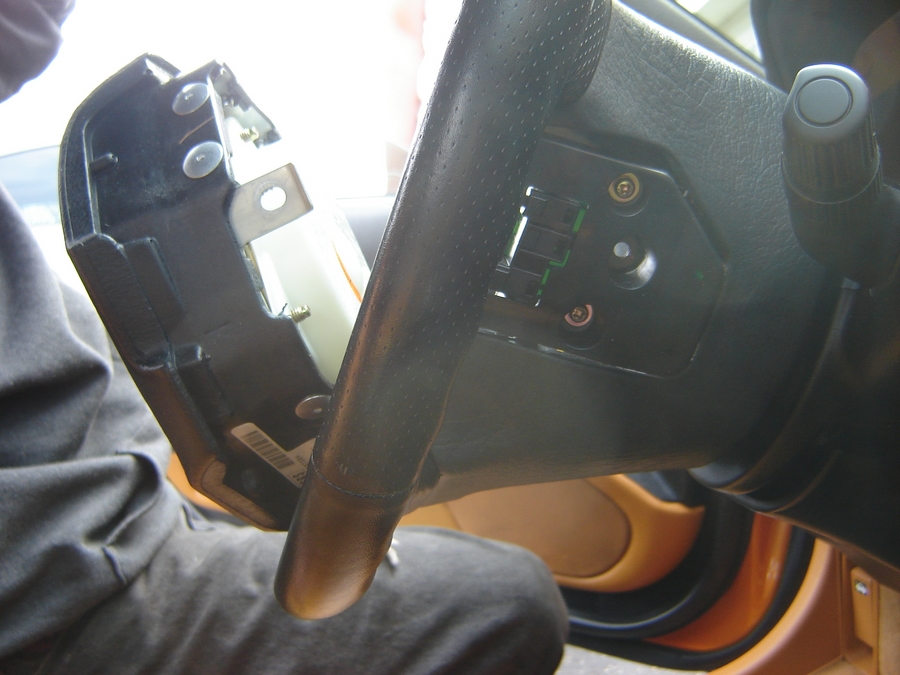
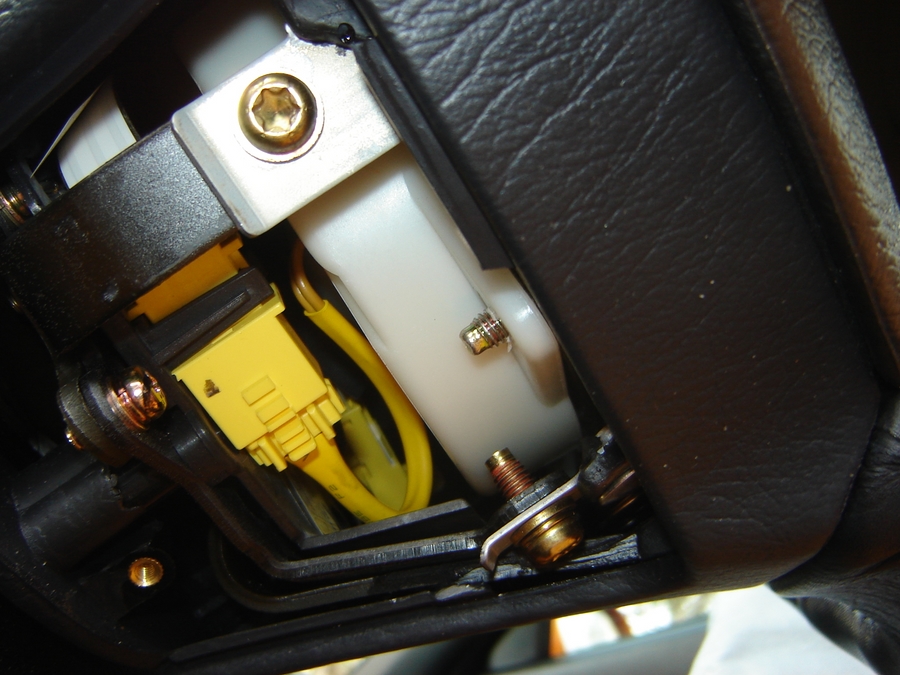
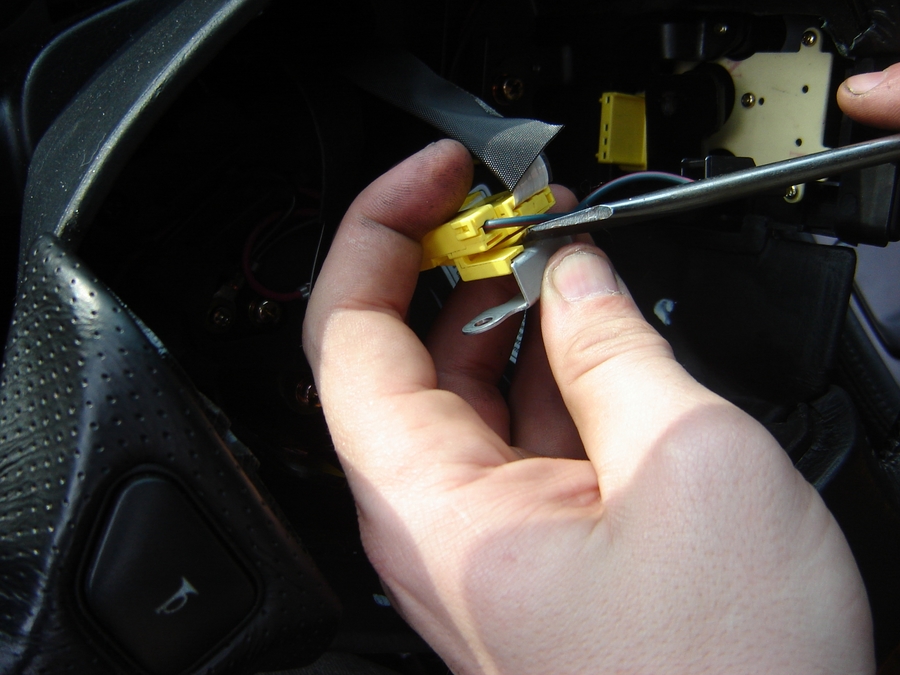
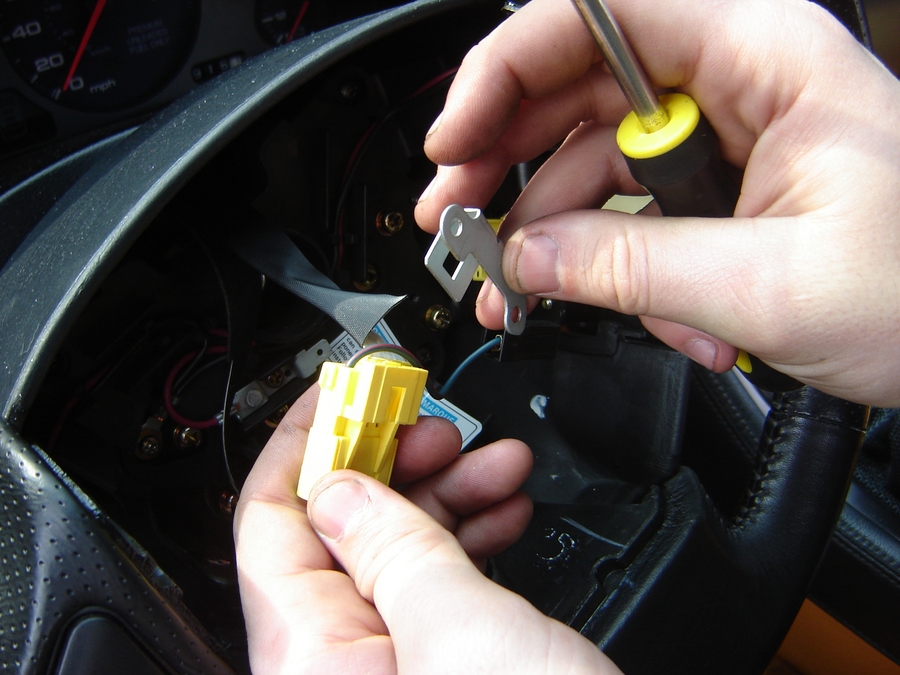
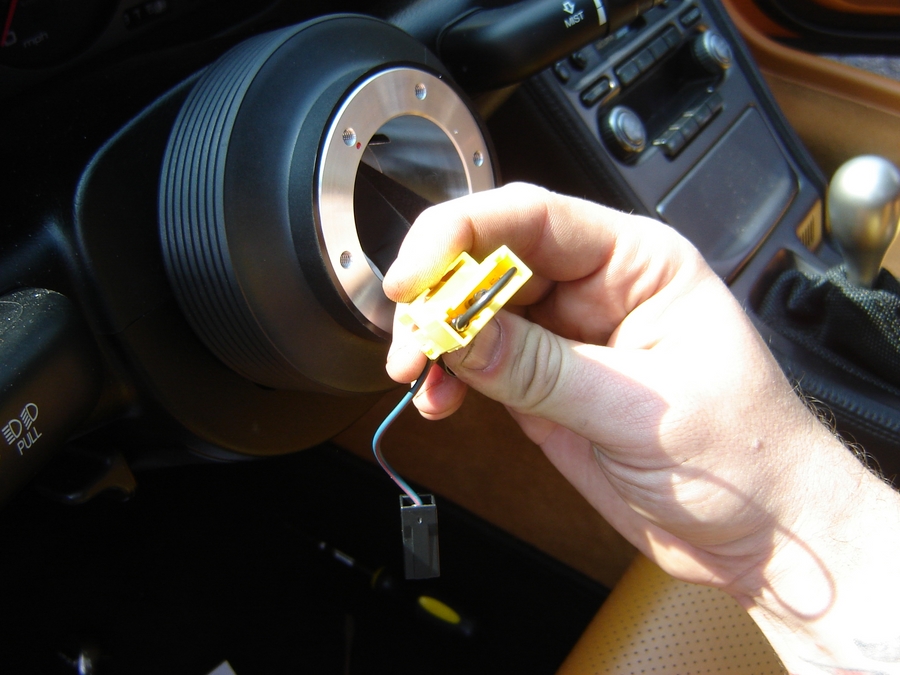
Step 7: Steering wheel is still connected by several connectors. Disconnect the yellow one on the left, the small black one in the center( connects to the cruise control). To remove the yellow one on the right ( connected to the cruise control)I found it easiest to remove the two screws holding the bracket in place. Then I used a flathead screw driver to remove the connector form the bracket. I then screwed the bracket back into place on the steering wheel as not to lose it.

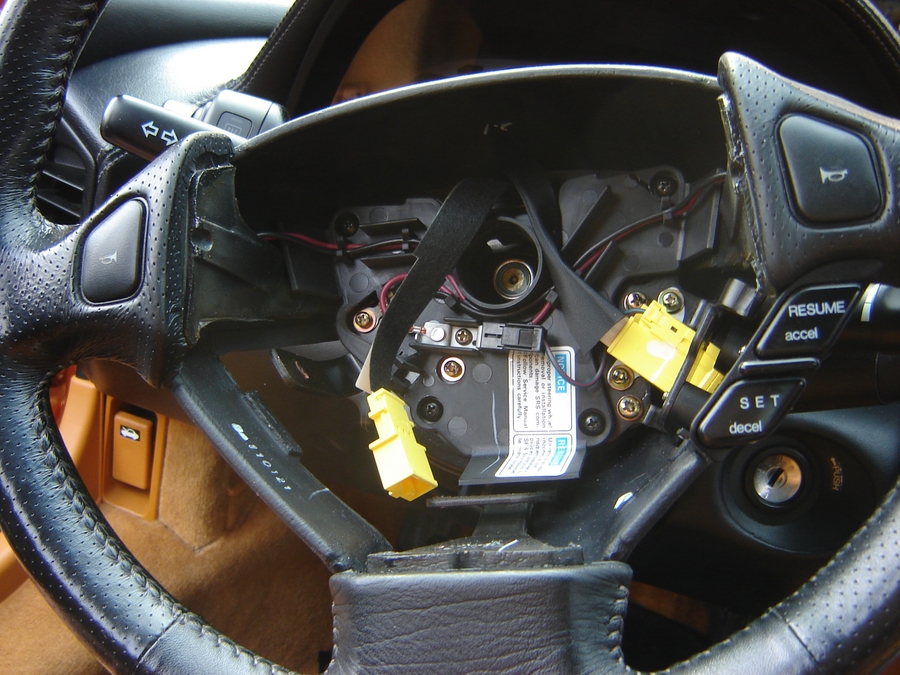
Step 8. Your airbag should be free of the steering wheel now.
Step 9: Make sure steering wheel is straight up and down. ( we did not remember, so we had to check after the wheel was on, and then test drive).
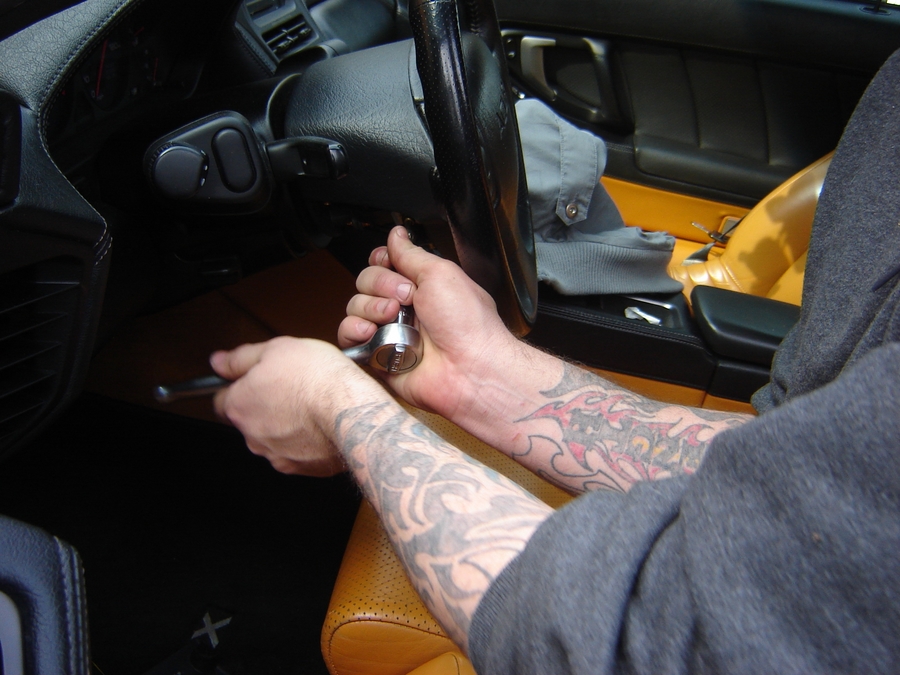
Step 10: Use a large breaker bar or an impact gun to remove the nut in the center of the steering wheel.
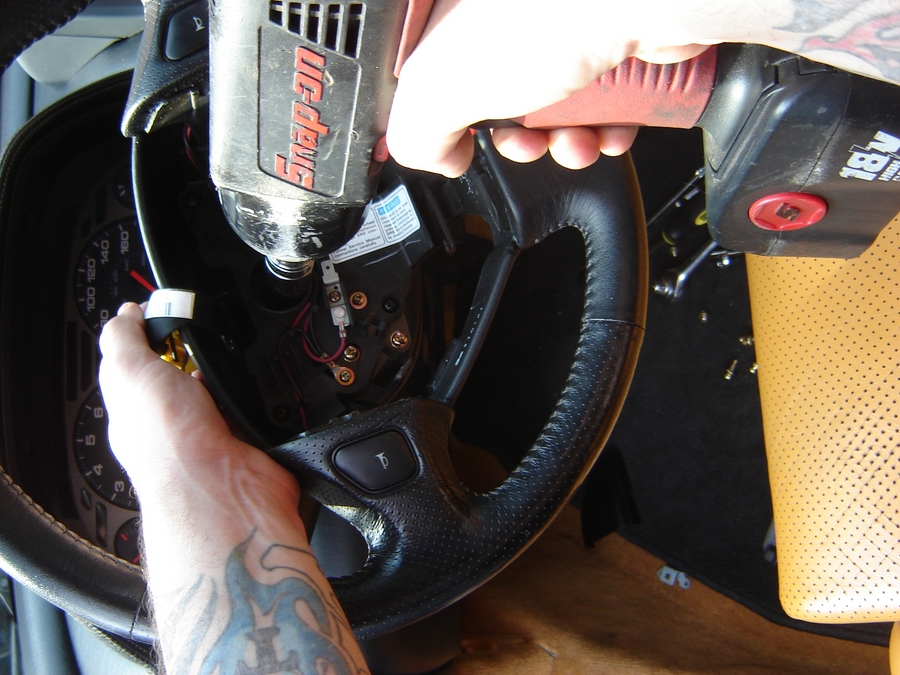
Step 11: gently pull the connectors through the steering wheel and remove the steering wheel from the car. You should only have the hub now.
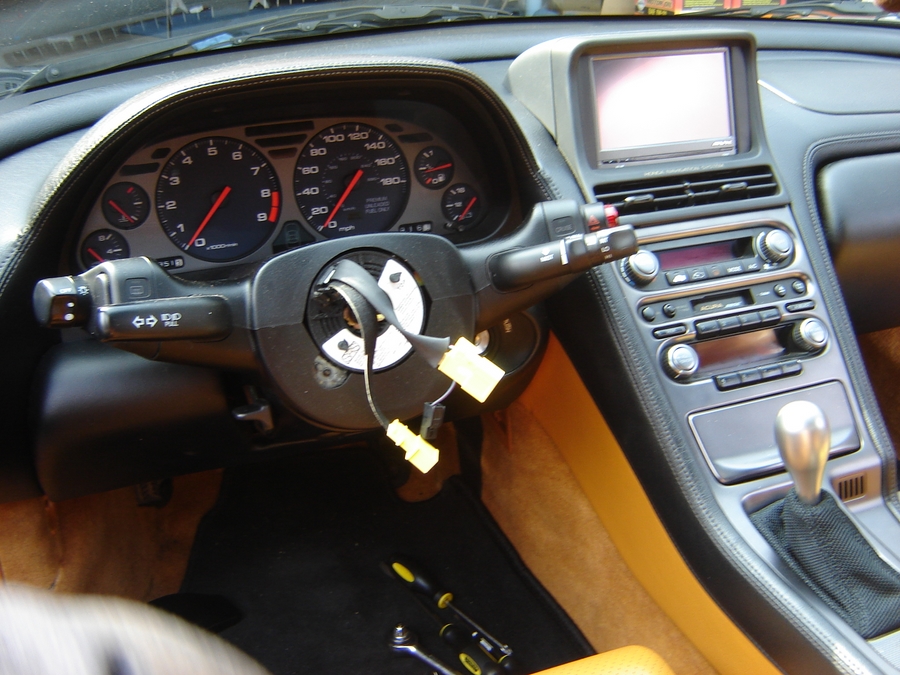
Step 12: I highly recommend that you re-assemble all the steering wheel components back together. Put the air bag back in, using all the bolts, and replace the cruise control cover. This way everything is back where you can find it.
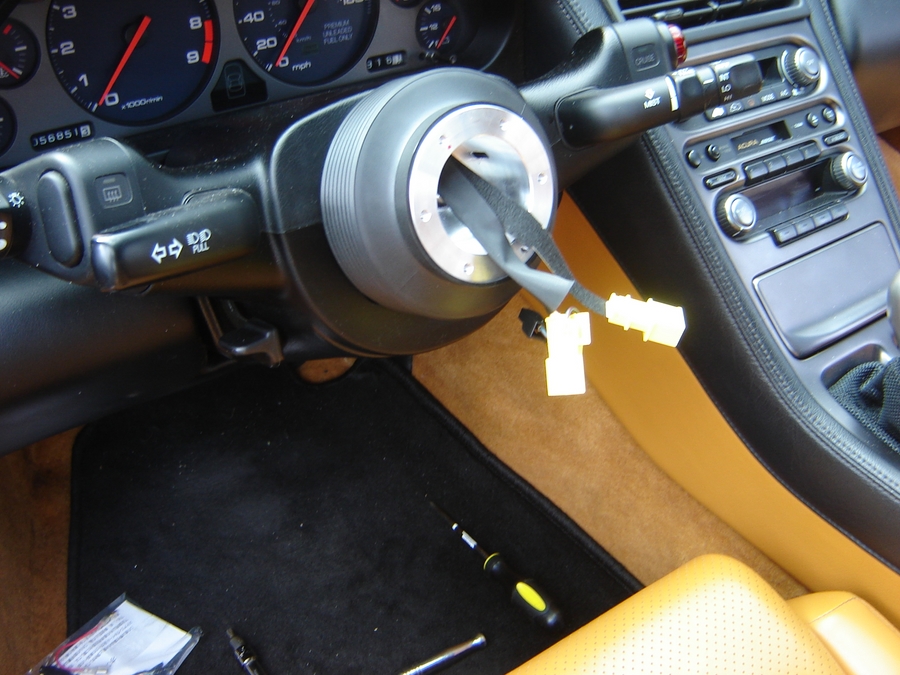
Step 13: Slide the Hub over the connectors and put into place on the steering column. Hold the connectors out of the way, then use an impact gun or breaker bar to re-install the nut. Make sure to line the dot at the top of the hub up with the center of the steering column. Its very important that you line the hub up straight. If the hub is off by even one tooth, you will have to turn the steering wheel to drive straight.

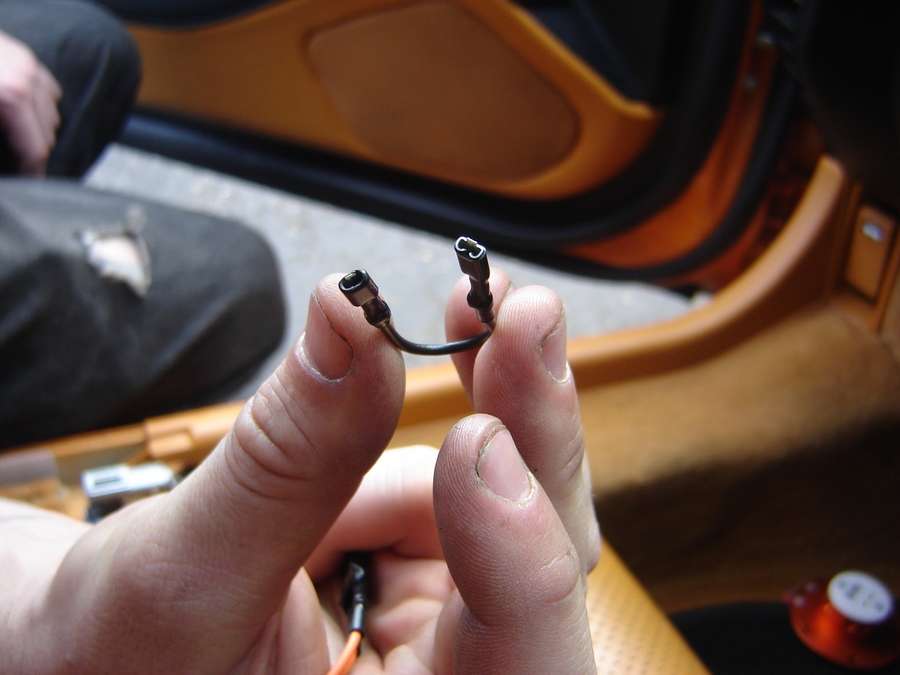
Step 14. You have two yellow plugs that need connectors. One has 4 pins and the other has 3, We will start with the plug with three pins. Take the resistor that came with the steering wheel and push it over pins one and three on the plug. This is basically the two outside plugs. It does not matter which side goes where.
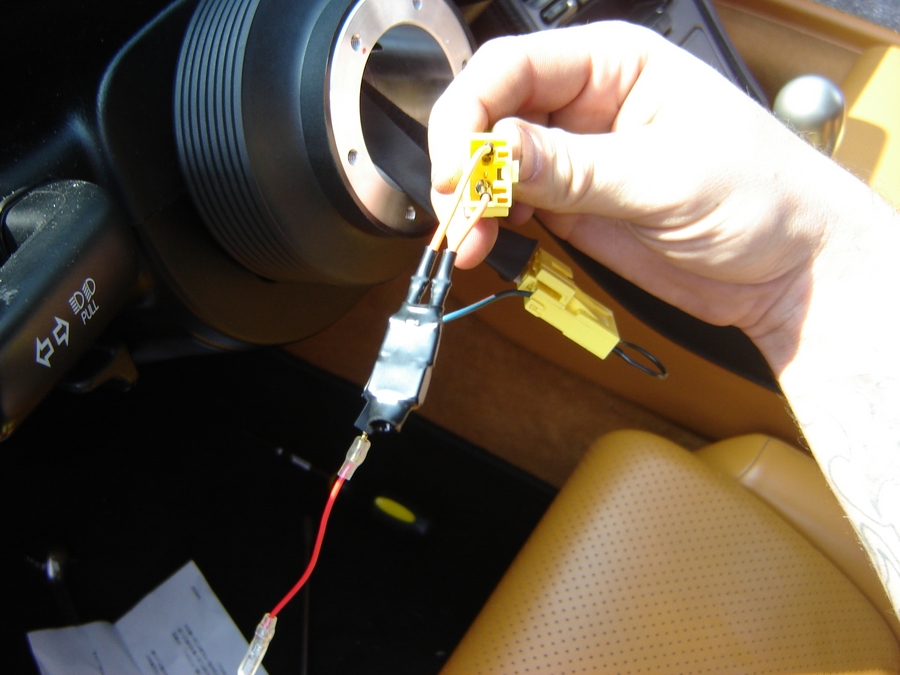
Step 15. Take the 4 Pin connector. There should be a wire coming off the back of this plug with a small black connector on it. You also have a small red wire with one female and one male connector on it. Push the male connector into the black connector. Now, take the thin black wire with two female ends on it. You want to connect one end to the #1 Pin on the 4 pin connector. The #1 pin is the pin all the way on the left, which has the wire with the black connector on it coming out right behind it. Now connect the other side of the black wire to the pin right next to it, pin #2 .
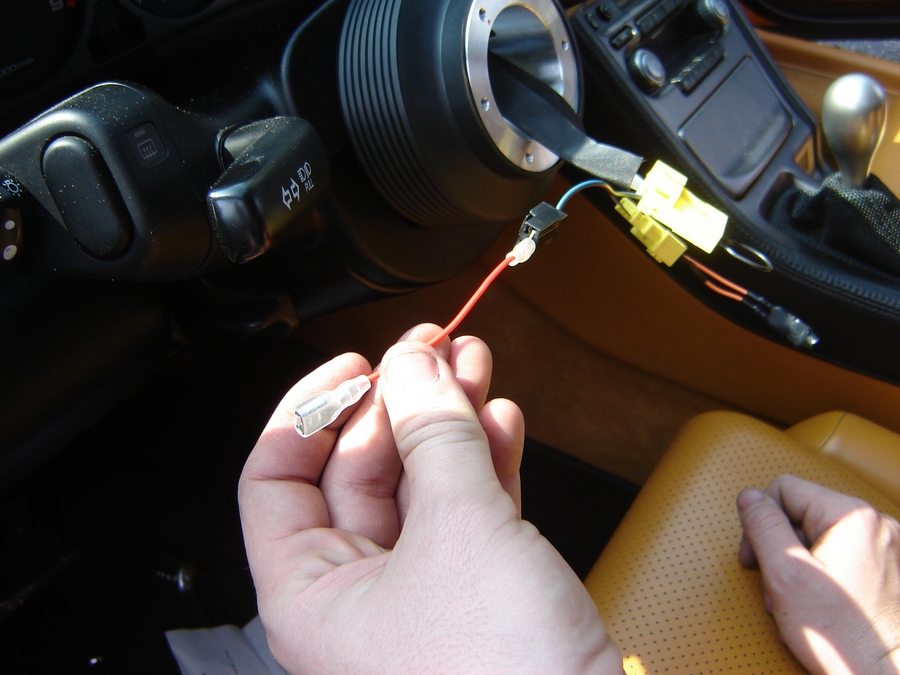
Now the air bag light should be bypassed, and the horn will be able to work.
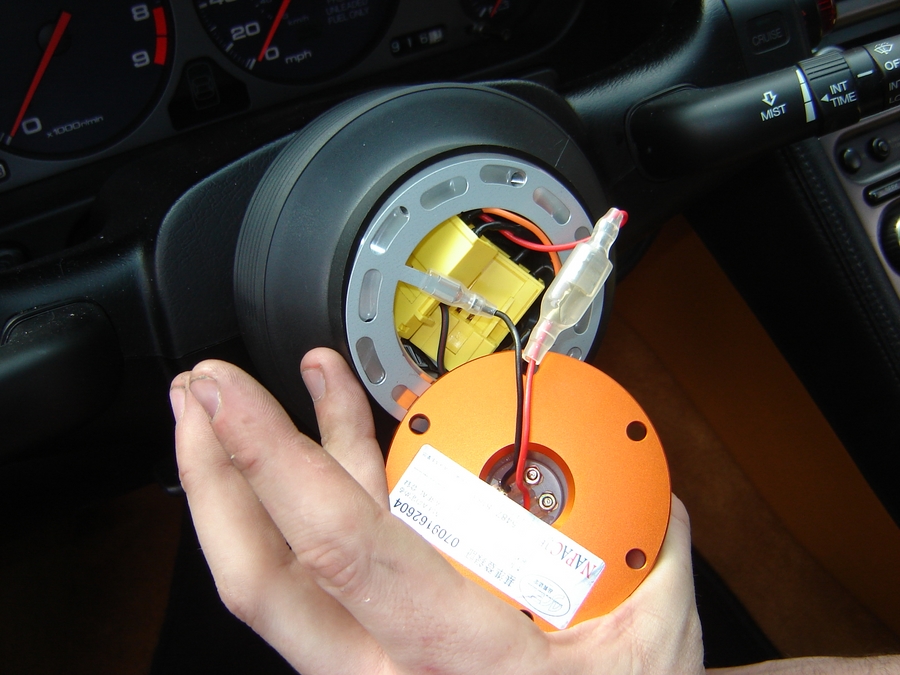
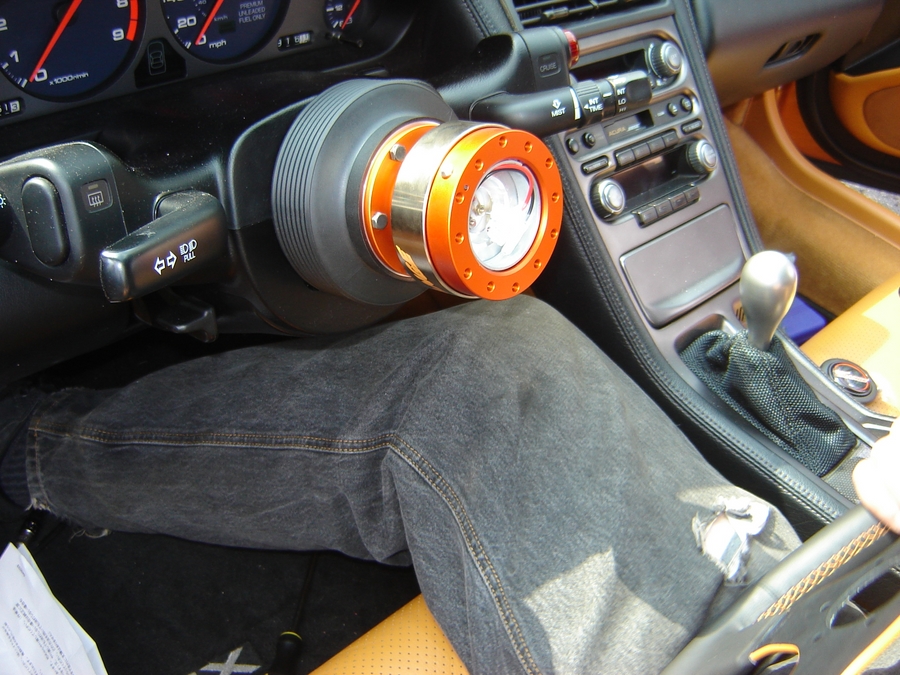
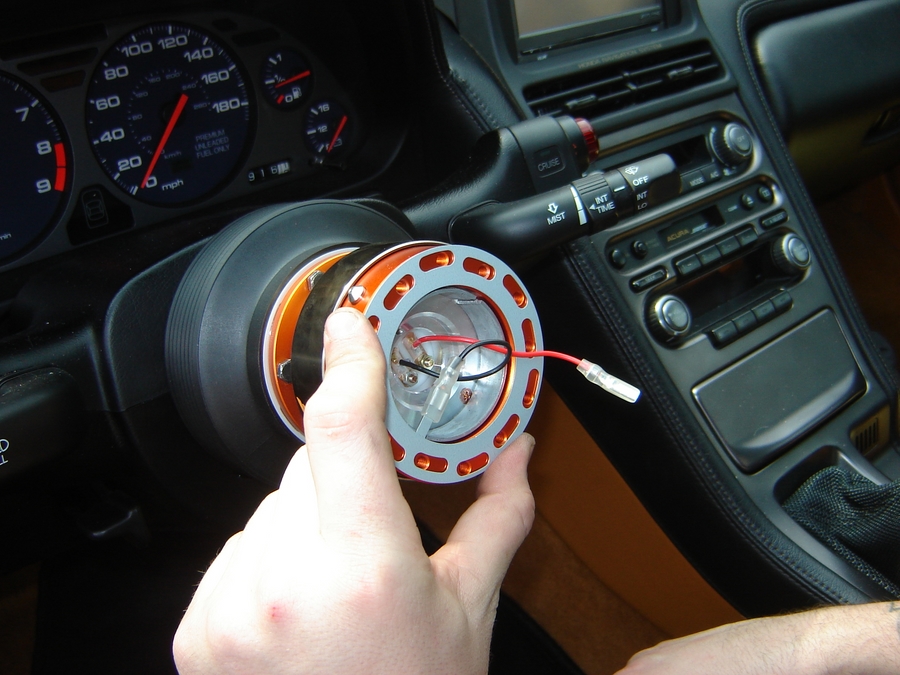
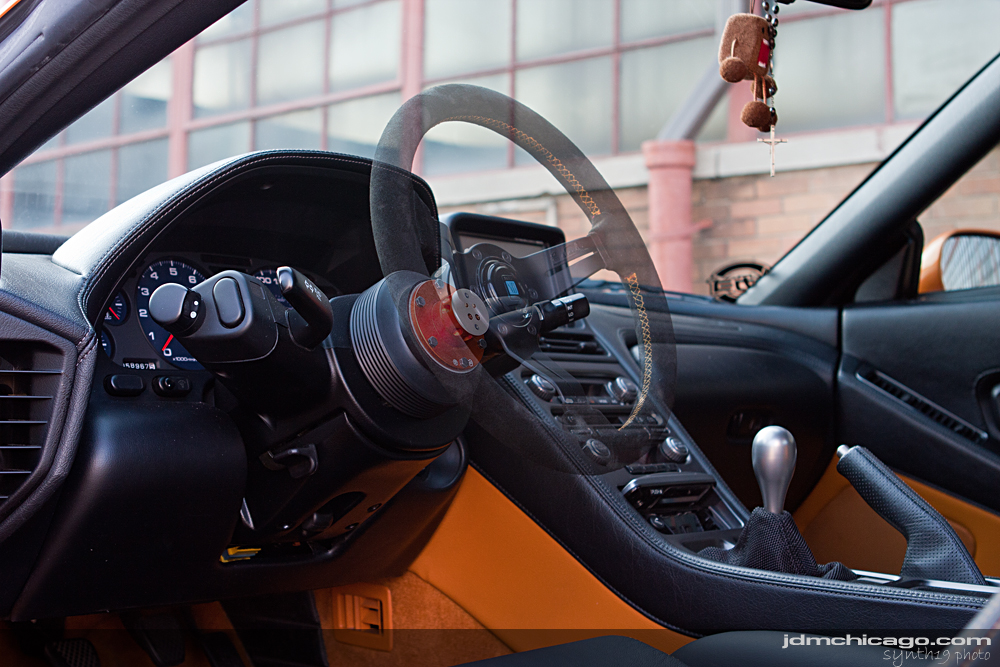
Step 16: Now its time to connect the quick release. VERY carefully wind all the wiring inside of the hub. This is a little bit tricky, as there is barely any space here. Take your time and be patient. If you just push it, you can damage the wiring harness. You might have to rea arrange a few times until you get it figured out just right. Take one of the small thin silver plates and place it over the bolt pattern on the hub. This will be your ground. Hook the small red wires female end to the male end of the red wire coming off the back of the hub. Connect the female end of the black wire off the back of the hub to the tab sticking off the metal disc.

Step 17: Bolt the quick release into place.
Step 18: Snap the the rest of the quick release into place.
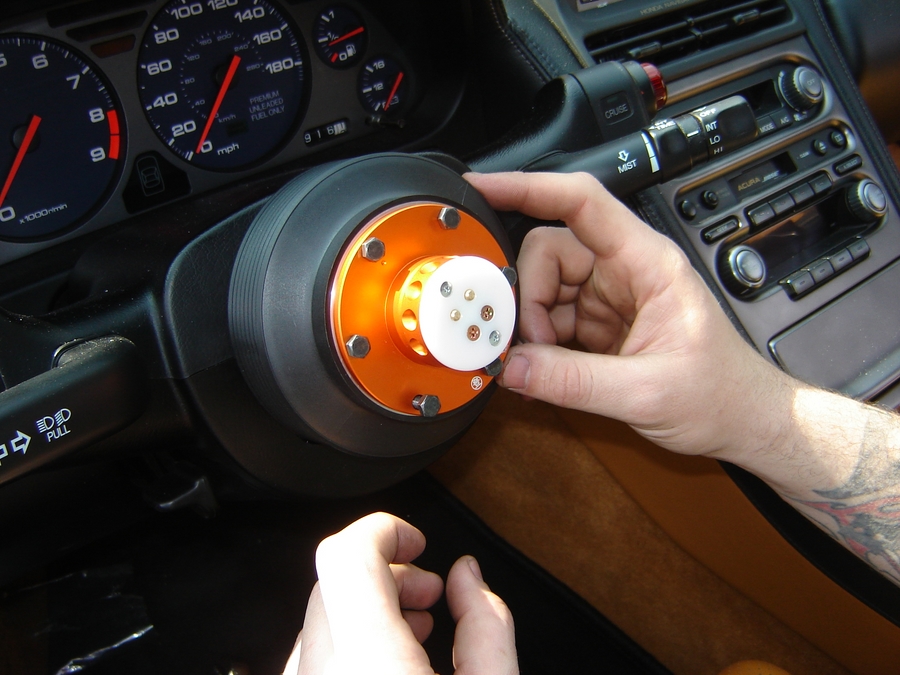
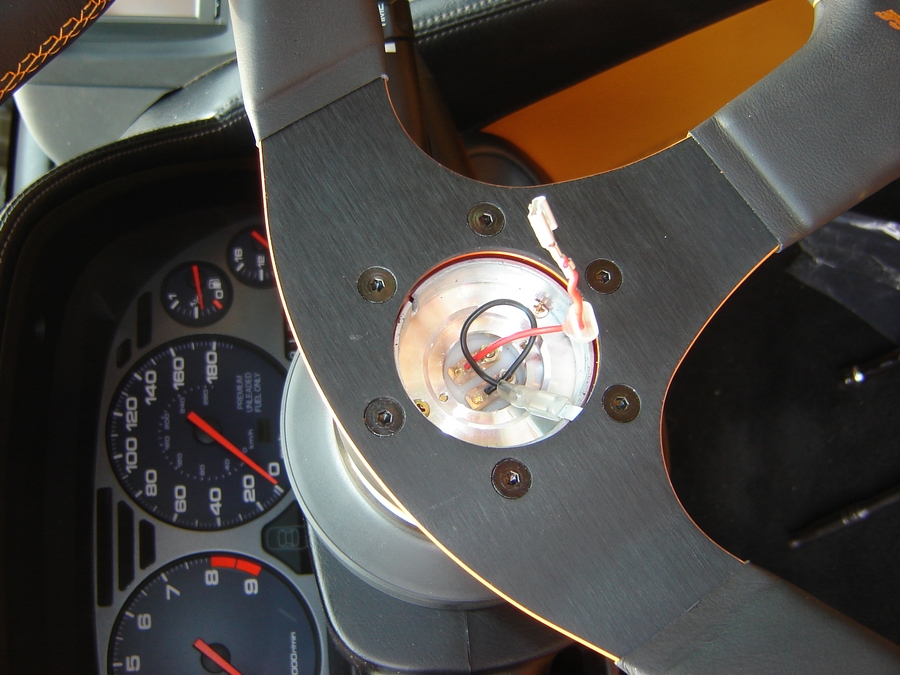
Step 19: Place the second silver ring over the bolt pattern of the quick release. Attach the female end of the black wire to the tab on the metal grounding disc.
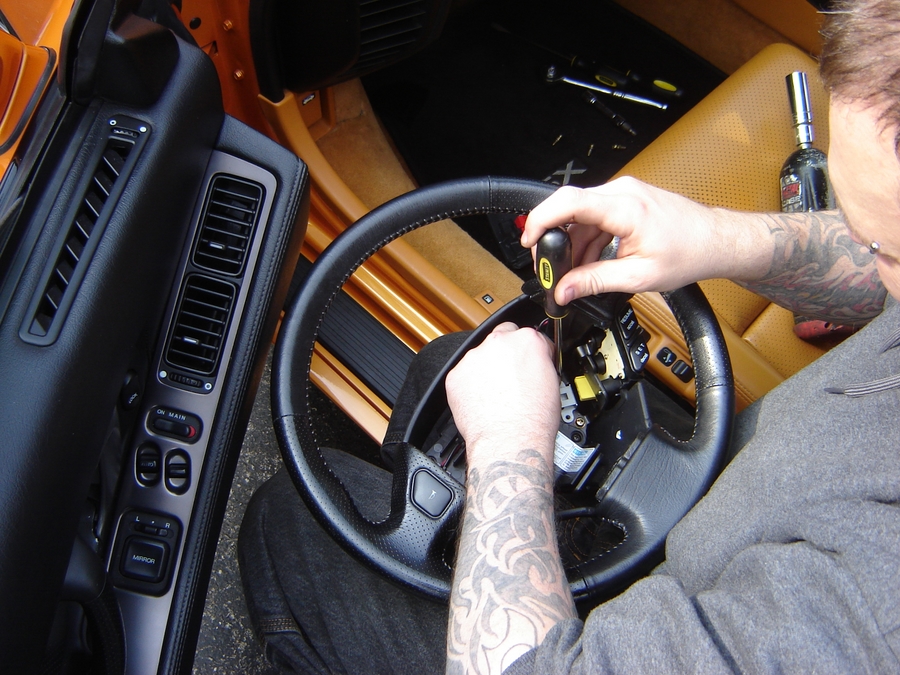
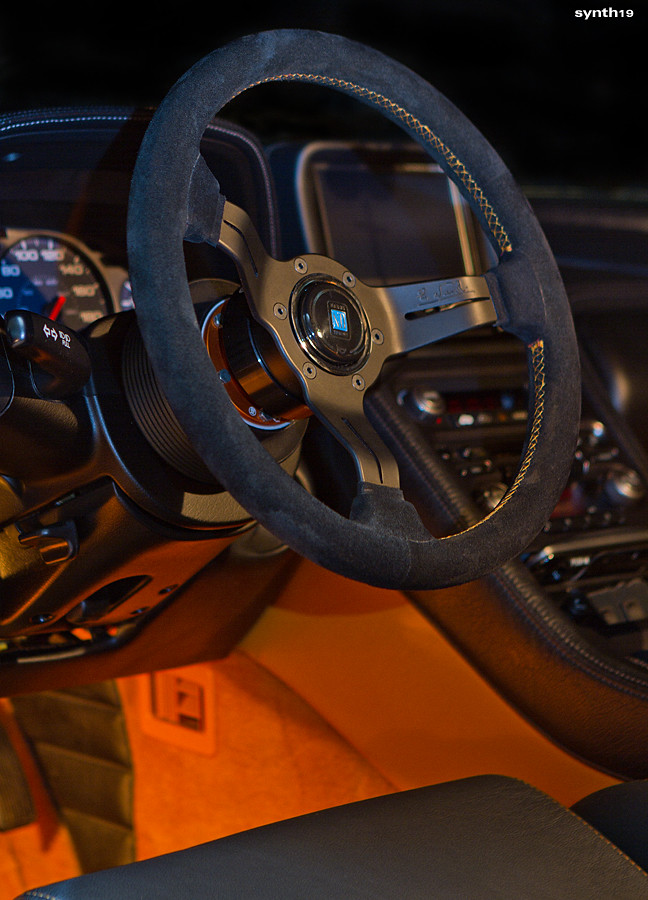
Step 20: Attach the steering wheel., making sure to keep the wheel aligned straight.
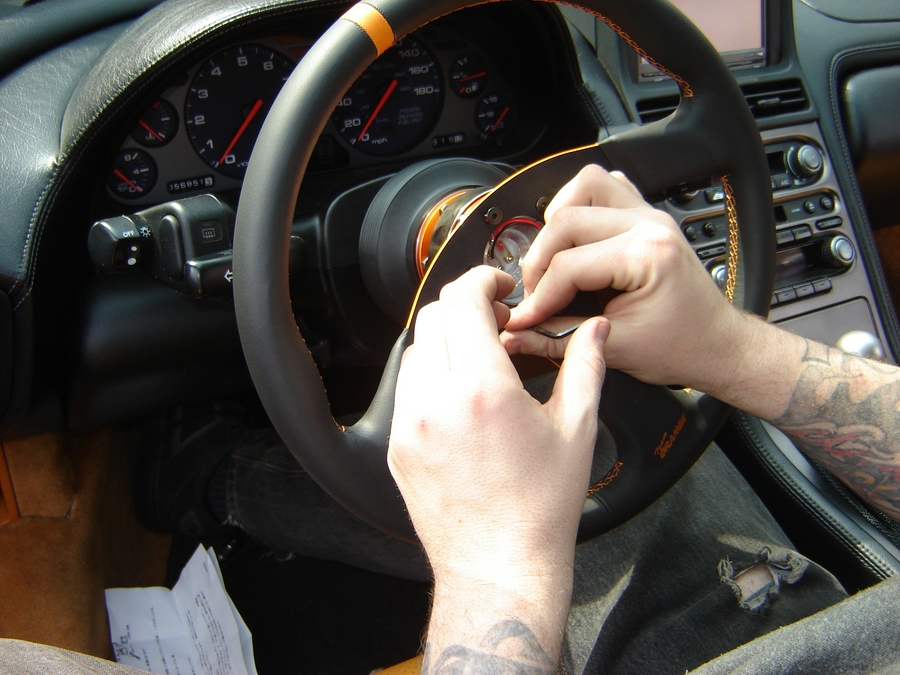
Step 20. Install horn. Connect the red wire to the back of the horn. I had to bend the tab to get it all to fit in the space provided. For the horn to work, the small metal wire at the top of the horn has to ground to the inside of the hub. If it doesn’t do this when you put the horn in normally, then pull the wire up gently, and pull the free side up and out of the horn. With the wire angled, it should easily make contact.
Step 21: FINISHED!
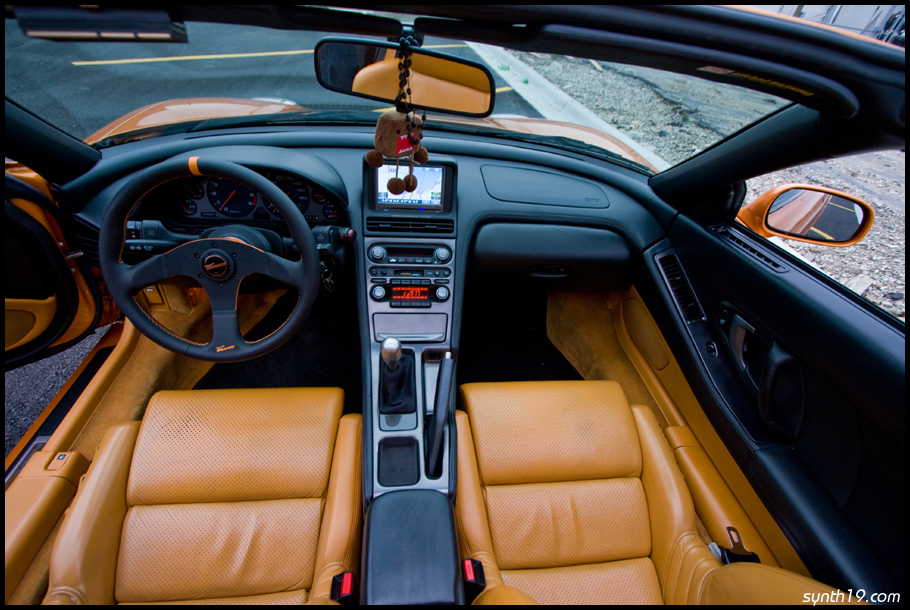
10 by Ginash George, on Flickr
2 by Ginash George, on Flickr
After doing quite a bit of research on the this install, some of the instructions were confusing and even conflicting with each other. Additionally, some of the newer steering wheel kits being made available are a bit different from some of the DIY pdf's found on this site. On my previous car, the instructions were pretty straight forward. I thought it would be nice to create a DIY thread for the greater good of the NSX community.
There are numerous vendors you can pick up these parts from. Hopefully the vendor you choose gives you everything- including all the RESISTORS to bypass the airbag light (who wants that annoying airbag light anyways)? Now there are other CHEAPER quick release products out there, but I'm going to warn you that those products are all replicas of the original works bell product. DO NOT confuse these products with lesser quality knockoffs. Do you really want to take a chance with an important safety product? Get the Real deal works bell. Click HERE for more info on Works Bell, their quality, and R & D.
*This process involves NO splicing, No drilling, etc. SRS light will NOT come on and your Horn WILL work. You can revert back to OEM later on if you chose too.
***NOTE: This is a DIY for those who do NOT care to have cruise control***
Let's get started.....
Step One:
Disconnect Battery (removing negative terminal shall suffice).
Step 2: Remove screws from bottom of steering column.
Step 3: Undo clip and remove panel.
Step 4: Use a torx bit to remove the torx bolts from the bottom sides of the steering column
Step 5 carefully pry off panel on right side of steering column to reveal another torx bolt. Remove this Torx bolt as well.
Step 6: with these bolts gone, the airbag should slide right out.
Step 7: Steering wheel is still connected by several connectors. Disconnect the yellow one on the left, the small black one in the center( connects to the cruise control). To remove the yellow one on the right ( connected to the cruise control)I found it easiest to remove the two screws holding the bracket in place. Then I used a flathead screw driver to remove the connector form the bracket. I then screwed the bracket back into place on the steering wheel as not to lose it.
Step 8. Your airbag should be free of the steering wheel now.
Step 9: Make sure steering wheel is straight up and down. ( we did not remember, so we had to check after the wheel was on, and then test drive).
Step 10: Use a large breaker bar or an impact gun to remove the nut in the center of the steering wheel.
Step 11: gently pull the connectors through the steering wheel and remove the steering wheel from the car. You should only have the hub now.
Step 12: I highly recommend that you re-assemble all the steering wheel components back together. Put the air bag back in, using all the bolts, and replace the cruise control cover. This way everything is back where you can find it.
Step 13: Slide the Hub over the connectors and put into place on the steering column. Hold the connectors out of the way, then use an impact gun or breaker bar to re-install the nut. Make sure to line the dot at the top of the hub up with the center of the steering column. Its very important that you line the hub up straight. If the hub is off by even one tooth, you will have to turn the steering wheel to drive straight.
Step 14. You have two yellow plugs that need connectors. One has 4 pins and the other has 3, We will start with the plug with three pins. Take the resistor that came with the steering wheel and push it over pins one and three on the plug. This is basically the two outside plugs. It does not matter which side goes where.
Step 15. Take the 4 Pin connector. There should be a wire coming off the back of this plug with a small black connector on it. You also have a small red wire with one female and one male connector on it. Push the male connector into the black connector. Now, take the thin black wire with two female ends on it. You want to connect one end to the #1 Pin on the 4 pin connector. The #1 pin is the pin all the way on the left, which has the wire with the black connector on it coming out right behind it. Now connect the other side of the black wire to the pin right next to it, pin #2 .
Now the air bag light should be bypassed, and the horn will be able to work.
Step 16: Now its time to connect the quick release. VERY carefully wind all the wiring inside of the hub. This is a little bit tricky, as there is barely any space here. Take your time and be patient. If you just push it, you can damage the wiring harness. You might have to rea arrange a few times until you get it figured out just right. Take one of the small thin silver plates and place it over the bolt pattern on the hub. This will be your ground. Hook the small red wires female end to the male end of the red wire coming off the back of the hub. Connect the female end of the black wire off the back of the hub to the tab sticking off the metal disc.
Step 17: Bolt the quick release into place.
Step 18: Snap the the rest of the quick release into place.
Step 19: Place the second silver ring over the bolt pattern of the quick release. Attach the female end of the black wire to the tab on the metal grounding disc.
Step 20: Attach the steering wheel., making sure to keep the wheel aligned straight.
Step 20. Install horn. Connect the red wire to the back of the horn. I had to bend the tab to get it all to fit in the space provided. For the horn to work, the small metal wire at the top of the horn has to ground to the inside of the hub. If it doesn’t do this when you put the horn in normally, then pull the wire up gently, and pull the free side up and out of the horn. With the wire angled, it should easily make contact.
Step 21: FINISHED!
10 by Ginash George, on Flickr
2 by Ginash George, on Flickr
Last edited:


")
