• Protip: Profile posts are public! Use Conversations to message other members privately. Everyone can see the content of a profile post.

Ultimate Hybrid NSX Project

HINT; I can adjust camber without affecting scrub radius & vice versa.....If I dial in zero scrub for a 12" wide wheel, & then bolt on an 11" wide wheel (assuming same offset), does it change the SR?

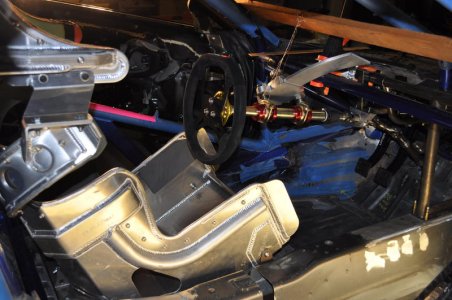
pix 7/8 shows the backside of the upright is tapered and the "pillow block" mounts to it can be mounted the other way to increase camber but that number is fixed and not adjustable, if not, I give up.

AFAIK, SR is independent of the wheel dia., its dependent on the offset of the wheel. so the answer is no.[/QUOTE]

OKAY....you're close enough already! The pillow block (which contains the top monoball) has NO bearing on camber.....and it can't be mounted any other way than pictured......BUT, if I loosen the 2 bolts that fasten it to the upright, and place SHIMS (of varying thicknesses) BETWEEN the pillow block & upright, it changes the scrub radius!

Your comments on offset are correct as it impacts the SR.....BUT, while wheel diameter doesnt affect SR, wheel WIDTH does! Just picture an exaggerated example like a 6" wide wheel vs. an 18" wide wheel, & ask yourself "where does the center of the tire contact the asphalt"?
Sort of a trick question....especially for Fraser, haha!
 
when you find time please update your website so I can browse through the porn easily.

Major Upgrade to my "official" build site!

My site is being worked on (offline) as we speak....will have many new features, including a working BLOG, & Youtube interface......and a video / storyboard to advise viewer of latest developments without having to page thru all the photos. It will also be auto-linked to FB & Twitter.
Hope to have it "LIVE" by mid July!
STAY TUNED!
 
Last edited:
Dale, who approved your vacation??? You have a an NSX that needs to be worked on. updates???

OK, OK,....more Engineering Porn (for those with perspiring minds!)

FYI.....it's 115 degrees here, & I slow down to a crawl, until I get recharged in Monterrey, Carmel & Pebble Beach next week!

Recent Challenge: How do I mount my HEAVY fuel pump as low as possible, as close to the fuel cells as possible, as sturdy & protected as possible, AND....completely isolate it from any potential engine-bay fire and/or cabin fire?

These pics reveal my solution.....the little green "thingys" are rubber isolators (as-in vibration absorbtion).

DSC_1147.jpg

DSC_1148.jpg

DSC_1149.jpg

DSC_0065.jpg

DSC_0066.jpg

DSC_0067.jpg

DSC_0068.jpg

The sheet aluminum "roof" is actually a support cradle, & will weld into the tunnel.....it forms an isolated tunnel for the water & oil lines to pass thru without coming into contact with the pump. I had to machine the base (5/16ths 6061) in 2 halves, to allow the pump to attach to the BOTTOM of the base plate.....resulting in an extra 1/2" clearance in the upper tunnel while simultaneously placing the pump 1/2" lower than possible doing it the easy way. Like I've said before, sometimes the extra effort is worth it when the final execution is satisfying.......or maybe I was simply suffering from heat exhaustion!?

Stay Tuned.....
 
I am stealing alot of ideas. Just saying lol. The fuel pump location is pure genius. Have a fun and safe vacation.

THANKS!....and steal away.....just not for resale!

FWIW, August in Monterrey is pure car-guy nirvana!.....if you want to get a sense of the DEGREE of nirvana, just check out my "Laguna Seca" photos on my Facebook page!......more than just cars to enjoy (it IS California!)
 
Fuel Pump Mount & Tunnel Mods (cont.)

These pics show the FP mount "jigged-up", ready for weld-up. Notice; rubber mounts replaced by aluminum bushings, and spacer block to precisely position the cradle so final config has .100" clearance to tunnel floor.

I decided to re-shape the tunnel for more clearance over the FP cradle....easier now than later. The black mock-up tunnel cover is Home Depot ABS couplers, glued together. The actual 4" 6061 tubing is $ 24/ft. and the ABS is about $ 5/ft. Better to "mess-up" (PC) the cheap stuff.....fit has to be perfect so my welder dude isn't filling huge gaps in .065" sheet welding! New configuration provides major improvement in the tunnel profile, allowing easier routing of water & oil & power steering & fire-suppression lines.

DSC_0072.jpg

DSC_0070.jpg

DSC_0074.jpg

DSC_0075.jpg

FWIW: I discovered the 2 "rails" that form the base of the OEM tunnel & contain the nut plates for tunnel-cover attachment are stamped purposely NOT exactly in the same plane as each other! Sneaky Japanese engineers created a cover fit that forces the cover to take a slight bow.....as-in pre-stresses the cover to add rigidity BOTH laterally & longitudenally! They came up with this trick over 20 years ago!
And to think MY ideas are ingenious....HA!
 
how long have you been at this Dale?
 
how long have you been at this Dale?

I don't remember?

There were a few interruptions along the way.....little things like a 2 1/2 yr divorce, moving 5 times in 3 years, oh.......and an adverse climate for my investment advisory business (like a 50% pay cut)......BUT, the extra time has allowed me to re-define the entire concept.......a COUPLE OF TIMES!
Lets just say the final outcome will be VERY cool, and VERY fast!

FWIW, I dusted off my shifter kart & have been doing some nightime track sessions......just to stay in shape.......quite the humbling experience!

PS....even my kart racing has had moments of distraction! (she has a big right foot too!)

my first race ).jpg
 
Last edited:
I'm surprised that you saved 35lbs by swapping to LS7.

You should build/sell a conversion kit! :)

WAY too much chassis modification for a kit to be feasible!.....It could be done without stretching the wheelbase (mine is 5" longer). but the rear axle shafts would be ....mis-aligned by 2.5"......resulting in a less than optimum CV joint angle......too many other OEM systems just not up to the challenge as well (IMHO).

Speaking of weight reduction, I dropped 22 pounds just by eating right & exercizing 3 days/week!.....of course the cool suit pretty much negates that!
 
Dale! We need updates!!
 
Fuel Pump Mount & Tunnel Mods Complete!

Okay Already!.....yes I've been busy, but it's been with my completely re-designed website (I can't believe how LONG this "stuff" takes!).

So here are a few pics of my "raised ceiling with sub-floor" tunnel. Also, I FINALLY got my new Tilton pedal assembly & "unobtanium" short-stroke master cylinders!

tunnel weld-up 2.jpg

tunnel weld-up 5.jpg

DSC_0291.jpg

DSC_0263.jpg

DSC_0264.jpg

DSC_0266.jpg

DSC_0268.jpg

DSC_0269.jpg

DSC_0294.jpg

DSC_0295.jpg

The pedal assembly pictured places the master cylinders inside the driver's compartment, whereas my original design was mounting them in front of the front "firewall" (where the front coilovers mount). I modified the design to give a cleaner appearance, and to provide some needed extra clearance for my ARB blade pushrods, which mount horizontally between my coilovers & the front firewall..........I'm working on THAT configuration now, but I'll shoot some pics as it progresses. The GOOD NEWS: the front ARB config is the LAST bit of fab work to finally say my complete suspension is finished!.....READY TO ROLL!
 
Thanks for the update Dale. Great to know you're still at it.
 
How are things going Dale? Any updates to this? Did you finish the suspension so you can finally get this piece of art rolling?
 
1 year bump for an update on this amazing project......earth to Dale......
 
Where is this tunnel the pump is in? Is that under the car? The standard oem tunnel or some place else? I can't figure it out
 
1 year bump for an update on this amazing project......earth to Dale......

I'm STILL Here.....and I'm STILL working on the Racecar!
Here are some random photos from various "systems" implementation....mostly steering, brake pedals, cage mods, & suspension "droop limit" tethers.

DSC_0648.jpgDSC_0435.jpgDSC_0415.jpg
DSC_0650.jpgDSC_0431.jpgDSC_0416.jpg
DSC_0651.jpgDSC_0436.jpgDSC_0418.jpg
DSC_0437.jpgDSC_0445.jpgDSC_0425.jpg
20140520_102729.jpgRear Tether.jpg20131211_145444.jpgDSC_0685.jpg

All right....this photo upload system is WAY SLOWER than I remember! I have a LOT more to upload, but I don't have the PATIENCE! Anyone want to give me a clue???
 

Attachments

  • DSC_0440.jpg
    DSC_0440.jpg
    74.2 KB · Views: 225
  • 20131211_145457(0).jpg
    20131211_145457(0).jpg
    54.6 KB · Views: 222
  • DSC_0679.jpg
    DSC_0679.jpg
    65.8 KB · Views: 225
Last edited:
Back
Top