• Protip: Profile posts are public! Use Conversations to message other members privately. Everyone can see the content of a profile post.

Down Under Trackday NSX

bummer about the seats, but I get the impression it would take a lot more than that to really slow you down.

what on earth are those black/white thingies wrapped in plastic in a box ? (they look like beanies?? )

and how does that comptech -5 to +5 work - I assume it's a timing adjuster ??

great build, a real eye opener. those brakes look seriously huge :eek:
 
Comptech things are adjustable cam gears so we can dial up what we need or what we can get on the cams themselves.

The plastic stuff wrapped up are T shirts and hats and stickers kinda provided by Ross from STMPO........... a nice touch I thought !

Brakes are 355mm all round. I think front and rear are both 34mm wide............should stop OK, but it's kind of an untested set really, but I'm sure with the custom pedal setup we'll get what we want till we can get the ideal Performance Friction setup later on.
 
love the fact your running a marga hills hood!
 
To be honest I had no idea what make it was. Ross had it sitting around and for what we wanted to do there was simply no point buying a mint condition carbon or other material unit as we're going to modify it quite a bit to suit the ducting that will run from the front, through the radiator and out through the other side of the duct which will meet the bonnet so we've got a sealed duct from the front of the bumper to the bonnet........

We've also got to modify the headlight area since we're running GT One fixed headlights not the pop up factory units.

We specifically wanted the largest area possible on the bonnet since it's going to act as a true aerodynamic device so it all worked out well for us but I love the look of it as well so all good.........
 
Just so you know, seats with head restraints have been installed before.

Look here.

attachment.php
 
Yeah I know it's possible, but not when you're 6' 4".......... put the head retraints too high up and then it won't clear the window. If I used a traditional height seat then it would clear the window OK, but I had to use a special tall version of the seat as otherwise the belts came through the seat just below my shoulder blades which is very unsafe in the event of a crash, they should be coming out just at shoulder level so I needed a taller seat.

It's just an issue with the sharp angle from the top of the door to the roofline.......even a few inches lower would help, and I could have cut the floor out and drop the floor and seat down, but I was concerned that since the NSX is so low already that if I dropped the floor down to make seat room that the floor would stick below the rest of the car and would be the first thing to hit should I go off track and that wouldn't be nice !
 
Well it's hard to see, but we've made some real progress today and will hopefully make some more progress tomorrow to get close to the point where we can get the main hoop installed.

I finally got chance to get some dry ice up to the workshop so I could remove all of the factory sound deadening to give us a tidy surface in the car and also remove what weight there is in the stuff (2.5kg)

P1010081.jpg

P1010082.jpg

P1010083.jpg

P1010084.jpg

P1010086.jpg

P1010091.jpg


Tried one some of Steve's wheels from his GTR for giggles......... gives us an idea of where my wheels will sit, although these aren't the right profile tyres ......
P1010092.jpg


P1010093.jpg

P1010094.jpg

P1010095.jpg

P1010096.jpg

P1010097.jpg
 
Last edited:
Bit annoying that you can't see some of the progress we've made today, but some is hidden away under the plates, but we've got the base of the platforms that the main hoop will be welded to. I've also made the rest of the box sections to support the platform on each side but didn't get chance to take pics.

Those will be welded in place tomorrow and then we've got to take some photo's for Motorsport NZ to verify the construction during the certification process, then we can clean up the parts and make them look pretty......... :D

This gives you the idea of where the main hoop will sit..........

P1010099.jpg

P1010098.jpg

P1010100.jpg
 
Interesting mounting method. Is that horizontal right angle piece only to provide a flat weld point for the tube? It looks to me that under heavy shock loadings, of the type generated in a bad rollover (heaven forbid) it would collapse an inch or two down to the sill . Perhaps it's a clever/intentional shock absorber designed in?
 
So, some major progress today :D..............

I managed to clean up the floor on the passenger side as well as the back wall of the cabin so it's ready to be prepped for paint which was a mission, but it's come up really well and was just time consuming more than anything else....... the dry ice did most of the major work. Drivers side floor is going to be cut out of the car and replaced so I haven't bothered cleaning it up. We need to drop the floor a little in the car to make sure I have the right amount of headroom...... yes it's that tight !!

PB010391.jpg

PB010392.jpg


Steve has been working really hard on the car also which is very much appreciated and he's got the reinforcement / foot plates made for the cage themselves all finished. We took some photo's for Motorsport NZ so that they can see and understand what we've done and then we finally bonded them in with some 3M 760 Sealer / Adhesive specified by Motorsport NZ for the purpose of bonding the plates we've made to the Aluminium shell of the car along with the 3 serious bolts and the mounting for the main hoop was done !!

We're not allowed to muck around with the welds or grind them down to make them look any neater than they are, but I think Steve did a great job anyhow.......
PB010385.jpg


PB010389.jpg

PB010388.jpg

PB010394.jpg


I had also clearanced the top of the roof to allow clearance for the main hoop itself to sit right up where the main supports for the roof used to be and we also measured up with me in the car in a mock up seat to determine the safest position of the front legs of the cage to run to make sure in the event of a roll over that the cage would be above my head (something not easily done in such a low car with such a tall driver) so we think we've picked the best place for safety.
IMAG0084.jpg


So now we just need to cutout the rear stays to go from the main hoop to the rear strut towers and then the cross bars which need to go from corner to corner in the rear (Motorsport NZ requirement) and things will really start coming together. Unfortunately we didn't have the tool on Steve's lathe we needed to be able to machine some small spacers we need for the plates which go on top of the strut towers, so hopefully Speedtech is organising some to be made today for us so we can progress with the rest of the cage in the next day or so...........

Fingers crossed we'll see a much more complete cage by next week !!! Thanks for all your help Steve.
 
Last edited:
Well today has been a massive day I feel and I didn't even know any of it was happening ! I'm busy preparing for my engagement party / bbq that's happening tomorrow so I had to focus on the other part of my life outside of cars for a while !! :D .......... so I was more than pleasantly surprised when Steve e-mailed me through these pictures showing my cage finally coming together after all of the good prep work he's been doing !

PB030398.jpg

PB030399.jpg

PB030400.jpg

PB030401.jpg

PB030402.jpg

PB030403.jpg

PB030404.jpg

PB030405.jpg


Now work is likely to stop at this stage as there is a requirement from MSNZ to get the cage approved before the end of the year due to regulation changes in next years design so we're going to get the paperwork in with what we have so far (which is acceptable to them) and then focus on completing the front legs, stays and other parts required to really tie the whole car together........ but what a great end to the year !!! Thanks Steve :D
 
coming along in leaps and bounds. I assume the dry ice freezes the old glue for easy removal?

what sort of engine mods will you be running in final trim? what class of racing are you aiming for? (apologies if you've answered before... I'm reading all the recent posts but all the earlier)
 
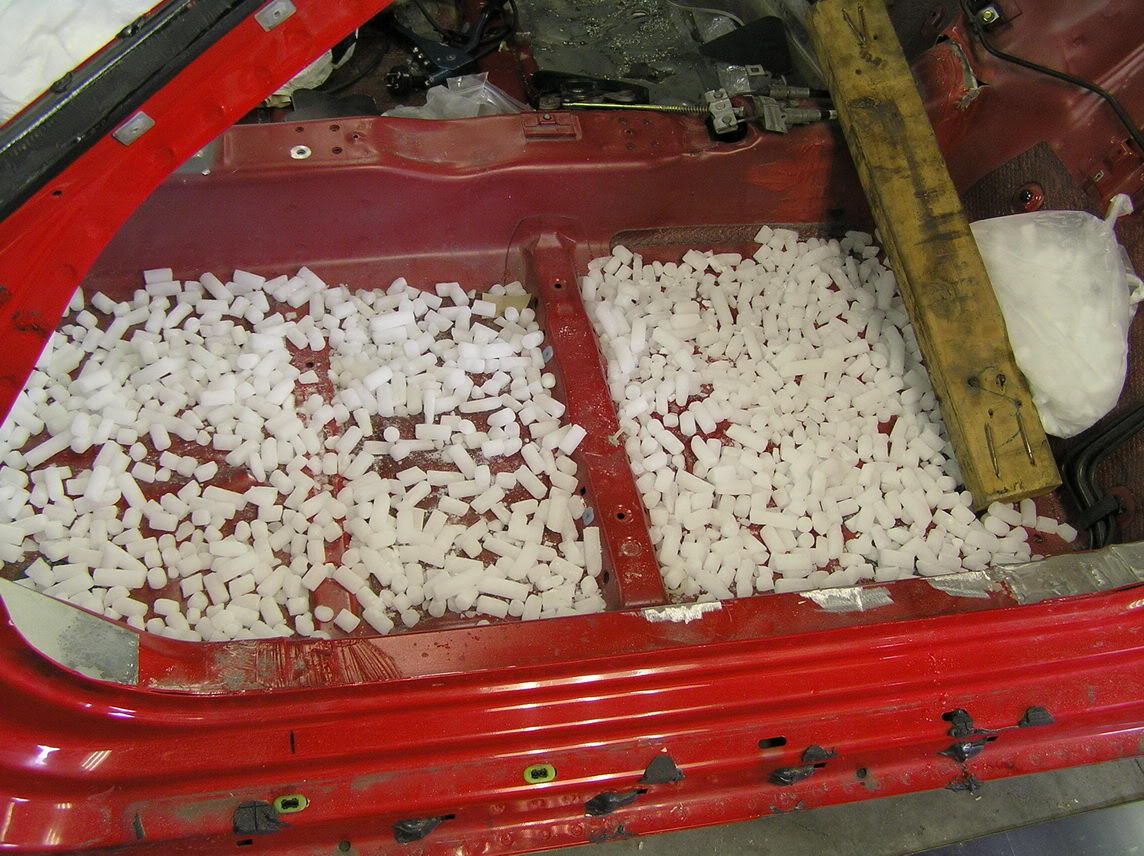
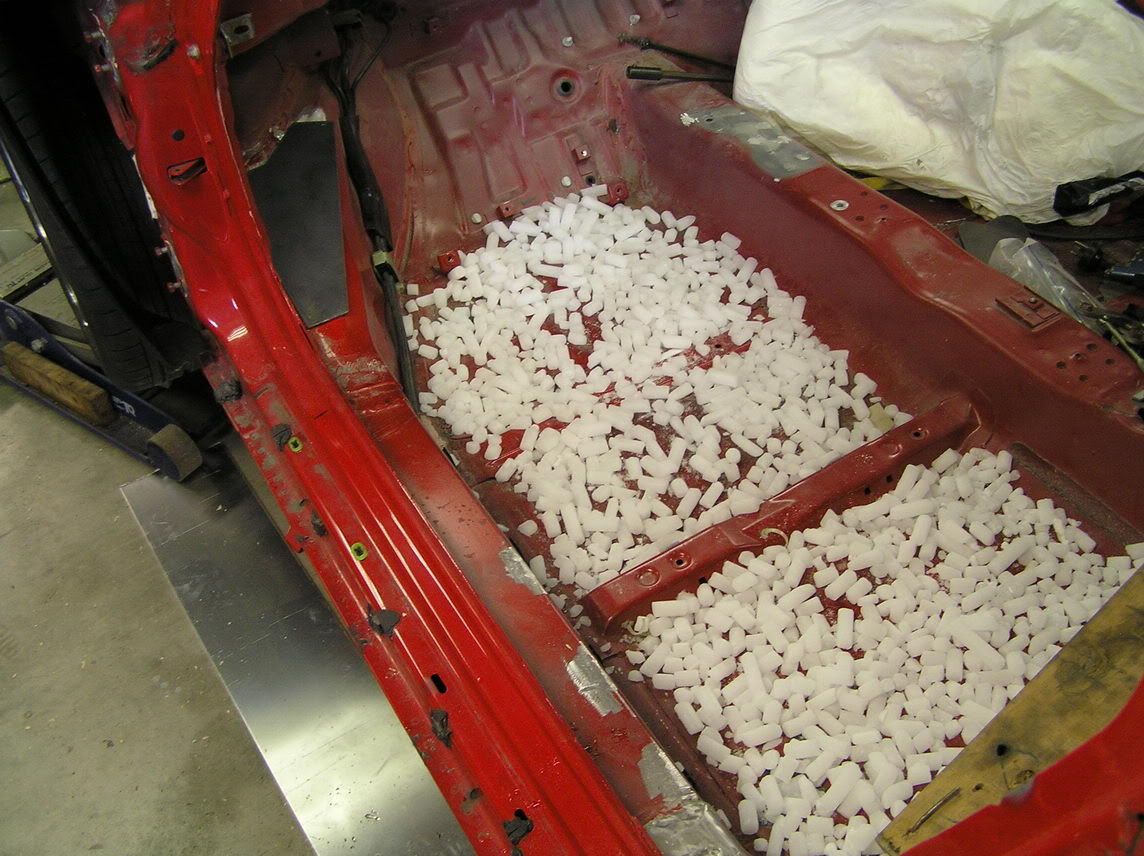
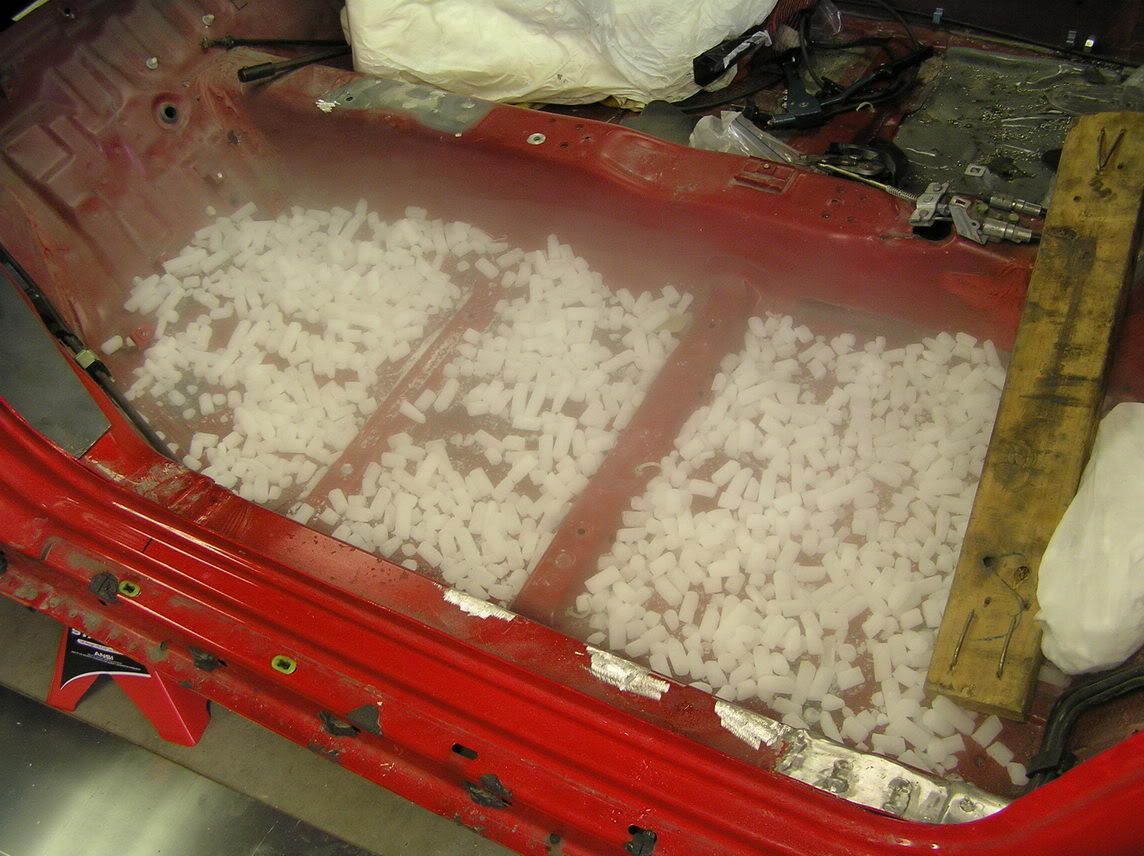
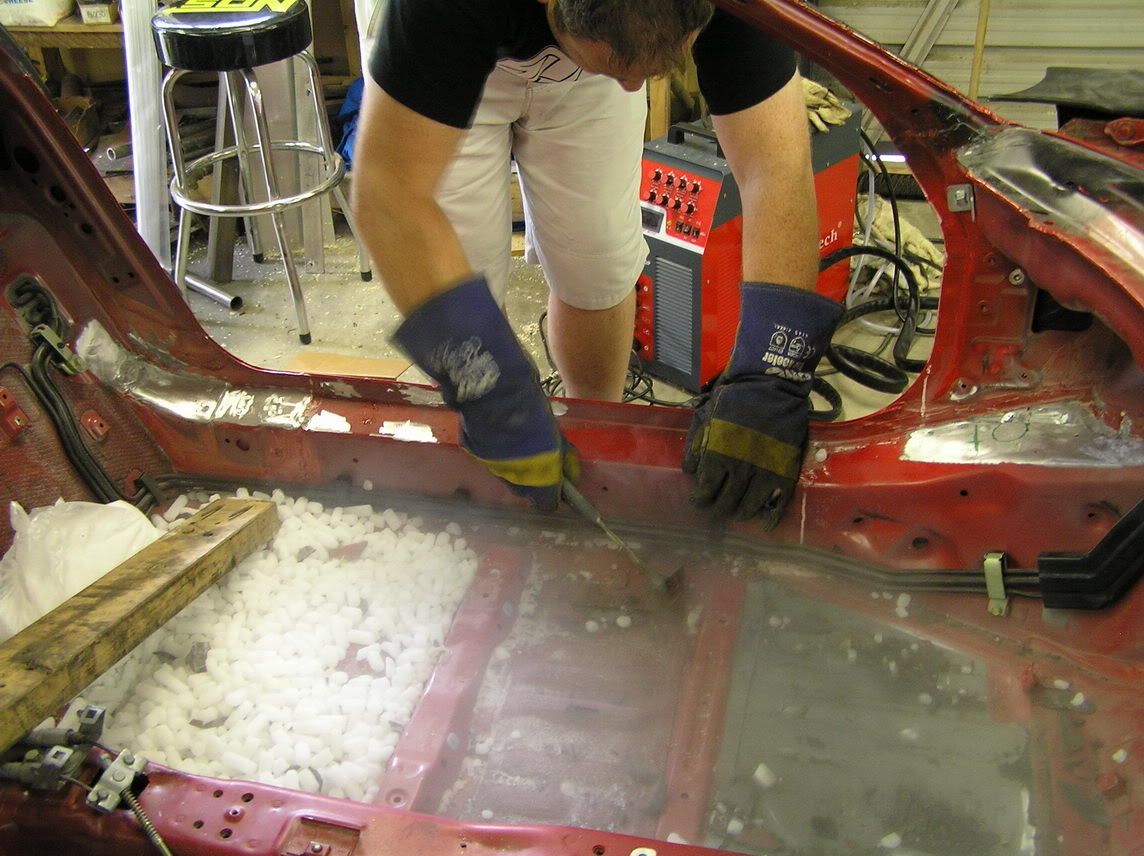
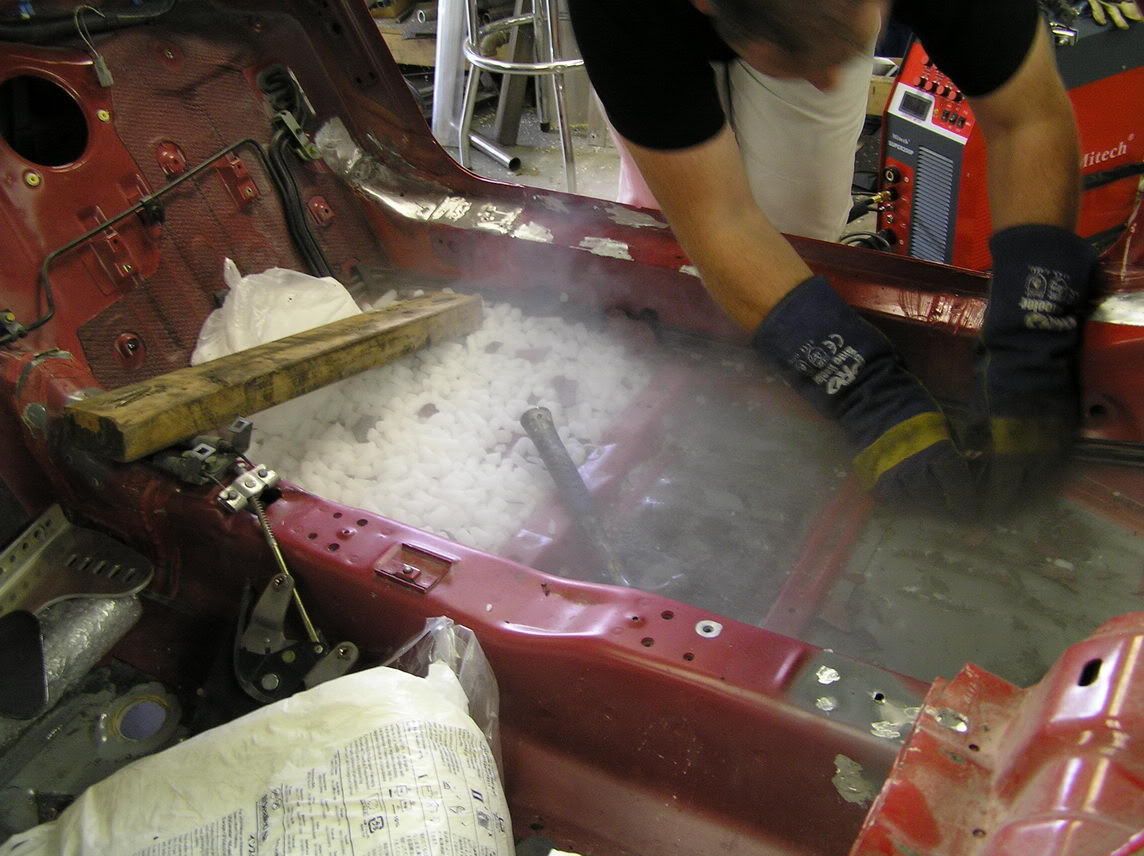
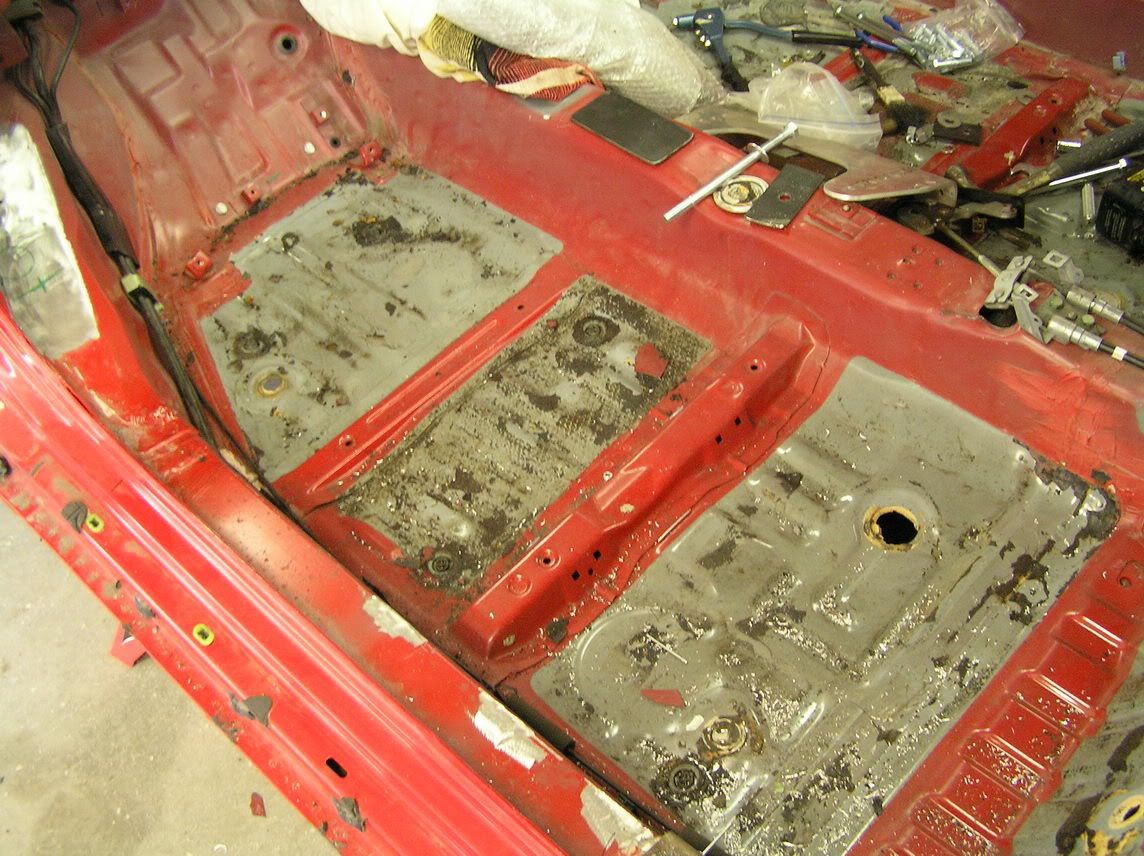
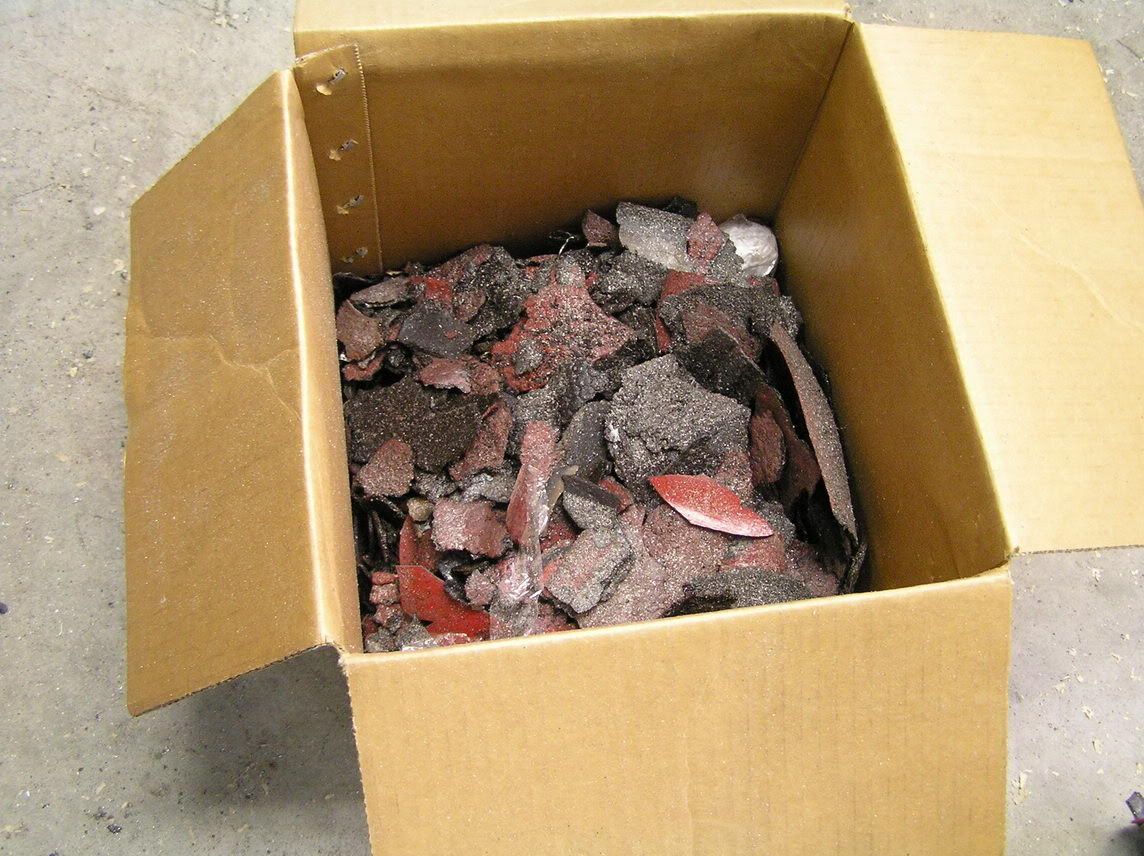
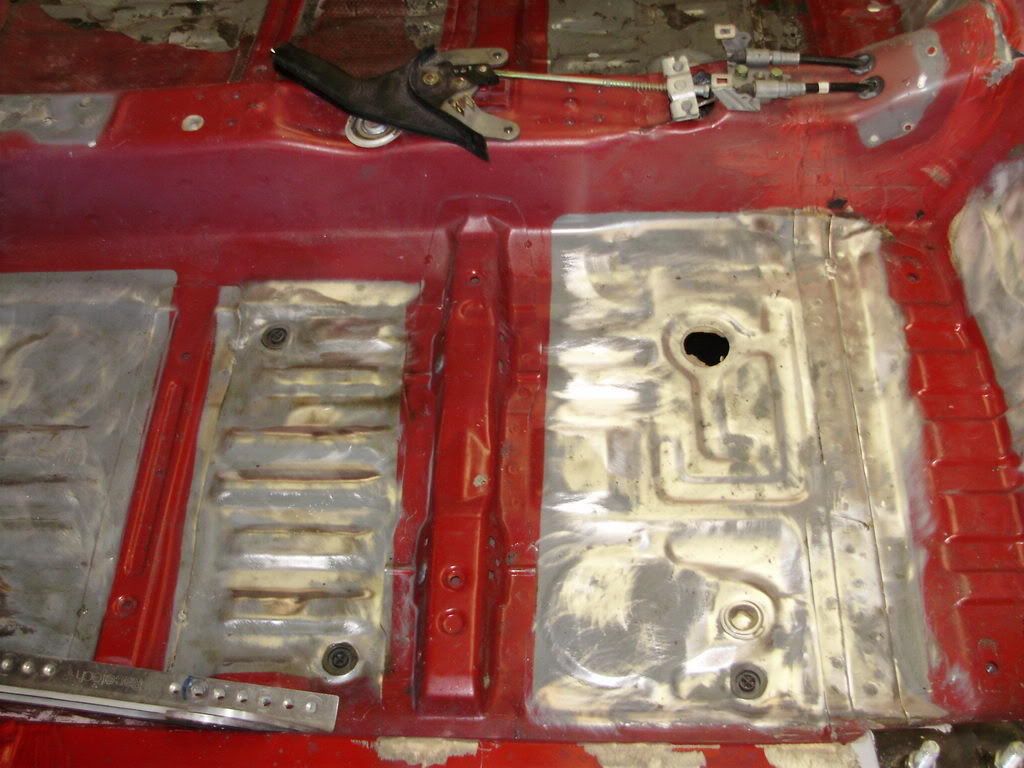
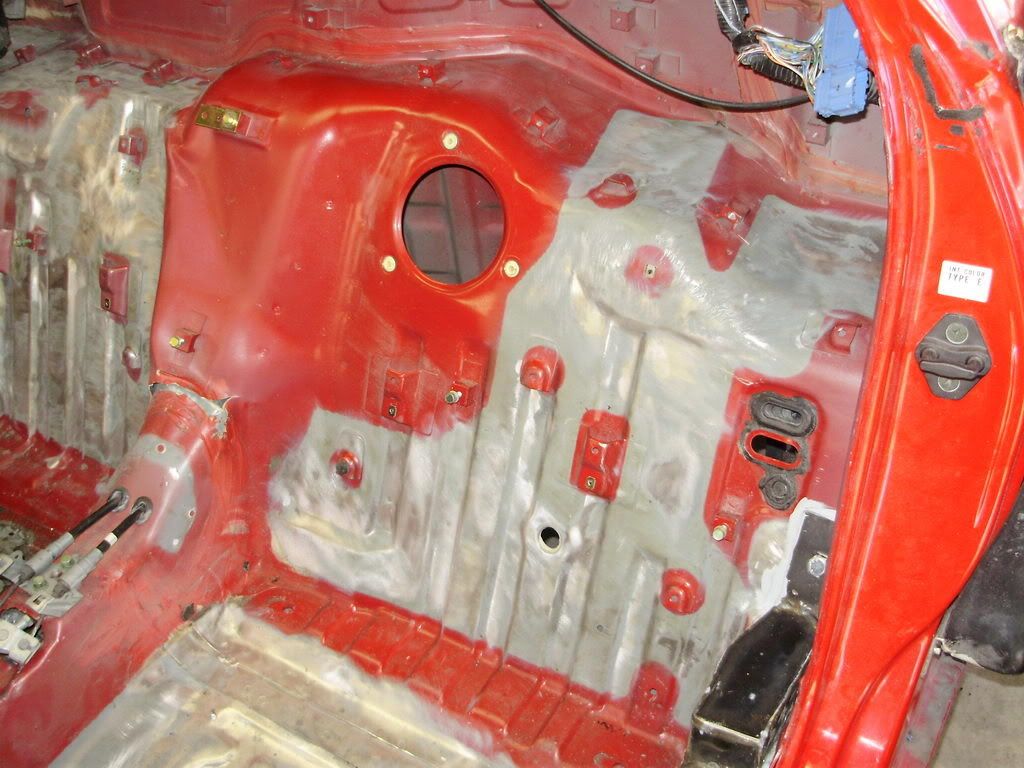
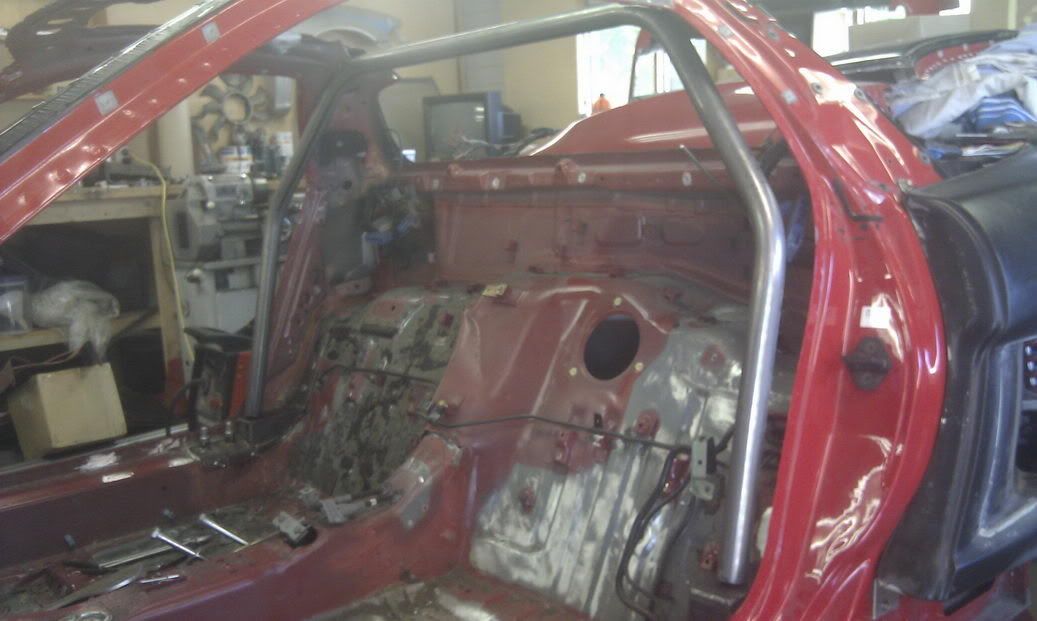
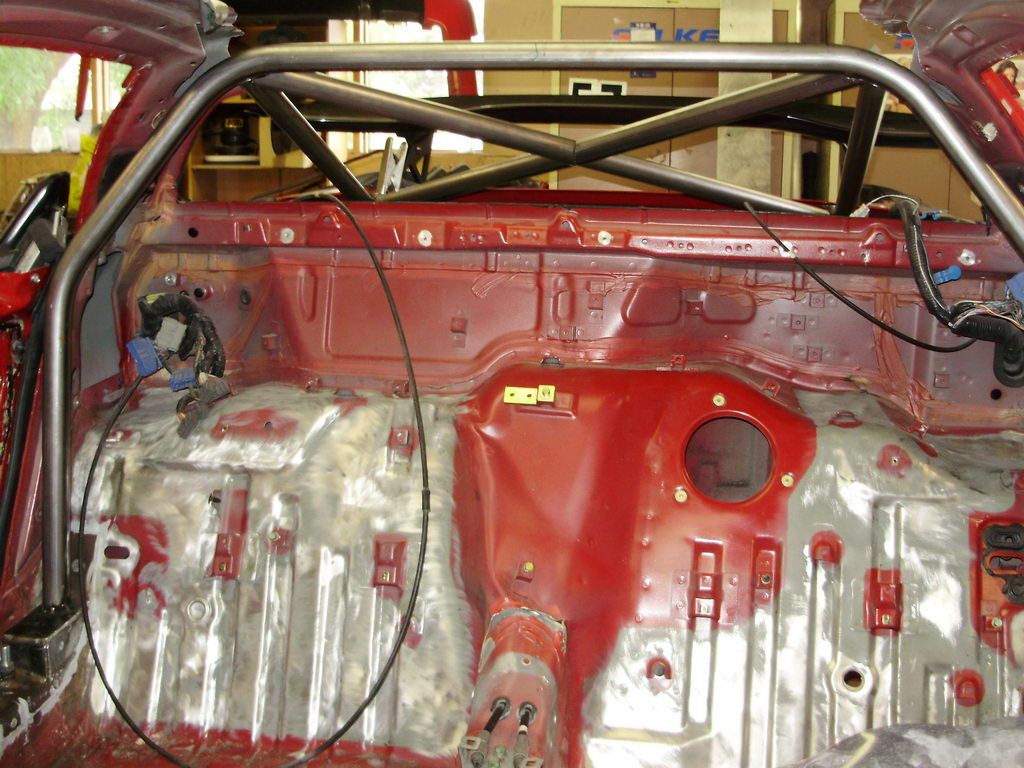
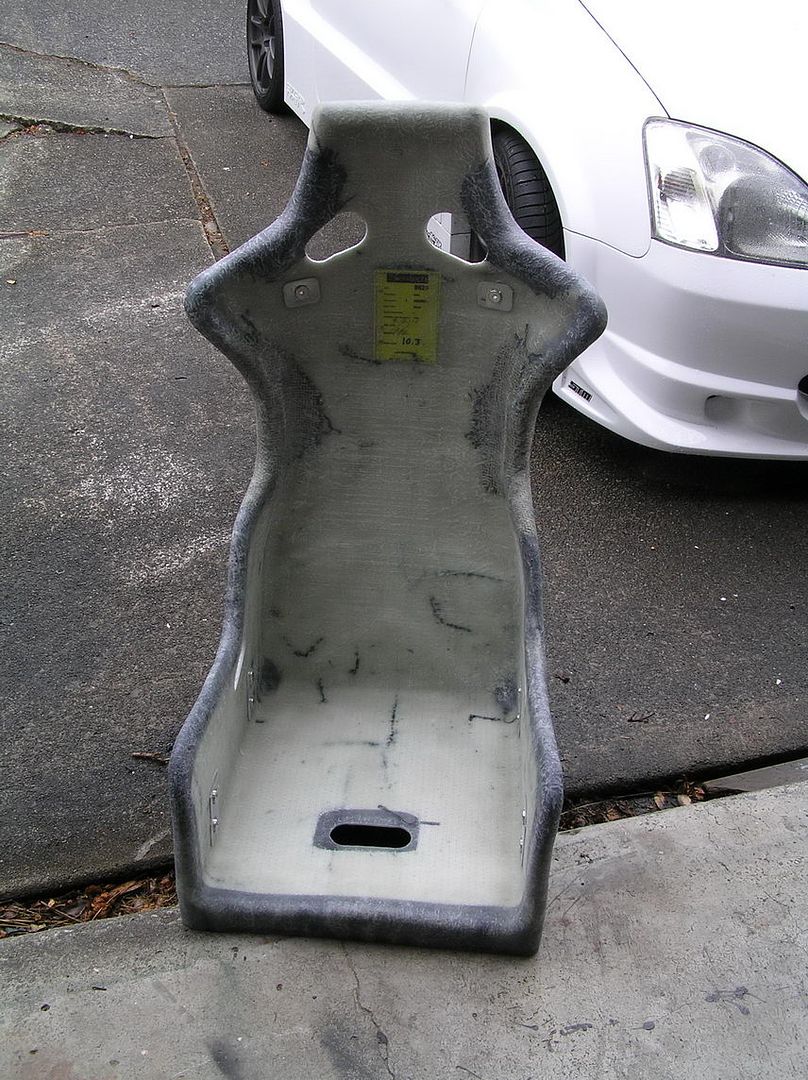
Yeah you leave the dry ice on the sound deadening for about 15-20 minutes, then you can just give it a strong whack with a rubber mallet or softer hit with a normal hammer and it'll just break away in large lumps leaving very little behind.......... saved me a very very long time if I'd have had to do it by hand with something to lever it off in it's usual form as it's a tar based product so would be a nightmare.

I must admit I haven't gone into the engine spec in intricate detail with anyone,but have spoken to Ross and one other US tuner as well as my tuner here from Speedtech Motorsport and all seem to say the same basic thing which is baffled sump and billet oil pump gears will be all that is required to make it a really reliable track engine.

I have no idea if others have other opinions, but I'm more than happy to take advice on the engine build, but I haven't read anything anywhere to make me thing differently from above.

I'm not really aiming to have it race in any particular class here to be honest, but it will be able to run in a few of the top GT classes here, but in reality this car is just for me to have some fun in, so I'm going to start off in tarmac sprints and hillclimbs first to get some racecraft back (haven't run in competative cars for nearly 20 years) and then once I feel more comfortable in the car I might get into a series here called the Intermarque series which as it suggests is fairly open to any brand....... then we'll see.

I started off initially wanting to have an end goal of running in the New Zealand Targa Rally but we've not been able to road legalise the car as yet and it needs to be road legal to tour between the competative stages (www.targa.co.nz), but doing the Targa is a massive undertaking........ 2000km's over 5 days I think so we've got plenty of time to get it up to scratch for that event also......

We've got so far to go with the car to get the basics sorted that unless I hear otherwise re the engine we'll just go down the path I've already laid out and then later on we can upgrade where needed.
 
You've really gotta do a targa one day!

We did Targa Tas (08) and Classic Adelaide twice before that... all a Porsche 968CS. You may recall; the first two TT (91/92) were won by an NSX, and Jim Richards (famous aussie :biggrin:) was second in his 968 in one of these, passed by Crick in his NSX late in the event.

We weren't e3ven close to that league, but it was an absolute blast. Particularly memorable was the 1st stage out of Strahan on last day. We were wearing down a R32 GT-R on a long 33km stage. An old factory Ford Escort rally car appeared in rear mirror going hell for leather. He was literally on three wheels around every corner! They overtook us soon enough and as we watched him pull away ... he rolled big time! No one was hurt (other than egos) I just wish my video was working that day :mad:

I wish I'd thought of your dry ice trick when removing the sound deadening from the 968... literally weekends wasted with horrible glues and solvents. :mad::mad: (probably carcenogenics too!). But it did eventually drop 40kg off the car.

How long do you reckon before you have the build done, with the car running in it's first event ?
 
Last edited:
Realistically I'd say 12 months.

With Xmas coming soon I don't think anything is going to happen till mid January again now, then I've got to

get the front of the cage and rest of that type of thing done
then weld roof back on
weld in reinforcement bars between front chassis rails
remount radiator on an angle to drive air through it and up to the bonnet vent
fit new headlights
finish making bonnet to fit new lights
create tunnel around radiator for bonnet vent to seal into
fit new brakes
fit new pedal setup
make steering column
cut holes and create mounts for suspension remote reserviors
cut out and drop down drivers floor
fit seat rails and seats
make full body undertray and splitter with side skirts
make new carbon interior
rewire entire car
fit digital dash and ECU
fit new sensors to suit extra ECU channels
drop engine out to fit cams and cam gears
remove and recoat cam covers in crinkle red finish
remove un-needed parts for aircon, idle control etc etc from engine
fit oil pump gears and sump baffle
change engine mounts
fit new clutch and gearbox
fit gear lever and cables
paint external of car
refit new plastic rear hatch

and no doubt a whole load of things I've forgotten !
 
Last edited:
Just some clearer pictures.....

All pictures are taken and paperwork prepared for Motorsport NZ application to go in tomorrow to get my homologation and logbook !!

Obviously some of the pics don't show all the finished welds, but they're all done now up to spec for MSNZ.

hb1.jpg

hb3_717x538.jpg

hb5_717x538.jpg


Also the tube used is seamed tube not seamless tube which I'm told is a requirement in the USA, but here the tube we're using is actually spec tubing listed by Motorsport NZ and is very low carbon high tensile strength tube and they feel it's more than OK to use so that's why we've used it in case anyone else is also wondering.
 
According to the specs it's 500mpa - less than 0.022% carbon content as Motorsport NZ have a list of a few specific electic seam welded tube that is acceptable as long as it has a smaller ID or basically a thicker wall. Minimum spec is 350mpa apparently.

The tube we've used is of course on the approved list so should be all good.

It's 38.1mm x 3.5mm tube.
 
Last edited:
I wish I'd thought of your dry ice trick when removing the sound deadening from the 968... literally weekends wasted with horrible glues and solvents. :mad::mad: (probably carcenogenics too!). But it did eventually drop 40kg off the car.


VERY thoughtful build!----I suffered over 20 man hours getting the "TAR FROM HELL" out of my car (using lacquer thinner, putty knife, & wire brush) when I built my cage. Now, WAY after the fact (of course) I've discovered a process called "dry ice pellet blasting"---ice pellets are the size of grains of rice, shot at about 120 psi, & they do not hurt the substrate! There is also a VERY effective stripper that I used on the undercoating---it's called "Molecular Tech 2500", & its unique in that it doesn't dissolve what you want to remove----it penetrates & causes a release of the molecular bond at the substrate. It's kinda pricey, but WAY worth it!
Keep up the good work!

PS....I'm having a custom-built seat (with head restraints) built by Butler-Built seats to address the height limitations. It has a pronounced "lay-back" attitude (65 degrees) and full rib cage surrounds, AND fits better than all the other "Pro" seats!
 
hb1.jpg

hb3_717x538.jpg

hb5_717x538.jpg


Also the tube used is seamed tube not seamless tube which I'm told is a requirement in the USA, but here the tube we're using is actually spec tubing listed by Motorsport NZ and is very low carbon high tensile strength tube and they feel it's more than OK to use so that's why we've used it in case anyone else is also wondering.

It's understandable that you chose to use tubing that your sanctioning body specifys, BUT... I'm SHOCKED that they approve electric-weld tubing! I can tell you that a "violent event" can cause that seam to burst completely! Also, at least here in the states, that kind of tubing doesn't have to pass ANY testing! At least your wall thickness is heavier than what we use in a chrome-moly (4130) cage. We typically use .125" wall for the main bar, & .095" for all other structural members. Even DOM (drawn over mandrel) would be preferable over EWT! Please take this observation in the spirit in which it is intended---as a note about YOUR safety!
 
Thanks LS7NSX, I totally take your comments as they are intended and do appreciate your input as I do with all informed input.

I suppose as you mentioned I can only take comfort from the fact that they do only approve a certain tube from 2 special mills here and apart from that only seamless tube and Chrome Moly.

I believe the reason they only allow these 2 mills to produce the tube is because they have actually tested the material and specified the thickness and higher tensile strength.

I would have loved to do it from seamless tube, however the places here require you to purchase 100's of metres of it at a time and so it simply put the price out of reach for us and Chrome Moly cages are only allowed to be made by a few certified builders and they want moonbeams to make a cage and it simply would have taken so much budget away from other areas of the build that I decided against it.

I know you could say there's no price you can put on your safety, but after talking to my cage builder and few other builders around I felt comfortable that the extra thickness and testing of the tube for strength gave me a very good chance in a big stack and it meant I could actually finish the build instead of having an awesome cage and not much else........

I guess one day my fiancee might be posting on here because I'm gone and she's got a lot of NSX spares to sell, but here's hoping not eh !! :tongue:

Also whilst I'm here I have to mention my total and utter admiration of your project also........ I love individualism when it comes to cars and certainly I never take "no you can't do it" as an option when it comes to my cars so when looking at your build I really appreciate where you're coming from and love the massive improvements you've made especially in the suspension area........ thanks for sharing it all with us.
 
Just a small update. Racetech called and let me know they have the base shell of my new seats made and wanted me to take one away and make sure we've got all the clearance we need before we go too much further, so I'll go up to the workshop on Monday and we'll give it a try !

P1010102.jpg

P1010101.jpg

P1010103.jpg


The close up shot is to show the embedded bolts that they've put in for me so we can brace the top of the seat also to make sure it's got maximum strength. The seats are very stiff anyhow, but even being that stiff there is still movement in the shoulders under heavy load and especially so with this special higher version of the seat. Their FIA seats have even more mounting and bracing up high as I believe it's an FIA requirement to have it bolted at the bottom and the top so it's got to be a good thing in my eyes !
 
Back
Top