-
Protip: Profile posts are public! Use Conversations to message other members privately. Everyone can see the content of a profile post.
You are using an out of date browser. It may not display this or other websites correctly.
You should upgrade or use an alternative browser.
You should upgrade or use an alternative browser.
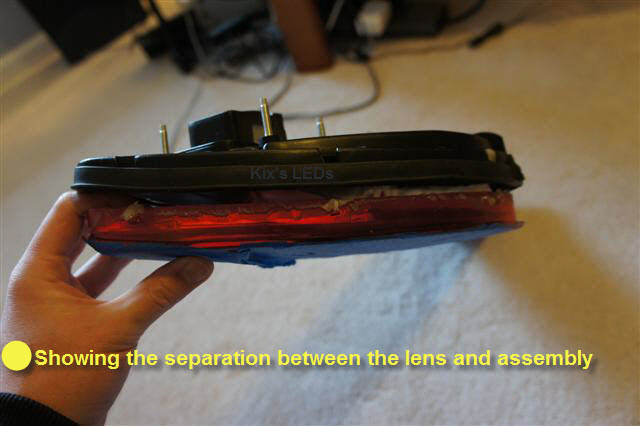
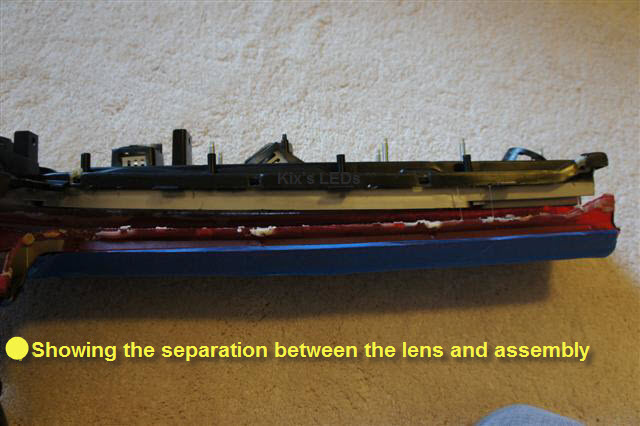
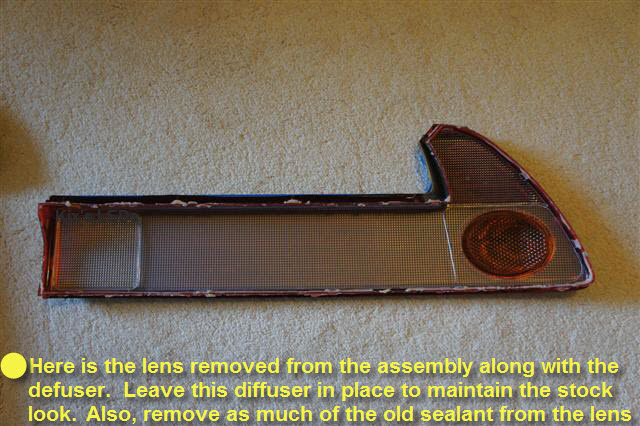
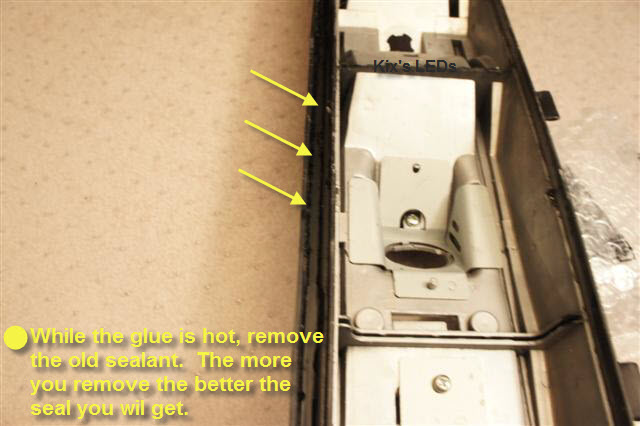
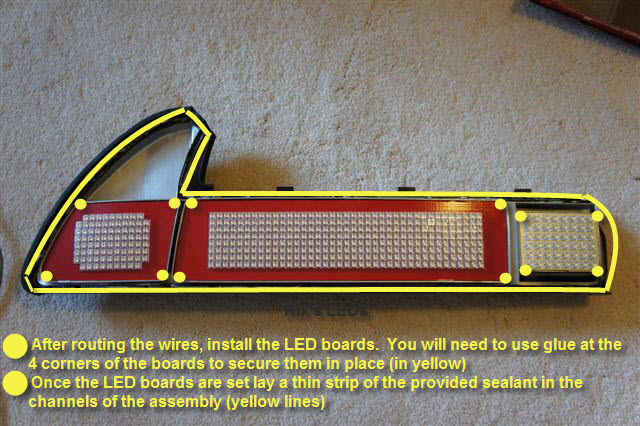
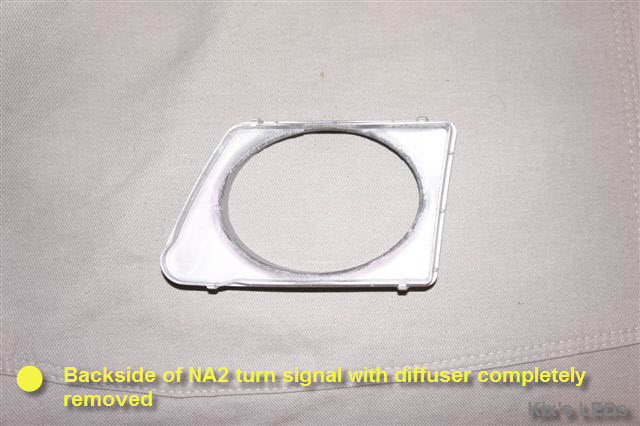
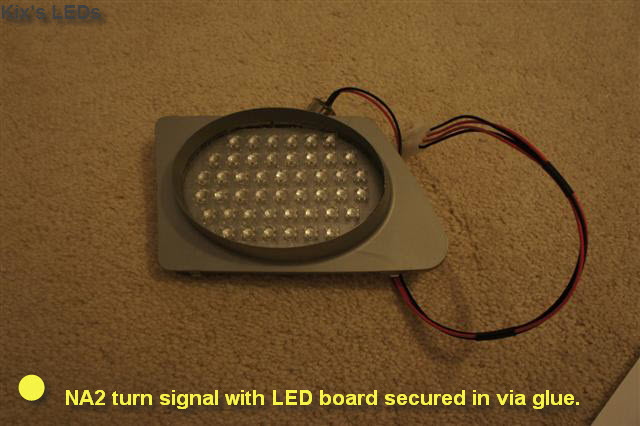
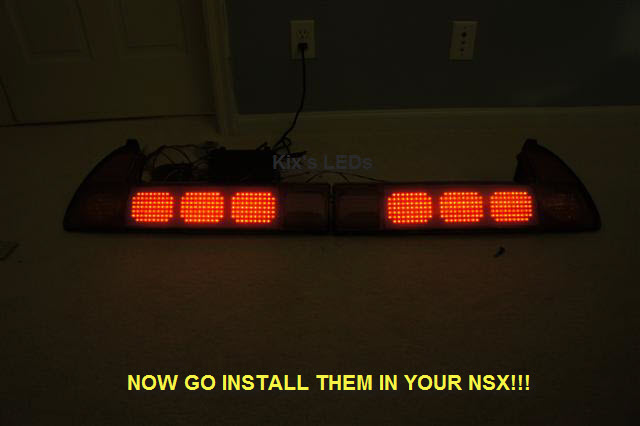
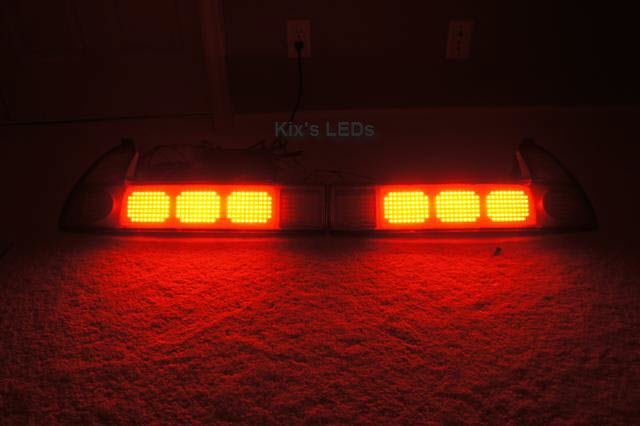
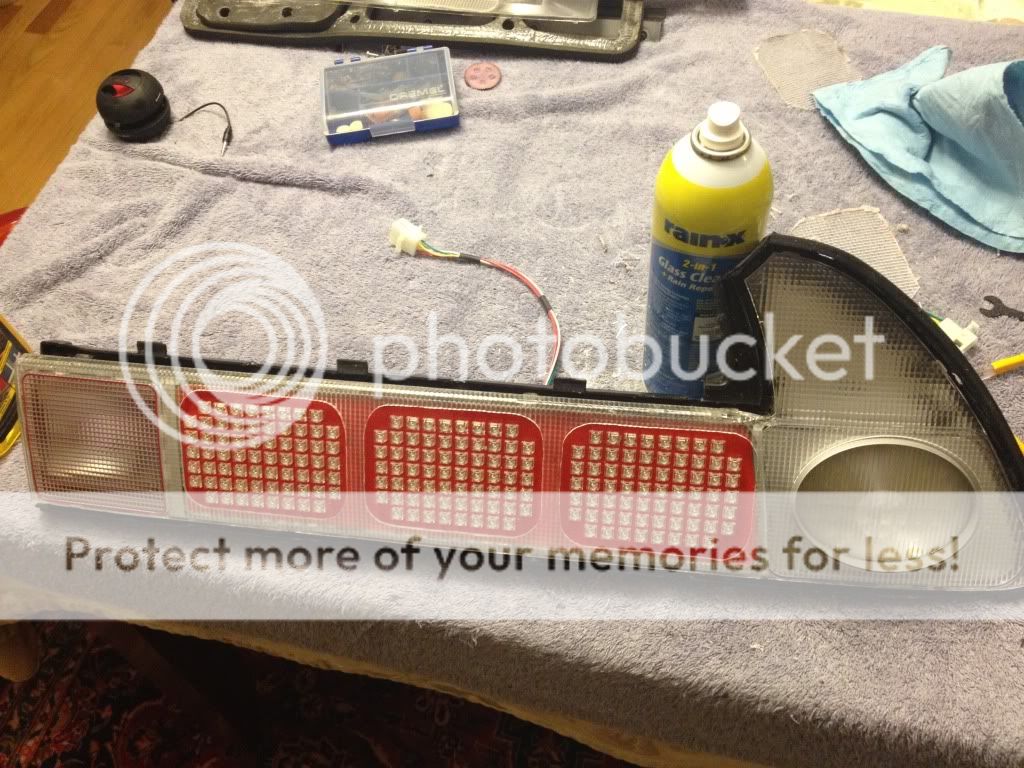
DIY - Tail lamp separation & LED Panel Install
- Thread starter kix
- Start date


Great write up...but; geez, that sure looks complicated and risky!
It's really not that risky. I did the same back in the day to my Preludes tail lights, and I did this to a set of head lights for an 06 Acura Tl. The only difference is I used an oven set to 150-200 (cant remember for sure, I'm sure its online somewhere...), and put lights in for 2-3 min, removed and pryed apart for 1 min, back in the oven for 3 min, then out to pry... It took all of 20-30 min to heat glue up enough to separate the lens and body.
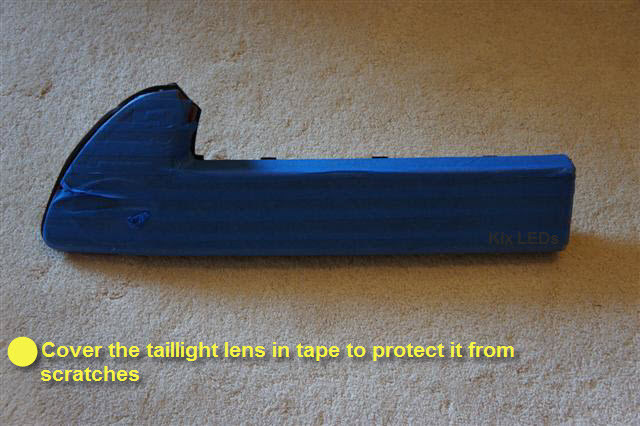
Do cover the lens with tape, as the adhesive becomes runny and can be a pain to remove once it cools down.
A positive of the oven technique is made putting the lens and body back together easy. Heat up, take out and push together, repeat as needed. A negative is the risk of cooking and deforming your lights, but as long as you don't leave em in for more then a few minutes, and are patient when separating the lens and body (think a little at a time) I don't see the plastic cooking.
Last edited:
Nice write-up, and the taillights look good. You should make some for resale.

Excellent write up") .
.
Regards,
LarryB
.Regards,
LarryB
sorry to hijack your thread, but I saw a vehicle a few days ago that had led tail lights that I think would work with the NSX if you were to swap the internals. I can't remember what it was, but I think it was either a smaller SUV or mini van. The tail lights were long rectangular bars that would look great in the NSX. At least I think they were LEDs, looked too good to be incandescent bulbs.
sorry to hijack your thread, but I saw a vehicle a few days ago that had led tail lights that I think would work with the NSX if you were to swap the internals. I can't remember what it was, but I think it was either a smaller SUV or mini van. The tail lights were long rectangular bars that would look great in the NSX. At least I think they were LEDs, looked too good to be incandescent bulbs.
Lincoln MKX perhaps?
Lincoln MKX perhaps?
Yeah, that's the one! Thoughts, anyone?
Totally agree.
i agree with the rod style led. my bmw came with factory led rods and looks awesome. hopefully someone can incorporate those into the nsx tails.
After all this is done, is it then plug and play? What do you do with all the connectors, the dimmer thingie, where do all those go? Don't we need a write-up on the rest of it?
BLT's kit is plug and play. Each of the connectors are different and designed to fit only 1 plug. I just placed my controller right on the trunk floor board. I think the wires are long enough you can even hide it in the tool tray.
Nice write up. I prefer the baking method as oppose to the water method but that works.
Nice write up. I prefer the baking method as oppose to the water method but that works.
why? you mean oven? I guess its easier becuase the light fits. I don't know if I have a pot big enough to cook a tail light
why? you mean oven? I guess its easier becuase the light fits. I don't know if I have a pot big enough to cook a tail light
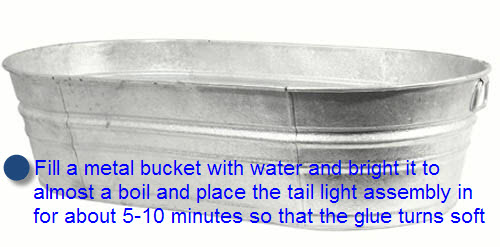
I already had one of these. I boiled like 4 big pots of hot water.
awesome writeup thank you!
I just did one side, took me all day to do it right. Getting that goop and glue out of the channels and off the lens is a tedious process.
Of course Richard is now long gone, ignores my emails, I have two bad interior LED's I paid him 200 dollars that work for about 4 seconds before they blew. I am a little pissed. This is an item where your choice is either a rather pricey option like clear corners, or fly by night guys that won't stick around. Richard bought a GTR and is gone. If a customer has a problem, it's not his. Before that I forget who it was, but he also left a bunch of people stranded. There was also evo4gtc Eric , but he is juat plain banned from prime, I guess hangs out in the Socal group. Three LED vendors, 3 guys that are gone. Now we have Alec fields, and let me tell you guys if he is taking your lamps, converting them, and handing them back done for that kind of money.... he is cheap.
But in general hand soldering individual LED's is not the way to go. It's mickey mouse and prone to fail. Imagine several hundred LED's... all hand soldered. This is a very cool looking mod that really updates the car but it is a ticking time bomb. I put mine in anyway, but I didn't modify anything so it can go back to stock.I will post pics when done
Last edited:
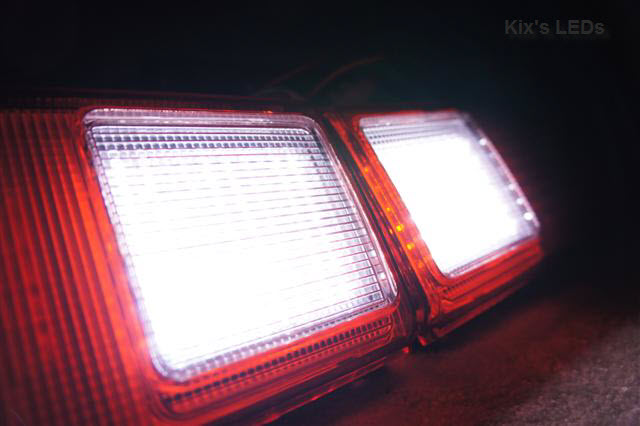
I didn't like the look with the diffuser or without so I cut the diffuser around the LED's. That took a half a day and a super steady hand
Now I have to see how that diffuser looks when the LED's light up. Hopefully not something weird. Needless to say I really know the taillamps now if anyone has any questions.
Now I have to see how that diffuser looks when the LED's light up. Hopefully not something weird. Needless to say I really know the taillamps now if anyone has any questions.
After 2 years since purchased and an unexpected blown engine, decided to have them also do the install.
Live the way they look, just need a little help. Brake lamp light on and after reading thread looks like Ill have to tap in and ground.
2nd.....passenger side signal has a serious hyper blink......any suggestions
Live the way they look, just need a little help. Brake lamp light on and after reading thread looks like Ill have to tap in and ground.
2nd.....passenger side signal has a serious hyper blink......any suggestions
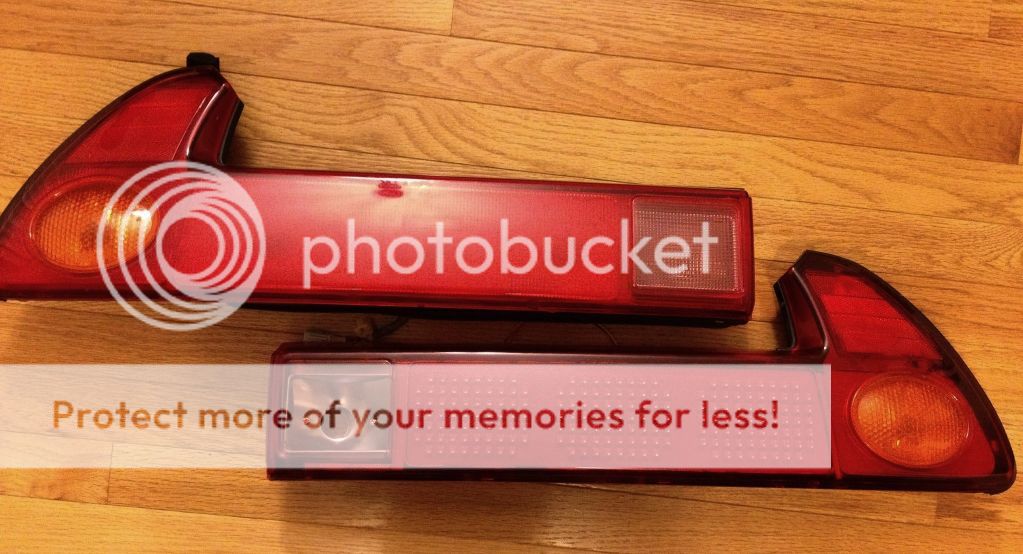
I used the baking procedure on my first tail light today. I had a bunch of dirt/buildup inside the lens from the car sitting for so long in the 2nd owners driveway.
220F until preheated, then 8m to start on a cookie tray with parchment paper down, plastic side (with painters tape) down.
Then I worked slowly using a plastic dash removal tool loosening up the large end of the light as noted in the original post. Once the glue started to cool a little bit, maybe 1-2m of loosening/prying, I would put it back into the oven for 3 minutes, then repeat. After being gentle my 3rd cooking allowed me to start loosening up the big end. It probably took me 8 heat cycles in the oven until it started to really come apart.
After that I popped out the clear part inside the red lens, the clear part over center of the light and a little clear part on the end.
Then I cleaned everything really well, reassembled and set the red lens on the back piece without any pressure on them. Just heating up the glue to get pressed together. I did one 8m cycle for the initial press, then 4m just to get the last couple of edges pressed flush, again at 220F.

Not sure if it shows up well, but what a huge difference. Really happy with how it all turned out. Yes a stick is currently holding up my trunk (struts are part of the winter build).

220F until preheated, then 8m to start on a cookie tray with parchment paper down, plastic side (with painters tape) down.
Then I worked slowly using a plastic dash removal tool loosening up the large end of the light as noted in the original post. Once the glue started to cool a little bit, maybe 1-2m of loosening/prying, I would put it back into the oven for 3 minutes, then repeat. After being gentle my 3rd cooking allowed me to start loosening up the big end. It probably took me 8 heat cycles in the oven until it started to really come apart.
After that I popped out the clear part inside the red lens, the clear part over center of the light and a little clear part on the end.
Then I cleaned everything really well, reassembled and set the red lens on the back piece without any pressure on them. Just heating up the glue to get pressed together. I did one 8m cycle for the initial press, then 4m just to get the last couple of edges pressed flush, again at 220F.
Not sure if it shows up well, but what a huge difference. Really happy with how it all turned out. Yes a stick is currently holding up my trunk
(struts are part of the winter build).
Last edited:
Similar threads
- Replies
- 2
- Views
- 730
- Replies
- 7
- Views
- 898
- Replies
- 12
- Views
- 2K
- Locked
- Replies
- 27
- Views
- 3K