Wow - that is weird Batmans. Usually it's the ringlands that go on the OEM pistons from what I've seen here over the years.
Well, I've been playing around with the AEMTuner software and my base calibration. It's easy to get overwhelmed. I'm no engine expert, and being able to control every parameter of your engine is not a good thing! I've put about 200 miles on it so far, logging every way. Haven't taken it above 6k RPM yet. A/F looks good.
Some things I've noticed:
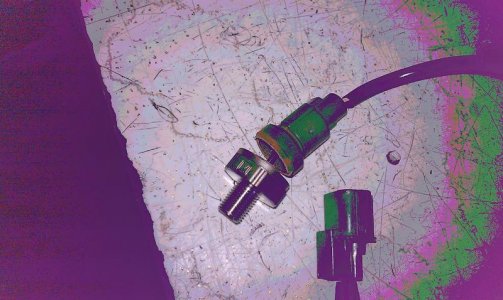
1) The base cal did not have O2 and knock feedbacks turned on. I looked at the feedback logic (looked reasonable according to the AEMTuner reccomendations) and activated them. Right away, even during idle, the knock sensor was adding fuel and reducing timing. I need to look at the knock sensor input (one of the improved items for the Series 2) and figure out what the correct frequency should be. I've read the knock sensors go bad over time (get noisier), and Batmans even had a broken one (see pic above), so maybe this is the problem.
O2 feedback seems to be OK. I haven't seen it correct anything yet. Base map A/F ratios seem to be OK and within range of others posted here for N/A applications.
2) It's noted VTEC is set to engage at 5000RPM in the base cal. This is easy to change if desired.
3) There's a few issues with a cold engine. This is expected, since it is pretty much trial and error to see how much fuel your engine needs when starting. Therefore, it's pretty hard for a tuner to guess what the settings need to be if they can't experience it. Also, your tuner has limited time available for testing your engine's cold starts. Because I wouldn't be touching the fuel or ignition maps, I felt pretty comfortable trying to tackle this on my own (after extensive internet wading of course beforehand).
There are two cold-engine issues: Engine cold start and cold idle.
Idle Control: It idles pretty well. But, when warming up, the idle would have an occasional 1-second surge. I reduced the idle feedback rate 250milliseconds and that seemed to help. Also, when cold (coolant temp of 60F) and at low throttle (10% TPS or less), suddenly letting off the gas would make the RPM drastically drop to about 500RPM or so. I think making a slight change to the Idle% vs Target% might help this, as well as the RPM Offset vs TPS, but I need to read up on those first. Reducing the idle feedback rate above seemed to help this slightly. Of course, this goes away on a warm engine.
Engine Cold Start: Ah, the AEM tuners common problem and the source of many internet threads. As supplied, the engine started fine on a warm restart. However, after a cold day here (40's), it would take about three separate ignition cranks to get her going trying to leave work.
Now, you need to check your battery first. The AEM doesn't work well below 11V from some reading. I have a newish Odyssey 680 battery. I haven't been able to monitor voltage yet while cranking, but I know it has some droop. I don't think this is my problem since I made some changes below and it starts quicker. Just something to keep in mind if you have a little PC545 or a regular battery in poor condition.
In the "Start" tab, I've changed just about everything. I'm getting closer... it now starts on the first crank during 50F, but after 4 seconds or so. I just make little tweaks here and there and observe the response, so it is a tedious process. Especially when you obviously have to wait for the engine and air temps to cool down. When I get it nailed I'll post the results and my logic(?).