Credit:
This method was described in another thread by OLDMNSX. I just followed his procedure and took pictures.
Overview:
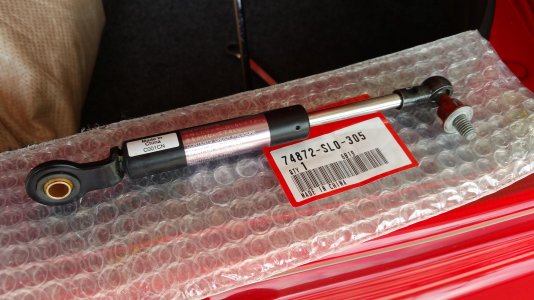
When replacing your trunk struts, the new OEM struts do not include the Ball-Studs, which must be purchased separately, adding at least $20-30 to the parts cost. Most folks buy these because it is thought to be “impossible” to remove the ball-stud from the old strut without cutting the strut cup with a Dremel, or grinding it away with a grinder and possibly ruining the very part you are working so hard to save. The method I describe is pretty easy if you have a few simple tools.
Tools Required:
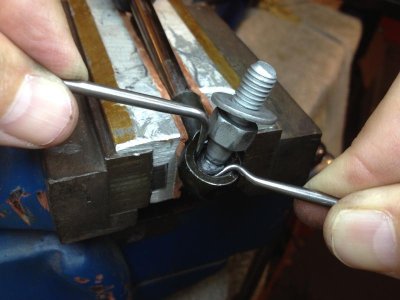
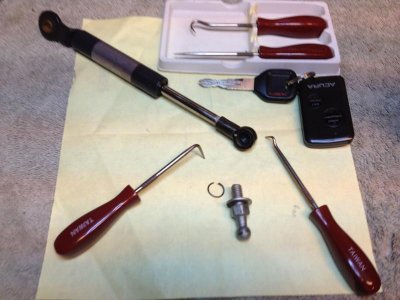
2 pick-type tools. It helps if they have angled ends. These can be dental-type pick tools or (in my case) picks with handles (set of 4 from Harbor Freight for $4-5). Either way, you need two. A vice to hold the strut while you are working with both hands is a huge plus.
Procedure:
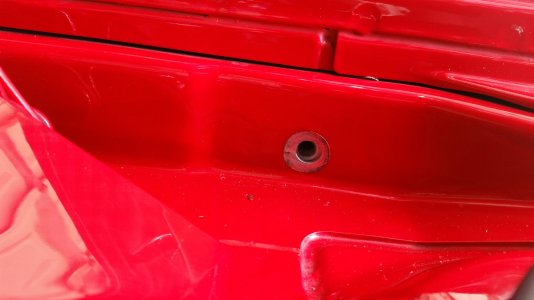
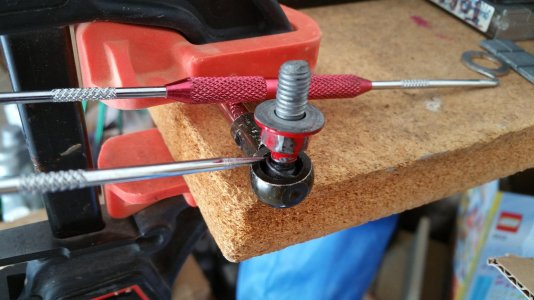
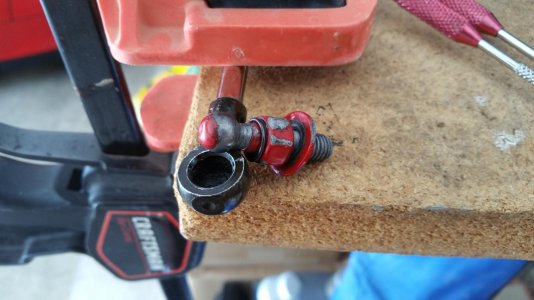
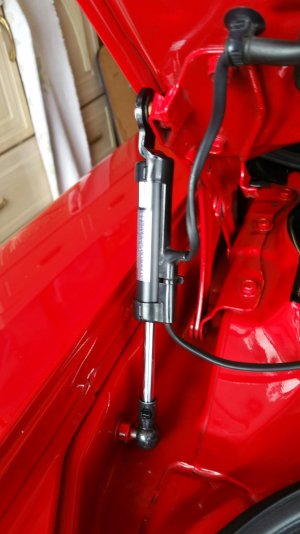
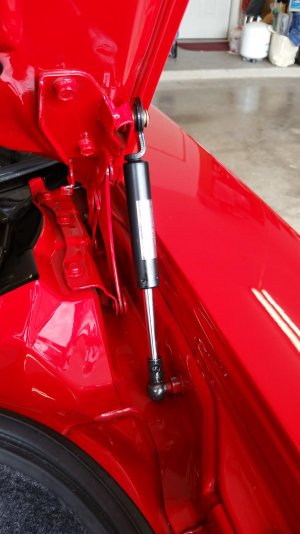
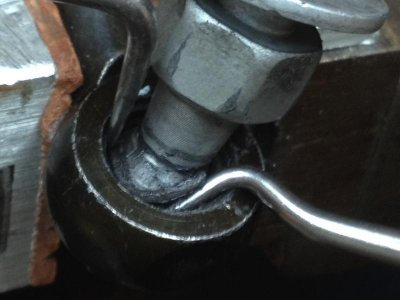
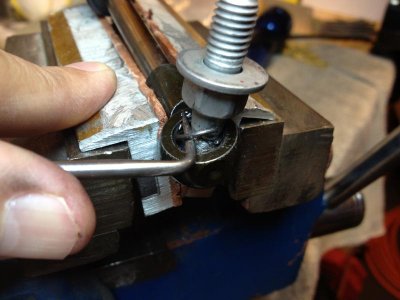
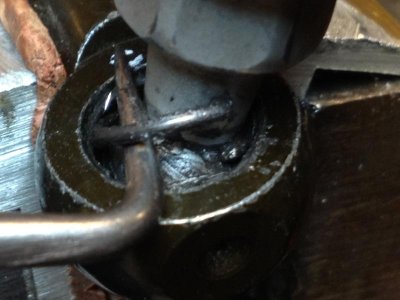
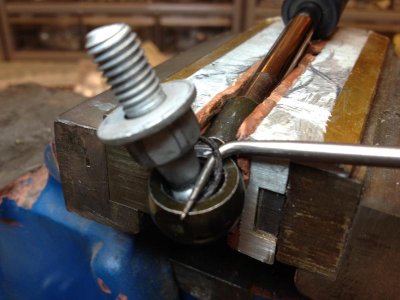
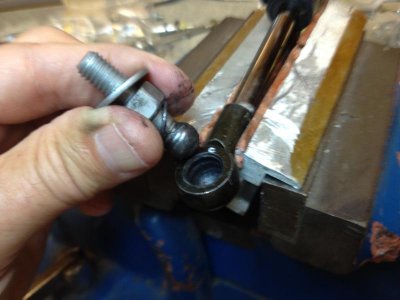
Remove trunk struts per Wiki & put in vice if possible. Locate the split in the wire ring that holds the ball-stud in the strut cup. On the opposite side from the split, push down with one pick. Insert the second pick in the split and pry up, pulling one end of the ring wire out of the cup. Now take the first pick and insert it under the pried-up end, between the lip of the cup and the ring wire. Work this pick across the cup, next to the stud, pulling more of the wire out. Now simply rotate this pick around the stud, using the pick against the stud as leverage. Either the ring will pop out or you can pull the stud out with the ring still around it. Reinstall the ball-stud to side of trunk and snap your new OEM struts in place. It took about 10 minutes to get the first ring out and less than 5 min for the 2nd ring. Good luck!
This method was described in another thread by OLDMNSX. I just followed his procedure and took pictures.
Overview:
When replacing your trunk struts, the new OEM struts do not include the Ball-Studs, which must be purchased separately, adding at least $20-30 to the parts cost. Most folks buy these because it is thought to be “impossible” to remove the ball-stud from the old strut without cutting the strut cup with a Dremel, or grinding it away with a grinder and possibly ruining the very part you are working so hard to save. The method I describe is pretty easy if you have a few simple tools.
Tools Required:
2 pick-type tools. It helps if they have angled ends. These can be dental-type pick tools or (in my case) picks with handles (set of 4 from Harbor Freight for $4-5). Either way, you need two. A vice to hold the strut while you are working with both hands is a huge plus.
Procedure:
Remove trunk struts per Wiki & put in vice if possible. Locate the split in the wire ring that holds the ball-stud in the strut cup. On the opposite side from the split, push down with one pick. Insert the second pick in the split and pry up, pulling one end of the ring wire out of the cup. Now take the first pick and insert it under the pried-up end, between the lip of the cup and the ring wire. Work this pick across the cup, next to the stud, pulling more of the wire out. Now simply rotate this pick around the stud, using the pick against the stud as leverage. Either the ring will pop out or you can pull the stud out with the ring still around it. Reinstall the ball-stud to side of trunk and snap your new OEM struts in place. It took about 10 minutes to get the first ring out and less than 5 min for the 2nd ring. Good luck!
Attachments
-
 1 starting.jpg46.6 KB · Views: 1,396
 -
 2 starting close up.jpg42.9 KB · Views: 1,267
 -
 3 2nd step.jpg48.3 KB · Views: 1,256
 -
 4 2nd step close up.jpg47.1 KB · Views: 1,238
 -
 5 ring almost out.jpg53.7 KB · Views: 1,242
 -
 6 pulling stud out with fingers.jpg42.9 KB · Views: 1,236
 -
 7 stud in trunk.jpg55.5 KB · Views: 1,221
 -
 8 group of tools.jpg54.5 KB · Views: 1,207