• Protip: Profile posts are public! Use Conversations to message other members privately. Everyone can see the content of a profile post.

Idler Pulley Bearing Replacement

Joined
25 September 2012
Messages
518
Location
Markham, Ontario, Canada
When cold starting my NSX, it sounded like it was supercharged for the first few minutes of driving! Cool (not). She was whining at me, and from what I researched, it sounded like the idler pulley bearing.

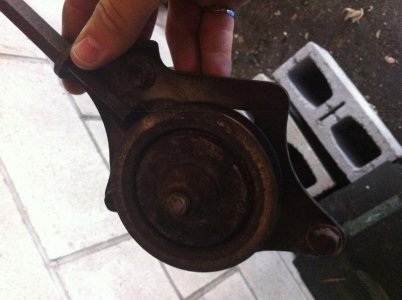
Reference your service manual (section 22-77) to get at the pulley. I took the whole pulley assembly out, but DO NOT DO THIS. It is a pain in the butt getting the bottom bolt out and the long through bolts at the top are near impossible to get out. But here's a photo of it anyway:
Pulley Assembly.jpg

This DIY can be done by only removing the "Idler Pulley Center Nut". The nut/cover/washer/pulley/sleeve all slide off the mounting bolt. It's a little tight getting it on/off, but trust me, it's easier than getting those two through-bolts out (in section 22-78).

Here is a link to a video I made showing how bad the bearing really was. If you hear your pulley whining it's probably as bad as mine was:

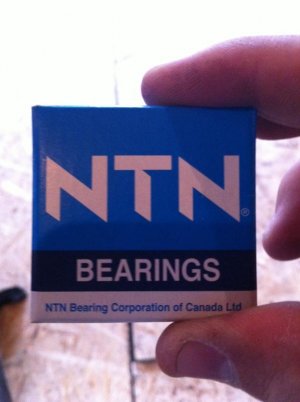
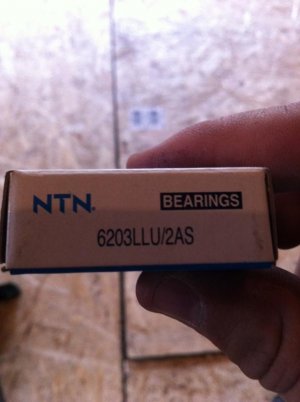
Rather than replacing the whole pulley (~$60), I replaced the bearing ($17 tax in). The bearing was: NTN 6203LU (or 6203LLU). Likely the bearing shop will reference the "double L" bearing name (my shop did), but taking the bearing out of the packaging, it shows the "single L" code. So both codes reference the same bearing.
Bearing1.jpgBearing2.jpg

I used a 11/16th socket to punch the bearing out (from the back side). I used a vice to press the bearings in/out, but a real press works even better. Some guys use hammers, but I didn't want to smash anything:redface:.

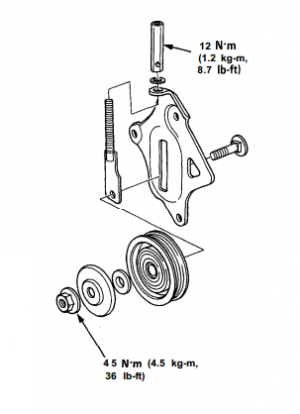
Install is a reversal of the removal. NOTE: make sure to put the washer, cover and sleeve in the correct order on the pulley bolt. I remember reading that it was a common mistake to screw this up. Here's a photo from the service manual:
PartOrder.PNG

Lastly, here is a video of the new bearing installed (much smoother):

I would recommend this DIY to everyone. It is super cheap and unbelievably satisfying. I still can't believe how quiet my engine was supposed to sound!

If you have a whining NSX, it's a really easy fix. It took me about 1-2 hours to do. It is likely a 30 minute job if you've got a press and don't take that darn pulley assembly out.

Now to replace my alternator bearings...

Lucas
 
Last edited:
Hi,

are you sure about the section 23, page 77 ?! in my service manual, the 23 section is Electrical
and in page 77 there is a circuit diagram showing the battery / starter / fuse box, etc

Thanks,
Nuno
 
Hi,

are you sure about the section 23, page 77 ?! in my service manual, the 23 section is Electrical
and in page 77 there is a circuit diagram showing the battery / starter / fuse box, etc

Thanks,
Nuno
Nuno

Fixed: section 22-77

Thanks for the heads up.

Lucas
 
Just wanted to add to this thread and give a thanks for it being here. I changed my bearing this evening. In all it took me about 1.5 hours. Mine required some extra disassembly of my supercharger idler pulley since it was right in the way but once that was out of the way all you need is a 12mm socket for the tension bolt and a 14mm wrench for the pulley center bolt. Once out I used a couple blocks of wood to put the pulley on, and as mentioned above an 11/16 socket and two decent taps with a hammer and block of wood and out she came. Flipped it over, and with a block of wood again, tapped the new bearing in. My cost on the bearing was $4. I went to a local place vs ordering online. (http://www.mcguirebearing.com/) I also replaced the belt while I was in there for good measure, another $12.

All in all this is a very easy DIY and will save you a lot of $$ vs taking it somewhere that will likely replace the entire pulley assembly for $60-$70 plus labor.
 
For the clarification, the NTN bearing used on our NSX A/C idle pulley is double seal and contact type so please use 6203LLU.
I saw someone using LLB instead but it's non-contact type so water can enter inside and not suitable for our usage.

If you look at the side of your existing bearing, it will show '6203LU' on the brown seal.
'LU' stands for the single side seal and NTN just placed it on both sides to make it double sided seal. Hence, the parts code 'LLU'.
If you order '6203LU' and not the '6203LLU', you will have this brown seal on just one side and at the other side, the ball bearings are exposed.
Some applications require this type of installation allowing the packing of special grease.

Kaz
 
Thanks for the write-up and clarifications all!

Thanks for the write-up and clarifications all!
Got mine done today thanks to all of your great info!!

When cold starting my NSX, it sounded like it was supercharged for the first few minutes of driving! Cool (not). She was whining at me, and from what I researched, it sounded like the idler pulley bearing.

Reference your service manual (section 22-77) to get at the pulley. I took the whole pulley assembly out, but DO NOT DO THIS. It is a pain in the butt getting the bottom bolt out and the long through bolts at the top are near impossible to get out. But here's a photo of it anyway:
View attachment 113277

This DIY can be done by only removing the "Idler Pulley Center Nut". The nut/cover/washer/pulley/sleeve all slide off the mounting bolt. It's a little tight getting it on/off, but trust me, it's easier than getting those two through-bolts out (in section 22-78).

Here is a link to a video I made showing how bad the bearing really was. If you hear your pulley whining it's probably as bad as mine was:

Rather than replacing the whole pulley (~$60), I replaced the bearing ($17 tax in). The bearing was: NTN 6203LU (or 6203LLU). Likely the bearing shop will reference the "double L" bearing name (my shop did), but taking the bearing out of the packaging, it shows the "single L" code. So both codes reference the same bearing.
View attachment 113278View attachment 113279

I used a 11/16th socket to punch the bearing out (from the back side). I used a vice to press the bearings in/out, but a real press works even better. Some guys use hammers, but I didn't want to smash anything:redface:.

Install is a reversal of the removal. NOTE: make sure to put the washer, cover and sleeve in the correct order on the pulley bolt. I remember reading that it was a common mistake to screw this up. Here's a photo from the service manual:
View attachment 113280

Lastly, here is a video of the new bearing installed (much smoother):

I would recommend this DIY to everyone. It is super cheap and unbelievably satisfying. I still can't believe how quiet my engine was supposed to sound!

If you have a whining NSX, it's a really easy fix. It took me about 1-2 hours to do. It is likely a 30 minute job if you've got a press and don't take that darn pulley assembly out.

Now to replace my alternator bearings...

Lucas
 
Timely bump ...my pulley bearing and alternator were making wirrrring noises ..after much searching and help from various friends( who shall remain nameless) I sourced one of the last oem bearings in the US dealer network....:eek:
 
Nice 😊

For mine, I found the NTN 6203LLU part on Amazon for about $12 USD and had it in a few days.

NTN Bearing 6203LLU Single Row Deep Groove Radial Ball Bearing, Contact, Normal Clearance, Steel Cage, 17 mm Bore ID, 40 mm OD, 12 mm Width, Double Sealed https://www.amazon.com/dp/B000UVKERI/ref=cm_sw_r_cp_api_glc_fabc_YJG7Fb5WZW3S8?_encoding=UTF8&psc=1

Also bought one of those nice belt tension gauges to get the belt tension within spec. Checked it before pulley removal, then set it back once bearing was replaced.

OTC Belt Tension Gauge, Universal https://www.amazon.com/dp/B000I198J0?ref=ppx_pop_mob_ap_share
 
HaHa you are way more "handsy" than I.....:biggrin:
 
Shop around a bit. The on-line prices are all over the place. Motioncanada (Motion Industries) lists the NTN 6203LLU bearing for a nudge over $8 and yes, when searching bearing supplier web sites you do have to be careful that you specify the 17 mm bore.
 
Back
Top