-
Protip: Profile posts are public! Use Conversations to message other members privately. Everyone can see the content of a profile post.
You are using an out of date browser. It may not display this or other websites correctly.
You should upgrade or use an alternative browser.
You should upgrade or use an alternative browser.
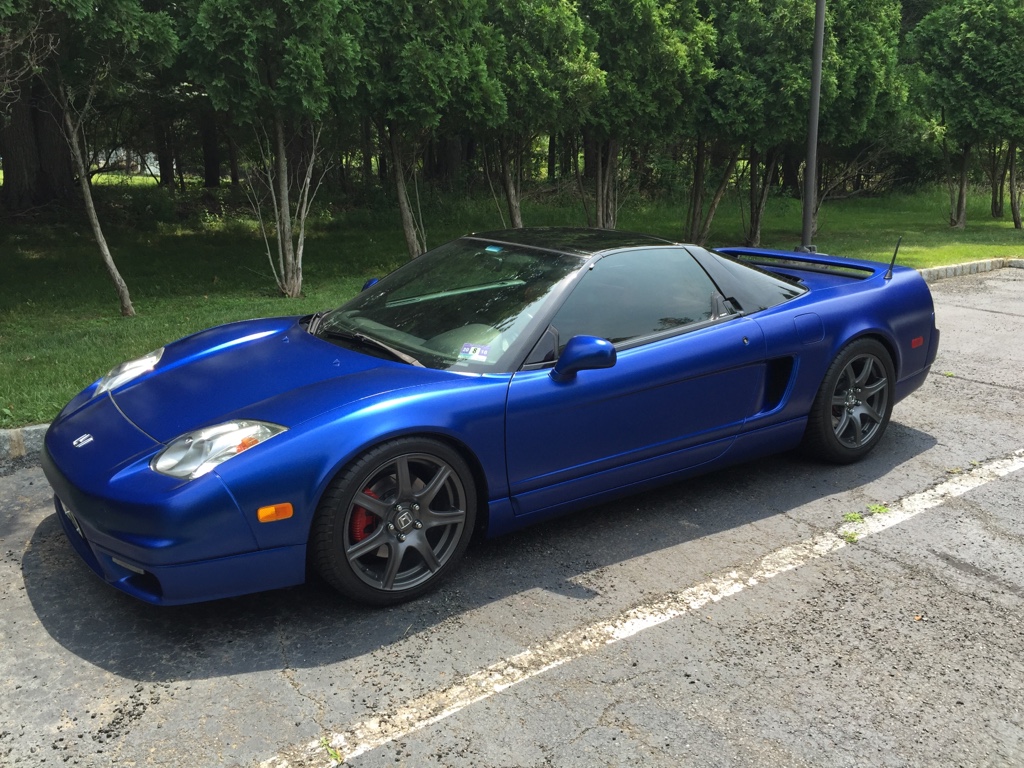
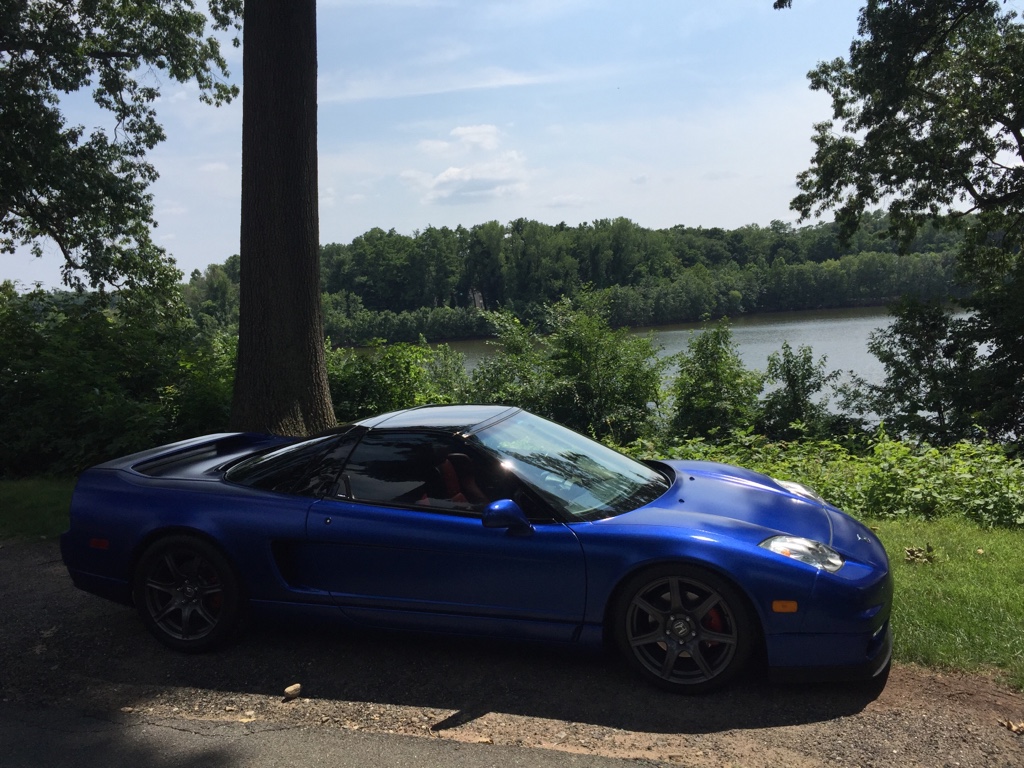
2002 Black/Red OEM+ Build
- Thread starter white98sh
- Start date

I guess I am partial to blue and gunmetal
Looks great!
Thanks Teej! There are a lot more modded and unique cars on here but I hope to give it my own simple twist.
Some more pics as the dip cures the color changes a bit. Little more shiny and less purple.
Also got the Couture Vortex lip (JP Aero copy) installed professionally. It wasn't a perfect fit but they managed to get it on there.
Got the windshield washer hose clips from Acura, still need to install the SOS NSXR lower chassis bar spacers and replace the taillight gaskets. They were leaking like crazy and the trunk was soaking wet from leaving it in the rain overnight (yes the horror!)


Here is a 2" long imperfection in the lip. Not too noticeable but could be better.

Some more pics as the dip cures the color changes a bit. Little more shiny and less purple.
Also got the Couture Vortex lip (JP Aero copy) installed professionally. It wasn't a perfect fit but they managed to get it on there.
Got the windshield washer hose clips from Acura, still need to install the SOS NSXR lower chassis bar spacers and replace the taillight gaskets. They were leaking like crazy and the trunk was soaking wet from leaving it in the rain overnight (yes the horror!)
Here is a 2" long imperfection in the lip. Not too noticeable but could be better.
Last edited:
Installed SOS lower chassis bar spacers. They give you 4 10mm spacers to lower the battery tray and I think a 12mm plus 6mm to lower the bar. I only used the 12mm though cause with both the bar was hitting the battery tray still. Still very close to the swaybar so we'll see if it rubs.
My car sits for weeks at a time and usually the battery is dead by the time I can enjoy it. That meant carrying a heavy jump box in the trunk (FYI the Jump-N-Carry JNC660 is the best I've used).
Then I read about the CTEK trickle charger and decided to try it out. Wow, it even reconditioned a 6-year old and presumed dead battery back to life (it couldn't save my MagnaPower ETX18L lightweight battery though, lasted only 2 years). The only downside was I had to keep my hood open all the time to connect the trickle charger using the clamp connections, allowing dust all over the car and frunk. So I happened upon a magnetic connector made by nakidparts.com for Corvettes and decided to give it a shot. They offer Battery Tender and CTEK versions and are made in the USA. http://www.nakidparts.com/id127.html
A pic of the setup on a C6.

It allows you to just drive away without worrying about whether the charger is connected. The wires are the specific length for Corvettes so I had to lengthen mine 38" for the ground and 34" for the positive to locate the connector on the driver's side which is closer to my electrical outlet.
Here's some pics of the wiring and setup.
Stock magnetic charger receptacle

Extending wires using sealed bullet connectors. I've never used these before but they work fine. Just a little finicky to connect using a standard wire stripper. Apparently there are special tools for crimping bullet connectors.

I only had the same color connectors so I did 1 side male the other female to prevent any mixups in polarity.

Sealed and weatherproof

I used a lot of black heatshrink tubing to make it look OEM. Thanks Harbor Freight! Then route the wiring.

Location of the receptacle and wiring through the mesh. Prep surfaces with an alcohol pad and stick on using 3M extreme outdoor mounting tape.


Yay! Now I just need to get a car cover and cut a hole to fit my antenna and this baby will be able to be stored, dust-free and charged!

Pretty discreet when disconnected. I guess the front plate distracts your attention... grrr NJ! Get with it!

Then I read about the CTEK trickle charger and decided to try it out. Wow, it even reconditioned a 6-year old and presumed dead battery back to life (it couldn't save my MagnaPower ETX18L lightweight battery though, lasted only 2 years). The only downside was I had to keep my hood open all the time to connect the trickle charger using the clamp connections, allowing dust all over the car and frunk. So I happened upon a magnetic connector made by nakidparts.com for Corvettes and decided to give it a shot. They offer Battery Tender and CTEK versions and are made in the USA. http://www.nakidparts.com/id127.html
A pic of the setup on a C6.
It allows you to just drive away without worrying about whether the charger is connected. The wires are the specific length for Corvettes so I had to lengthen mine 38" for the ground and 34" for the positive to locate the connector on the driver's side which is closer to my electrical outlet.
Here's some pics of the wiring and setup.
Stock magnetic charger receptacle
Extending wires using sealed bullet connectors. I've never used these before but they work fine. Just a little finicky to connect using a standard wire stripper. Apparently there are special tools for crimping bullet connectors.
I only had the same color connectors so I did 1 side male the other female to prevent any mixups in polarity.
Sealed and weatherproof
I used a lot of black heatshrink tubing to make it look OEM. Thanks Harbor Freight! Then route the wiring.
Location of the receptacle and wiring through the mesh. Prep surfaces with an alcohol pad and stick on using 3M extreme outdoor mounting tape.
Yay! Now I just need to get a car cover and cut a hole to fit my antenna and this baby will be able to be stored, dust-free and charged!
Pretty discreet when disconnected. I guess the front plate distracts your attention... grrr NJ! Get with it!
Last edited:
Well, decided to start tearing into the stereo. That carbon vinyl on the center console had to go, along with the double DIN unit. I had picked up an OEM stereo last year. After all the rats nest wiring was removed, I plugged in the OEM unit. No go, something immediately smelled burnt. I've triple-checked the wiring and it is stock although was hacked up and reconnected by a PO.

Until I figure out the headunit situation I'm going to work on the trim and windows. Removed the driver's side door panel (easier than I thought) but didn't get to the Hugabuga install yet. Hopefully I can get all the trim pieces removed and painted before the July 12th window kit meet in NJ.
Took a bunch of pics so I'll know how it goes back together. Attaching here in case anyone else is interested in removing the door panels. I followed the excellent guide here: http://nsxe-repair.com/DS-removal.html


Looking pretty stock in there. Tip for removing the door panel, which I found in a post here, is to start at the front edge and work your way back.


Notice the broken silver post... will deal with that later


Starting to bubble. The passenger side looks a little worse.

Post welded using QBond... hope it works, if not will try epoxy.
search terms
door cards interior trim paint refurbish removal installation switches vents
Until I figure out the headunit situation I'm going to work on the trim and windows. Removed the driver's side door panel (easier than I thought) but didn't get to the Hugabuga install yet. Hopefully I can get all the trim pieces removed and painted before the July 12th window kit meet in NJ.
Took a bunch of pics so I'll know how it goes back together. Attaching here in case anyone else is interested in removing the door panels. I followed the excellent guide here: http://nsxe-repair.com/DS-removal.html
Looking pretty stock in there. Tip for removing the door panel, which I found in a post here, is to start at the front edge and work your way back.
Notice the broken silver post... will deal with that later
Starting to bubble. The passenger side looks a little worse.
Post welded using QBond... hope it works, if not will try epoxy.
search terms
door cards interior trim paint refurbish removal installation switches vents
Last edited:
May just be the flash but are your door inserts the perforated black suede ones instead of the perforated black leather?
Nope that would be cool but they are stock leather.
Trade you lol. I have the suede ones but want the stock ones
") Suede would look awesome with the dash seats or other parts done to match
Suede would look awesome with the dash seats or other parts done to matchJust bench tested the head unit. It's buggered... all lights are on but no one's home.. and there's this spinning noise. At least the fishy smell is gone (along with the capacitors I'm guessing)
My options:
1) Get it fixed (not sure if anyone is willing to fix these anymore)
2) Buy another OEM headunit (and risk the same failure down the road)
3) Do a stereo delete and run a hidden audio setup.
I think #3 is the most appealing for me. There are some great threads on Prime about hidden stereos so I have some digging to do!

- - - Updated - - -
Some pics of the passenger door panel coming apart. I'm going to roll to the Hugabuga NJ party without the panels... saves some time.


Bubbling. On the back the same mounting post broke as the driver's side. The screws are in so tight that any excessive torque will snap the posts. For future reference, when removing or screwing in, make sure to hold the post with pliers or vise grips.
Now I have all the trim pieces off, I'm going to try a chemical solution to remove the foil. I'll post back if it works.
My options:
1) Get it fixed (not sure if anyone is willing to fix these anymore)
2) Buy another OEM headunit (and risk the same failure down the road)
3) Do a stereo delete and run a hidden audio setup.
I think #3 is the most appealing for me. There are some great threads on Prime about hidden stereos so I have some digging to do!
- - - Updated - - -
Some pics of the passenger door panel coming apart. I'm going to roll to the Hugabuga NJ party without the panels... saves some time.
Bubbling. On the back the same mounting post broke as the driver's side. The screws are in so tight that any excessive torque will snap the posts. For future reference, when removing or screwing in, make sure to hold the post with pliers or vise grips.
Now I have all the trim pieces off, I'm going to try a chemical solution to remove the foil. I'll post back if it works.
Kleen strip
Kleen strip
That removes the foil? I was under the impression it only takes off paint. Don't want to melt the plastic either, that is some strong stuff!
On another build thread someone used Kleen Strip to take off all the layers. It wont melt the plastic, but if someone has every used epoxy on them, it will definitely soften that up. But you shouldnt have that problem. I believe those panels are actually metal under all that. But maybe there is a less caustic approach.


Well some things came up and I am considering selling the car. Never thought this would happen but I am moving and it might be easier to sell it than worry about storing it. I've only driven it 1600 miles since I bought it last year. Here is the for sale post: http://www.nsxprime.com/forum/showthread.php/190636-2002-Black-Red-manual-(feeler)-in-NJ
Decide not to sell, and took her out for a quick spin.
Looks good, what plans do you have for it now that you've decided to keep?
Decide not to sell, and took her out for a quick spin.
Good move.
Looks good, what plans do you have for it now that you've decided to keep?
Same as before, replace the faded carpets, reinstall the refinished center console and trim, and send her off to LarryB for a checkup!
Same as before, replace the faded carpets, reinstall the refinished center console and trim, and send her off to LarryB for a checkup!
Are the oem red carpets available?
I have been pleasantly surprised to find the oem red floor mats and a lot of the stock interior bits in 'new pure red'. I think there were only ~21 red interiors sold in the US.
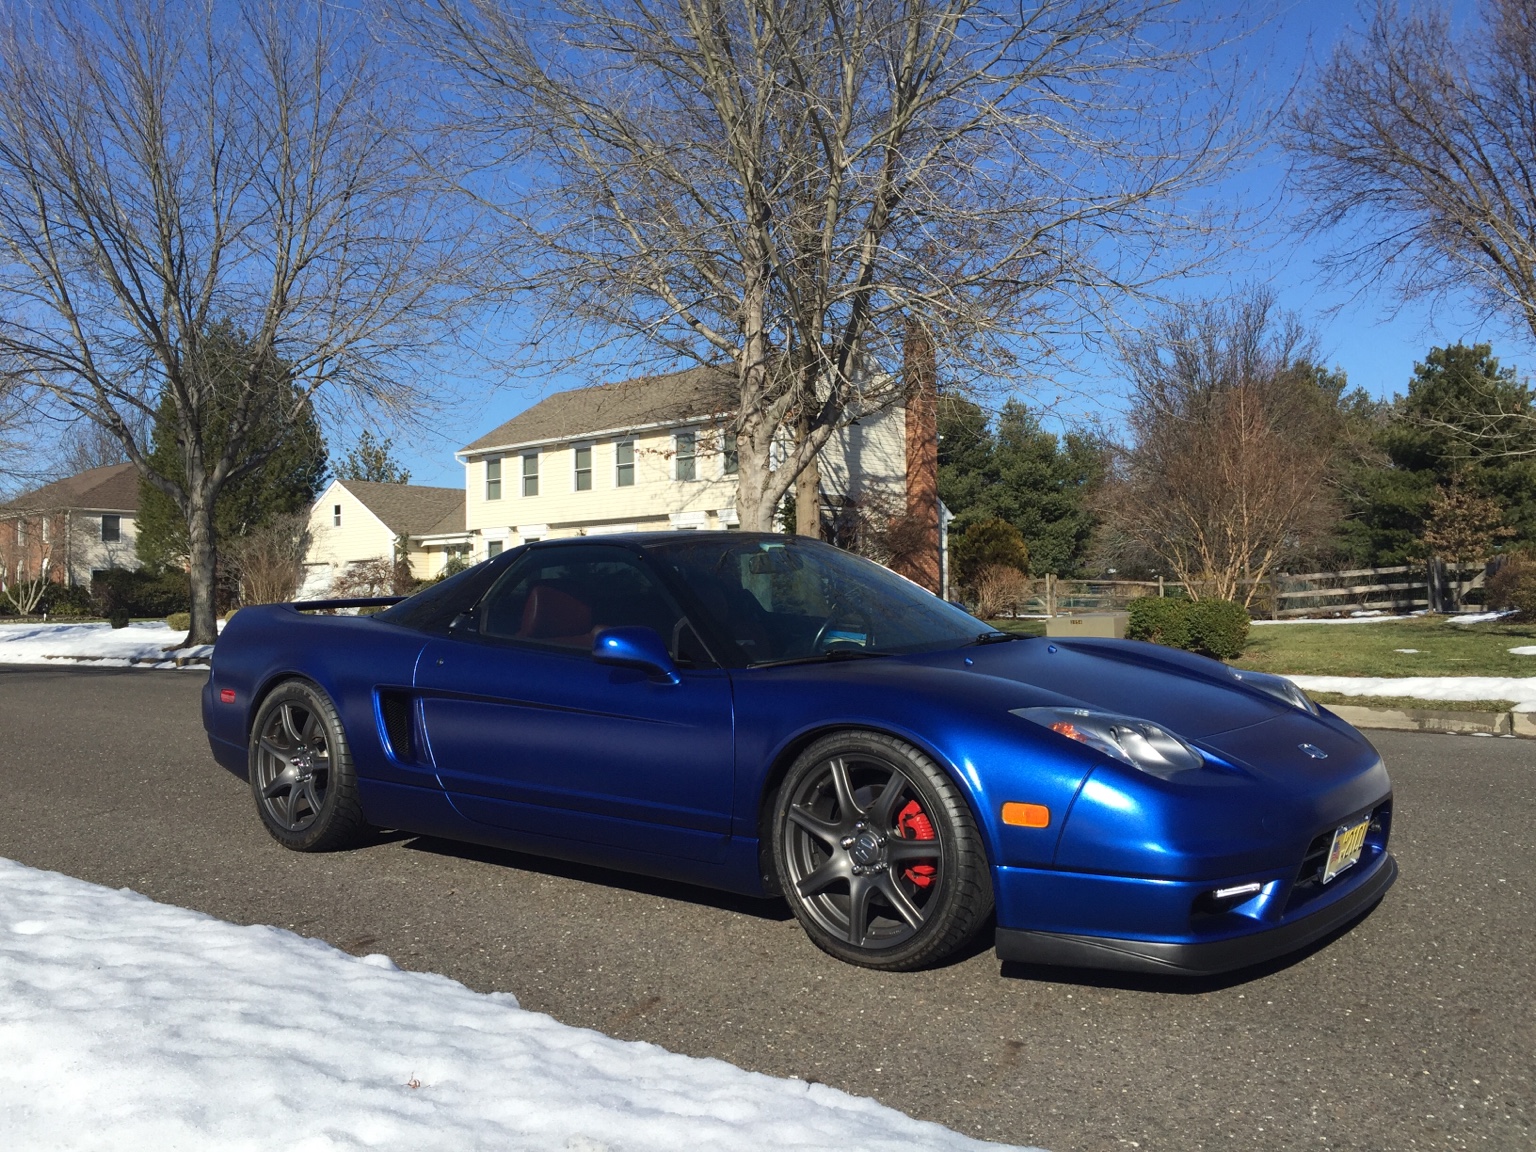
Wow I love the black on red, this is the same color combo on our e46 m3, can't go wrong! Quite popular in the m3 crowd but super rare for an NSX!
Great color combo, both before and after! And I like your motto of OEM+. I too came across that in the VW scene and carried that over into my other cars. Are you considering going to NSXPO this year?
Thanks! I have to admit I went a little overboard with the plastidip and front lip. Will be removing and going back to OEM soon.
Are the oem red carpets available?
I have been pleasantly surprised to find the oem red floor mats and a lot of the stock interior bits in 'new pure red'. I think there were only ~21 red interiors sold in the US.
Yes surprisingly I was able to get a set of carpets and floor mats as well as speaker grills and the side step garnishes all in New Pure Red. I believe many of the red interiors were built for edm and jdm. You are correct there were 21 red interiors, 13 black/red and 8 red/red. I've never seen a red/red but there were 3 black/red for sale during my search.
Wow I love the black on red, this is the same color combo on our e46 m3, can't go wrong! Quite popular in the m3 crowd but super rare for an NSX!
Thanks Rick! The red actually has a slight burgundy hue which I think makes it the more appealing.
- - - Updated - - -
On another build thread someone used Kleen Strip to take off all the layers. It wont melt the plastic, but if someone has every used epoxy on them, it will definitely soften that up. But you shouldnt have that problem. I believe those panels are actually metal under all that. But maybe there is a less caustic approach.
BTW I tried Kleen strip a while back, definitely do not use on any exposed plastic. It will melt that stuff quick. I have figured out a way to remove the foil cleanly. Will post pics once I get the interior installed.
BTW I picked up another NSX! It's a diamond in the rough but I will bring back the shine!
Similar threads
- Replies
- 5
- Views
- 3K
- Replies
- 29
- Views
- 3K
- Replies
- 5
- Views
- 3K
- Replies
- 2
- Views
- 2K