• Protip: Profile posts are public! Use Conversations to message other members privately. Everyone can see the content of a profile post.

JMC's Slow build

Joined
28 December 2013
Messages
132
Location
Tx
Hello guys. I picked this beauty from a non-primer in Albuquerque mid may. I was still in my apartment (with no garage) so it was kept in storage for a couple months. Fast forward a couple months and I found a suitable house with a three stall garage, moved in and just this weekend was able to clean it out and get things arrange to start doing car related things. It has been a pretty solid eight years since I have been able to really work on cars like I used to, so this is a pretty big deal for me. To celebrate, I changed the oil in my 97 Honda prelude, mopped the floors and got the NSX situated so that work could commence.

Some History:
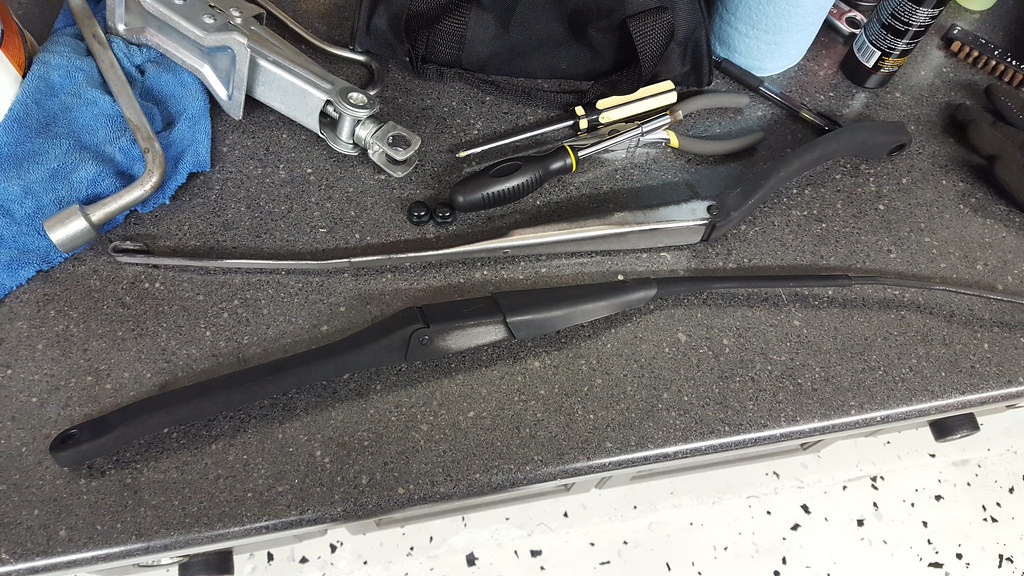
I picked this thing up as an all stock BB '92, two owner car with 59k miles. It had all documentation and the original window sticker. It also just had the 60k mile service performed. The car was in pretty good shape except for a broken suspension joint boot, a leaky cv boot and some paint scratches. It was surprisingly free of rock chips and dents. Overall the car was in maybe 8.5-9.0/10. Pretty good, but it would need some work when I could get to it. I drove it 10 hours from Albuquerque to Dallas, took it to the dealership for an oil change since it was about time for one anyway. While there, we looked over the service records and decided to also do spark plugs a valve adjustment in addition to fixing the two aforementioned problems. After this, she was good to go, everything except the stereo worked great, even the window regulators. Despite that, I still signed up for the Hugabuga window fix tour and had that fixed two. The windows are a bit faster now and will last quite a bit longer.

Apologies for the potato quality pics. I don't have a decent camera.

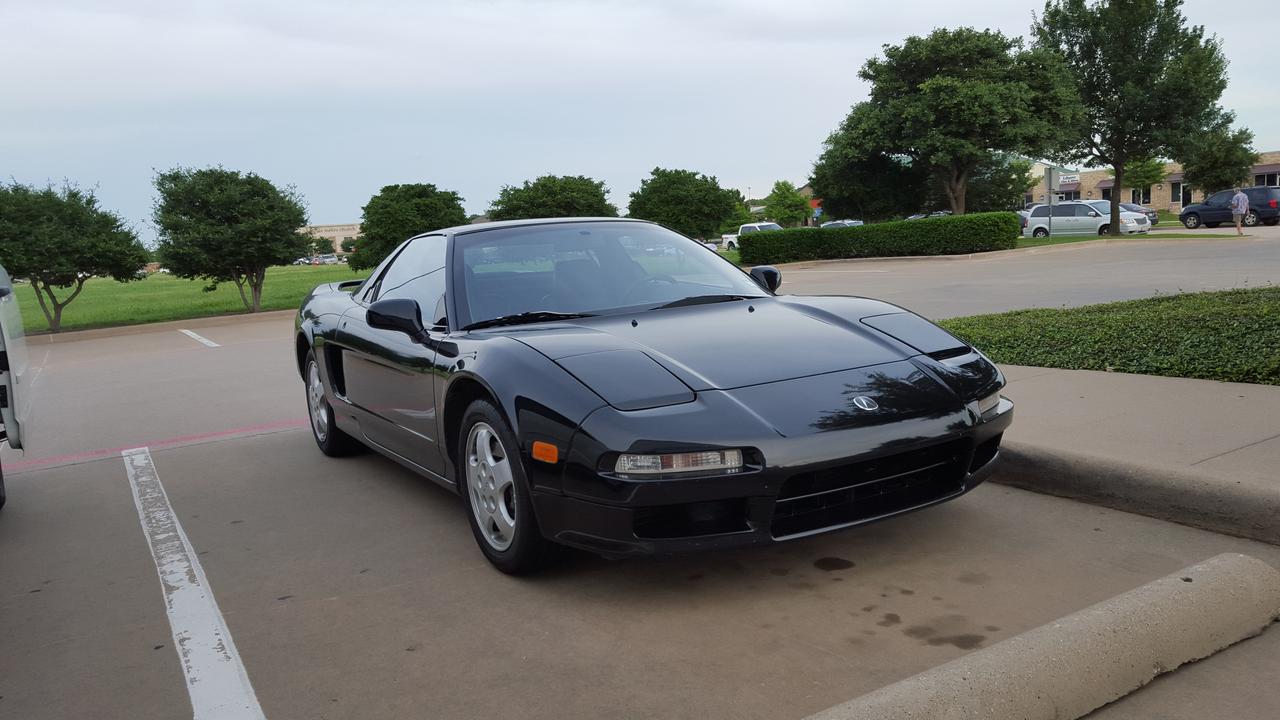
Here she is a couple weeks after I picked her up:
Dwn5odu.jpg

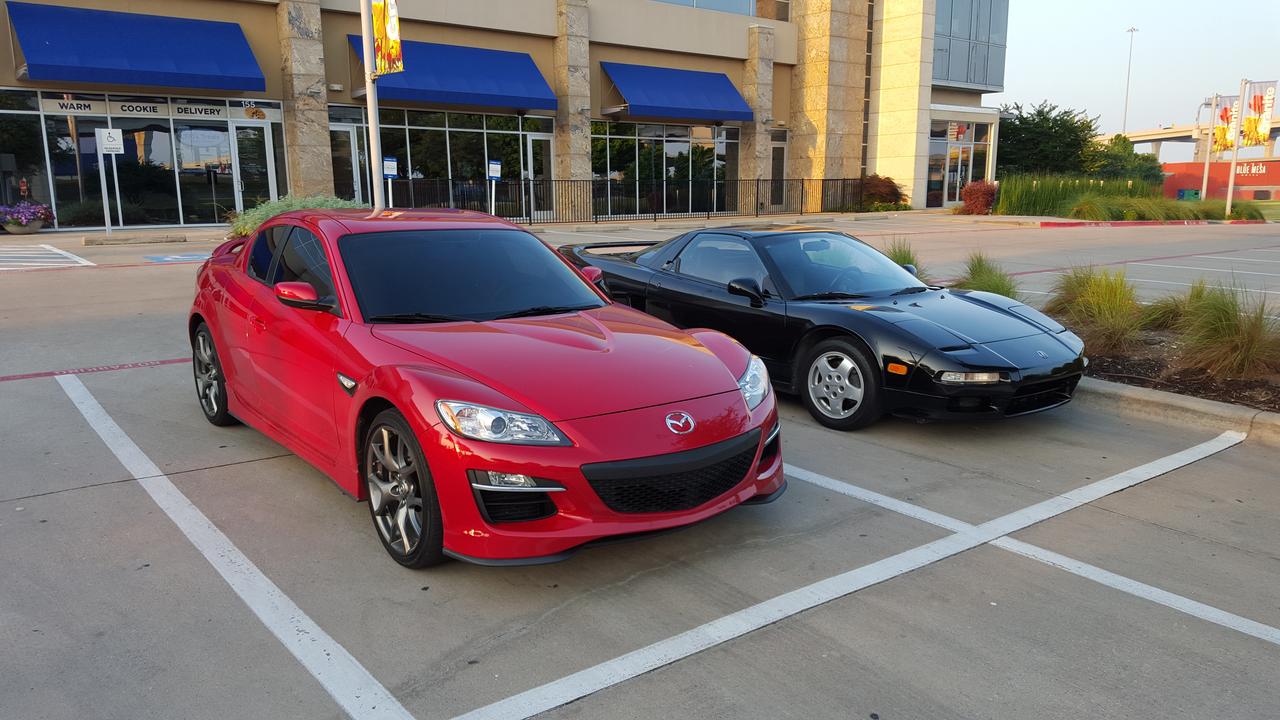
Alongside my buddy's RX-8 when we went to cars and coffee:
DkEvYgh.jpg

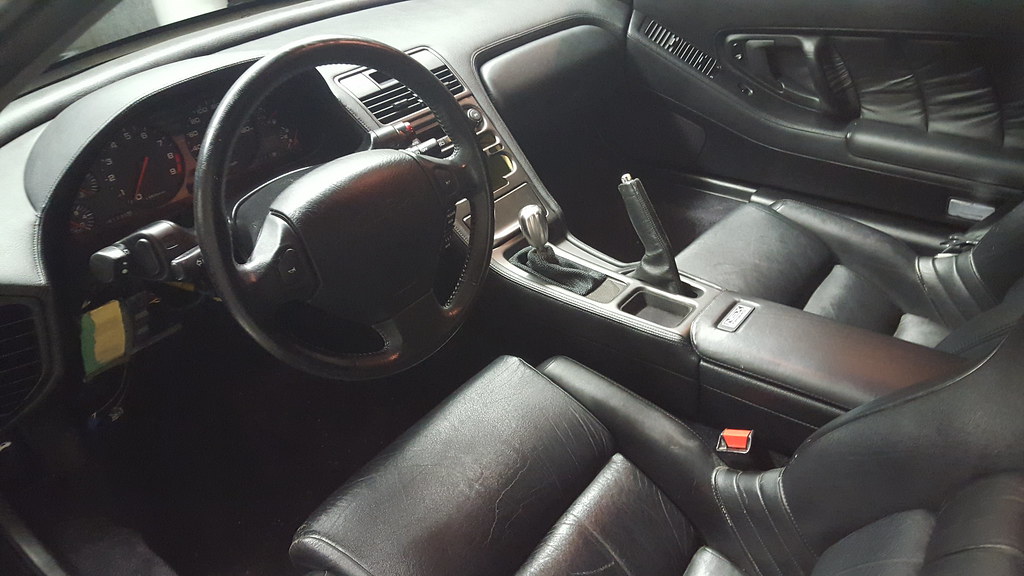
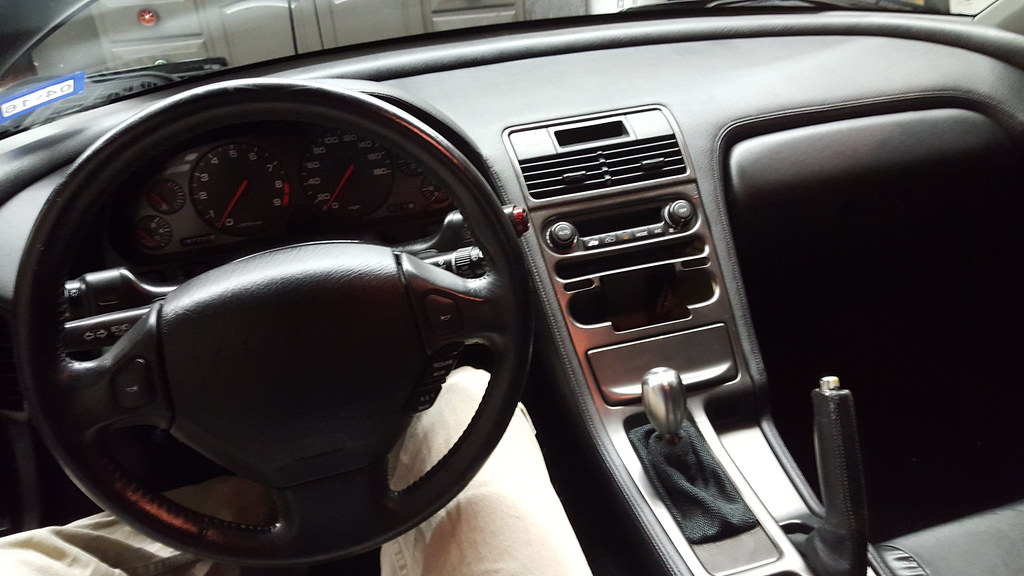
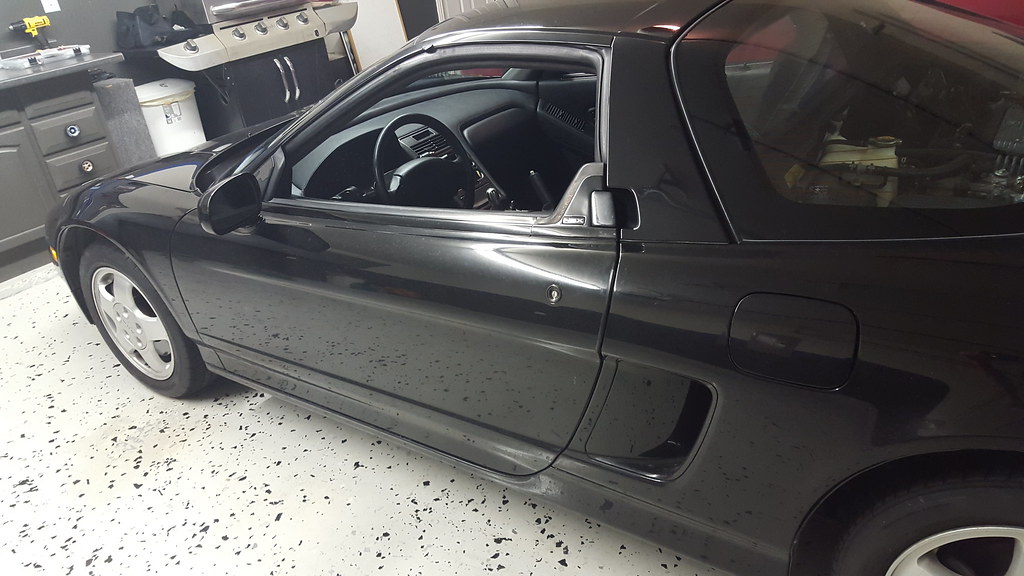
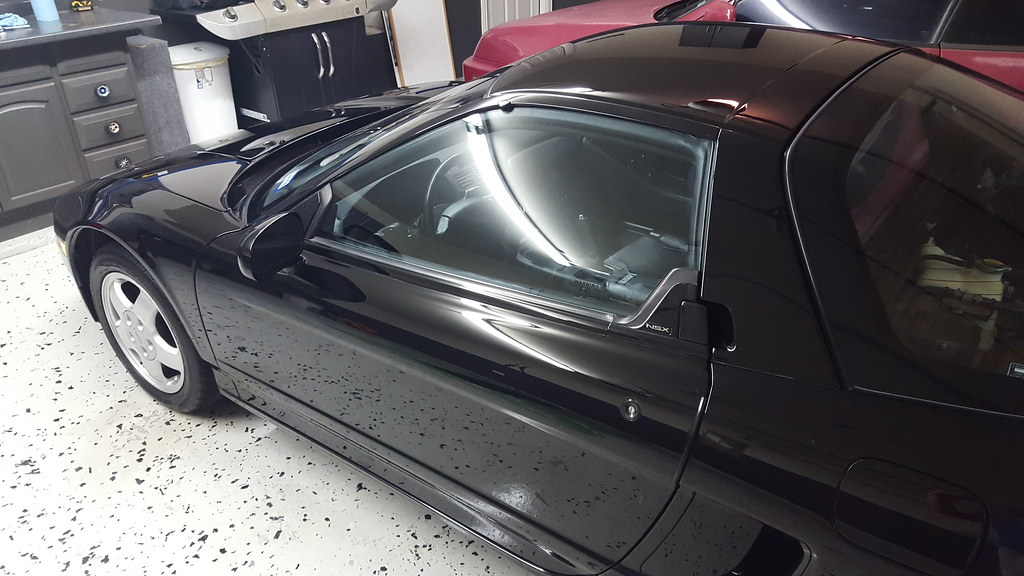
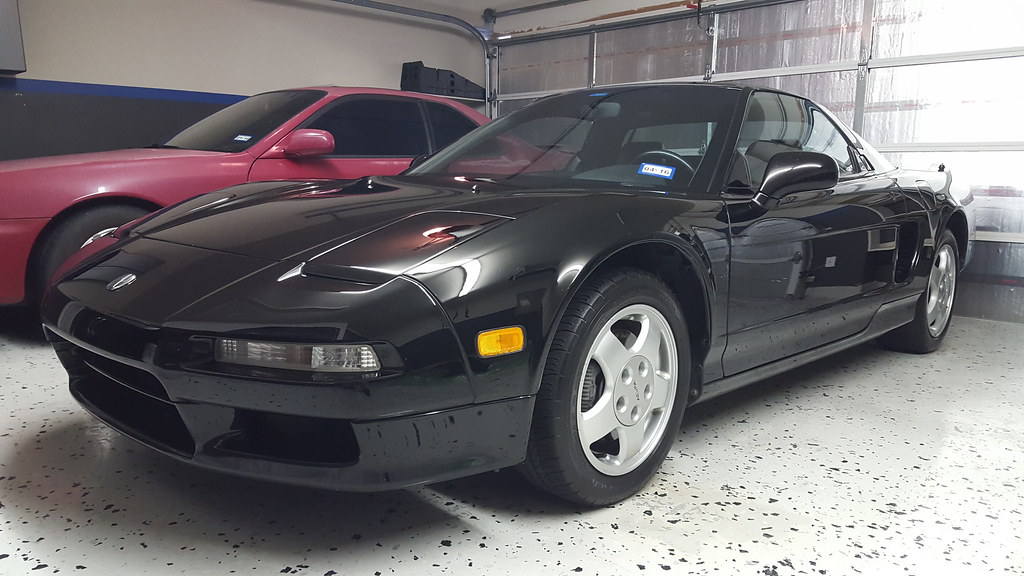
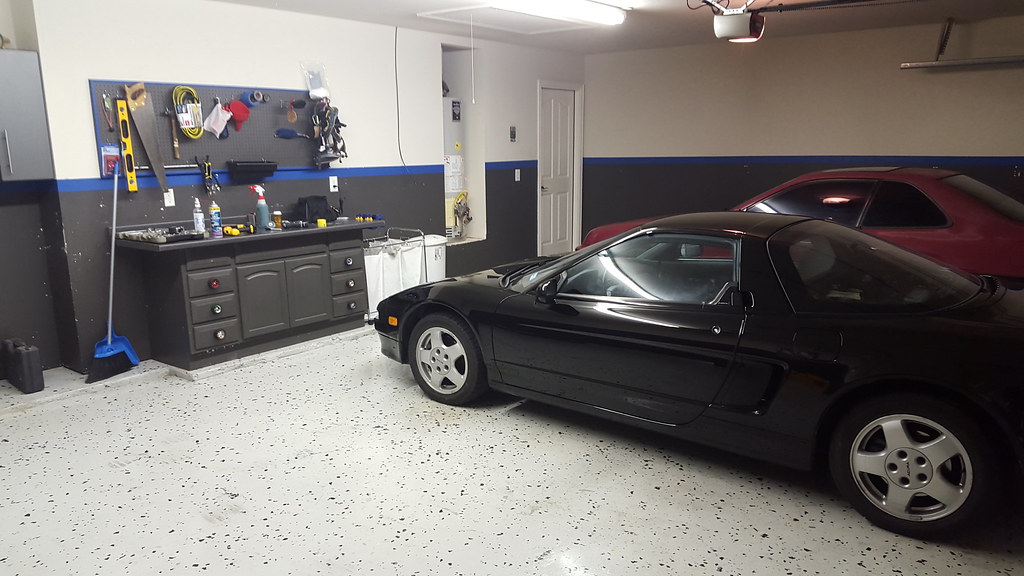
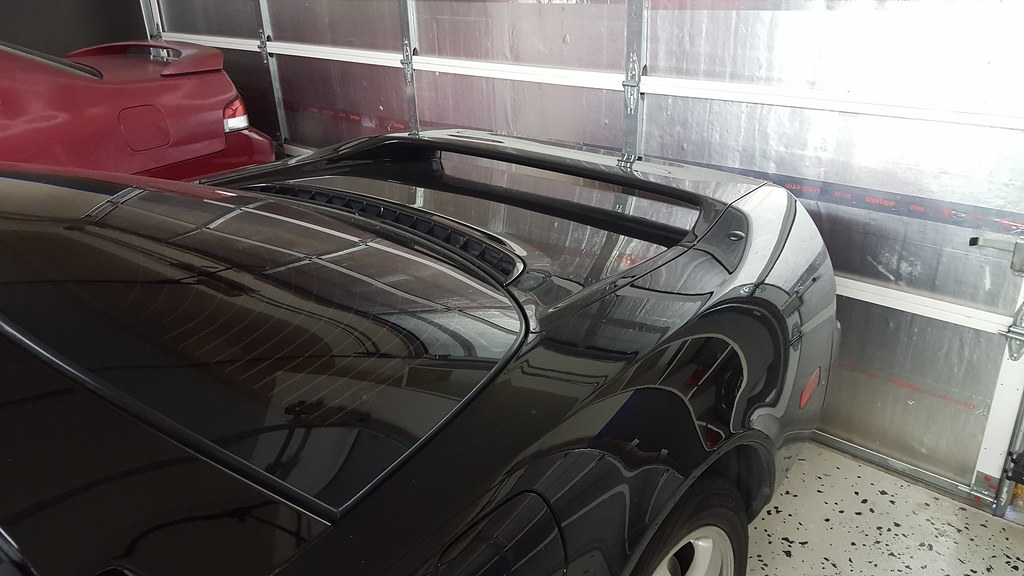
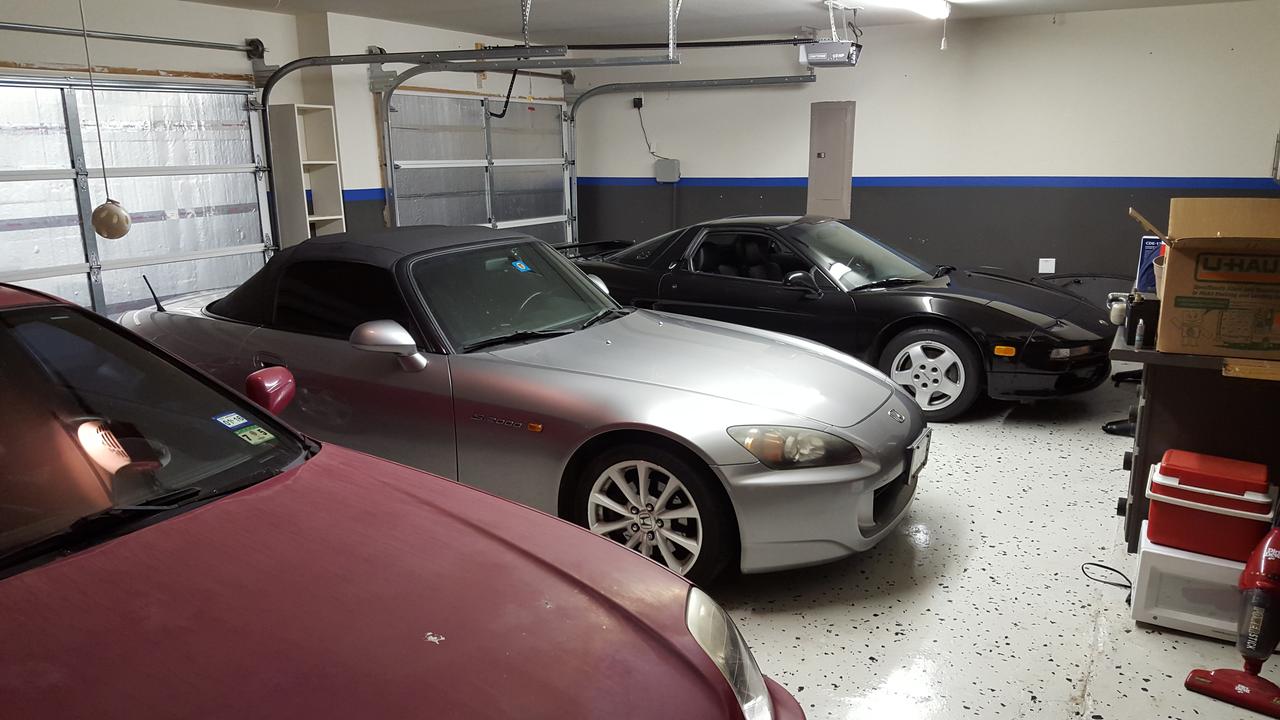
As she sits right now Next to her sister cars:
8nbwJ09.jpg

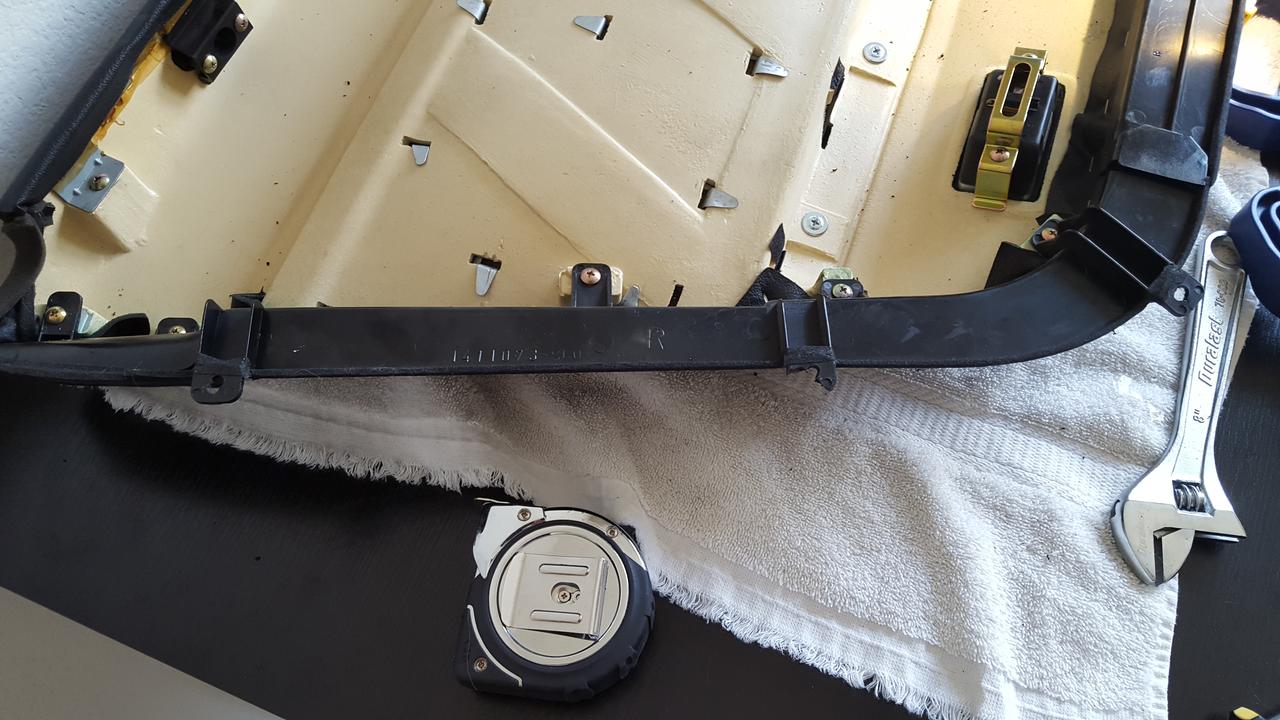
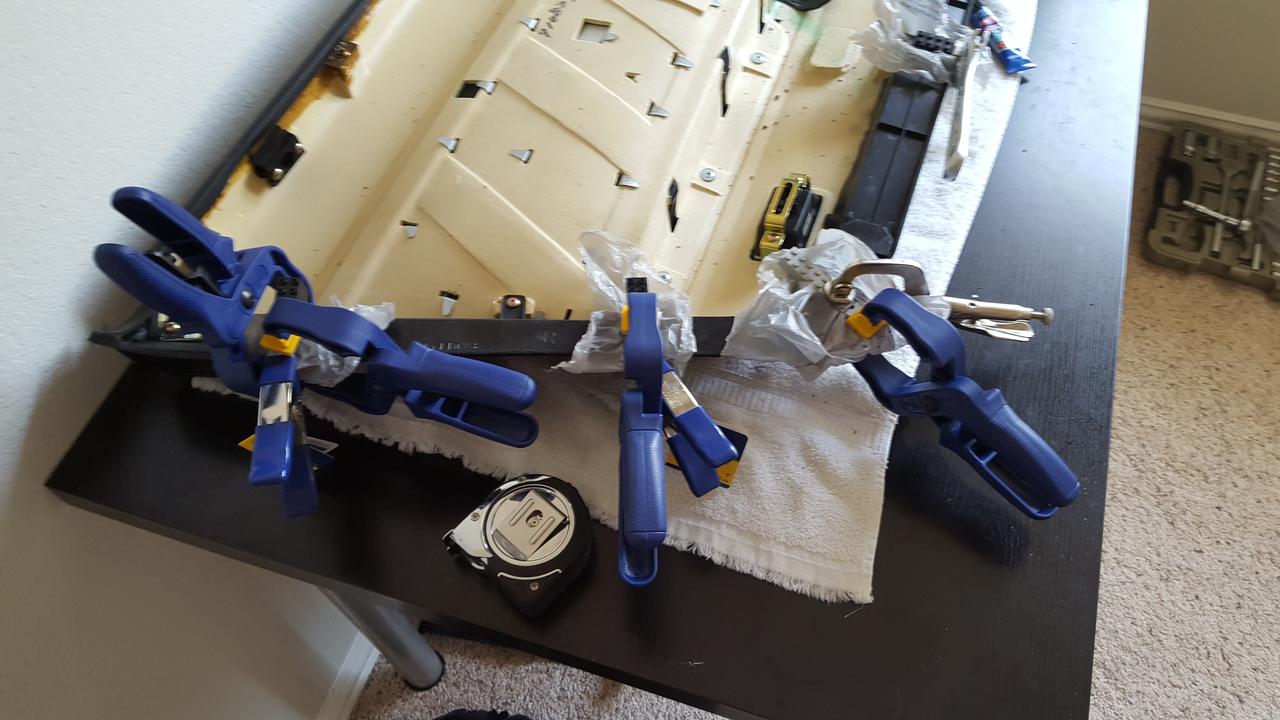
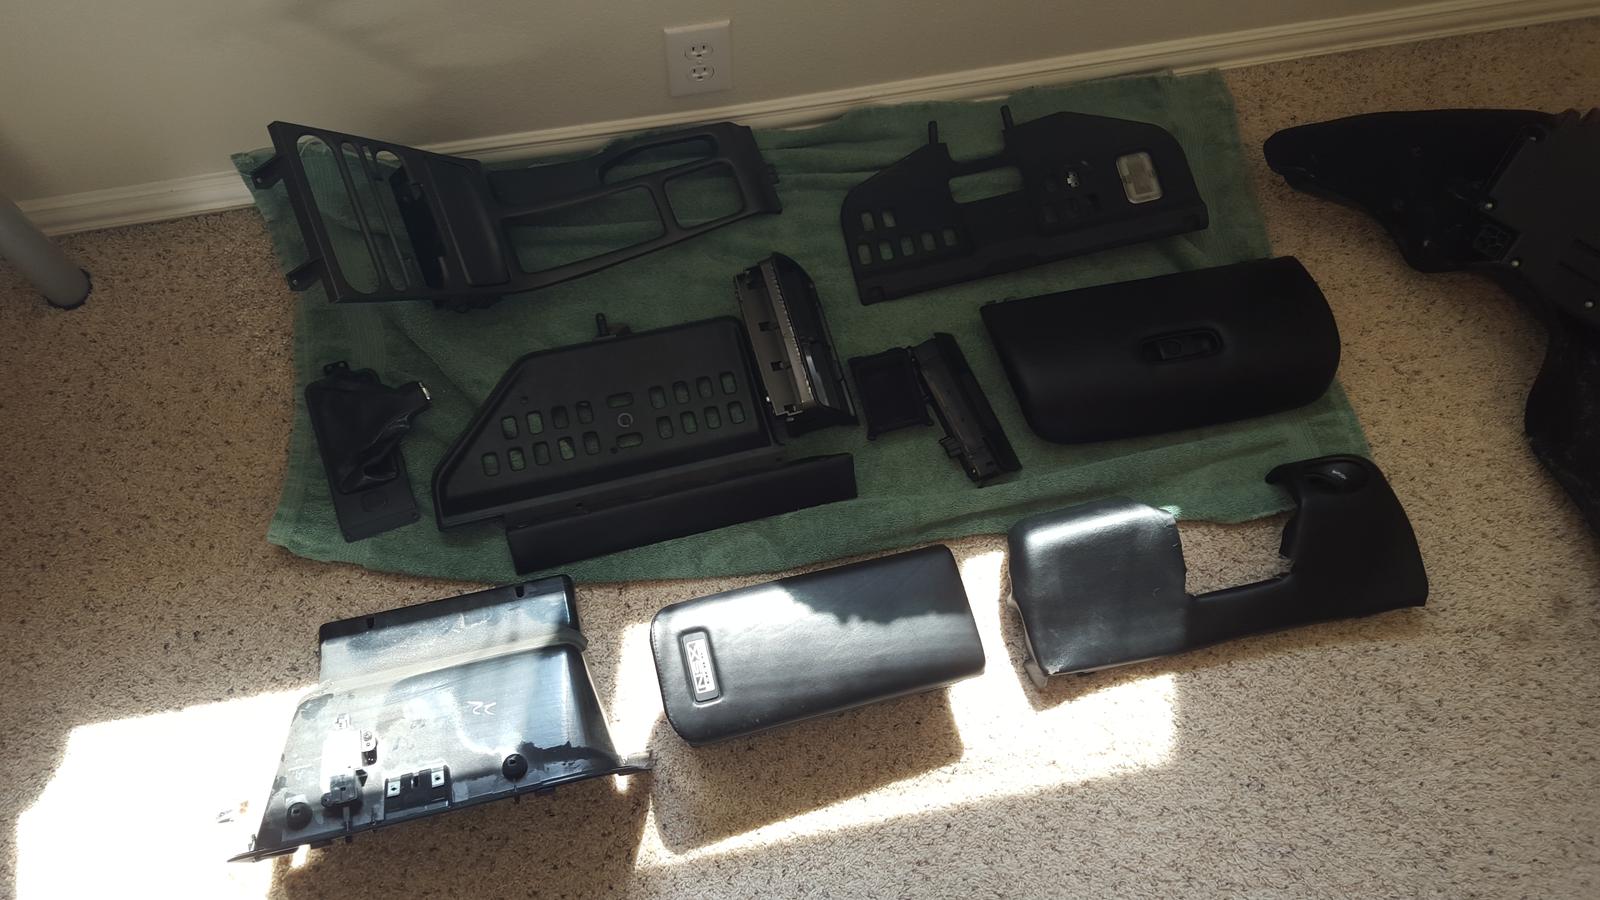
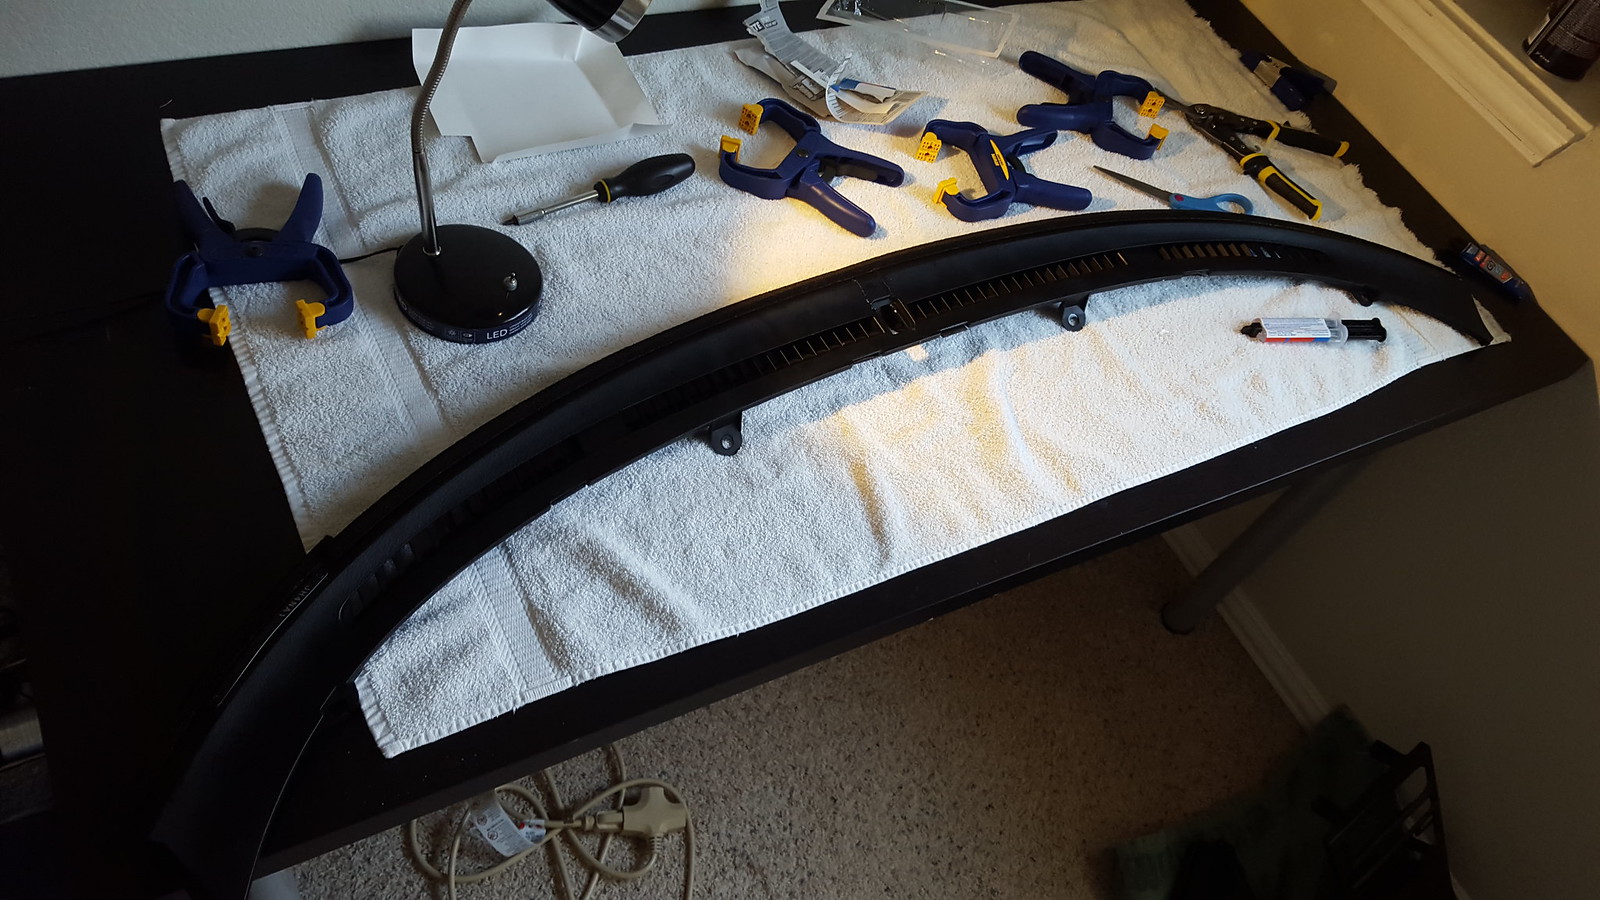
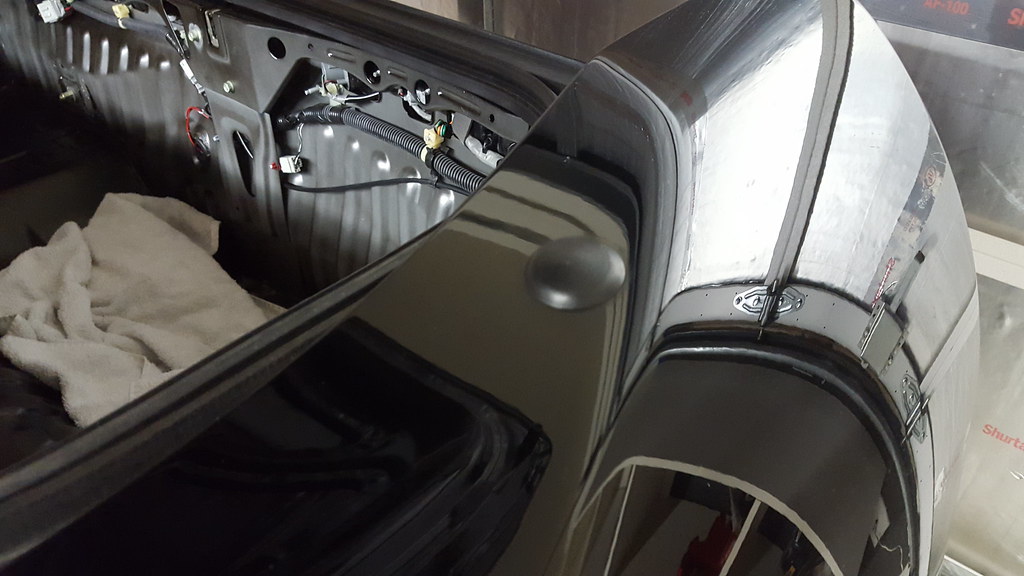
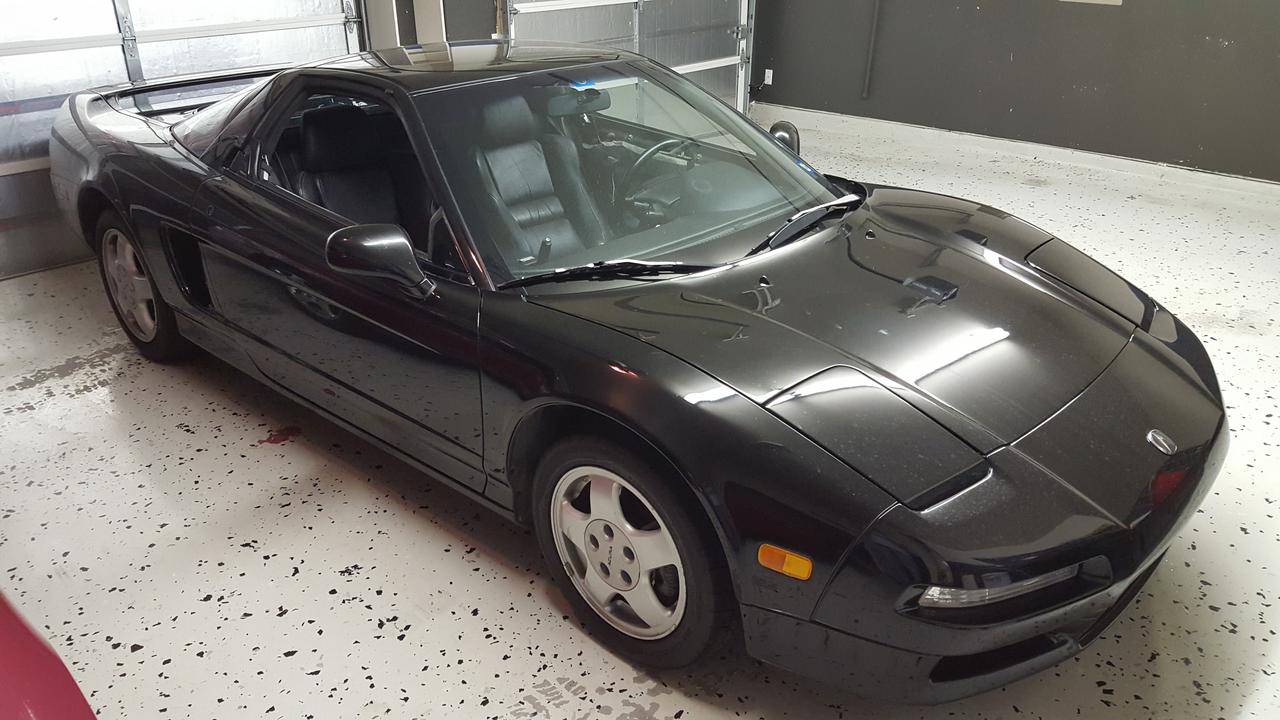
How she sits, patiently waiting to have her door panels reinstalled:
NSsyotN.jpg


The immediate plan:
She drives beautifully, so no need to mess with any of that. I just want her to look a bit better, so I am just going to focus on getting her back to "showroom" condition.
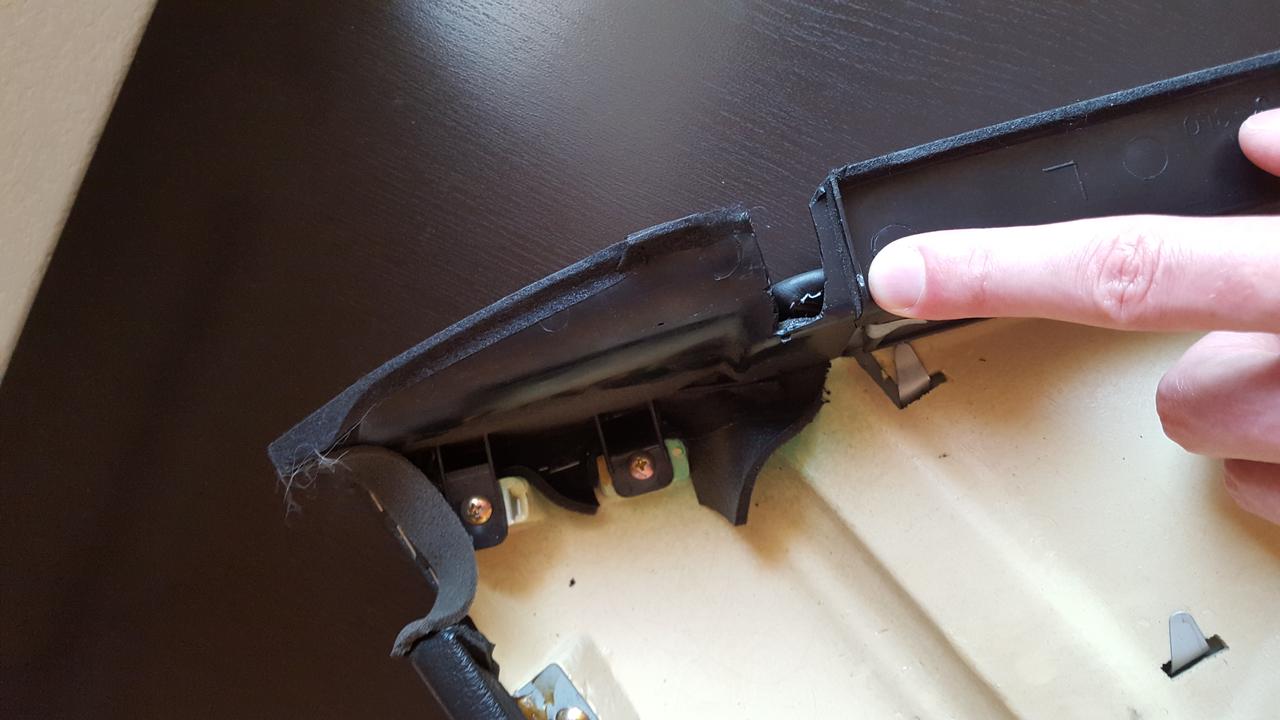
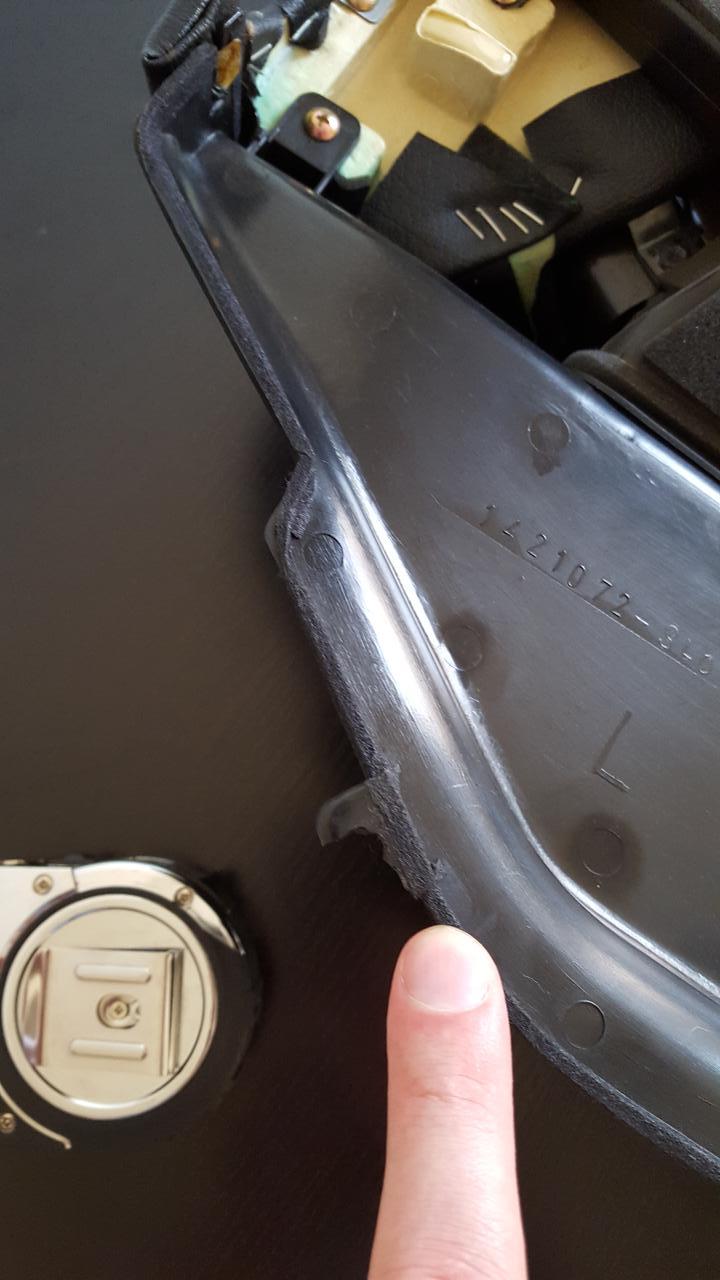
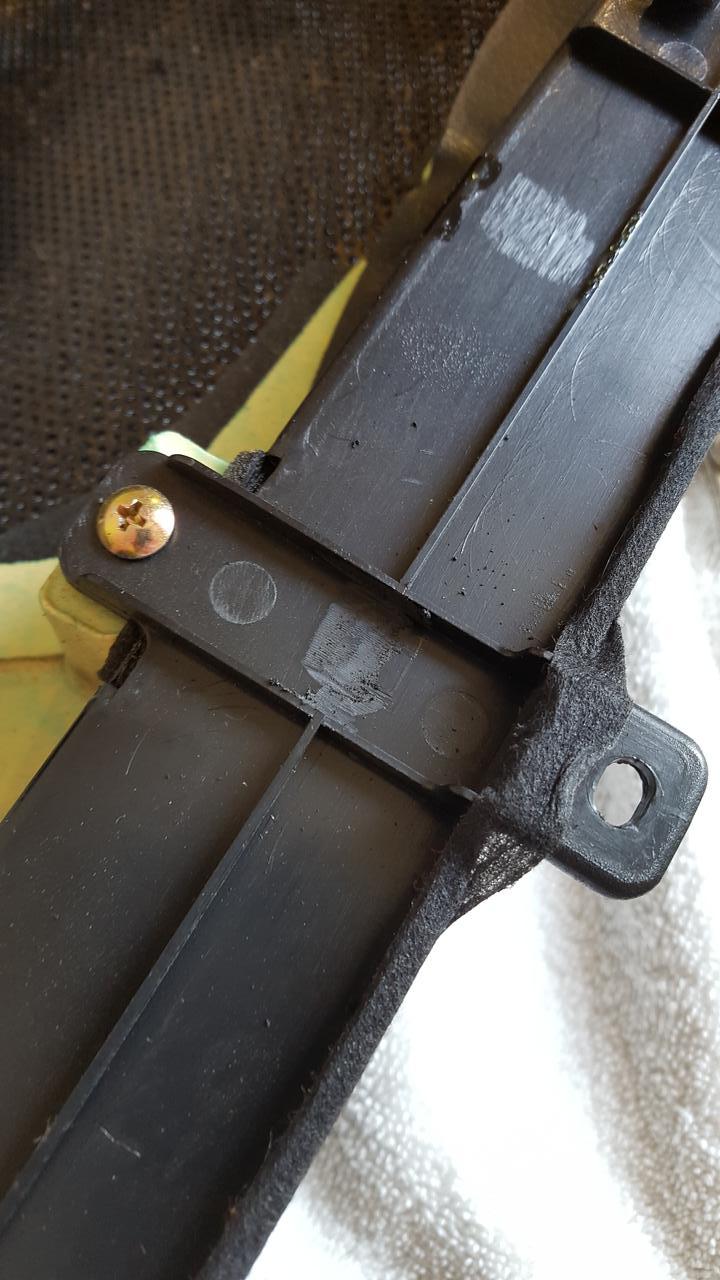
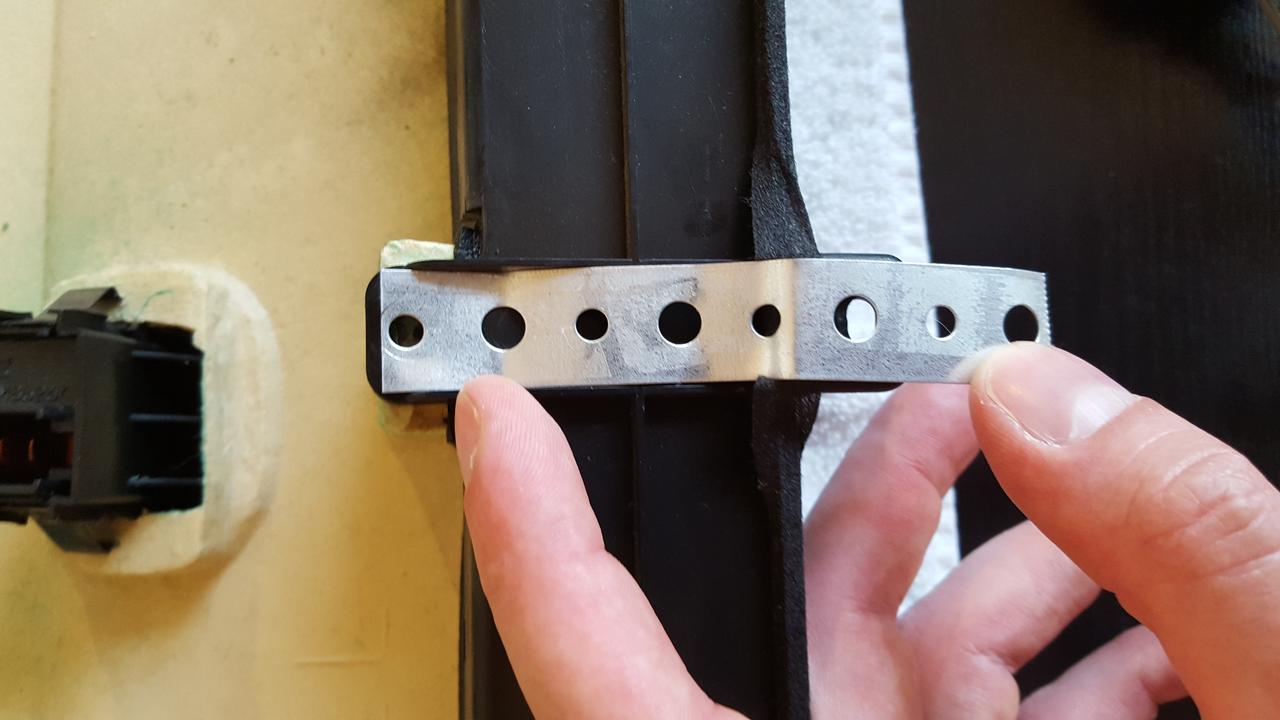
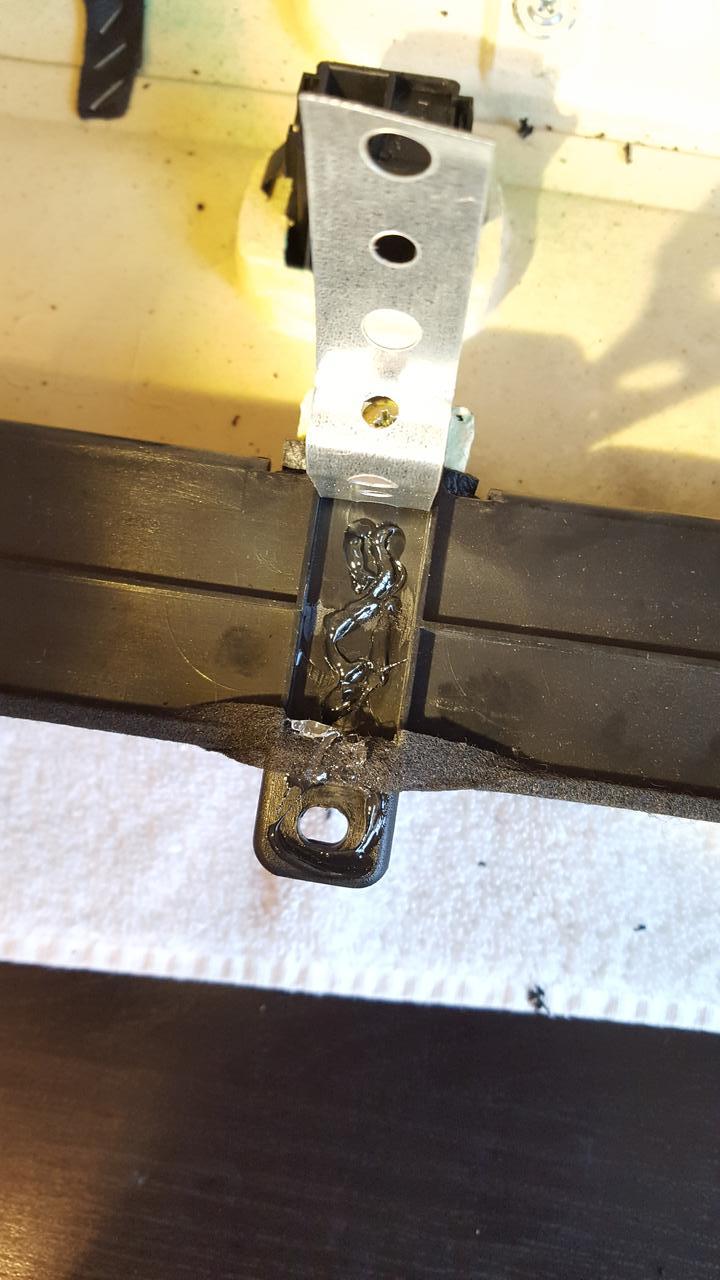
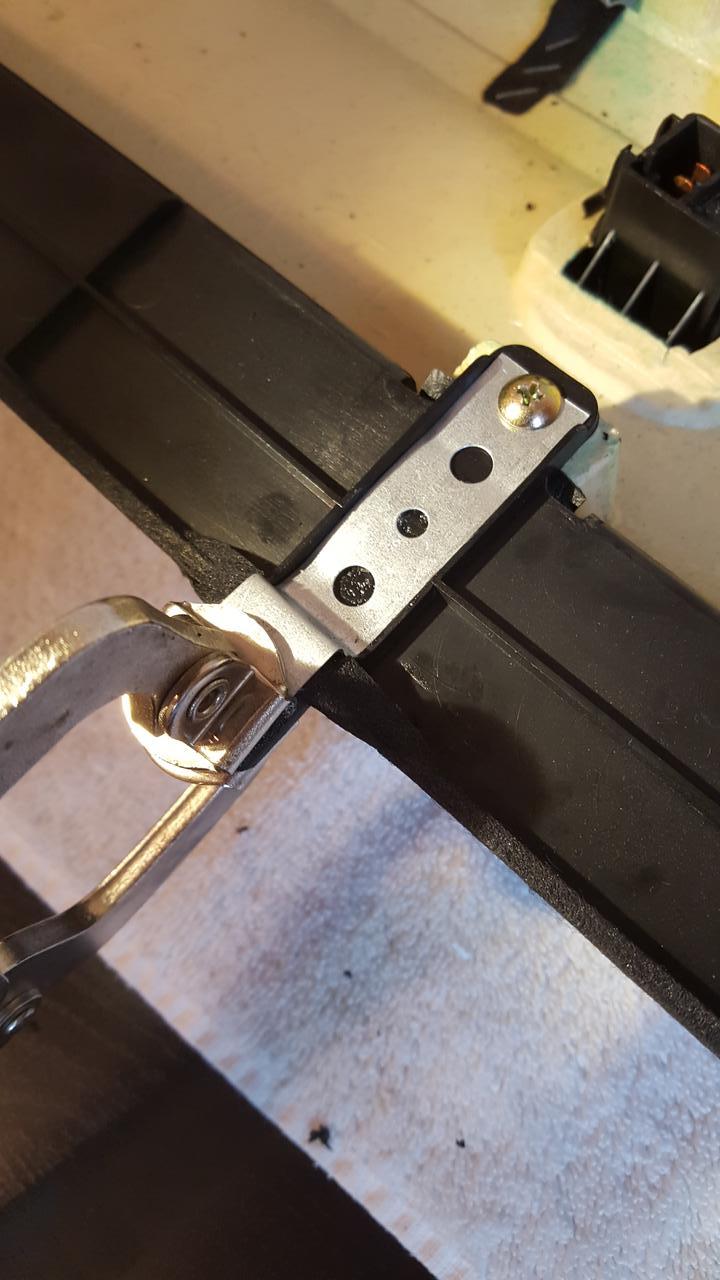
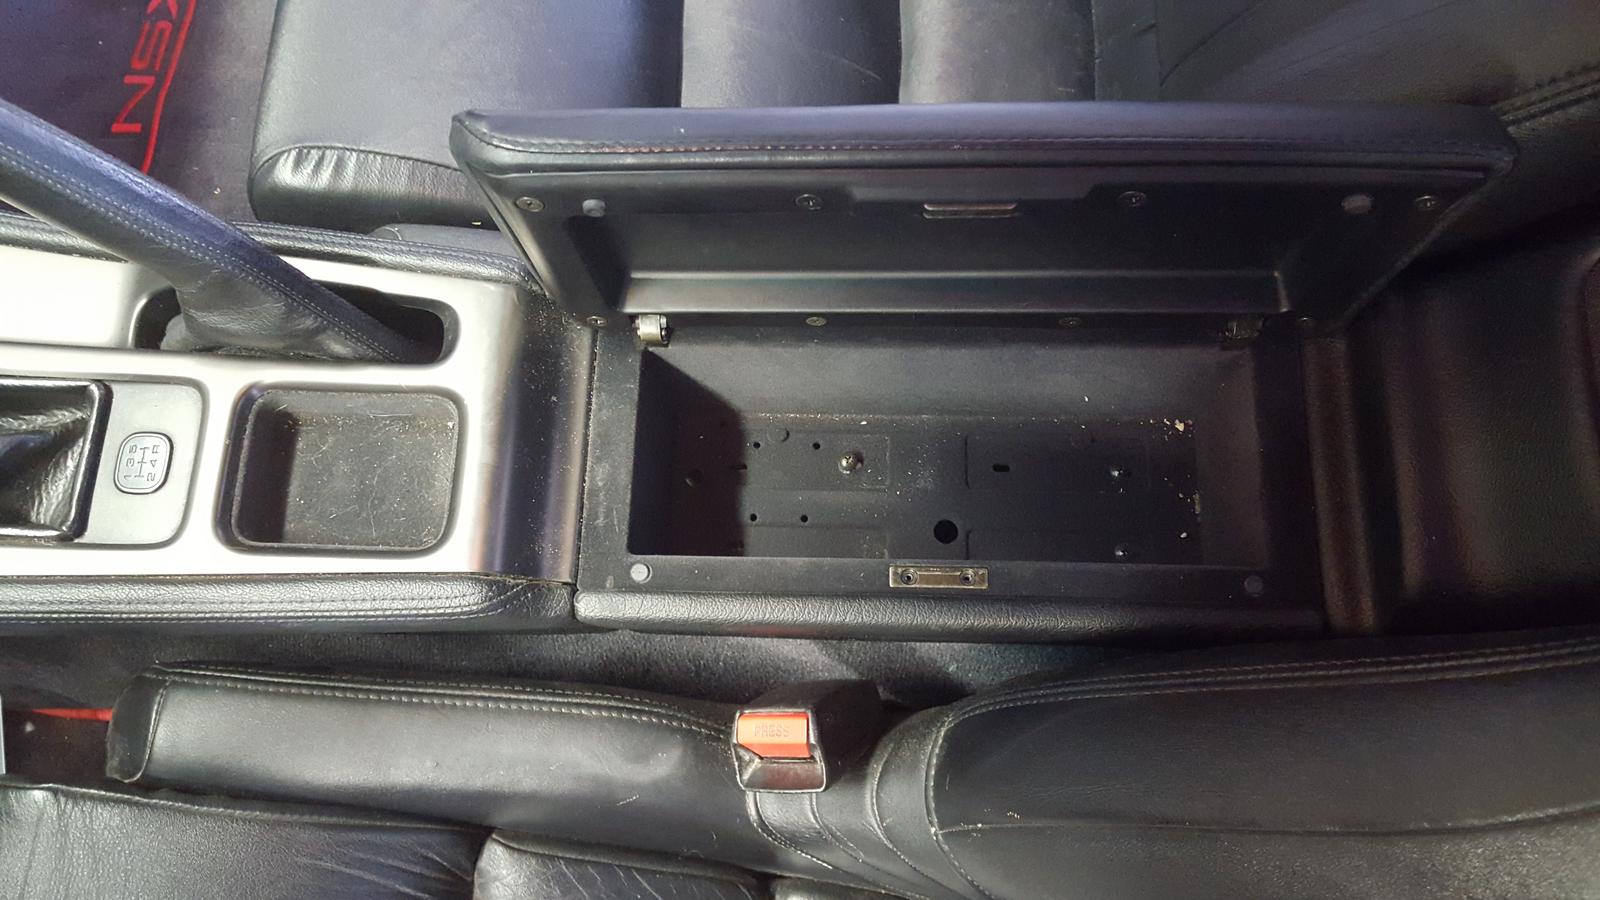
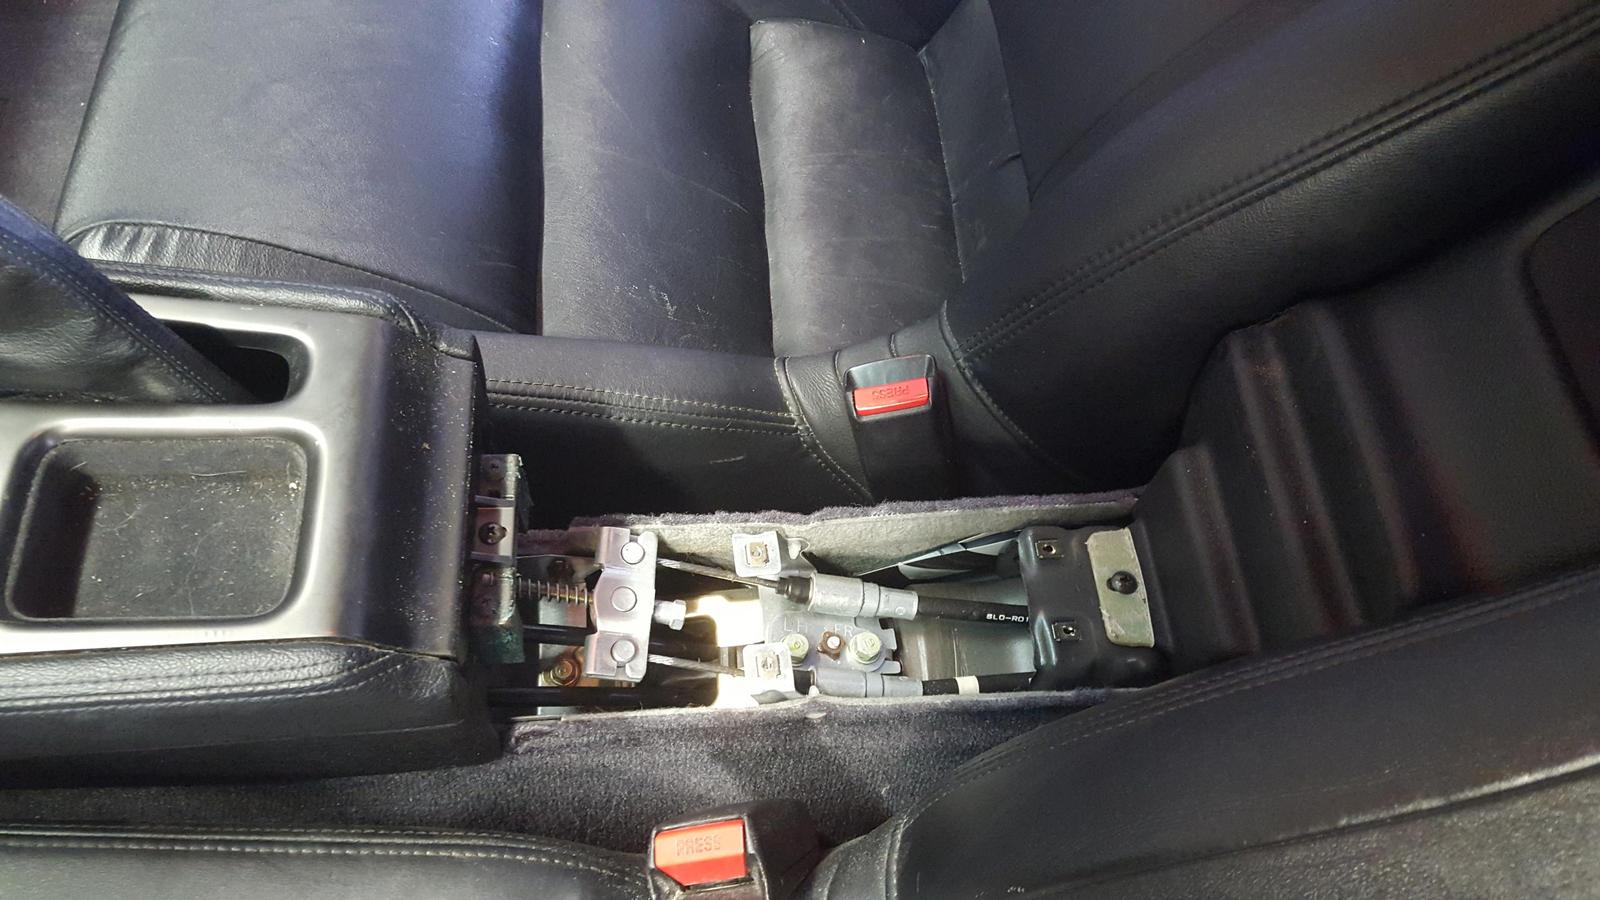
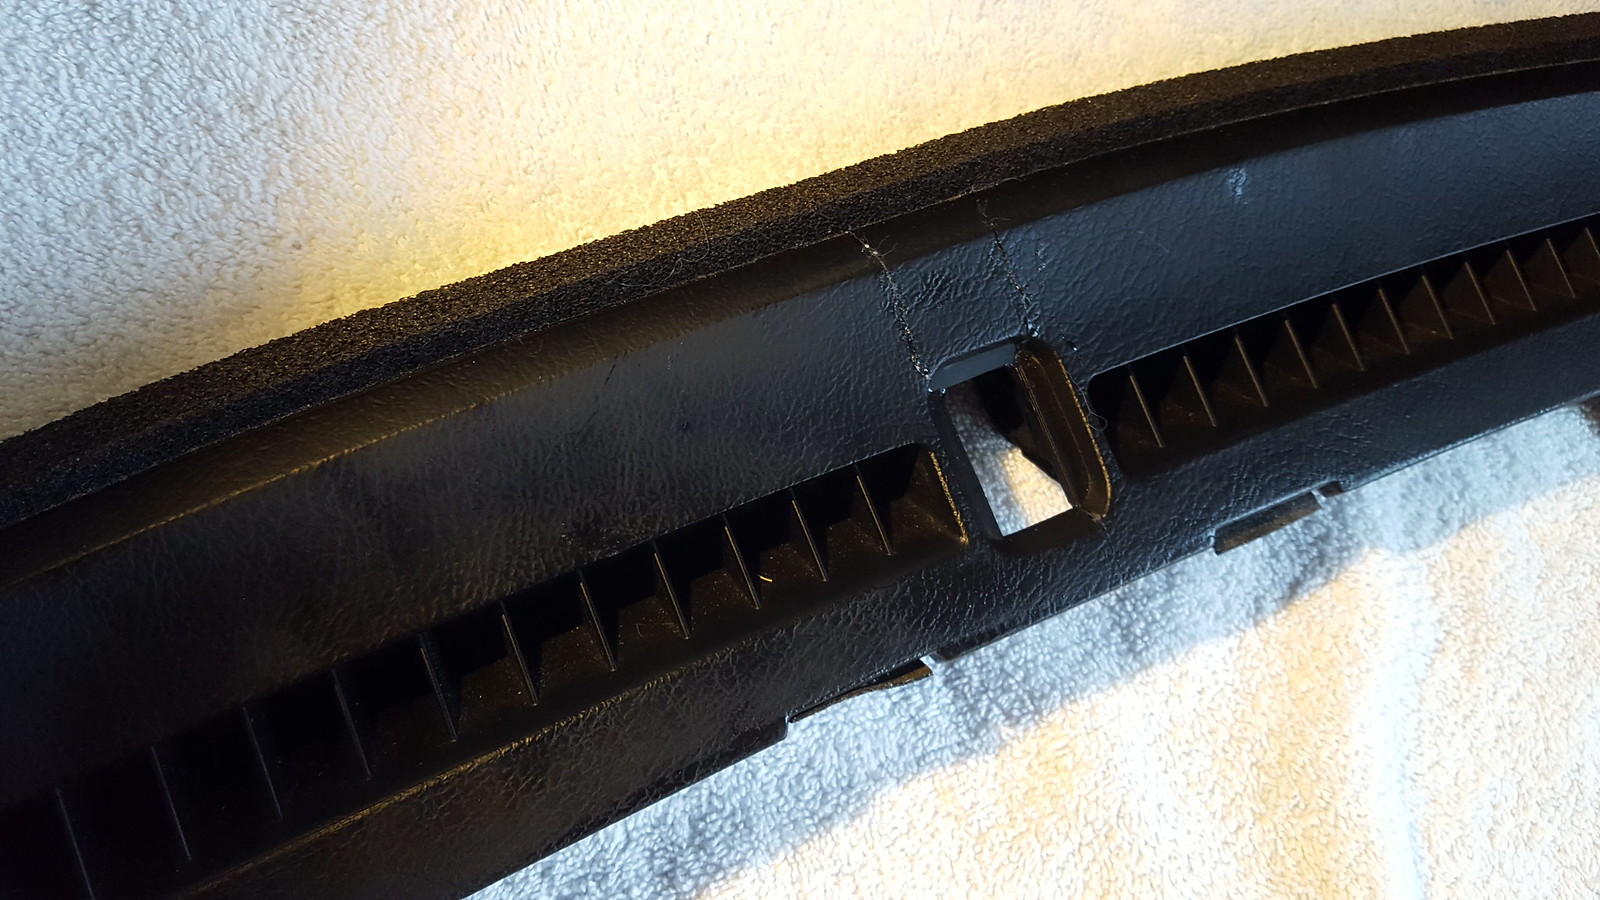
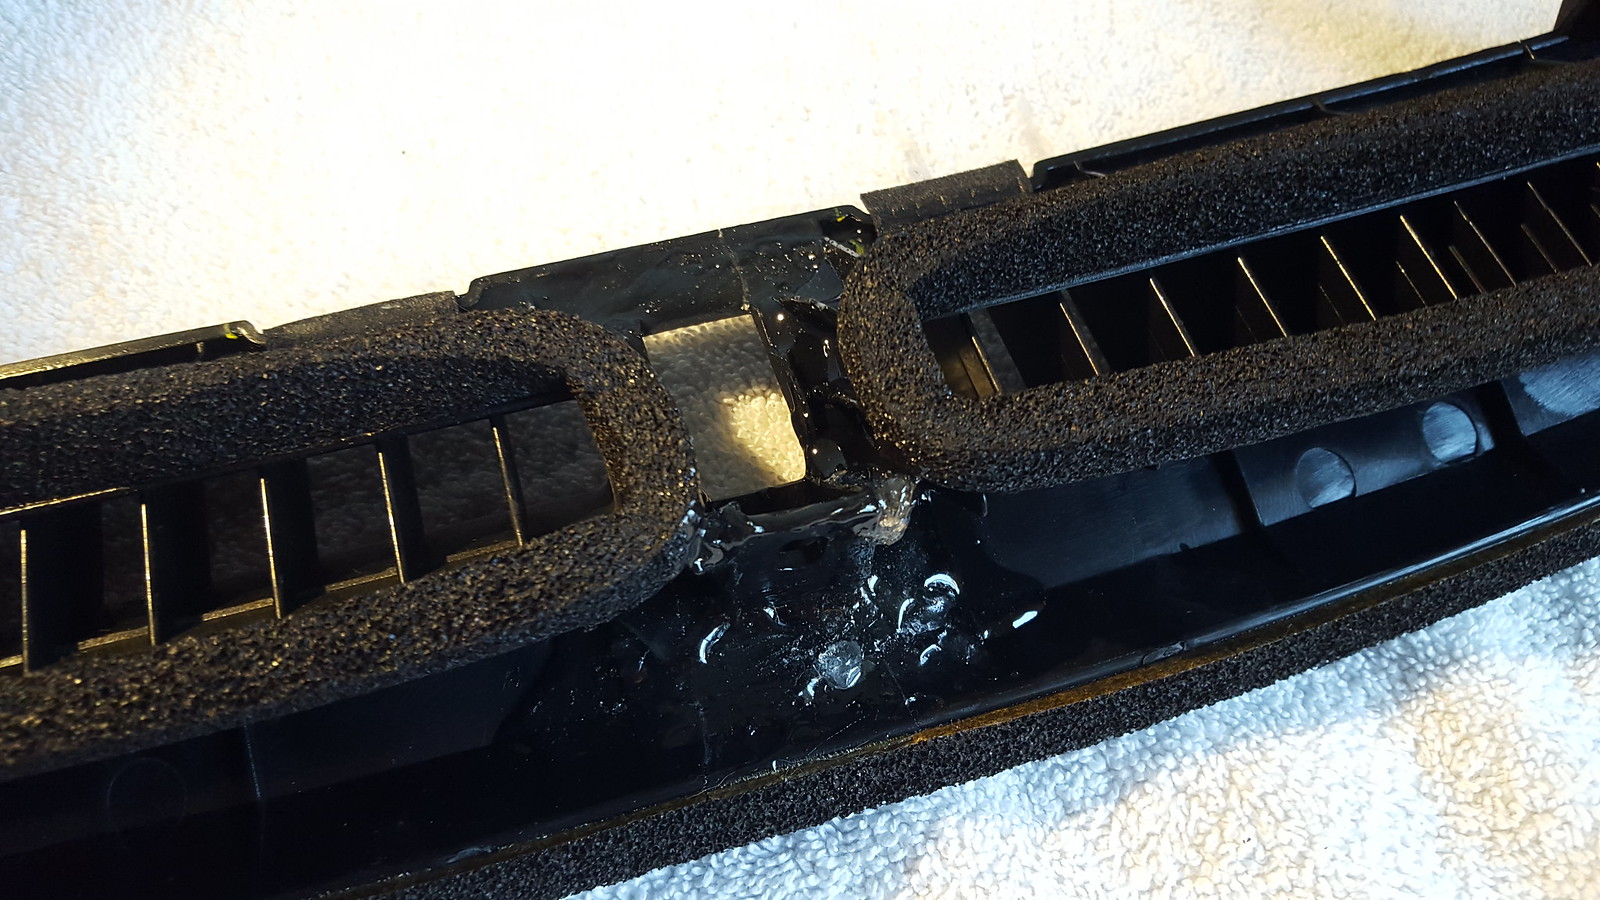
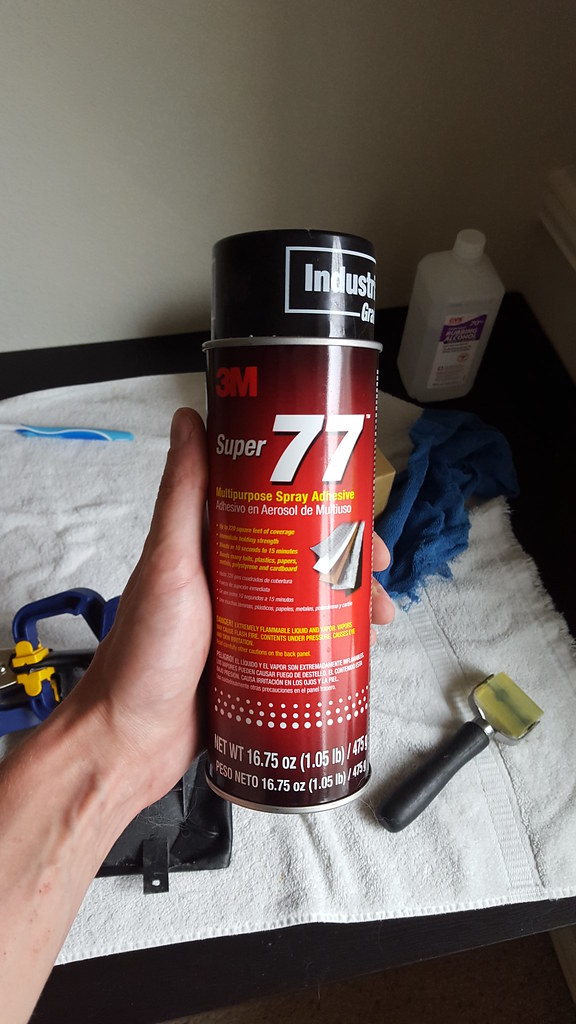
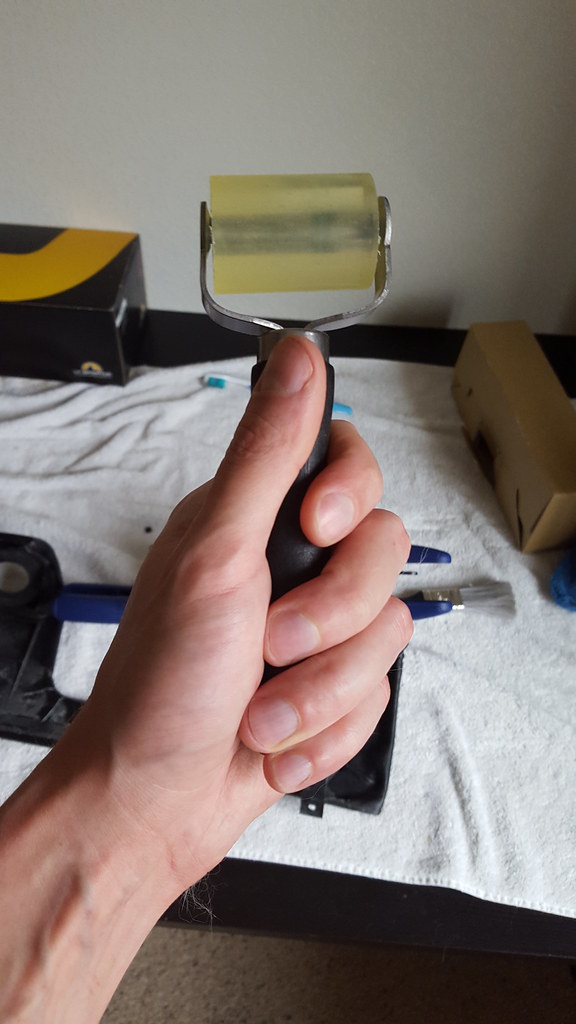
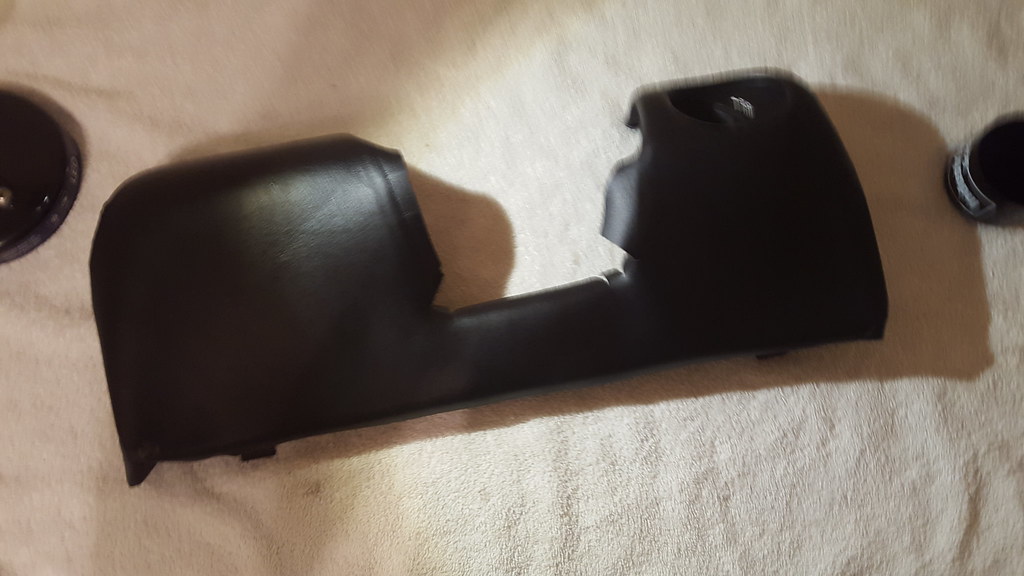
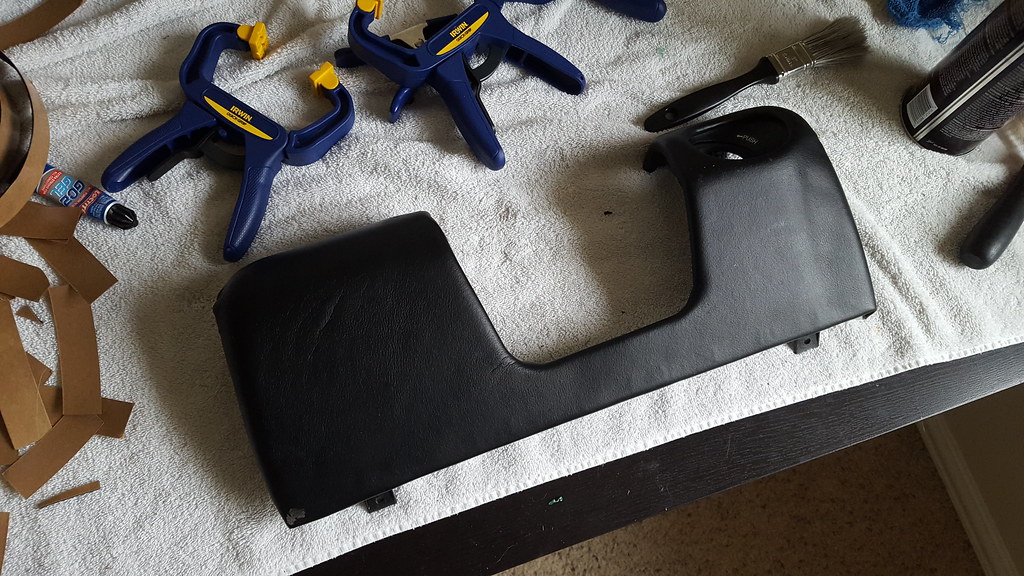
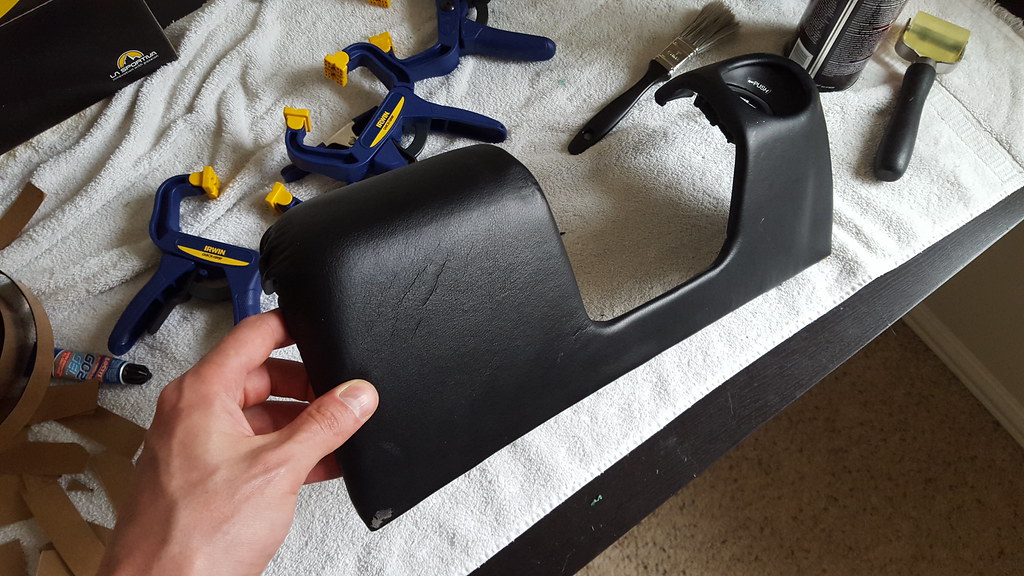
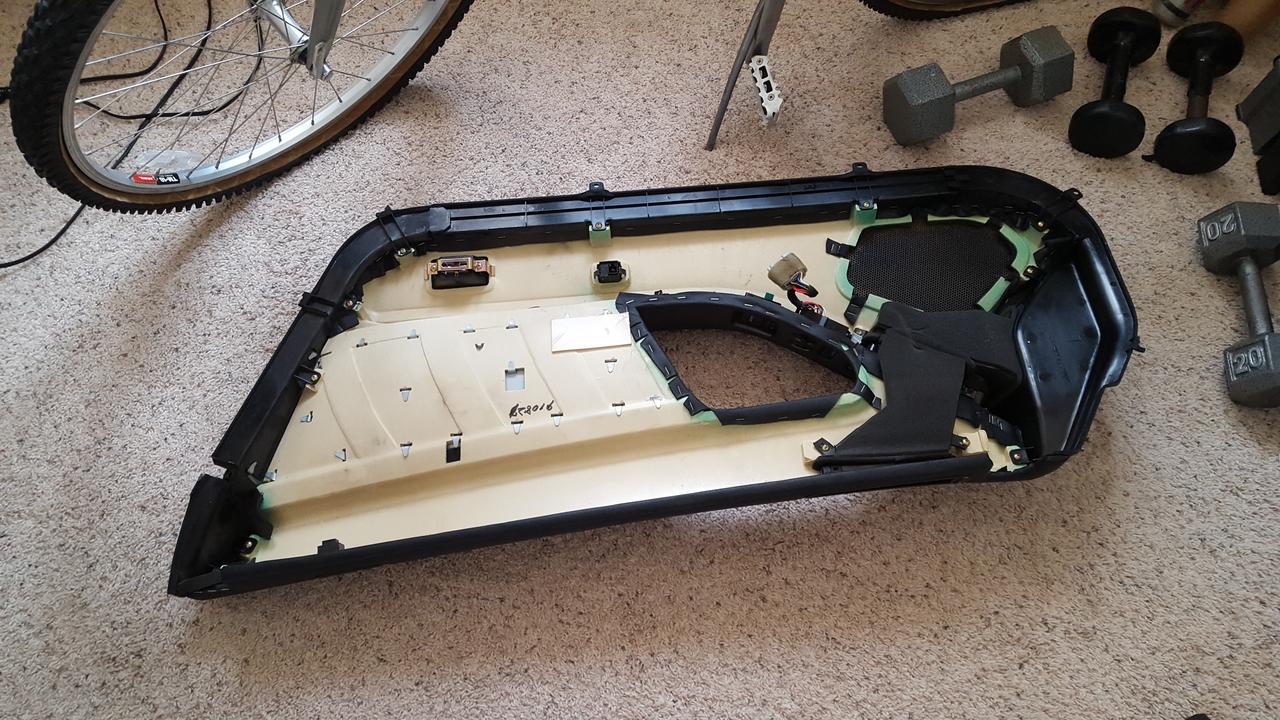
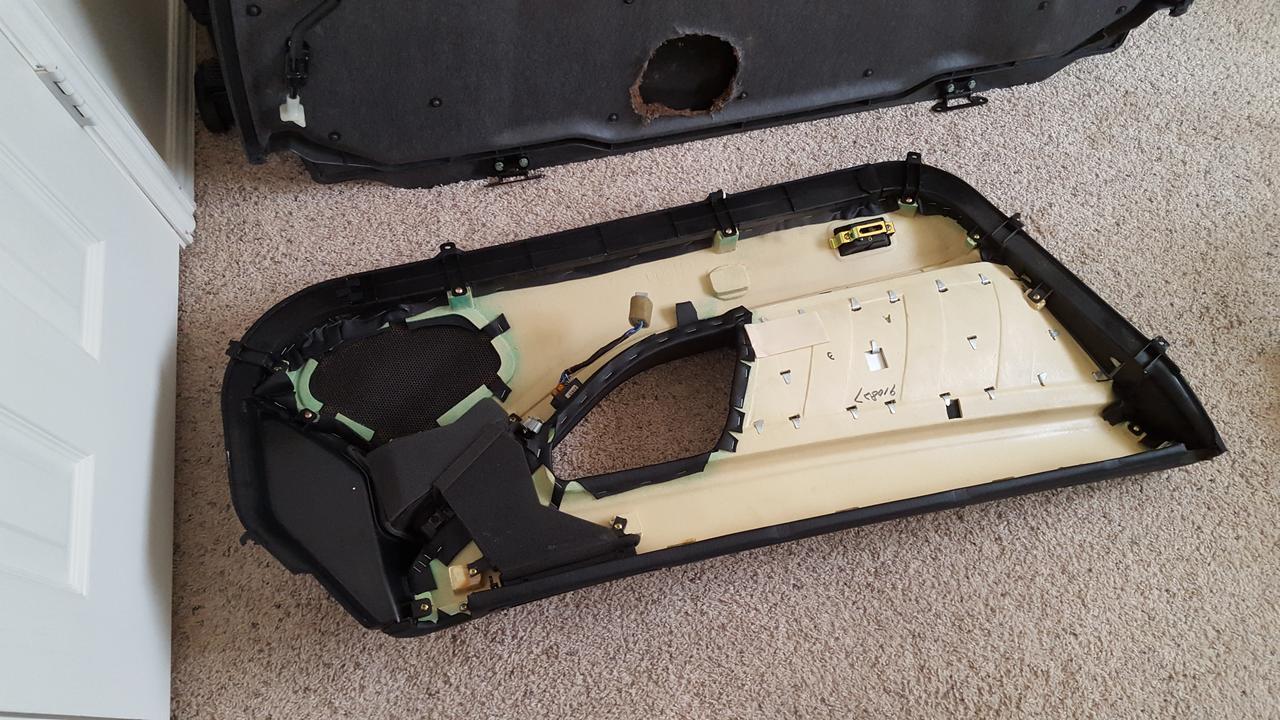
While doing the window regulator repair, I found that most of the plastic tabs on the door panel were broken. I plan to order new parts and reinforce them with some thin metal backing to prevent them from splitting again.
Z7kzqxI.jpg

JkbtXsi.jpg

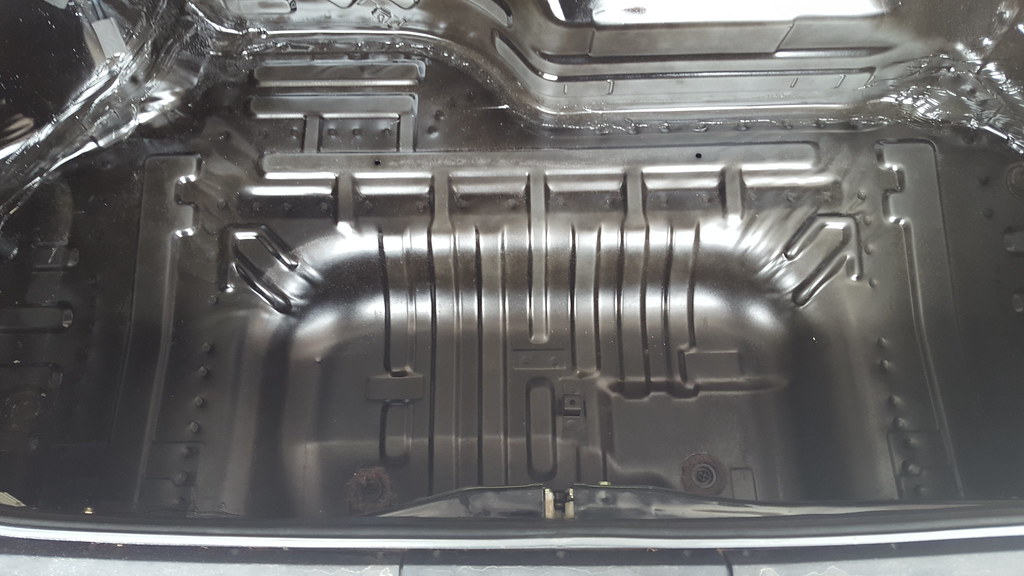
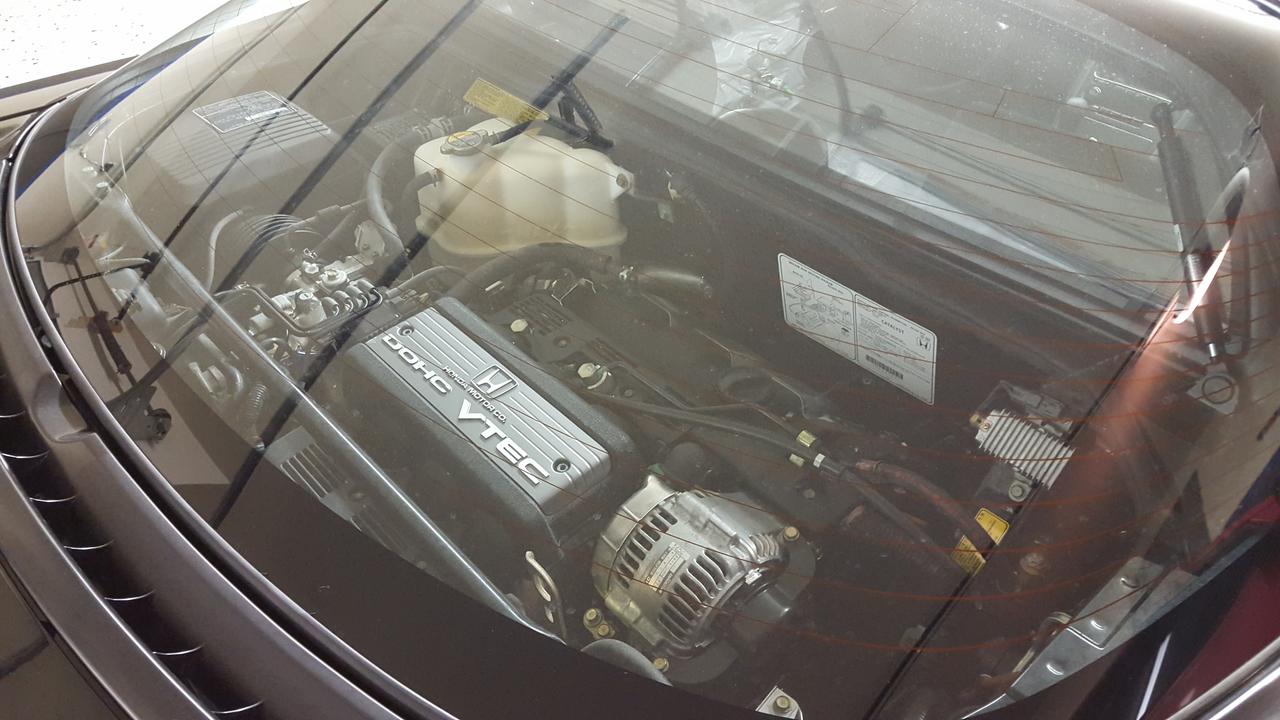
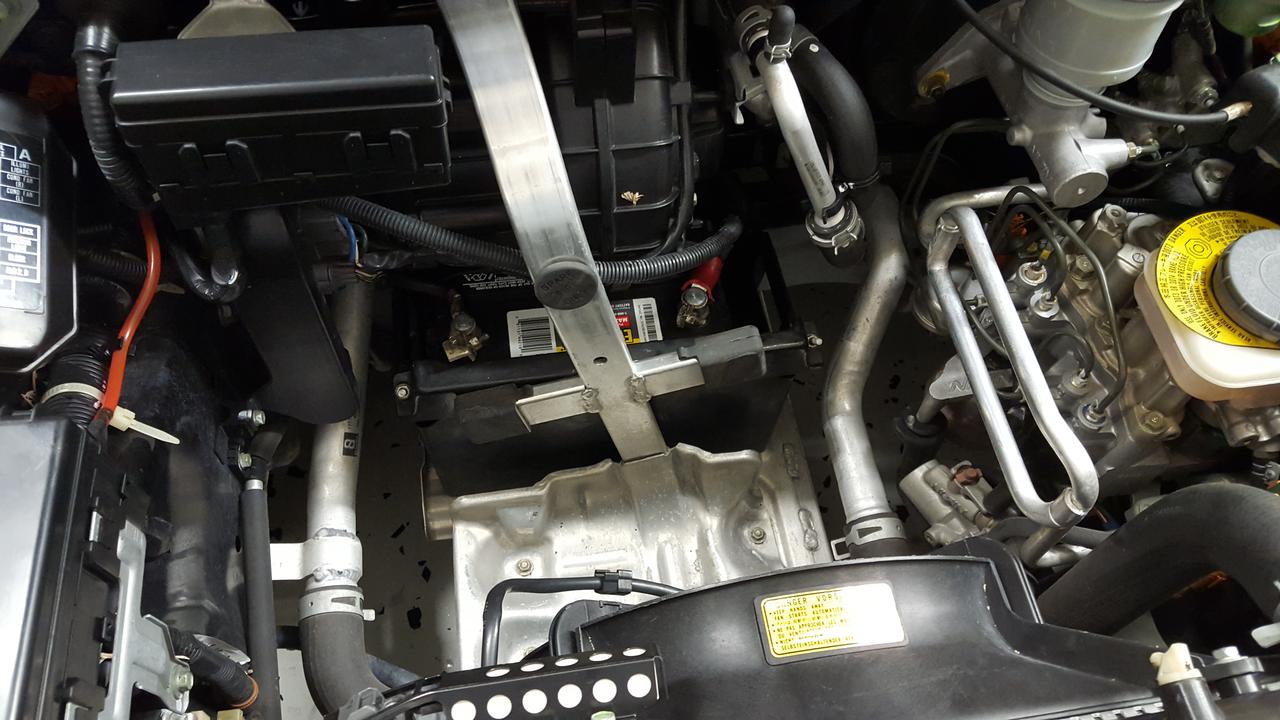
The engine bay needs some sprucing up. It was dusty when I bought it and I cleaned it up as best as I could without a hose, but it still needs some love.
I removed the engine cover because why hide the heart and soul of this machine?
CIKTXNh.jpg

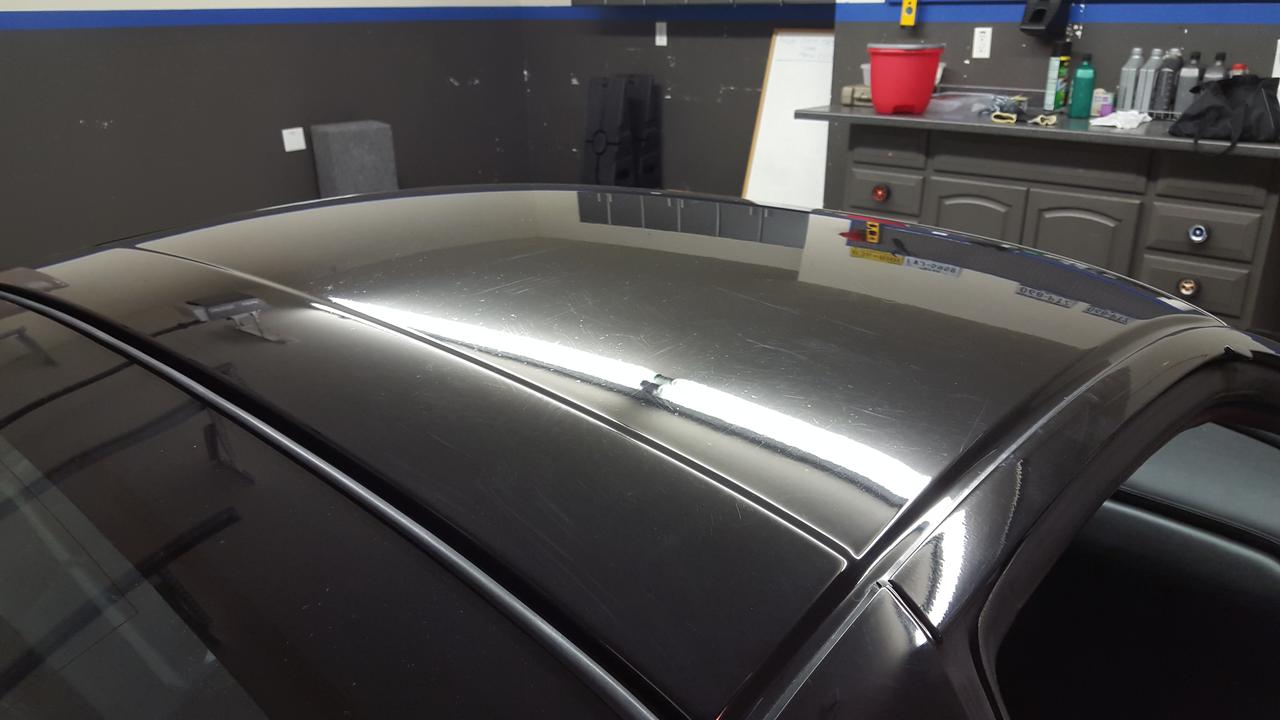
She needs a comprehensive detail to take care of some of the scratches in the finish.
CvNkNqc.jpg

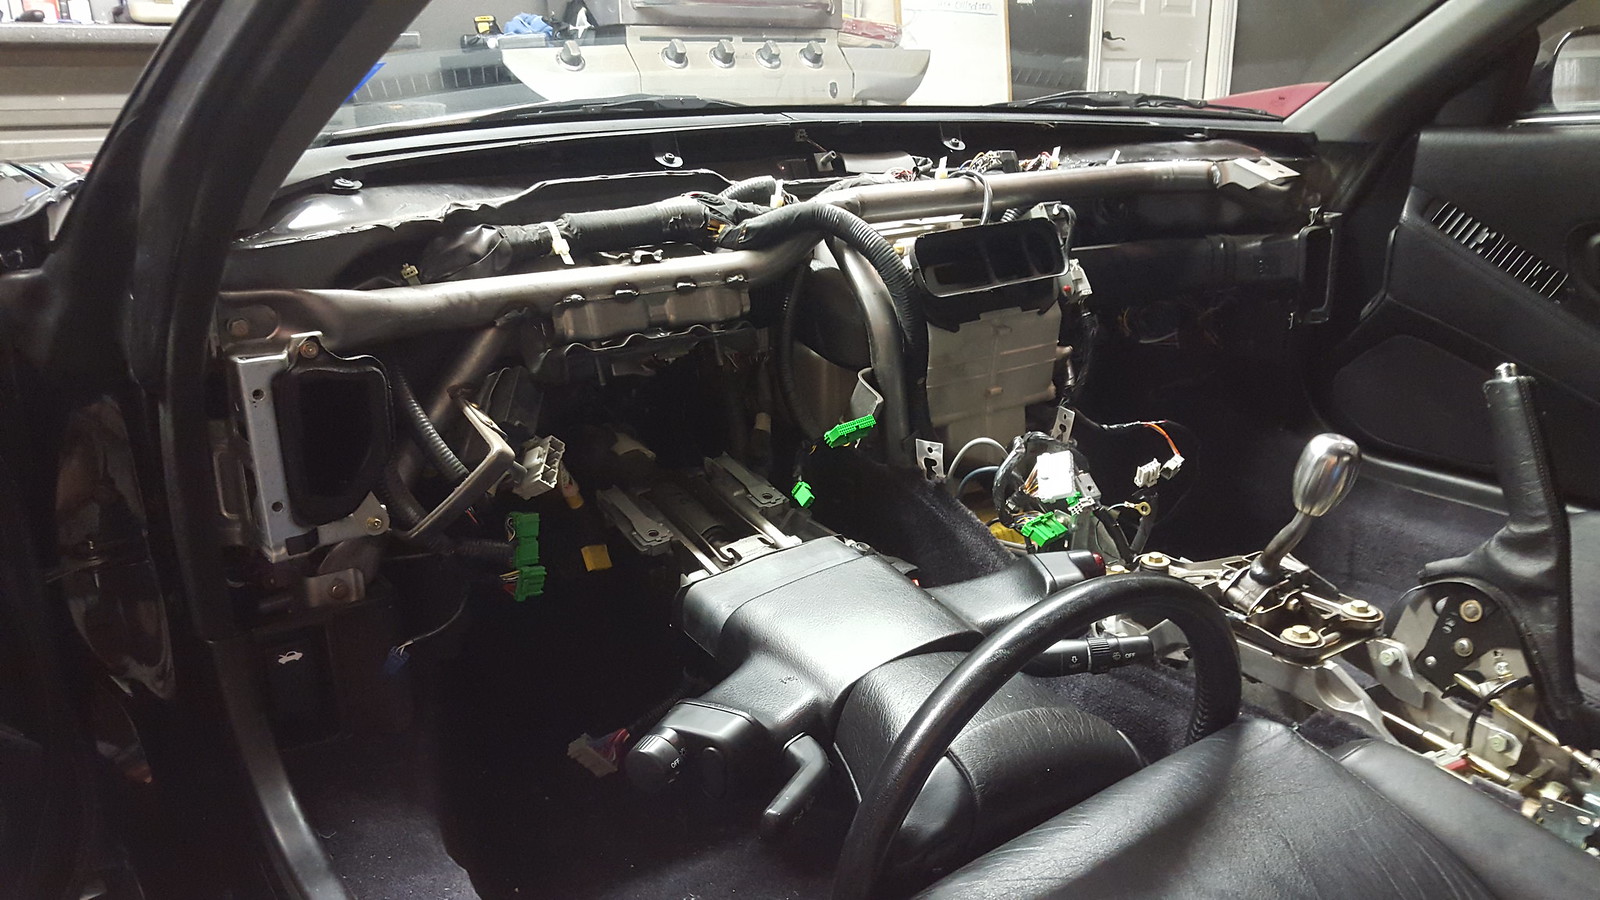
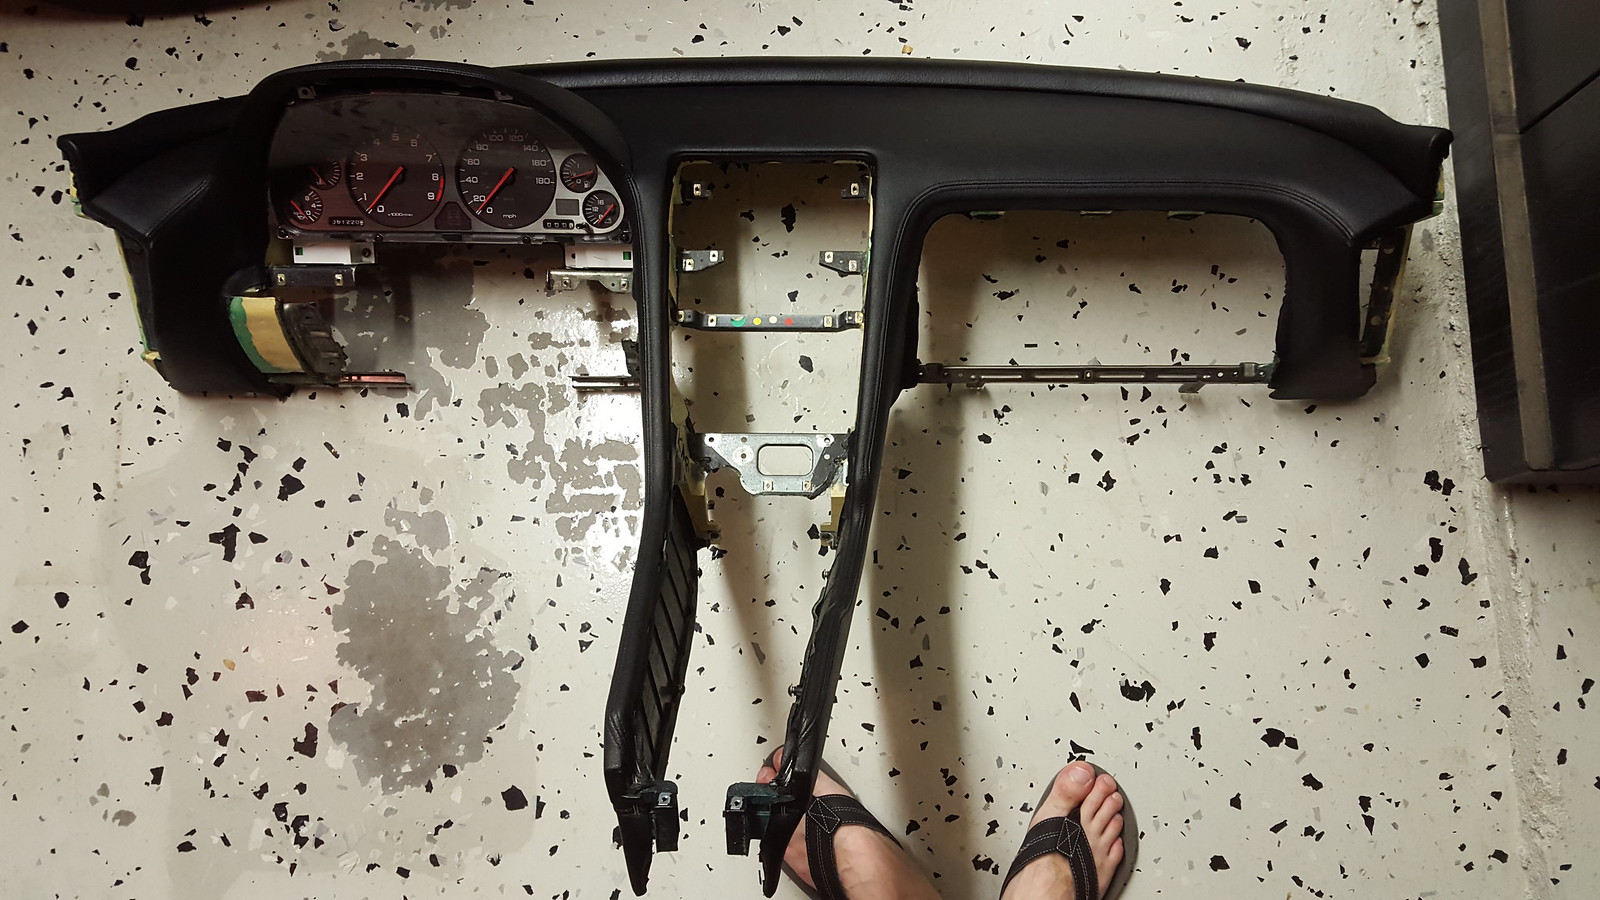
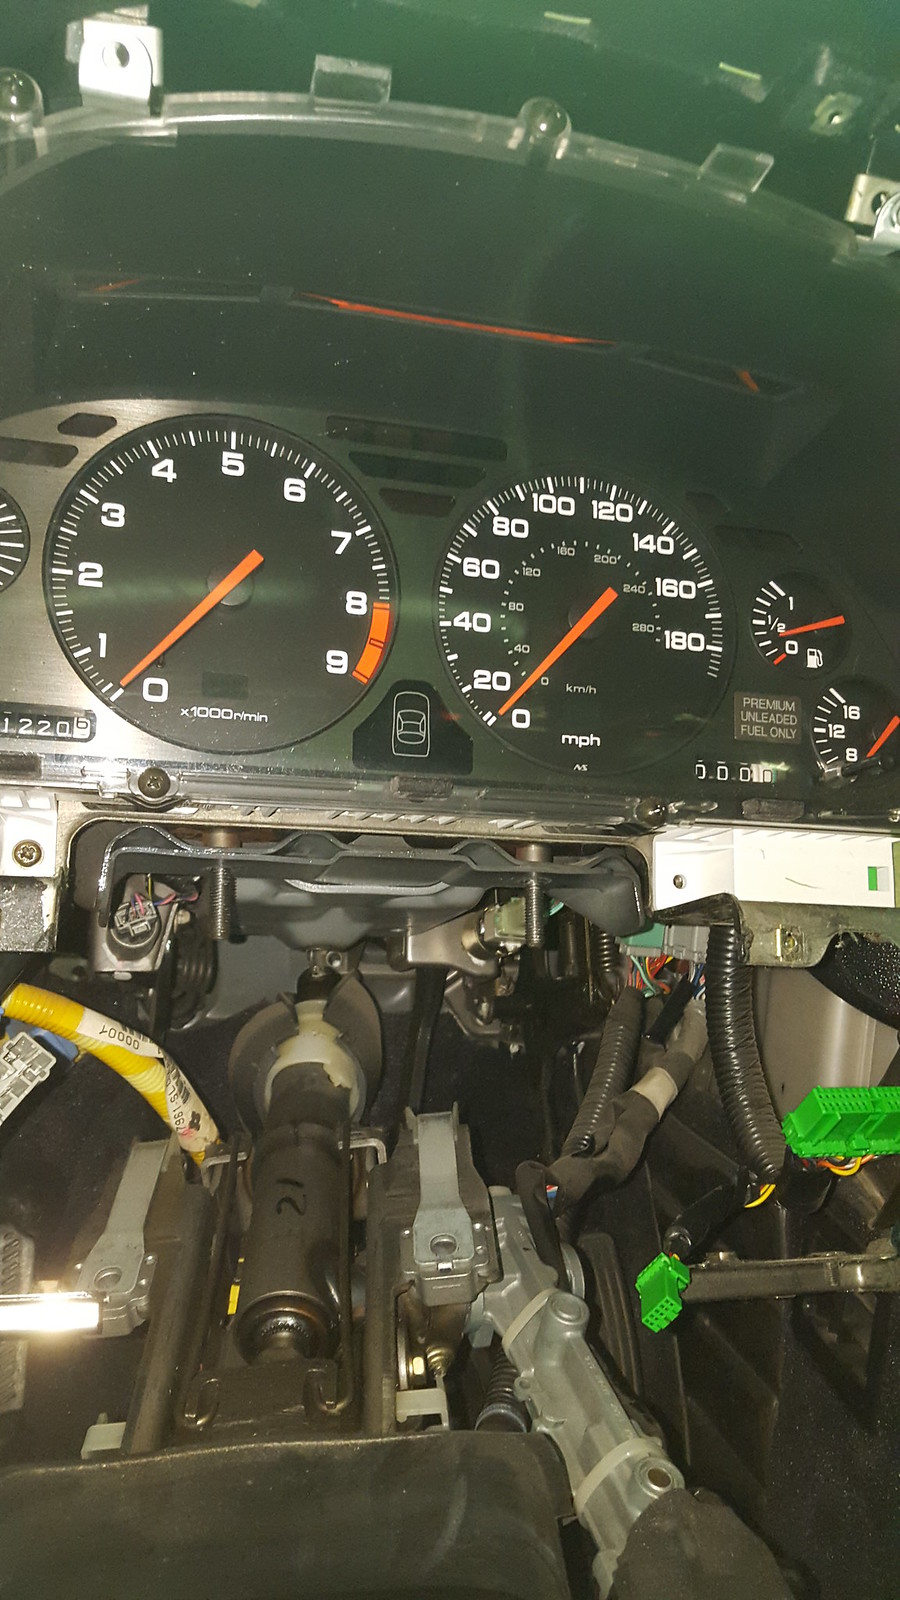
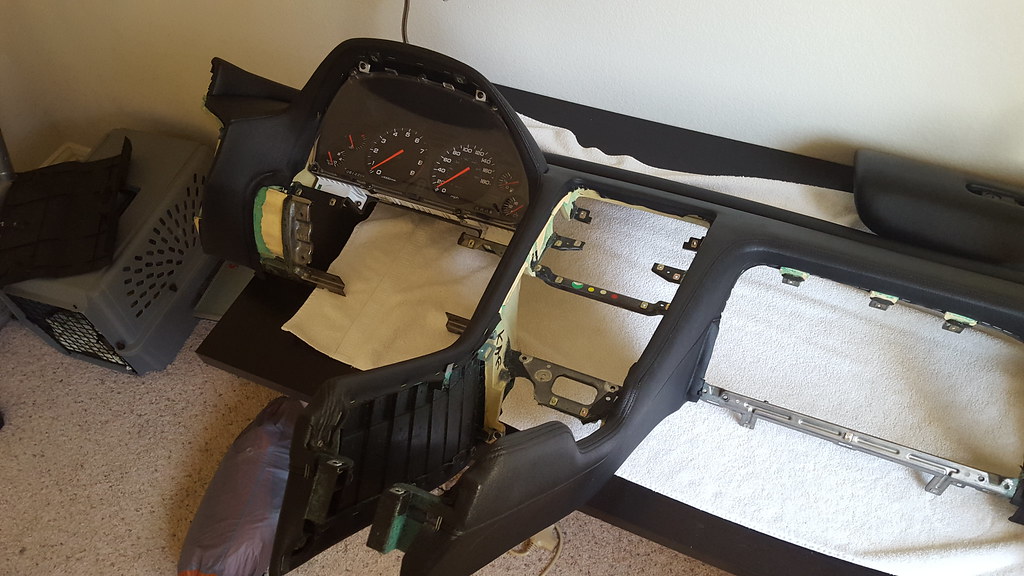
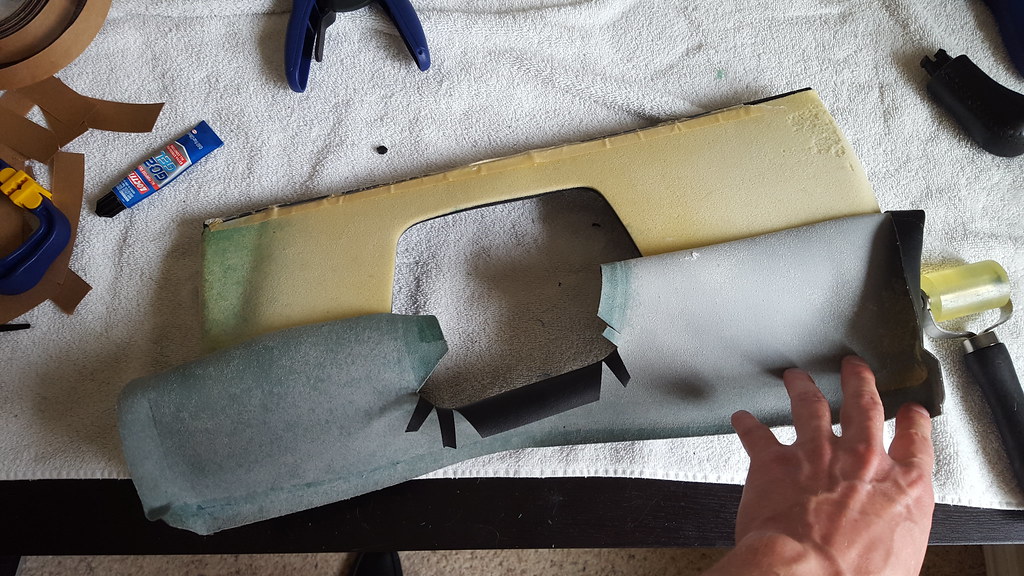
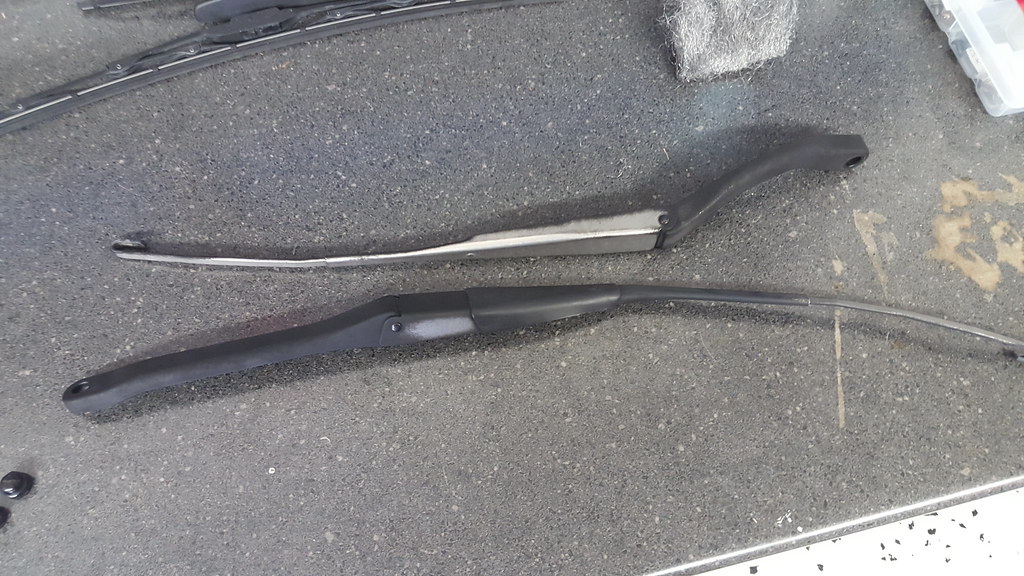
She has a couple rattles. One occurs exactly at 2500 rpm, some others happen when driving over bumpy roads. The windshield defroster vent is cracked and creaks on occasion. If I am bold, I would rip out the interior and replace it.

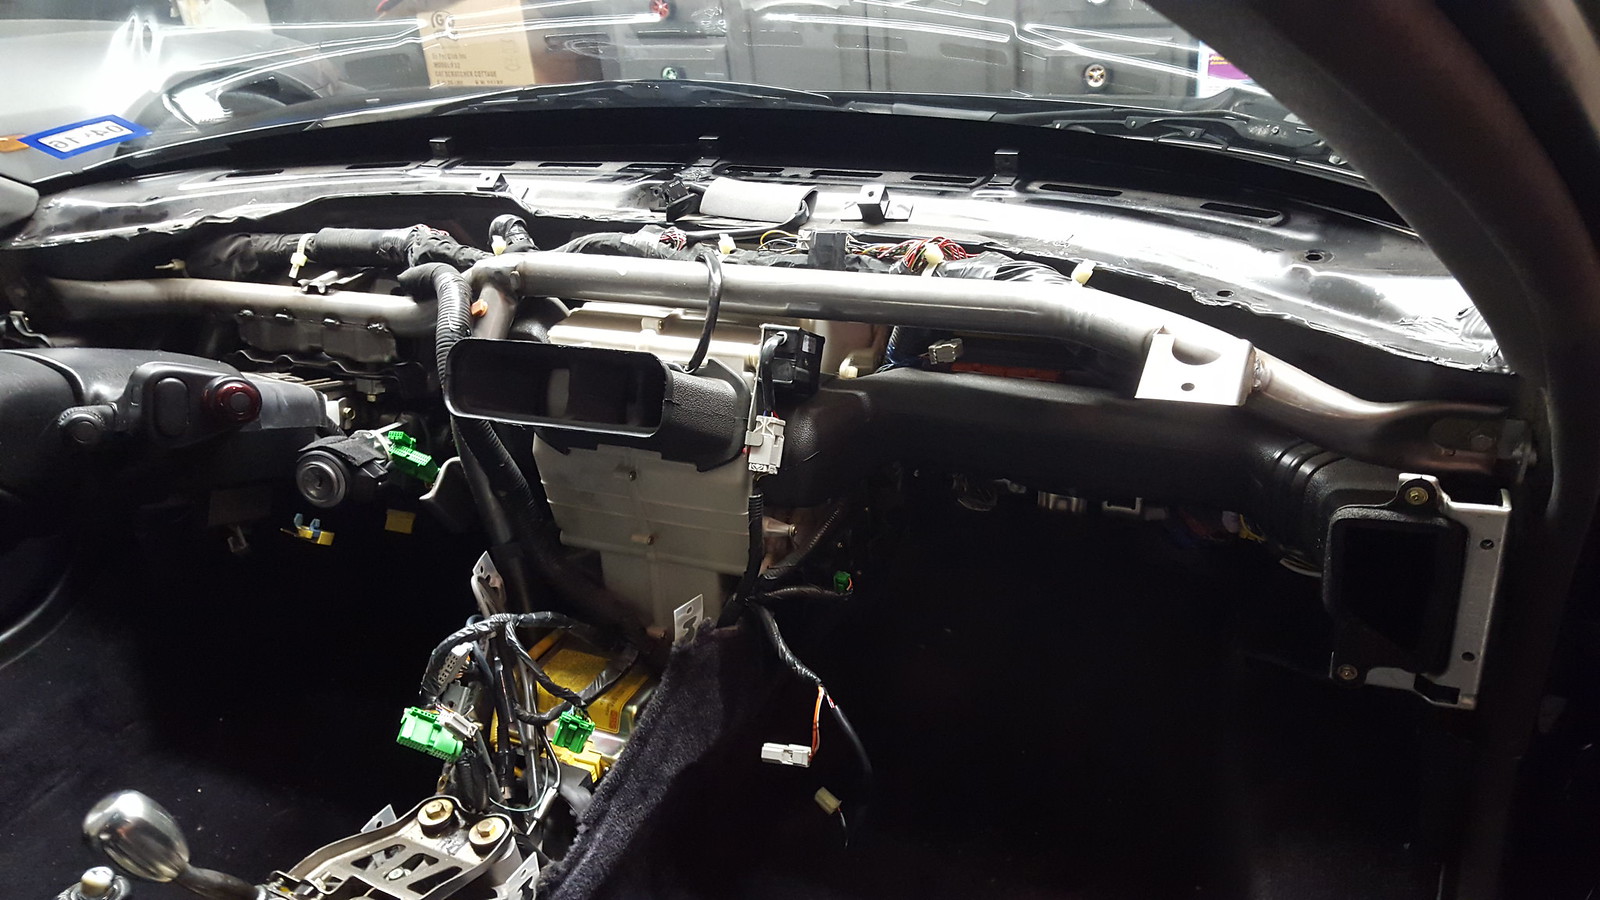
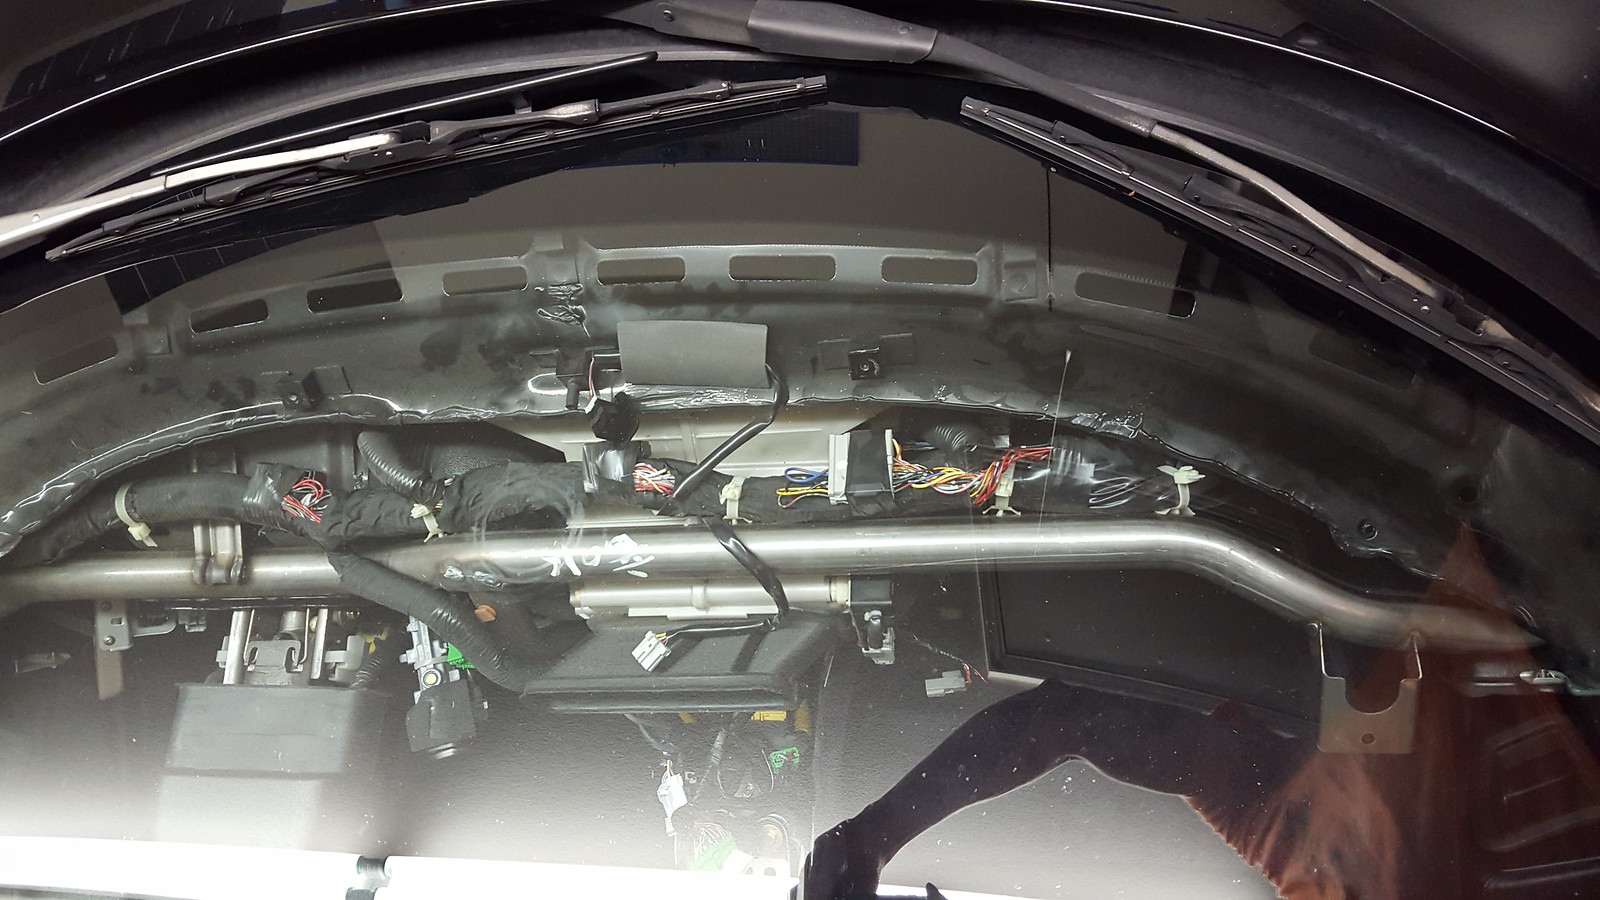
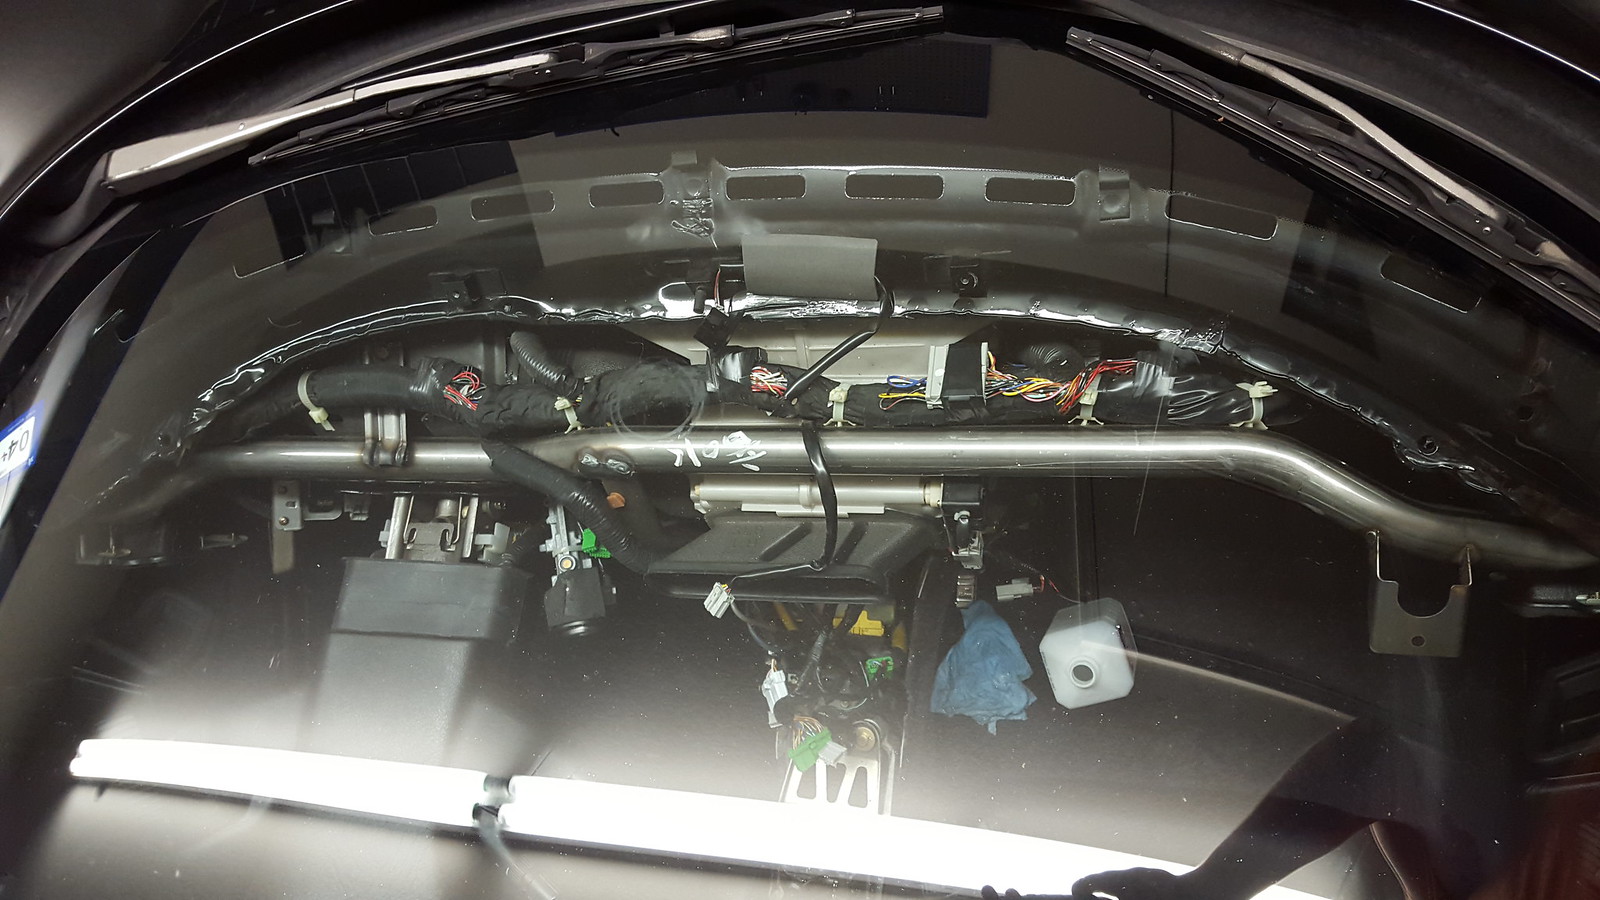
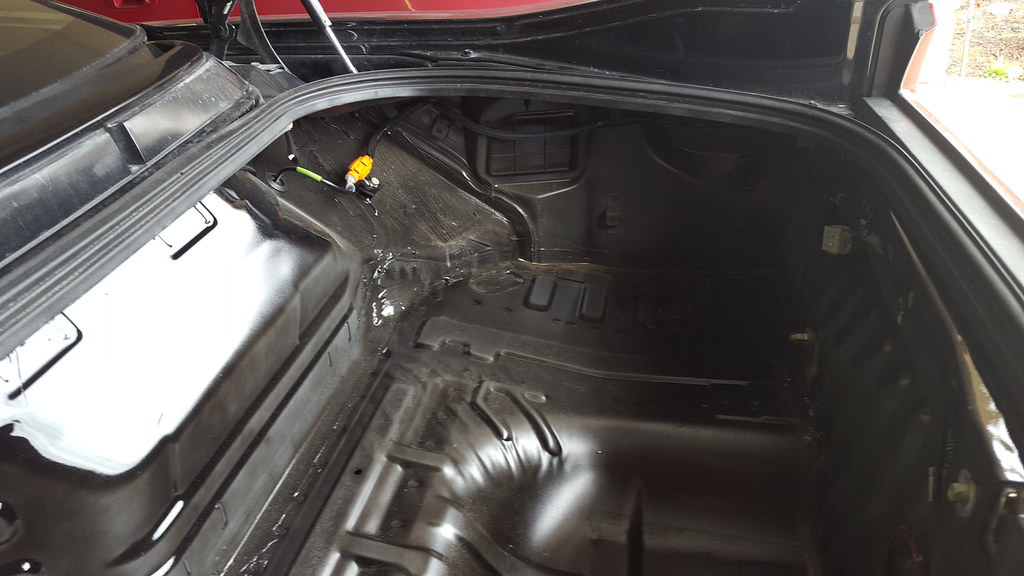
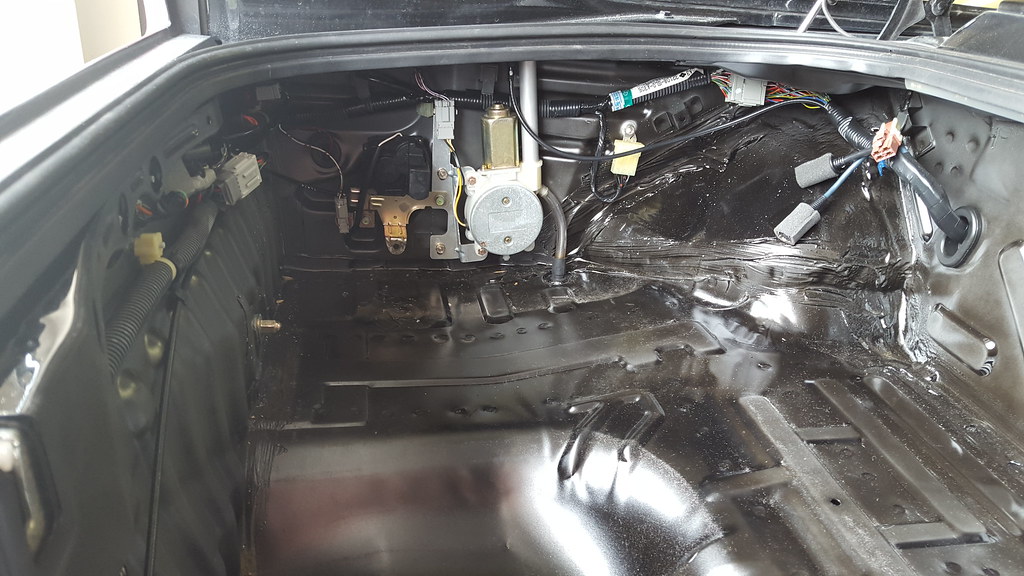
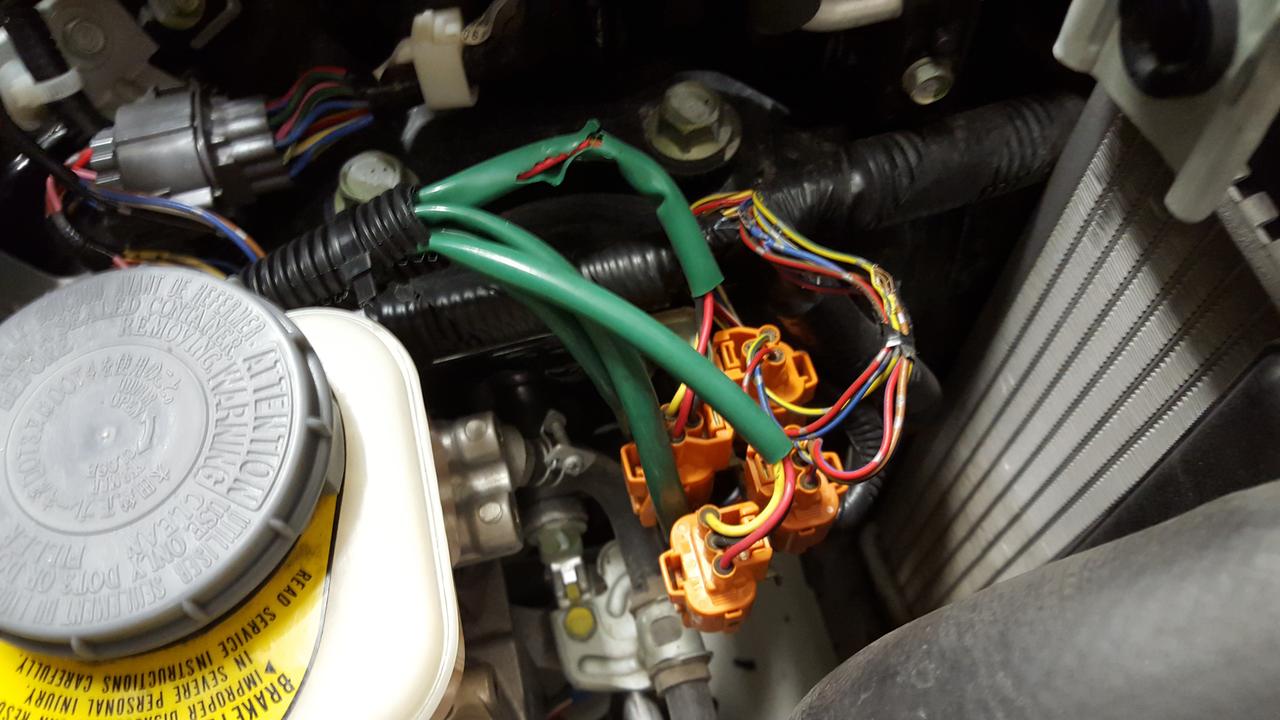
There are also some exposed wires under hood that need to protection:
IT9sYqv.jpg


The longer term plan:
I think the performance is already plenty for almost any driving circumstances except for track sessions. Before I go crazy with anything, I want to do a track day with a stock car. I haven't gotten a chance to stretch its legs and I want to experience the car the way Honda intended it. Additionally, it will almost certainly be me that is the bottle neck when it comes to driving at any HPDE, so why try to improve its performance?
Cosmetically, there are a few things I want to tidy up:

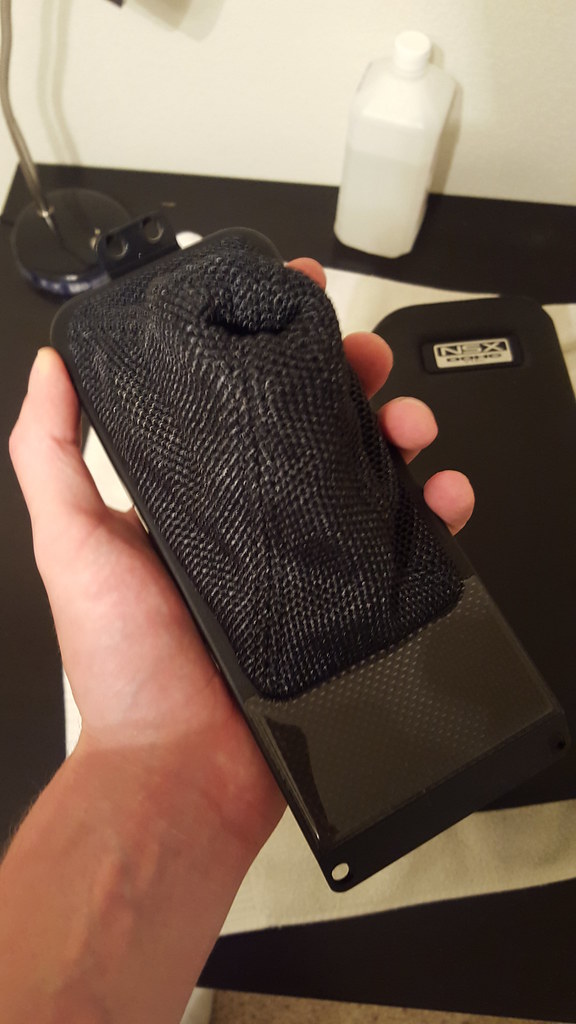
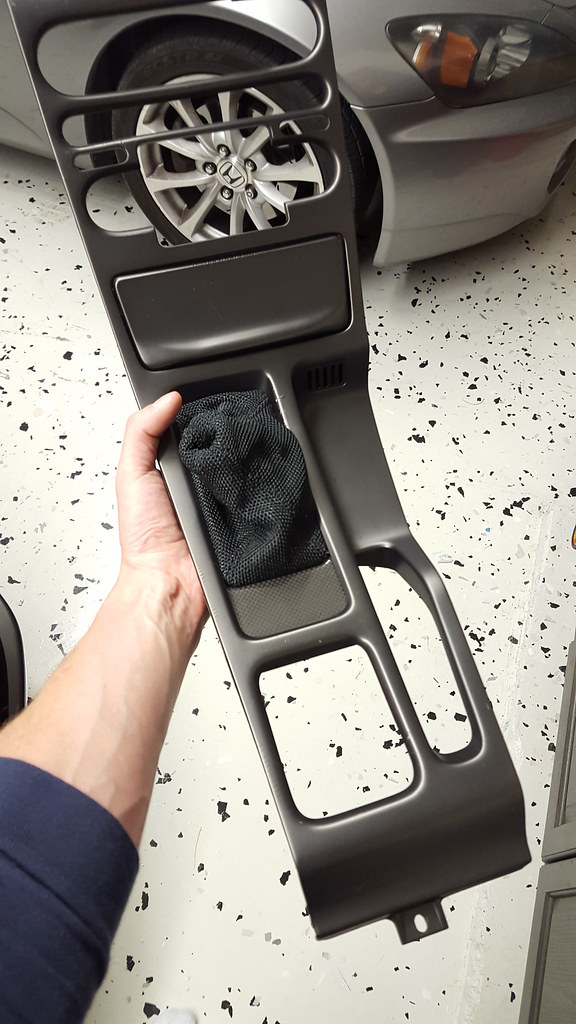
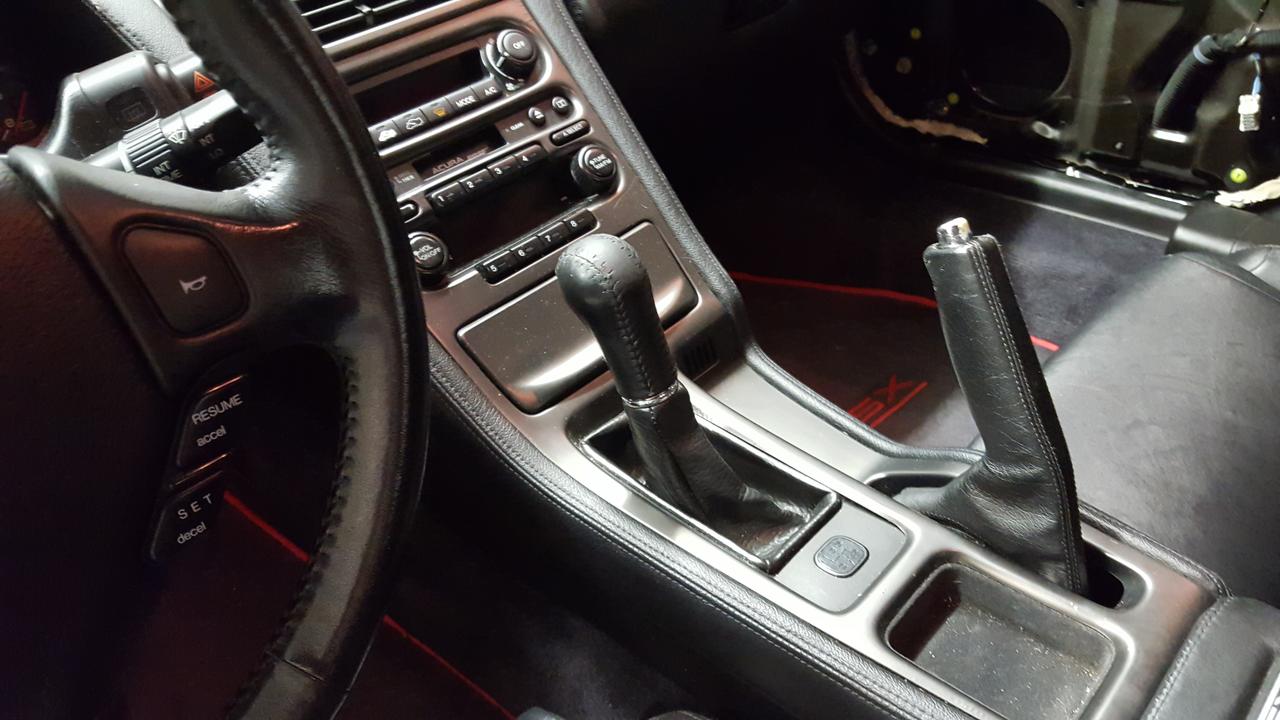
For one, the shift boot is a bit old an cruddy. I think a nice short shifter and type-r boot will freshen that up nicely. The gathered leather on the doors is ok, but some new inserts would also help to update the look.
aMbY2tP.jpg

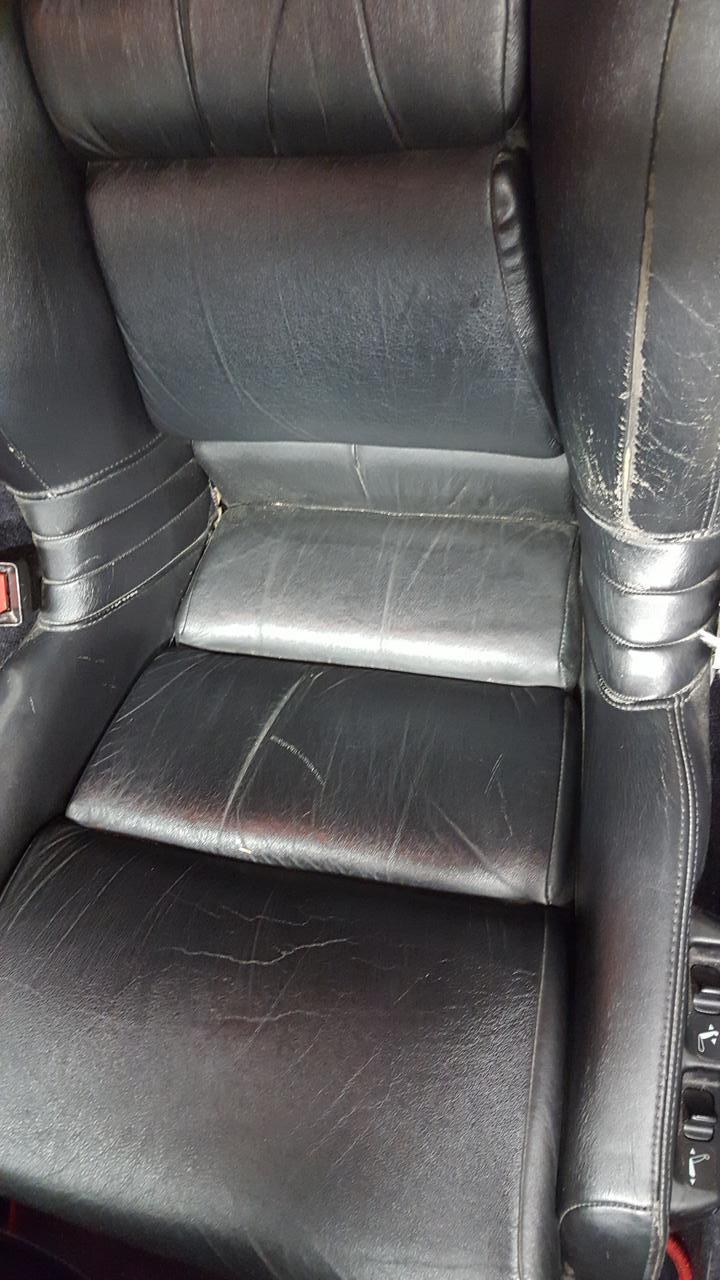
Seat bolsters are also a bit worn. Not sure of a good way to slow or stop the damage here.
XBxqT6D.jpg


Lightness is also important. I would like to try to shed some mass without being super extreme. So far the spare tire, engine cover, door speakers have been removed. I plan to just remove the stereo entirely since the amps are bad any way. Besides, the engine sounds so good I would only need a stereo for long trips. As a side note, I swear there was a difference in handling compared to before and after removing the spare tire.
AjQEEvE.jpg


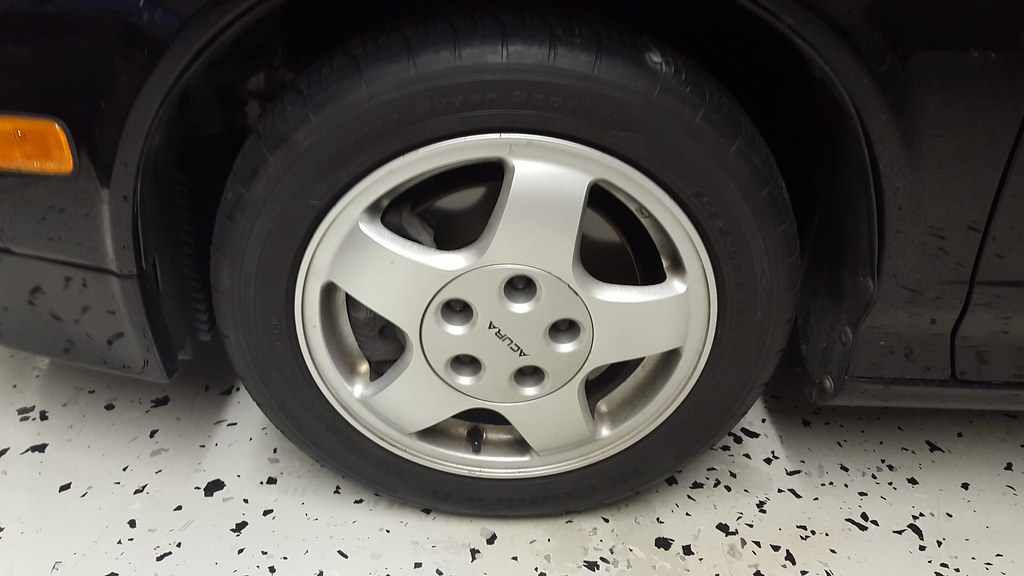
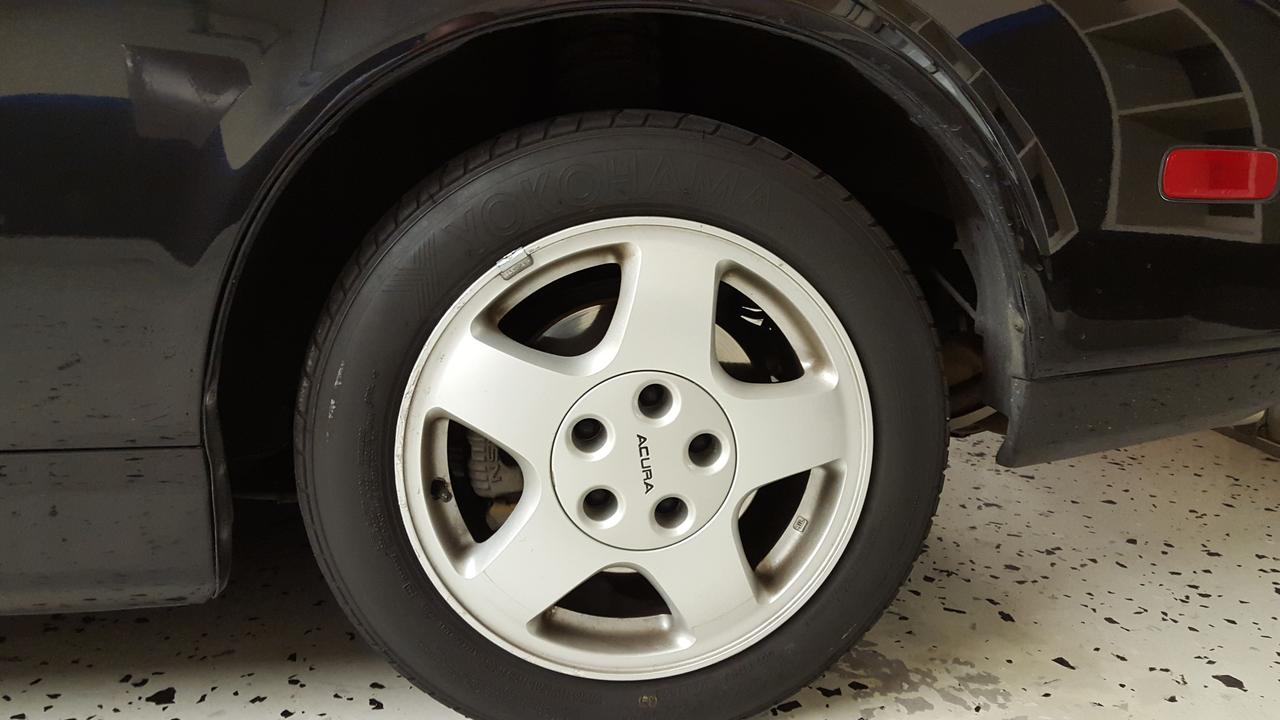
To me, the stock wheels and tires are what really dates this car. It will need some new shoes soon. I am thinking some silver RPF1's in 17" front 18" rear. I would almost go for 16's/17's, but I ill not be able to upgrade to a bbk without getting new wheels.
0atuB1W.jpg


I also think she could be lowered a touch, maybe an inch or so would do the trick.

Eventually improving performance would be nice. I think I would start with an intake, then headers and maybe some exhaust. The exhaust is a complex thing. I want something light, without much rasp or drone. It would be nice to hit C32 power levels with just some bolt-ons and a tune.
After that, I think I would like to upgrade to a 6 speed with a 4.23 final drive would be a worthy upgrade if my stock 5-speed succumbs to the snap ring problem. It is in range, but shifts fine, so if it goes, its time for an upgrade.

So on to some questions:

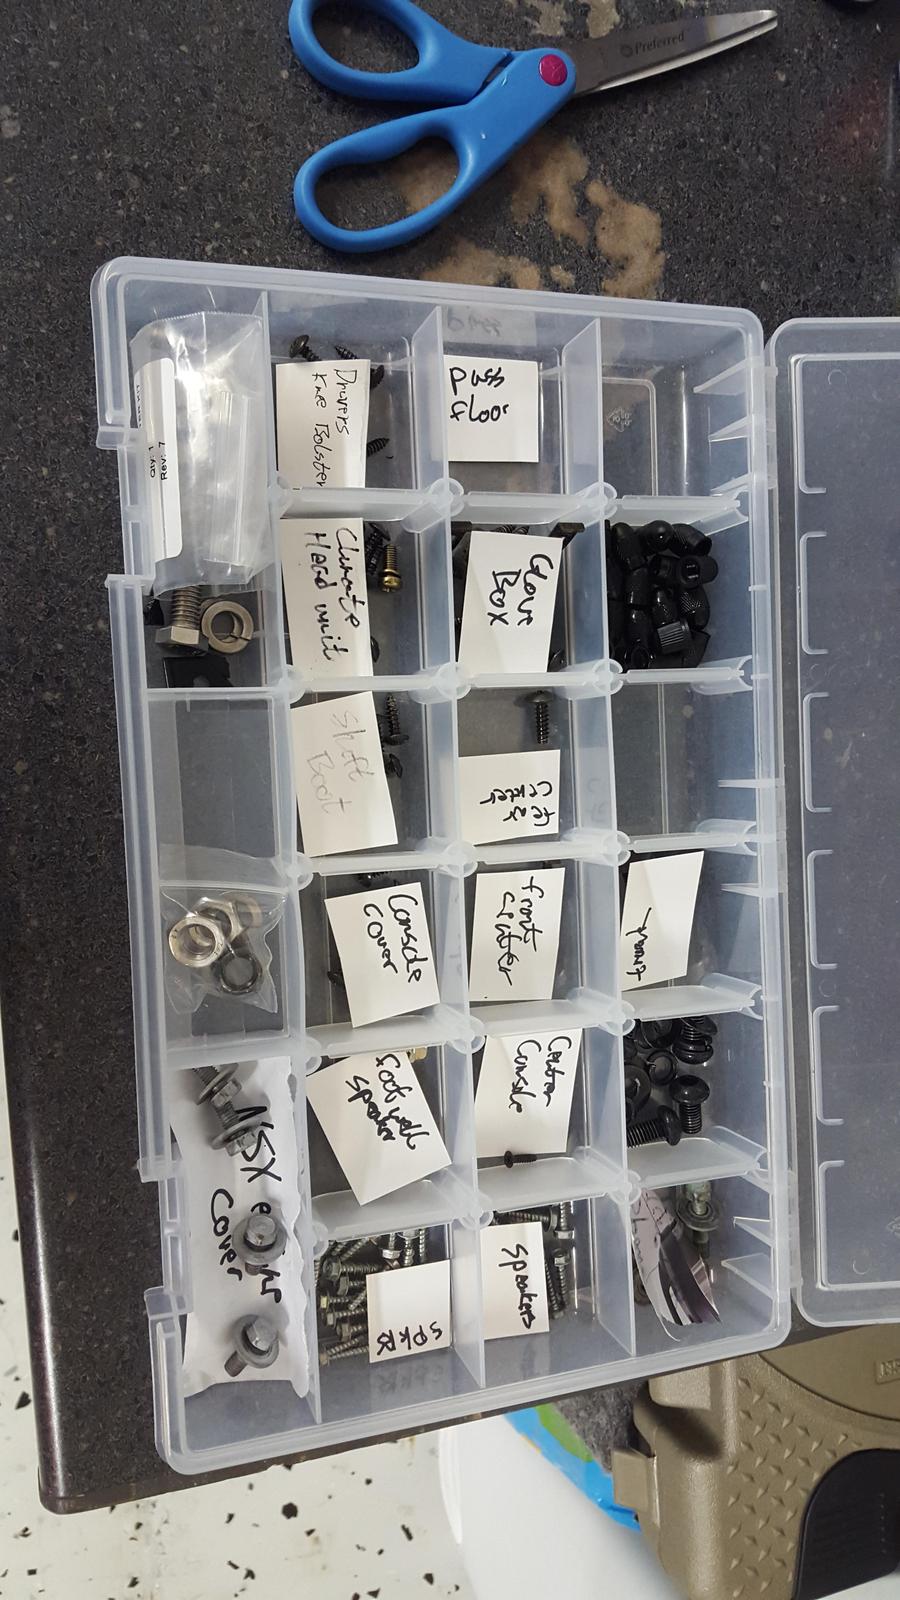
What would be a good place to find those door trim pieces to replace the ones with all the broken tabs? I have priced it out on a few parts sites and it comes to around $400 for both doors. It would be nice to find something cheaper.
Is there are good way to preserve the seat bolsters?

Open to crits and comments, so post away. Thanks for looking!
 
Glad to see another stocker in Dallas. I recommend the SoS knob, for a start. It's been a great upgrade from factory. If you're going to Cars and Coffee this month, I'd be more than willing to let you check it out.
 
Nice car. These are a real blast to drive.

I think the original wheels will be considered classics one day soon. So I would recommend keeping them in storage if you upgrade. In keeping with the "originality" theme, you might want to pick up a set of '95 - '96 wheels and tires for the upgrade...they make a big difference in appearance.

I would keep the originals. They are only worth like $400 right now. Not worth selling since I can store them. I do like the 95-97 wheels though. This does bring up another question: When going with wider wheels/tire, like 225 front and 275/285 rear how noticeable is the change in grip and ride quality? Some meaty rear tires with a good stance really adds some power and aggression to the look, but doing anything extreme could potentially have a negative effect on ride and handling. Maybe a some 225 front with 265 rears would be plenty. What do you guys think?
 
I would keep the originals. They are only worth like $400 right now. Not worth selling since I can store them. I do like the 95-97 wheels though. This does bring up another question: When going with wider wheels/tire, like 225 front and 275/285 rear how noticeable is the change in grip and ride quality? Some meaty rear tires with a good stance really adds some power and aggression to the look, but doing anything extreme could potentially have a negative effect on ride and handling. Maybe a some 225 front with 265 rears would be plenty. What do you guys think?

Definitely keep the original parts, in storage. I'm too debating on aftermarket, or going up to the 94 - 97 wheels. They make a world of difference in appearance. With these earlier cars, you have to look at things like correct tire/wheel correlation for TCS issues, etc. Yes, a wider tire will add more grip but the larger series tire (taller sidewall) will offer a somewhat softer ride. There's a thread on here about maintaining correct TCS tire sizing ratios somewhere around here.
 
Congrats, sounds like you have a great plan for her. Id say coilovers and wheels and tires and you will notice a great improvement.
 
Wow good stuff!! From reading your intro post it sounds like you definitely have done your research and are headed in a very good direction!! In for updates :) Congrats on the purchase!
 
Doors are back on.

I got a bit of time to repair the broken tabs on my interior door panels this weekend. I like how the tabs a separate plastic bits that attach to the main panel. If they broke, you could get new trim rather than an entire panel. These bits are still on the pricey side though. It would cost around $380 plus shipping for both doors. I figured I would try to fix it Macguyver style before shelling out some fat stacks for new trim. Even if I did damage one further, I would at least still have the option of ordering the part. This is how I did it:

Pic of one of the broken tabs and two good tabs.
RleQkQf.jpg


Some spots were worse than others.
BddAhvn.jpg


eSuGy2B.jpg


I bought some metal sheers, pipe hanging tape (the thin metal strips with holes) and some epoxy. I used my dremel to grind down the rib right here so that I could set the metal down in the groove there.
OqBxJIt.jpg


The pipe hanger fits really well, I still had to trim a bit off each side to get it to lay in the groove.
OavZTrI.jpg
.

Load that sucker up with some epoxy.
HAlKhTE.jpg


Clamp that sucker down:
kuTVxCw.jpg


After testing out this technique on one good tab, I got some more clamps and get to work on the other tabs. I used some plastic to prevent clamps and my lego shims from sticking to the epoxy.
Jl7qRx1.jpg


I let it set for a few hours and then did the remaining 4 tabs. This is how it looks when complete. Its a little "Red Green" if you know what I mean. Fortunately, this is something you will never see when driving.
NuBiEKO.jpg


I reinstalled the passenger side door this morning and it seems to have worked just fine.

-Make sure you have enough clamps to do each door in one pass. Each tab required a larger clamp and a smaller one to hold the metal to what remains of each tab.
-Use some Loctite epoxy, the kind that comes in a double syringe. It sets pretty fast and is pretty hard.
-Use a plastic bag of something to prevent clamps from sticking.

If you have any questions, just let me know.
 
I got the doors back on. Time to tackle some of the interior rattles. There was a rattle emanating from the center cubby and one from the passenger side dash. This was a strange rattle. It would only occur at 2500-2600 rpm without the parking brake engaged. I figured it must be the cable. I removed the center cubby to see if I could locate the exact source of the rattle. After looking through the service manual (specifically pages 868 to 872), I concluded that this might be an extensive job so I used a screw organizer to keep track of all the screws being removed. I know, my handwriting is pretty terrible.
glAtjwL.jpg


To get at the center screws that hold the center console down, there is a felt covered panel the can be removed easily with a little pick. There is a notch in the center at the rear where a dental pick or bent paperclip can be inserted. The panel can then be lifted up easily to reveal this:
q0DqsZn.jpg

Upon removing these 4 screws and lifting the cubby straight up, I was greeted with this:
JebWA48.jpg

The parking brake adjustment and the shifter linkage. I performed a few more tests by revving the engine to 2500 or so rpm and engaging the brake slowly. It sounds like it is actually coming from the underside of the vehicle now. I will have to get under it and see what I can find. I have to purchase some jack stands first though. Since there were a few other small random rattle and squeaks, I figured I would just leave some interior components and drive it anyway in an attempt to narrow down what was causing them. From here I proceeded to remove the rest of the center console:
tddtDh6.jpg

Everything came out easy with some plastic trim removal tools. I got these and they work great. For some things like the clock, it may be wise to put a sheet of paper between the tool and trim to prevent scratches. The underside of the dash was the squeakiest. There were several loose panels including the underside panel, the glove box lid and the glove box itself. Removing these objects helped with some of the smaller rattles that appeared when going over bumps, but the most annoying one remained. It came from the dash on the passenger side. I would take pics, but they just wont show much. It seems to be cased by the dash rubbing against the metal beam running across the cabin. I shoved an old towel between them. It helped, but I was still able to push on the dash and cause the squeak. When driving it though, it virtually eliminated it. I need to come up with a way to secure the towel or otherwise get some padding on the backside of the dash. Not sure if it would be worth it to remove the entire dash.

Here is what I have removed so far and cleaned up:
iVxS0Ii.jpg

I found the leather was coming off the knee bolster below the steering wheel, so getting some glue and fixing that is the next step.

This stuff may not be exciting, but it is very satisfying to me. Taking apart an old car and "restoring" it makes me feel like I accomplished something.

Once this interior business is complete, I will move on to detail the engine bay. Also, if you look at my spreadsheet here, I have removed 93 lbs. With a couple more things, I could get it to about 100. After that weight loss will begin costing money. I think 2800 lbs would be a good goal. Wheels, tires, a lighter battery, lighter exhaust, suspension, a type-R style wing, a brake upgrade, replacement bumper beams and a couple other things if I can find them for the right price should work.

As always, thanks for looking and let me know if you have any questions or comments.
 
It's been a good week. I finally got the dash removed, giving me access to the cracked defroster vent. I tracked down a couple sources for a vent, but I wanted to see if I could repair it myself first. Considering the part was $270 or so new, or about $180 used, It would be well worth the $7 worth of epoxy to try and mend it.

I was able to remove everything without any help, so it was pretty easy. I made it my goal to remove at least one part each night. My advice for any one tackling an interior removal would be to just take their time, keep track of all the screws and fasteners and check to make sure all wiring is disconnected. I found a few stray cables still attached to the dash while I was removing it. I had to awkwardly set it down and disconnected them. There are two fasteners, one near the parking brake and one under the passenger center console that are attached to metal tabs that need to have a plastic tab pulled back in order for it to slide off the metal. This isn't obvious just by looking at them. They almost look like they are just held on by friction. Again, take your time, double check fasteners and cables and its a cinch.

Dash removed revealing the cracked defroster vent.


The dash is out! There was one screw holding the cluster in place that would not budge. I almost stripped out the head before I gave up and tried to remove the dash with it in. Still came out just fine.


Some pics of the steering column lowered:


More pics of the dahsless interior:


Top view of the interior before cleaning it with some rubbing alcohol.


All cleaned up.


On to the Broken defroster vent. I forgot to take before pictures, but It came out in three pieces. I was able to place it back together and then smother the backside in epoxy. It looks like I applied it with my feet, but no one is ever going to see it, so no big. The front isn't as clean as I hoped it would be, but I saved about $200, so I will label this as acceptable. Besides, its an old car, nothing is going to be perfect.


Behold. The craftsmanship:


Back in one piece. I used a bit of rubbing alcohol to clean up the front. It helped a little in removing the epoxy, but since it had set, not much came off.


Next step: Begin putting the interior back together. While doing so, I plan to place some felt tape and foam window sealer where there is give on the panels. I think I found where some of the squeaks were emanating from, so I will be placing padding accordingly. I think some of the zip ties holding the wiring together, may have be another culprit. I will have to do some testing to see if that is true.

At any rate. Work continues. Its still gunna be a few months before anything really exciting happens here.
 
Nice job. I need to swap out my current dash for my new one. I wish I knew how you did that...

It's pretty simple. Just check out the manual on prime here:
http://www.nsxprime.com/FAQ/Reference/1991_svcman/1991servman.pdf
Go to page 860-880 or so. It should show where all the fasteners are. Also, when you finally do get it loose, it works best to sit in the car with the seat all the way back, lift the dash out and set it down. Then, get out of the car, walk over to the driver's side and remove it the rest of the way. Good luck!
 
It's update time! I was able to get most of the interior back in this weekend. It was really pretty easy. I am having an issue with some lateral movement of the steering column, so I haven't put the rest of that in. Everything went pack together perfectly and best of all, NO MORE RATTLES!!!!! I am sure you guys know how irritating they can be. Now they gone and everything is good forever.

Interior shot. Radio was left out since the stereo doesn't work anyway. New type-R mesh boot installed with countersink shift knob installed. The knob is heavier and about an inch lower. It makes a huge difference in the way it looks and feels. The mesh boot looks much better than the old leather one. Overall, totally worth the upgrade.


The mesh boot from SOS when it arrived:


Installed in the Dash Bezel: Fits well, easy install, 10/10 would buy again.


I forgot to take pictures while I was doing it, but there is a thin strip of felt attached to the sides of all interior bits. I attached a newer, thicker, strip to the front lip of the dash where it overlaps the defroster vent. Bare vinyl rubbing together caused some of the creaks and squeaks. It took a couple test fittings to make sure felt was in all the right places, but it squeak free now.


I was also able to tackle the peeling leather on the driver's side knee bolster:


I got some of this stuff: Spray it on both surfaces, wait 30 sec for it to settle and get less tacky, then carefully touch the two surfaces together. It bonds almost instantly.


Have a roller handy or else the leather may bond unevenly. Also wear gloves.


It took a couple tries to get the leather lined up so it would adhere without any wrinkles. I ended up clamping two corners to make sure it was lined up, then did one side at a time, using the roller to work the leather across the panel. I did the rear with a separate pass. It took a few clamps to hold some of the extra leather down.


Before:


After:


Not quite perfect, but only cost about $6 for the adhesive.


Next up: Painting the wipers:
 
The first exciting upgrade happened: A paint correction and detail!

Before:


After!


I need to get it outside and get some real pictures taken of it.

Also, the wipers are painted:

Before:


After:


I just used some flat black paint. We will have to see how well it holds up. The can was $6, so touch ups aren't an issue.

Next up: Got a pretty nice puncture. Top right near the sidewall. Not sure if it can be patched, so I will just have to get some new tires. If I have to get new tires, I might as well get new wheels to replace the fat fives.


There are a few considerations here: Weight, style, size, and weather they will clear a bbk.

My first choice would be some 16"/17" RPF1's since they would be slightly lighter than stock. Due to their barrel, they probably wont clear a bbk. Which ultimately makes me wonder if I need a bbk. I don't plan to track it regularly. I might just repaint the calipers or something. What do you guys think?
 
Before going the BBK route. I would get a new set of pads front and rear, Motul 660 fluid flush, Maybe even replace your stock rubber brake lines, depending on age. Could also check to see if your rotor are in spec. You can remove the dust shield to better cool down your rotors, but you have to remember to protect your ball joints.
 
Before going the BBK route. I would get a new set of pads front and rear, Motul 660 fluid flush, Maybe even replace your stock rubber brake lines, depending on age. Could also check to see if your rotor are in spec. You can remove the dust shield to better cool down your rotors, but you have to remember to protect your ball joints.
I'm actually surprised how many people go BBK for no/light track use versus just buying good set of tires, vented cry treated rotors and set of something like EBC RedStuff + steel braided brake lines and RBF600/ATE blue. I find NSX brakes to be very very good. Very progressive and super natural braking feel. But sure it all depends on purpose especially if you're chasing time on the track.
 
I'm actually surprised how many people go BBK for no/light track use versus just buying good set of tires, vented cry treated rotors and set of something like EBC RedStuff + steel braided brake lines and RBF600/ATE blue. I find NSX brakes to be very very good. Very progressive and super natural braking feel. But sure it all depends on purpose especially if you're chasing time on the track.


BBK's look awesome is the main reason. It's pretty flimsy, but the NSX calipers look weak. I will go with those suggestions instead though. I tried to find a decently priced BBK. I even looked at just getting some RL calipers instead because they don't look aftermarket. I can't find anything that is ultimately worth it though. Might just get the calipers painted and go with the upgrades you mention.

- - - Updated - - -

Before going the BBK route. I would get a new set of pads front and rear, Motul 660 fluid flush, Maybe even replace your stock rubber brake lines, depending on age. Could also check to see if your rotor are in spec. You can remove the dust shield to better cool down your rotors, but you have to remember to protect your ball joints.


I have read that your ball joints will overheat if the dust shields are removed. How do you protect them then?
 
Awesome job, I'm going to paint my wiper arms as well. Any recommendation on the paint?


thanks

I am not certain that it matters. There was another thread here about it here. I selected some matte black spray paint from Lowe's, cleaned off the wipers with some soap and water after taking some fine steel wool to them. I then applied a coat, let it dry overnight, applied another coat in the morning and it was done. Probably cost $10 worth of paint and steel wool, so even if it doesn't hold up well, it is no big deal to apply another coat. There are probably some high heat paint that would lost longer.
 
It has been a while, but I have made some minor updates.
How she sat last week after a nice wash:

I removed the trunk carpeting, worth 5.6 lbs of weight reduction.

All cleaned up:

Next up for removal is the power antenna. I have the rubber plug ready to cover the hole.


The best upgrade so far: 30% tint for the front and 20% for the rear hatch.

Until next time gents...
 
Removal of the power antenna:


The hole was plugged by Honda OEM 82871-671-000 GROMMET (25MM)

As suggested by this post.

I have been thinking about the next mod. This inspired me. I was thinking of picking up a new center console bezel, like the one offered by SOS that only has holes cut out for the climate control and shifter, mounting a magnet to the back of it and using it as a stealth phone holder. The goal would be to have it so i can set my phone (Galaxy S6) on the blank area of the center console and have it just sit in place. It would be cool to put an induction charger behind it as well, so I wouldn't have to plug in my phone to charge it.

I am not sure how well of this would work, so if any one has any suggestions, I am all ears.

Thanks.
 
Back
Top