NSX AUTHORITATIVE "Double DIN" everything you ever wanted to know thread build
We did our very first NSX double din install about 5 years ago on a 1991 NSX. Customer came to us with a bone stock interior 1991 NSX and wanted to install a "better" stereo. One thing lead to another and pretty soon we were fabricating a custom dash panel from his stock one. Of course the stock panel became the donor piece thus there is no way to ever go back to stock. Roughly 20 hours later we had this beautiful panel crafted to both reduce glare and at the same time consolidate his electronics into one neat piece.
The biggest problem with the NSX center dash piece is due to the angle - any DD dash or LCD screen for that matter mounted flush to the dash will create massive glare. Everyone is aware of this problem so we set about in our mission to create a solution that we think addresses most issues with any double din installation. In that particular installation we used a Kenwood DD deck which had "reverse" tilt" function. Most manufacturers offer tilt these days HOWEVER they till in the wrong direction for the NSX. Majority do positive tilt and the NSX requires REVERSE TILT, sadly not many companies offer this anymore so this is why we built the angled DD panel.
Some of the things we have learned after doing over 40 installs now are listed below:
Some of the biggest issues are:
1) You pay a stereo shop “X” amount of labor hours (typically $70-100 per) to modify your OEM dash panel plus costs to get it color matched
2) You LOSE your OEM dash panel and won’t be able to go back to stock (new replacements retail for $800+)
3) Car will be in the shop for at least 3-4 days for the work to be completed thus down time
4) Glare problem will be there from the LCD screen
5) Ashtray gets in the way or doesn’t work properly - many of you don’t even use the ashtray
6) It’s very hard to get an exact paint color code match since different model year NSX has different color finishes
7) Still NO carbon fiber finish all said and done!
Typical NSX owner’s wish list based on our experience modifying past NSX owner’s dash panels:
a) Reduce glare by angling the DD unit at an angle more upright from the dash panel
b) Create a pre-made OEM dash panel replacement that allows owners to have a replacement without sacrificing their OEM dash panel
c) Offer both a FRP (paintable) or CF finish dash panel based on customer needs
d) Minimize “down” time and create a product that ANY NSX owner can utilize instead of only being able to offer the service to local customers*
e) Relocate unsightly ashtray plug to somewhere more discrete (fingers hit the wires protruding out of cigarette lighter which gets in way of shifting)
As mentioned earlier in the thread, each double DIN panel back then had to be fabricated by hand. The good part is we can build each one suited to fit the exact radio the customer wanted so it guarantees a perfect fit. Bad news is there is considerable cost, time, labor invested not to mention down time to do this and naturally we can only do this for local customers. We have done a handful of custom dash panels with the customer shipping us their purchased radio and stock panel. We would do the custom build on one of our donor NSX cars here and then ship it all back to them. But the final installation and wiring still had to be done by customer on their end.
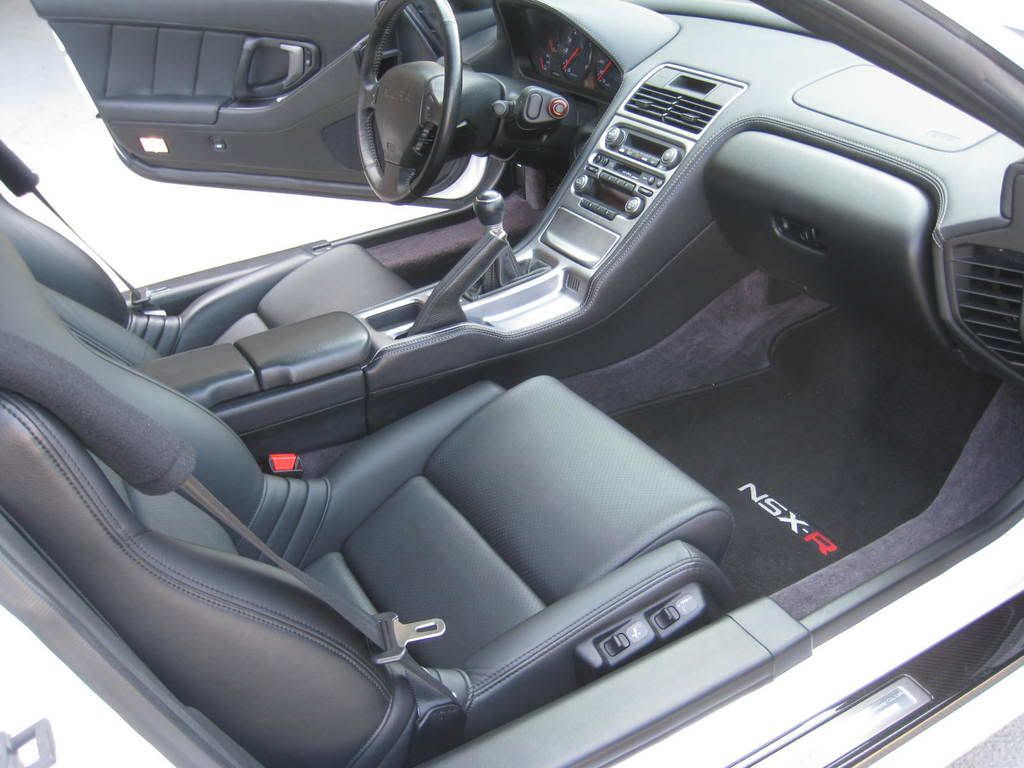
So with all this said, let's take a look at the stock NSX dash panel and dash opening:
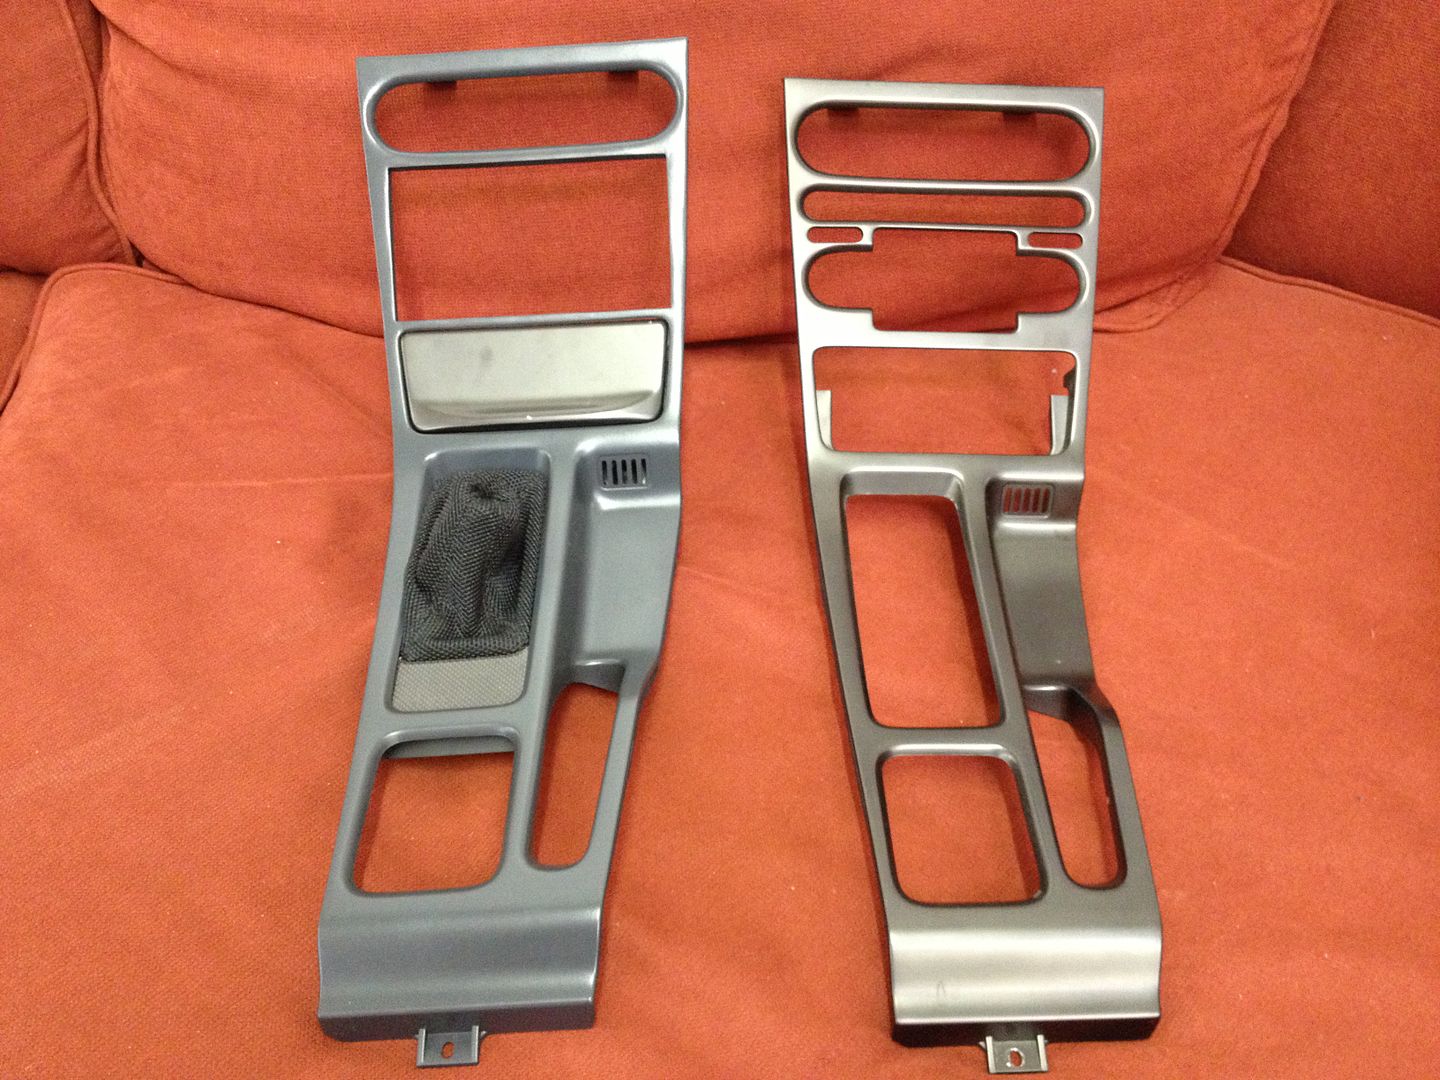
here's a stock dash panel on right compared to your typical DD cut dash panel. You have very little material on the bottom left /right edges of the panel and it's prone to snapping in two pieces:
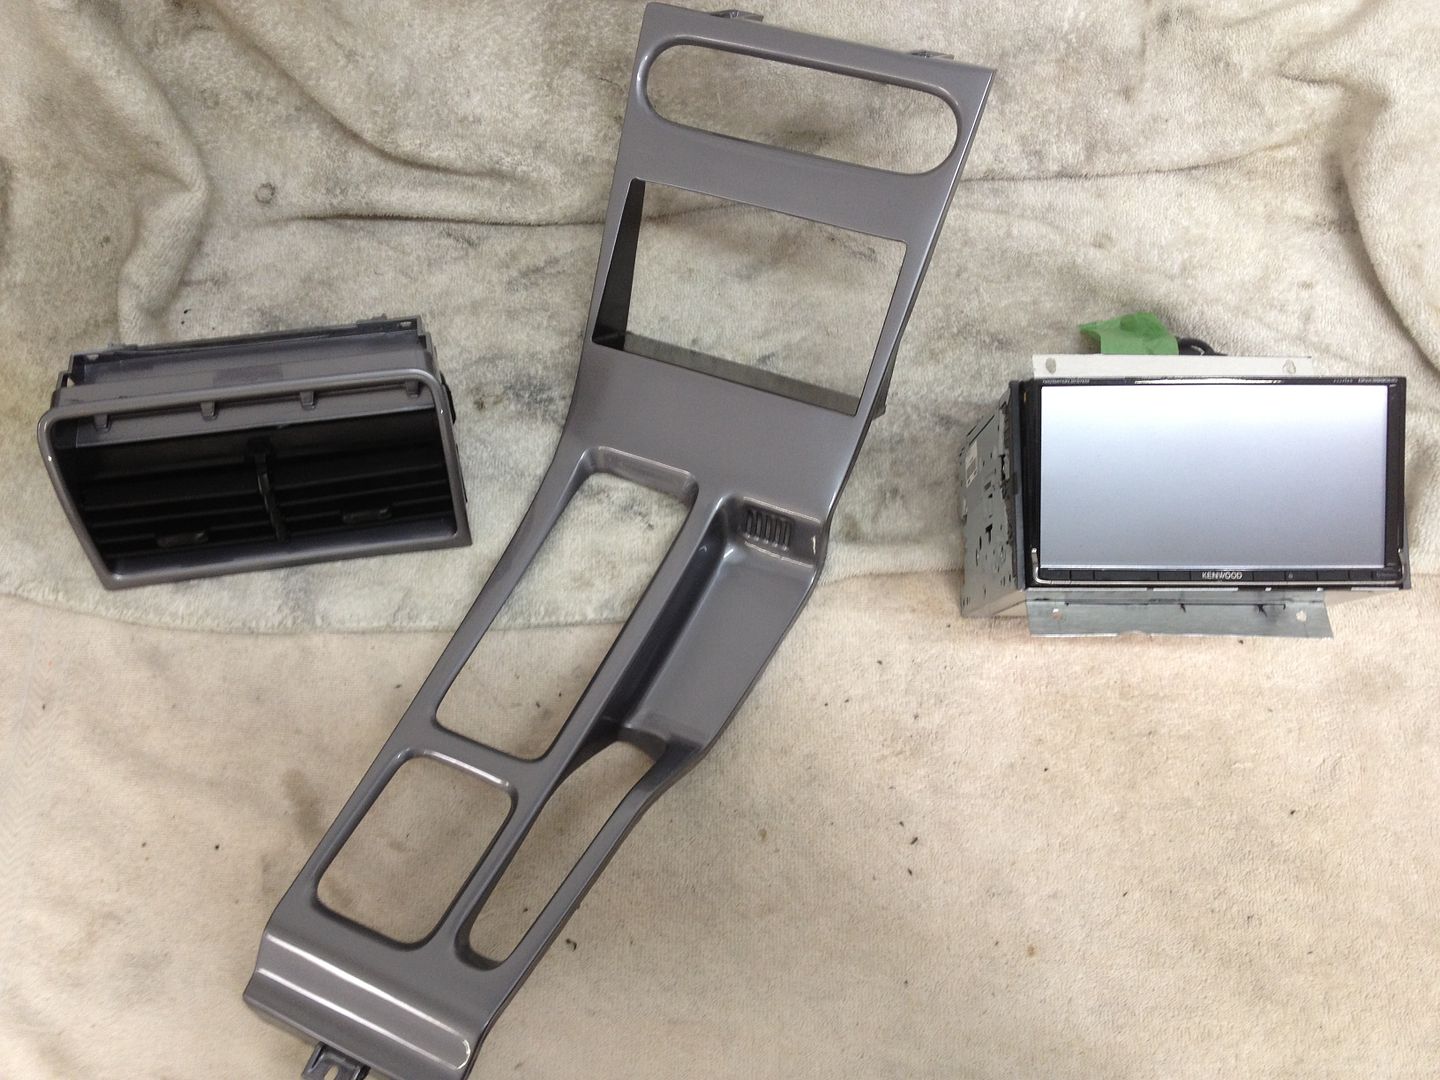
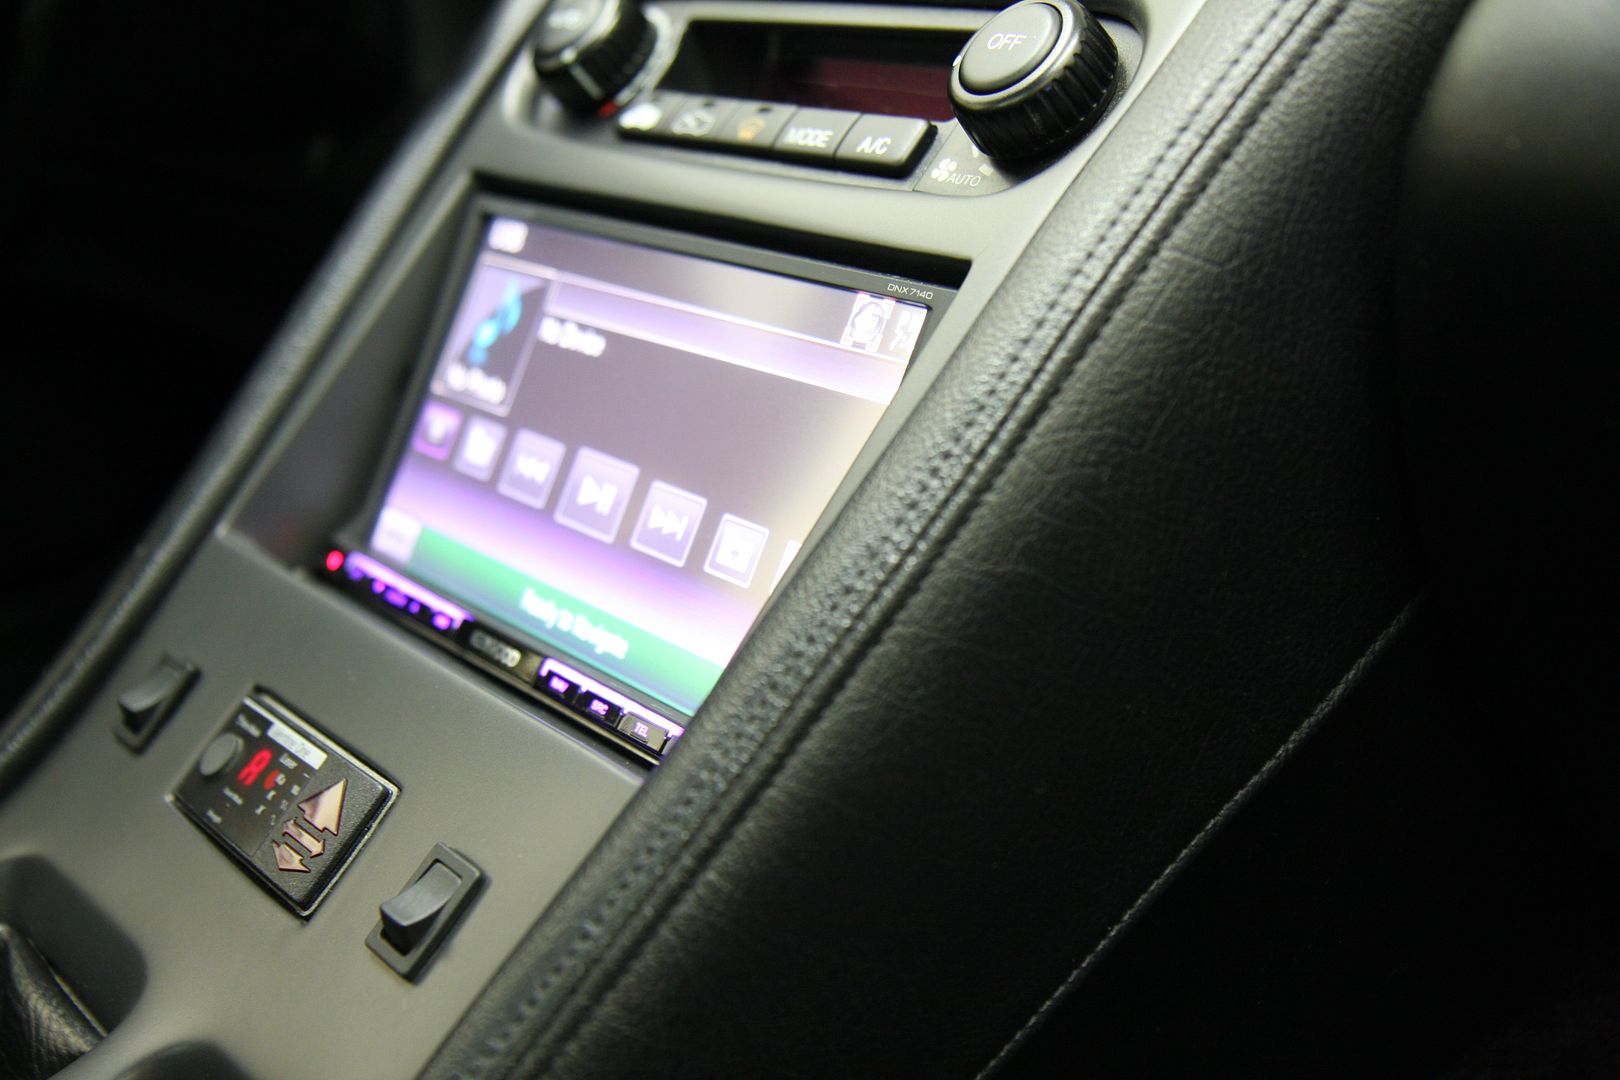
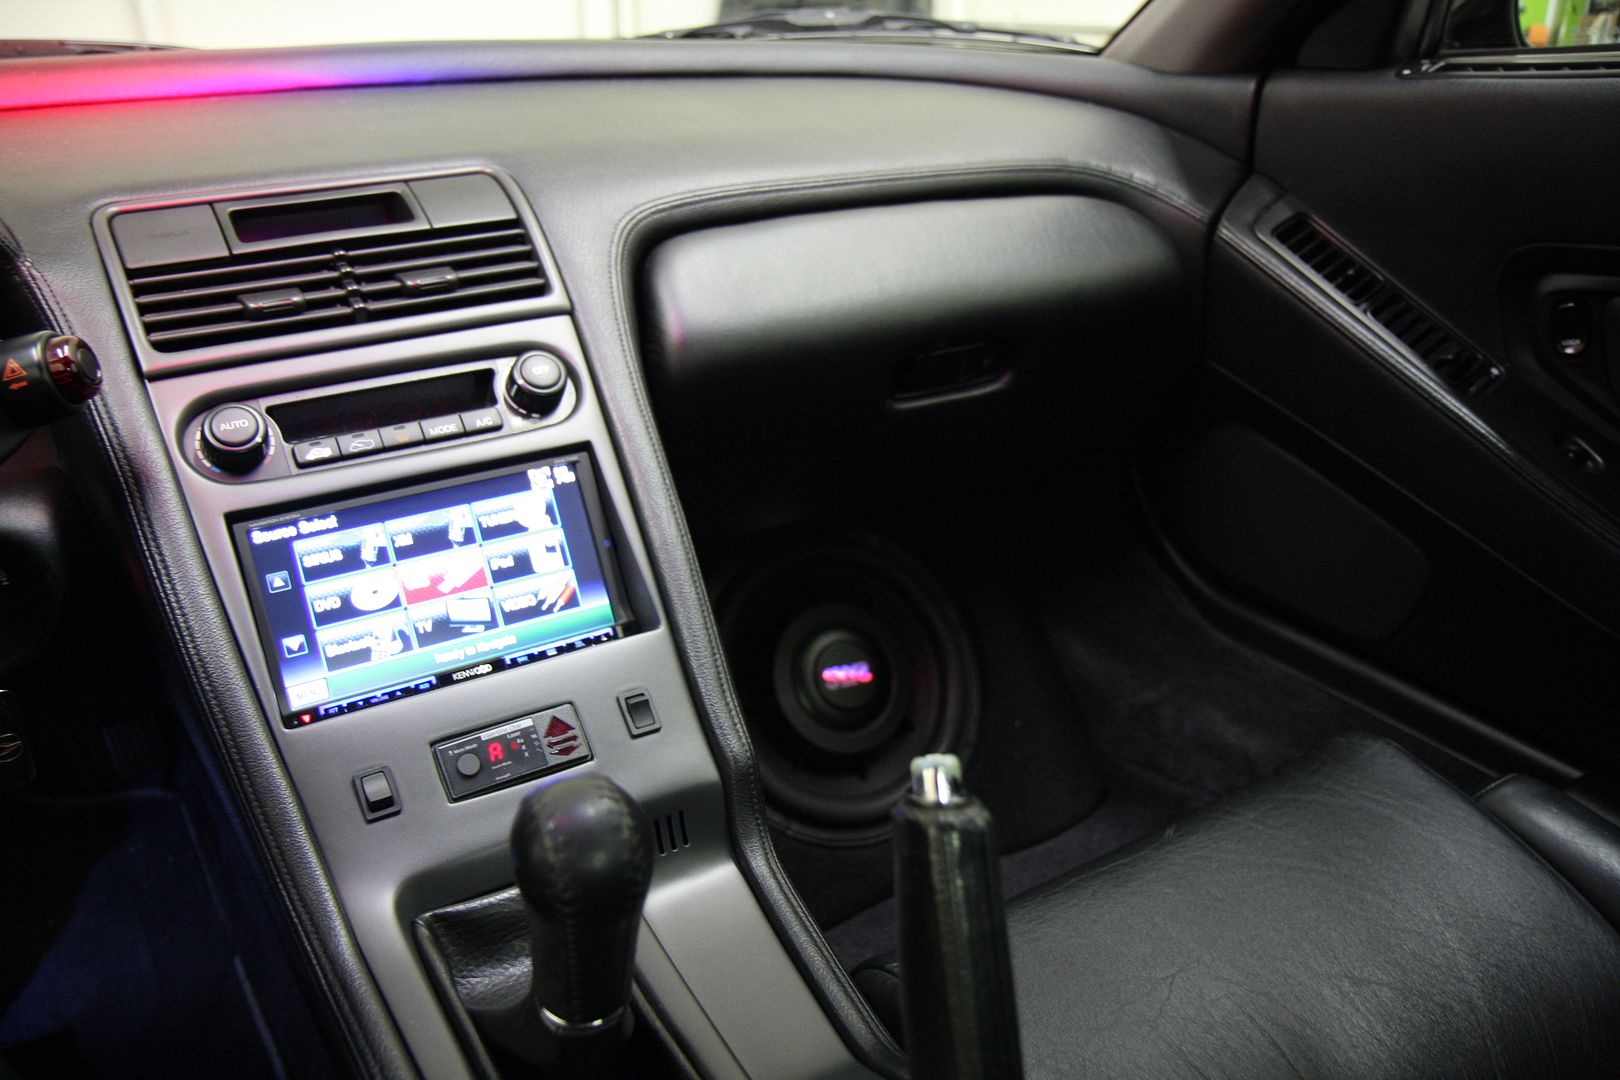
Our EuroBoutique reduced angle dash panel with ashtray "Delete" offers glare reduction and a cleaner look:
Radio mounted with custom brackets:
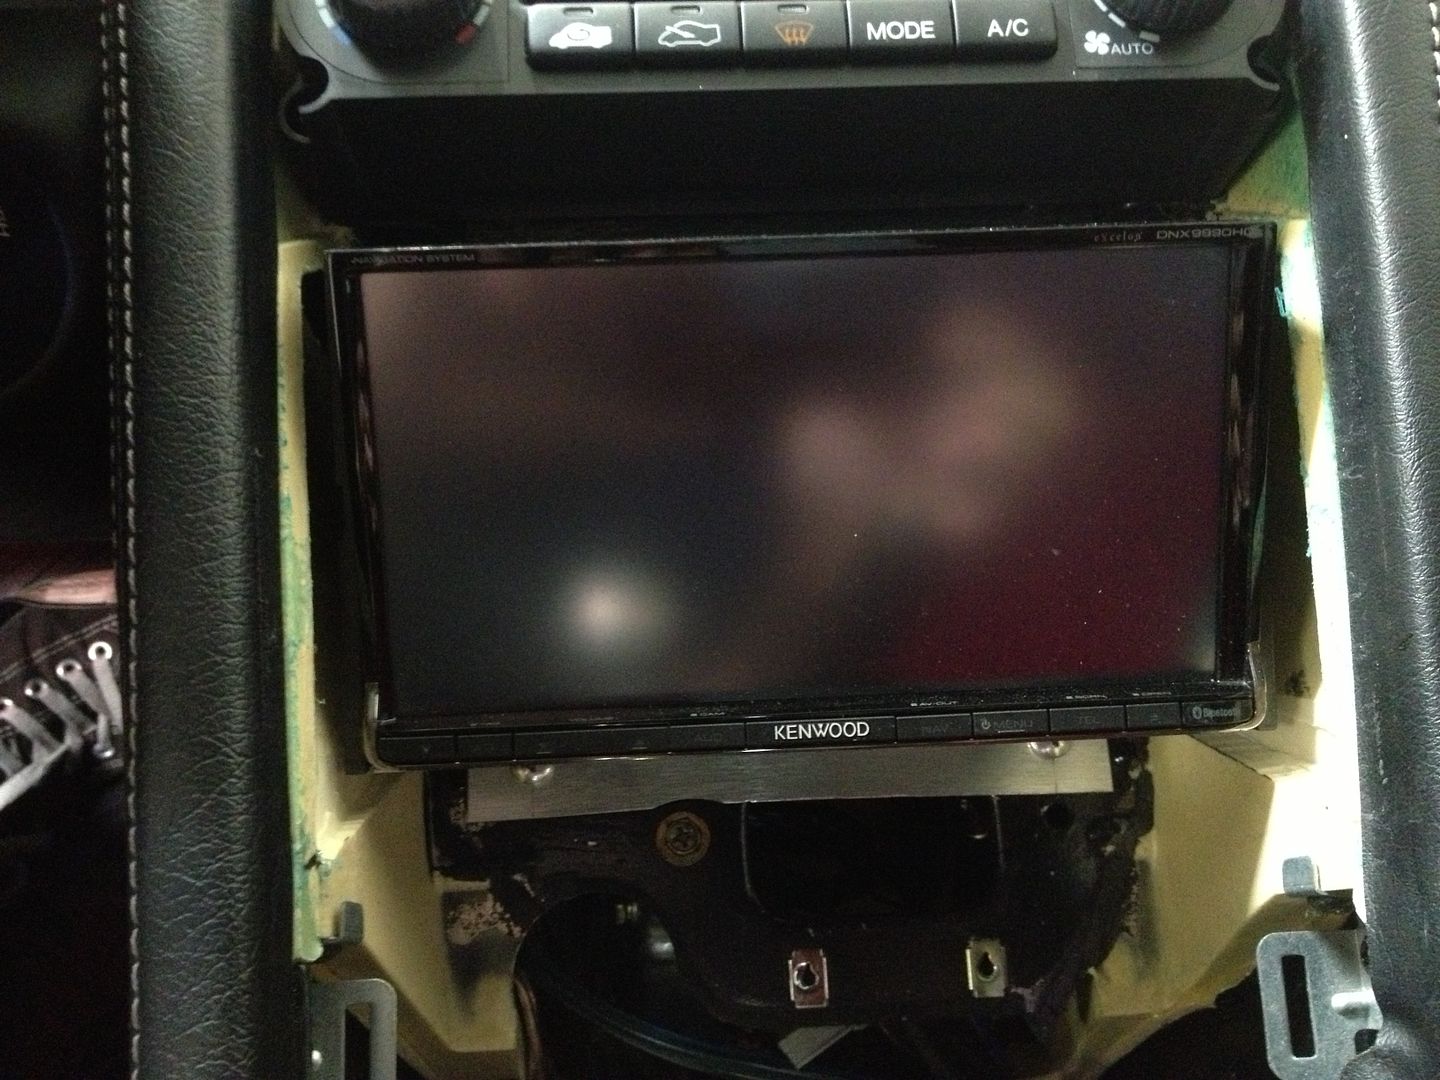
This Kenwood Radio has reverse tilt so combined with our reduced glare panel the radio is actually viewable in sunlight!
When no power is applied the radio goes back to original position:
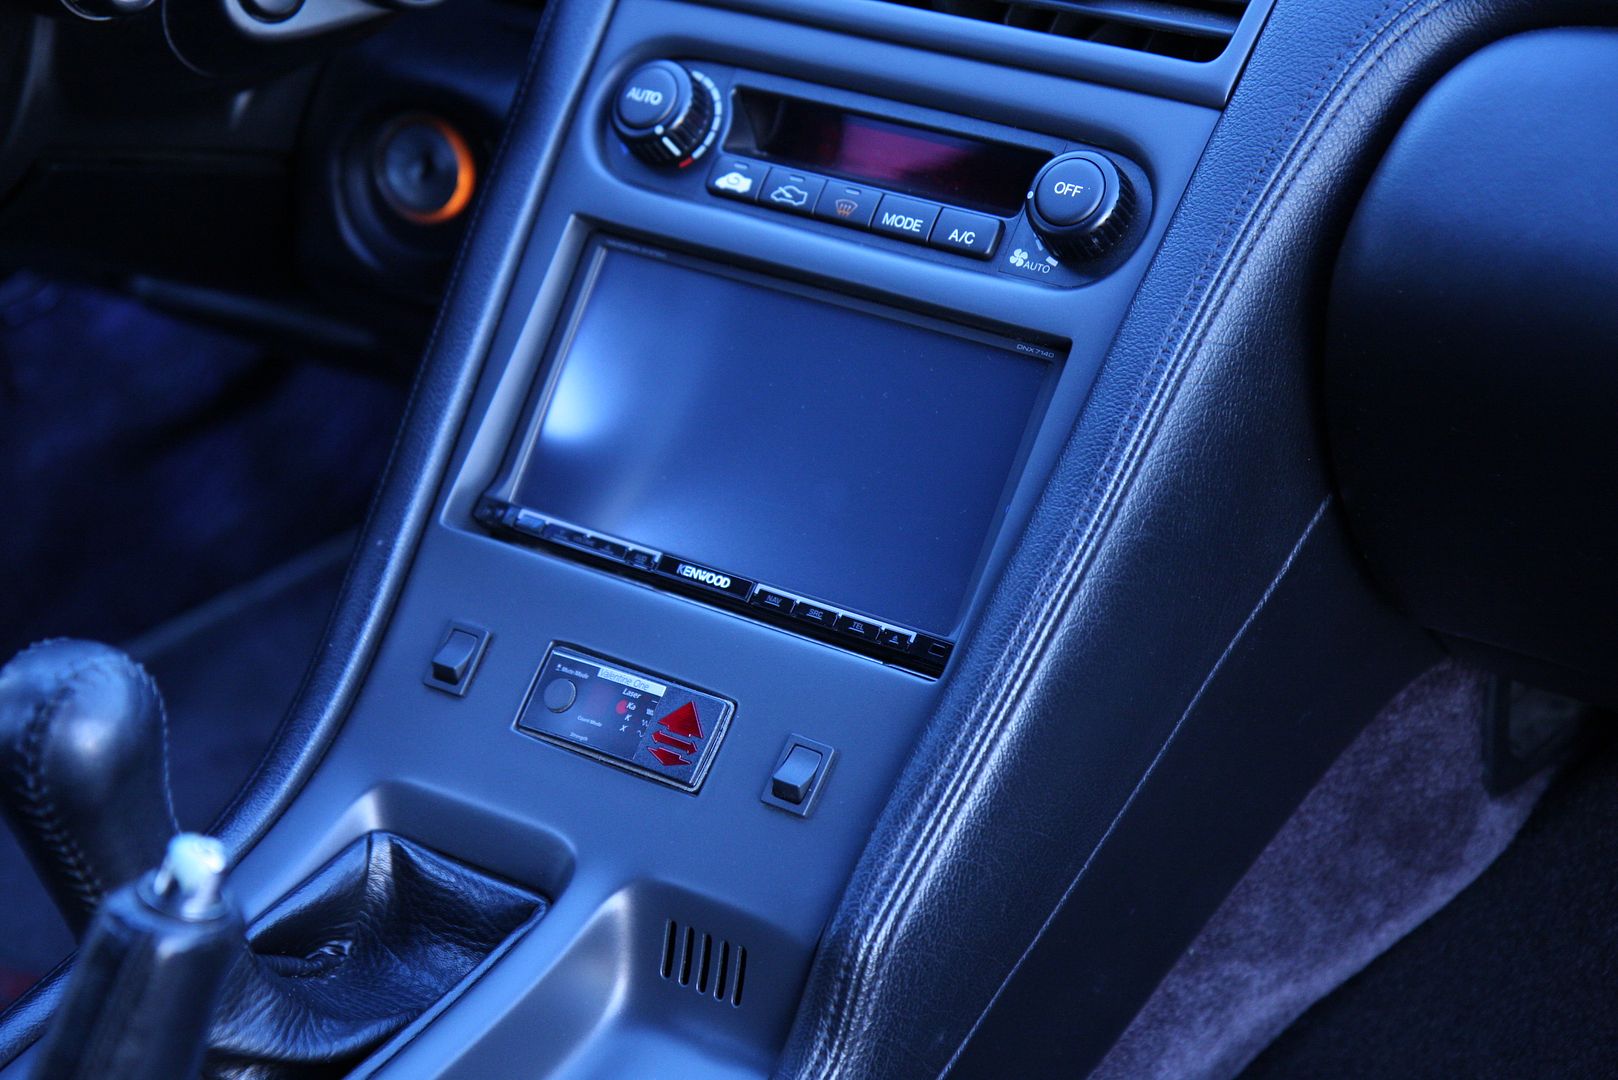
We also mounted custom switches and a V1 display in this panel per customer request:
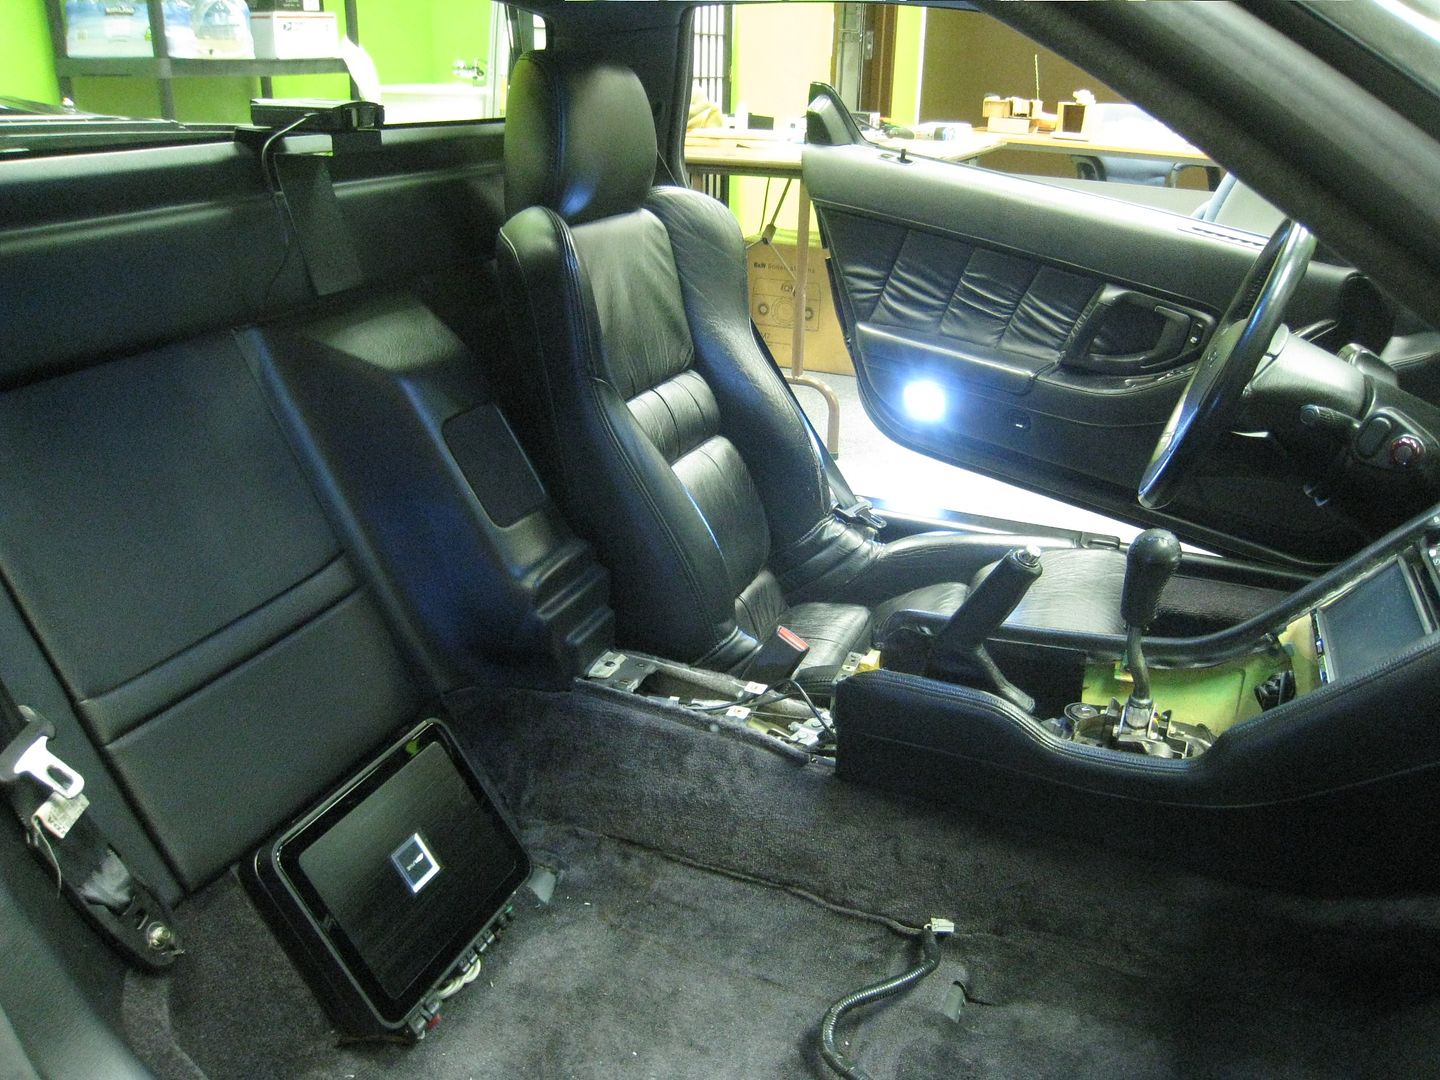
Cabin showing amp installation prior to re-assembly:
Stay tuned as we get more photos of the install!
www.euroboutique.us
Follow us on Instagram [MENTION=8868]EuroBoutique[/MENTION]
We did our very first NSX double din install about 5 years ago on a 1991 NSX. Customer came to us with a bone stock interior 1991 NSX and wanted to install a "better" stereo. One thing lead to another and pretty soon we were fabricating a custom dash panel from his stock one. Of course the stock panel became the donor piece thus there is no way to ever go back to stock. Roughly 20 hours later we had this beautiful panel crafted to both reduce glare and at the same time consolidate his electronics into one neat piece.
The biggest problem with the NSX center dash piece is due to the angle - any DD dash or LCD screen for that matter mounted flush to the dash will create massive glare. Everyone is aware of this problem so we set about in our mission to create a solution that we think addresses most issues with any double din installation. In that particular installation we used a Kenwood DD deck which had "reverse" tilt" function. Most manufacturers offer tilt these days HOWEVER they till in the wrong direction for the NSX. Majority do positive tilt and the NSX requires REVERSE TILT, sadly not many companies offer this anymore so this is why we built the angled DD panel.
Some of the things we have learned after doing over 40 installs now are listed below:
Some of the biggest issues are:
1) You pay a stereo shop “X” amount of labor hours (typically $70-100 per) to modify your OEM dash panel plus costs to get it color matched
2) You LOSE your OEM dash panel and won’t be able to go back to stock (new replacements retail for $800+)
3) Car will be in the shop for at least 3-4 days for the work to be completed thus down time
4) Glare problem will be there from the LCD screen
5) Ashtray gets in the way or doesn’t work properly - many of you don’t even use the ashtray
6) It’s very hard to get an exact paint color code match since different model year NSX has different color finishes
7) Still NO carbon fiber finish all said and done!
Typical NSX owner’s wish list based on our experience modifying past NSX owner’s dash panels:
a) Reduce glare by angling the DD unit at an angle more upright from the dash panel
b) Create a pre-made OEM dash panel replacement that allows owners to have a replacement without sacrificing their OEM dash panel
c) Offer both a FRP (paintable) or CF finish dash panel based on customer needs
d) Minimize “down” time and create a product that ANY NSX owner can utilize instead of only being able to offer the service to local customers*
e) Relocate unsightly ashtray plug to somewhere more discrete (fingers hit the wires protruding out of cigarette lighter which gets in way of shifting)
As mentioned earlier in the thread, each double DIN panel back then had to be fabricated by hand. The good part is we can build each one suited to fit the exact radio the customer wanted so it guarantees a perfect fit. Bad news is there is considerable cost, time, labor invested not to mention down time to do this and naturally we can only do this for local customers. We have done a handful of custom dash panels with the customer shipping us their purchased radio and stock panel. We would do the custom build on one of our donor NSX cars here and then ship it all back to them. But the final installation and wiring still had to be done by customer on their end.
So with all this said, let's take a look at the stock NSX dash panel and dash opening:

here's a stock dash panel on right compared to your typical DD cut dash panel. You have very little material on the bottom left /right edges of the panel and it's prone to snapping in two pieces:

Our EuroBoutique reduced angle dash panel with ashtray "Delete" offers glare reduction and a cleaner look:

Radio mounted with custom brackets:

This Kenwood Radio has reverse tilt so combined with our reduced glare panel the radio is actually viewable in sunlight!

When no power is applied the radio goes back to original position:

We also mounted custom switches and a V1 display in this panel per customer request:

Cabin showing amp installation prior to re-assembly:

Stay tuned as we get more photos of the install!
www.euroboutique.us
Follow us on Instagram [MENTION=8868]EuroBoutique[/MENTION]
Last edited:


")


