Hi Everyone!
I am going to show you how to convert the targa dome into a Very Bright and high quality LED dome light with no permanent modification to the dome required. It's an easy install and should take about 1 hour to do. The light will have camparable output to some the kits being sold but at a fraction of the cost. It uses a high quality, low power 350mA LED driver which is the most important part in a LED circuit.
Keep in mind that i am doing the DIY with used parts and it was disassembled after taking pictures. I've used the same parts in my dome for about 7 years.
The prices for LED components have gotten very cheap so the modification is really not expensive at all.
Here is what you will need.
1- LUXdrive 3023-D-N-350. This is the LED Driver and superbriteleds has it for $13.99
1- 30mm festoon base This is optional but will make install easier. 95 cents at superbriteleds
2- 9-LED mini light panel. These are the LED's. ledwholesalers.com has these for $3.99ea.
Velcro
soldering iron
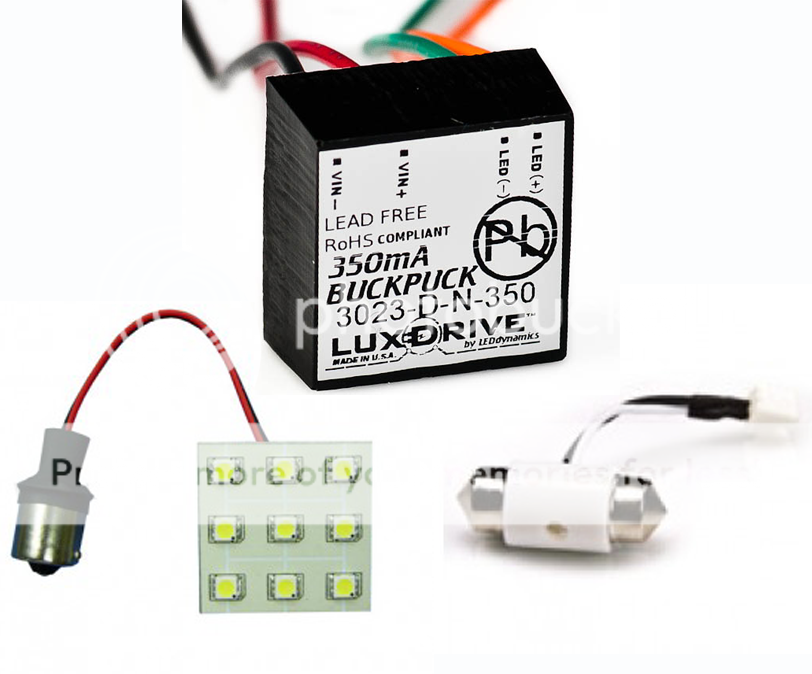
The LED Driver- LUXdrive 3023-D-N-350
This is a very high quality driver and i have used about 25 over the years with no issues. It's a constant current driver and they come in different configurations. The one i'm listing is the non-dimming with wires attached which is the simplest to install.
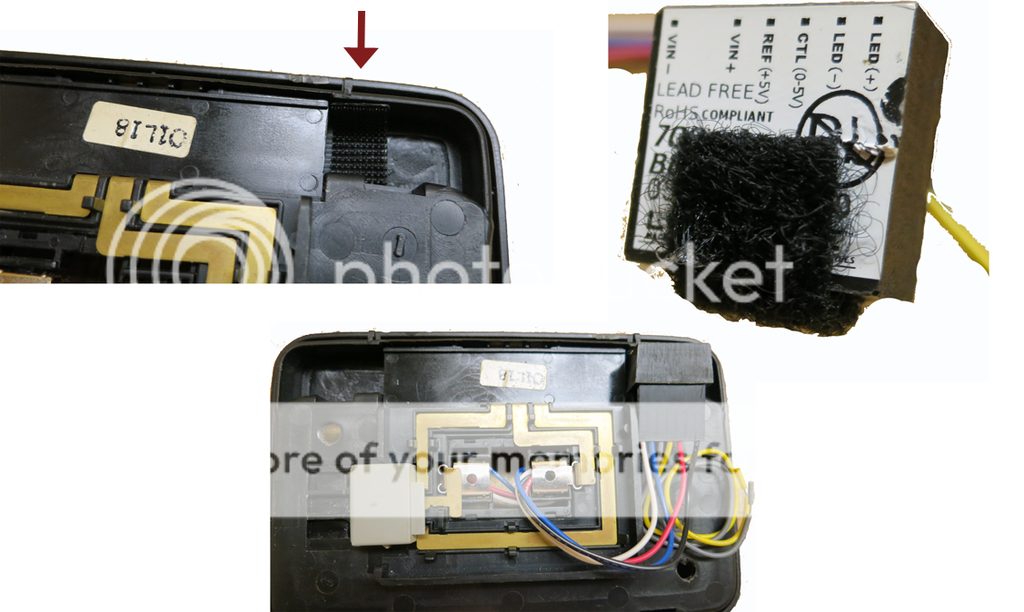
1. Apply velco strip to driver as shown below.
2. Apply velco strip inside indention on back of light. Looking at back of light. with switch at top it will be the right one.
3. Push driver into indention and run wires through center to front. Your driver will look different, attached wires and only 4
The LED's
These are 1156 9-smd 5050pcb lights. The drivers are junk but the boards are really nice. They also come with driver inline and 194 socket which will work fine. We will just cut off the old driver and trash them. I have used about 60 of these for years with no issues. They are getting harder to find.
You can use other boards for this but they have driver separate from the board and the board needs to be 1.50x1.50. If the drivers on on the back of board they won't work. Also keep in mind power consumption.
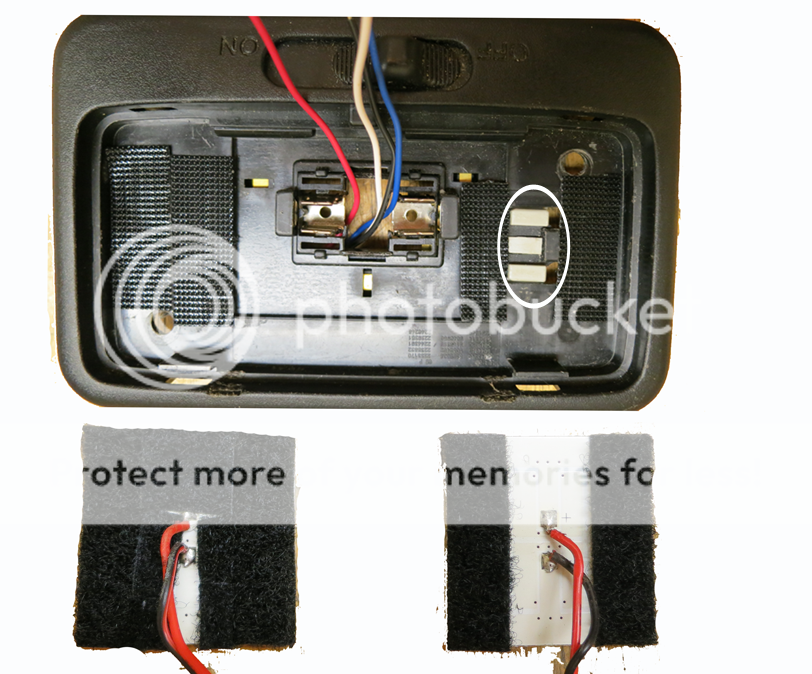
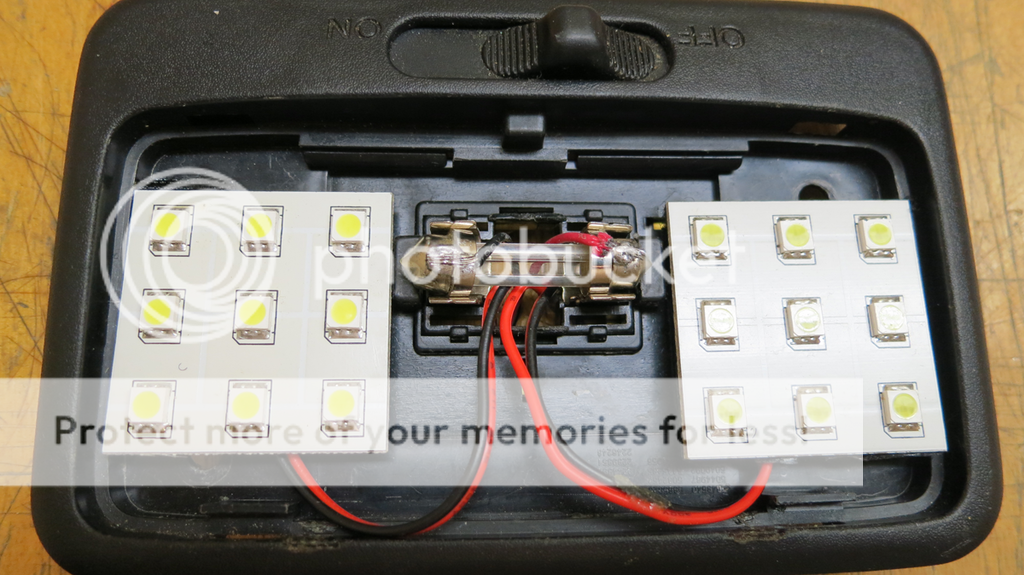
4. Apply velcro to inside of fixture as shown. On the right side make sure you go around the raised area marked in white.
5. Apply velcro to LED boards. Leave a open area on both for wires to go straight down and on right one match where you put on fixture (open center)
6. After cutting off the old driver (inside socket). Solder the red from both boards to the white from the driver and the black from both boards to the blue from the driver. Leave enough wire, it can be stored in back.
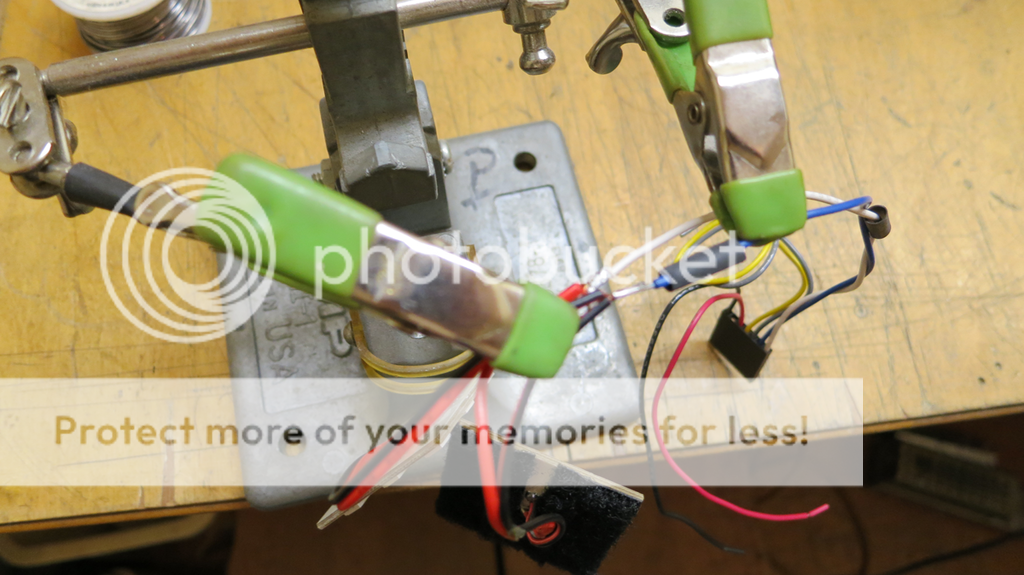
7. The red and black from driver. This is where you cut the plug off the 30mm festoon base and solder black and red to it. This can be done different ways, below i took the ends off a old bulb and soldered the wire to them. Used a piece of plastic between to hold them together. A blown bulb works great but do not use a working bulb.
8. Snap in your festoon base and dress wires in back. Red to right with switch at top.
9. Let boards hang while reinstalling the light in car. After tightening the screws attach the boards to fixture.
10. DONE!
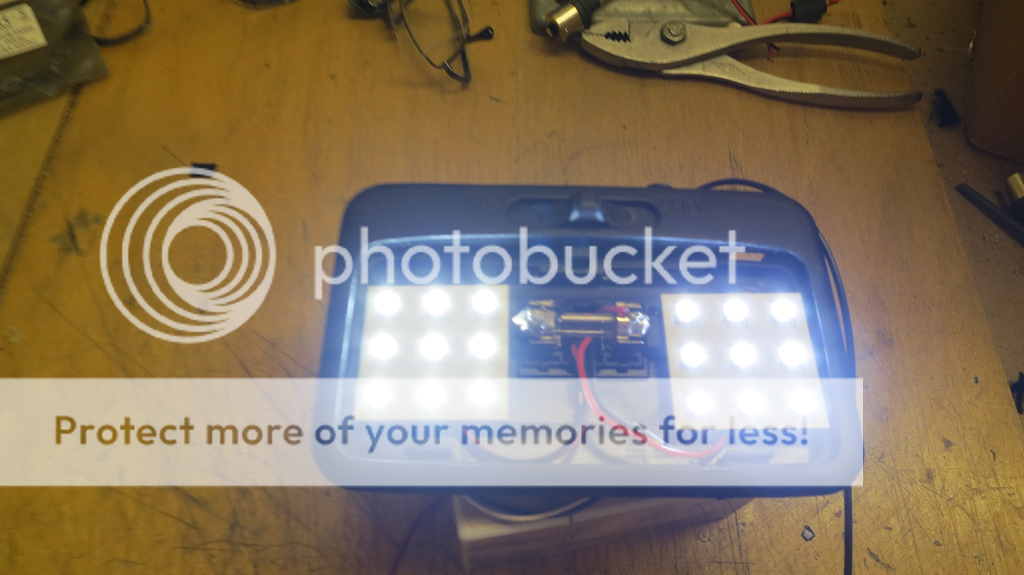
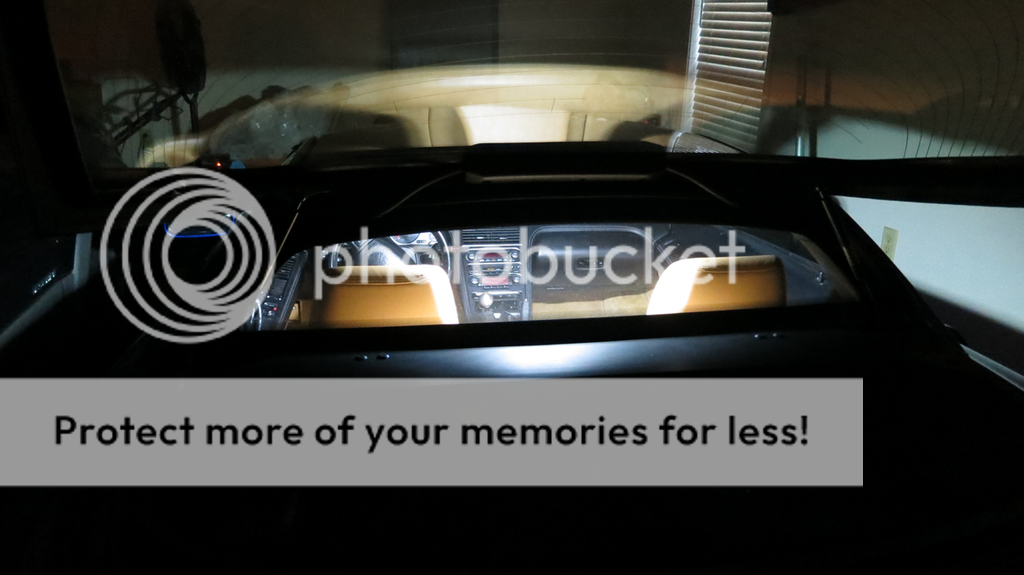
Hope you have fun doing it and enjoy the brightness of night!
Mike
I am going to show you how to convert the targa dome into a Very Bright and high quality LED dome light with no permanent modification to the dome required. It's an easy install and should take about 1 hour to do. The light will have camparable output to some the kits being sold but at a fraction of the cost. It uses a high quality, low power 350mA LED driver which is the most important part in a LED circuit.
Keep in mind that i am doing the DIY with used parts and it was disassembled after taking pictures. I've used the same parts in my dome for about 7 years.
The prices for LED components have gotten very cheap so the modification is really not expensive at all.
Here is what you will need.
1- LUXdrive 3023-D-N-350. This is the LED Driver and superbriteleds has it for $13.99
1- 30mm festoon base This is optional but will make install easier. 95 cents at superbriteleds
2- 9-LED mini light panel. These are the LED's. ledwholesalers.com has these for $3.99ea.
Velcro
soldering iron

The LED Driver- LUXdrive 3023-D-N-350
This is a very high quality driver and i have used about 25 over the years with no issues. It's a constant current driver and they come in different configurations. The one i'm listing is the non-dimming with wires attached which is the simplest to install.
1. Apply velco strip to driver as shown below.
2. Apply velco strip inside indention on back of light. Looking at back of light. with switch at top it will be the right one.
3. Push driver into indention and run wires through center to front. Your driver will look different, attached wires and only 4

The LED's
These are 1156 9-smd 5050pcb lights. The drivers are junk but the boards are really nice. They also come with driver inline and 194 socket which will work fine. We will just cut off the old driver and trash them. I have used about 60 of these for years with no issues. They are getting harder to find.
You can use other boards for this but they have driver separate from the board and the board needs to be 1.50x1.50. If the drivers on on the back of board they won't work. Also keep in mind power consumption.
4. Apply velcro to inside of fixture as shown. On the right side make sure you go around the raised area marked in white.
5. Apply velcro to LED boards. Leave a open area on both for wires to go straight down and on right one match where you put on fixture (open center)

6. After cutting off the old driver (inside socket). Solder the red from both boards to the white from the driver and the black from both boards to the blue from the driver. Leave enough wire, it can be stored in back.

7. The red and black from driver. This is where you cut the plug off the 30mm festoon base and solder black and red to it. This can be done different ways, below i took the ends off a old bulb and soldered the wire to them. Used a piece of plastic between to hold them together. A blown bulb works great but do not use a working bulb.
8. Snap in your festoon base and dress wires in back. Red to right with switch at top.
9. Let boards hang while reinstalling the light in car. After tightening the screws attach the boards to fixture.
10. DONE!


Hope you have fun doing it and enjoy the brightness of night!
Mike