I know others have done this before but I didn't find a DIY so here goes. I wanted to upgrade the rear view mirror with a more modern one with auto dim feature and Homelink. This is for a 99 NSX-T. My stock mirror was in bad condition.
There are plenty of Gentex Mirrors with Homelink on eBay for ~ $50. Just be sure to find one with a wiring harness. Unfortunately it seems the stock mount is unique and there's no adapter available. So I needed to buy a new button mount as well:
https://www.ebay.com/itm/Mito-Auto-...e=STRK:MEBIDX:IT&_trksid=p2057872.m2749.l2649
First remove your stock mirror. Using a philips screw driver, loosen the screw and slide it down and off.
http://www.nsxprime.com/wiki/TSB_92-039
Now you have to remove the stock mount. I followed this video to remove the stock mount:
https://www.youtube.com/watch?v=RivVLkOJbnw&t=512s
I was really worried about cracking the glass or burning the interior. I used a bunch of beach towels to cover everything. I used a small butane torch like in the video. I heated up the mount for about a minute or less and poked at it with a flat head screw driver. It just fell right off. It caught me off guard. I was expecting it to come off slowly and not so soon. Good thing I had the towels there to catch it.
Torch I bought:
https://www.ebay.com/itm/Eagle-Jet-...0.l1311.R4.TR12.TRC2.A0.H0.Xbutane+.TRS0.TSS0
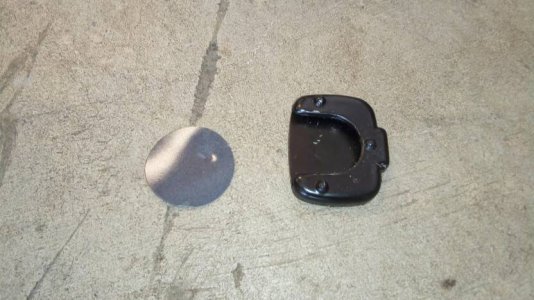
Here's the mount removed. There was small round glue patch that came out.

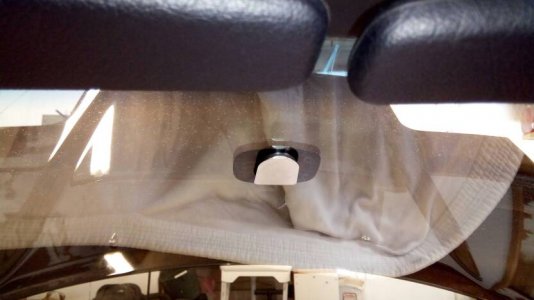
Here's the new button mount installed. Following the package instructions, I cleaned it with the provided wipe then waited for it to dry. Then making sure I had the correct position on the button (test fit on the mirror to be sure!) I put 1 drop of the provided glue and then quickly put the button in position and held it there for 1 minute. The instructions say you can mount the mirror in 15 minutes but I waited an hour or so just to be safe. In the mean time I started taking panels apart.

For the wiring I connected to the driver's side fuse box. There are 4 ports there above the fuse box available for a quick connection. I used the 2nd one from the left which is switched power (2nd turn of key). For ground I just used a screw on the side of the fuse box. If you have a test light it would be helpful.
To run the wires, remove the sunvisors so you can pull the top headliner down a bit to hide the wires. For the A pillar, start from the top and pull. It just comes off. It's held on by some clips. Pretty simple really. Then run the wire down the pillar. Remove the two screws holding the bottom kick panel and disconnect the footwell light and chime. Remove the kick panel and fish the wire down to make your connection. You need a female type connector for the power wire and washer type connector for the ground.
This thread was helpful:
http://www.nsxprime.com/forum/showt...tector-Hardwire-Installation-into-Acura-NSX-T
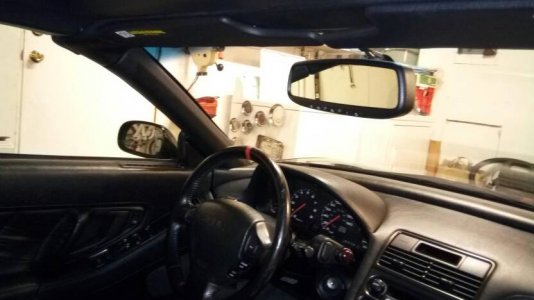
Here's the mirror installed from the inside

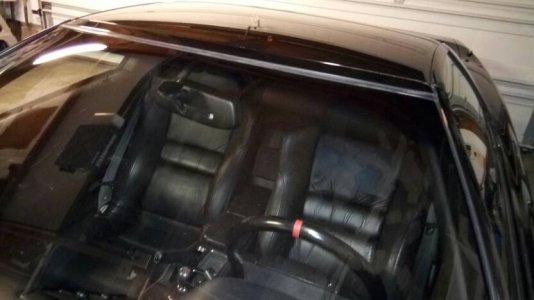
And from outside

There are plenty of Gentex Mirrors with Homelink on eBay for ~ $50. Just be sure to find one with a wiring harness. Unfortunately it seems the stock mount is unique and there's no adapter available. So I needed to buy a new button mount as well:
https://www.ebay.com/itm/Mito-Auto-...e=STRK:MEBIDX:IT&_trksid=p2057872.m2749.l2649
First remove your stock mirror. Using a philips screw driver, loosen the screw and slide it down and off.
http://www.nsxprime.com/wiki/TSB_92-039
Now you have to remove the stock mount. I followed this video to remove the stock mount:
https://www.youtube.com/watch?v=RivVLkOJbnw&t=512s
I was really worried about cracking the glass or burning the interior. I used a bunch of beach towels to cover everything. I used a small butane torch like in the video. I heated up the mount for about a minute or less and poked at it with a flat head screw driver. It just fell right off. It caught me off guard. I was expecting it to come off slowly and not so soon. Good thing I had the towels there to catch it.
Torch I bought:
https://www.ebay.com/itm/Eagle-Jet-...0.l1311.R4.TR12.TRC2.A0.H0.Xbutane+.TRS0.TSS0
Here's the mount removed. There was small round glue patch that came out.

Here's the new button mount installed. Following the package instructions, I cleaned it with the provided wipe then waited for it to dry. Then making sure I had the correct position on the button (test fit on the mirror to be sure!) I put 1 drop of the provided glue and then quickly put the button in position and held it there for 1 minute. The instructions say you can mount the mirror in 15 minutes but I waited an hour or so just to be safe. In the mean time I started taking panels apart.

For the wiring I connected to the driver's side fuse box. There are 4 ports there above the fuse box available for a quick connection. I used the 2nd one from the left which is switched power (2nd turn of key). For ground I just used a screw on the side of the fuse box. If you have a test light it would be helpful.
To run the wires, remove the sunvisors so you can pull the top headliner down a bit to hide the wires. For the A pillar, start from the top and pull. It just comes off. It's held on by some clips. Pretty simple really. Then run the wire down the pillar. Remove the two screws holding the bottom kick panel and disconnect the footwell light and chime. Remove the kick panel and fish the wire down to make your connection. You need a female type connector for the power wire and washer type connector for the ground.
This thread was helpful:
http://www.nsxprime.com/forum/showt...tector-Hardwire-Installation-into-Acura-NSX-T
Here's the mirror installed from the inside

And from outside

Last edited:


