• Protip: Profile posts are public! Use Conversations to message other members privately. Everyone can see the content of a profile post.

Big McLargeHuge’s 1990 JDM NSX Adventure Thread

Week-off Updates pt.1

Really busy week recently working on a bunch of misc. projects.

I rebuilt the front calipers again with a mix of Centric square seals and Honda kits, and it's a lot easier to do when you put the pistons in the correct direction...that was an embarrassing mistake but they're fixed now and no harm done besides some lost brake fluid. Works perfectly again.

Then, I installed the Fortune Auto brake hose brackets that weren't originally included and raised the front coils by another ~1/4" to get a bit more clearance.
JPZz3bD.jpg


Next I finally removed the front bumper to do a couple things underneath. Highly recommend watching N-Wing's videos here if this is something you plan on doing. (http://www.nsxprime.com/forum/showthread.php/207458-NSX-Bumper-Removal-Instructions-(1991-2001)).
rx3HIPB.jpg


Worst part of this for me was removing the turn signal lenses. Otherwise it's not too hard, the really hard part is putting it back on correctly.
7v8CMmH.jpg


Initially I removed just the bumper assy, but then went on removing the bumper bar and washer fluid tank underneath as well.
uRkjUrd.jpg


Looks a bit sad :(. This was the point I was worried about getting to in case I found a horror show underneath from prior damage. Fortunately I really didn't see any signs of damage up here, it had certainly been removed before somewhat carelessly but that's it. One of the bumper foam spring clips was missing and one tab on the bumper was broken, and some clips/screws were mismatched, but not bad for 31 years.
gu1q7T4.jpg


I had waited a few weeks for the SoS front NSX-R chassis bar kit to come back in stock and it finally arrived just in time to install. Pretty simple kit but well thought out with instructions and a nice powder-coated finish.
BCgtB4O.jpg


This is where the front upper bar goes. Normally you can do this without removing the front bumper and finagling the radiator shroud out, but I had a couple other things to do under here anyways.
X4xDbY2.jpg


Somewhat of a moment of truth, the chassis bar fits perfectly which I was very relieved about. I did have to straighten out the tiedown hooks a bit after curbing them and then media blasted them and coated with rust converter. I also gave the front A/C lines and radiator support a bit of cleanup to fix the flaking paint and debris marks. Looks real good if someone ever bothers to peer through the bumper.
MkTauTH.jpg


Also did some minor epoxy repairs on the radiator shroud to fix up a few cracks for no particular reason, but maybe it'll help lose a bit less airflow. There are two pieces that need to be cut out to fit the chassis bar as well.
zSvmVIv.jpg


I also installed some Hella supertones to replace the factory horns that were crusty and didn't sound too healthy or authoritative. Normal early Honda horns are 1P connectors and grounded through the horn bracket, the NSX uses 2P connectors so I had to get the universal horn set with spade terminals.
mj9HV1O.jpg


I don't like modifying factory wiring but the stock connectors were either broken or the terminals were corroded. I have Sumitomo WPC connectors I was planning on using for the door locks, but here I just used the standard Delphi knockoff weatherpacks that I like.
OYPF18E.jpg


All together with the refinished tiedowns and fog light brackets too.
xynHuWb.jpg


Another big job I kinda glossed over was getting a bunch of trim pieces refinished in berlina black, including the Shine GT front lip spoiler I got. The rear vent garnish and front lip were the main goals, the A & B pillar covers I had already done myself about a year ago but wanted to get a more professional finish. They did a good job and the finish looks factory, but the color is still a shade or two lighter than the roof itself since I just handed them the pieces without the car. I'll get that corrected at some point in the future, just not now.

That means it was another few hours to disassemble everything and put it all back together, including the annoying 8mm B-pillar nuts (of which I have all 4 now instead of just 2) and the upper door seals which need to be carefully squooshed back in place.
AADpXvU.jpg


I fitted the Shine GT lip with the bumper off. I got it from another Primate for pretty cheap and was planning on repairing it myself, but I just didn't have the time so I handed it off to the bodyshop to have them fix it. Turned out pretty well, and the fitment on the stock bumper is decently good.

The problem is that the curvature of the lip with the extra reinforcements is more concave than the bumper itself, so it forces the corners of the bumper together a bit. I'm a bit concerned about putting undue force on the bumper itself so I'm keeping an eye on it.

The underside already had a mix of a few different types of hardware for fixing the lip in place, but I bought some OEM bolts and cheap Amazon Honda-type spring nuts so all 13 holes are secured properly. With the thicker fiberglass lip it's a bit harder to fit the stock hardware vs. the thinner plastic OEM lip, of which I have a new one sitting around as a spare.

I added some rubber strips to the bottom of the lip to lessen the scrape damage, but so far I haven't actually damaged it yet getting up & down the shop ramp or my driveway so I think the extra 1/4" lift up front helped.
LoISTit.jpg


Continued in next post.
 
Last edited:
Week-off Updates pt.2

We last left off with the bumper being removed, so next up is putting it back on. Not much to say but N-Wing's video (http://www.nsxprime.com/forum/showthread.php/207458-NSX-Bumper-Removal-Instructions-(1991-2001)) was helpful again to get the basic process down.

The most important I found was bolting the bumper bar down with it lifted up off the two holding hooks in order to get the bumper high enough to meet flush with the front edge of the hood. Before mine looked like it was sagging down, and if you look at a lot of other NSX I believe you can tell if the bumper was previously removed and bolted down with the bar resting on the hooks. Every car is a bit different but this was true for mine. Now, the hood sits perfectly flush with the bumper which I'm very happy about, it was probably my #1 annoyance on the whole front end. I tried to adjust the headlight lids as well but need to do a bit more for the left side.

My #2 annoyance was the gaps between the front of the fenders and the sides of the bumper, which I still wasn't able to get perfect. I really did try almost all day and the best I could do was split the difference between both sides to make it look even. Better than before, not as good as I wanted but acceptable. I think the lower lip is actually bowing the sides of the bumper inwards which is hurting the fitment a bit, but nothing I can really do about that besides cutting the lip into pieces or putting the OEM back on. I'm fine with it for now, still a big improvement in my book.

46JEtiM.jpg


Moving downwards, another item on the punchlist was replacing the Pride test pipes with their high-flow catalytic converters. I miss the test pipes but swapped them out because:
Test pipe pros:
-Louder/more aggressive sound
-Power gain?..
Cons:
-Louder and drones more on the highway, "rasp" at lower RPMs is a bit less pleasant
-Friends complaining about driving behind me
-Soot staining the rear bumper
-Environment or whatever

The "2nd gear pulls under a bridge" moments are a bit less fun but this makes the car more drivable. I still need to get the exhaust tips properly aligned, the system as a whole didn't get the flange angles quite right.
EVK8iqe.jpg


Goodbye my sweet princes..
llK7YVE.jpg


Anyways I made the car a ute now in order to replace the rear hatch glass rubber trim. Taking the hatch off is at least a 2 person job, 3 people preferred for safety. I also realized someone had previously "deleted" my rear glass defrost wiring for some reason so I'll have to fix that at some point.
Kz8bqm1.jpg


Following the FSM and in the middle of cutting off the old rubber with a new razor blade. Simple but time consuming to get all the rubber off the chamfered edges.
m0ChLYO.jpg


Once every bit of old rubber was off and the glass was cleaned 5 times over, I ran a bead of 3M weatherstrip adhesive in the groove of the new rubber and slid it on to let it sit overnight.
mdfK8fr.jpg


Horrible picture of the glass installed again the next day with 2 additional helpers.
UltRGIK.jpg


The extra adhesive that blebbed out from under the rubber needed to be removed, and I gotta say I wish I had chosen a different type of adhesive. This stuff is professional grade and made for this application, but dries to a somewhat rubbery consistency that is an absolute mission to remove. I must've spent 2+ hours picking every teeny little piece off to make this chewing gum ball in the picture below, the dried adhesive seems to stick to itself the best so I used the ball of old adhesive to pick the excess off. RIP my fingertips
so2Rd2b.jpg


This is before I started removing the adhesive but shows the new hatch trim and the Davis Design Fab coil guard kit that I finally installed along with the repainted rear garnish. The combo of all these shiny black pieces versus the old faded ones goes a long way to improve the overall look of the car, as Kaz likes to say. Something Skyline owners don't seem to be concerned about judging by how bad most of the trim is on those cars.
FGk86HC.jpg


That previous night I also reassembled the rest of the interior after doing some final adjustments on the windows. Just one sentence mentioning those but that was like a 2 day process overall and pretty involved. Glad to say that the function of both windows is way better than before, they both seal well and go up fully with the doors closed which is a big improvement. Still not fast going up but I'd need to get new window rails to help with that which I'm not interested in at the moment. Perfectly happy with them now.

Otherwise, I scraped off as much of the old vapor barrier glue as possible and used 3M butyl cord instead of the stuff I tried before, which dried up and became useless. Still using my custom vapor barriers which seem to work fine. I also put in several new OEM square clips (where the screws go) into the door where there were several ones that were either missing or broken. This allowed me to securely mount the speakers without using zip-ties on the left side.
ImAJnqD.jpg


Interior back together for the first time in months, and it feels good. Still a tedious process and I had to temporarily fit the door cards to drill out my custom ABS mounting tabs, but the panels are fully secured now. There's one or two tabs on each side that need a bit more modification to fit properly but still a success. These will come off again to fix my door lock connectors that I didn't get time to look at, and to reupholster the armrests and pleated leather triangles at some point as well. I never thought I'd spend so much time inside the doors..
JQ6ja95.jpg


Last day before the car show on Saturday, all lubed up. I kept the front lenses out to polish them separately.
yCLftuL.jpg


One last water test on the driver's side which was much harder to get right. With an indirect pressure washer spray no less. I did leave the front edge of the door seal a bit further out to help get a better seal.
nrPBhq3.jpg


I spent the rest of the day detailing the interior, exterior, and engine bay. Typical stuff but it takes me a few hours. I actually need to get the seat belt webbing replaced as well, the driver's belt is fraying a bit. Added to the list.
j7mdFol.jpg


Running on very little sleep and a few hours before the show, I finally installed the Modulo replica wing that I'd been working on. I ran out of time to work on it so there's still some sanding and polishing to do in order to get the finish smooth but it's close to being done. Keeping the stock wing of course, this won't be permanent.

The fitment is overall good, all the bolts lined up but the side gaps are a bit different on either side. The other issue I ran into at the last minute was that I was planning on using Honda 2P WPC connectors for the 3rd brake light, but found the hole in the rear trunk lid was too small to fit the larger WPC connectors, it only fits the standard Sumitomo HD090 2P connectors which I didn't have extra. I had to do a dirty one and cut off the factory connector to use spade terminals on either end which works fine but makes me feel bad, so I ordered new factory connectors from Cycle Terminal to wire it correctly once I remove the wing again to perfect the finish.

Not pictured is a light polish of the rear trunk lid and rear bumper area to get rid of some paint defects and all the soot that had collected from the test pipes. I was really running out of time and didn't get to polish up as much as I wanted, still had to install the front turn signals and fog lights. I also found that the turn signal bulb connectors were gunky and making my FR DRL work intermittently so I also ordered new OEM connectors to replace those as well (Marker Light 250 Connector Item# ETN 250-2 Female and ET250-2C Female from Cycle Terminal).
71ovKWb.jpg


Finally, I made it to the show early on Saturday after a long week. The show was held at Atlanta Motorsports Park in north GA, and I got to do a cheeky lap of the track when I was leaving which was probably not allowed. On the last turn I encountered a Mitsubishi Delica van driving the wrong way on the track which I'm sure is the first time that's ever happened in human history.
S9iY5lC.jpg


I5fhdU1.jpg


855Agob.jpg


Bonus Carrera GT which I'm told was completely restored by Porsche and the odometer set back to zero.
S9rSZ0f.jpg


Color combos don't get any better than this.
eC6oQvP.jpg


(How were there no photographers taking pics for me?? :( )
WWUfnIi.jpg


You'll notice that I said I was going to do the S2K ABS conversion as well, but I ran out of time very quickly to even attempt it. Everything above was more than enough to keep me busy the whole week so I'll have to find another long weekend to finish that project. Other than that, an EPS rebuild and rear camber bushings are really the only major items I have left right now. Exterior-wise I'm also very happy with the current look but maybe I'll find some doodads to stick on here and there for fun.

My Amayama order from March finally shipped out this week after the left lower door seal came in after 2 months of waiting, but the box is stuck in US Customs because they need a "breakdown of item composition" that I sent over already. I dealt with that once before and after an email to Fedex with the item descriptions they released the package so I'm hoping that's the case here. Really not trying to spend all day looking up HTS codes for all 50 items, that's their job...

In conclusion, I'm very happy with how the car is sitting now. It's actually fairly close to what I was envisioning when I first started looking for my own NSX. Of course, there's still a ton left to do as always, but by the end of the year I think my project list will be short. One thing I still would like to do is an engine-out to swap the cams and LMAs, but the timing belt is only a year old so not high on my priority list.

Oh yeah, and I'd like to go to the Mideast NSX meetup in Raleigh NC this weekend but have other plans already, and I'd want to get the car a bit more sorted (i.e. camber) before driving that long of a distance. Next time for sure though.
 
Last edited:
ABS Conversion pt1

I had this past Memorial Day long weekend planned out to try the S2K ABS conversion, but circumstances got the better of me again. In the meantime, I prepared the KSP wiring harness for the AP1 S2000 ABS so that I wouldn't have to mess with figuring out the wiring in the middle of the dirty mechanical work.

Here's the base KSP harness, meant for the NA2 ABS system. The 4P connector bottom-left goes to an 18P connector that I removed since it's meant for the TCS system which will not function with the S2K ABS unit, so there will be no TCS anymore, not that I'll really miss it. The four empty bullet terminals were also connected to a NC mechanical SPST relay on the right which I cut off to replace.
kZ3wW95.jpg


Here's the unused TCS connector and the relay I replaced the mechanical one with. This Crydom DC60S3-B is the same style NC SPST relay but solid-state, which I've read from Kaz is meant to reduce electrical noise generated by the mechanical relay especially for those using digital gauges (i.e. my S2K gauge cluster). This one will sit inside the cabin nearby the ABS computer. I made a new 4P connector to the KSP bullet terminals with a "Delphi" weatherpack connector kit.
XpIBfpw.jpg


This wiring diagram is directly based off the one graciously provided to me by @Honcho, so all credit and thanks to him. I wanted to walk myself through the wiring process and figure out what modifications I needed to make to the KSP harness, which turned out to be very minor. The only difference between the NA2 and S2K wiring is the WALP pin (warning light) on the ABS modulator connector, which needs to be moved from pin 11 to pin 7.

This diagram and wiring colors are specific to the KSP harness I bought, it might change a bit between harnesses (they used some odd wiring colors changes here and there).
Kln6rdV.jpg


Here's the ABS connector with the cover pulled off the back. Pin #1 is at the bottom-left of the picture (BLU) and moves up. Pin 11 (WALP) is the white wire on the bottom-middle.

The pins can be removed by sliding the inner white retainer back (in the middle of the 4 brown large rubber seals) and sticking a thin & stiff pin remover tool in the front-end "T" hole. Pretty fiddly.
Nyfd0Sk.jpg


WALP wire moved from pin 11 to pin 7. Everything else is the same.
u72rrtf.jpg


The last mod is to create a useable SCS service check light connector. The harness came with a bullet terminal which I didn't have parts to match so I used a weatherpack 2P instead. At Honcho's recommendation I created a blanking plug for normal use and a shorting connector that will ground out the SCS pin and activate the check light. The bare end of the black ground cable will be cut to length and get ring terminal to a good ground point once I have the harness in the car.
GBUlFJn.jpg


Now it should be a plug-and-play install in the car which will shorten my downtime. The quality of the harness overall is very good, just one or two mismatched wire colors. The provided instructions and parts list are also helpful once you've translated them.
0Eu2yUe.jpg


That's about it until I finally do the bulk of the ABS upgrade when I get the time and energy. I'd like to perform my own tests for stopping distances & turning stability to compare the NA1 and S2K systems but the logistics might not work out.

Otherwise, I bought Joe's in-dash HVAC unit foam replacement kit to prep for the inevitable day when I have to pull the dash out to rebuild the HVAC unit or replace the evaporator or heater core. I'm saving that for when my old R-12 A/C system finally kicks the bucket and I have to convert it to R-134a, at which point I'll probably replace the evaporator as well even if it's not leaking yet. So far so good though, somehow..

There's also new Timken rear wheel hubs coming in since I'm getting a bit of intermittent humming from the rear left and there's not much else to replace. They have OEM NTN bearings which is the most important thing.
i8d0Jri.jpg


And finally I bought a set of custom cabin air filters from Desmond Wong on the FB groups since I wanted to remove the blower assy and clean the evap during the ABS job, which is also a good time to install a cabin air filter. Looks like a set of 3D printed brackets, nice filters, and new push-clips to replace broken ones from taking the windshield cowl off. Nicely done and well priced.
rCLQHKU.jpg


More to come but I'll be banished to a job site in the northern US from ~July-Oct so there probably won't be much progress during that period. Hopefully I can find the time to finish off the ABS before then.
 
Last edited:
More minor updates.

I took the car to get tinted at Glass Tiger in Lilburn, GA. Llumar IRX 50 on the side windows (not too dark) and AIR80 (clear) on the front windshield and engine hatch, so the cabin is fully enclosed now and shouldn't feel like as much of a solar oven in the sun with the IR/heat rejection. The engine bay tint should help protect all the hoses and plastics in the bay from UV damage. They did a great job and great guys to talk with as well.
sPqwvpd.jpg


Noice.
K73A42c.jpg


Then I continued the work on the Modulo replica wing to get a better finish and gloss since I installed it in a rush last time. Hours of sanding down the extra resin in multiple grits and then compounding/polishing several times over. Started with 400 grit -> 800 -> 1500 and then compound -> polish. The 400 is a bit fine but I didn't want to accidentally blow through the original resin into the fibers.
sNECdn8.jpg


The dry resin is way harder than any car's paint so it just takes a lot of effort to get the gloss back after sanding. Would be nice to have a rotary polisher for the job, but that also adds a lot of heat into the resin which might mess up the finish.
QSxlKAC.jpg


Turned out great though, I'd give it a 90%. Overall I'd spent 20+ hours trying to repair this thing so I'm just about worn out.
DMOit8G.jpg


I also did the right thing and got new OEM HD090 2P connectors for the 3rd brake light and fixed the one on the car's harness. I wish waterproof connectors could've been used but they're too bit to fit inside the trunk lid. I used a bead of butyl tape around the harness grommet hole to try and seal out water since the OEM grommet is part of the wing's wiring harness, and also filled the connector with some dielectric grease.
nV4IHx4.jpg


Quick shot detailing the car before Caffeine and Octane on June 6th. I like the stock engine bay look, I might add the NSX-R intake cover and the coolant cover too.

You can see that someone straight up just cut the rear defroster wiring off so I'll have to look at fixing that eventually, I'm missing the little black box that mounts to the hatch but hopefully it's just a few missing wires to the spade plugs on the defroster lines. Never really needed it anyways.
SZyT68B.jpg


I ended up staying for a long time at the show and met a new owner with a cool green SC'd 94 NSX and met up with Jason (JLCoolman) who owns these two GPW cars, the only ones I've seen around ATL.
SlTnNzZ.jpg


Super fun time and thanks again to @JLCoolman for the meetup, talking with other owners is always the highlight of any show.
l4QXHCC.jpg


My Amayama order actually arrived! It's been around 3 months since the order was placed, and got stuck in customs for 3 weeks as well. No duties involved (edit: I think they auto-billed me ~$50 without notification...), just a lot of waiting without any updates.

A lot of random crap I've been holding out on, including the NSX-R coolant condom, new lower door seals to replace my torn ones, taillight parts, fuel pump resistor, ABS bits, and new engine bay fuel hoses. You know I'm running out of stuff to replace when I'm just buying new parts because the old ones are kinda ugly. Once I drop the engine for cams/LMAs in the future I can clean out the bay and it'll look almost brand new.
o1aMGuy.jpg


With drew's help I bought a set of used JDM tails from Buyee/Yahoo JP auctions that should arrive soon and then I'll start working on some custom LED tails that I prototyped like 2 years ago. Still TBD on whether I'll tear apart those or my original lights. Also, EMS shipping to the US has resumed after over a year so there's another shipping option besides Fedex/DHL. Still not cheap though ;)
 
Last edited:
The modulo wing repairs look like they turned out great! I must admit I was skeptical at first but you pulled it off!

Were you able to get the rest of the adhesive off the rear glass? When I replaced my rear hatch molding in 2016 I didn't use any adhesive due to a fear of it squishing out like that, I just scraped the old stuff off and put the new molding on dry. Seems to have worked pretty well, it hasn't come off in almost 5 years.
 
Last edited:
Wow, great job on the rear wing........time reasonably well spent I think considering the results!
 
Car looks great with the wheels and that lip. That rear window garnish is so shiny! Now I’m contemplating getting my pretty faded garnish painted… as usual, great attention to detail

Also, I was hoping the EMS shipping would be cheaper, but it looks like more money than both fedex and ups. Not ideal
 
Last edited:
The modulo wing repairs look like they turned out great! I must admit I was skeptical at first but you pulled it off!

Were you able to get the rest of the adhesive off the rear glass? When I replaced my rear hatch molding in 2016 I didn't use any adhesive due to a fear of it squishing out like that, I just scraped the old stuff off and put the new molding on dry. Seems to have worked pretty well, it hasn't come off in almost 5 years.

Thank you! I had left it in a pretty poor state the first time since I didn't know how hard it would be to polish the resin, but after some practice I was able to get the gloss back. Not sure if I'd try that all over again though, it was a ton of work especially with how many cracks there were to repair.

I got 99% of the adhesive off, there's one or two spots where it stuck to the gloss part of the trim and bonded to it that I tried to scrape off but that didn't help. I was really worried that the wind would catch under it and rip it off but if yours has been fine then I guess there's no problem.

Wow, great job on the rear wing........time reasonably well spent I think considering the results!

I'll just say that I won't be making a side business out of carbon repairs based on the labor investment :biggrin:

Car looks great with the wheels and that lip. That rear window garnish is so shiny! Now I’m contemplating getting my pretty faded garnish painted… as usual, great attention to detail

Also, I was hoping the EMS shipping would be cheaper, but it looks like more money than both fedex and ups. Not ideal

Thanks again :). If you really want to be factory correct, I think the actual paint code for the rear garnish is NH-566 Gloss90 which isn't exactly the same as berlina black (NH-547), so it might naturally have a touch more satin than pure gloss.

EMS posted a notice that their prices would increase once shipping resumes (~$8/kg), but their rate schedule is a bit lower than what Amayama shows so maybe Ama's adding some fees on top of the base shipping cost.
 
C&O At the Drags

More fun weekend activities at Caffeine and Octane at Atlanta Motor Speedway. They let me park at the adult's table, out of the sun. Great event save for the very start where we waited 1.5 hours in line to get to the infield. Their first event here so hopefully that improves later.
7xBnyWK.jpg


YFTDWV5.jpg


Dragstrip area on the left. There were some pretty interesting matchups, like a Can Am and a G37.
gAWrfxy.jpg


Right area was a drift circuit. I'd love to get into that, just not with this car.
ItPV3VM.jpg


Your bonus car for today is a SL65 AMG Black Series, 1 of 175 in the US. Absolutely nuts looking in person, if you manage to find one at all.
m6sYE87.jpg


Big package from JP also came in. Buyee does a good job with the extra protective packaging but this was one expensive box to get overseas.
NnIs8Vo.jpg


One set of JDM tails in decent shape. They've been spray painted with smoke paint which I can probably remove with some sanding, and one small crack on the left lens and center garnish but good overall. Less warped than mine as well.
mlbTZW8.jpg


The backs aren't as good, one or two broken studs on the side lenses but the center is missing all 5 studs. Nothing some all-thread stock and ABS cement can't solve. All in all they should serve as a good base for an LED conversion.
kyLkuM9.jpg


Sitting so long in the sun made me get more familiar with the A/C system, which works okay but not great (the new tint helps a ton too). The passenger (left) side gets noticeably colder than the driver's side, which is odd when you consider that the blower unit has no provisions for zoned air control, everything coming in the cabin goes through the one evap vent outlet and is just distributed through the plastic ducts, no doors. I came across a FB thread where someone had the same issue and the ever-helpful Steven G. posted this ancient thread that explains the theory (http://www.nsxprime.com/forum/showt...at-the-same-time?p=48762&viewfull=1#post48762).

Basically, low refrigerant (don't say Freon, that's a brand name) means that only the passenger side (inlet) of the evaporator gets quality liquid refrigerant, and the driver's side (closer to the outlet) gets just gas or a mixture so the air closer to the driver doesn't get as much heat sucked out by the refrigerant's phase change. I confirmed that my refrigerant is low by looking at the sight glass on top of the dryer in front of the radiator, it's pretty foamy which indicates the charge is a good couple of ounces low. Not low enough to trip the pressure switch though. The FSM R-12 charge is 32-34 oz, so maybe I'm in the 20's?

I'm tempted to use Freeze12/Envirosafe/etc. to recharge which is a hydrocarbon-based refrigerant (butane & propane) compatible with R-12 components but then everyone would tell me just to convert to R-134a. It would be ~$400 in parts to do it right with a new compressor and associated fittings/consumables, and I'd have to invest in manifold gauges and a vacuum pump w/desiccant. I did want to package it with an evaporator replacement & HVAC unit rebuild but I should probably just take it easy, an evac and recharge would be pretty easy if that becomes necessary. I want to replace the front hardlines as well just for good measure, they get shot blasted and kinked up over time. Hopefully no condenser replacement(s) required. Either way, I'll probably save all that until next summer since I'll be traveling most of the summer and can limp along until then.
 
Last edited:
>I'm tempted to use Freeze12/Envirosafe/etc. to recharge which is a hydrocarbon-based refrigerant (butane & propane) compatible with R-12 components but then everyone would tell me just to convert to R-134a.

Go ahead with the top off of the Freeze12, works OK....so use it.

R-290 works well as a top-off. Full R-290 is not a great match for an R12 system but is acceptable, not a greenhouse gas, and quite inexpensive.
 
Big McLargeHuge;2036223 One set of JDM tails in decent shape. They've been spray painted with smoke paint which I can probably remove with some sanding said:
You can also try some brake cleaner to remove the spray tint. Then finish it up with some headlight polish.
 
>I'm tempted to use Freeze12/Envirosafe/etc. to recharge which is a hydrocarbon-based refrigerant (butane & propane) compatible with R-12 components but then everyone would tell me just to convert to R-134a.

Go ahead with the top off of the Freeze12, works OK....so use it.

R-290 works well as a top-off. Full R-290 is not a great match for an R12 system but is acceptable, not a greenhouse gas, and quite inexpensive.

Maybe I will :rolleyes:. It would just be a temporary band-aid (plaster? more brand names) for another season or two, I still have to go over the whole system to clean everything out and replace o-rings during a conversion. Of course overfilling or having the compressor blow up would cause even more issues so I'd have to be careful. I'm not sure how difficult it would be to find somewhere that can evac R-12 since I'm assuming most places don't want to mess with it.

Way to represent at that AMS event, the adult table indeed!

My expectations were low after waiting so long but I'd recommend it to anyone in the area in the future :)

You can also try some brake cleaner to remove the spray tint. Then finish it up with some headlight polish.

If your brake cleaner removes paint then you need to get a different kind of brake cleaner. (or make sure someone didn't switch the labels with paint stripper)

I've not tried brake cleaner for that before. I probably will not use a dedicated paint stripper (not that you're suggesting that) due to most of them likely melting the plastic lens, but sandpaper might not be able to get into tight areas and will probably take quite a bit of labor. I'll test some safe methods and report back.
 
Last edited:
If your brake cleaner removes paint then you need to get a different kind of brake cleaner. (or make sure someone didn't switch the labels with paint stripper)

It only works on spray tint since it's not really "paint". At least the VHT brand isn't. I know it removes that because I've done it before.
 
Here's Johnny

I'm back from my temporary out-of-state work project a few months earlier than expected and spending plenty of time in the hot summer garage again. First some miscellaneous pictures then A/C work.

First off, I installed the NSX-R coolant tank cover and new fuel pump resistor to make the engine bay look a bit nicer.
BwjbvfL.jpg


Then I tried re-soldering the joints on the turn signal cancel unit to see if it fixes my no-cancel issue. No change at all :rolleyes:
xbNNnk5.jpg


I finally found a buyer for my old A/T transmission on eBay. The end of an era. FYI, don't tip the trans up on its face without a big drain pan or you'll have a huge oil slick on your hands. I'm a bit sad to see it go, and almost just as sad to see the really nice shipping pallet I got with my M/T last year leaving too. It's a nice box.
RA06SwN.jpg


Next up is a somewhat impromptu show at Helen Import Day 2021. In case you didn't know, Helen, GA is an odd German-esque town in the north GA mountains that sits in the middle of some great driving roads. Best known for tourism and lazy river tubing.

I ended up waiting in line right behind another NSX and met another local owner with some other cool cars too. What're the chances?
Vur2ZPl.jpg


This past Labor Day weekend was September's edition of Caffeine and Octane, the "world's largest monthly car show". I can believe it but I haven't seen the numbers myself. Parked up next to my friend's new R35 that we drove all the way back from a dealer in PA after purchasing. It might smoke my car, but my seats and suspension are much more comfortable on long drives ;)
PoPATnV.jpg


After that, we journeyed in a long convoy of exotics to another get-together where there was another gathering of Red Squadron (plus Alex's Lovefab turbo in the back), and met yet another owner. Just when I think I've surely met every owner in GA. Maybe metro ATL is 2nd in number of cars behind SoCal?
L3OFgNH.jpg


Your bonus car for today is spicy Diablo. How could you not stop to take a look?
aI43oDq.jpg


Must be a happy new owner.
CRA2LvR.jpg


In a few days I'll make a separate post about my R-134a A/C conversion in progress. So far so good; I've replaced the compressor, flushed all the lines and put on new O-rings, new drier, vacuumed out the system, and stopped short of charging it since I found my front condenser hardlines have one or two decent kinks in them that's restricting flow. That kind of pressure drop isn't good for system efficiency so I'm trying to source new lines, of course not available in the US (same P/N between LHD/RHD) so ATR is coming in clutch as always. I've read that Kaz likes to replace them on occasion anyways since they take a beating from road debris so I'll wait a bit longer to get that done first. The system looked clean during flushing so I'm pretty confident it'll work well.
 
Last edited:
Good to see your posts again, they are always a treat!

That shipping crate was originally for a Suzuki GSX-R engine, that's currently in a SCCA P2 class club racer.

Your car next to the GTR makes the Nissan look like it took a large hit of Helium :tongue:
 
Good to see your posts again, they are always a treat!

That shipping crate was originally for a Suzuki GSX-R engine, that's currently in a SCCA P2 class club racer.

Your car next to the GTR makes the Nissan look like it took a large hit of Helium :tongue:

Maybe one day I'll cross paths with the crate again. I should've taken measurements to recreate it.

She's a chonky one but worth the weight ;)
 
R-134a A/C Conversion

I finished up my R-12 to R-134a A/C conversion this weekend so here's a walkthrough of my experience. It was my first time messing with A/C systems but this presumably should be in my wheelhouse as a chemE :cool:. Long post but hopefully it can serve as a bit of a DIY guide for others.

First off, some references I pulled together:
-Kaz explanation of compressor choices (http://www.nsxprime.com/forum/showt...ith-a-94-or-newer/page2?p=1996629#post1996629)
-Kaz NSXUK blog posts (http://www.nsxcb.co.uk/entry.php?1318-Koyo-Rad-Cooling-Sys-Washer-motor-04&goto=next) and (http://www.nsxcb.co.uk/entry.php?1837-AC-Refresh-02&goto=prev)
-Joe G's in-dash HVAC unit vid, I didn't mess with it yet (https://www.youtube.com/watch?v=ga7aT63fkE4) and HVAC rebuild thread (https://www.facebook.com/groups/7990613243/permalink/10156770275213244)
-Adam S's compressor replacement vid (https://www.youtube.com/watch?v=967Q30N-Q-s)
-Low refrigerant symptoms (http://www.nsxprime.com/forum/showt...at-the-same-time?p=48762&viewfull=1#post48762)
-More Prime reading (http://www.nsxprime.com/forum/showthread.php/202120-AC-Overhaul-advice-needed!)
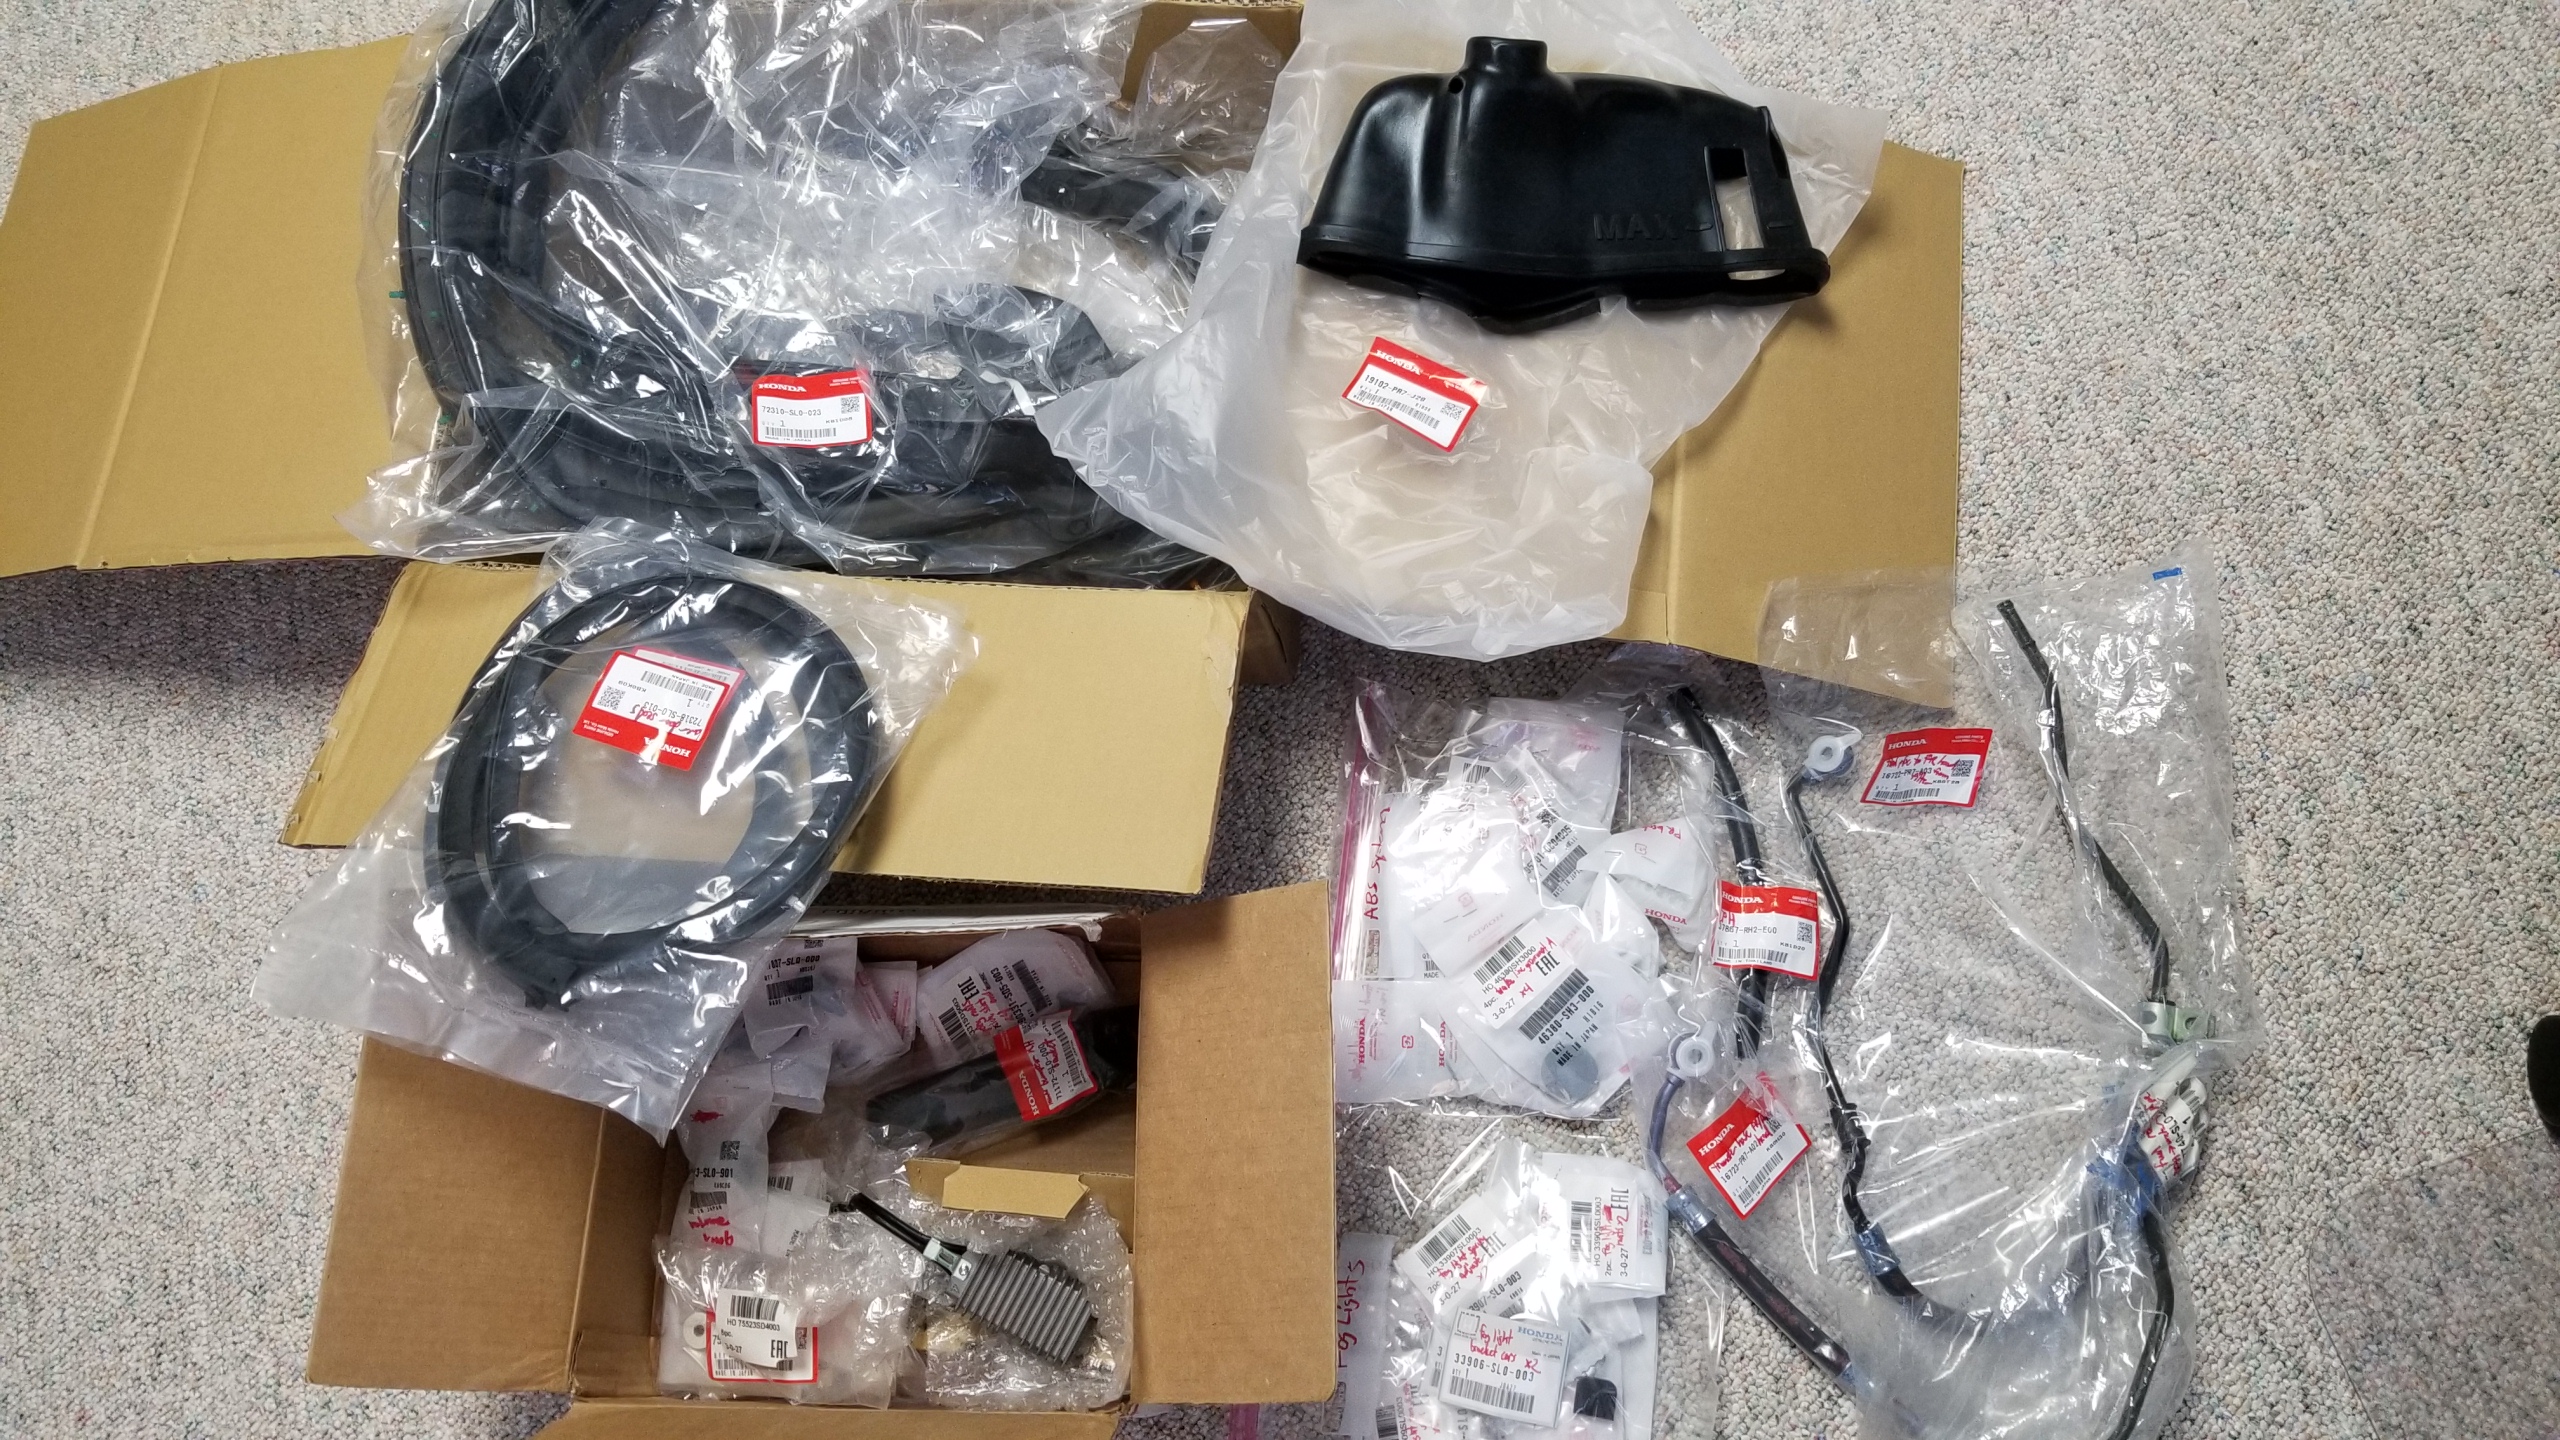
Parts used:
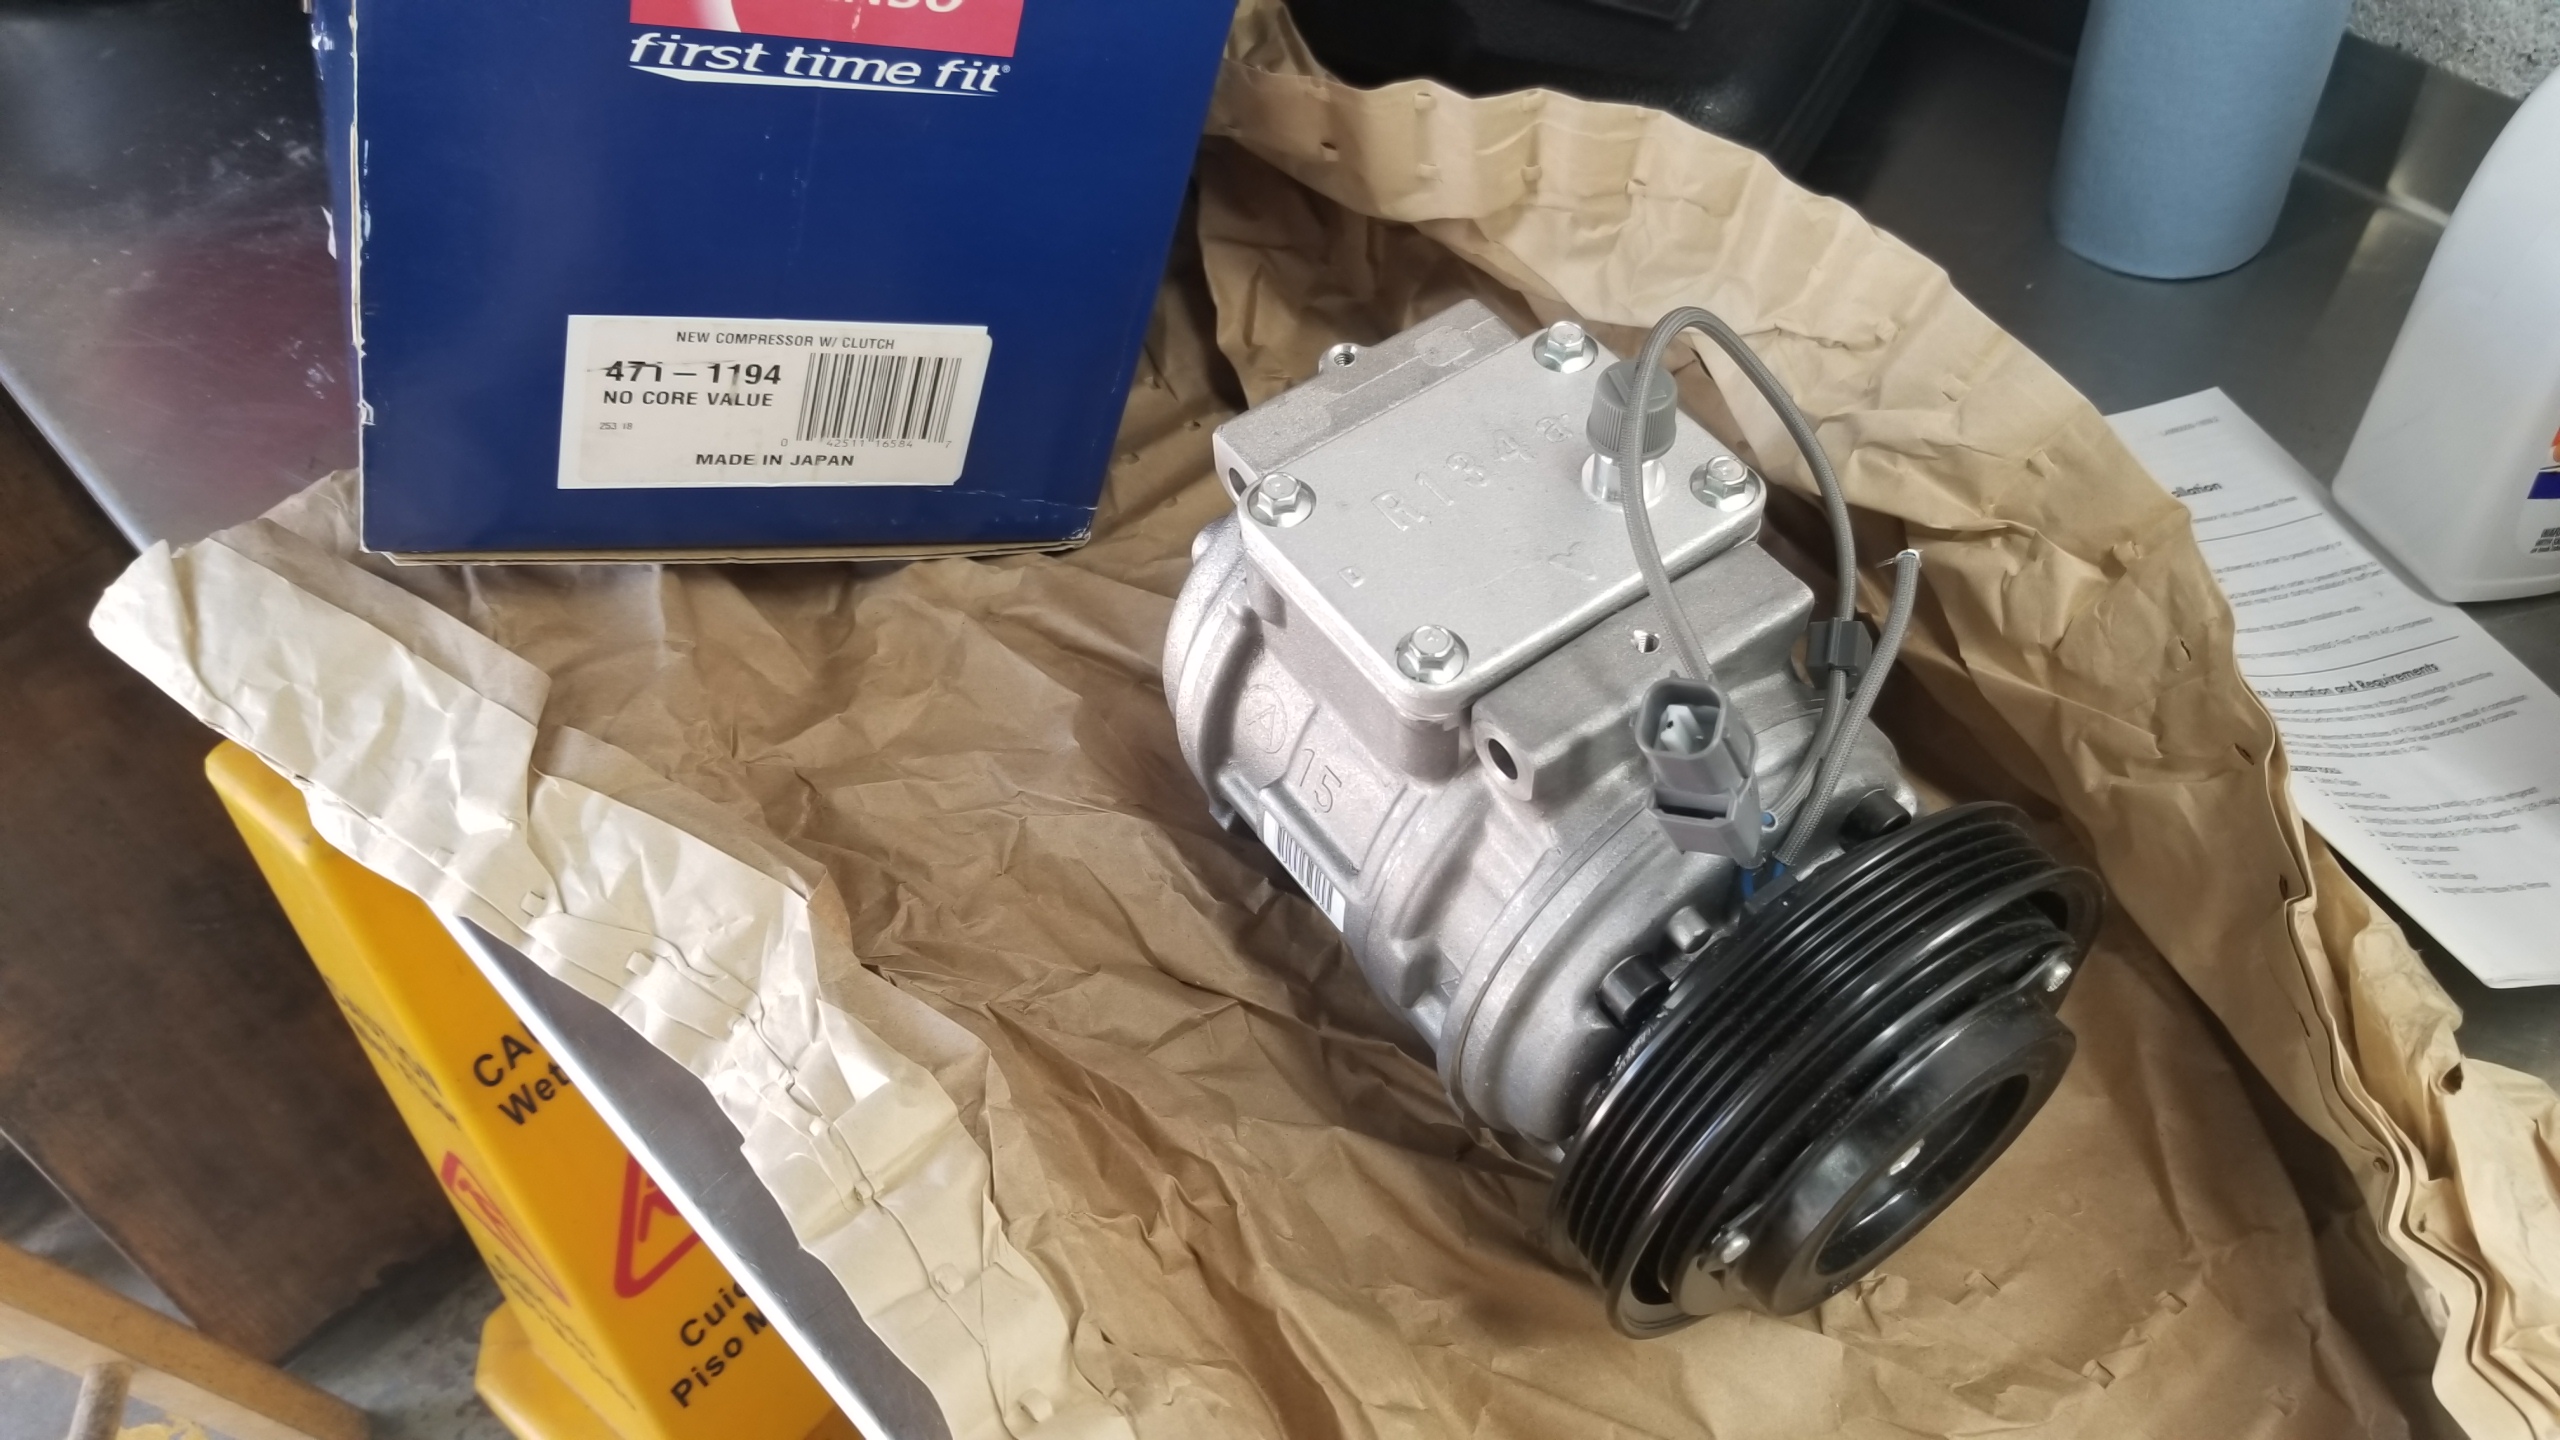
-Denso 471-1194 New Compressor with Clutch (need to re-use old clutch/pulley/field coil assy)
-Denso Retrofit Kit RTF-KIT-2 off Buyee Japan (for high-quality OEM retrofit fittings & labels)
-Four Seasons 26744 AND 26745 O-Ring & Gasket Air Conditioning System Seal Kits (26745 has mostly correct O-ring sizes)
-Four Seasons 33412 Filter Drier (slightly smaller than R-12 drier, still fits in bracket)
-FOUR UNCLES IRONCUBE AC Flush Kit
-Four Seasons 69994 Super Flush Solvent qty (2) (3 cans would be better)
-Chemours Brand Automotive Freon R134a Refrigerant - 12oz Can qty (3) (legit Freon-brand Freon)
-Denso A/C Compressor Refrigerant Oil 999-0101 (ND-OIL 8)
-Amazon R12 / R134a AC Master Valve Core Repair Kit (need valve core removal tool)
-Amazon AURELIO TECH 2020 UPGRATE Version 4 Way A/C Manifold Gauge Set Kit
-Harbor Freight vacuum pump
-Front A/C condenser pipes A and C (80331-SL0-A02 and 80333-SL0-A03) from ATR Racing (same between LHD/RHD, not available in US)
-100mL graduated cylinder (cylinder with GED acceptable)
-UV flashlight
-UV dye
-tabletop digital scale
-compressed air source

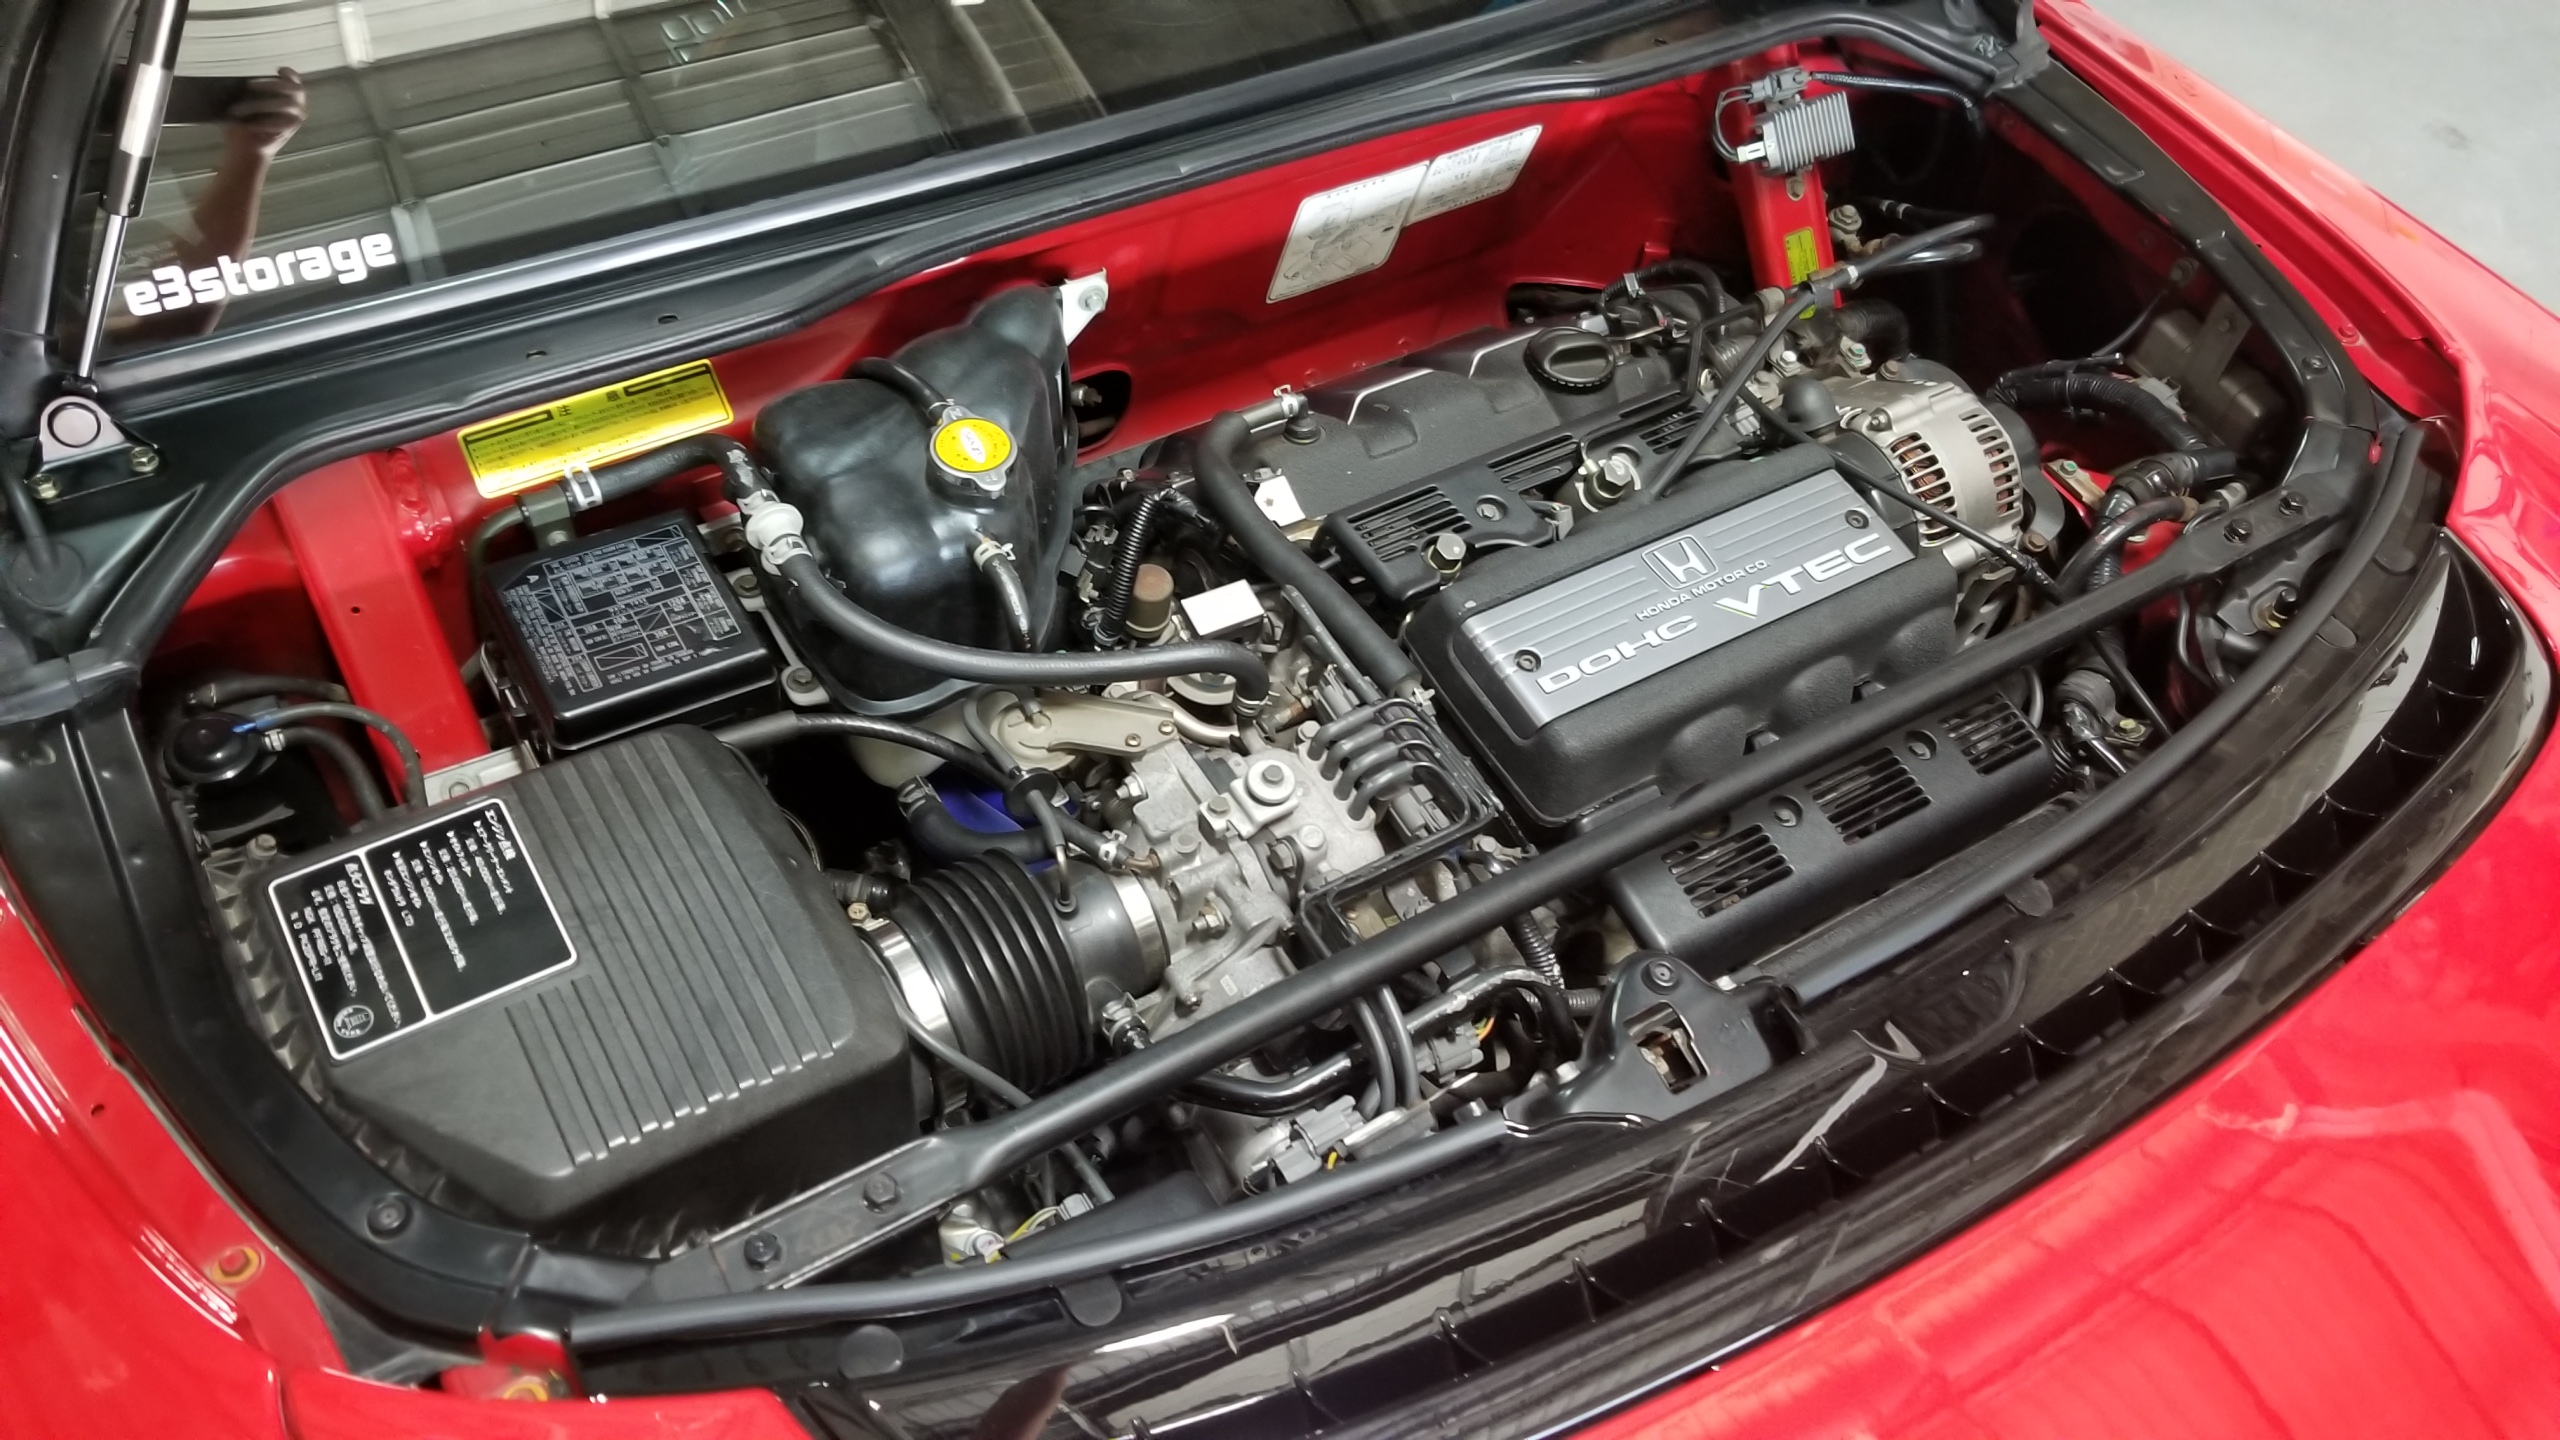
Why did I undergo this process? Number 1, my A/C wasn't blowing much colder than ambient anymore, and was low on R-12 according to the drier sight glass and noticeable lack of colder air on the driver's side (see http://www.nsxprime.com/forum/showt...at-the-same-time?p=48762&viewfull=1#post48762). No one works on R-12 anymore, I didn't want to have R-12 anymore, R-12 parts are hard to find, and my A/C compressor was pretty loud with the clutch engaged. I wanted to do a complete flush of the system to make sure the compressor wasn't sending death particles throughout my condensers and evap.

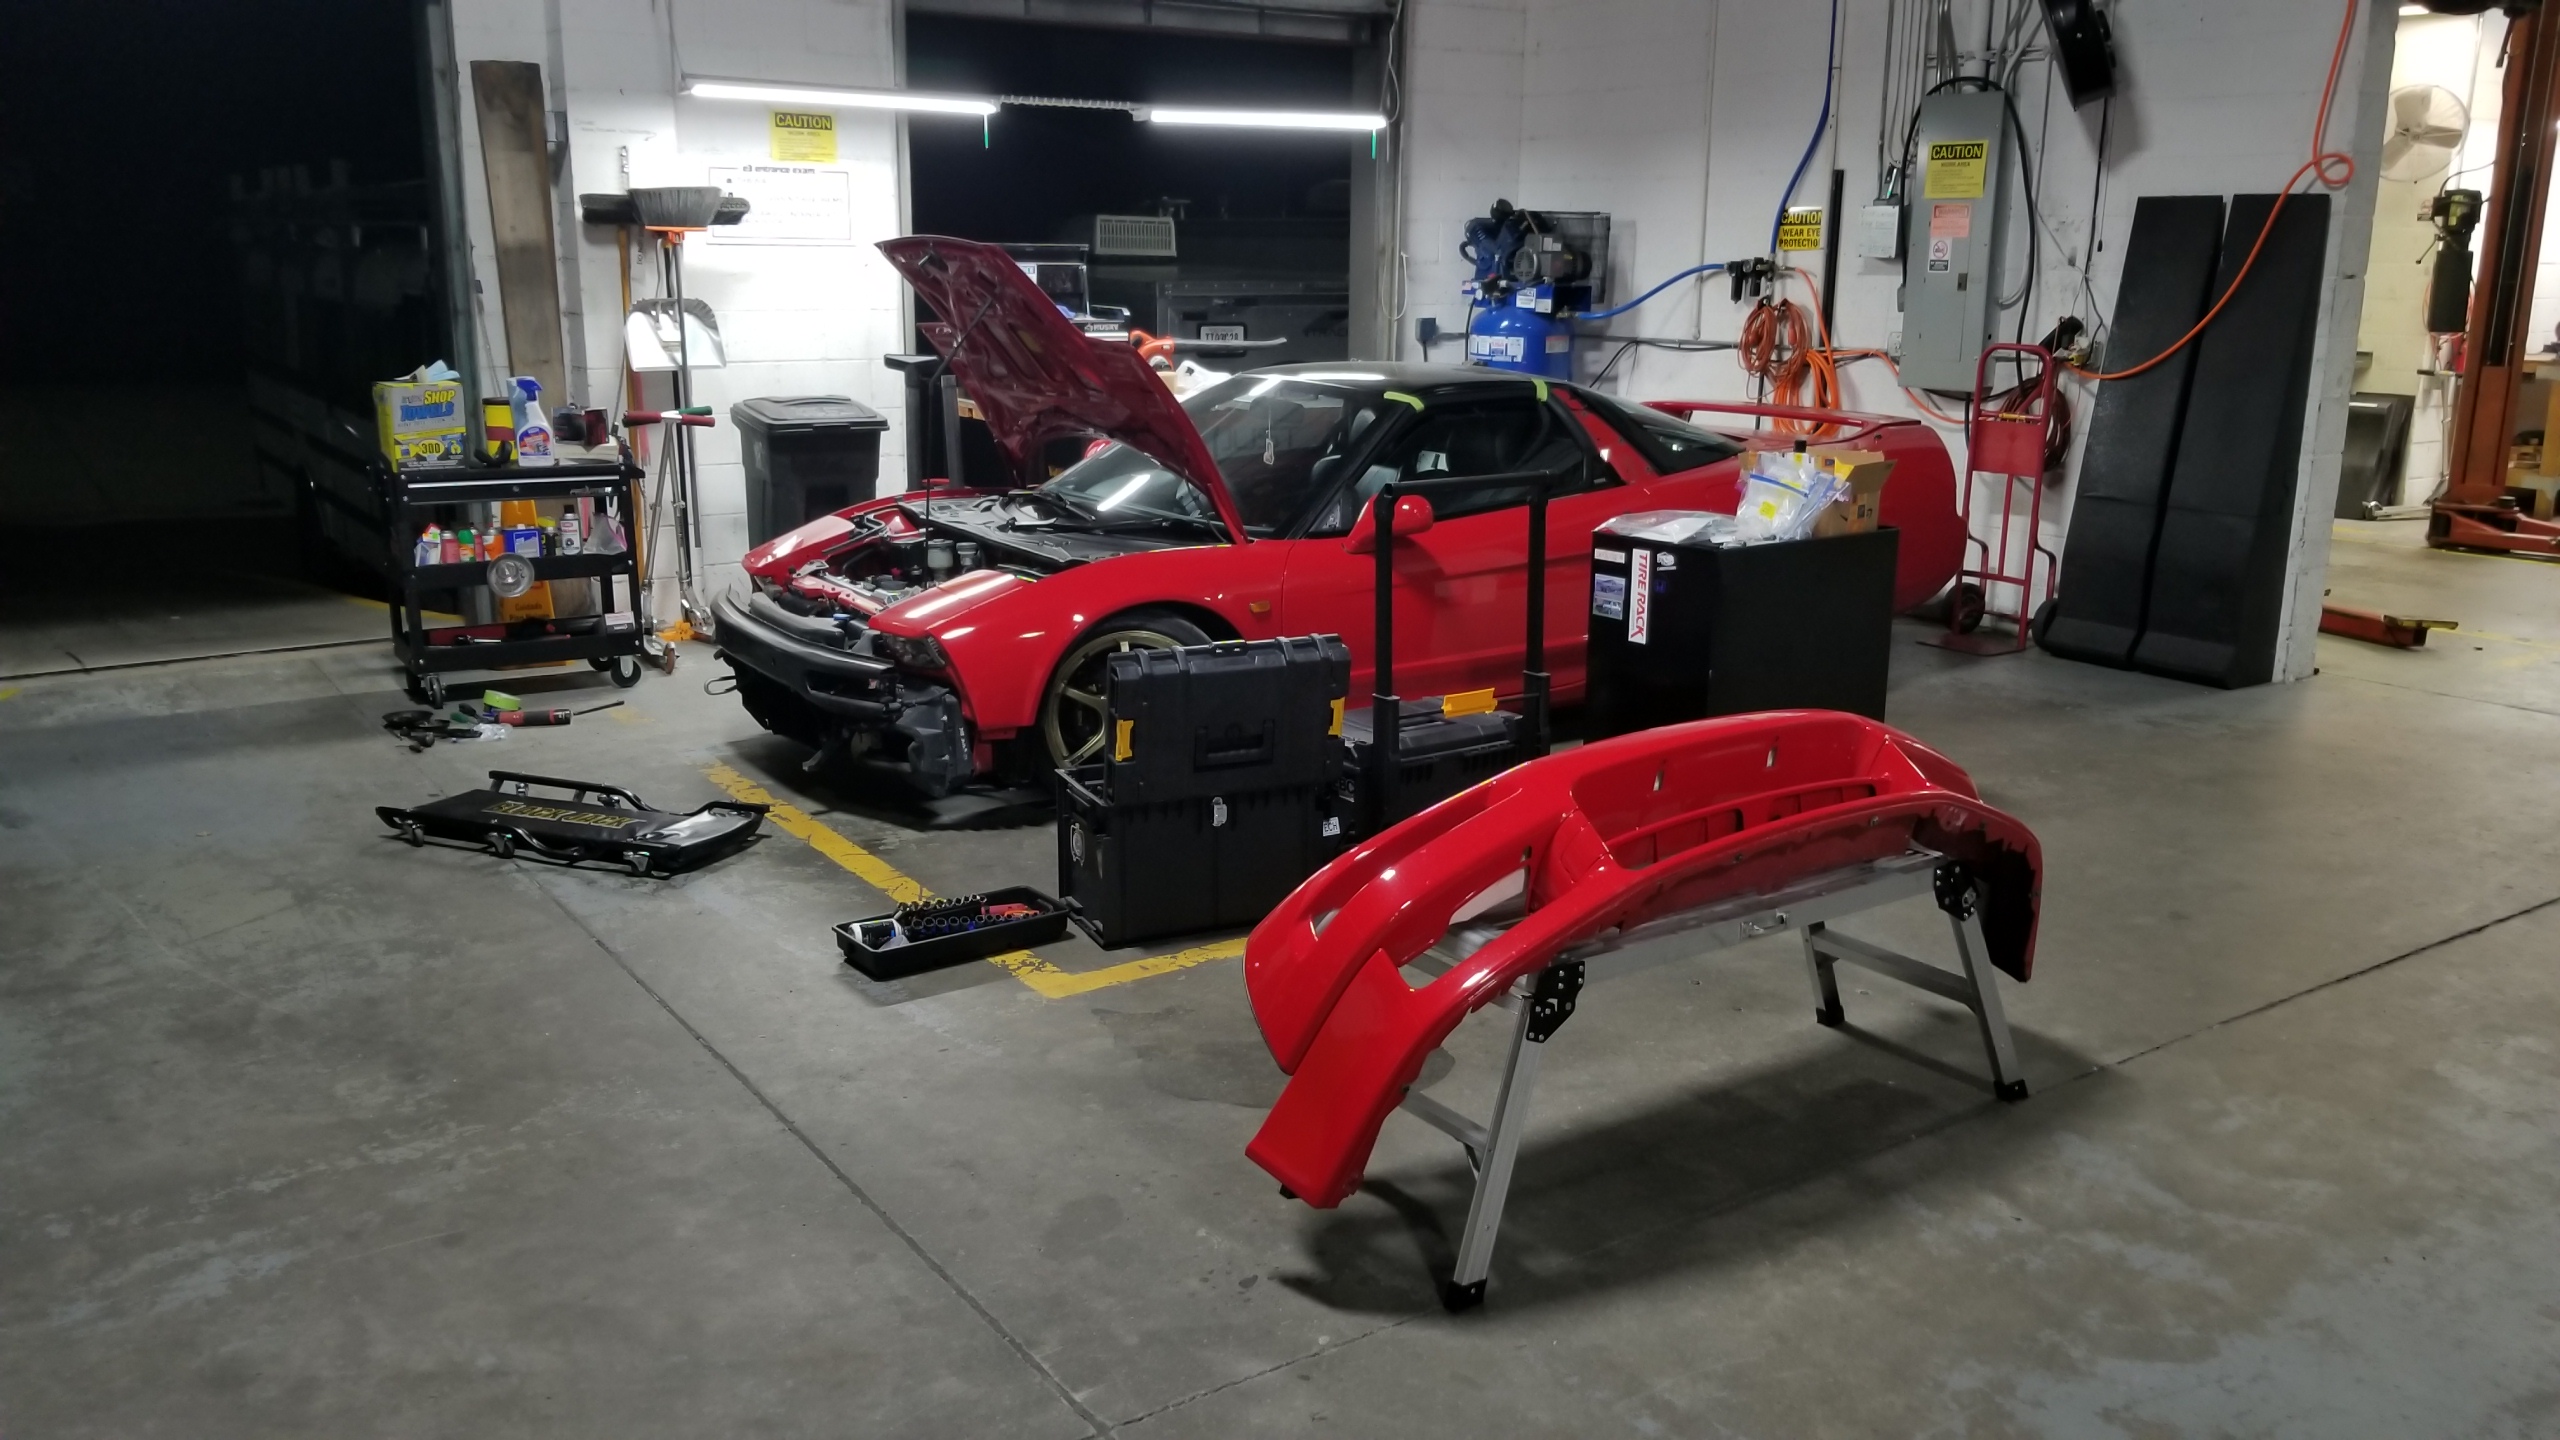
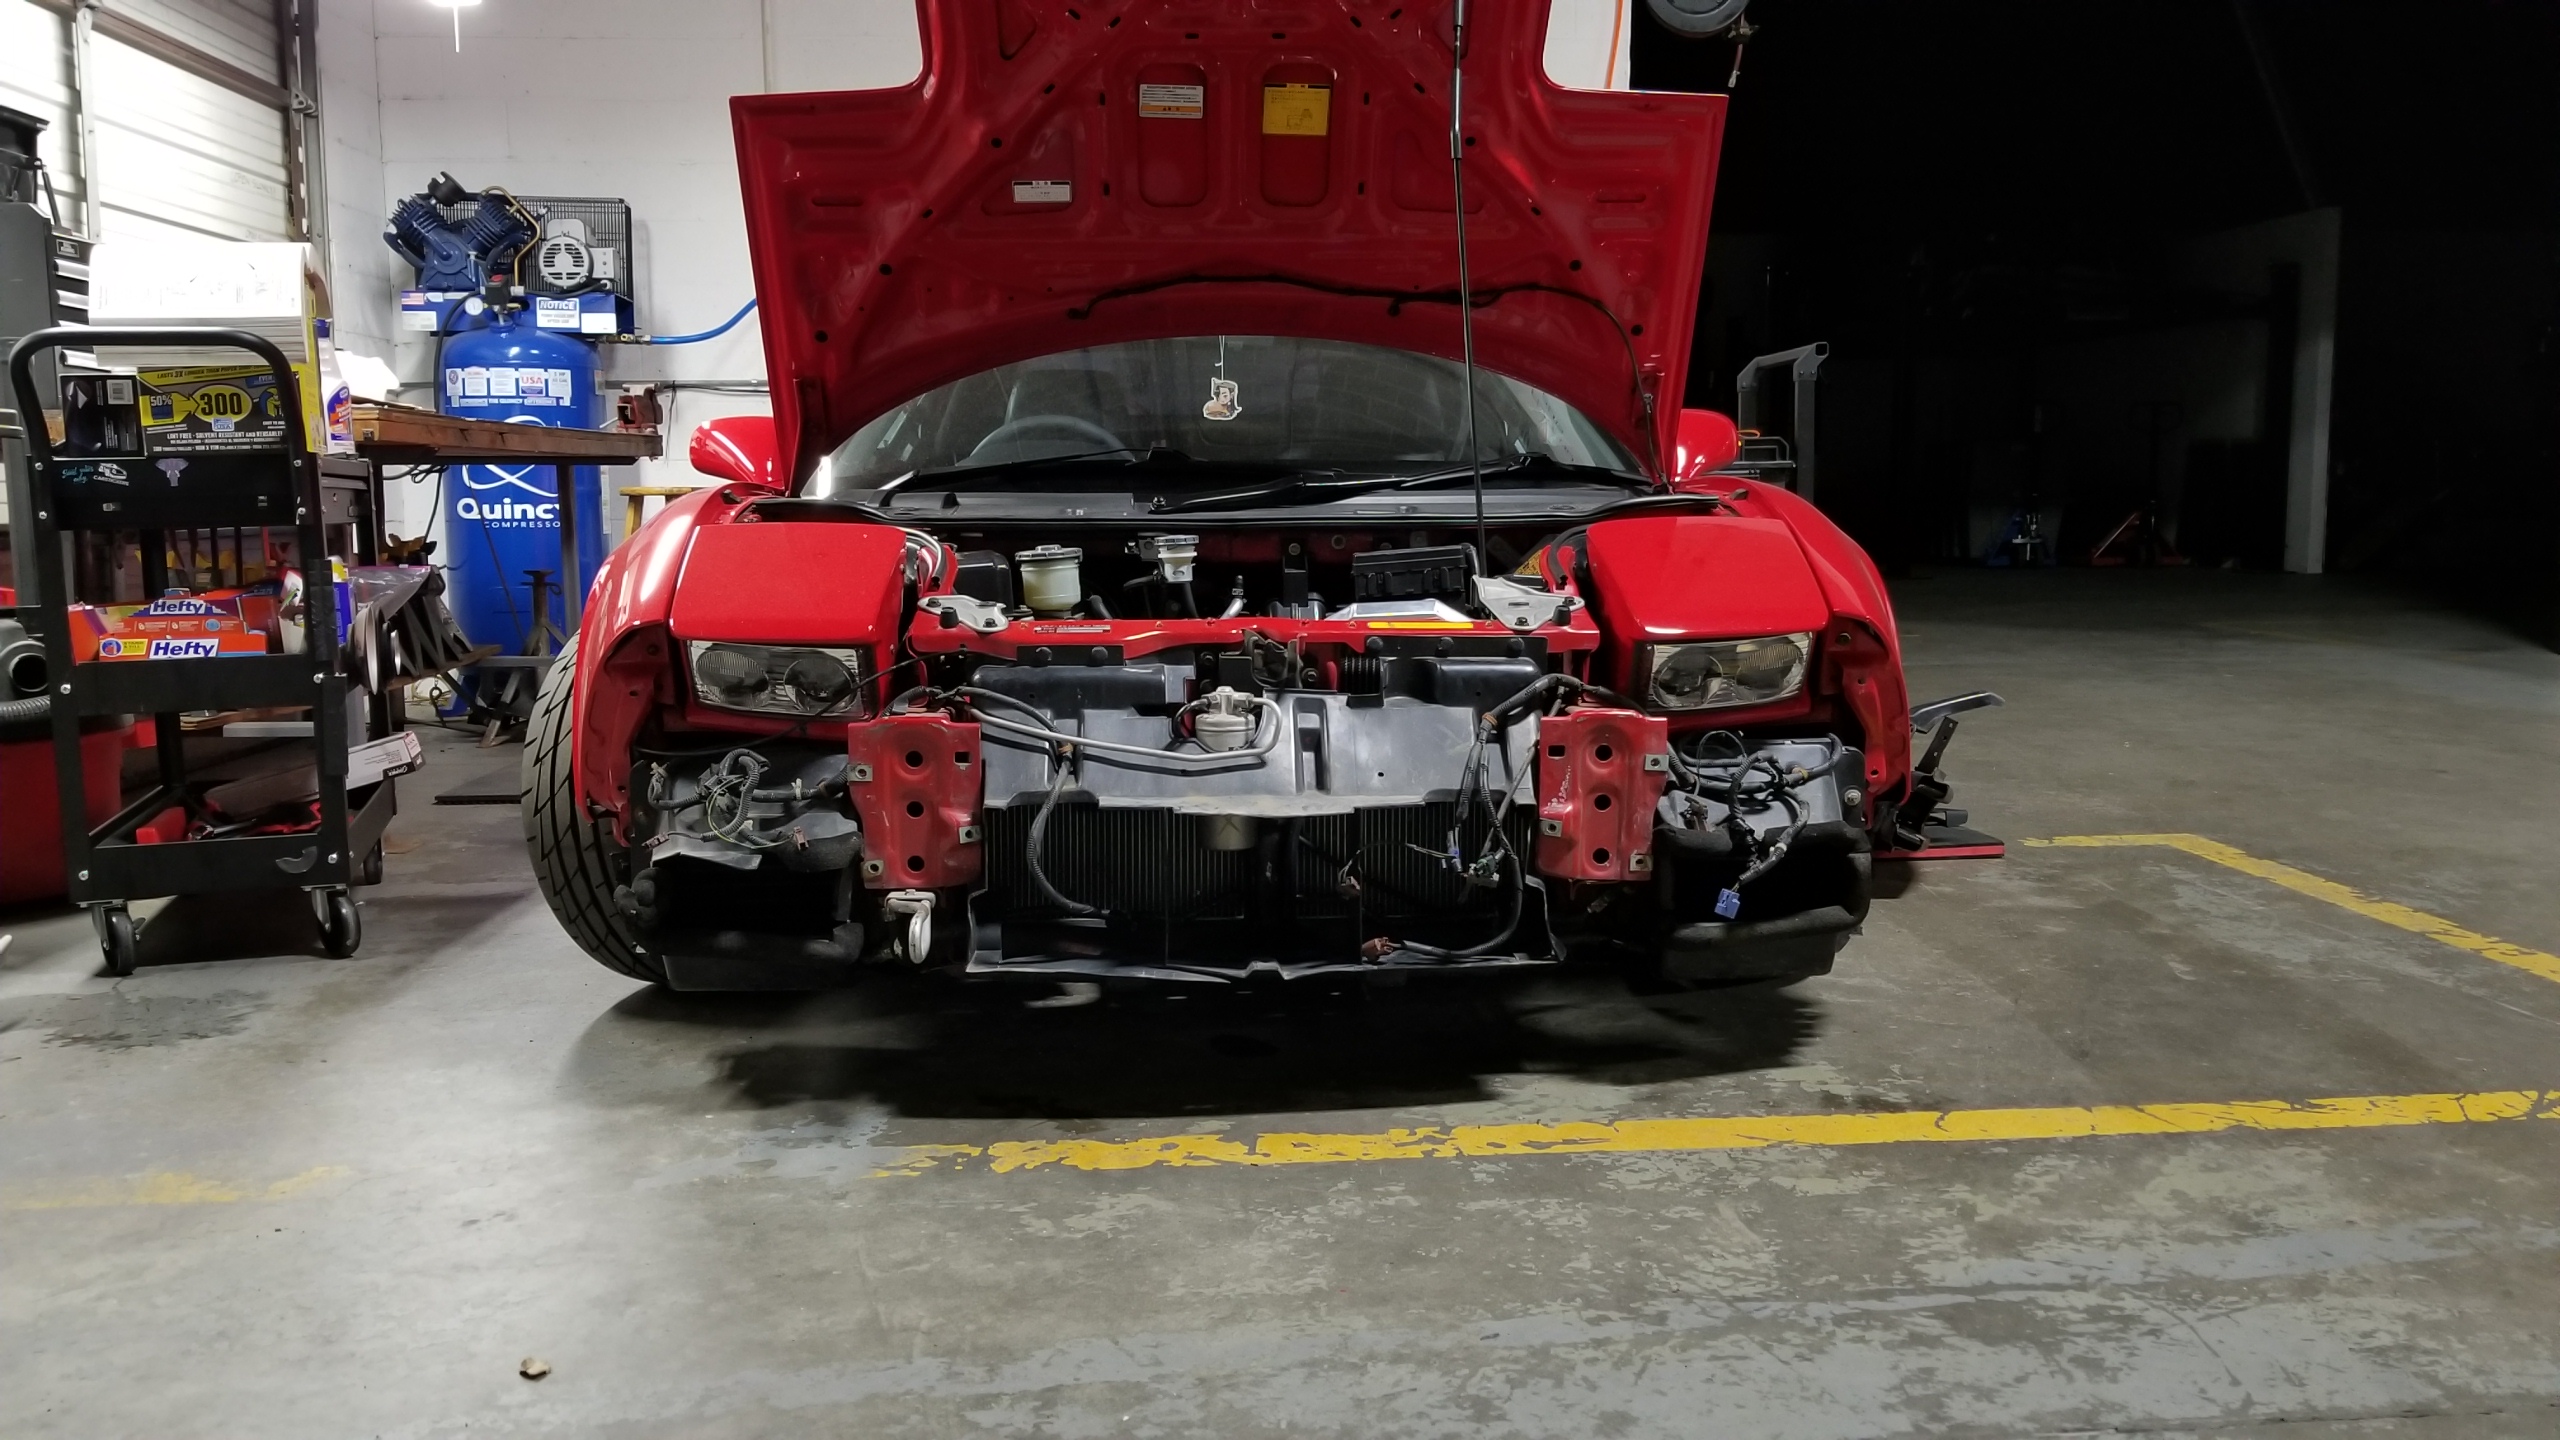
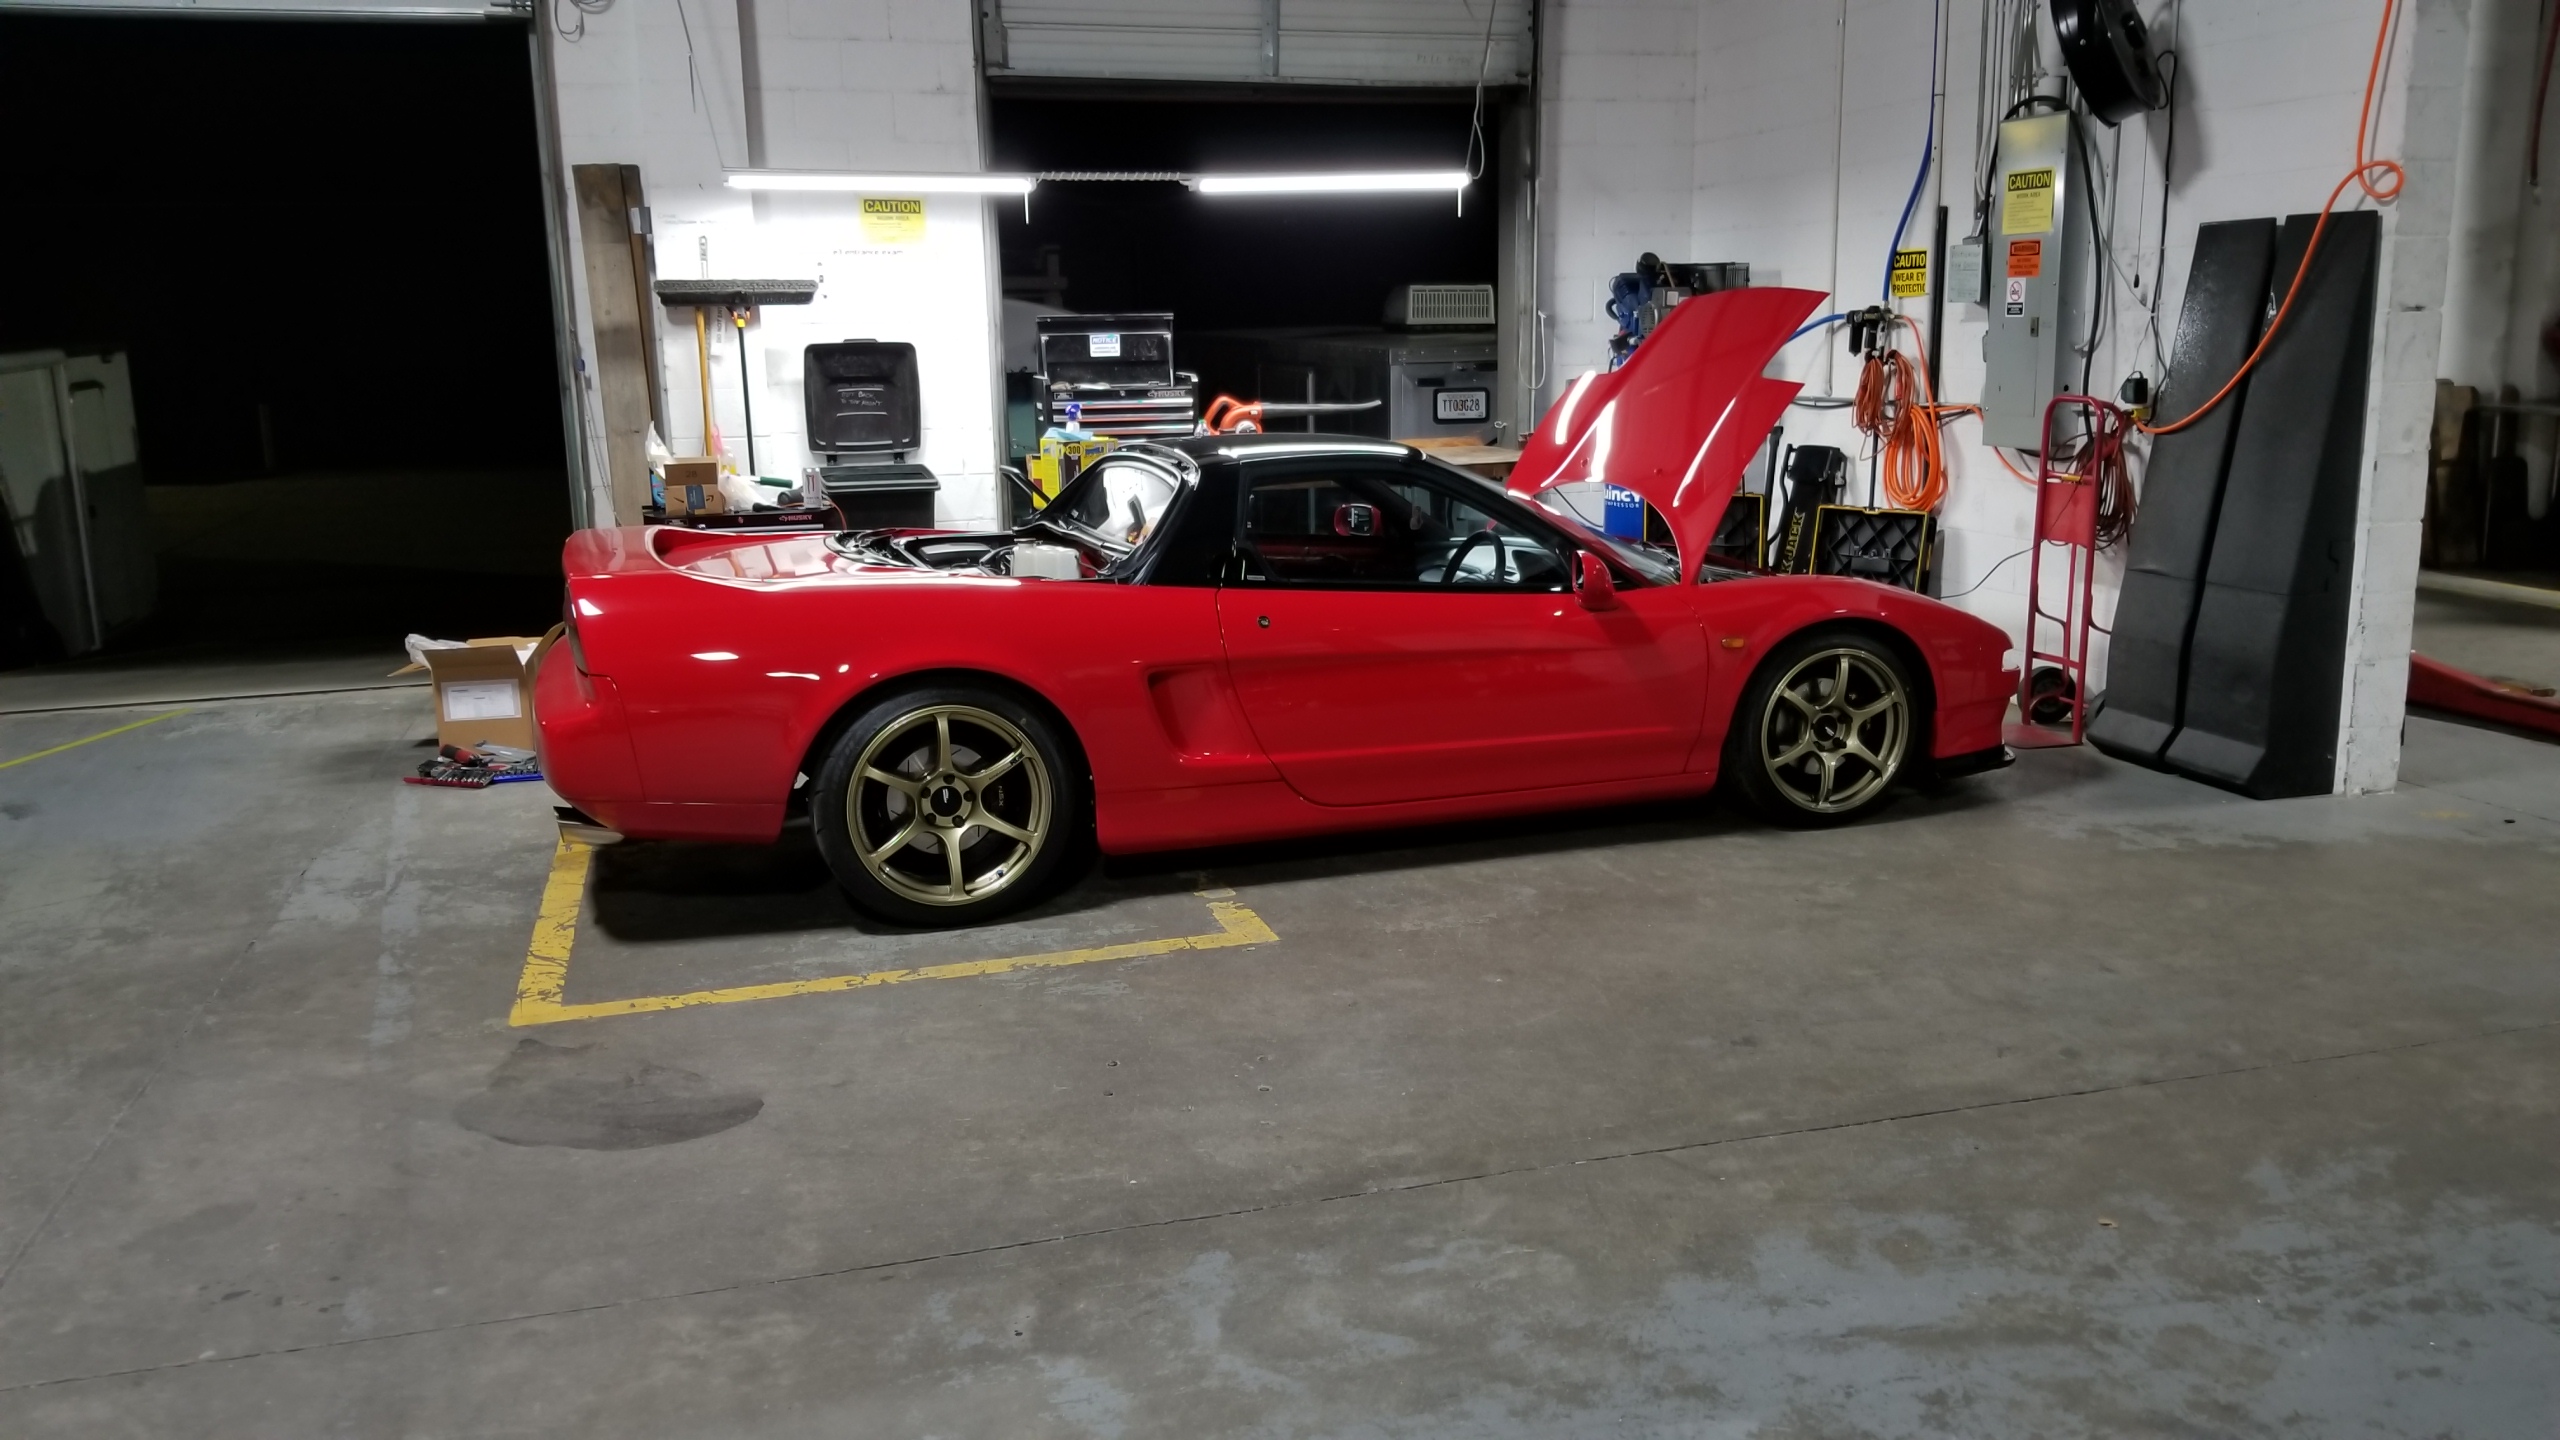
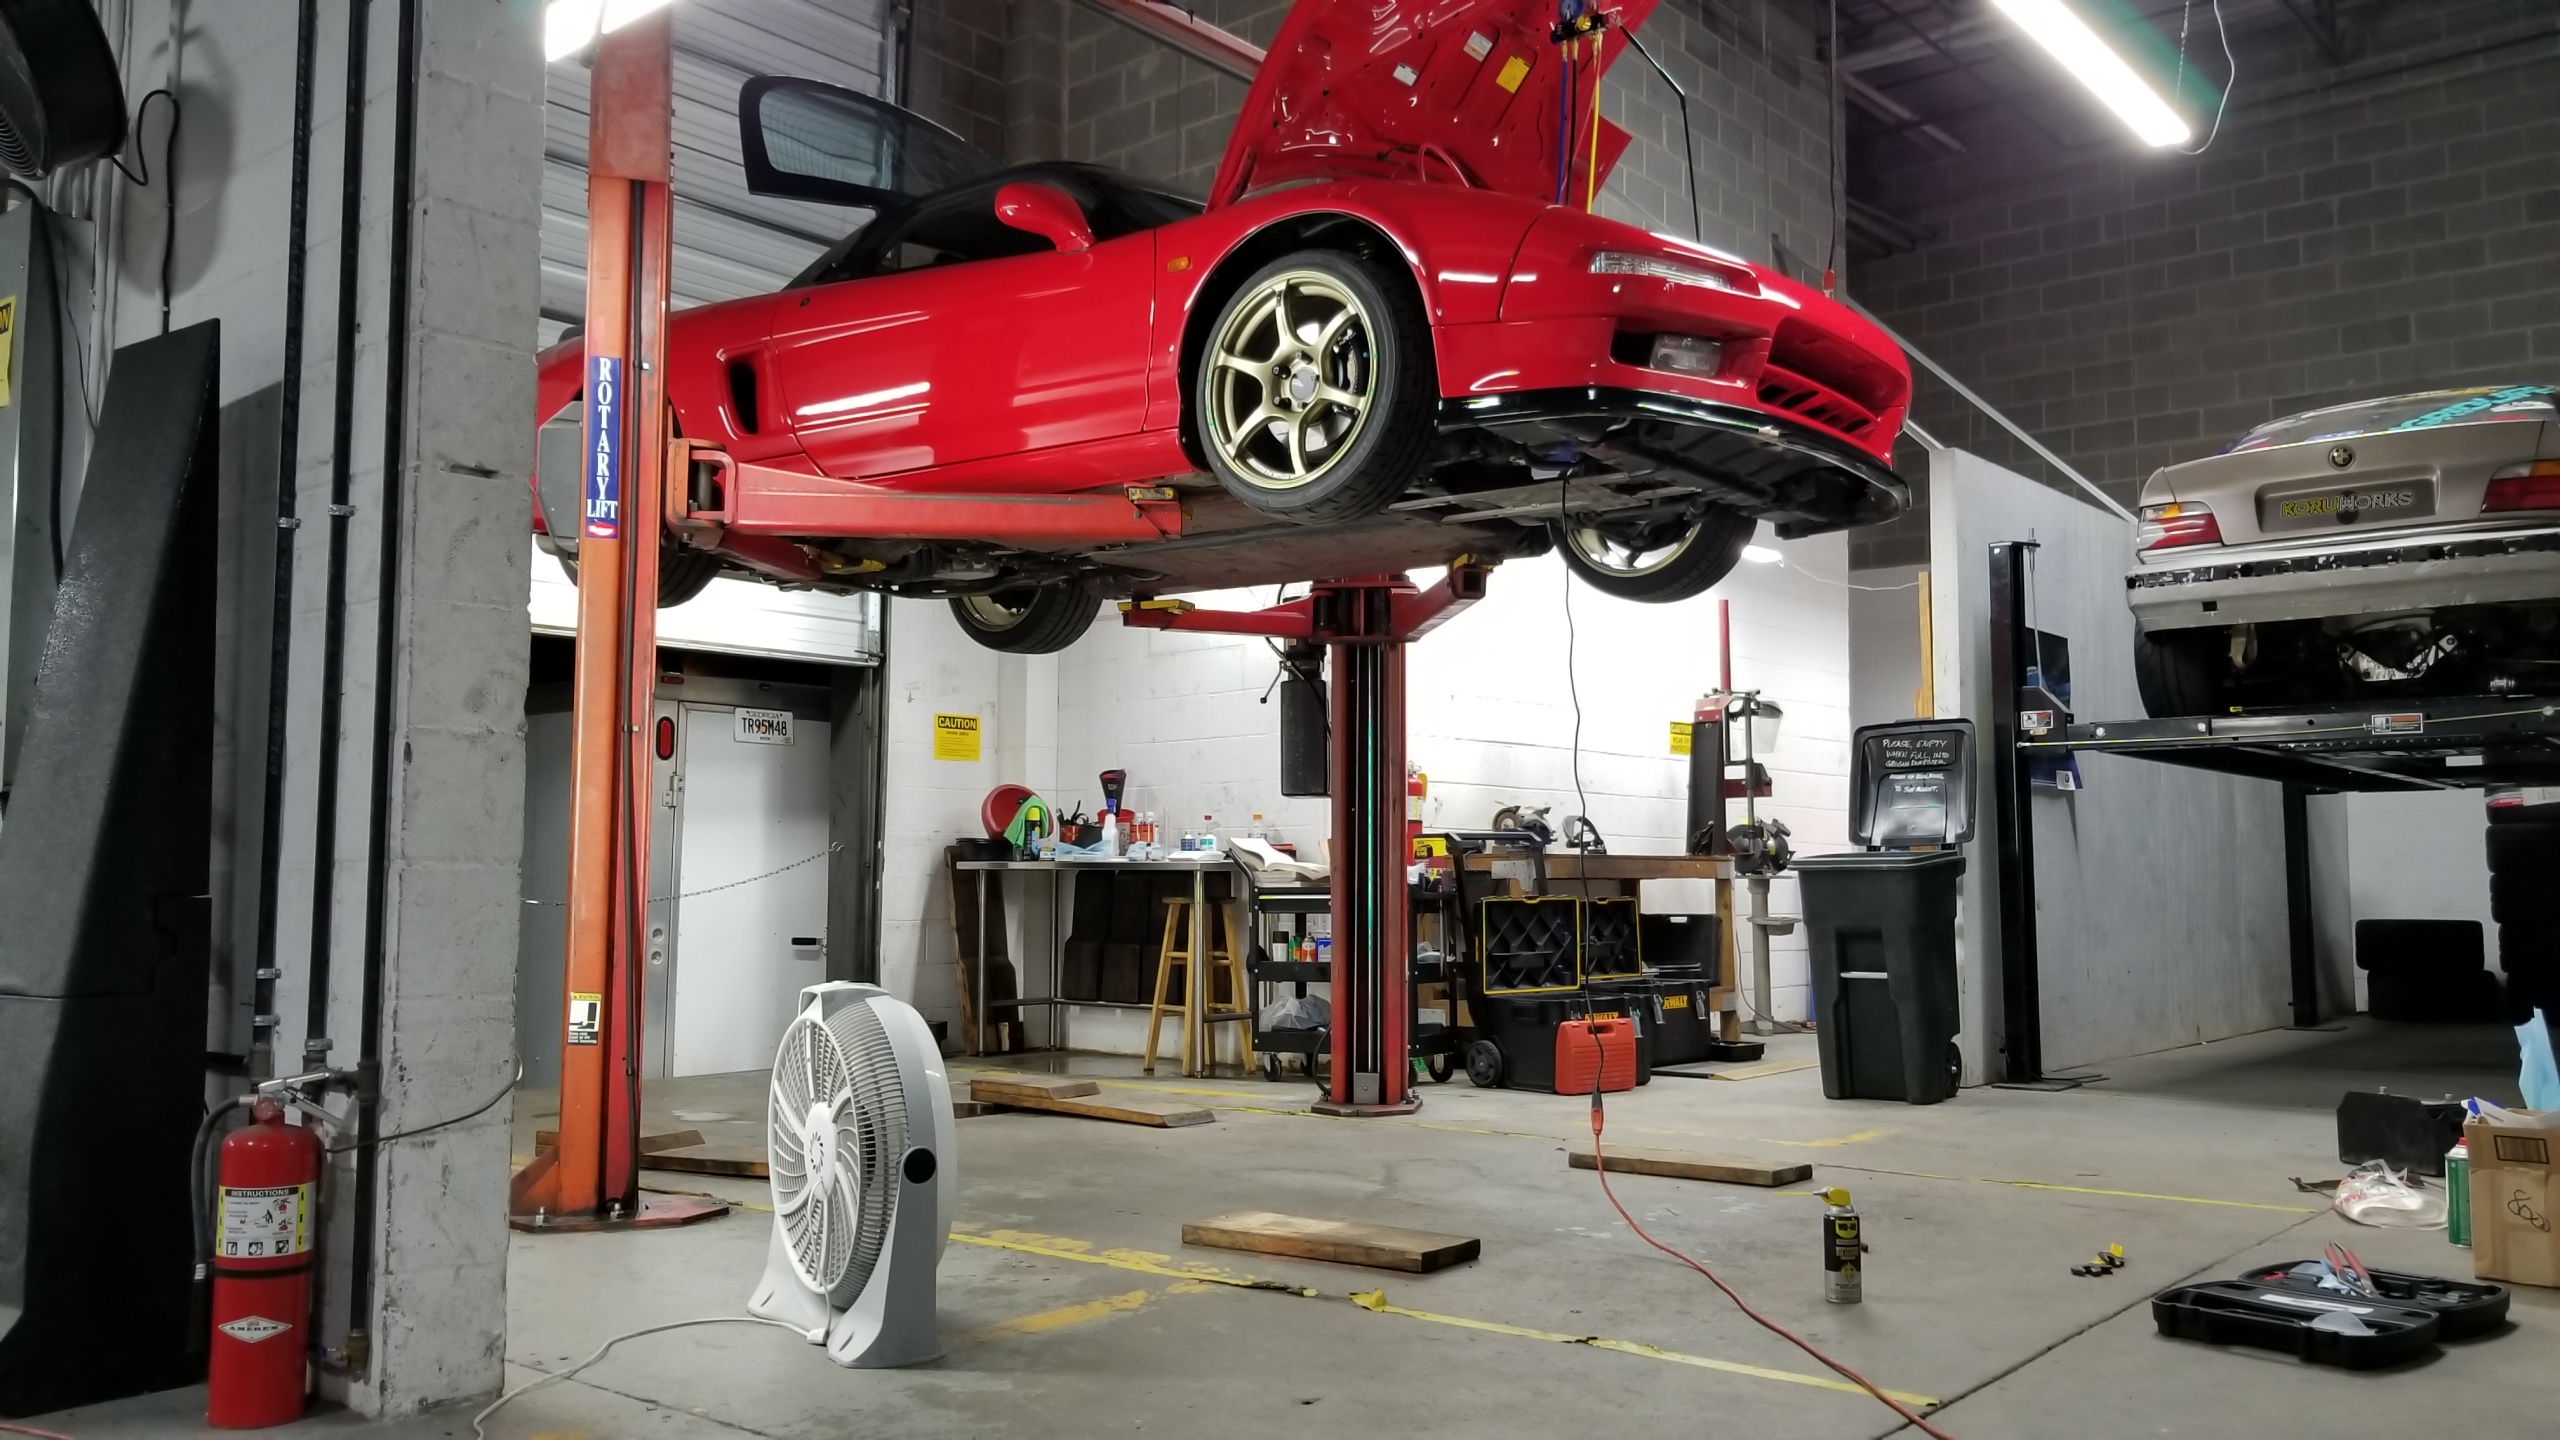
This time I used the 2-post lift for the first time. It takes a lot more positioning and setup to get right, but once I got everything lined up it was so nice being able to stand up and work underneath the car instead of sitting down. I debated a lot as to which direction to lift the car from but this orientation with the asymmetrical lift arms got the center of gravity closer to the middle of the lift.
M9bRBDP.jpg


Here's the new Denso 471-1194. There are a few choices for R-134a compressors from the Kaz thread above. This particular model has a pulley that's too big and will overdrive the compressor, especially with the slightly larger A/T crank pulley I have. This requires re-use of your old clutch set. I went with this model because it was much cheaper than the 471-1193 and did not require buying the updated OEM compressor bracket to shift the pulley over.

It's possible to re-use the old R-12 compressor which supposedly works fine for a while, but if you're doing this job then just pay the extra ~$200 for a brand-new compressor with the correct oil.

At this point it would be prudent to remove the A/C belt and the 10A fuse for the compressor clutch until you're ready to charge the system again so that the compressor doesn't automatically kick on when you have no or low refrigerant.

Obviously you have to remove the old compressor as well, which I didn't happen to get any pictures of. If you're familiar with the car you'd know that it involves dropping the front beam w/engine mount which involves a few steps of removing some underbody bracing, shift cables, A/C wiring connector, and the belt. As usual, the hardest part is getting the through-bolt and nut off the front mount and back on during reinstallation. Usually requires a creative combination of extensions and swivels.
0oqXIsM.jpg


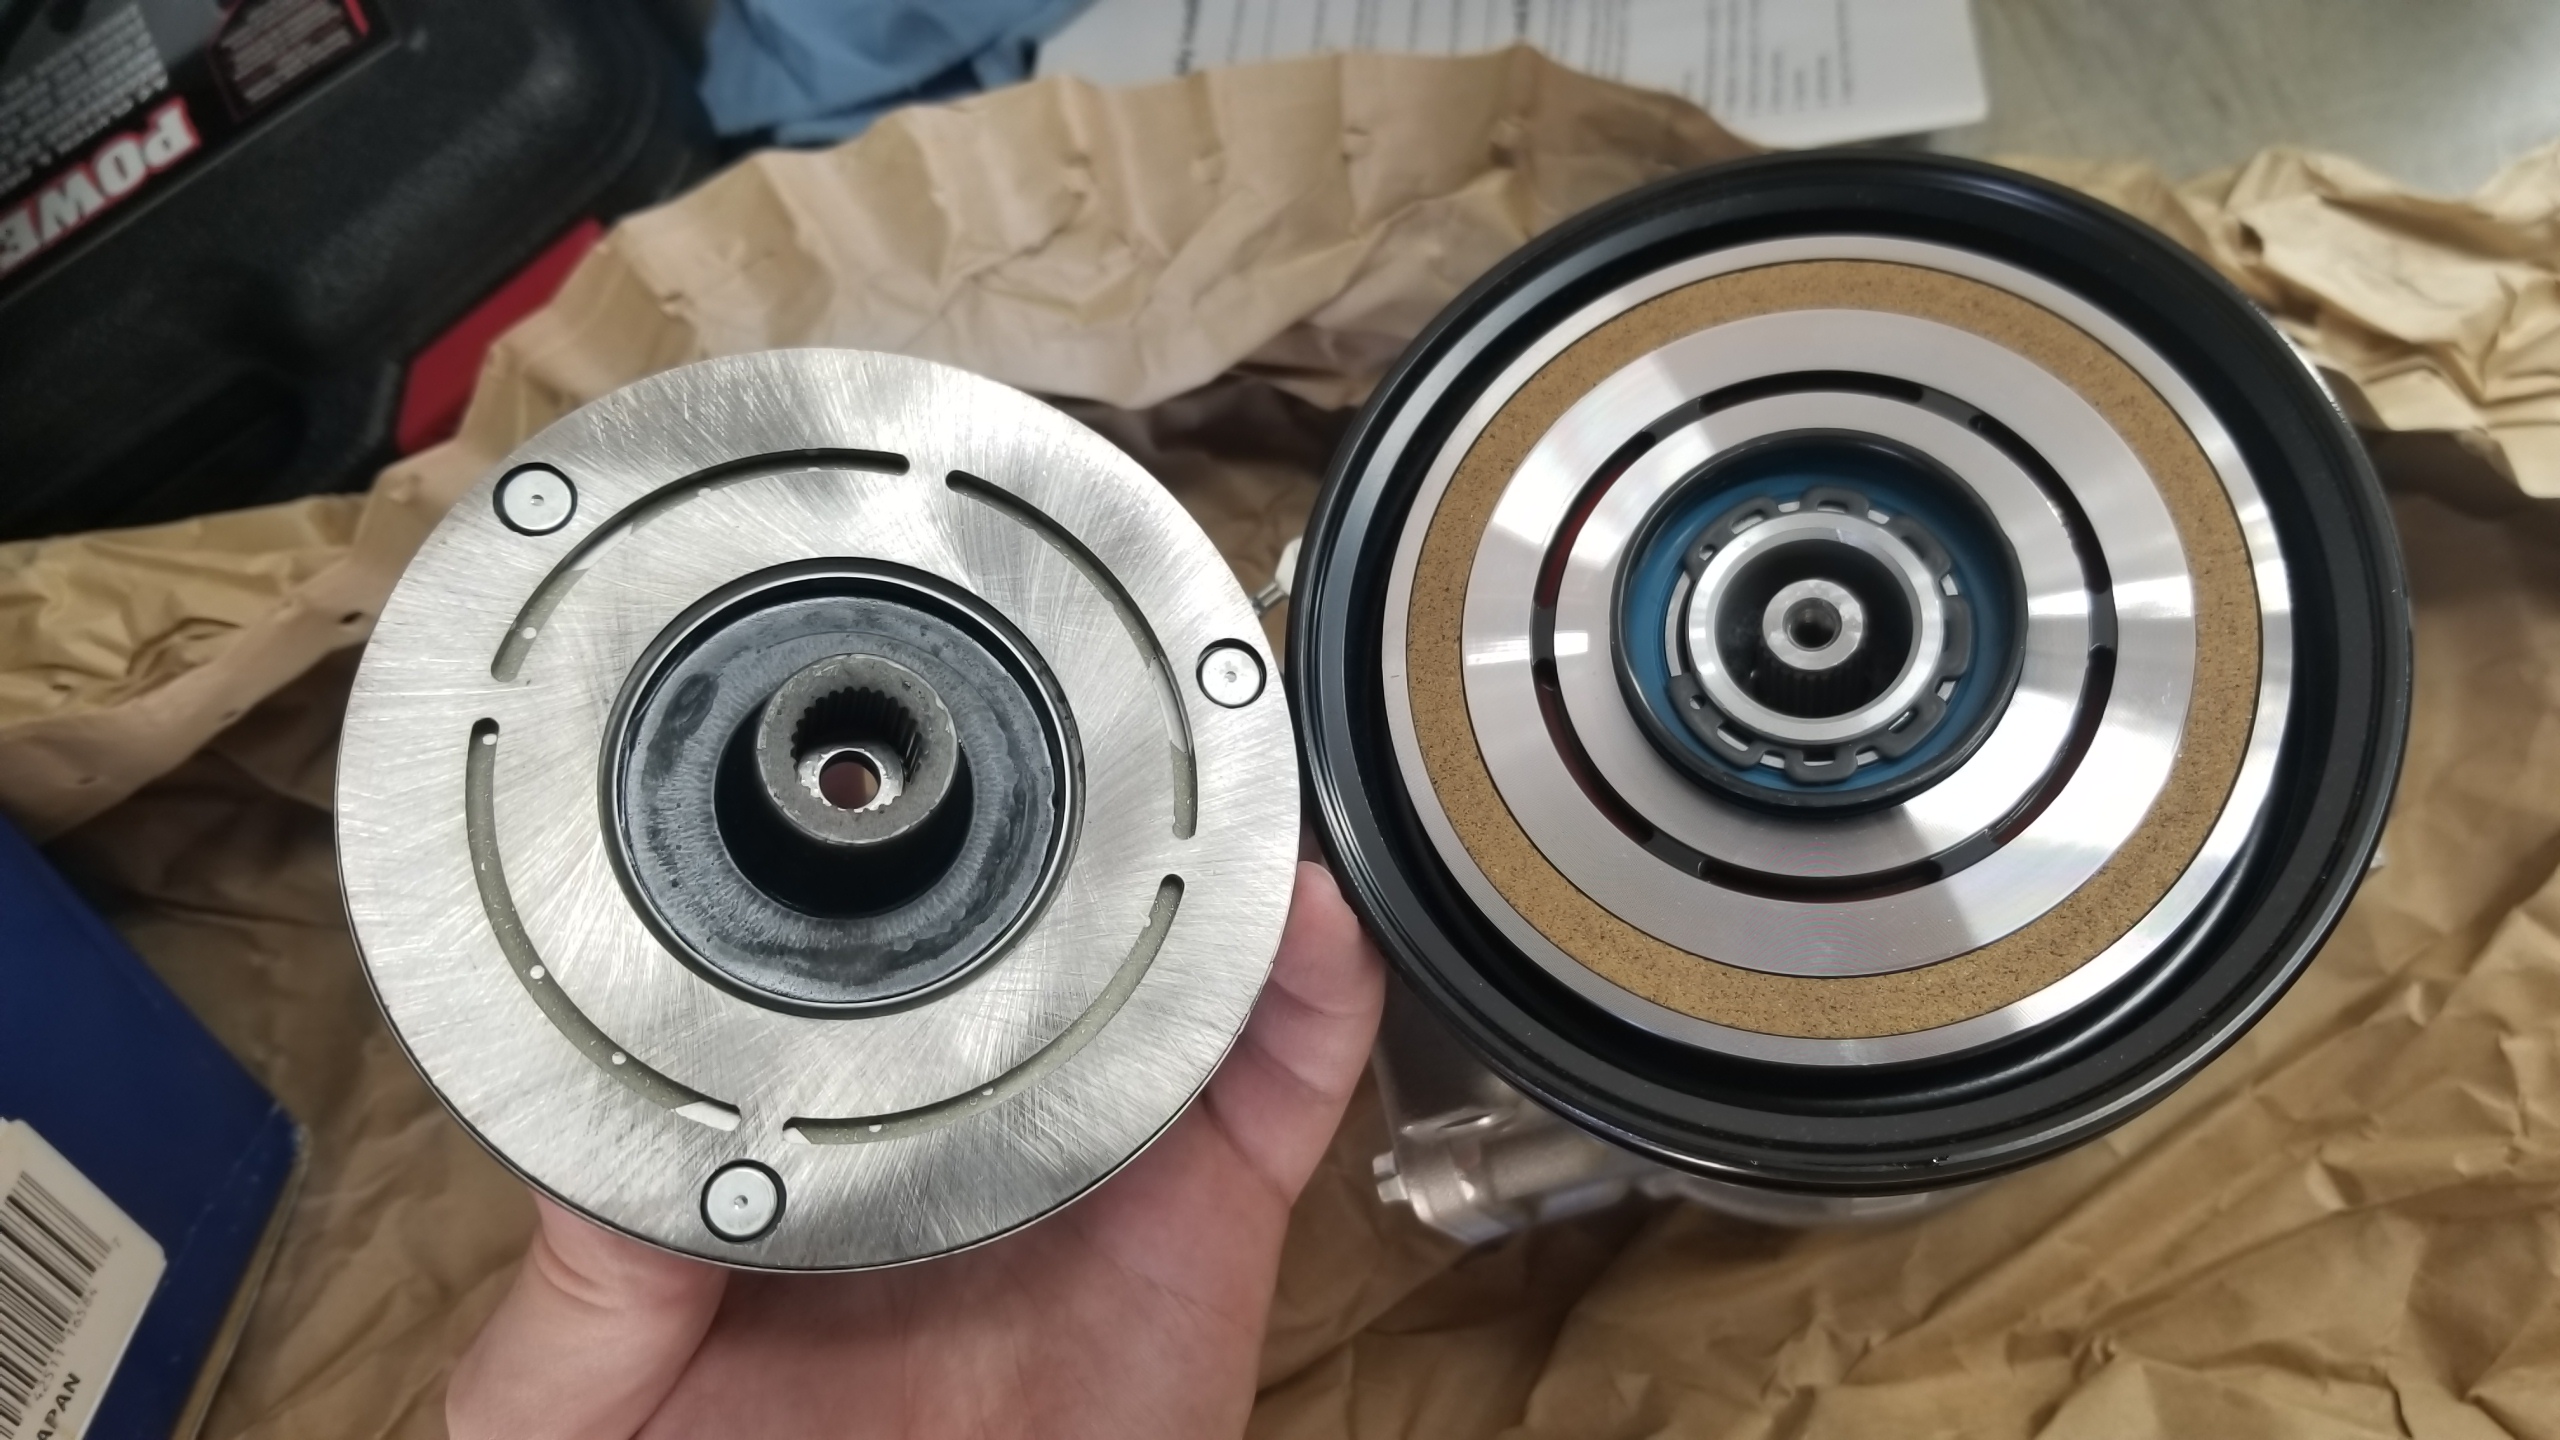
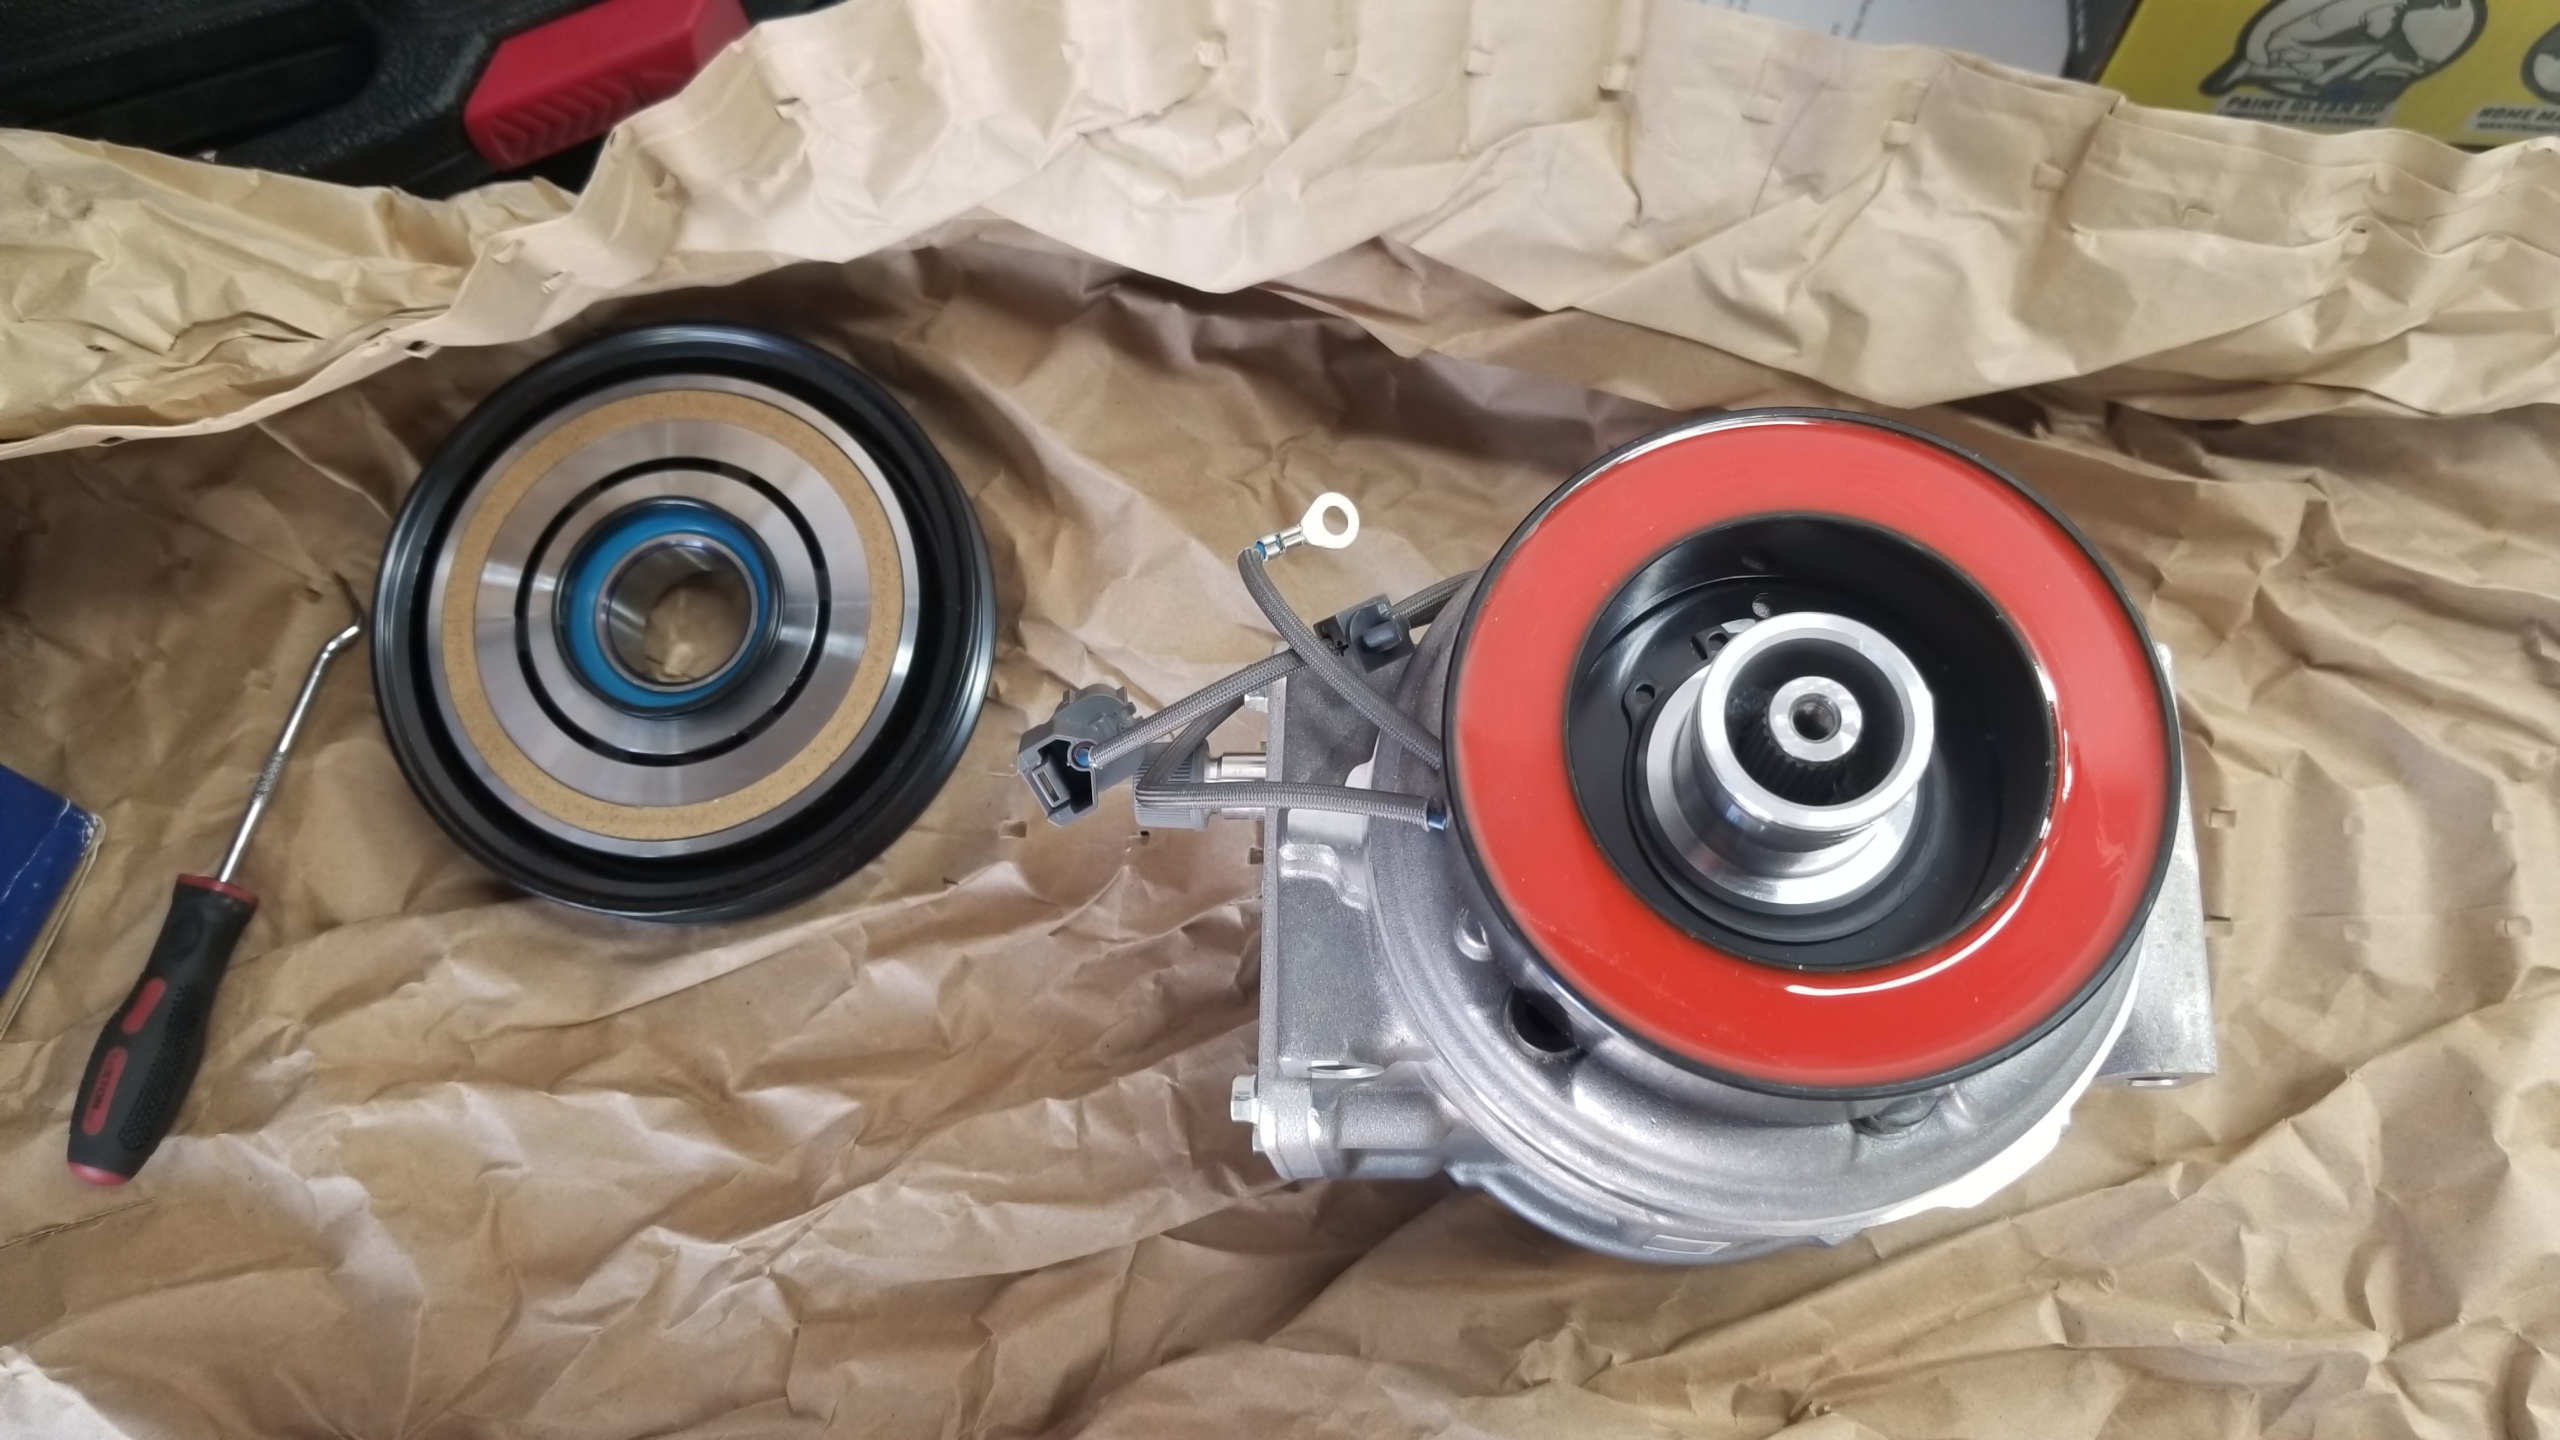
Here's what a new clutch set looks like. No special tools required for disassembly, but an impact for the 10mm center bolt is helpful.
tsY7A2i.jpg


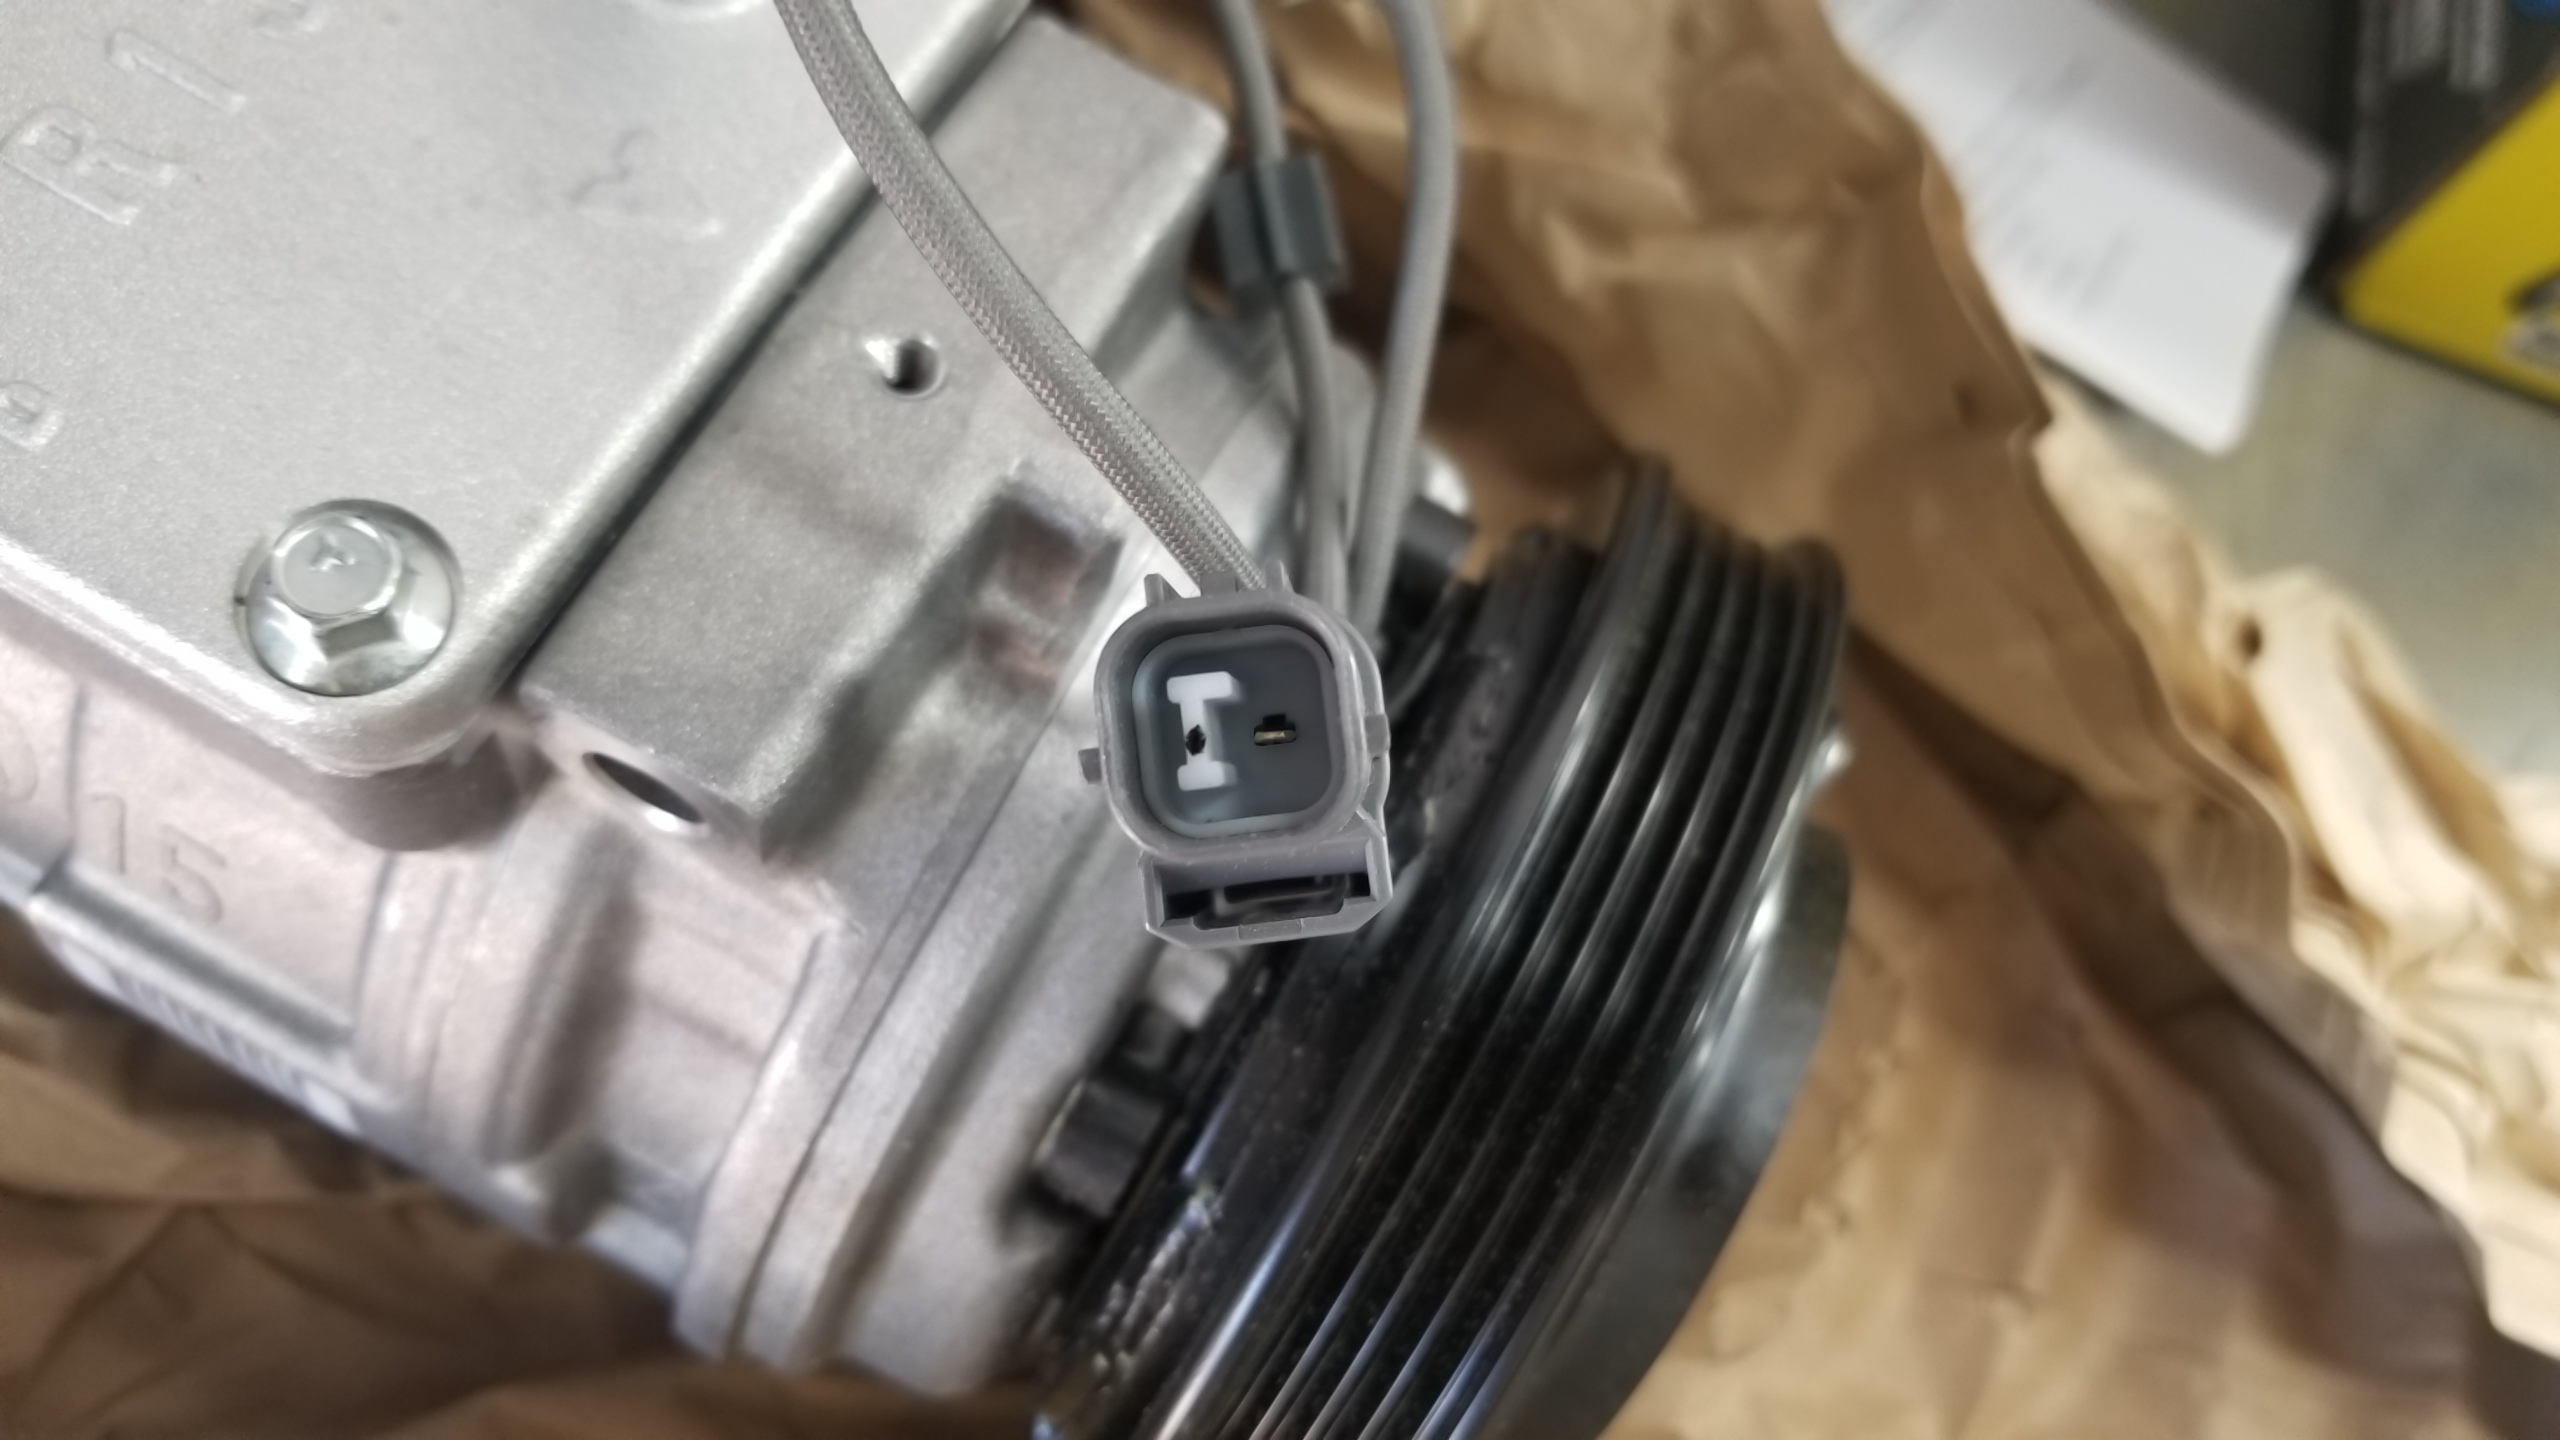
Here's the clutch connector that's integrated into the field coil. This isn't the correct one for the car as shown further below.
NxzF4qT.jpg


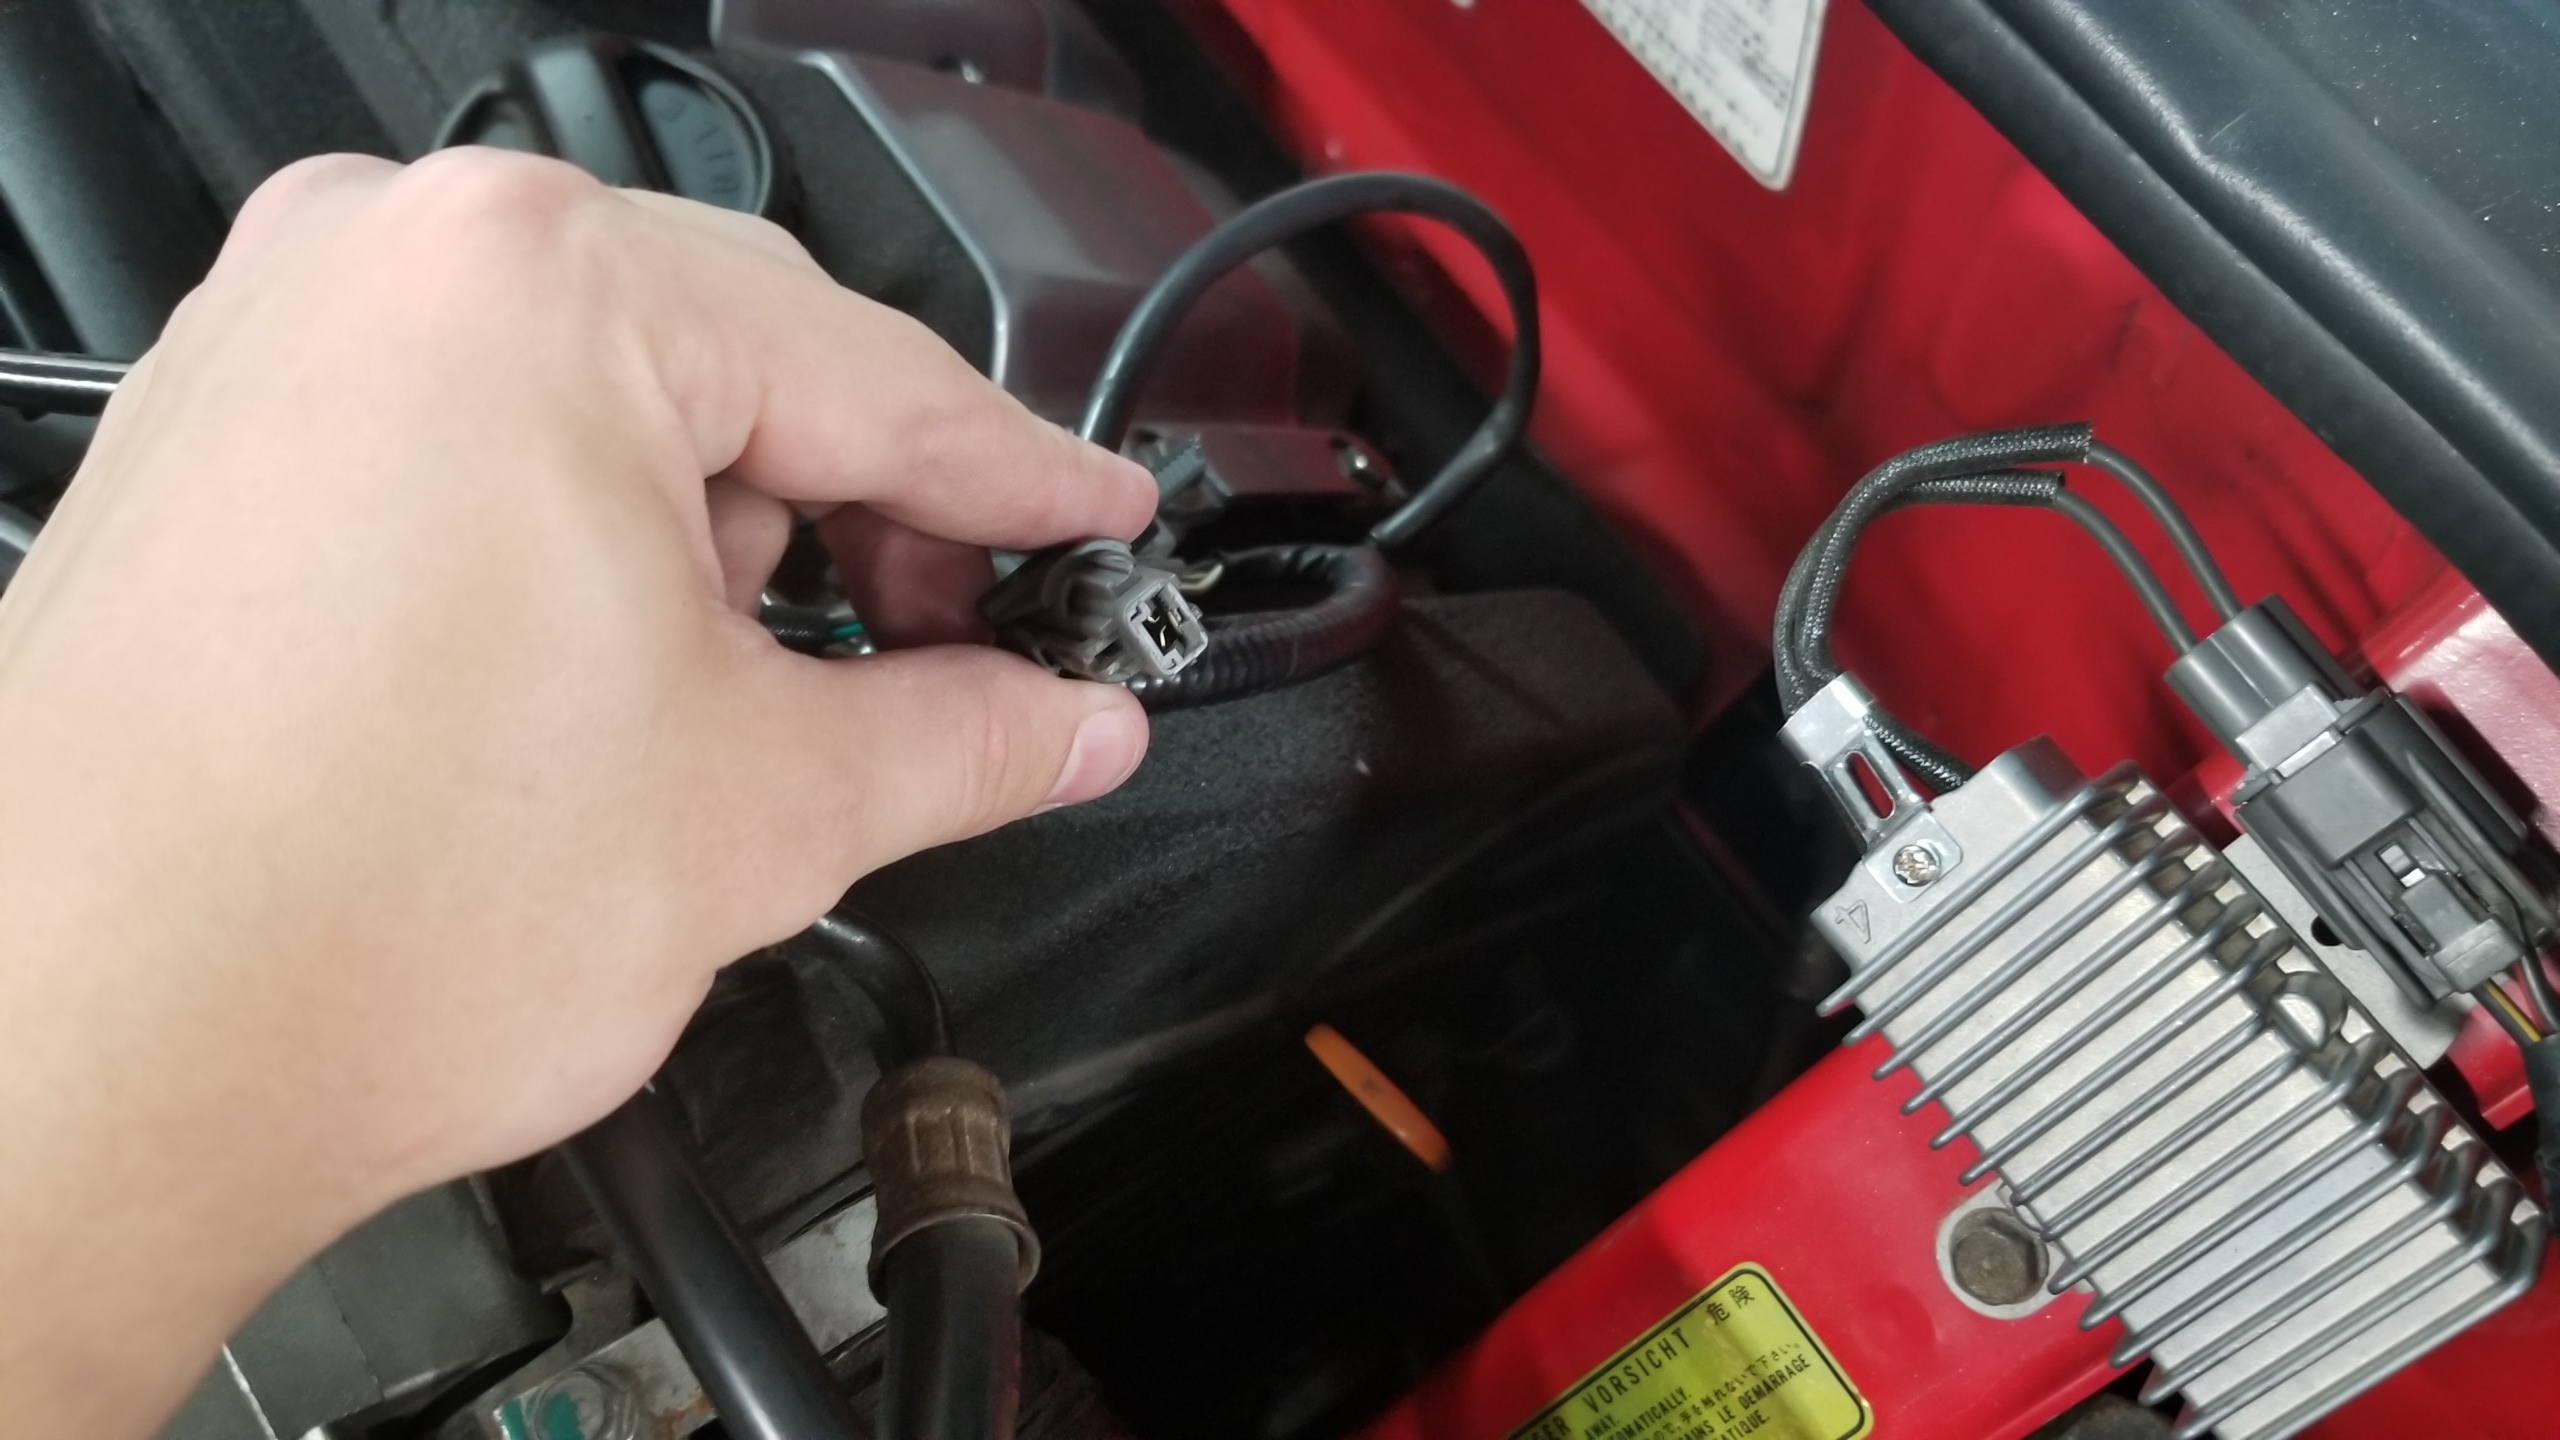
Original A/C clutch connector on the engine wiring harness.
1uiqPpI.jpg


To get the new compressor to fit correctly, you need to transfer over your old pulley, clutch assy, and field coil, which also has the correct harness connector. You can't mix-and-match the coils and pulley as it won't fit right. The main downside was that I also re-used the old pulley bearing as I didn't have a new one on hand. I believe my R-12 compressor had been replaced at some point in the past, so my old bearing and clutch looked to be okay to re-use. If you want to try to replace the old bearing with the one staked into the new pulley, you'd have to be careful and probably use some heat to remove the bearing without pushing on the inner race. It wasn't designed to be removed without damaging the bearing since you can't push out by the outer race.

With the old clutch assy installed onto the new compressor, make sure the clutch gap is set according to the FSM. The old and new compressors should have shims to adjust the gap, verify it's within spec with feeler gauges and adjust as necessary before installing the compressor. Otherwise I'm assuming it won't work.
I1HqlRC.jpg


Transferring over the hoses to the new compressor. I drained about 110mL of oil from the new compressor and was only able to fill about 100mL back into the outlet side without spilling. This is a good opportunity to fill with the correct amount of system oil and UV dye, just not to the suction/inlet side of the compressor since I read somewhere that could hydrolock it.

According to the threads linked above, the compressor is loaded with about the right amount of oil for the system, assuming you've flushed out as much of the lines as you can. The only thing I didn't flush was the evaporator.
sAFkDPE.jpg


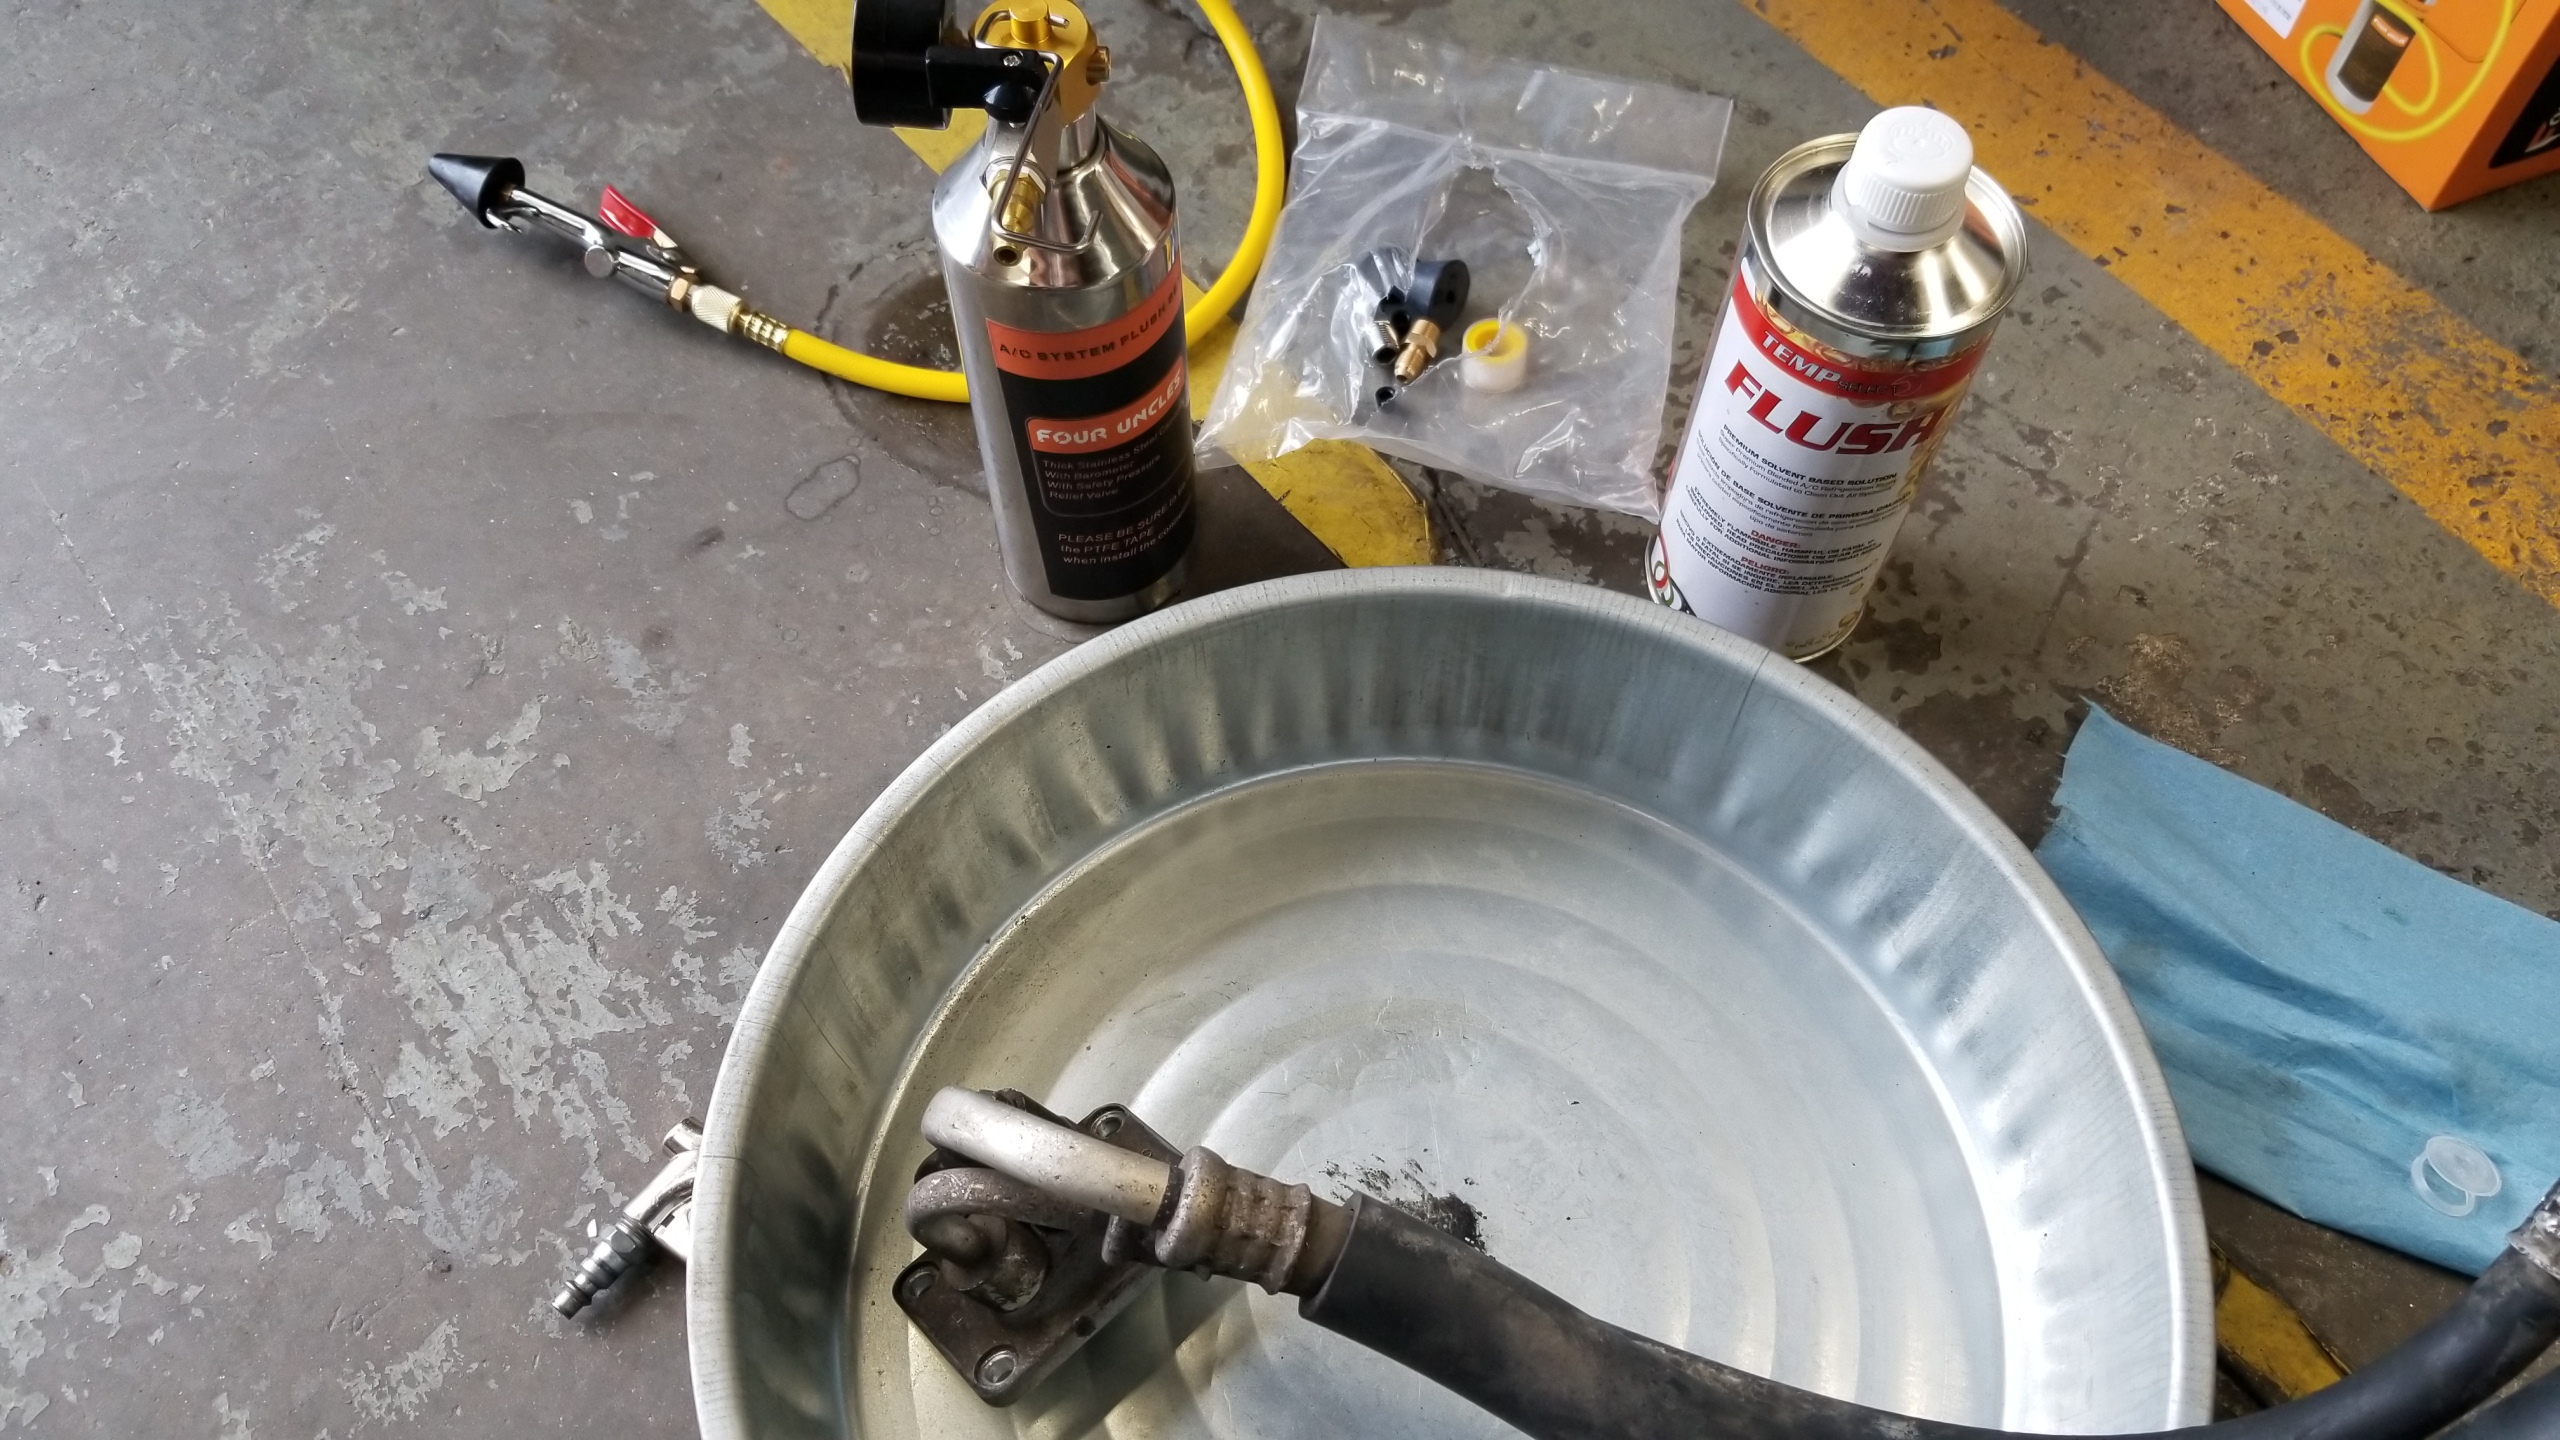
First use of the flushing kit. Why is it called Four Uncles? What did each uncle contribute? Many questions remain unanswered.

I was very pleased with these products. The flush gun connects with a quick-disconnect to a compressed air source, which you can then disconnect for a short burst of flushing solution or keep it connected to keep blasting. Just remember to close the shutoff valve before disconnecting the gun or you'll blow your eardrums.

The flush solution I used seemed to work well and evaporated quickly. You use way more than you expect though, so I'd get at least 3-4 cans next time. 2 was barely enough.
uRLYTfR.jpg


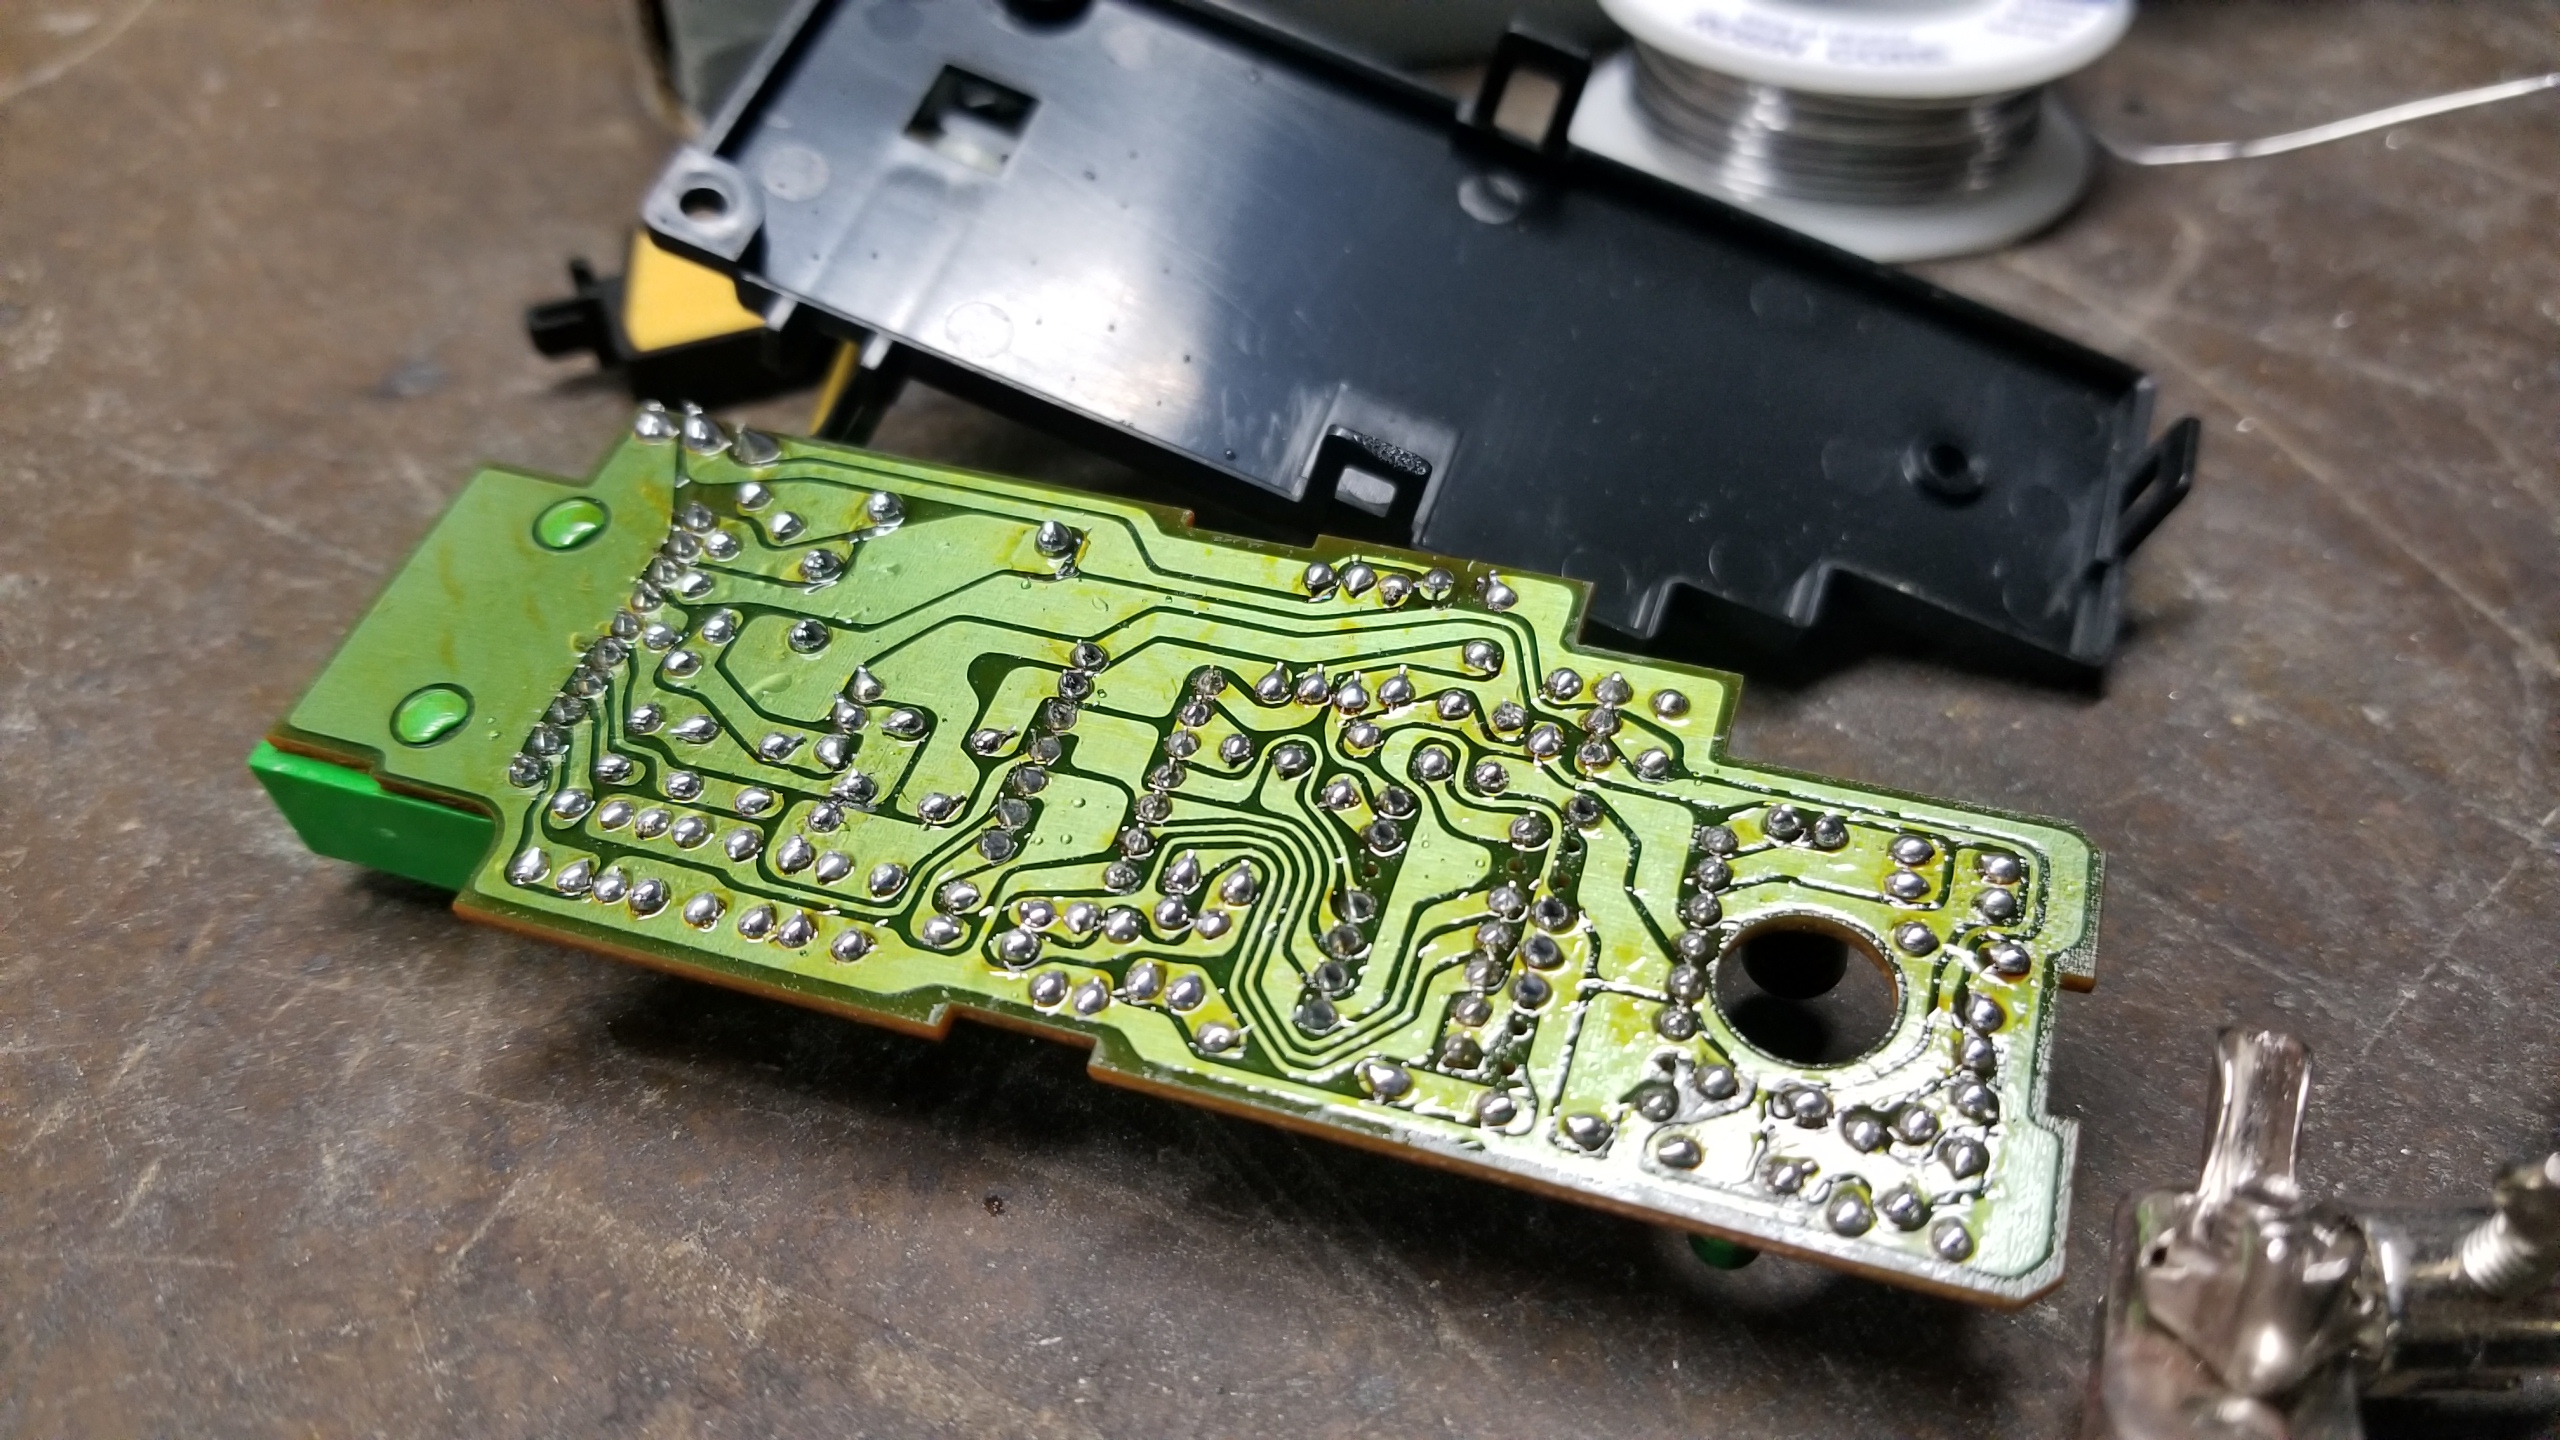
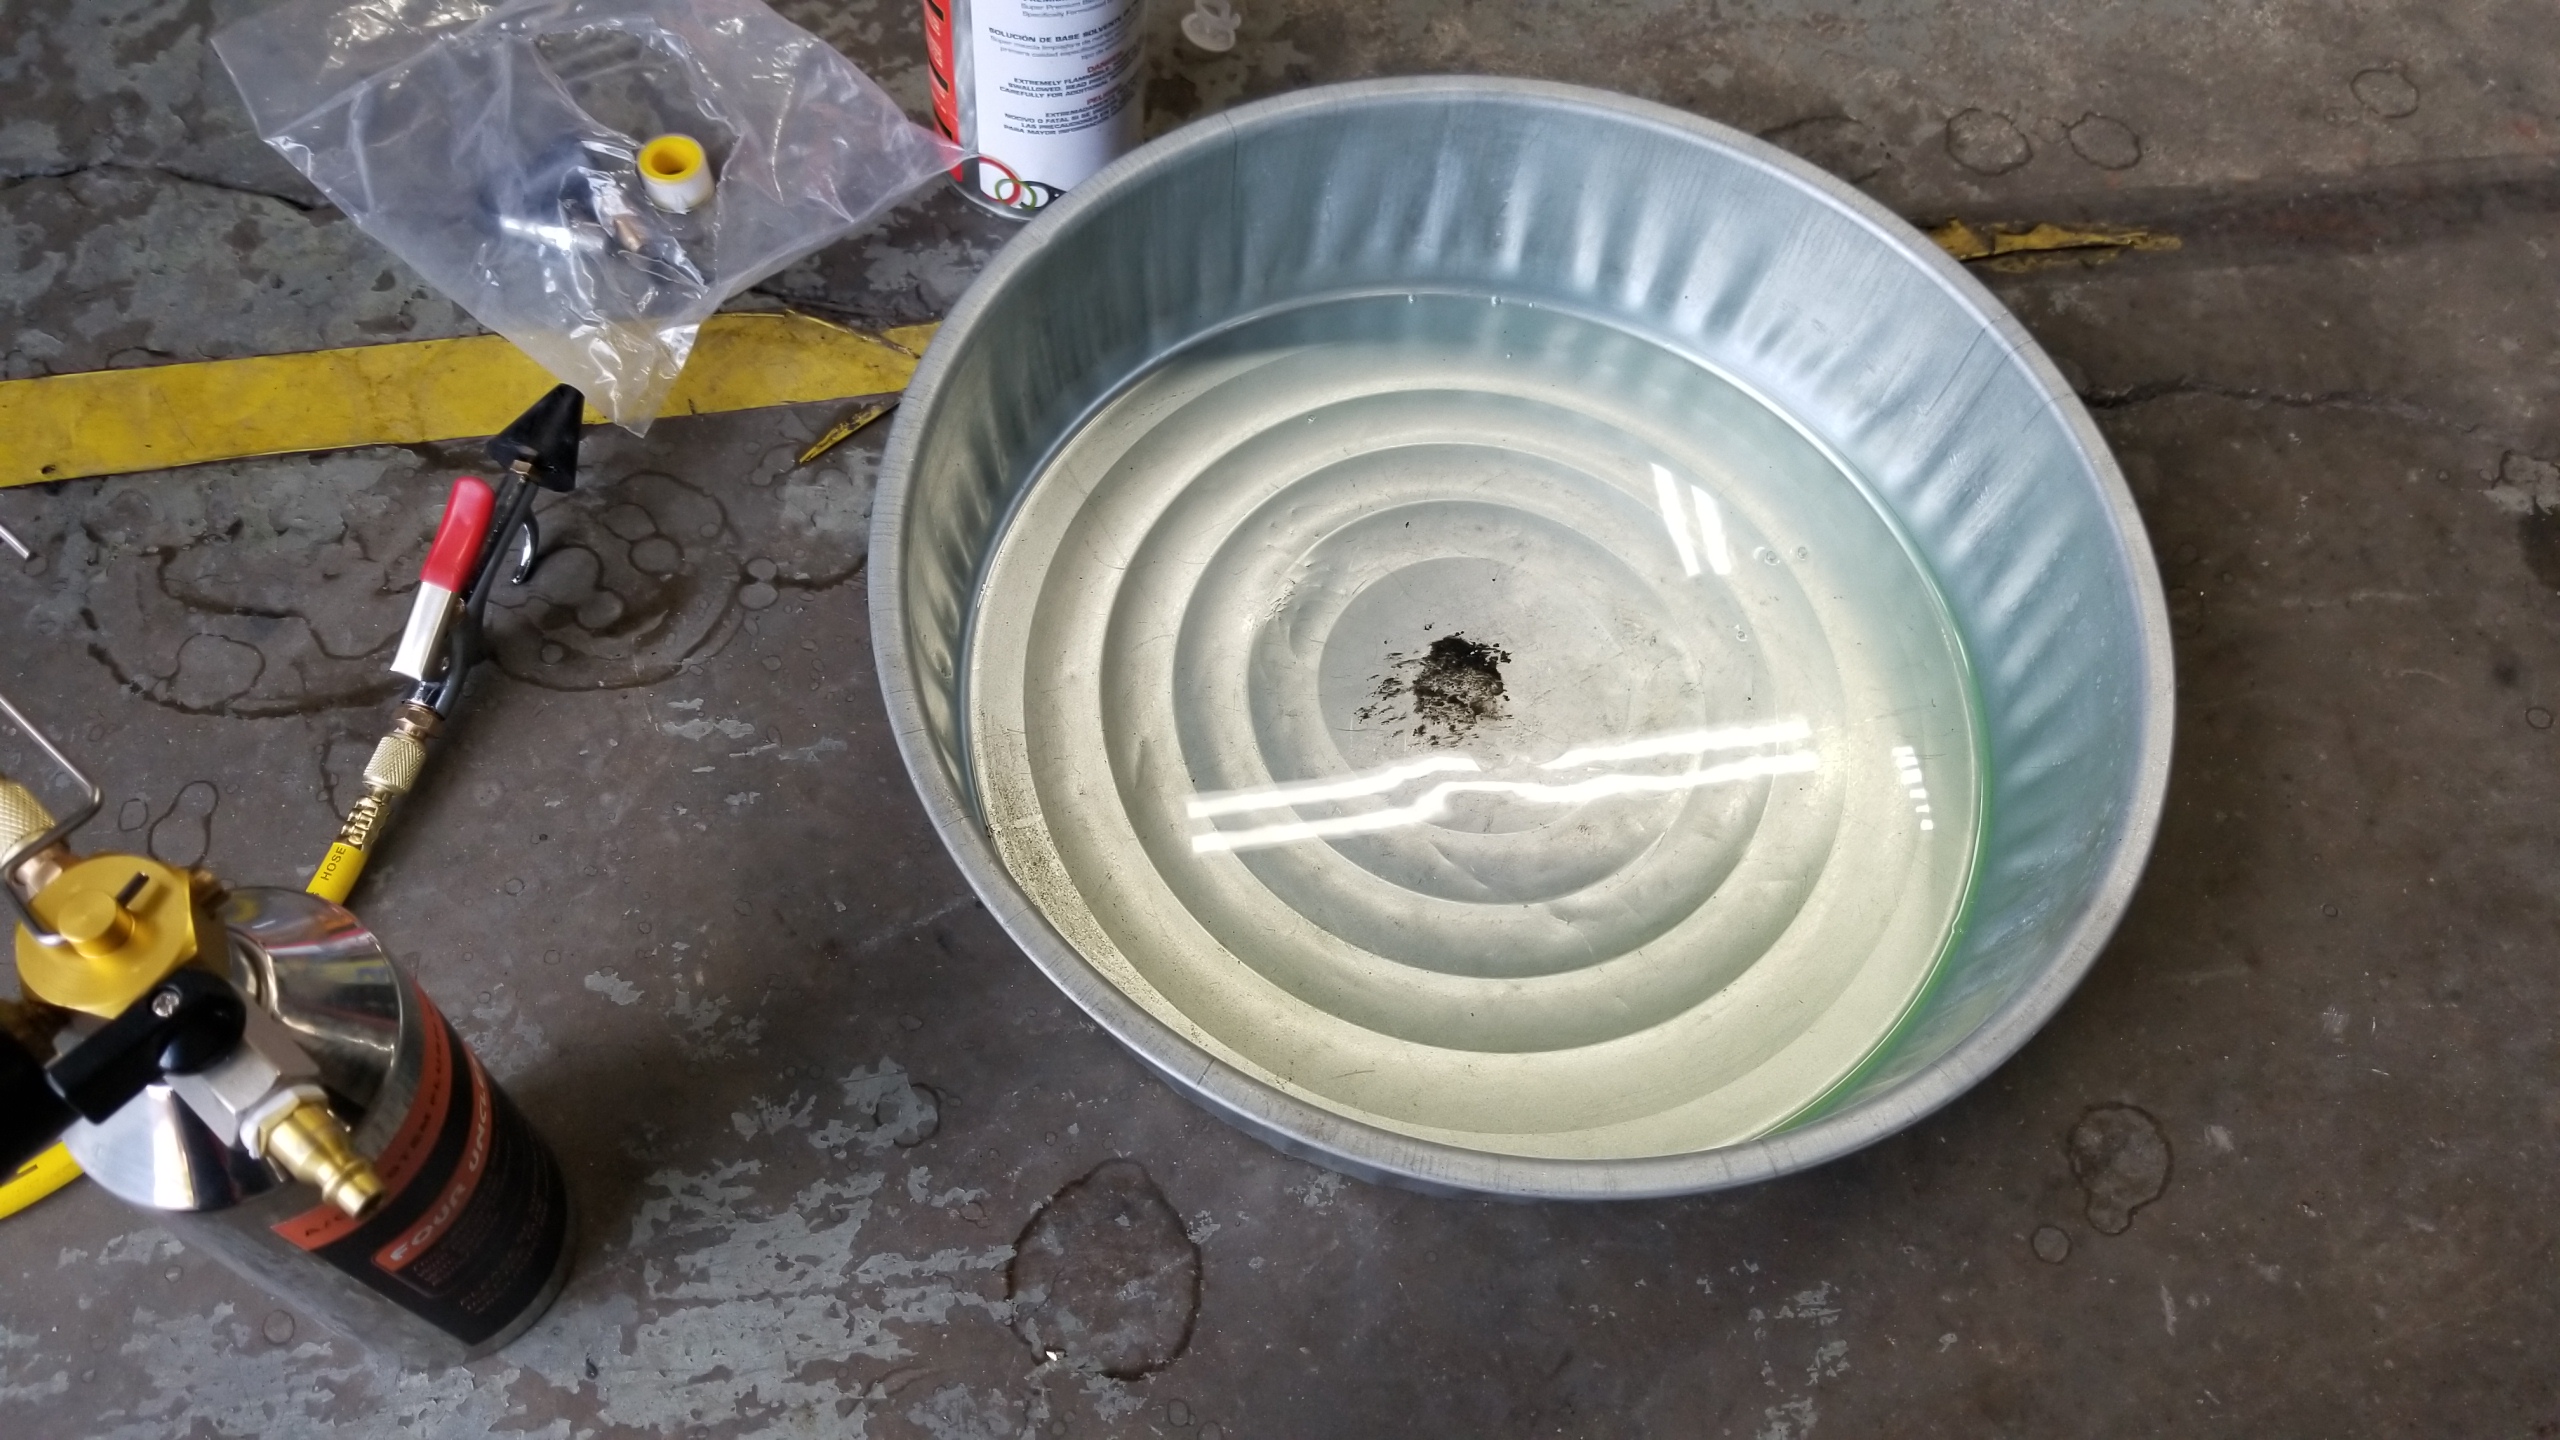
Results from flushing the hoses. The black spot in the middle is just leftover paint. Fortunately, the fluid came out very clean, the green tinge is from old UV dye.
8hHtaXj.jpg


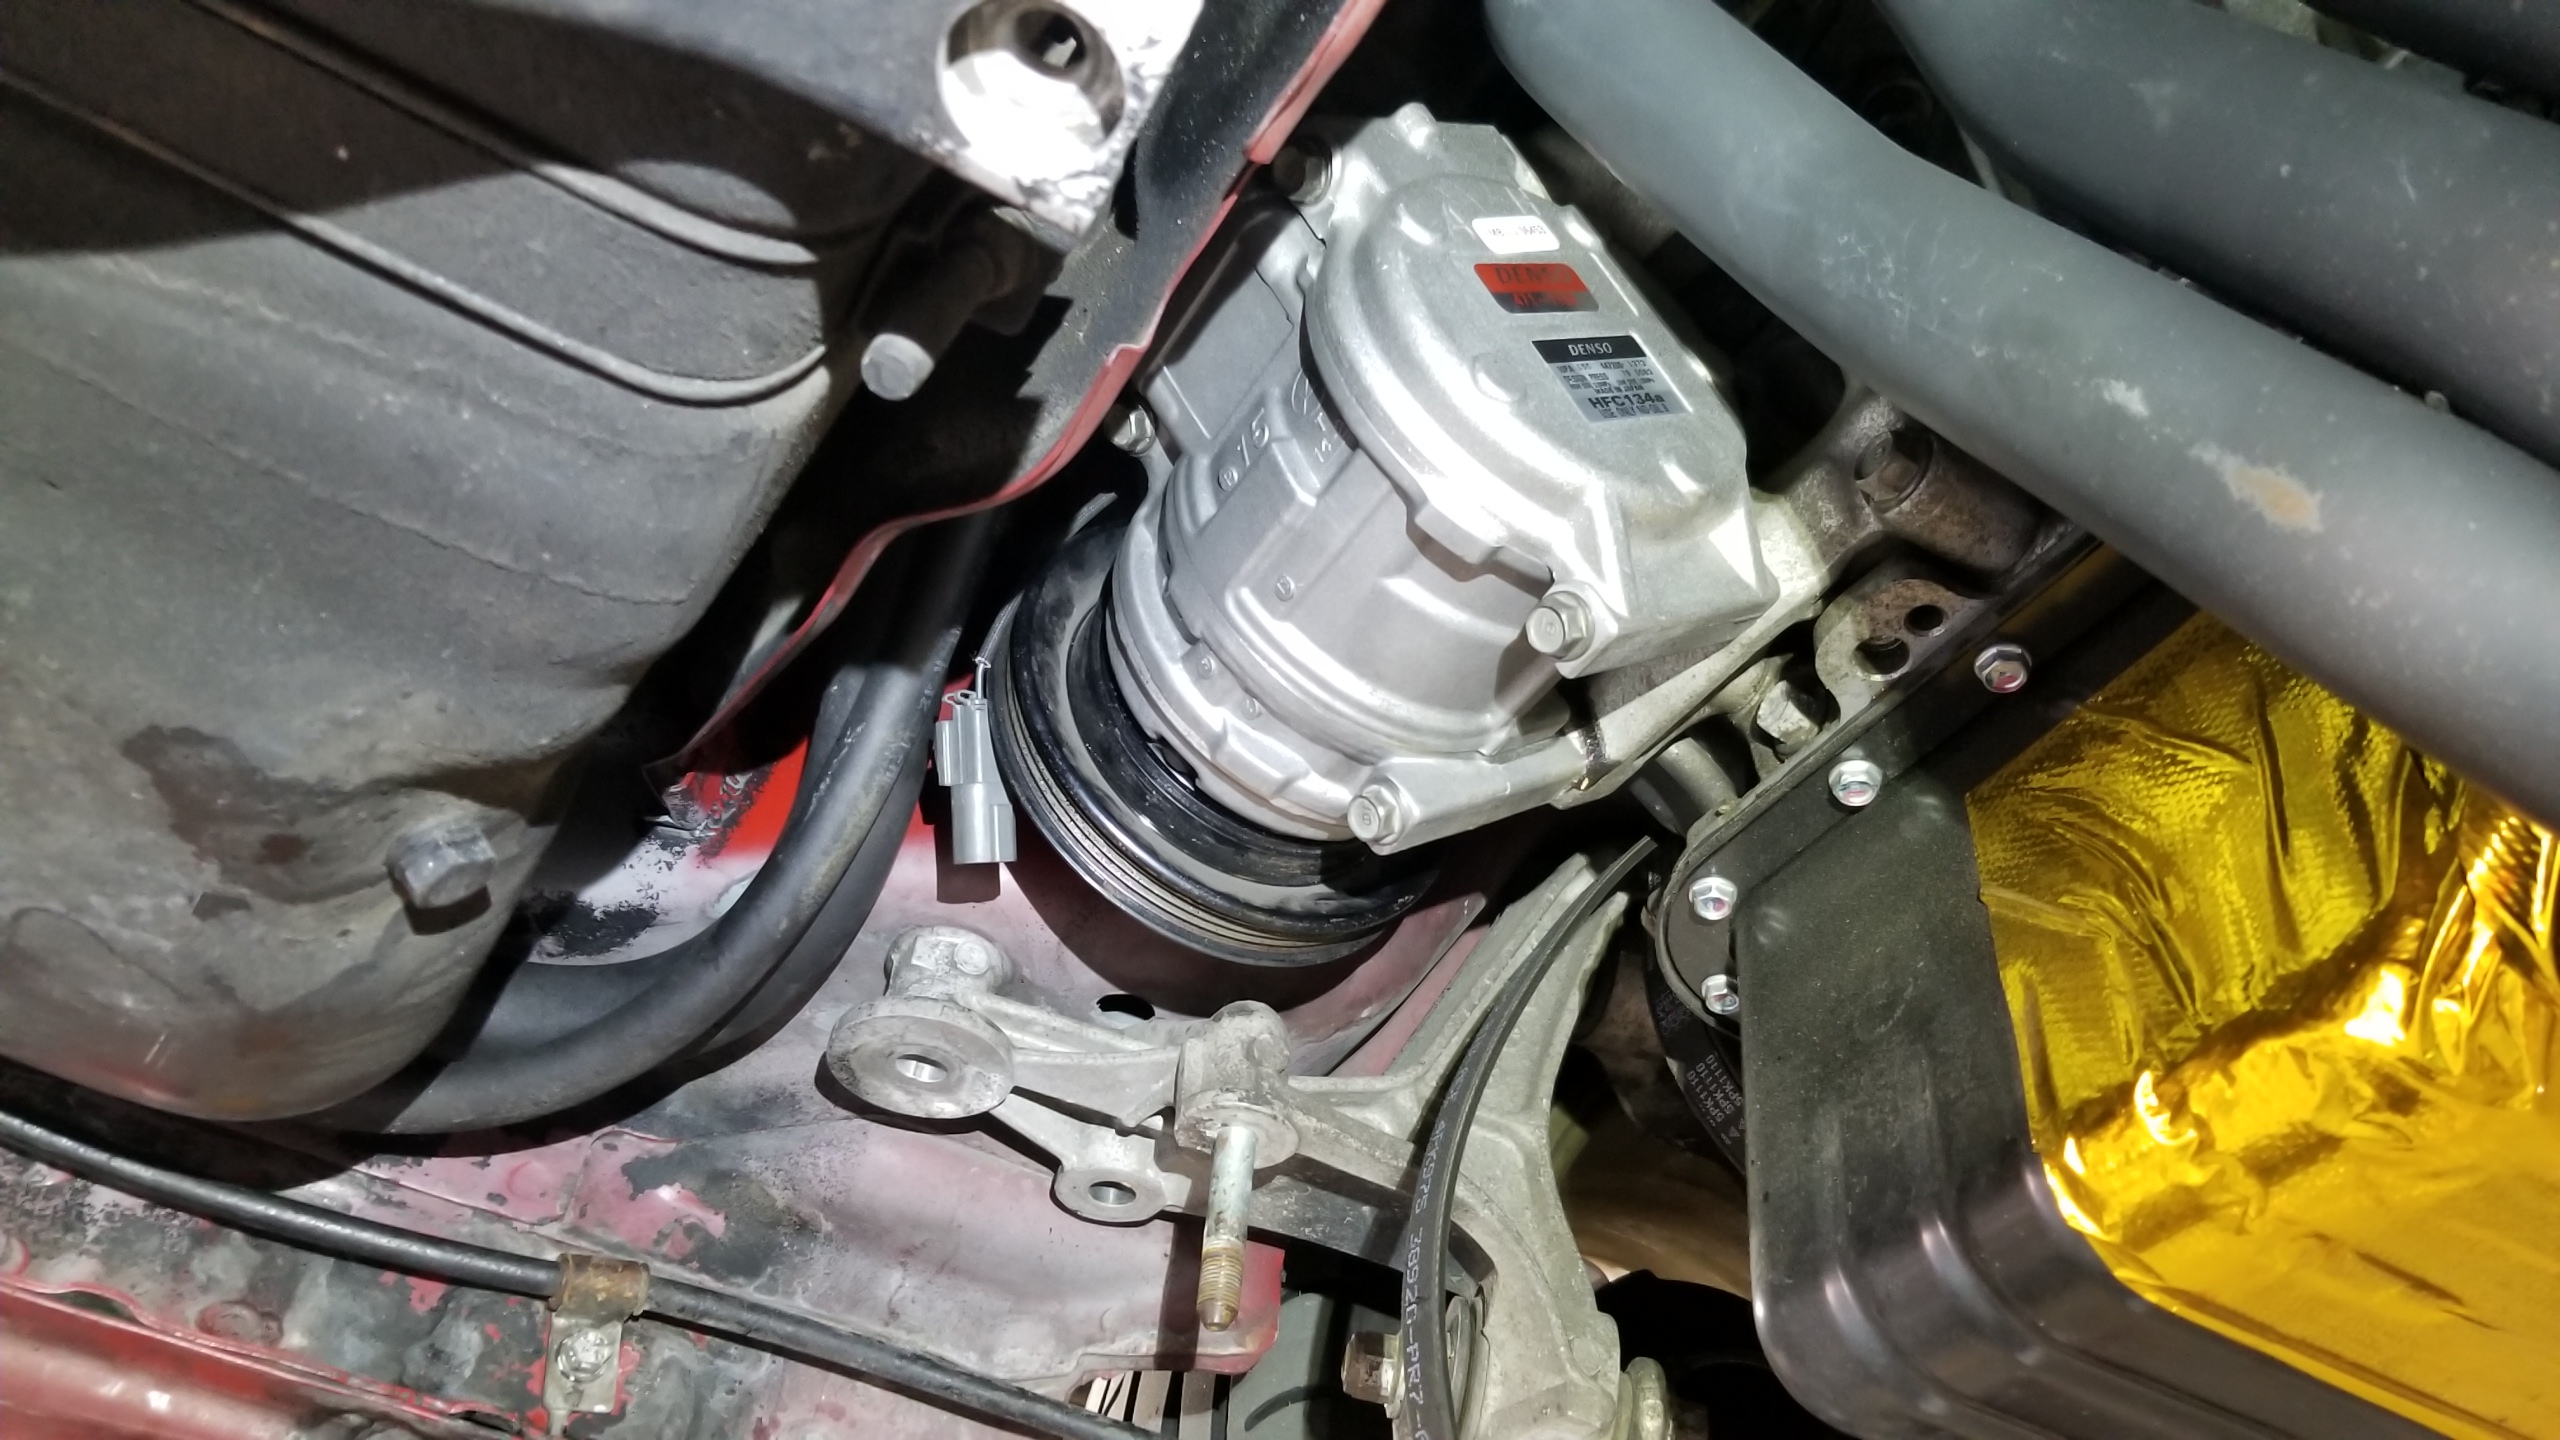
New compressor installed and torqued. Not pictured but I tore off the Reflect-A-Gold off the back of my old compressor and glued it onto the new one to help reflect some heat away from the exhaust headers.
wsi5IRi.jpg


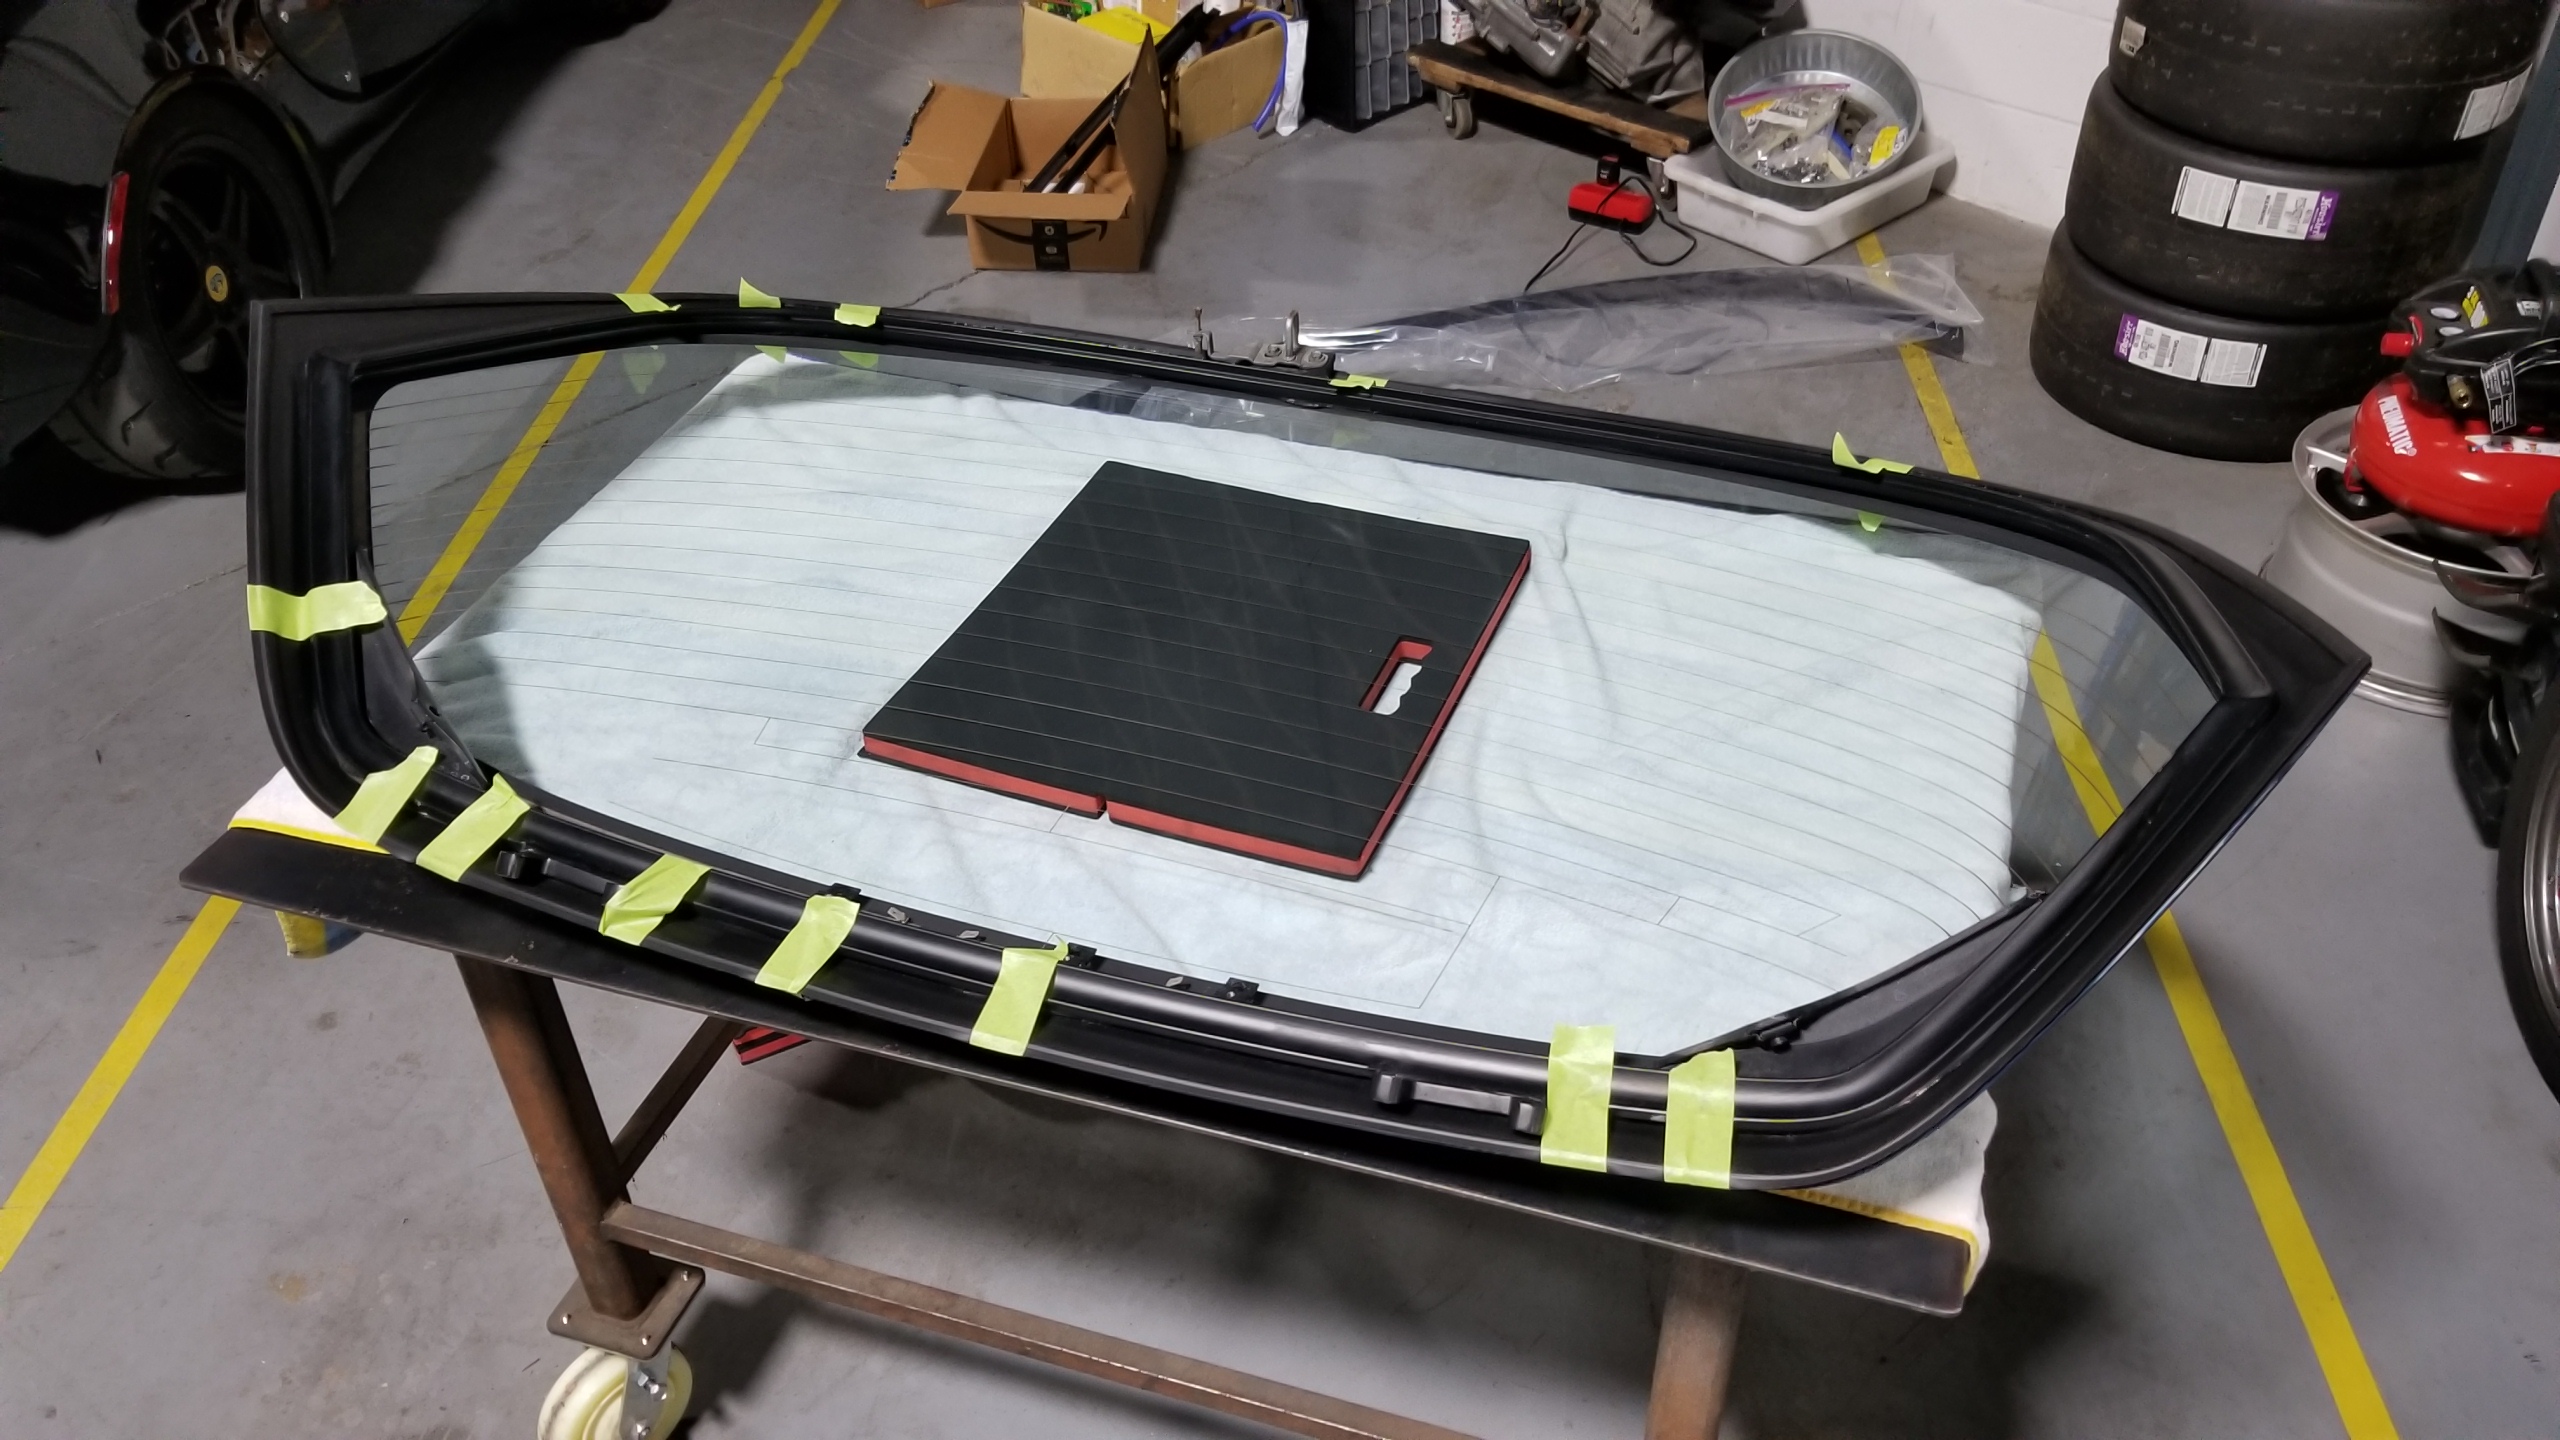
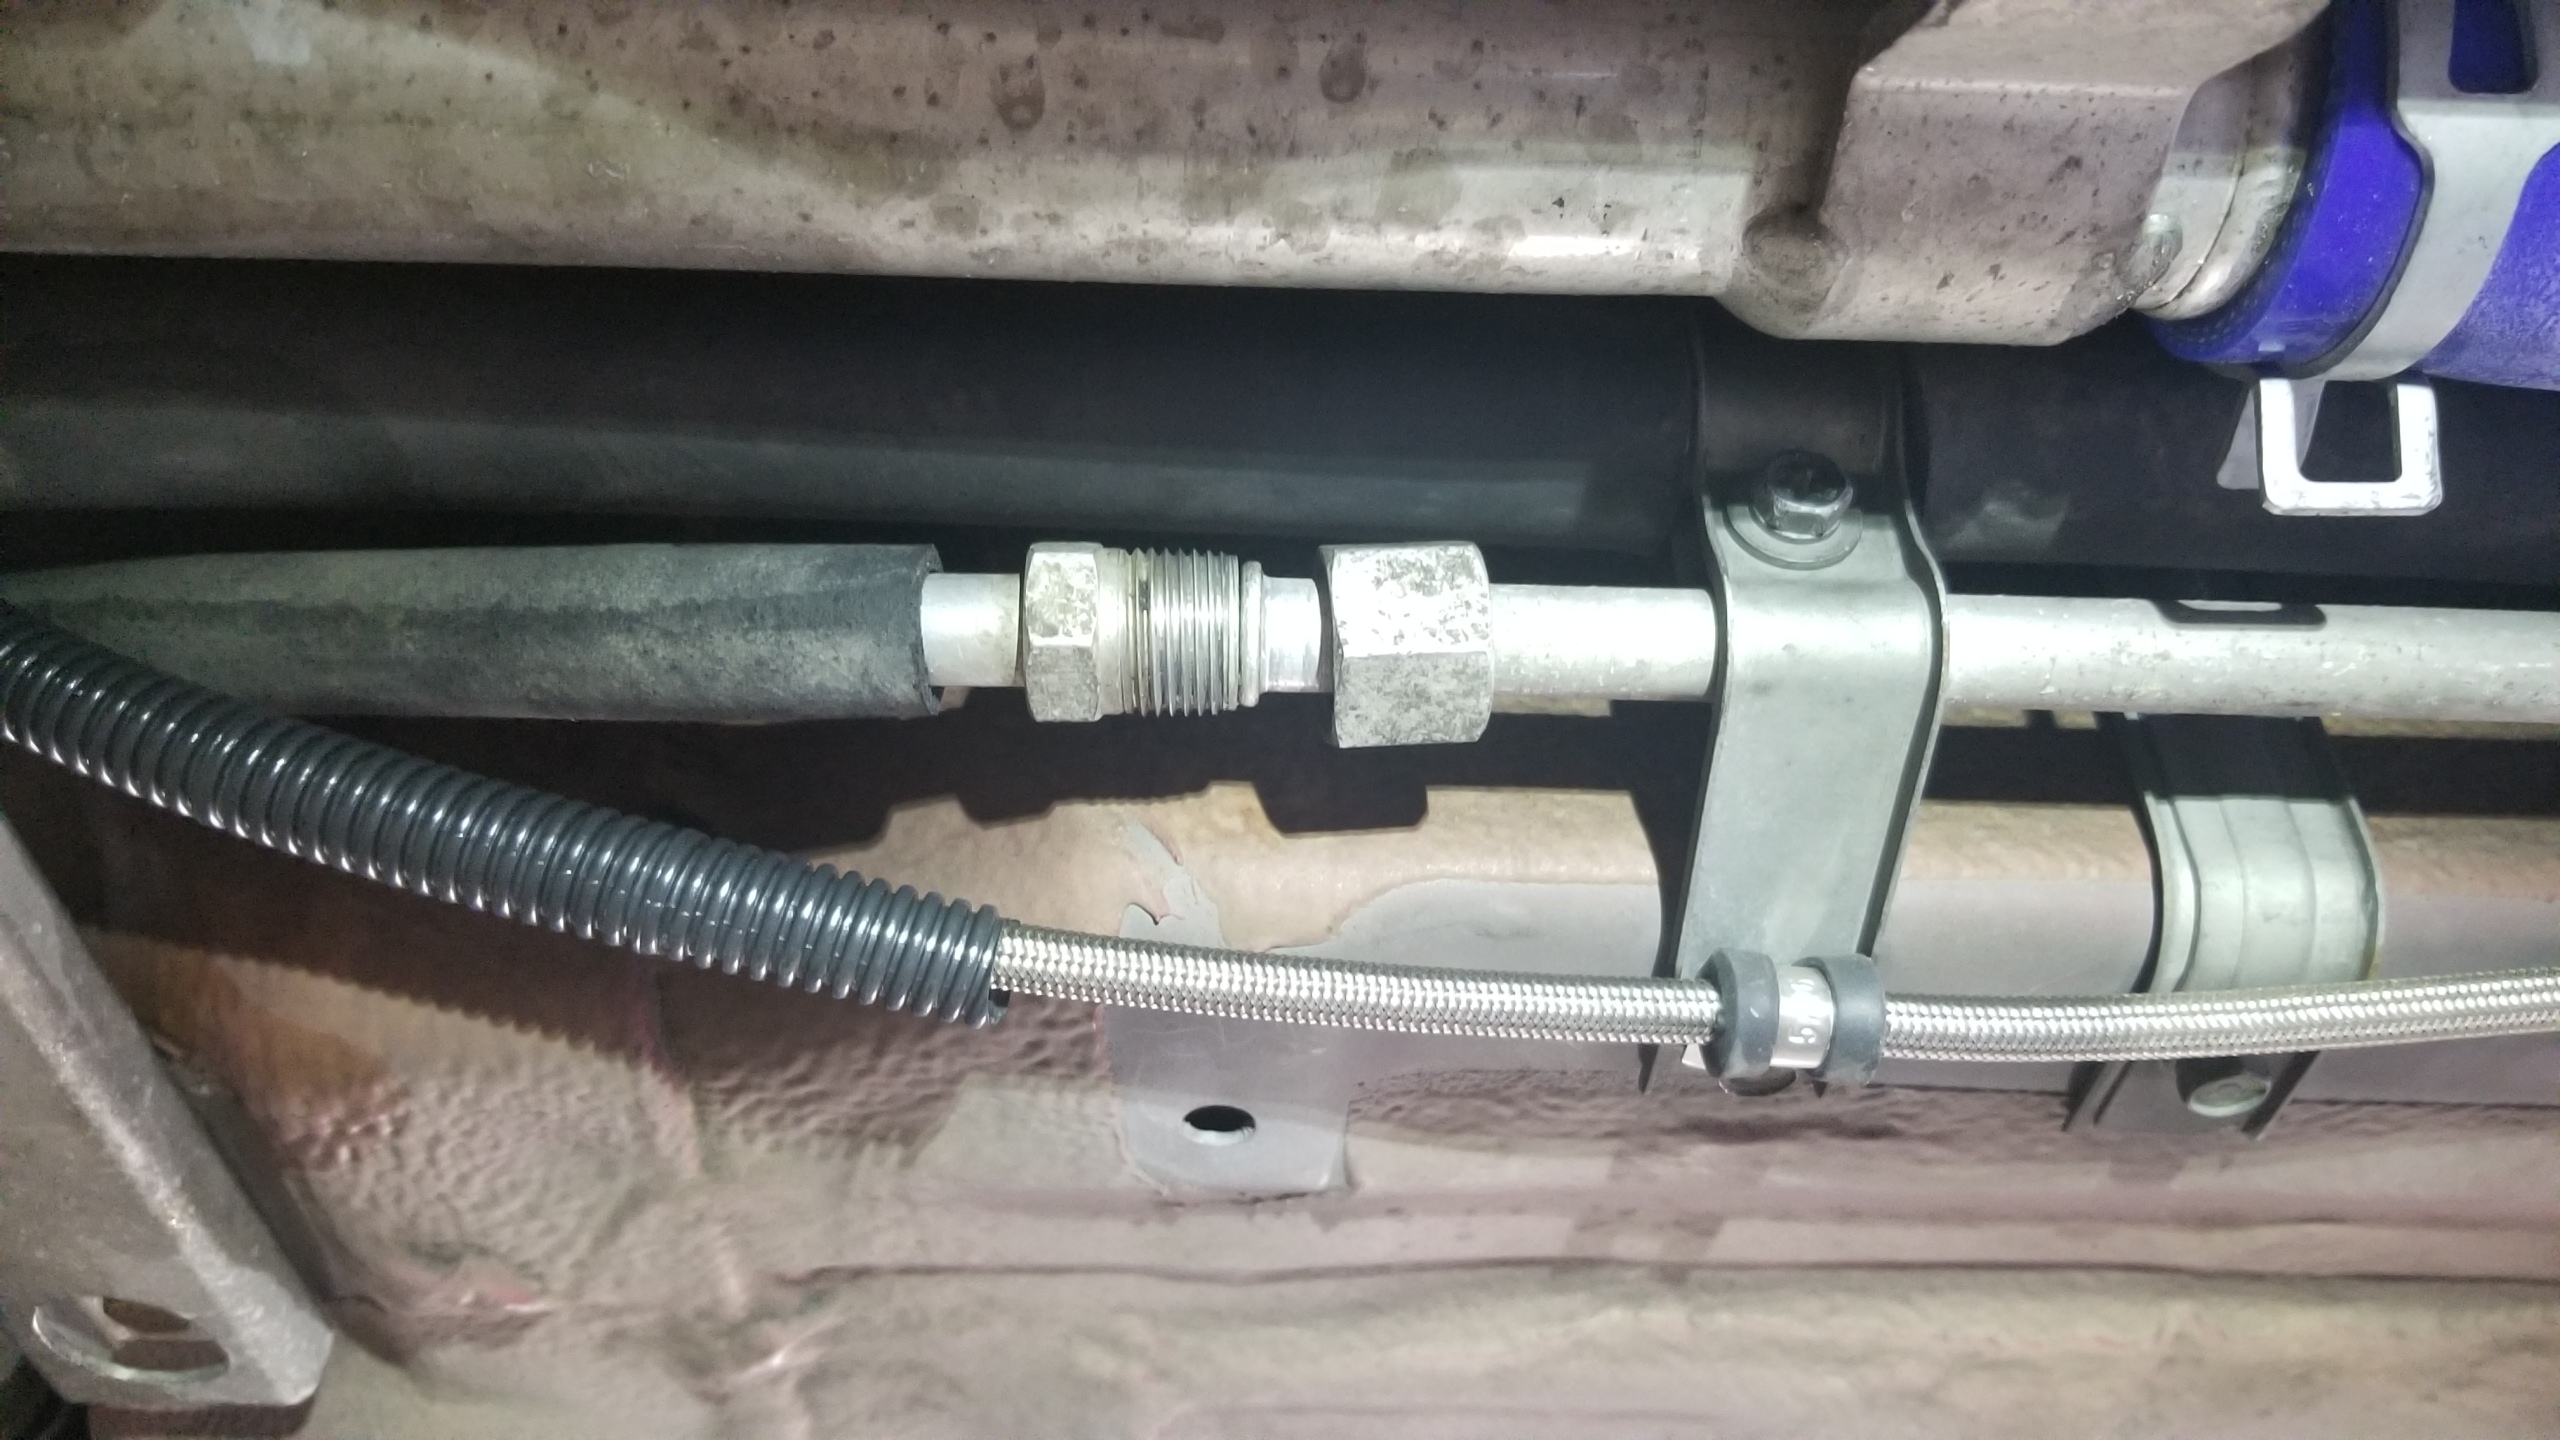
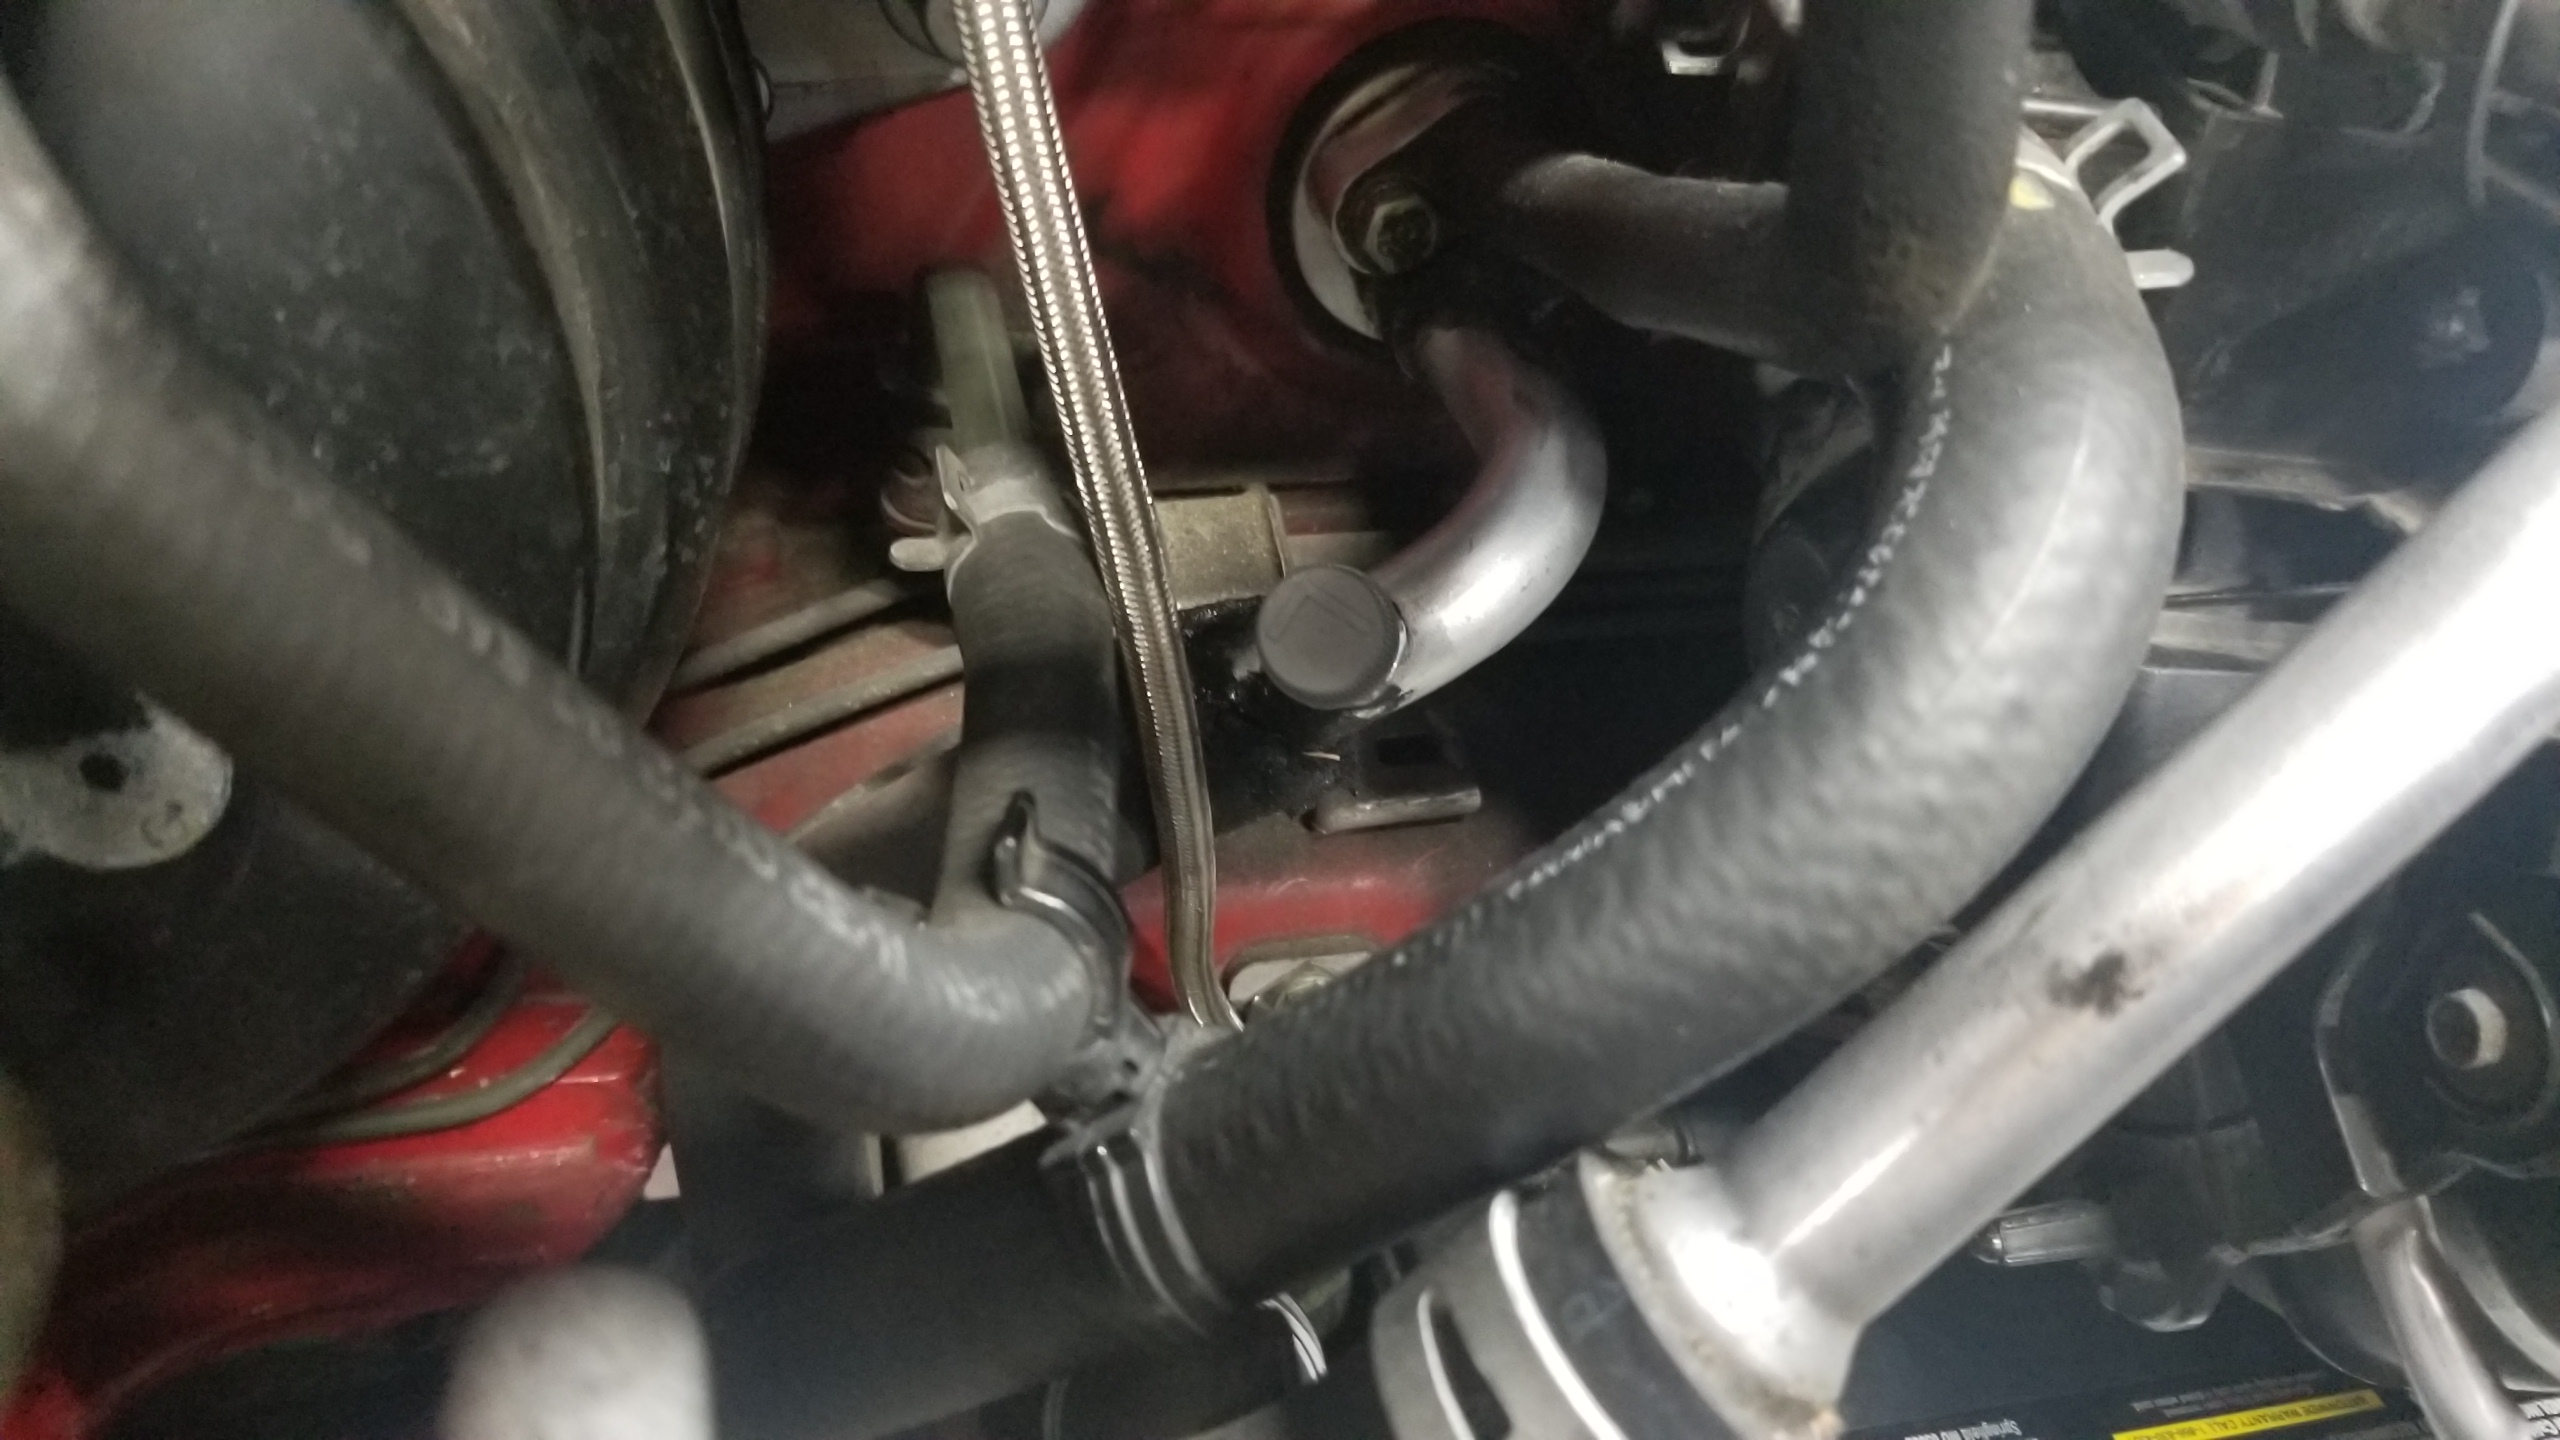
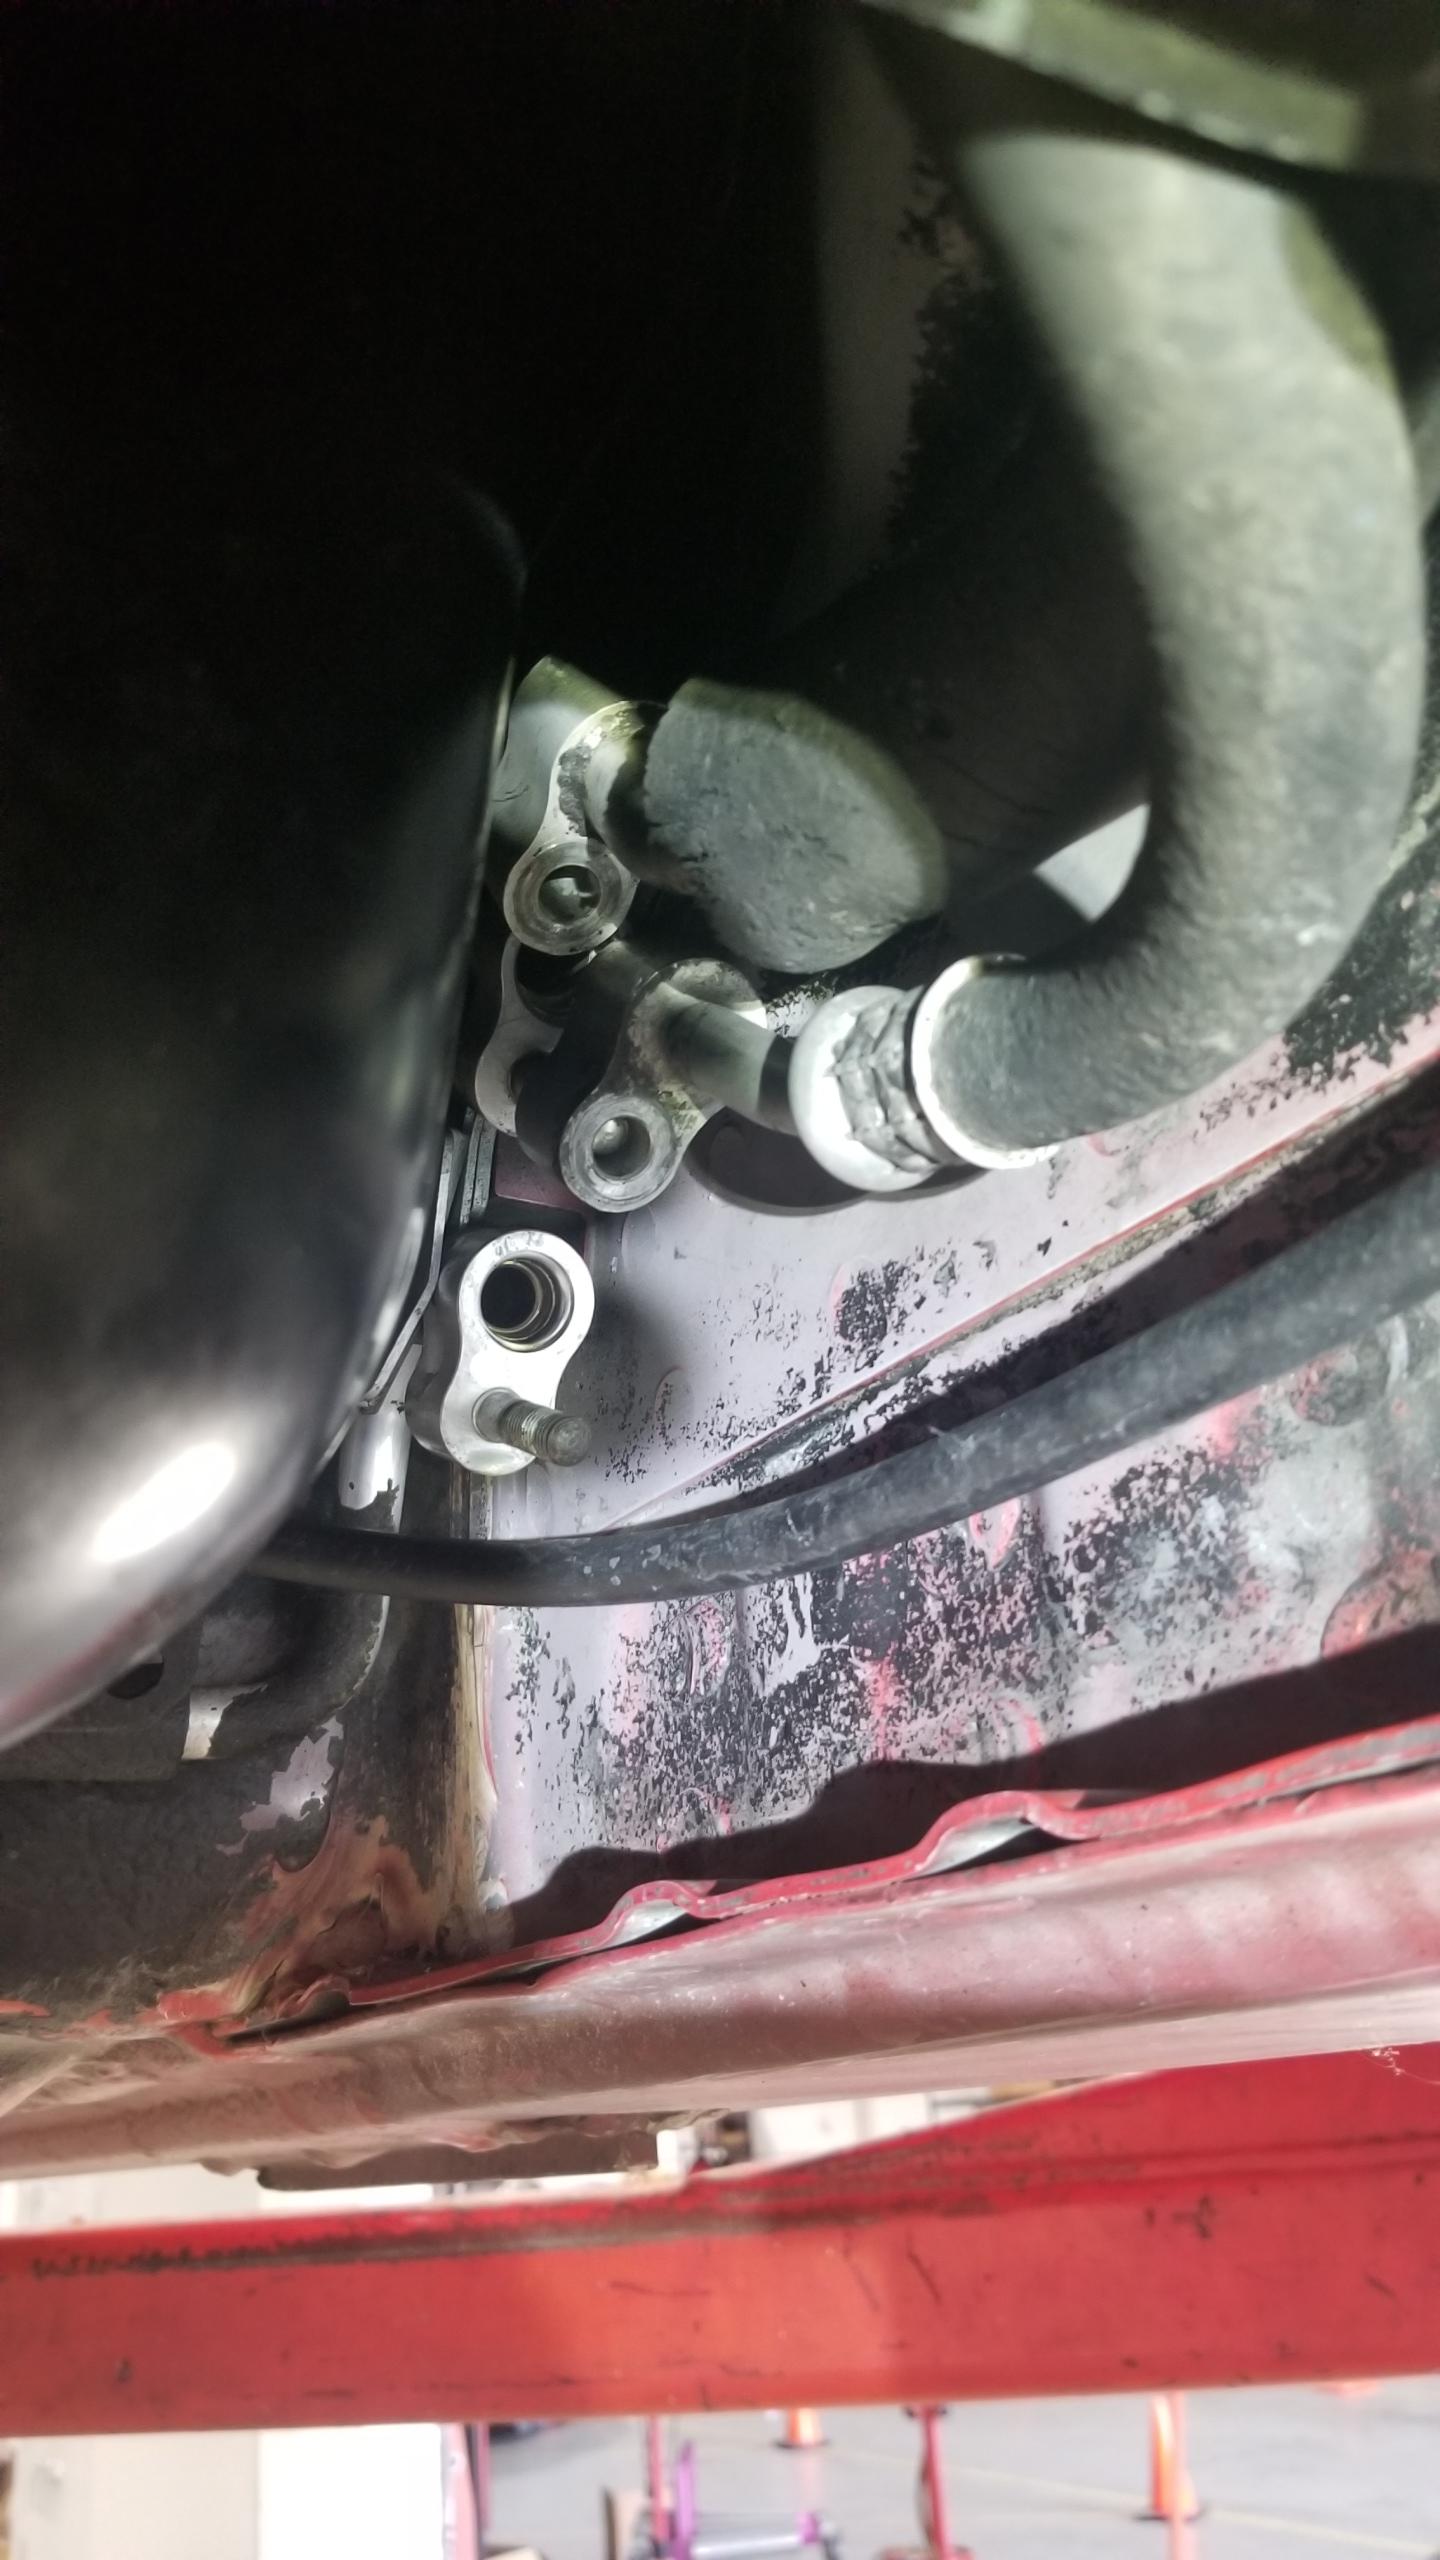
Here's where the compressor hoses connect to, next to the gas tank. Hopefully you caught on that removing these means that you're breaking a line into the A/C system and it needs to be discharged of refrigerant before performing this work.

FYI, it was impossible to find any A/C shops in ATL that still work with R-12. I called 7-8 places including a classic car-specific A/C shop, and none of them work with R-12 anymore let alone have the capability to recover it which legitimately surprised me. Maybe that wasn't the case 5-10 years ago but now I'm pretty confident that there's close to zero professionals that mess with R-12 anymore. I'll say my system was empty when I replaced the compressor and leave it at that. You should make every attempt to recover any refrigerant, R-12 was superseded to R-134a for a reason. Which then was superseded again recently to R-1234yf which is even less of a greenhouse gas, but if you have a newer Civic that uses it then you probably hate it already.
5bB3a9J.jpg


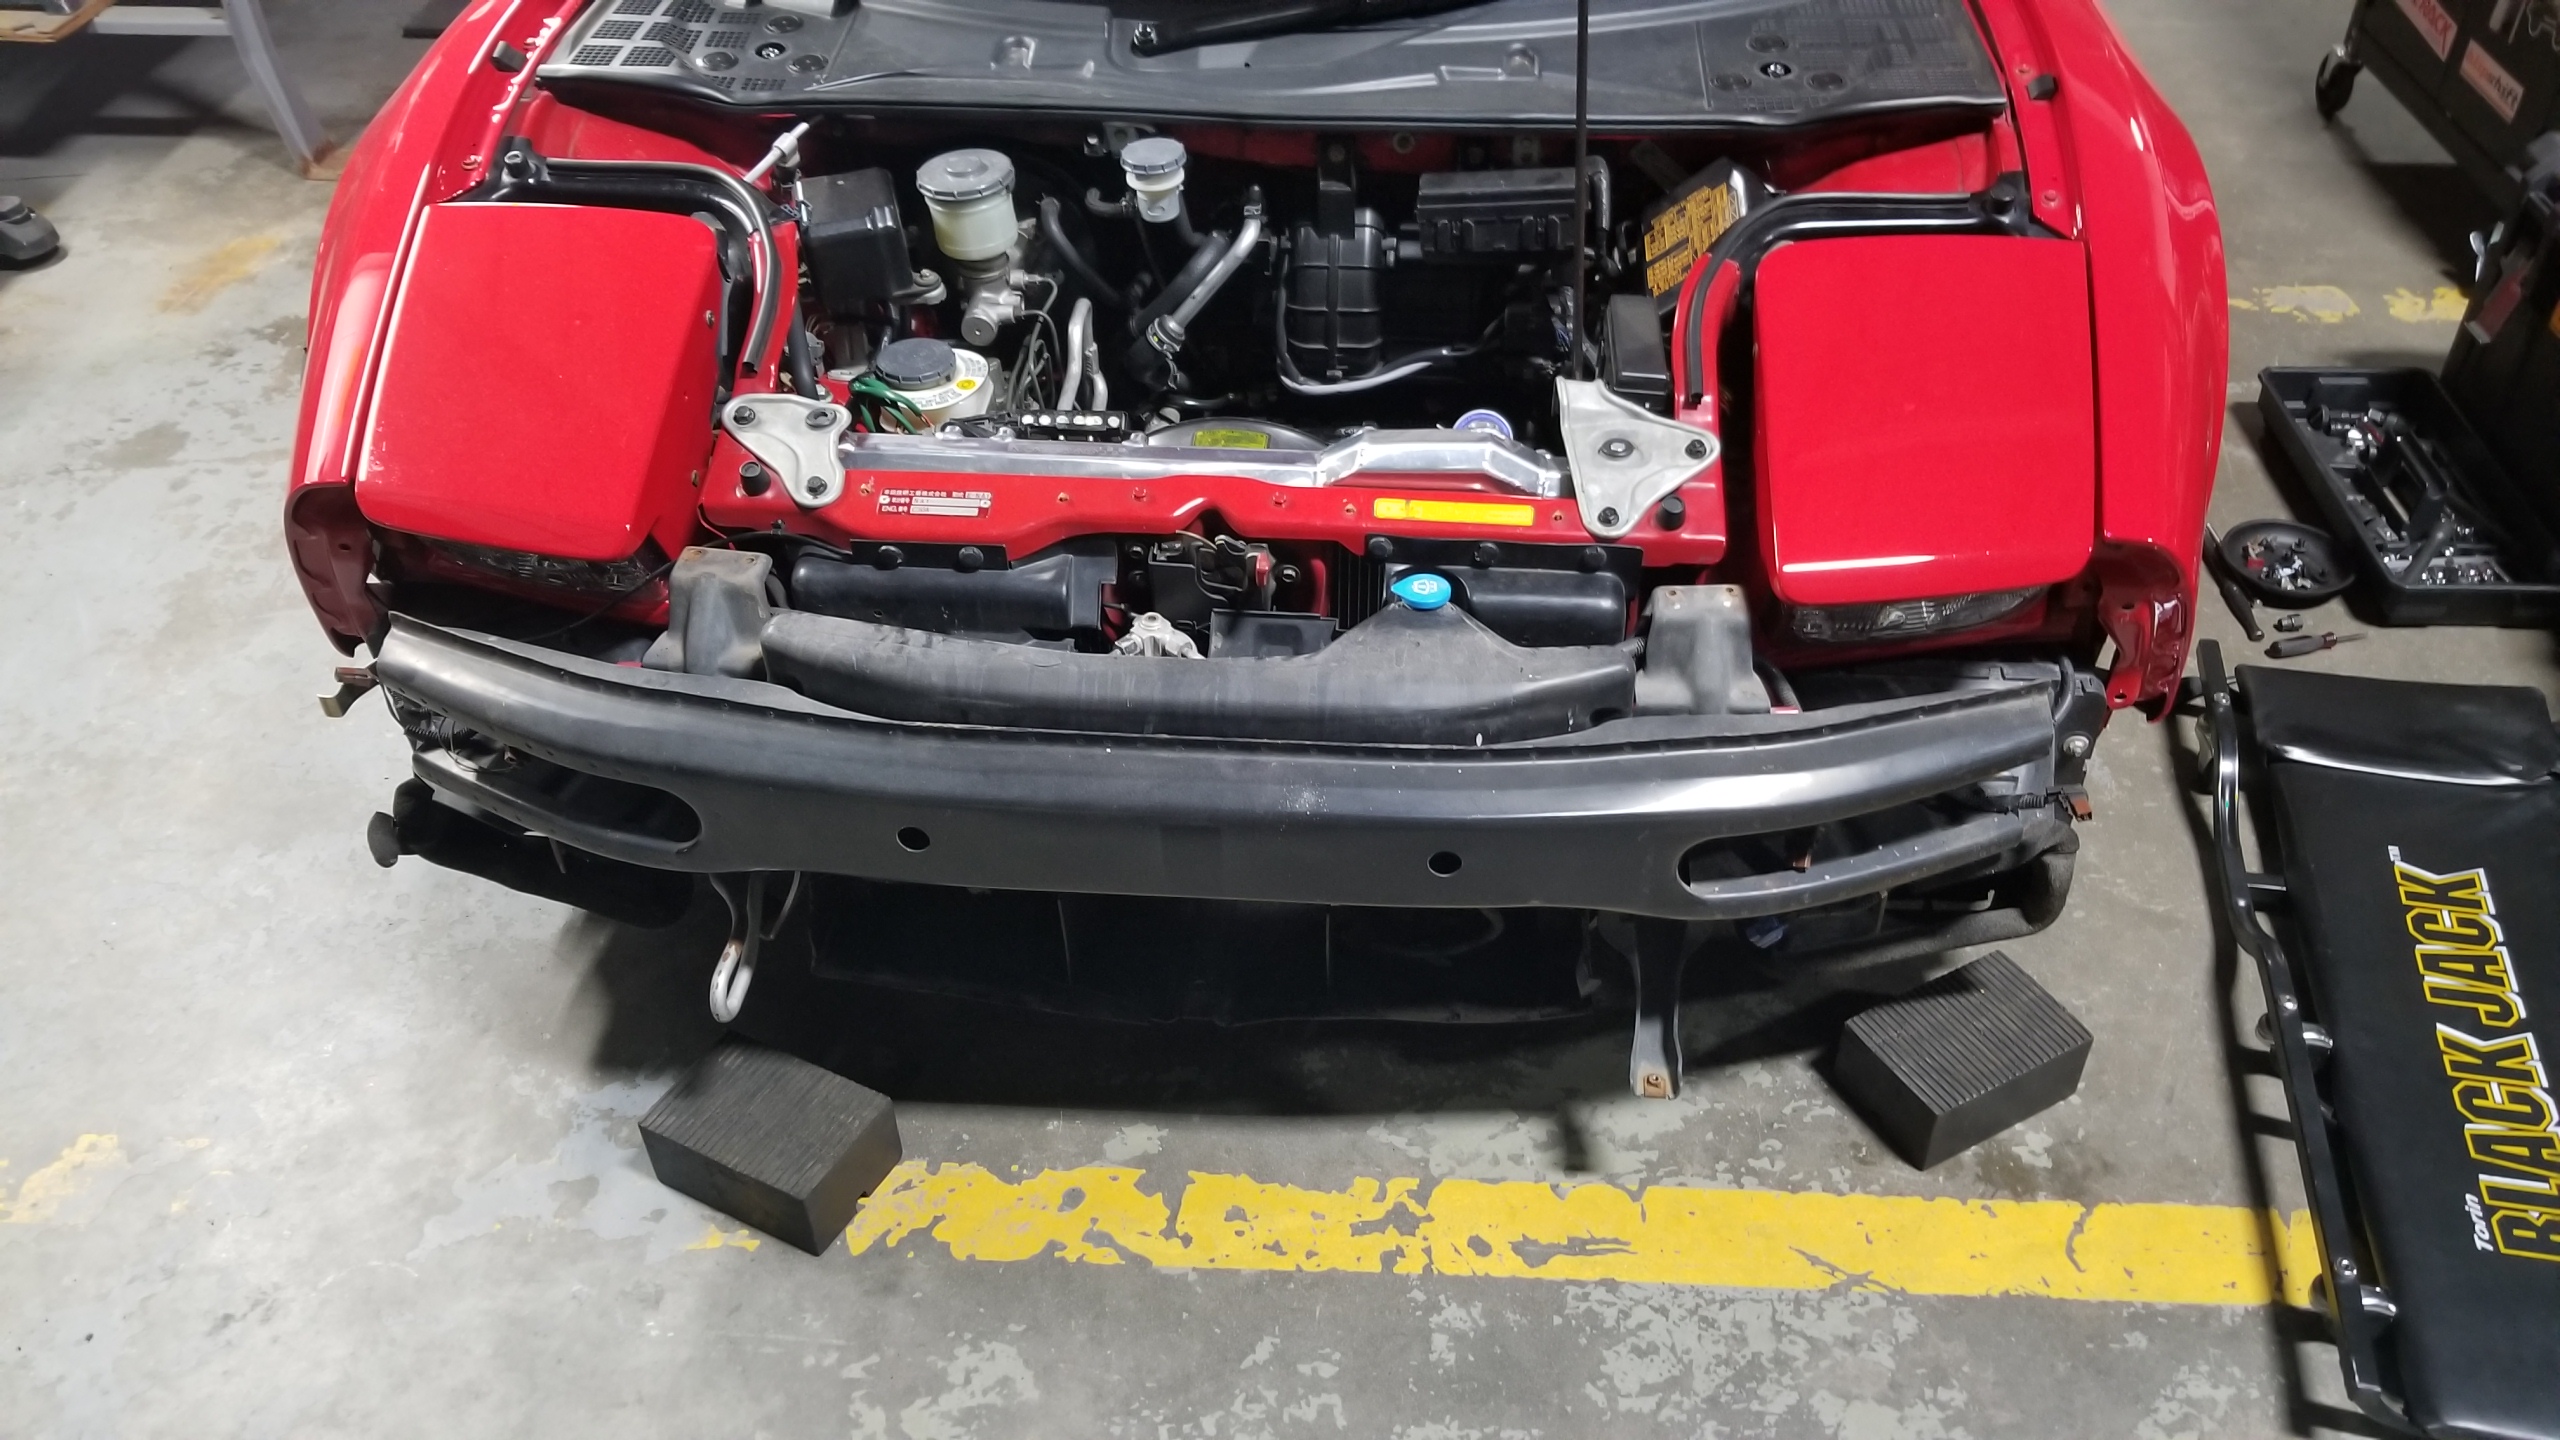
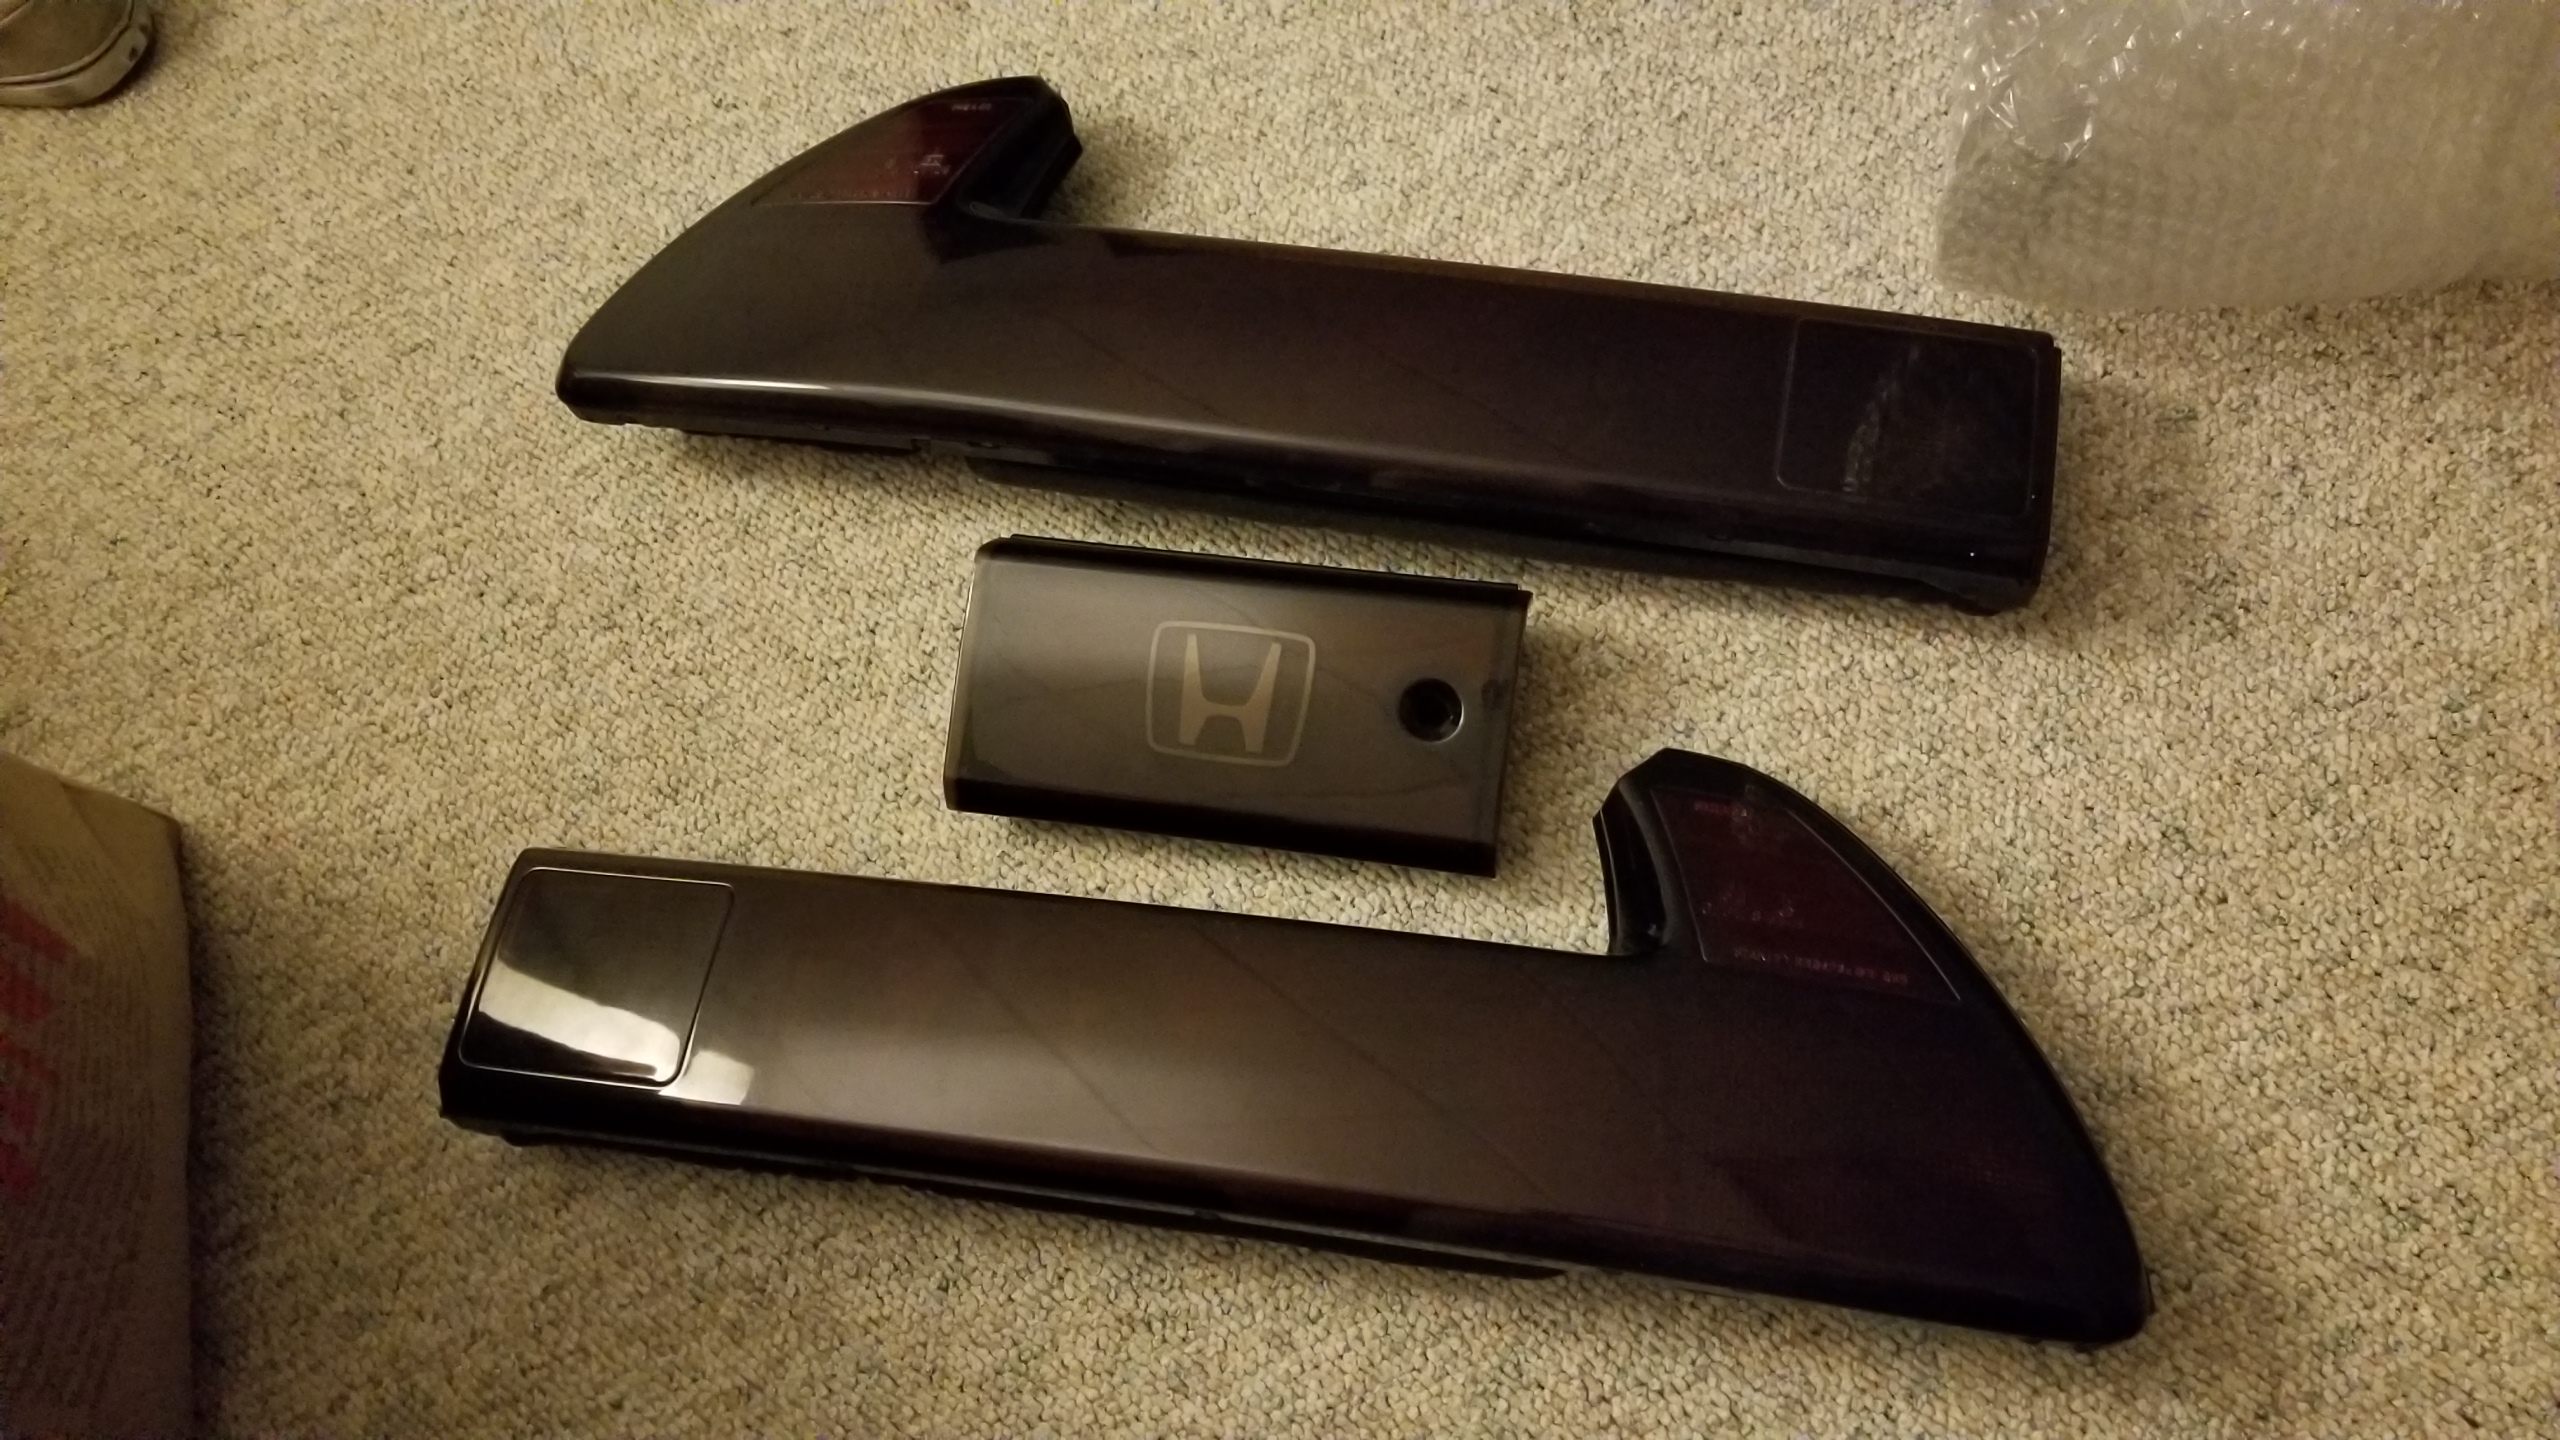
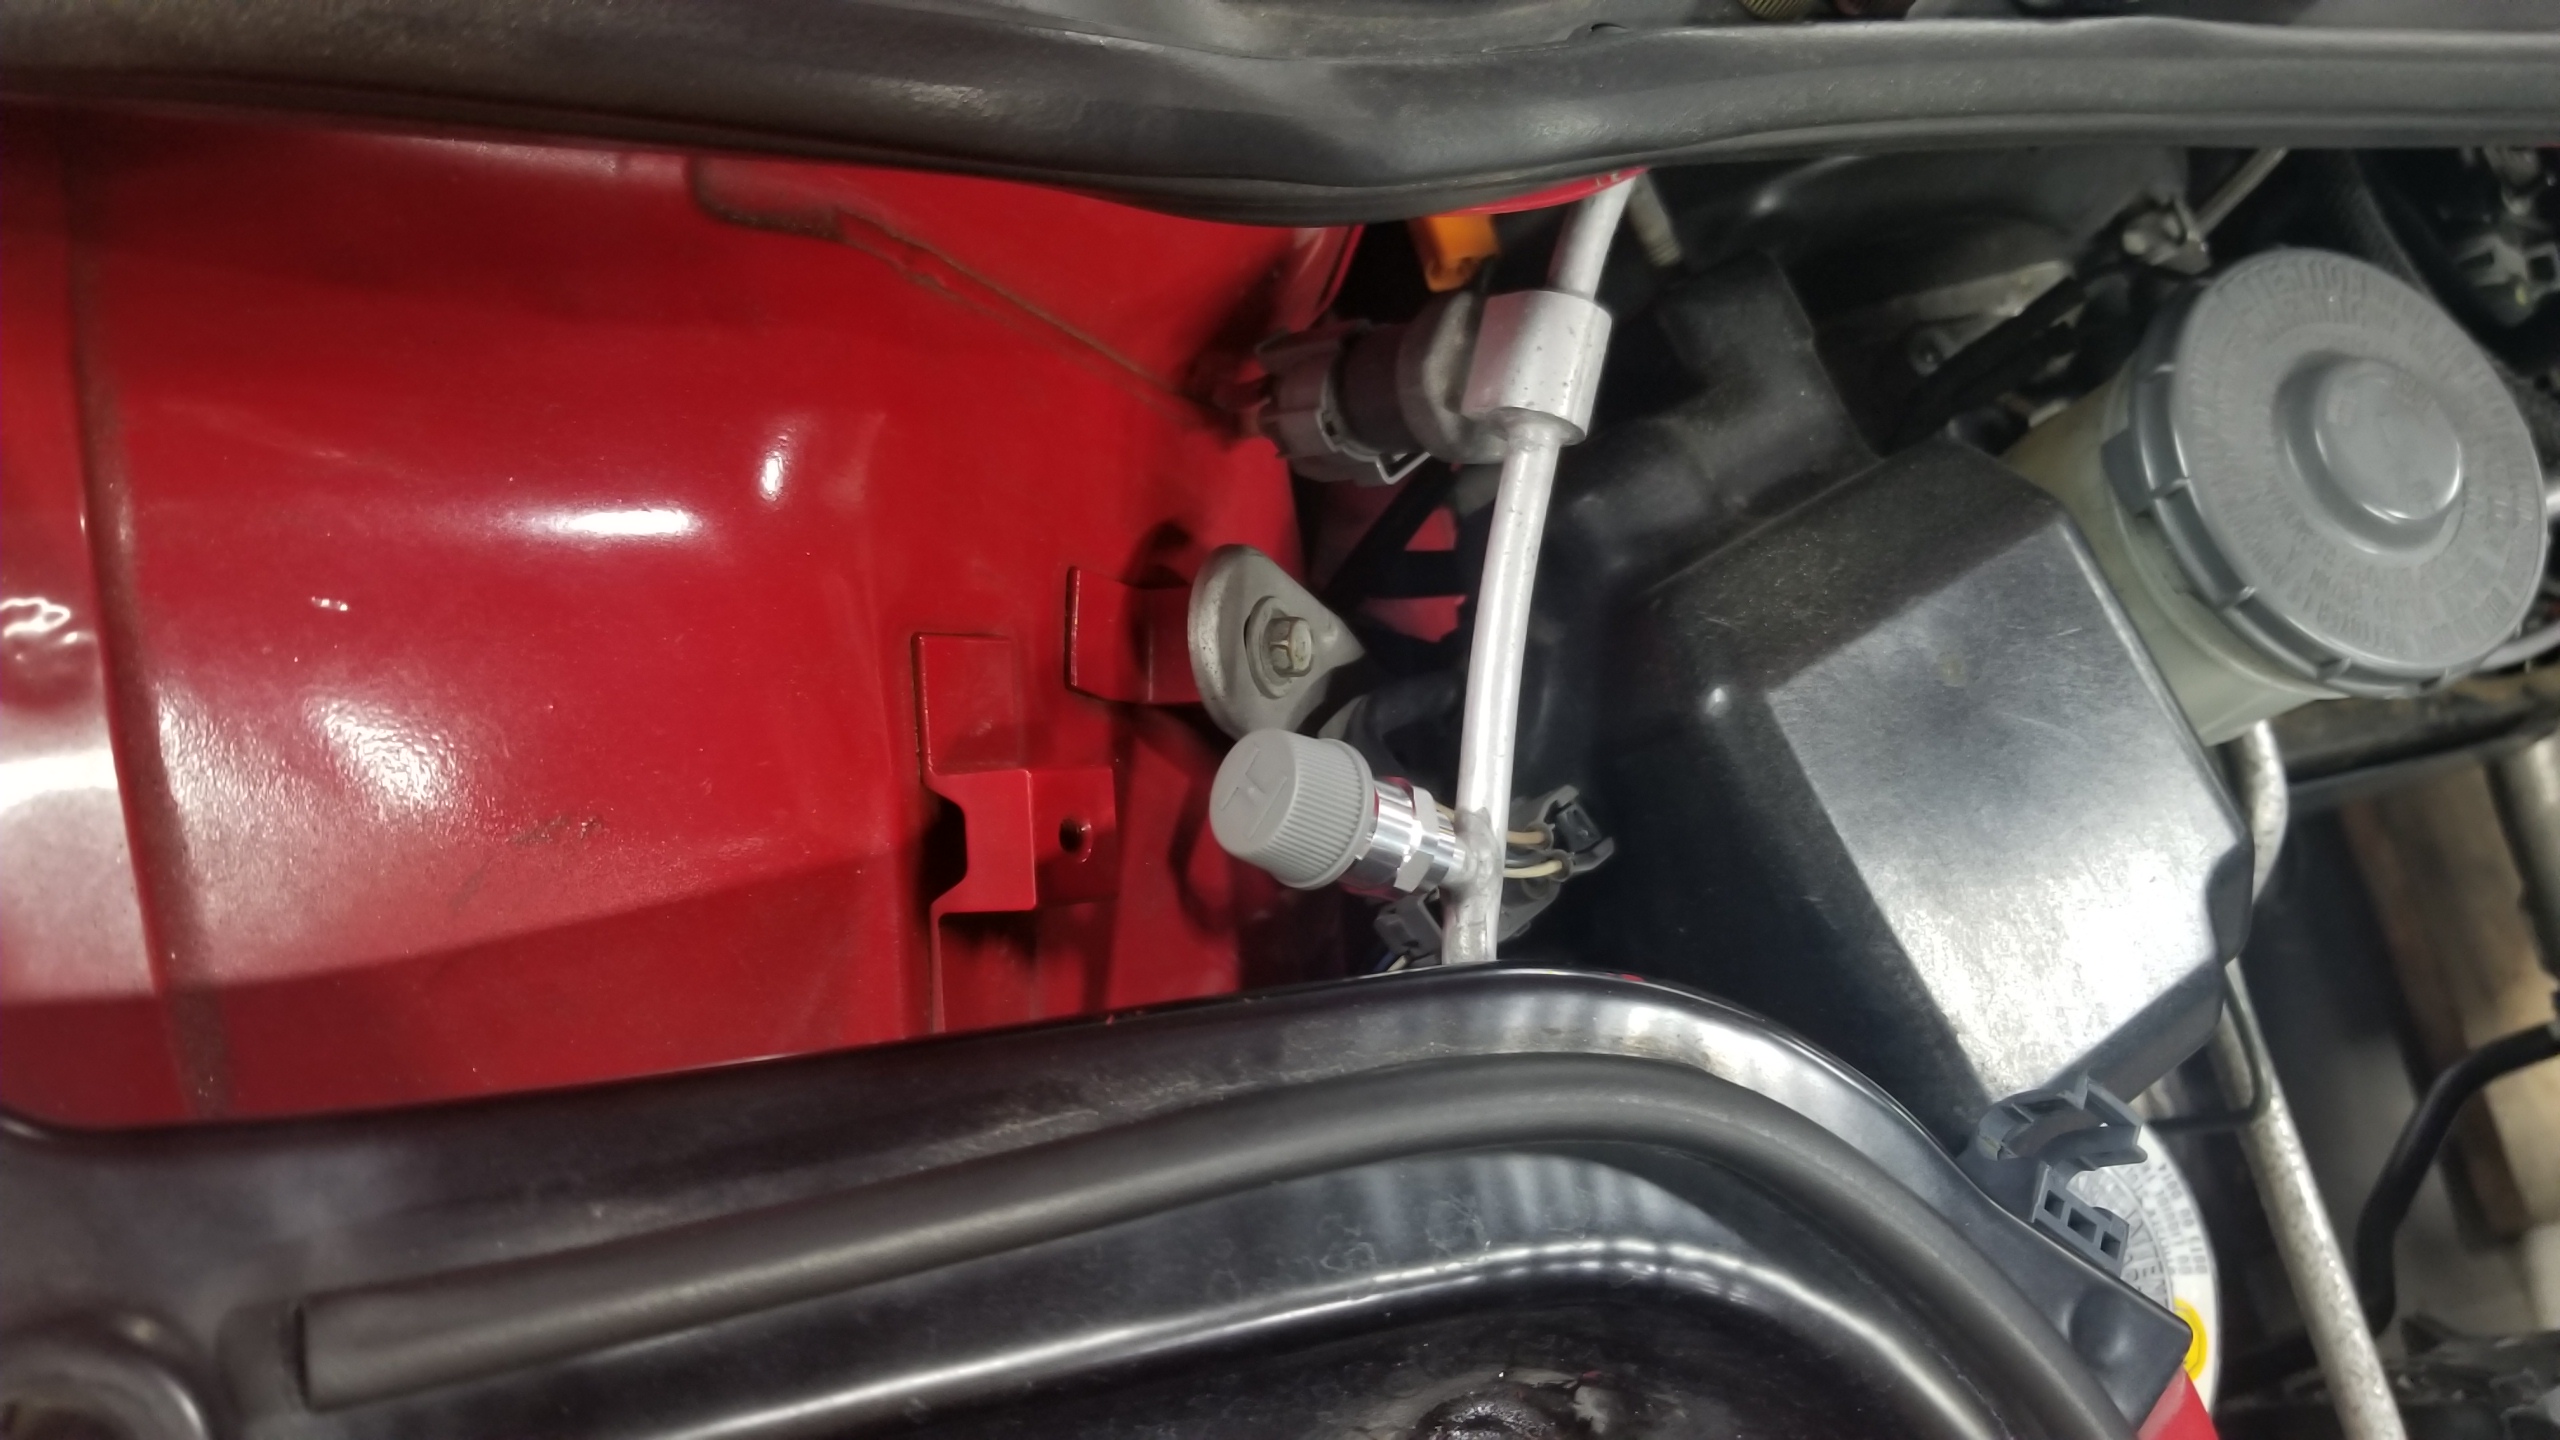
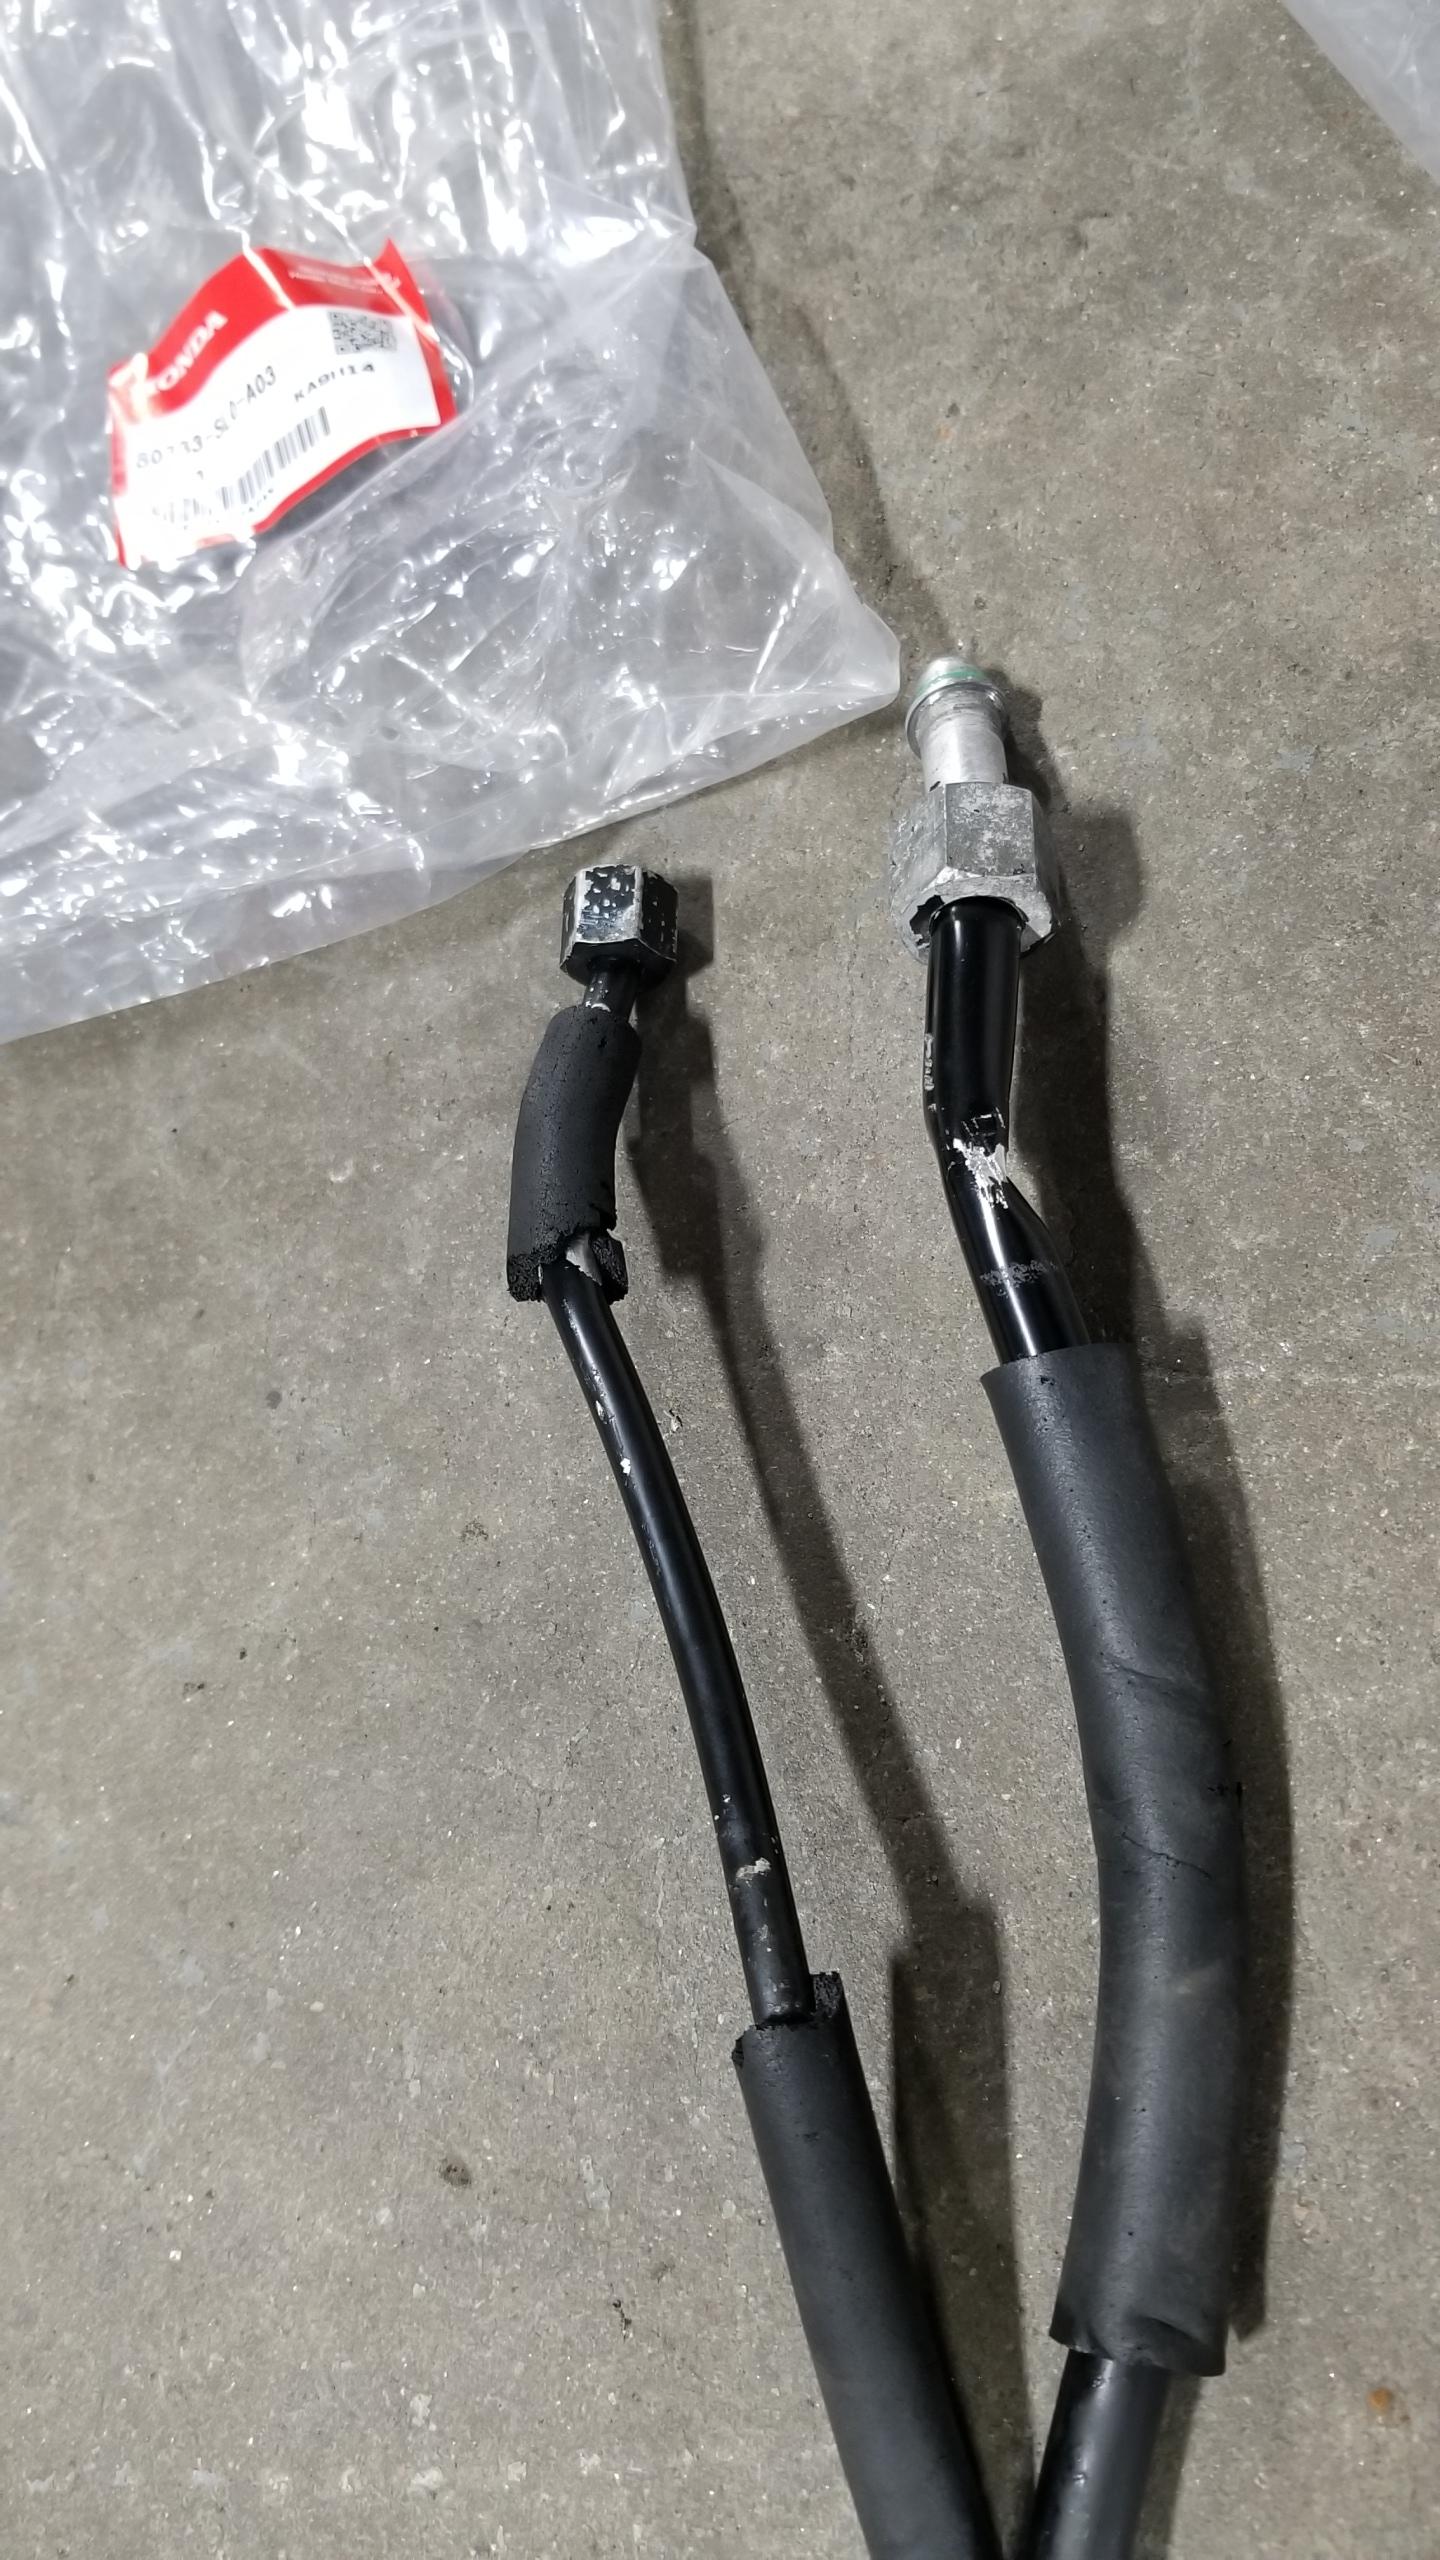
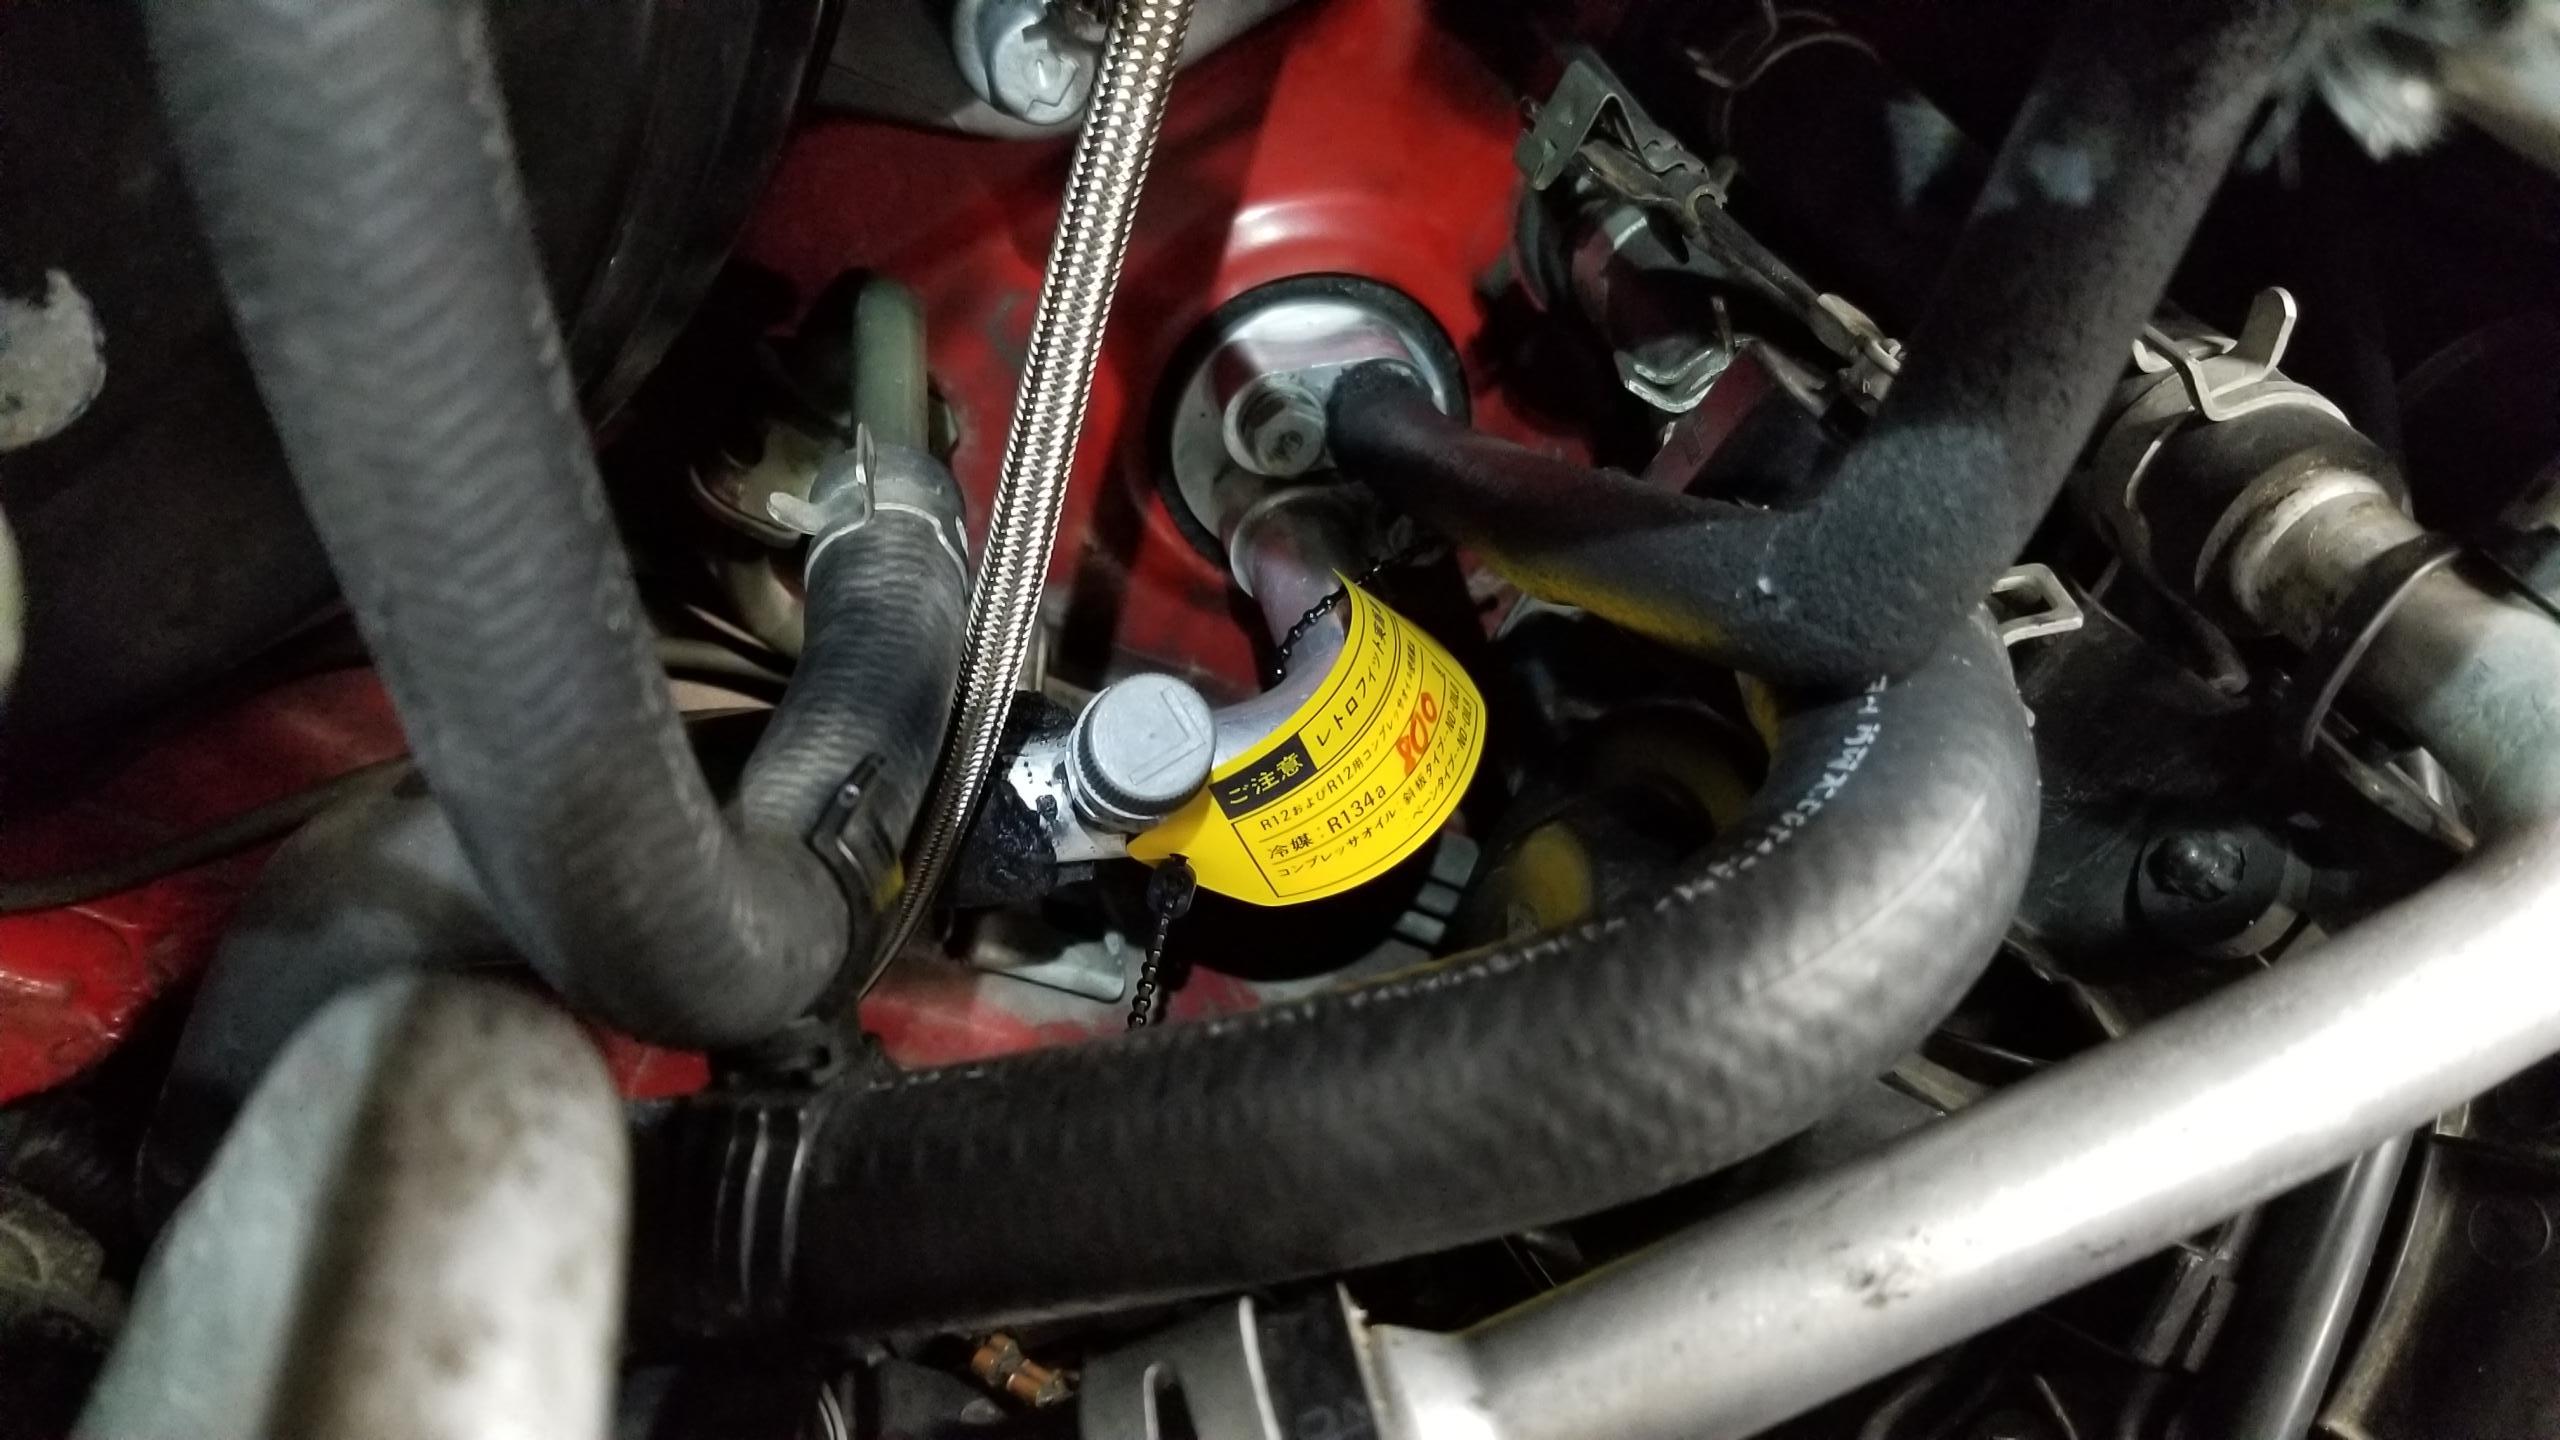
With the compressor replacement done (and the underbody parts put back together), I moved onto replacing the high/low fittings up front with new R-134a-spec ones. The R-12 fittings are externally threaded, R-134a fittings are quick-disconnects with internal threads for the caps. The Denso RTF-KIT-2 was expensive and I had it imported from Japan no less, but the fittings are high-quality and it includes the JDM conversion stickers which I'm a sucker for.

Of course, no A/C job is complete without a Swpeet(??)-brand valve core kit. Really, the only thing I ended up needing was the valve core remover tool, which I used to remove the R-12 valve cores from my existing fittings. This was necessary because the new fittings come with their own Schrader-type valves, so you don't want to double-up on those.
hDoBmog.jpg


New high-side fitting installed. It just screws on to the old fitting once the old valve core is removed. Very easy, just don't over-torque it.

A bit further up is the pressure switch which you can also replace if necessary, I just left it alone.
z4r4PZ1.jpg


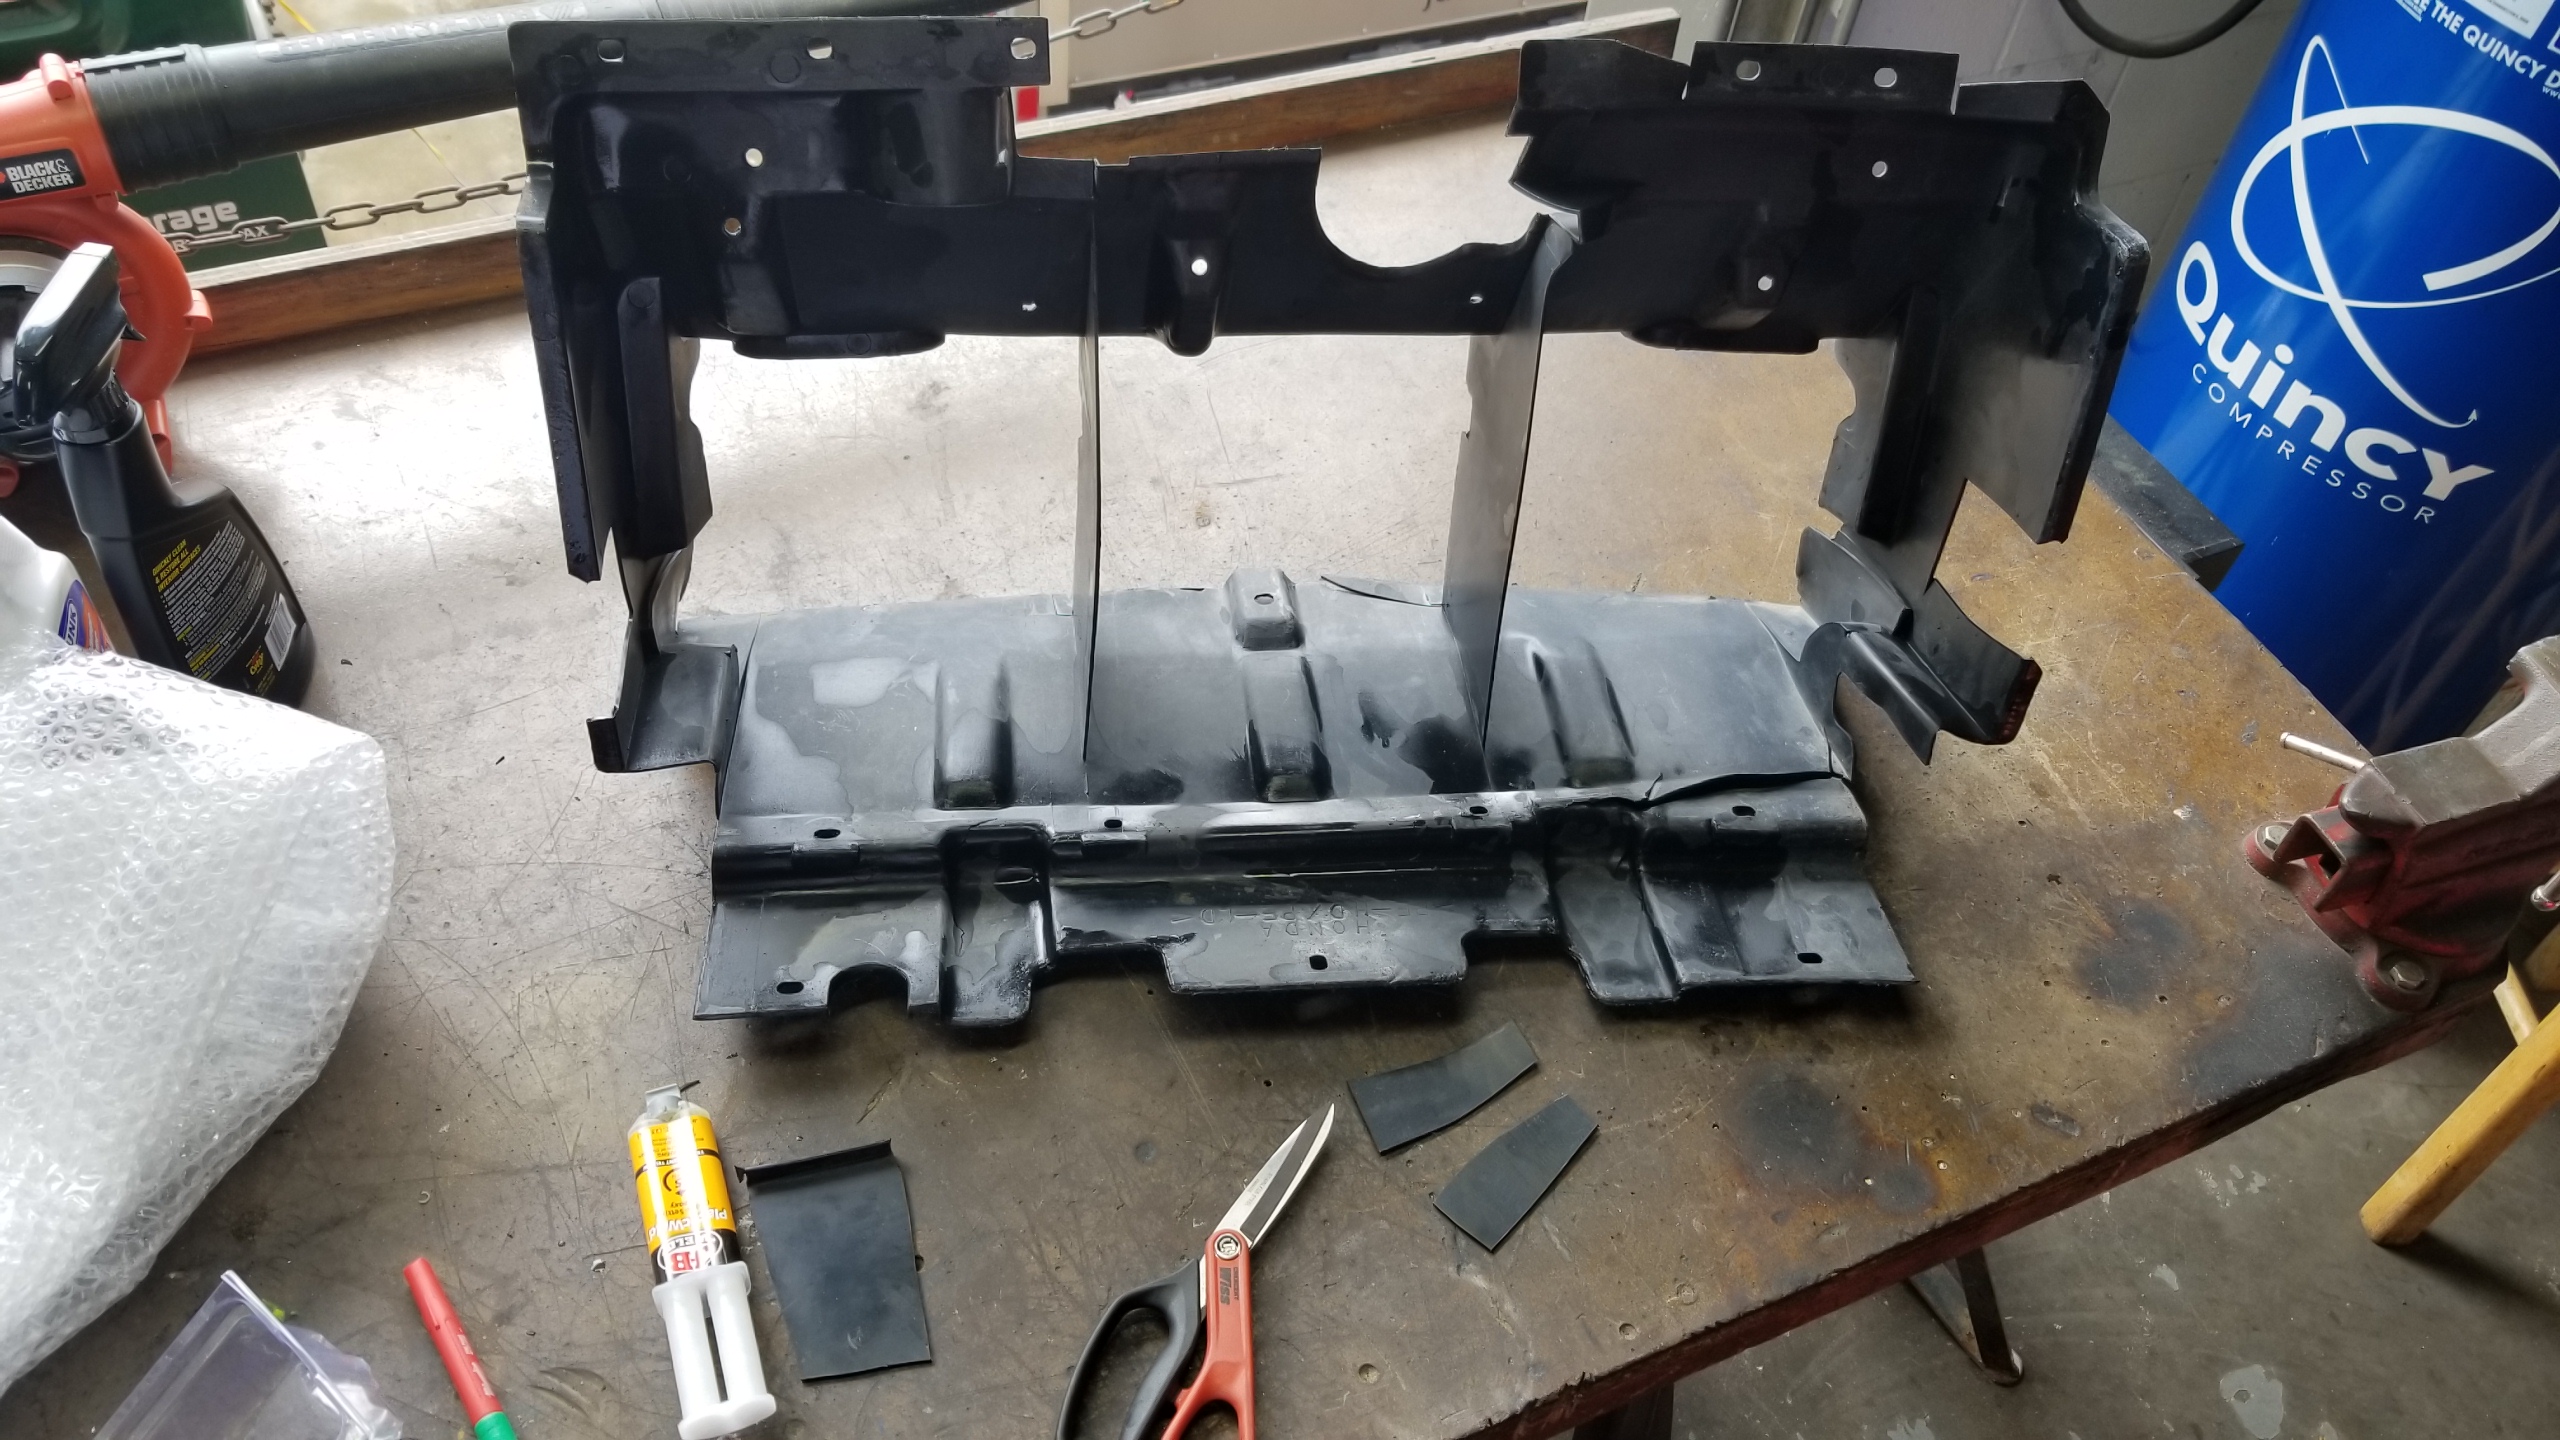
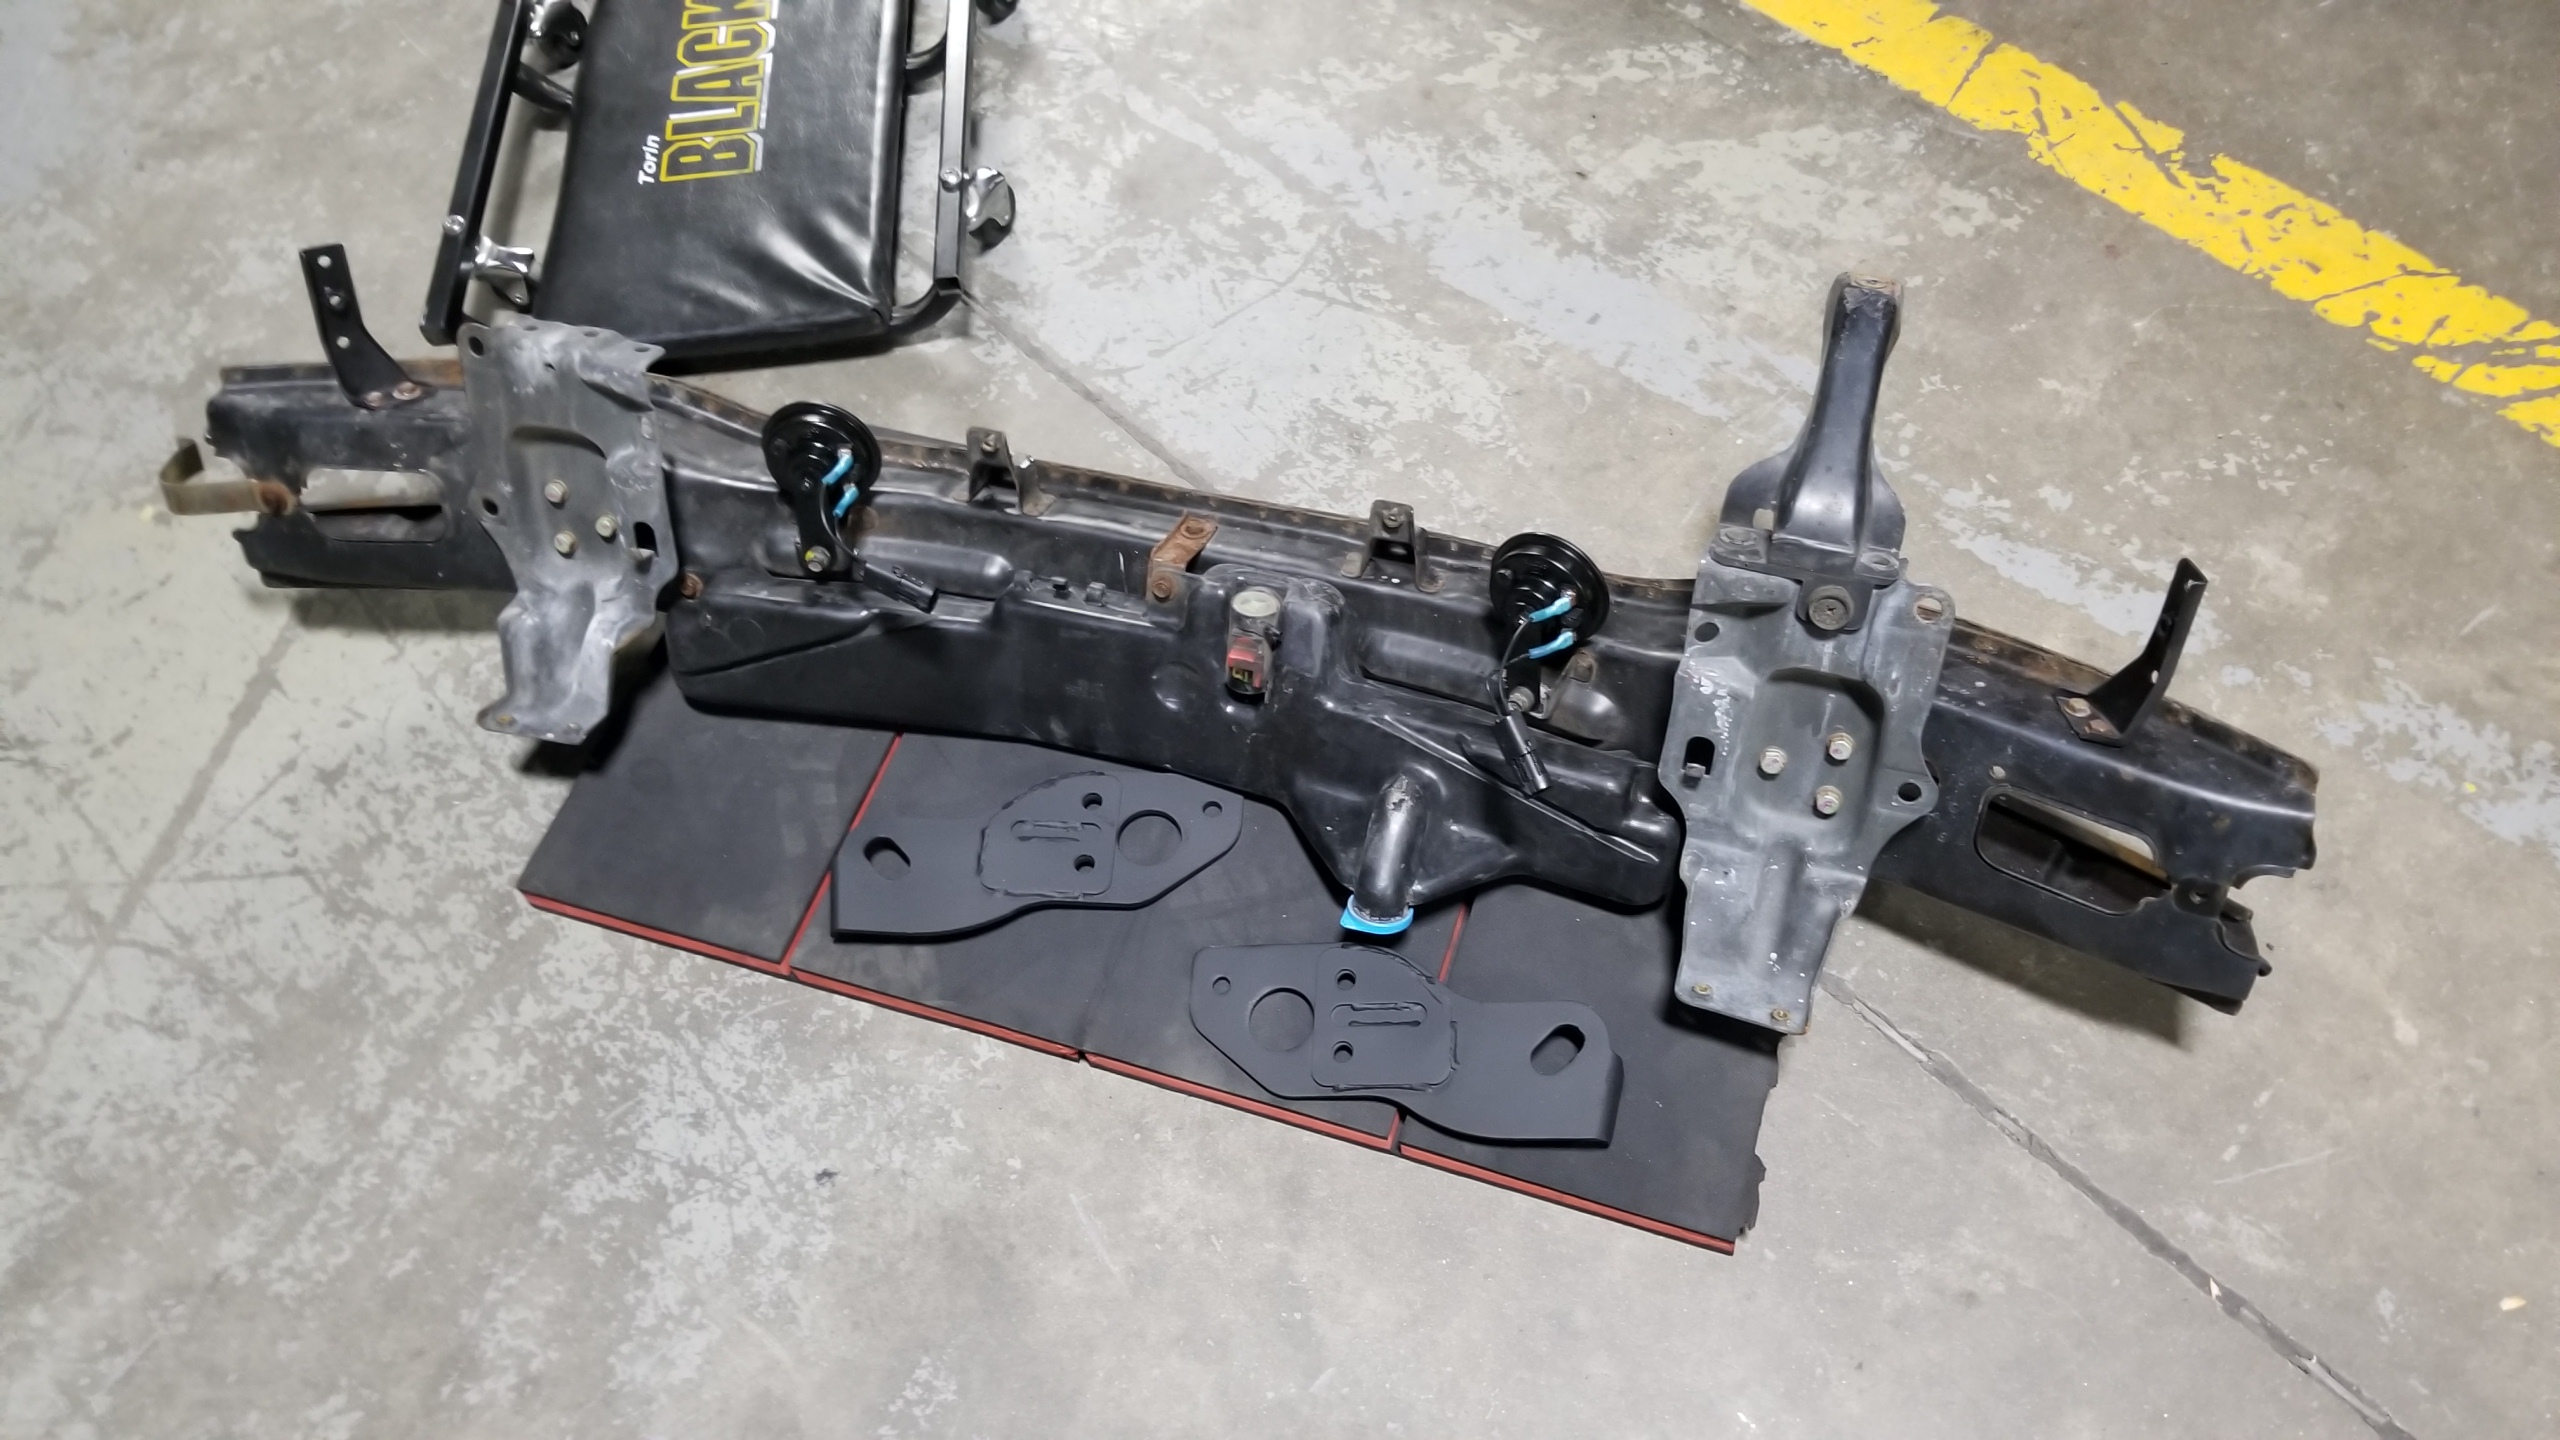
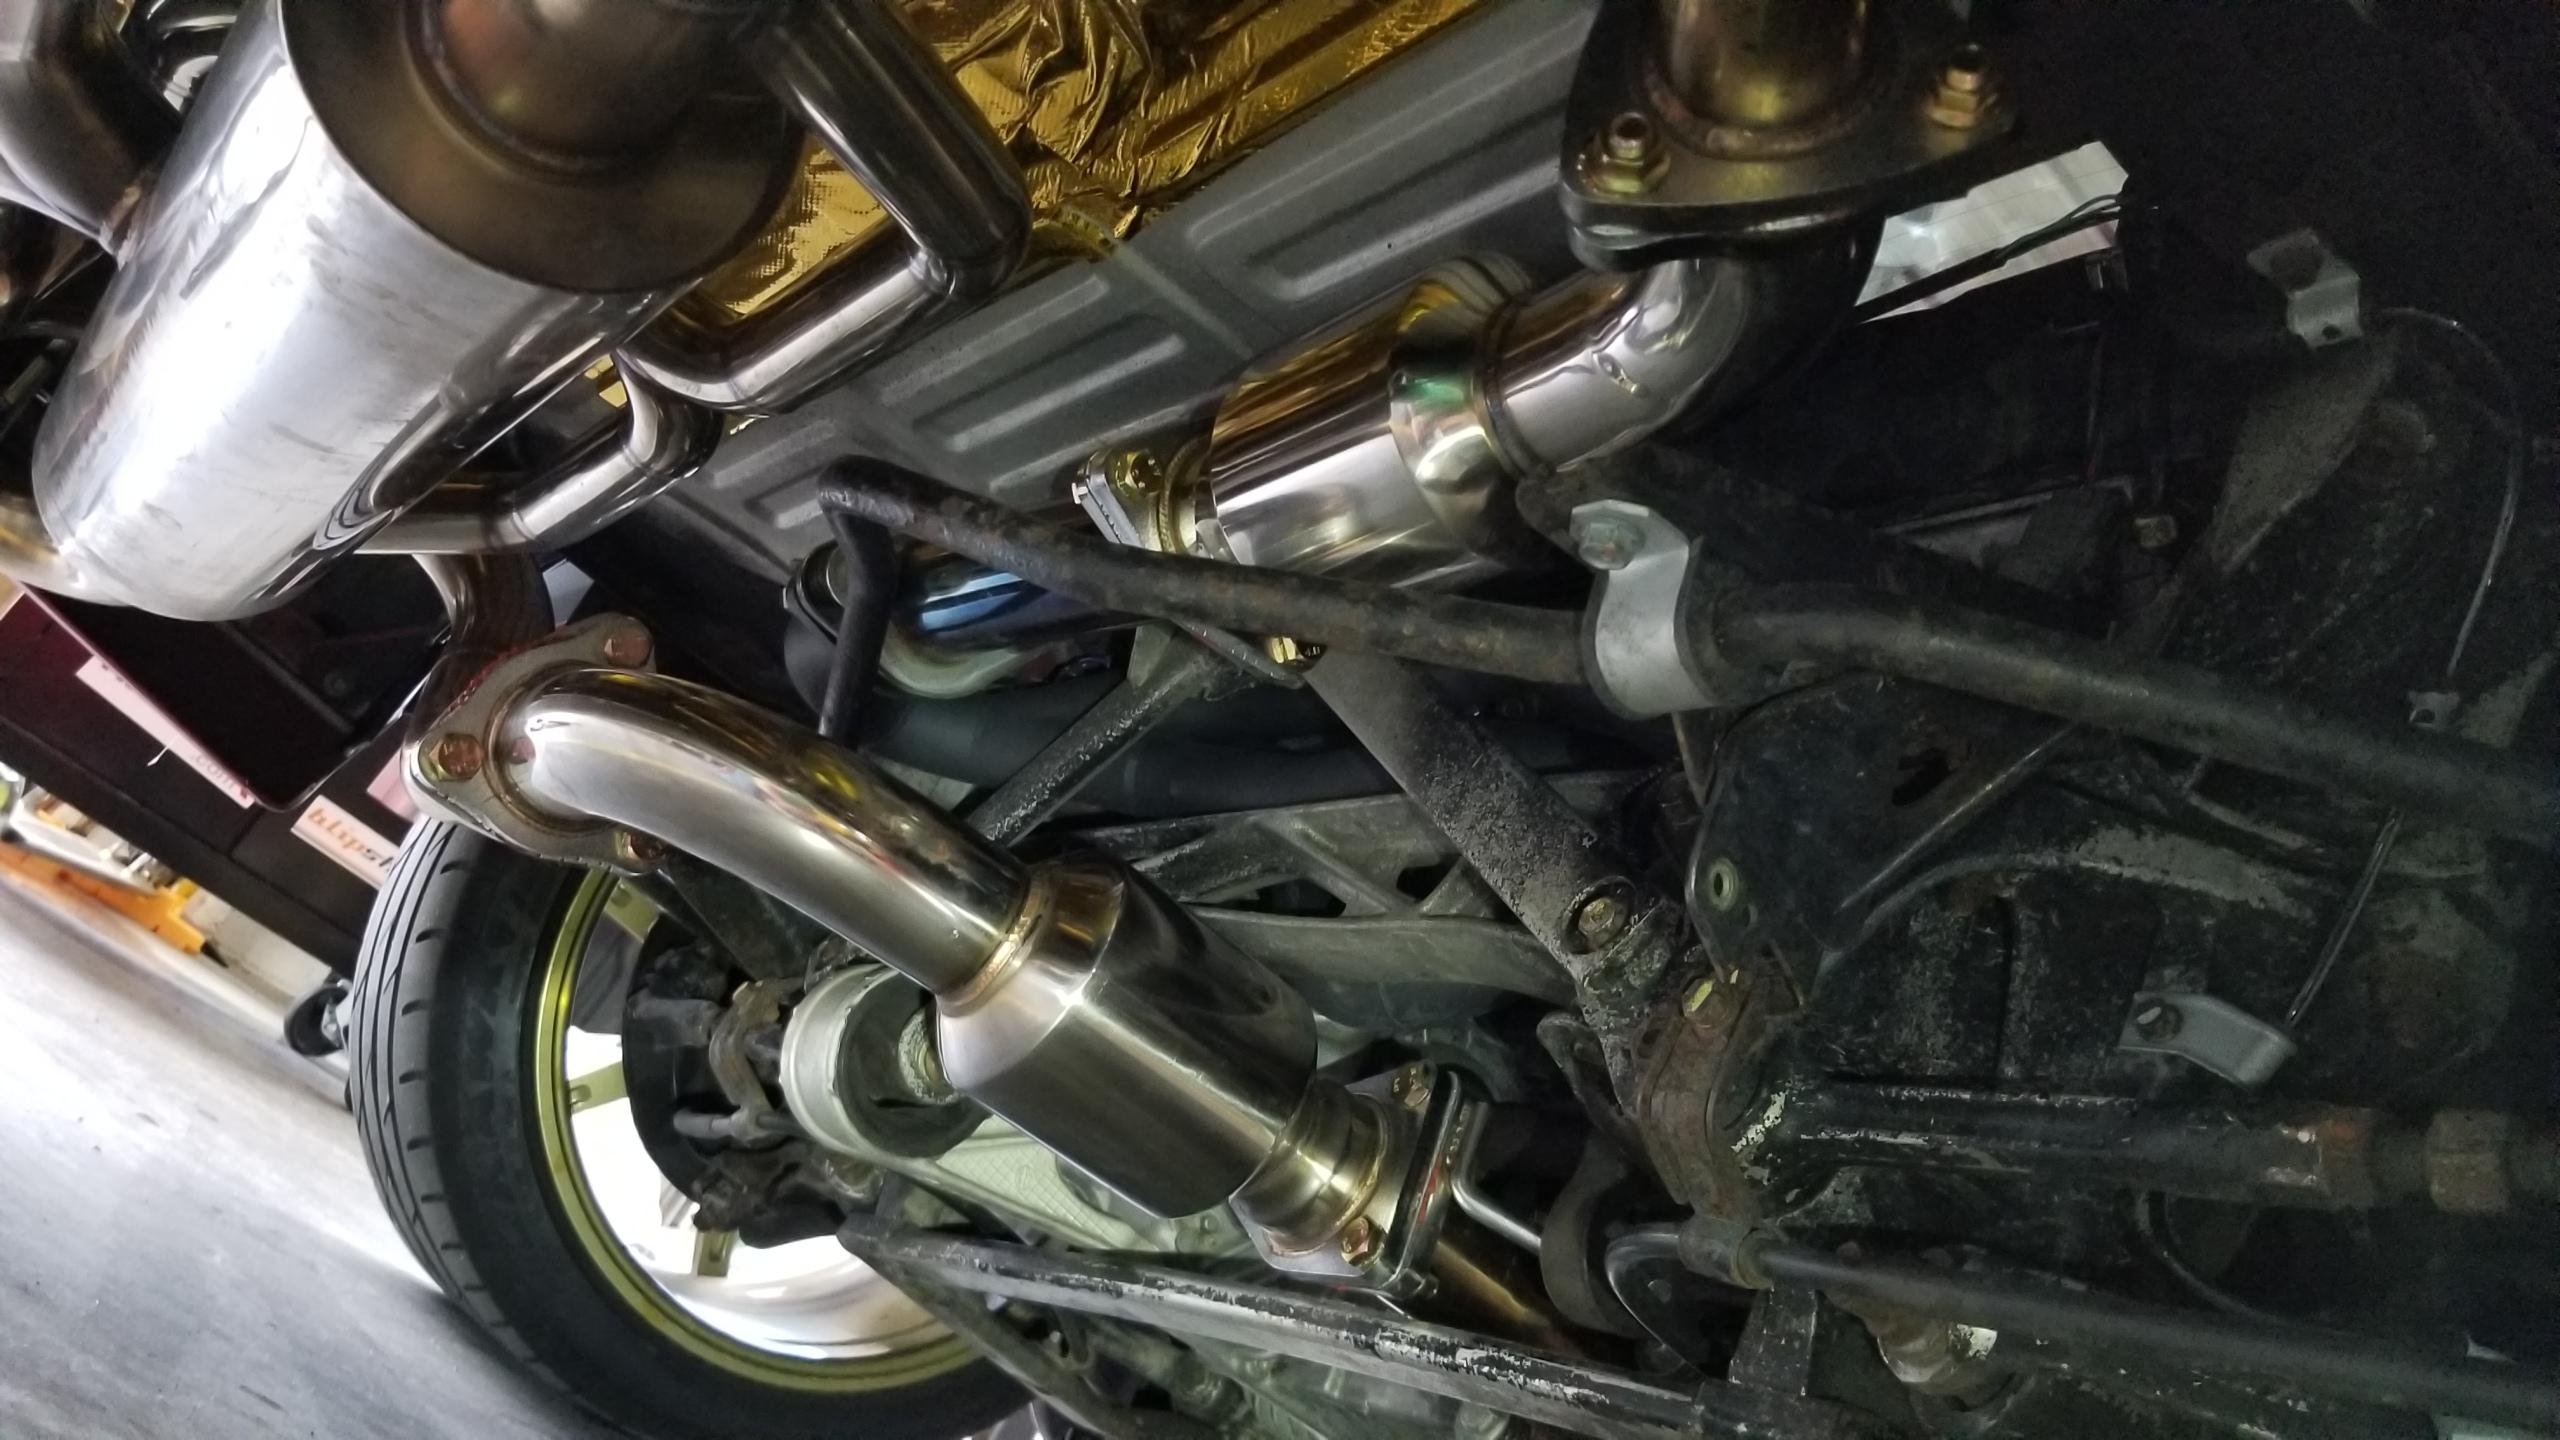
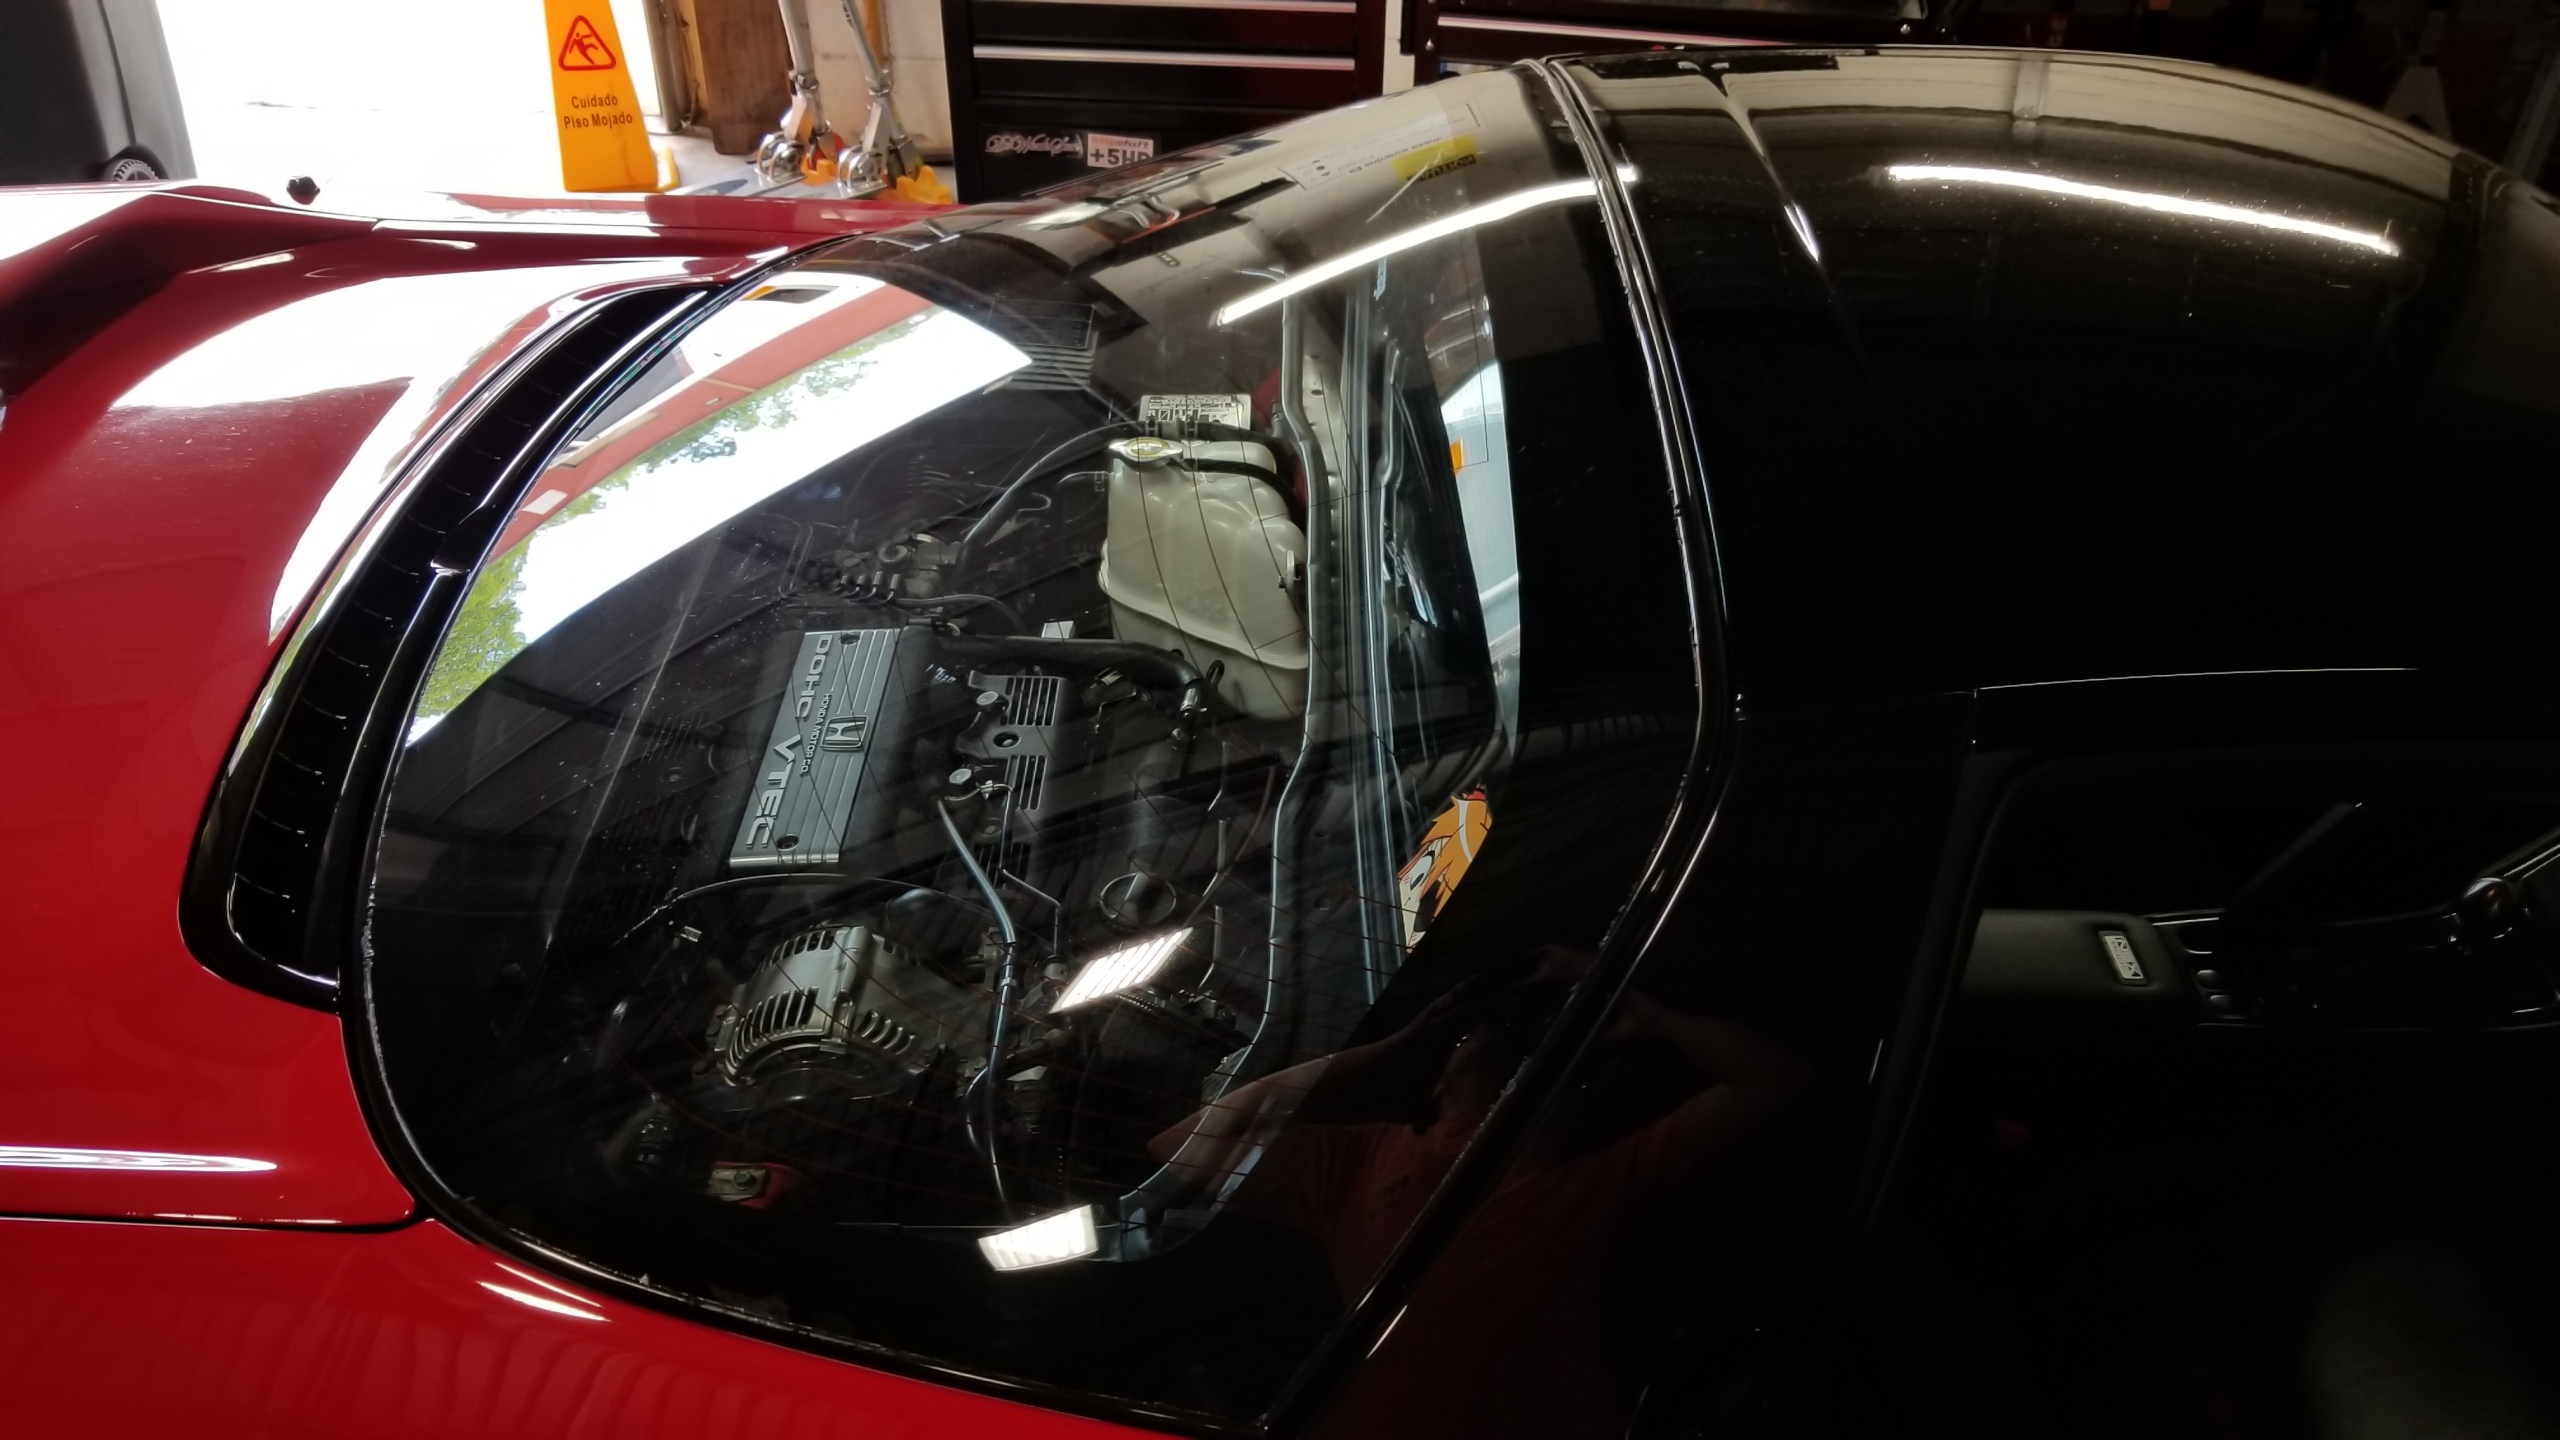
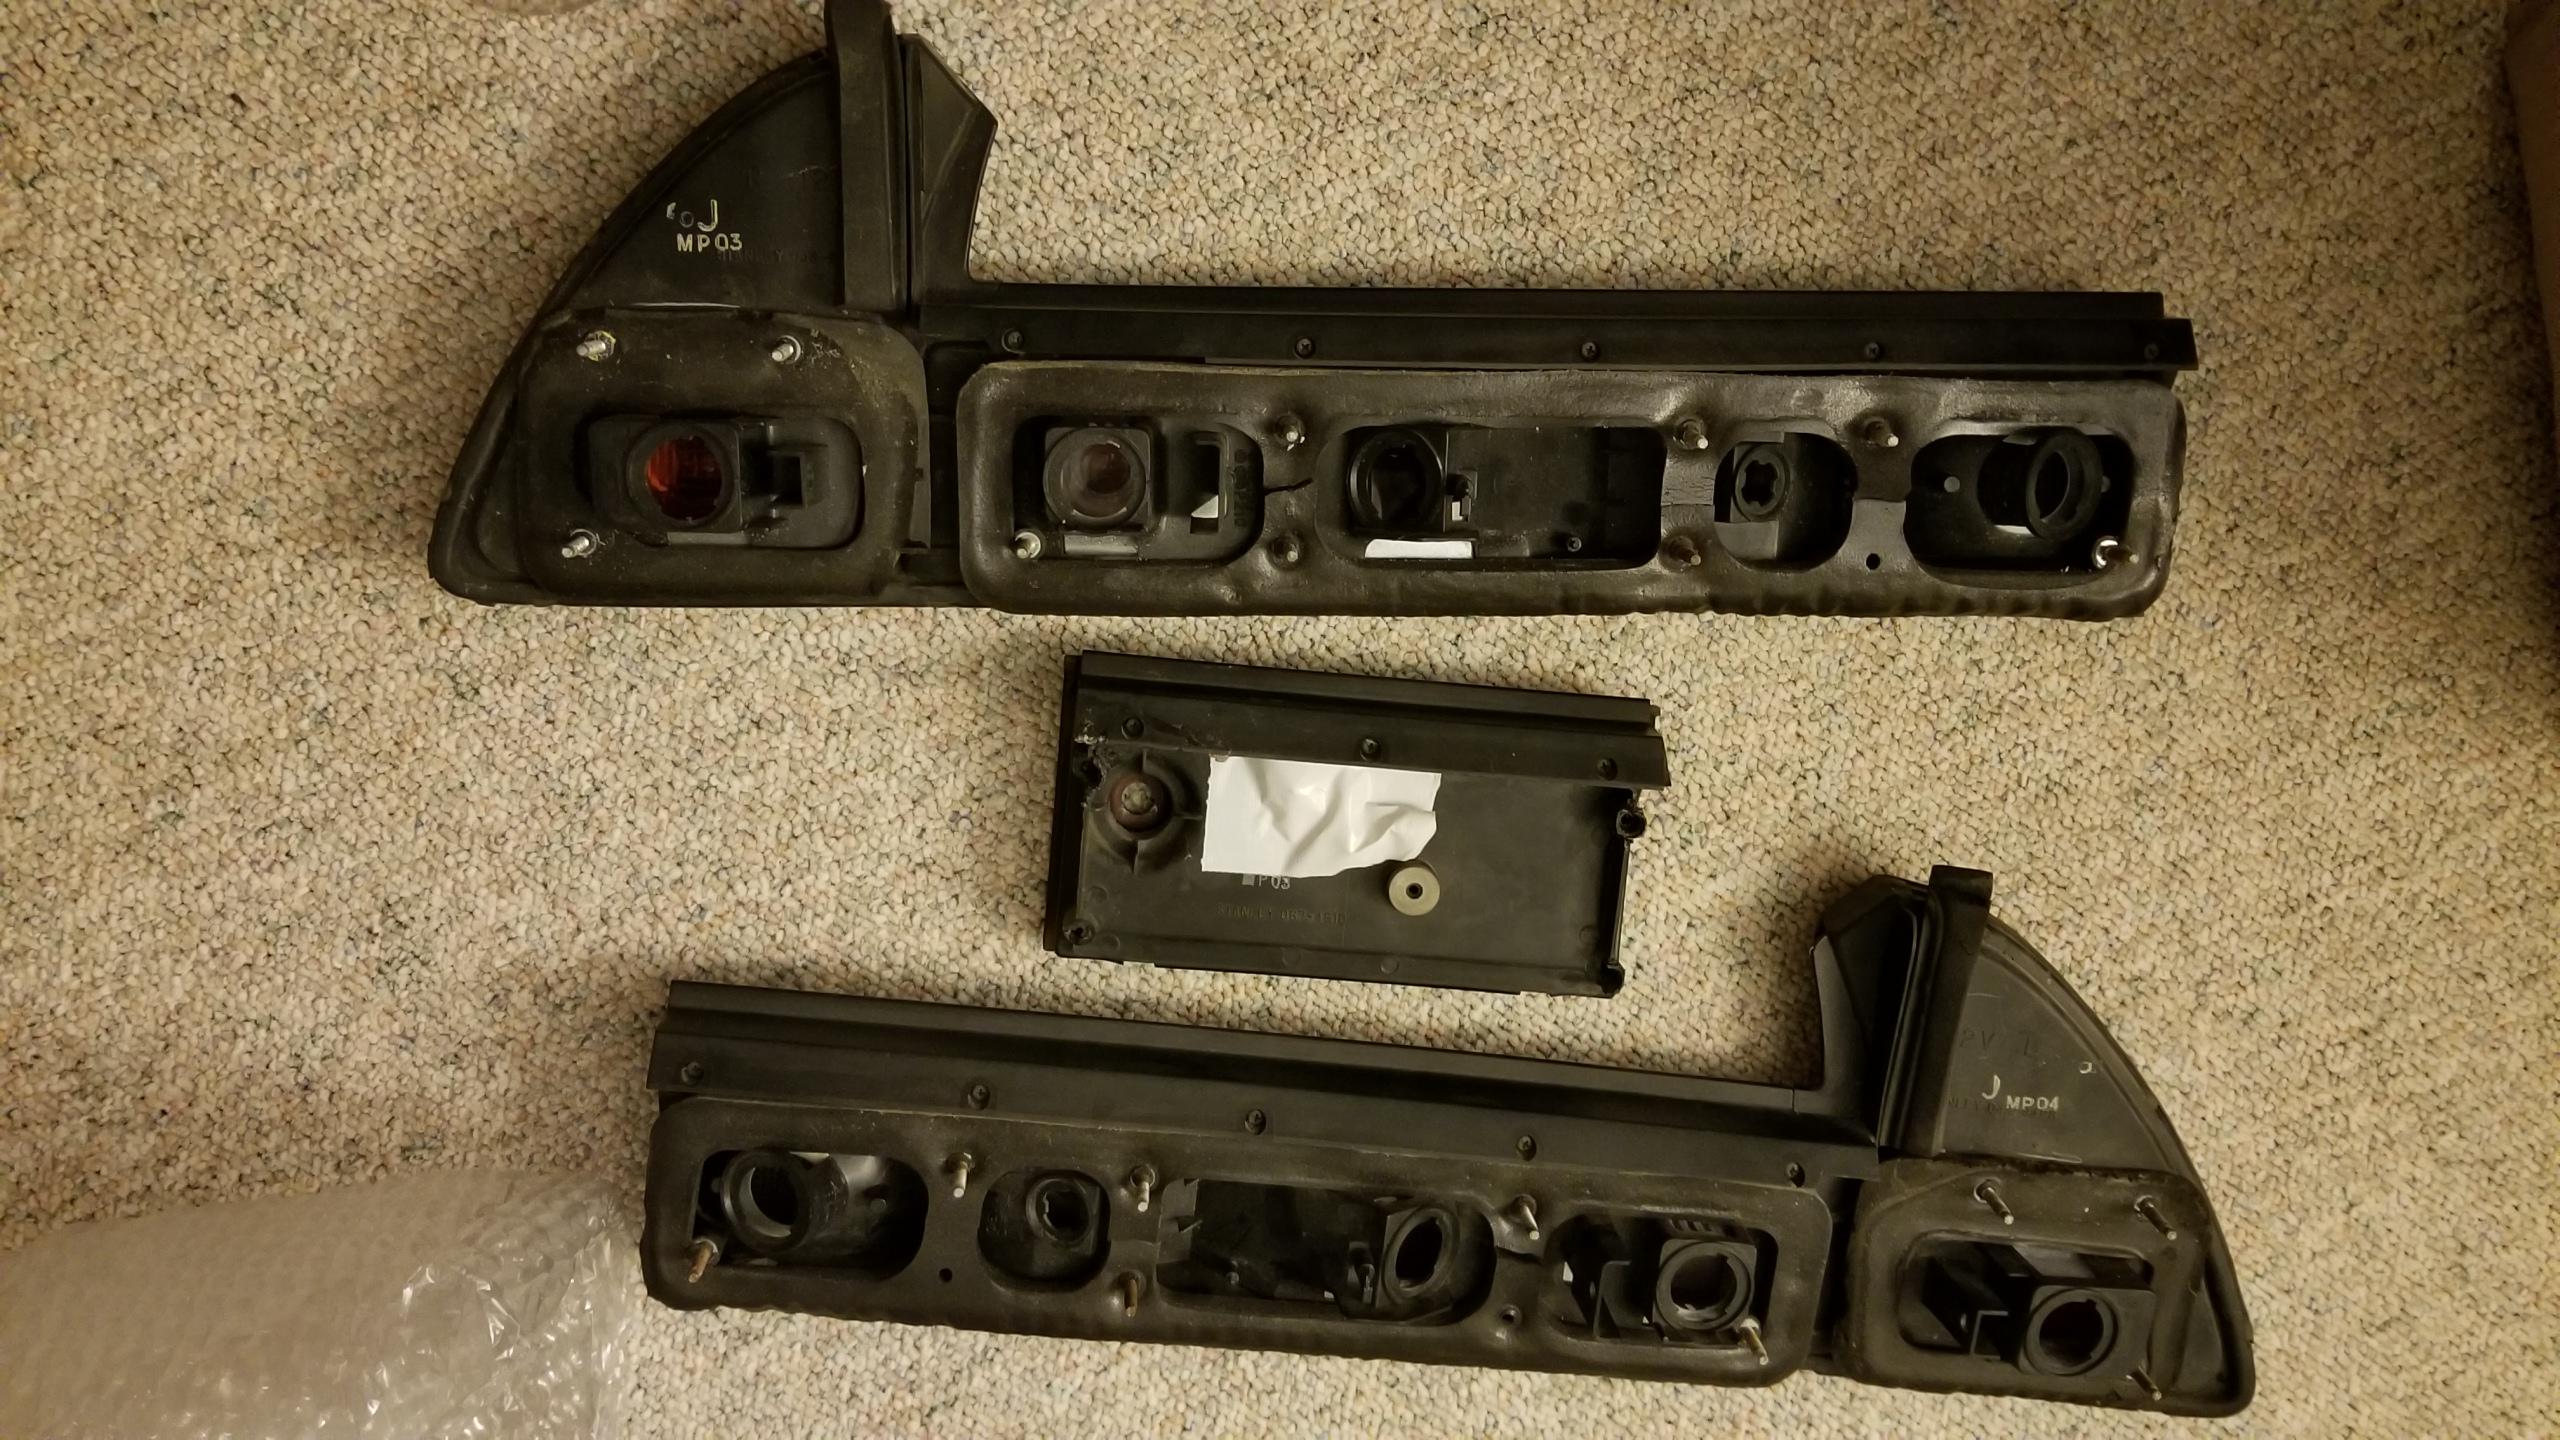
Now's a good time to perform a system flush, so below are some pictures of the connection points to look for. Key points are the compressor hoses in back, one fitting under the center tunnel, two fittings at each front condenser, two fittings at the drier/accumulator, and two fittings at the evap front bulkhead.

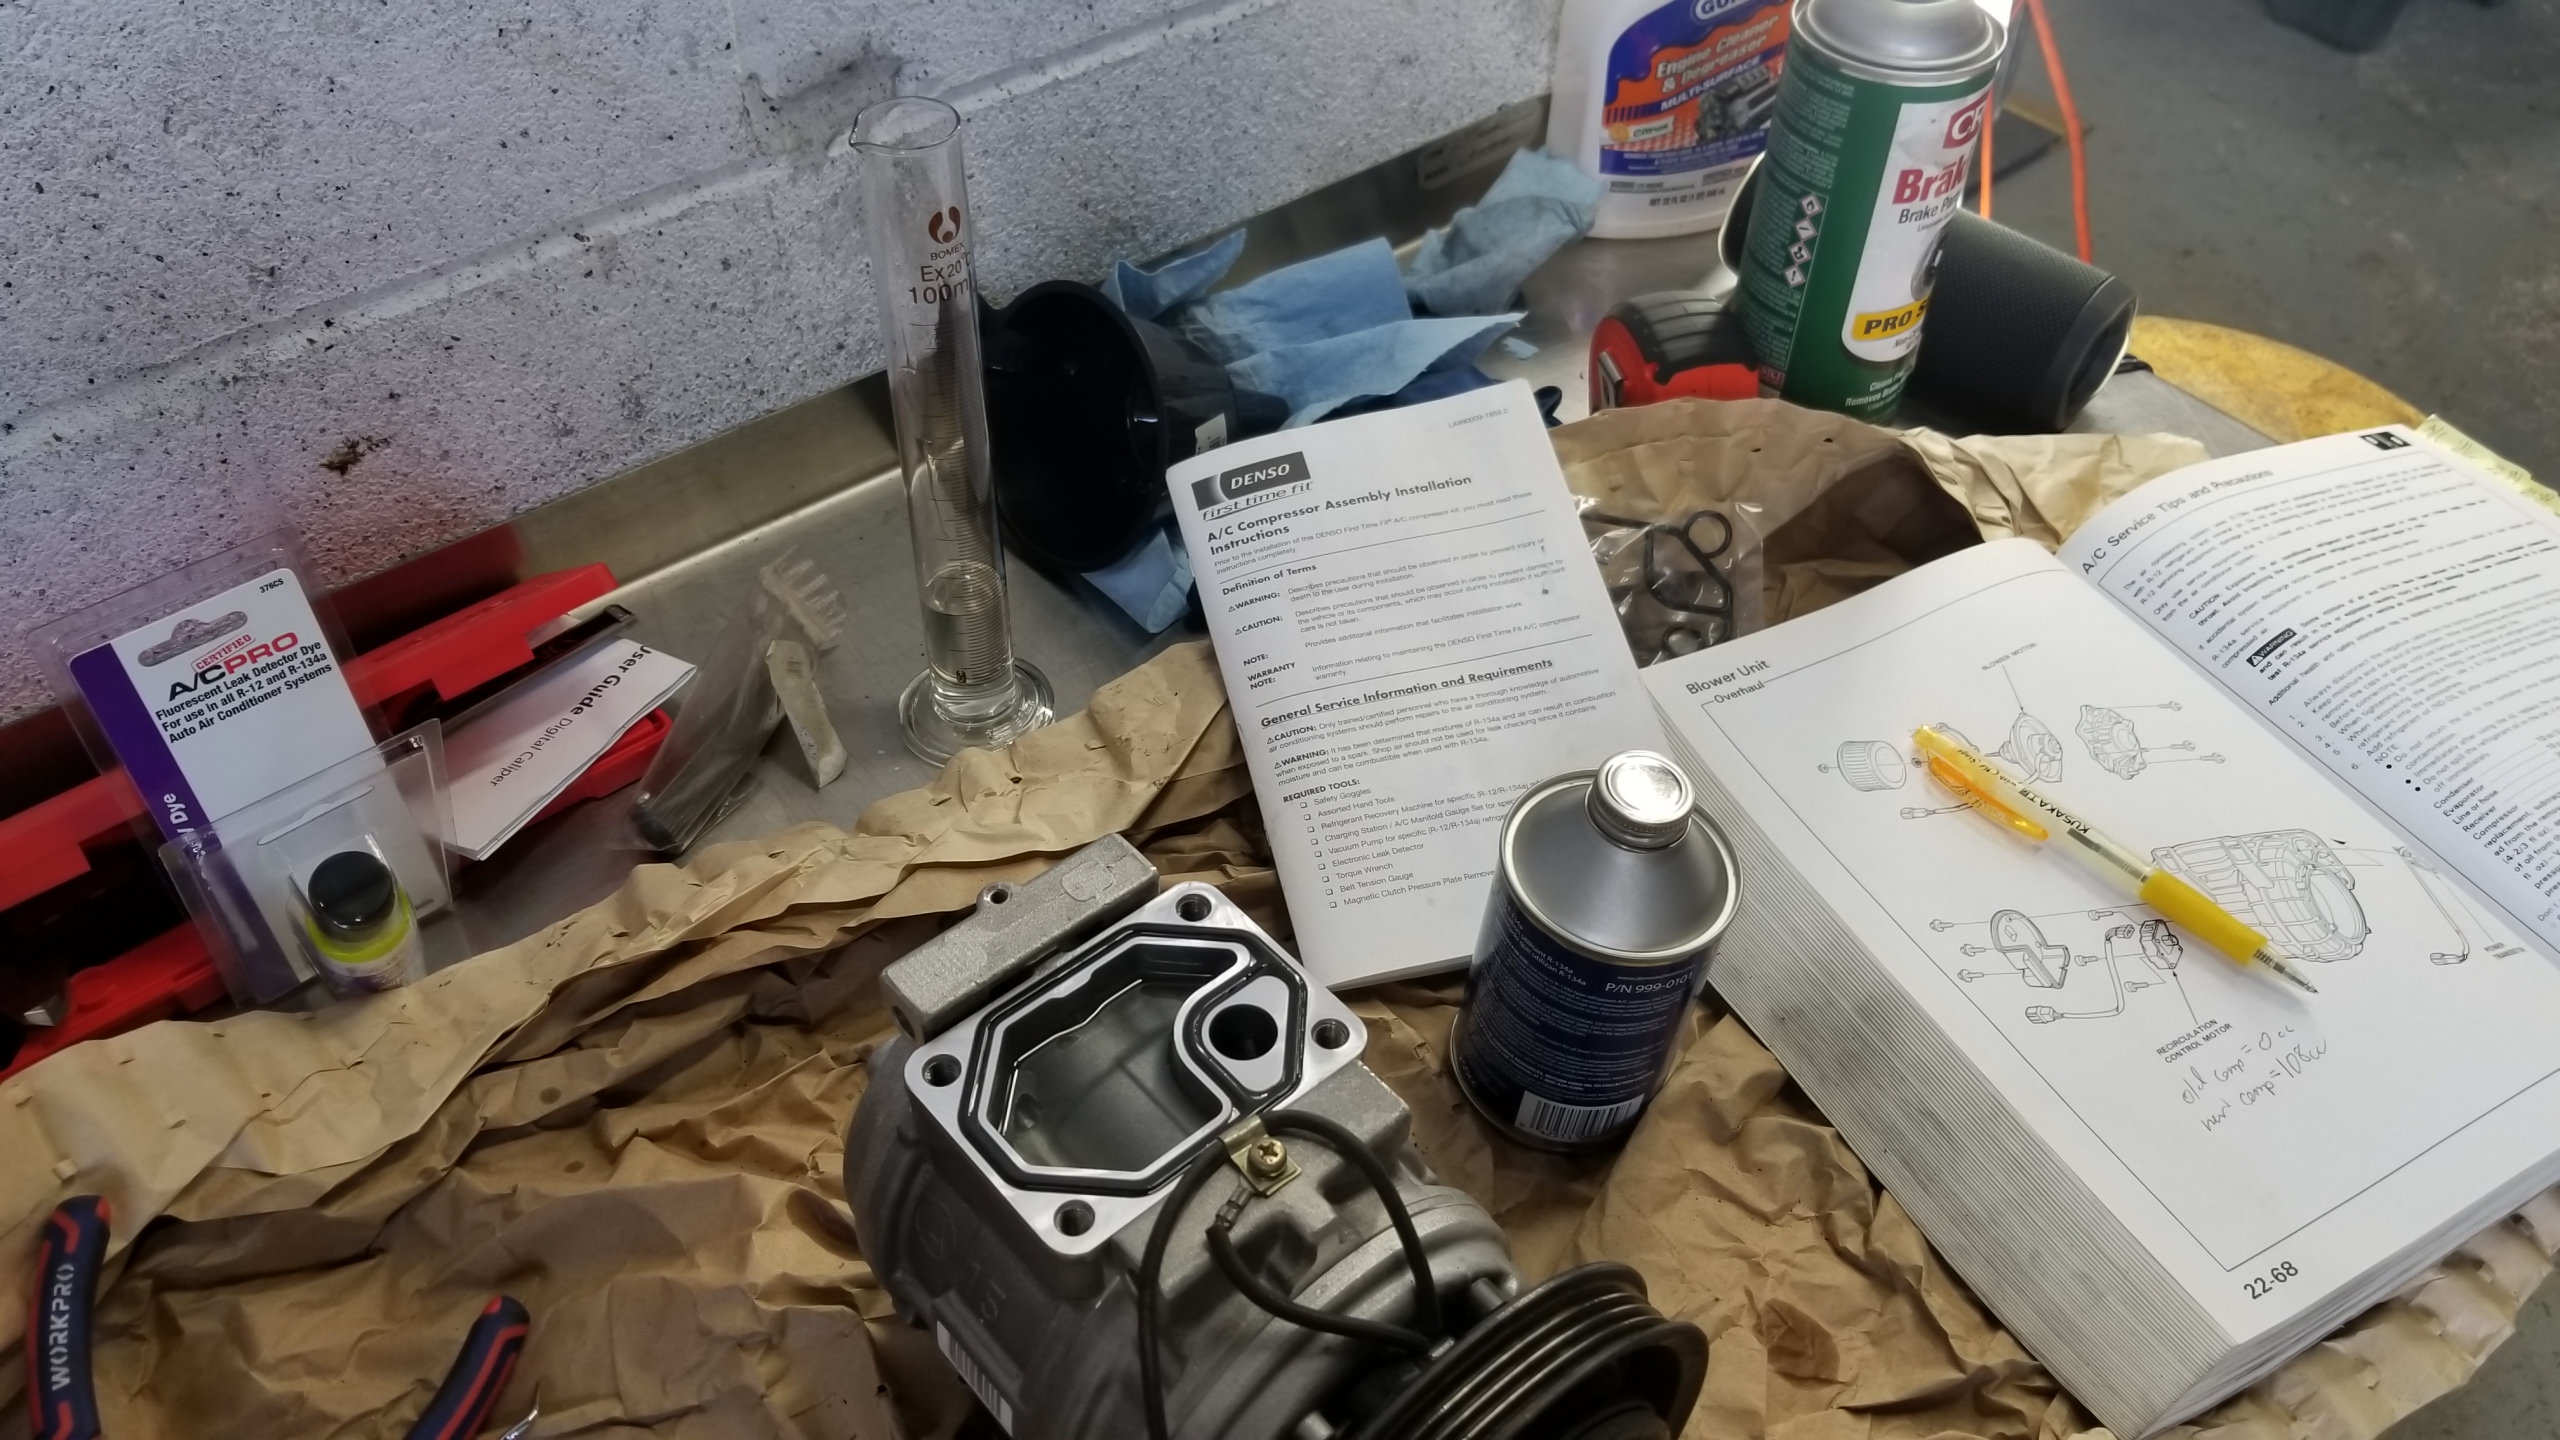
The FSM climate control section does a good job of explaining the system layout, so study that for a bit and then you'll understand which pipes to flush and where. The 1991 manual is for R-12, but page 22-6 has a great system diagram and pg. 22-65 has all the oil and torque specs for the system fittings. I have a physical copy of the 1994 manual which is for R-134a instead, so keep in mind which one you're looking at especially for the oil and refrigerant charge amounts. The LHD/RHD layout isn't much different, though the evap is handed and some of the front hardlines are too.

For flushing: you'll go through solvent faster than you expect. Flush as many lines as possible, and find a way to capture the dirty fluid on the other side. It would be best to have some polytube to divert dirty fluid to a container, I relied solely on rags to absorb the fluid but that was a bad idea. The velocity that the flush travels ends up splashing it everywhere, and if your system had UV dye in it already it will get on absolutely everything. This added a few hours to my work efforts for cleanup of spilled dye so that I can tell if my new system is actually leaking. Blow out each line with compressed air for a minute or so to remove any leftover fluid. Rubber-tipped nozzles for air guns are necessary.

For O-rings: replace any O-rings with new ones from the kits above, make sure you use the old O-ring and match the size and thickness as closely as possible. Usually the new rings are green, but that's not necessarily true since the new lines & compressor I got have black rings and seals for R-134a. Use a small amount of new ND-8 oil to lube the rings before installation, as usual.

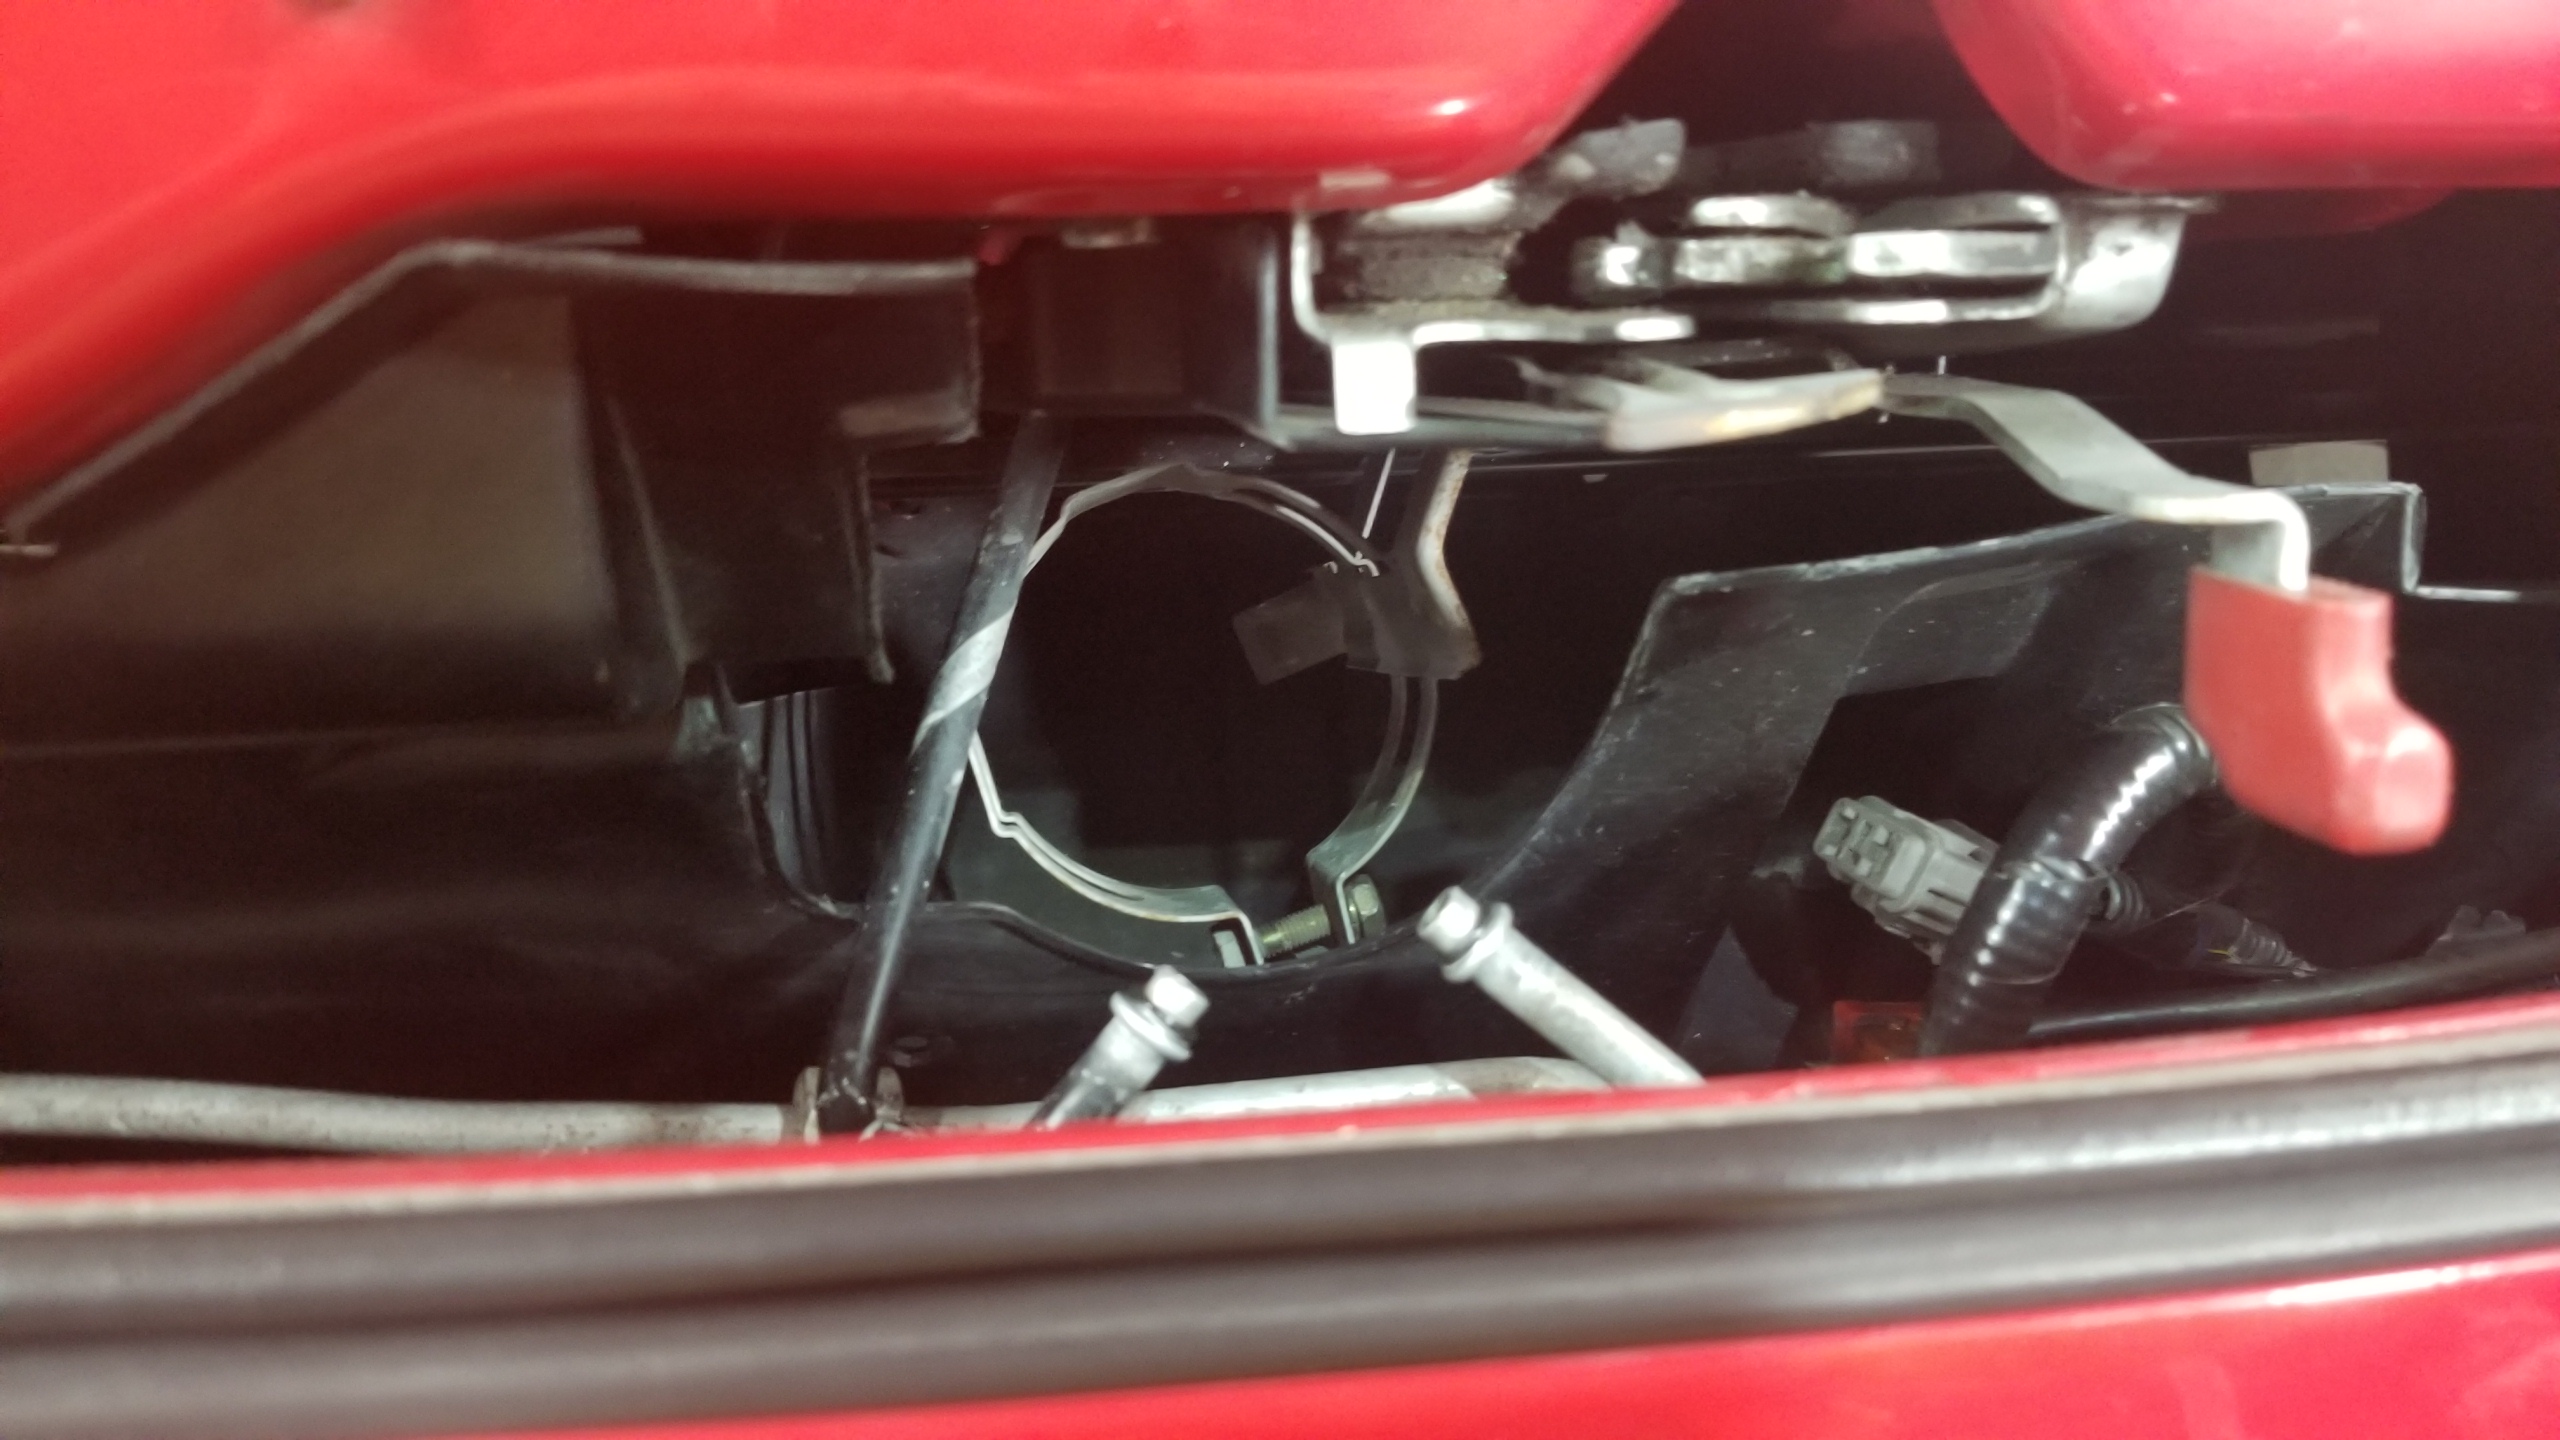
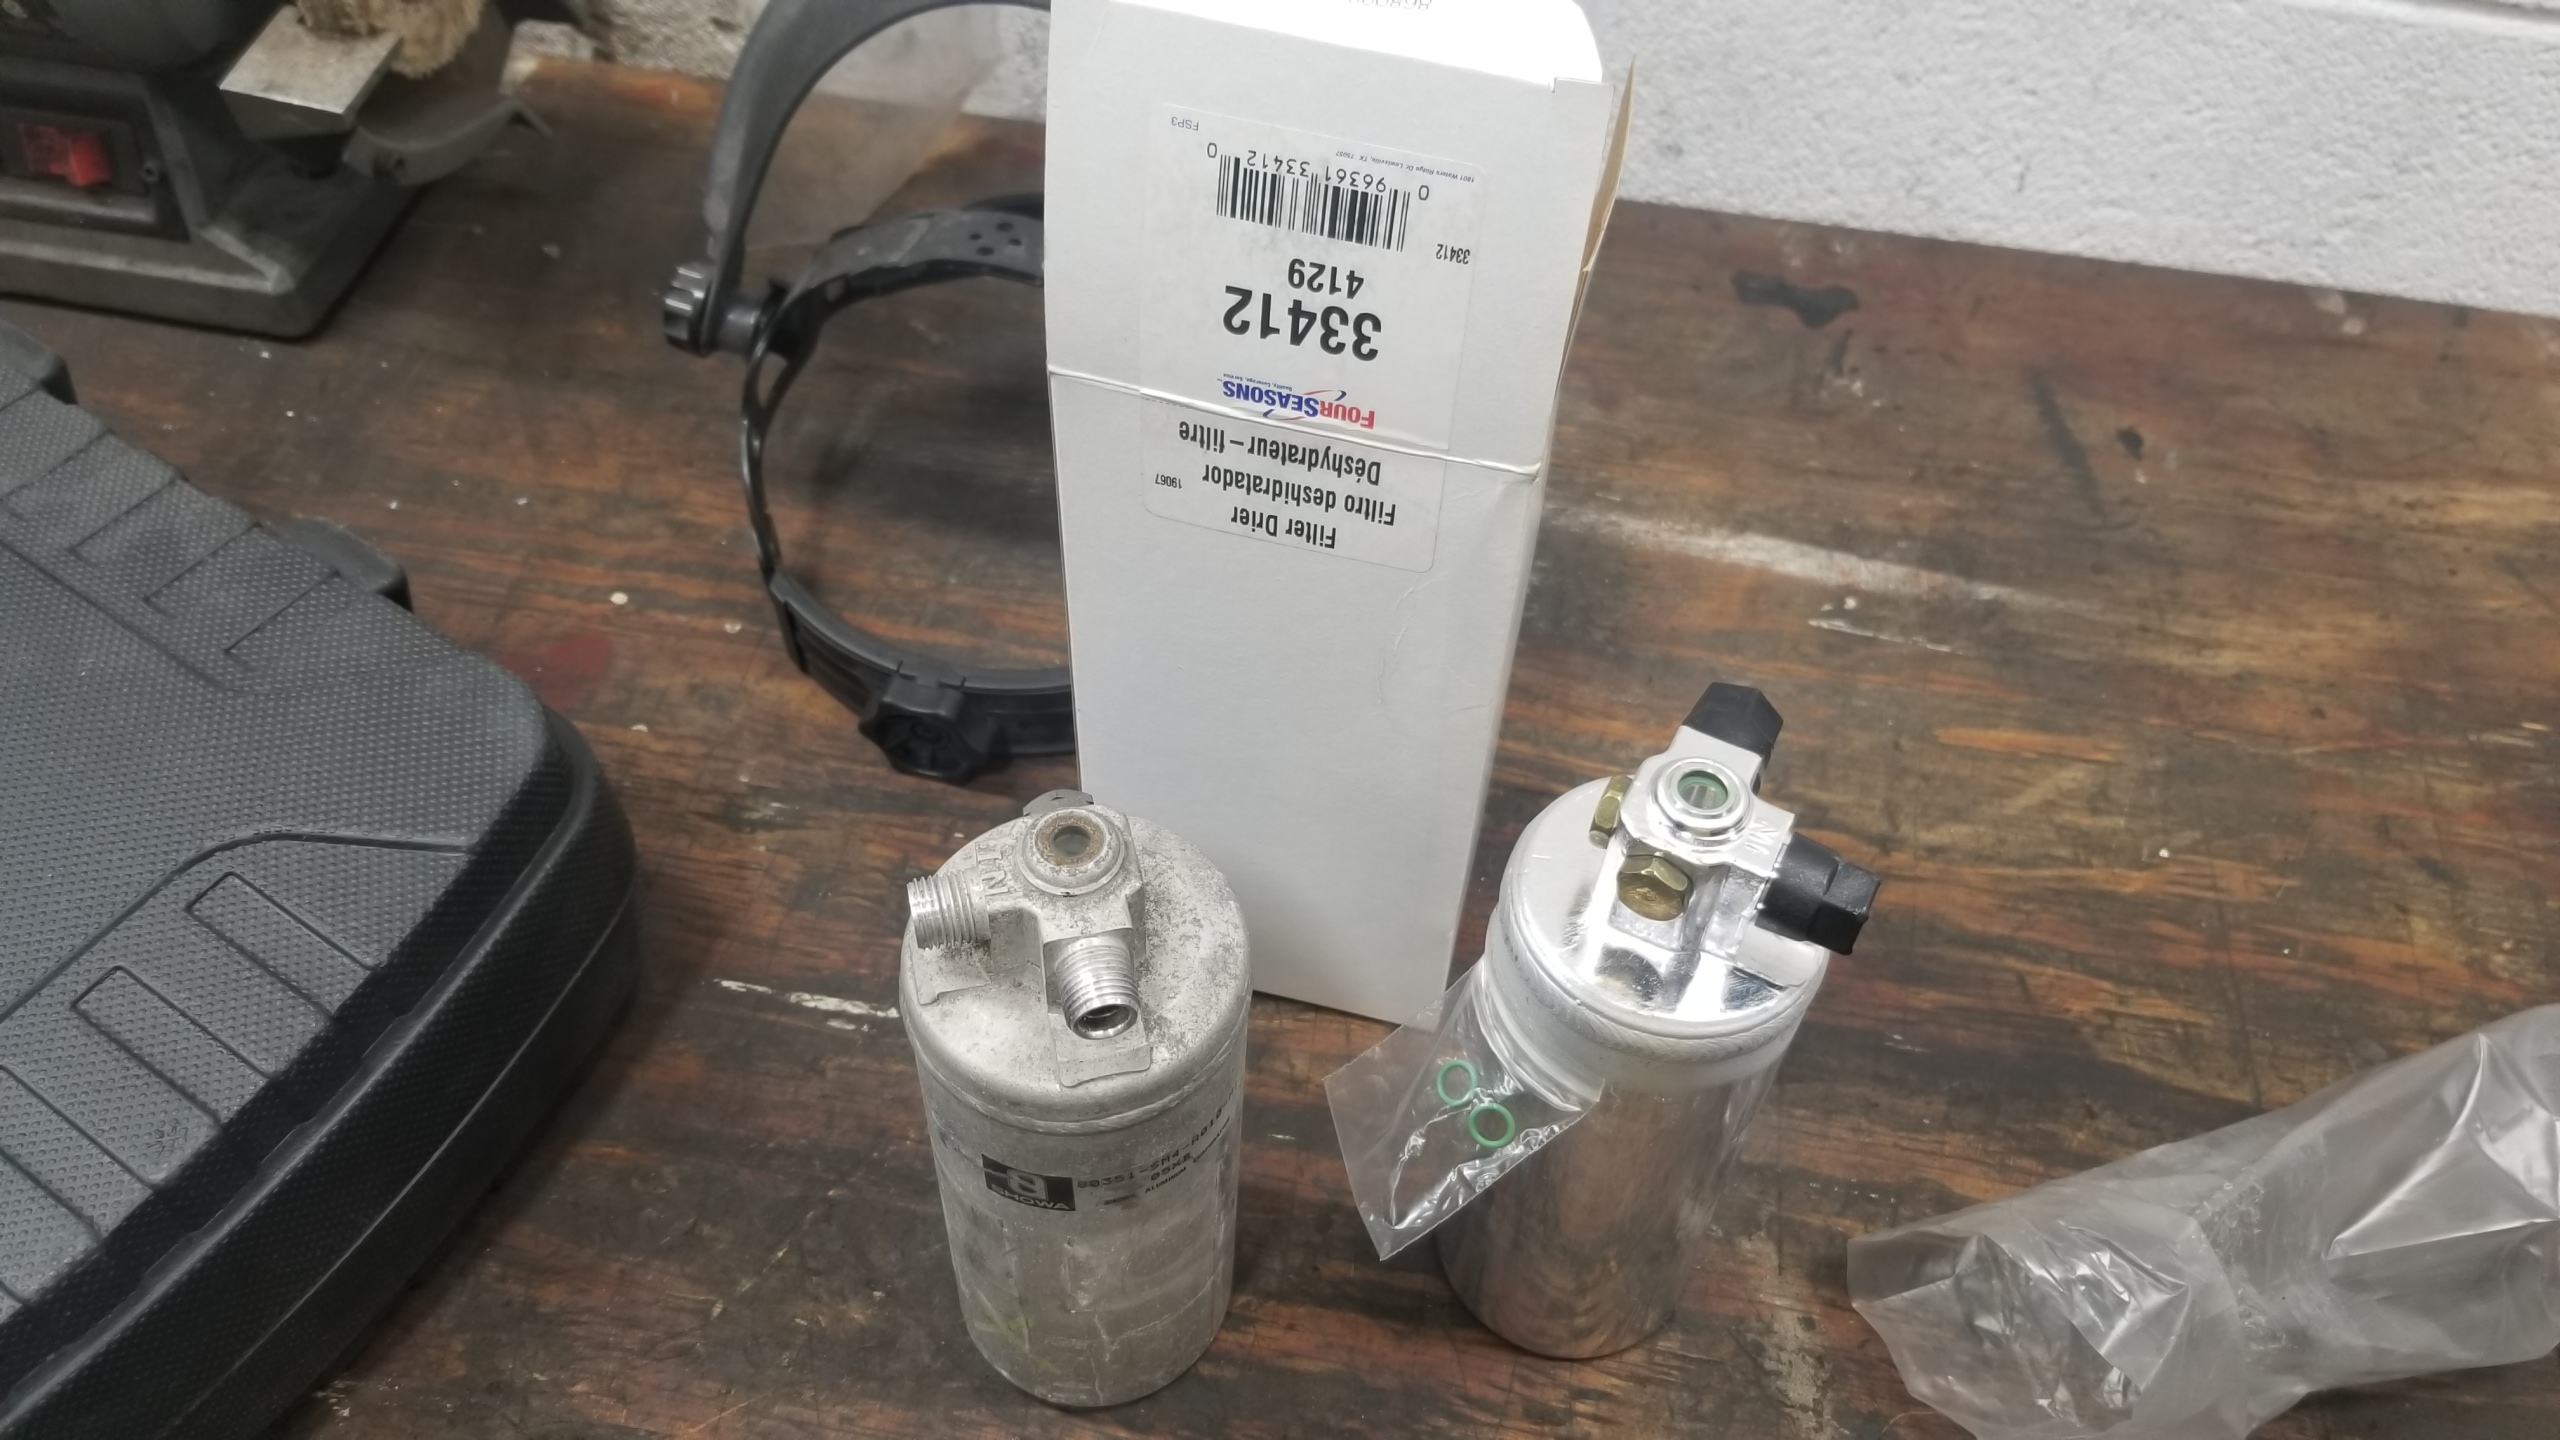
Here's where the drier/accumulator goes. Two fittings, one inlet from the 2nd condenser and one outlet to the evap unit. The bracket has a 10mm clamping bolt that is a bit too big for the new 134 receiver, but you can make it fit. I stuck a small piece of foam between the drier and clamp to make it snug. The R-12 accumulator being larger also allows for more margin of error for the total refrigerant charge, so you might be able to use either one.
vgv22eF.jpg


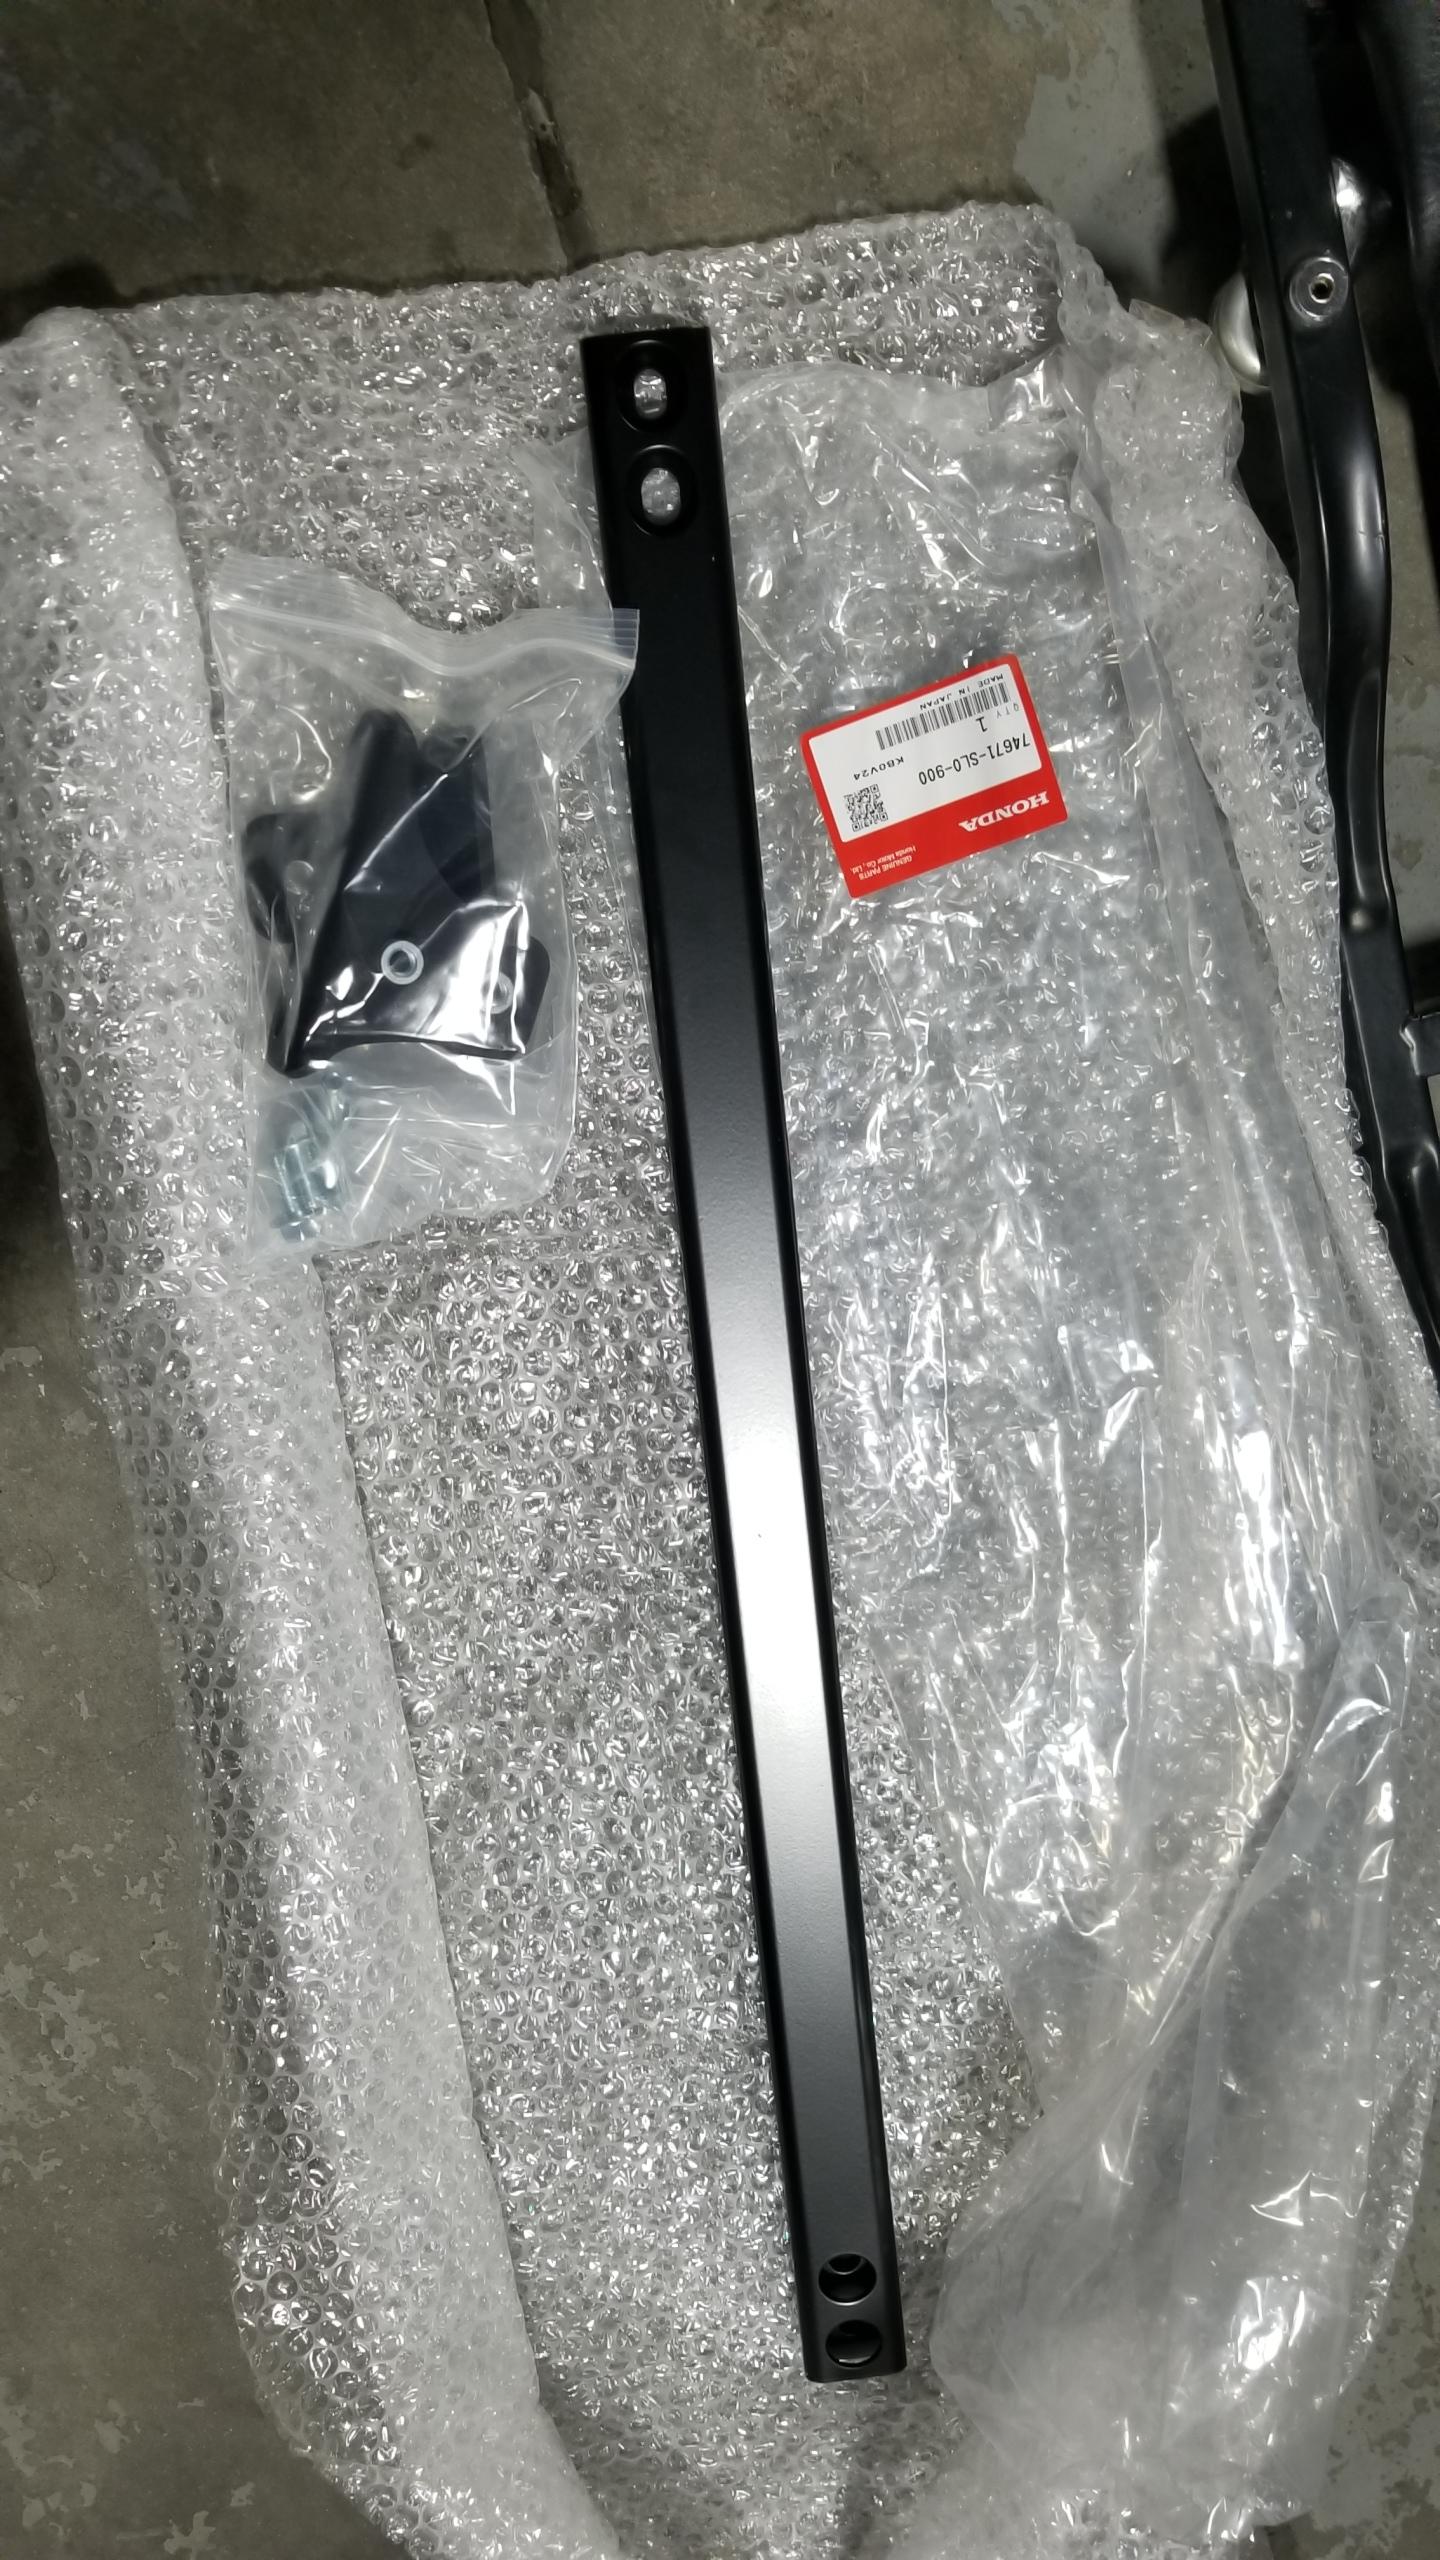
New drier part number. This is cheap and should be replaced as well as a consumable item. It comes with new O-rings as well. Don't open up the new drier until you're ready to pull a vacuum on the system so you don't ruin the desiccant with moisture in the air.
2UwoiK3.jpg


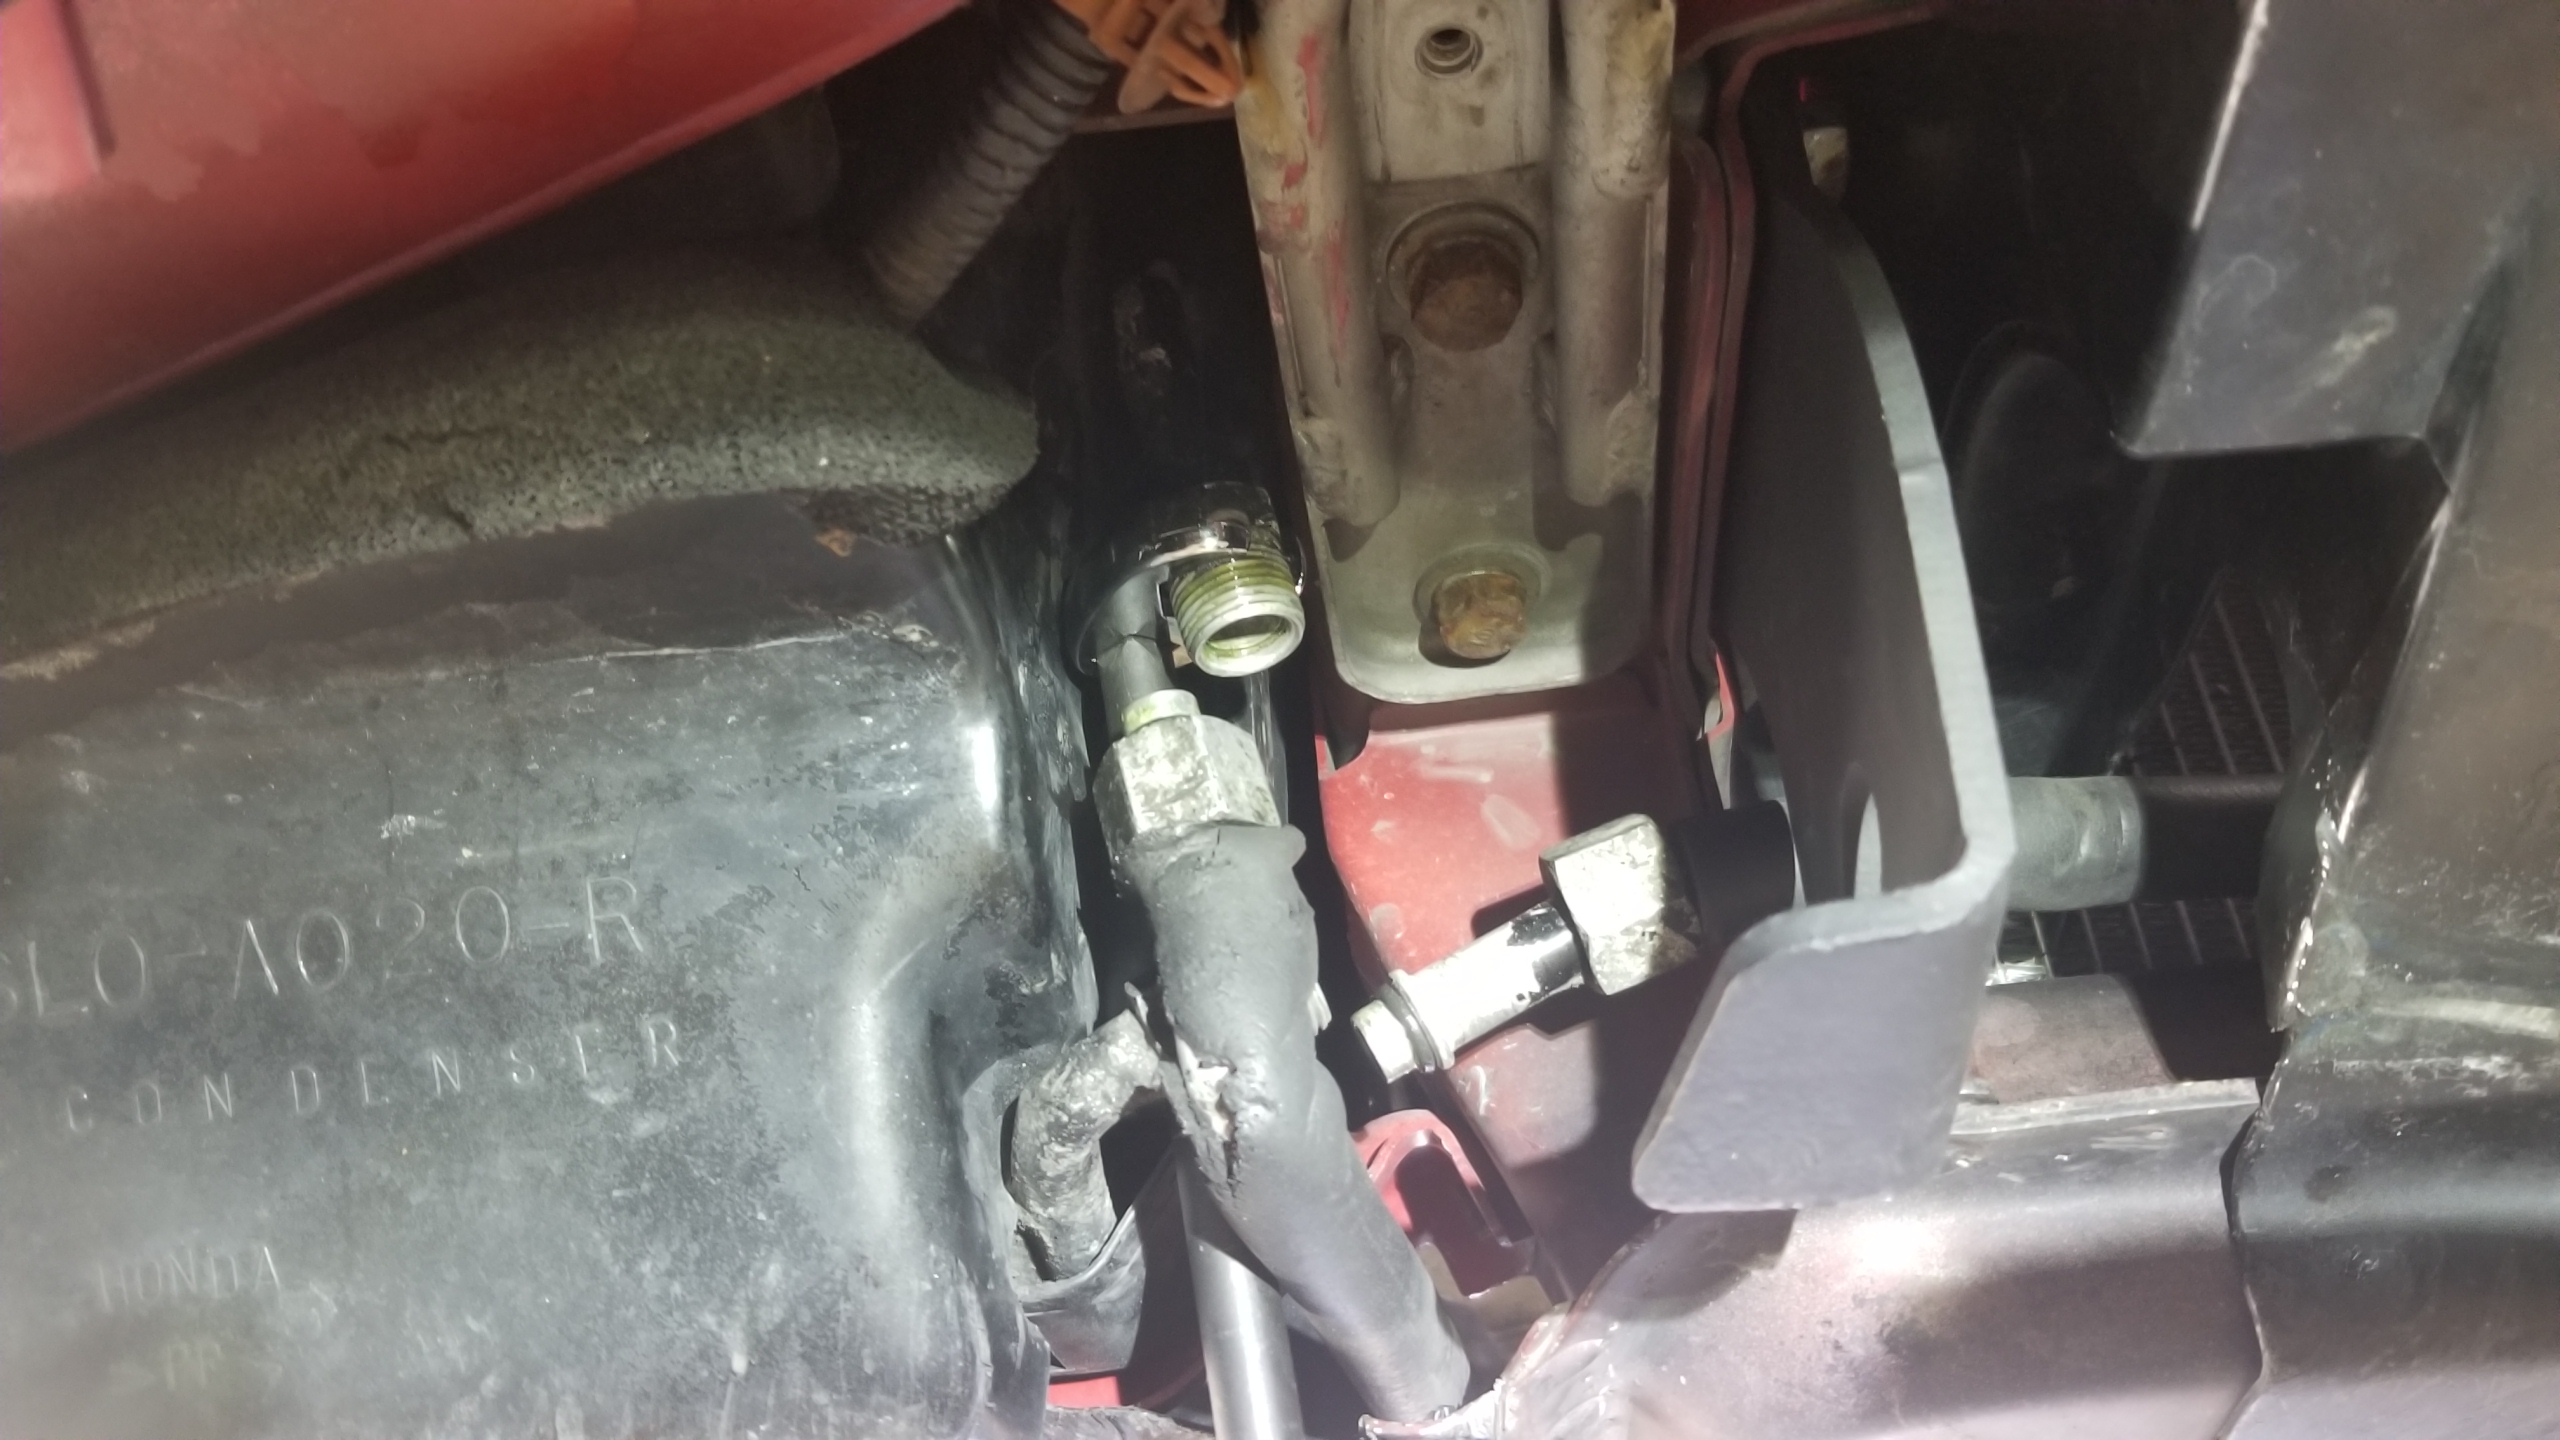
Two fittings on the front-right condenser. This is the first condenser that receives the hot/high pressure gas from the compressor and starts turning it into a hot/high pressure liquid.

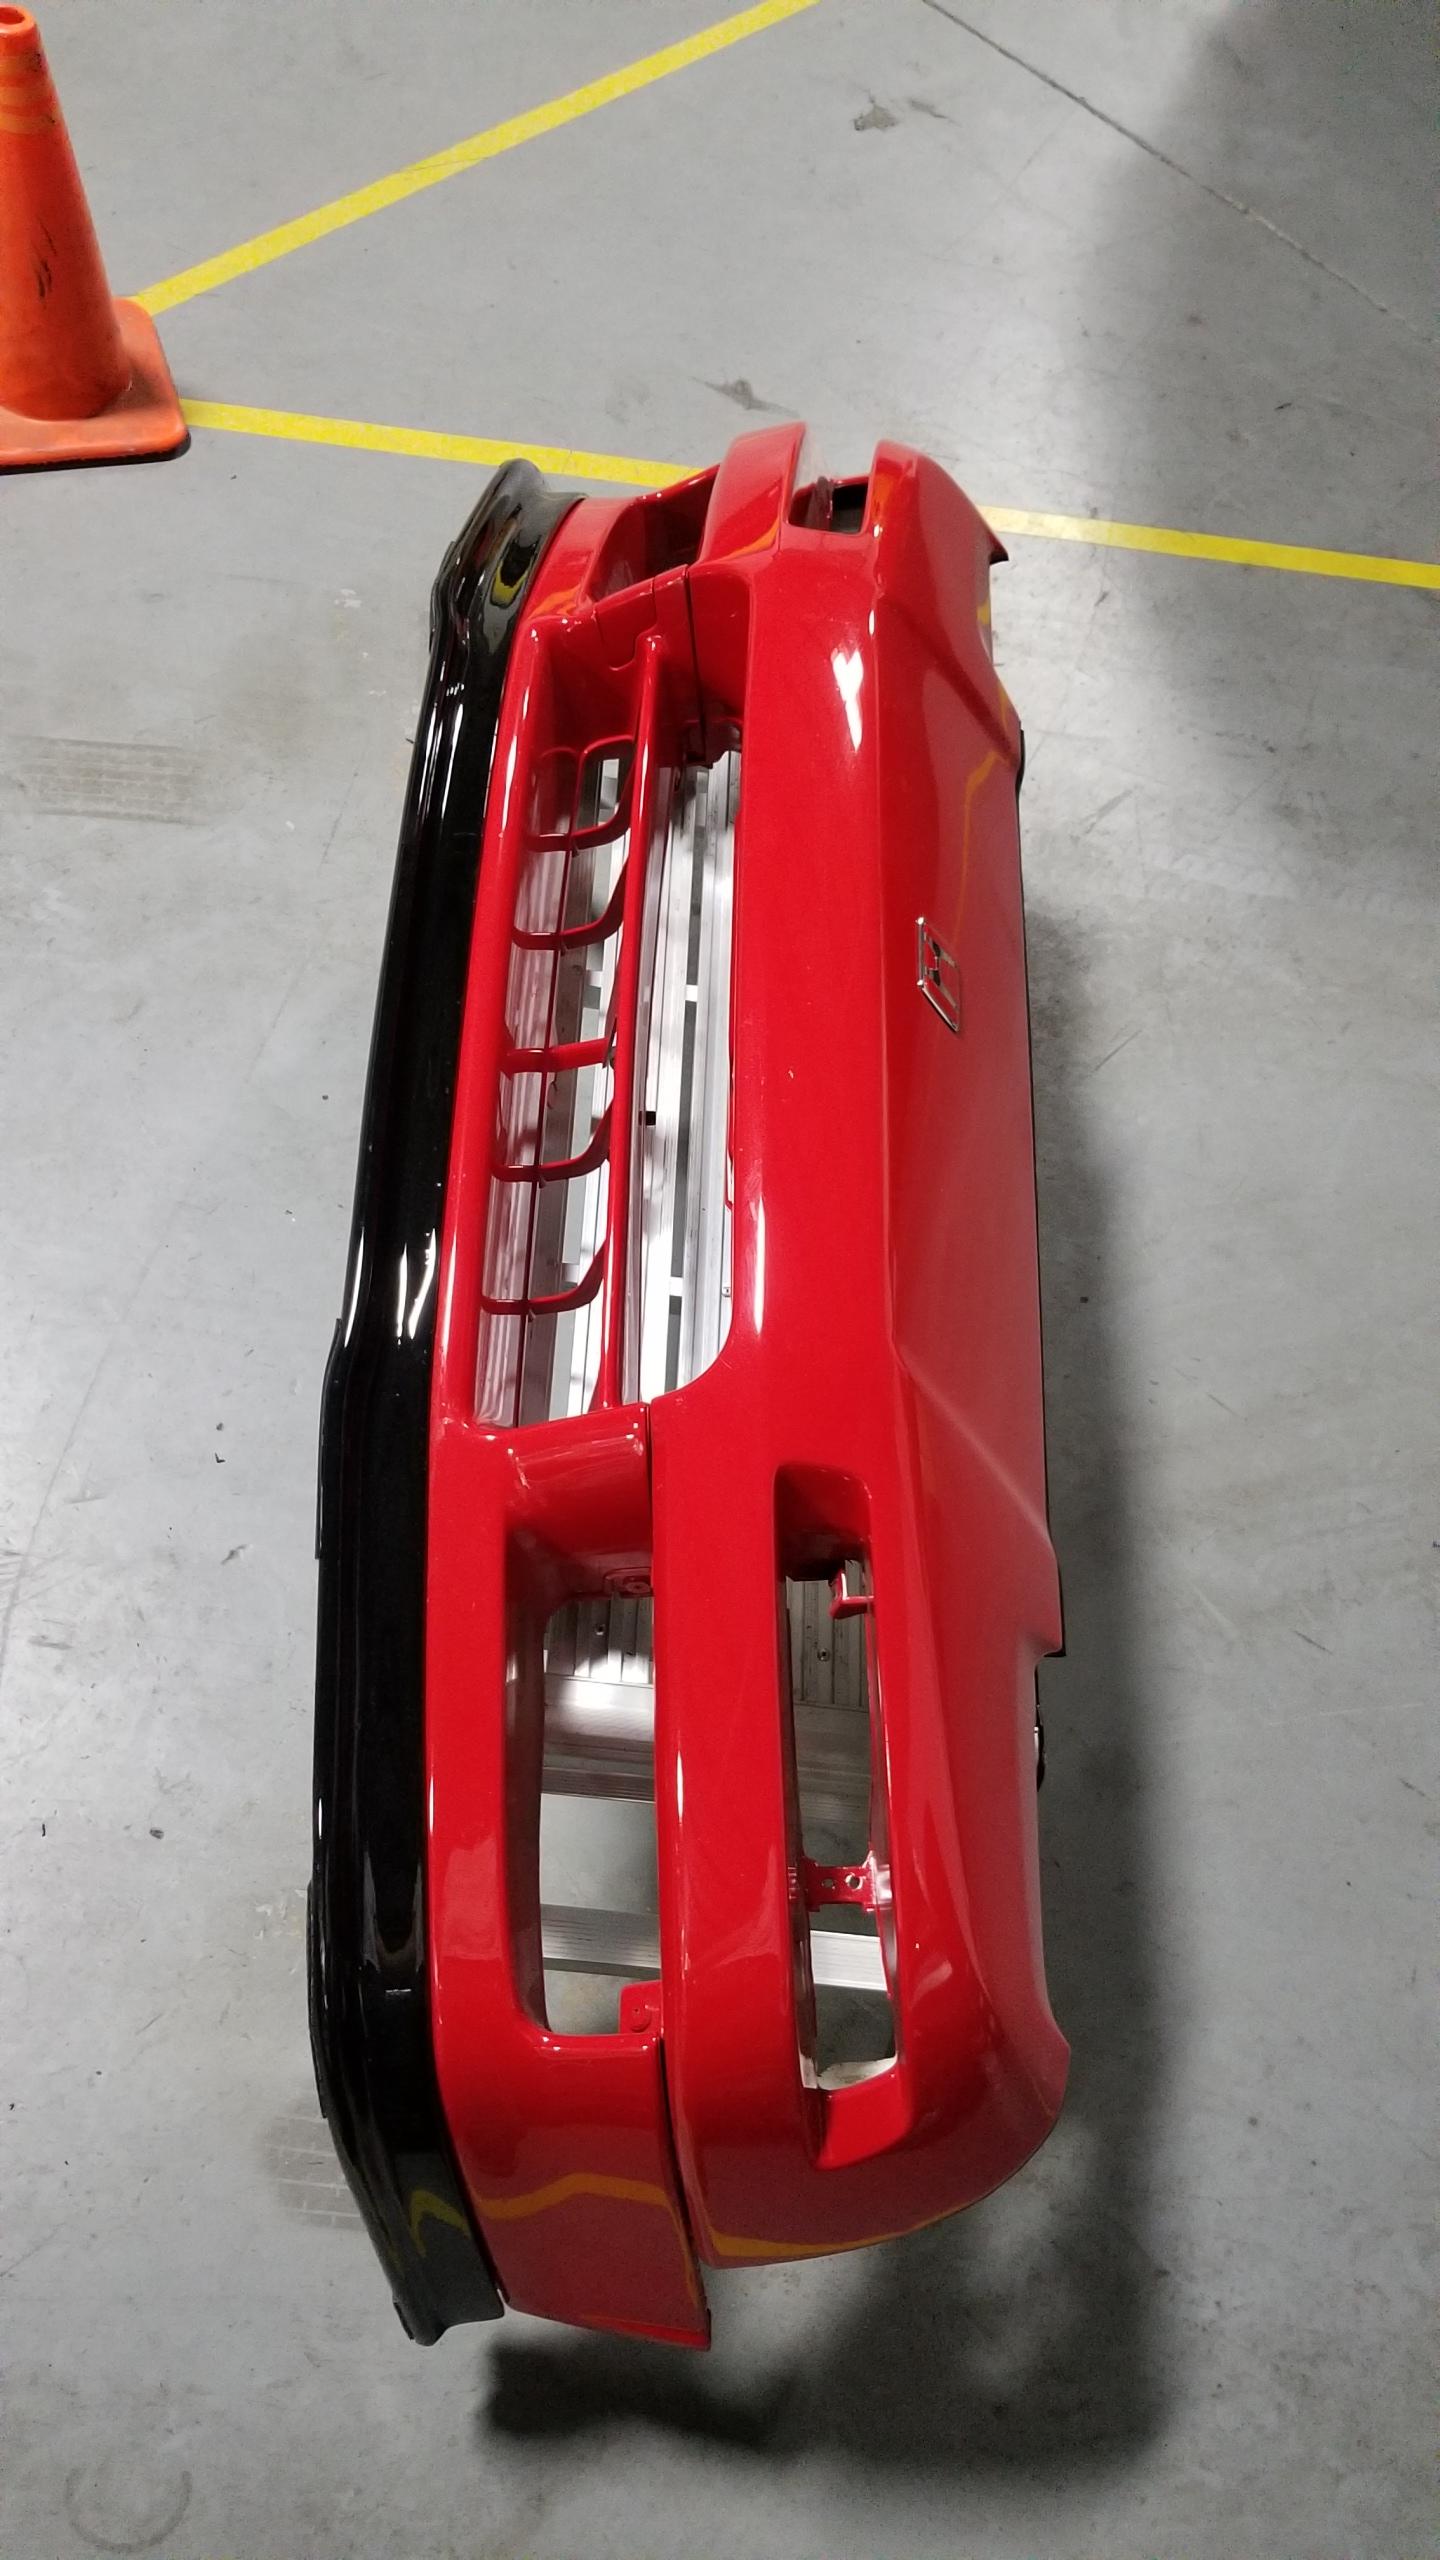
You should be very careful with these fittings since they sit at the front and take some abuse from debris and corrosion. Everything's aluminum and easy to strip. The larger lines have 22mm fittings and 19mm fittings if I remember right. If you can't get a fitting loose, try some penetrating fluid and/or heat and try again. If you still can't get it loose, it's probably best to leave it alone and let the old O-ring do its job. If you end up kinking or breaking a line to the condenser, you'll have to get a new one and pull the front bumper off to replace it which isn't fun. My front condensers are likely original and fairly beat-up already, but they're still kicking so I'm keeping them as long as possible. Fortunately, I believe LHD/RHD cars share the same part so it should be a bit easier to find a replacement if necessary in the future.

Flushing the condensers take a ton of solvent before any comes out the other side. The first condenser contained a ton of old oil, the second condenser started out much cleaner. Save extra solvent for these and blow out thoroughly.
oo0Dhjv.jpg


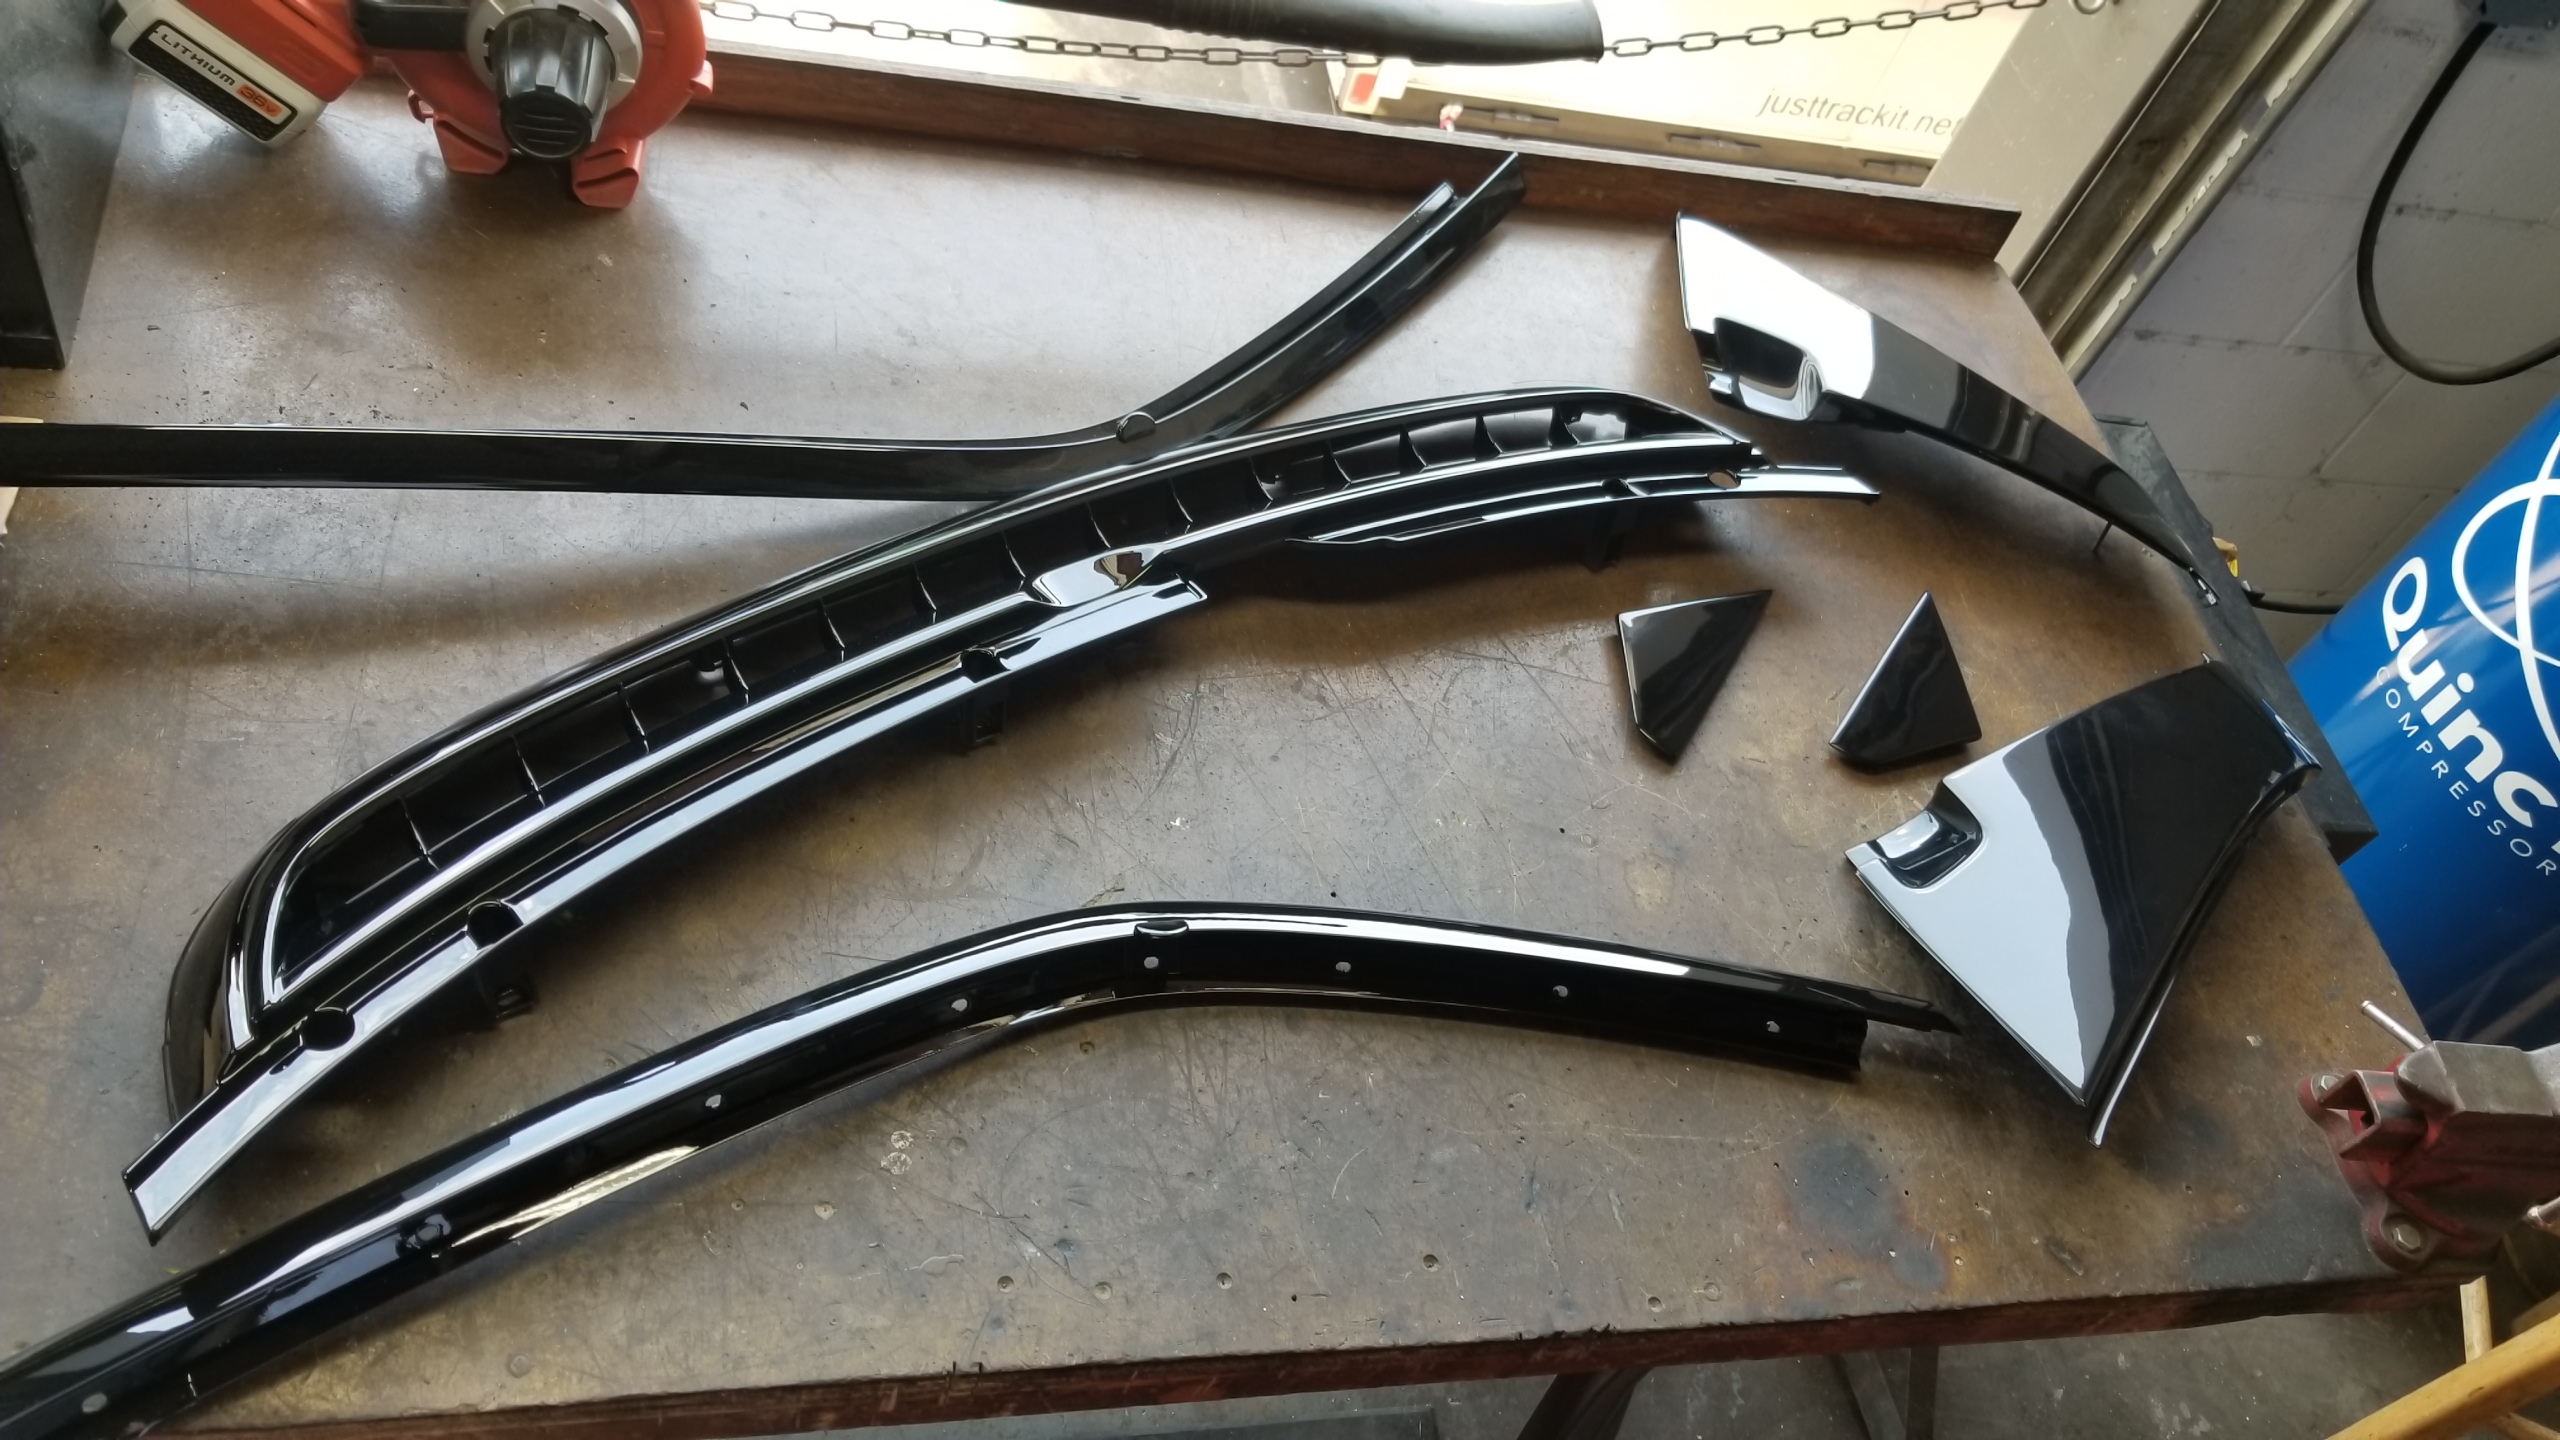
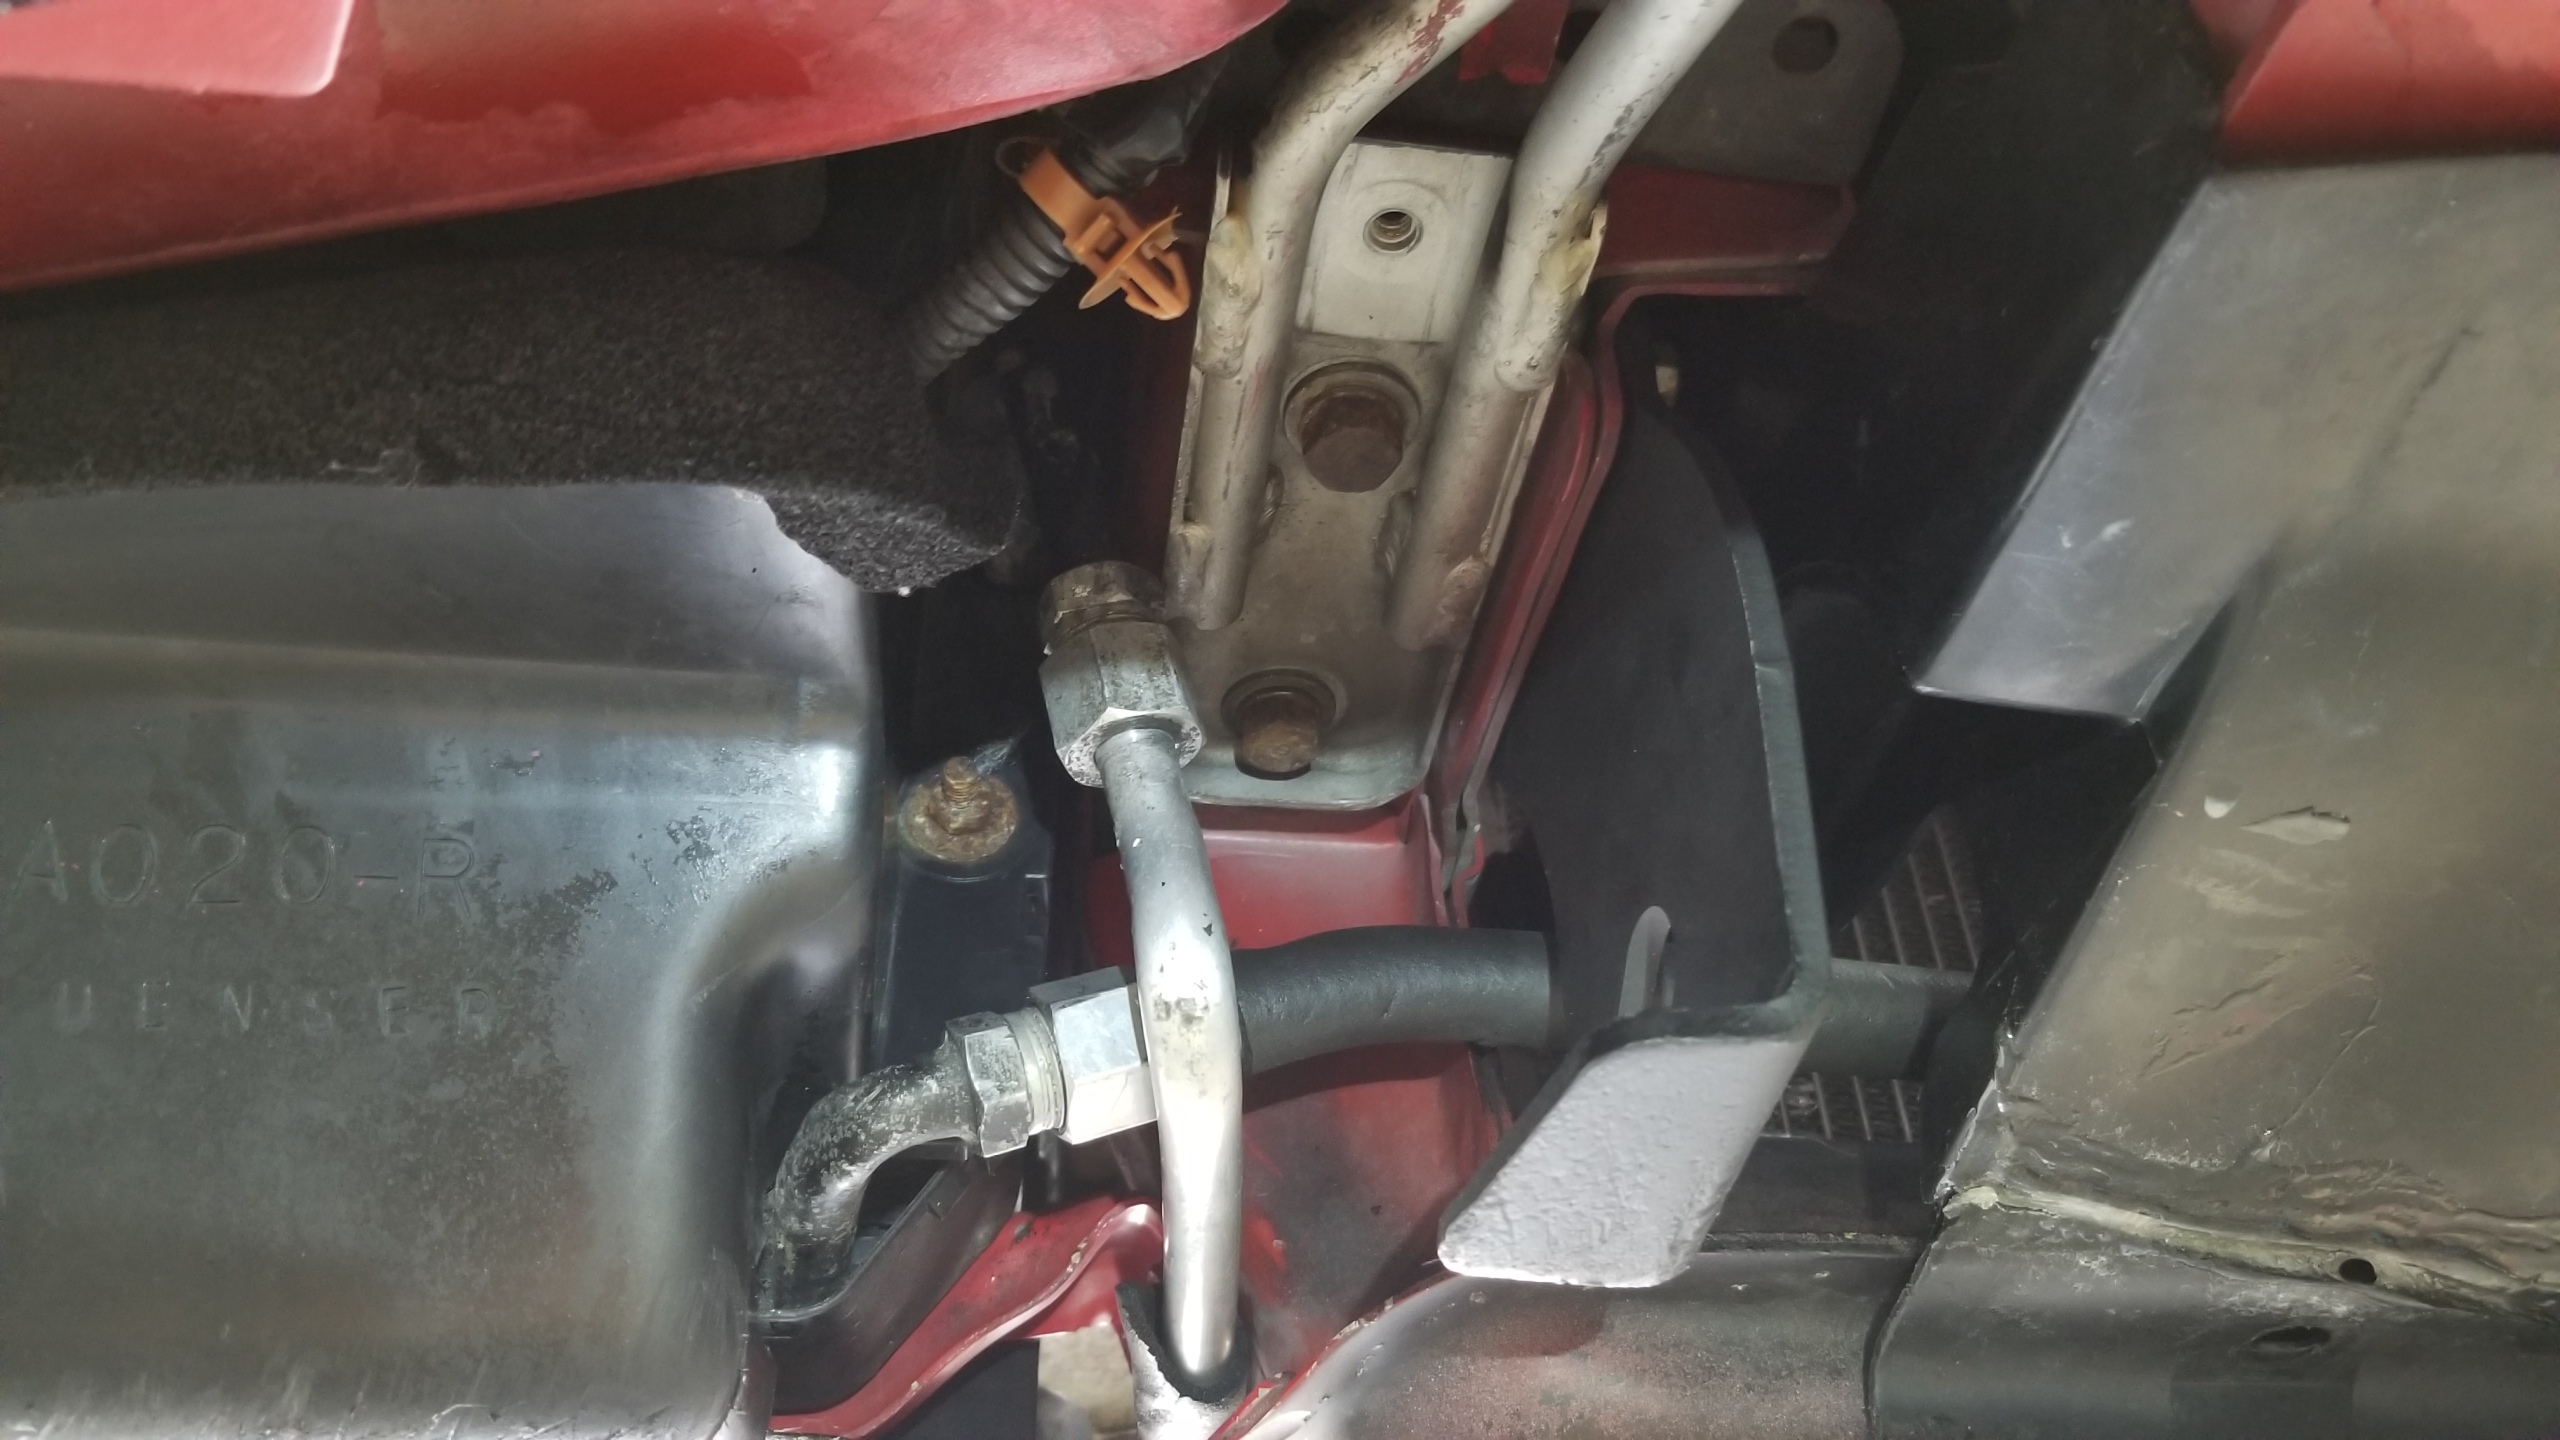
Same side reconnected after flushing, with new O-rings and a new front hardline between the two condensers.
TzUEH2U.jpg


This is the front-left condenser, the 2nd in series. This pic is after I replaced the two lines with brand-new ones since the old ones were kinked and beat-up, also something Kaz recommends. The top line is from the first condenser to the inlet of this condenser, the bottom line is from the condenser outlet to the drier inlet.
NrgR0VV.jpg


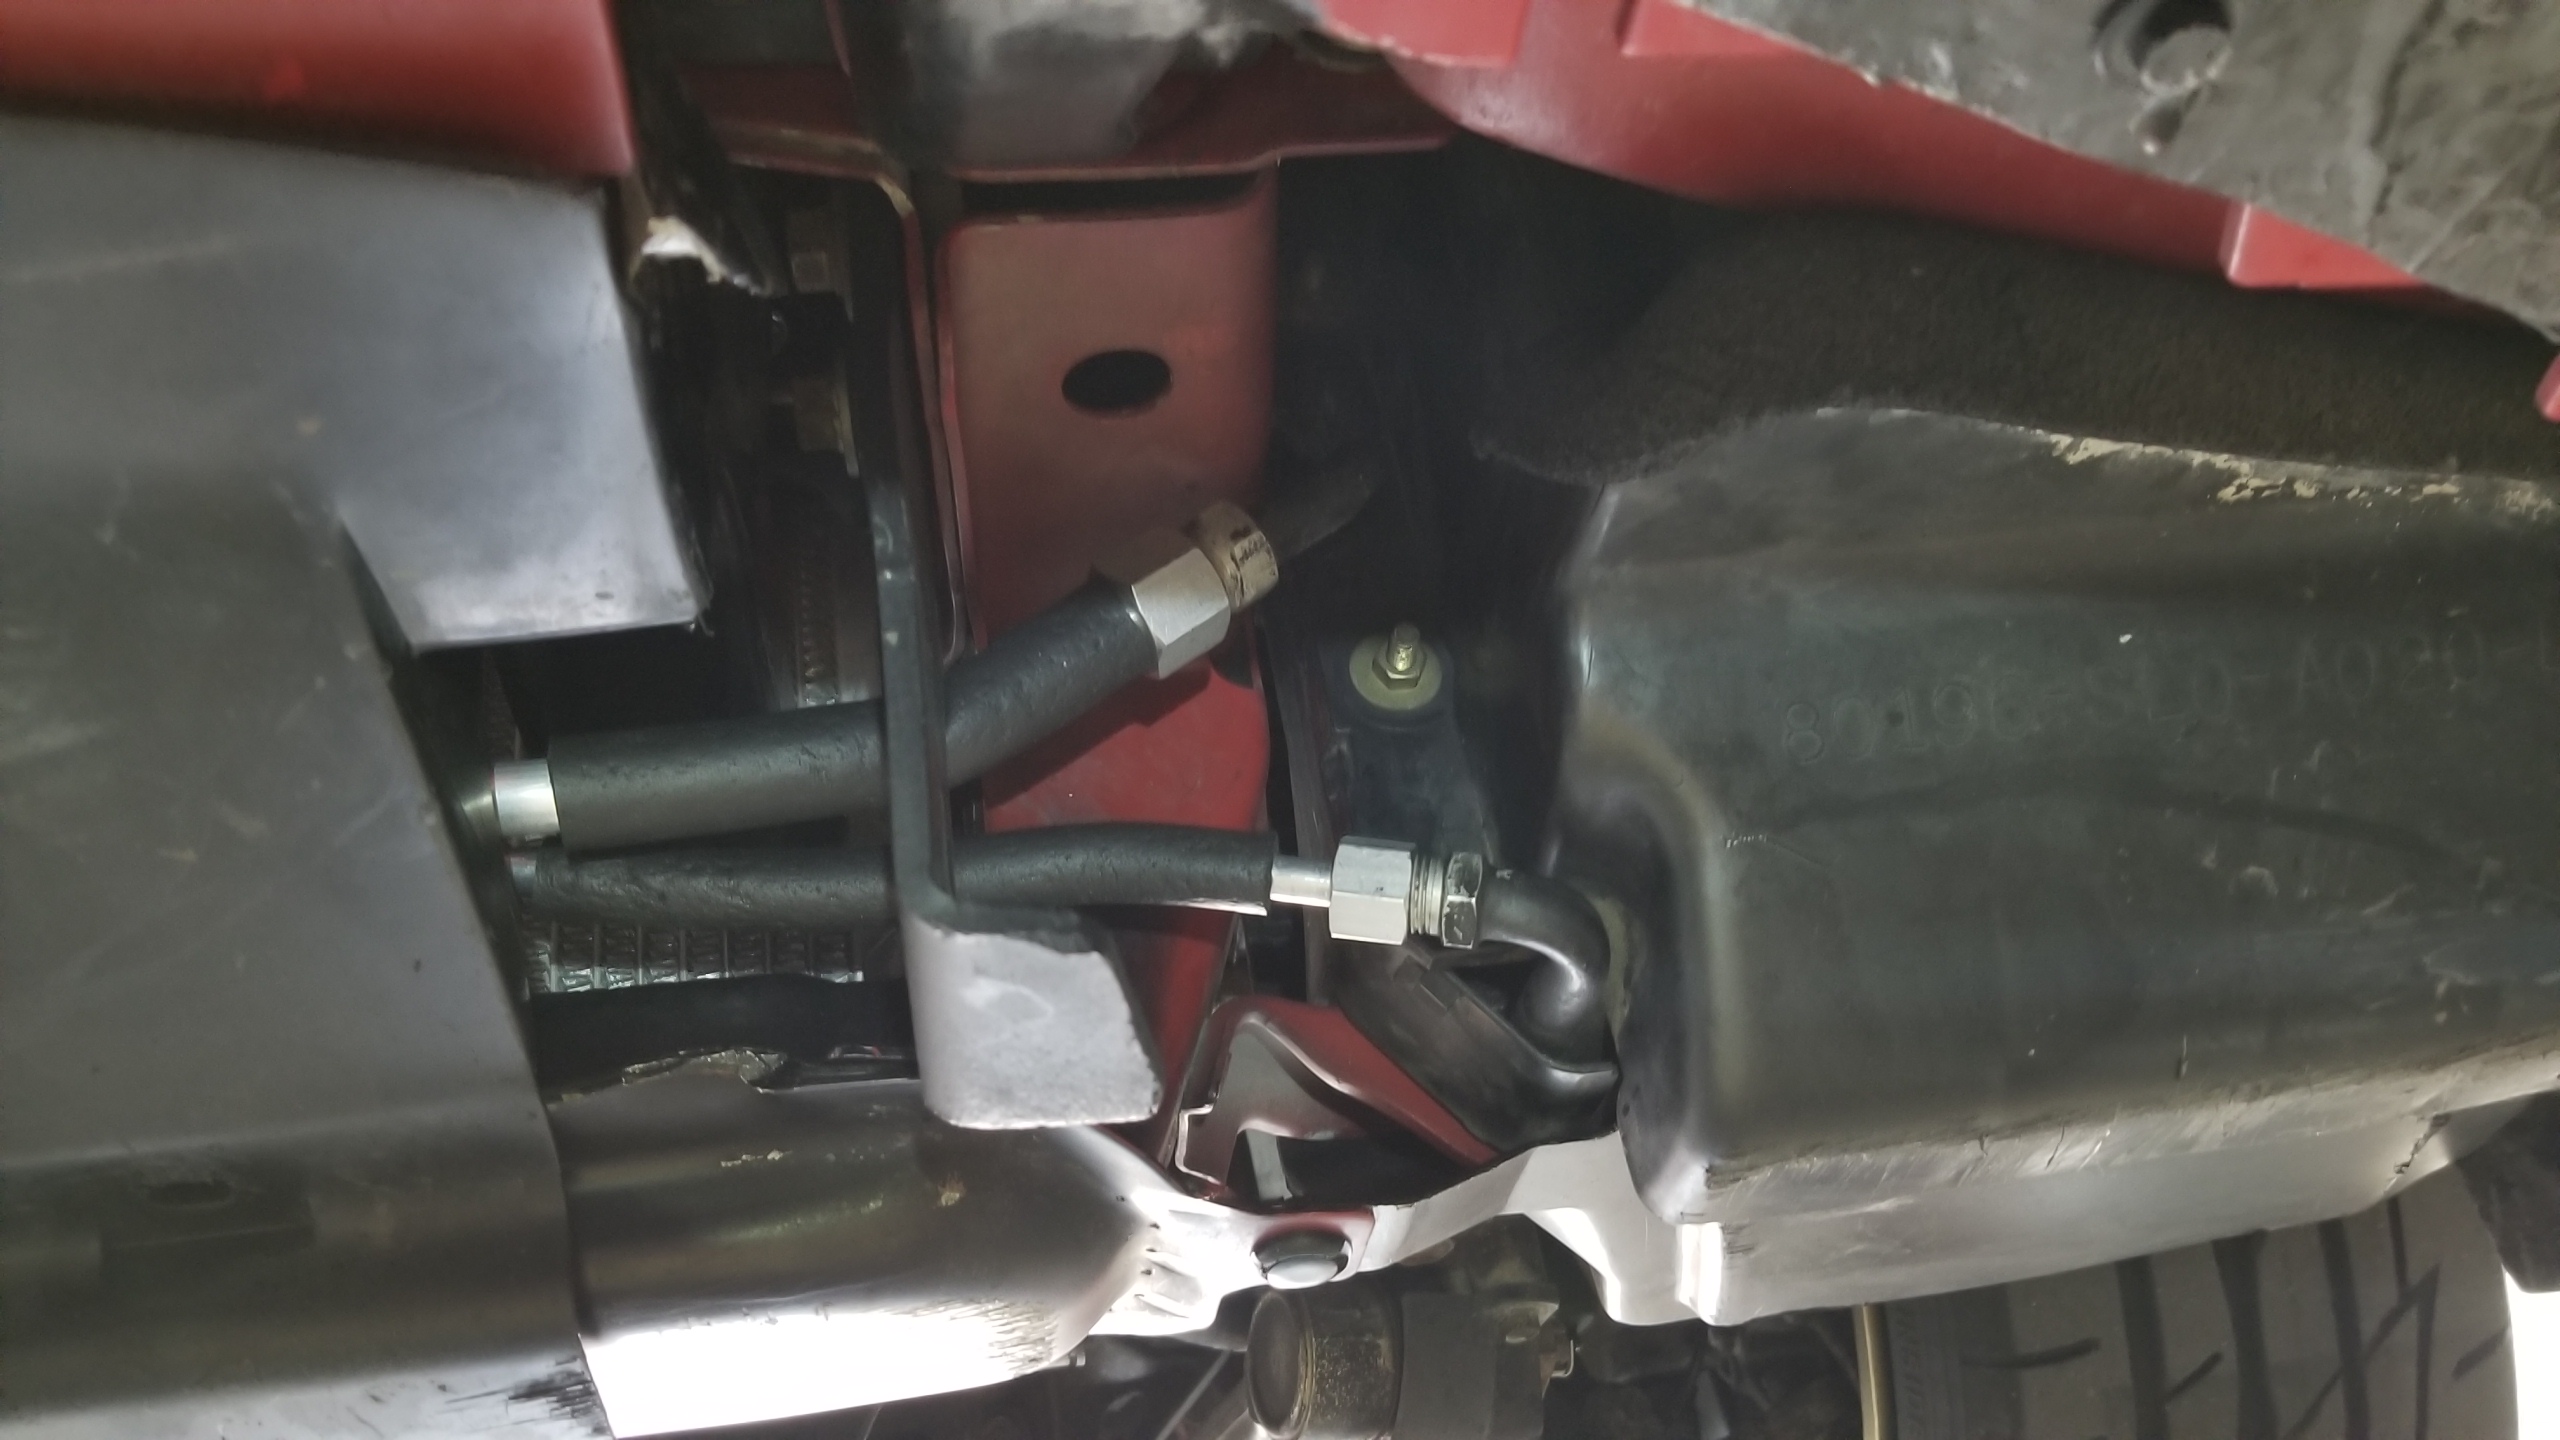
There's one fitting on the low side under the center tunnel which runs between the low-side hose and the inlet to the first condenser. Don't forget to replace this O-ring too.
YCSGvE6.jpg


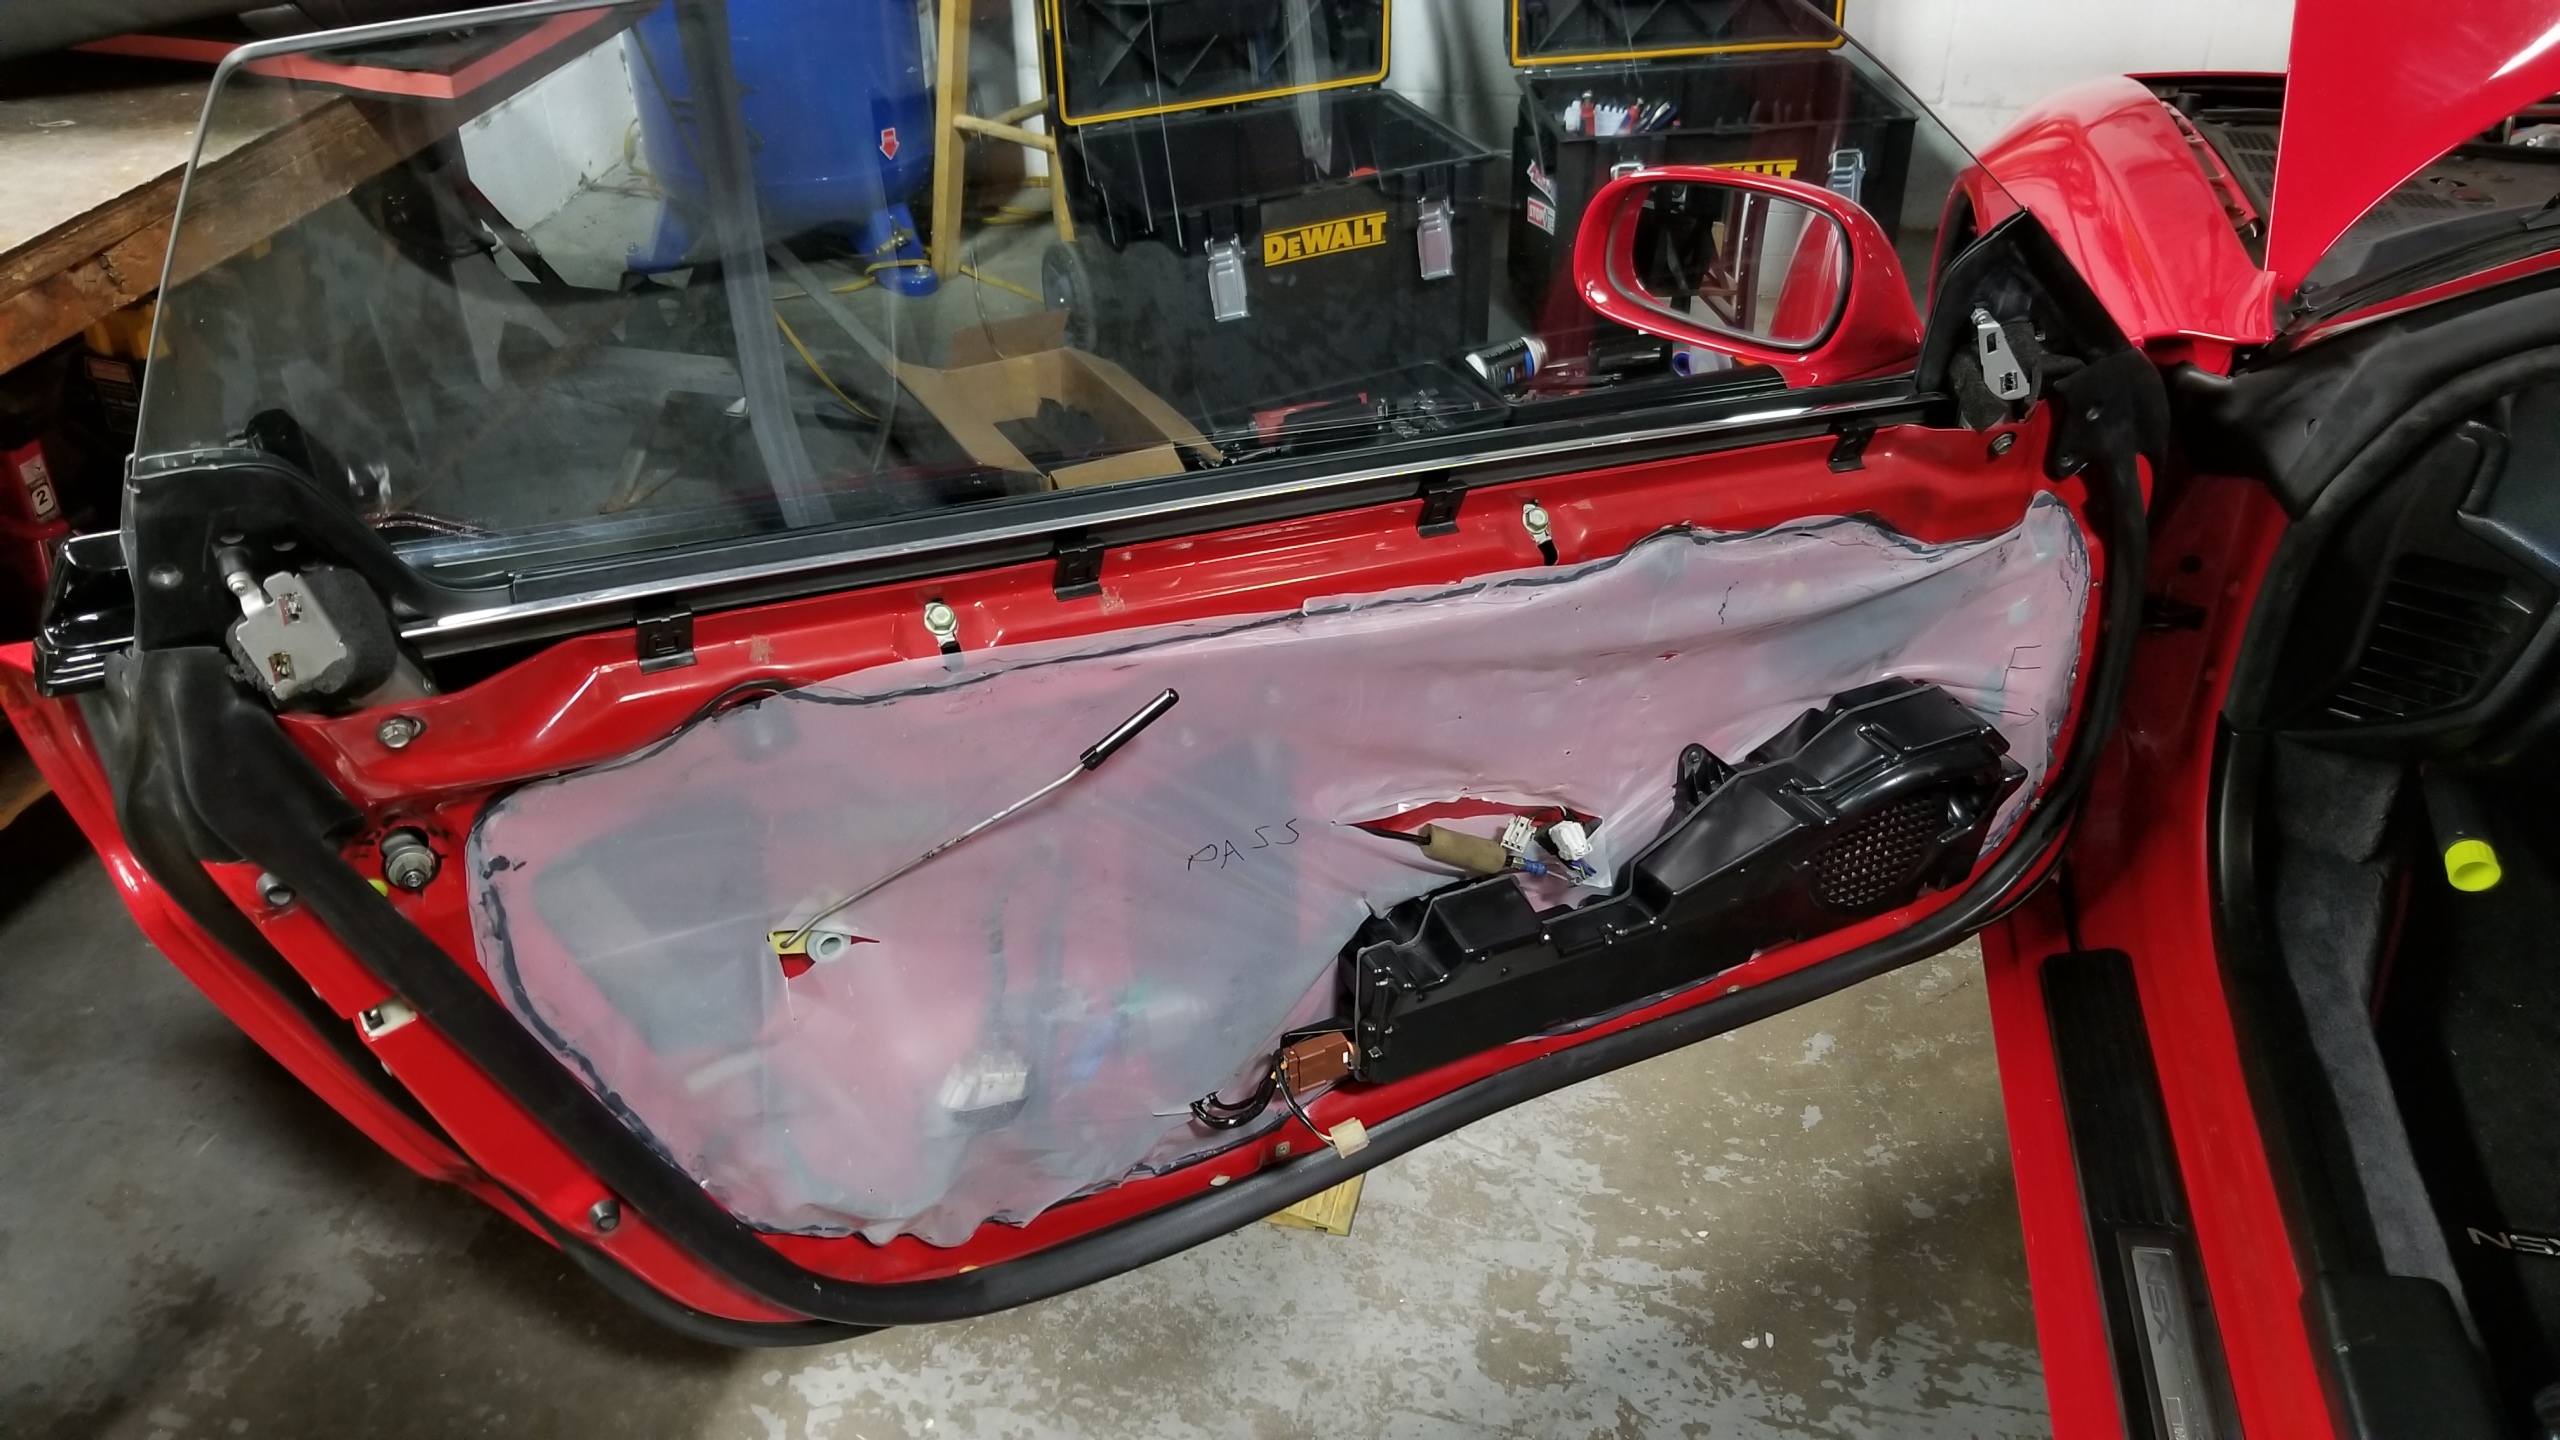
Last but not least, in the background is the low-side fitting and the two pipes to the in-dash evaporator. The two 12mm bolts are not hard to remove, but it's difficult to get enough clearance to remove the lines for flushing to replace the O-rings. Since this is probably going to be the outlet side of your flushing, it would be prudent to make sure the fluid doesn't spray everywhere so you don't have to waste too much time cleaning up. You can remove a few bracket bolts for the high side line to get a bit more free-play to work with.

This is where you'd disconnect the evaporator if you were removing the HVAC blower/heat/evap unit from the dash, which I'm not doing at this time. Ideally you'd inspect the evap and expansion valve and flush/replace O-rings on those but not strictly necessary and that job alone would probably take several days.
rJCgwBa.jpg


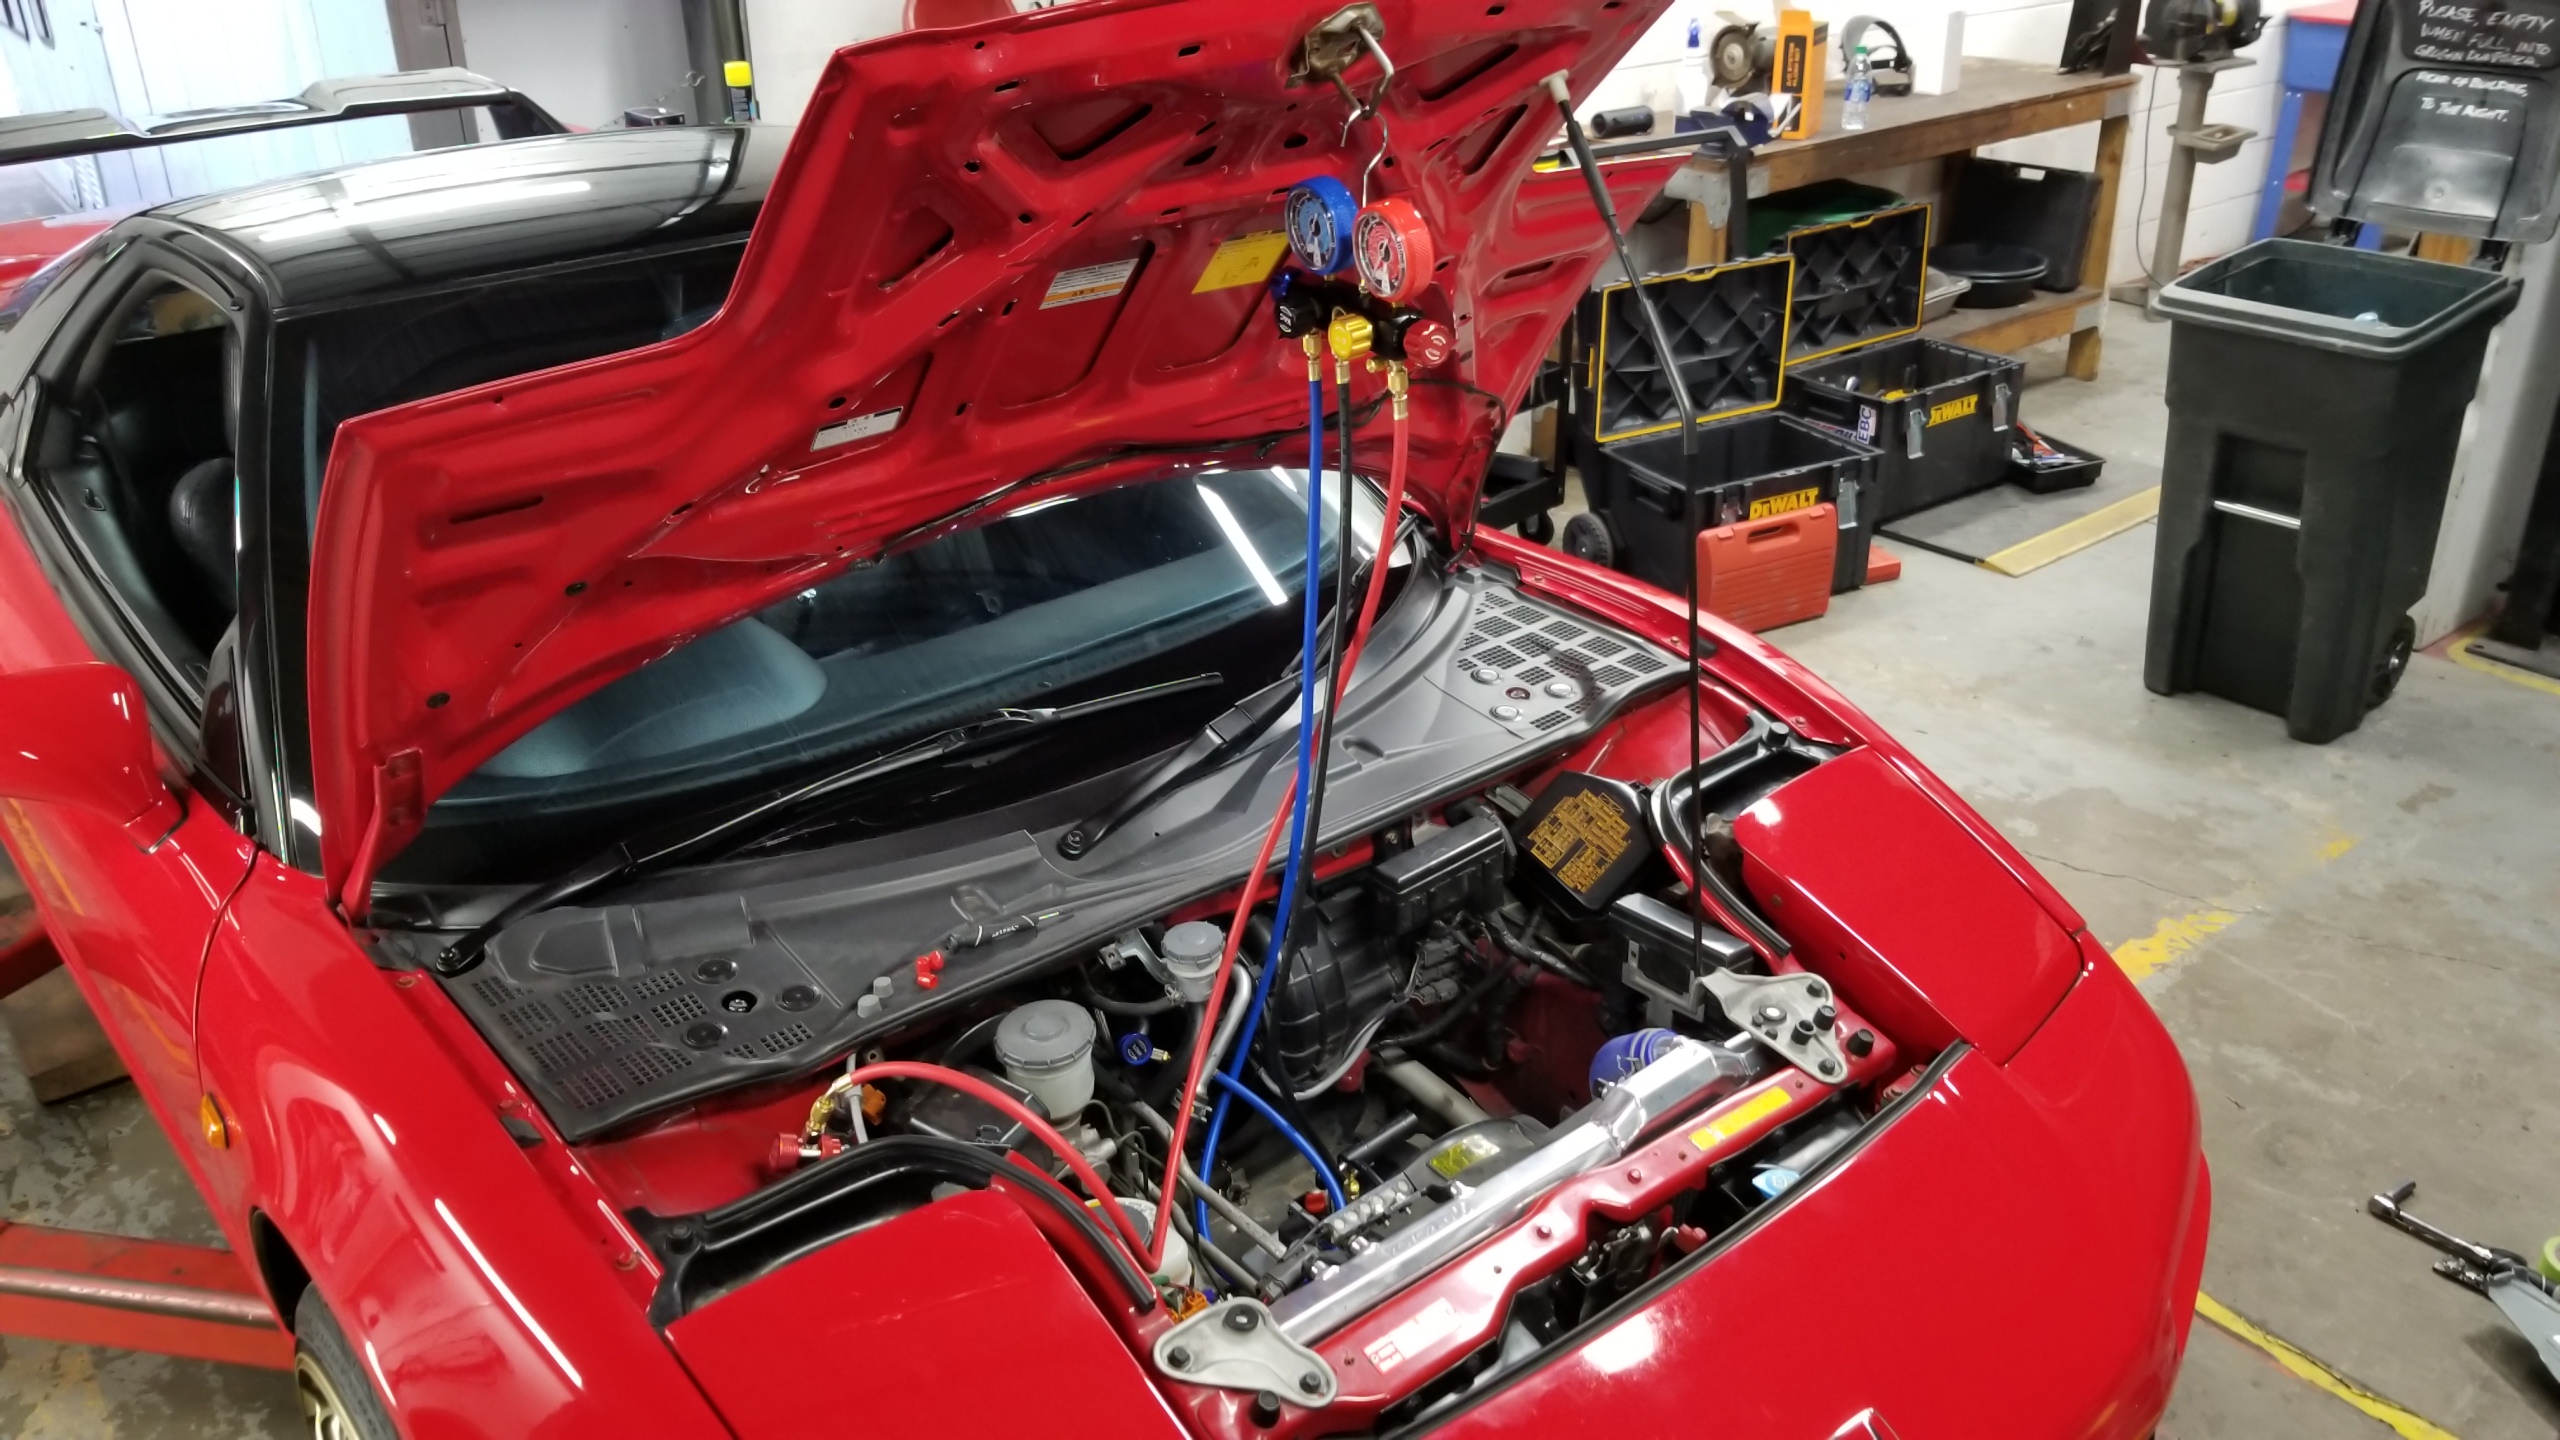
Once I had done the laborious and dirty work of flushing all the lines and replacing as many O-rings as possible, then I finally connected up the manifold gauge set and vacuum pump, and installed the new drier/accumulator. Right after that, I turned the vacuum pump on to pull out air & moisture from the system to preserve my new drier.

I was pretty impressed with the manifold gauges I got for pretty cheap on Amazon, it seemed of decent quality and also had separate fittings for the vacuum side and charging side which was convenient. I watched a few different videos on this process to make sure I hooked up everything correctly and didn't do anything dumb. It's not hard to do, but easy and potentially costly to mess up.
UhLrWOJ.jpg


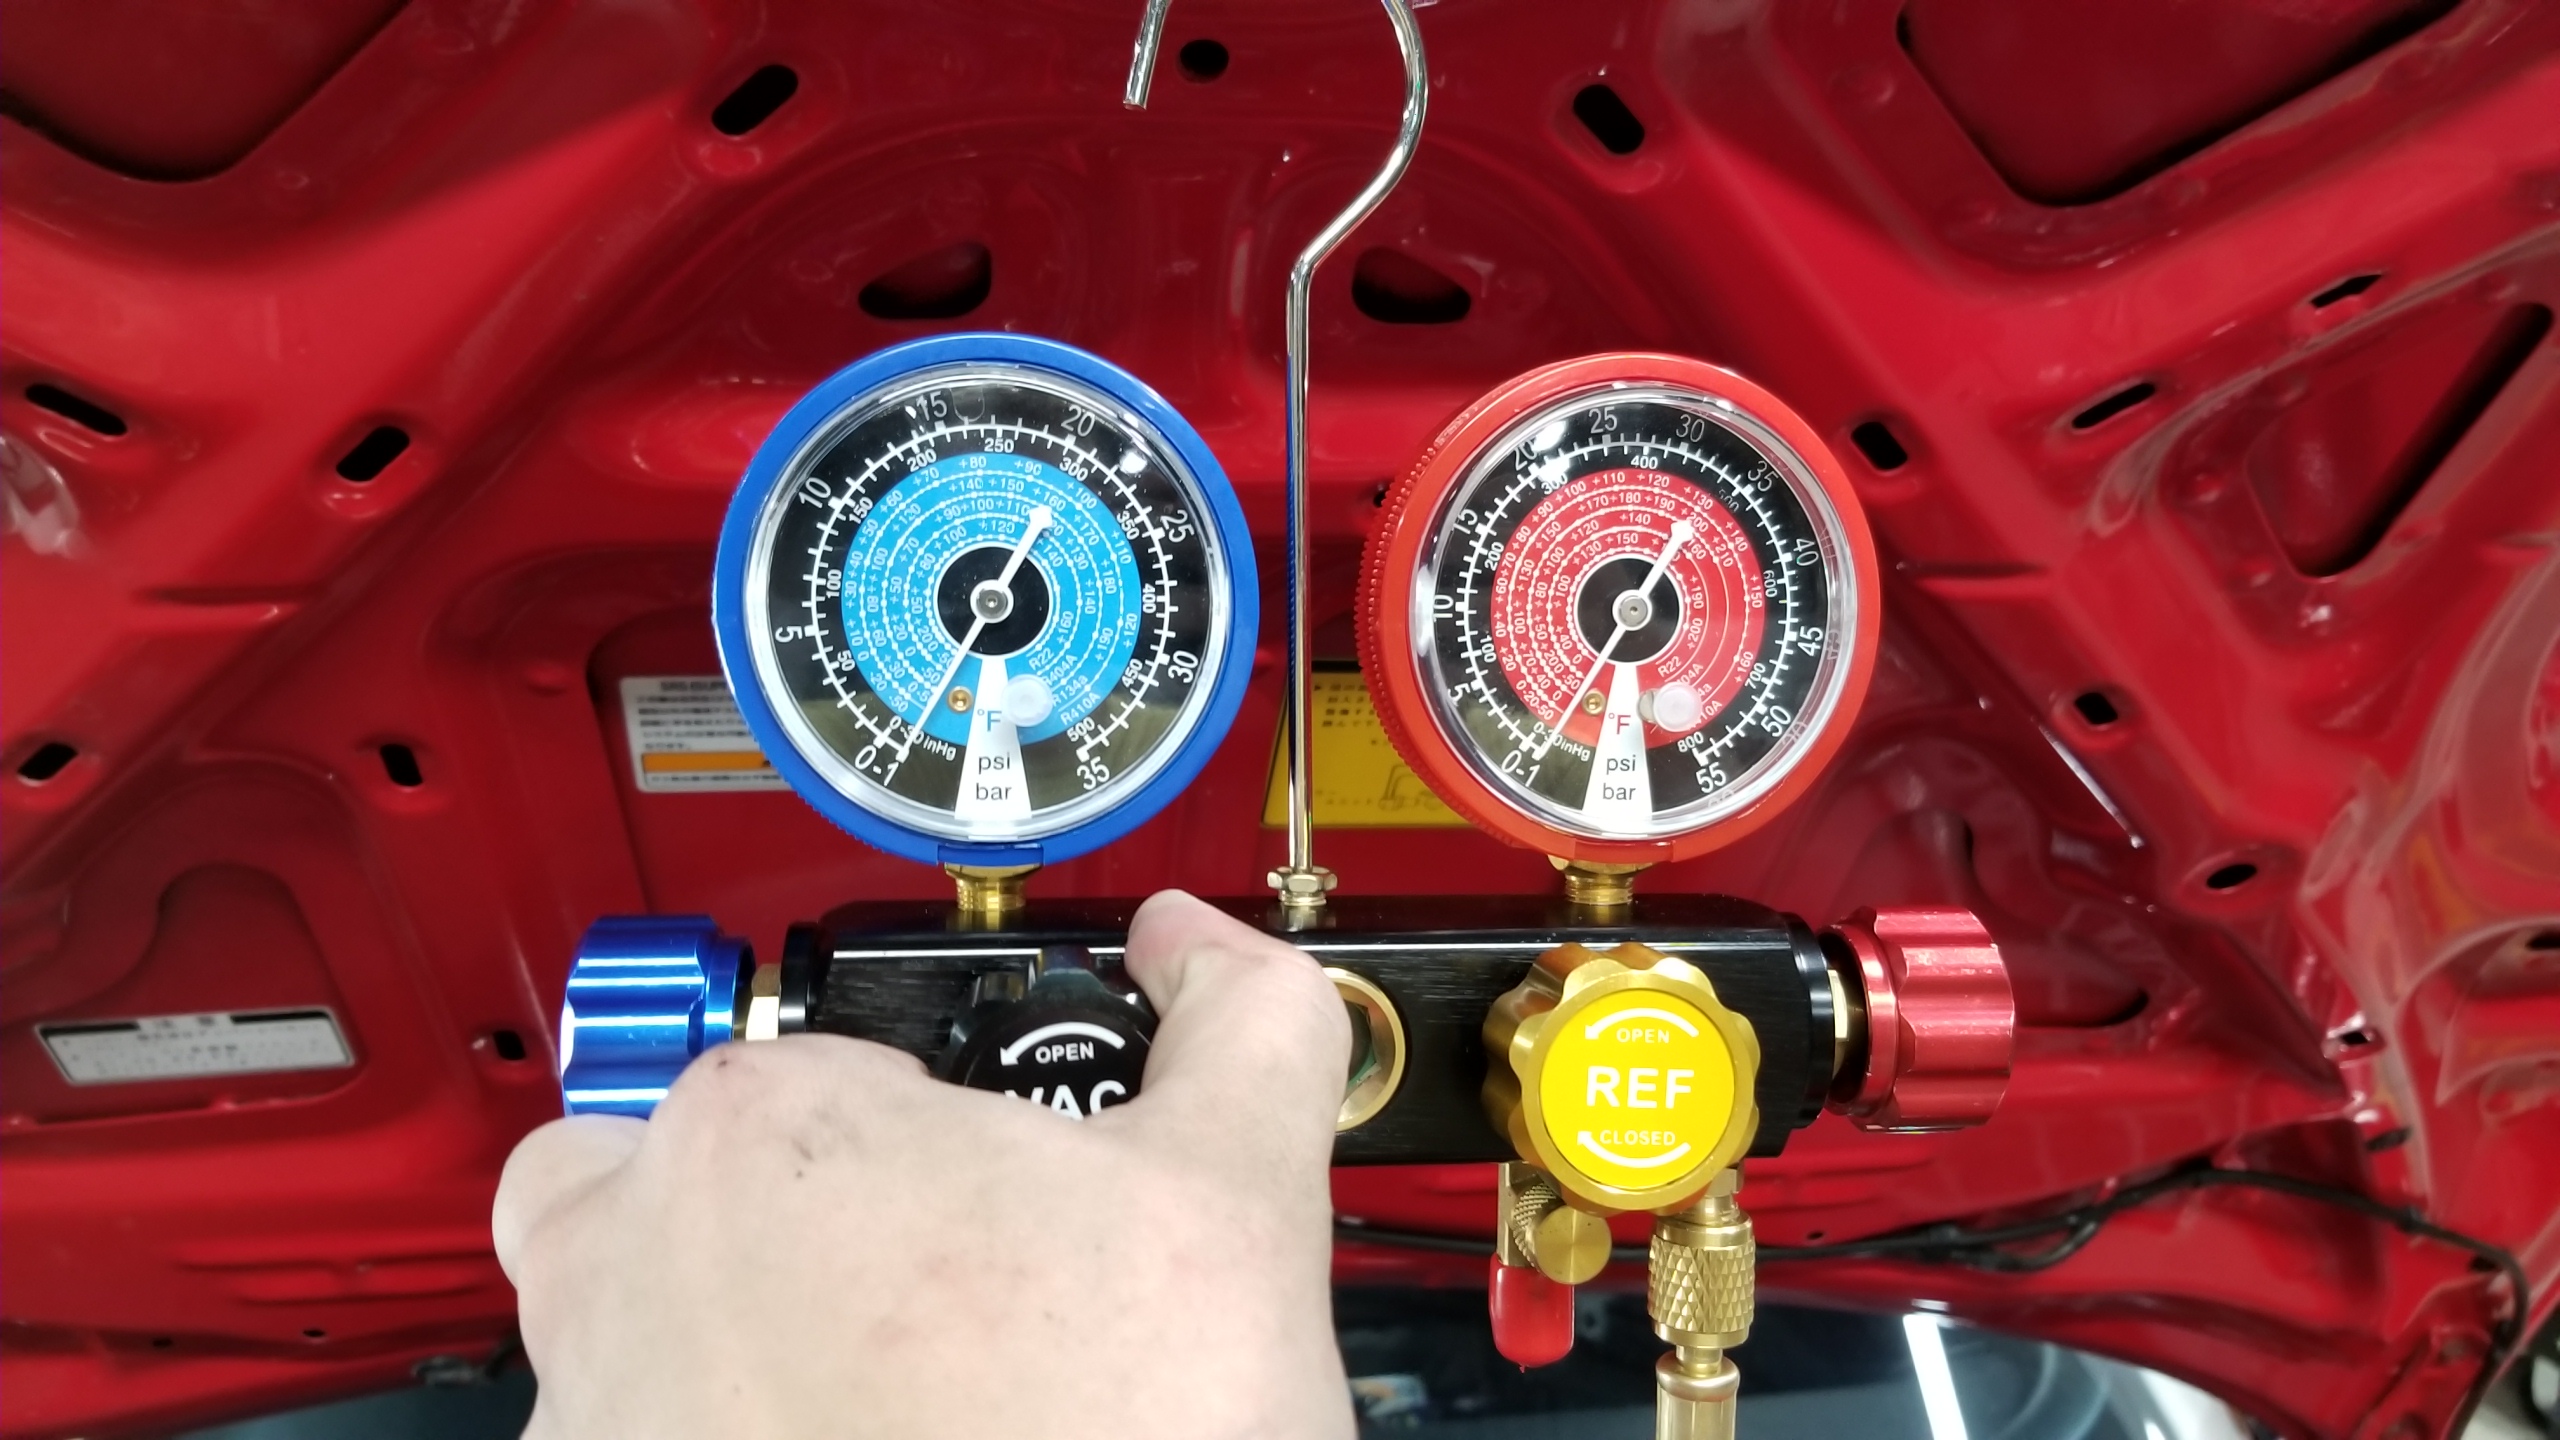
I opened up both the high and low sides to pull vacuum, shown by the 0-30 inHg pips on the gauges which aren't the most clear. Anyways, I had the vacuum pump on for about 20 mins and then shut off the system to check for leaks by seeing if it lost vacuum over time. After another 20 minutes or so the gauges hadn't changed at all so I called it good to go.
QDIvOjK.jpg


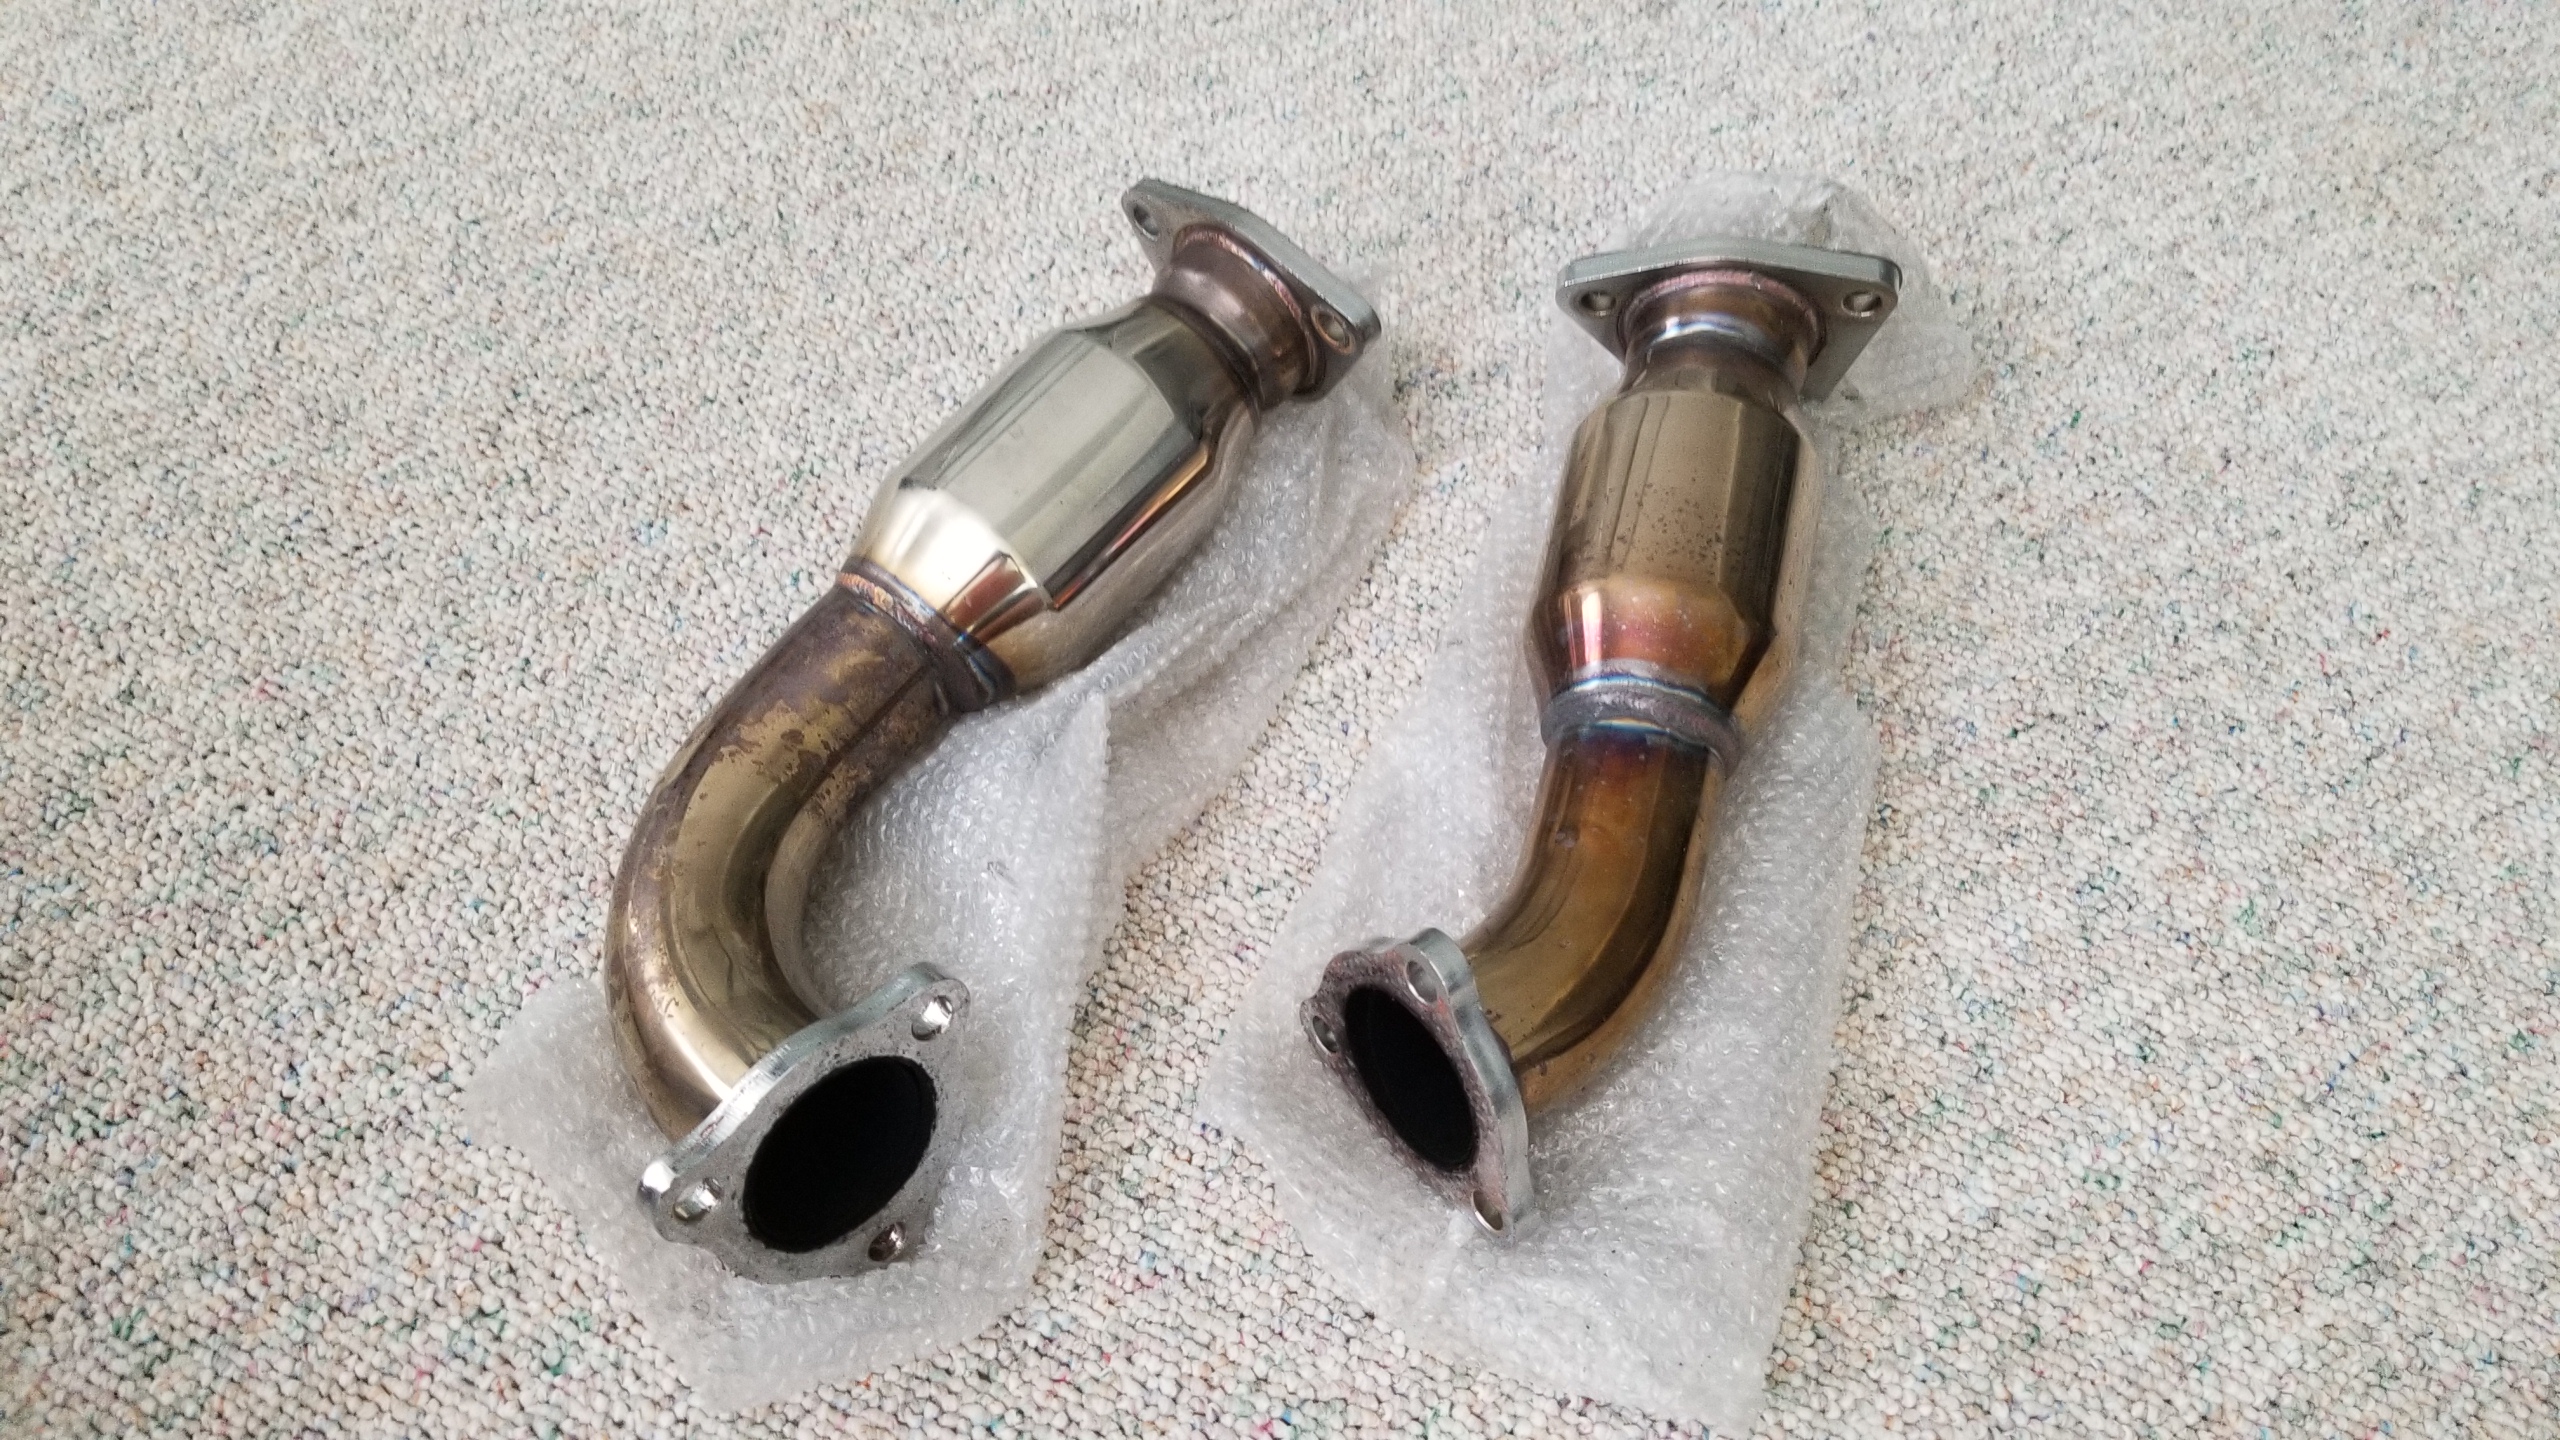
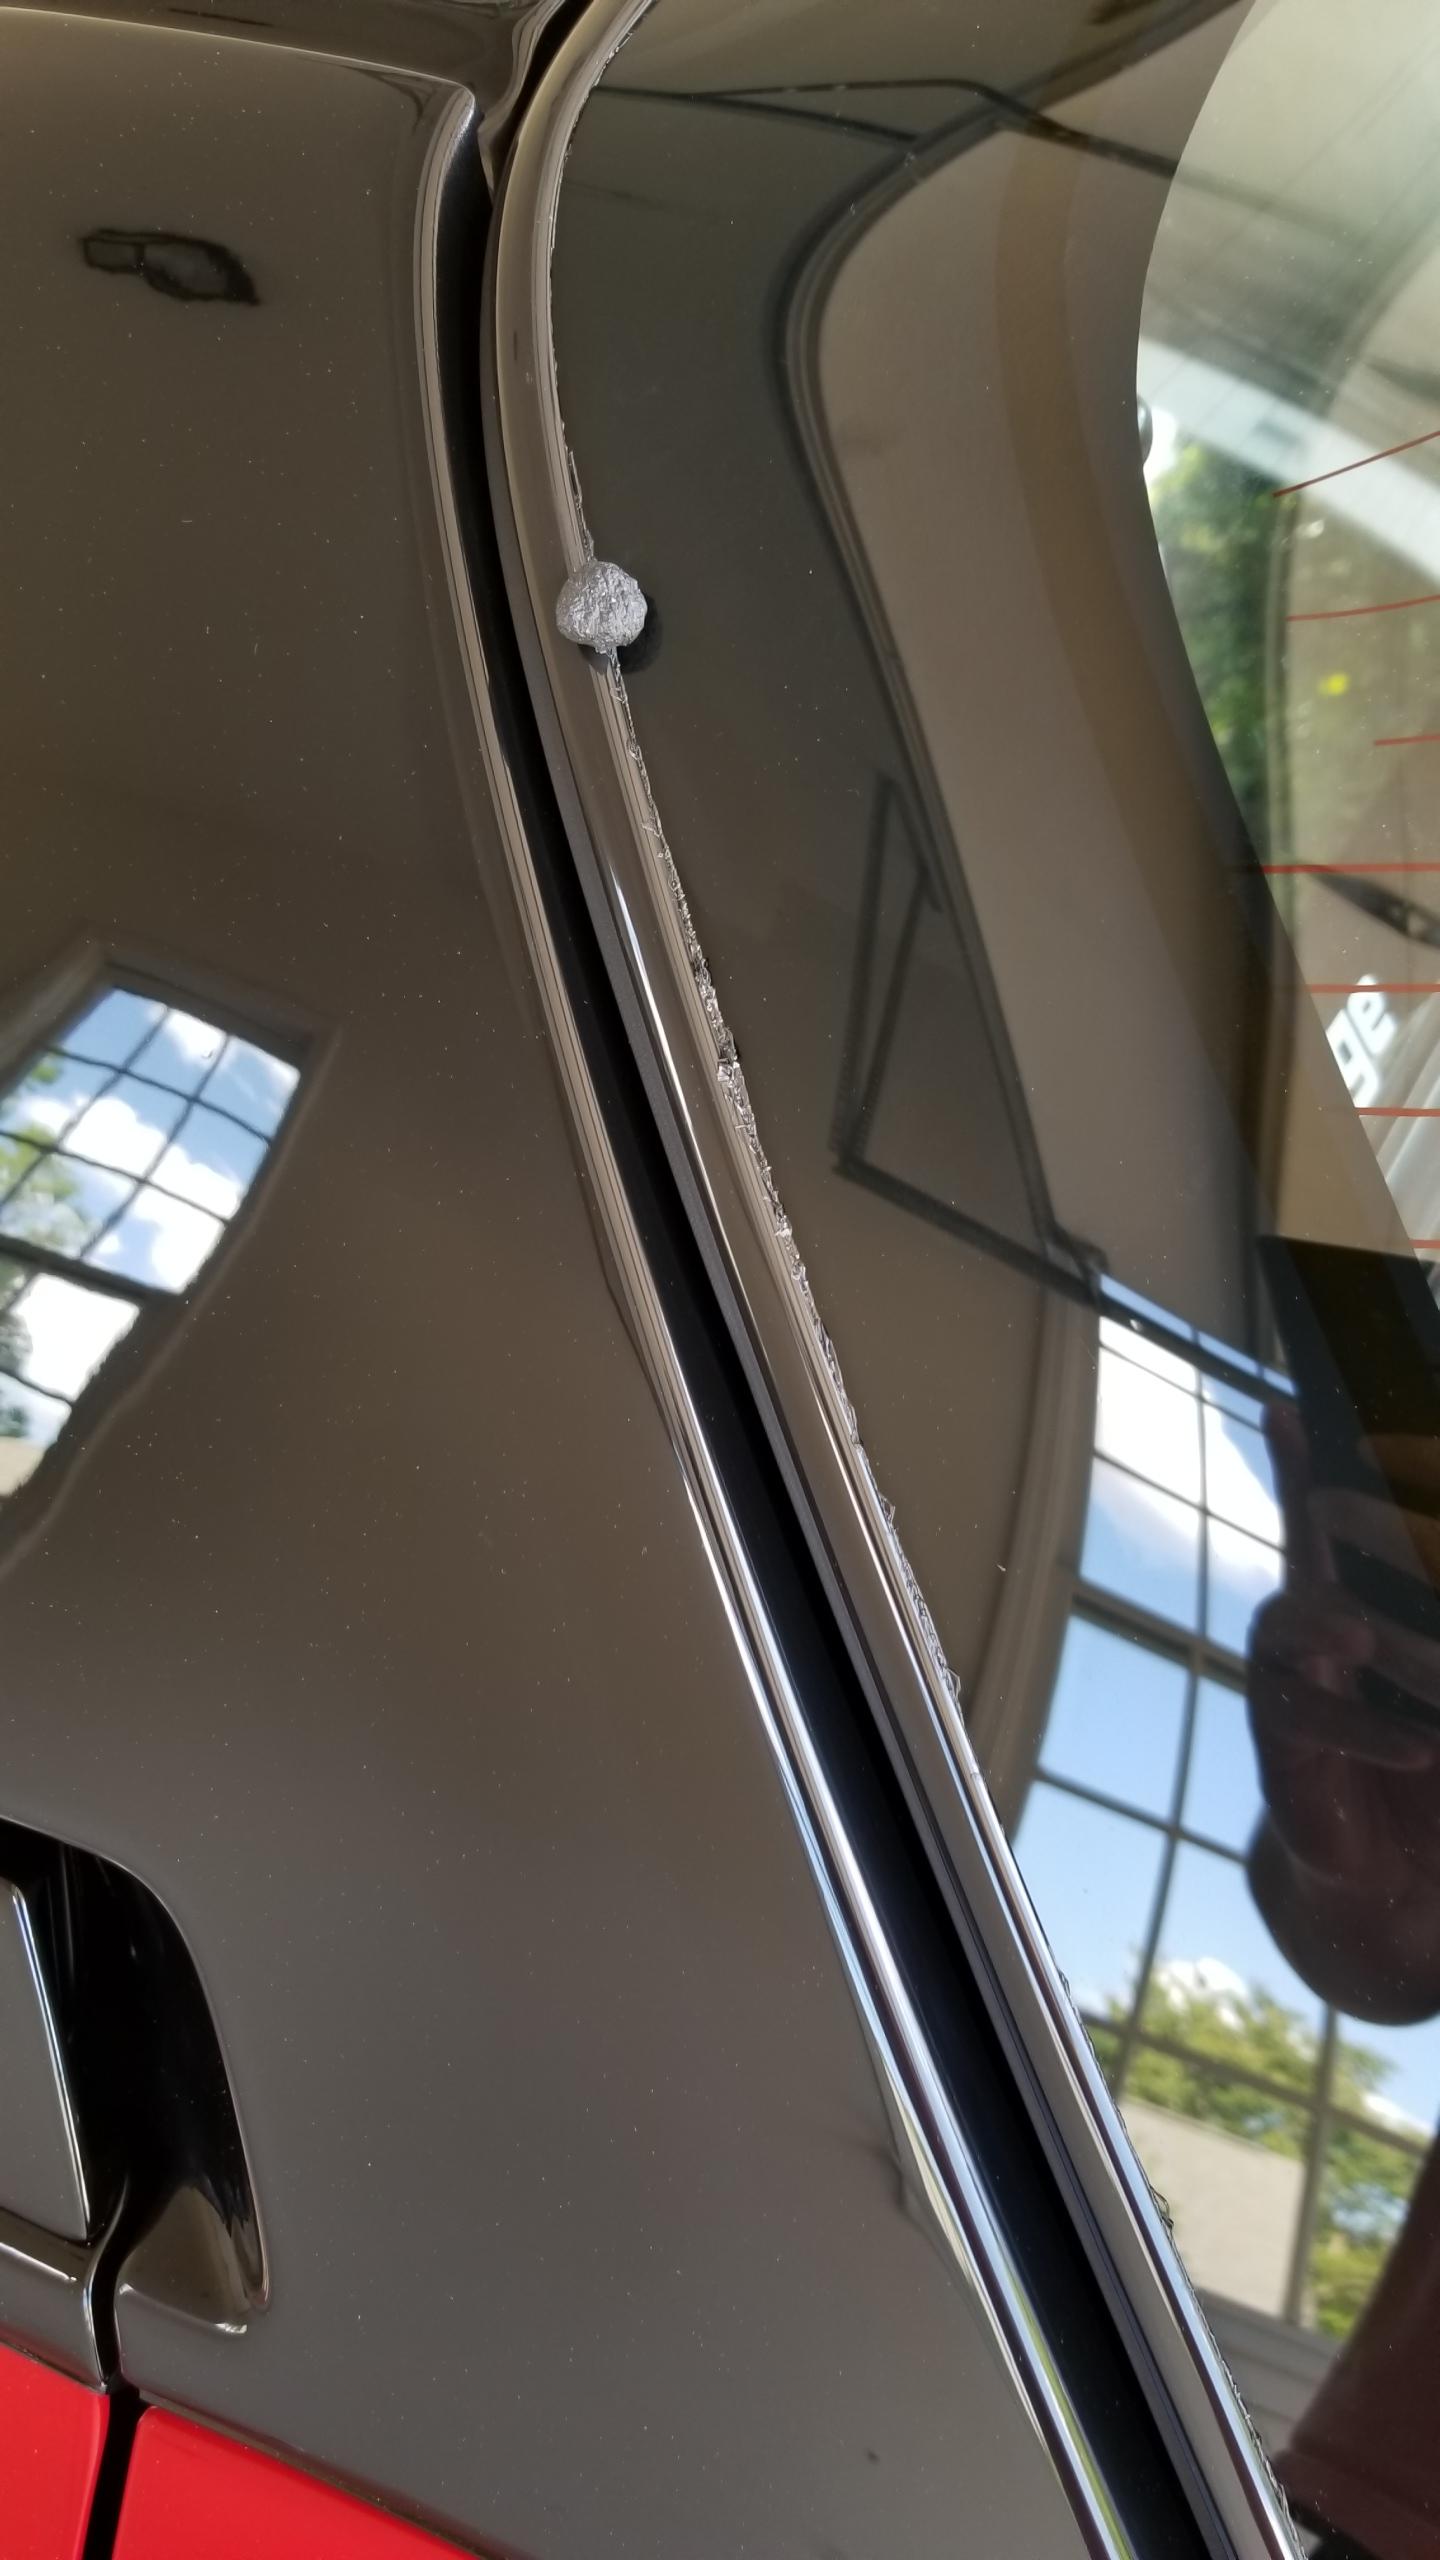
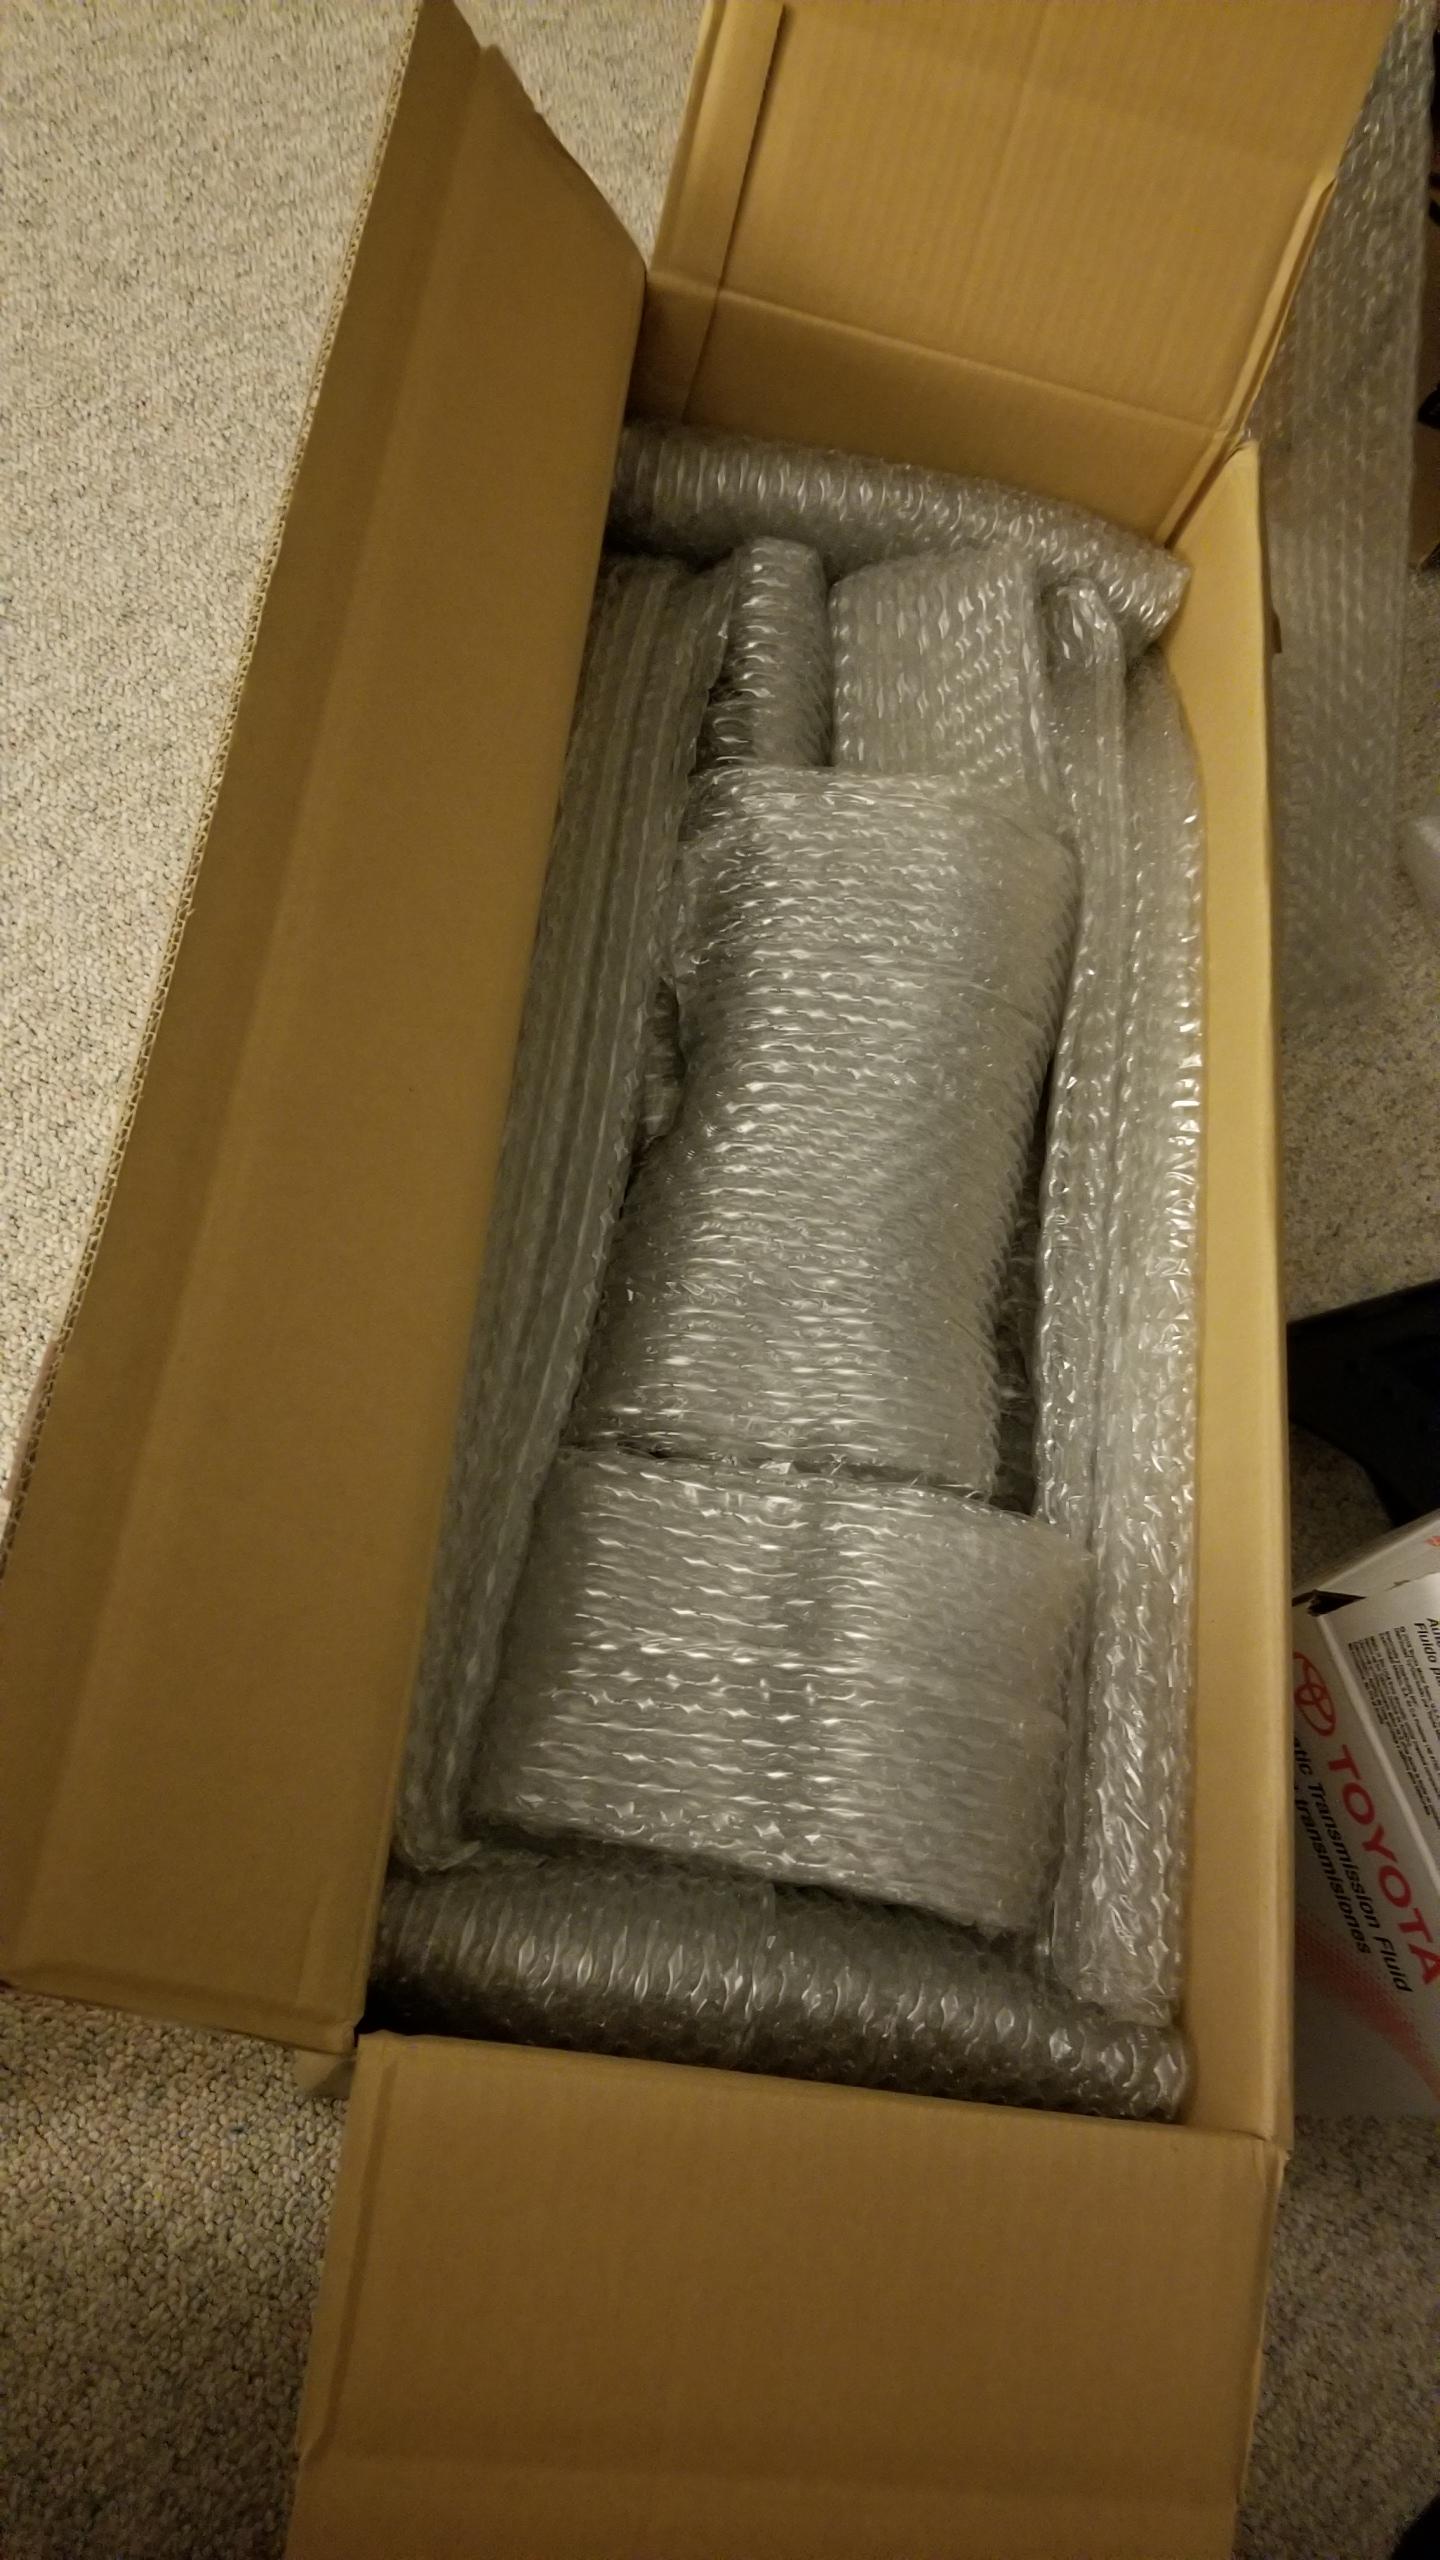
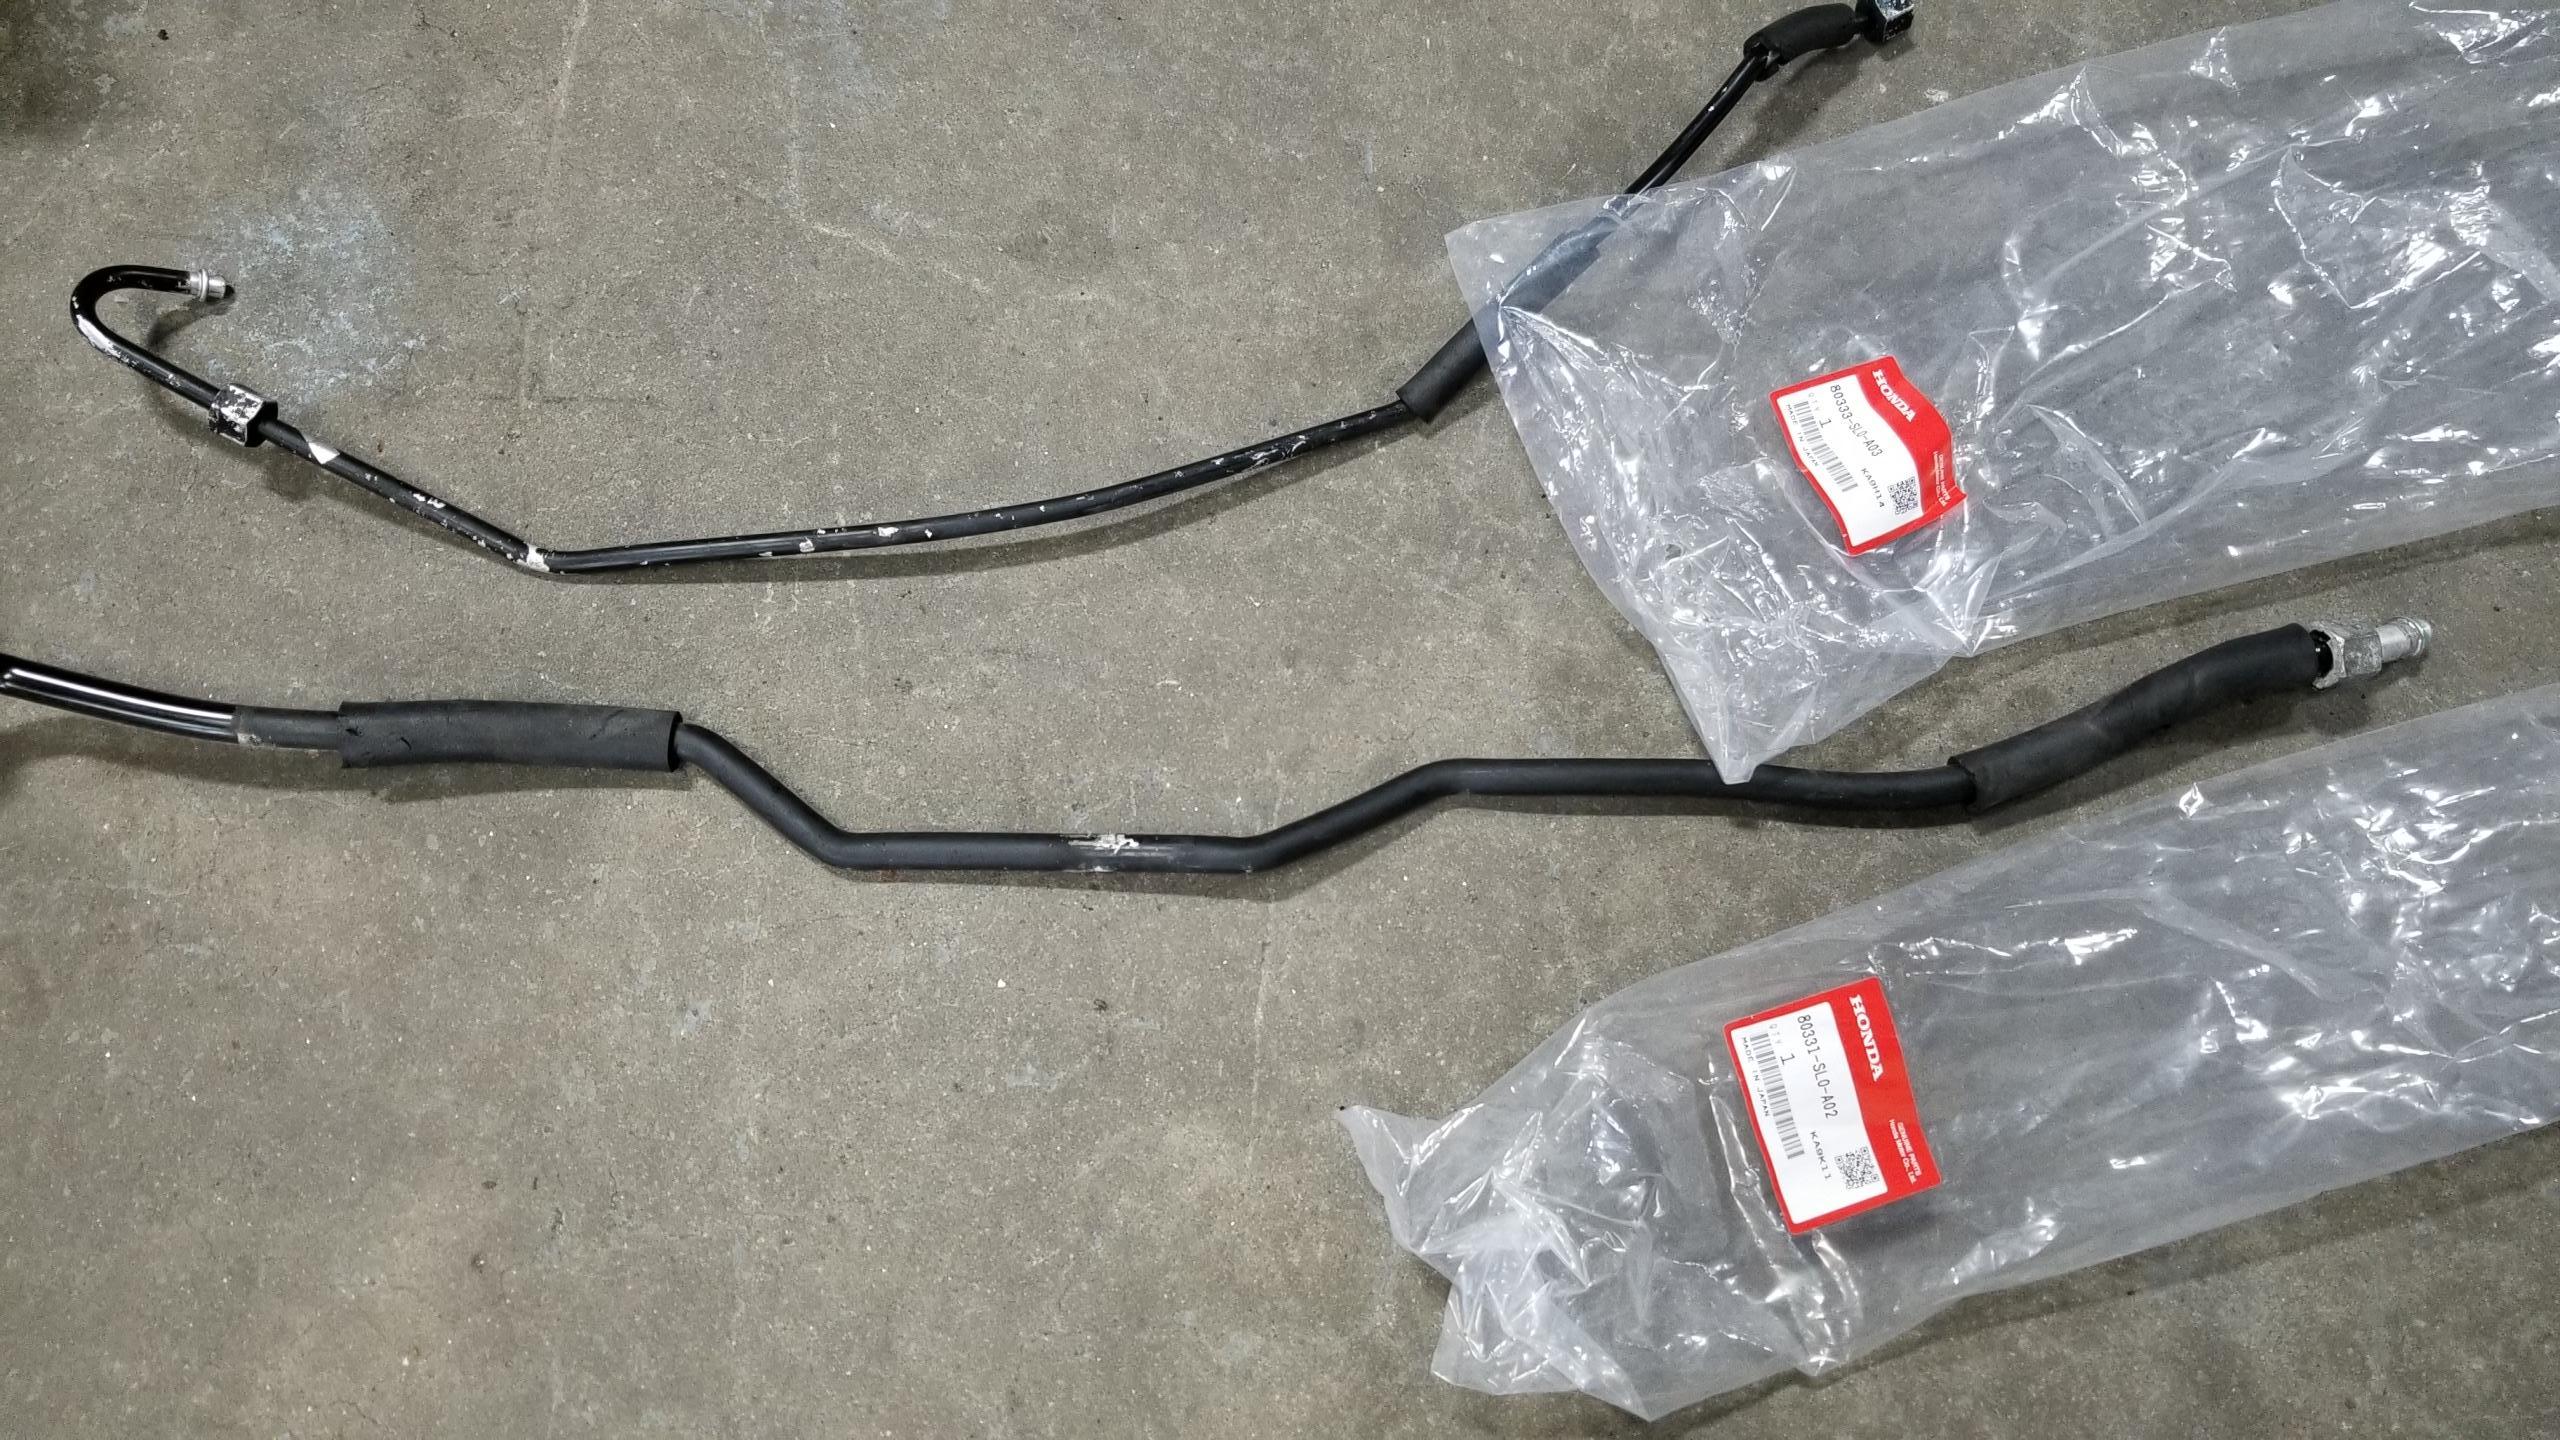
After I pulled vacuum on the system, it actually took me another 1.5 weeks to get to this next part which was replacing these two lines below and charging the system. I ended up finding that the front two lines were kinked up in a few places, and that kind of pressure drop is not good for overall system efficiency and might flash some of your liquid refrigerant from the condensers back into gas prematurely of the expansion valve.

Predictably, these lines are all but unavailable in the US, either backordered or maybe discontinued though Tim @OEMAcuraParts was able to find one of them on a shelf somewhere, but I needed both. Amayama was my next choice, but one of the lines was on 1-3 month backorder which I didn't want to wait for. Fortunately, Christian @ ATR being the king of parts had both in stock and at my door in about a week. The lines were quite a bit more expensive than the new compressor itself but you gotta do what you gotta do. The lines come capped with new O-rings, which happen to be black, not green. I used them anyways, color isn't really an indication of material and I'm sure they're 134 compatible.

I disconnected the old lines and was pleased to find the system had held vacuum the whole time. Fitting the new lines was challenging, both to snake the old ones out and new ones in place, but especially to line up the fittings correctly so that the O-rings were square and I didn't cross-thread any nuts. Some "gentle but firm" muscling into place was required.
9xjzWLF.jpg


Kinky, but not the fun kind. Part of this was my own fault with the prior curb incident..
d4IWDdg.jpg


Once the new lines were installed, I prepared to charge the system, which I of course got nearly no pictures of performing. Shown is the new can & adapter, and a kitchen scale for measuring the refrigerant.
sgYwAQP.jpg


This part will largely be text since I was focused on not messing up, but here's the rundown of charging new refrigerant:
-R-134a charge amount is 800-850 grams, a bit less than the R-12 amount. Refer to 1994 FSM. Apparently, overcharging the system can puncture the evaporator, which is a massive undertaking to replace
-pull vacuum for at least an hour, longer is probably marginally better
-close off high side, charge only through low side fitting
-connect yellow charging hose and bottle. Any UV dye or extra oil required can be poured, slowly and messily, into the hose as well to be sucked up into the system. Better to pour it into the compressor or into a line instead IMO
-reconnect A/C compressor and 10A fuse, turn on car and turn on A/C on CCU
-open up the can and manifold charge valve, wait for Freon to come out, wonder why it's not coming out, realize the can tap valve has a very small range where it's actually opening the can, purge the hose of air through the manifold Schrader valve without letting oil spray out, realize you should invert the can slightly to get liquid to come through, but not too much liquid since the compressor isn't meant to compress liquid and you could damage it so try to keep the can upright to pull in gas which is much slower to come out. The can gets really cold as well because of the flashing refrigerant inside
-charge two full cans of refrigerant, 340 grams each for 680g total. At this point, the A/C compressor should've kicked on, and you should be getting noticeably cold air
-VERY CAREFULLY, charge with about half of the 3rd can to hit the 800-850g range (others have said 850-900g, I'd prefer to be lower). It pays to take it very slow here and try to keep the can upright and pull in gas only, which is slower but safer. I disconnected the can several times to check the weight on the scale, if you have the hose connected, it will mess up the scale reading. Make sure you take the weight of the can itself and the valve into account
-hit 800g verified by the scale (aiming for the lower end to be safe), disconnect everything and you're done. Enjoy ice-cold air

I didn't pay much attention to the sight glass or manifold pressures while I was charging, I just aimed for the right weight of refrigerant. My high/low side pressures seemed good at the end, apparently expect ~30 psi low and ~177 psi high, depending on engine RPM and ambient conditions. The sight glass remained foamy looking which I've read is to be expected with 134.

I'm sure I missed some steps, but there's plenty of videos online of varying quality since charging R-134a is common to pretty much anything. The keys here are not to charge over 850g, make sure you have the right amount of oil, and make sure you're not charging into the high side fitting or pulling air into the system accidentally.

JDM AF tag with the amount I charged into the system below.
xYpG9QF.jpg


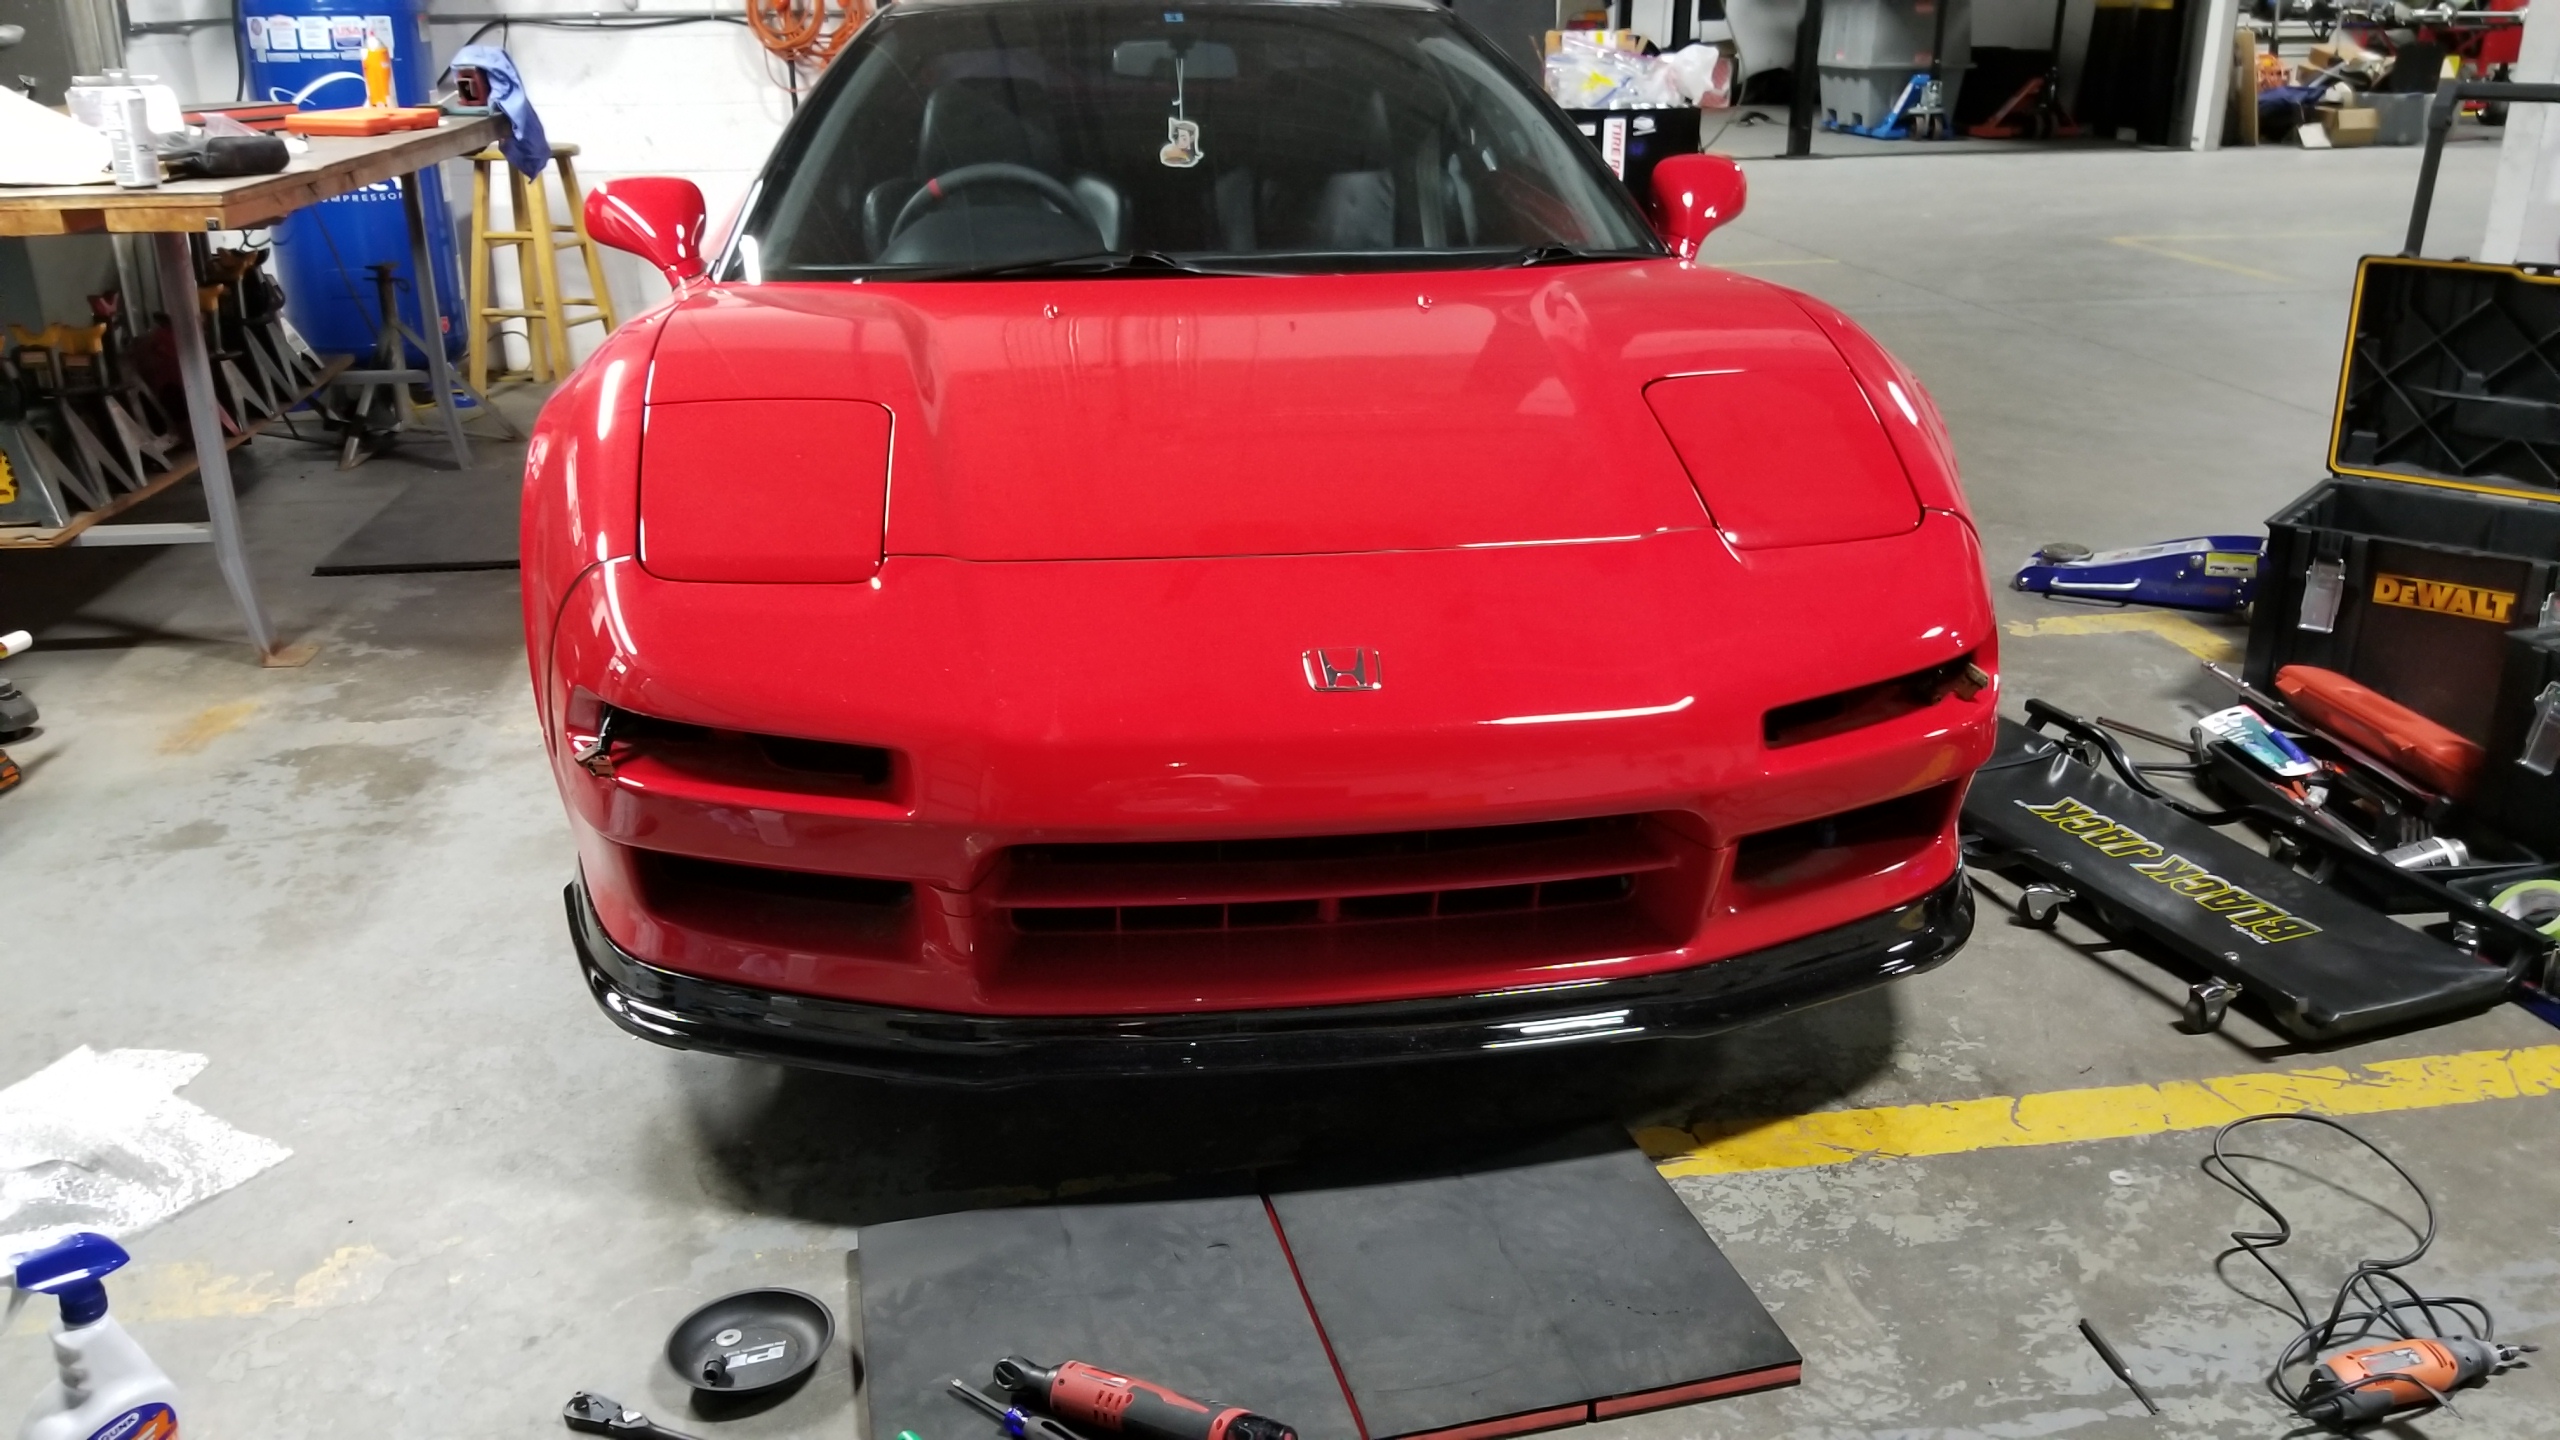
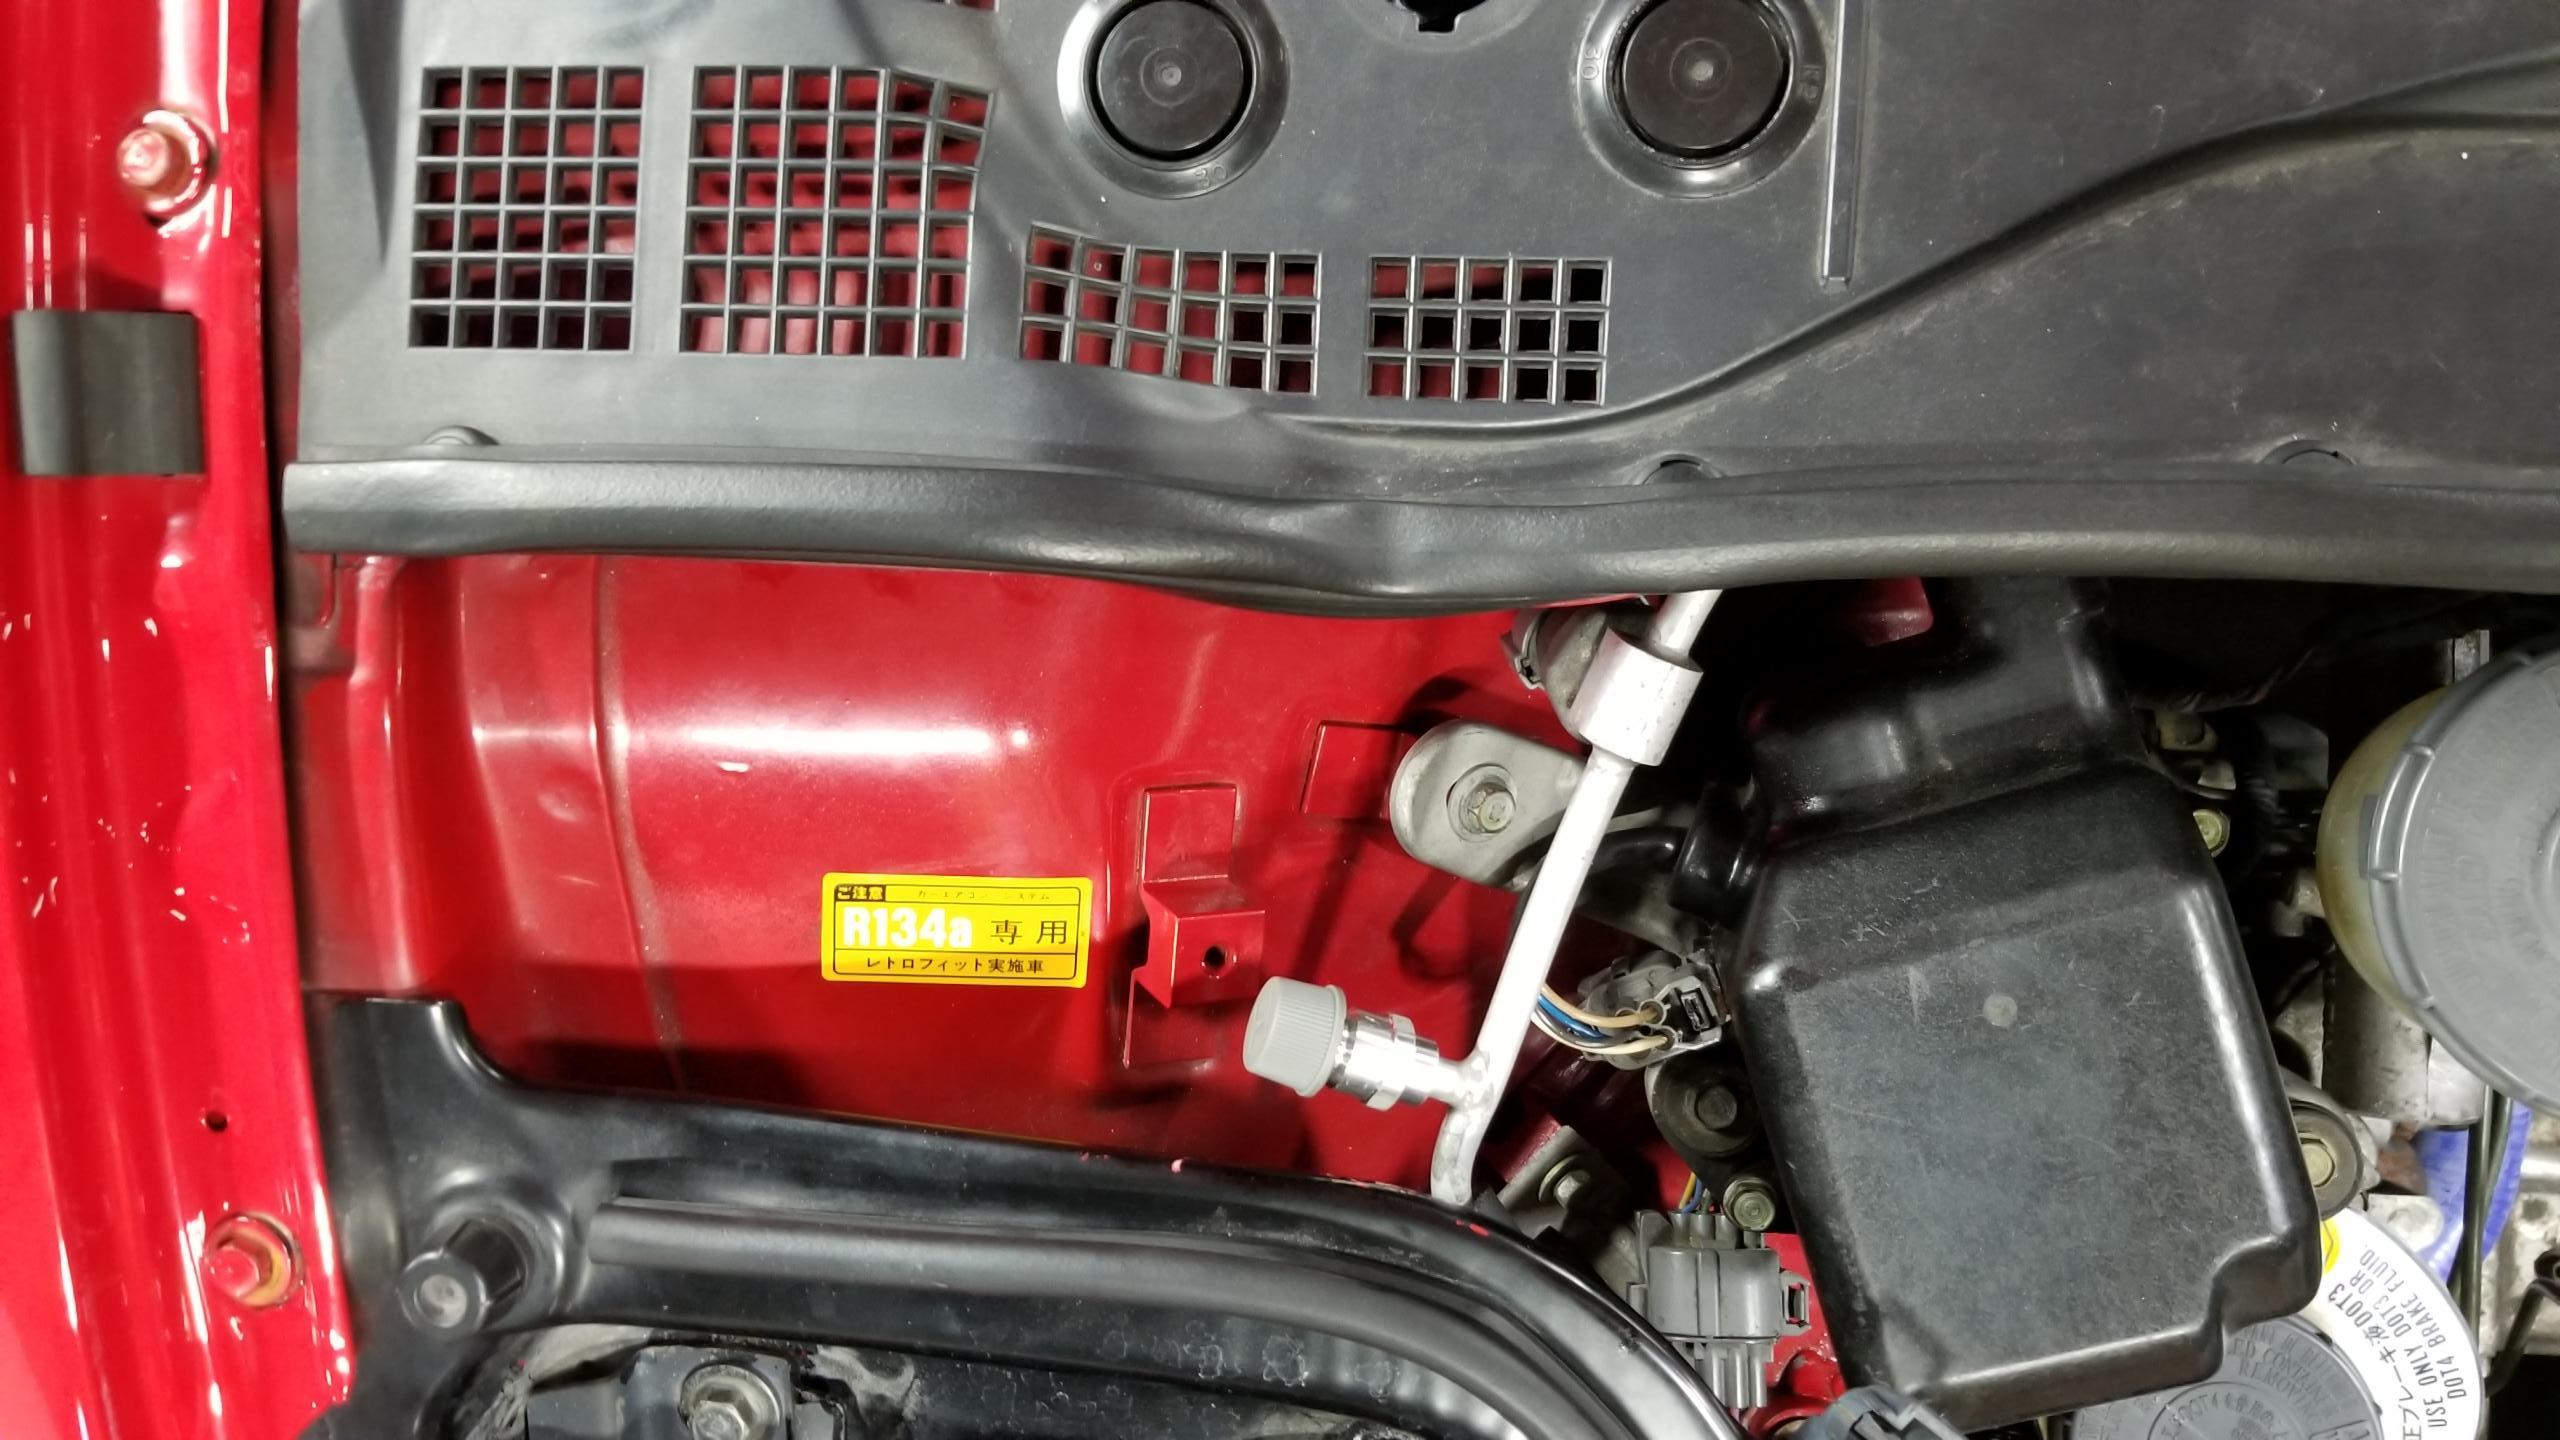
R-134a conversion label affixed next to the high side port, the front radiator support didn't really have room and I didn't want to put it on the underside of the hood, so this seemed like a good compromise.
RjqByNS.jpg


Somewhat anticlimactic ending since I can't convey temperature through the internet, but rest assured, from a brief test drive I was thoroughly chilled and very happy. It was an incredibly humid day in GA as evidenced by the huge trail of condensation I left behind wherever I drove. I still need to test whether the A/C compressor actually shuts off, and will update if anything doesn't work or something breaks, but I did everything I can think of to make this last as long as possible and feel good about it. Of course, at some point I'll have to tear into the HVAC core and evap but hopefully not for a long while.
lRNIcYc.jpg


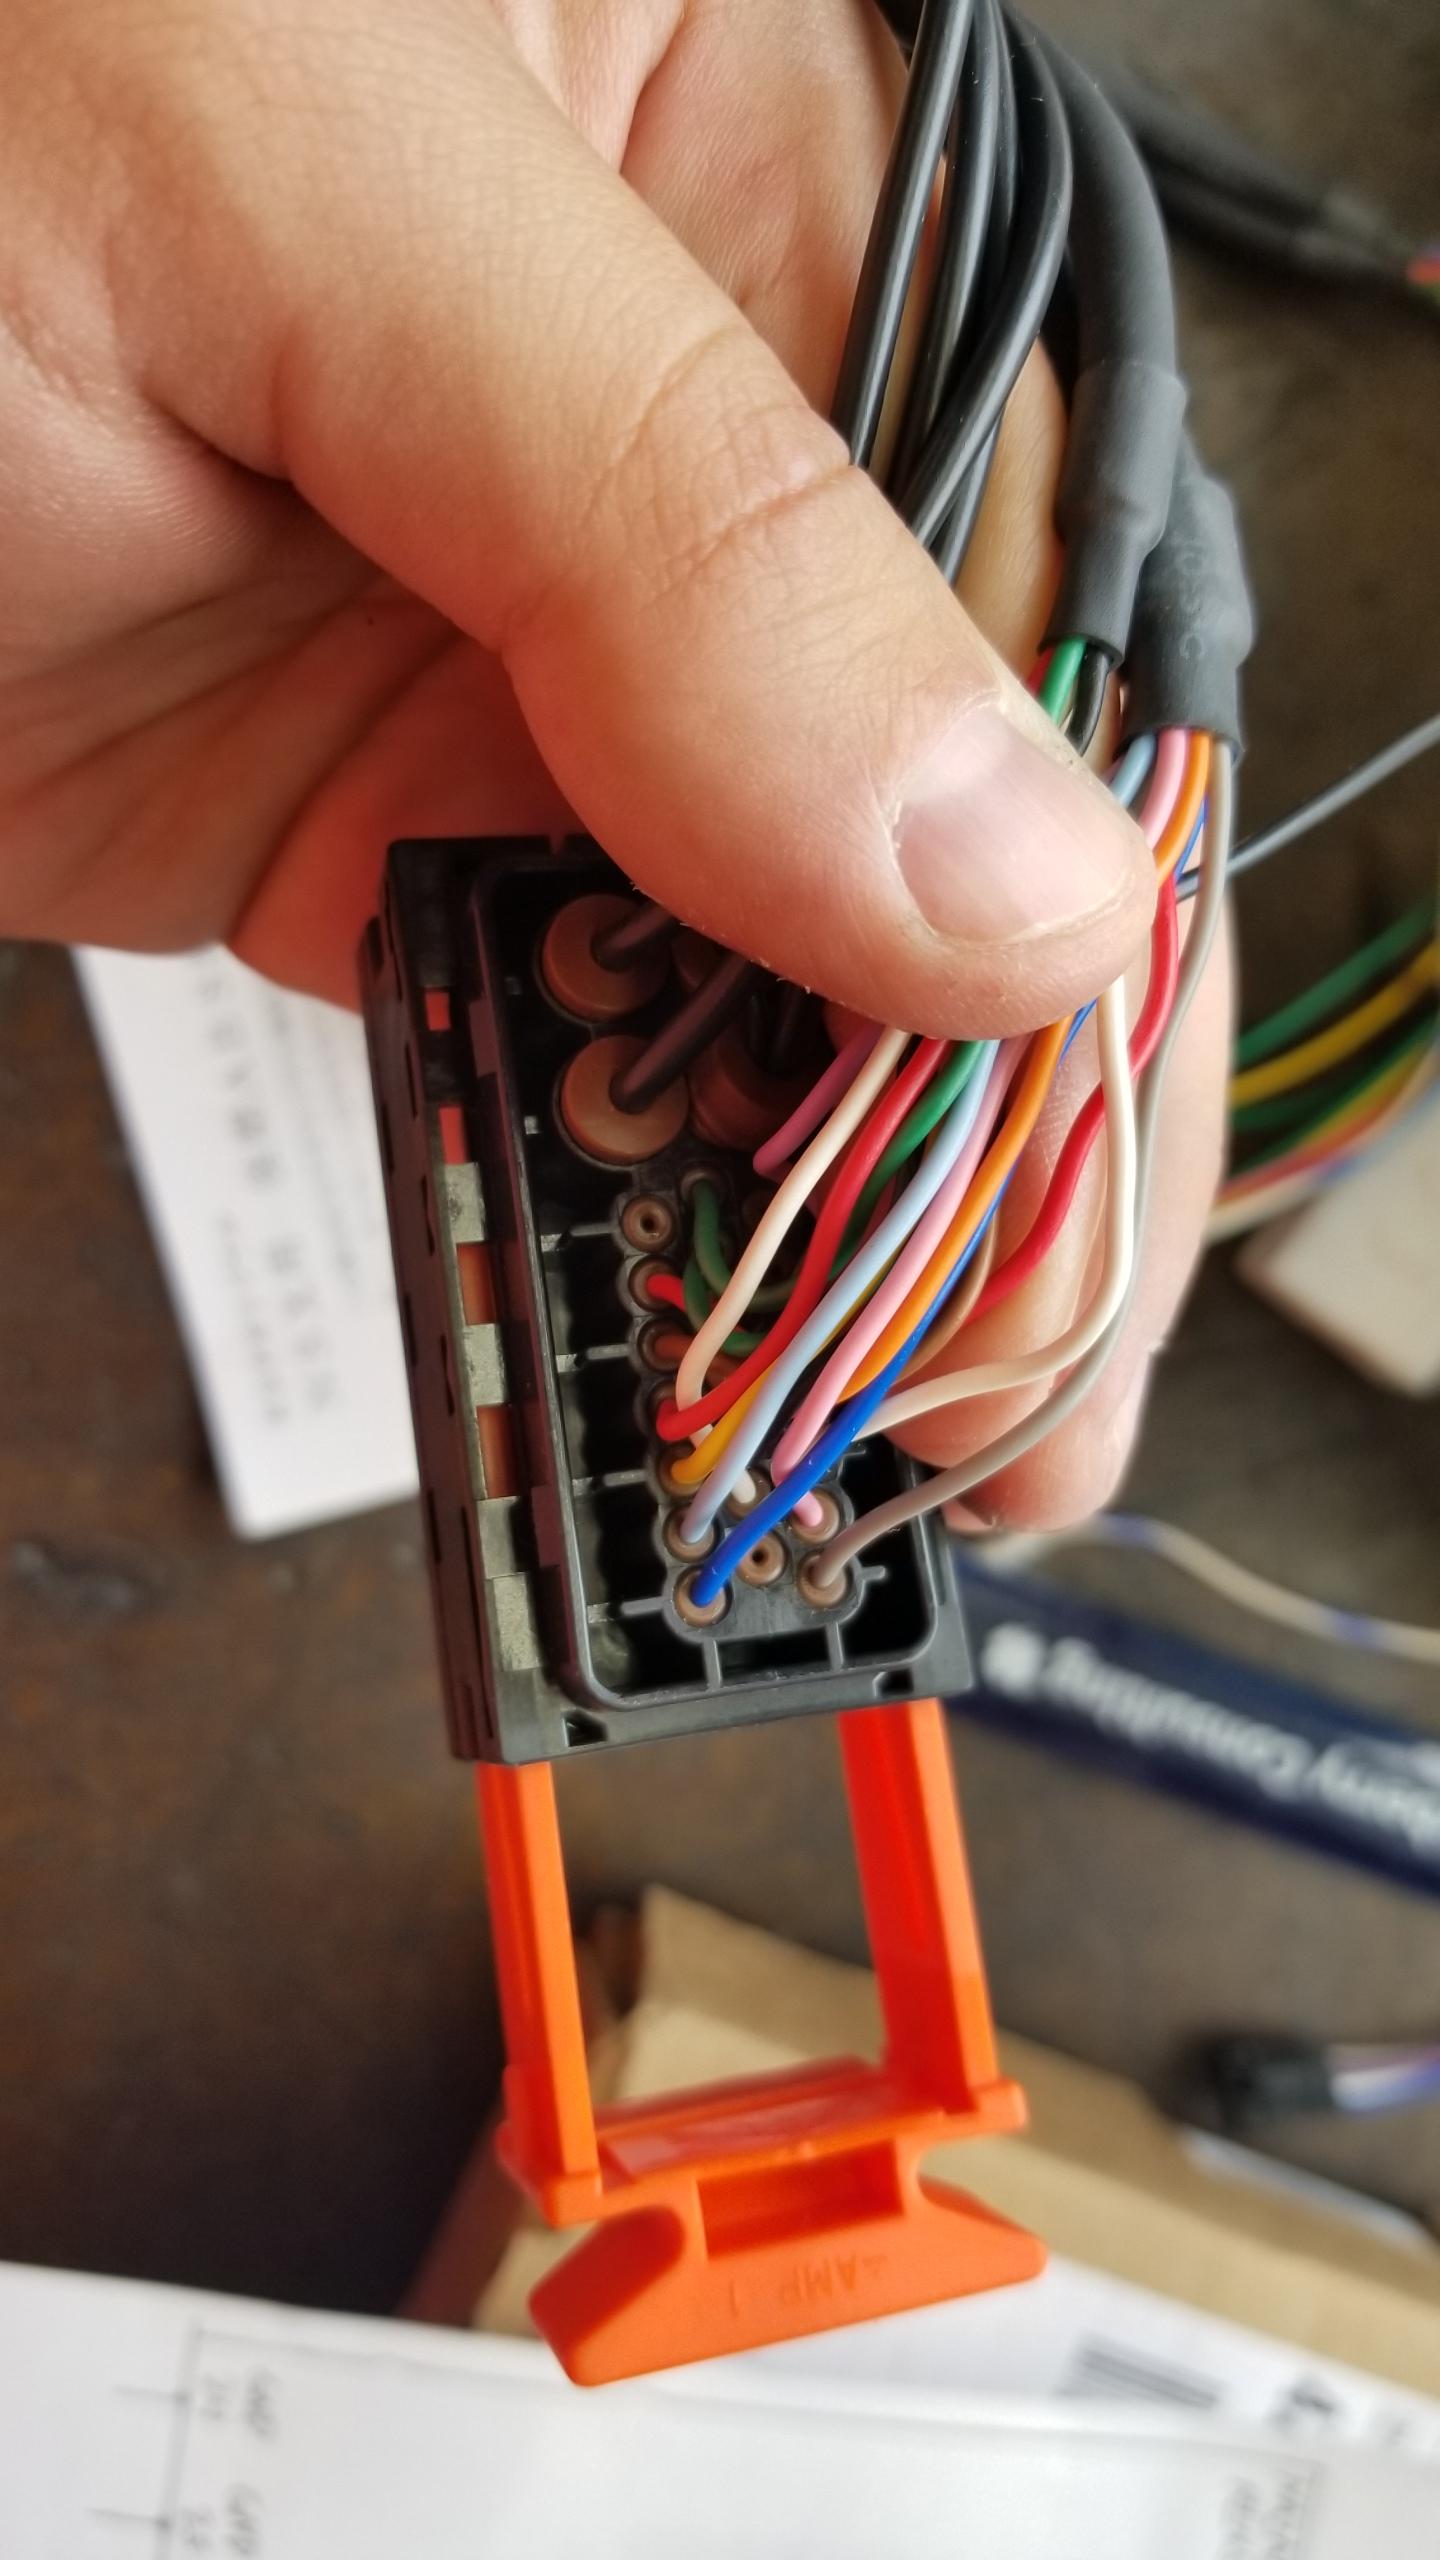
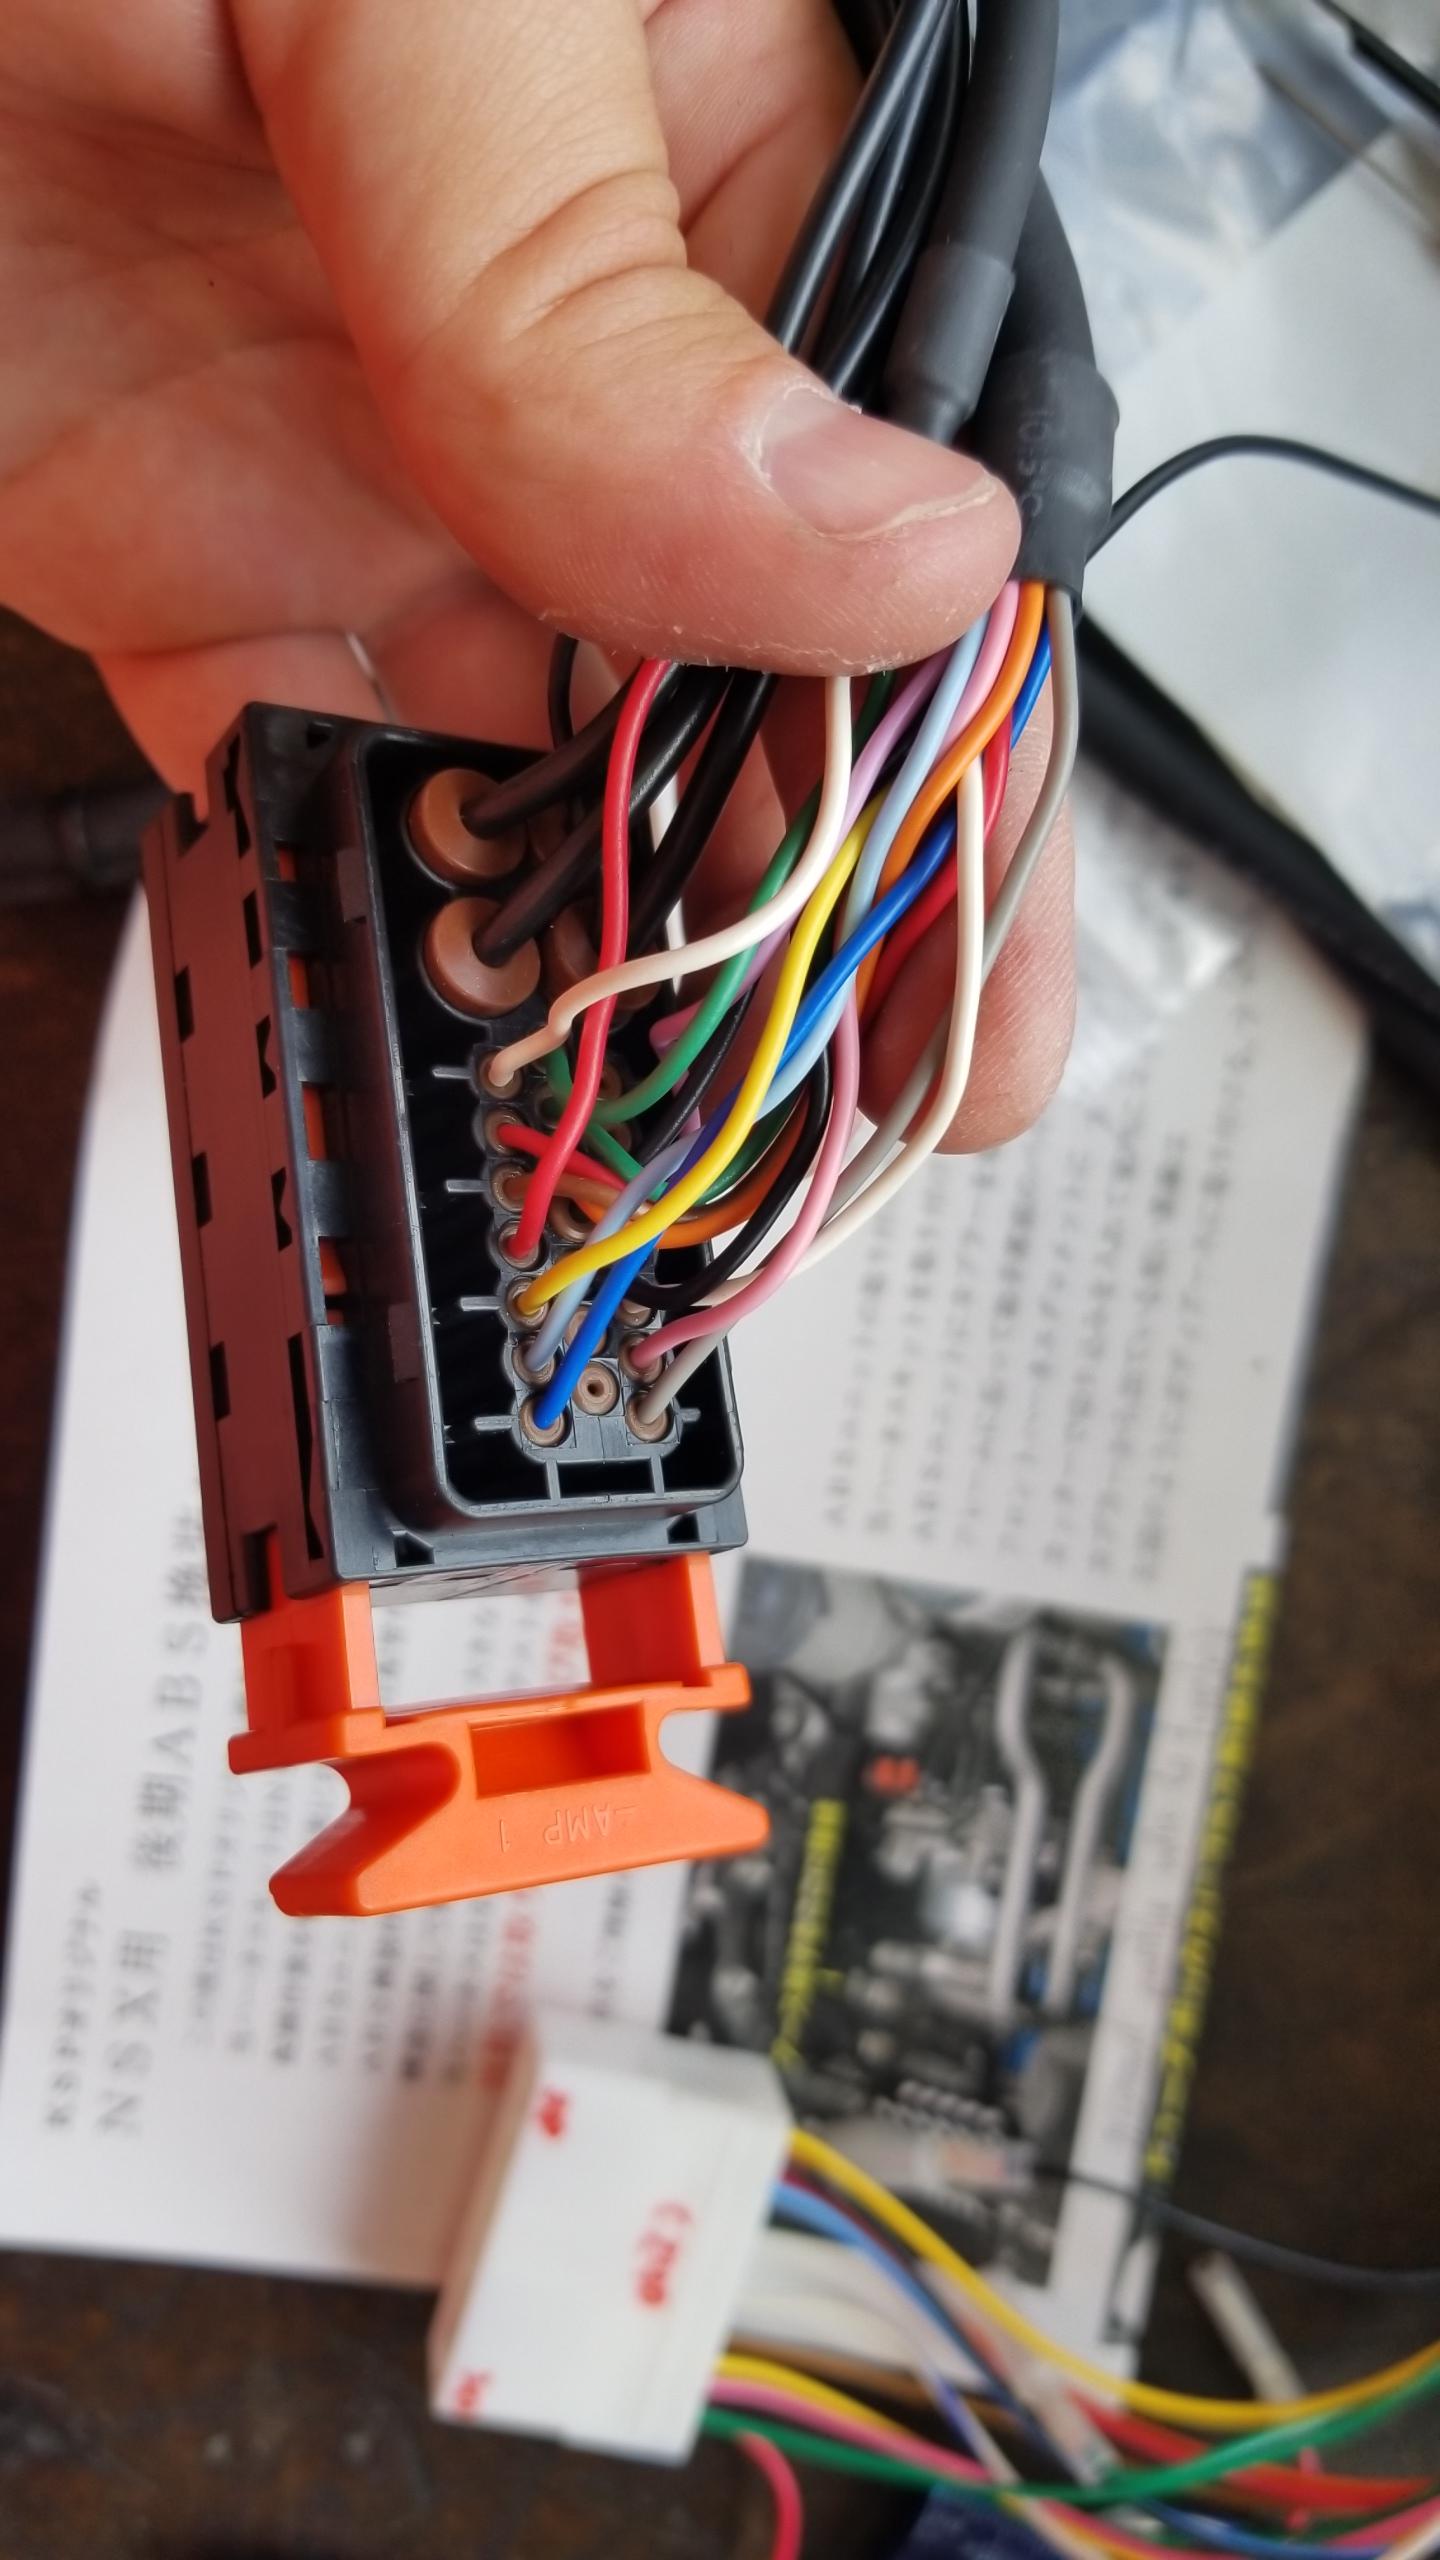
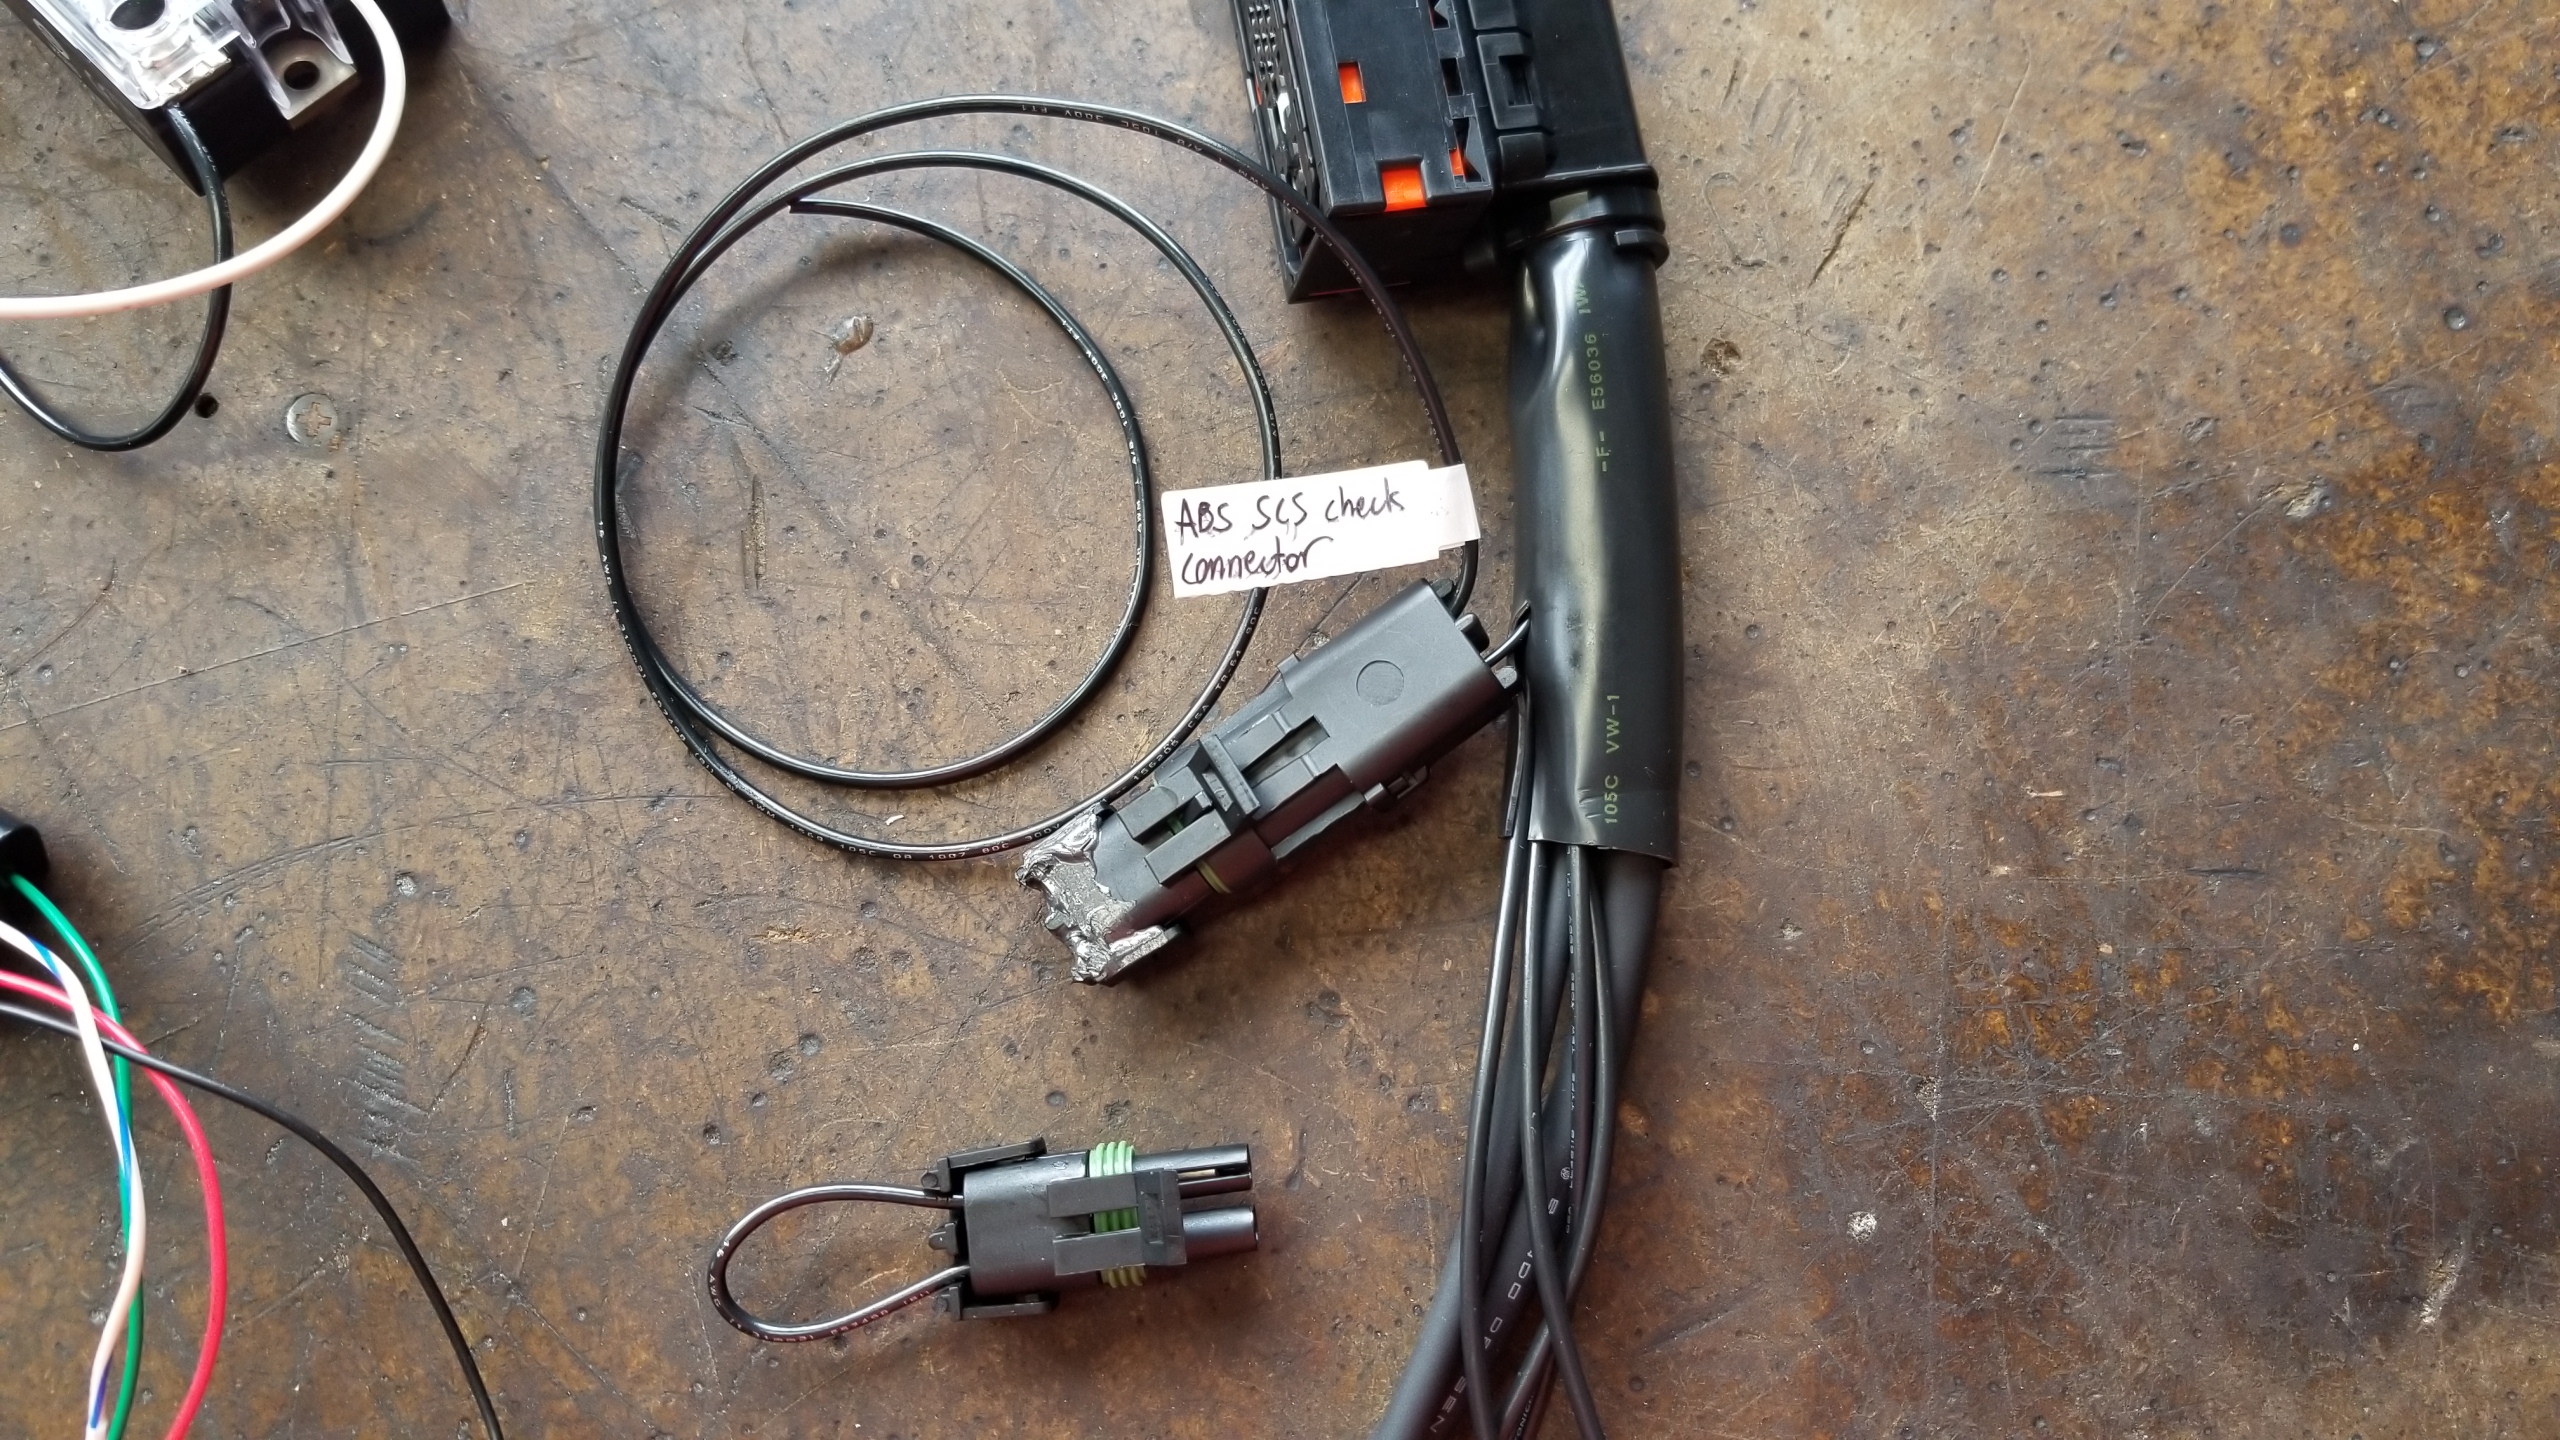
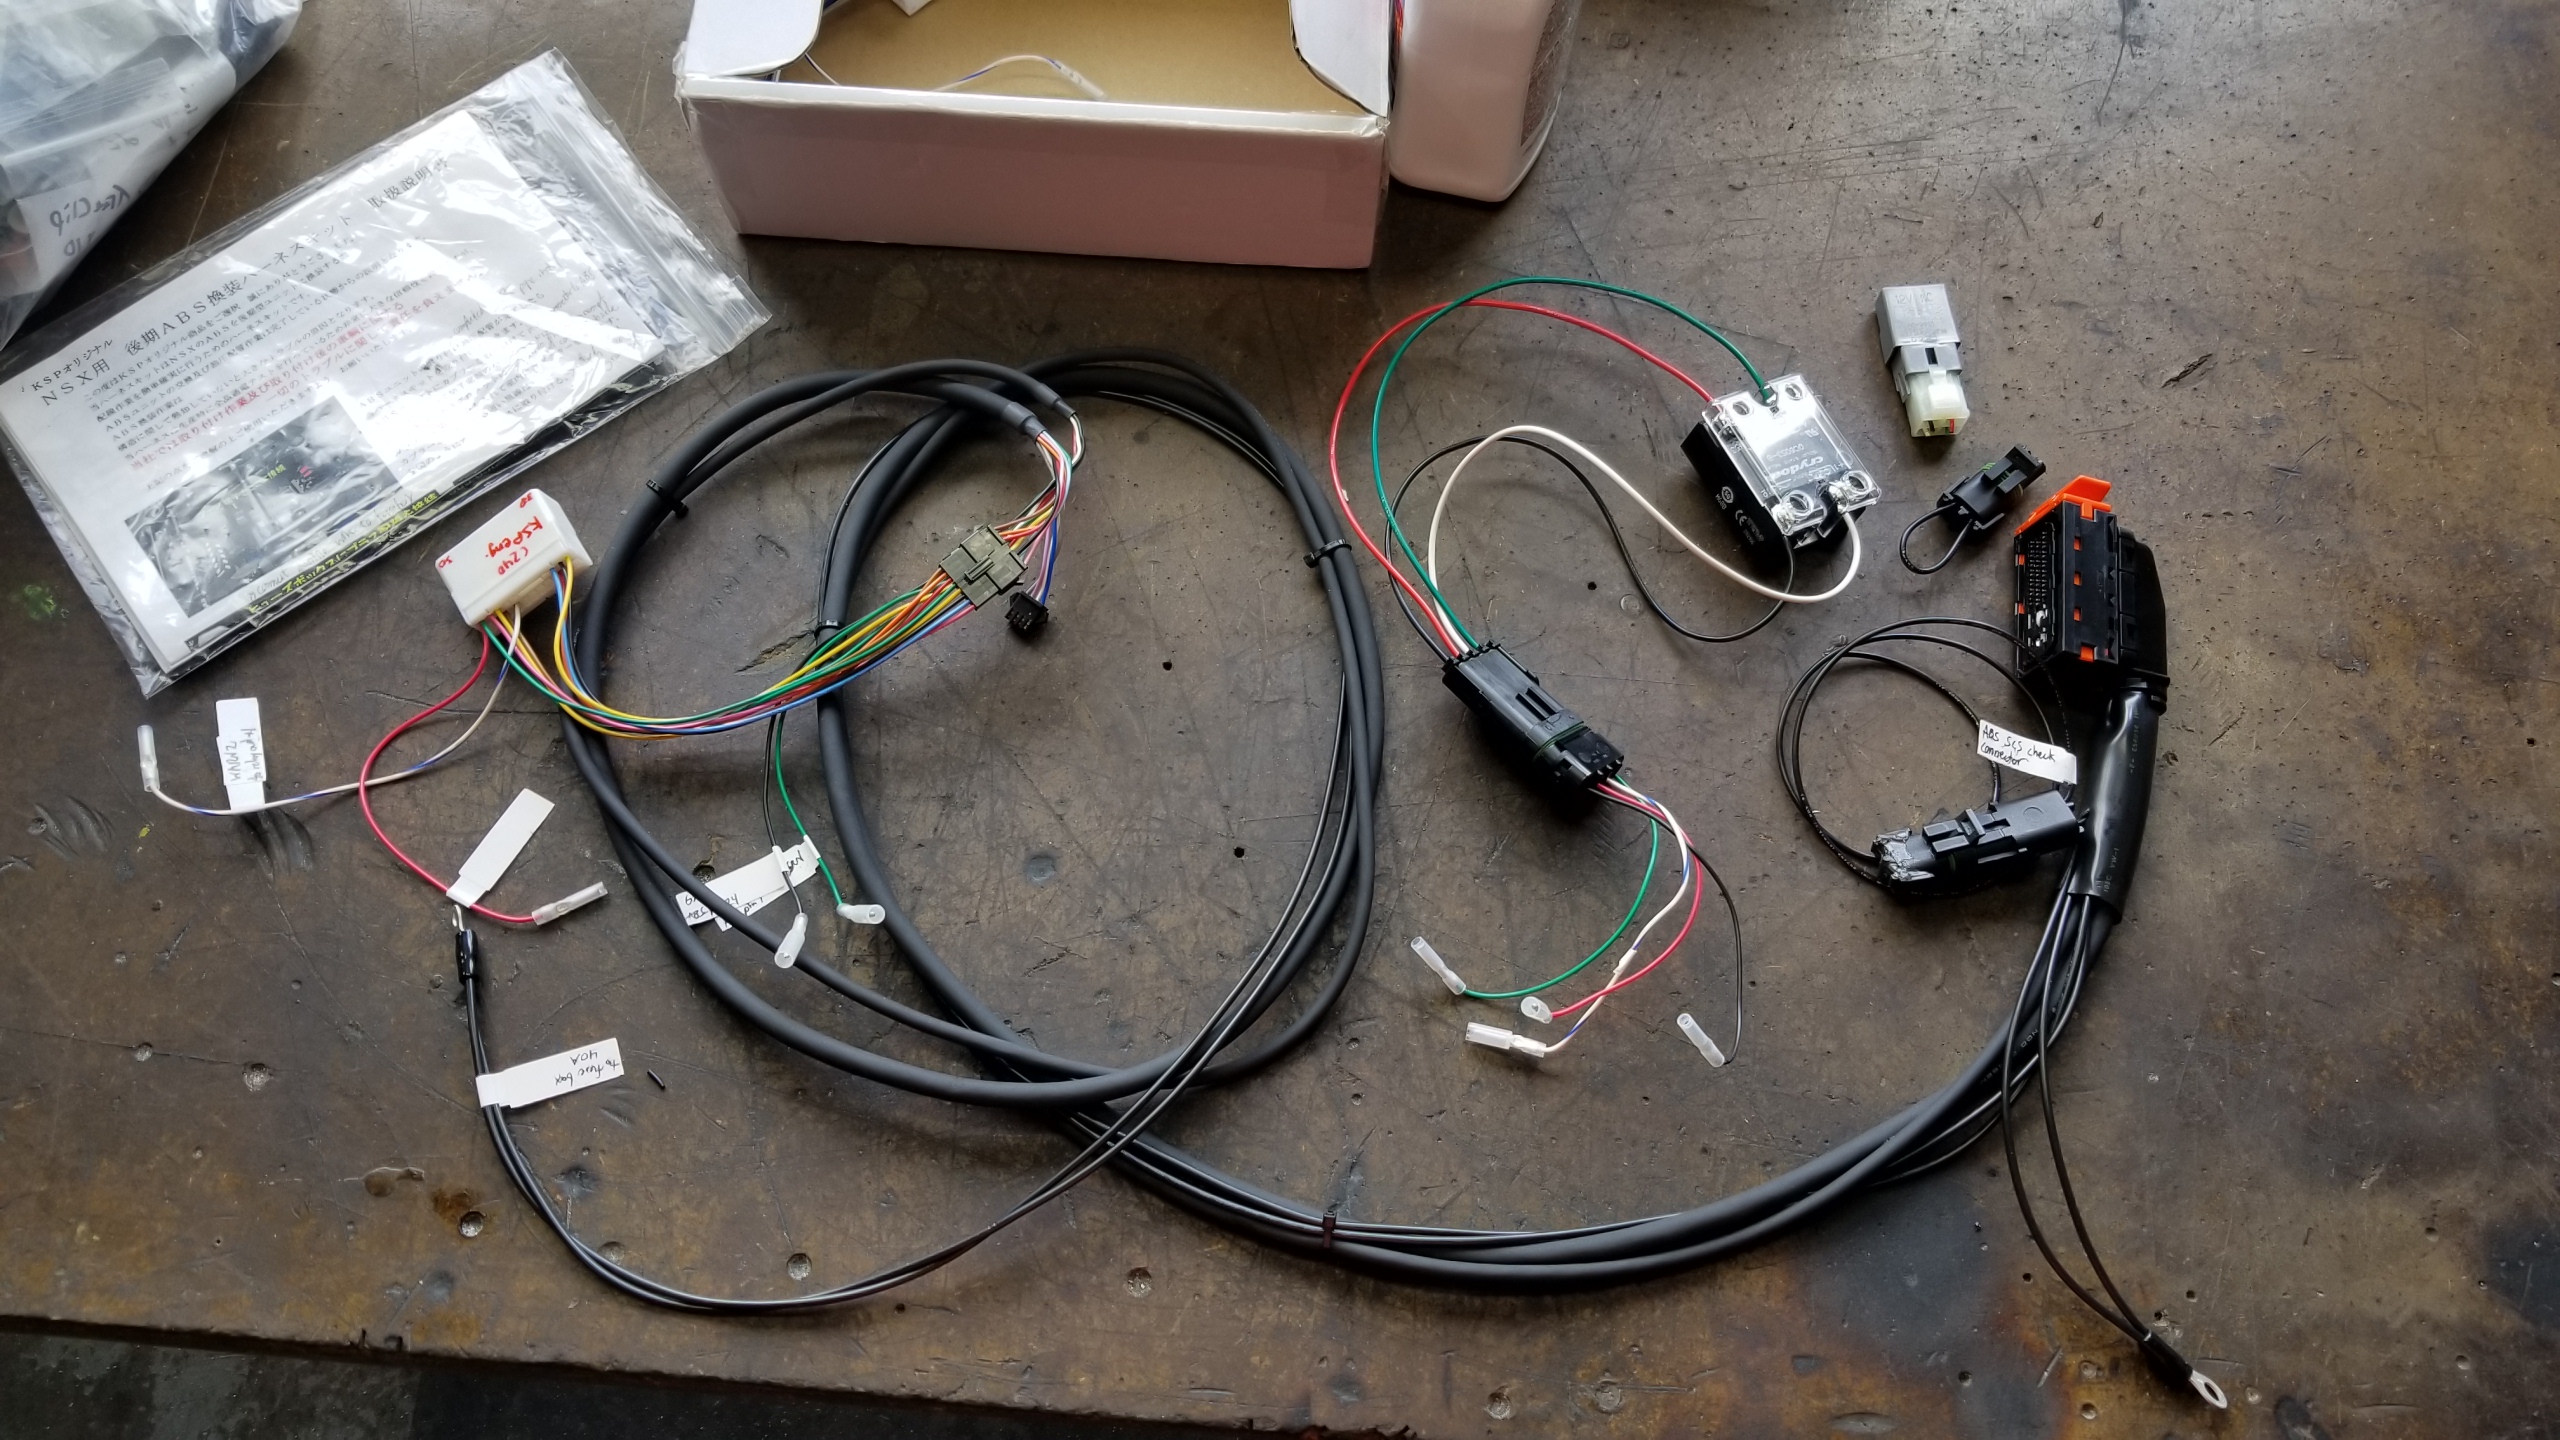
Future projects include the S2000 ABS swap which I've been sitting on for months, but I figured my A/C was more important since I was concerned the compressor was being damaged. So I finished that just in time for fall to roll around :biggrin:. I also have to replace my rear-left ABS sensor since it seems to be going out, and both my outer driveshaft boots since I ended up tearing small holes in them when I removed the OEM rear coilovers because the springs shoved the strut against the boots, should've used spring compressors. End post.
 
Last edited:
I finally found a buyer for my old A/T transmission on eBay. The end of an era. FYI, don't tip the trans up on its face without a big drain pan or you'll have a huge oil slick on your hands. I'm a bit sad to see it go, and almost just as sad to see the really nice shipping pallet I got with my M/T last year leaving too. It's a nice box.
RA06SwN.jpg

I just sold my AT and have questions LOL. I'm going to build a pallet too- did you have to ship freight or was it within the FedEx weight limit? Did you even use FedEx? :D

Also, when you tipped it over, where did the trans fluid come from? I drained mine before removal- I know there is still some in the torque converter, but I assumed that was stuck in there?

Your bonus car for today is spicy Diablo. How could you not stop to take a look?
aI43oDq.jpg


Must be a happy new owner.
CRA2LvR.jpg

My all time favorite exotic- so cool to see one in person! And orange too!
 
This is awesome. I will definitely refer back to it when I properly dig into my AC [emoji41]

Good luck! It's on the easier side of jobs I think, as long as you manage to keep the dashboard and front bumper installed, i.e. don't mess with the condensers or evap core.

I just sold my AT and have questions LOL. I'm going to build a pallet too- did you have to ship freight or was it within the FedEx weight limit? Did you even use FedEx? :D

Also, when you tipped it over, where did the trans fluid come from? I drained mine before removal- I know there is still some in the torque converter, but I assumed that was stuck in there?

My all time favorite exotic- so cool to see one in person! And orange too!

I shipped LTL freight through Freightquote which I chose Estes through as the cheapest option, Fedex was somewhat higher cost. Never again with UPS lol. No problem with Estes except I had to call the terminal 3 times to get them to finally get a guy to come pick up the pallet from the dock at my office. The total weight I put down on the BOL was ~275 lbs, I added about 50 lbs more than what the manual trans was. Having a good deadlift 1RM is a must for solo transport :biggrin:

I'm assuming the fluid pooled in the bottom of the case and in all the crevasses inside even though I also drained it from the plug beforehand, maybe doing it again would've helped. Once I tipped it over it mostly poured out of the axle shaft hole, way more than I expected. The torque converter didn't have anything in it once I juiced it last year. I shipped with the converter splined on the bottom of the input shaft.

The Diablo was definitely the star of the show, benefits of living around ATL :)
 
Back
Top