• Protip: Profile posts are public! Use Conversations to message other members privately. Everyone can see the content of a profile post.

bogle's 1991 mild build thread

Yeah I just use a utility knife and a straightedge. For intricate bits, I make multiple passes with the knife until it’s all the way through. For big straight cuts I just score it pretty deep, then bend at the score and it’ll break where you want it. Then a normal metal file works well to clean up the sharp edges.
Thanks for sharing the tips.
Good luck with the rest of the project. We will rooting for you on the side line. :)
 
[MENTION=36953]bogle[/MENTION] I bow down to your fabrication skillz! Your nav pod mod is truly impressive and perhaps it can serve as a blueprint for other owners who want similar functionality.
 
Thanks! Though I will say anyone on this thread can make these brackets and things, even the mounting brackets I’ll post about soon. I’m working with a rock and a stick here, no special tools. If you have a caliper, knife, drill and a hacksaw you can make this stuff.

I wish I had a drill press, a vice, and a little brake. But those thing will come when I have more space.
 
Mounting! First step was deciding on direction. Most navpod threads I've seen end up effectively gluing the screen to the navpod plastic. e.g. In the inspiration thread, he uses legos and glues them into place.

In an OEM navpod setup, they would mount the screen to a frame, just like the head unit, HVAC controller etc. This is the world I wanted to live in. I end up taking the center console off like every other week for some reason. If the screen were glued to the navpod, it would make this process a whole lot more complicated. Disconnecting wires and extracting the screen every time I need to root around near the shifter seemed like way too much. Also, what if I want to replace the screen? Encasing it in carbonite wouldn't be ideal.

I wanted to bolt it to the SoS frame, and I wanted it to be sturdy. The problem is that this approach is a lot harder than gluing the screen to the plastic. The frame-mounted screen + plastic have to perfectly mate up, so the brackets need to be right in an environment where there are a whole bunch of weird angles, and mounting points are not so precise.

I had a number of crazy ideas involving multiple brackets with several angles connecting to the sides of the screen. But after staring at it a bunch and measuring some things, it looked like I could just get away with the stereo's factory mounting holes connected to some 90deg brackets.

I didn't take pics of my first attempt, my brackets interfered with screws mounting the SoS frame to the car. You'll see the extra holes in some pics later.

For the second attempt, I decided to mount the thing to the underside of the SoS frame. This left some room for the screw heads. Here's a bracket

fceb47e2bc5e33f4b5872a1867cc249e.jpg


Then installed in the car

62dda986e3afaa980fe182c26409e941.jpg


The main problem was positioning the holes in the bracket. To make attempt #1 brackets like this, I just bolted up the SoS frame to the navpod plastic outside the car and measured. Buuut, when I tried to put the navpod plastic on, it was all wrong:

bc8624a91a33f748228efd48171dc929.jpg


Turns out there is a specific way the navpod plastic and SoS frame want to interact in my car. There were two important measurements that helped me figure this out. You can see both in this pic

122689250-1de9cc00-d1d6-11eb-823a-46359eddda65.jpg


Because the the SoS frame only mounts to the navpod in one plane, it rotates on the mounting holes at the back of the navpod, and it moves through a little arc in relation to the plastic. So I took a precise pod-to-bracket measurement + the Z distance between the bracket and the dash. These two things helped me mock it up outside the car so I could measure stuff.

The best thing that helped me hit the measurements was jamming this deburring tool's handle in between the frame and stereo. Super high tech:

04f0697b3b381293915626278f473e34.jpg


Then the distances were good enough to measure for brackets. Note the distance between the frame and the edge of the plastic here. That's the important bit:

bb28ebf68b825386869c7661d030979b.jpg


Then done, slotted, and filed, here's the finished brackets in the plastic

8ebd4ee9caa54bea6bf340abf6d940e7.jpg


And out of the plastic

40f5122529c155dc65a1d92925fb9830.jpg


Does it fit???? Lol kinda. This attempt was still too low and there's a little gap at the top.

1e0721d61ce93c96e09f36441e26b1e9.jpg


I spent an hour messing with it, adjusting within the slots, and tweaking angle of the brackets from the last post. I probably removed and installed the whole unit 10 times. Too high, too low, gaps... I also made another ABS trim ring to go behind the one shown in the last post for a more flush mount. Then one time .... it fit. Here it is all bolted up and feeling solid.

deb21dbb13a520a2875302ec59d2b360.jpg


1d2953a848ac0c37bc88e964048e8fc1.jpg


Yay!

A pic without the plastic for clearance reference.

825c68bae4f64d4902492ebbc297c7f7.jpg


Now I'm through the hard part and into the wiring. I think I can make it a pretty self contained unit with all the antennas and junk on the SoS frame:

4708af89500f954bec2dafbede09661d.jpg
 
Great progress.
I bet you were really excited at the last attempt to centered the screen. It seems like a lot of work, but if it wasn't perfect, you will be reminded every time you step into the car. :D

The second to last photo showing the clearance without the plastic cover really shows why you had to modify the unit.
 
Yeah, super excited for sure. You're totally right, I'd see every little gap, and if it were off kilter by a mm, I'd notice and be annoyed. Several times I thought "why am I doing this, just glue it to the damn navpod and be done." But it worked out! Hoping this unit isn't DOA.....

I'm really glad this thing is so thin above the IO board. With tablet tech where it is, it's absurd so many stereos are so thick. I guess it's just not a requirement in most applications. Also it worked out that there is some clearance between the unit and the dash as the USB cables plug in above the dash, then need to route below.
 
In the last post I was able to get the navpod all mounted and looking [emoji108]. The next order of business was wiring it + firing it up. I had a lot of work in it up to this point, but still wasn't totally sure things would work out. Does the unit work at all? Does RealDash work on it? Can it read data from the USB ports? Probably yes to all, but also cosmic rays, and I heavily touched the stereo without static protection while building the brackets.

First step was to tear into the center console, get the climate control unit out of the way and see what was behind the head unit. The head unit wiring will be simple, I thought. I mean, it really only needs power, a couple RCA connections, and the backup camera, right?

Lol.

5be6775ba399378a48707e5ac11fd8da.jpg


Not sure if you can tell, but it's a rats nest. There was even this random little box hooked into the amp +switch out:

cf272a93e30bd1940794eec63cf4a9d3.jpg


I read up on it, and still I don't really know what they're using it for. It's basically an electrical switch, input is the amp turn-on out, and outputs go back into the head unit to both the e-brake input and brake input. Why? IDK. Maybe working around something in the Alpine unit. All I know is it can go when the head unit goes.

I've had pretty limited amount of time to work on the car recently, so un-nesting this mess was a bit out of scope. I just wanted to figure out one thing: does it blend?

I built a little harness with 2 4-pin HD 090 connectors to make it easy to replace if necessary. The plug with 4 wires is housing all the necessary power bits: 12v constant, ACC, illum, ground. The other plug will handle all the rest: amp turn on, backup switch, etc. For this pass, I decided to hook up only power and the backup camera (pink wire) just to see if it worked.

b8d2099139c096e4e4512ec8584d94db.jpg


ACC, illum, and ground go to my little distribution block I posted about a while back, thus the crimped terminals. Then 12v constant comes (yellow wire) from the stock radio plug.

Cool, run that junk up to the navpod area. There is a good amount of room for the wiring behind the left side of the new duct.

0e576b1f4b996eba7e66fba1c43a48fb.jpg


I followed [MENTION=32903]natcc99[/MENTION]'s advice and put a little grommet on the aluminum bracket. The dash will push the wires into the grommet, so it should be all good.

e177ed5230a21273b93f769ddbdf77cf.jpg


I plugged it in, bolted it up, took a deep breath, turned the key to ACC, and .......

It works! Here it is immediately after boot:

5c3c5d6c84f8ac0e022d0949a3904d39.jpg


Next thing: does RealDash work? General setup stuff ensued: get wi-fi working, create a google account, log into the play store, etc. Finally, I was able to download RealDash. Cool! They have a factory AEM Infinity calibration now, so I loaded that up, plugged in my CAN analyzer into the USB port, and started the car. Holy sheet it works, this is proper reading RPM and temps:

34db235761eb8acbda992afbb8e08ca0.jpg


I bought a kindle fire 8" tablet to mess with RealDash in an Android environment outside the car, and ended up creating a custom dash. I'll post the details in the next post. I still need to use the custom dash in the car and put the interior back together. Summer is busy....
 
Hello, congratulations on the progress. I know you were worried about the headunit powering up after the modifications. I bet it was relief to see it working.

Nice job on the protective wire grommet. :)

The wire hardness is night and day compared to the original rat's nest.

Perhaps the PAC switch was designed to allow DVD movies to play while driving? I recall that some units from that era required a signal to show that the e-brake was engaged. Some units simply needed to be grounded to trick the headunit, but others were smarter and required more elegant means to simulate the e-brake. It's just a guess.
 
Thanks! Yeah I was super excited when it first lit up. Everything I was worried about worked. I had weird unexpected issues with the gps, google play store, and in app purchases, but have been able to fix or work around all them so far.

Yeah the new harness is a lot better. There will be a couple more things going up to the new unit, but I should be able to keep the cleanliness. I can’t wait to get rid of the original head unit and all that wiring!

That sounds right on the pac switch. It is going into the e-brake and brake inputs, which are probably there to prevent you from doing sketchy things while driving.
 
It's alive! For real! It fits! It shows the stuff I want! Here it is warming up

c50f078f86536a2a6e11c3c00a93a3d0.jpg


I got everything together and drove the car yesterday. I am soo happy with how it turned out. The navpod is in the perfect place, the dash is clear & obvious, the updates are fast, it looks good, and it's nice to have 30 seconds of history in the charts to spot any weird AFR, or to see where the temp peaked during a pull.

But first: more fitment nonsense

The first time I tried to fit the new JDM duct with both the navpod + stereo was when I was putting the interior back together. Definitely a mistake. If O was doing this again, I'd mock up everything with the duct.

The duct generally doesn't quite fit with the USDM heater core. I assume it's a LHD vs RHD thing, or maybe the JDM cars have different plastic on the fan/heater core. Either way, the duct wants to be way more left than it can be. That coupled with at least 47 other things made the duct push the navpod out about 1/4" when all mounted up.

When mocking things up at first without the stereo, I just popped the duct's little ears over the fan's stays and thought it'd be all good. Not so. Having the ears over the fan stays pushed the duct out more than necessary, which also pushed out the navpod. The stereo sort of exacerbated all this by pushing the duct down ever so slightly.

I ended up cutting all the ears off, shaving the little flare off the top of the duct where it met the navpod, and shaving about 1/8" off the back of the navpod's duct with the dremel.

I'm sure this is all nonsense without pics--I didnt take any pics except one cause I was in a hurry. It's not pretty, and even the remaining ear in the pic is now gone, but it works and holds tight.

37f94e0c87668543e9f14feaf95d49d3.jpg


New dash

I built a new dash in RealDash from scratch.

128649215-75b2c038-520f-4f05-9f75-1cf33c2b9dbe.png


I used a few of their sample dashboards as inspiration, but really only wanted to show a few values (for now). I wanted the main values to be clear at a glance and blend in with the rest of the car.

The biggest decision was what font to use. Honda used the Microgramma typeface for everything in the 80s and 90s. I downloaded a sample, but it's reallllly wide. I think even Honda uses a modified version of it for the numbers on the cluster (see the "1" on the tach), but uses it verbatim in other places, like the auto gear indicator in an auto NSX's cluster (Again, note the "1").

128652267-43c3f67b-a626-4920-8f74-5f89eb12ce53.jpg


Anyway, I found a skinnier typeface based on Microgramma called MicroFLF. Here they are next to each other, MicroFLF on the bottom:

128652290-f50e0f26-fd13-4c85-a55b-1d8a486a6eb8.png


RealDash only has hyper-complicated sample dashes to choose from. I tried to start from a few of them but quickly realized that they had a million things I needed to get rid of or change. I spent more time deleting stuff on my first few attempts than I ultimately spent building this dash from scratch.

Some notes on using realdash

* I started on a windows machine, but the app is built for mobile using mobile interactions. Using it in a laptop environment was really frustrating and slow--literally 5 clicks to delete something. It was way easier to use my kindle fire to build the thing.
* Their layout tools are garbage. I designed it in figma, then did a lot of math to lay things out with absolute numbers. Fortunately they allow inputting absolute numbers.
* I built one number + chart, then pasted it everywhere
* Use white images. Inserting an image requires adding an "Image gauge", and it uses white as the default mask color. For example, the NSX image on the dash is a white image, and I set its color to red. I could even hook it up to RPM or something and change the image color based on the RPM value.

Materials

If anyone wants to recreate this, or have a resonable starting point, I put all this up open-source style.

The dash is at https://github.com/benogle/cartune/tree/main/nsx/realdash

I also created a few splash screens for 1280x800. They look like this:

nsx-splash-red.png


There is a red one, white one, 2x versions of each, and an SVG of each you can import into your drawing editor of choice and modify as you like: https://github.com/benogle/cartune/tree/main/nsx/splash-screen

If someone uses anything here and has questions, let me know!
 
Last edited:
Quick update. I’m taking the car to laguna seca on Saturday as part of a BaT “alumni” display. They invited like 100 cars, and I was fortunate enough to be one of them. All the BaT cars will be at turn 3 from like 8am - 4pm. If you will be there, come by and say hi!

As part of the prep to take the car, I had it detailed today. I had them do the engine bay, frunk, wheel wells, and suspension. Oh man is it cleaner. I can’t wait to work on it next, it will be so clean. They said the majority of the dirt came from under the car. The AC compressor and oil pan are up next as one unit of work, hopefully it’ll all be way less gooey.

4a564065cf31d3a6a08c77dca4e336d6.jpg


I’m mostly excited about the suspension tbh

d6db777b5acba4b007a427bb26984947.jpg


7b400abe8959f6dba490f90552194768.jpg


3f59145507c53f78edbf3290cc6c3f9f.jpg


I didn’t get a pic of the engine bay cause I spaced. But, spoiler alert: it’s way cleaner. I’m hoping to get some good photos at the event, both of the car and all the other stuff there e.g the vintage F1 race(s) will be happening.

And shoutout to the place: Auto sport detailing in Santa Rosa. They did an amazing job. We chatted for a while when I picked it up about the paint. He even took out a bunch of little scratches on the rear fender while I was standing there to show me how paint correcting would work on my not-so-great paint. Explained the whole thing etc.
 
Last edited:
Well, the Motorsports reunion + BaT event was fun

06382df89fe7784a257eb1e492ff7531.jpeg


The car was super popular, pretty consistently drawing at least a pair. I left the hatch open all day. A couple seconds into staring at the engine bay, someone would inevitably point and be like .... "Is that a supra(charger)?!"

7b080970c80795a133e028650c6b3ef4.jpeg


It was pretty cool to watch people interact with the car. I spent a lot of time creeping from afar. After having owned it for a while, working on it every weekend, mostly thinking about its problems, seeing tons of NSXs on social media, and being on Prime, the car feels semi-common. But people's reactions made me realize it's a pretty special car. A bucket list car even for people with a Ferrari or that 400k 993.

A couple things I learned: everyone thinks the wheels are TE37s and the car is a dude magnet. No lady looked twice, nope. They'd take pics of the 911s and Ferraris nearby, then walk right by the car to peep the next Porsche. Their dude would stop and point at the supercharger. Lol

f522883f305d0f67945a7d31e41f85d7.jpeg


The races were good, and they had some crazy stuff there. You could walk up to anything in the paddock. That CLK GTR? Unattended. The Audi Le Mans car with the bodywork off? Walk into the garage, no problem. Nearly all the cars were unroped (redbull F1 car was the exception).

Here’s a bunch of random pics. I was most excited by the formula and Group C cars. So cool to see them in person and way up close

6d57b9d313cf52ad0b582649f23dd30c.jpeg


e6a61f7c1c53cbf141879178189c3f92.jpeg


05dfe357cabf92076f03c7b0e02cb96e.jpeg


3153ac2e17b7b8844290b78edbee9478.jpeg


197c2766f15423203b40885a843ea8e0.jpeg


232181542c979e3fd4f11b74b4007bdf.jpeg


Looped a 60s lotus, oops. He was all good though.

ef844297341b8bf0cc29e170686ac563.jpeg


bf90f069e924ed35526eacf34a629201.jpeg


Most of the F1 field

7e61282c417af7121b99886d5ae36977.jpeg


Zoom, enhance. "Wait. Is that ..... is that a supercharger?!?!"

c57968373d89eb662253516d16e8b5c4.jpeg


A couple more shots of the car on its own. On the drive down to the track it occurred to me that the car is soo much better now than when I bought it. There is no way I would have felt comfortable driving 6 hours in hot weather a couple months into ownership. It's quieter, more comfortable, clean, cruises at stoich, has less rattles, clunks and other weird noises, I have more information about the engine, it has had all the maintenance done, etc. I’m obviously not done, I mean it only gets 22 MPG, not my best work. But overall it feels good, man.

6281212e38b65f993e9b37c087a50d14.jpeg


dbeedef607811cdb66df47ac65a61fed.jpeg
 
Great updates, the event looked like a ton of fun :) I'd like to go to Laguna one day. Man your car's clean underneath. Jelly.

If you've never had paint correction done before you'd be amazed at the difference it makes. Especially for a black car, you might not notice how dull the paint might be beforehand but after a proper correction it'll gleam so much your eyes will hurt. Of course that also means you'll be even more disappointed when the car gets dirty again, but starting from a corrected & protected state makes it much easier to clean too. Basically hose-off and it'll look better than 99% of cars on the road. The one asterisk is that if your car lived outside for an extended period then you might not have the "paint health" for a correction on the upper surfaces/trim like door handles, B-pillars, etc. since the clear fails easily in typical Honda fashion.

It was pretty cool to watch people interact with the car. I spent a lot of time creeping from afar. After having owned it for a while, working on it every weekend, mostly thinking about its problems, seeing tons of NSXs on social media, and being on Prime, the car feels semi-common. But people's reactions made me realize it's a pretty special car. A bucket list car even for people with a Ferrari or that 400k 993.

A couple things I learned: everyone thinks the wheels are TE37s and the car is a dude magnet. No lady looked twice, nope. They'd take pics of the 911s and Ferraris nearby, then walk right by the car to peep the next Porsche. Their dude would stop and point at the supercharger. Lol

I had to comment since I feel so similar. I love taking the car to shows and watching people interact with it and talk with people about it. All positive interactions. I find that leaving the rear hatch open attracts even more attention, in my case I usually have it closed with no engine lid so people can see inside without worrying that something's gonna get messed with when I'm not there but I always creep from afar anyways. It's def easy to get lost in the NSX sauce from being online so much but IRL it definitely can make someone else's day to see one in person. As long as they're a dude, haha. One of my favorites is when someone guesses the value of the car and overshoots by 50%+ :biggrin:

Maybe this is a good reason to add the Nismo stickers? You spent so much effort on the wheels that it might spark more interesting conversations.


Zoom, enhance. "Wait. Is that ..... is that a supercharger?!?!"

c57968373d89eb662253516d16e8b5c4.jpeg

LOL

There's always the one guy explaining to everyone else about the car, and it has to include "Senna" or "basically an Accord engine"
 
Last edited:
Big McLargeHuge said:
There's always the one guy explaining to everyone else about the car, and it has to include "Senna" or "basically an Accord engine"

TRUE LIFE!!

*rolls eyes*

:D
 
If you've never had paint correction done before you'd be amazed at the difference it makes. Especially for a black car, you might not notice how dull the paint might be beforehand but after a proper correction it'll gleam so much your eyes will hurt. Of course that also means you'll be even more disappointed when the car gets dirty again, but starting from a corrected & protected state makes it much easier to clean too. Basically hose-off and it'll look better than 99% of cars on the road. The one asterisk is that if your car lived outside for an extended period then you might not have the "paint health" for a correction on the upper surfaces/trim like door handles, B-pillars, etc. since the clear fails easily in typical Honda fashion.

Yeah, I realllly want to get it corrected + ceramic coated, especially after seeing the spot he did on the rear fender. The paint isnt so great, though. The front has lot of rock chips on the bumper + headlights, the left front fender has had a tire grab onto it which created some weirdness, the left B pillar is faded, etc. He said he wasnt sure if he'd do the whole thing in its current state. I'd probably have the pillars painted (or put the carbon ones on), and maybe have the front resprayed, then do it. He said it's a tough call, cause if you are doing a big chunk, you might as well just respray the whole thing. So I'm not totally sure what to do yet. Maybe just seal + wax the shiz out of it and call it good for now.

I love taking the car to shows and watching people interact with it and talk with people about it. All positive interactions.

Totally true, 100% positive. People were so excited to see it. So cool. Even when out and about, nothing but thumbs up and requests to pop up the headlights from all sorts of people.

One of my favorites is when someone guesses the value of the car and overshoots by 50%+ :biggrin:

Maybe not so far off the mark these days. I mean one sold on BaT with similar mods to mine a couple weeks ago for > 2x what I paid. It lower miles, but still. Eh, maybe we all need to up our insurance value...

Maybe this is a good reason to add the Nismo stickers? You spent so much effort on the wheels that it might spark more interesting conversations.

Yeah that's a good call. People will be like TE37s? Uh, why does it say nismo? Right now it's an inside thing with nissan guys I guess. A dude with an R32 came over and the first thing he said to me was "LMGT4". I was like yep. He thought it was cool. He had the 17x9+22 variant on his skyline, it was cool to see those in the flesh.


RYU said:
Those wheels and tires look mean! Can you share the wheel and tire sizing please?

It was a good event, definitely would do it again!

The wheels are Nismo LMGT4

* Front: 17x7.5 +30 215/40/17
* Rear: 18x9.5 +30 275/35/18

FWIW, I went more in depth on
piecing them together here, then more pics here
 
Last edited:
[MENTION=36953]bogle[/MENTION]

Oh man.. 5 star on popups!!! f*cking epic classic. How you found those Nismo Rays.. i'll never really know. I spent many weeks looking and gave up a long time ago. BTW I think you just convinced me to go 235/275 RT660's on my 9"/10" setup. Everyone says they run wide but i'm going to bite the bullet and just go for it. The fronts are going be sketchy but I think it will work on mine. Thanks for postings those. I was on the fence about 215 vs 235 660's for many months.
 
Cool, definitely post pics! I'm curious about the 275s on the 10" wide, and super curious about the 235s on the front. I still have my 17/17 CE setup and I really want to run the 9" rears (+40) on the front at some point. Probably a bad idea tho with stock fenders + liners.

The 275s are a little taller than I'd like, but it's ok. I love the meats, and tons of people commented on the meatiness on Saturday. It also still spins them when I roll on it in 2nd lol.
 
My next big job is replacing the AC compressor. I've admittedly been putting it off because it seems like it'll be time consuming. Periodically I'll look through all the AC-related parts I have, get under the car and poke at it, planning the job out. Those planning sessions usually result in pretty heavy feature creep. You know, while I'm in there, _what else_ can I do? What else needs cleaning or internet shopping?

It's a slippery slope. I figured if I was dropping that front cross member, I might as well replace the oil pan with a baffled pan. If I'm doing oil stuff, I might as well think about how to set up an oil temp sensor as it could affect my oil pan decisions. Eventually I want to get an oil pressure sensor into the ECU and get rid of the pillar gauge. Would I run a temp sensor and a pressure sensor in the same place? etc.

This all led me down a number of oil-related rabbit holes. I made some decisions, and I managed to get a couple things done.

Here's The Plan

1. Run an oil pressure sensor with the SoS relocation kit (covered in this post!)
2. Run an oil temp sensor in the pan
3. Remove all the junk that is now hanging off the stock oil cooler
4. Run all the sensors into the ECU through a couple open inputs through existing pathways in the harness (TPS, throttle angle, EGRL)

The oil temp sensor decision resulted in selling my bungless baffled pan, then ordering another CRF baffled pan with an 1/8" NPT temp sensor bung. That'll go on with the AC job.

Ultimately the oil pressure sensor project is independent of the AC/crossmember. The new pan is 3-6 weeks out, so the new oil pressure sensor was a good candidate knock out.

Hardware

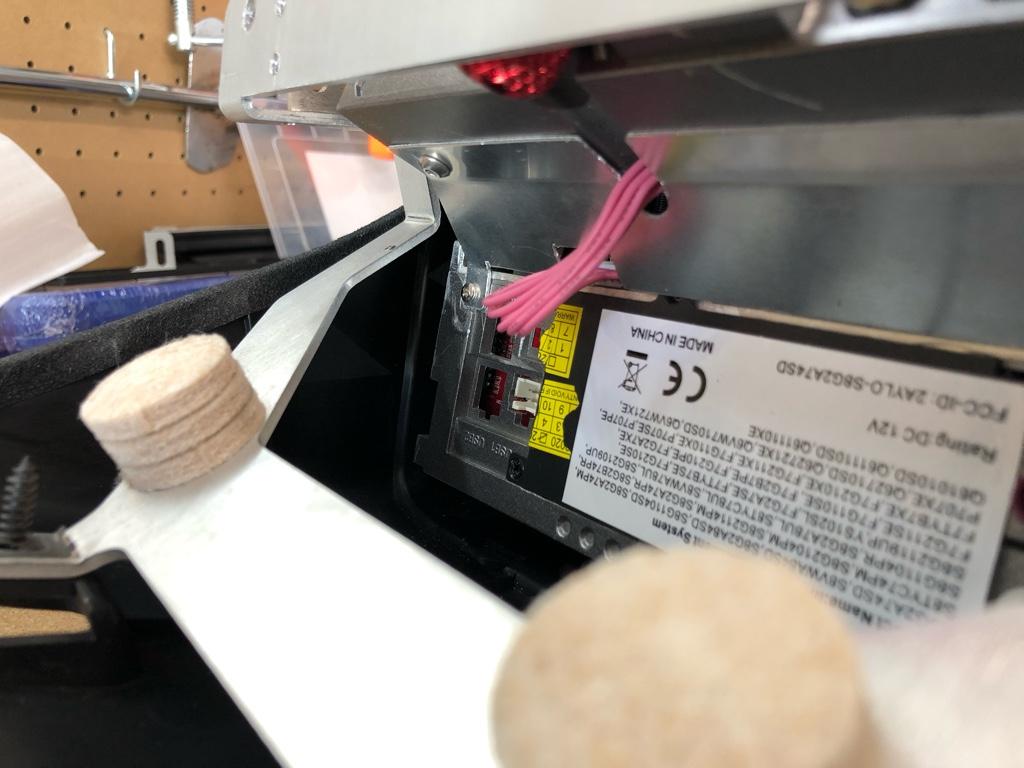
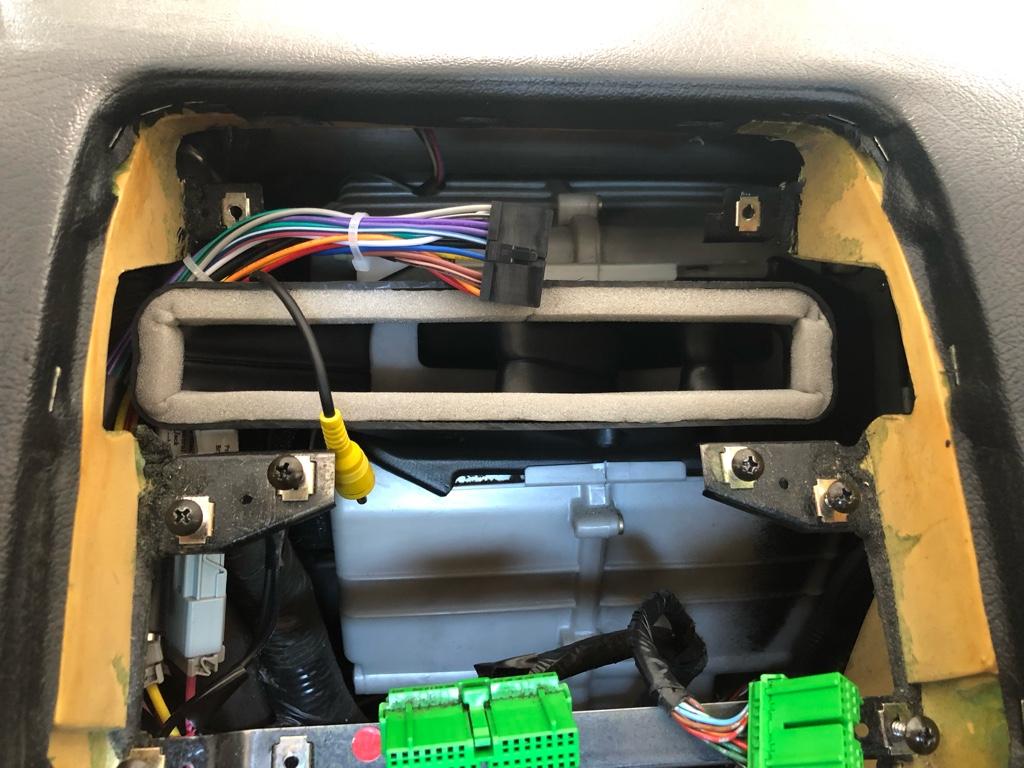
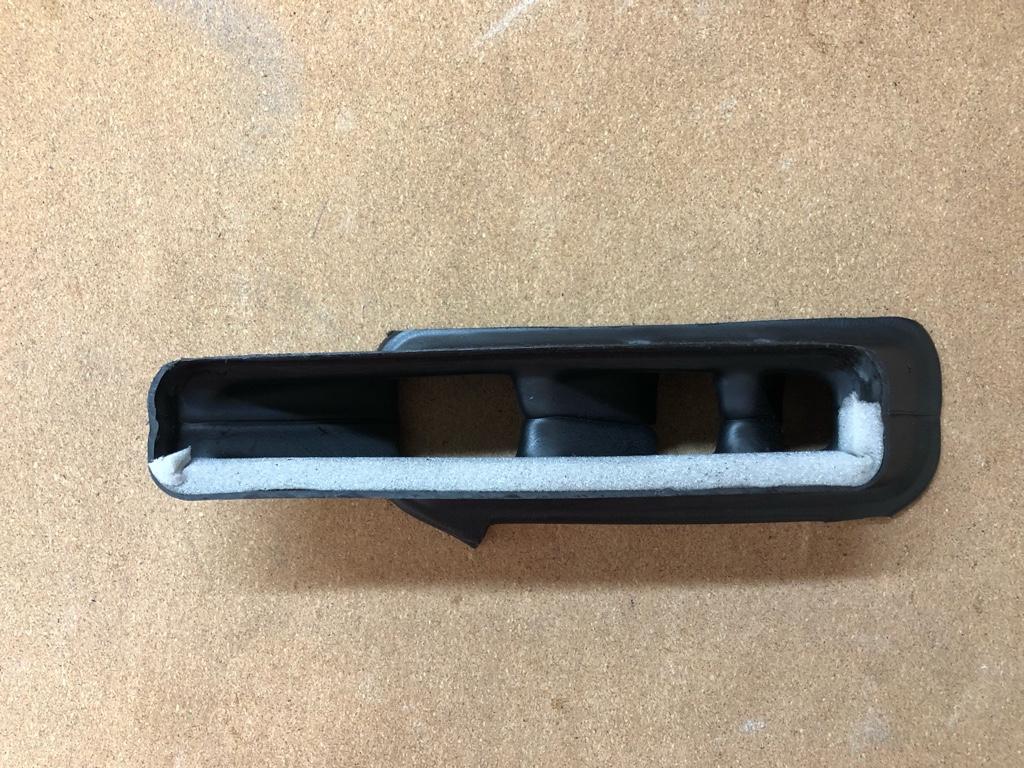
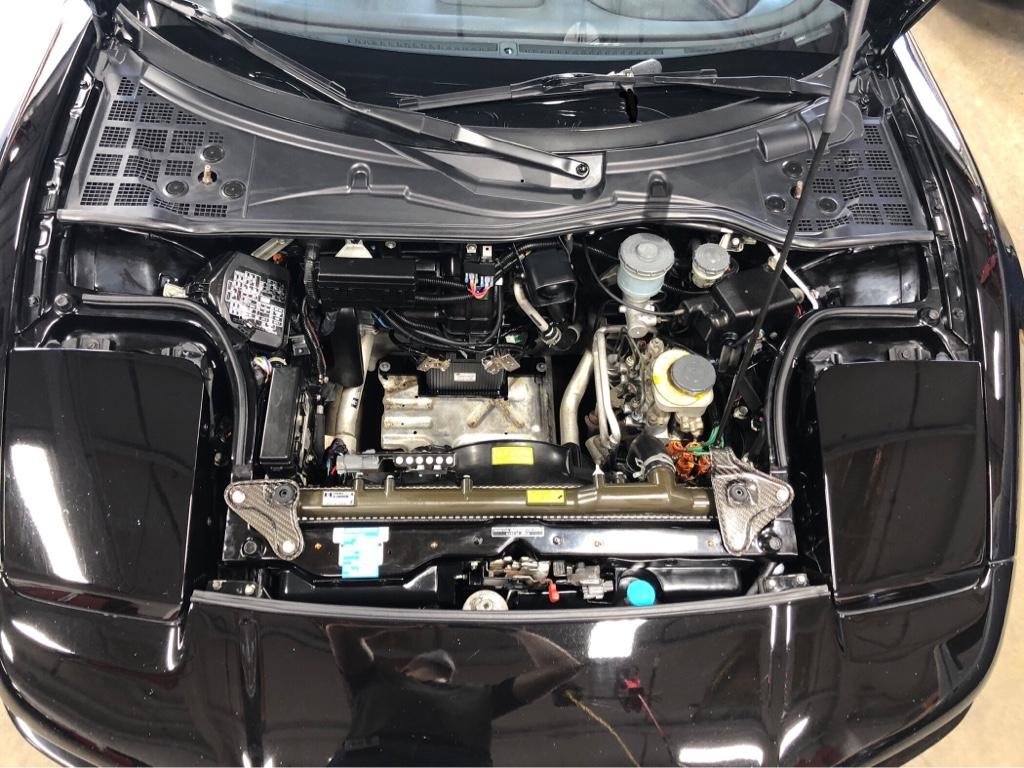
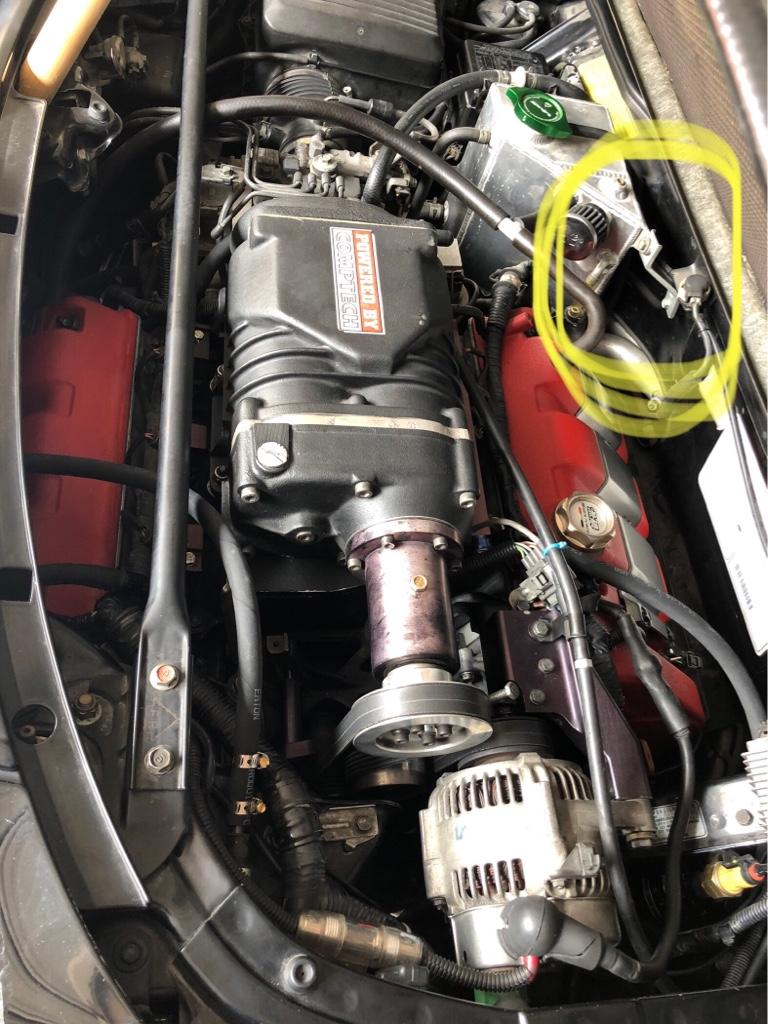
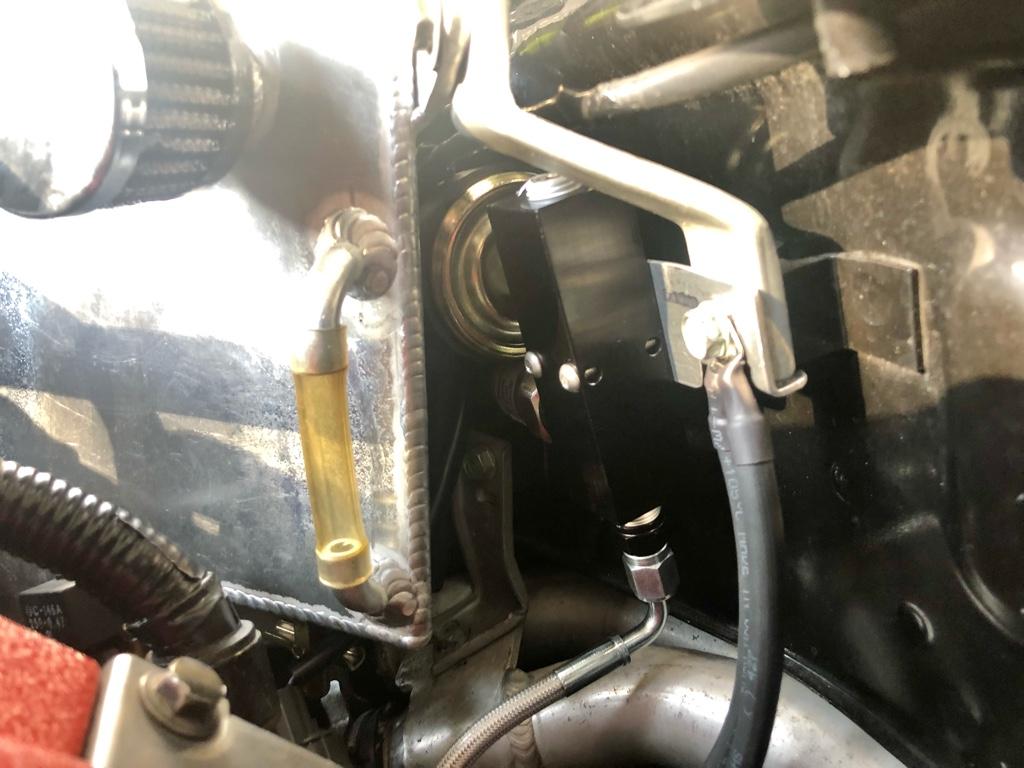
I considered a whole bunch of different oil pressure sensor setups, but ultimately landed on using an aftermarket sensor along with the stock cluster gauge's sending unit, all bolted to the firewall. For reference, I wanted it to go in the spot circled in yellow, and best case, the sensors would hide behind the overflow tank.

09f1517a5f49a1b39917d035db9543a4.jpg


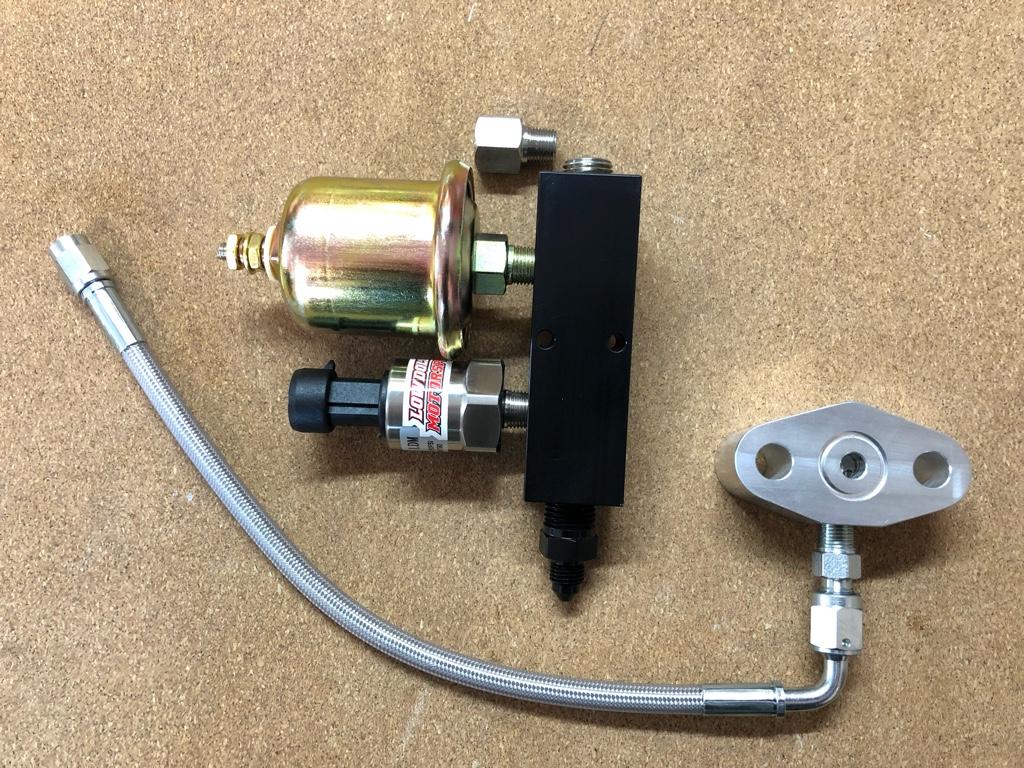
SoS's relocation kit looked like a great starting point to get the sensor to the firewall. The goal was to have the oil line mount up at basically the same place it would if I ran it directly to the SoS sensor, but then run 2 sensors. I didn't want to have to make a line or get a custom one made.

I managed to find 
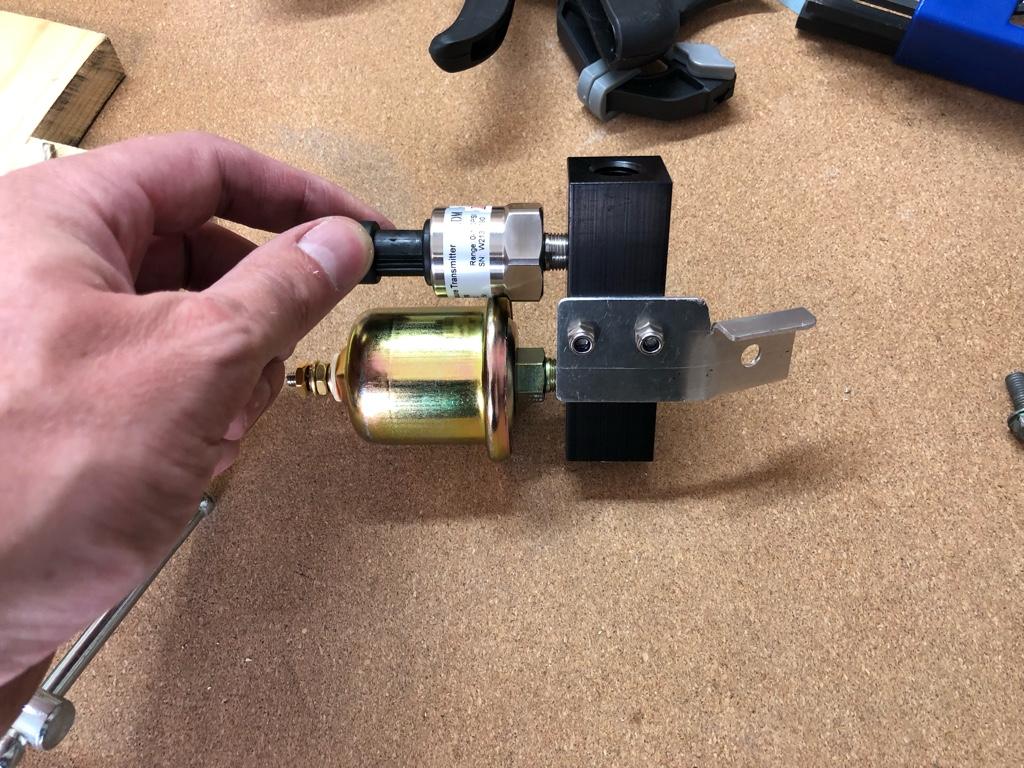
a manifold (Nitra MRA-2CB-W) with 2 1/8" NPT ports spaced far enough apart that the sensors just fit next to each other. I landed on a Lowdoller 150psi sensor as it seemed both cheap and had some good internet reviews.

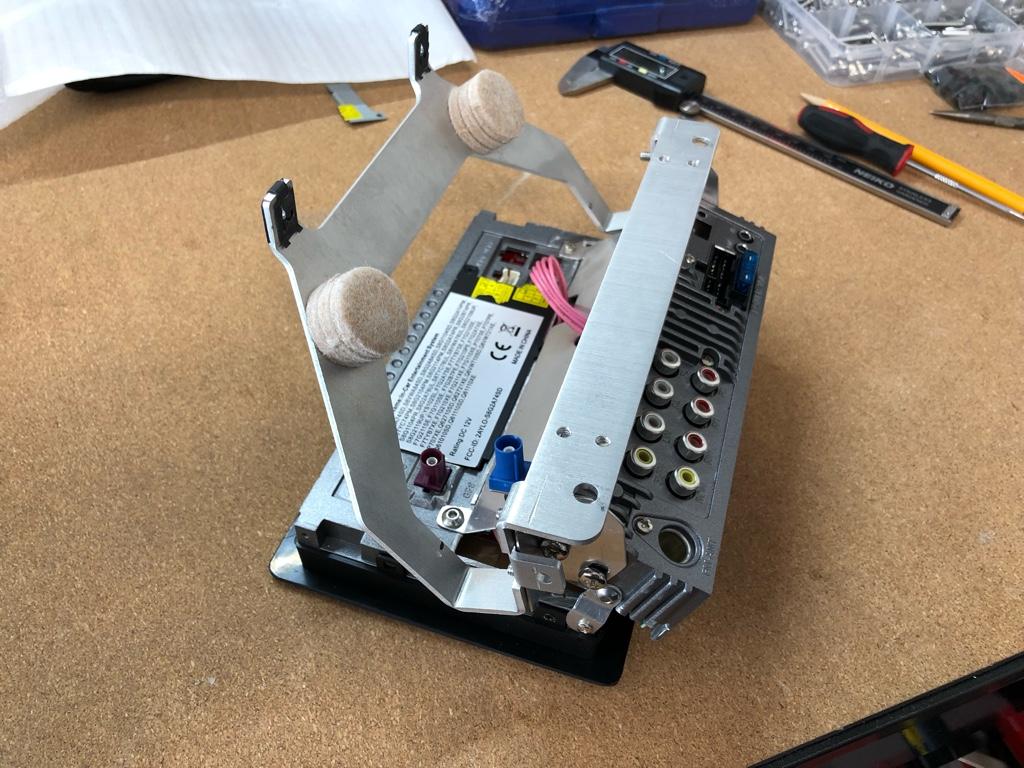
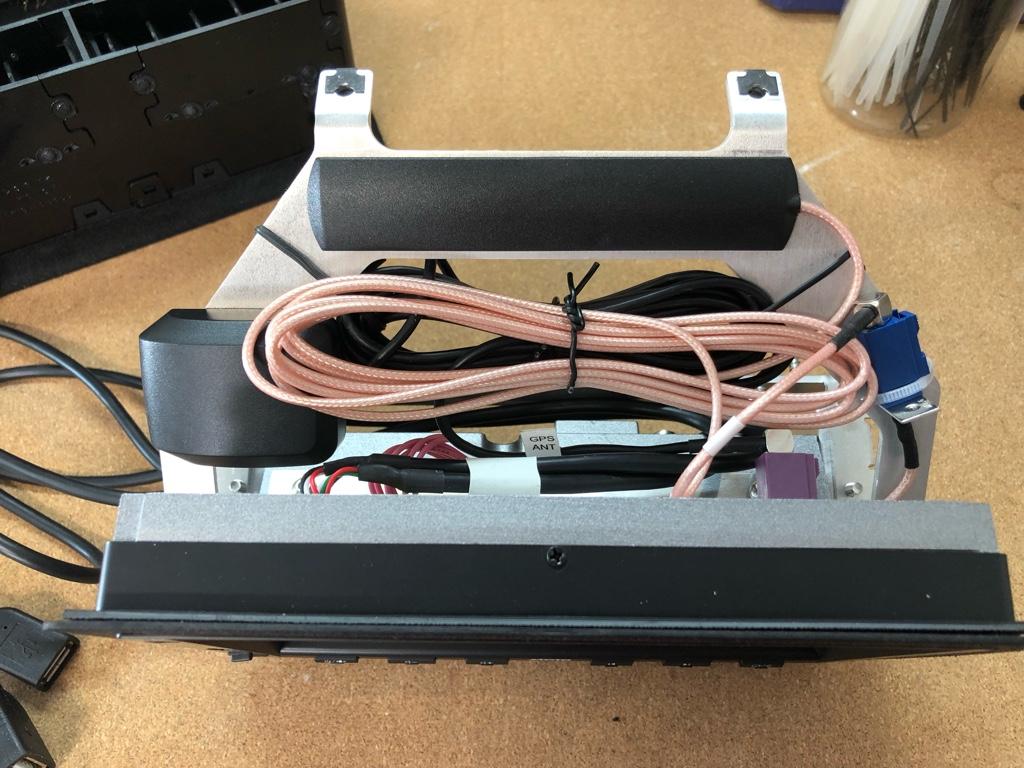
All the parts ready to be mocked up in the car

d1db7d3816ce24ca4708f3e09dc1032f.jpg


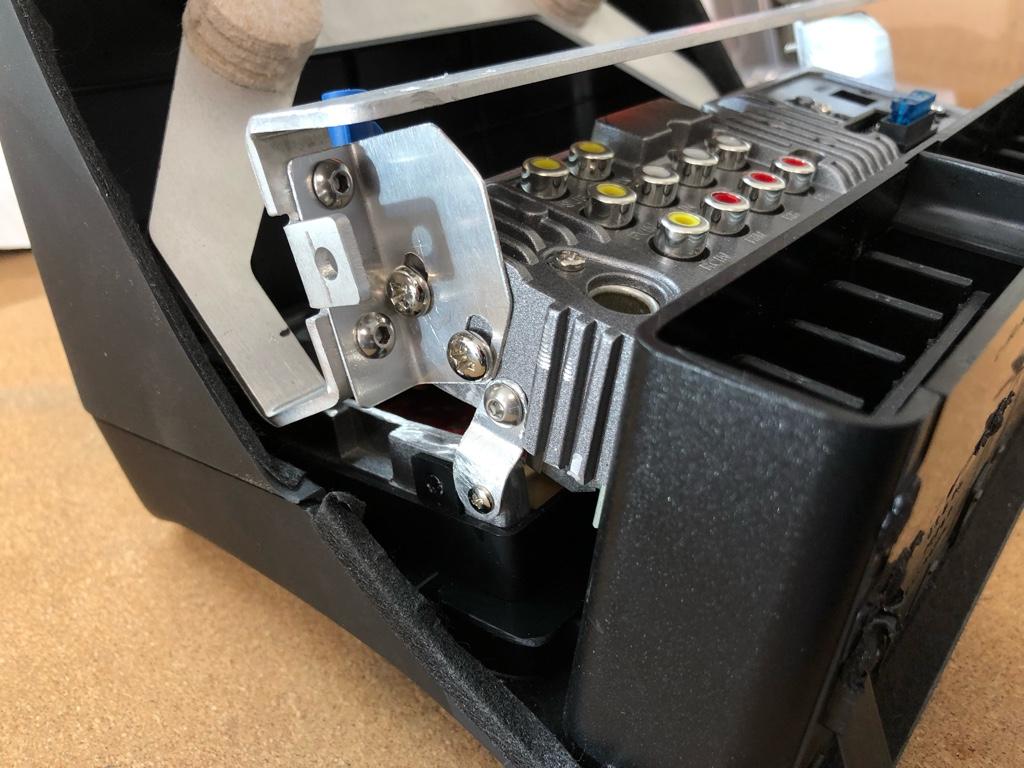
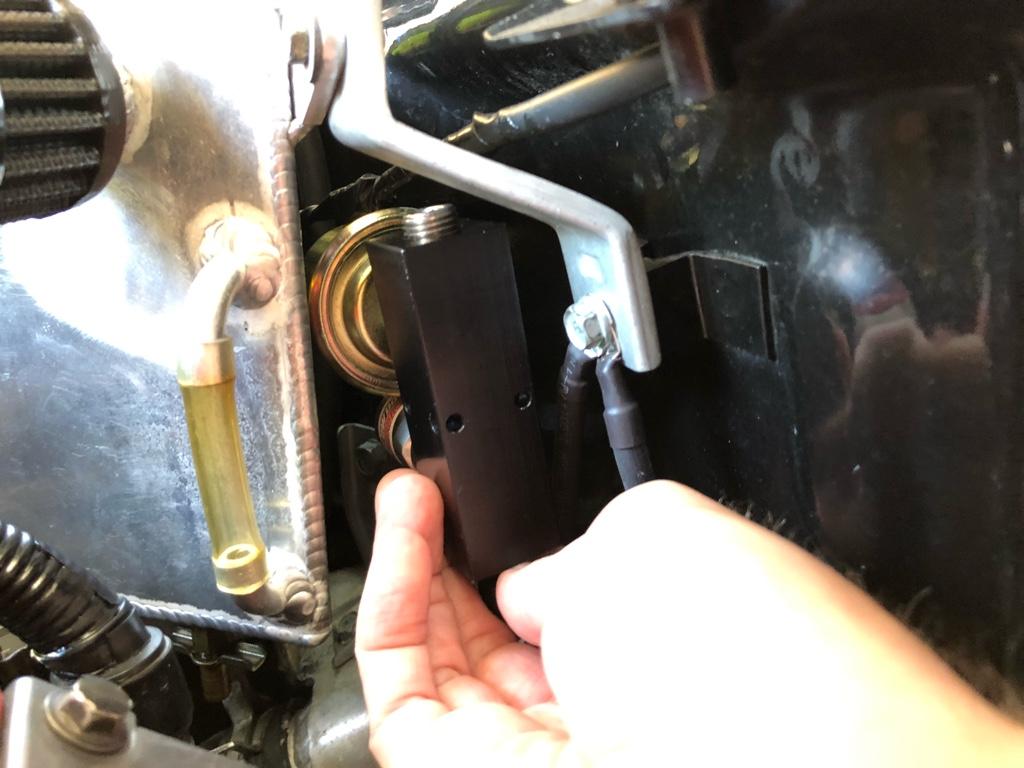
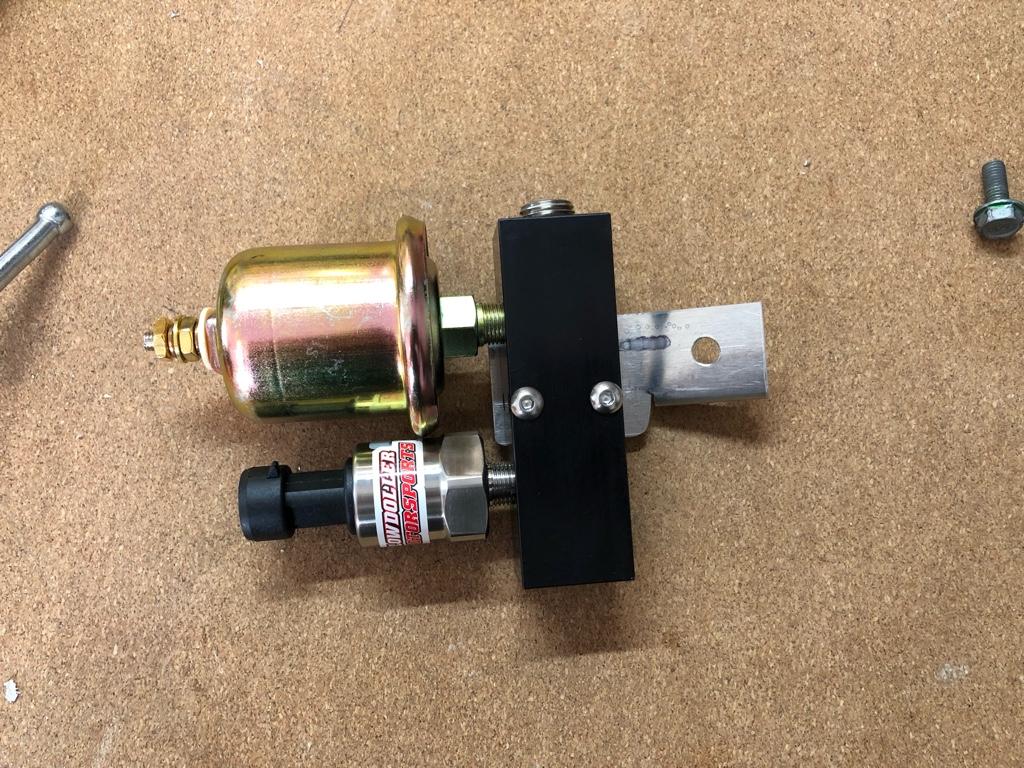
I tried a couple different orientations, but this fit the best and required only a pretty simple bracket.

ec34723c0ef66fef11f97c3636c9f4ac.jpg


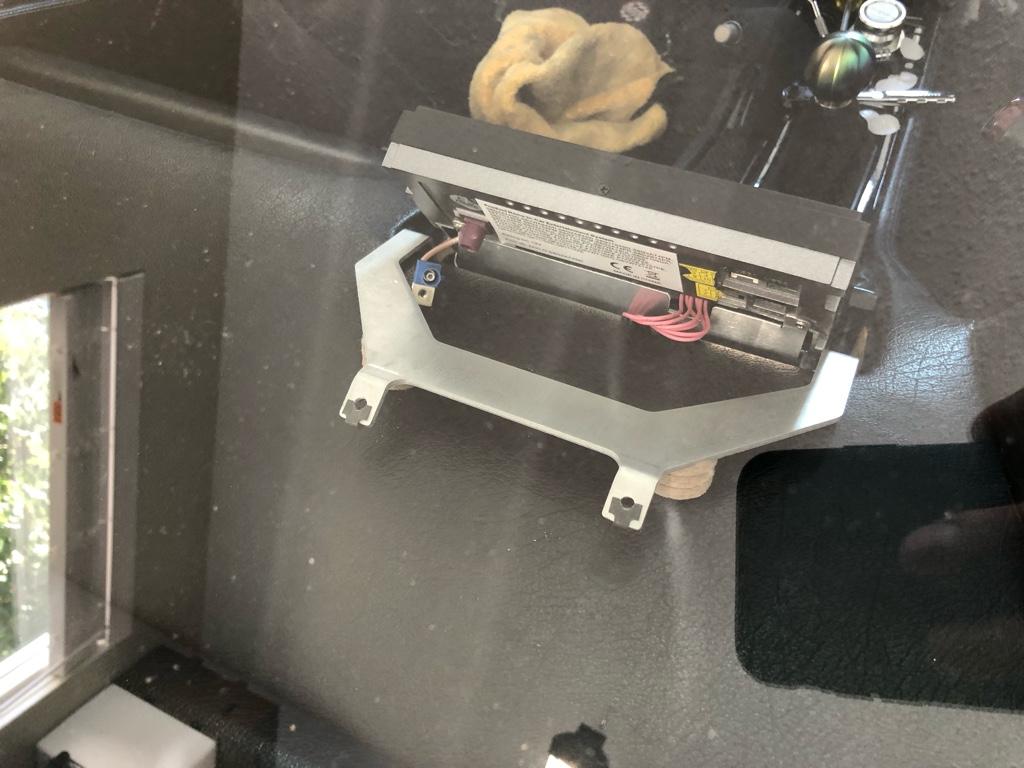
The bracket. The there is a 90deg tab on it in an effort to keep it from spinning on the firewall mounting point.

0848a2f05f0e725792397d70547f3e91.jpg


ed731957abc3c1f1bc2e3047d1eac63b.jpg


Then all mounted. There were a lot of steps here, but I got no pics. It turned out to be harder than I expected to get the old unit out, and the new one in. Mostly cause it was just an awkward location and I was trying to be clean. I had a pretty small time window available and had to get it totally finished and tested in that time. I was super careful and luckily had no leaks.

9515841ea054741b7860f2a298abff22.jpg


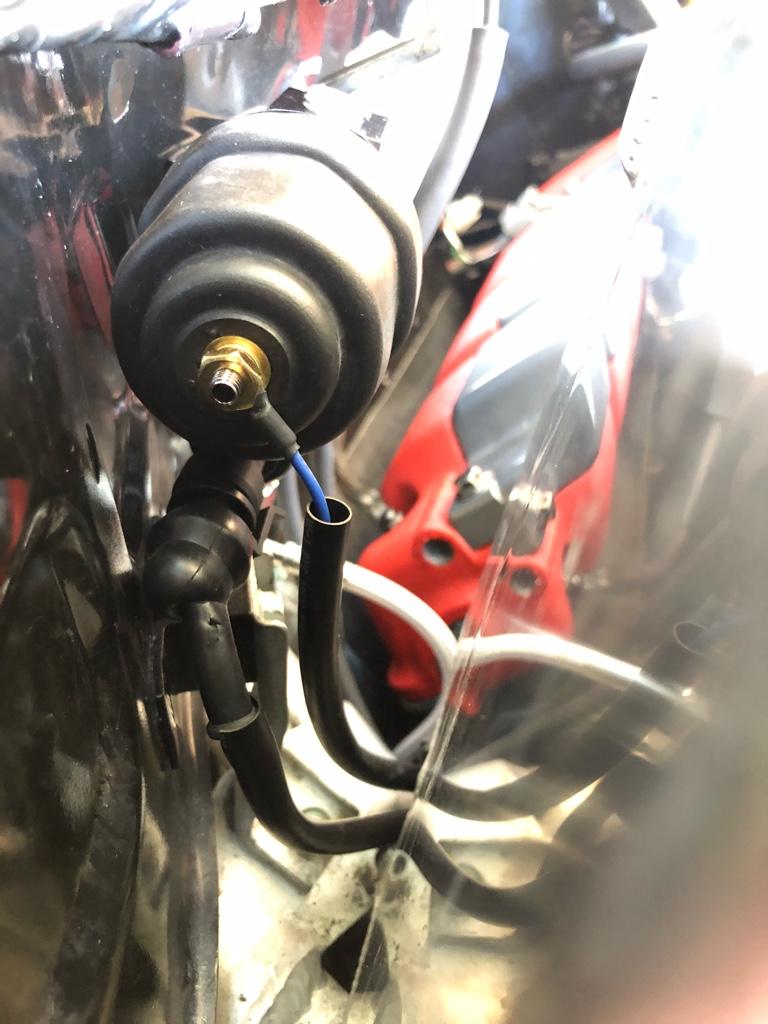
I ended up using the SoS sending unit. MotorMouth93 mentioned in another thread that the OG unit is more reliable than the SoS unit. I bought fittings and things, but once I was in it, using he SoS sensor turned out to be significantly easier, plus it was a better fit in the space available. I guess I'll cross that bridge if necessary--the gauge works now.

4778147be398d483c8e03dcb87cdc193.jpg


Software

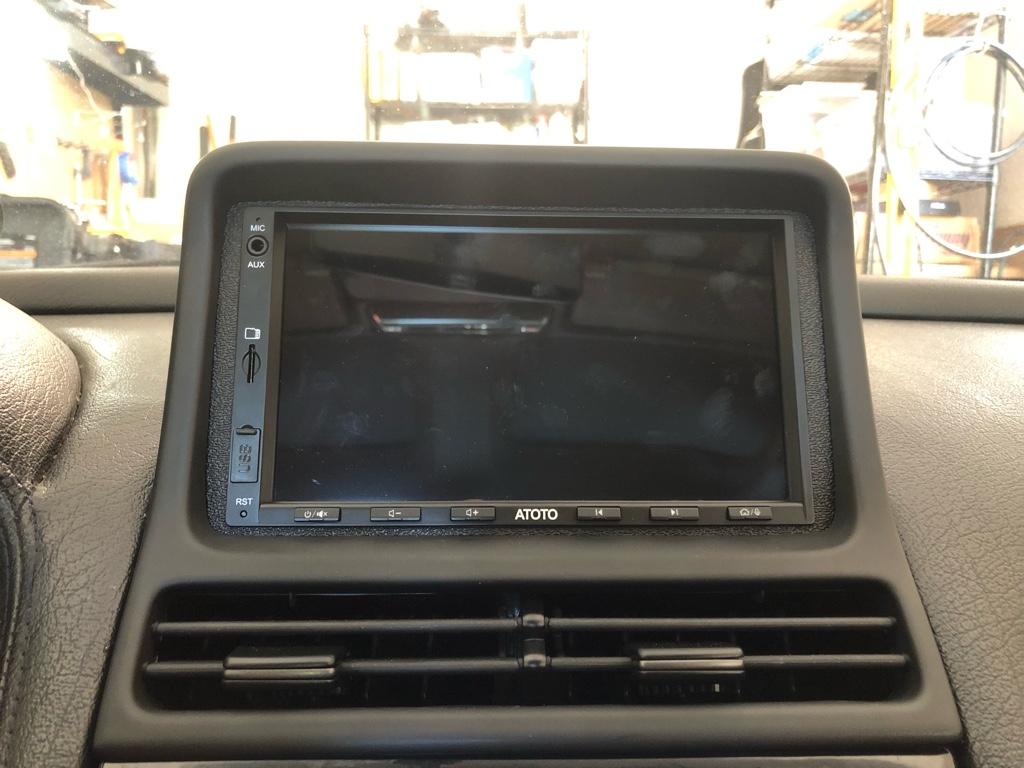
The next step was to get those fresh oil pressure volts to the navpod's screen. I wanted to accomplish a few things with the next iteration of the navpod dash design:

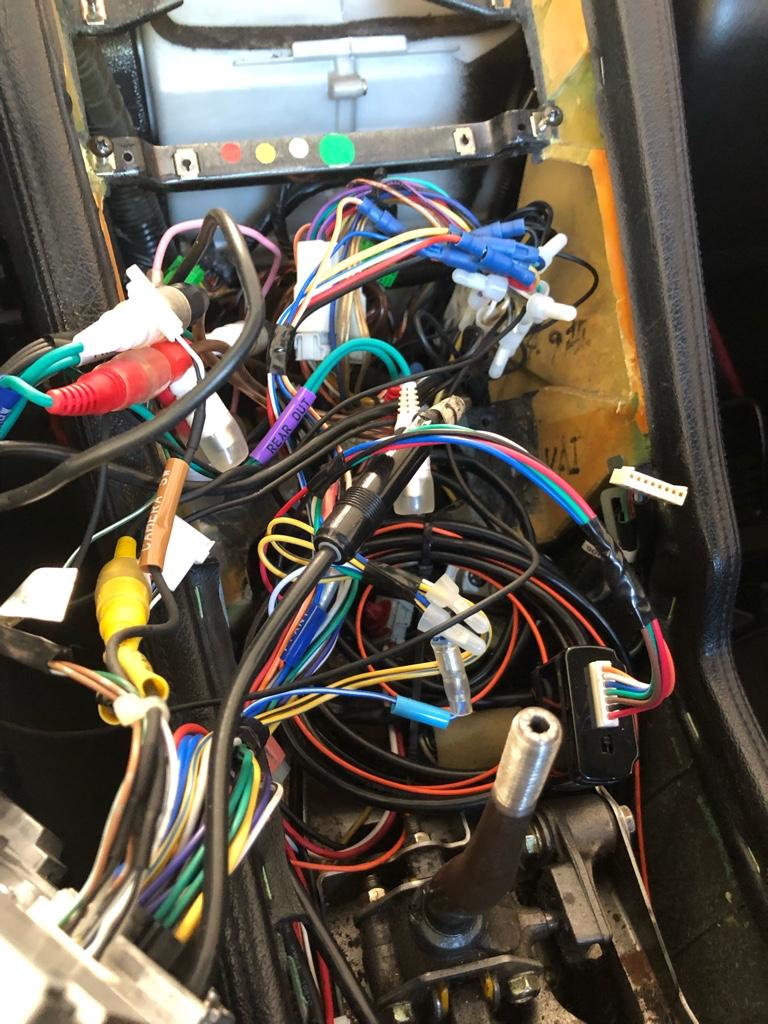
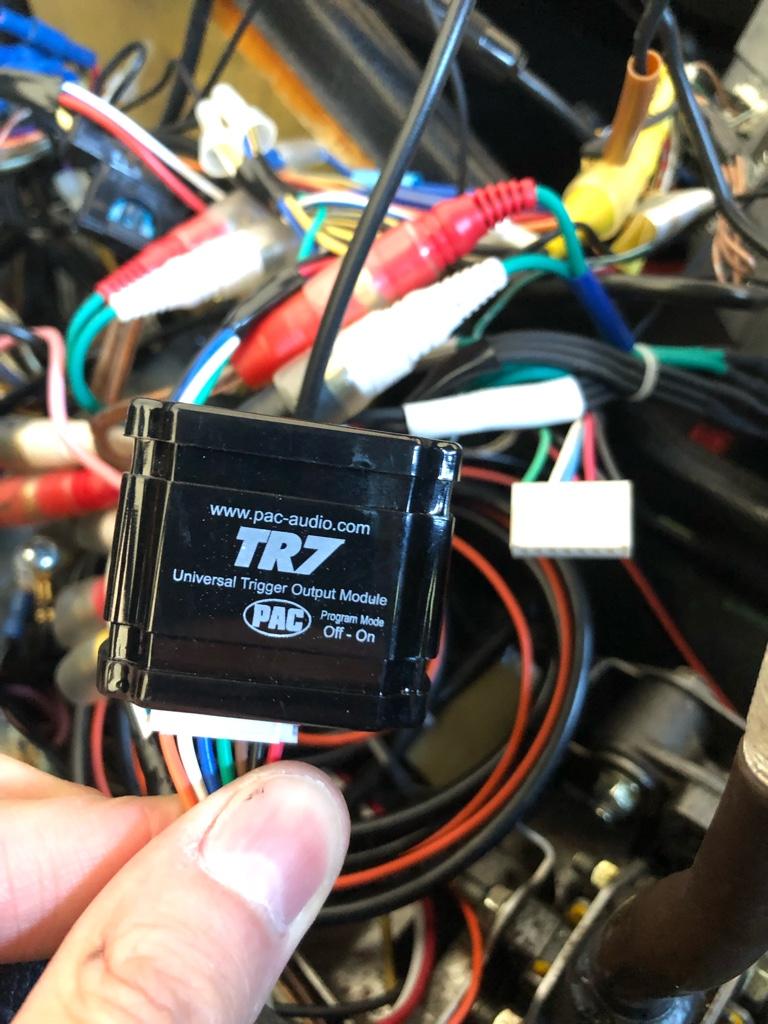
* Show the oil pressure & MAP signals. Currently these are the metrics the pillar gauges are displaying. If these were on the navpod, I can totally remove the pillar gauges, which would be nice. They have their own control box which doesn't fit anywhere, and has its own wiring nest.
* Room for oil temp and fuel pressure.
* I generally wanted everything to have a chart. It's tough to watch all the metrics in the moment, so nice to see if there are any anomalies
* I want to see all the things, but still keep it reasonably un-cluttered

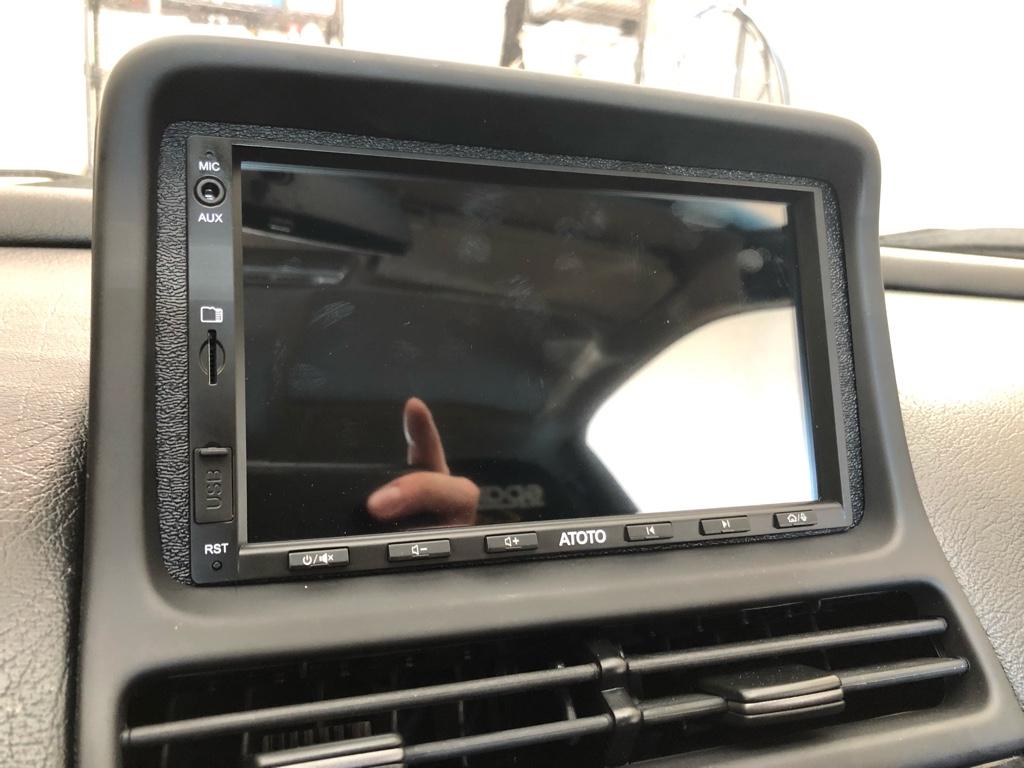
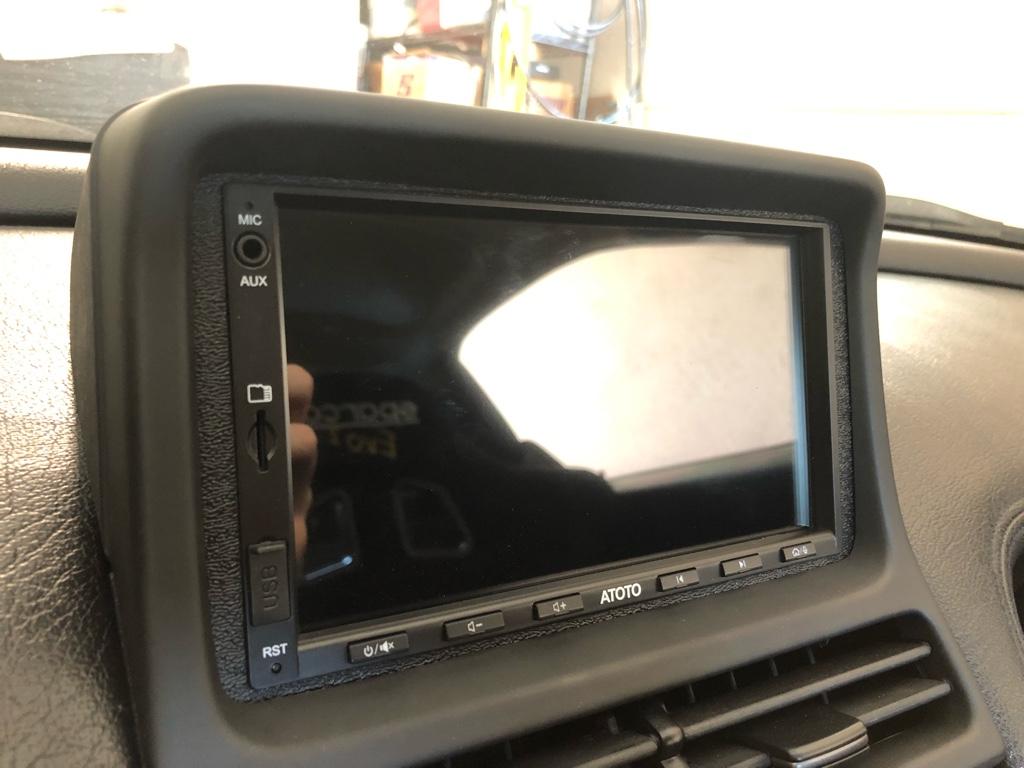
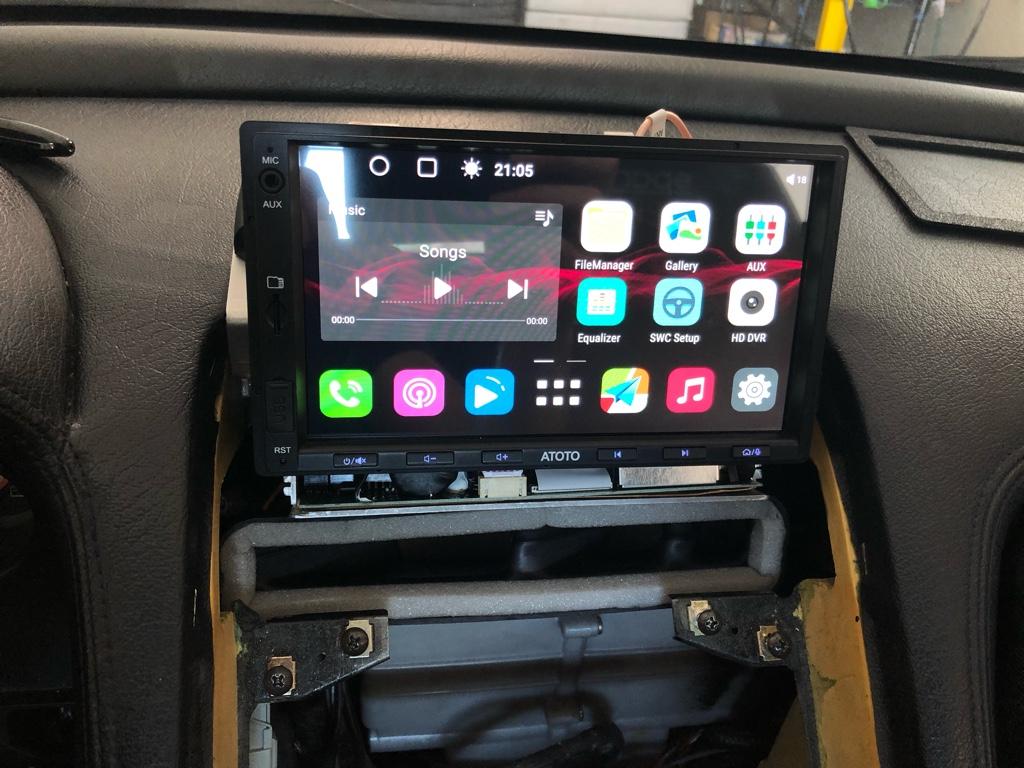
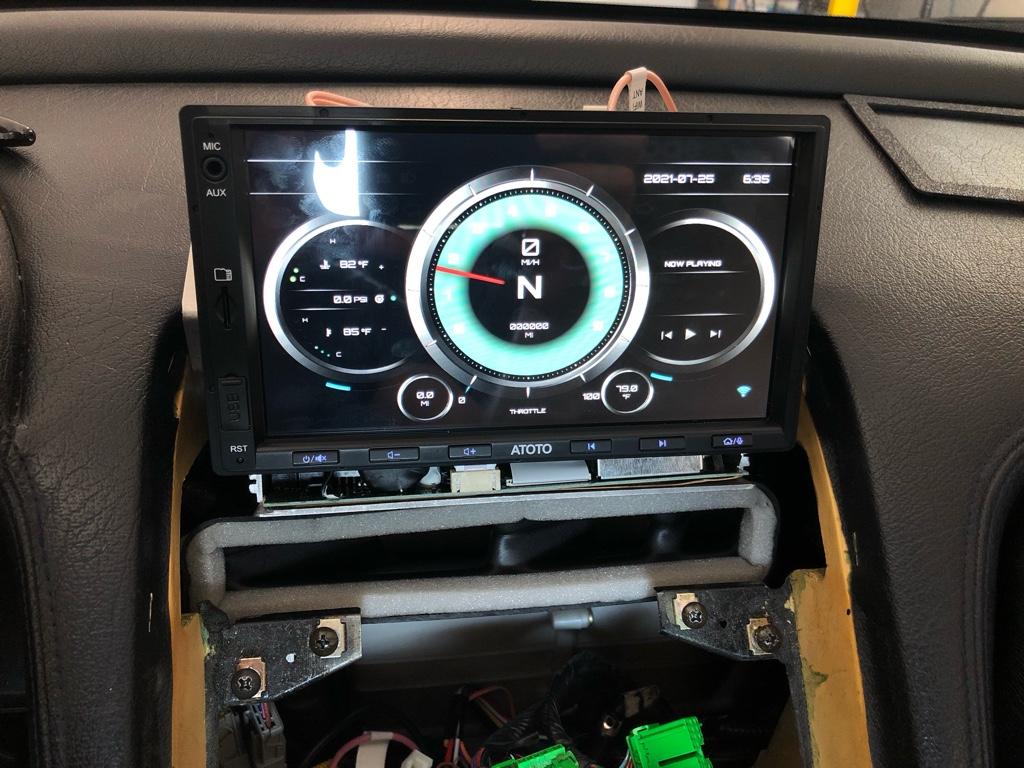
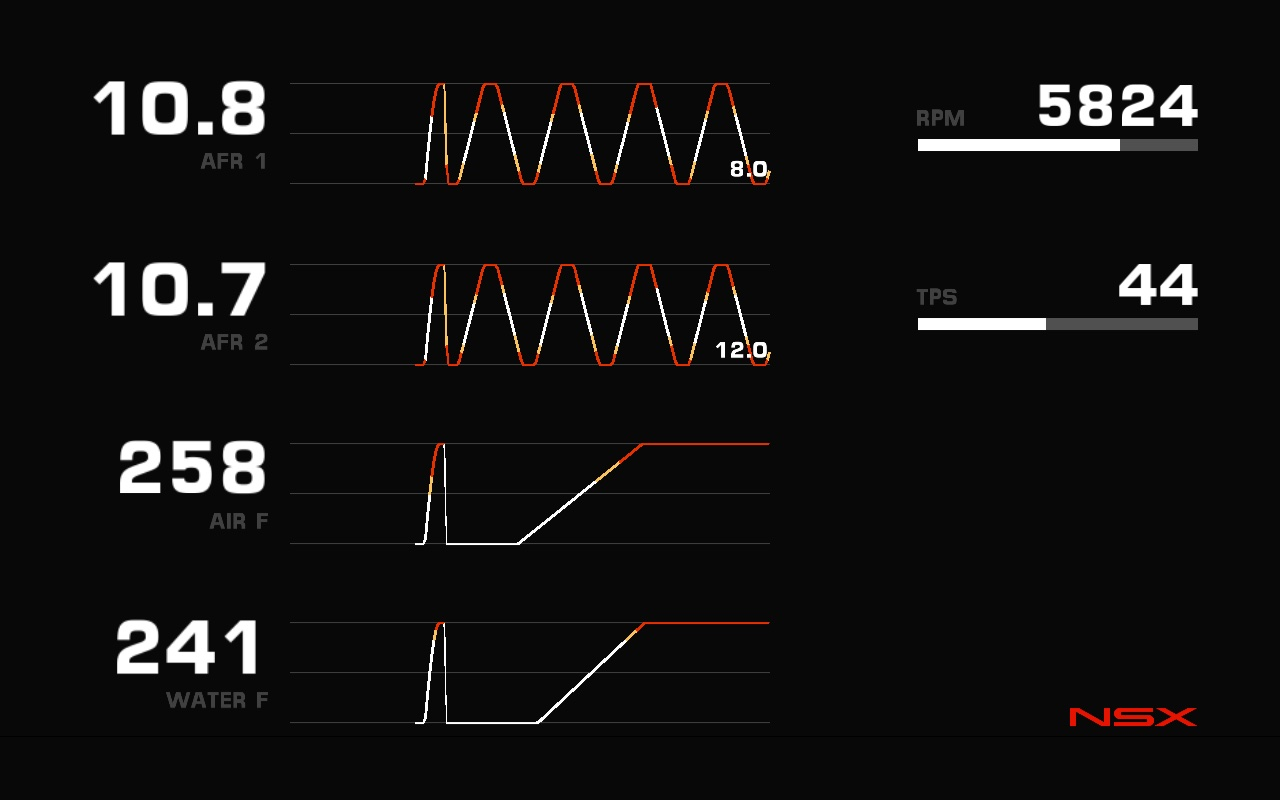
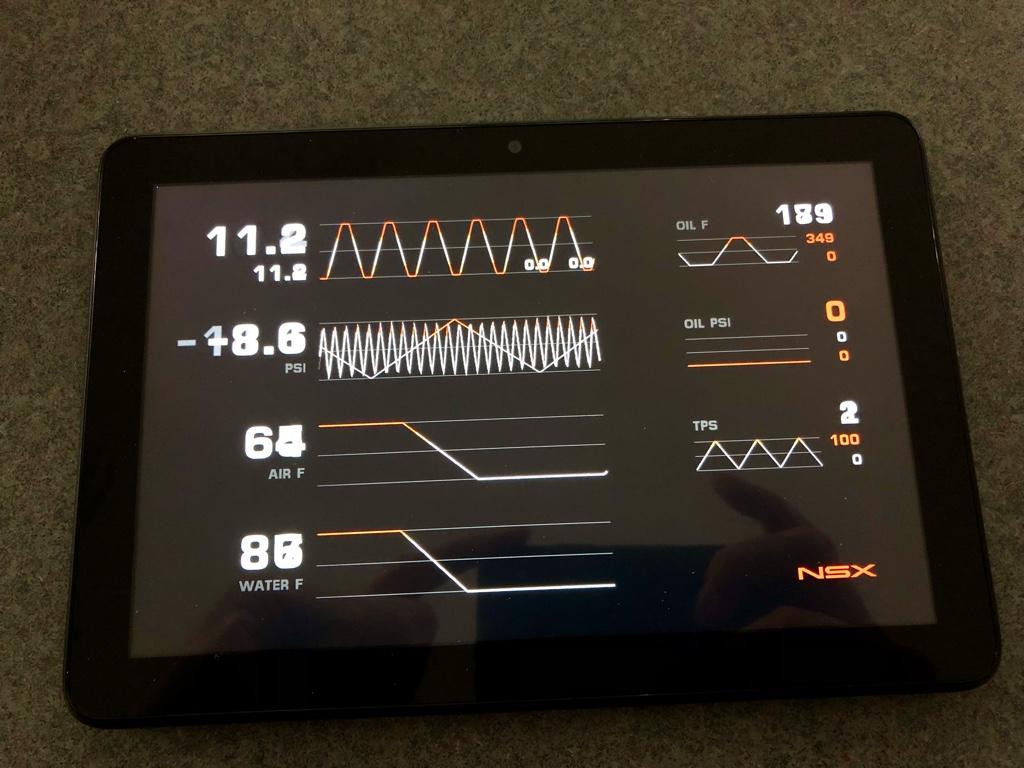
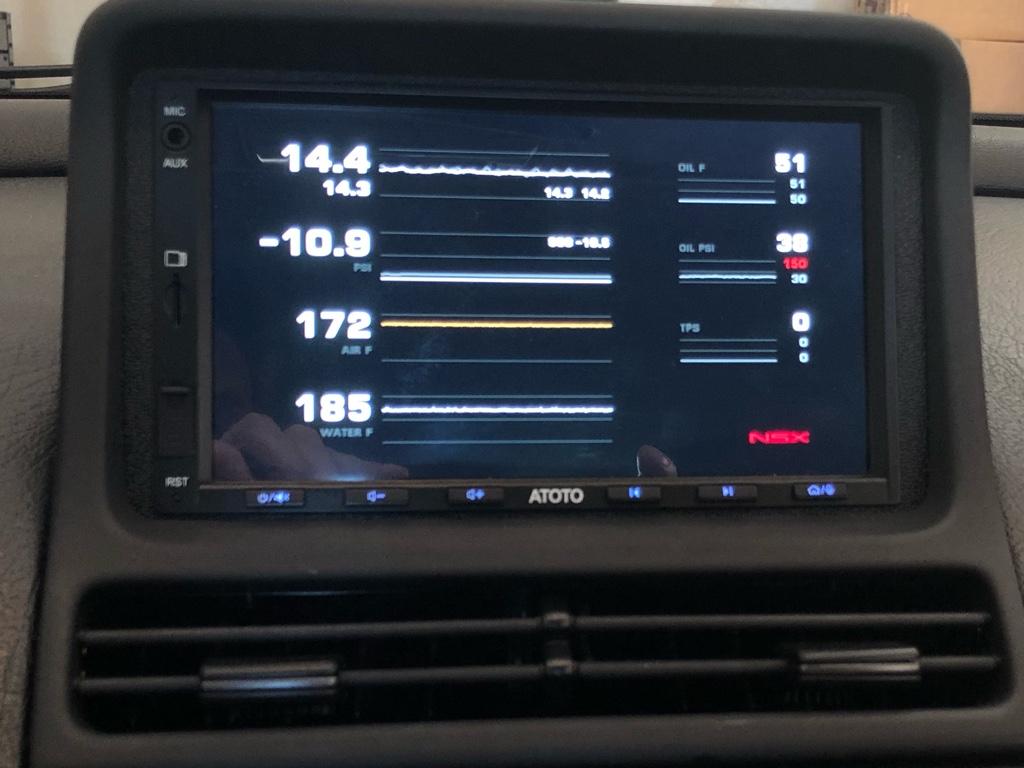
Well, this is what I came up with. I showed it to my dad and he was like, um, is it a space shuttle? I mean, yep. The downside is I only have really hasty, crappy photos of it. It's hard to get a good photo cause it's so bright.

1bc291ba5a5b8c109ff072088b0761f8.jpg


It may be a bit much: overlaid charts, mins and maxes, and literally 4 different AFR metrics (digital and analog for both front and rear). We'll see what I pay attention to and cull later.

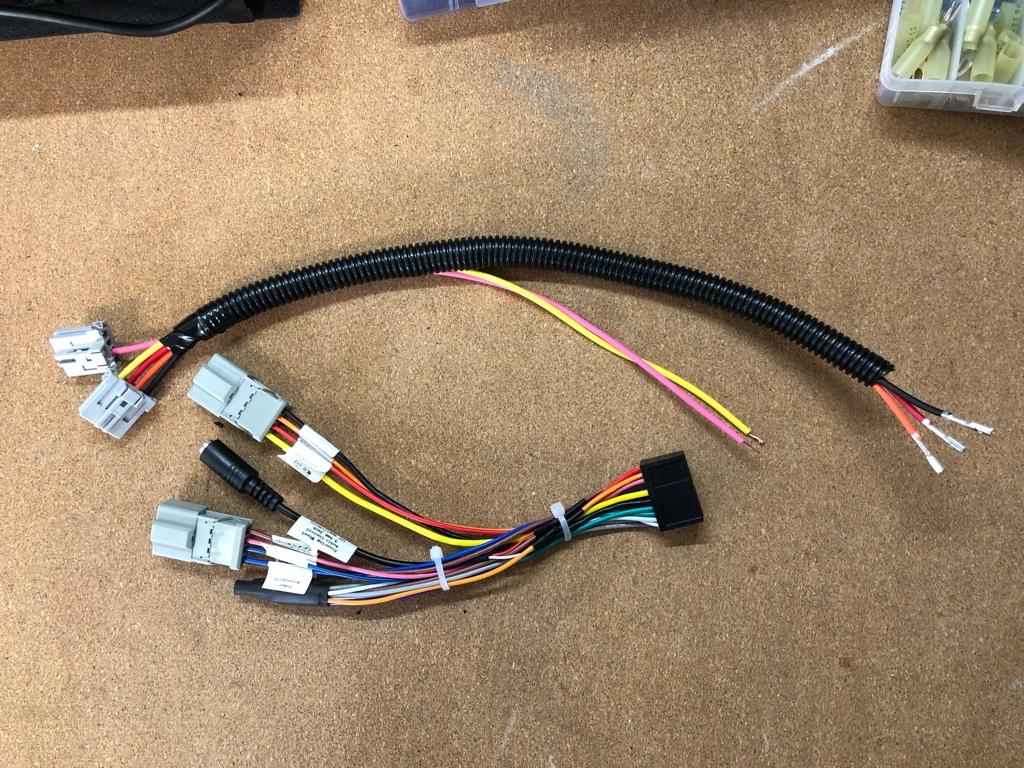
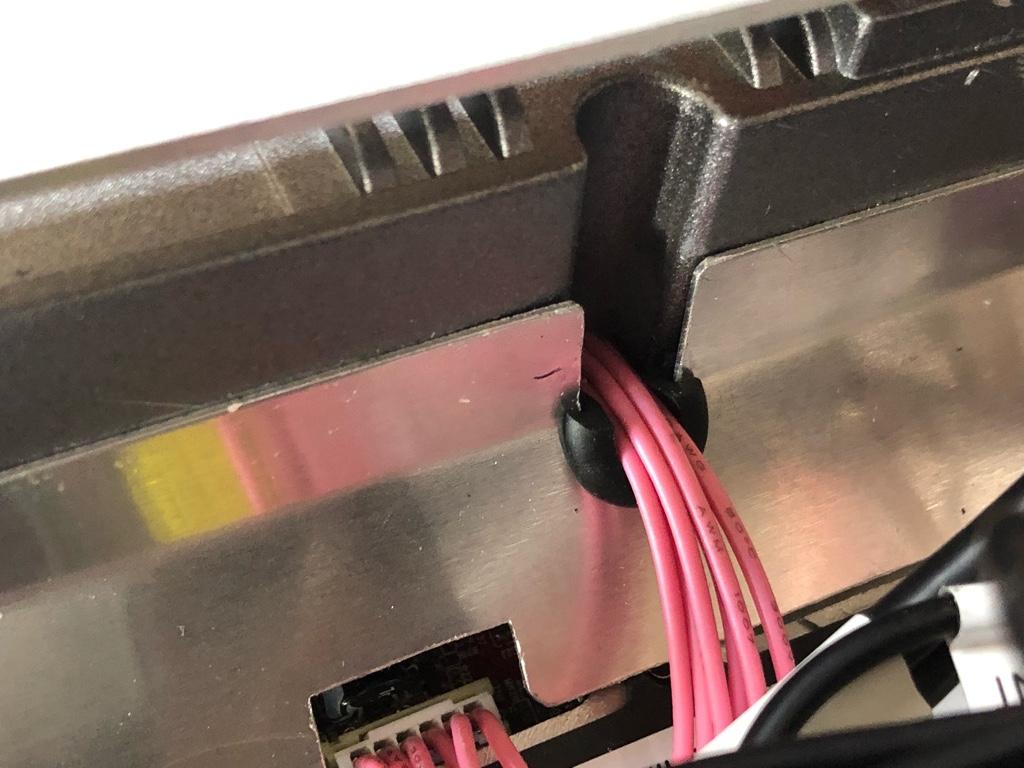
I ran the sensor through the Throttle Angle signal pathway into the D8 ECU pin. It's super nice because I don't need to run a single new wire. I made a little extension harness, then just plugged it in.

The ECU's available open inputs have the same issue I had with the TPS: they are crazy noisy, so that sucks. Fortunately there is a smoothing function in RealDash. Unfortunately, it does not work on min/max functions, so max oil pressure always shows 150psi.

94ab8ac7578baaf3086dce763d84d4e9.jpg


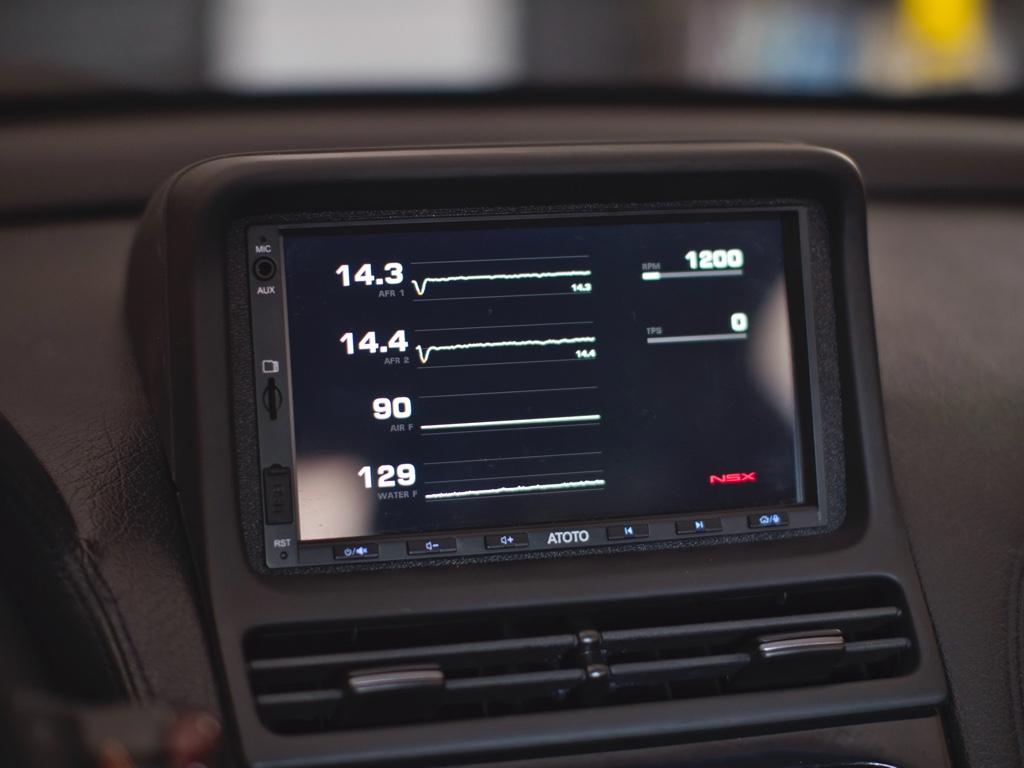
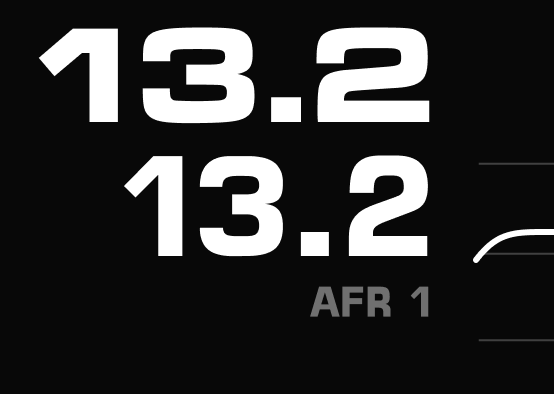
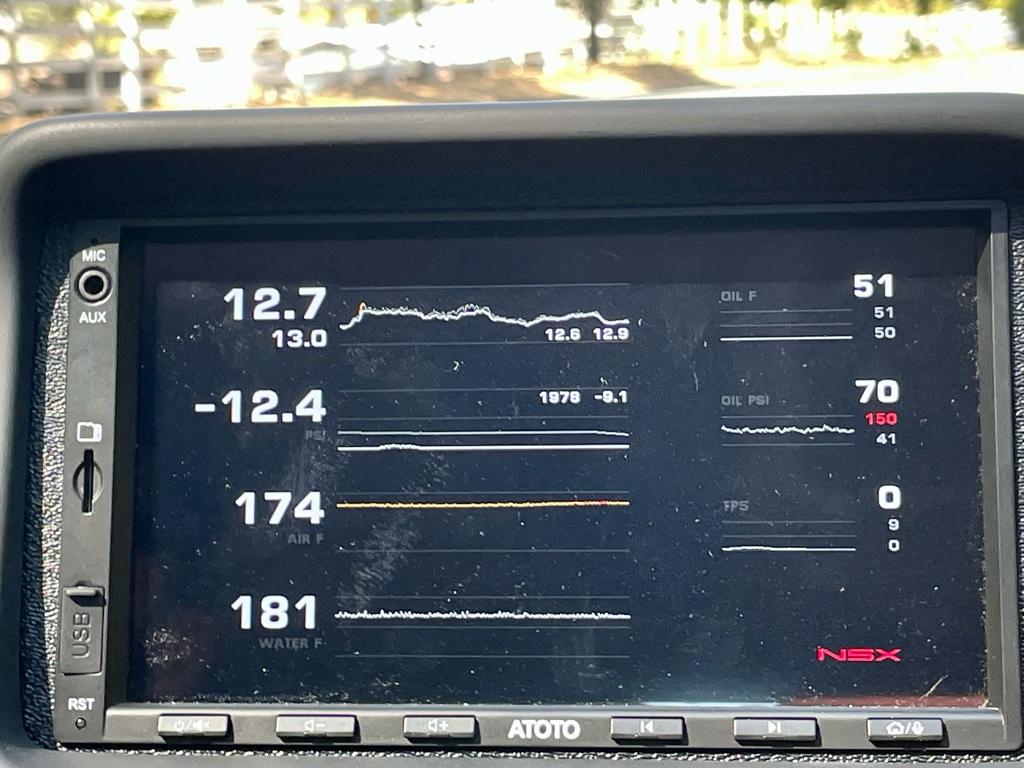
You can even read it in full-sun! This was a 100deg day. Air temps are high! Turns out it runs a little rich while engine braking under 2k.....

ca8c070dc256dd50202bbdc4f23b7f18.jpg


Data

Now I have 2 aftermarket sensors

1. The new one covered in this post, hanging off the side of the block
2. The pillar gauge sensor is teed off the pressure switch port, which is used for the oil light

Anyone run sensors in different locations? Curious what I should be expecting for normal operation. Any idea on pressure behaviors at different points in the block?

Generally, the new sensor seems to go through a larger range than the pillar gauge sensor, the new sensor on the block shows a higher pressure at high RPM than the pillar gauge, etc.
 
Last edited:
Just some points of data for you. This is based on recent memory. My idle oil pressure is usually around 20-25psi (alarm is <18psi). I idle my car high though around 950-1050rpm to smooth out the ITBs. Most cruising rpms i'm usually around 90psi. I'll collect better data next time I drive my car if you want. I can even data log which I haven't data logged for a while because those numbers have been consistent for a few years.

I do recall my oil pressure increased in general with the new oil pump housing and Toda oil pump gear.

Nice thanks for the info. Where is your sensor? Teed off the switch on the oil filter? Sandwich plate? Your data is consistent with my gauge sensor at the oil filter. The new one idles a little higher and reads over 100 at when the gauge reads 90. Though it’s tough to know exactly cause the input is pretty noisy.

If you did gather some more data, that’d be awesome, even if just by eye. I’ll also get some better data next time I go out and post it here..
 
[MENTION=36953]bogle[/MENTION], if you're constantly fighting noise on your input pins, does it make sense at some point to go to something like an Infinity or Haltech? It would drive me nuts to spend so much time fabbing up the amazing stuff you've done only to have it not work right because of an essentially un-fixable hardware issue.
 
Last edited:
Back
Top