I have been considering removing the engine cover for quite some time now and the main cocerns that had so far kept me from taking it off have been:
1) UV radiation damage to the rubber and plastic parts
2) Vibration of the engine hatch, especially over rough roads
3) Possibility of water gaining access to the engine when washing the car (not driven in the rain). This last was the least of the considerations.
4) Doing something about the infamous "milk jug" aka coolant bottle.
After doing my due research and asking questions of all the helpful people here who know far more about the car than I do, I finally proceeded with the task.
>>Removing the engine cover was no problem whatsoever.
Four size 10mm hex screws were removed without difficulty and off came the engine cover. It weighed in at about 14 lbs and not the 15 that it is usually quoted as weighing.
Time: 3 minutes
Cost: $0
I closed the hatch and noticed three things immediately.
One, that the car looked more "exotic".
Two, that the hatch would likely rattle over rough surfaces.
Three, that something needed to be done to the glaring big white water coolant bottle.
>>First, I applied several layers of 303 Aerospace Vinyl/plastic/rubber protectant [http://www.detailersparadise.com/_System/_AdvancedStore/ProductDetail.asp] (that is supposed to block 100% of UV rays with regular use) to everything that was rubber, plastic or vinyl. I bought it from Detailers Paradise, you can buy it anywhere you like.
Time: 15 minutes
Cost: about $24 shipped
>>Next, I painted the coolant bottle without removing it from the car.
I unscrewed the top two 10mm hex screws at 9 o clock and 1 o clock (positions as viewed from the back of the car). Then I inserted large paper sheets around the bottle and carefully sprayed the bottle with a very useful and relatively new Plastic Spray(Krylon Fusion Plastic Paint....requires no prep, primer etc.) [http://www.dickblick.com/zz014/11/products.asp?param=0&ig_id=6372]. I picked up a spray can for about $5 from Autozone, you can get it from anywhere you please including the above link.

Please ignore the "smudges" on the bottle....artifact from the glossy shine.
Different colors are avialable for the Krylon fusion paint.
Time: 20 minutes
Cost: $5
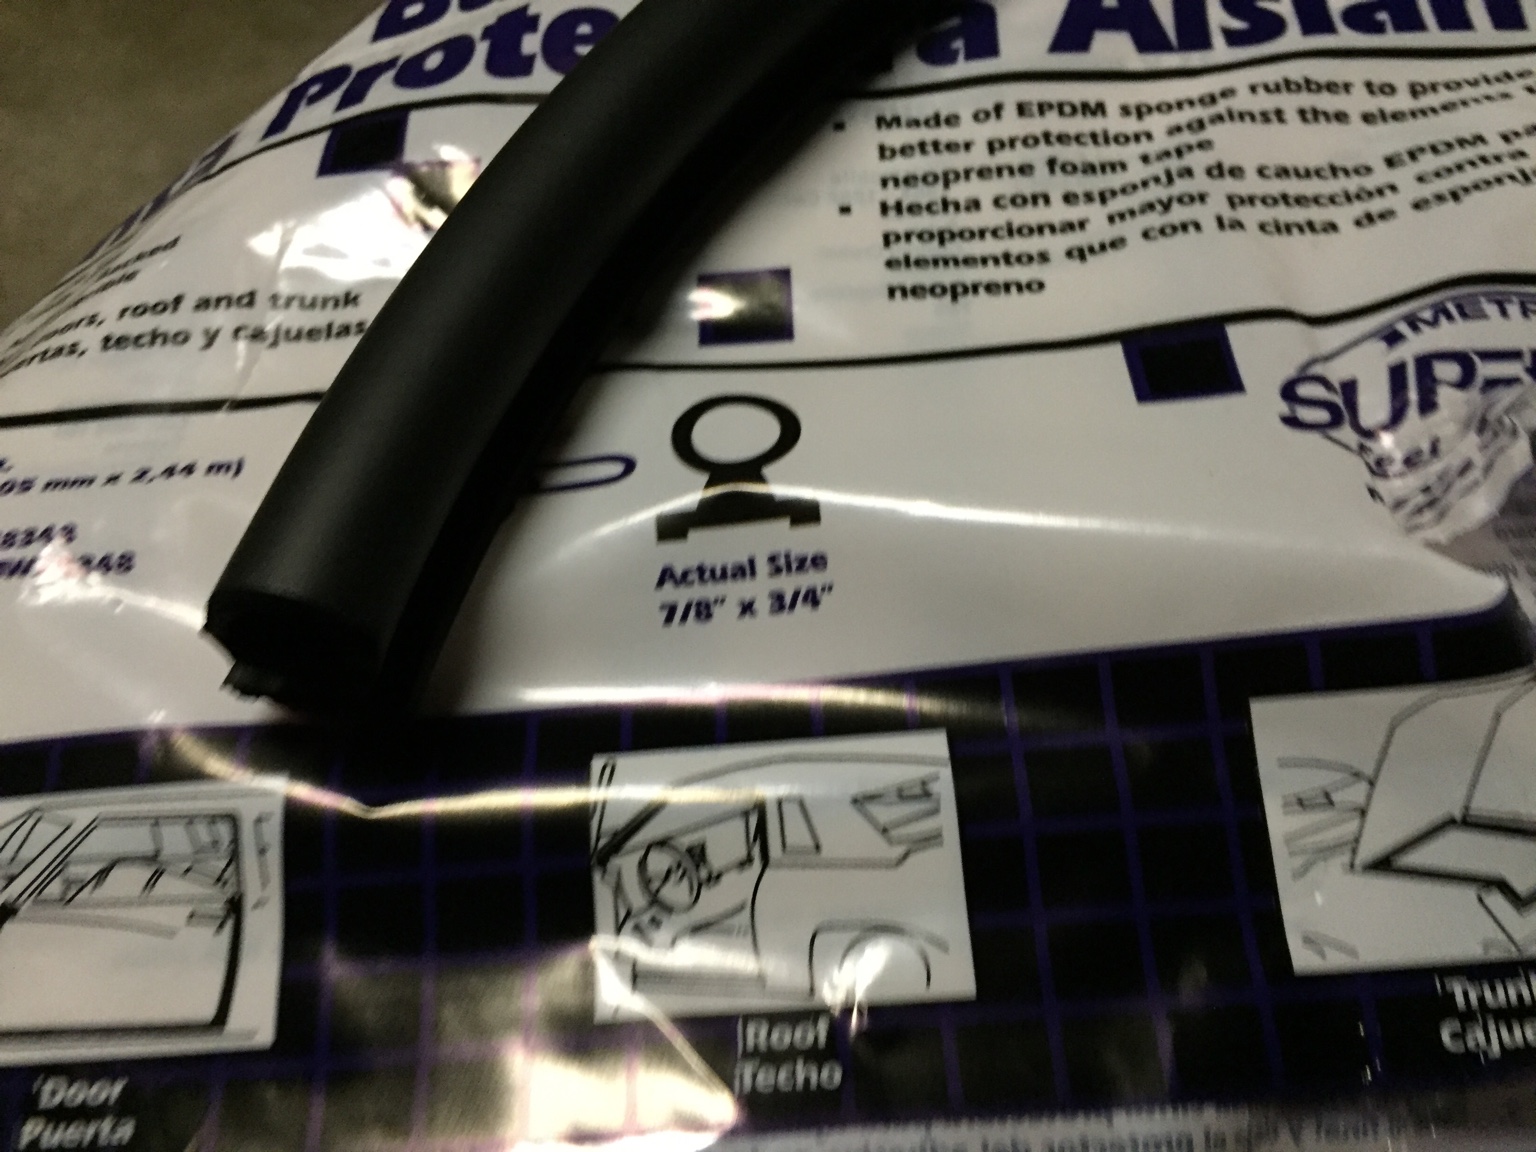
>>Now the little matter of the slightly vibration prone hatch (Note: not all cars that have the engine cover removed will have a vibrating hatch as some are "tighter" than the others. Also, one can apparently adjust the hatch latch, I did not, which can reduce the vibration, but I was also thinking of making the hatch as water resistant as before, so I did not go that route.
I purchased weather stripping from Autozone for this purpose.


The orange strip on the bottom is removed to expose a very strong adhesive strip that sticks very well. The weather strip is well made and very soft. It was applied as appears on the pictures below.
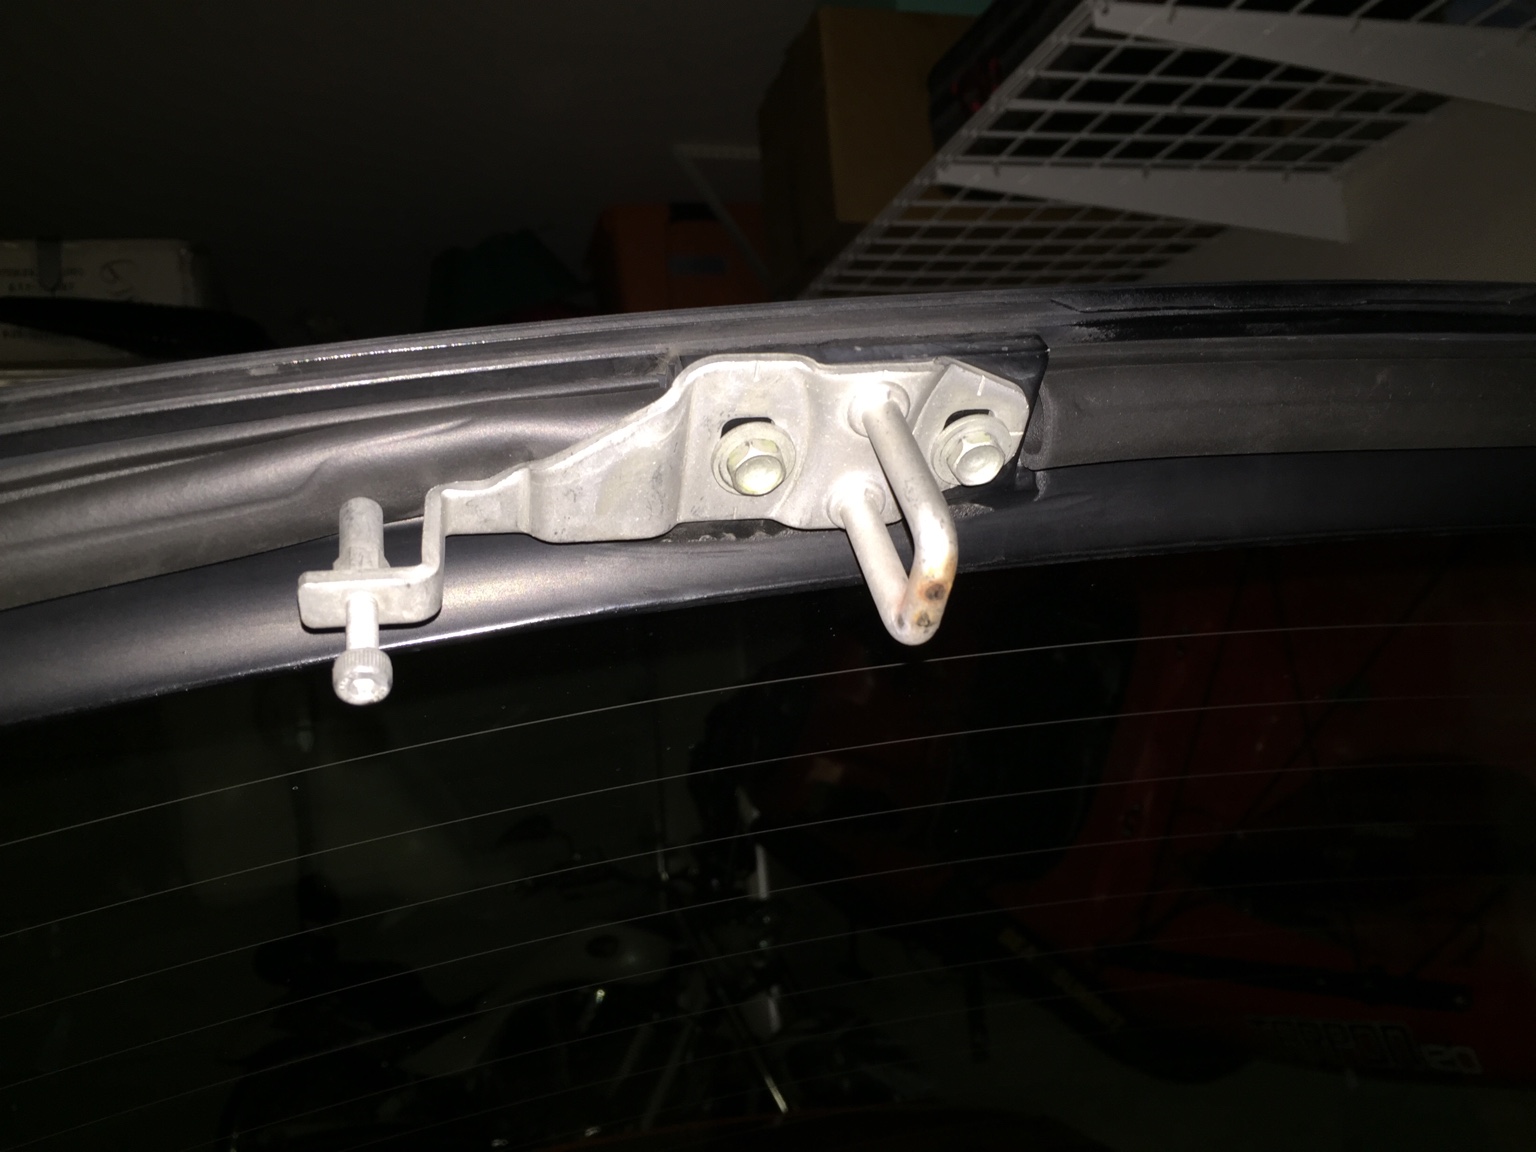
Left side

Right side

and the bottom Right and left sides (overlaps with the hatch strip only about 1/2") when the hatch is closed:


Closing the hatch, I felt good. It was tight and secure and required the same gently push at the lower mid portion as before removing the engine cover.
Time: 20 minutes
Cost: $16 including Tax
I finished last night and today with a bright sun up, it was time to test the job.

Starting the car, I felt that I could hear the engine growl just a bit more than before.")
Then I purposefully went a bit faster than usual over a bit of rough road and a train rail. NO VIBRATION OR RATTLING!
Reaching open road, I opened her up and it was clear that the wonderous NSX engine sounds were more clearly audible than before without becoming a nuisance. A definite plus!
After about 45 minutes of spirited driving I came back home for the final test.
With the exhaust crackling and twanging, I touched the glass hatch cover, I felt it to be no more warm than before removal of the engine cover....at all. If anything the front windshied felt warmer.
Touching the newly painted coolant bottle, it was clear that the paint was holding up perfectly. I could not rub off any of it even when I tried. It was hard and glossy, just as promised by the spray can. The weather stripping was working perfectly and I closed the hatch gently as usual with a slight push and it seated just as before.
....................................
Total Cost of the mini project>> about $50
Total Time: about 90 minutes including clean up and pic taking
Very well worth the effort, I feel.
....................................
I have long wanted to do this little project. I think it makes the car look very good and lightens it by about 14 lbs to boot. During the test ride I could see that people around me were admiring the exposed engine.
I hope this is of some little use to anyone who has been contemplating something similar.
1) UV radiation damage to the rubber and plastic parts
2) Vibration of the engine hatch, especially over rough roads
3) Possibility of water gaining access to the engine when washing the car (not driven in the rain). This last was the least of the considerations.
4) Doing something about the infamous "milk jug" aka coolant bottle.
After doing my due research and asking questions of all the helpful people here who know far more about the car than I do, I finally proceeded with the task.
>>Removing the engine cover was no problem whatsoever.
Four size 10mm hex screws were removed without difficulty and off came the engine cover. It weighed in at about 14 lbs and not the 15 that it is usually quoted as weighing.
Time: 3 minutes
Cost: $0
I closed the hatch and noticed three things immediately.
One, that the car looked more "exotic".
Two, that the hatch would likely rattle over rough surfaces.
Three, that something needed to be done to the glaring big white water coolant bottle.
>>First, I applied several layers of 303 Aerospace Vinyl/plastic/rubber protectant [http://www.detailersparadise.com/_System/_AdvancedStore/ProductDetail.asp] (that is supposed to block 100% of UV rays with regular use) to everything that was rubber, plastic or vinyl. I bought it from Detailers Paradise, you can buy it anywhere you like.
Time: 15 minutes
Cost: about $24 shipped
>>Next, I painted the coolant bottle without removing it from the car.
I unscrewed the top two 10mm hex screws at 9 o clock and 1 o clock (positions as viewed from the back of the car). Then I inserted large paper sheets around the bottle and carefully sprayed the bottle with a very useful and relatively new Plastic Spray(Krylon Fusion Plastic Paint....requires no prep, primer etc.) [http://www.dickblick.com/zz014/11/products.asp?param=0&ig_id=6372]. I picked up a spray can for about $5 from Autozone, you can get it from anywhere you please including the above link.
Please ignore the "smudges" on the bottle....artifact from the glossy shine.
Different colors are avialable for the Krylon fusion paint.
Time: 20 minutes
Cost: $5
>>Now the little matter of the slightly vibration prone hatch (Note: not all cars that have the engine cover removed will have a vibrating hatch as some are "tighter" than the others. Also, one can apparently adjust the hatch latch, I did not, which can reduce the vibration, but I was also thinking of making the hatch as water resistant as before, so I did not go that route.
I purchased weather stripping from Autozone for this purpose.
The orange strip on the bottom is removed to expose a very strong adhesive strip that sticks very well. The weather strip is well made and very soft. It was applied as appears on the pictures below.
Left side
Right side
and the bottom Right and left sides (overlaps with the hatch strip only about 1/2") when the hatch is closed:
Closing the hatch, I felt good. It was tight and secure and required the same gently push at the lower mid portion as before removing the engine cover.
Time: 20 minutes
Cost: $16 including Tax
I finished last night and today with a bright sun up, it was time to test the job.
Starting the car, I felt that I could hear the engine growl just a bit more than before.
Then I purposefully went a bit faster than usual over a bit of rough road and a train rail. NO VIBRATION OR RATTLING!
Reaching open road, I opened her up and it was clear that the wonderous NSX engine sounds were more clearly audible than before without becoming a nuisance. A definite plus!
After about 45 minutes of spirited driving I came back home for the final test.
With the exhaust crackling and twanging, I touched the glass hatch cover, I felt it to be no more warm than before removal of the engine cover....at all. If anything the front windshied felt warmer.
Touching the newly painted coolant bottle, it was clear that the paint was holding up perfectly. I could not rub off any of it even when I tried. It was hard and glossy, just as promised by the spray can. The weather stripping was working perfectly and I closed the hatch gently as usual with a slight push and it seated just as before.
....................................
Total Cost of the mini project>> about $50
Total Time: about 90 minutes including clean up and pic taking
Very well worth the effort, I feel.
....................................
I have long wanted to do this little project. I think it makes the car look very good and lightens it by about 14 lbs to boot. During the test ride I could see that people around me were admiring the exposed engine.
I hope this is of some little use to anyone who has been contemplating something similar.