One of the things I always wanted to do was upgrading the brakes of my NSX.
I like to drive the car fast and there have been moments that I wasn't really satisfied with the OEM brakes. When I upgraded the OEM brakes, the first thing I did was upgrade the brake-pads from OEM to the Axxis Ultimate pads, then using a higher grade fluid and mounting stainless steel brake lines.
After that I bought a set op the Stoptech Aerorotors in the OEM size. These modifications brought the braking capacity of the NSX to a higher level and when used correctly the brakes performed excellently, not only on the street but on the occasional track day as well.
However, when doing brake-testing I found out it still took a while before the brakes reached their maximum grip when braking hard. So I searched for a way to improve my brakes further.
I decided to go for the upgrade kits from Racing Brake. I ordered a set of the two-piece big-brake kit with the 324x28mm rotor for the front and for economy reasons the one-piece rotor kit in the 303x23mm 1997+ OEM size for the rear. To supplement this I also bought a set of the Hawk HP+ pads to use as well.
Together with a friend, who admittedly did most of the work, the new brakes were fitted last week.
First, the car was lifted. I took some pictures with the old brakes for comparison, first the front with the Stoptech rotors and the rear with the OEM rotors. The original brake rotor sizes are 282x28mm in front and 282x21mm for the rears.


We started with the rear brakes because of the hand brake there. This is what the old brake rotor looked like.

The hand brake is protected by a plastic caliper shield held with two 8mm bolts. Remove this cap. Then remove the split locking pin and then push the clevis pin holding the hand brake cable upwards and out. This is a bit tricky because there is very little space to remove the clevis pin. Then remove the cable clip and pull the hand brake cable back and out of the way. Make sure you don't bend it.
Remove the two 10mm bolts holding the caliper just like you would when changing your brake pads. Then take of the caliper and hang it by a wire so the brake line will not be unnecessarily stressed.
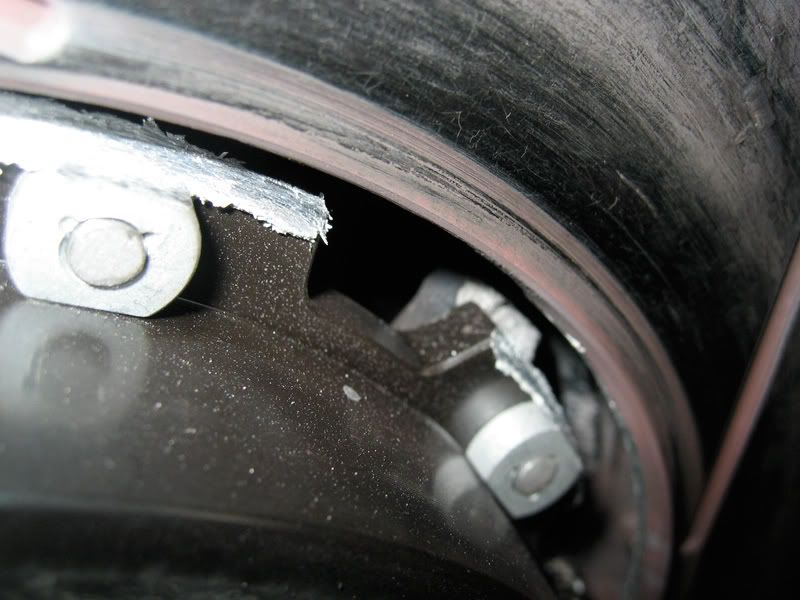
Remove the original brake caliper bracket. It is held with two 12mm bolts like shown in the following picture.

Remove the bolts and then the bracket. You will have to remove the sliding pin and the rubber pin boot and put them on and in the new bracket. This turned out to be very easy. The old and the new bracket can be seen here with the new and larger bracket on the right.

The rotor is fixed with two locking screws. These cannot be removed with an ordinary screwdriver, you will have to use an impact screwdriver to get them loose. However, in my case both had to be drilled out because the impact screwdriver would just destroy the screw heads. Drill out the head and the rotor will then come straight. The remaining part of the locking screw was then easy to remove.

With the old rotor off, it was easy to see the difference between the 282x21mm and the 303x23mm size.

You will need a steel brush to remove the rust of the brake hub to make sure the new rotor will mount flush with the hub. Then, put on the rotor and, if you want to, fix the rotor with two (new) locking screws.
Then simply bolt on the new bracket.

At first I thought getting the caliper on would be difficult because the new rotor is thicker than the old one by 2mm, especially because I was also using new pads. Before mounting the caliper you will have to turn in the brake piston all the way. Then place the new brake pads in their respective slots together with the brake shims. Use a little bit of grease between the pads and the shims. Then mount the caliper with its two bolts and test if the rotor can turn freely without touching anything but the brake pads.

Reconnecting the hand brake turned out to be the hardest part of the rear job. There is very little space to get the clevis pin into its proper hole especially since you have to keep the hand brake lever under tension to get it in. I think it took as close to twenty minutes to get the pin in. An extra pair of hands comes in very handy here. Once it's in of course, the rest is easy. Make sure all bolts are tightened with the correct torque and then put the caliper shield back on.
Next step was to replace the front rotors which were, as said before, the Stoptech Aerorotors. I can highly recommend these rotors for those who do not want to do an upgrade in rotor size. For the rest, the procedure for the front rotors is even easier than for the rears because there is no hand brake.
With both the caliper and bracket removed, this is what the Stoptech rotor looked like. The red stuff is a little left over spray paint that I used to touch up the brakes. Removing the rotors was relatively easy because the locking screws were not as tight as the rear ones.

Here are the old OEM brackets and the new Racing Brake ones. It is easy to see the increase in width for the new one. Please note, I had painted the brackets red in advance, when delivered they had a black finish.

Remove the sliding pins and boots from the old brackets and put them on the new ones. I was actually a little surprised to see how well these parts looked because they have to stand a lot of heat under heavy braking but both parts looked and felt just fine.

With the OEM sized rotors removed the difference in size with the new Racing Brake 324x28mm rotors is very obvious to see. If you take a close look at the Racing Brake rotor you can see the open space between the rotor and the hub. This should make the cooling effect of the internal curved vanes even more efficient.

Again, remove the rust on the hub with a steel brush and put the rotor on. The bigger 2-piece rotors do not come with holes for the locking nuts which was a little surprise. So, for testing the fit, just put on two wheel nuts on the stubs to hold the rotor tight. Putting on the bracket is simple down the two 12mm bolts.
Now comes the more difficult part. Because the rotor is so much larger than the OEM sized rotor, the caliper will come in contact with the rotor on both the top and lower edge. We used a Dremel tool and file to remove some of the excess material from the caliper to make the caliper fit.

Also, the retainer clips and pad spring can also hit the rotor. The pad spring can be bend a little backwards with a pair of pliers. Putting on the caliper then is easy. Don't forget to push back the pistons though. Since I did already have the stainless steel brake lines I did not need the SS brake lines that were supplied with the kit. However, the lines were a very tight fit and together with the thick, new Hawk pads made fitting the caliper not that easy. The final result looks like this.

The last step of course was putting on the wheels. Please make sure you clean the brakes with brake cleaner and remove all the old brake dust as much as possible. With the wheels on, the final results looks like this.


The new brakes fill the wheel space nicely, don't you agree ??
Then, of course, came the test drive. Immediately we noticed a loud and strange noise from the front brakes. It sounded like a small siren. First, we thought it was just cause by the retainer clips but when we checked, we found that the edge of the front calipers would still touch the rotor. So, the car was jacked up again, the wheels removed and both calipers were taken off. With a grinding tool we had to remove quite a lot material from upper and lower edge from the calipers to make sure they would not touch the rotor again. We then also took of the retainer clips. This stuff is made from thin, hard and flexible spring steel. We cut of the edge in the middle with pliers and then the fit was perfect. We then put everything back on. This time, there was no noise and the car braked fine.
We then cleaned up everything. Working with the brakes leaves a lot of brake dust which is not very healthy stuff so take a little care with that.
Now, of course, you will all want to know how the new brakes perform.
Well, after one week of driving all I can see that they are SIMPLY AMAZING. Mind you, I have not done the final testing yet, but the difference with OEM is more than I expected. The Hawk HP+ pads probably play their part as well of course, but even then, the results are even better than I expected.
With these brakes (and pads) it is simply SO easy to lock up the front wheels and get the ABS hitting in. With the old brakes, even with the Axxis Ultimate pads, Stoptech rotors and SS-lines, I had to use more pedal pressure to get some firm decelleration. Now, I get really instant response with much less pedal pressure. Firm braking at 100 mph immediately results in squealing tires approaching their adhesion limit. When I am sure the pads have been bedded in (yes, I followed the procedure but have to wait for better weather) I will do new brake testing and post the results soon.
For those who are wondering how the brake balance is, well, the smaller rear rotors so far don't seem to make that much of a difference but I have not reached my final answer on that yet.
For those who would like some extra braking potential, I highly recommended this upgrade from Racing Brake.
Or course, I put all the parts on a scale that. You will have to remember that the old rotors have seen some use so they are lighter than bright and shiny new ones.
The removed stuff:
Front: Stoptech 2-piece Aerorotors - 282x28mm - 5.4kg - 11.9 lbs each
Front: OEM brackets - 1.35kg - 2.98lbs each
Rear: OEM rotors - 282x21mm - 5.1kg - 11.24 lbs each
Rear: OEM brackets - 1.17kg - 2.58lbs each (Actually, there was more weight difference between the left/right OEM brackets than with the new Racing Brake brackets).
The new stuff:
Front: Racing Brake 2-piece rotor - 324x28mm - 6.9kg - 15.2 lbs each
Front: Racing Brake brackets - 1.43kg - 3.15lbs each
Rear: Racing Brake 1-piece rotor - 303x23mm - 6.2kg - 13.7 lbs each
Rear: Racing Brake brackets - 1.25kg - 2.76lbs each
So, in total, my unsprung weight has increased by 5.5kg or 12.2lbs which is the only negative I can think of right now. Now, I really need some lightweight wheels in the future.
I like to drive the car fast and there have been moments that I wasn't really satisfied with the OEM brakes. When I upgraded the OEM brakes, the first thing I did was upgrade the brake-pads from OEM to the Axxis Ultimate pads, then using a higher grade fluid and mounting stainless steel brake lines.
After that I bought a set op the Stoptech Aerorotors in the OEM size. These modifications brought the braking capacity of the NSX to a higher level and when used correctly the brakes performed excellently, not only on the street but on the occasional track day as well.
However, when doing brake-testing I found out it still took a while before the brakes reached their maximum grip when braking hard. So I searched for a way to improve my brakes further.
I decided to go for the upgrade kits from Racing Brake. I ordered a set of the two-piece big-brake kit with the 324x28mm rotor for the front and for economy reasons the one-piece rotor kit in the 303x23mm 1997+ OEM size for the rear. To supplement this I also bought a set of the Hawk HP+ pads to use as well.
Together with a friend, who admittedly did most of the work, the new brakes were fitted last week.
First, the car was lifted. I took some pictures with the old brakes for comparison, first the front with the Stoptech rotors and the rear with the OEM rotors. The original brake rotor sizes are 282x28mm in front and 282x21mm for the rears.
We started with the rear brakes because of the hand brake there. This is what the old brake rotor looked like.
The hand brake is protected by a plastic caliper shield held with two 8mm bolts. Remove this cap. Then remove the split locking pin and then push the clevis pin holding the hand brake cable upwards and out. This is a bit tricky because there is very little space to remove the clevis pin. Then remove the cable clip and pull the hand brake cable back and out of the way. Make sure you don't bend it.
Remove the two 10mm bolts holding the caliper just like you would when changing your brake pads. Then take of the caliper and hang it by a wire so the brake line will not be unnecessarily stressed.
Remove the original brake caliper bracket. It is held with two 12mm bolts like shown in the following picture.
Remove the bolts and then the bracket. You will have to remove the sliding pin and the rubber pin boot and put them on and in the new bracket. This turned out to be very easy. The old and the new bracket can be seen here with the new and larger bracket on the right.
The rotor is fixed with two locking screws. These cannot be removed with an ordinary screwdriver, you will have to use an impact screwdriver to get them loose. However, in my case both had to be drilled out because the impact screwdriver would just destroy the screw heads. Drill out the head and the rotor will then come straight. The remaining part of the locking screw was then easy to remove.
With the old rotor off, it was easy to see the difference between the 282x21mm and the 303x23mm size.
You will need a steel brush to remove the rust of the brake hub to make sure the new rotor will mount flush with the hub. Then, put on the rotor and, if you want to, fix the rotor with two (new) locking screws.
Then simply bolt on the new bracket.
At first I thought getting the caliper on would be difficult because the new rotor is thicker than the old one by 2mm, especially because I was also using new pads. Before mounting the caliper you will have to turn in the brake piston all the way. Then place the new brake pads in their respective slots together with the brake shims. Use a little bit of grease between the pads and the shims. Then mount the caliper with its two bolts and test if the rotor can turn freely without touching anything but the brake pads.
Reconnecting the hand brake turned out to be the hardest part of the rear job. There is very little space to get the clevis pin into its proper hole especially since you have to keep the hand brake lever under tension to get it in. I think it took as close to twenty minutes to get the pin in. An extra pair of hands comes in very handy here. Once it's in of course, the rest is easy. Make sure all bolts are tightened with the correct torque and then put the caliper shield back on.
Next step was to replace the front rotors which were, as said before, the Stoptech Aerorotors. I can highly recommend these rotors for those who do not want to do an upgrade in rotor size. For the rest, the procedure for the front rotors is even easier than for the rears because there is no hand brake.
With both the caliper and bracket removed, this is what the Stoptech rotor looked like. The red stuff is a little left over spray paint that I used to touch up the brakes. Removing the rotors was relatively easy because the locking screws were not as tight as the rear ones.
Here are the old OEM brackets and the new Racing Brake ones. It is easy to see the increase in width for the new one. Please note, I had painted the brackets red in advance, when delivered they had a black finish.
Remove the sliding pins and boots from the old brackets and put them on the new ones. I was actually a little surprised to see how well these parts looked because they have to stand a lot of heat under heavy braking but both parts looked and felt just fine.
With the OEM sized rotors removed the difference in size with the new Racing Brake 324x28mm rotors is very obvious to see. If you take a close look at the Racing Brake rotor you can see the open space between the rotor and the hub. This should make the cooling effect of the internal curved vanes even more efficient.
Again, remove the rust on the hub with a steel brush and put the rotor on. The bigger 2-piece rotors do not come with holes for the locking nuts which was a little surprise. So, for testing the fit, just put on two wheel nuts on the stubs to hold the rotor tight. Putting on the bracket is simple down the two 12mm bolts.
Now comes the more difficult part. Because the rotor is so much larger than the OEM sized rotor, the caliper will come in contact with the rotor on both the top and lower edge. We used a Dremel tool and file to remove some of the excess material from the caliper to make the caliper fit.
Also, the retainer clips and pad spring can also hit the rotor. The pad spring can be bend a little backwards with a pair of pliers. Putting on the caliper then is easy. Don't forget to push back the pistons though. Since I did already have the stainless steel brake lines I did not need the SS brake lines that were supplied with the kit. However, the lines were a very tight fit and together with the thick, new Hawk pads made fitting the caliper not that easy. The final result looks like this.
The last step of course was putting on the wheels. Please make sure you clean the brakes with brake cleaner and remove all the old brake dust as much as possible. With the wheels on, the final results looks like this.
The new brakes fill the wheel space nicely, don't you agree ??
Then, of course, came the test drive. Immediately we noticed a loud and strange noise from the front brakes. It sounded like a small siren. First, we thought it was just cause by the retainer clips but when we checked, we found that the edge of the front calipers would still touch the rotor. So, the car was jacked up again, the wheels removed and both calipers were taken off. With a grinding tool we had to remove quite a lot material from upper and lower edge from the calipers to make sure they would not touch the rotor again. We then also took of the retainer clips. This stuff is made from thin, hard and flexible spring steel. We cut of the edge in the middle with pliers and then the fit was perfect. We then put everything back on. This time, there was no noise and the car braked fine.
We then cleaned up everything. Working with the brakes leaves a lot of brake dust which is not very healthy stuff so take a little care with that.
Now, of course, you will all want to know how the new brakes perform.
Well, after one week of driving all I can see that they are SIMPLY AMAZING. Mind you, I have not done the final testing yet, but the difference with OEM is more than I expected. The Hawk HP+ pads probably play their part as well of course, but even then, the results are even better than I expected.
With these brakes (and pads) it is simply SO easy to lock up the front wheels and get the ABS hitting in. With the old brakes, even with the Axxis Ultimate pads, Stoptech rotors and SS-lines, I had to use more pedal pressure to get some firm decelleration. Now, I get really instant response with much less pedal pressure. Firm braking at 100 mph immediately results in squealing tires approaching their adhesion limit. When I am sure the pads have been bedded in (yes, I followed the procedure but have to wait for better weather) I will do new brake testing and post the results soon.
For those who are wondering how the brake balance is, well, the smaller rear rotors so far don't seem to make that much of a difference but I have not reached my final answer on that yet.
For those who would like some extra braking potential, I highly recommended this upgrade from Racing Brake.
Or course, I put all the parts on a scale that. You will have to remember that the old rotors have seen some use so they are lighter than bright and shiny new ones.
The removed stuff:
Front: Stoptech 2-piece Aerorotors - 282x28mm - 5.4kg - 11.9 lbs each
Front: OEM brackets - 1.35kg - 2.98lbs each
Rear: OEM rotors - 282x21mm - 5.1kg - 11.24 lbs each
Rear: OEM brackets - 1.17kg - 2.58lbs each (Actually, there was more weight difference between the left/right OEM brackets than with the new Racing Brake brackets).
The new stuff:
Front: Racing Brake 2-piece rotor - 324x28mm - 6.9kg - 15.2 lbs each
Front: Racing Brake brackets - 1.43kg - 3.15lbs each
Rear: Racing Brake 1-piece rotor - 303x23mm - 6.2kg - 13.7 lbs each
Rear: Racing Brake brackets - 1.25kg - 2.76lbs each
So, in total, my unsprung weight has increased by 5.5kg or 12.2lbs which is the only negative I can think of right now. Now, I really need some lightweight wheels in the future.
Last edited:

")