
Hello Everyone!
Although i've been an active reader on NSXPrime since the beginning, and I've registered as a member back in 2006, i haven't really presented myself in the past, so here it goes:
My name is Bruno, I'm 34 and I'm from North of Portugal!
My NSX is a EDM 1993 NA1 MT LHD with 39.000 Kms / 25.000 miles.
I was a big fan of Ayrton Senna and I wanted an NSX since I was 15 :smile: when i first saw on the tv Ayrton driving it at "Autodromo do Estoril"!
....But i had to study, and then work in order to accomplish my dream... and my dream became reality when I bought my NSX in January 2005 when i was 26:biggrin:!
My NSX first belonged to the owner of an Honda dealer in the north of Portugal, and was 19.000 Km / 12.000 miles when i bought it!
It has been 8 years of pure joy!
I decided to start this building thread as I've done and I will be doing some small upgrades along with maintenance to my precious red devil :biggrin:. It won't be a big modification thread, as i like to keep the OEM look (and reliability...), and most of the parts I'll be installing are OEM or over spec ones to heal some of the known, and very little :wink:, week points on our beloved NSX!
So here we go:
Installed Parts :
- 94-01 16/17 OEM wheels
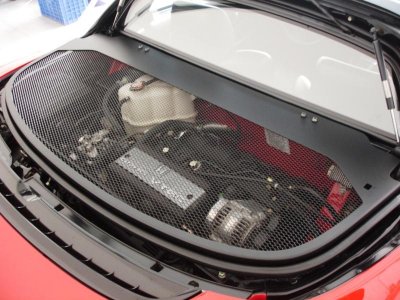
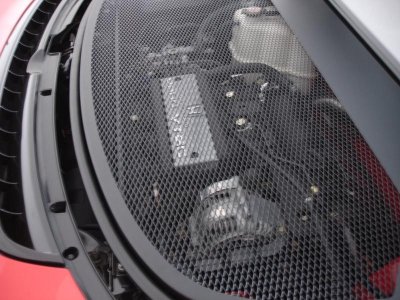
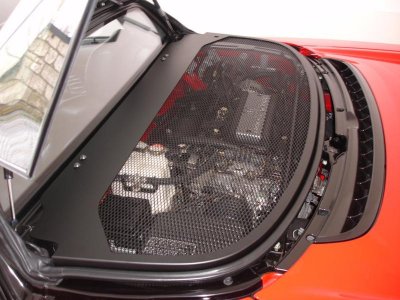
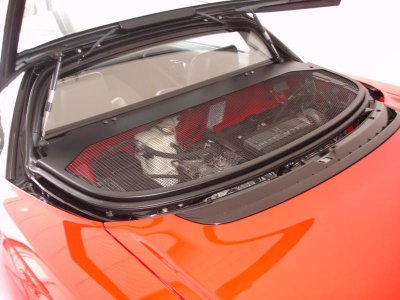
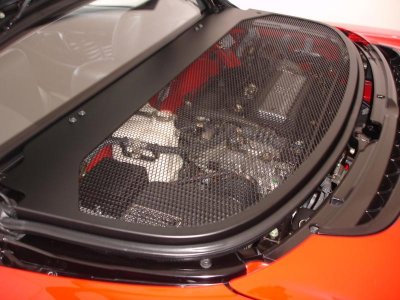
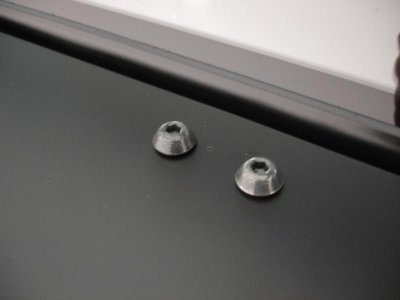
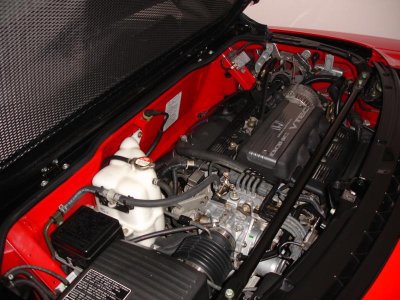
- NSX-R Engine Cover (from Sudesh - UK)
- Downforce Scoop
- Uni Dual-Stage Filter
- OEM 3rd Led Brake Light
- Guppy attack antenna
To be installed with my next TB service:
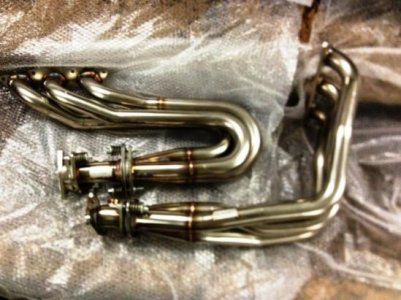
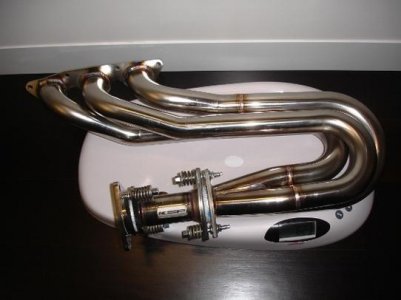
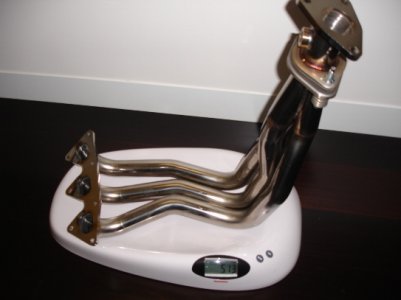
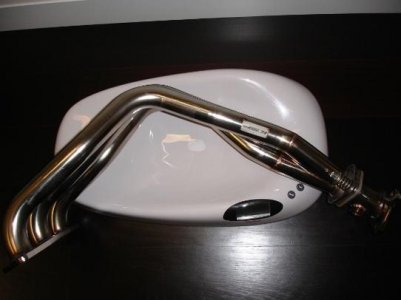
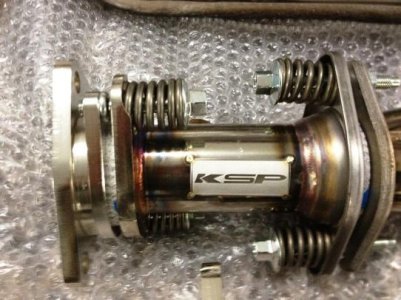
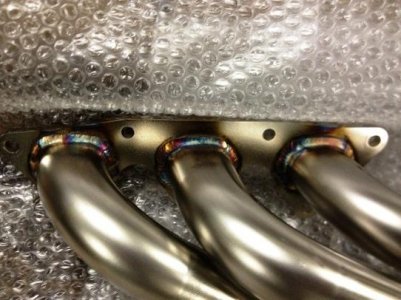
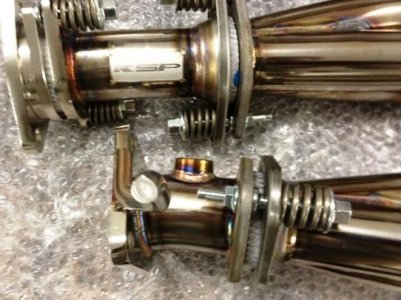
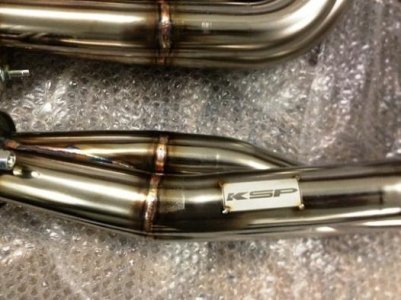
- KSP Headers
- ATI Crankshaft super damper
- Toda Racing Billet steel oil pump gear (along with all the OEM bolts / washers/ o-rings...)
- Toda Racing TB (along with all the big service OEM parts and some others: WP, adjuster, gaskets bolts, washers, o-rings, oil filter, fuel filter, alternator and A/C belt, spark plugs...)
- ScienceofSpeed Clutch Slave Hose Kit
- Venair Reinforced Silicone Coolant Hose Kit (with all the other 17 OEM hoses, clips, clamps and thermostat)
- LMA's (along with all the OEM seals, washers, o-rings, solenoid and spool valve filters...)
- Honda JDM NSX-R Coolant Expansion Tank Cover
- Honda S2000 clear side markers
- SPOON Oil Filler Cap
- SPOON Radiator Cap
- Phenolic gaskets to insulate the manifold (I'll check my VVIS bolts too)
- CT Engineering Cam Pulleys
I'll be removing the following parts:
- OEM spare-tire + mount
- toolkit
- engine compartment cooling fan
Some upgrades i intend to do in the future: (but i'll keep things slow as i have many other personal projects at same time :wink
- later spec ABS upgrade
- 17/18 Prodrive GC-07C
- Stoptech BBK
- All the NSX-R bars and non-compliance rear beam bushings + toe links
- Coilovers
- 2002 Rear Valence + Skirt + Door Panel
- Exhaust
Now for some pictures (I'll update when new parts arrive):


- - - Updated - - -
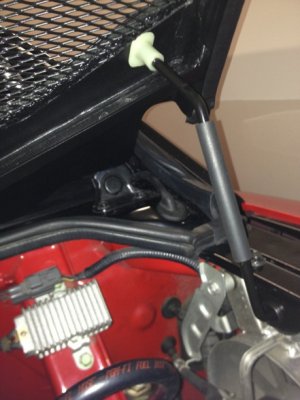
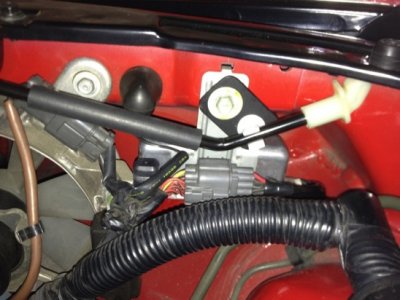
For some detailed pictures on the NSX-R Style Engine Cover:
Although i've been an active reader on NSXPrime since the beginning, and I've registered as a member back in 2006, i haven't really presented myself in the past, so here it goes:
My name is Bruno, I'm 34 and I'm from North of Portugal!
My NSX is a EDM 1993 NA1 MT LHD with 39.000 Kms / 25.000 miles.
I was a big fan of Ayrton Senna and I wanted an NSX since I was 15 :smile: when i first saw on the tv Ayrton driving it at "Autodromo do Estoril"!
....But i had to study, and then work in order to accomplish my dream... and my dream became reality when I bought my NSX in January 2005 when i was 26:biggrin:!
My NSX first belonged to the owner of an Honda dealer in the north of Portugal, and was 19.000 Km / 12.000 miles when i bought it!
It has been 8 years of pure joy!
I decided to start this building thread as I've done and I will be doing some small upgrades along with maintenance to my precious red devil :biggrin:. It won't be a big modification thread, as i like to keep the OEM look (and reliability...), and most of the parts I'll be installing are OEM or over spec ones to heal some of the known, and very little :wink:, week points on our beloved NSX!
So here we go:
Installed Parts :
- 94-01 16/17 OEM wheels
- NSX-R Engine Cover (from Sudesh - UK)
- Downforce Scoop
- Uni Dual-Stage Filter
- OEM 3rd Led Brake Light
- Guppy attack antenna
To be installed with my next TB service:
- KSP Headers
- ATI Crankshaft super damper
- Toda Racing Billet steel oil pump gear (along with all the OEM bolts / washers/ o-rings...)
- Toda Racing TB (along with all the big service OEM parts and some others: WP, adjuster, gaskets bolts, washers, o-rings, oil filter, fuel filter, alternator and A/C belt, spark plugs...)
- ScienceofSpeed Clutch Slave Hose Kit
- Venair Reinforced Silicone Coolant Hose Kit (with all the other 17 OEM hoses, clips, clamps and thermostat)
- LMA's (along with all the OEM seals, washers, o-rings, solenoid and spool valve filters...)
- Honda JDM NSX-R Coolant Expansion Tank Cover
- Honda S2000 clear side markers
- SPOON Oil Filler Cap
- SPOON Radiator Cap
- Phenolic gaskets to insulate the manifold (I'll check my VVIS bolts too)
- CT Engineering Cam Pulleys
I'll be removing the following parts:
- OEM spare-tire + mount
- toolkit
- engine compartment cooling fan
Some upgrades i intend to do in the future: (but i'll keep things slow as i have many other personal projects at same time :wink
- later spec ABS upgrade
- 17/18 Prodrive GC-07C
- Stoptech BBK
- All the NSX-R bars and non-compliance rear beam bushings + toe links
- Coilovers
- 2002 Rear Valence + Skirt + Door Panel
- Exhaust
Now for some pictures (I'll update when new parts arrive):
- - - Updated - - -
For some detailed pictures on the NSX-R Style Engine Cover:
Attachments
-
 NSX_R_Engine_Cover_01.jpg80.2 KB · Views: 1,389
 -
 NSX_R_Engine_Cover_02.jpg87.9 KB · Views: 1,398
 -
 NSX_R_Engine_Cover_03.jpg72.9 KB · Views: 1,325
 -
 NSX_R_Engine_Cover_04.jpg60.5 KB · Views: 1,330
 -
 NSX_R_Engine_Cover_05.jpg70.7 KB · Views: 1,316
 -
 NSX_R_Engine_Cover_06.jpg47.7 KB · Views: 1,340
 -
 NSX_R_Engine_Cover_07.jpg18.8 KB · Views: 1,334
 -
 NSX_R_Engine_Cover_08.jpg80.2 KB · Views: 1,340
 -
 NSX_R_Engine_Cover_09.jpg50.2 KB · Views: 1,304
 -
 NSX_R_Engine_Cover_10.jpg47.3 KB · Views: 1,293
 -
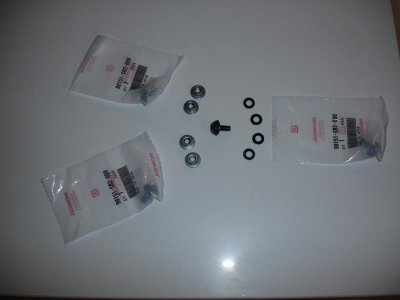 NSX_R_Engine_Cover_bolts.jpg21.1 KB · Views: 1,297
 -
 080.JPG96.1 KB · Views: 1,311
 -
 088.JPG95 KB · Views: 1,285
Last edited:


.jpg")
.jpg")


