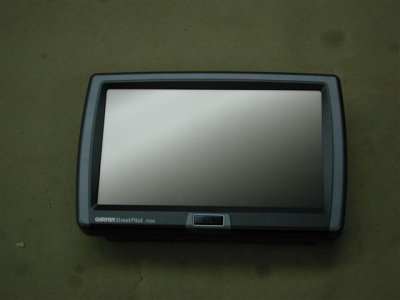
Buying my JDM nav pod 2 years ago and looking for something to put into it, I finally settled on the Garmin 7500. Its a all in one unit, meaning there is no DVD player or double DIN to mess with. I did not like the double DIN look and it wouldn't fit in the pod anyway. Alpine, Fujitsu and Pioneer were also other choices but I settled on the Garmin because it did everything I wanted it to do. I has voice, a 7 inch screen, inputs for a DVD or backup camera, you can hook up XM if you wish, built in patch antenna with provisions for an external antenna. Outputs for speakers, USB download (to update the software from the Internet) and you can also hook it up to your speed sensor just in case you loose satellite signals. It also has a SD card slot so you can put your favorite MP3 music for playback through your FM radio if you wish.
So the question was how to install this unit which actually came with a bracket and several cables, one being the 12V lighter plug. Not for me thank you very much, cause this was going to all be wired under the dash hiding all wires and anything else like the backup cam and DVD player.
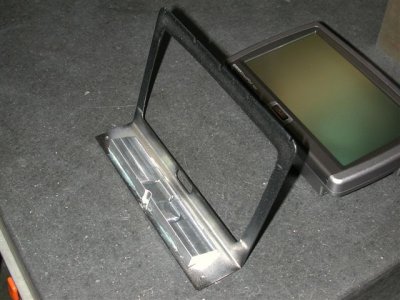
The unit is actually smaller than the pod. That's a good start, meaning I didn't have to cut the front of the pod like so many other installs I read about here.
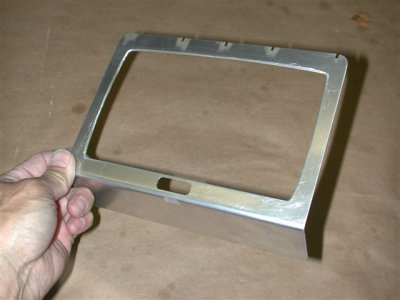
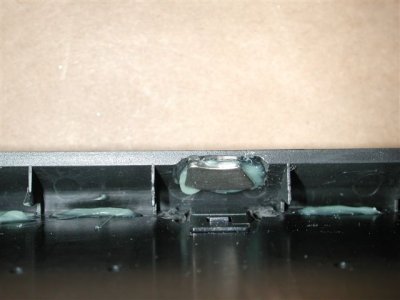
So through a series of brackets I came up with because I didn't want to cut or drill my new GPS unit, and I didn't want hardware showing on the pod, I made a sheet metal bezel out of aluminum which is wrinkle finished with powder coat black. There is a machined base also out of aluminum to support the unit and lock it in with steel straps screwed to the base. There are also some hidden pieces glued onto the pod to support the sheet metal bezel and lock it in. Then I drilled several holes under the pod just over the vents in order to use the IR remote supplied with the unit. You have to aim a little more carefully but its not a problem as you are in the correct position (driver or passenger) to hit the on/off/IR switch without being blocked. Oh and just in case you do have to turn the unit off with the built in switch, you can do so through the holes. Then I glued a small magnet in the switch area, this is to hold the stylus (not supplied) that has a piece of steel on it to hold it in place when not in use (I hate fingerprints on the screen!) Sorry I forgot to take a pic of that. Will do it later.
So now I have to install it. 2 screws on the back and its secure. Oh and I forgot to mention the little S curved clear plastic rod that's used for the light sensor to operate. Power will come on when the car is started, or I can select the JDM switch panel that I installed, so the pod can be used with the car off. That of course uses 2 Schottky diodes for isolation. Sorry if I forgot anything but I will add it later. And I noticed I can only put 5 pics here, so I'll add some more later.
BRad
So the question was how to install this unit which actually came with a bracket and several cables, one being the 12V lighter plug. Not for me thank you very much, cause this was going to all be wired under the dash hiding all wires and anything else like the backup cam and DVD player.
The unit is actually smaller than the pod. That's a good start, meaning I didn't have to cut the front of the pod like so many other installs I read about here.
So through a series of brackets I came up with because I didn't want to cut or drill my new GPS unit, and I didn't want hardware showing on the pod, I made a sheet metal bezel out of aluminum which is wrinkle finished with powder coat black. There is a machined base also out of aluminum to support the unit and lock it in with steel straps screwed to the base. There are also some hidden pieces glued onto the pod to support the sheet metal bezel and lock it in. Then I drilled several holes under the pod just over the vents in order to use the IR remote supplied with the unit. You have to aim a little more carefully but its not a problem as you are in the correct position (driver or passenger) to hit the on/off/IR switch without being blocked. Oh and just in case you do have to turn the unit off with the built in switch, you can do so through the holes. Then I glued a small magnet in the switch area, this is to hold the stylus (not supplied) that has a piece of steel on it to hold it in place when not in use (I hate fingerprints on the screen!) Sorry I forgot to take a pic of that. Will do it later.
So now I have to install it. 2 screws on the back and its secure. Oh and I forgot to mention the little S curved clear plastic rod that's used for the light sensor to operate. Power will come on when the car is started, or I can select the JDM switch panel that I installed, so the pod can be used with the car off. That of course uses 2 Schottky diodes for isolation. Sorry if I forgot anything but I will add it later. And I noticed I can only put 5 pics here, so I'll add some more later.
BRad