• Protip: Profile posts are public! Use Conversations to message other members privately. Everyone can see the content of a profile post.

Headlight Stopper A

Joined
27 July 2007
Messages
7,445
Location
Denver, CO
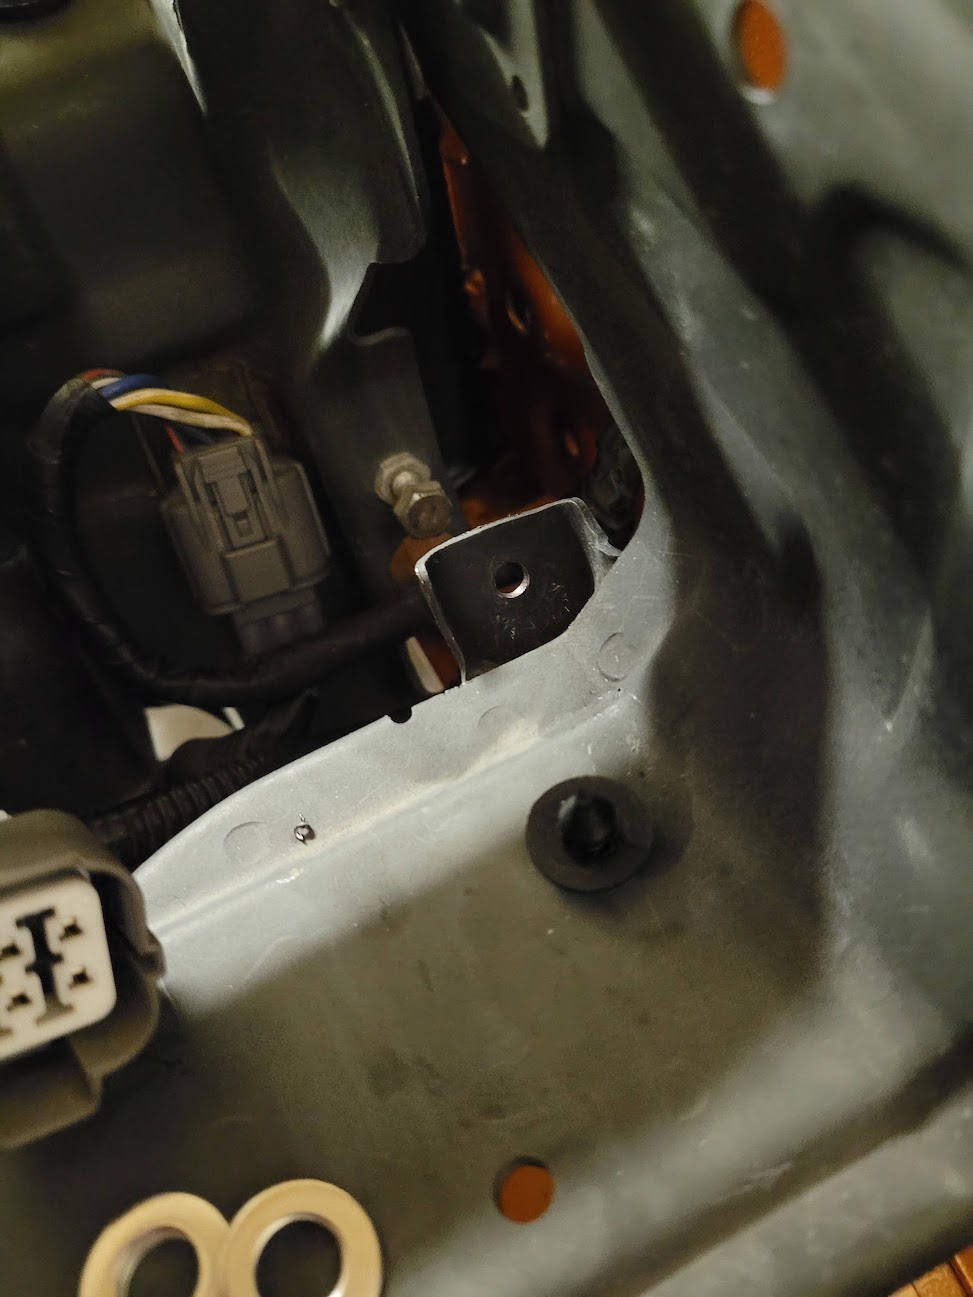
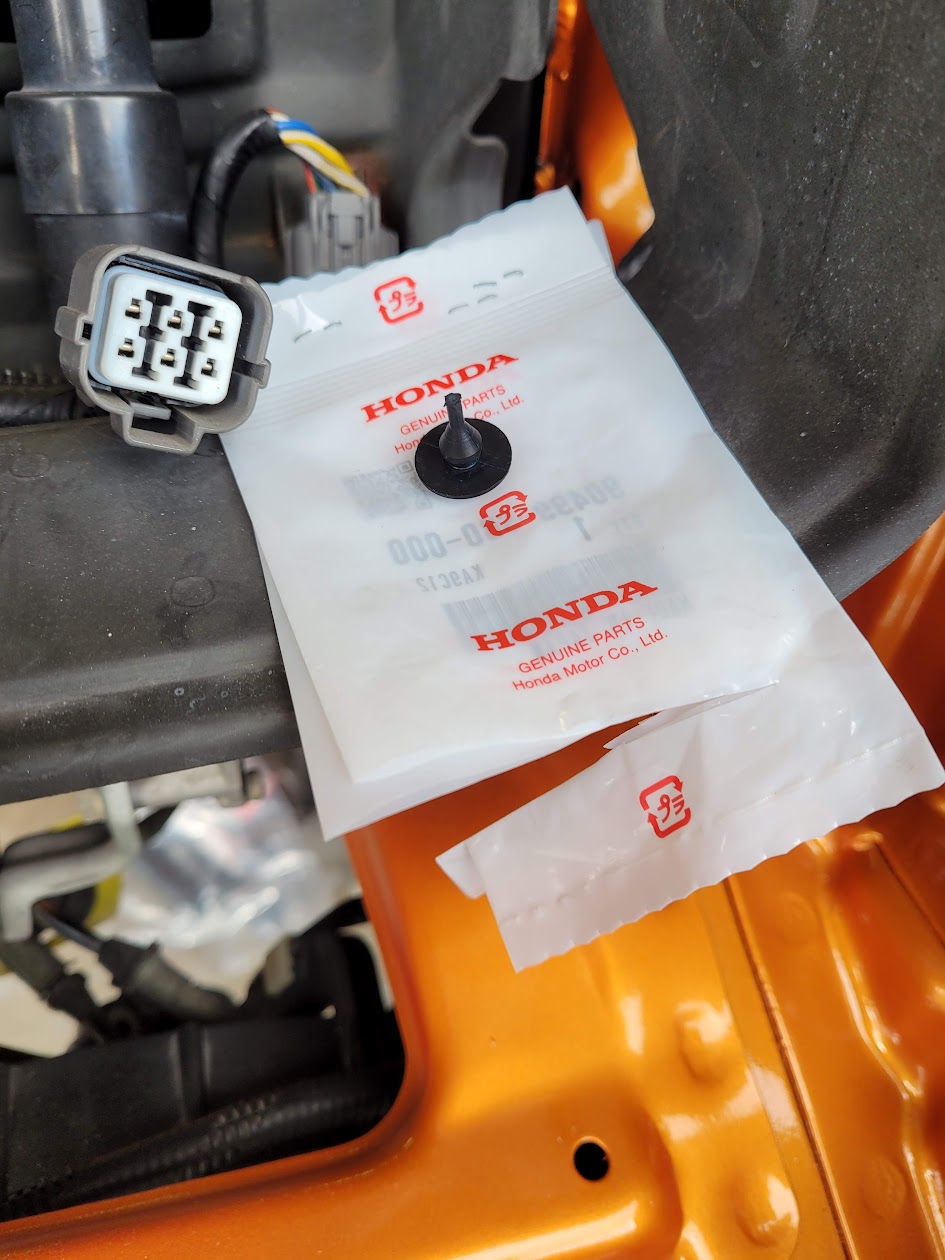
Ok... I'm at the point where I'm ready to break out some fire, sharp tools and blunt objects on this. Probably better to see if another owner has solved this before I mutilate my NSX. This is Stopper A. It pushes through a hole on the headlight frame. Seems simple, right? Here are the solutions I tried that failed:

  1. Push it through the hole.
  2. Pull it through the hole with needle nose pliers (while pushing from the other side). This ripped the little end off it.
  3. Silicone grease.
  4. Mobil 1 Synth grease.
  5. Twisting it while pushing it through the hole.
  6. Trying to jam/pack the rubber through the hole with a flat blade screwdriver (while also pushing).
  7. Using a C-clamp and nut on the other end to push it through (while greased). It just smashed it flat.
  8. Drilling the hole using a slightly larger bit to help ease it through.
  9. Rage-cursing at it.
  10. Grunting and screaming at it like a chimpanzee trying to figure out a digital clock.
  11. Trying to reason with it by explaining that it is holding up the entire re-assembly of the front end.
  12. Quiet sobbing, bargaining and begging it to fit.

Somewhere in Japan, there is a person who can do this task in less than 3 seconds. Like everything on the NSX, there is a trick to doing this- does anyone know what it is?

ACtC-3ffrAZPfMMxxiNHVpbrF0J36wcmCC8N4HCZgTcxJd69kXpXkVSh3HcdHuqE6whJBeglBYt7Y4DLW8CADmmbmkz2HNqORR3JlqLp2LMGH6cyYSrOgEMRUa3FixHiUA-6GUWLgplI29GddlOlG9DrfHAC=w945-h1260-no
 
In the temperature range in your garage you are typically well beyond the glass point of the rubber and the stiffness and modulus of the rubber does not change that much with temperature. However, the change in stiffness by elevating the temperature of the stopper may result in sufficient reduction in modulus to allow the conical portion of the stopper to deform more so that you can push it in.

I suggest you try a little 'away from the car' experiment . Using one of those heat guns for paint stripping, heat the stopper up and then squeeze the conical portion of the stopper with some needle nose pliers. Compare the resistance to a cold stopper. If there is no material change then don't waste further time with my suggestion. If it appears softer then try heating the stopper to get it in the hole with a little silicone grease.
 
I second heat....
 
In the temperature range in your garage you are typically well beyond the glass point of the rubber and the stiffness and modulus of the rubber does not change that much with temperature. However, the change in stiffness by elevating the temperature of the stopper may result in sufficient reduction in modulus to allow the conical portion of the stopper to deform more so that you can push it in.

I suggest you try a little 'away from the car' experiment . Using one of those heat guns for paint stripping, heat the stopper up and then squeeze the conical portion of the stopper with some needle nose pliers. Compare the resistance to a cold stopper. If there is no material change then don't waste further time with my suggestion. If it appears softer then try heating the stopper to get it in the hole with a little silicone grease.

I second heat....

Thanks guys- looks like that's my next step tonight.

Did you double check you have the correct part number?

Sent from my G5 using Tapatalk

Yes, unfortunately. I had the same idea as you- "maybe the part changed from 91-01?" Nope, it's 90499-SB0-000 for my 92, which is what these are.
 
the hole in your pic is the hole it's supposed to press into? I'll take a look at mine tonight to see what it looks like installed.

I wish- that's for a zip-tie wire harness. The hole at issue is much smaller. I'll attempt the heat trick tonight and snap a pic.
 
Another way to try this route without using a heat gun (cause you could accidentally melt the thinner edges of the part if you hold it too long at a certain angle) is dip the piece in boiling water for about 15-20 sec and then try pushing it into place. And once it cools down it'll harden right back up!
 
Well, I tried the heat trick. No joy. The hole is just too small. Here's a pic. I may just enlarge it slightly more, since I can't afford the delay much longer.

ACtC-3fNZadfFCISizKyHs4yvLPxqakjIGGeKNqAh_m7lWV2Aa6vAbpJ2pDGgZwIgMFMSgDCoT5YlB2oN7cr4n8bGS3vC9MD9GgN4Ox7Ce_gAh3RPJ1sPUSIhYcqfOMOrgfGQ54a-aOxNtkgKzep2pyVgqox=w973-h1297-no
 
Well, I tried the heat trick. No joy. The hole is just too small. Here's a pic. I may just enlarge it slightly more, since I can't afford the delay much longer.

Sorry to hear that did not work.
Before you make the hole bigger...once you drill, there is no going back, how about trimming the stopper? It is cheaper and replaceable. Just trim a little at a time until it fits.
 
Sorry to hear that did not work.
Before you make the hole bigger...once you drill, there is no going back, how about trimming the stopper? It is cheaper and replaceable. Just trim a little at a time until it fits.

I was thinking that too- they are cheap if I mess one up
 
How about putting it in a pot of boiling water ...
I'd break out the camp stove near the car, put it in the hot water, pull it out with the BBQ tongs and give it a try.
 
Last edited:
If the smallest part of the stopper is the size of the hole, then...
I'd force it in with a small flat screwdriver, preferably with a taped-over head to prevent scratches.
 
If the heat gun doesn't work I second boiling water, though I never tried it. Realistically the quickest solution would probably be to trim the stopper down and lock it somehow on the other side (hot glue, sugru, tape?).

I went through this same frustration with the brake pedal stopper. It's this hard white plastic which doesn't seem to want to shrink to get through the hole. I just glued a coin into the hole to cover it and threw the stopper away.
 
I'd also recommend the boiling water. If that also doesnt work, and instead of trimming the stopper you could cut the stopper end that goes into the hole into a + sign and feed it through that way. you could also burn the ends after they are through the hole to "reseal" the stopper
 
I suggest that if you have a vernier caliper, use it to measure the diameter of the groove in the stopper retention stud where it fits into the body and then compare it to the diameter of the hole. If the stopper diameter is significantly larger than the hole, then there may have been a production change and chances are that new stopper is not going into that old hole.

If the stopper is too big for the hole, then drilling the hole would be the obvious option. However, I do like @YelllowScorpion 's idea of cutting a + in the retention stud of the stopper to allow space for compression of the retention stud. I would suggest using something like a dremel with a fine diamond blade to do the cut since cutting with a knife does not really remove material. You could start with a single - cut to see if that allows sufficient compression and progress to a second cut to create a + if you need more compressibility.

That stopper looks to be rubber and rubber is a cross linked compound so it doesn't melt. It will burn; but, you can't burn / melt the retention stud to reseal it.
 
Update-

Heat was ineffective. On my last attempt, I got the rubber so hot it was smoking. The issue is that there is a sharp ridge on the cone that catches on the hole and causes the rubber to stack up behind the hole. Even grease will not allow it to pass through. Considering this, I put the stopper in a vise and used a razor to shave off the flat ridge. This, combined with grease and a slightly enlarged hole, resulted in success. I still cannot understand how Honda installed these in the OEM configurations. Maybe a strong vacuum?
 
You are assuming that the part actually fits. Nobody from Honda has had to install one of these in the last 16 years. Perhaps there was an oops in the last production run after 2005 resulting in a size / material discrepancy and nobody has noticed until you came along. Its not like these are a high volume consumable.

I expect that with that long rubber extension the factory trick was to use the extension to pull it through the hole with a nudge from the back (your failed #2 method). Pulling on the extension would elongate / collapse the conical portion allowing the cone part of the stopper to fit through the hole. That is how I have done similar style body plugs on other cars. However, in a subsequent production run if they changed the durometer of the rubber to something stiffer the stretchability of the rubber may have been reduced to the point that it can no longer be jammed into the hole without extraordinary measures.

It is in now so at least you can move along with the next steps.
 
Can you pull from the small end? With some boy butter, and possibly pushing (massaging) on the sides?

Somewhere I feel as if I’ve overcome this issue in the past somewhere.

sounds like a busy weekend.....
 
ewwwwwwwww....:eek:
 
You guys are all terrible. :D

I just put in a big parts order at Mita and got 4 more of these stupid things. That way if I mess one up again, I have spares.
 
Back
Top