• Protip: Profile posts are public! Use Conversations to message other members privately. Everyone can see the content of a profile post.

Honcho's Long Road to Imola Type-S Zero

Body and Paint Work 03

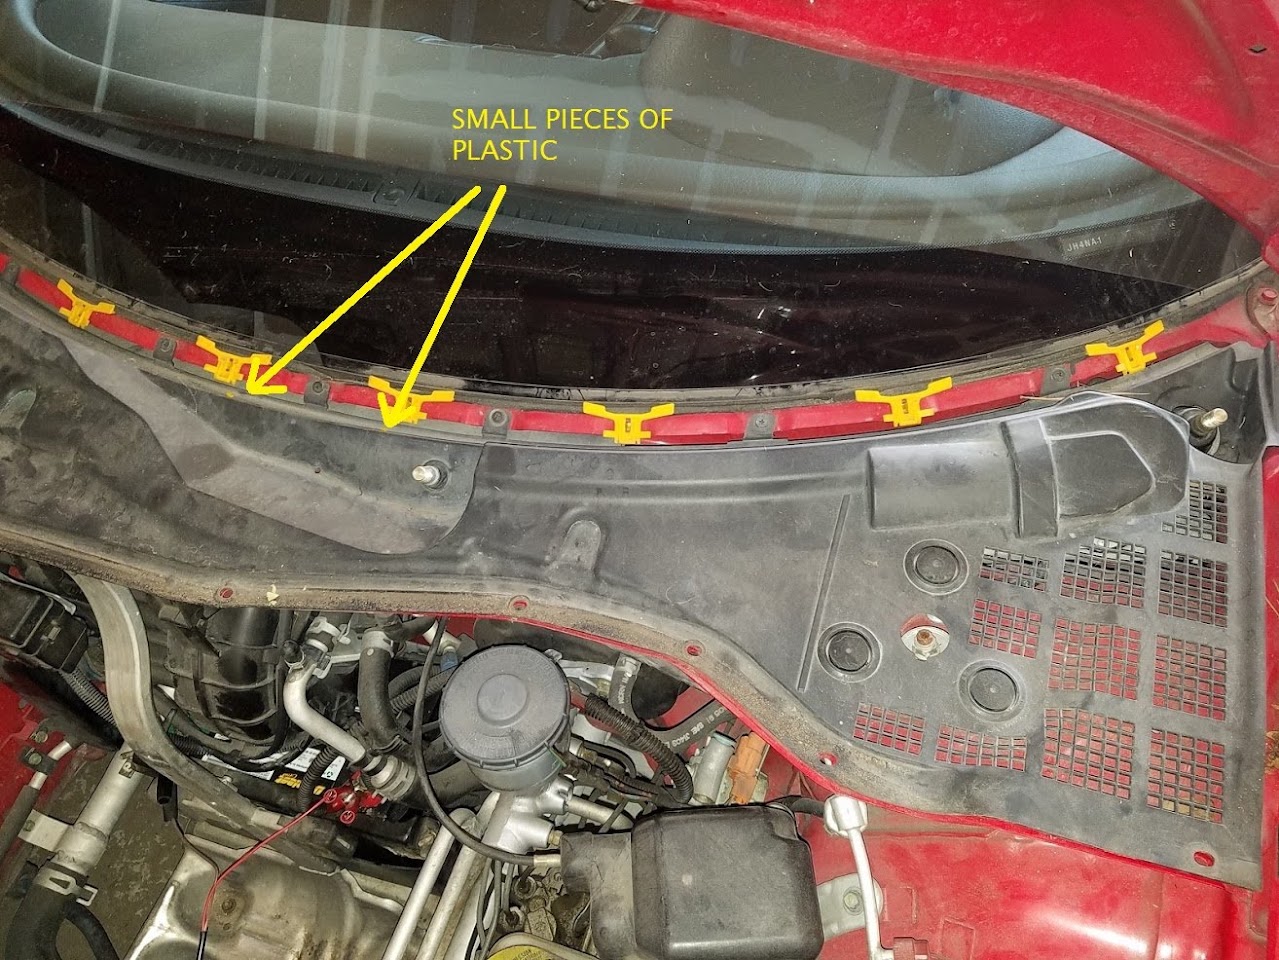
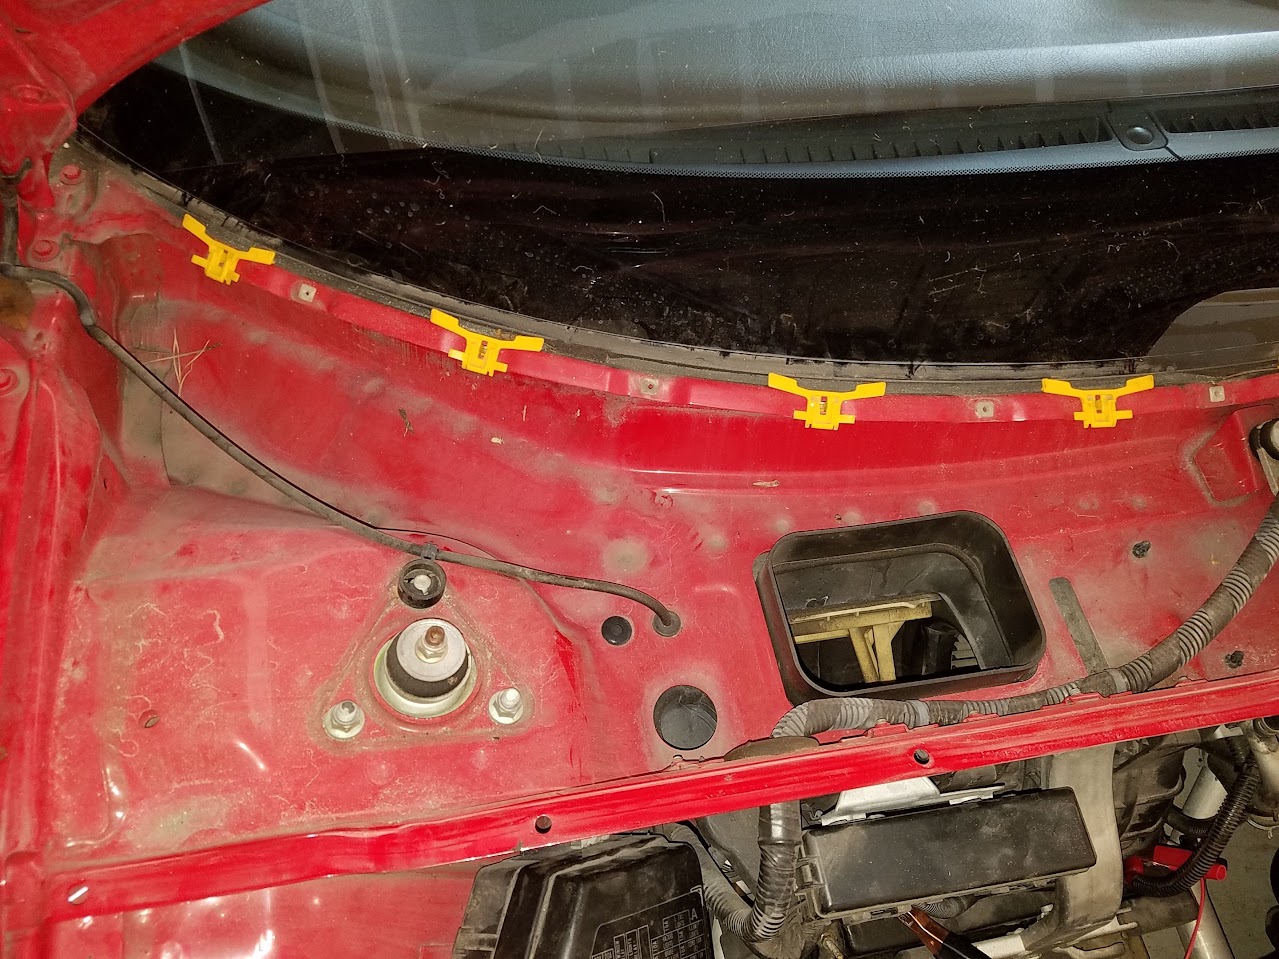
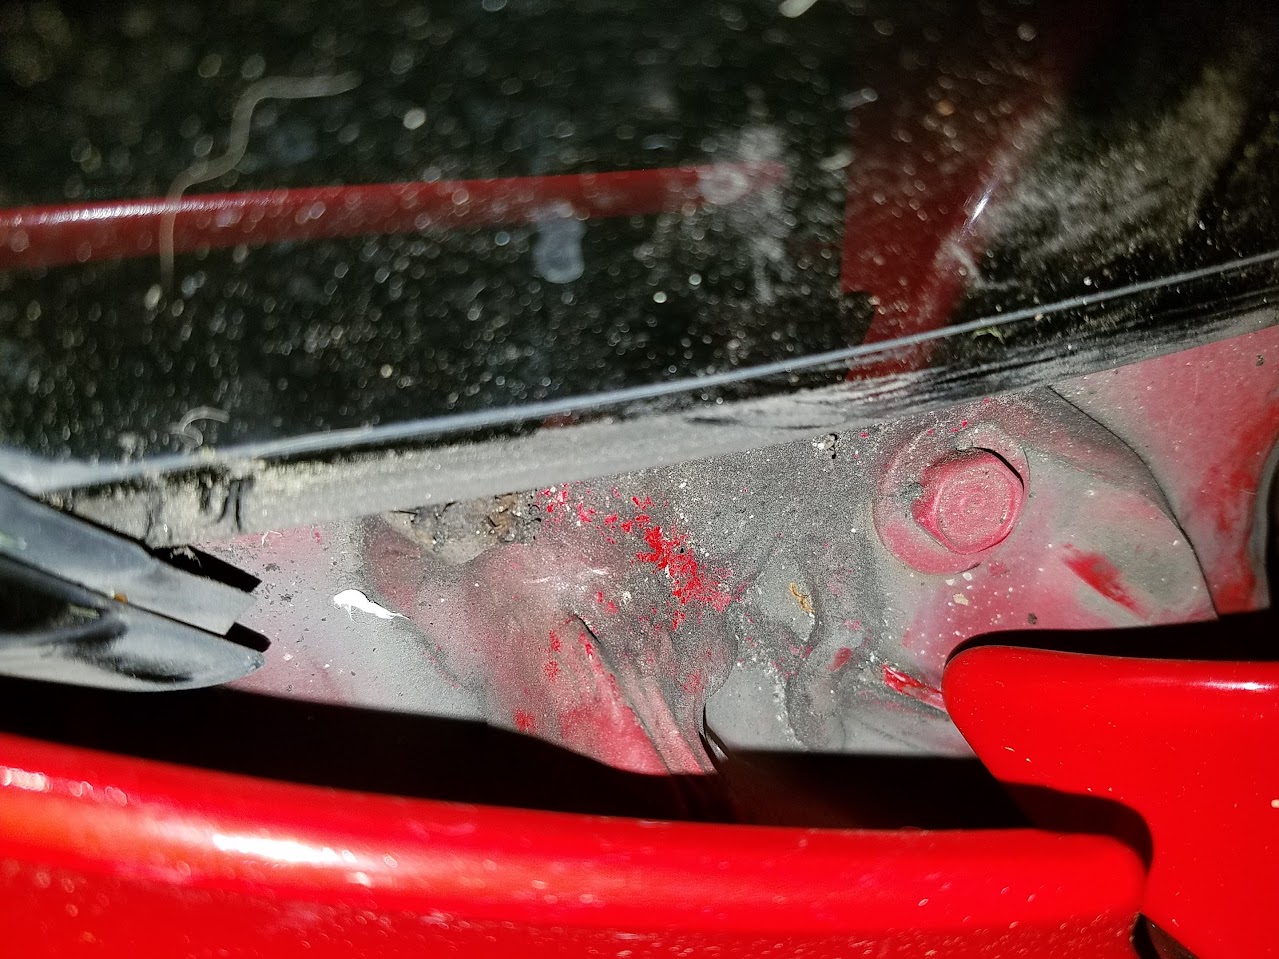
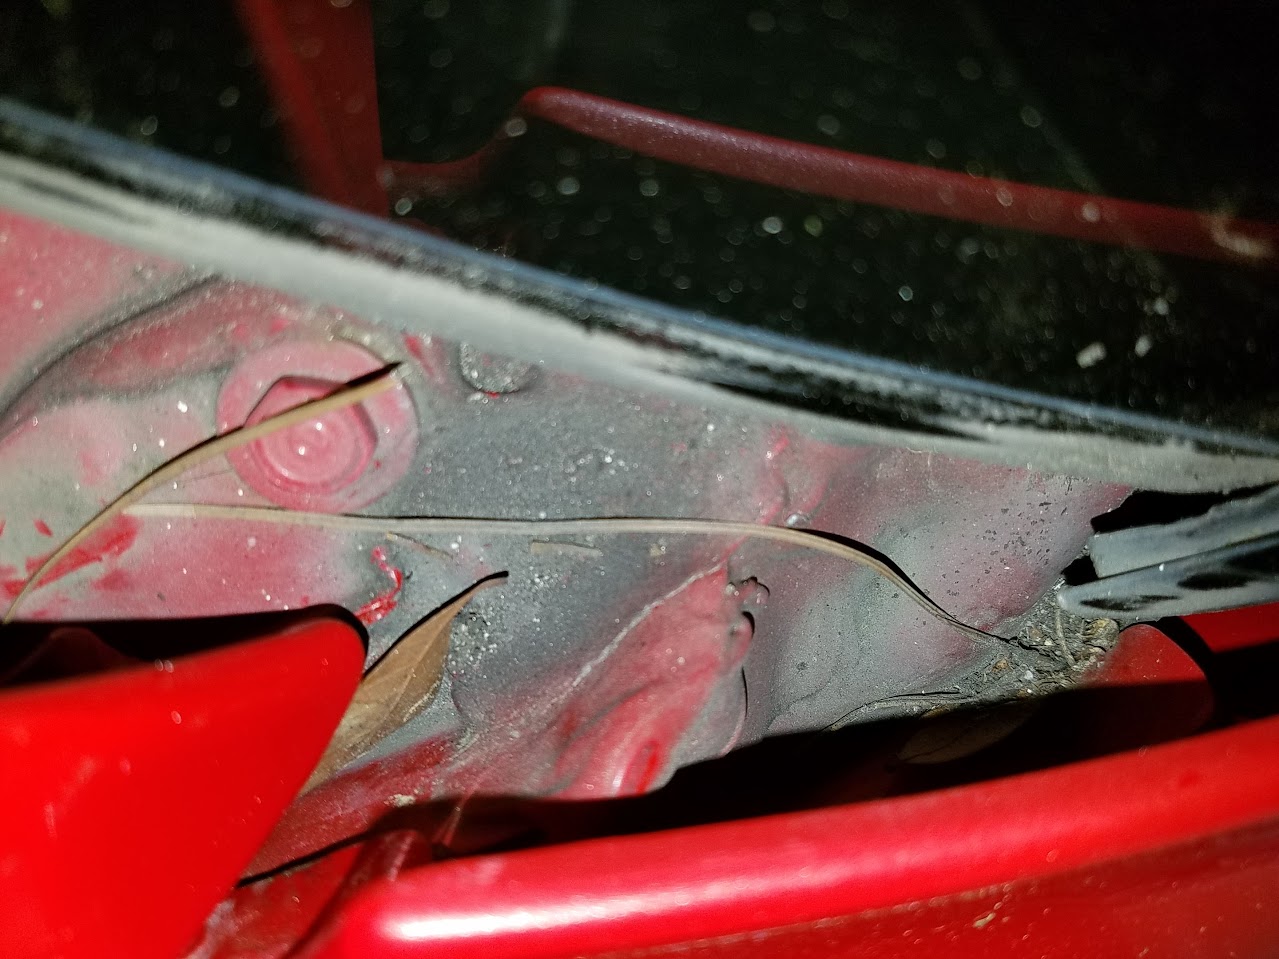
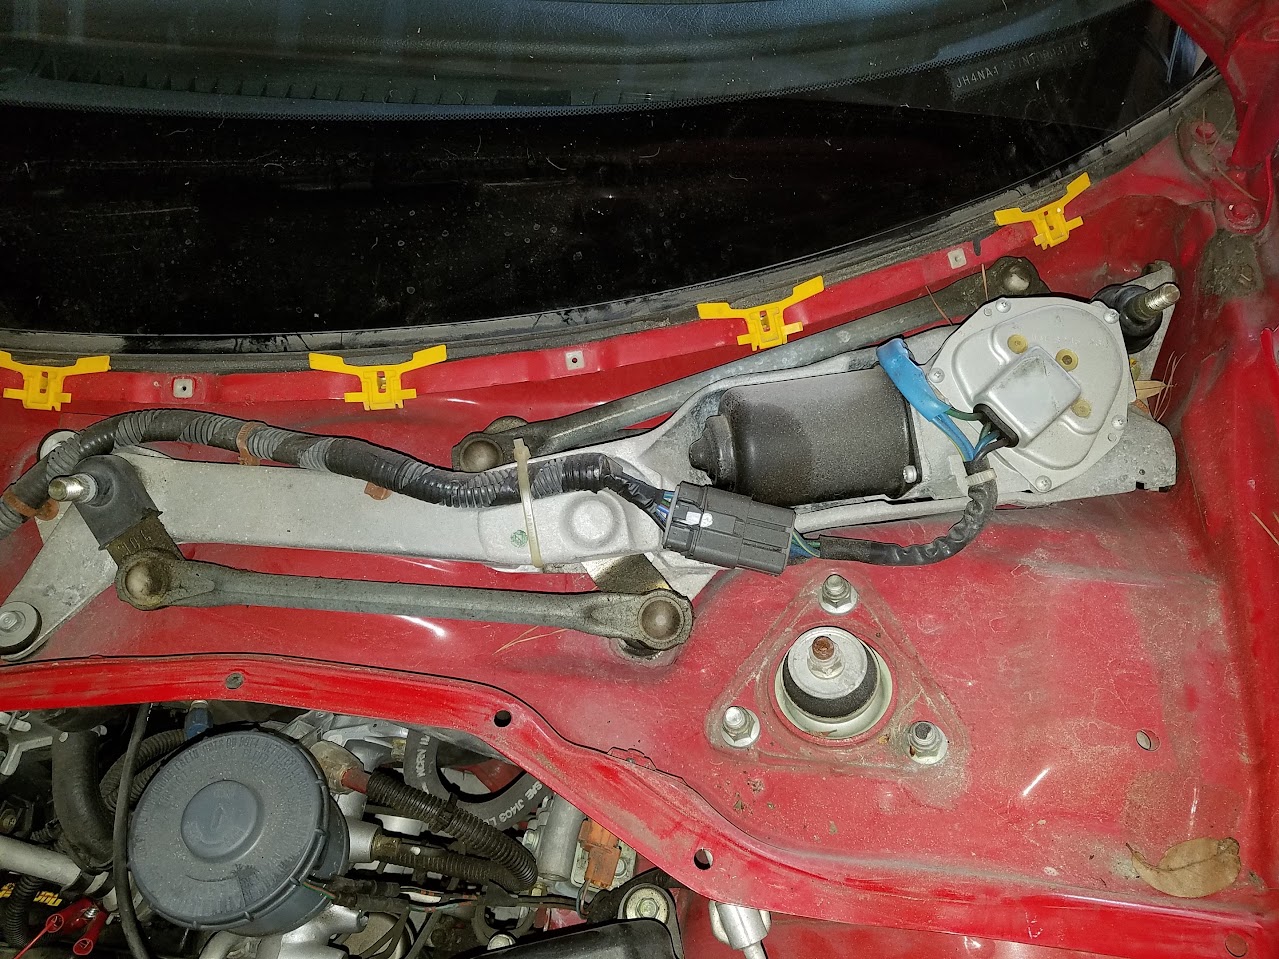
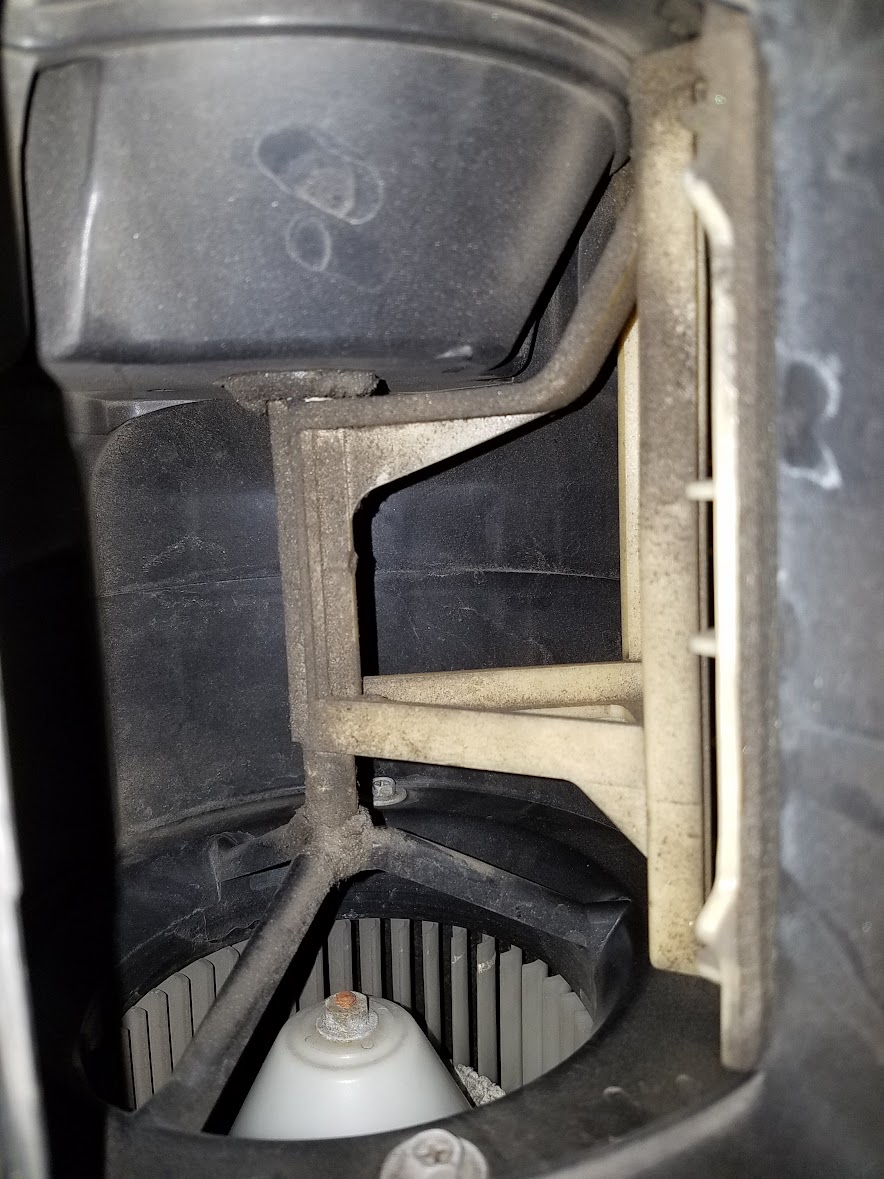
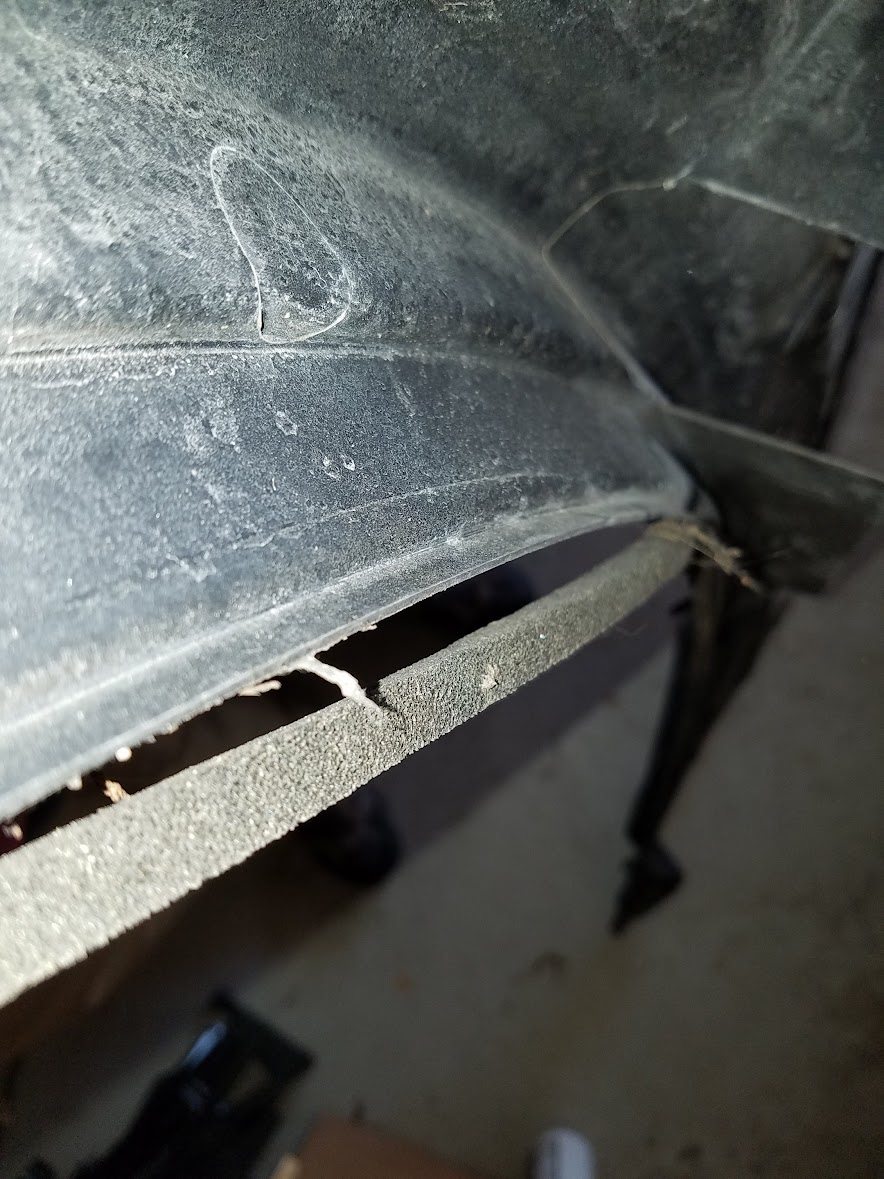
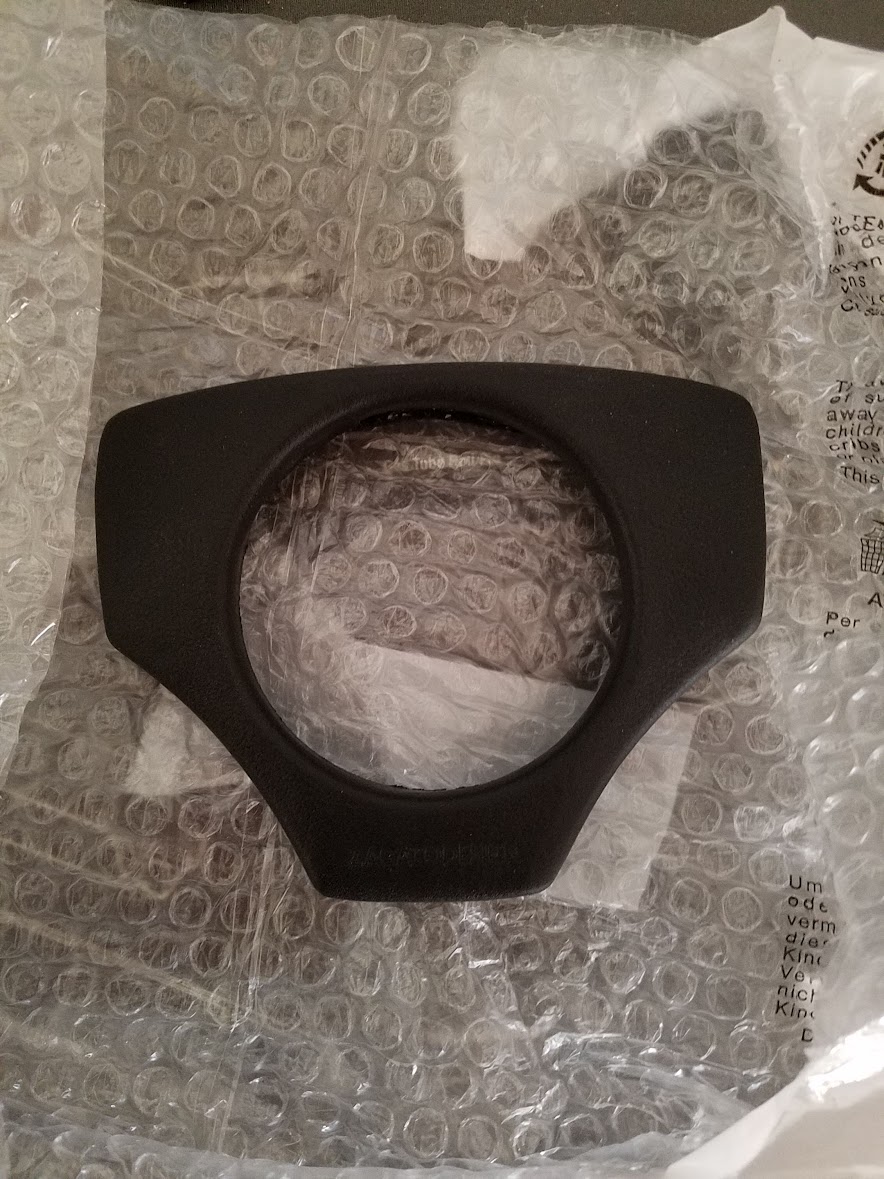
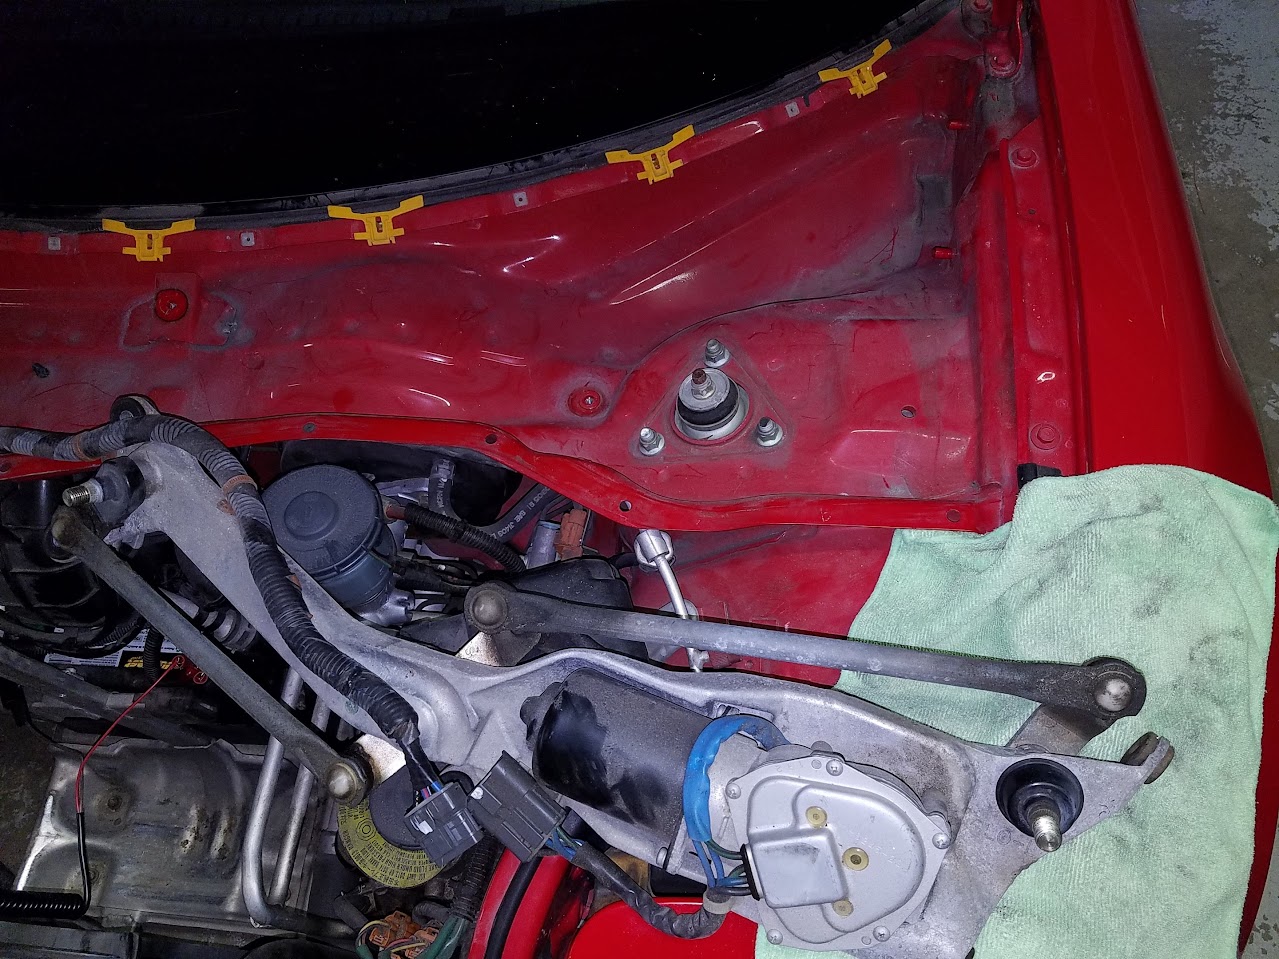
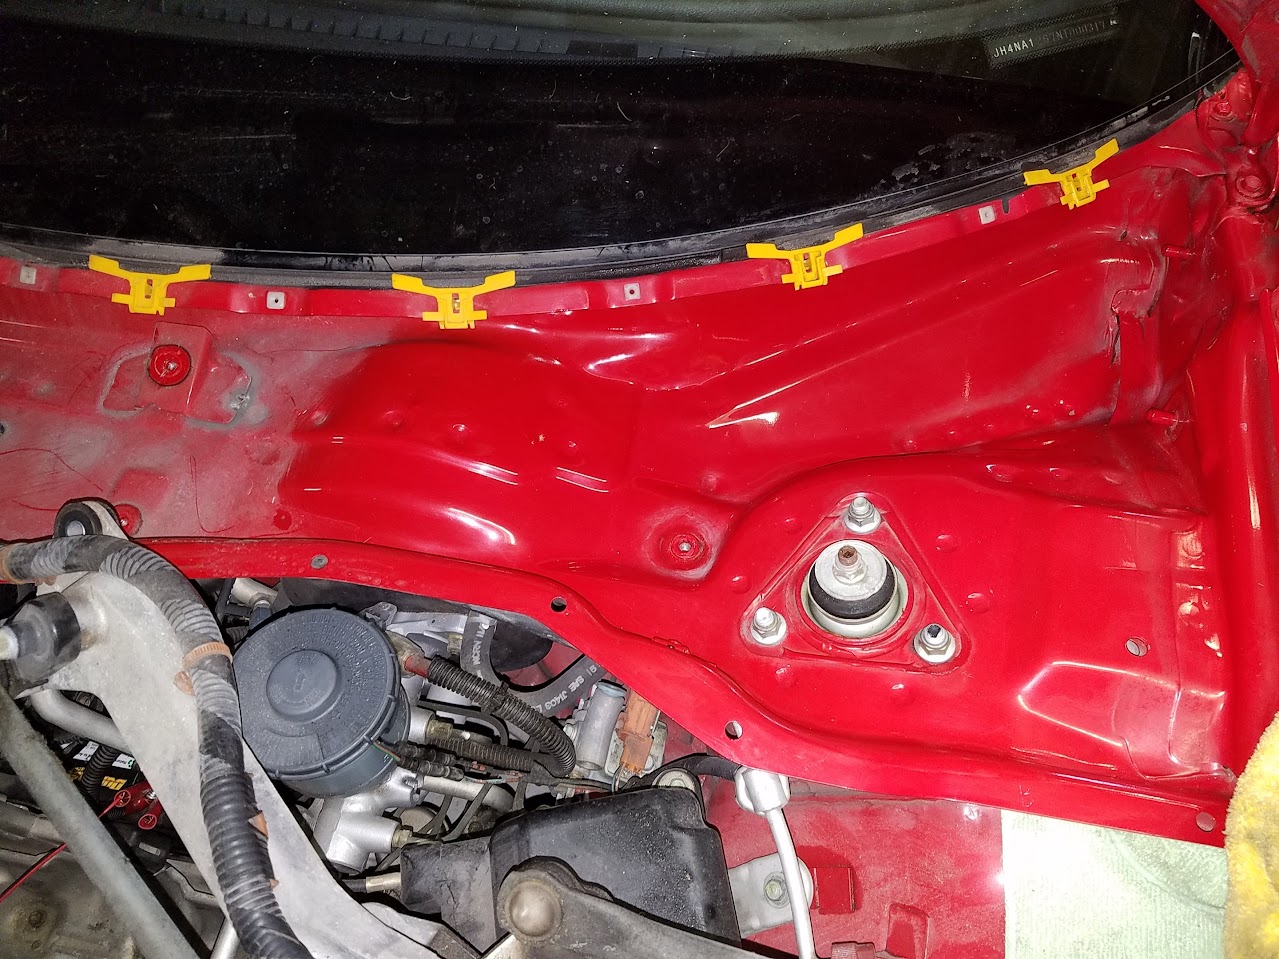
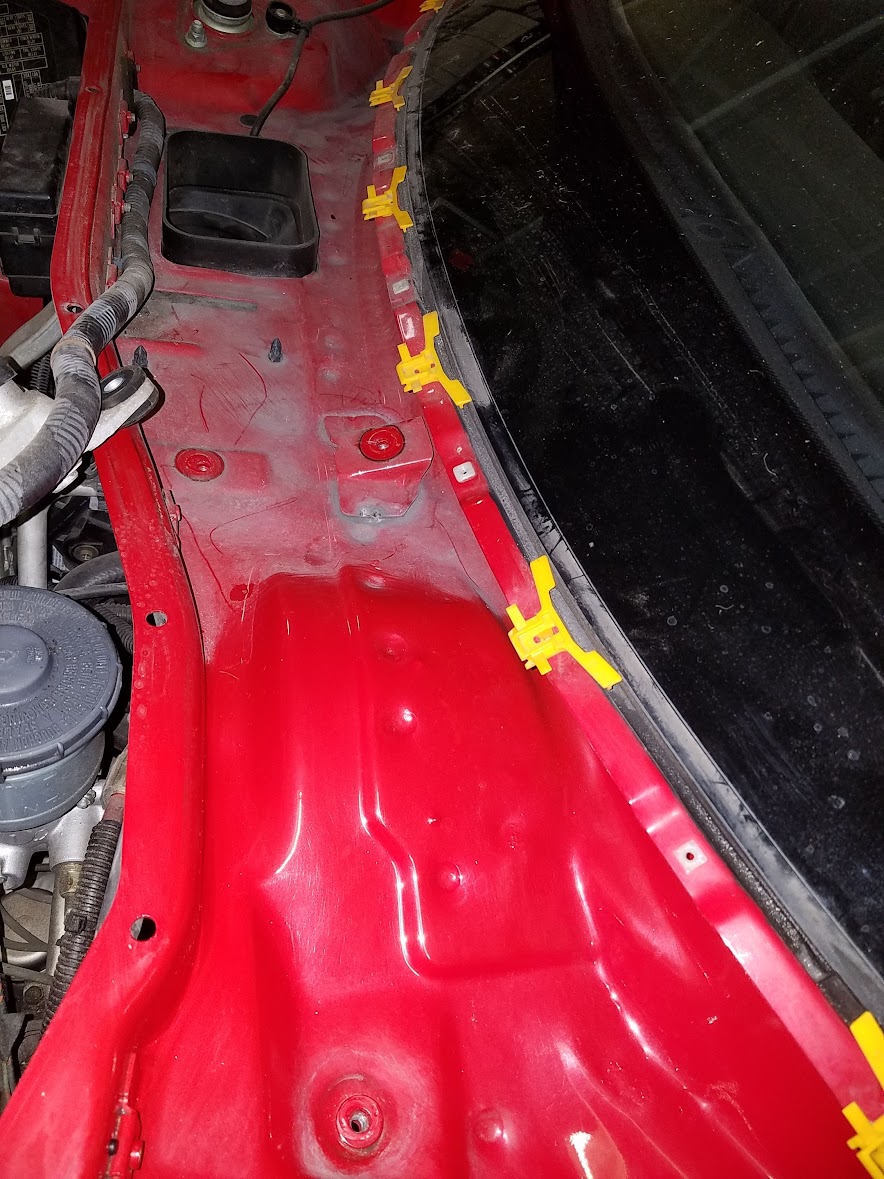
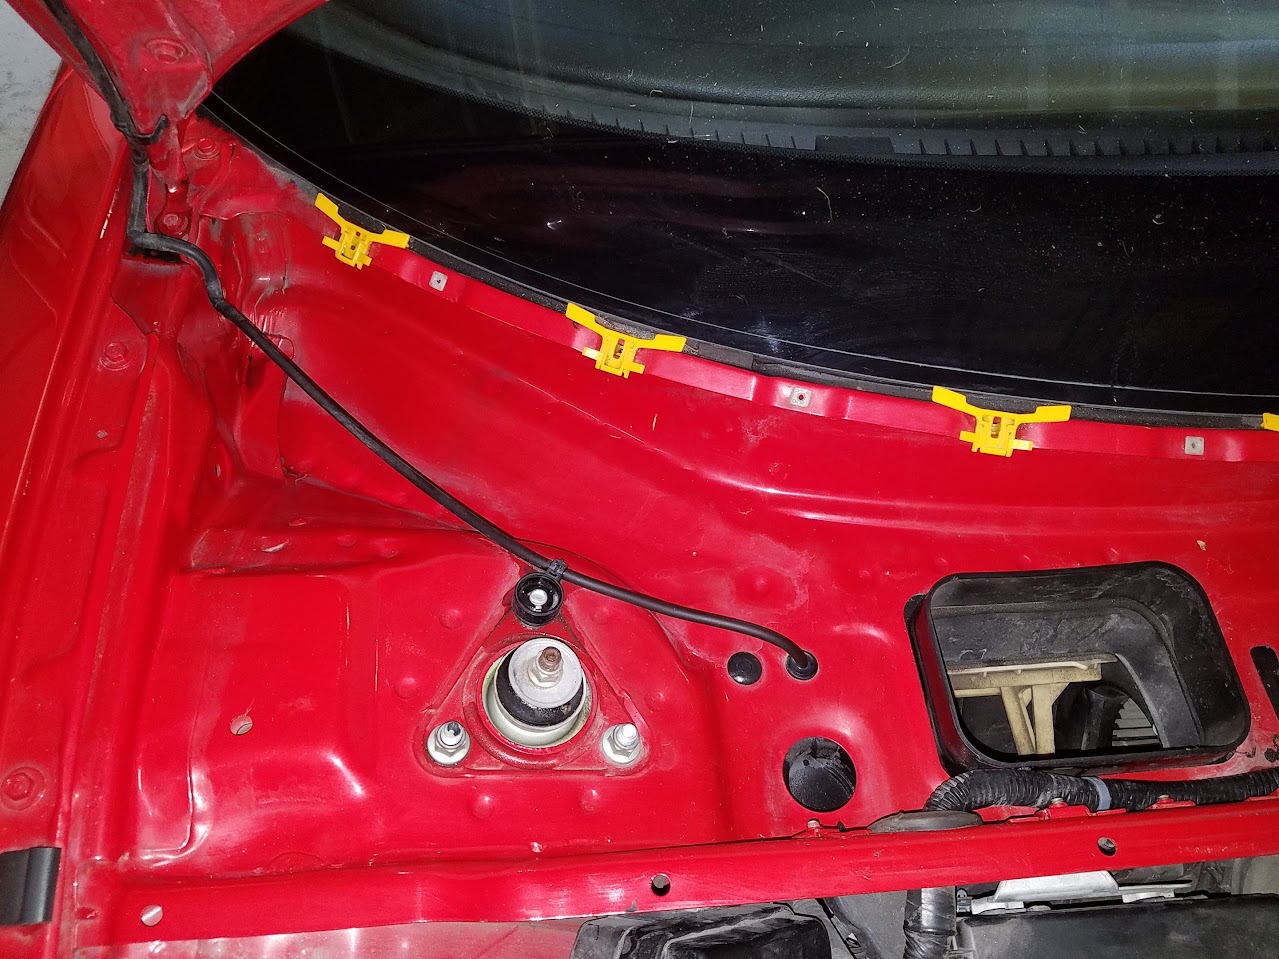
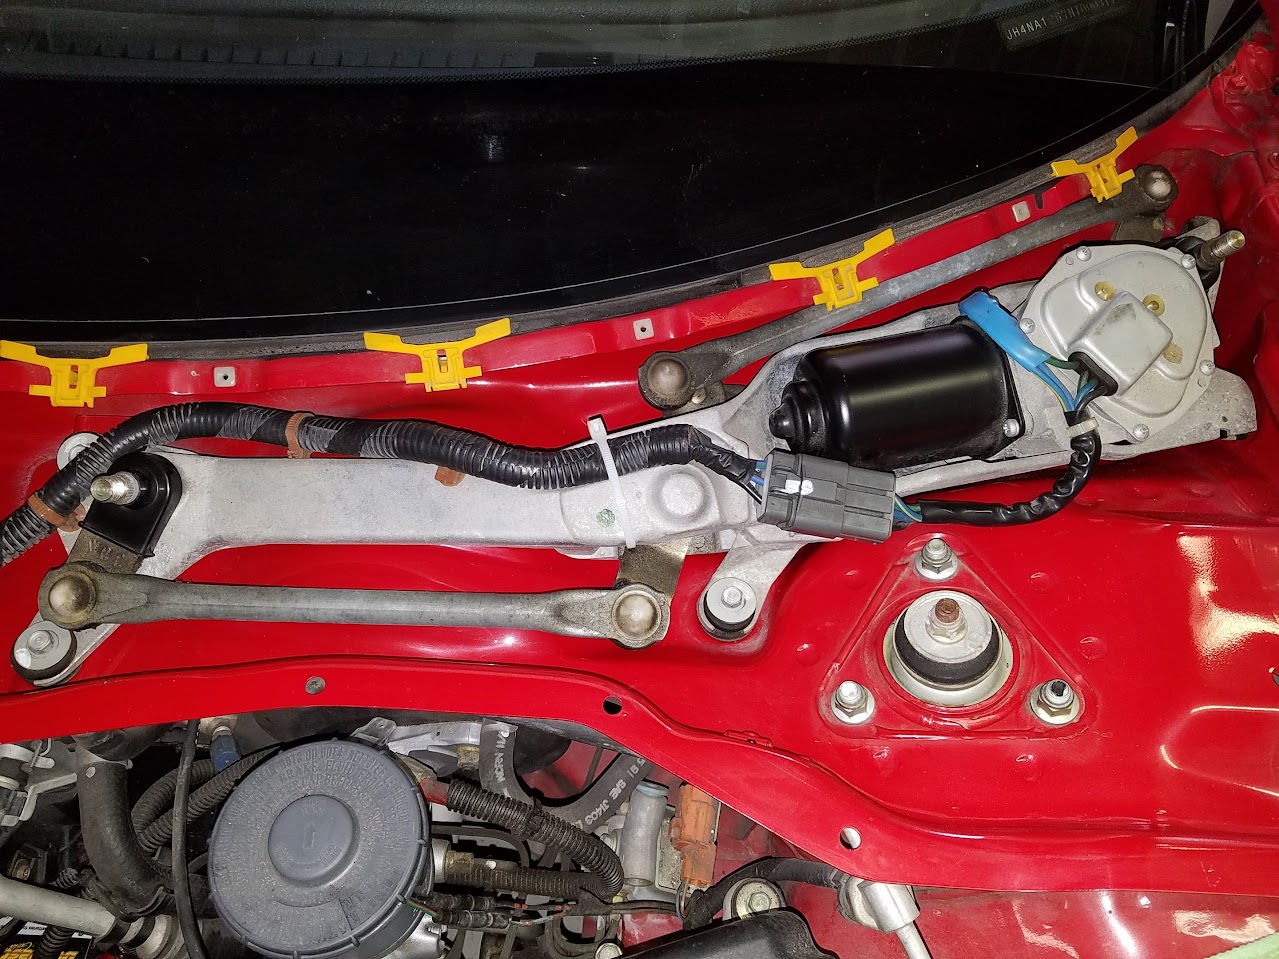
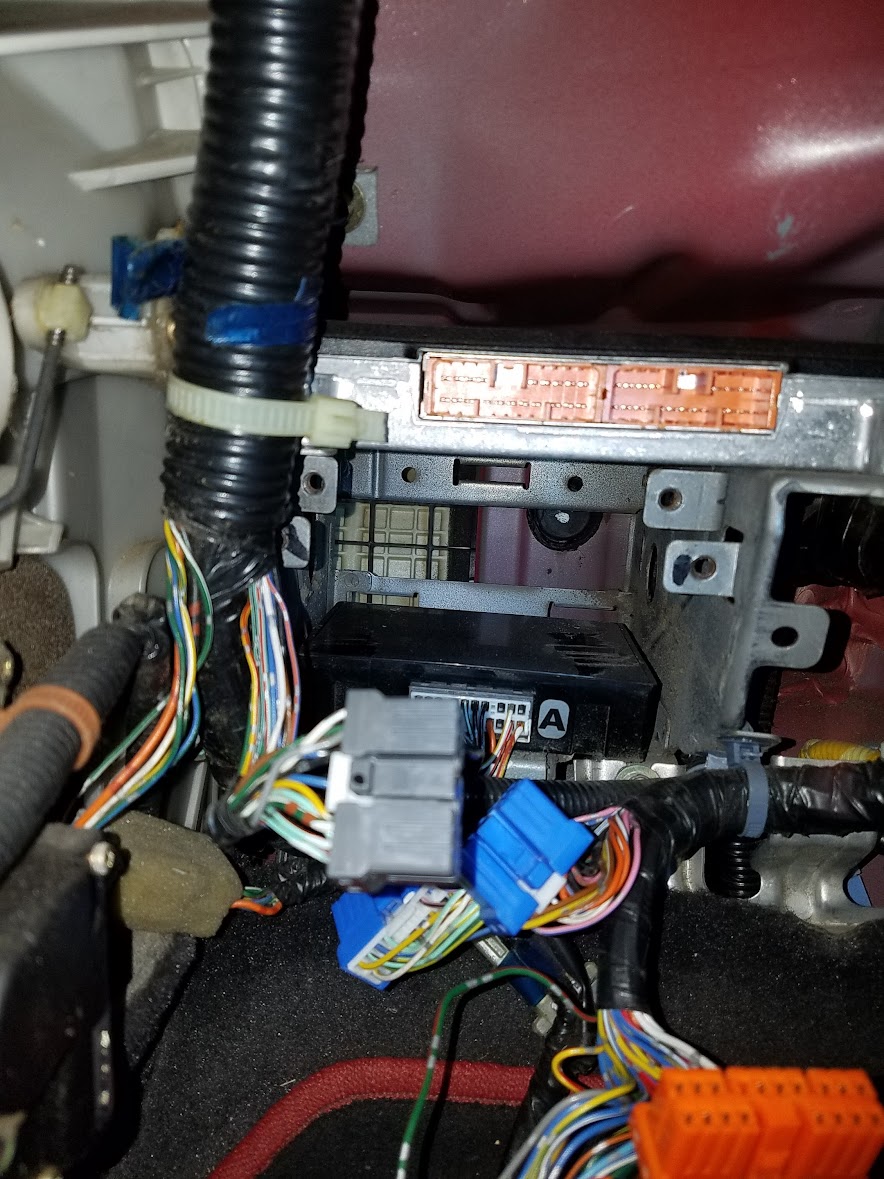
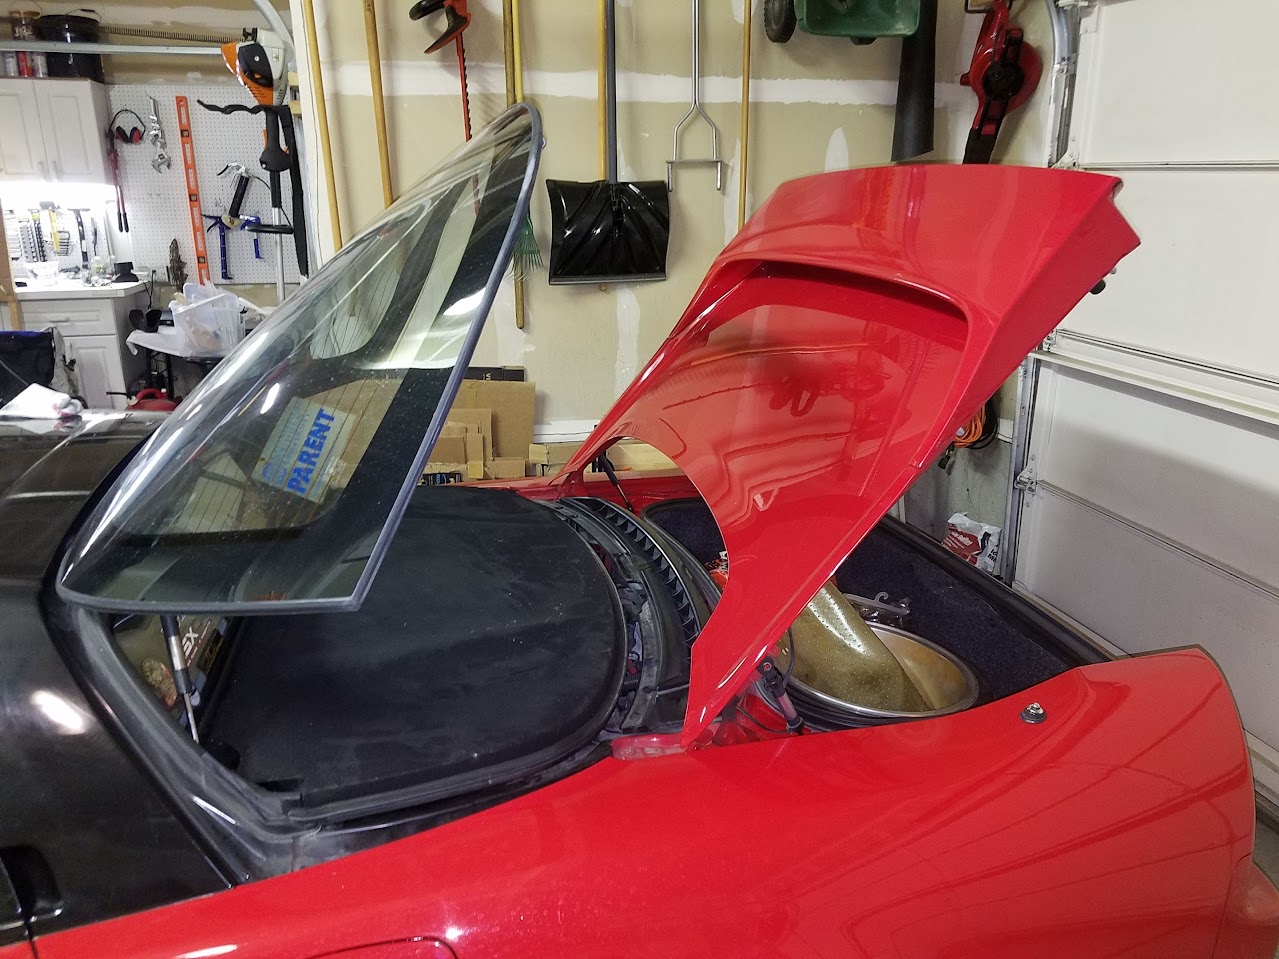
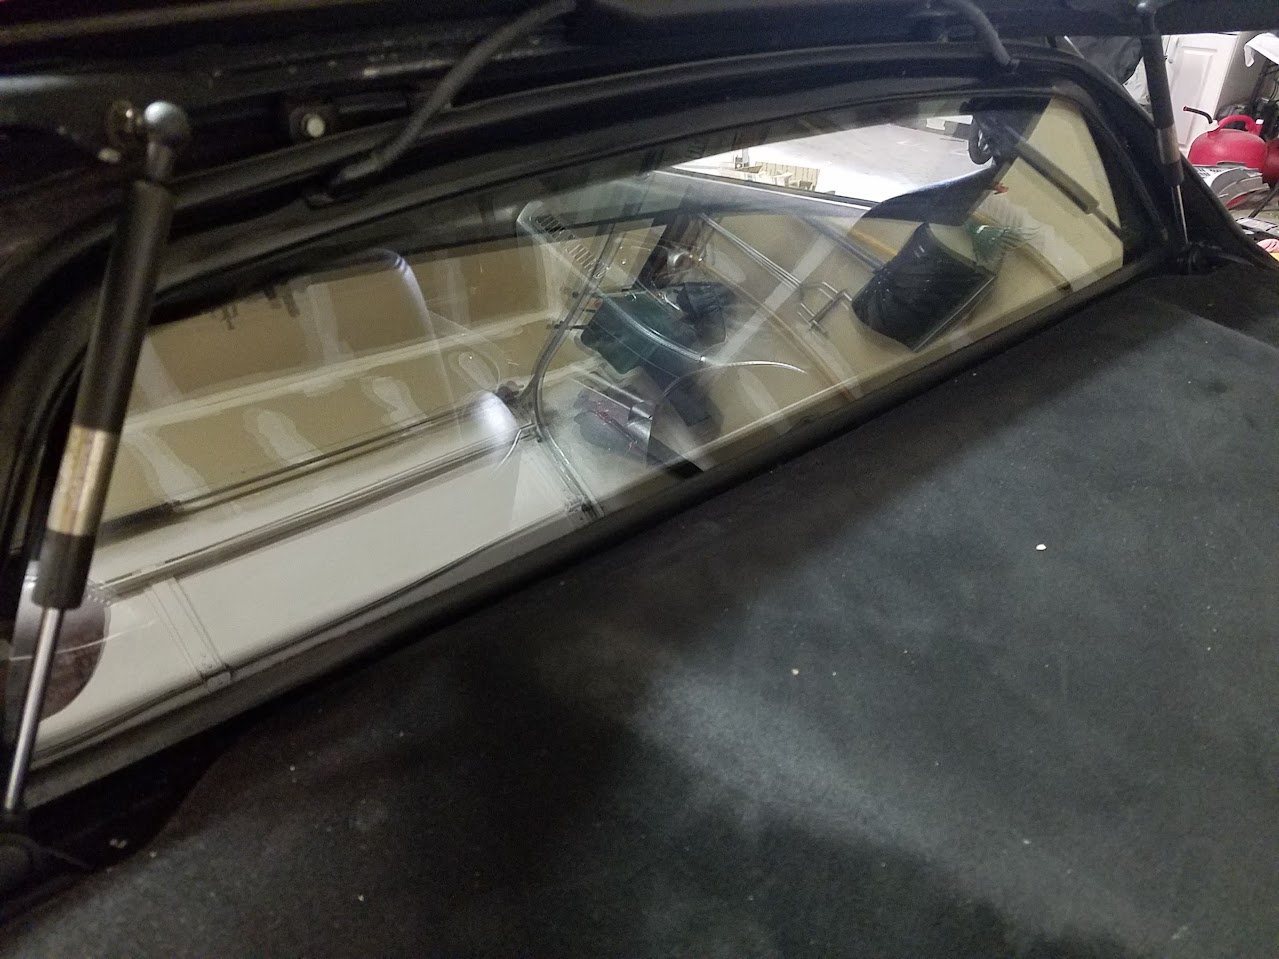
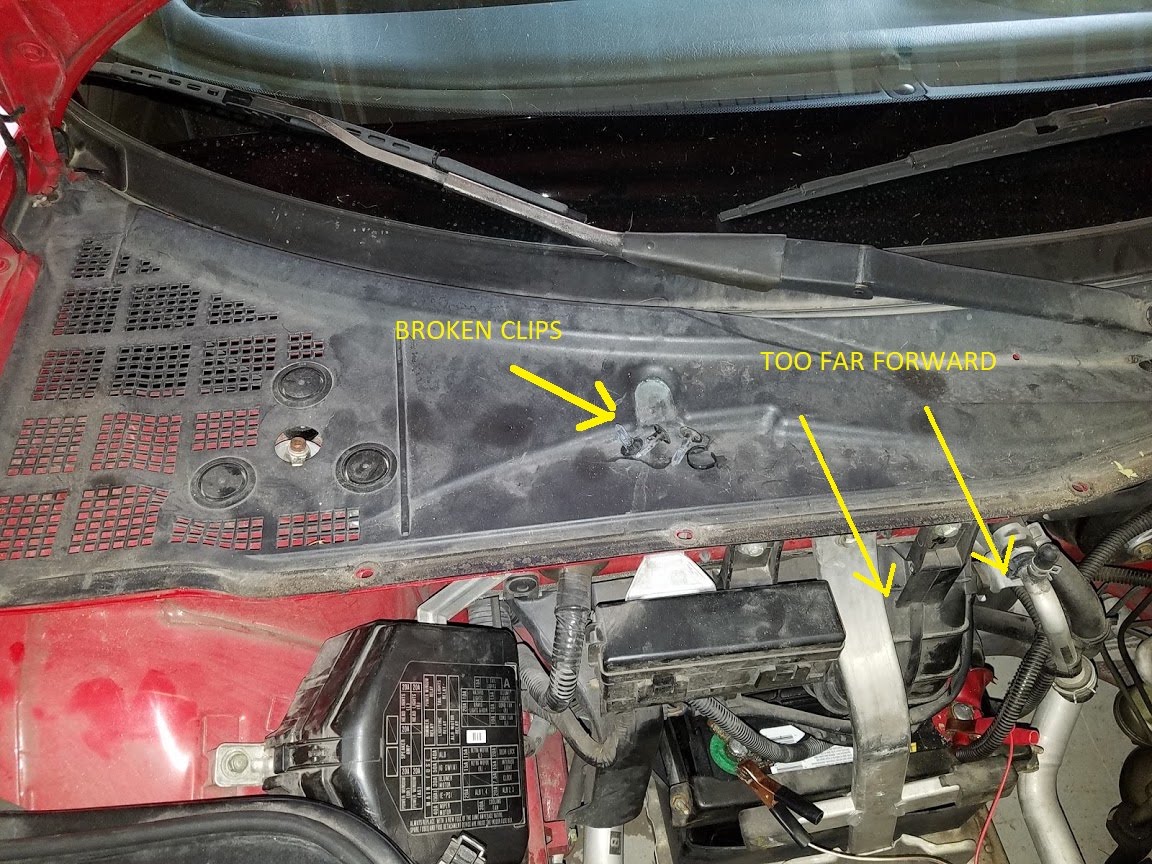
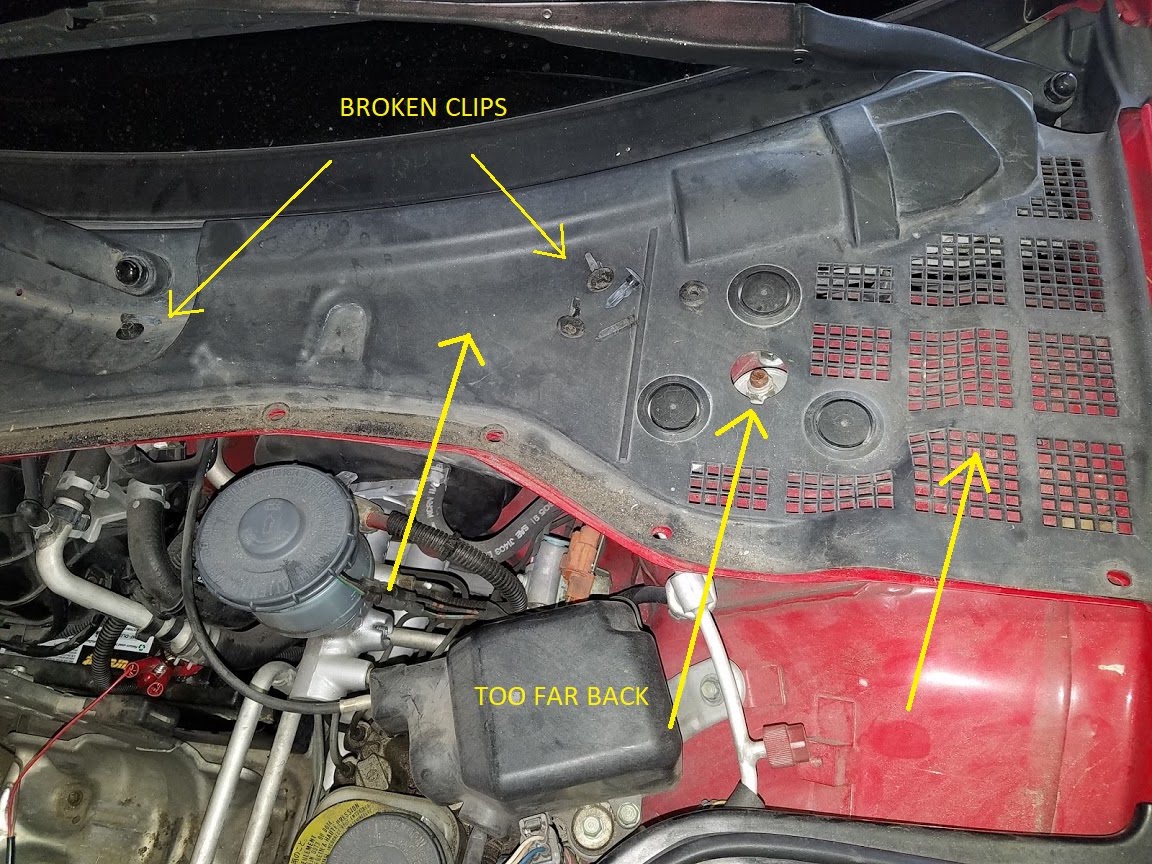
Speaking of poor fitting, I'm fairly sure this NSX had its windshield replaced in the past. My first clue was the horribly shrunken windshield top seal and trim, which is typically a sign that it has been installed improperly. My second clue was the remarkably good/clear condition of the windshield on a car this tired. My third clue came today while deleting some of the aftermarket wiring. Since I am waiting on the gas struts to come back, my ability to work in the back half of the car is limited (I don't trust the glass hatch being held up by a piece of wood.) So, I decided to work on the front bay. I noticed that the rear hood seal was not fitted to the body correctly. Upon further examination, I noticed that all of the mounting clips were broken and the entire trim cover looked to be installed crooked. To fix, I think I must completely detach the trim cover and rotate it 1-2 degrees clockwise before re-fastening. This makes me a little nervous to fix because I think I need to remove the windshield lower trim piece to access the clips/screws holding the trim cover. Has anyone done that? I might be able to re-use the weatherstrip piece, but I must replace all of the plastic trim clips. I have a growing shopping list for The NSX Shop.

AM-JKLVBfHkpPHc-ppmcjodQmLK5sIIY5JrXr-iQOK3Lx0uXILa6-xMMfgj-OZAabmeJgW3VkD_qpXvMbdDE4IZIdjIewuyvwsCt-wLd3Lq4xQOJ1Si2xuAnAyRQoitKBrnpT2MHKbuQbegtLc6J9E-Vl3qw=w1152-h864-no


AM-JKLVMNW07zEgybu_hOYVSPwwaFjGp-TivY4dYhsyS9OhzEk2lT_LAfn-Cr1Y1wCJiO21WOL8VEJcAr-4ZbrQM1ZGQrshb5NlB8st7LJ0E2AopJvx42YSwg1Bq3LGuIM9WY__uYyRizT6z5Msadktk8UDf=w1152-h864-no
 
Last edited:
Aftermarket Wire Removal 02

Decided to attack the strange wires going into the main fuse box, relay box and into the firewall. Upon further investigation, I discovered these wires were all part of a switched purple "dazzler" light kit that fit inside the A/C condenser scoops. The front skirt duct covers are missing... The lights were controlled by a switch someone screwed to the driver knee bolster panel. Power source came right off the main terminal under the fuse box cover and was grounded to the spare tire holder bolt! The switch was grounded to one of the mounting screws of the driver side fuse sub-panel. It is now all out and in the bin. The fuse sub-panel carpeted cover was not installed correctly, so I was able to fix that too. Also, noticed a 10 amp fuse where the 7.5 amp clock fuse should be.

AM-JKLVlh6CsesQFzfhw94TWN0l5aw_PbfAUdWeV-3xwTZ_Lhx_p-nJFmpNNlWJfgXP2jfRqiiuRJgayv_MvpxerZiOJgMRReT_csFvauYW5Py3EuJEjiEi0WZV60zw5kBAGCFMq8-j-ZXfvxq-EMLrWu6Kw=w1279-h960-no


Not safe.

AM-JKLX8RsXqaoBpUUhnmL0yHsQR2DZXgKJqUL-xcU8Psq1DOvyz08SpZ4iDebDT37x6IVIOGJIwm3S6rgNlDYeV_0fEd3mA9KaCCjMHHqCWtH1mj_cvJnYgJ5aCPCqvrGSkkGj4lkp2PzIZFA2yXT0Nj7Z4=w885-h1179-no


AM-JKLU1gPBSfg-bbe2-_GbEGWyZ4hixKsSyMH2zszcYnpNSBk57C-dqP3tYHiRnEeOpMoNuL5Vpae7b1gWLAe_T_N66uqgbjiHO9kutW-QRG--nZ7CIae4tdekmd6j2jHjHr11Djhkgm3zyJH6d73vU-mfA=w885-h1179-no


AM-JKLXTZmlMEVMTwxw_K0k2Z5R5C3gp0Ty9zYQu9NMa2zQIL1yWJ_WAarsJGp_72U2StIt5MjtybgByxvBWaNqW9s2EVoEXQ9xksM0URgO7bWEhRYxAYqL7GBuUDFeXIS-w6hC6X_FLqGVJhHHUWo3UXfXc=w885-h1179-no


AM-JKLVAwIXAY0JXIepWyKpzgJE1zFkUBeyYVCXEFPa-eVxT0pFp3_DYYqCkey1b4gwzchYHYVS5wQsnwNJuF-jy1i2nuQhQqYTMlVxDUzwvuNYC9L12TVjSLEaQZyt1zS8Dq4mxpTpZ9wHr0mpgbtNbkNU9=w885-h1179-no


Routing through the firewall. Looks to be using the clutch hard line grommet. Kind of neat to see the clutch master cylinder blanking cover in there.

AM-JKLWppYZadZGkem-IhLCoiYjXvosSsmmrtv77G6jL0mRI-ec85MNxpjz4TBxutCdotYyX_UxyaK6NvW7SMqFmNVITJmiLNoVayJxq0TGODFKMLqAJiQQVoMZkQN-tQ6MuU-r_FAIneniCp0j1D1ch07gO=w885-h1179-no


All out and going into the bin.

AM-JKLUDnyE2QFeN97OJadEd3FEGwz4heh7k0RXncrhS9wP-q1ywyCIlD9DeUzh_9FeskdCg3MVdD-OetUA-la3AWc5CLsSorhh5CqbhGSK7Q_erH5QHZYHT-wIOXmy8_6ju5buYqbzN2tbAzb80DYwhq3B0=w885-h1179-no
 
Last edited:
One of my favorite things to do, remove someone's old wiring and all that junk, cleaning it up etc. Makes you just feel soooo much better.
 
Agree- it's so therapeutic!

I will admit to being thankful for having been spared this sort of therapy when I bought mine, or yours, whatever. Although I do enjoy projects, a project car was not part of my NSX dream.
 
I will admit to being thankful for having been spared this sort of therapy when I bought mine, or yours, whatever. Although I do enjoy projects, a project car was not part of my NSX dream.


Oh, I've been there with yours already. Here is a small sample of what came out of that car:

AM-JKLXnZZsceenEV3DdY995tC2Up9gmljt4r4OjWUv_6uamL22mCSYh2F_9oISRLrJGsi1I3haNTCsW4vngjw4Oak7eyYBReDNztCWBP0vvqtrJN8I_Cgg8EvN-K2SphdxHY2vxAGkxMvYuYchFoQCmFw8r=w723-h960-no


This NSX is worse.
 
Last edited:
Body and Paint Work 04

I got home from work early yesterday (long day- up in Dallas at 3 am and flew back to Denver then straight to the office) and found myself with about 20 minutes to kill, as Mrs. Honcho and the kids were not home from French pre-school yet and I already had dinner going. Perfect time for some NSX work! I decided to continue work in the front bay area. First order of business was to remove the windshield lower trim to access the cowl cover screws. I have read many horror story threads about this process, indicating all of the ancient yellow clips will shatter. However, with a door panel removal tool and careful prying/lifting, all of my clips seemed to survive. I did notice a few small pieces of yellow plastic (clearly from the clips) laying there, but can't for the life of me figure out where on the clips they came from. In any event, I will replace all of these with new ones during the Stage 1 repaint next year, so I'll live with these old ones for now.

AM-JKLX0pkN-mRFKaSFvdb9gdURfUNFe1u3fJebY5VoEKzThOra7XYzeLMukja2_c9W4xZyW4vfP8n0N3vNQNuhLHSEZlm_zkLX41sbTssnpU46Y3VnnHWEEHTfKhCCOV8-RO_OUWIPfs0S9-B4QlvpnoKjg=w1279-h960-no


Quite dirty under the cowl. 26 years of grime, leaves, seeds, etc. I will remove the wiper motor to get a full clean in there. Not only will it dress up the area, it will save me time and labor in tearing it back down for the Imola repaint in 2019.

AM-JKLWHBFn25AUsFAYudjva-8ZH7zBhTAwCCE-ZKtUrwWiMK_X0u10P_1pP7r8EjCoBCuxVY7RgD12Um_TbJMLDrb-NmWDzK9SA1wcf25Fd_I-FPXQ2GDL2uvzloU3FnMKb1ldU7YpDOOfUwg_k2qPyyeA9=w1279-h960-no


AM-JKLXUdsrKxHXEGel0cYs9LwZhMqT2fmHbCfQXa5p_KBHWS3Bb6kibNDs0cUqrEWoM5XFWIb8k9UliI7W63datXVkLP7tXWFP3E0Cwfwn7RhjMt_y6ntig3PgKQxBVInJMJjB48Nvf09fQ17BH_gDyrbZr=w1279-h960-no


AM-JKLWsqddhg9RE8NOG2-DfdpPKI7VaAa05CZBjECzJtE0mHEx-q-3uwDC6ZyYQiqaBK-12o1A9DWdeFTCXCkh3_-vwknMMwS7ODhSkLDhVhl4Ieltd-U3gNnMt5NdzGe_yCAltzUkeso3ViV3kYDg41FA3=w1279-h960-no


AM-JKLWiXMFcR00QsdMOMOJH-jTH_z2NF9uCFp0iV-7yXVrMH0Shd9mkQaTFV3osawiJ3b3edc0O-aO0s9zxA05elOwkr0-ao2yo4Stxc66DmhKHwkN2UeXowHUabWdigI7jGkUWEZ0Z59nO19_nk0aATGbM=w1279-h960-no


Blower unit is very dirty. I might just remove it, disassemble and clean, but might wait until the repaint.

AM-JKLXJp8CjvpjodbNlt4IlQ7cIluVVPj5Ud6wDlJgQchkAT3GBsAPEaLvBOKcKTAmw8pcWNxpKZsJ8hAngeSWL1fuhJDNZkLAikZU_QGR7jv_Xfgkx-r3uyFJPCqfa_Oi7FT3l781bAjya5waHekA9mDy7=w885-h1179-no


Finally, the foam weatherstrip is pulling away from the cowl. Not sure how to replace or what adhesive to use to re-attach. I was thinking of getting some Home Depot weatherstrip...

AM-JKLVKThvtcLlABHmPfsFNYqxANcfStwTq0GYXMGhoZC5C7bKkTf6ToJftBJ7MoFO8hcBqkt9Hat9scIVrhIfN57TCTI6DU4jm68RRrrrfeZRlEjFPIGPIk_XGEj2ACiLJVIkaORPaF5Q1GwU9hrrOPsXT=w885-h1179-no


Also, something special arrived in the mail from Slovenia...:D
[MENTION=34522]NSX_n00b[/MENTION]

AM-JKLV3pLM_wTExD2jlVd-fq2CYh7Q0bUbvhEFKq5pgHHSOh_ZEJXez3KpA9LG2xgVDxkVqQVzBd7SeymwP38eyrNAzM5-u1fb5RB3PHamYlQxiV-PIxzIu1vktO3SXdB6t11mZD8kaZiVM6-SL-ibDXzcs=w885-h1179-no
 
Last edited:
Body and Paint Work 05

A bit more work this evening. Cleaned up the entire cowl area and wiper motor. Next is to wash the cowl plastic piece and hood gasket in the hot soapy water, dress with 303 and put back on the car. Unfortunately I will have to order all of the clips before I can complete this job, which means a budget request to Mrs. Honcho.

Wiper motor is out. I originally intended to remove it completely, but the orange harness ties were fixed very tight into the motor housing. They started to crack when I pried them, so I decided to leave them alone and just put it to the side. For the repaint, I will have to bite the bullet and remove them. Hopefully they are available from Honda or elsewhere, as I'm sure they will break.

AM-JKLUblO8eOvNWu3XvhjQZUvmEFG-XzcVLg9gtCEeWBZXn8QF5Uxo9lCJhVdP2hjl-r1EXPMV91sDk0WBisj9mVebU6SqO1jiK_t9S6BXKUSY6g-iW0Lq_LVdTnQ2KoJppAlpmeArV2mfJJOFLExzXNU_9=w1279-h960-no


Starting the wash. I use a very simple method: a spray bottle full of water and a squirt of dish soap, and agitate with a detailing brush. I use a microfiber towel to wipe clean, as the fibers absorb the liquid and grab all of the dirt particles. Works well. I will follow up with a good spray wax/detailing spray.

AM-JKLVdSK5pOCUvZQ_D-bc9052p_o0zHgDjuzVkBD74YanUVAWcKiQR50vRHlURqO9v7y-c490vE3Tp6qak-FYmBb9jT_w1qOP9nAExMmi9DU0nbv3lnPcusHBqdeRhCdofjKrxnmIXAco6ibNP8PRGK5uQ=w885-h1179-no


Getting there...

AM-JKLULKQh_L8UCKNxOEKvPw9F4jngRimzeaK-oejs9eZiu2eoeMbz5Eaadjj9zjnv6GHtmwPXBtBwcVdxNybUfomYqSa0YAtqGjVxkdn2c_bnC7khgw4QXhAZtvmndrfBIuV_u2kQl1QywUb3zspc2kJ-K=w1279-h960-no


AM-JKLUQ14Nb8U-2XRIEVs-WTnukUOyjVVWrLdd5XGEZVqNwtXM2PwPWydW_SiC9RfNn5HCASLOeEevZmYhyyXEYLIcic5upE1ZZO6IGFN_AxfF8qfcr75Oinz-y85wVL9FaMOu3V8_p7qvWiVlODppiQ7uA=w885-h1179-no


Much better. In addition to just looking nice now, this will save time next year for paint, as I will not have to deep clean everything before prep sanding this area.

AM-JKLWK5cjHQojERCNwgrZaHZpLattMFkcGc0brtAe_eTXepsAS1N22cPKh7cfZYW58z11fP5nc2A0z90cJtoBZLgpXG78QkCohw-vHuq9ocLxXvAALyCOugzAL8qb6E0MtfvymVfOzKQoKFeQzlEEoT293=w1279-h960-no


AM-JKLXKZYBPleQ7DIh38zu99eGWHuvudiVLeVG6TlZxgUhkjfCDYu3G98N3iOdy5jvV5T5kO-oDS6OvlwdSRTq1nhLtA1Hme2-TwKLAcEMgHSzMUrZa3BfwYGZ3S17rYYtgaiWTnzWoRaDV1a3ClOcw_8Zu=w1279-h960-no


New white zip tie replaced in the factory location.

AM-JKLUYVOqHdxYrjX2aY-67HP5gf1oLx9X7sALxO4rRUvpbYTjSCugxIhXI9ZPDH1sO_-waN2QU0eXAN6S0QXeYhv-BP7lDbezpYZ-PV5VXTOudSjHoAgSrqRfIODtJMtccD7npuXN_rucViTnQKHqyBMLV=w885-h1179-no


Wiper motor back in. This is as far as I can go before the clips get here.

AM-JKLUkDTsO2lqNzkJt8bGT9L6PpxcLAlaVAPiAU7rRhr6Xp0MhlBeeC-R5F0kjfVT7wIJY39CFYmaAfNJ2Q3QUaPKo_IEOeiqEHzHsGo9481OoC-A0lpqYURRWJDLDSPfK9TCCVEB1ch9zIzlH6uQPJxEl=w1279-h960-no


Big job coming up for the long holiday weekend: remove EPS rack, controller, power unit and harness. Maybe delete cruise control too....
 
Last edited:
You are an animal Paul. When you are finally done the car is going to be a masterpiece.
 
Weight Reduction - S Zero Conversion 01

With the front bay on pause until I get the new trim clips in, I decided to start in earnest on the S Zero conversion. First up is cruise control delete. I never used it in my other NSX despite almost 8 years of ownership, and since the S Zero did not have it as an installed option, time to lose 6 lbs. :D

Glove box is out. Amazing how quickly it came back to me.

AM-JKLVcJw-DWDdH-w3acKBKtqgvqz99jicWGH5ite5y36HDdvADwZgVy2vXS4OLLEB1fxn3RK3N1Xa0Ema-EBpyIq48J-9Ew9uESjnHvoV_4W8_wrM-7o-YOghABhhD1M_hpTwialTJW-DuuNUTiIpST8jC=w885-h1179-no


Once you remove the cross-duct for the HVAC (just pulls off), you can access the control unit stack. ALB orange plugs are unplugged here (I will drive with the ancient Gen 1 ABS until I decide whether to delete fully or convert to the modern ABS). To get to the left side cruise control bolt, you need to remove the ALB unit bolt first.

AM-JKLXDY-ksdgqhITiFTqKrKV0jqLOVeq1CoIlqq_s6dat994pXagBDgHjUuAnNUoPgVzrVZ320waBhqS1EgVOEInzTtDa_PVLLrrWNJW5HhH45BpsNlDqAPlaDBfHd4zpKDURVsvUPxh9T523NawgAceNS=w885-h1179-no


I was somewhat stumped on how to remove the control unit. There was no way to get my fingers on it to pull, nor was there a way to get a flat blade screwdriver in to pry it out. It felt almost like there was a third bolt/screw in the rear of the unit that was creating resistance as I pulled. But, turns out it is just a rubber coated tab to keep the unit stable in the rack. To get it out, I made a tool. :) After obtaining a wire coat hanger from my closet and shaping the hooks with my vise and a screwdriver shaft, it worked perfectly.

AM-JKLX_VzU9dYJw5nrwuU2aN9Nzb3faOa1LPCPzdm748xTsHJwlDCFbDguhl6wdoTAU3yiiwstlLEYFjQKE4ux6kTTwFMJzS0MOn99j03GCl64HgiIH24IaTtauaa2hpBR8O-N2OgWAZTnsAxfSKX5G3iUp=w885-h1179-no


It's out!

AM-JKLUHa7pKU16A0kk3VC5BnHXLLuFERTjyatfOX8raegg1liWiv5burobxeQCqRhfsSpj4ujIY5w1hAR2CAcf2CA_cZI-UMtUiyogy2GJah8JNncaZbUJh9CiEROBZsoGUymkKMZRG9_WWcTnqi0AKjx1X=w885-h1179-no
 
Last edited:
Weight Reduction - S Zero Conversion 02

While I was in there for the cruise control, I decided to remove the EPS controller and subwoofer too. To get the EPS controller out, you first must remove the two front bolts on the door lock unit controller directly under it. Then, you can wiggle out the EPS unit.

Early generation EPS Controller:

AM-JKLVhAXu36iNcDn_ZvufVyGFb4QP9hB8DIGjcAyPEvnHnYhrmrmuCzuZiRGMd-svlzMq4qt3XQ39gZaeY8eVXRo6KotGx0-LeA-falGUJUIcQzFVUWmO3sWlF1Ie0xsndGziS8ZZ3J5v6FJOMsYBu3vk9=w885-h1179-no


From the bottom of the EPS unit, a message from the past. This is why I love the NSX. Every single person involved in making it was spiritually committed to the ultimate sports car experience.

AM-JKLUdGmpFpKmGQZhc5wzz6f8ZljIqt08zALI2AHlWLkq08kTlr8l7kE2Zfs8ftfGzCAg4dWMAxtQV2bAklgYI_FAg2acDfTSg85hUKcjqThVftIkJb72E4u3hof6JosY7Knlmxf-siksBP92j_GIQ34r5=w885-h1179-no


Starting to look like a S Zero in there!

AM-JKLXsggvCc0b3Igllw1ziqpM8_GuIDn7saQulD2YkTANWh1p6VYZj_M8gLnSLev2hXSpQnFmXaTIJOoZiSnRP2ajXLYAsKKQsghgZdnZ5NXOHHLPxaUVuAnzXZFu2ym5IDYkJy8uP4ZtCRsxWZlzfT-mW=w885-h1179-no


Subwoofer is out. Looks like a cheap aftermarket speaker wire coming out of it. Sigh. I'm going to have to take out the seat and carpet now...

AM-JKLWzspOJW8mGbLYzASfR0sskRLqzncIlXidhHP-IIg1P6XX8Z3skgfJoNd3R1qMoA-3NaTy-Rp3jmyWn84--6dFHi5hbHsBZiNXmm_jf5rxoKJTAZkHYTeZIfPeOHkxvN_1OvQkZPHw4VUFSwMQZMluU=w885-h1179-no


Gen 1 EPS power unit revealed. Will attempt removal tomorrow.

AM-JKLW1sDI5XfSDE2rPffTdO-FjbWIHaLZ0-9qcxH8ehSiUkMcTOpo0jufu7prpAVdw75GgUqLpHhUQpyheVurVbO3NtZD5HJ-Lh_AUReo5jfaL9oXgimd5Qn20wbk9GuuWGNI07ul9HqJp8Zne8uoezkgI=w885-h1179-no
 
Last edited:
Good work there and even better pictures. Thanks for documenting all of your efforts so that others can follow and see just how well built these cars are. Great stuff here.
 
these cars seem so simple when you do all the work:biggrin:
 
Good work there and even better pictures. Thanks for documenting all of your efforts so that others can follow and see just how well built these cars are. Great stuff here.

Thanks. Over the years, I've felt that no one has done a comprehensive, notated restoration with pictures. Some of the resto threads have been very good, but not comprehensive. If you read Kaz's blog over on the UK site, that level is what I'm aiming for here. Hopefully I will be successful!

these cars seem so simple when you do all the work:biggrin:

LOL. This pictures do not do justice to my bloody knuckles- the glovebox area is tight with many sharp edges!

Wow. You're not wasting any time!

Ha- stalled out this weekend. Mrs. Honcho put the kabosh on the EPS rack in favor of cleaning out the basement to get ready for the big construction job.
 
Body and Paint Work 06

Gas struts are back from Frank at Strutwise. He did a great job- highly recommend his service! My hatch and trunk now stand up on their own- no more wood sticks.

AM-JKLU4Cn_c31zTW6R_TOM6oCjzLsSxizqzghdUDC0WYIXvz_e-jPRVrLJekypODpF61McJIaVIgaYkNx8M8BLK2KXwjmMmm4_kDuhXeDKuvUt8Uu9lOsz6cjzZ3-W1-23T9902AFrVQJOkNzq89eBJjuaR=w1279-h960-no


Now that the hatch glass stands up on its own, I can de-sticker the rear glass partition.

AM-JKLXK75Vu37utTVz-tVpYtsqDoV5A157pQezUXEXttdeeTo-RWHo8f_TuL068bLkeR34X9A6kJ0S52vn2s5f4fUrc_66S7k2nytQMNgPIMx6XzhMXlHGT8QitqqUUy6EZ9OmjDuqiVC_sBKwJwLiy2Cxb=w885-h1179-no


"High Octane, Low Profile" :D

AM-JKLXNLL639cR4IfuvBYJb8IDT9MS3qrjHLWcBahW9MantHkPDg7fORX7buPOVDe_a_rA-sPjDI3nvFksvQBld7CmJ38g7XZcfxYSHGIk_LNi5Tdmv0hZqMthOheIUfwGZbV3R2ahthDvfZ5d_UbY6rTWE=w885-h1179-no


AM-JKLUuTkCJqxl4hvD39xE_49g-QWjf3hrnq3UrWjO4tl5mnKkmhVXuPxzA8aItWY9PtUEOMXf_OI6AVriVsAicYszPKcVp8OM0iOB-jkZpbFBd6_F1l2jEAcUqTA0jg9_jFFqLrPWLEPRUaBy5pk90IzhE=w885-h1179-no


Much better- starting to look like a NSX again.

AM-JKLWXUUdlO36M3jaJKGGJOiggjlRs_c3JOobhcVT5IN25mNwtRu0U5AYMaWOV9vhDzpPWzb56lbjJ4sLI51X1TWyQUX3V8e4i9P62_ZO_VTe_ykf2hAkj6Af1Rv4PzWs7xOwjztkzvwGOBU_h24nhSi_c=w1279-h960-no


In scraping all of the ancient stickers, which were baked onto the glass by the heat of the sun and engine, I had to lean on the engine cover. I got covered in flock! Good thing I will cut this cover to make a Type-S/NSX-R mesh cover. It's ruined anyway.

AM-JKLWCFSMHGzZPEL30rVLofK_Y4z38eKF_mhi0VM2lVvz0JqAwVN9SstDbH1DbmrrzY1FI3AYpgNOxMFtb8EN3CEVcuR81_-AdTeCFXn5zF1R4XvaalnB7DiBhFw8rYUZztMGdAorlPLXdbHtNPKsFNdIs=w885-h1179-no


Lots of new parts starting to roll in. A big box is coming from Japan...

AM-JKLVwdws_xG-PsL1jhcb-H-V97TIl6Pv7fAlOGZX0DhGg8DfnGJ4DJIeLT2yX_wksBQGIO_aqTRqRuvCQp7ofSOeqnb18zqZ1hcRhaZVni-e5XBW3EGLLugImUlOm_Ex6HMoLrBCASjLCU5coS0MNAjcI=w1279-h960-no


Special delivery from Momo. Type-S steering wheel! Or is it...

AM-JKLXJlZ-jSlg1j1CY5JaEgX6yNFjFR29V6Lxy46kpijRIE1Pz6TZ1-ciCXMp-FDPKmf6tF9GSzirSvxtCNRZ1FBqXFe69dTbK3C2efzqnfDc5_JGOQrGKseSRknB4se-pvgOHQRIaYxrdKSE5ixBwPK4z=w1279-h960-no


AM-JKLW7jJCKdpGwVIZThCmzvs9R0tKqVJQZ05Ql7IGjV6Nko5gvxEIC-l4LgmbOE8o4e1H5S9BOqY8S7wOWTI8gjQZm0aINohbj4dWuGPRAJsiDunfYe7-TJcmn8zSAbFdQaXKjoo1JZDKBylfnTTHRtHXh=w1279-h960-no
 
Last edited:
Weight Reduction - S Zero Conversion 03

Mrs. Honcho graciously volunteered to help me remove the EPS rack to send it on its way to NSX Rack Repair. However, she had to bake cookies tonight, so I had no helper. Instead, I decided to attack the cruise control removal. I have already removed the control unit. However, I ran into a brick wall on this job. How on earth am I going to remove that cable from the throttle pedal arm? I can get my fingers on it and it wiggles. I tried to push on the side to see if it snaps out, but nothing. Perhaps the cable lifts out of a slot in the top and it pulls out vertically? [MENTION=12356]Mac Attack[/MENTION] [MENTION=25737]Kaz-kzukNA1[/MENTION] - any tricks or tips here? It is at the top of the throttle pedal assembly, so there is no way to get a tool on the top of it.

26 years of carpet fuzz

AM-JKLUFSLwcPJ-vZ2-kfJgEl9VzXYarlVgckO28Haj-G3BmAxDFVk4eW1rR6zo_XgKevXR9L6aHIxukIEeT3AEtz2-HgMYP0MV7BrLyeqFCwRk1ZamNpG7U20-bBVgXK_eh8OtLULaCCy7UUTebG4ro03ly=w1278-h959-no


AM-JKLXtxWfgDuvX7jskrKPNGW0YR7EaaqPYV6r_s7F1g-7L4DuV8eUVTYBNAu6YP9gwvk3U5kzJ3KZXEezbkaex4UH_6QHqhPPCgPcF3TECvr6RJb6h4WTJ8s_bKkJKs6yszWvhDZR7V5NzOHRpd2rLlAp7=w1278-h959-no
 
Last edited:
Mrs. Honcho graciously volunteered to help me remove the EPS rack to send it on its way to NSX Rack Repair. However, she had to bake cookies tonight, so I had no helper. Instead, I decided to attack the cruise control removal. I have already removed the control unit. However, I ran into a brick wall on this job. How on earth am I going to remove that cable from the throttle pedal arm? I can get my fingers on it and it wiggles. I tried to push on the side to see if it snaps out, but nothing. Perhaps the cable lifts out of a slot in the top and it pulls out vertically? [MENTION=12356]Mac Attack[/MENTION] [MENTION=25737]Kaz-kzukNA1[/MENTION] - any tricks or tips here? It is at the top of the throttle pedal assembly, so there is no way to get a tool on the top of it.

It's coming back now.... I've been trying to suppress memories of that painful weekend where I removed all kinds of stuff at once and I was tired and sore from all the contortions needed to get under the dash, hands all scraped up from the sharp metal, etc.

What you have to do is first unlatch the black plastic bulkhead connector where the cable passes through. Reach in under the front hood area and give it a good twist 90 degrees to the left or right. I forget which way. It's tight so you're going to have to twist hard.

Once you get that bulkhead connector disconnected from the firewall it should give you enough space to wiggle the connector off the gas pedal... somehow.


Thanks Dave. I'll try again tonight.
 
Back
Top