-
Protip: Profile posts are public! Use Conversations to message other members privately. Everyone can see the content of a profile post.
You are using an out of date browser. It may not display this or other websites correctly.
You should upgrade or use an alternative browser.
You should upgrade or use an alternative browser.
Honcho's Long Road to Imola Type-S Zero
- Thread starter Honcho
- Start date
Re-Assembly 84
Front Brakes
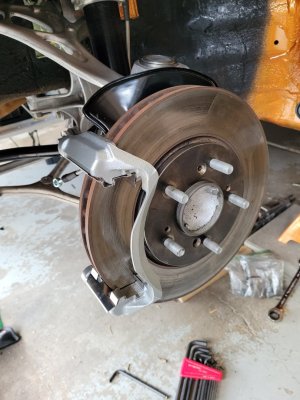
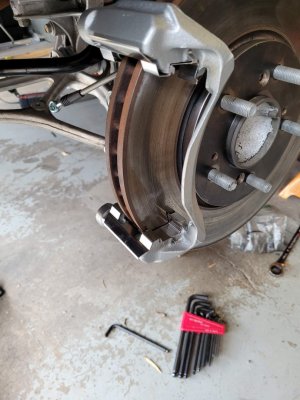
After 4 years sitting in a box, the front brakes are back on the car. These are the original rotors (which were almost new- just rusty). Just cleaned them up. All new hardware. And new stainless lines. Endless MX72 Plus pads get here tomorrow from the land of the rising sun.
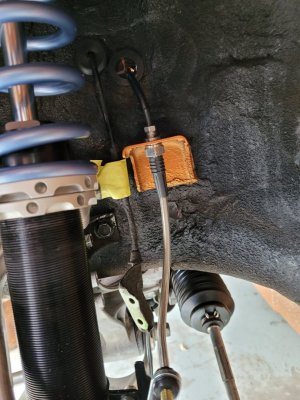
Front Brakes
After 4 years sitting in a box, the front brakes are back on the car. These are the original rotors (which were almost new- just rusty). Just cleaned them up. All new hardware. And new stainless lines. Endless MX72 Plus pads get here tomorrow from the land of the rising sun.


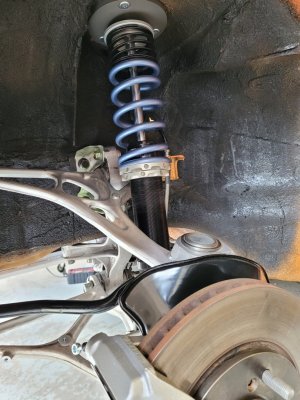
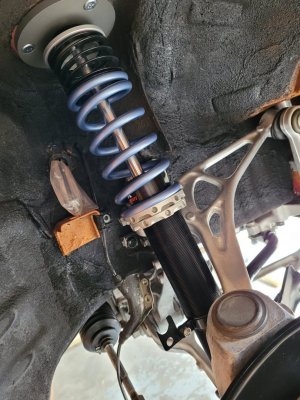
If it is at least 165mm (minimum NSX-R front spec), I'm calling it good.
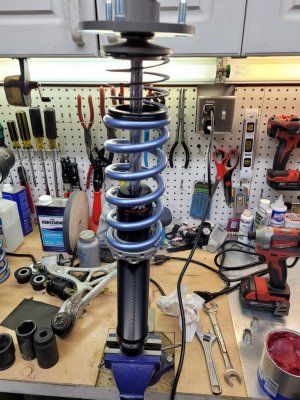
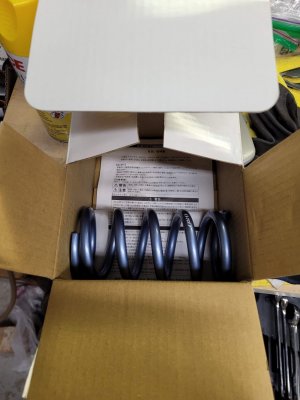
Nice! I think you’ll be fine on the height. I have probably 2” of threads above the perches on the front bodies at ride height with the 7” springs and I’m not all that low. I bet at the top of the bodies, rideheight will be higher than the nsx-r
Re-Assembly 85
Front Brakes
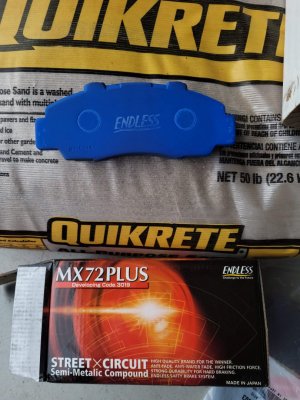
When I had my GT-R, the Endless MX72 brake pad was the "baller" option for those owners who did not want to change their pads for the track. A set was well over $1,000! Thanks to the weak Yen, however, these pads are now within the reach of us mere mortals. Even better, Endless has revised the compound into the MX72 Plus, which has better fade tolerance while preserving the legendary modulation this pad is famous for.
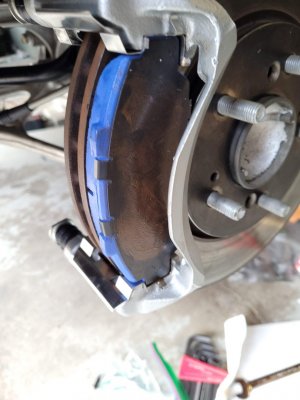
Mounted on the rotor with all of the correct OEM shims (there are 3 on the 91-95 brakes). It's very important to use copper anti sieze between the shims. Proper application will virtually eliminate squeaking.
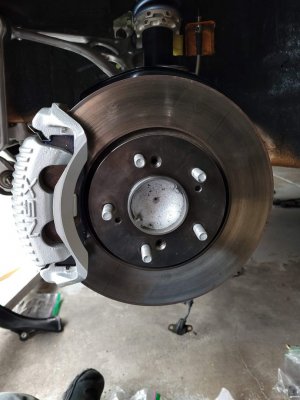
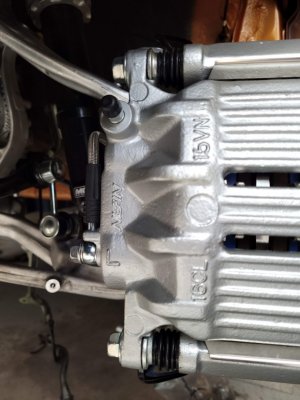
Caliper mounted.
All new hardware and lines.
Front Brakes
When I had my GT-R, the Endless MX72 brake pad was the "baller" option for those owners who did not want to change their pads for the track. A set was well over $1,000! Thanks to the weak Yen, however, these pads are now within the reach of us mere mortals. Even better, Endless has revised the compound into the MX72 Plus, which has better fade tolerance while preserving the legendary modulation this pad is famous for.

Mounted on the rotor with all of the correct OEM shims (there are 3 on the 91-95 brakes). It's very important to use copper anti sieze between the shims. Proper application will virtually eliminate squeaking.

Caliper mounted.

All new hardware and lines.

Re-Assembly 86
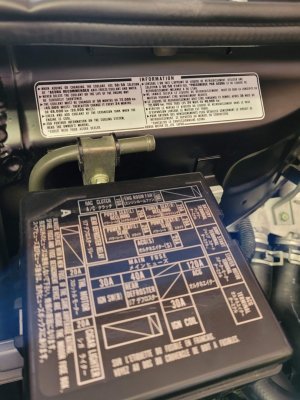
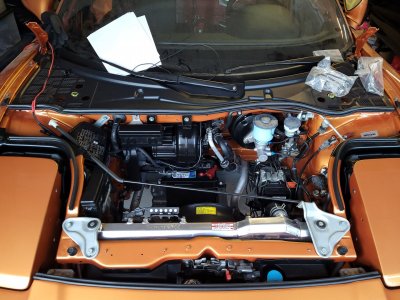
Coolant tank, brake master, vacuum lines, wire harness, etc.
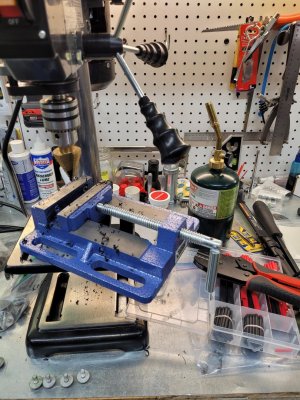
The general state of things in the shop. Gives you an idea of how many different things are going on at once.
Finally, I am able to start installing the decals. This means we are close to the end...
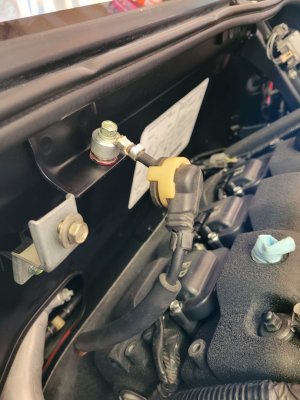
Engine ground mounted using the copper paste for a good, anti-corrosion fit.
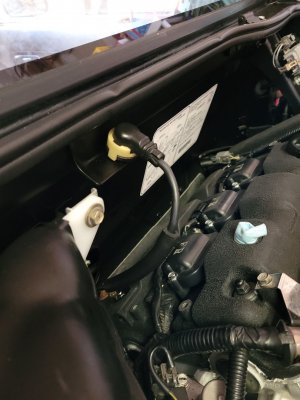
Engine ground means we can now install the Type-S coolant tank, after a 4-year slumber in a parts bin.
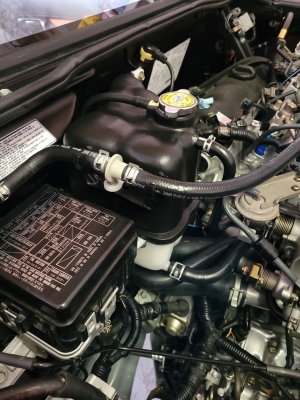
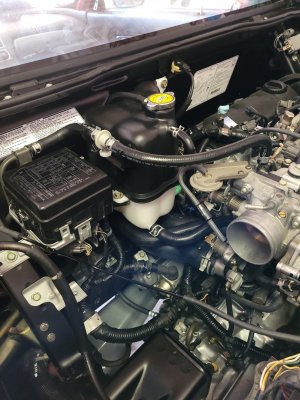
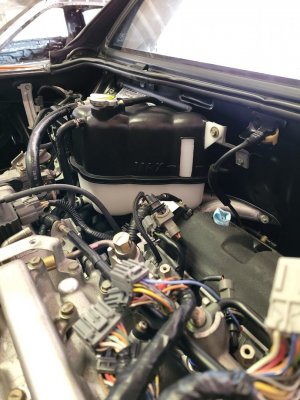
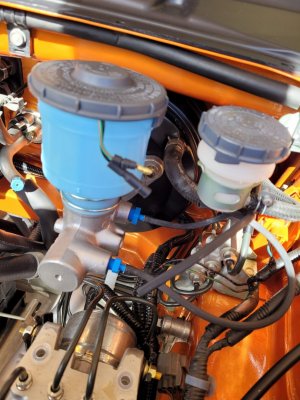
New brake master cylinder installed with the bench bleed kit mounted. Need to finish the brakes and brake lines before we can fill/bleed it though.
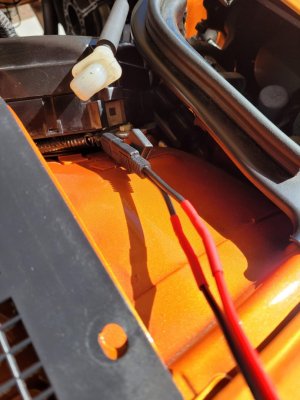
Completed the OEM battery charger installation and setup. I had to create a custom harness due to the orientation of the + and - wires on the maintainer. Super clean now, like @bogle.
Coolant tank, brake master, vacuum lines, wire harness, etc.
The general state of things in the shop. Gives you an idea of how many different things are going on at once.

Finally, I am able to start installing the decals. This means we are close to the end...

Engine ground mounted using the copper paste for a good, anti-corrosion fit.


Engine ground means we can now install the Type-S coolant tank, after a 4-year slumber in a parts bin.


New brake master cylinder installed with the bench bleed kit mounted. Need to finish the brakes and brake lines before we can fill/bleed it though.

Completed the OEM battery charger installation and setup. I had to create a custom harness due to the orientation of the + and - wires on the maintainer. Super clean now, like @bogle.

Re-Assembly 87
Cowl, weatherstrip.
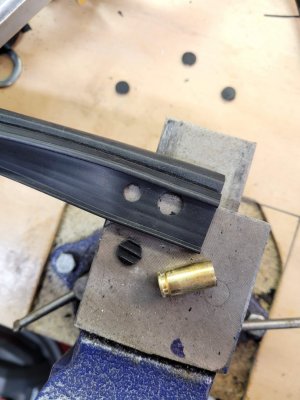
I hit a small snag when I realized that the hood cowl weatherstrip I ordered was for the RHD NSX. The holes don't line up with the LHD. What to do? Checked with Tim P at Acura and the LHD version is out of stock. So, I had to get creative. A few minutes with a hammer and a spent 9mm casing, and I was back in business.


Thanks- yes I'm in Denver. Somehow I managed to take the entire car apart and put it back together without a lift!? My next door neighbor has a nice 2-post Bendpak tho...Honcho -
Well done on lots of work, congrats to you! If you want to put your car up on a lift, let me know - you live in Denver, right? I am in Boulder.
- Rob
Re-Assembly 88
Door panel, switches, brake rotors, etc.
I got new screws from Honda for the brake rotors- these things are miserable. I always have to drill them out. I managed to get three out but broke off the drill bit in number 4, so it's gonna stay like that. I may just buy a new hub. PLEASE use copper anti-seize on these when you put them in!
[hold for pic]
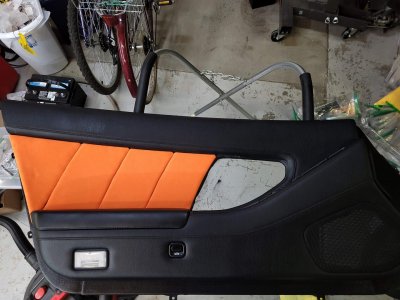
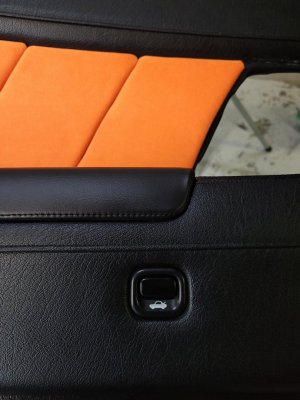
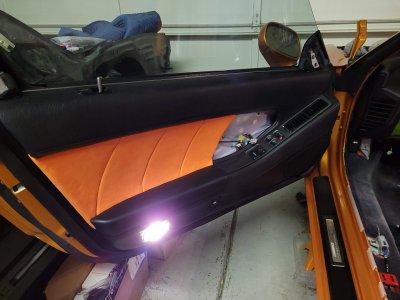
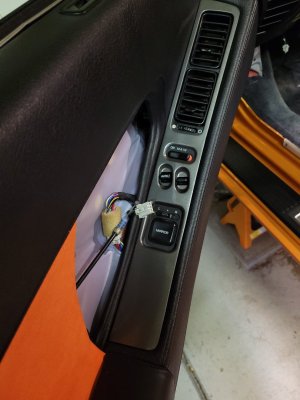
Managed to get the driver door panel finished. I will leave off the final orange piece and the door triangles, since this panel may need to come back off for the body shop to look at the window interference with the interior structure. I really just need to buy a new door- project for another year.
These panels have new factory arm rests and a new window switch on the driver side.


Hi, Honcho - I am the one who started the thread about bringing back the page that contained every single change that occurred on NSXs over the years in excruciating detail. I saw it once and was too stupid to print it. I know you are busy with car stuff as well as keeping Prime going. May I get the file of those changes that I can print out for my own evil purposes (buying the "right" NSX)? Thank, Honcho! Your car is looking very nice, by the way!
- Rob
[email protected]
- Rob
[email protected]
@Rob5995 the old wiki pages are accessible in the meantime through web.archive.org, here is the changes by year page: https://web.archive.org/web/20220708122535/http://www.nsxprime.com/wiki/Changes_by_Year
Amazing I wish I could do a full resto.
Re-Assembly 89
Getting close to the finish line now...
NSX Prime's own @Big McLargeHuge stopped by to lend a hand.
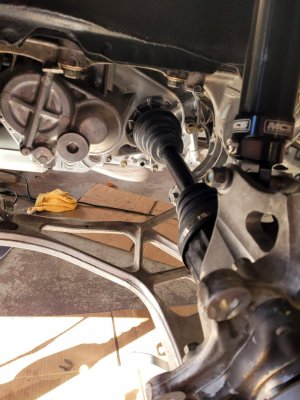
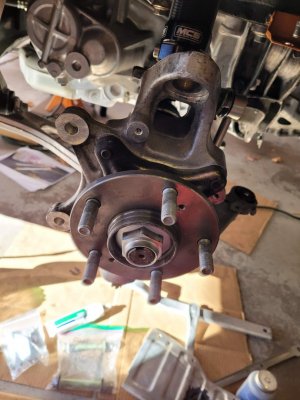
Left driveshaft installed with lower control arm and hub.
Transmission filled with Torco MTF.
Engine filled with 5 quarts of Mobil 1 0W-40. A full overhaul will take 6.7 quarts, but I will crank the engine with 5 to circulate the oil and use the dipstick to top off the rest.
Shift cables connected with supporting pieces re-installed after a long 4 year slumber. The car shifts very smoothly.
Clutch line bled. The pedal actuates quite well.
Getting close to the finish line now...
NSX Prime's own @Big McLargeHuge stopped by to lend a hand.
Left driveshaft installed with lower control arm and hub.


Transmission filled with Torco MTF.
Engine filled with 5 quarts of Mobil 1 0W-40. A full overhaul will take 6.7 quarts, but I will crank the engine with 5 to circulate the oil and use the dipstick to top off the rest.
Shift cables connected with supporting pieces re-installed after a long 4 year slumber. The car shifts very smoothly.
Clutch line bled. The pedal actuates quite well.
Re-Assembly 90
Coolant, etc.
Proceeded with the coolant fill process. I used 3 gallons of Honda 50/50 and 1 gallon of distilled water. Topping off the system with 50/50 will give me about a 60/40 water-to-coolant ratio for a little bit better summer protection.
Here is the tool:
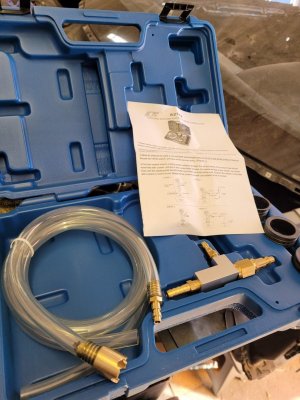
Apply 50 inches of vacuum. I didn't take pictures, but all the big hoses were completely flattened. Remember to pinch the overflow tube- it matters.
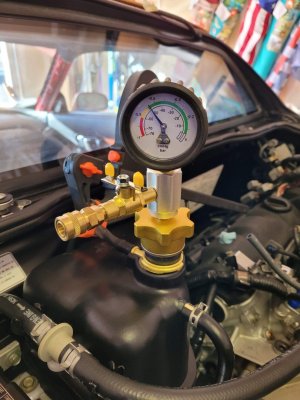
After a few minutes, start the flow.
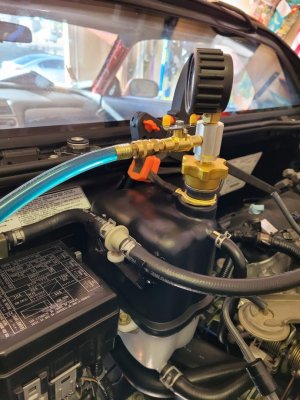
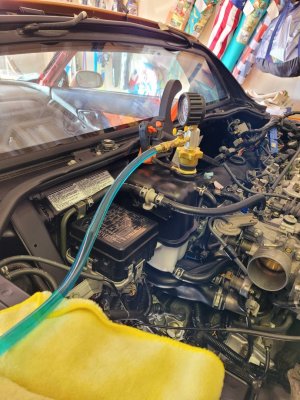
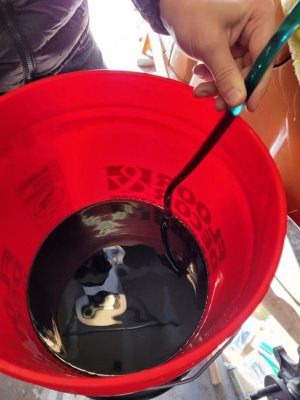
We noted that the radiator bleeder and thermostat bleeder were still dry, but the coolant bottle was above the max line. Next step is to run the car for 30 seconds, which will circulate the coolant and move any air bubbles to the bleeders. Then, we do a bleed sequence and warm up the car to full temp with the cap at the half setting. I expect it to take another half gallon or so.
Coolant, etc.
Proceeded with the coolant fill process. I used 3 gallons of Honda 50/50 and 1 gallon of distilled water. Topping off the system with 50/50 will give me about a 60/40 water-to-coolant ratio for a little bit better summer protection.
Here is the tool:

Apply 50 inches of vacuum. I didn't take pictures, but all the big hoses were completely flattened. Remember to pinch the overflow tube- it matters.

After a few minutes, start the flow.


We noted that the radiator bleeder and thermostat bleeder were still dry, but the coolant bottle was above the max line. Next step is to run the car for 30 seconds, which will circulate the coolant and move any air bubbles to the bleeders. Then, we do a bleed sequence and warm up the car to full temp with the cap at the half setting. I expect it to take another half gallon or so.
Re-Assembly 91
ECU, Oil temp sensor, Wideband O2, harness, etc.
Got the ECU re-connected with both the oil temp sensor and wideband harnesses routed. Now I can put the rest of the interior back together.
Used the front bank O2 wire bracket at the driveshaft heat shield to keep the wires safely away from the spinning driveshaft and hot manifold.
Oil temp sensor in place.
Wideband mocked up for harness fitting.
Wideband and oil temp wires tidy for the panels.
I have used that vacuum bleeder in the past. IMO, I dont mind it a time or two but after seeing those hoses collapse so hard it makes me wonder how that may affect their integrity if were to use more than few time.
Getting close, Honcho, keep up the good fight friend!!
Getting close, Honcho, keep up the good fight friend!!
I know, I thought the same thing but LarryB and Kaz have done it hundreds of times with no issues I'm aware of... But yeah, seeing those big hoses completely flattened...I have used that vacuum bleeder in the past. IMO, I dont mind it a time or two but after seeing those hoses collapse so hard it makes me wonder how that may affect their integrity if were to use more than few time.
Getting close, Honcho, keep up the good fight friend!!
Also, will add pics to the above. I was moving too fast!
Looks great! You probably already did since the picture was posted, but make sure your axle nuts are torqued and staked in place!
I also did the vacuum bleed on my full engine rebuild. As long as you don't have any sharp burrs on the aluminum nipples the only concern is the contraction shortening the hose and placing undue stress on the fragile aluminum piping mounts. That's assuming new hoses of course.
I also did the vacuum bleed on my full engine rebuild. As long as you don't have any sharp burrs on the aluminum nipples the only concern is the contraction shortening the hose and placing undue stress on the fragile aluminum piping mounts. That's assuming new hoses of course.
Reassembly 92
ECU, Oil Temp Sensor, etc.
Big day. The NSX now has a brain. Up to now, I had never tested the Demon II unit on the ECU. I wasn't sure if it would even turn on. Thankfully, @MotorMouth93's soldering skillz are tight. Using my custom datalog cable, the laptop saw the Demon, turned it on, and uploaded the PGM-FI BIN file. I'm using a slightly modified version of @mskrotzki's BIN, since he has it tuned so well to this altitude. Mark's NSX starts and idles perfectly using the RDX injectors, so I'm using what he's got.
Also, I never tested to see if my custom oil temp light circuit would actually work. It uses a MOSFET N-Gate switch controlled by an Arduino Uno to cycle the "Hot Cat" light in the dash, which is a JDM feature (it's where the seatbelt light normally is). Basically, when the oil is cold, the light will stay on and when the oil is too hot (at the track), it will flash. Finally, when the oil is at a normal temperature, the light is off.
I had to learn C coding to program it, and John suggested I try a test blinking code to see if the switch would even work and/or if my wiring was right. Well, here you go.
View attachment 20221130_211152.mp4
ECU, Oil Temp Sensor, etc.
Big day. The NSX now has a brain.
Also, I never tested to see if my custom oil temp light circuit would actually work. It uses a MOSFET N-Gate switch controlled by an Arduino Uno to cycle the "Hot Cat" light in the dash, which is a JDM feature (it's where the seatbelt light normally is). Basically, when the oil is cold, the light will stay on and when the oil is too hot (at the track), it will flash. Finally, when the oil is at a normal temperature, the light is off.
I had to learn C coding to program it, and John suggested I try a test blinking code to see if the switch would even work and/or if my wiring was right. Well, here you go.
View attachment 20221130_211152.mp4
Thanks Dave. The nuts are just blasted on with my little electric impact wrench for the time being (50-100 lb/ft...ish LOL). It's just to hold the spindle in place so we can run the transmission for a few minutes to circulate the fluid. I'll torque them fully and stake once the car is back on the ground.Looks great! You probably already did since the picture was posted, but make sure your axle nuts are torqued and staked in place!
Similar threads
- Replies
- 4
- Views
- 434
- Locked
- Replies
- 2
- Views
- 405


