• Protip: Profile posts are public! Use Conversations to message other members privately. Everyone can see the content of a profile post.

MotorMouth93's 1994 Berlina Black NSX Thread

Cool, those are some pretty aggressive specs. You’ll have to report back if you have any rubbing issues. For perspective on a 8” front, 9.5” wide rear setup it’d be 17x8+27.3 and 18x9.5+11.3. There’s a dude I follow on ig who has the same spec fronts as you (17x9+40) in CE28s and I always wonder if he has rubbing issues. Maybe no issues for you cause the front tire is a normal size, not way taller or wider.

There are a lot of GTR spec wheels for sale which end up being in the 9.5+15 range, but I ignore them cause I figured they are too aggressive. Running more offset is the dream, but worried about rubbing or fender grabbing.
 
No issues so far but I haven't driven the car a whole lot yet, mainly just around town on some errands. My ride height is also fairly high compared to most people running wheels specs like these so I imagine that makes it fairly forgiving. The guy I bought them from had his car lower though with the same size tires and didn't report any issues.

I'm looking at maybe buying a stock FD RX7 fuel pump, it seems to flow about like the Walbro 255 while being quieter and more reliable. I've noticed a few times in my logs that the fuel pressure seems to dip a PSI or 2 vs what I'd expect it to be so I'm not sure how much I can really trust the Walbro pump.
 
Last edited:
I am truly impressed as I am reading through your thread for the first time. I am new to the nsx community and am really inspired by all the work you have done on your car :). I have tried ordering a few different plastic clips for these rear interior pieces as several of mine are missing and broken but can’t find the right part number or place to order from. Any advice is greatly appreciated.
Thanks,
Ahmad

Sorry @Gojira77 somehow I missed this post.

The topmost rear trim piece, the long one across the top, uses 3 of these clips: 91560-SL4-003 (watch out for the little metal stud on the trim piece that has to go into a hole behind the drivers seat, lots of people don't see it and bend it, I don't know if I bent mine or if it was the PO but I just cut it off since it was pretty jacked up and the piece stays fine without it)

The big square panels behind each seat use 4 of these each, for a total of 8: 90668-SJ4-003
 
Last edited:
Here's a better photo of the wheels. I'm actually pretty happy with the fit on the front, I might just add a half degree of camber and call it fine. The rear sits a bit higher so I'm not sure what to do about that yet, maybe have another groove cut in the Bilstein shocks to drop it 1/4" or so to match the front.

nsxwheels.jpg
 
Man its been a while since I've updated this thread, so might as well do one last update prior to forum migration which I've been procrastinating way too much on. I've done a decent amount of work on the car just done a fairly poor job documenting it.

Wheels + Suspension

The fitment of the wheels with the OEM springs + Bilstein shocks was not working for me so I pulled the trigger on a set of KW V3 coilovers to drop the car a bit lower and get a bit more camber so the wheels sit more flush. On the rears this worked out great, no rubbing and they look good. (a bit too aggressive for my taste but it is what it is) The fronts though are now just barely rubbing on the fender liner when hitting large bumps or dips, I'd say its an "acceptable" amount of rubbing given how aggressive the fit is but I still hate it so the new wheels can't come soon enough. It does look good though.

The coilover install went smoothly, the NSX suspension is pretty easy to work on for the most part so it didn't take too long and I just reused the factory top hats but put the SoS poly bushings in them. The coilovers make some faint clunk/rattle noises at low speed though so I'm wondering if that's just the way they are or if the stiffer top mount bushing contributes, I might swap in new OEM top mount bushings to see if that helps the issue.

IMG_3235.jpg


IMG_3179.jpg


IMG_3177.jpg


I sound like a broken record but I really love these wheels with the extended studs and titanium lug nuts.

IMG_2902.jpg


IMG_2911.jpg


Oh I also got the chance to mock up my 996 brake calipers. They fill out the 17" wheels nicely but they only have a few millimeters of clearance with the spokes, and won't fit at all once the wheel spec I want arrives so that's going to be a no go sadly.

IMG_2816.jpg


Chassis

I don't remember if I posted about this or not, but I bought a set of the Spoon rigid collars. There's plenty of wild claims about how these things cured world hunger while halving lap times on the nurburgerking but I doubt I'll notice much difference. I just got them because they aren't that expensive and I like what they do from a conceptual perspective. Putting the rear subframe in and lining it up perfectly is a pain, it tends to shift around due to the weight of the engine and the way the hoist holds it up so some bolts end up tight due to the subframe pressing sideways into them and theres quite a bit of play in the bolts and this seemed like a good fix for it.

IMG_3489.jpg


I started by sweeping out the garage and getting the car up completely on jack stands, and getting it up high enough to easily crawl around underneath. The center jack point makes it pretty easy, thank you Honda.

IMG_3482.jpg


The included instructions have nice pictures but really not a lot of detail other than telling you more or less what to remove and then where the collars need to go. Most of it is not in English.

IMG_3499.jpg


I started with the front, there's only 4 bolts with 2 collars each so I figured it'd be quick but that was false, it took longer than the back which has 12 bolts. You have to remove battery tray/brace, the steering rack mounting bolts (make sure to tie it up somewhere so it doesn't just fall on you), and also the 4 L brackets that old the subframe up near the UCA mounts, and only then can you lower the subframe 1/4" and get the collars in. For some reason, one of the big bolts holding the L brackets to the chassis doesn't have threads built in it has a nut on the back side which you have to be careful of.

IMG_3483.jpg


IMG_3484.jpg


IMG_3485.jpg


The passenger side went very quickly, just a few minutes to get the collars in, but the drivers side was tricky: that side of the subframe had been placed about 1-2mm off center from the factory (presumably, there's nothing to indicate that the front subframe bolts had ever been touched before) so getting it back in place was tricky due to the rear mount point of the front control arms attached to it. The bushings had more than enough flex to move but I had to install the collars one at a time then alternate tightening them to make it fit properly.

You can see the collars installed on the front subframe here, I used plenty of the included copper grease and everything torqued down very smoothly as they crushed slightly into place.

IMG_3487.jpg


The rear was actually easier despite there being way more stuff to remove and subframe bolts. Probably because the car was already in the air and I've dropped the subframe a few times so I know my way around it pretty well at this point.

IMG_3490.jpg


For me, the frontmost passenger side rear subframe bolt is always really tight since the subframe tries to rotate a bit, pushing it sideways against the threads. No way was that going to line up first try so I started with the 4 subframe bolts up near the UCA mounts (3 of them shown here after the collars were installed). These holes all have a lot of play with the bolts and were pretty easy to get the tapered collars in and properly seated, and once those were lined up I put the collars in the front most holes, gently starting to torque the rear bolts pulled the subframe into perfect alignment with the chassis and all the front bolts which used to be a huge pain slid right into place and lined up perfectly!

I haven't driven the car yet but I would recommend these purely due to how much better the rear end goes together even if theres no difference at all when driving the car, it just makes it way easier to get everything perfectly in line and only add a small amount of time to the job of putting the engine back in. If a car has been crashed I'm not sure that everything would line up so easily though so YMMV.

Engine Build Updates

I bought that one off dry sump that was for sale in the classified ads for a while and I'm trying to figure out how I can make it work for my application. It has a really nice billet sump pan with integrated oil pickups, and its built for a 4 stage Dailey engineering pump (3 scavenge stages + 1 pressure stage) that also has a built in air-oil separator. The tricky part is going to be the belt, as I want to keep the timing cover and move the belt to the outside of the crank pulley and just change it at every oil change interval. I also want to keep the factory oil cooler so it could require some modifications to the sump pan to allow for that.

IMG_2758.jpg


IMG_2762.jpg


I started prepping the block now that I have it back from the machine shop. The casting was quite rough and had a lot of burrs and ridges and sharp edges so I've been slowly filing those down and smoothing them out with abrasive pads. Once I'm done with the cleaning and deburring I'm going to try to have it vapor blasted.

IMG_3114.jpg


IMG_3138.jpg


IMG_3279.jpg


I've also been deburring the crankcase and main caps. In this case, removing the unnecessarily sharp edges around the bearing shell to reduce the chances of cracks through the oil hole. Once the main caps were prepped I ran them through my ultrasonic cleaner then gave them a bath in hot soapy water, then blew them dry and oiled them and wrapped in plastic wrap.

IMG_3264.jpg


IMG_3265.jpg


There was a guy selling a set of old C30 heads that Endyn had worked over about years ago including port and chamber work, the price was right and I'm not sure how long it'll be until I get my other heads back so I bought them and am having a buddy vapor blast them then checked out by the guy who built the heads that are currently in my car. Supposedly they were only run for a few hundred miles before the engine popped so I'm hoping at least the bronze guides are good to go but we'll see what he says.

IMG_3336.jpg


IMG_3351.jpg


IMG_3403.jpg


Misc Photos

IMG_2917.jpg


IMG_2909.jpg


Coworker has an NC1.

IMG_3116.jpg


IMG_2901.jpg


And thats about it. Next big project is pulling the trans and installing the Type R final drive, which I might do this week. I have all week off work since I'm changing jobs, and my last day was last friday and my first day is on Monday so it'd be nice if I can get it knocked out before then but that remains to be seen.
 
Last edited:
Awesome update! Unfortunately I can't say the same for my heap. I love that ITB linkage system everytime I see it.

You need to ditch that F-Con and get on John's ECU. ;) He's done amazing work and has nearly OEM-like functionality.
 
@Honcho I don't know about OEM functionality hah, I still have some tuning issues to work out, mainly the barometric pressure corrections but I think I know how to handle it, just need to write the code patches for it. Cranking fuel is another weak spot, it never doesn't start, but sometimes warm starts need a tiny throttle blip to get started.

@RYU I hope the issues with your engine can be resolved soon! Looking forward to your thoughts after dyno day.

@bogle Getting the dry sump running will be a substantial effort but would probably be a very nice thing to have for running ITBs long-term since I could use the scavenge pumps as a vacuum source for a PCV system that will function even at WOT. Mounting the tank will be tricky though, I thought I could fit it where the emissions control box sits, but its not looking like it'll fit so I might have to do something like relocate the fuse box, or just get a slightly smaller tank. (nice dry sump tanks like this cost like $700 due to the all aluminum construction and internal baffling so I'd really rather not do that though) Ultimately I'd like to have the tank mounted where the emissions box sits, then fabricate hard lines running across the rear wall of the engine bay with 3 short soft hoses: oil feed, oil return, and crankcase gas return, then figure out a way to use the factory oil cooler since those work pretty well if you aren't going crazy with the power. This sump pan has an AN fitting directly to the main cap oil feed though so I'd need to modify a pump housing to allow me to feed oil in from the pressure stage though the side block off plate then figure out how to route it down to the main caps from the cooler which would require some tricky fabrication.

But anyways, I pulled the transmission out. Took maybe 5-6 hours to get it out, but at least an hour of that was due to me trying to skip steps then having to go back and do them later. I tried to avoid messing with the passenger side suspension but then had to remove the LCA to get the driveshaft and intermediate shaft out. Then I tried to avoid removing the rear beam (not technically required but it is if you actually want access to the engine mount bolts) then had to go back and do that too. Once everything was out of the way though the transmission separated quite easily which was a nice surprise.

IMG_3520.jpg


First problem, I used some silglyde brake grease instead of urea grease on the clutch components, resulting in heavy wear on the clutch fork that I replaced a few years ago and a "gritty" clutch pedal feel. I'm going to use the correct urea grease on reassembly this time. The sad part is I had the urea grease at the time but didn't use it for some reason. I'm going to see if I can clean up the clutch fork but if not I'll be buying a new one. The silglyde is not an appropriate lubricant for hot dirty environments, and is better suited to the relatively clean and sealed environment of a brake caliper piston.

2nd gear only seemed to grind only if I timed the shift too close to pushing the clutch in, so I suspect that maybe the incorrect grease was delaying the clutch release a bit. I could shift at 8k all day with no grinding as long as I consciously made sure to delay the shift a fraction of a second.

IMG_3521.jpg


Once the case was split I pulled the gear stacks out and dismantled the countershaft in order to install the Type R countershaft and final drive. In addition to the final drive upgrade, I've had an occasional 2nd gear grind since rebuilding the transmission that I've been wanting to investigate.

IMG_3527.jpg


The rental puller from Autozone was too small so I did this. Do not do this. It is incredibly stupid. I wasn't willing to tighten the bolt too much do to the potentially hazardous situation that could create but fortunately the gears weren't on there too tight. I also had a bunch of cardboard and foam on top of this mess to try to contain any issues. Ultimately it worked without incident though, and I got the countershaft apart.

When putting the new countershaft together I found that the clearance for 2nd gear was too small (the clearance is set by a sleeve that's a few thousands of an inch taller than the gear itself) and that the sleeve I had was already larger than any of the listed parts in the FSM for adjusting this clearance so I think there's a typo somewhere. (I measured with a set of Mitutoyo digital calipers reading in increments of 0.0005" and also a a Mitutoyo micrometer reading in 0.0001" increments so I'm pretty dang sure its a FSM problem rather than a measurement error) FSM calls for 0.0016-0.0039" clearance as measured by a feeler gauge (incorrectly listed in the FSM as 0.002-0.004 due to rounding of the millimeters measurement) and the 0.0015" feeler was VERY tight, so I ordered some 0.001 stainless steel shim stock to make a shim which should put me in the 0.0025ish range which is perfect and I don't have to wait for obscure parts from Amayama. I vaguely remember this tight clearance being a thing when I reassembled the transmission but I figured it was close enough and ran with it, but since 2nd gear is causing problems I'm making damn sure to cross all my Ts this time.

I also did not replace the 1/2 gear hub and sleeve, and the 2nd gear side of the sleeve had a decent amount of wear on it from over 100k miles of driving so perhaps the mismatched wear of the brand new 2nd gear and worn sleeve contributed as well? So I'm replacing the 2nd gear hub, sleeve, and synchro for good measure. 2nd gear shows a bit beyond usual wear due to the occasional grinding issue but the teeth are still nice and sharp so it should be fine.

IMG_3529.jpg


Anyways, hopefully I can get the transmission reassembled and back in the car by the end of the weekend. Probably not, but we'll see. I'm planning on trying out the Pentosin FFL-4 fluid per some recent discussions so we'll see how that goes.
 
As you probably could have predicted, I did not get the transmission back in the car by the end of the weekend.

After assembling the new countershaft I checked the clearance for 1st and 2nd gear and found the 2nd gear clearance to be just barely too tight according to the FSM. Spec is 0.0016"-0.0039" as measured with a feeler gauge and mine was right at 0.0015". I believe I came across this issue 3 years ago when I was assembling this transmission after opening it the first time but then decided it was close enough and ran it, which turned out to be a mistake. When inspecting the 2nd gear components I found some hot spots on the thrust side of the gear indicating that there is indeed an issue, fortunately I was able to clean up the surfaces with some 600 grit sandpaper, WD40, and a flat stone countertop.

IMG_3539.jpg


IMG_3541.jpg


After light sanding using only the weight of the gears themselves.

IMG_3542.jpg


IMG_3543.jpg


I measured virtually zero dimensional change before and after sanding and the problem areas cleaned up nicely.

The clearance for this gear is set by using sleeves of different lengths that sit within the needle bearing inside the gear. Part of the reason for cracking the transmission open again was to figure out why 2nd gear occasionally grinds and to replace the associated parts, so anything not perfect needs to get fixed now since I really don't care to do this again, at least not for another 20 years anyways. The numbers in the FSM for the lengths of the different size sleeves seem to be wrong, both the metric and inches values. The sleeve I have doesn't line up with either of the two sizes according to the FSM so rather than hope I can guess the right sleeve to buy from Japan (NLA in the USA) I opted to buy some 0.001" shim stock and make a shim to get the correct clearance. I tried various methods of cutting out the shim but ended up just tracing the sleeve and using scissors.

IMG_3544.jpg


After assembling the countershaft (with a new 1/2 hub and sleeve assembly for good measure) I checked clearance again with the shim and it was perfect, so hopefully that will resolve the 2nd gear issue.

The worst part of cracking the transmission open is all the cleaning, and this little 10 liter ultrasonic cleaner has been a godsend in that regard. I fully disassembled everything and ran it all through the ultrasonic cleaner filled with diluted simple green and it does a great job of stripping all the oils and grime off of the components, then a quick rinse in the sink, blow dry with compressed air, and light coating with WD40 to prevent rust until it can be assembled.

The shifting mechanism had some interesting blue spots on it after the cleaning process. Kinda looks like oxidization from the welding process that was never fully cleaned off.

IMG_3565.jpg


Then I went to assemble the transmission and the gear stacks wouldn't seat in the bell housing, and the countershaft seemed to be hanging up. After some cursing and investigation I found that Honda had put a 65 tooth 4.06 standard final drive ring gear in a box that was supposed to contain a 72 tooth 4.23 type R final drive ring gear. Even the part number on the box was for a Type R ring gear, it was just mispacked wherever it was assembled. I ordered these parts roughly a year ago so of course Amayama told me there was nothing that could be done, so now I'm waiting on another Type R ring gear to arrive before I can put the transmission back together.

Since I had to order from Japan anyways I also opted to buy the NLA 2nd gear sleeve and see if that fixes the issue without the shim, as well as buying a new countershaft nut and washer which I was originally just going to reuse, and also buying a new 3/4 sleeve and hub for good measure since the 3rd gear teeth on mine have 100k miles of wear on them and its better to just replace those parts I think. For anyone planning a rebuild or gear change, just replace the 1/2 and 3/4 hub and sleeve sets by default, and if clearances are right on the edge of okay, don't just send it.
 
Cool writeup on the Spoon collars. I've been on-and-off on them for a while but I think this convinced me to give them a try during my end-of-year project.

Interesting comment on the 2nd gear grind with shift timing, I experience that on occasion as well when I rip it into 2nd improperly. Maybe something similar where the spacer sleeve I thought I could reuse was slighly off. I never wanted to take the damn thing apart again but maybe it'd be worth a gander when I have the whole drivetrain out soon. The shifting can feel a bit "tight" right after hard autoX driving with hot fluid/metals, so maybe some clearances are too small in my case too. Can't wait for that project lol.

Good thing it looks like you can re-use the gears, I'm sure getting a new short 2nd gear could be a very long undertaking. I agree with replacing as much as possible with new parts, there's a noticeable difference between a new & old gear or hub/slider set.

Sorry to hear about the ring gear mixup. I managed to sell my old 4.06 gear on Prime so maybe you could recoup most of your money at least.
 
Thanks for the write up on the collars too. I read it before but until I decided to do them given my Suspension tear down it didn't make sense until now. I think I should do the rears later since we plan to drop the engine again. My concern is if during the subframe drop the bolts will get mixed up with each other and each collar will no longer be bespoke to each hole. Am I overthinking this?
 
You don't waste any time taking your transmission apart! Nice work. What took you a few days took me weeks haha. Nothing wrong with your puller method either.

Sorry to hear about the ring gear. Hopefully Amayama comes through sooner than later.
 
Thanks for the write up on the collars too. I read it before but until I decided to do them given my Suspension tear down it didn't make sense until now. I think I should do the rears later since we plan to drop the engine again. My concern is if during the subframe drop the bolts will get mixed up with each other and each collar will no longer be bespoke to each hole. Am I overthinking this?

You only pull one bolt at a time, so mix-up is not an issue.
 
You only pull one bolt at a time, so mix-up is not an issue.
That's not quite what I meant. I know I won't mix up the bolts but whatever random shop that works on my car after me (say HQ Engineering) might just put all 8 rear subframe bolts in a tray for example. The collars might just fall off randomly. Each collar conforms to it's specific hole so once they are used they should be placed in the same location I reckon.

I just can't trust any mechanic after me to follow this level of detail.
 
@99 rs this project ended up taking me nearly 6 weeks, since I had to order from Amayama twice. I wish it was only a few days like it was supposed to be at the start.

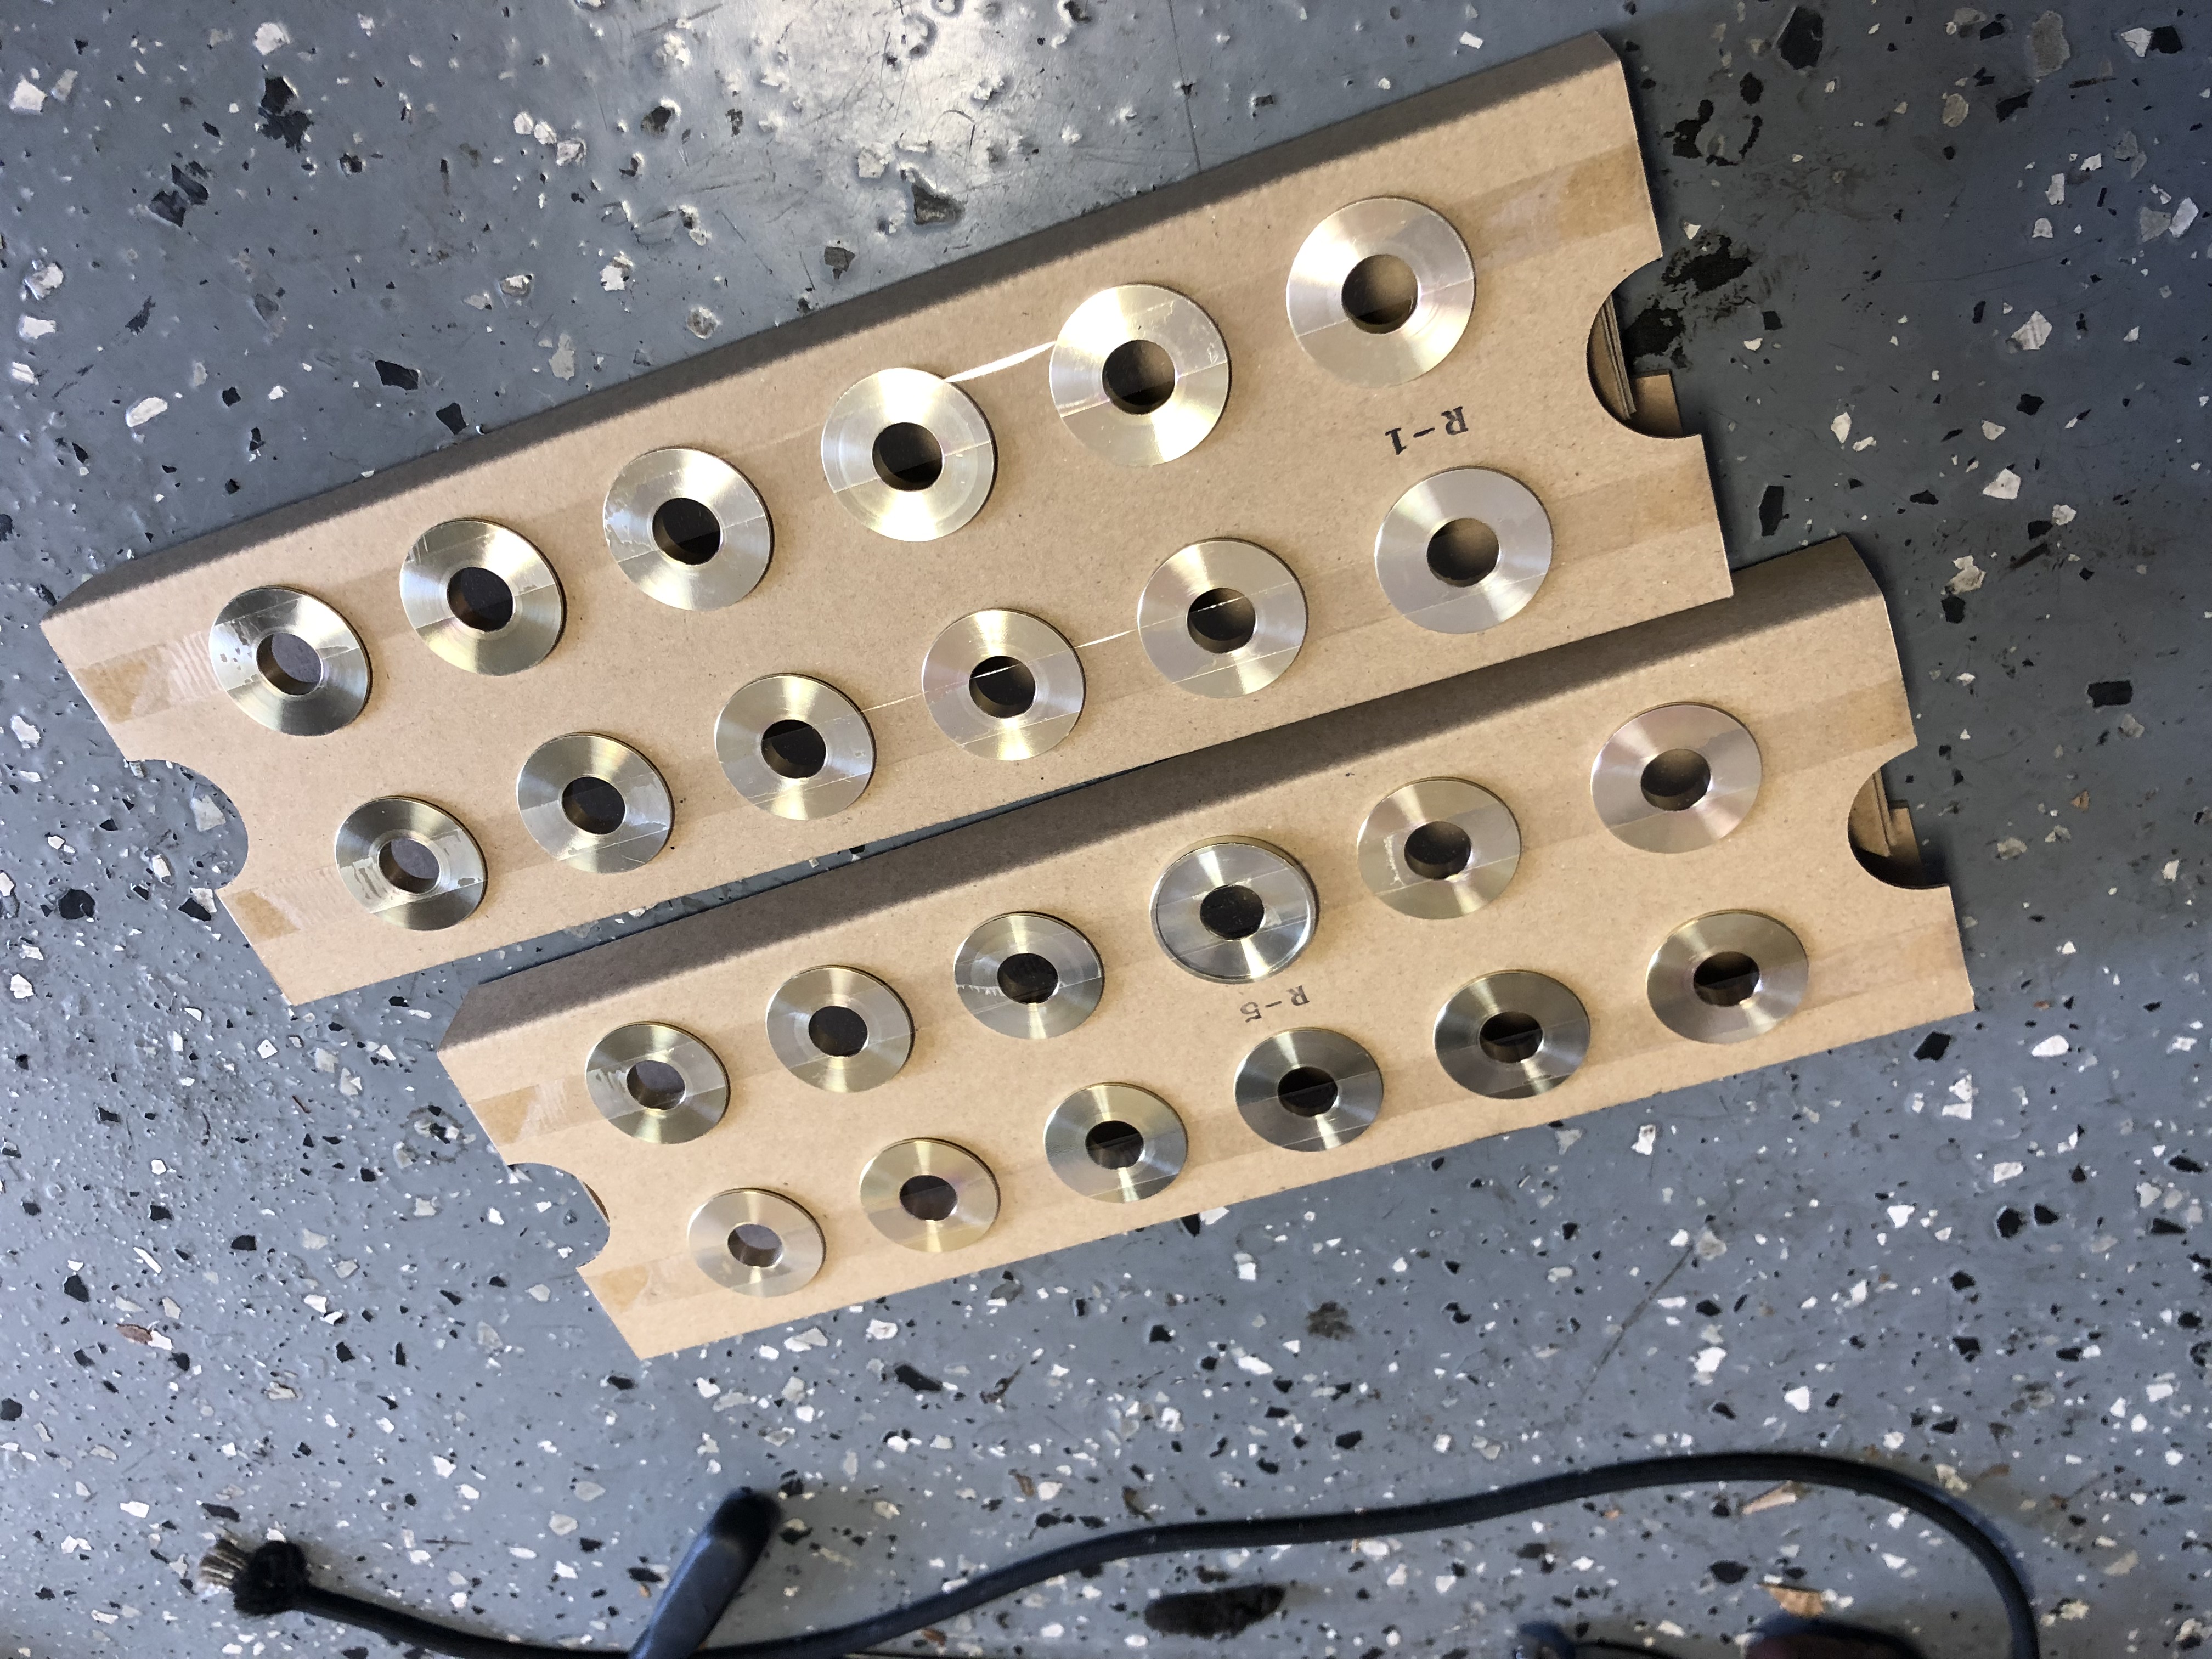
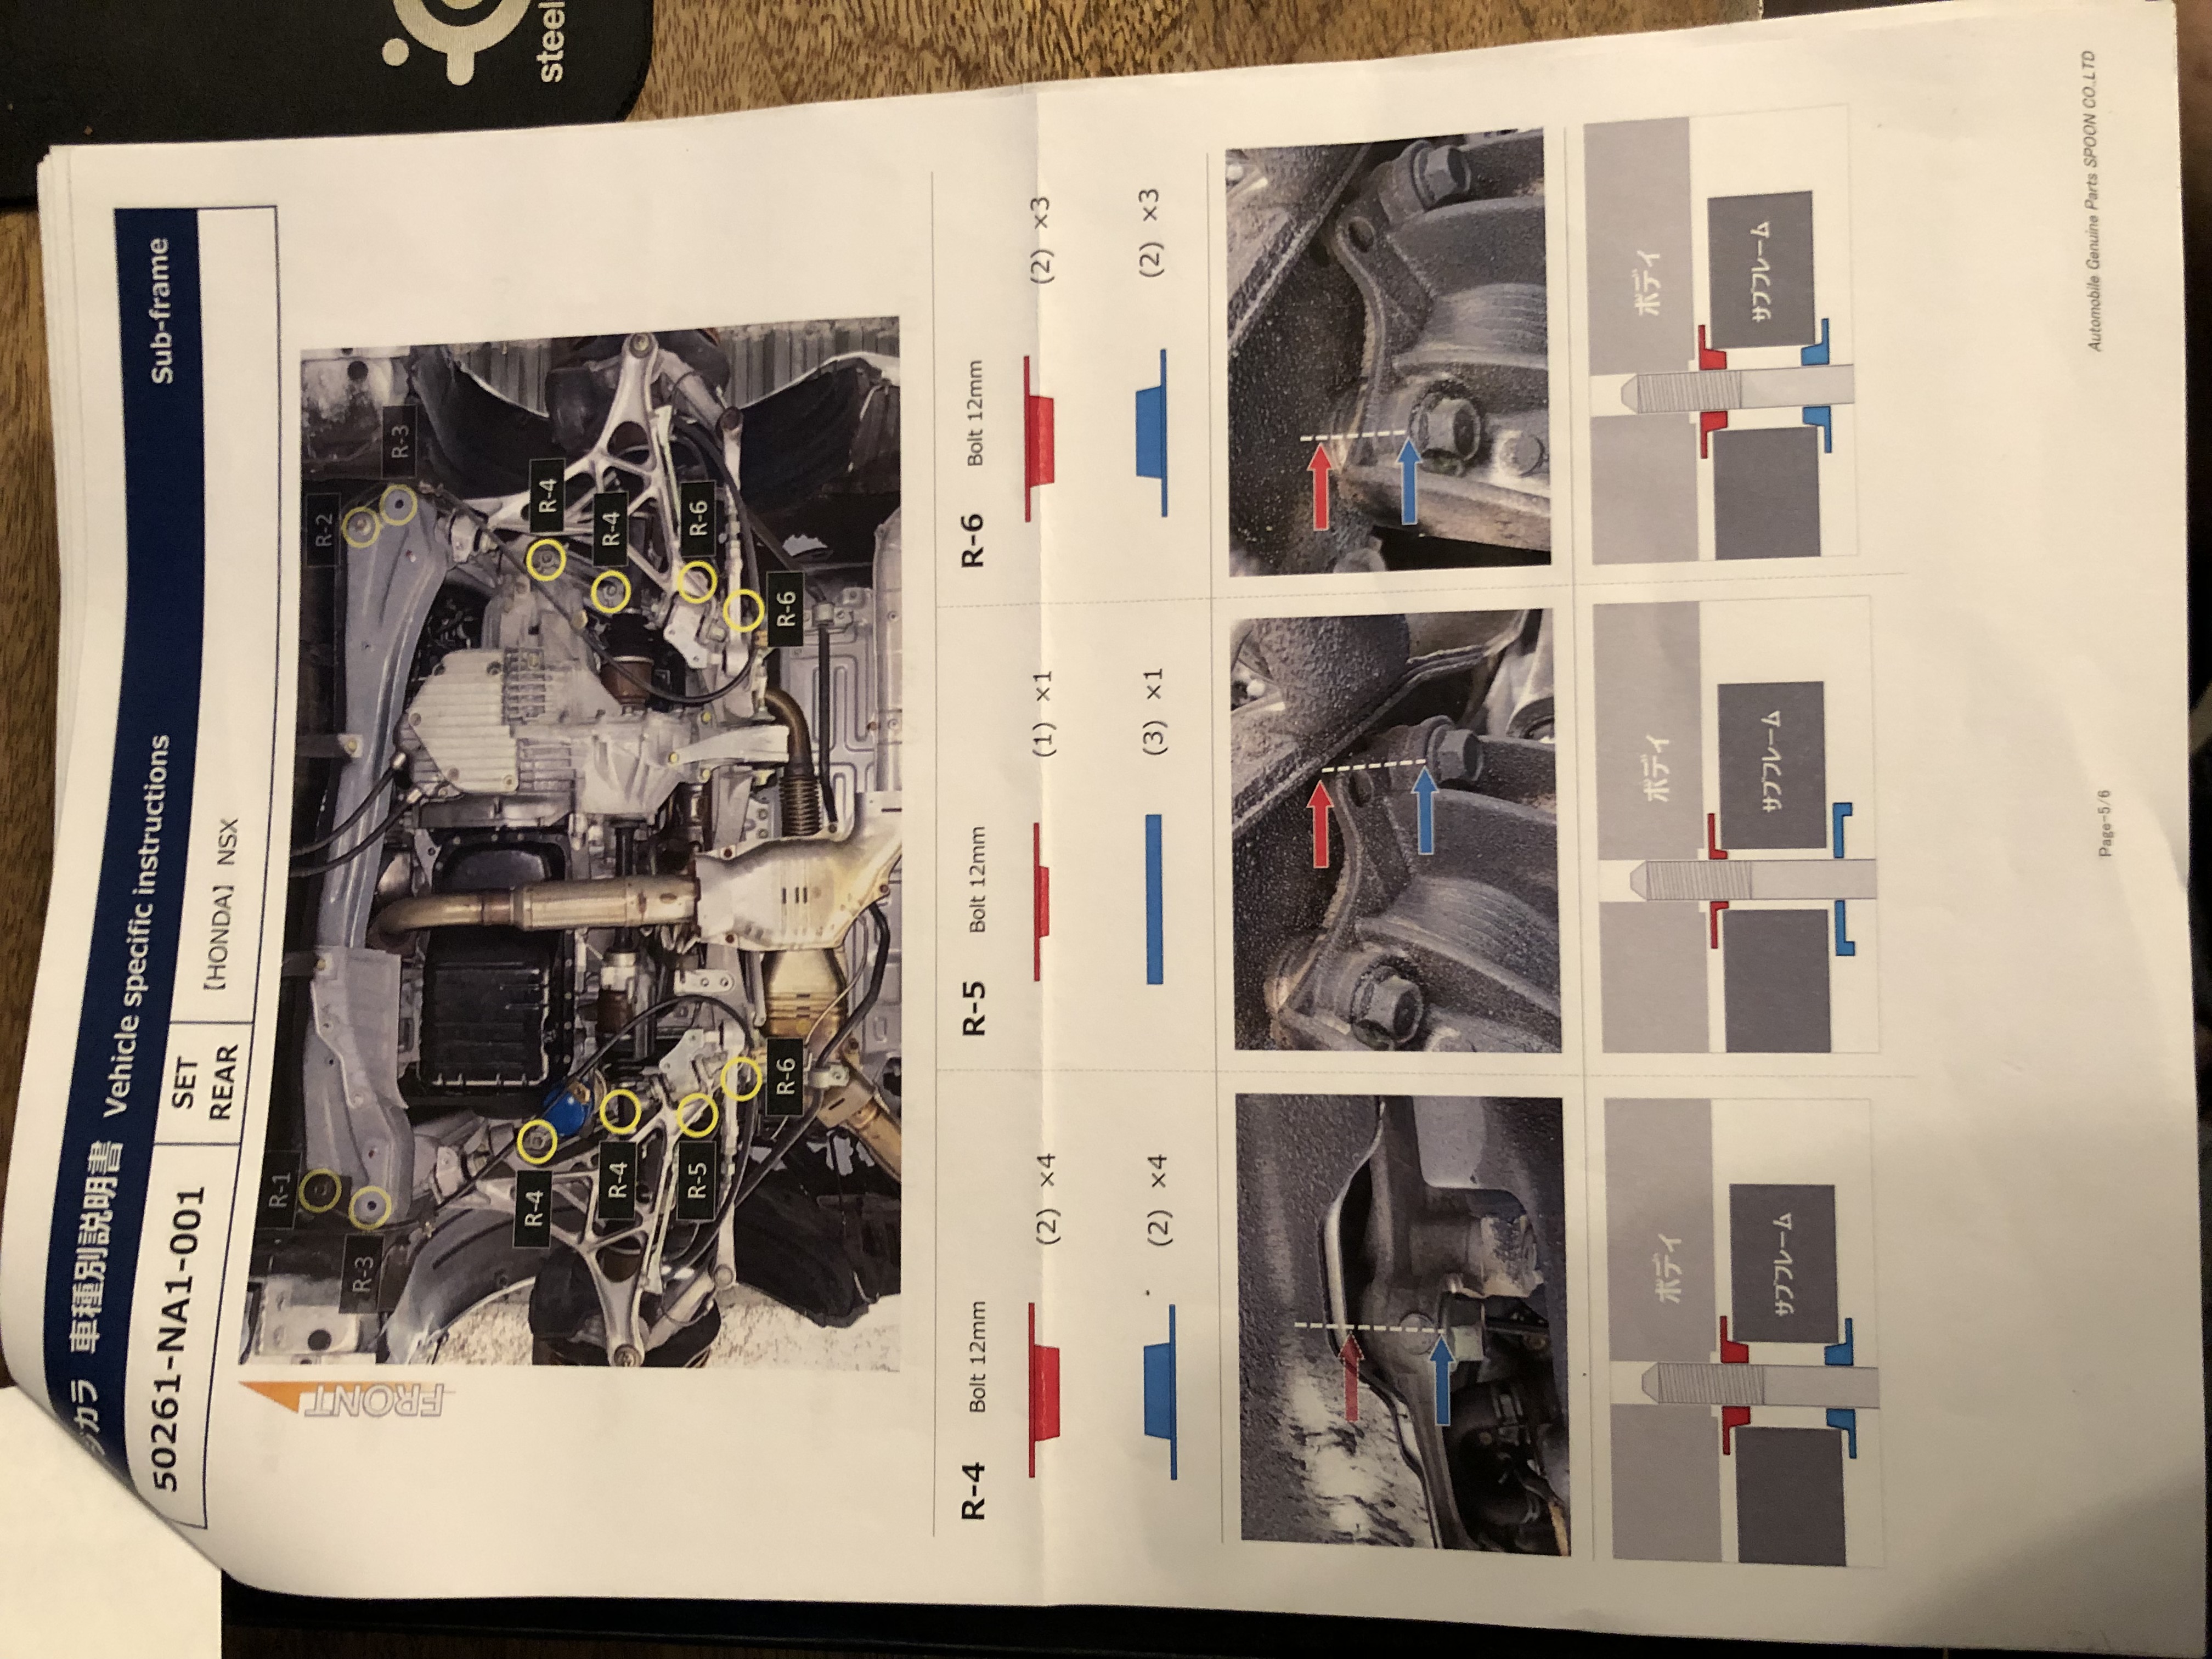
@Big McLargeHuge It'd be nice if I can manage to sell the 4.06 parts. I really like the spoon collars, they are very satisfying to install and take the guess work out of getting the subframe properly aligned.

@Honcho @RYU the collars are basically just oddly shaped crush washers so I suspect they would be fine to be used again once or twice, if my new engine ever gets finished I probably won't replace them but I will make sure everything ends up back in the holes they came from.

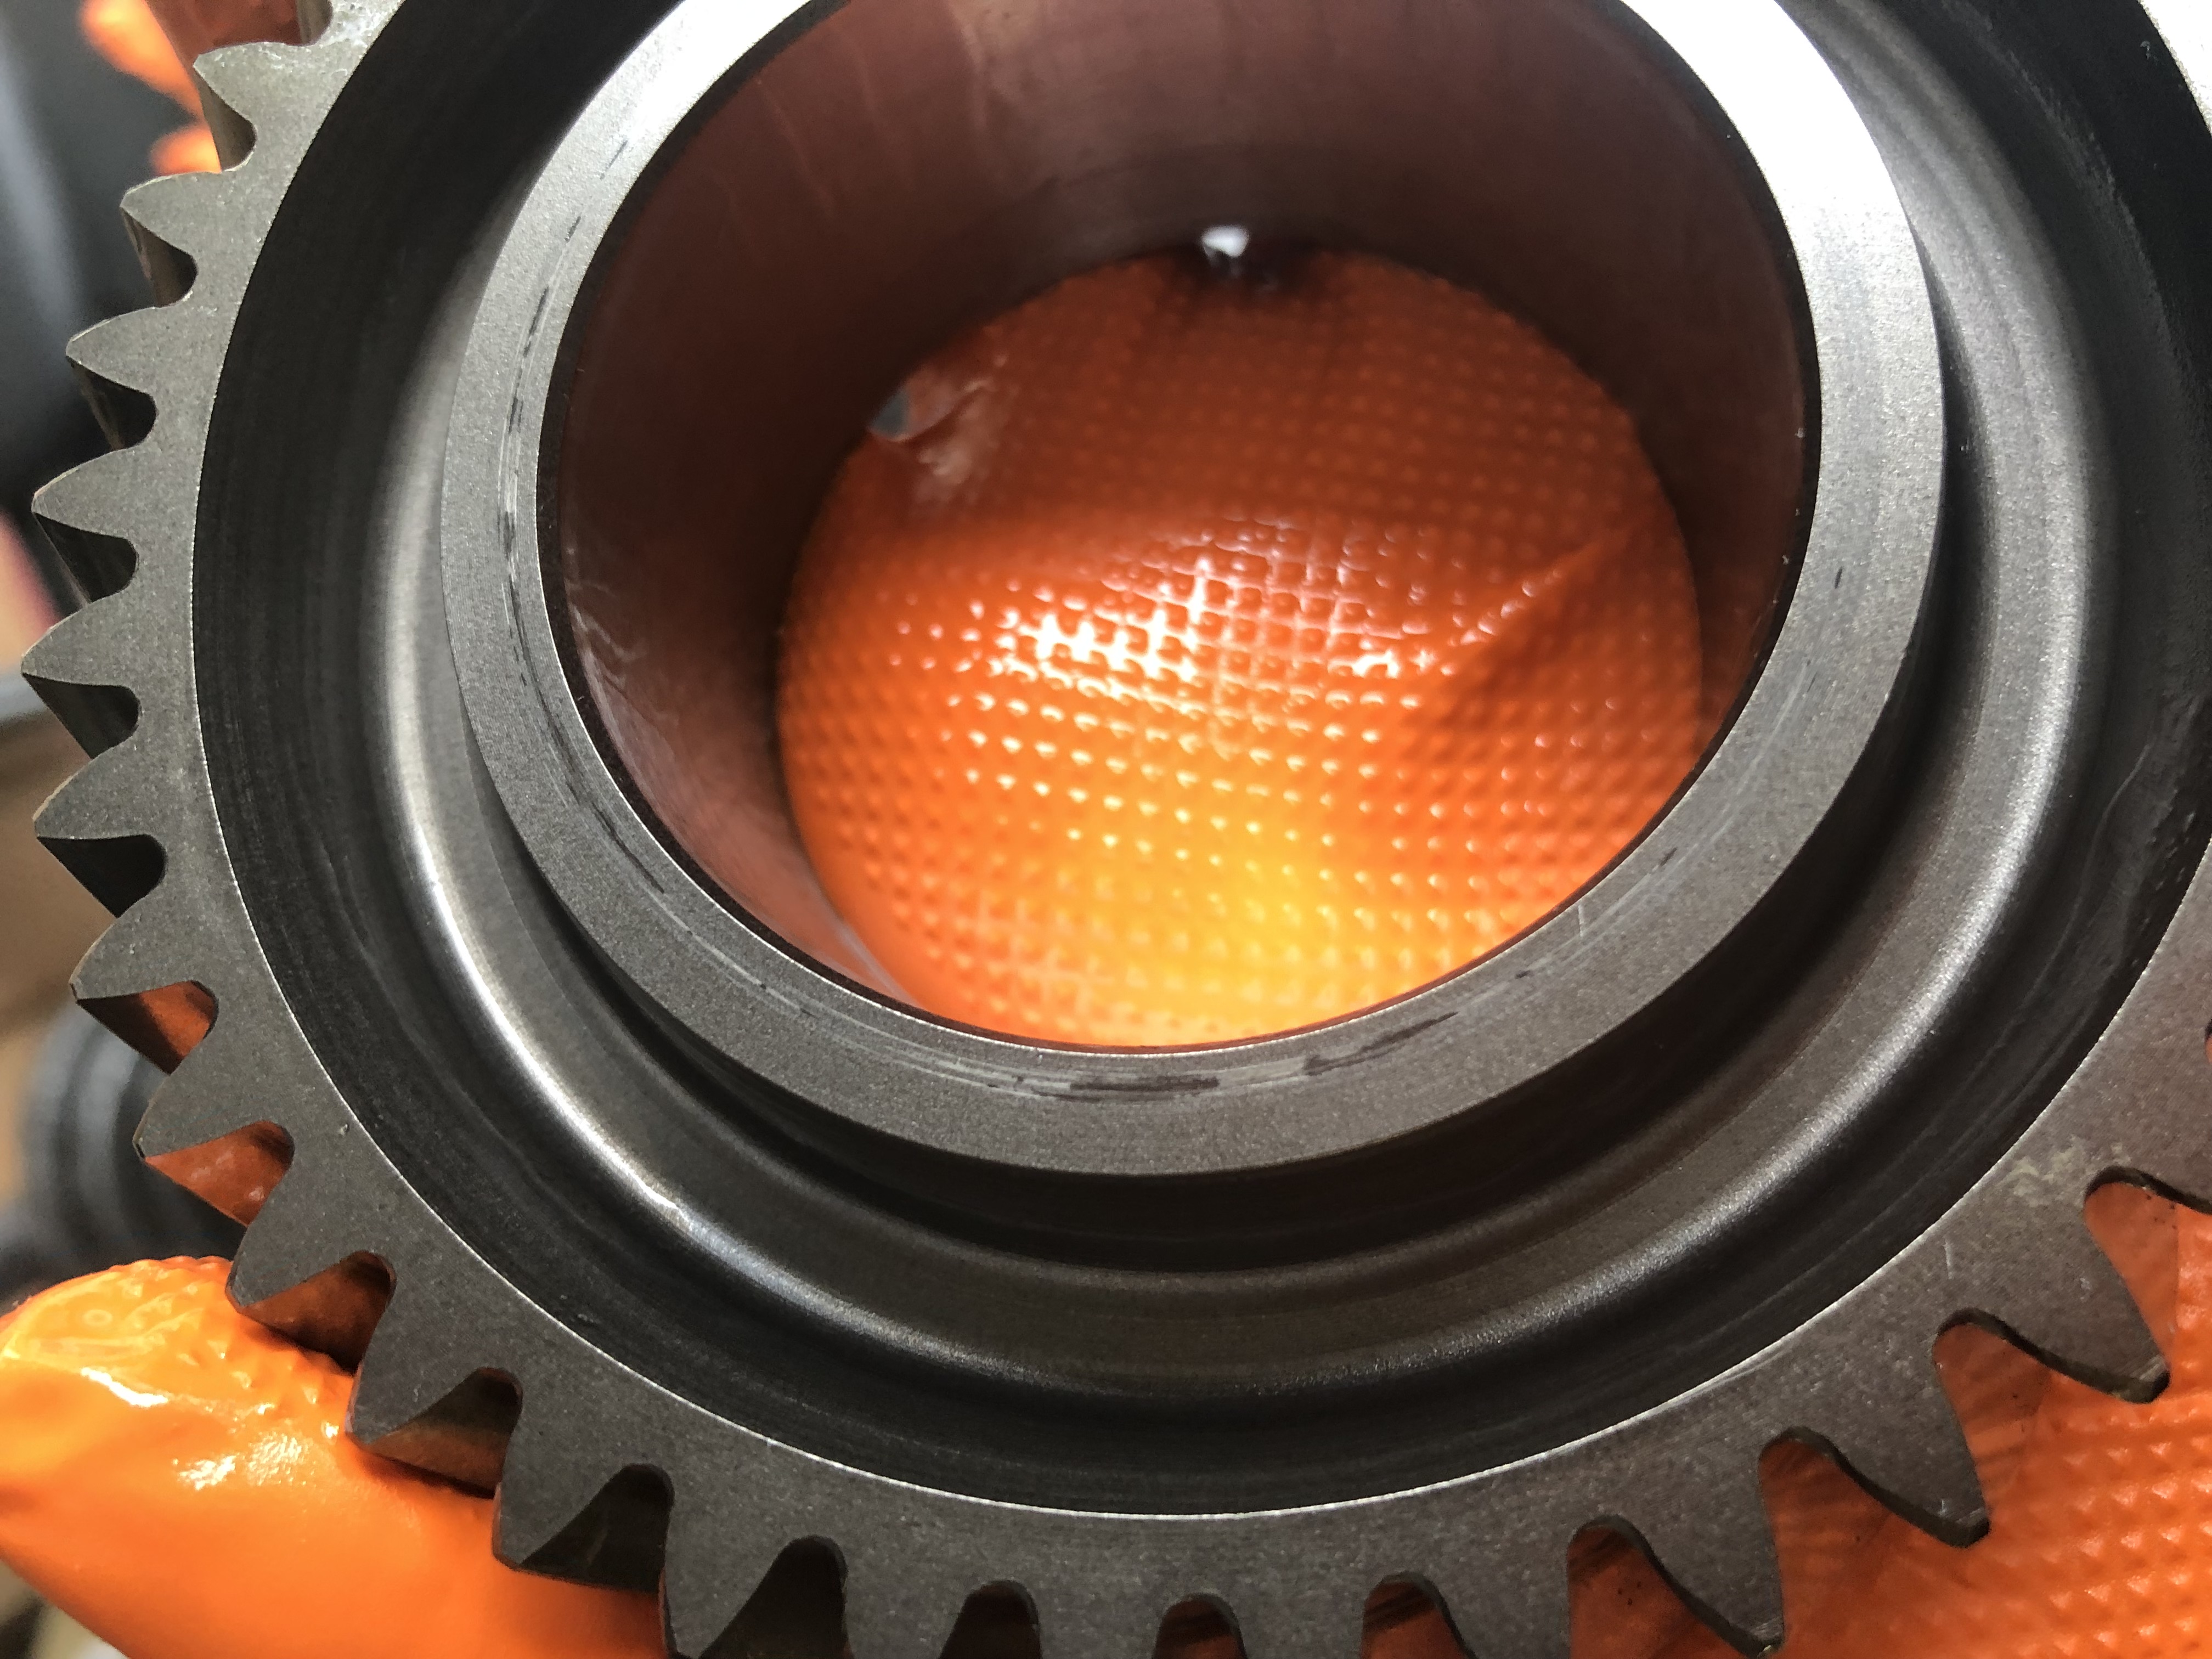
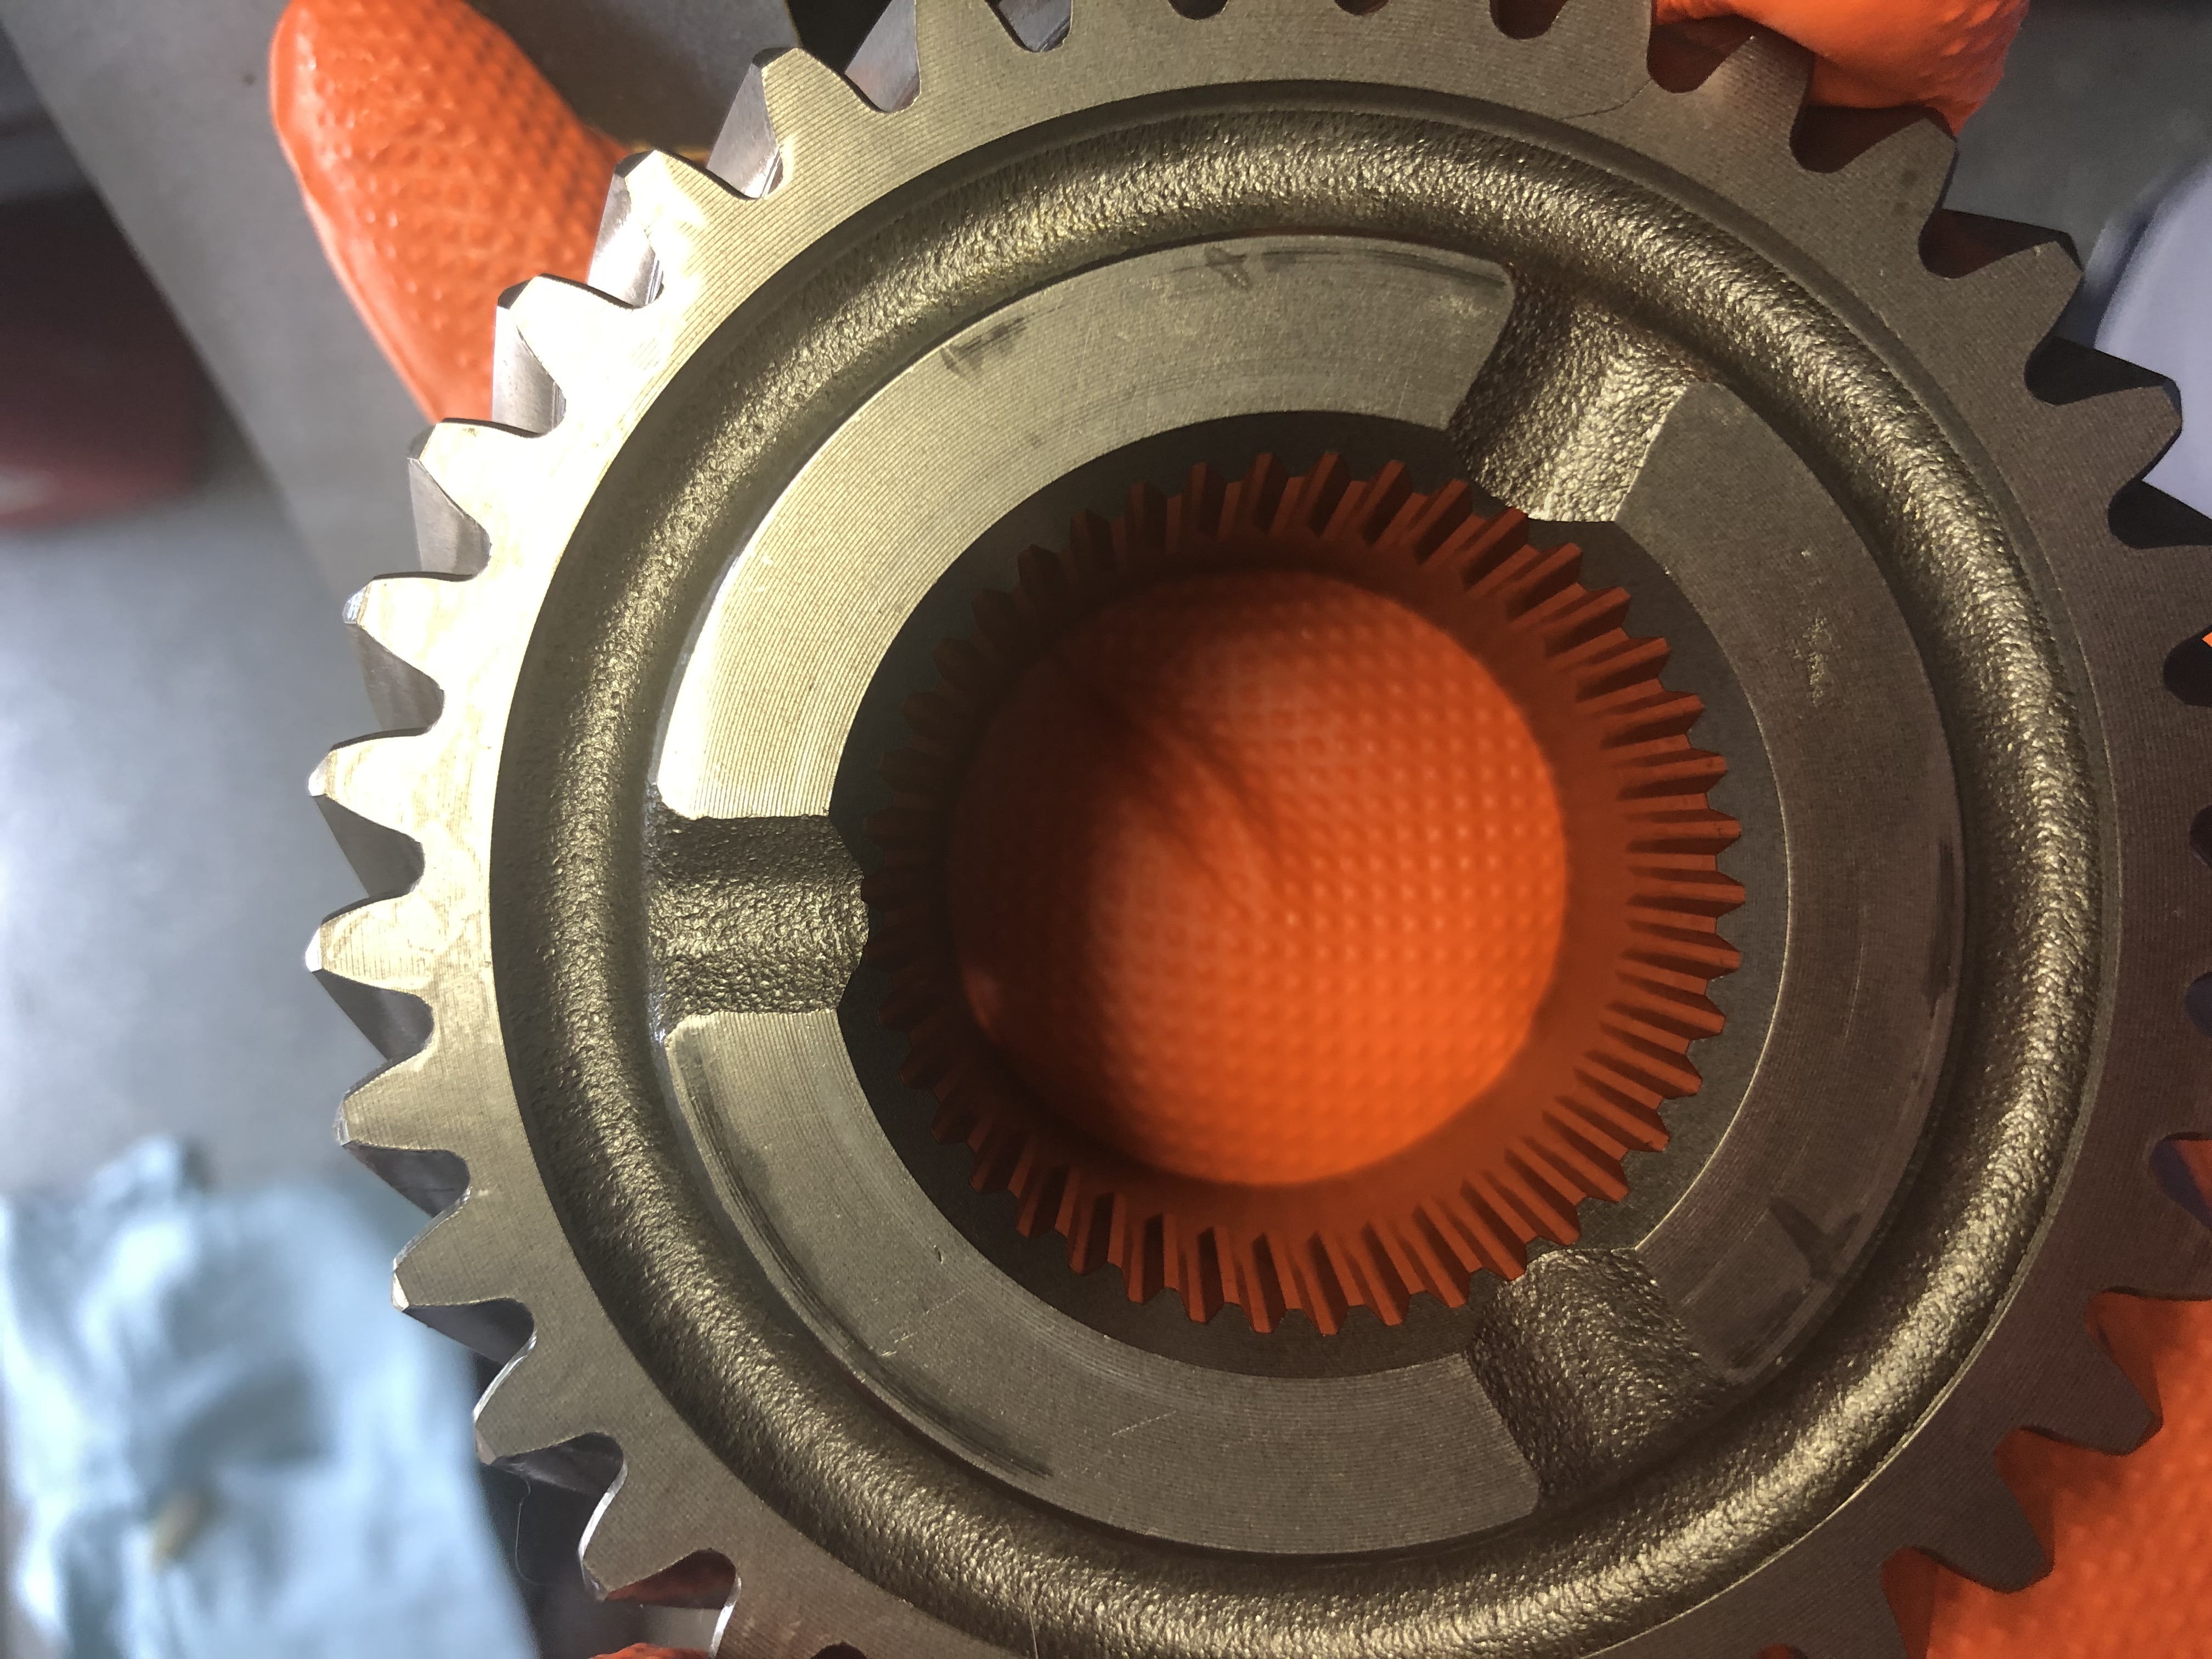
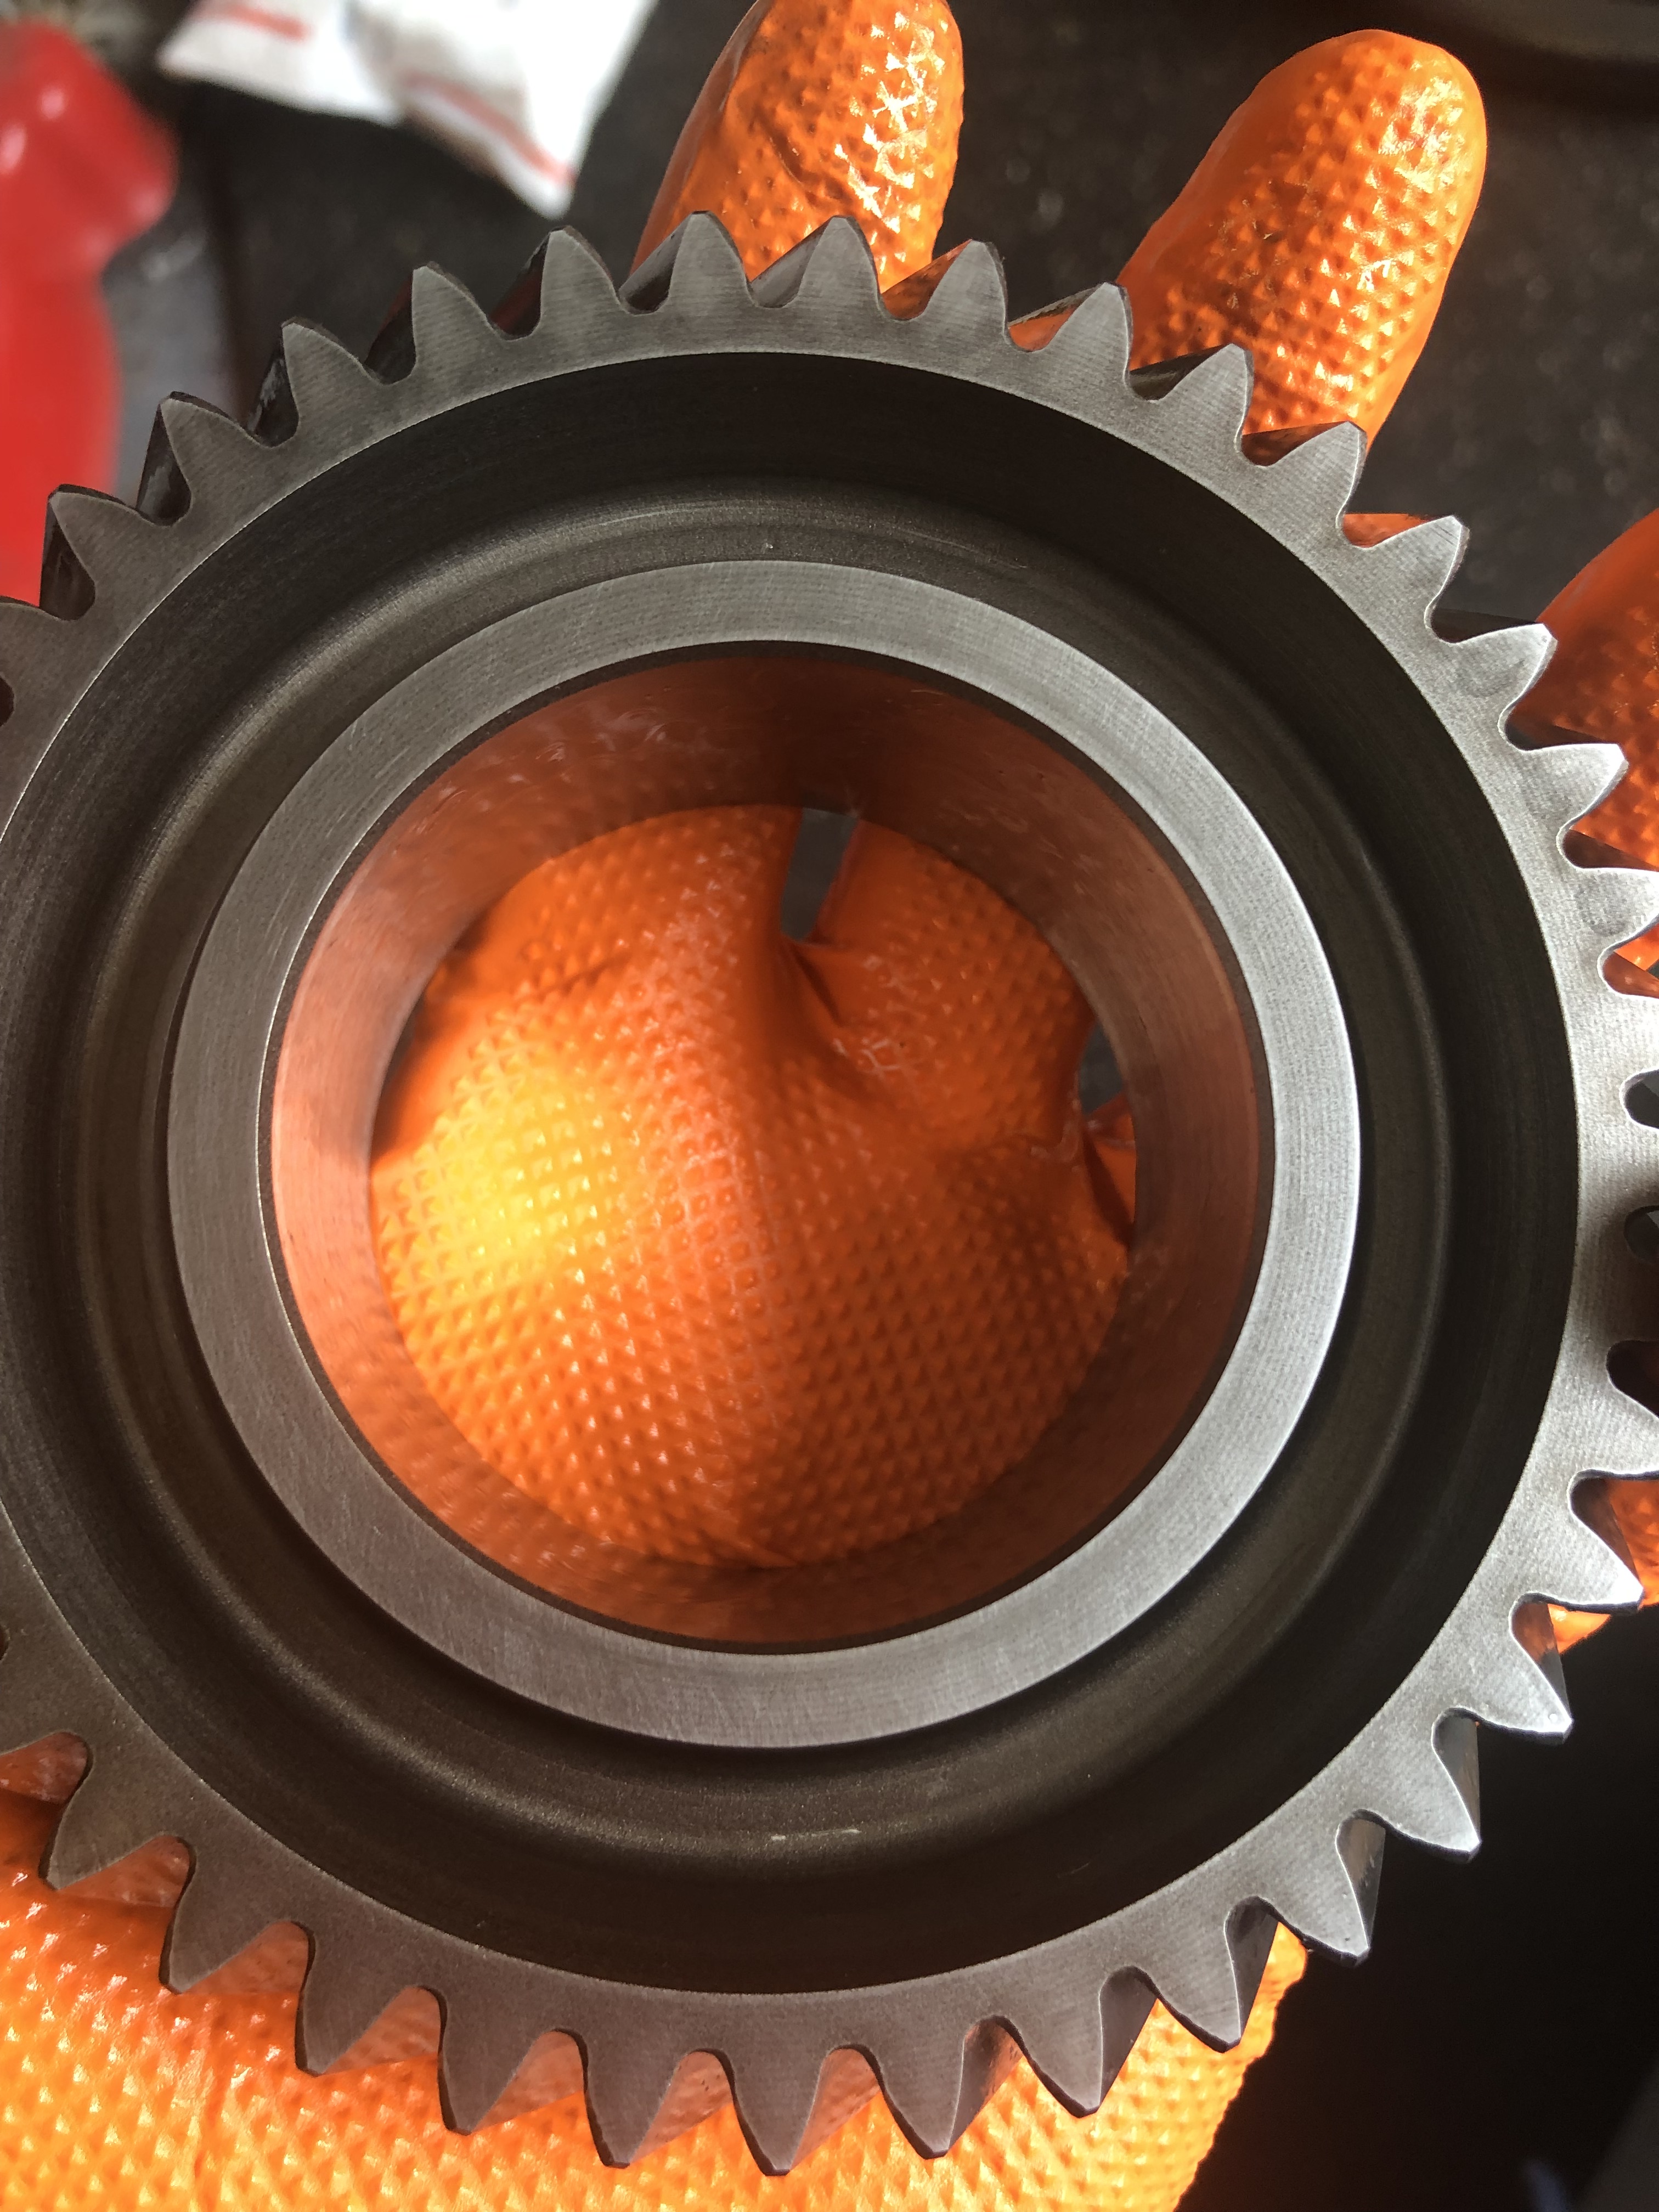
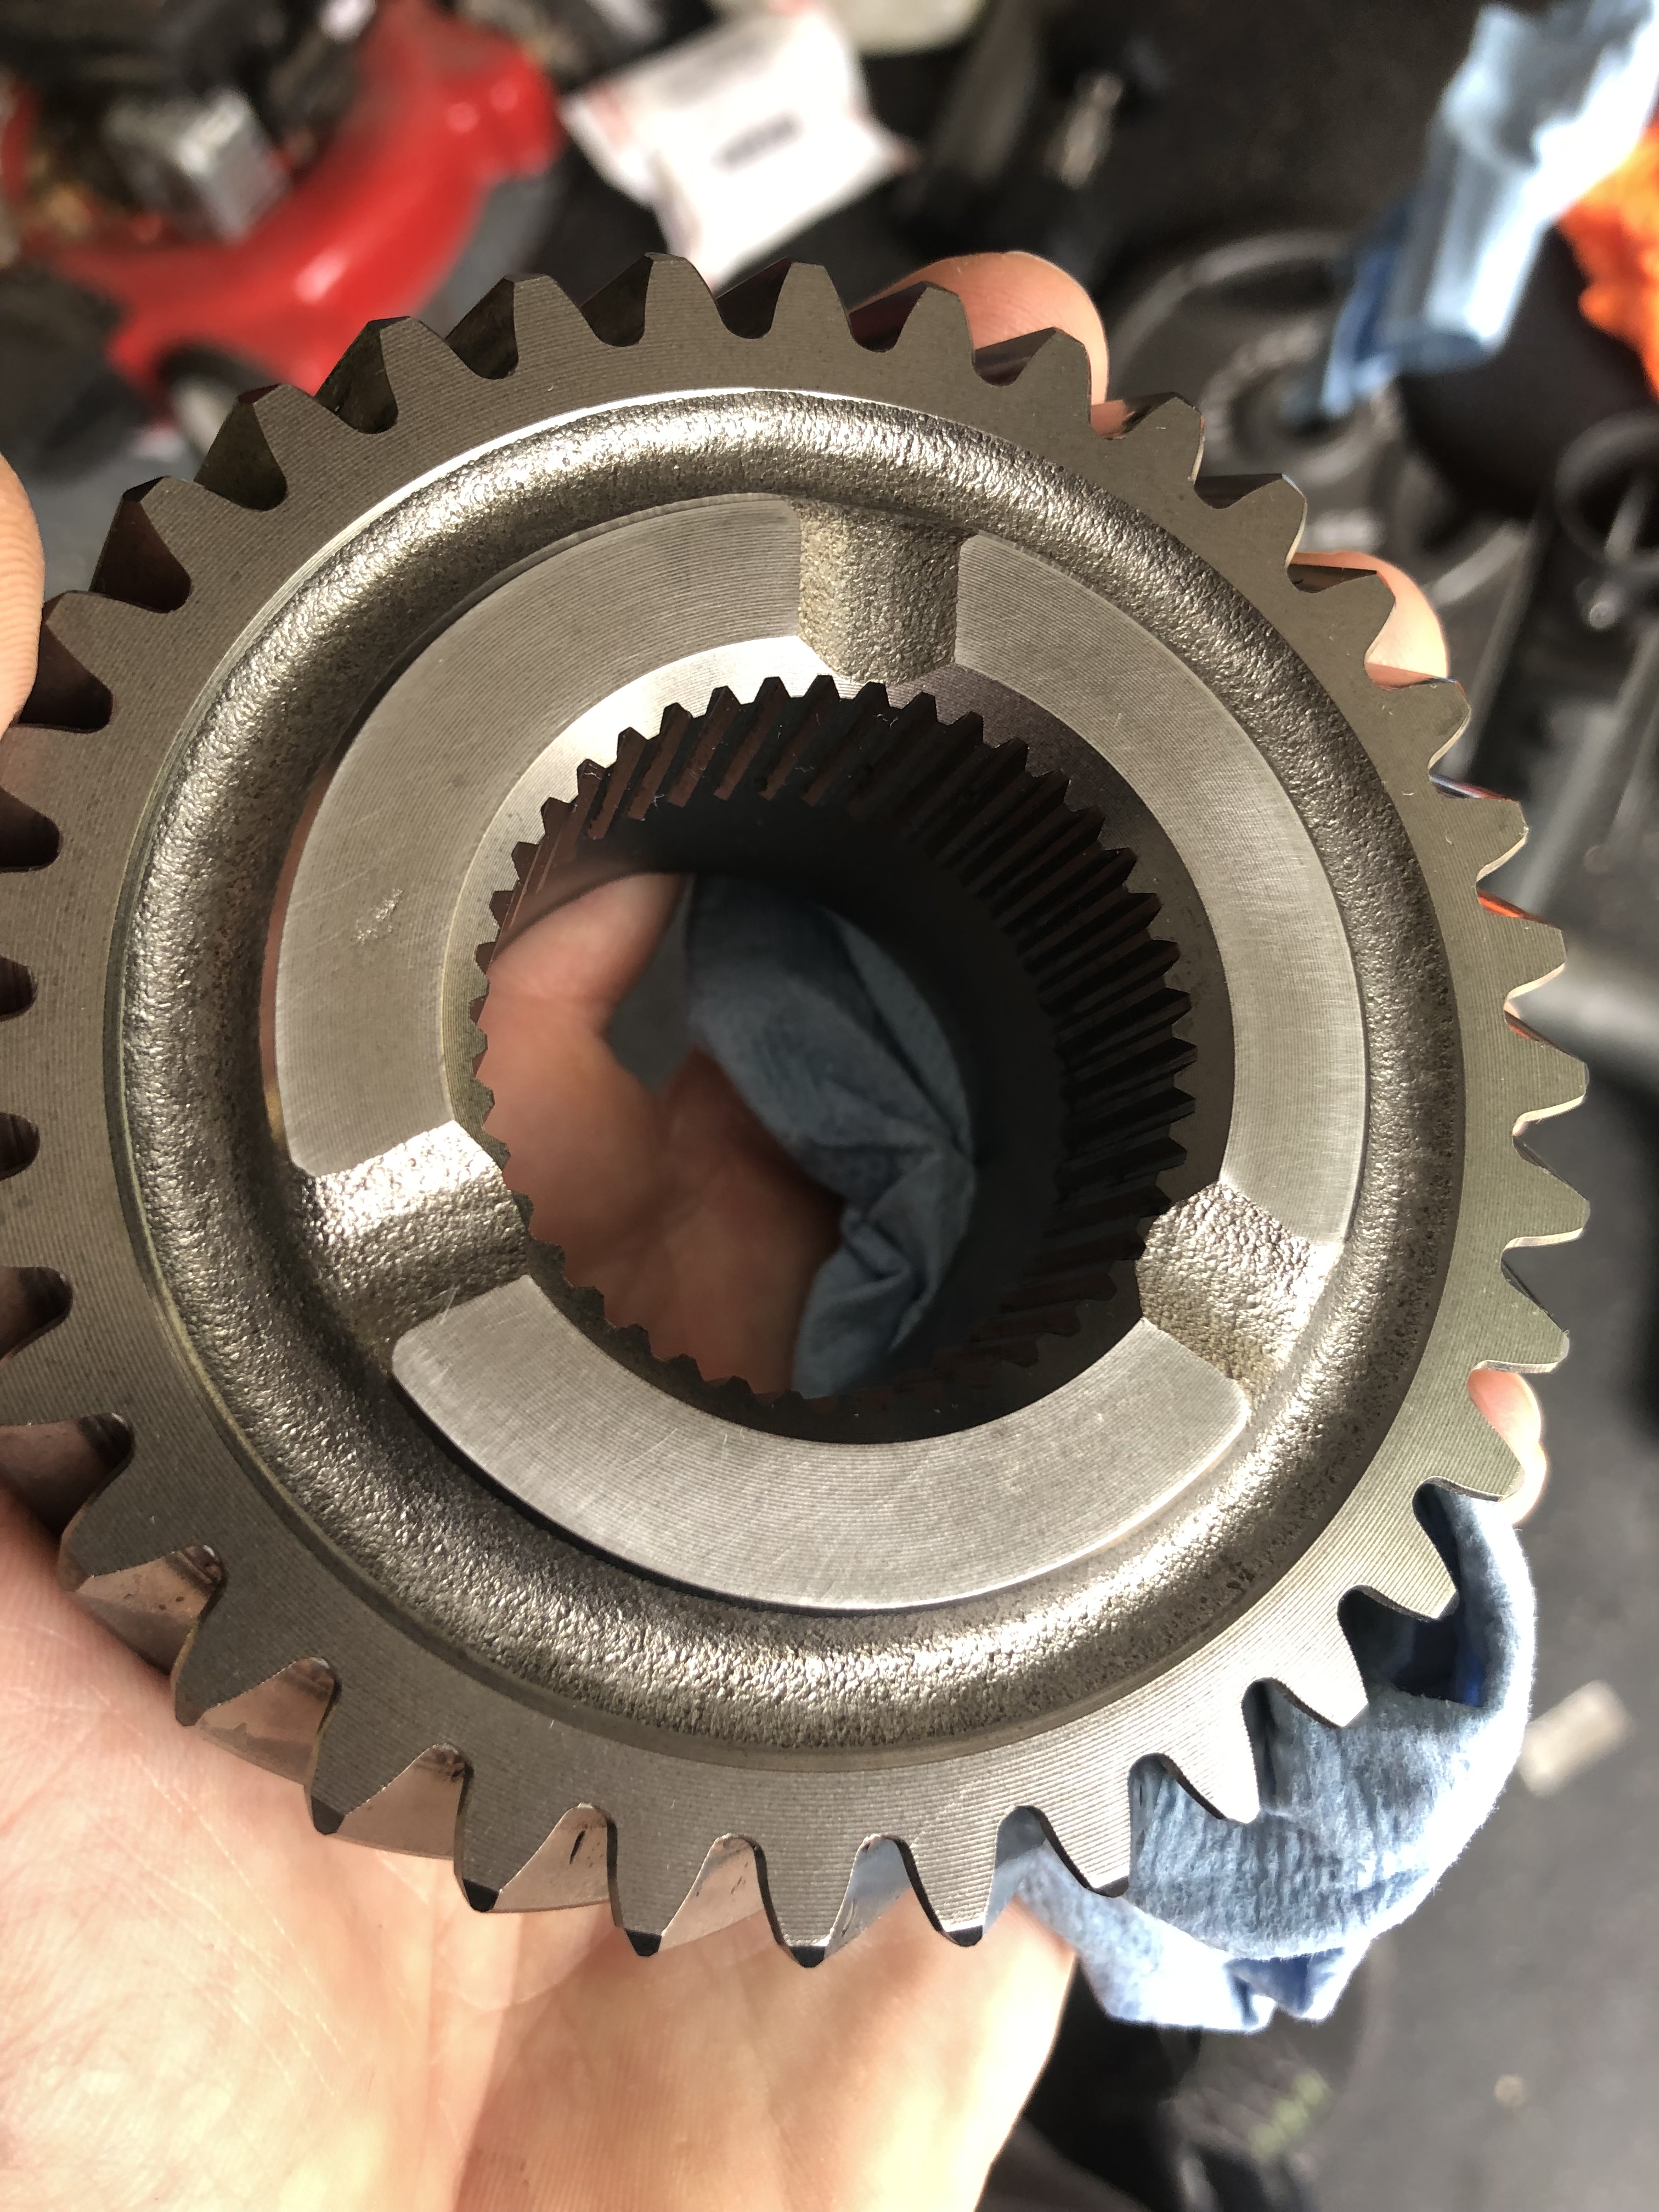
But anyways, picking up where I left off last time, the new ring gear arrived along with some other bits, so I installed the larger size 2nd gear clearance collar which put the clearance between 0.002" and 0.003" which is about perfect, and assembled the transmission. At the very end, I went to drop the oil pump gear in and it wouldn't fit! Turns out Mita sent me a 4.06 oil pump drive gear when the 4.23 is the only one even listed on their website! Not sure how this mixup happened, and they ignored my email about it. I can't say I expected anything since its been nearly a year but at least some sort of acknowledgement would be nice.

So I ordered a 4.23 oil pump drive gear on Amayama and waited another 7-8 days, fortunately this part is no longer on backorder status like it was a year ago.

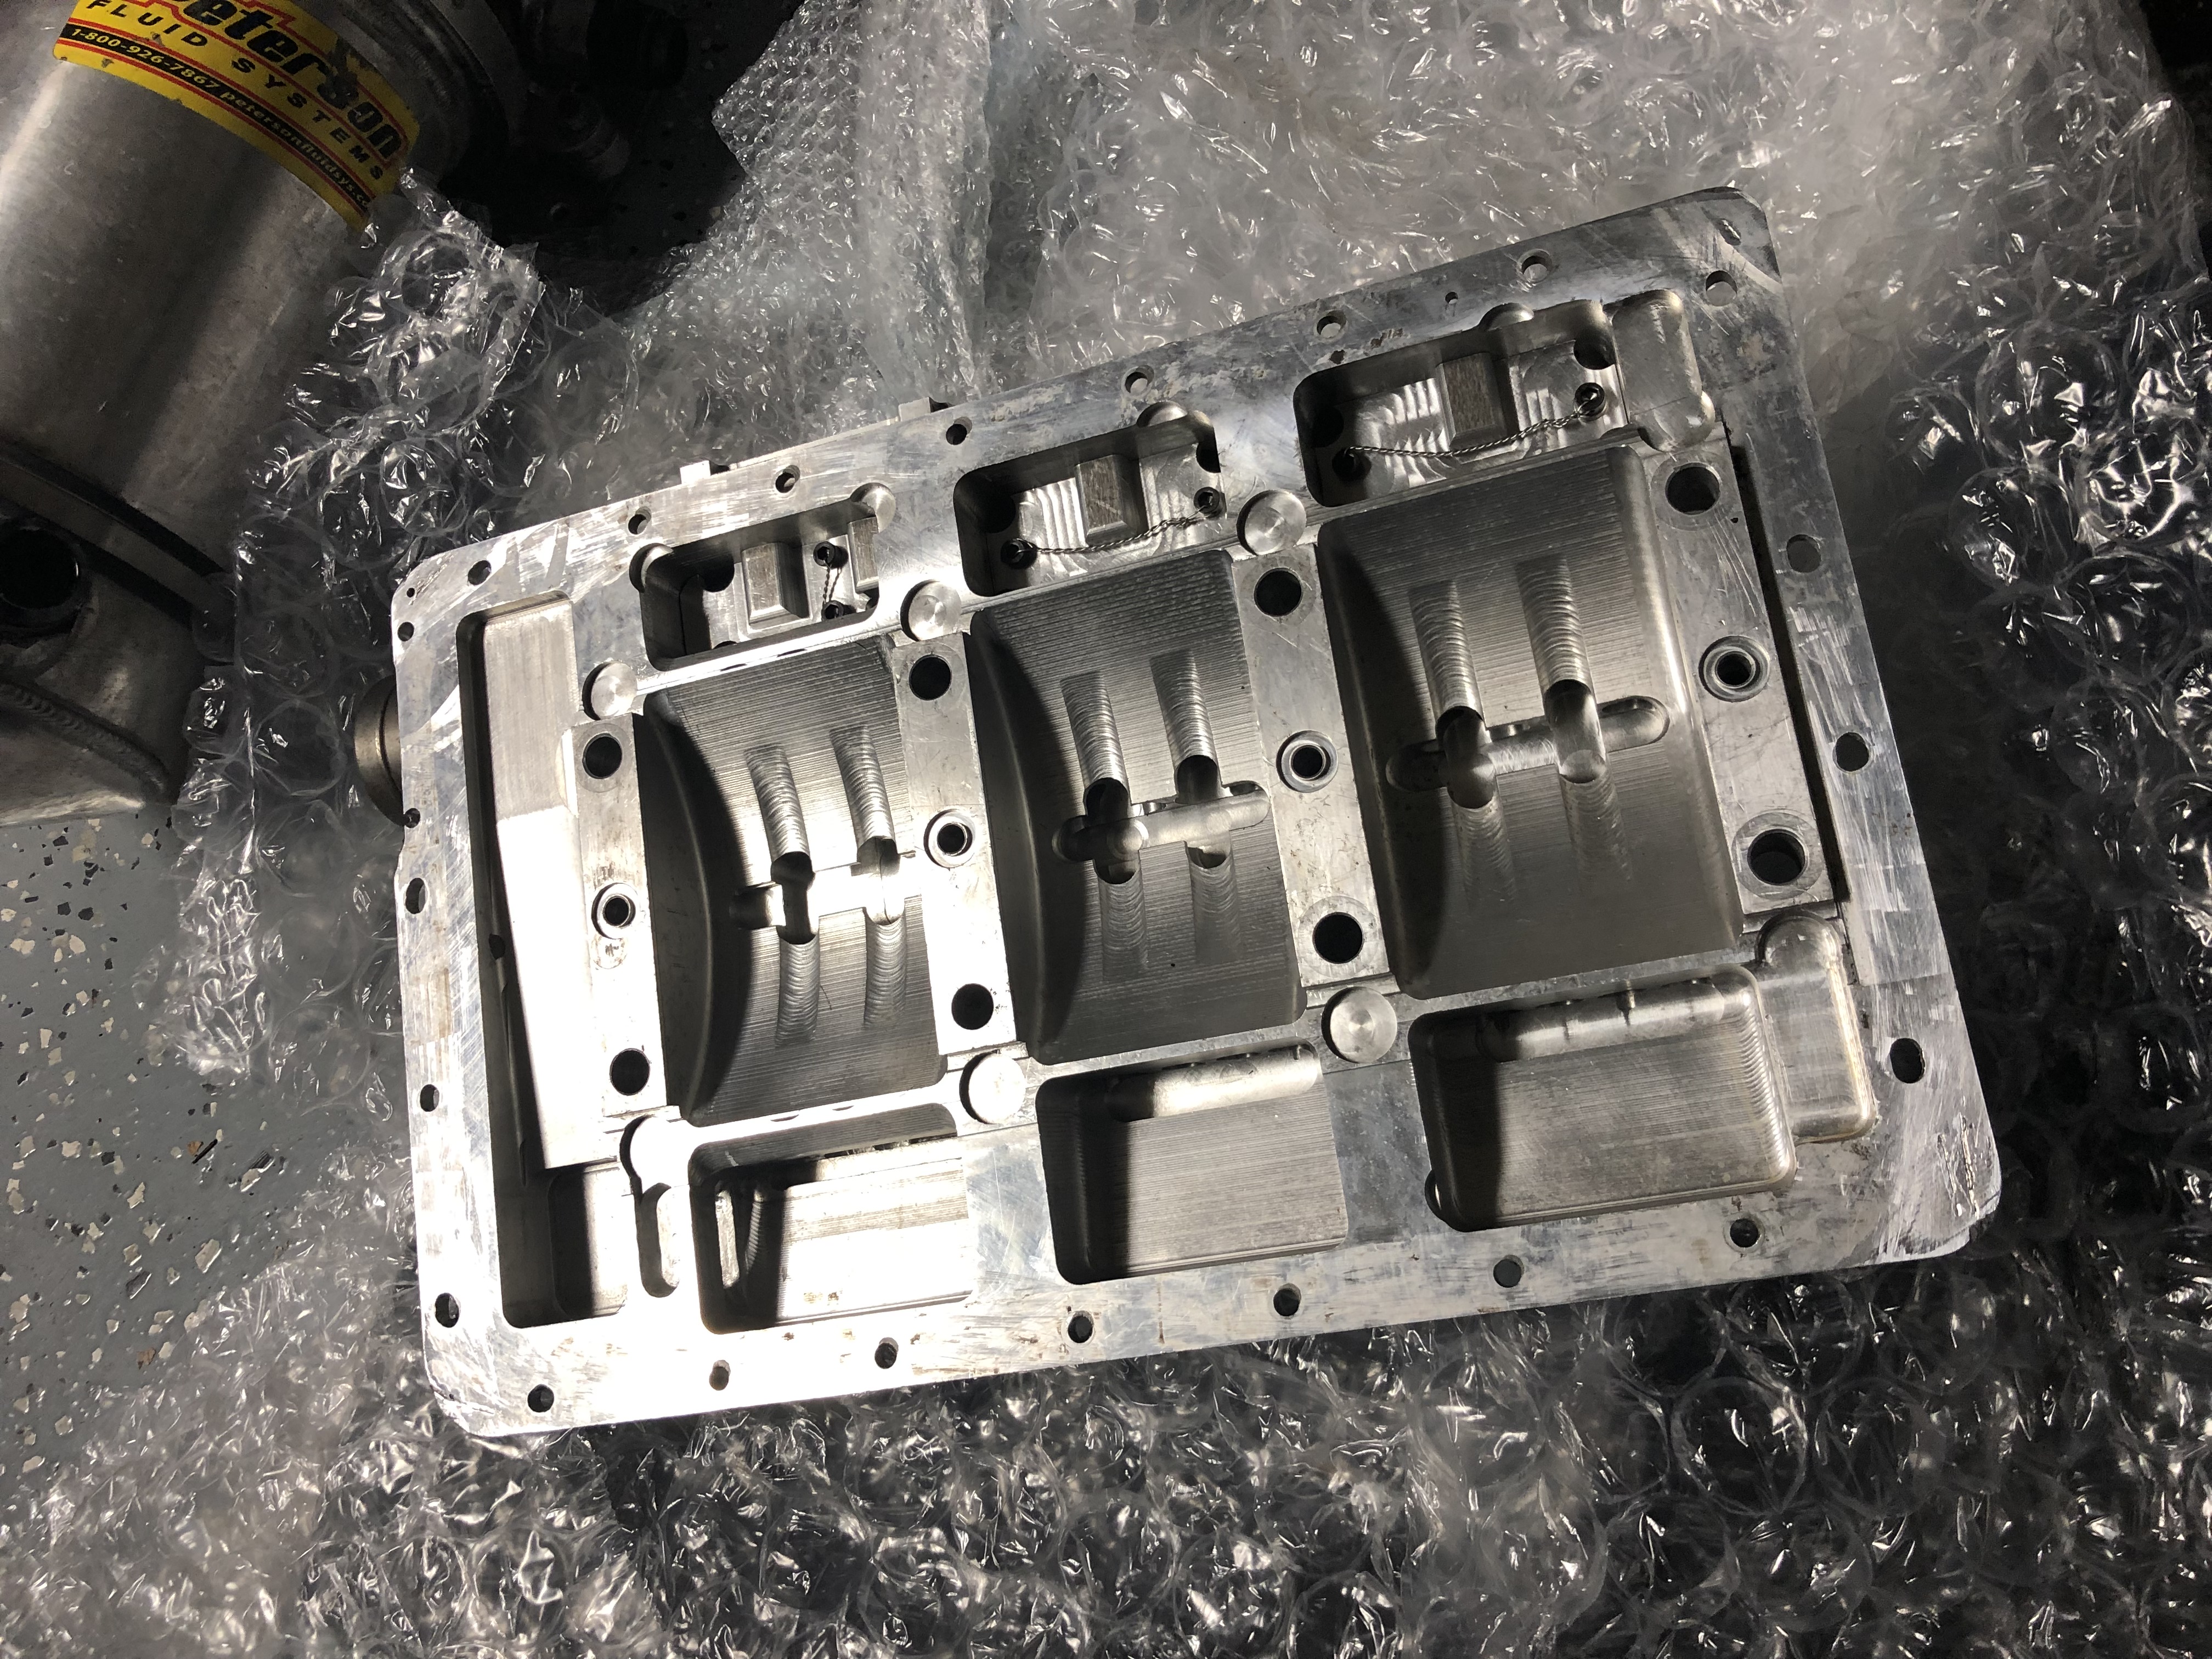
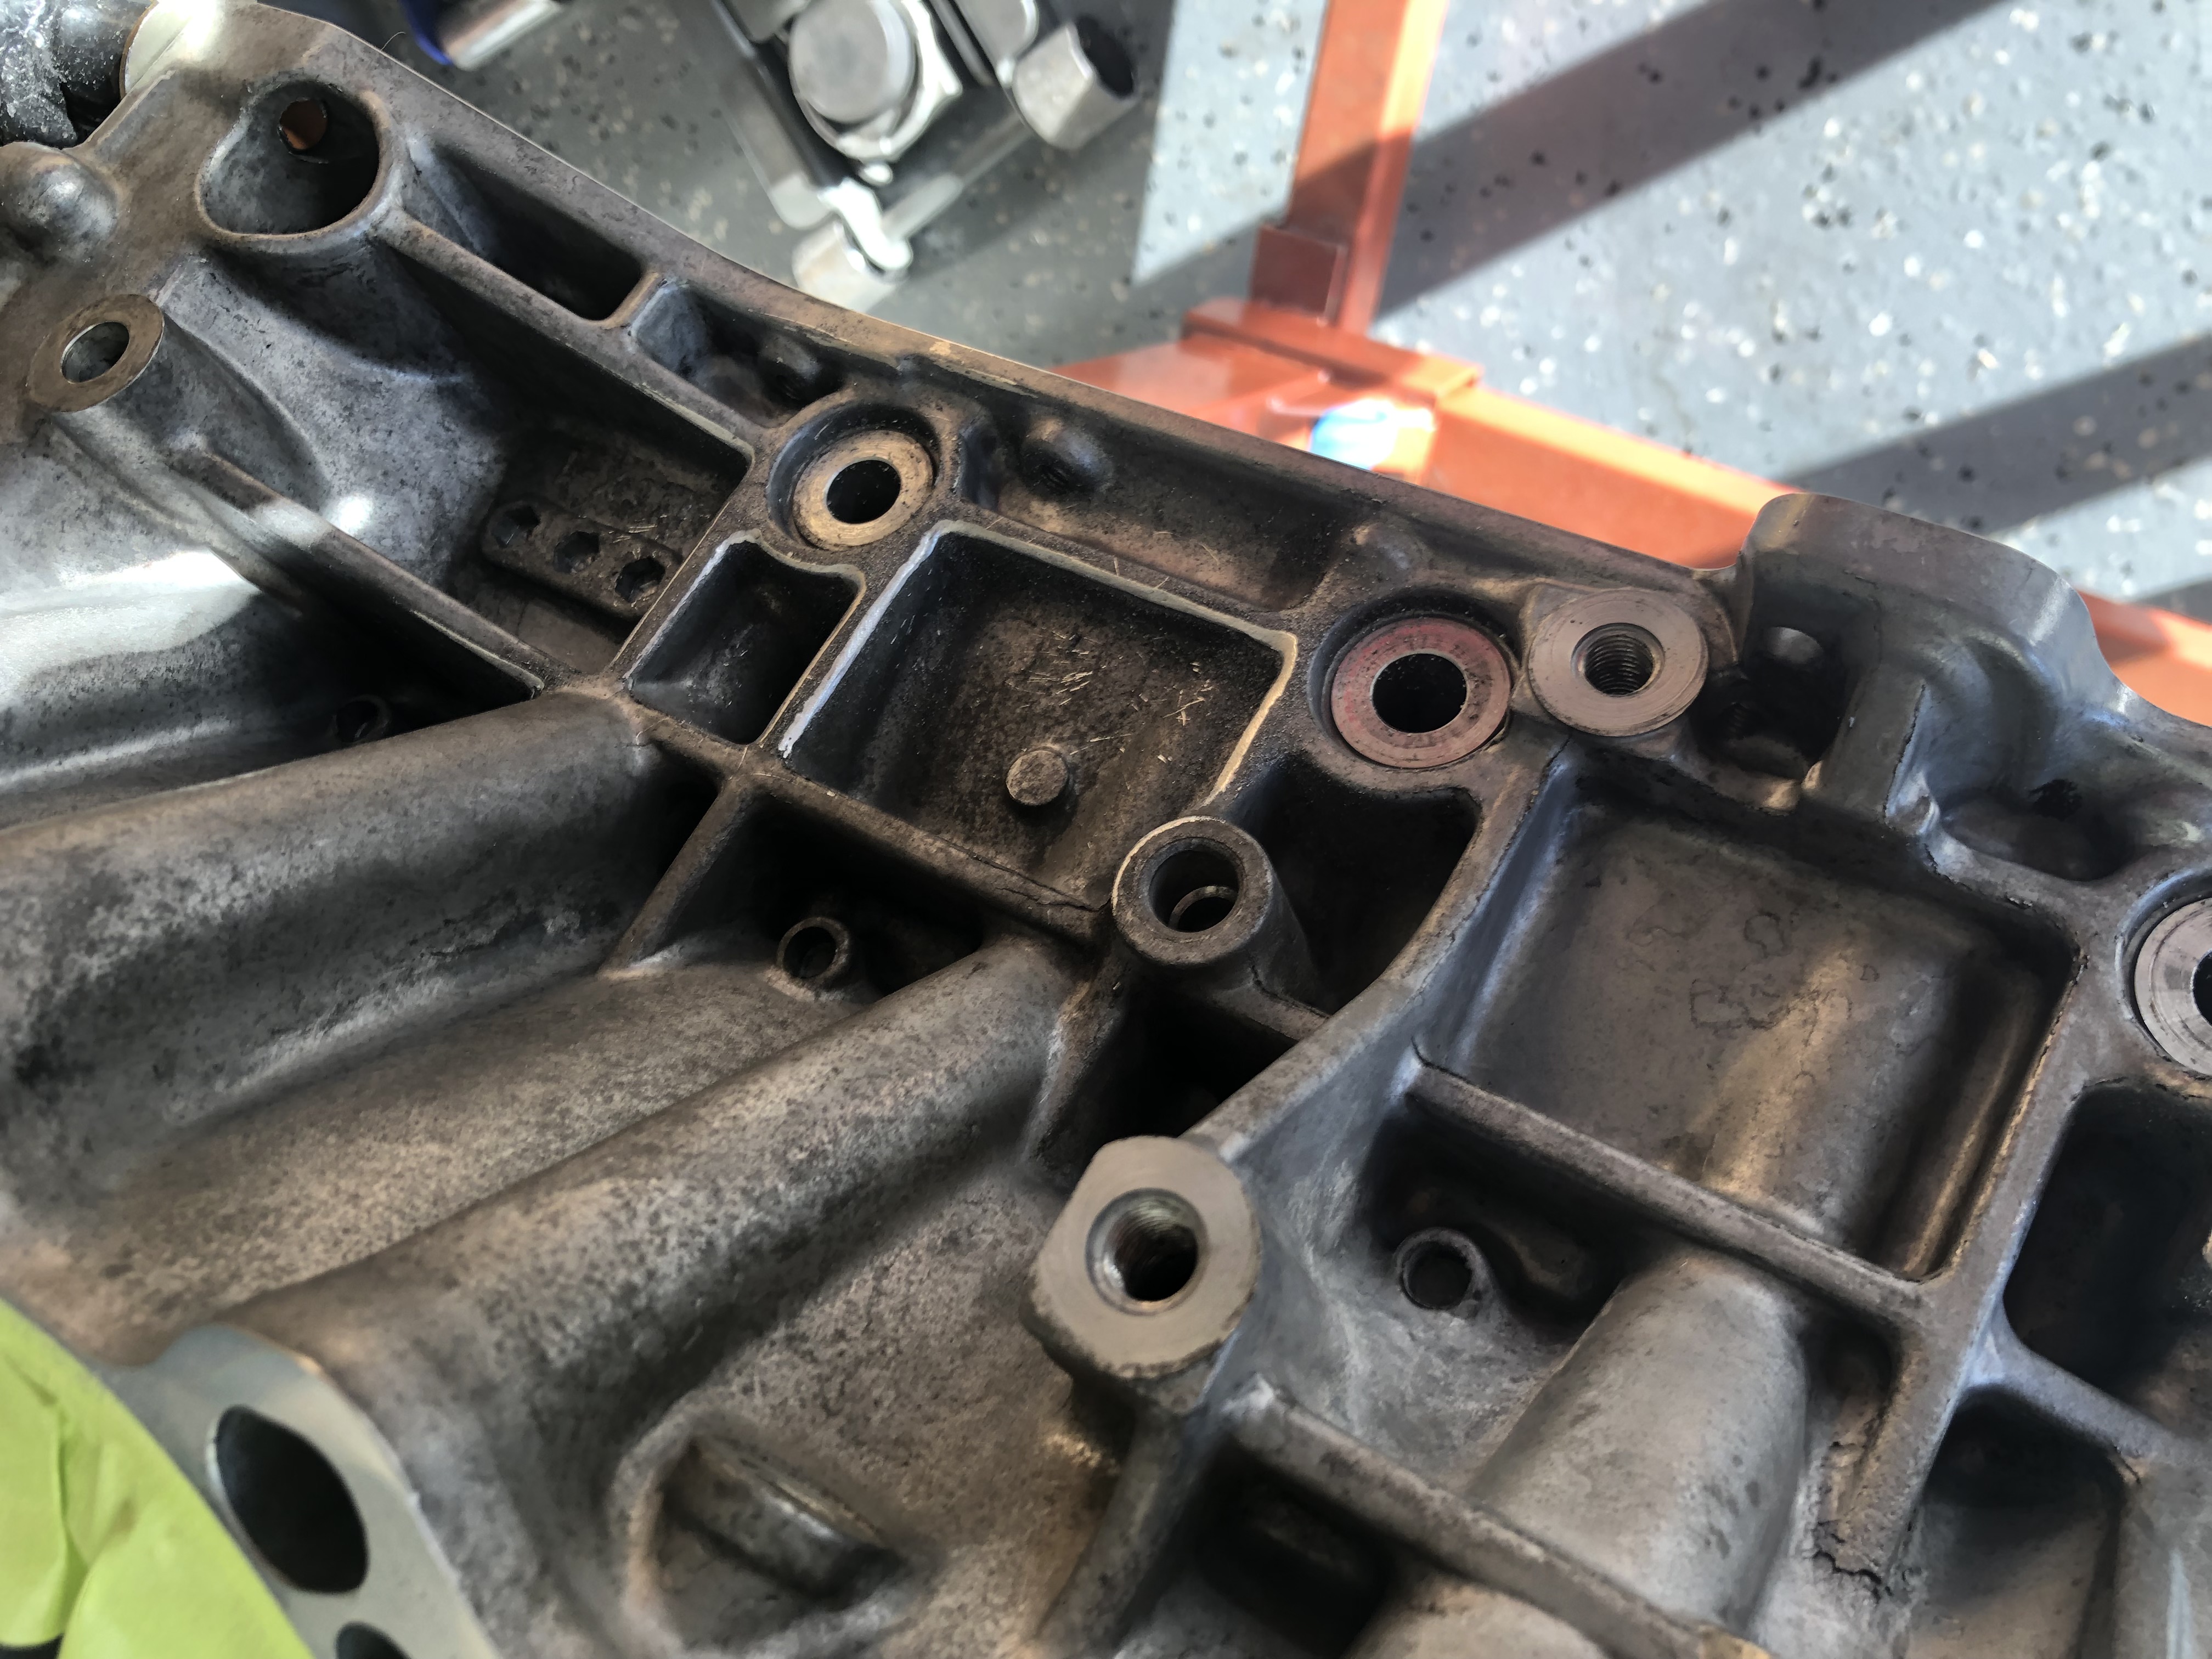
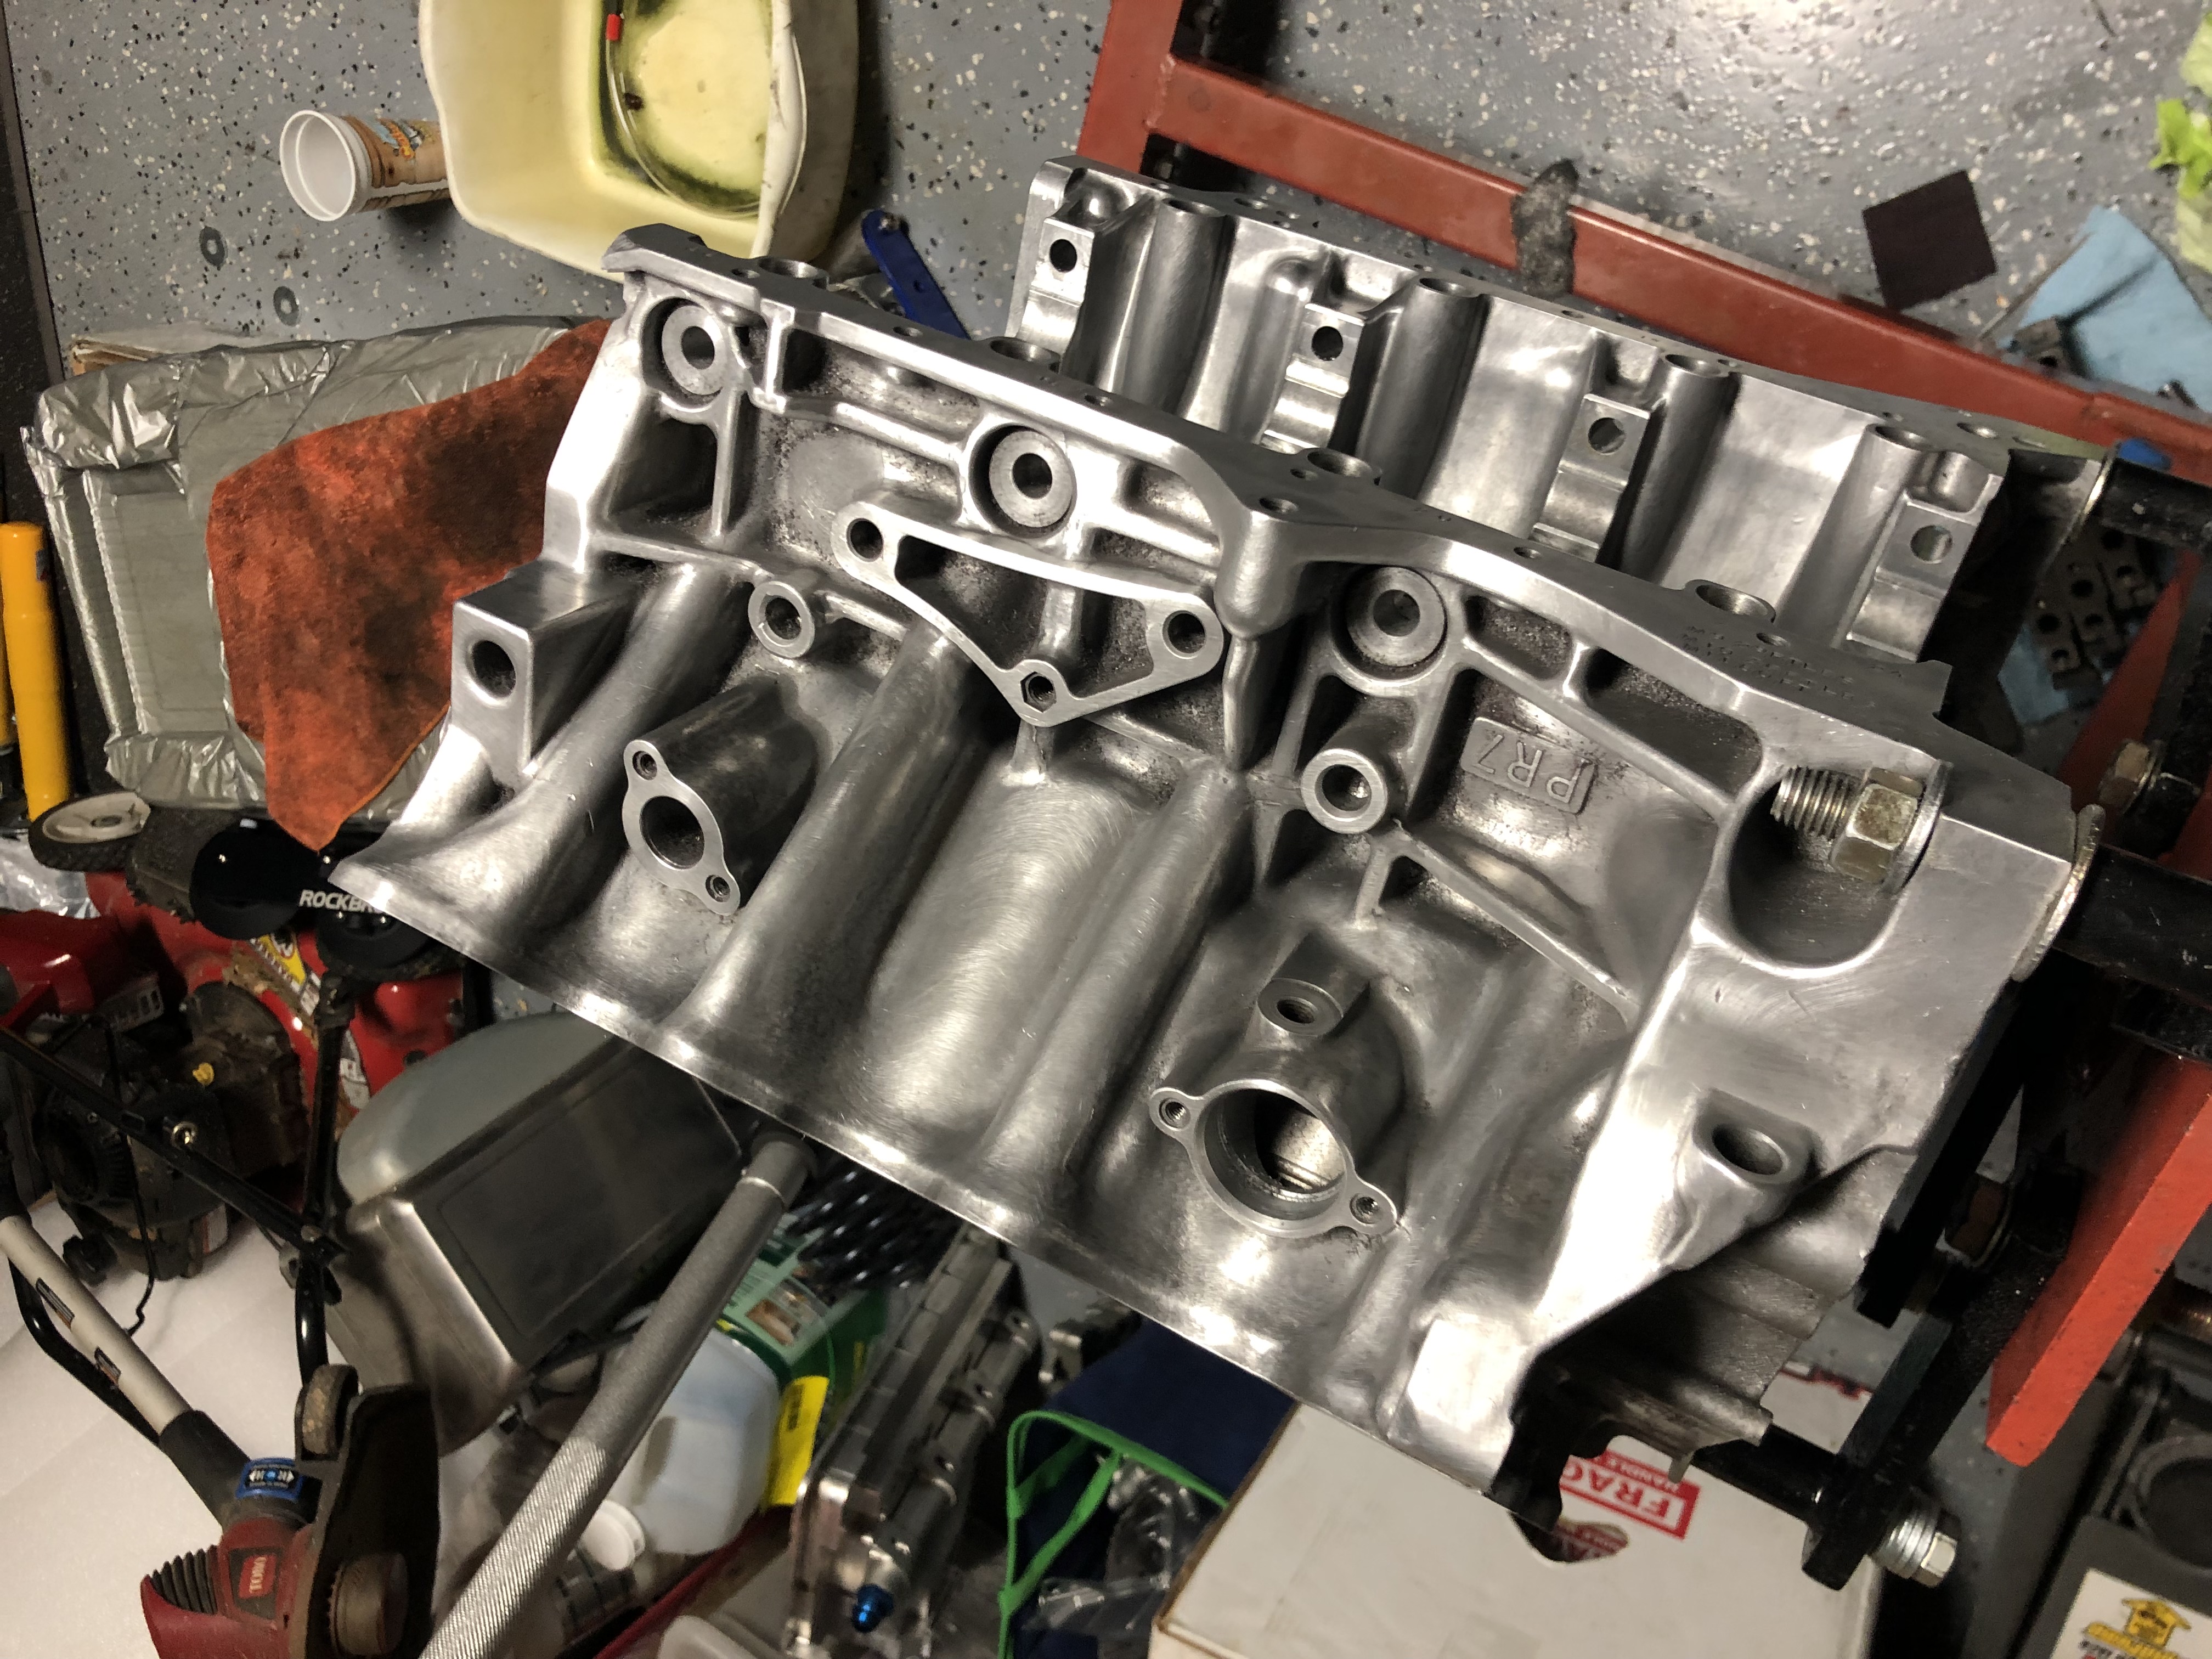
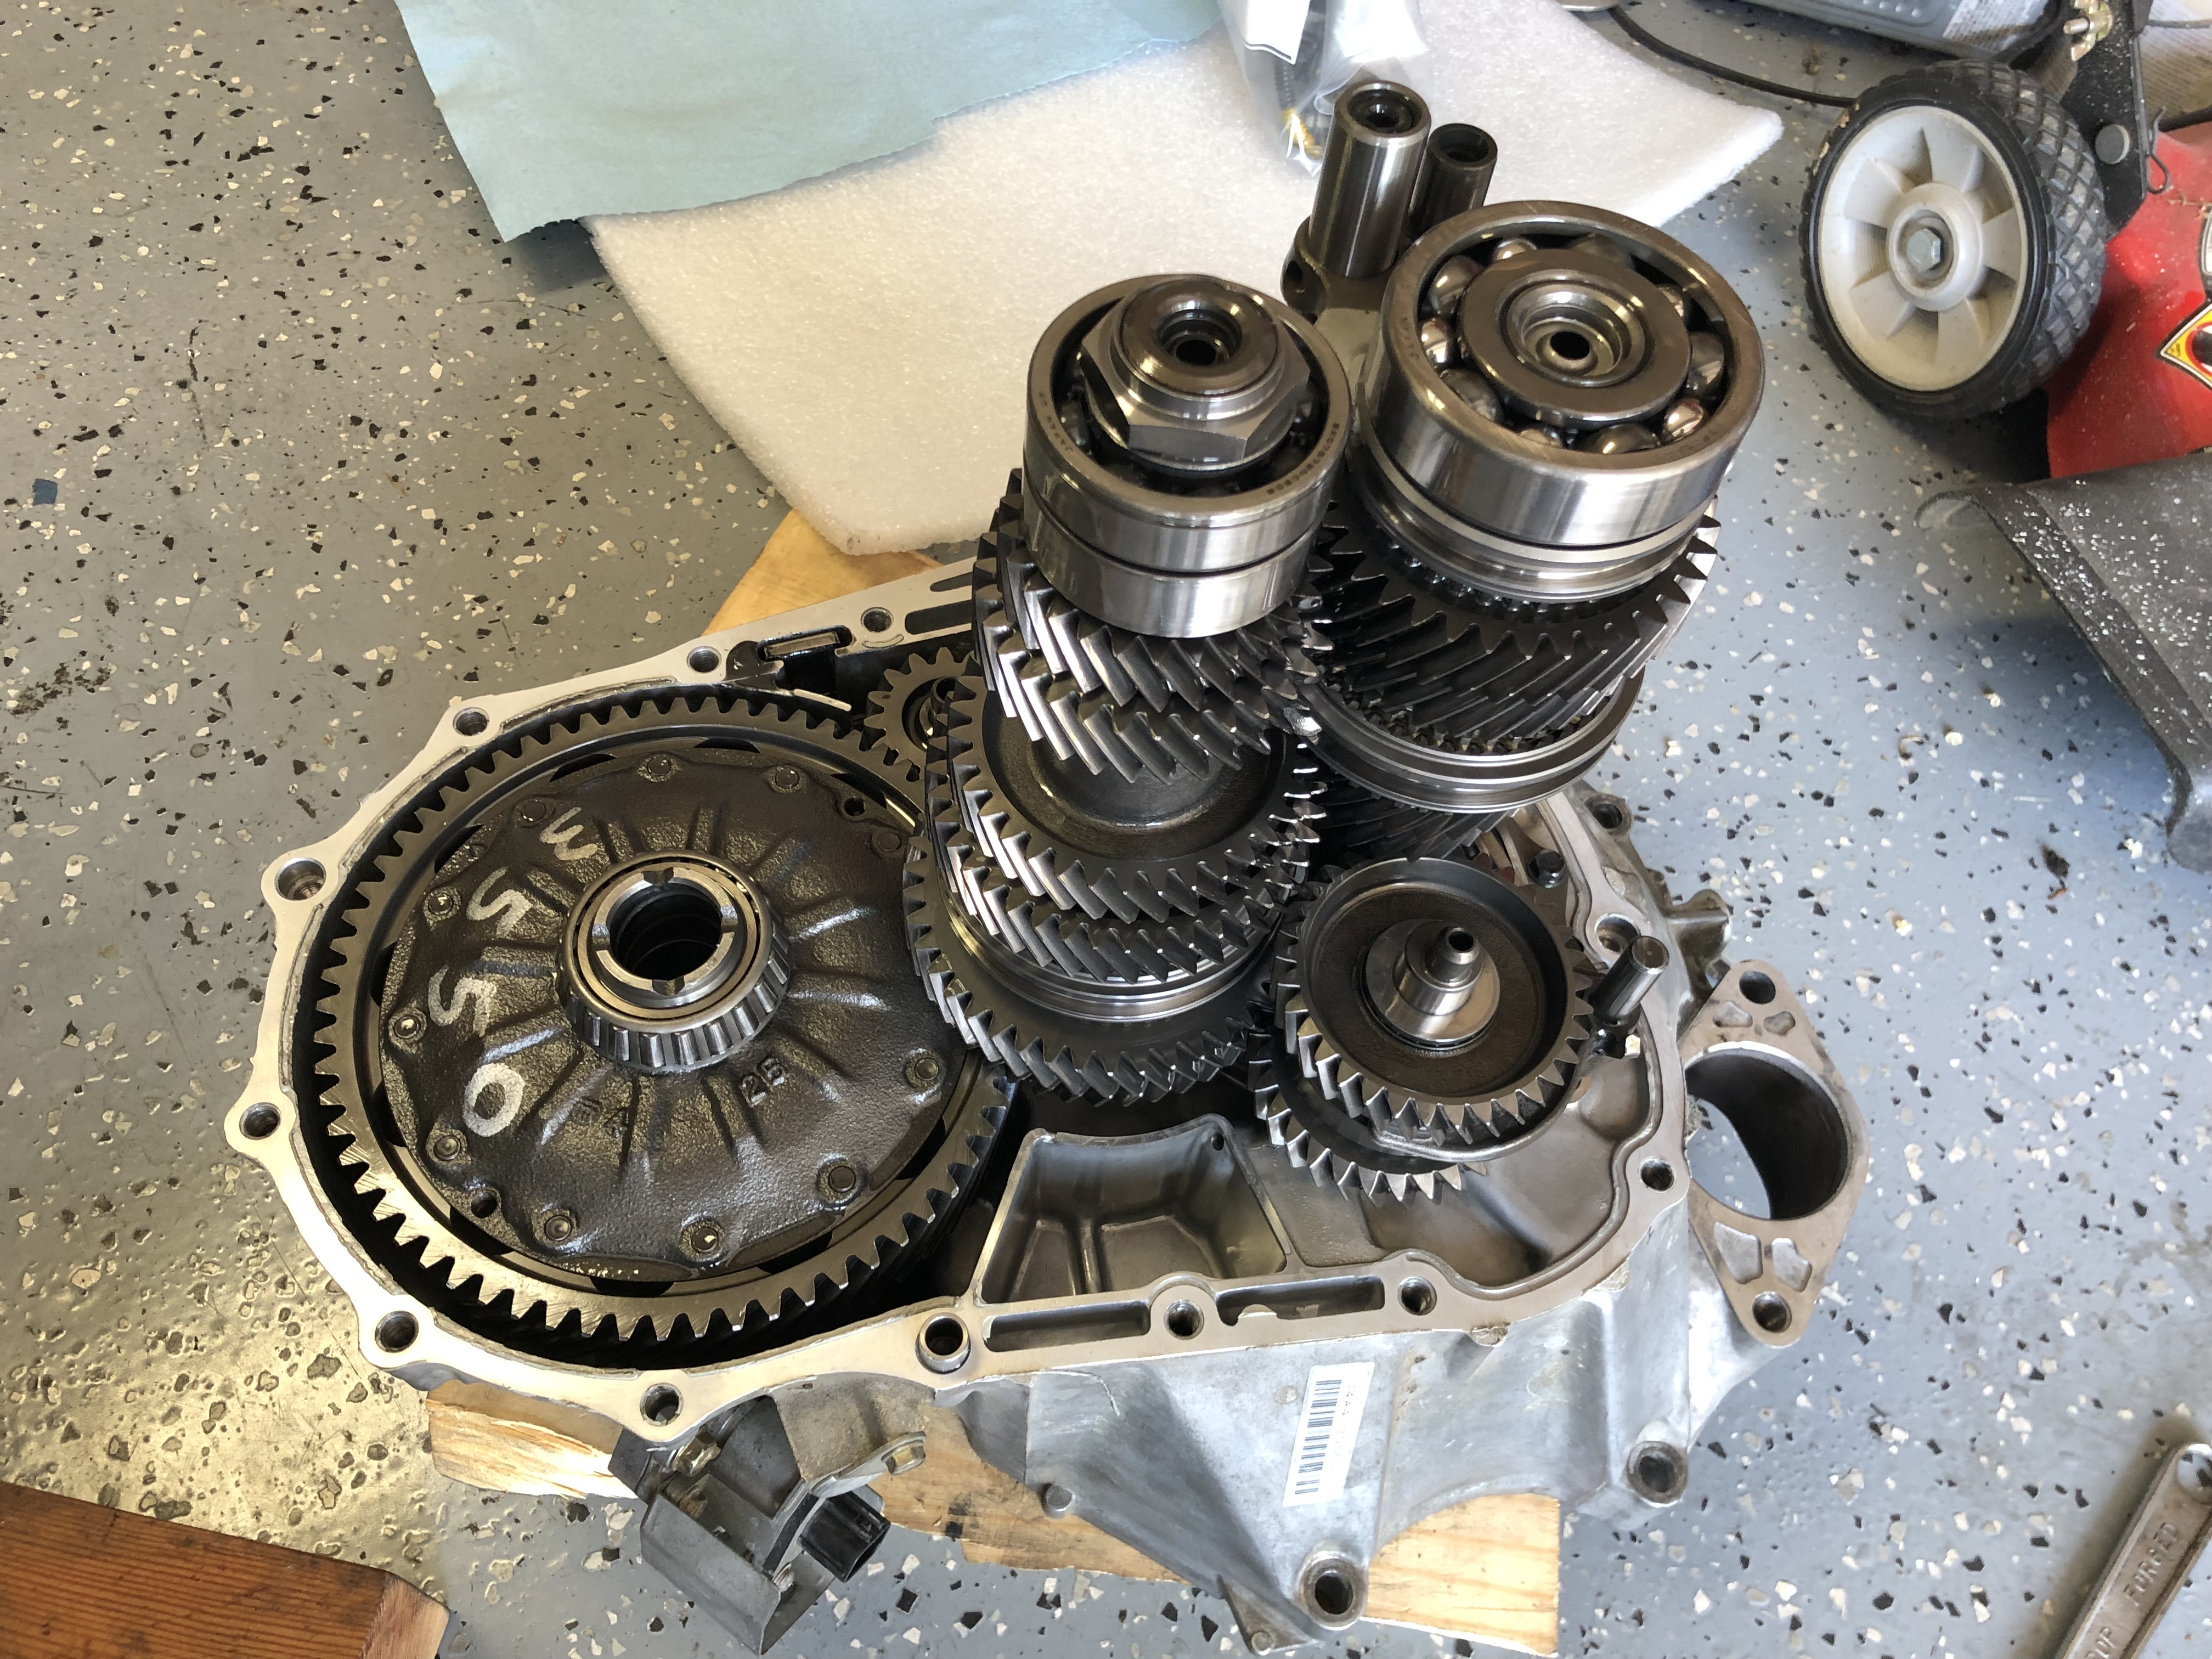
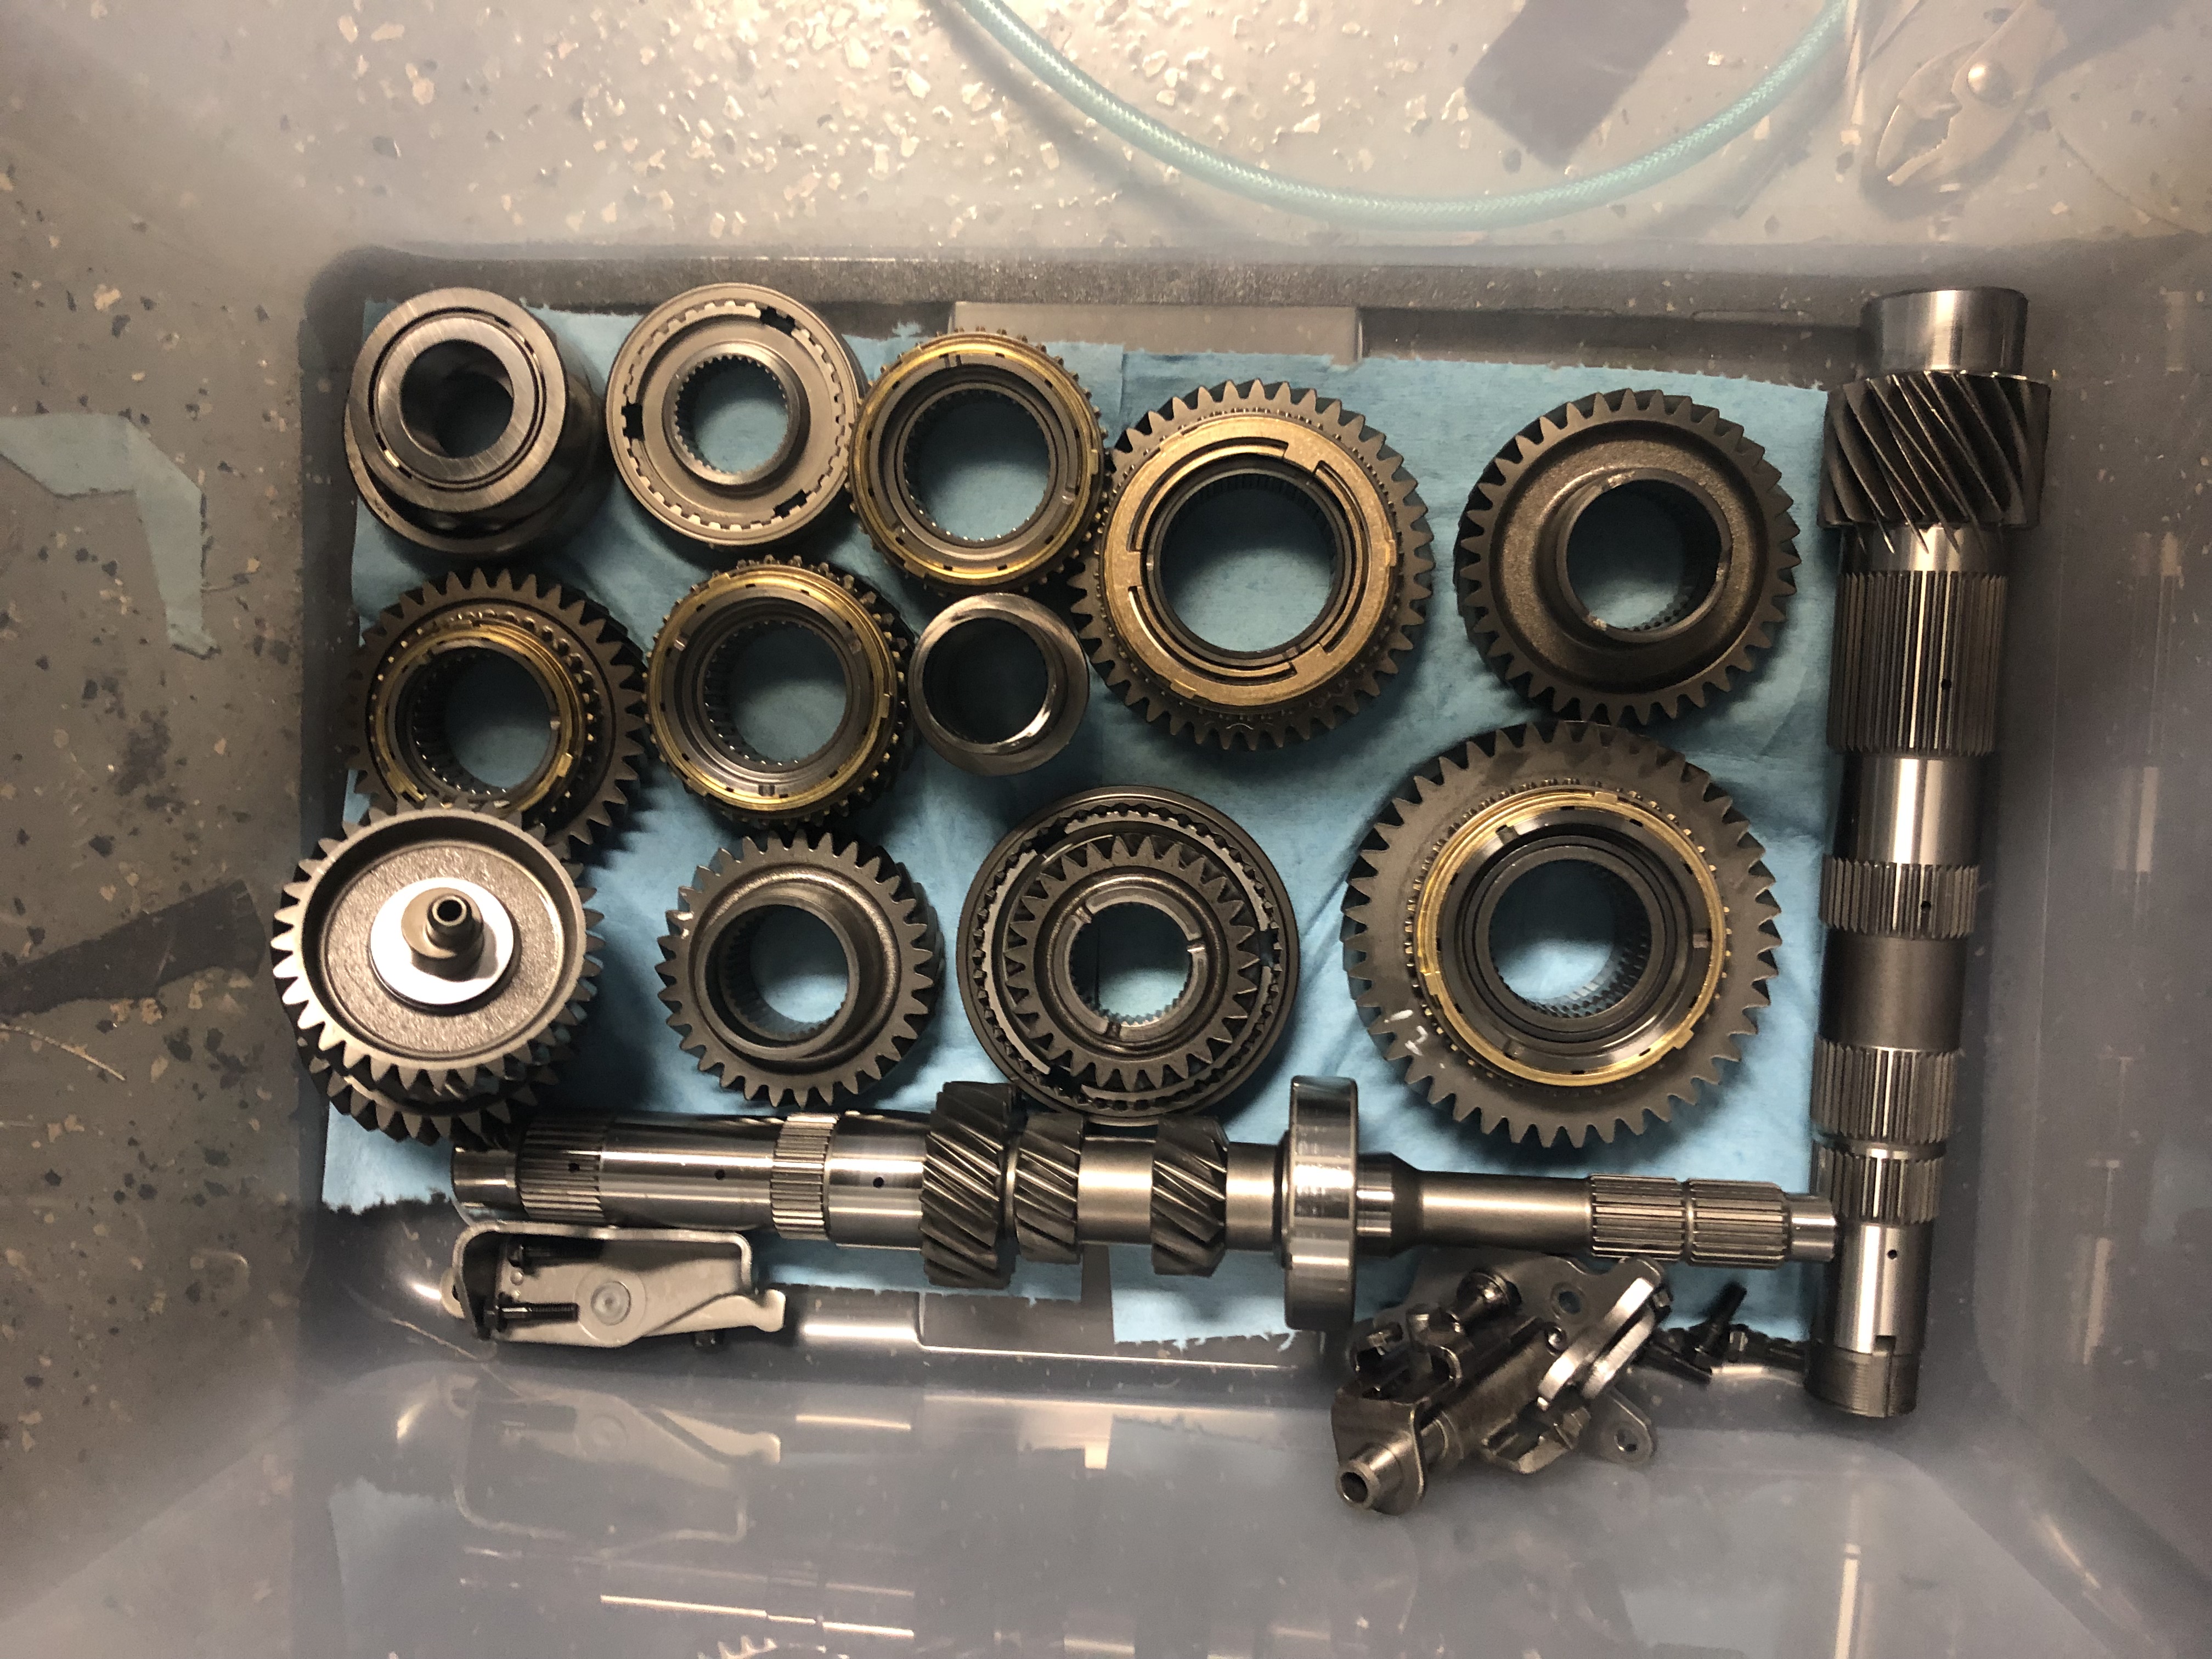
Parts all cleaned and ready for assembly.

IMG_3626.jpg


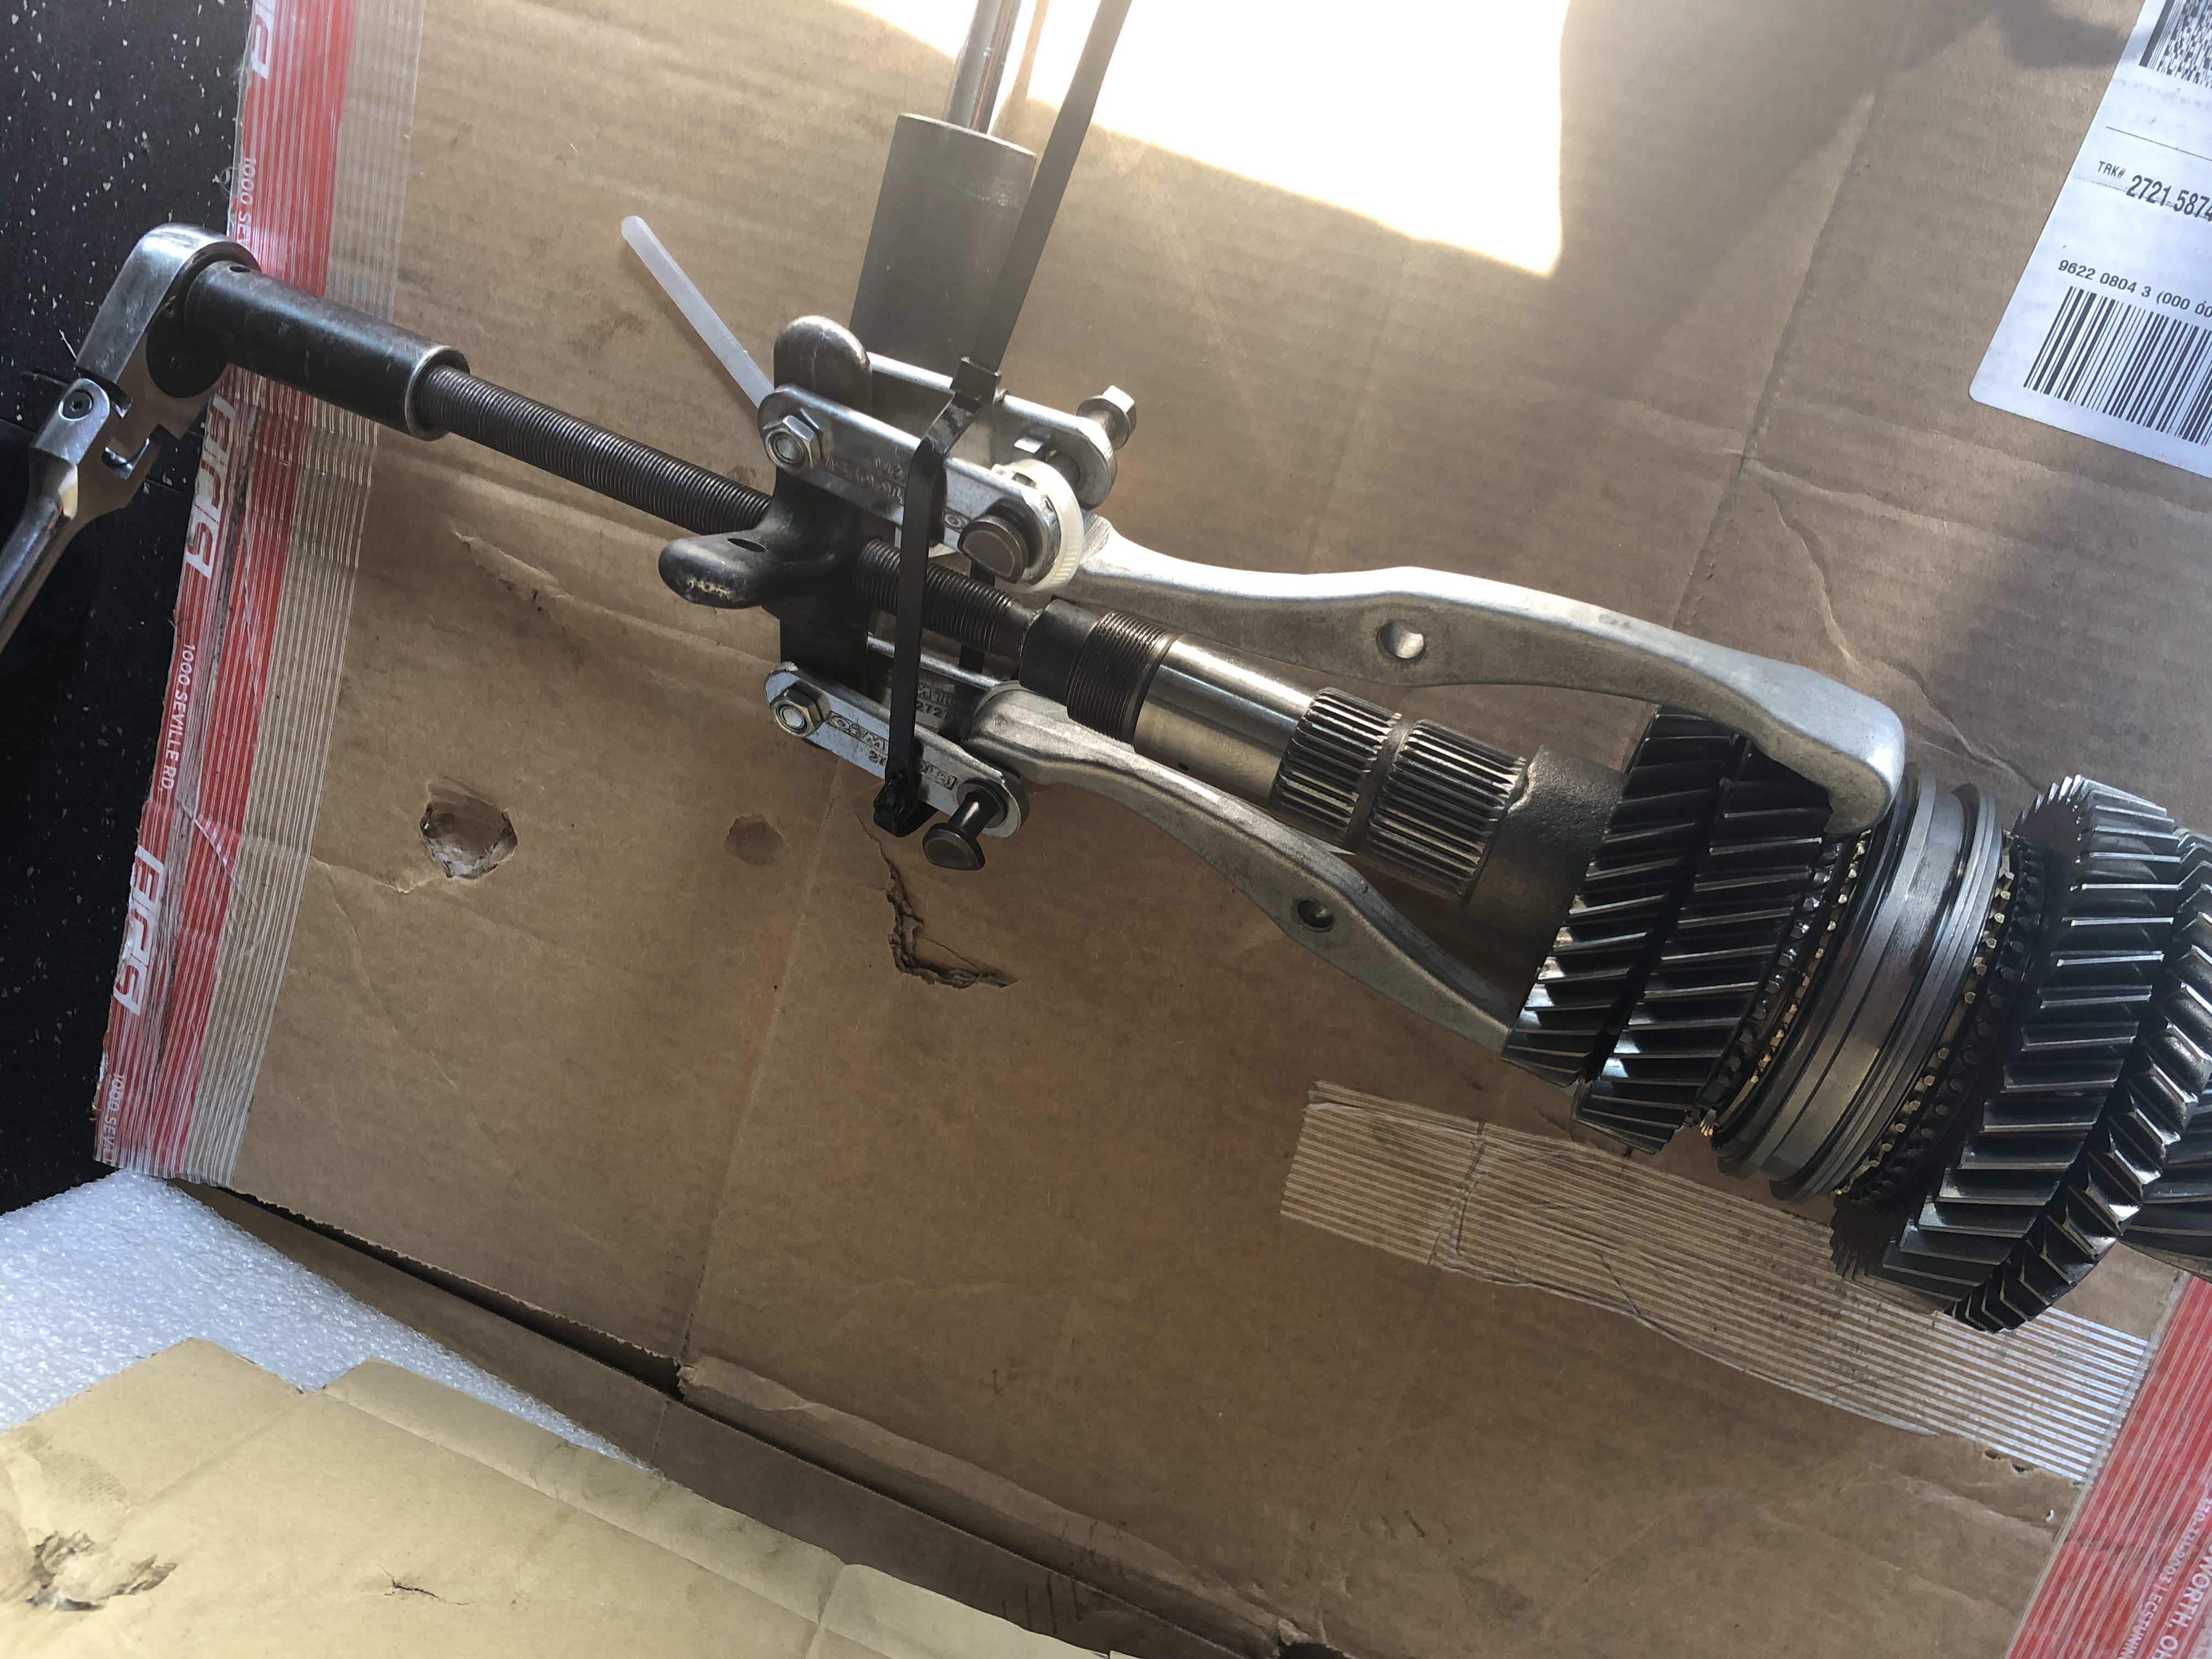
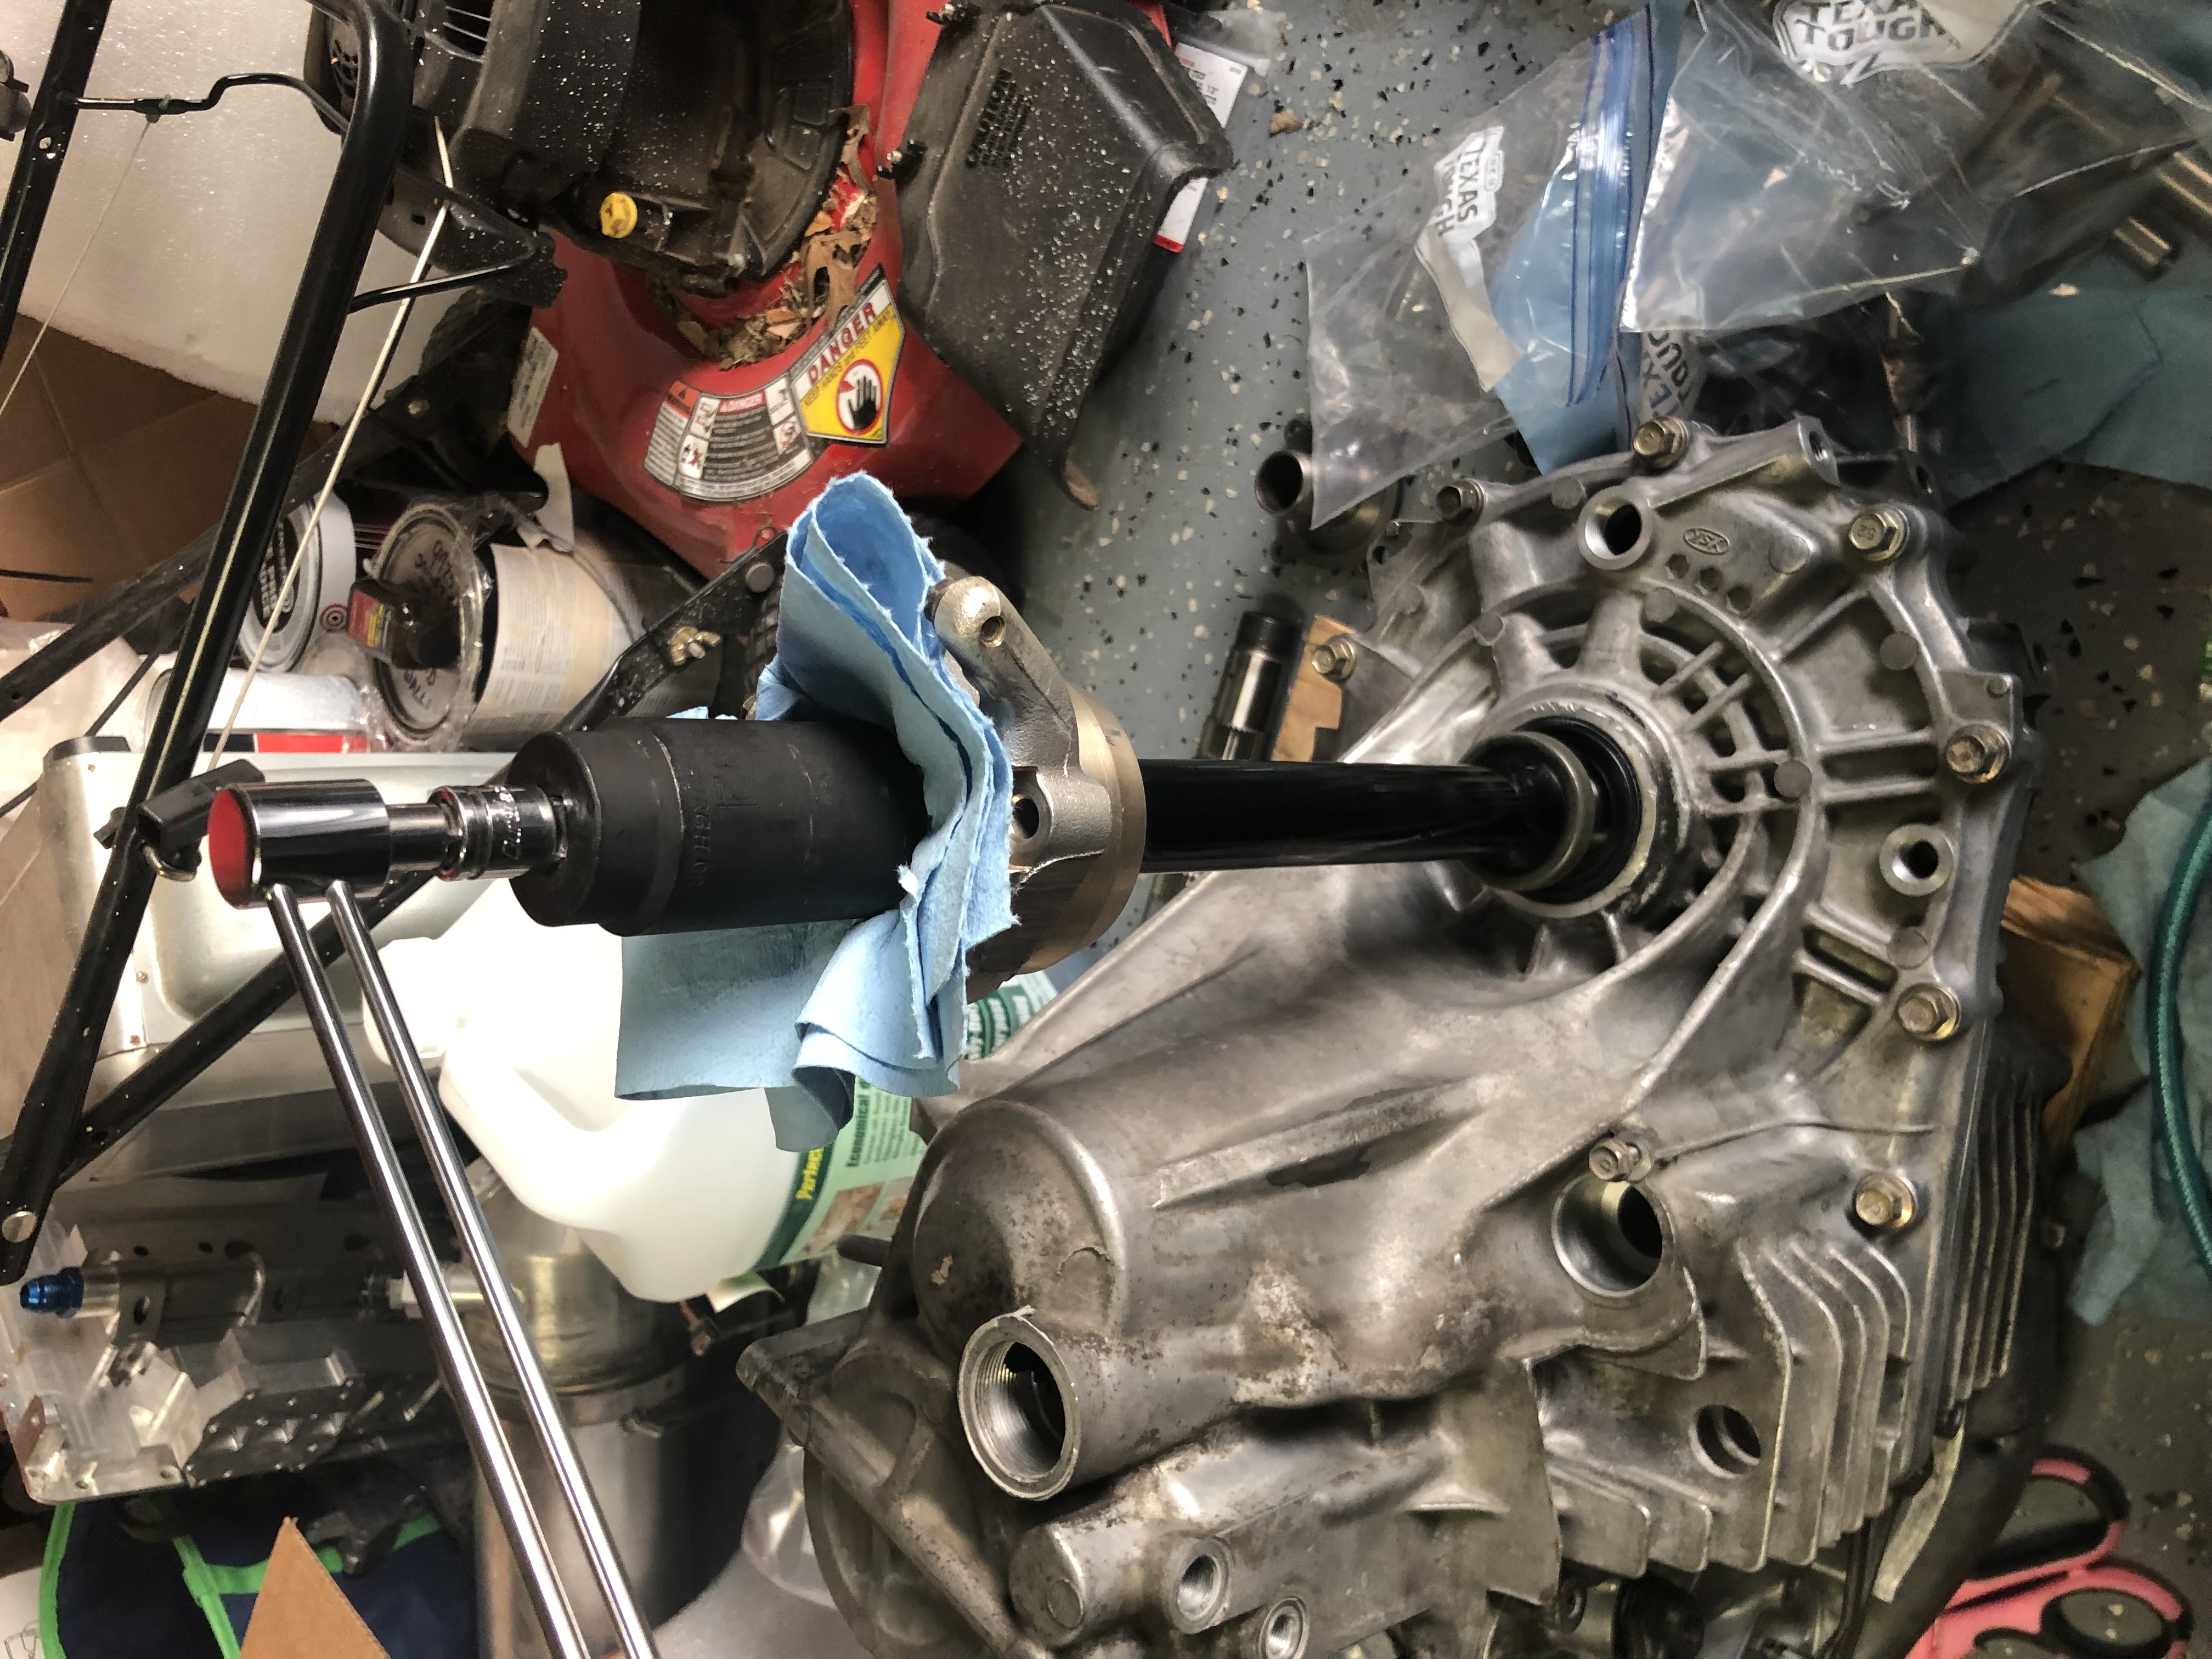
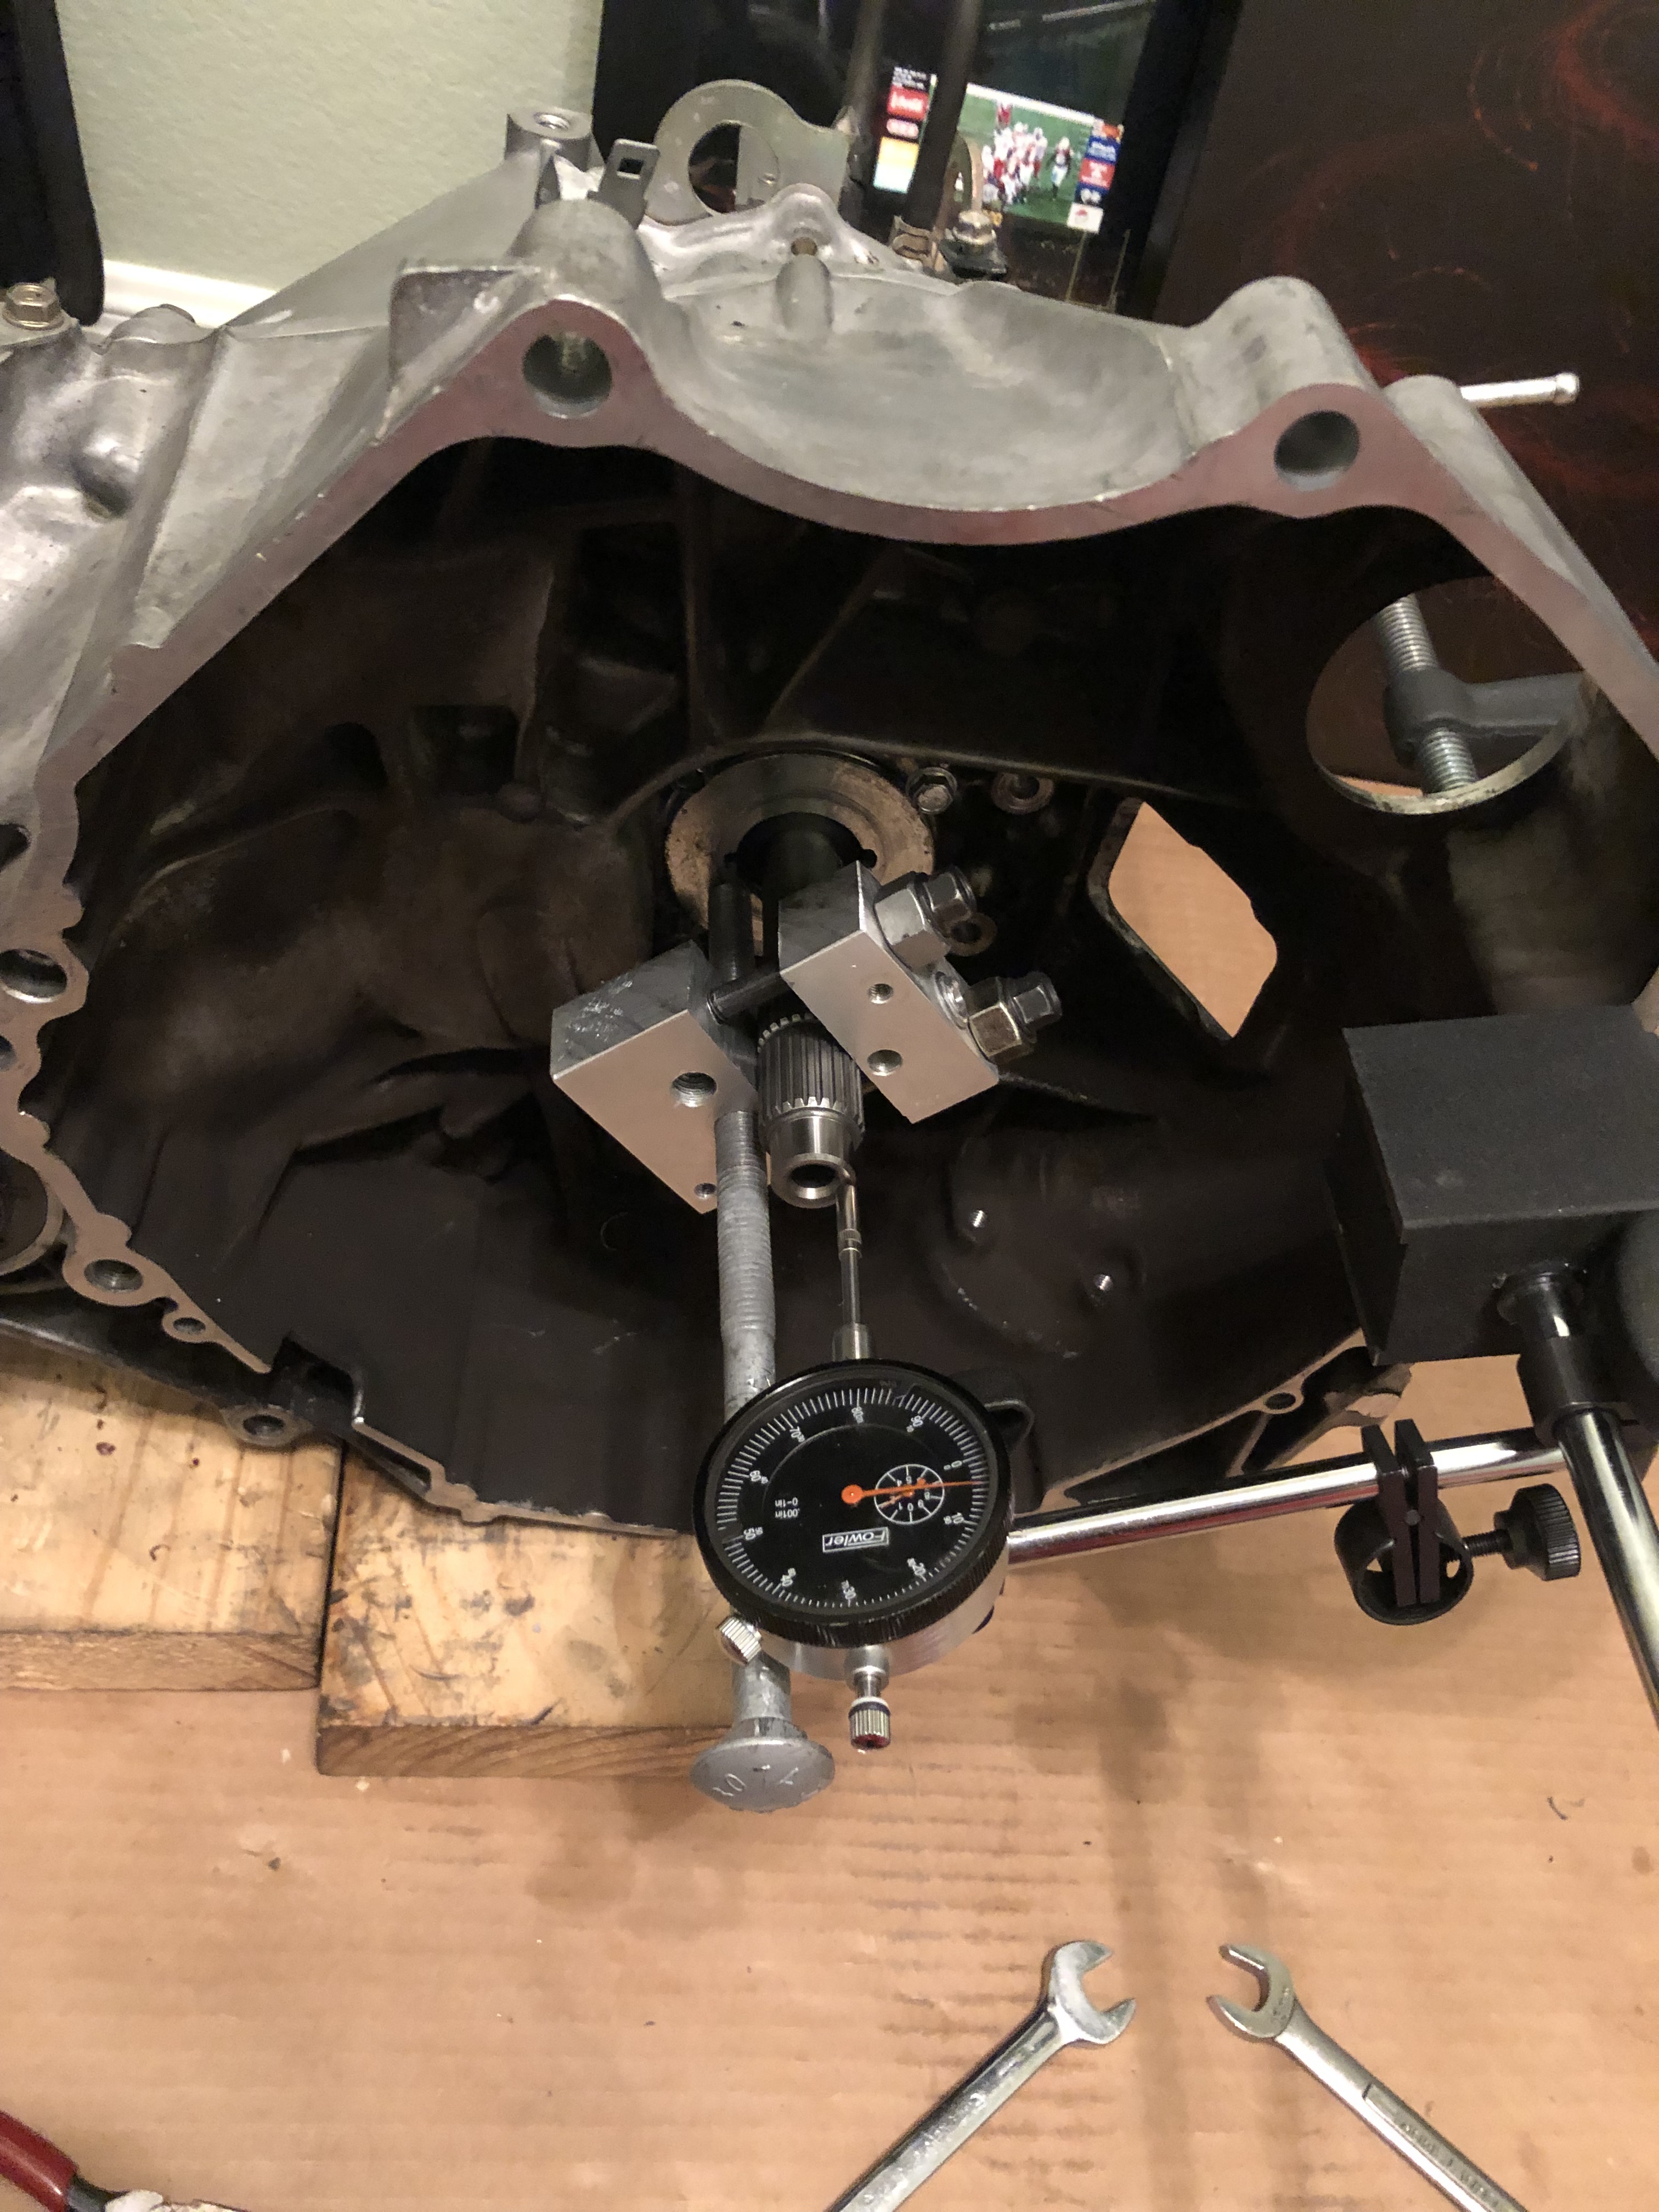
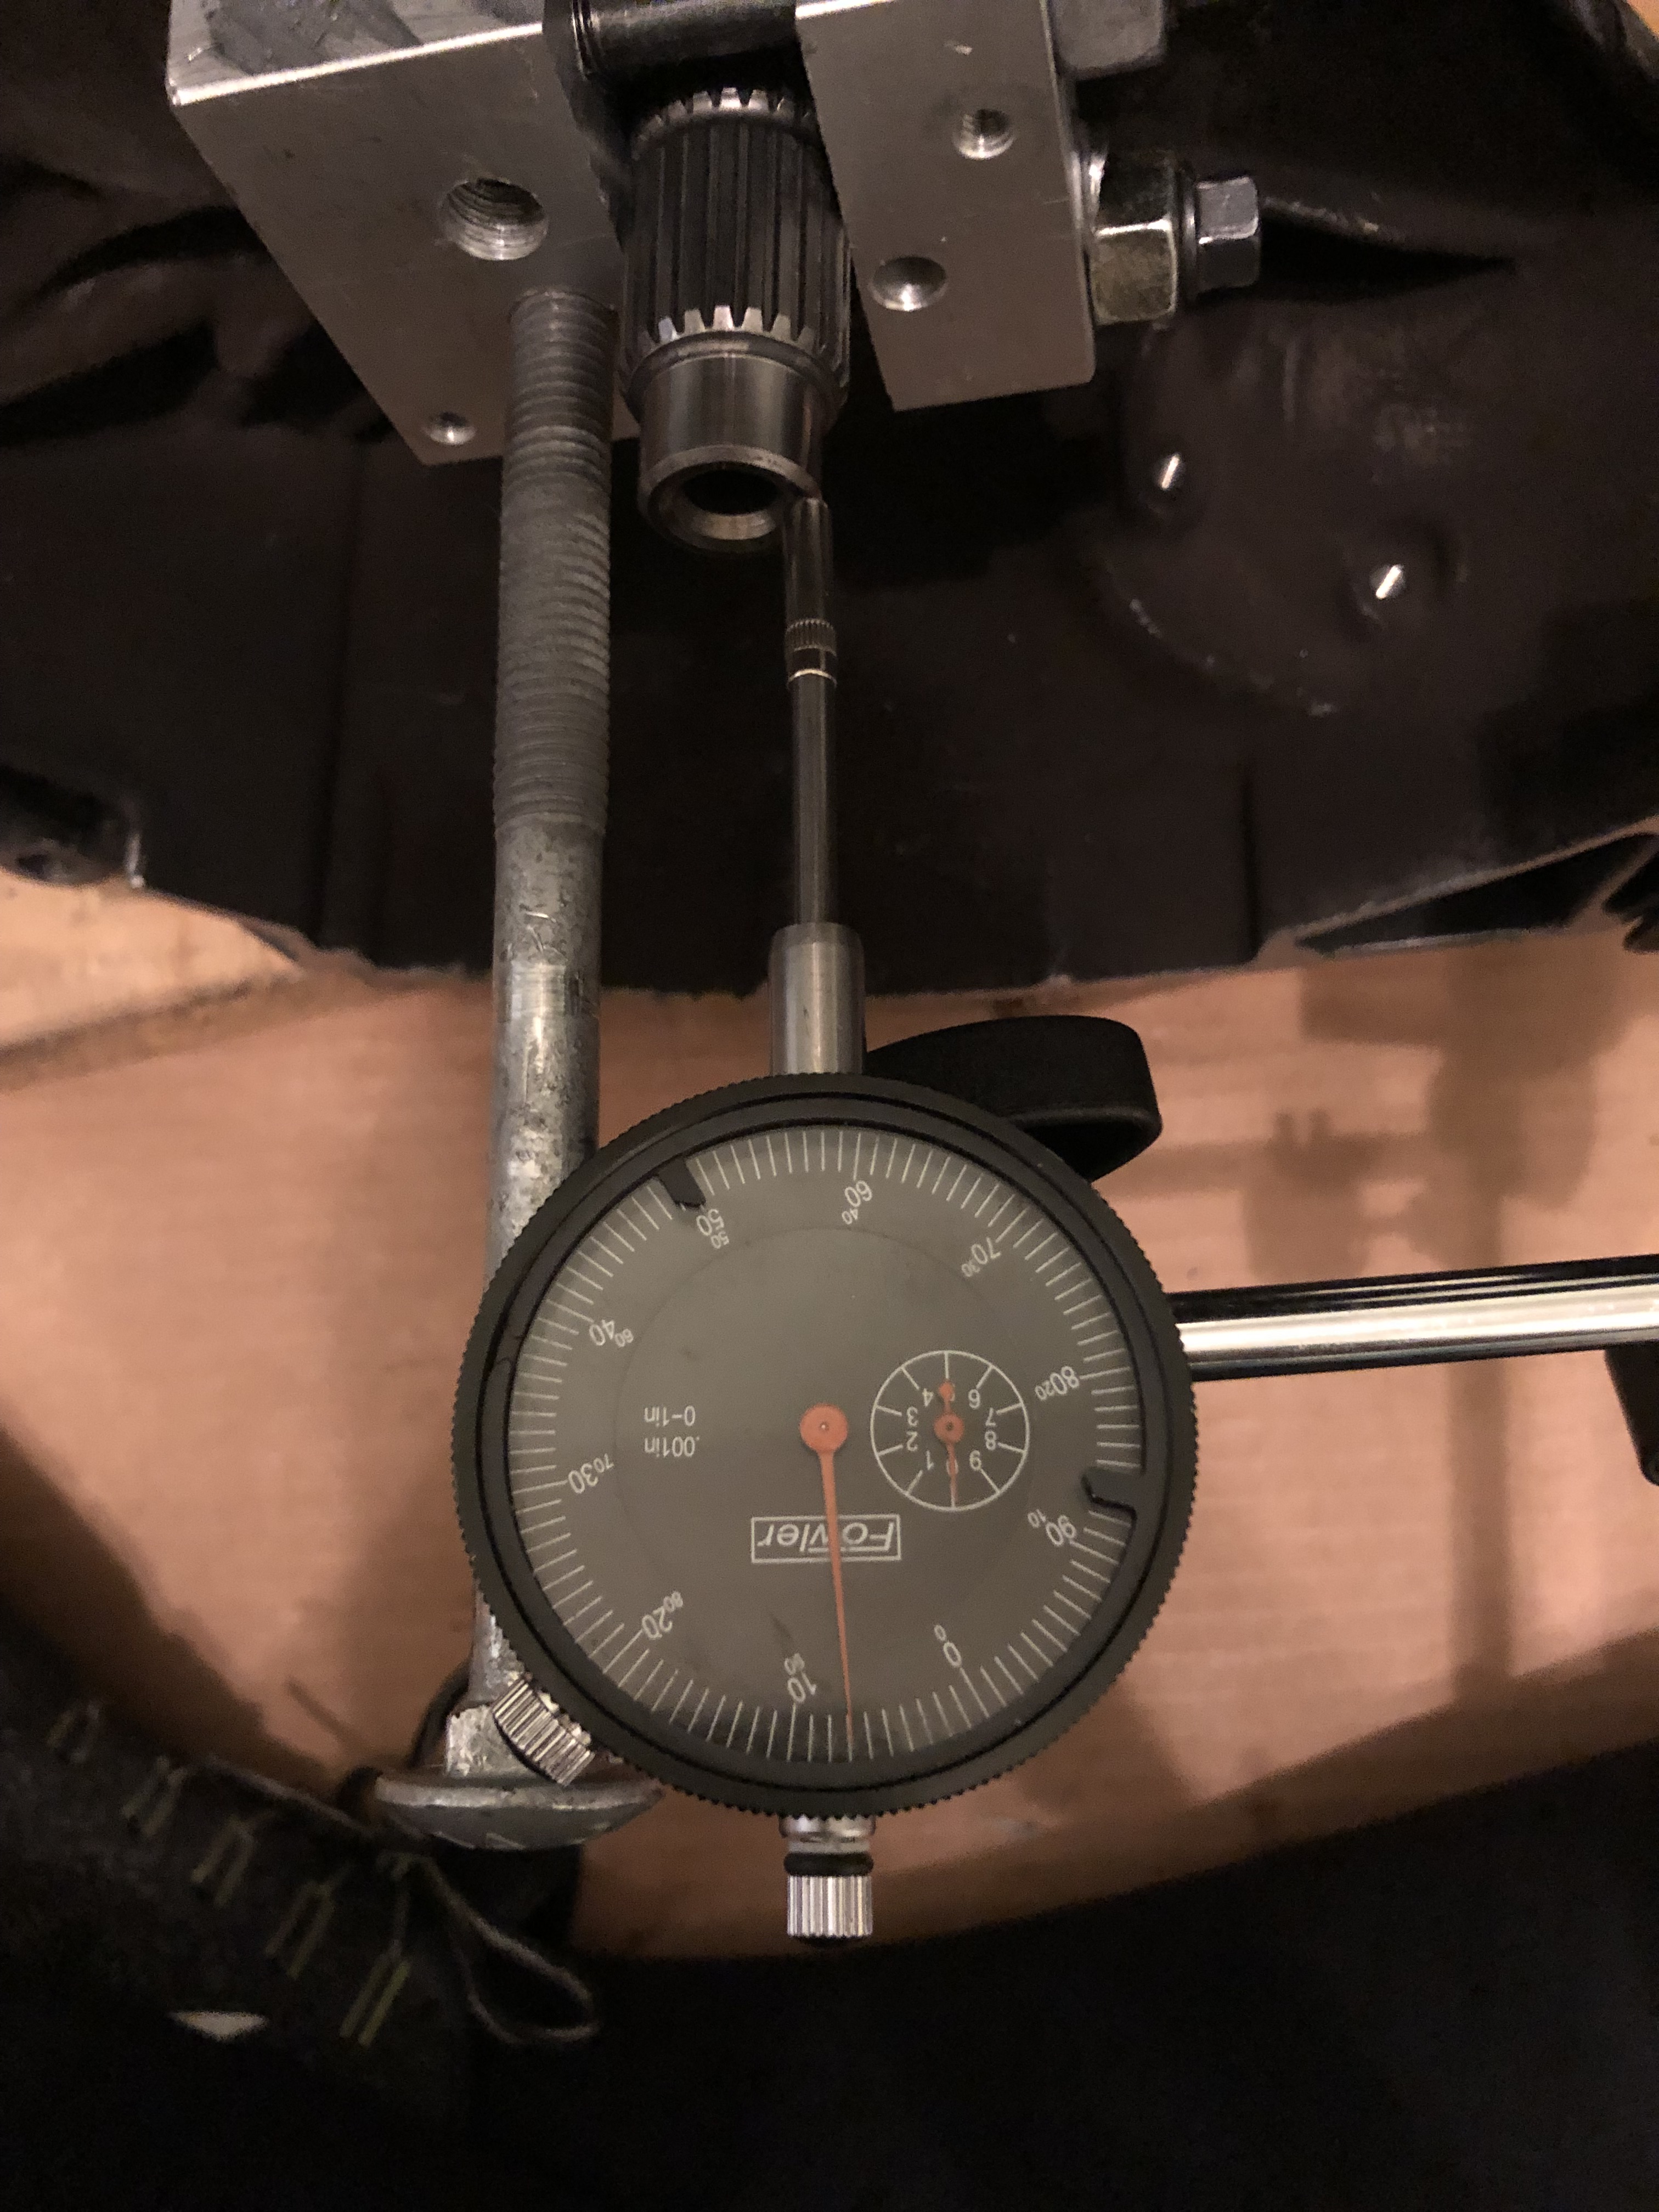
Checking differential preload. This should be done when swapping ring gears as there is a tolerance of a few thousands of an inch on these. I measured the 3 that I have and and they were all a tiny bit different, fortunately not enough to throw off the preload reading. Last time I used a bolt through the middle of the diff, but I realized that could create a situation where the bolt was compression the differential and throwing off the preload so I wanted to find a different method. Sticking the intermediate shaft in the diff, putting a folded paper towel over the splined end, and jamming a 32mm socket down on it worked great and cost nothing.

IMG_3631.jpg


At this point I was ready for final assembly, so I sealed up the transmission.

Then I read @
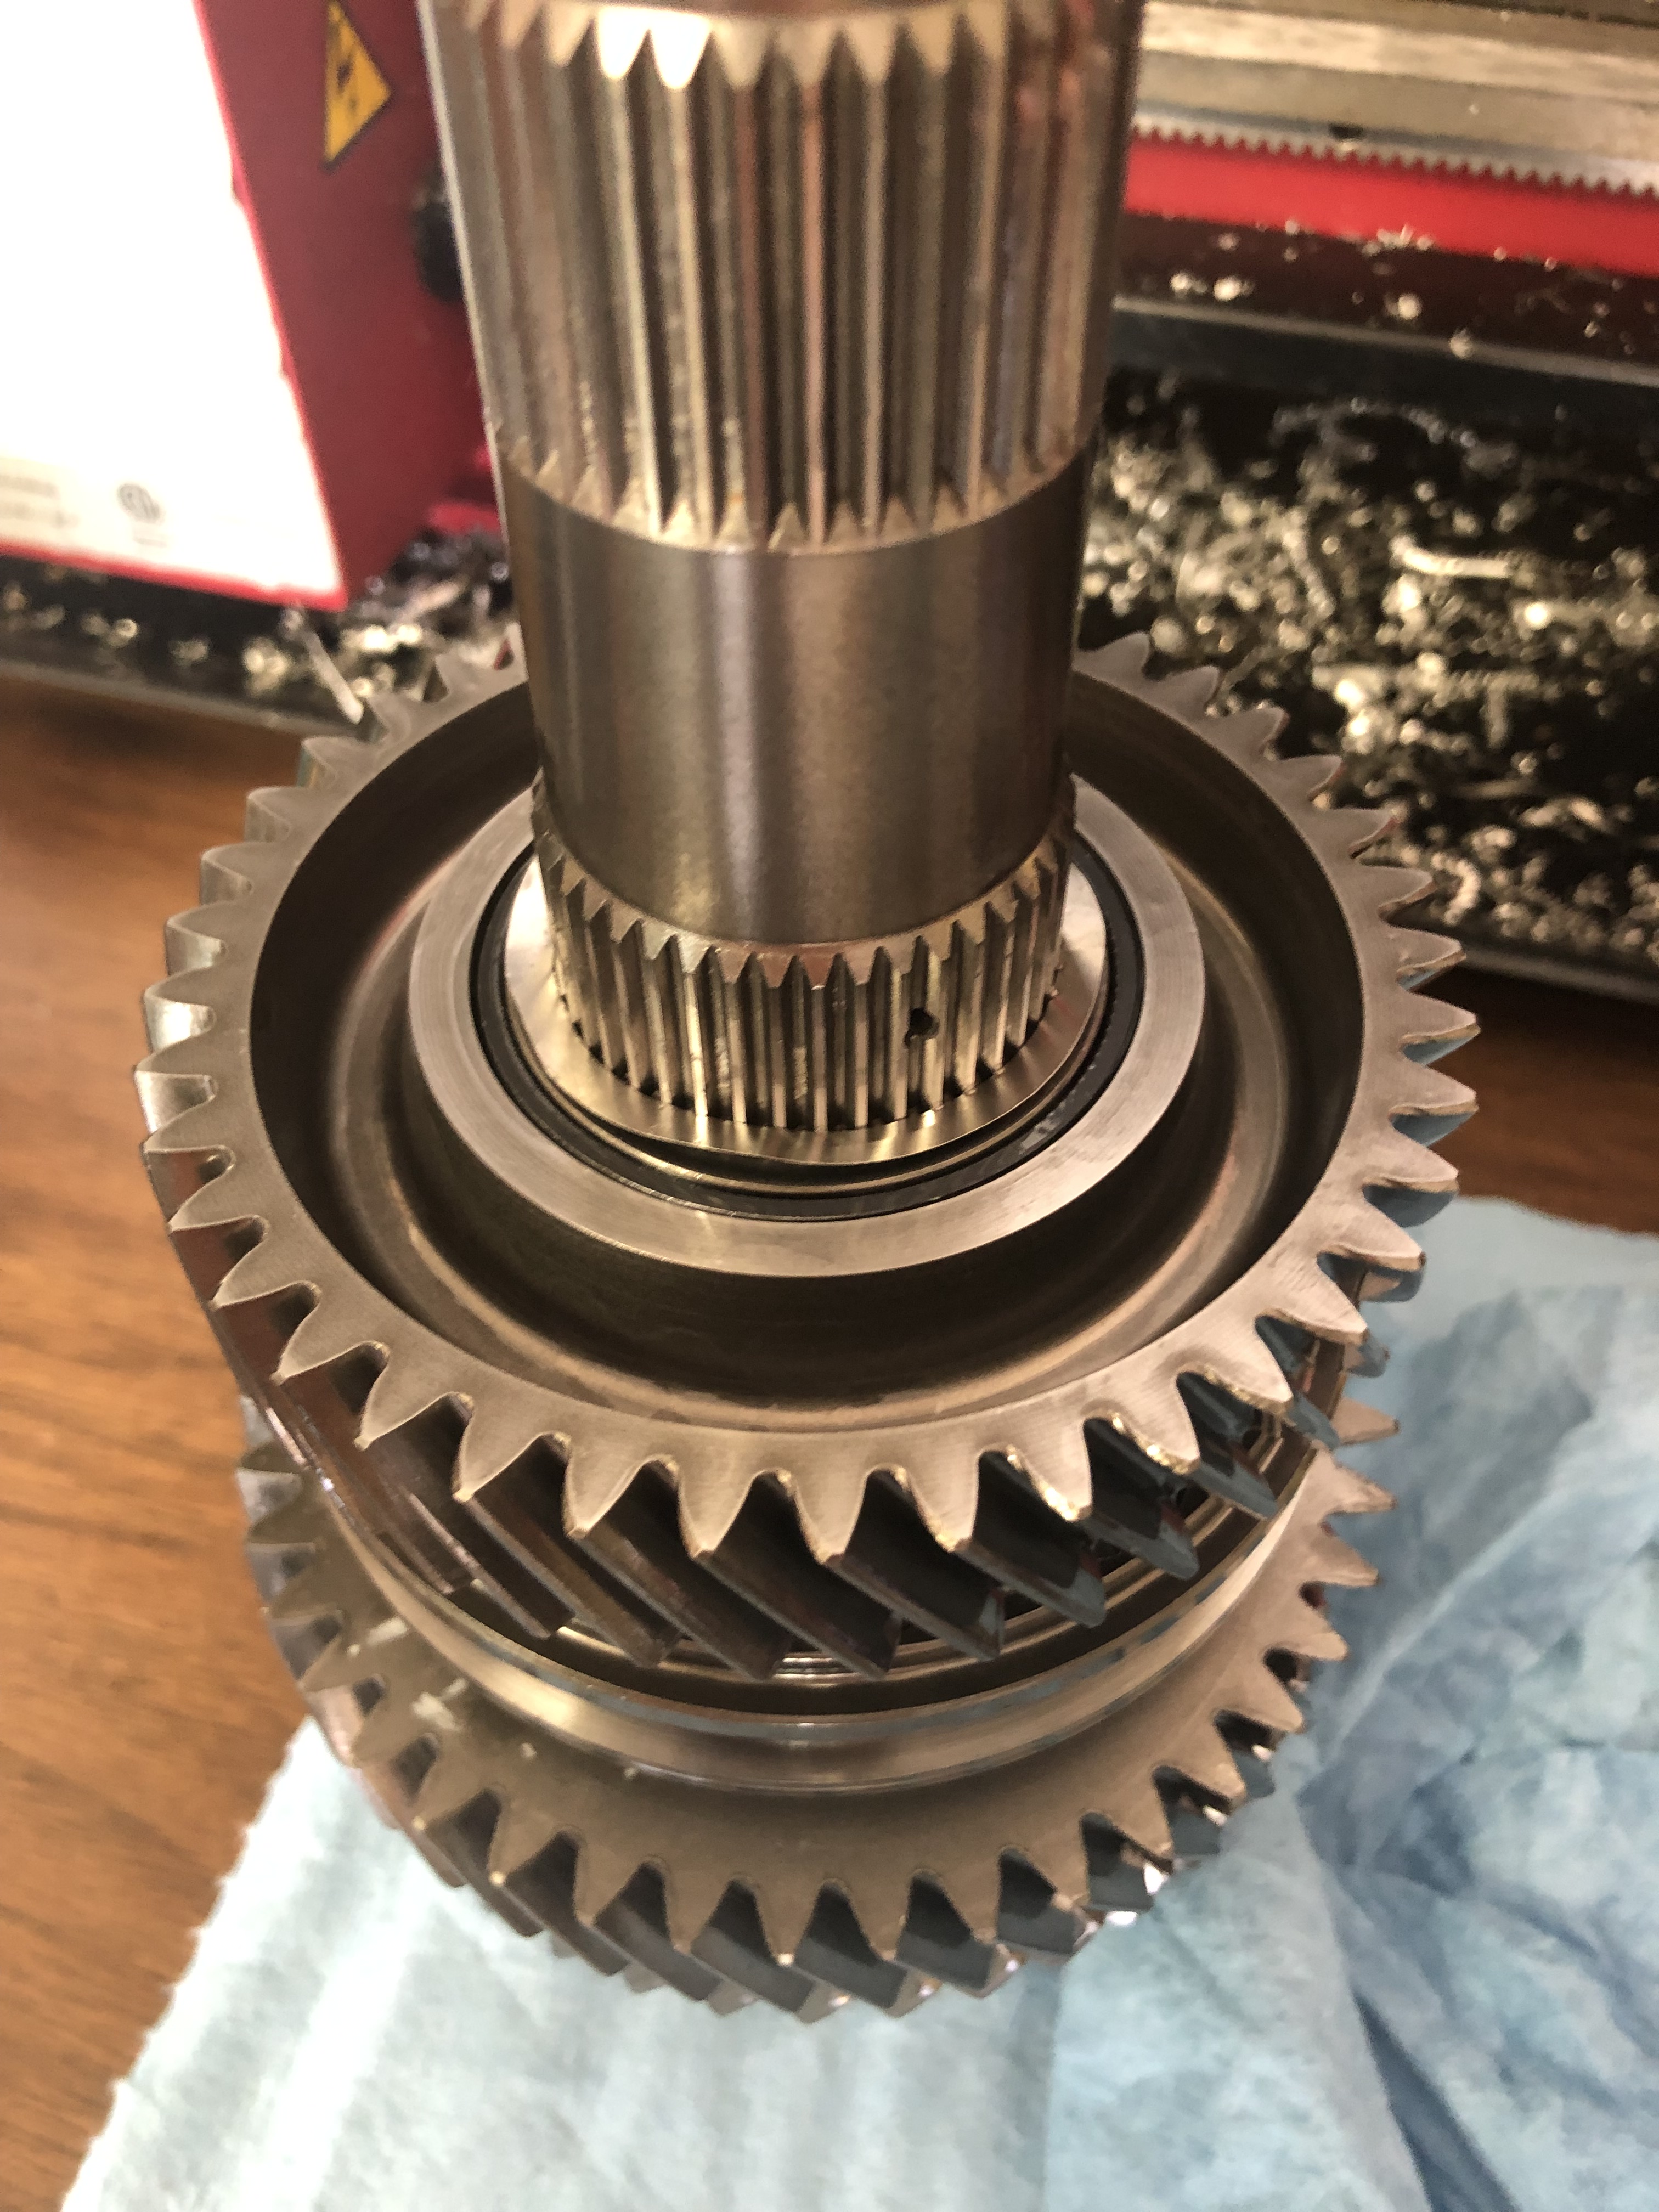
99 rs thread about the mainshaft clearance and decided I needed to check it the proper way instead of just by using the dial indicator without the spring washer, so I fabricated a mainshaft clearance tool out of some junk I had laying around and found that I had 0.012" clearance! Spec is 0.0055-0.0083" so this was not good at all! The tool I made was basically just a small block of aluminum that clamps onto the main shaft with a threaded hole for a long bolt to push against the housing.

IMG_3707.jpg


So I took the transmission in the house since its been 100-105F in my garage lately, cracked the trans back open, took everything out, and went through the mainshaft clearance process again. I found that the best I could do with the shims I had on hand was 0.008-0.009" clearance. I could order a new shim and wait over a week for it, so I decided to just make an additional shim out of the 0.001" shim stock instead. It worked perfectly and I got the clearance bang on at 0.007", and reassembled the transmission, again.

IMG_3723.jpg


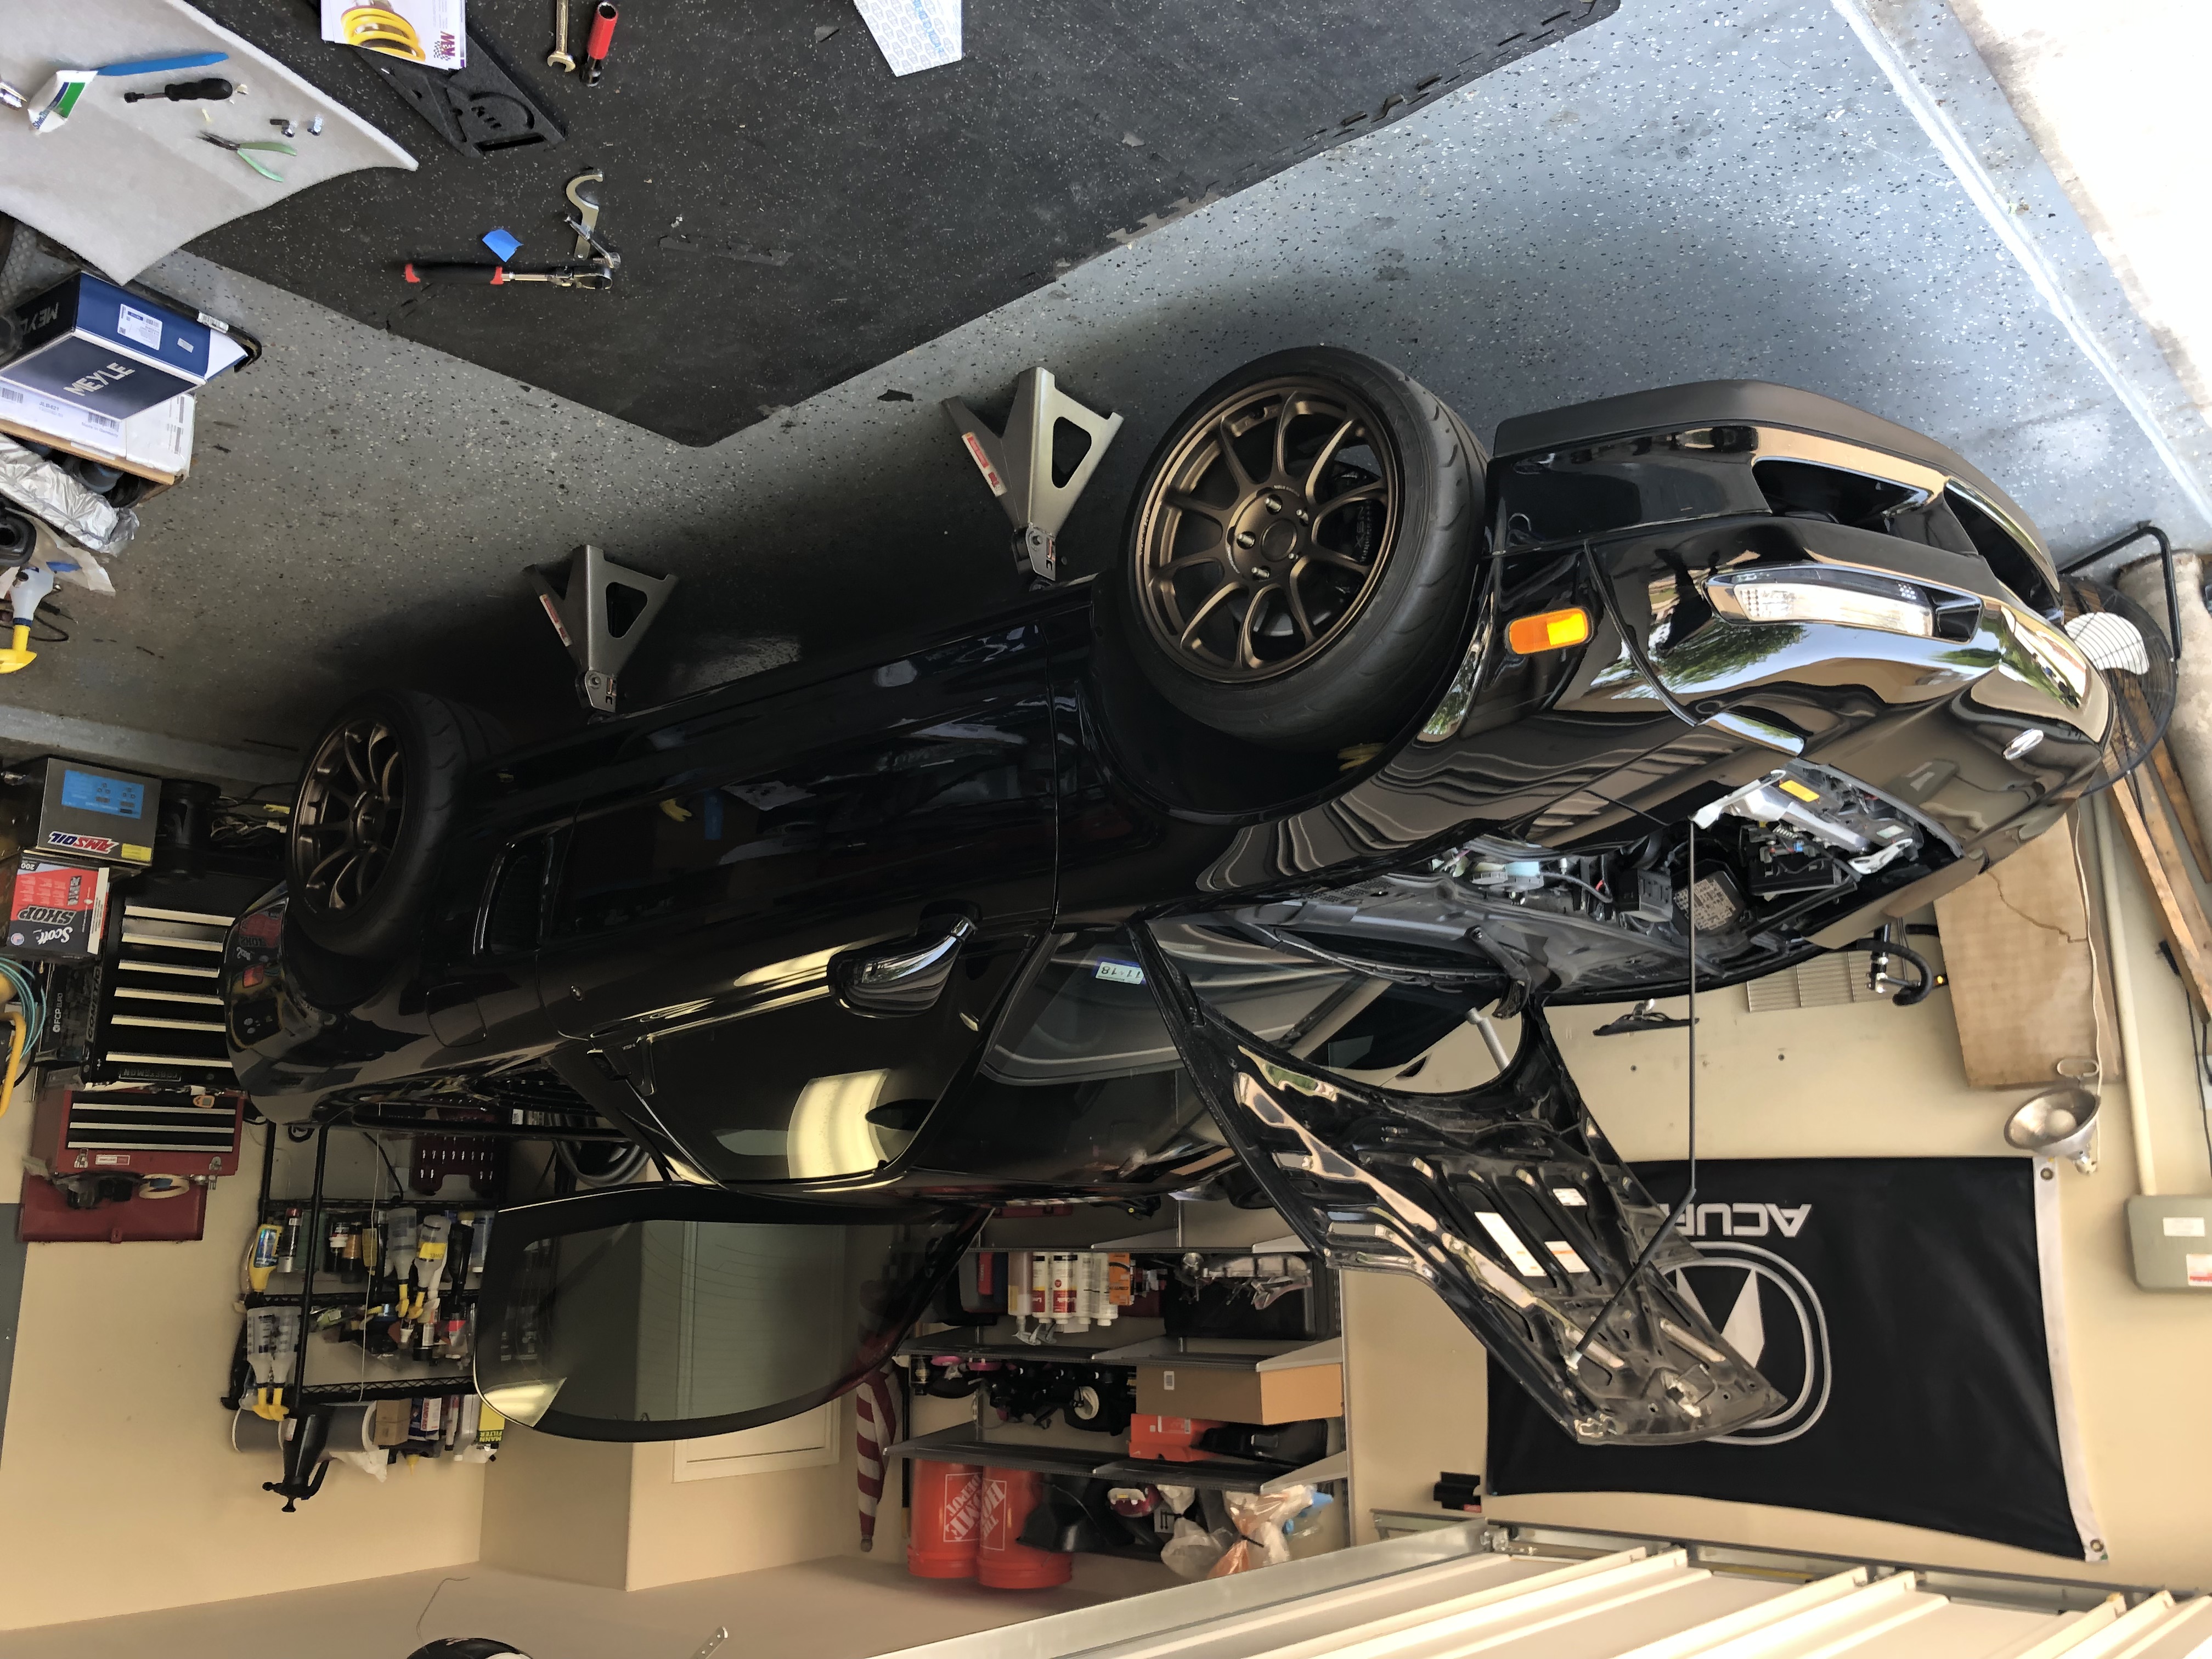
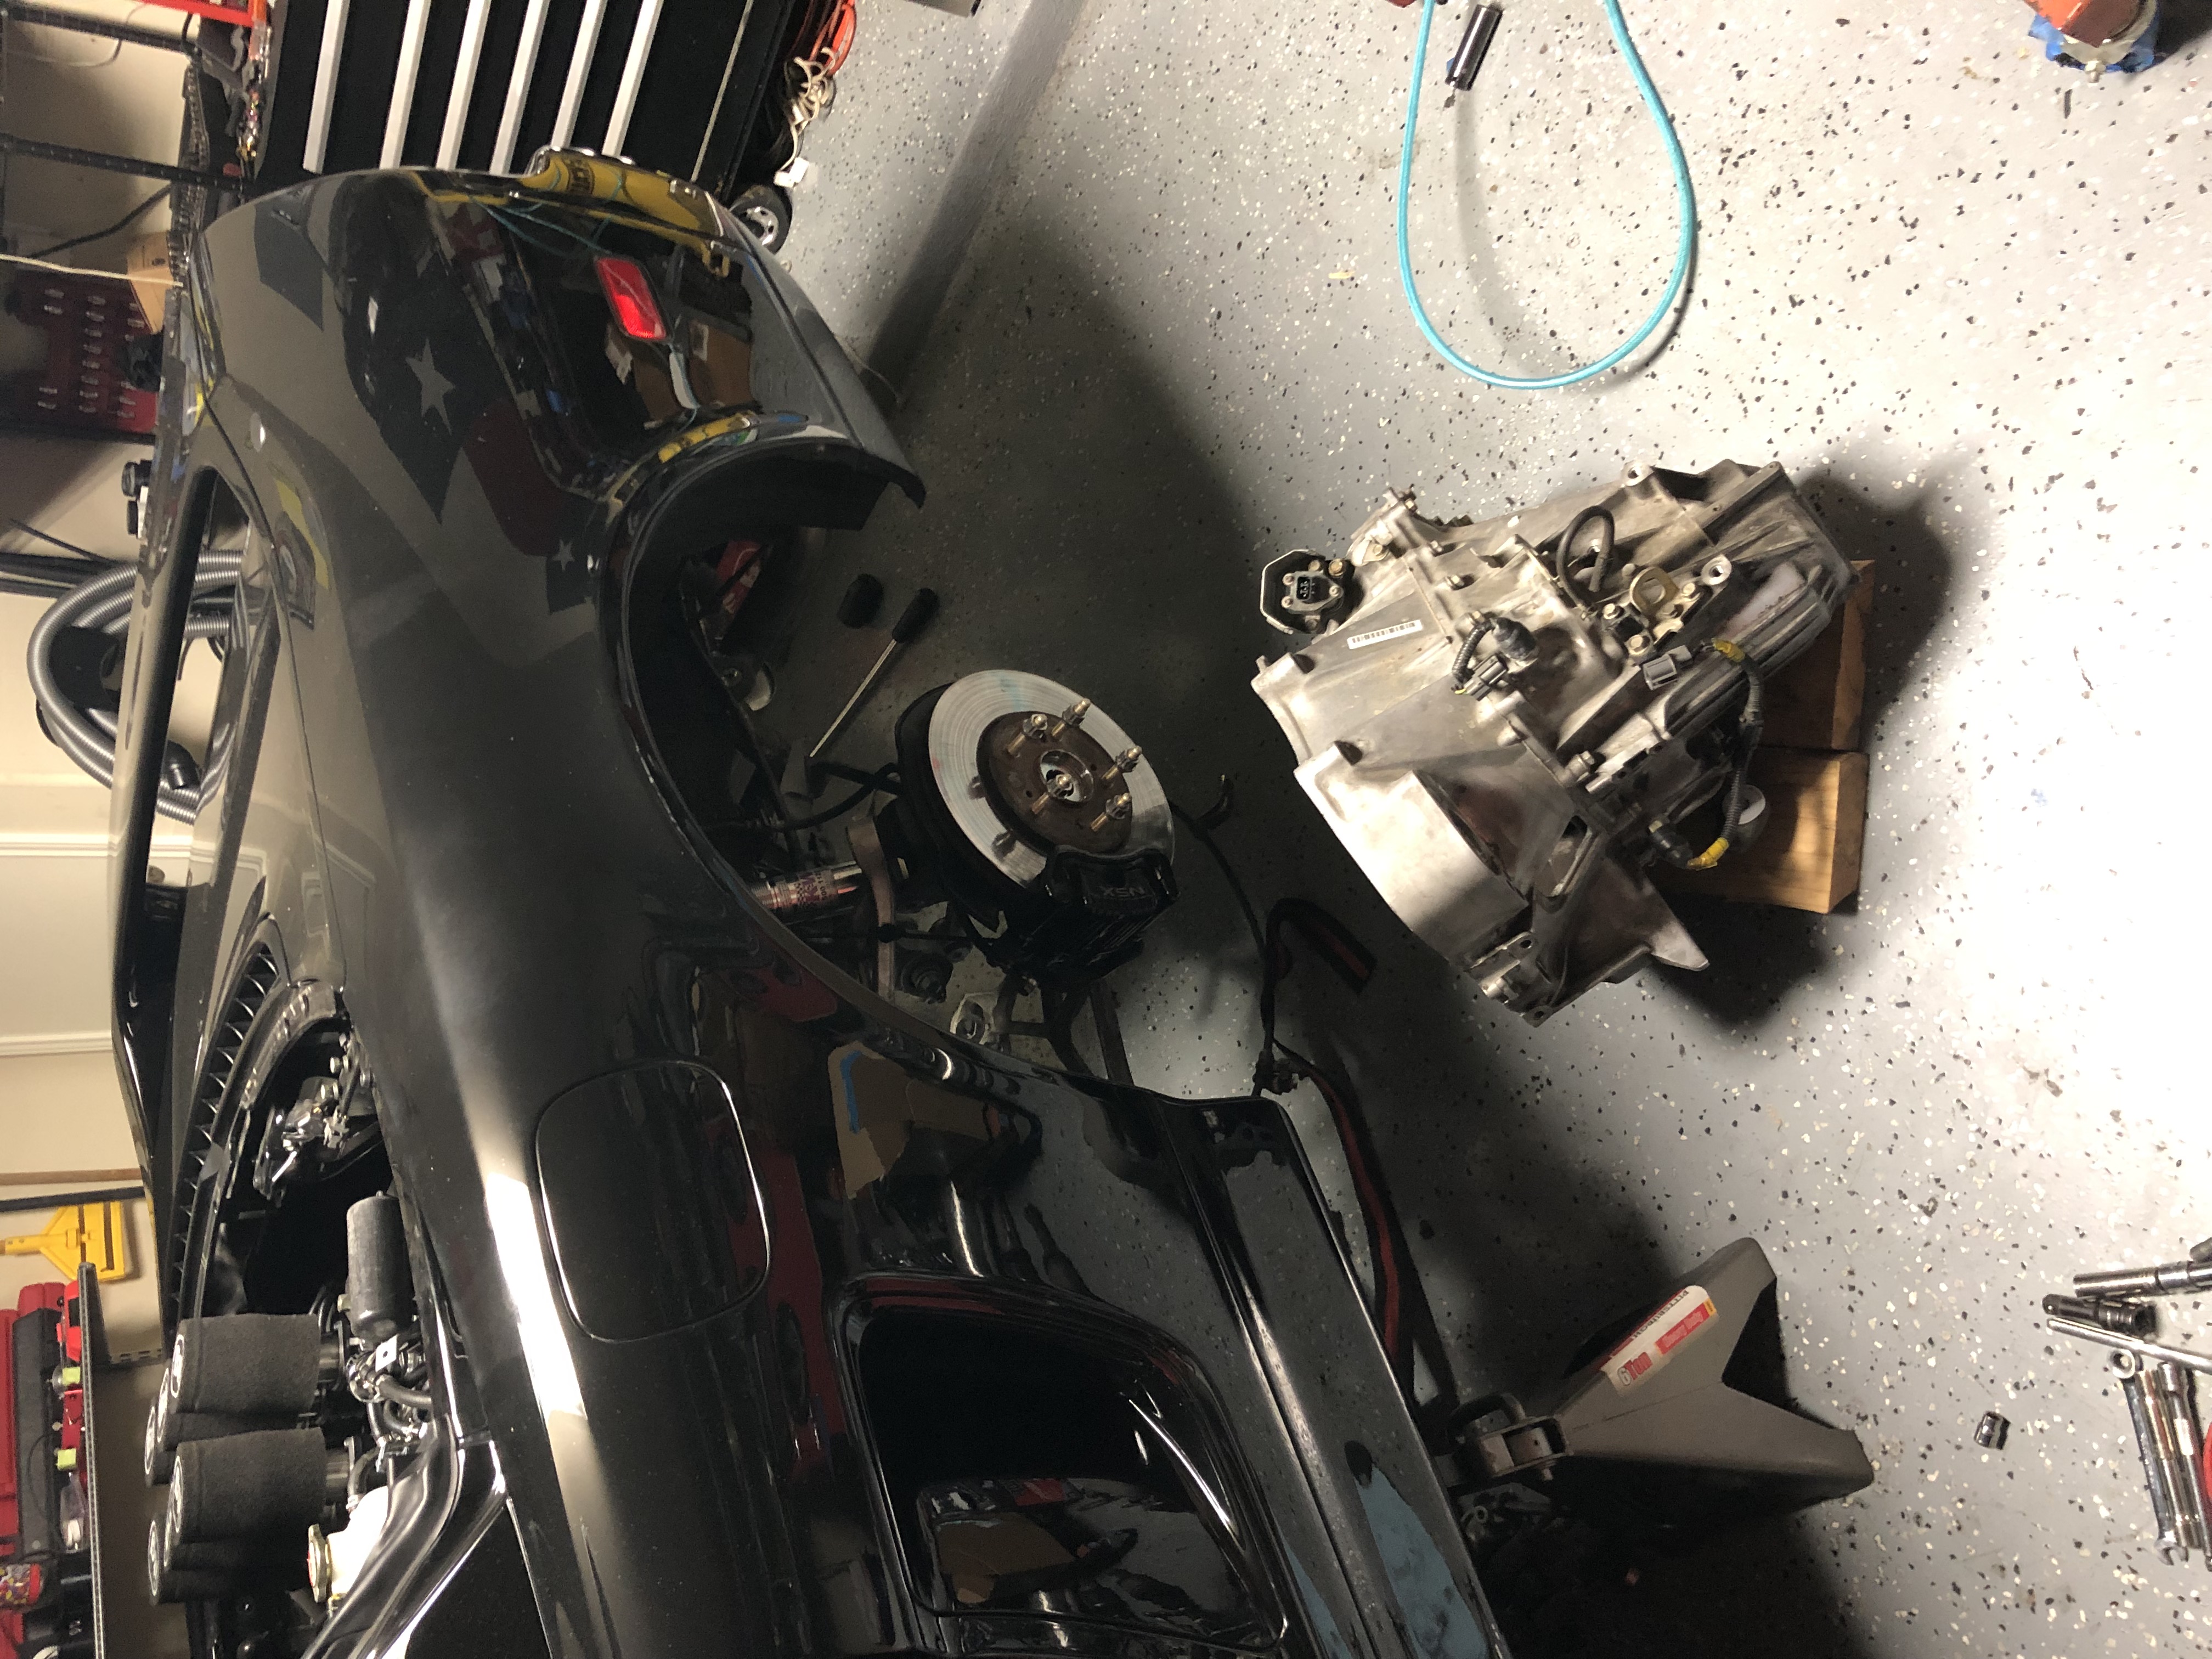
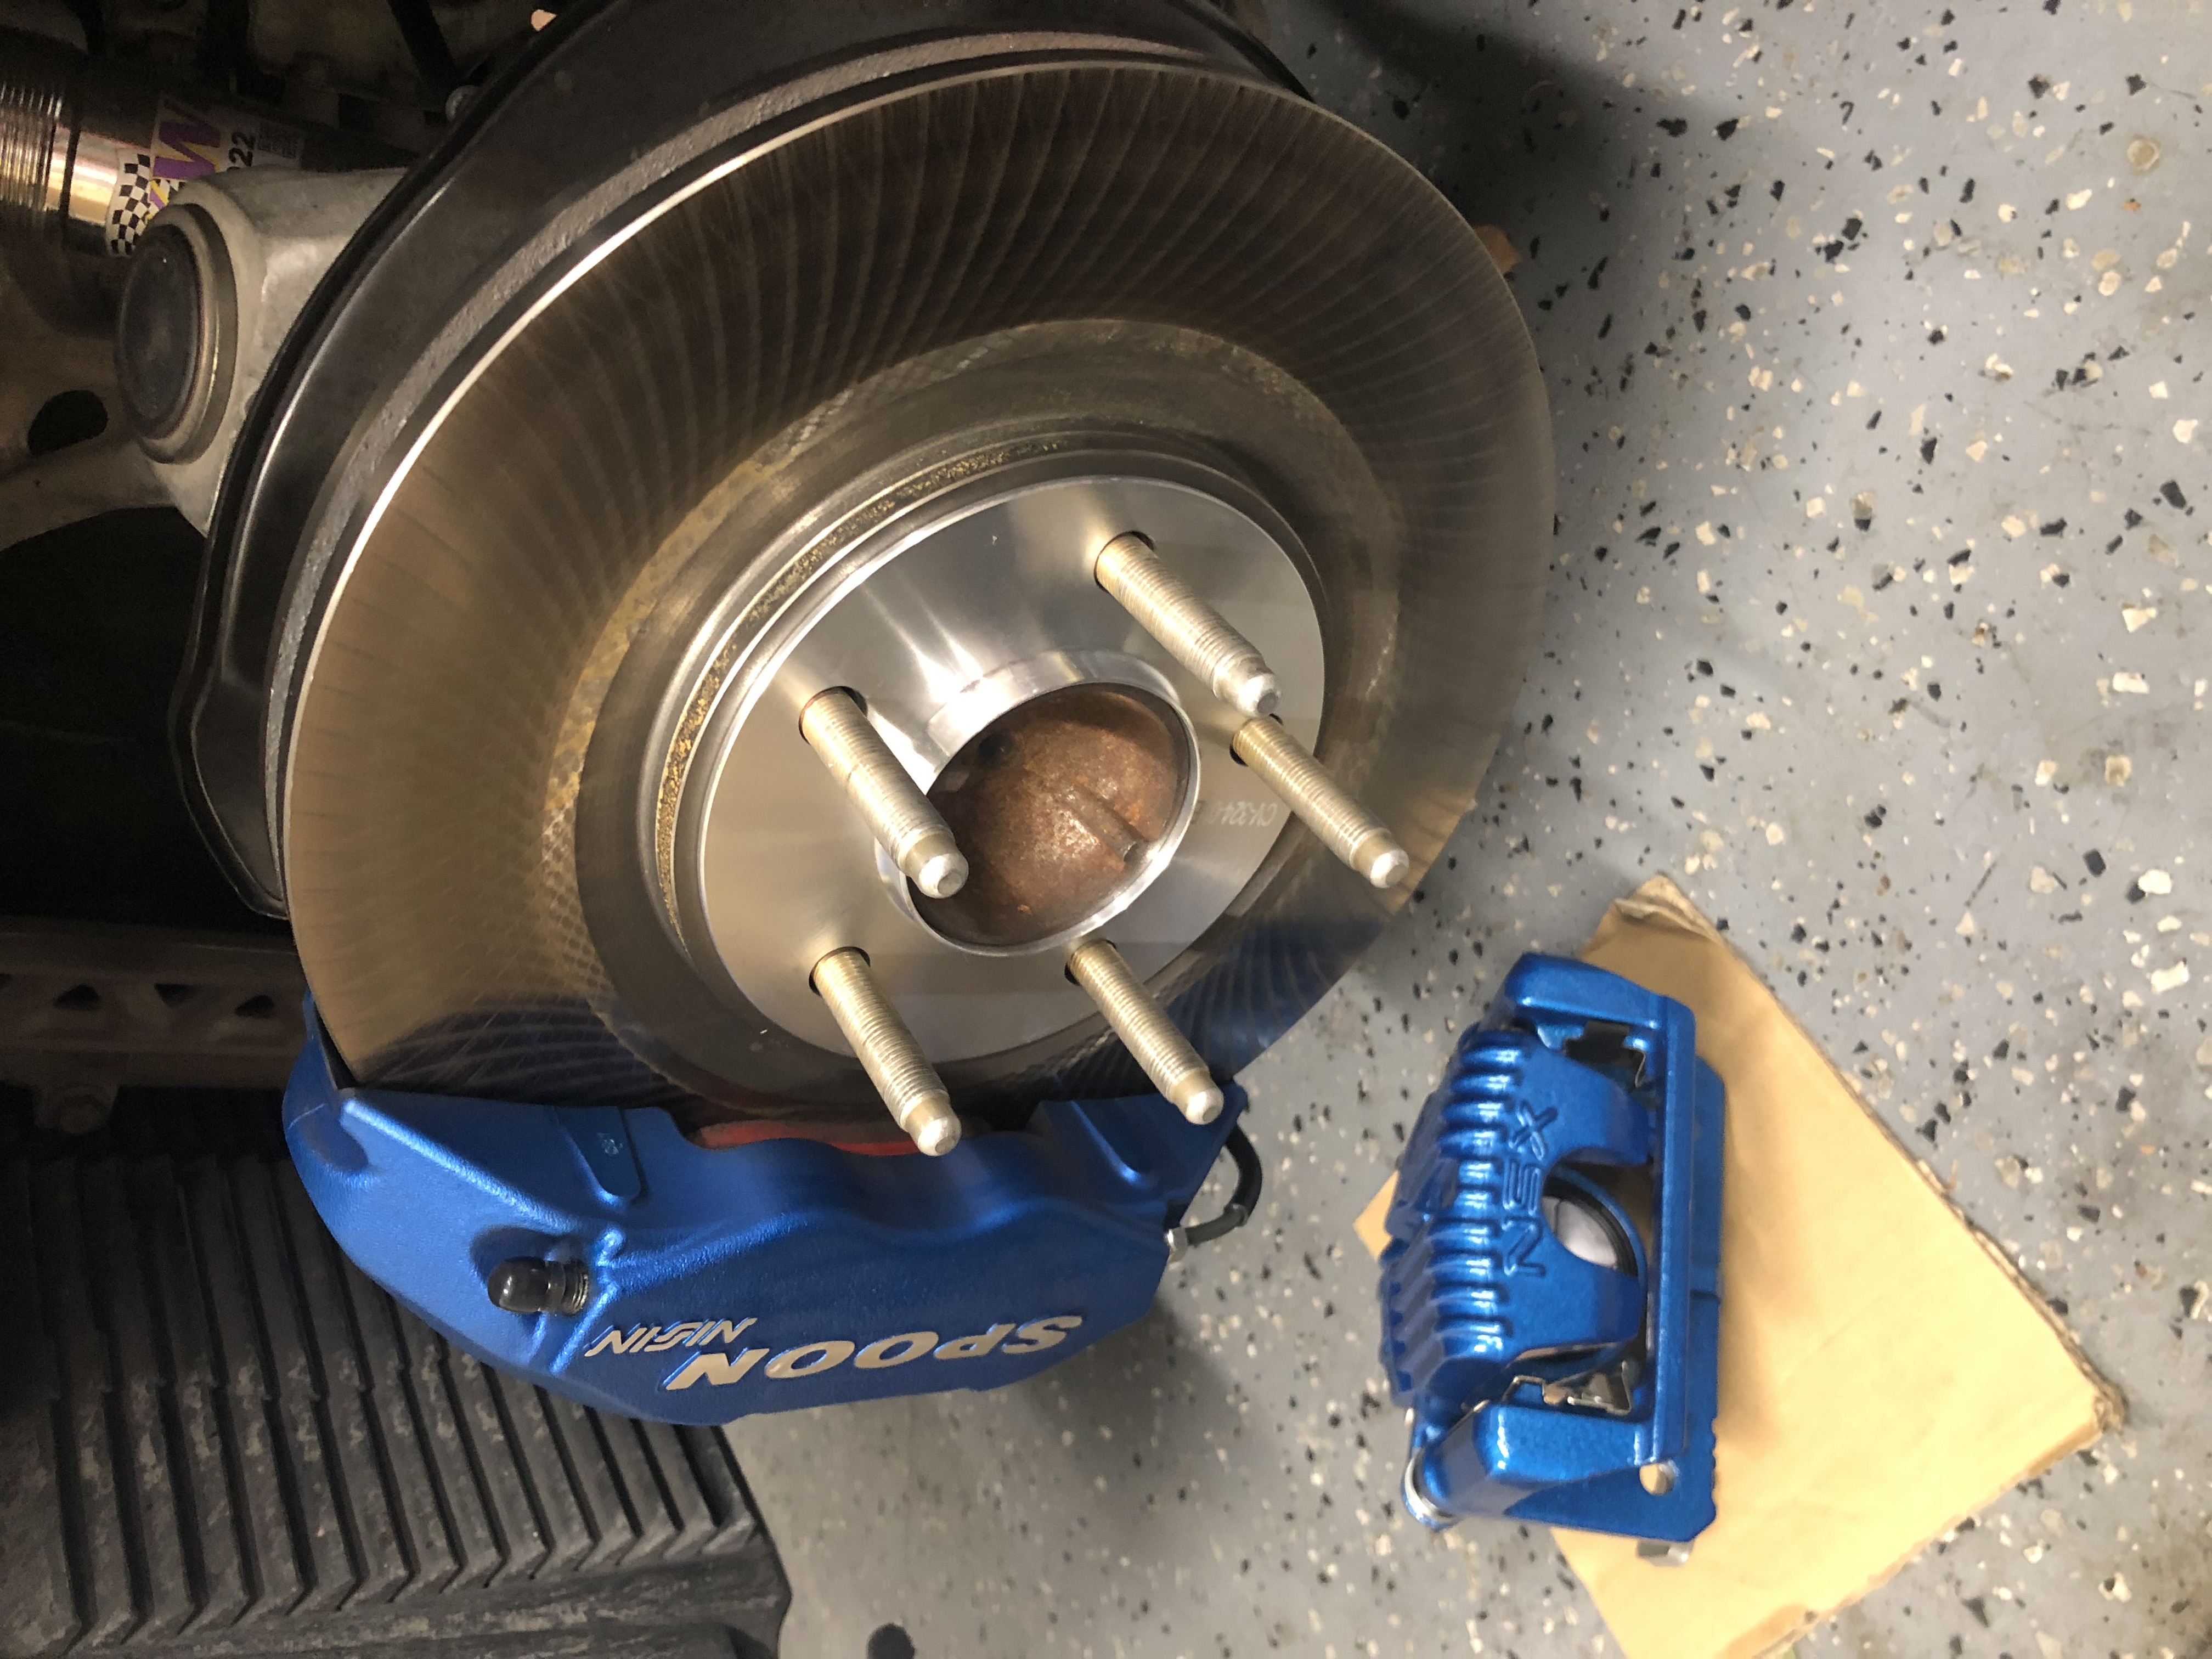
With all the clearances correct I, took the clutch apart, cleaned off the crusty remains of the Sil-glyde grease I used on the throwout bearing and splines last time, and regreased with the proper Honda urea grease, and put the transmission back in the car. I didn't have the jack stands high enough so I had to slide the transmission and transmission jack under the car separately, then wrestle the 130lb transmission up onto the jack once both were under the engine bay. This absolutely sucked, just jack the car up higher or use a hoist. Its a weird rolly shape and the jack was 6-8" high at the minimum so I spent probably half an hour pushing pulling and shoving while laying on my back trying to get it up on the jack, but finally got it. The transmission jack is the one from harbor freight thats really intended for RWD shaped transmissions so it wanted to fall off too. From there though it took maybe an hour and a half to two hours to get the transmission mated up with the engine and the engine mounts reinstalled, I expected way worse. Its an annoying process since you have to angle the engine down so the transmission will clear the front UCA mount point so I had to go back and forth adjusting the height of the transmission and engine by about 1/8" increments until it lined up correctly, then it actually went on fairly easily. From there it was just putting the rest of the junk back on.

So anyways, onto the rear lower ball joint debacle. I'm blaming this on @RYU, as him telling me about his ball joint project prompted me to go poking and prodding at mine.

I started out looking for Beck and Arnley part number that supposedly fit the NSX which is 101-4102, then looking at the compatible Honda part numbers to see if I could find an OEM ball joint that would fit in the rear. I found some reports that the B&E part shaft was too short but I was hoping going backwards to the OEM parts would find something longer. The part I ordered was 51220-S84-305, it ended up being too short (only about 3/8" threads stuck out the bottom of the control arm which isn't enough for proper thread engagement) and didn't have a snap ring groove. Apparently Honda stopped putting snap ring grooves on that part number at some point since most of the FWD cars that use that particular joint have the lower shock mount on the LCA, hanging all the weight of the front of the car from the ball joint rendering the snap ring unnecessary, but I could fairly easily add a groove on my lathe if it fit otherwise but it didn't so thats a moot point. That B&E part cross referenced to like 6 other Honda ball joints so maybe one of them would fit but I don't care to order all of them just to find out.

In the process of this experiment I had removed one of my OEM lower ball joints, so now I had to figure out how to put it back in. Turned out a C clamp worked pretty well.

IMG_3671.jpg


Then I decided to try to remove the ball joint on the other side. This is the side that the Acura dealership busted up a few years ago. Basically, they tried to separate the ball joints instead of just removing the control arm bolts like the FSM says, and they ruined it. They tried to replace it but couldn't for some reason, so instead they replaced the whole knuckle. Then when the new knuckle showed up, they tried to separate the UCA, and ruined that too, so bought a new UCA. (at the time I wasn't aware of the FSM explicitly saying not to do this so I didn't tell them to ram the $1500 worth of broken parts up their rear ends like I should have).

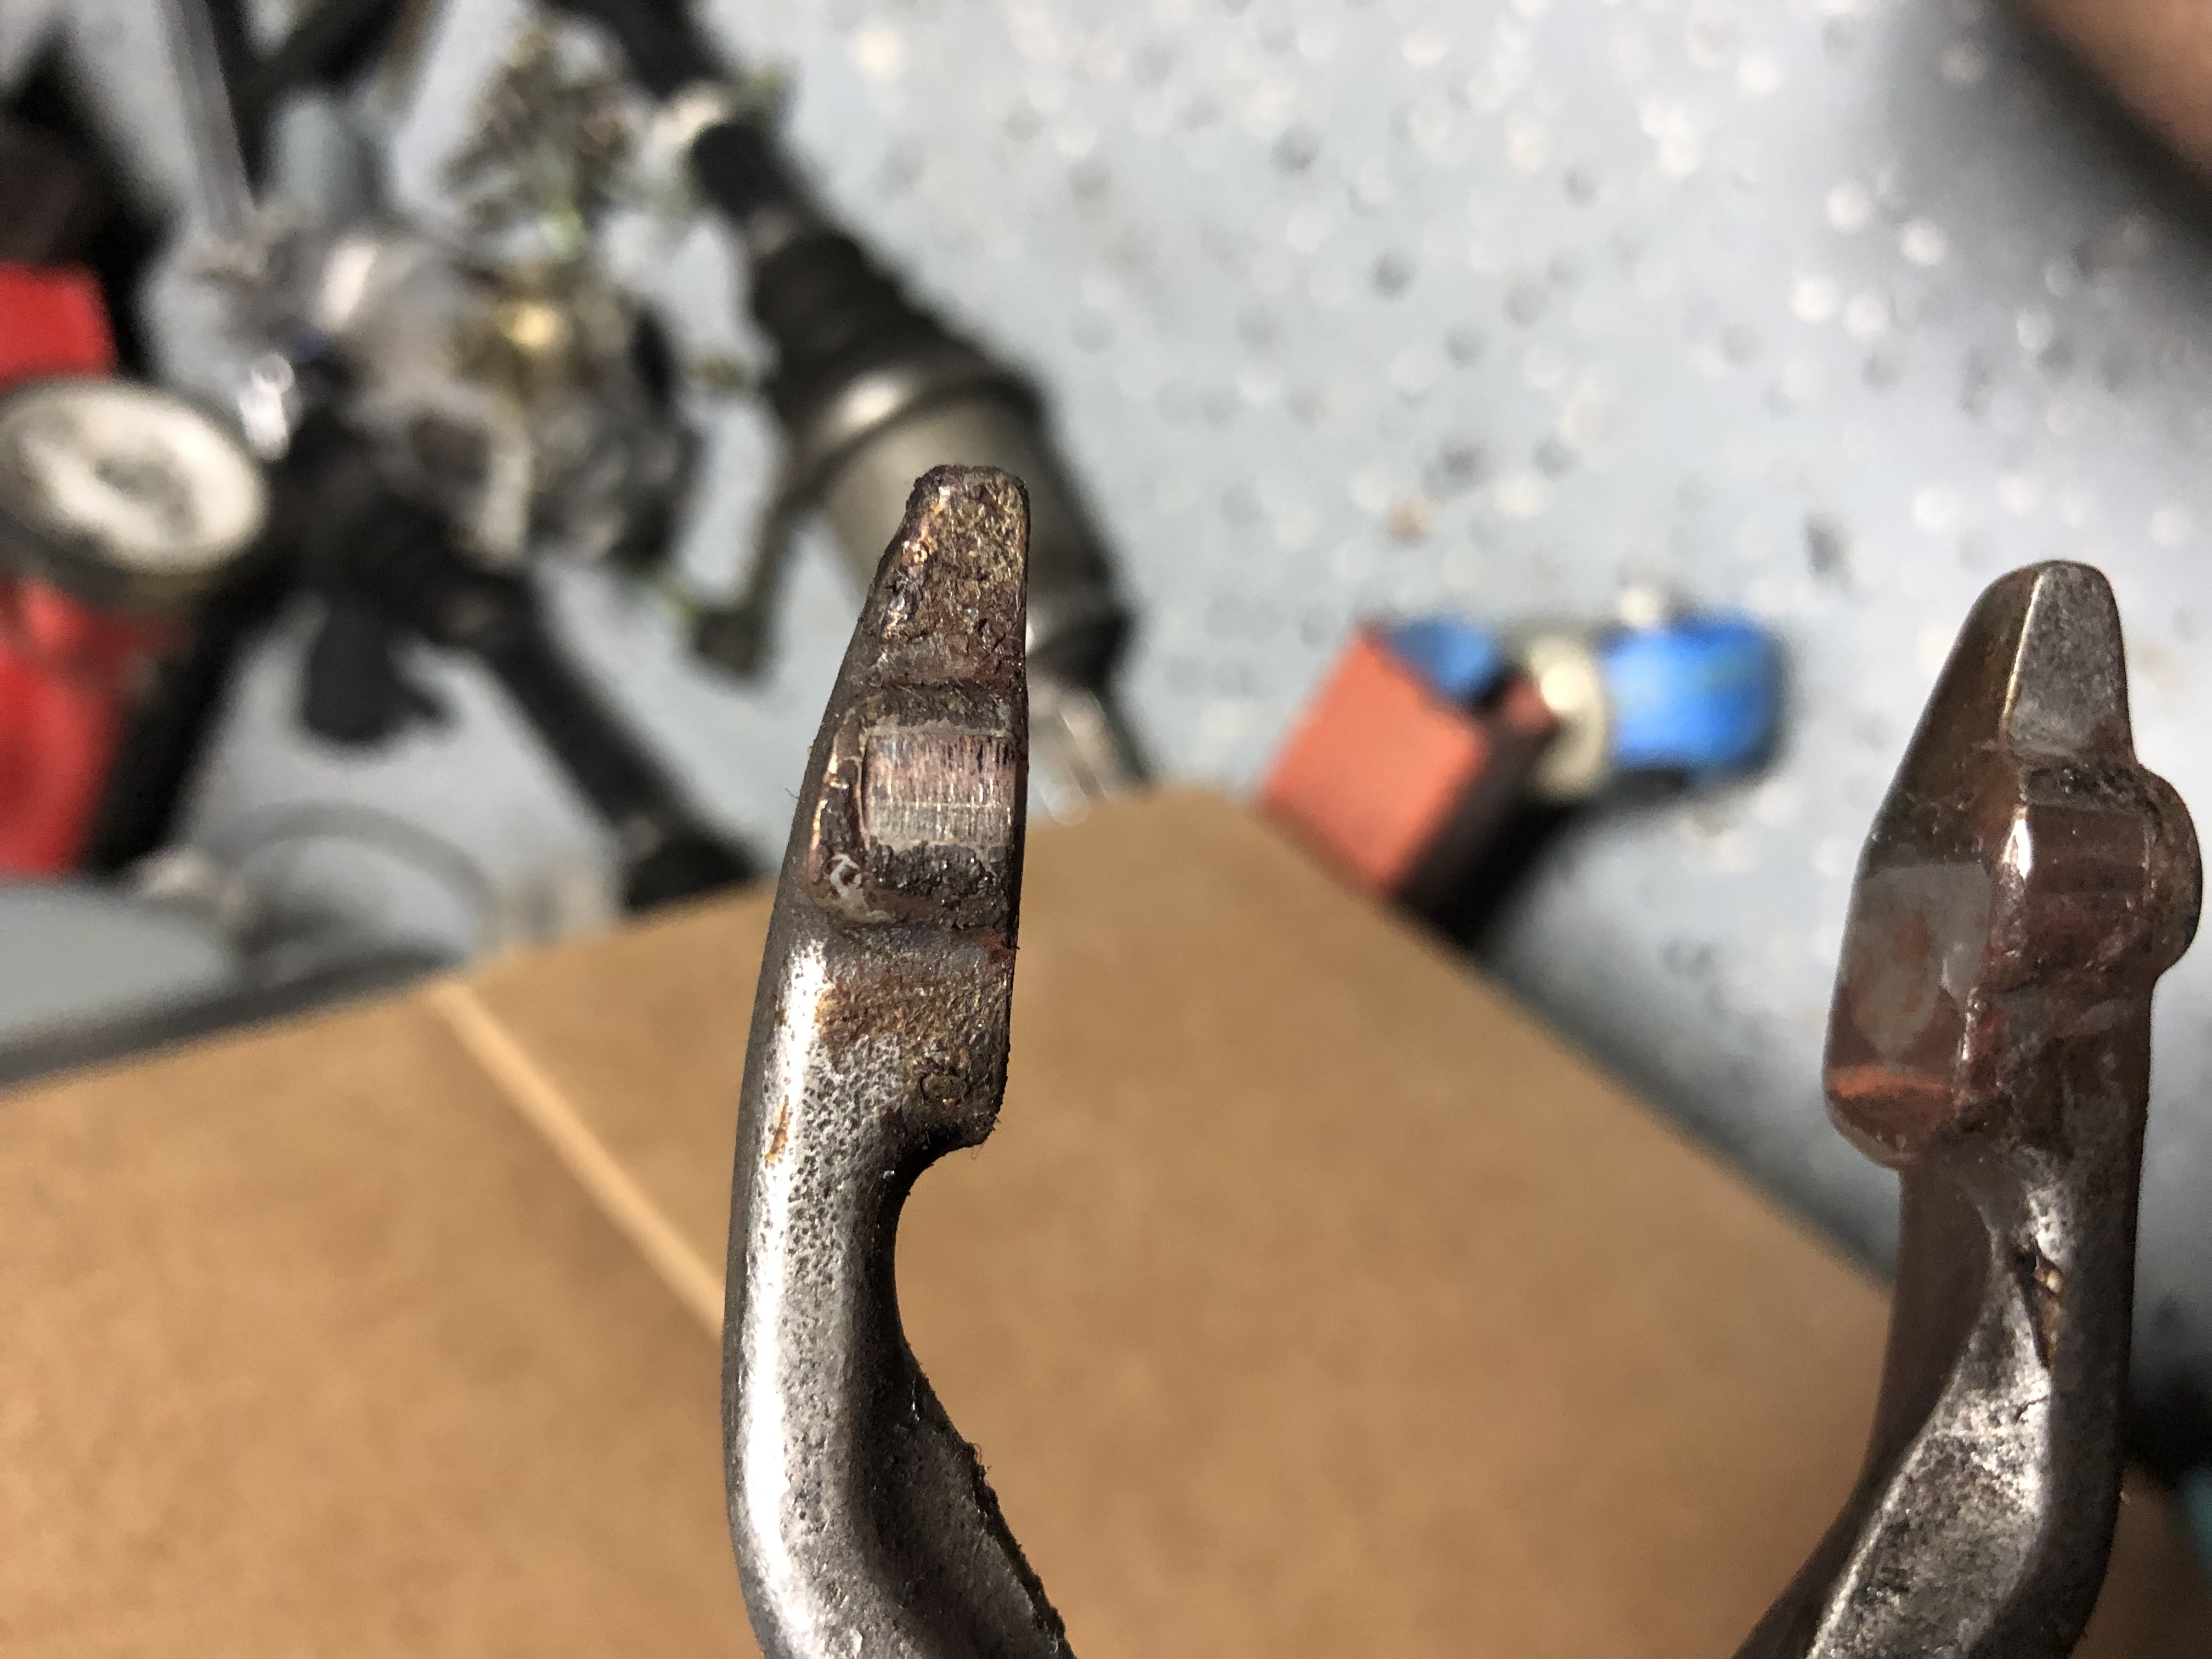
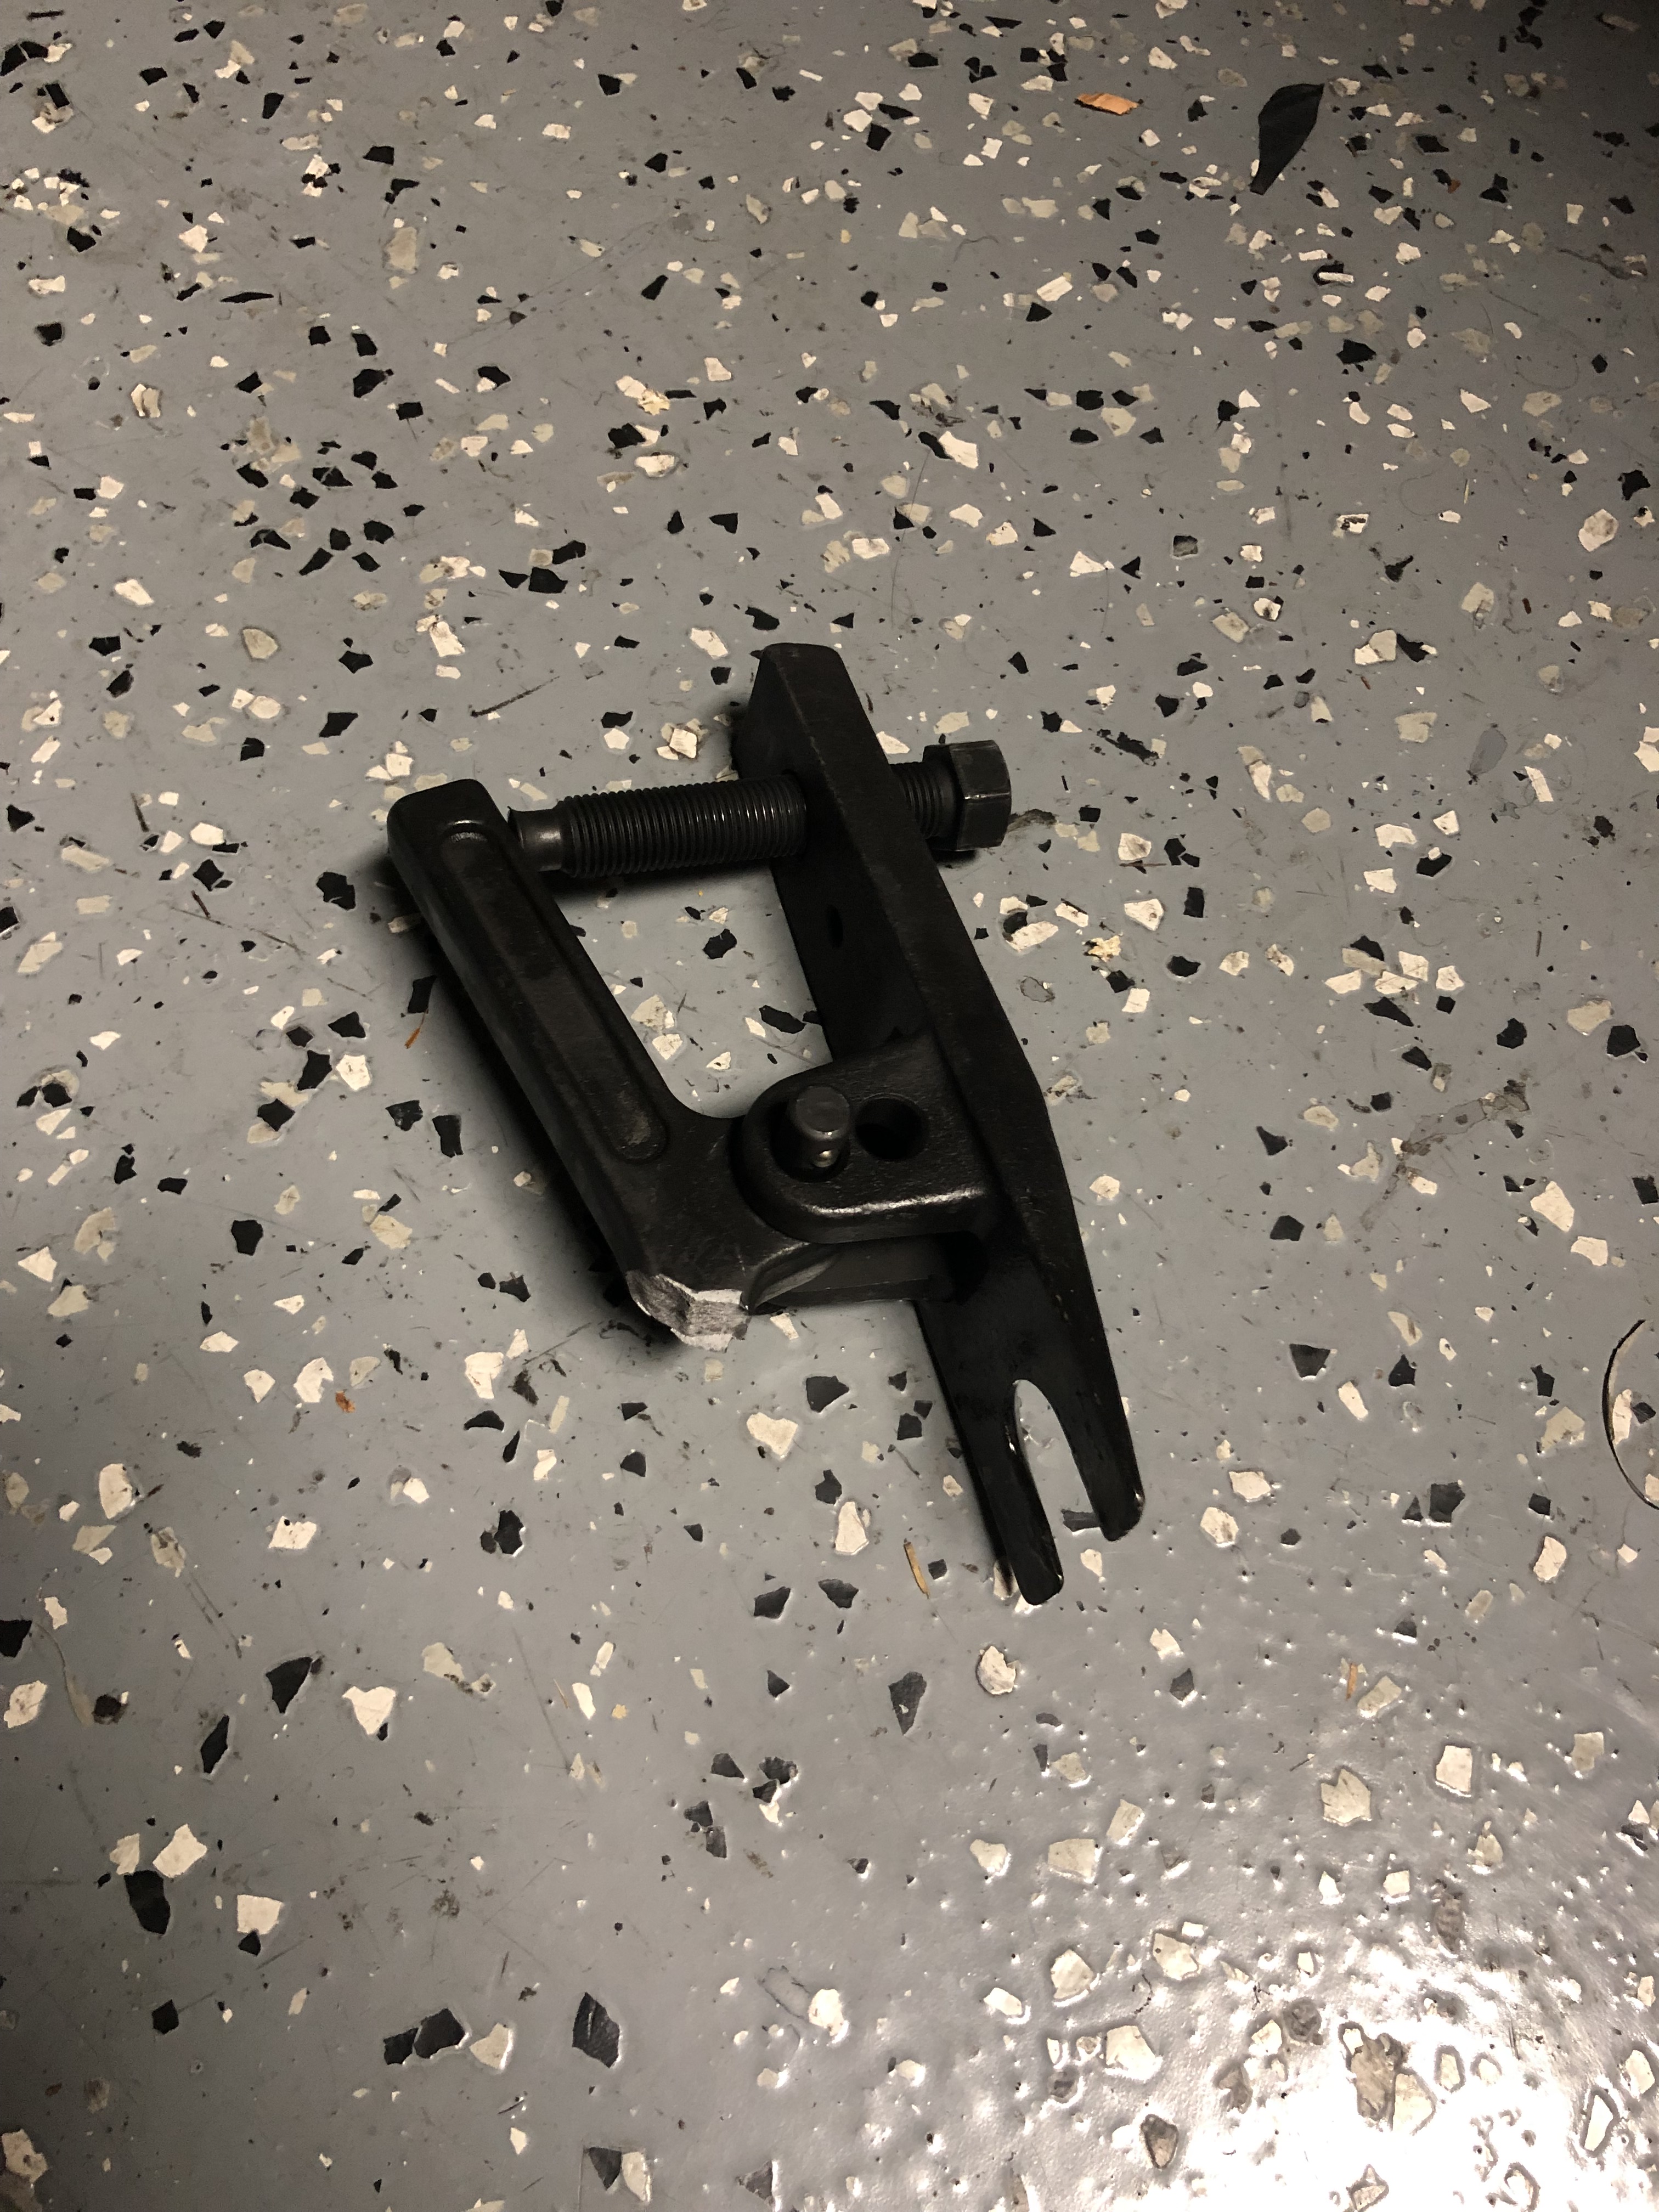
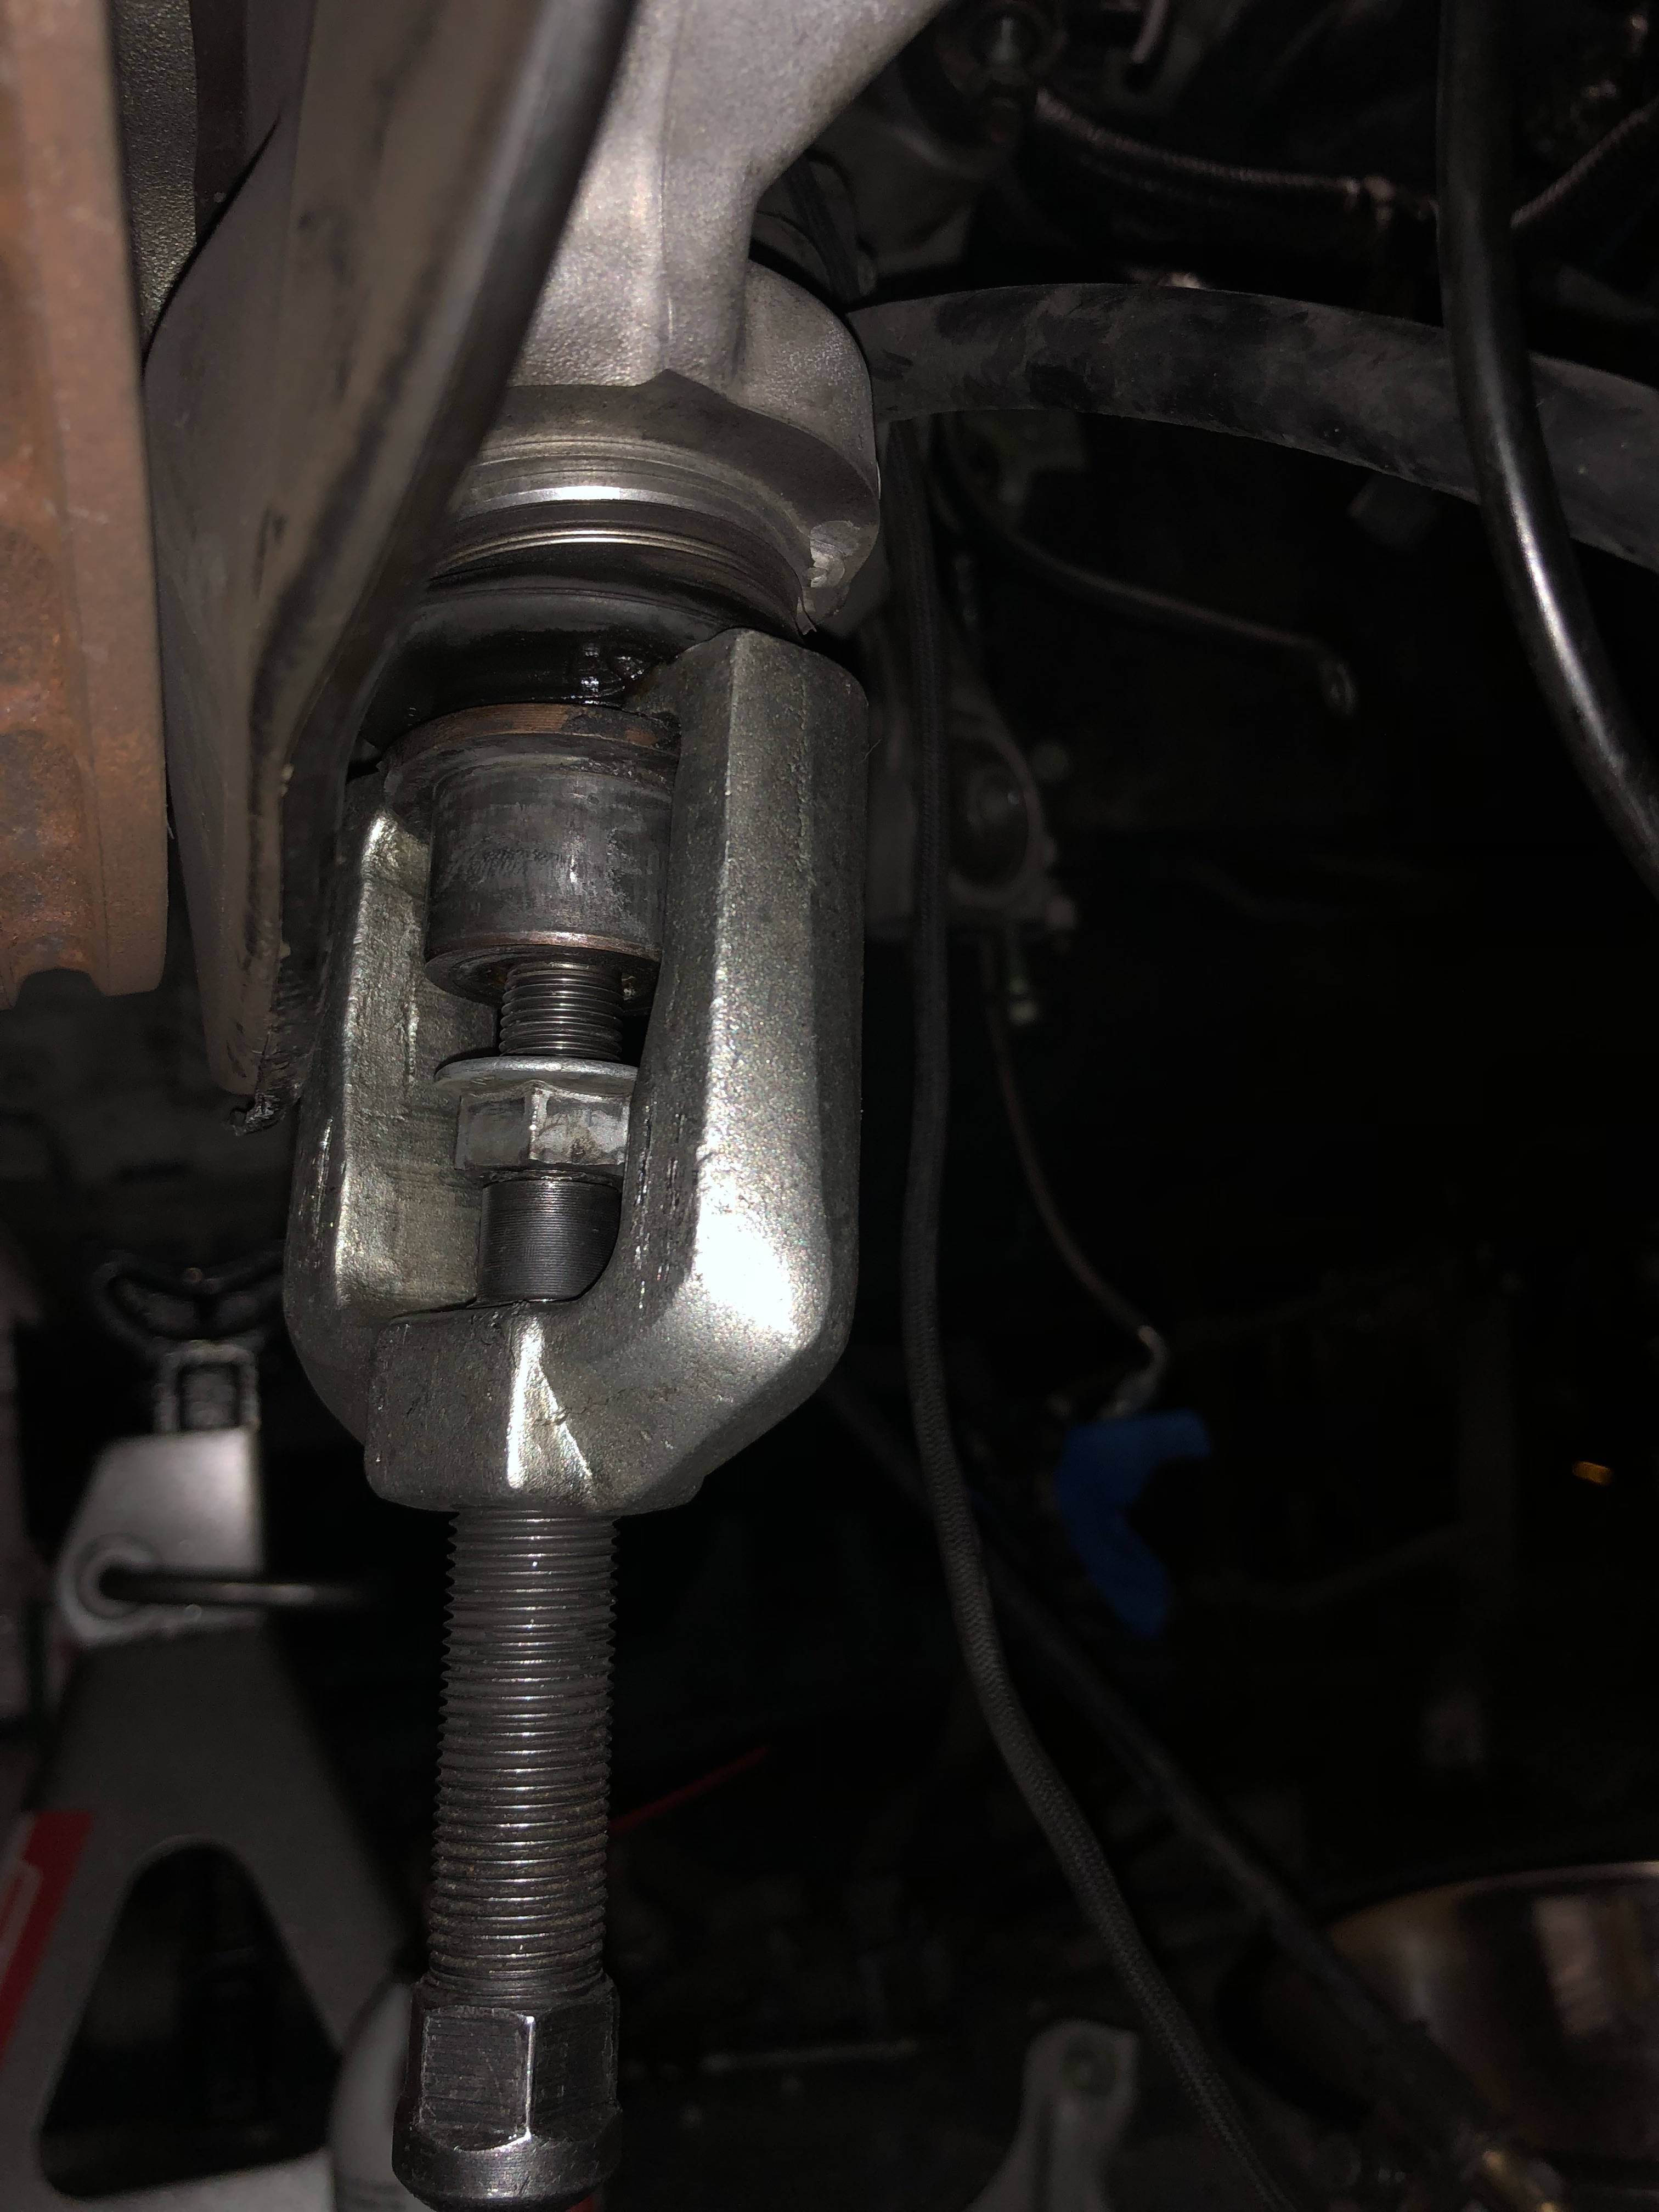
Anyways, somehow this ball joint that was new as of 2018 was so stuck into the LCA that I had to destroy it to remove it, I snapped off a ball joint tool trying to get it out, and this was after I'd tried heating to 200f with a heat gun, letting it sit under tension with penetrating oil, etc. So I guess they just used an impact to torque the joint down? Or they deformed the steel sleeve enough so it somehow locked onto the ball joint? They beat the crap out of the LCA and sleeve doing whatever they did so I'll probably replace that soon.

IMG_3682.jpg


Once all reasonable methods had failed I used a 2 arm puller to separate the LCA from the steel insert and figured no way a pitman arm puller wont take it off. Turns out I was wrong, the pitman puller just bent the flange.

IMG_3685.jpg


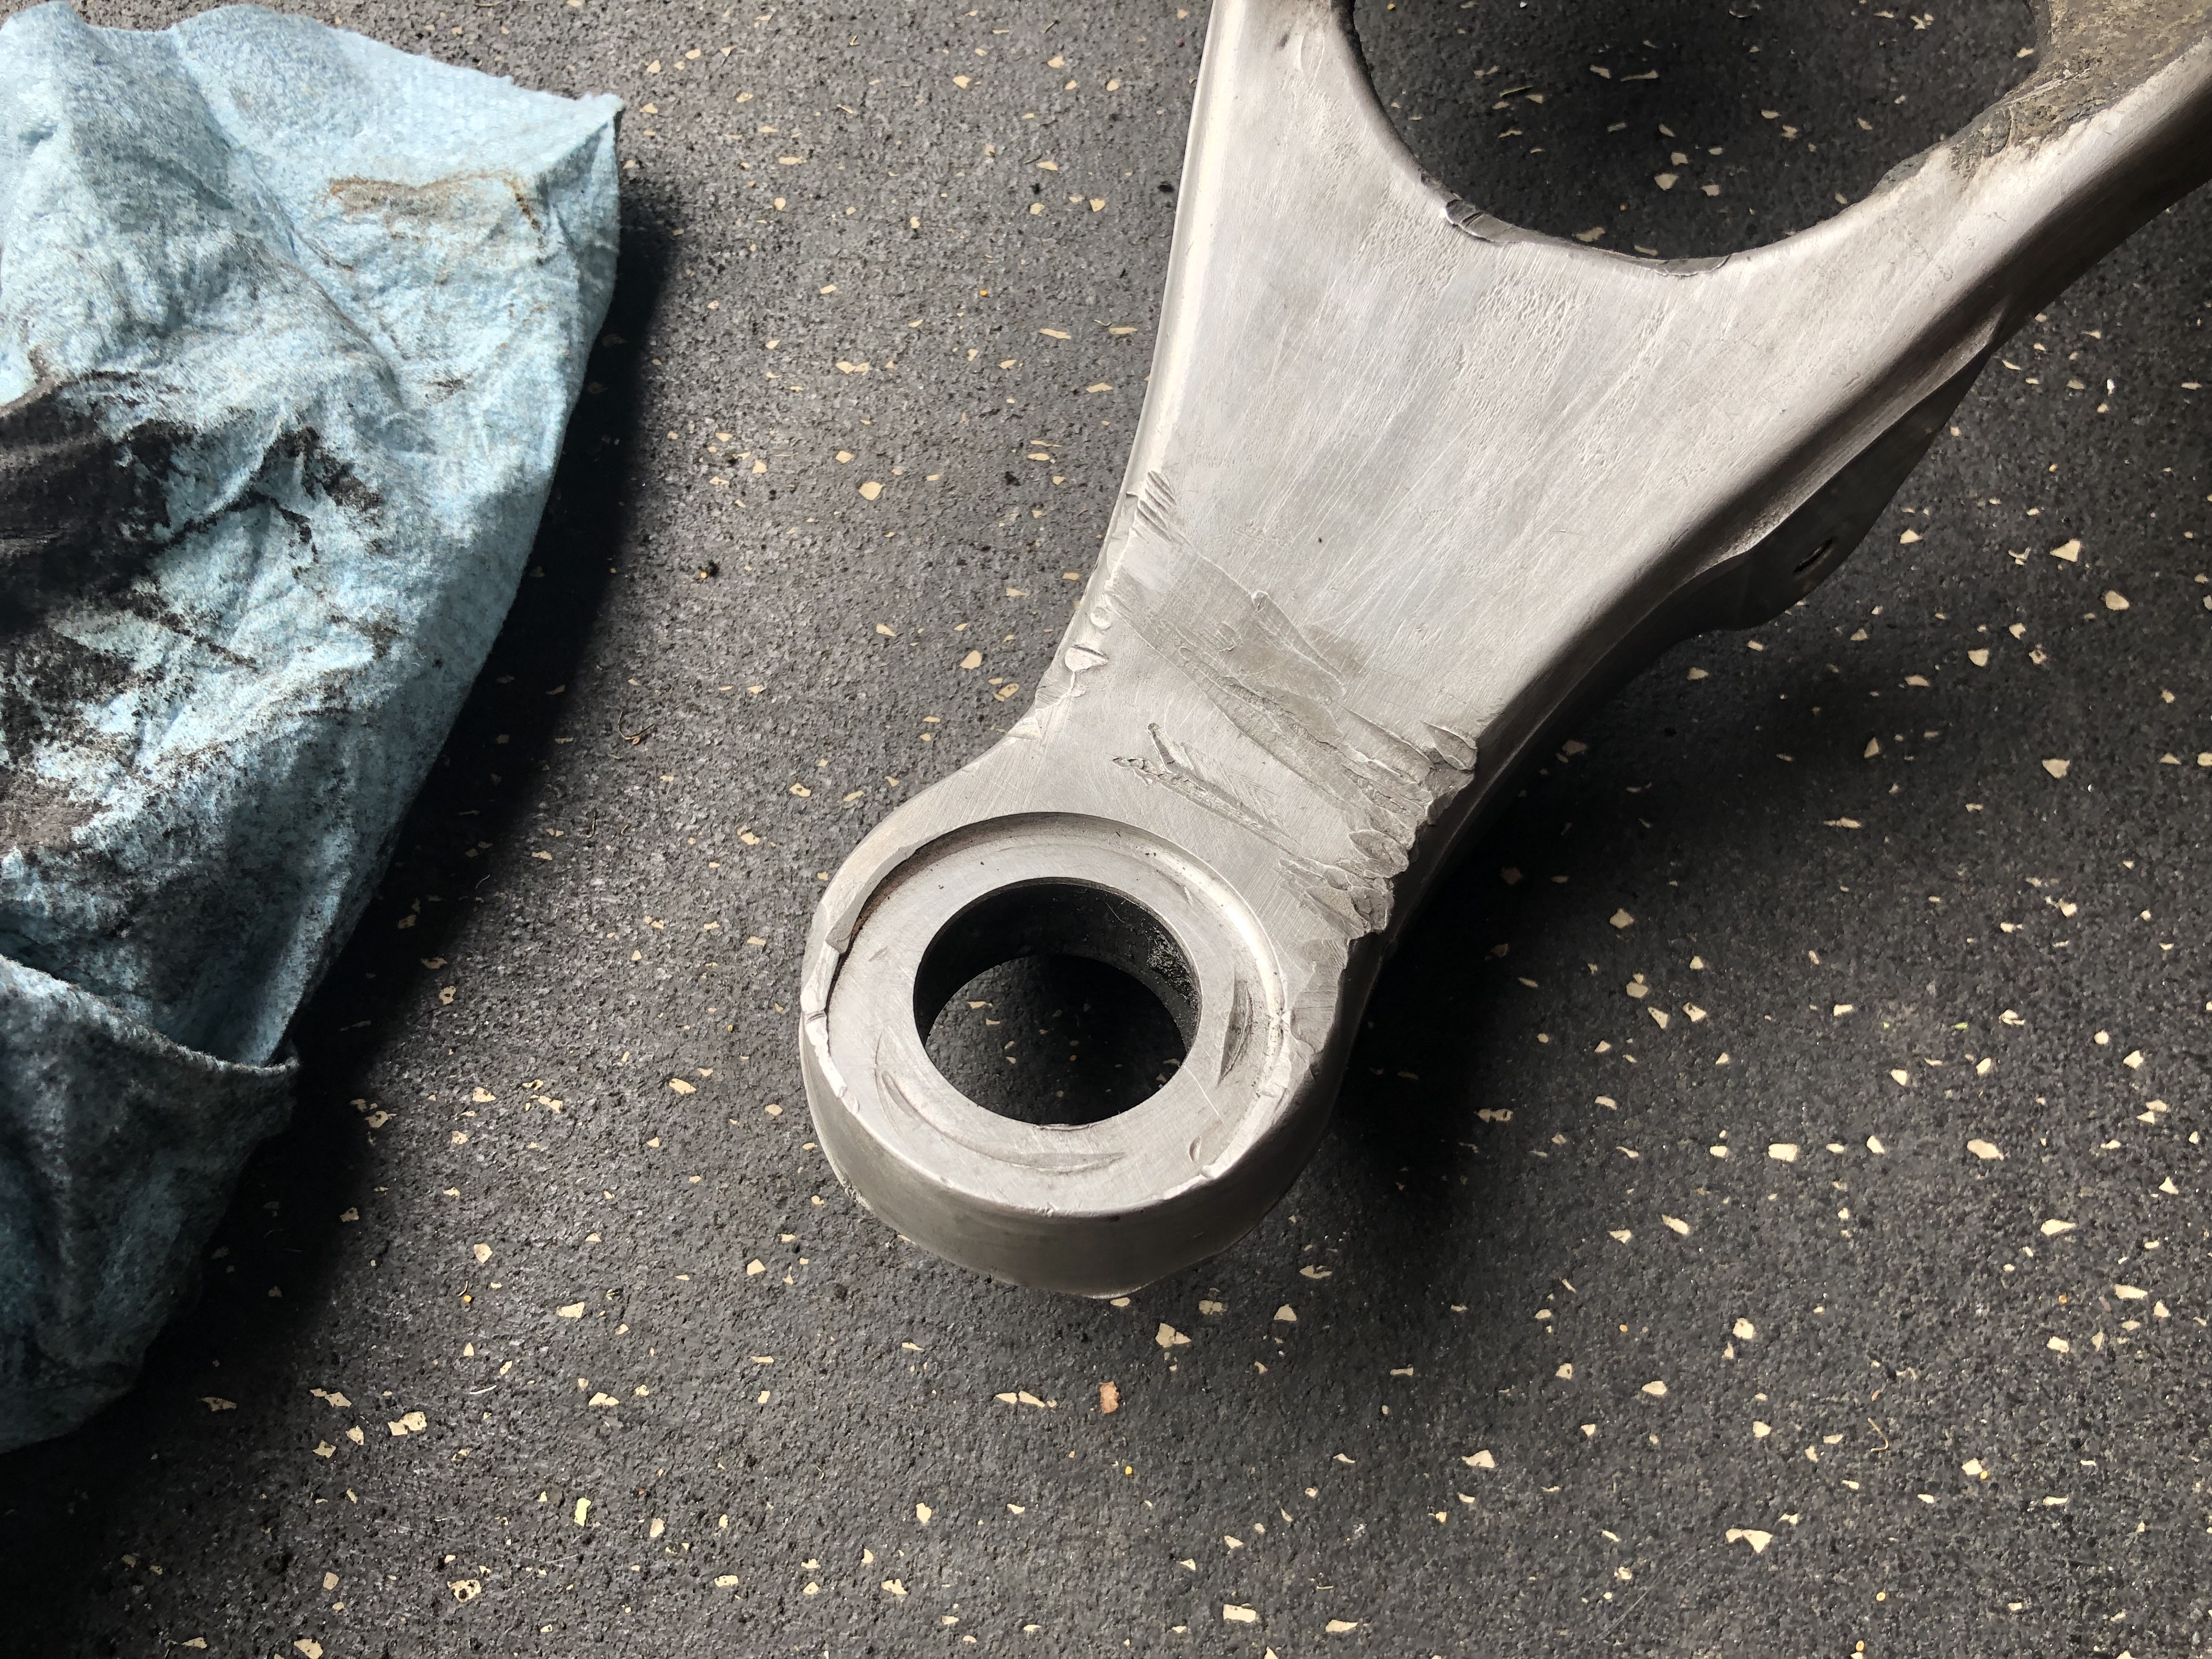
The monkeys at the dealership had bent the flange up pretty good already though, so it was digging into the aluminum arm. I think they also used a pickle fork or pry bar on it, since its got tons of dents in it.

IMG_3686.jpg


IMG_3691.jpg


To finally get the ball joint separated from the sleeve, I removed the ball joint from the knuckle, heated it with a torch about as hot as I could get it, then dunked it in a bucket of water to try to thermal shock it into breaking free. After doing this, I put the pitman puller back on it and clamped it in my vice and cranked down on it, and it finally let go and sounded like a gunshot. To not be stuck waiting another couple weeks for a control arm, I straightened out the sleeve as best I could then turned the surfaces true again on the lathe, and put it back in the control arm along with cleaning up some of the worst of the damaged arm with a file to try to reduce stress risers.

IMG_3742.JPG


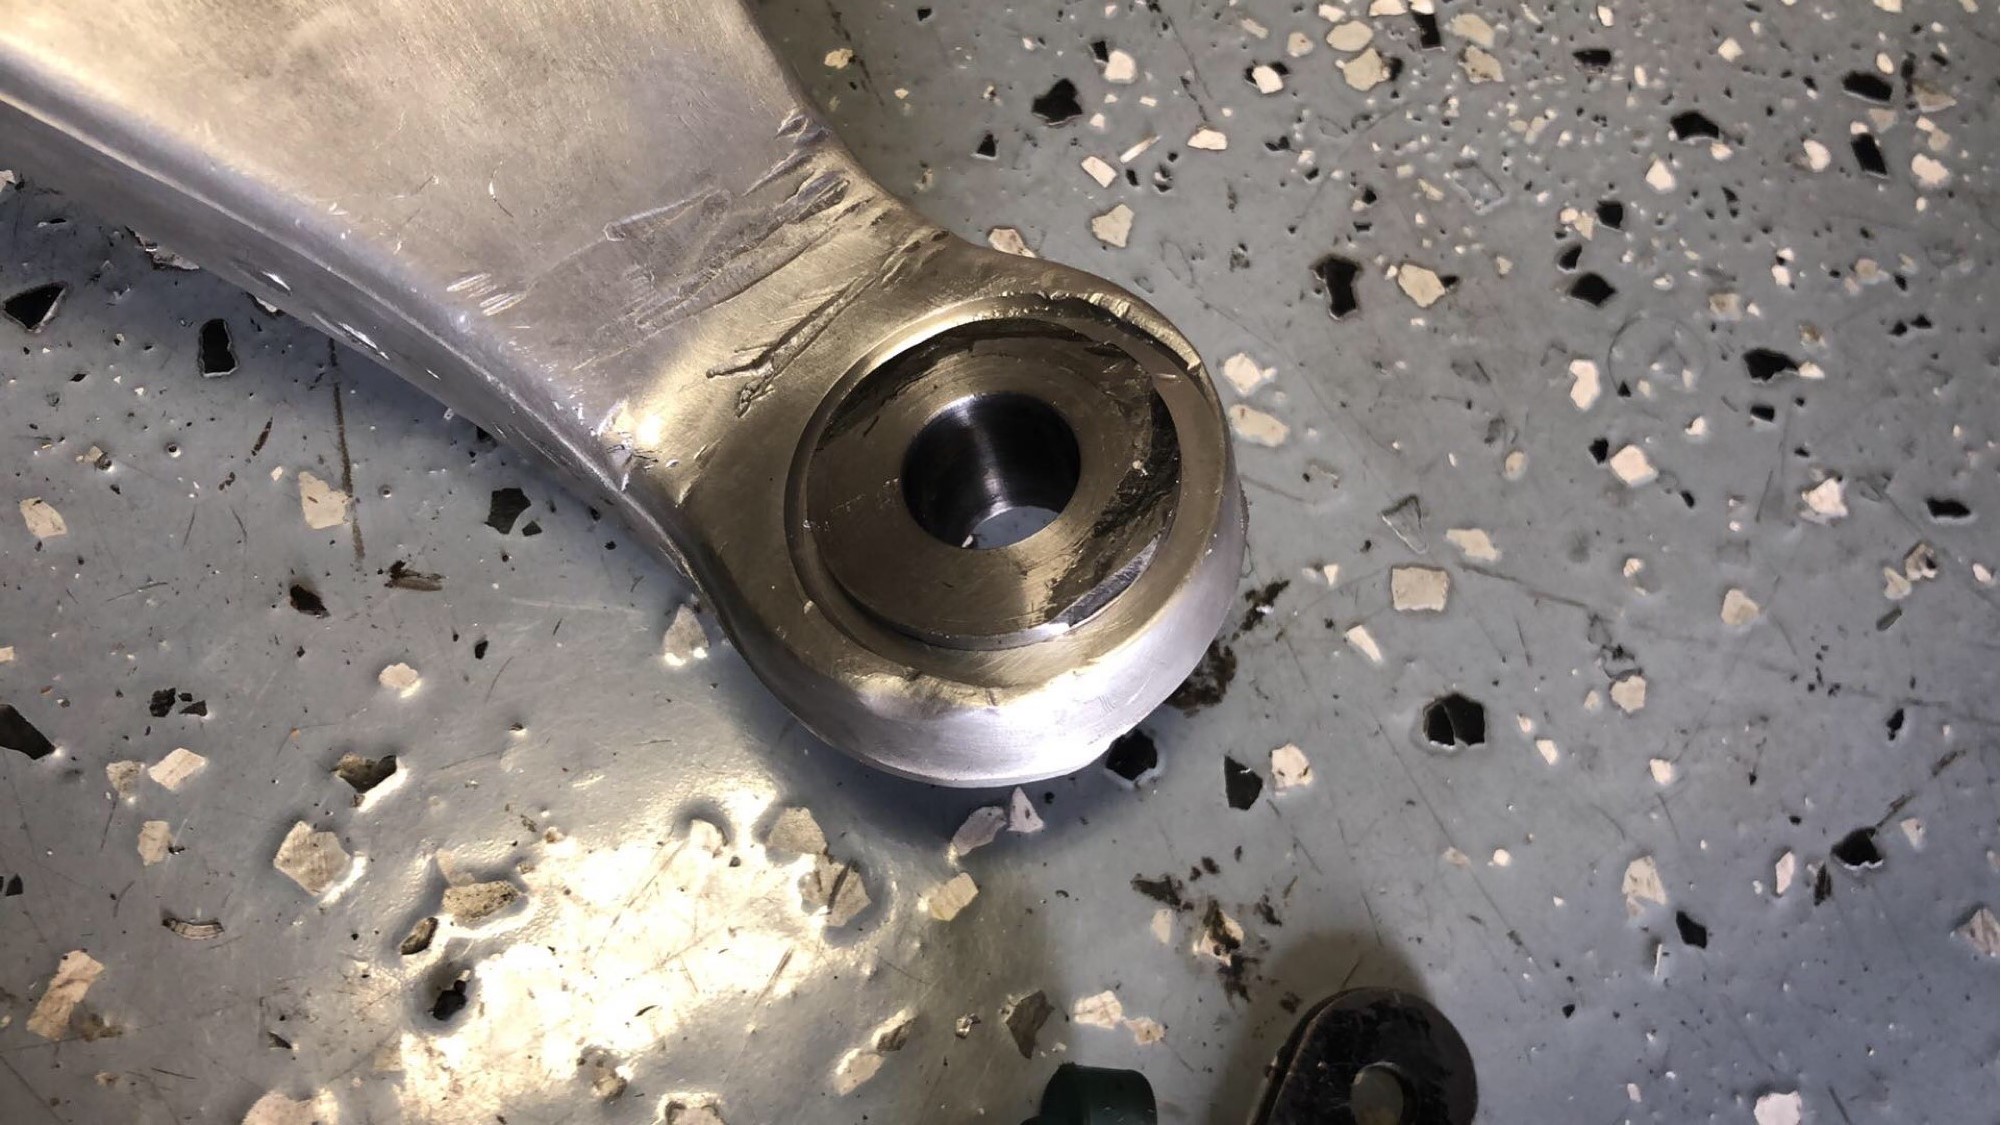
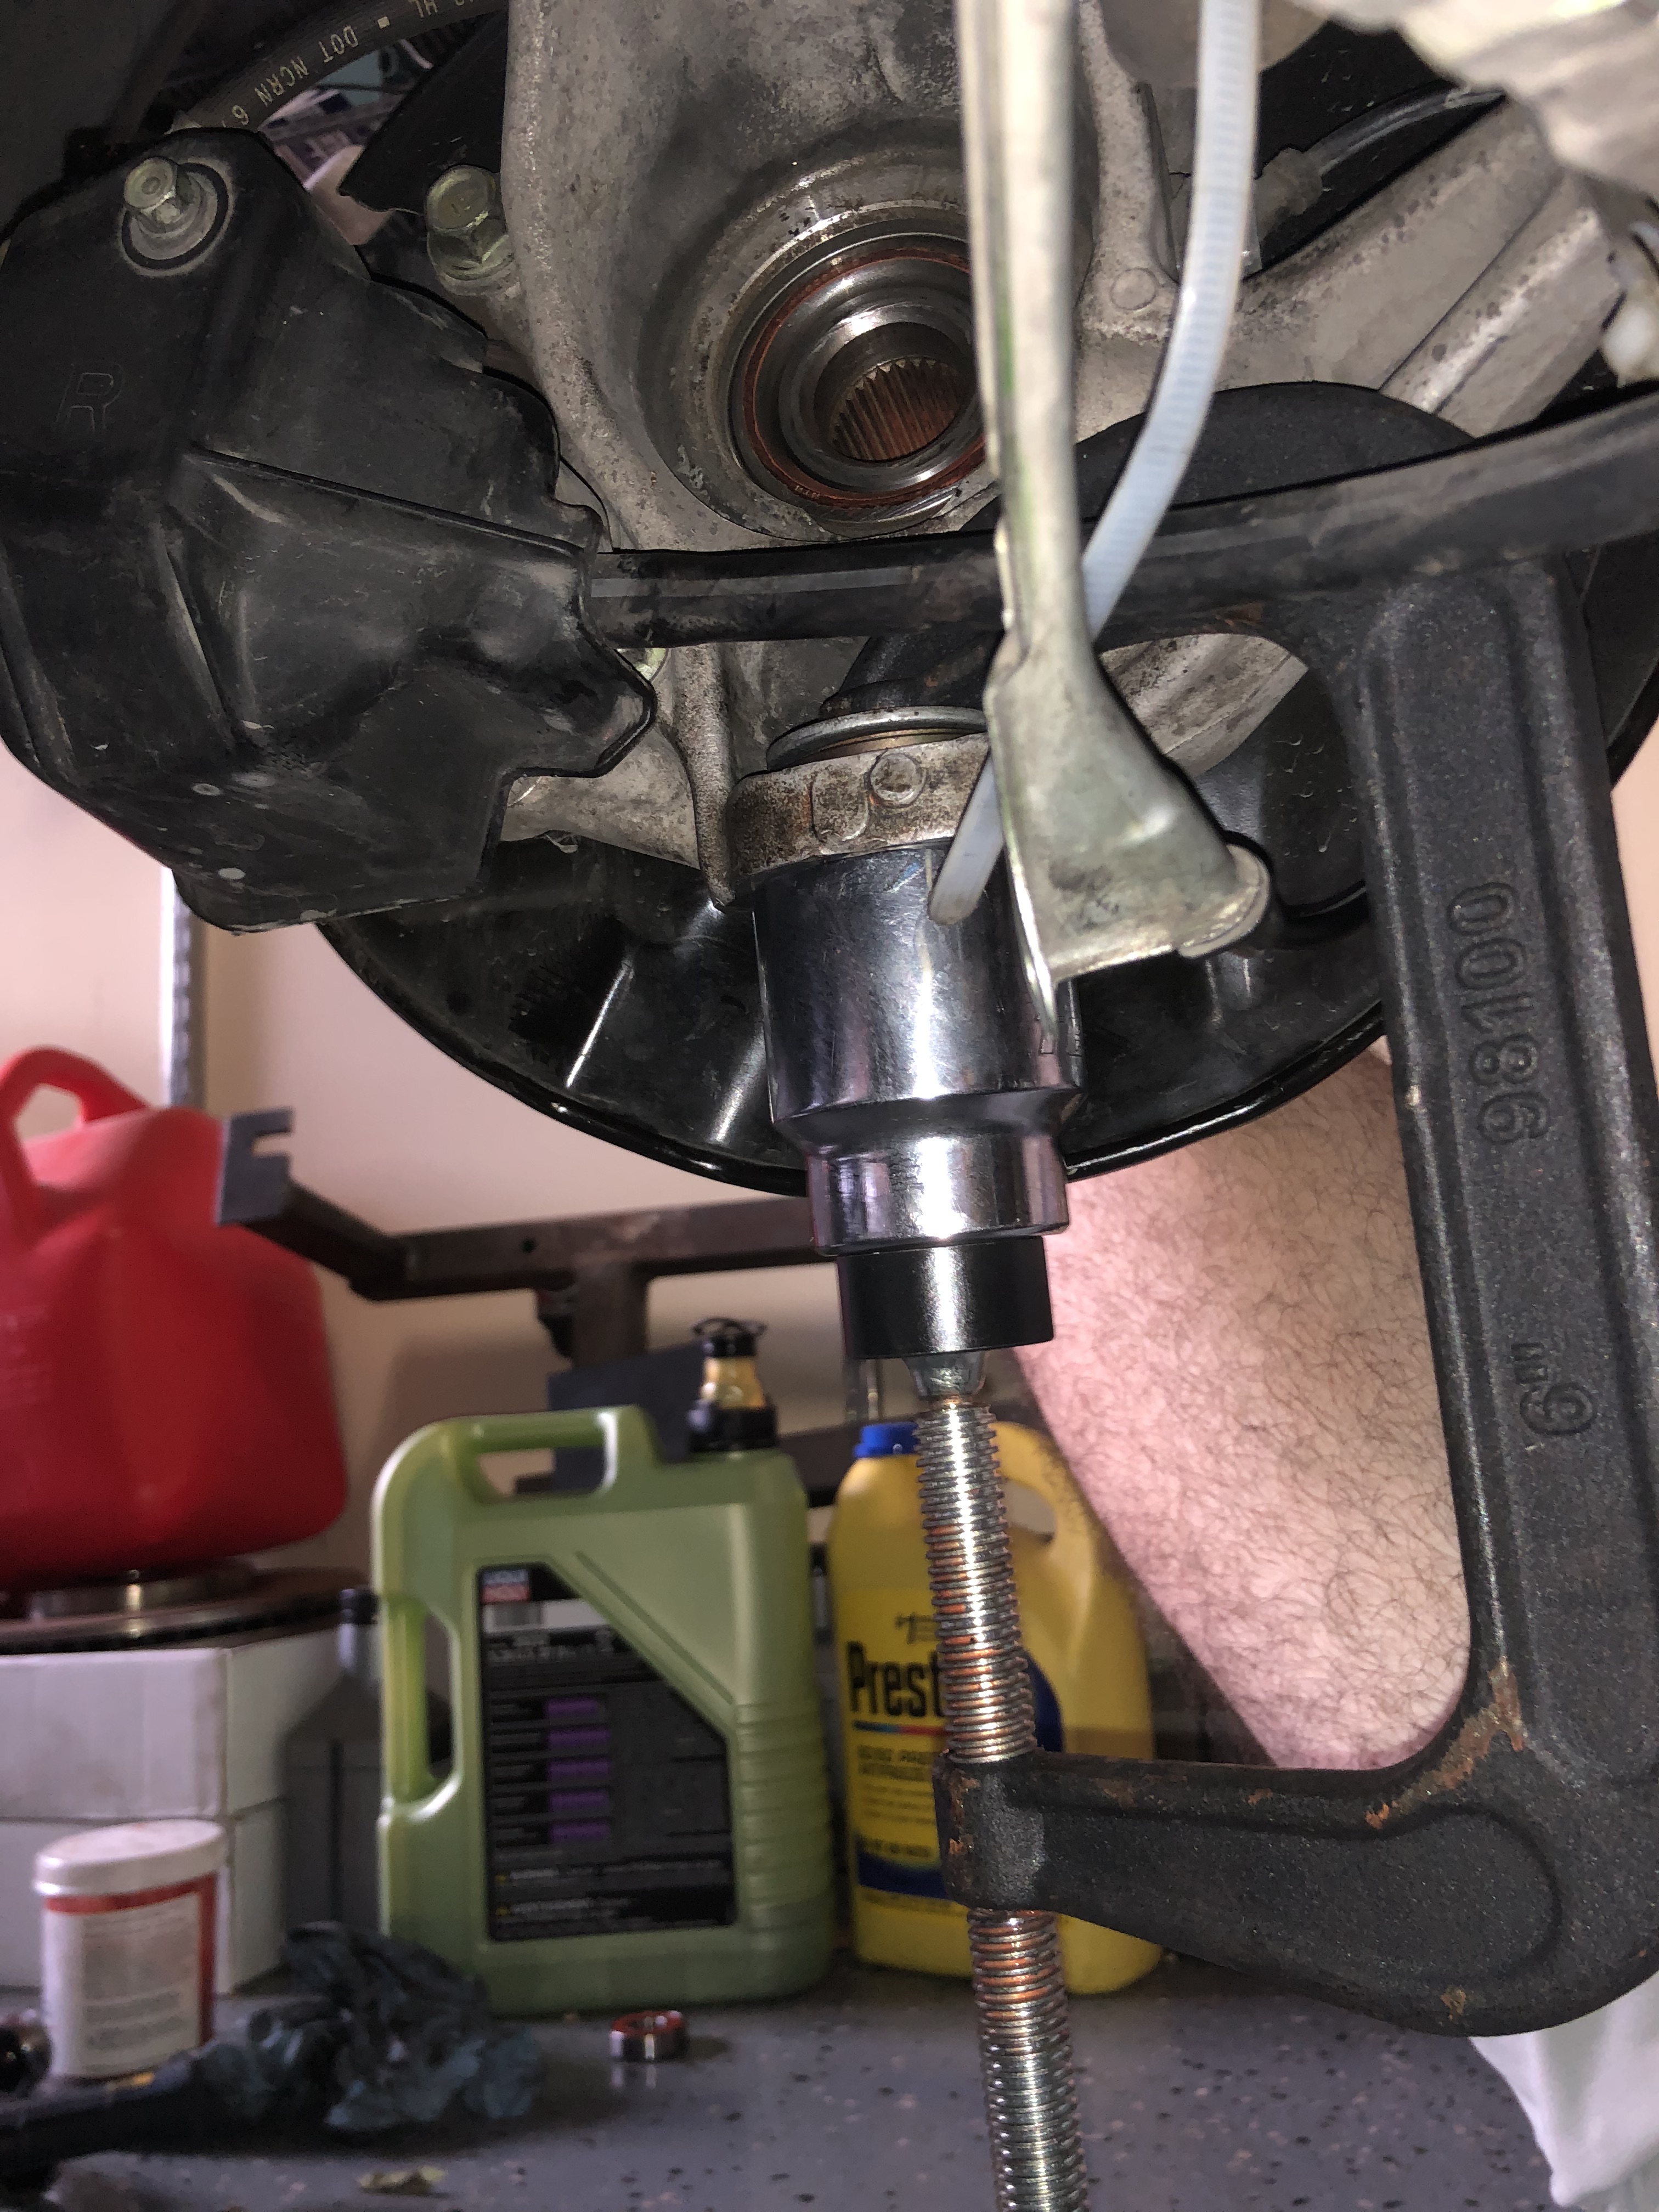
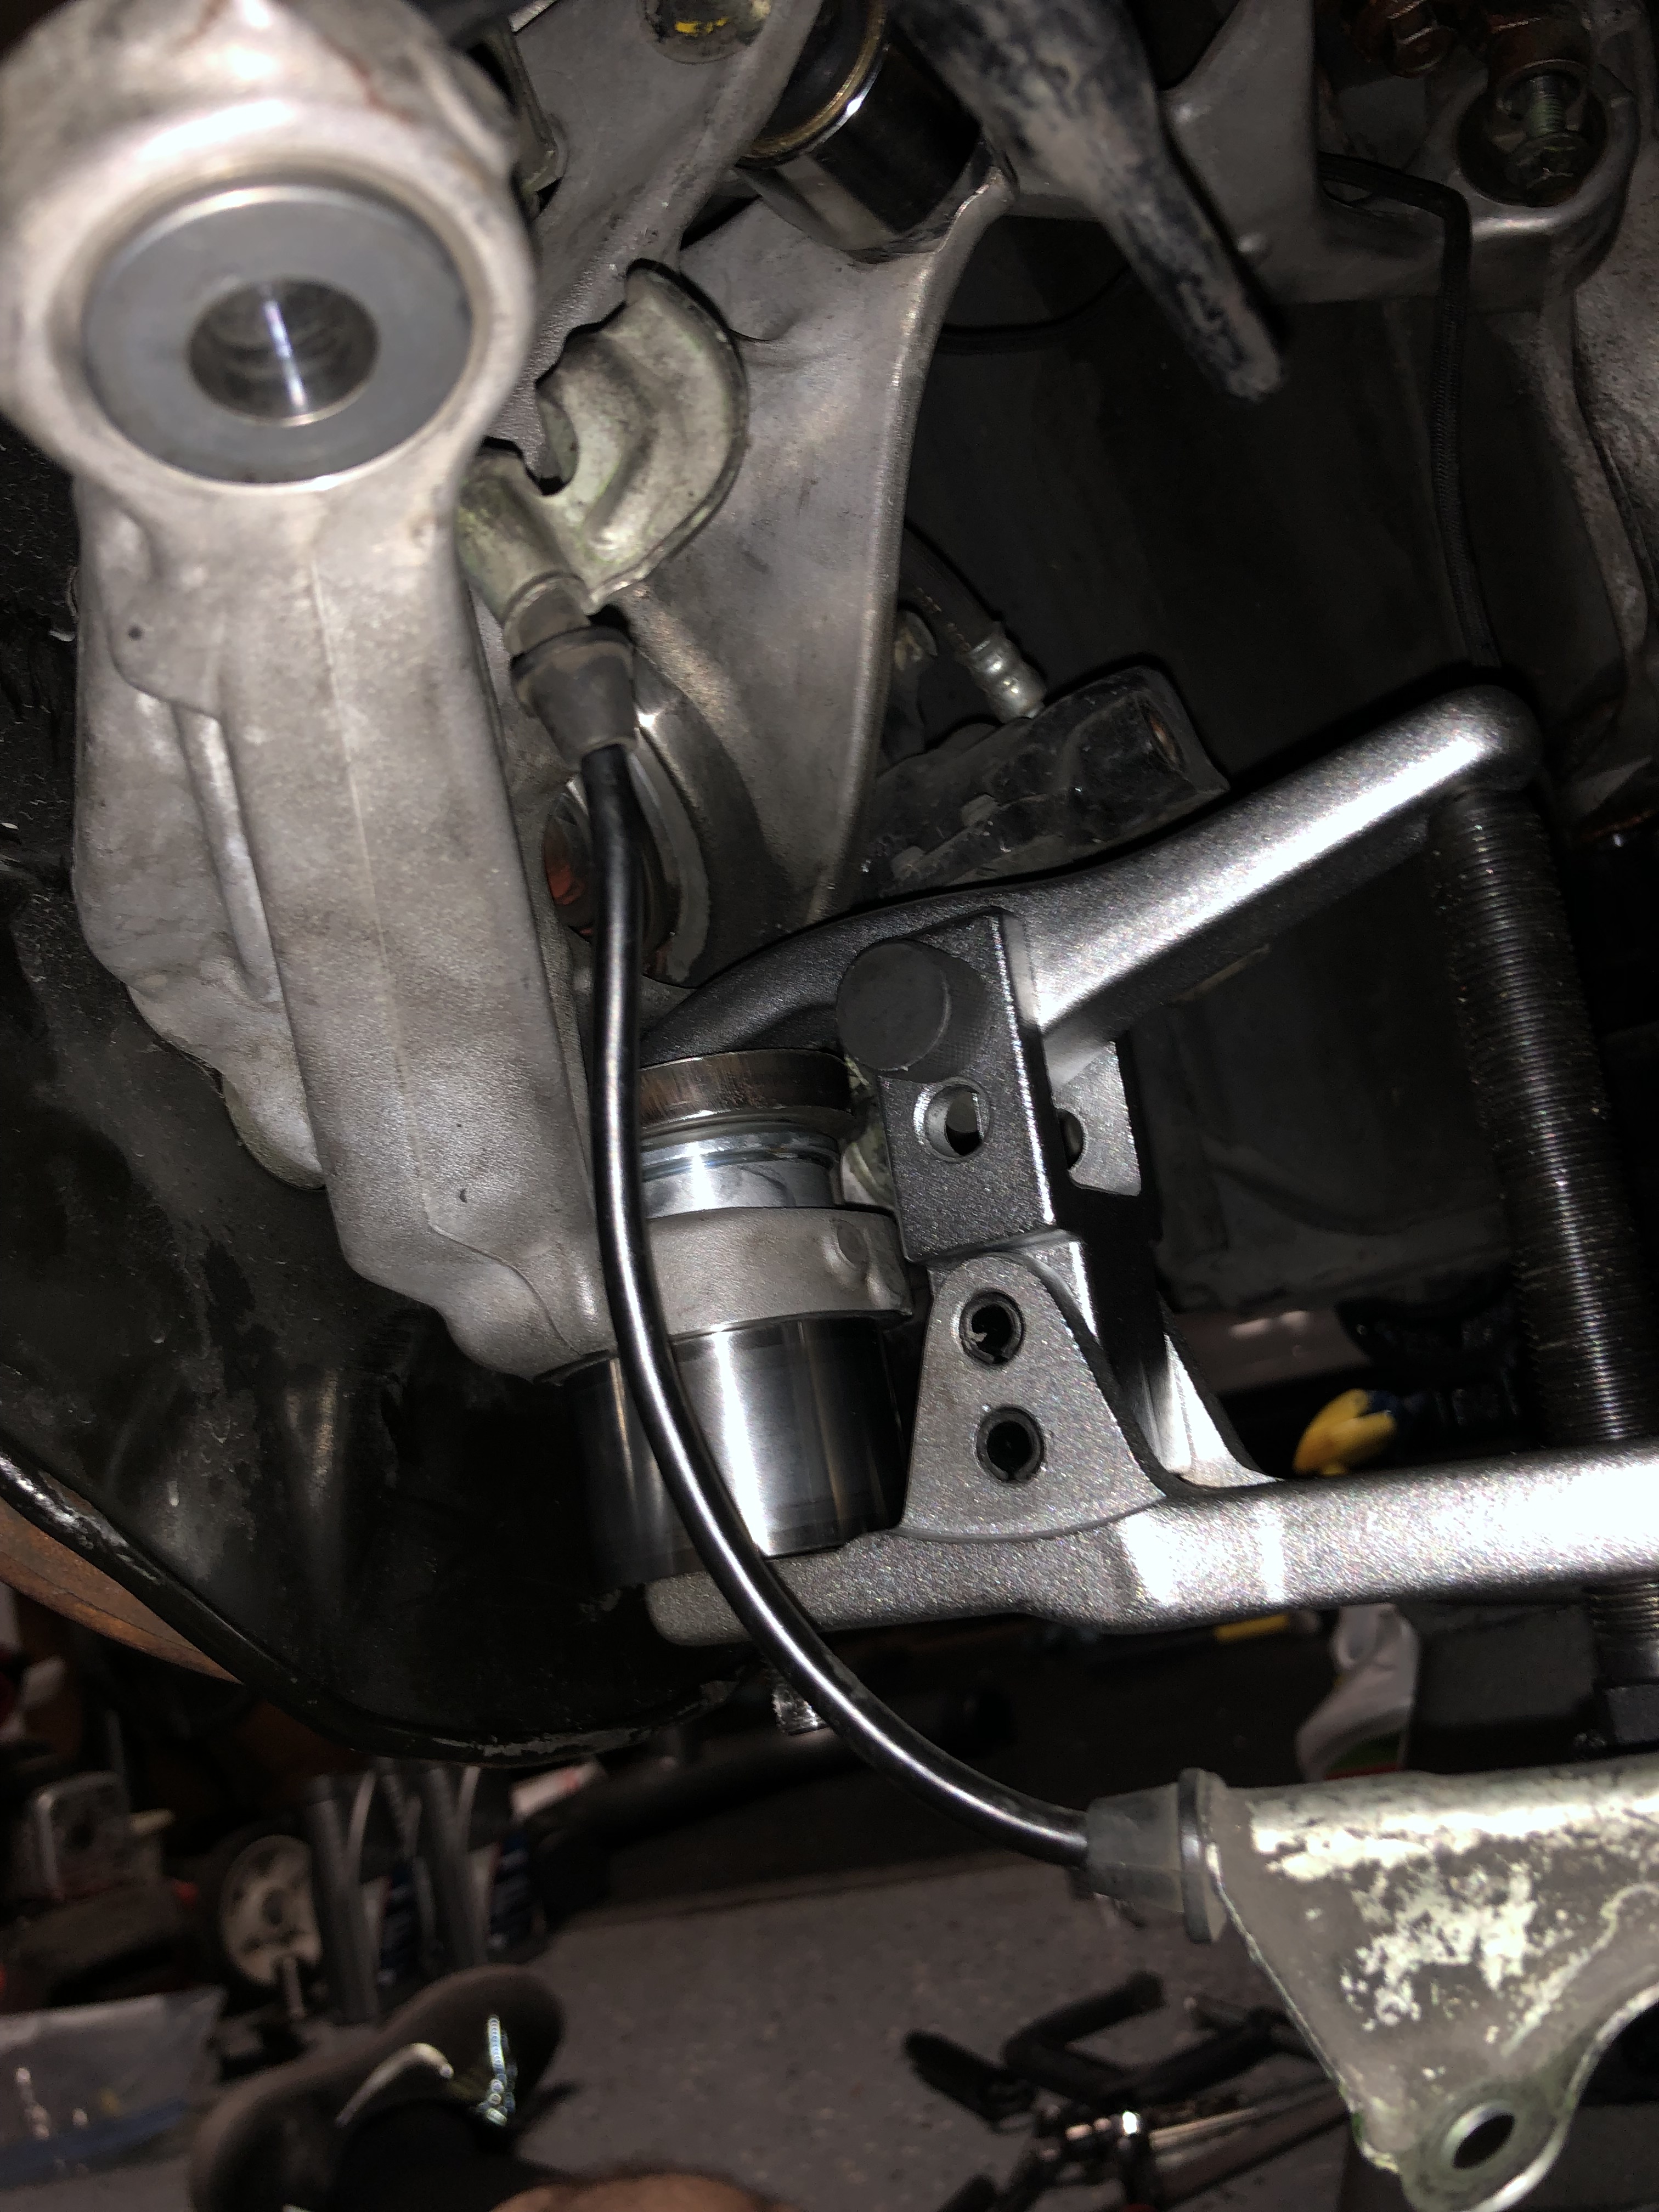
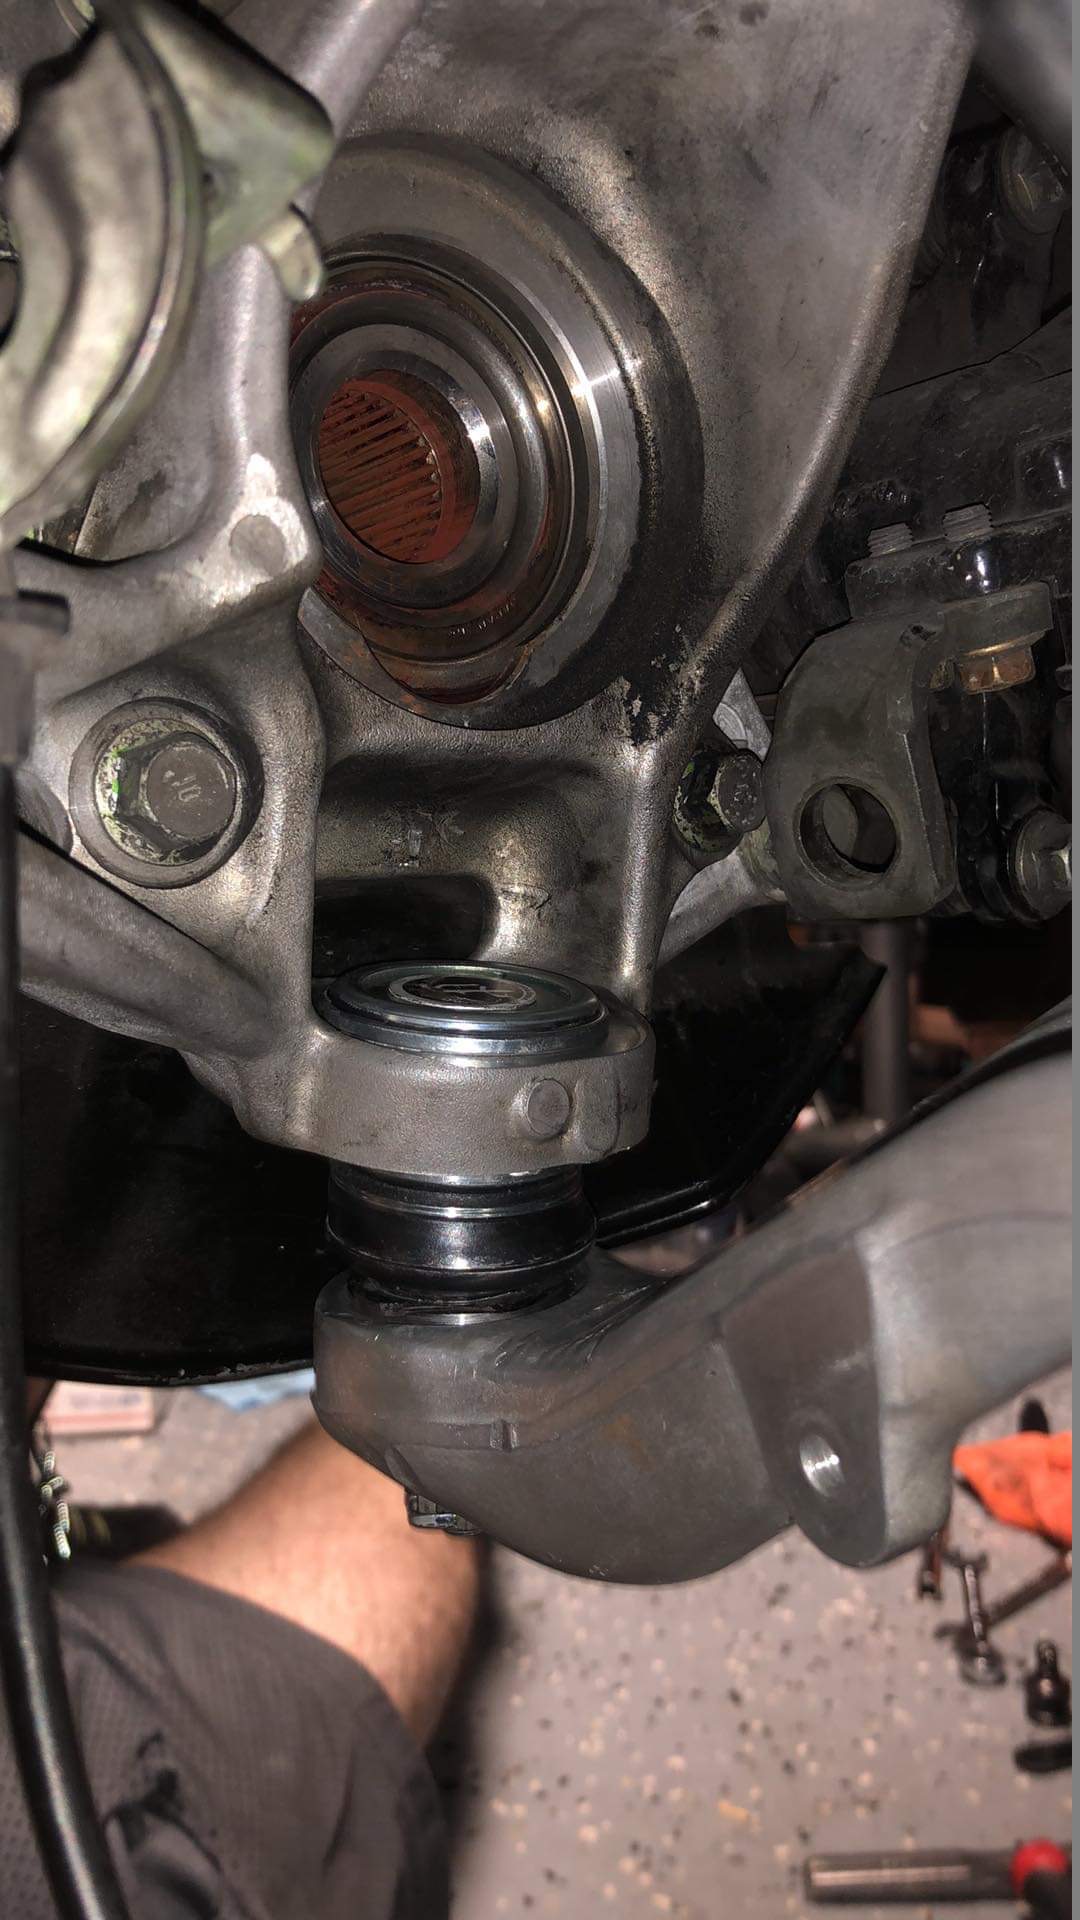
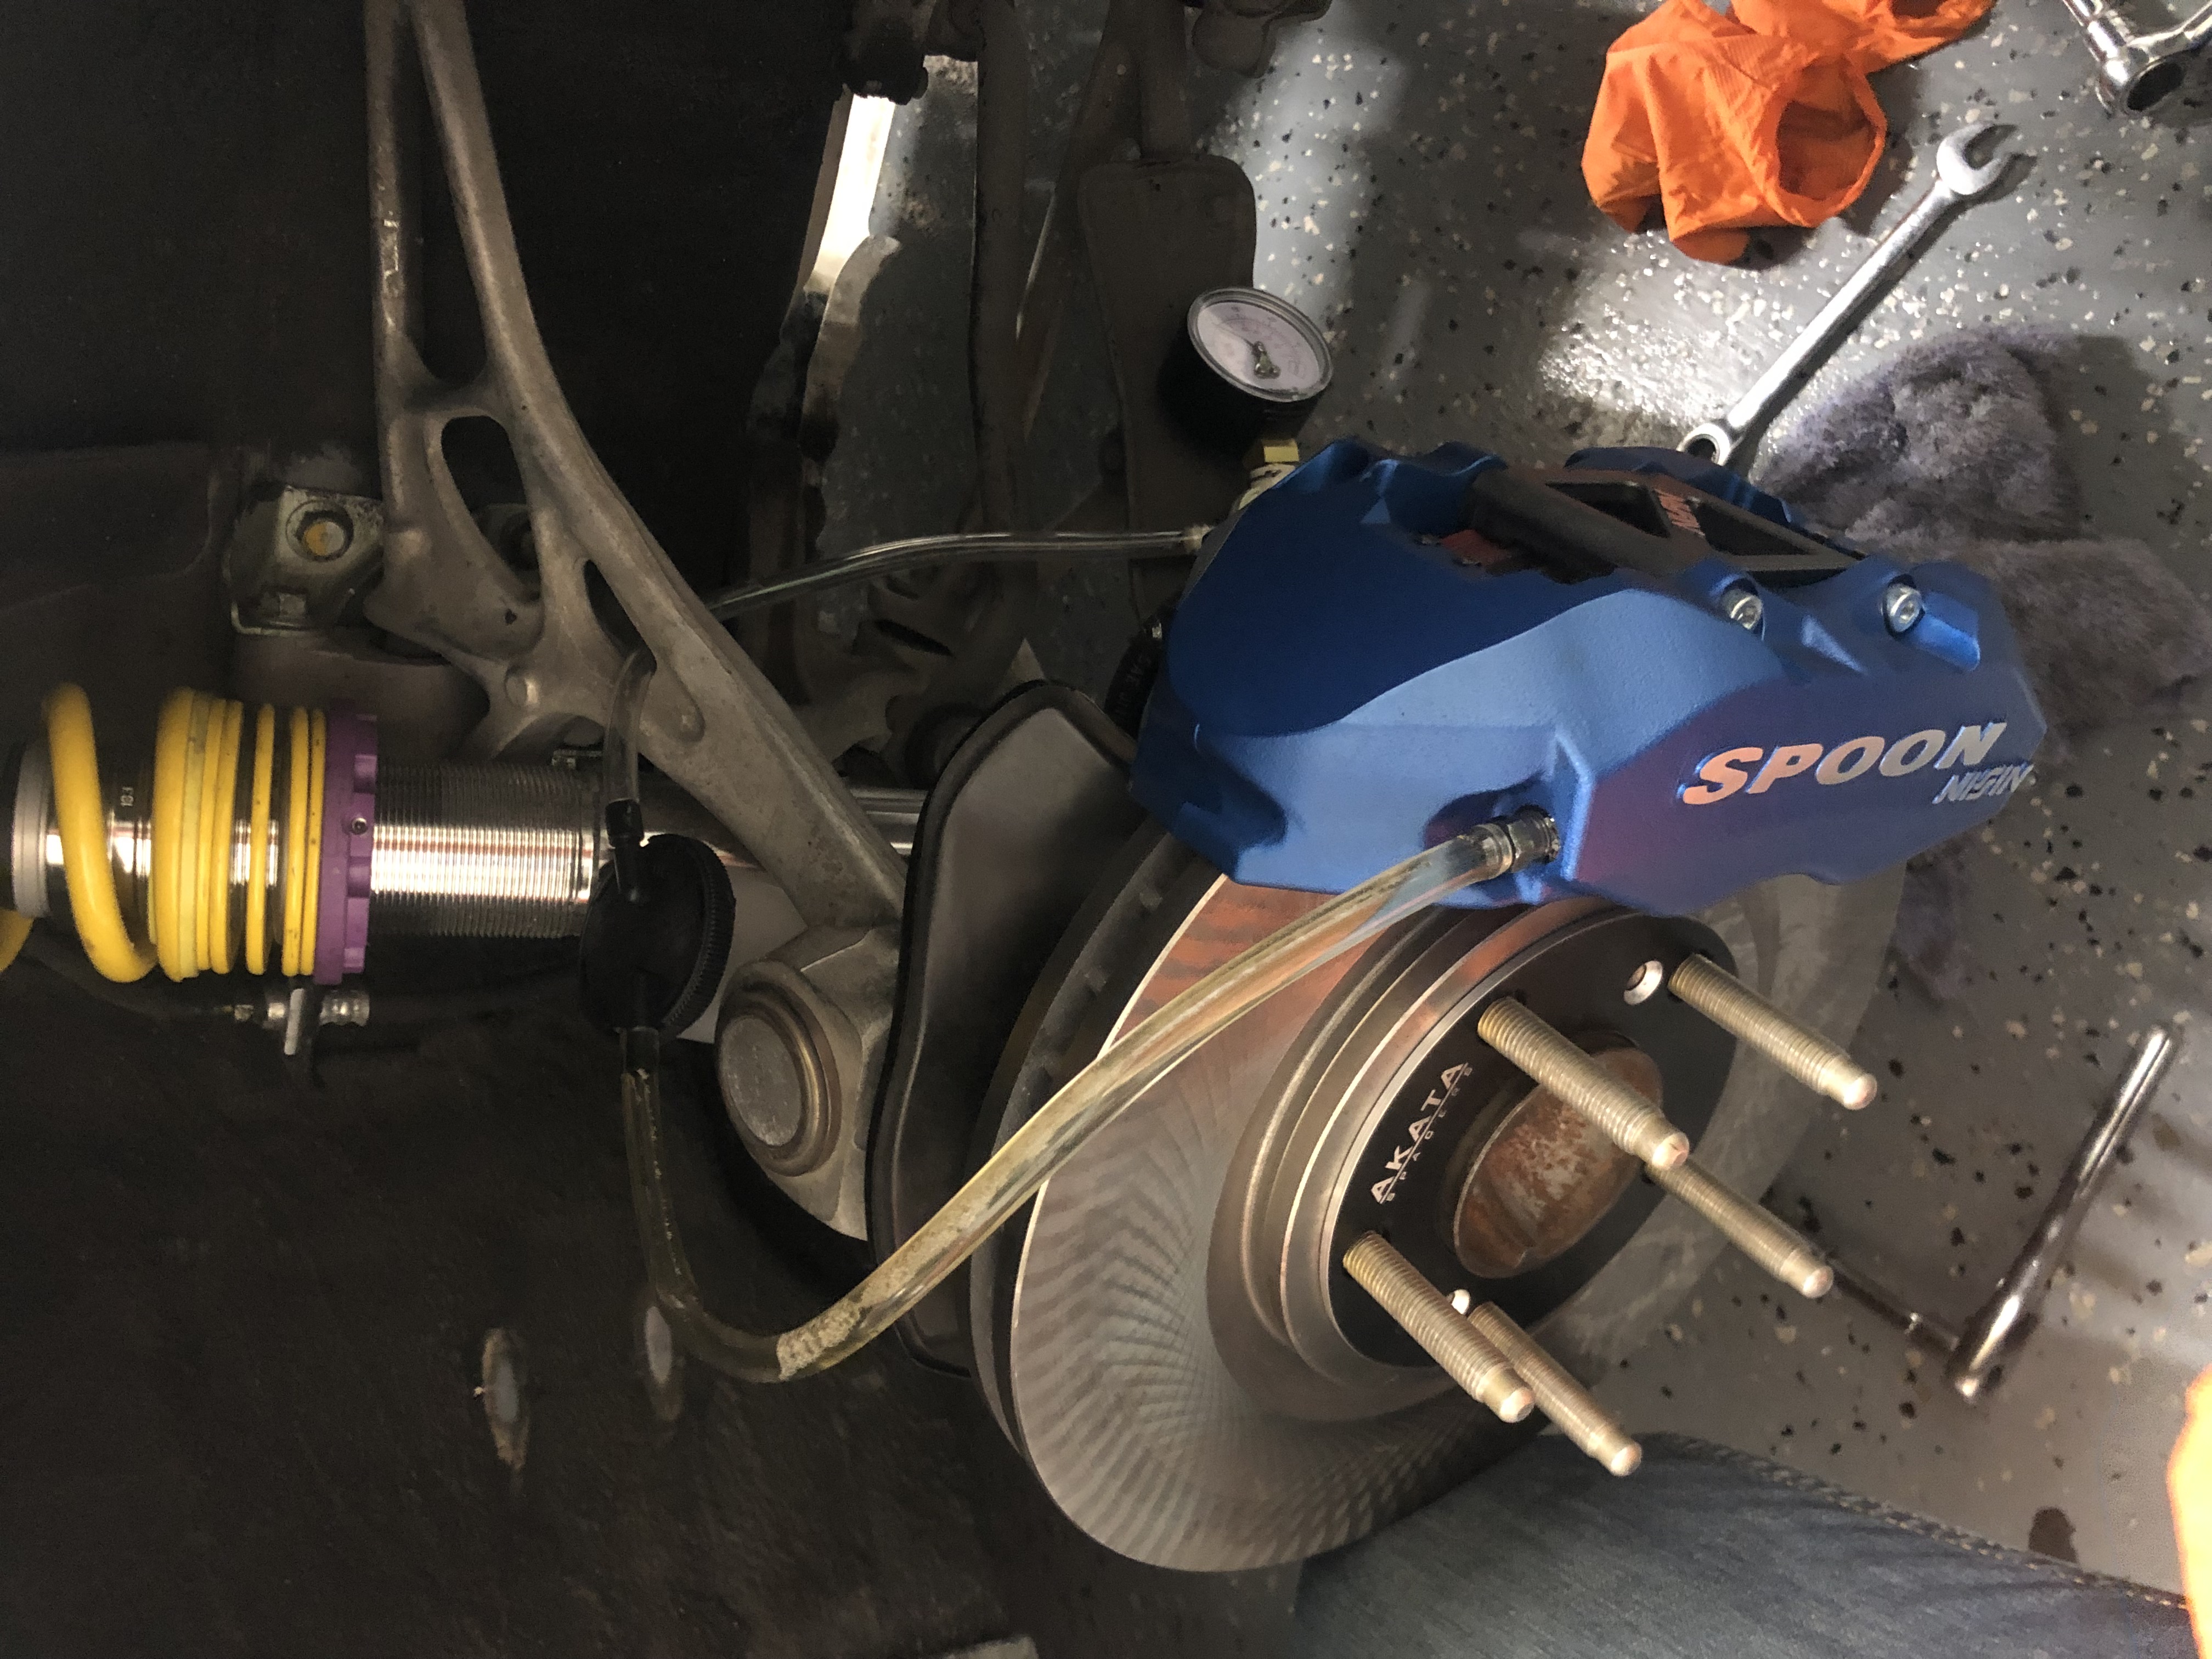
Then, since the ball joint was completely ruined by the torching process, I bought new rear lower ball joints from Pride which rebrands Hard Race ball joints as their own. These joints are about 0.0015" larger than OEM, presumably to fit more securely in old parts, so I bent a C clamp trying to install them. After looking around the garage I realized I could flip my big BMW ball joint popper tool upside down and use that to press the new ball joints in! I put a steel disk in between the ball joint and tool to keep from damaging the ball joint, and the receiver sleeve is actually the leftover 2nd gear clearance sleeve from the transmission lol.

IMG_3750.jpg


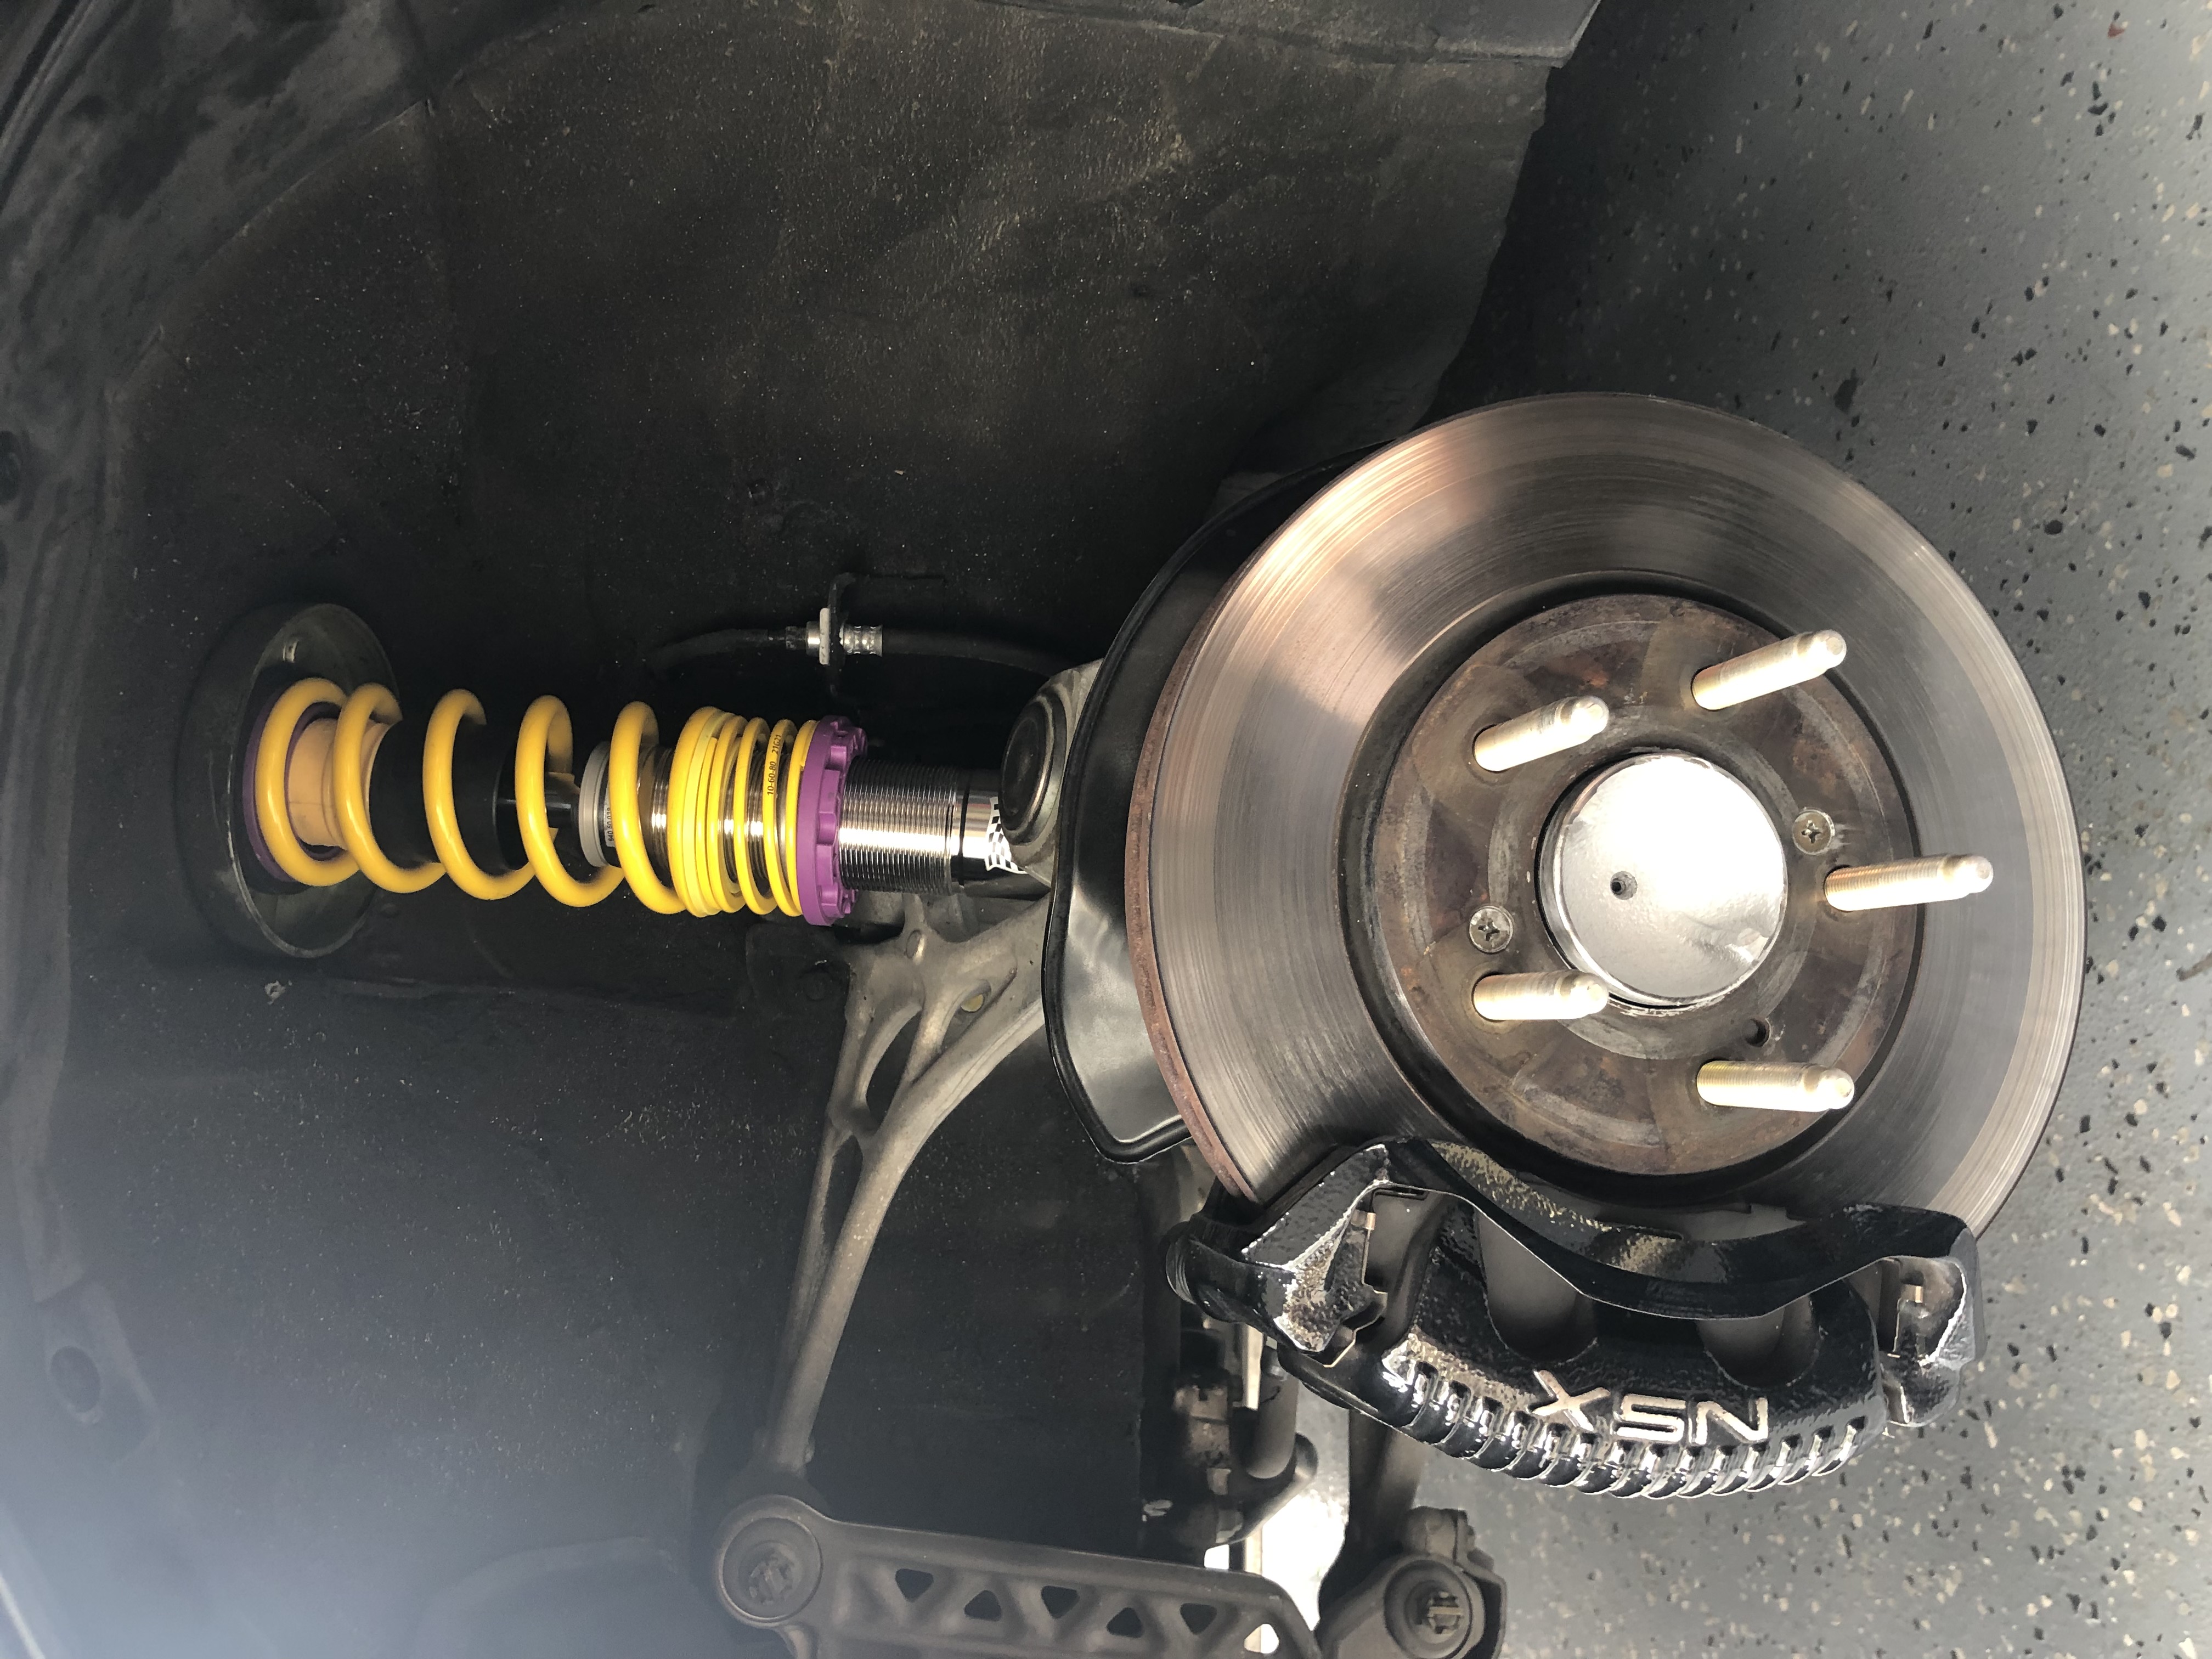
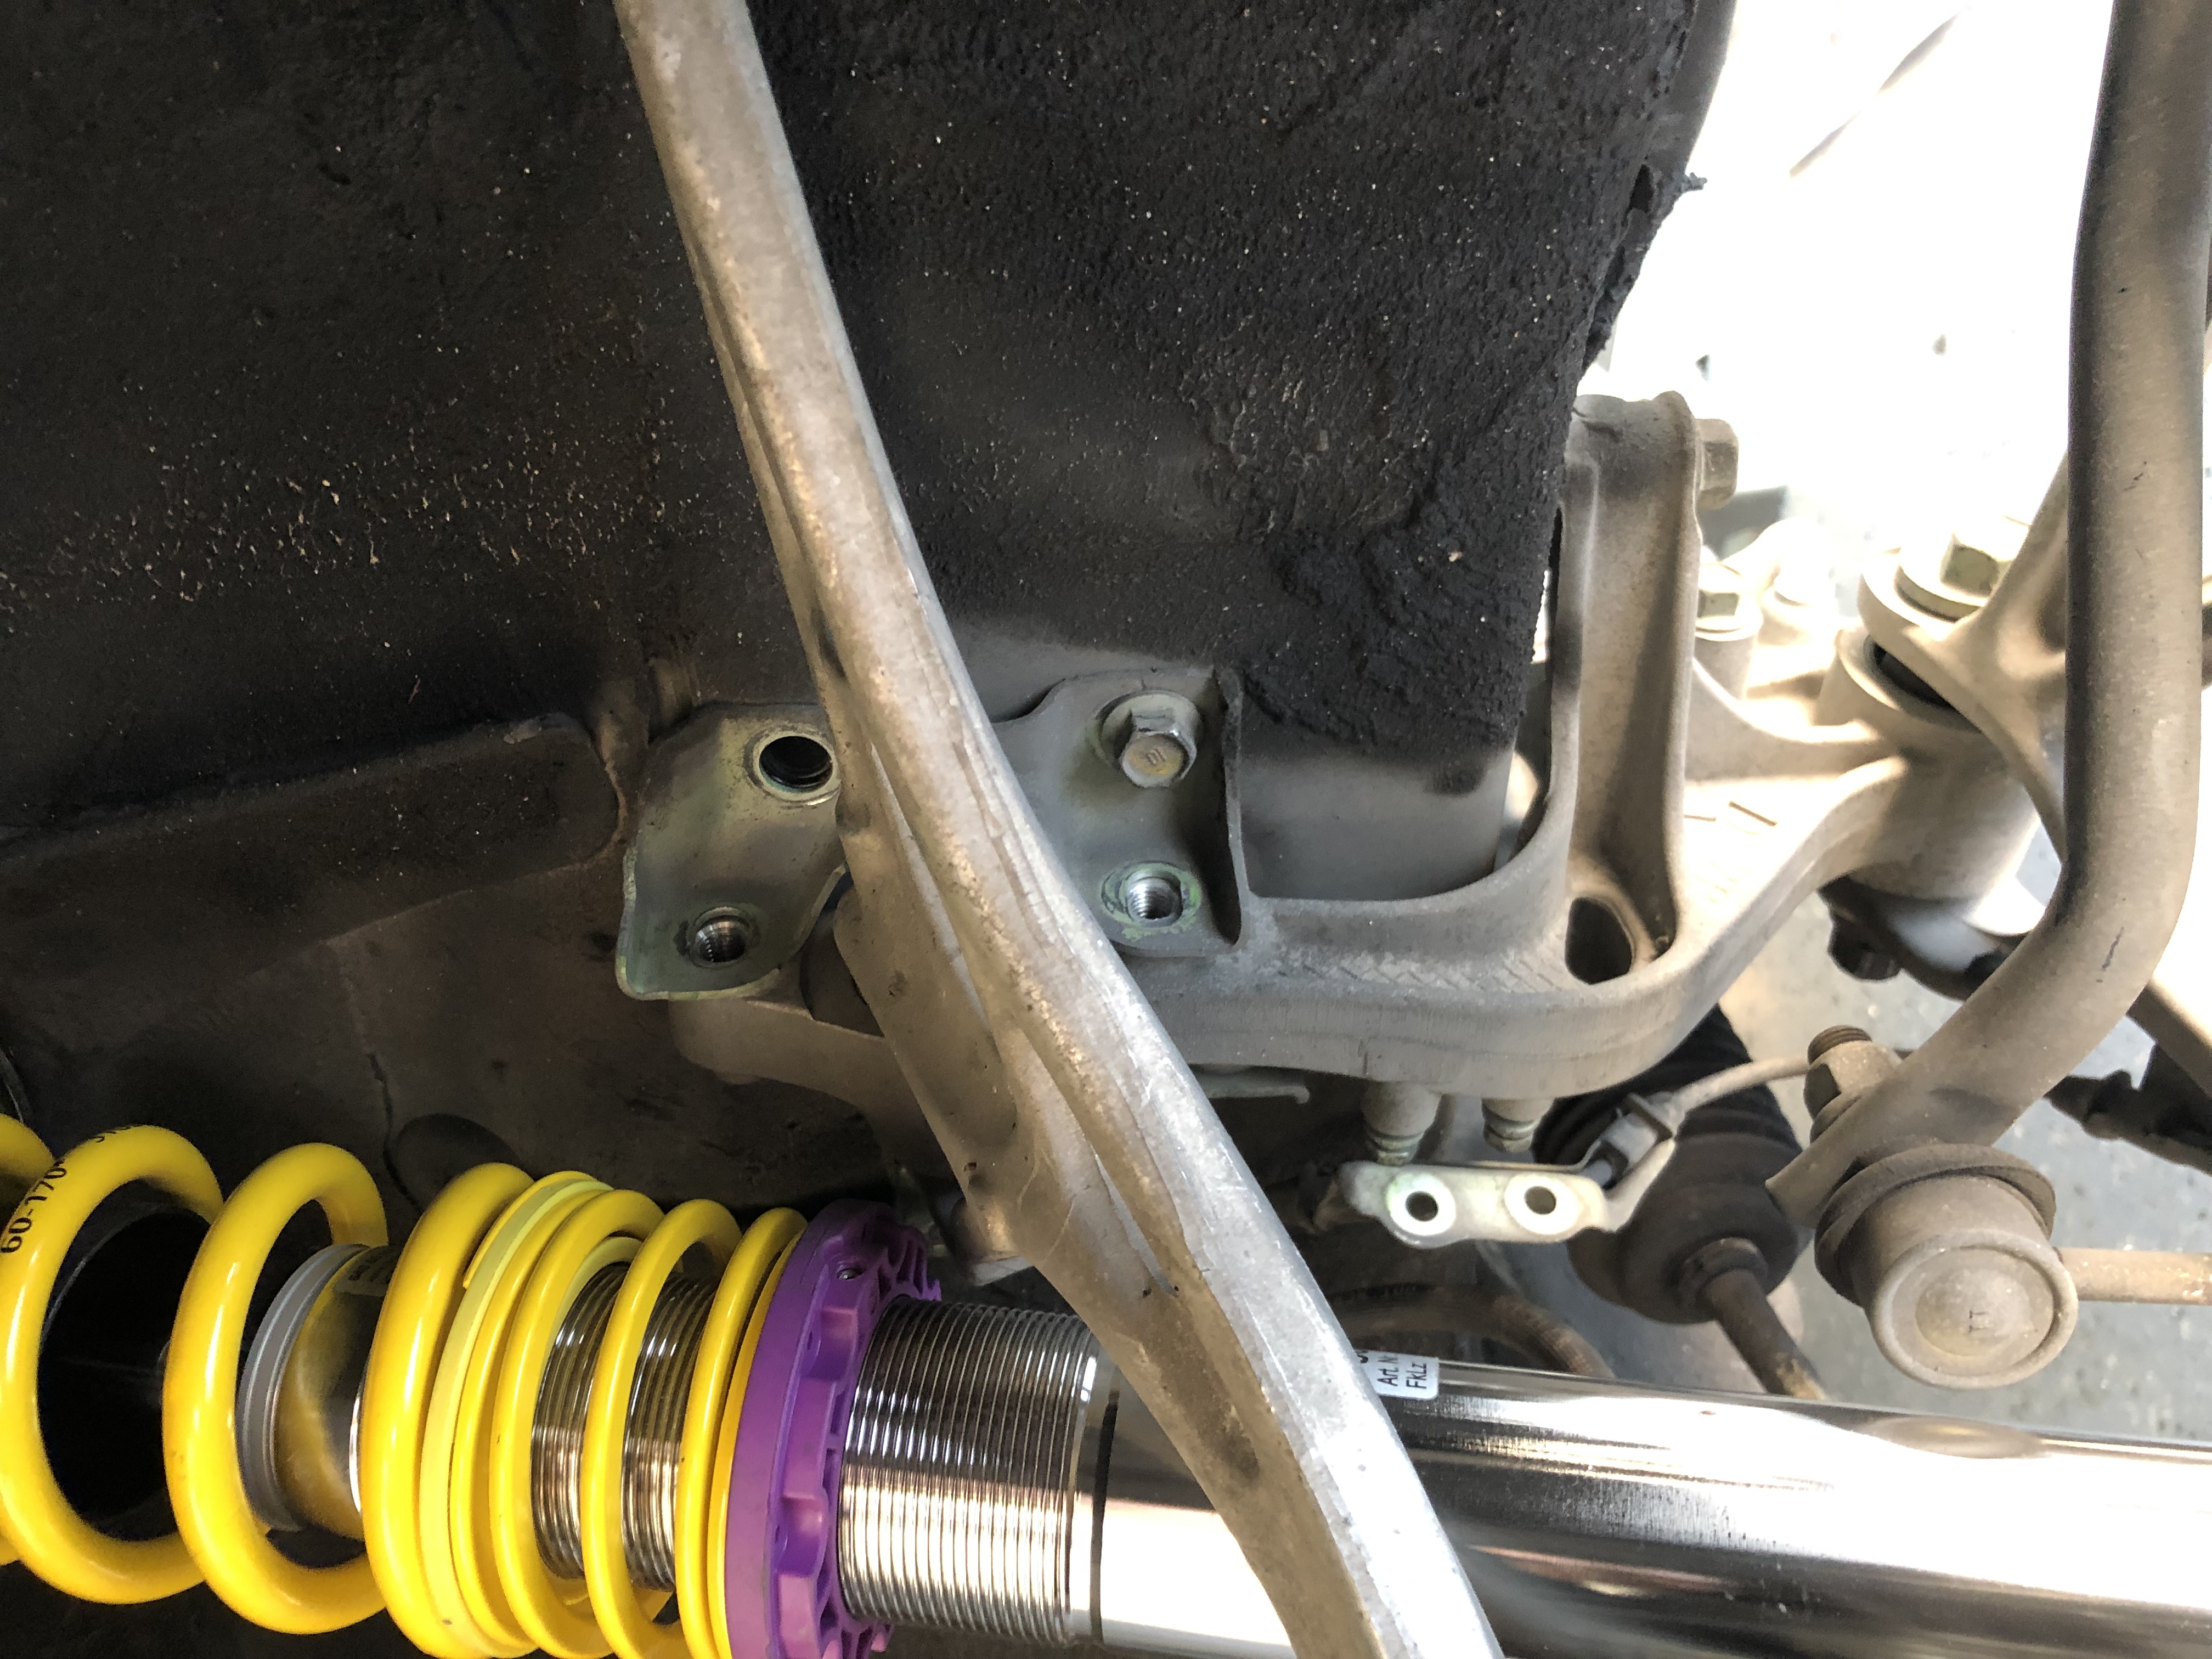
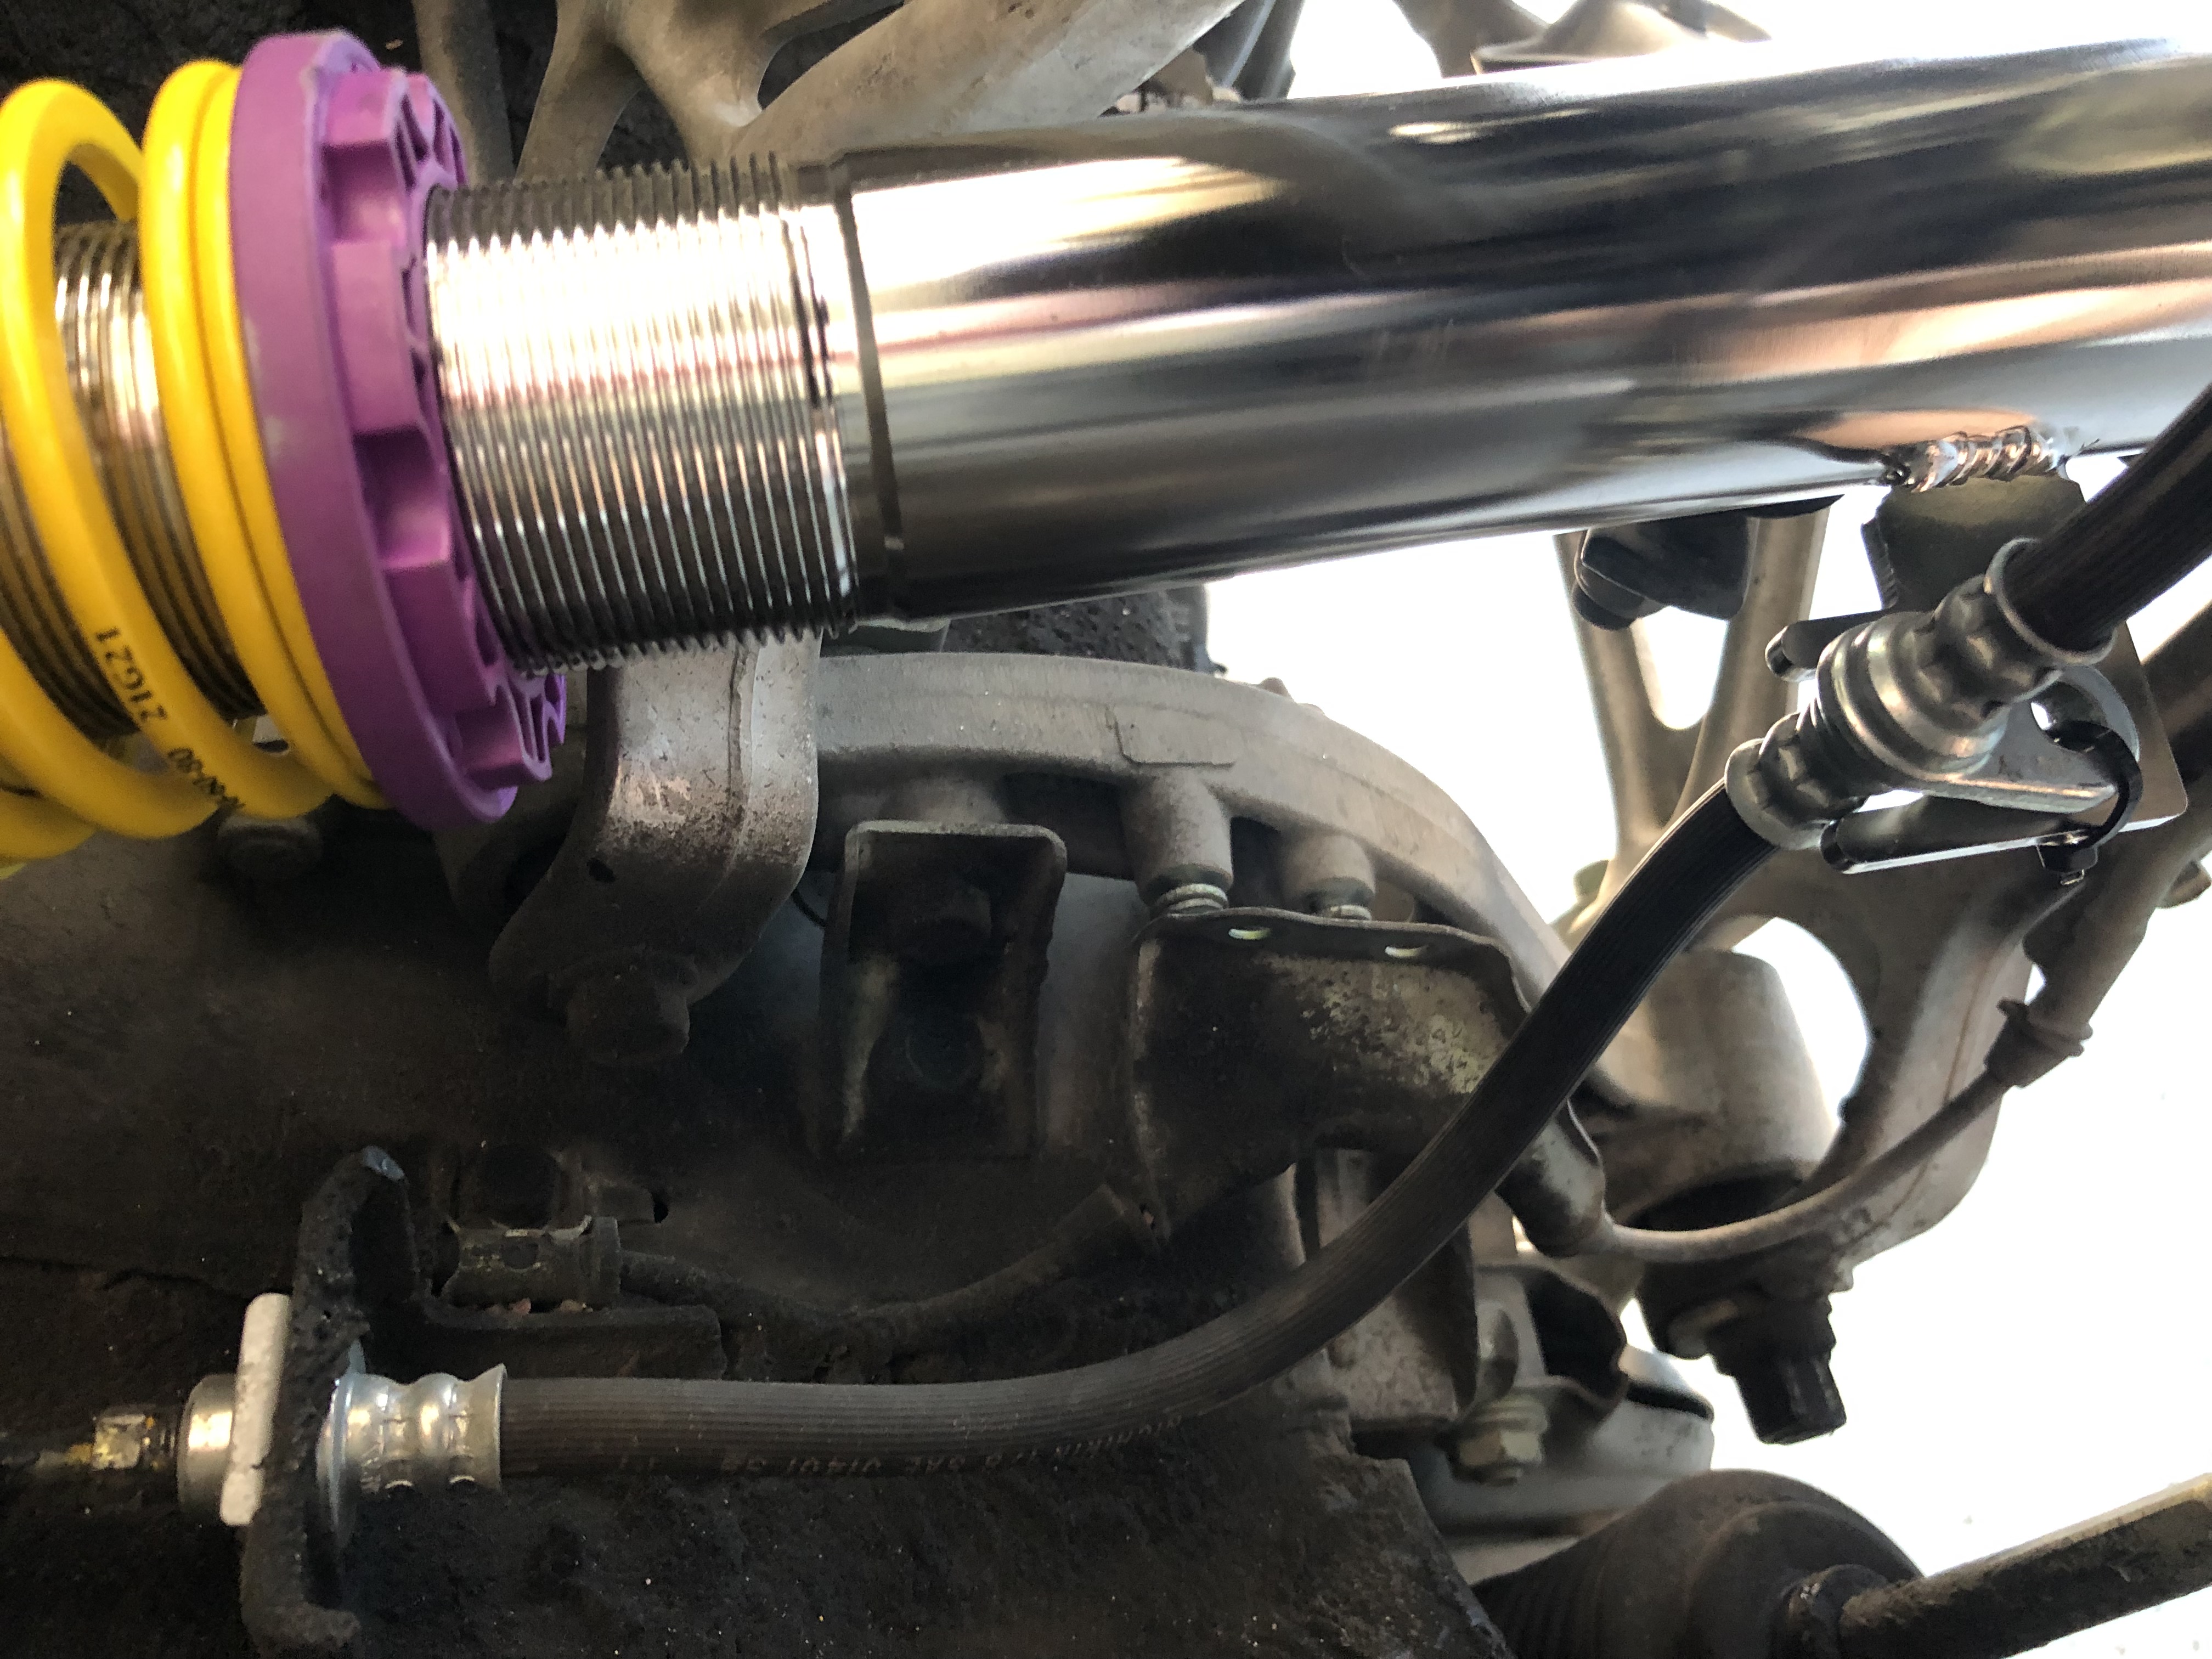
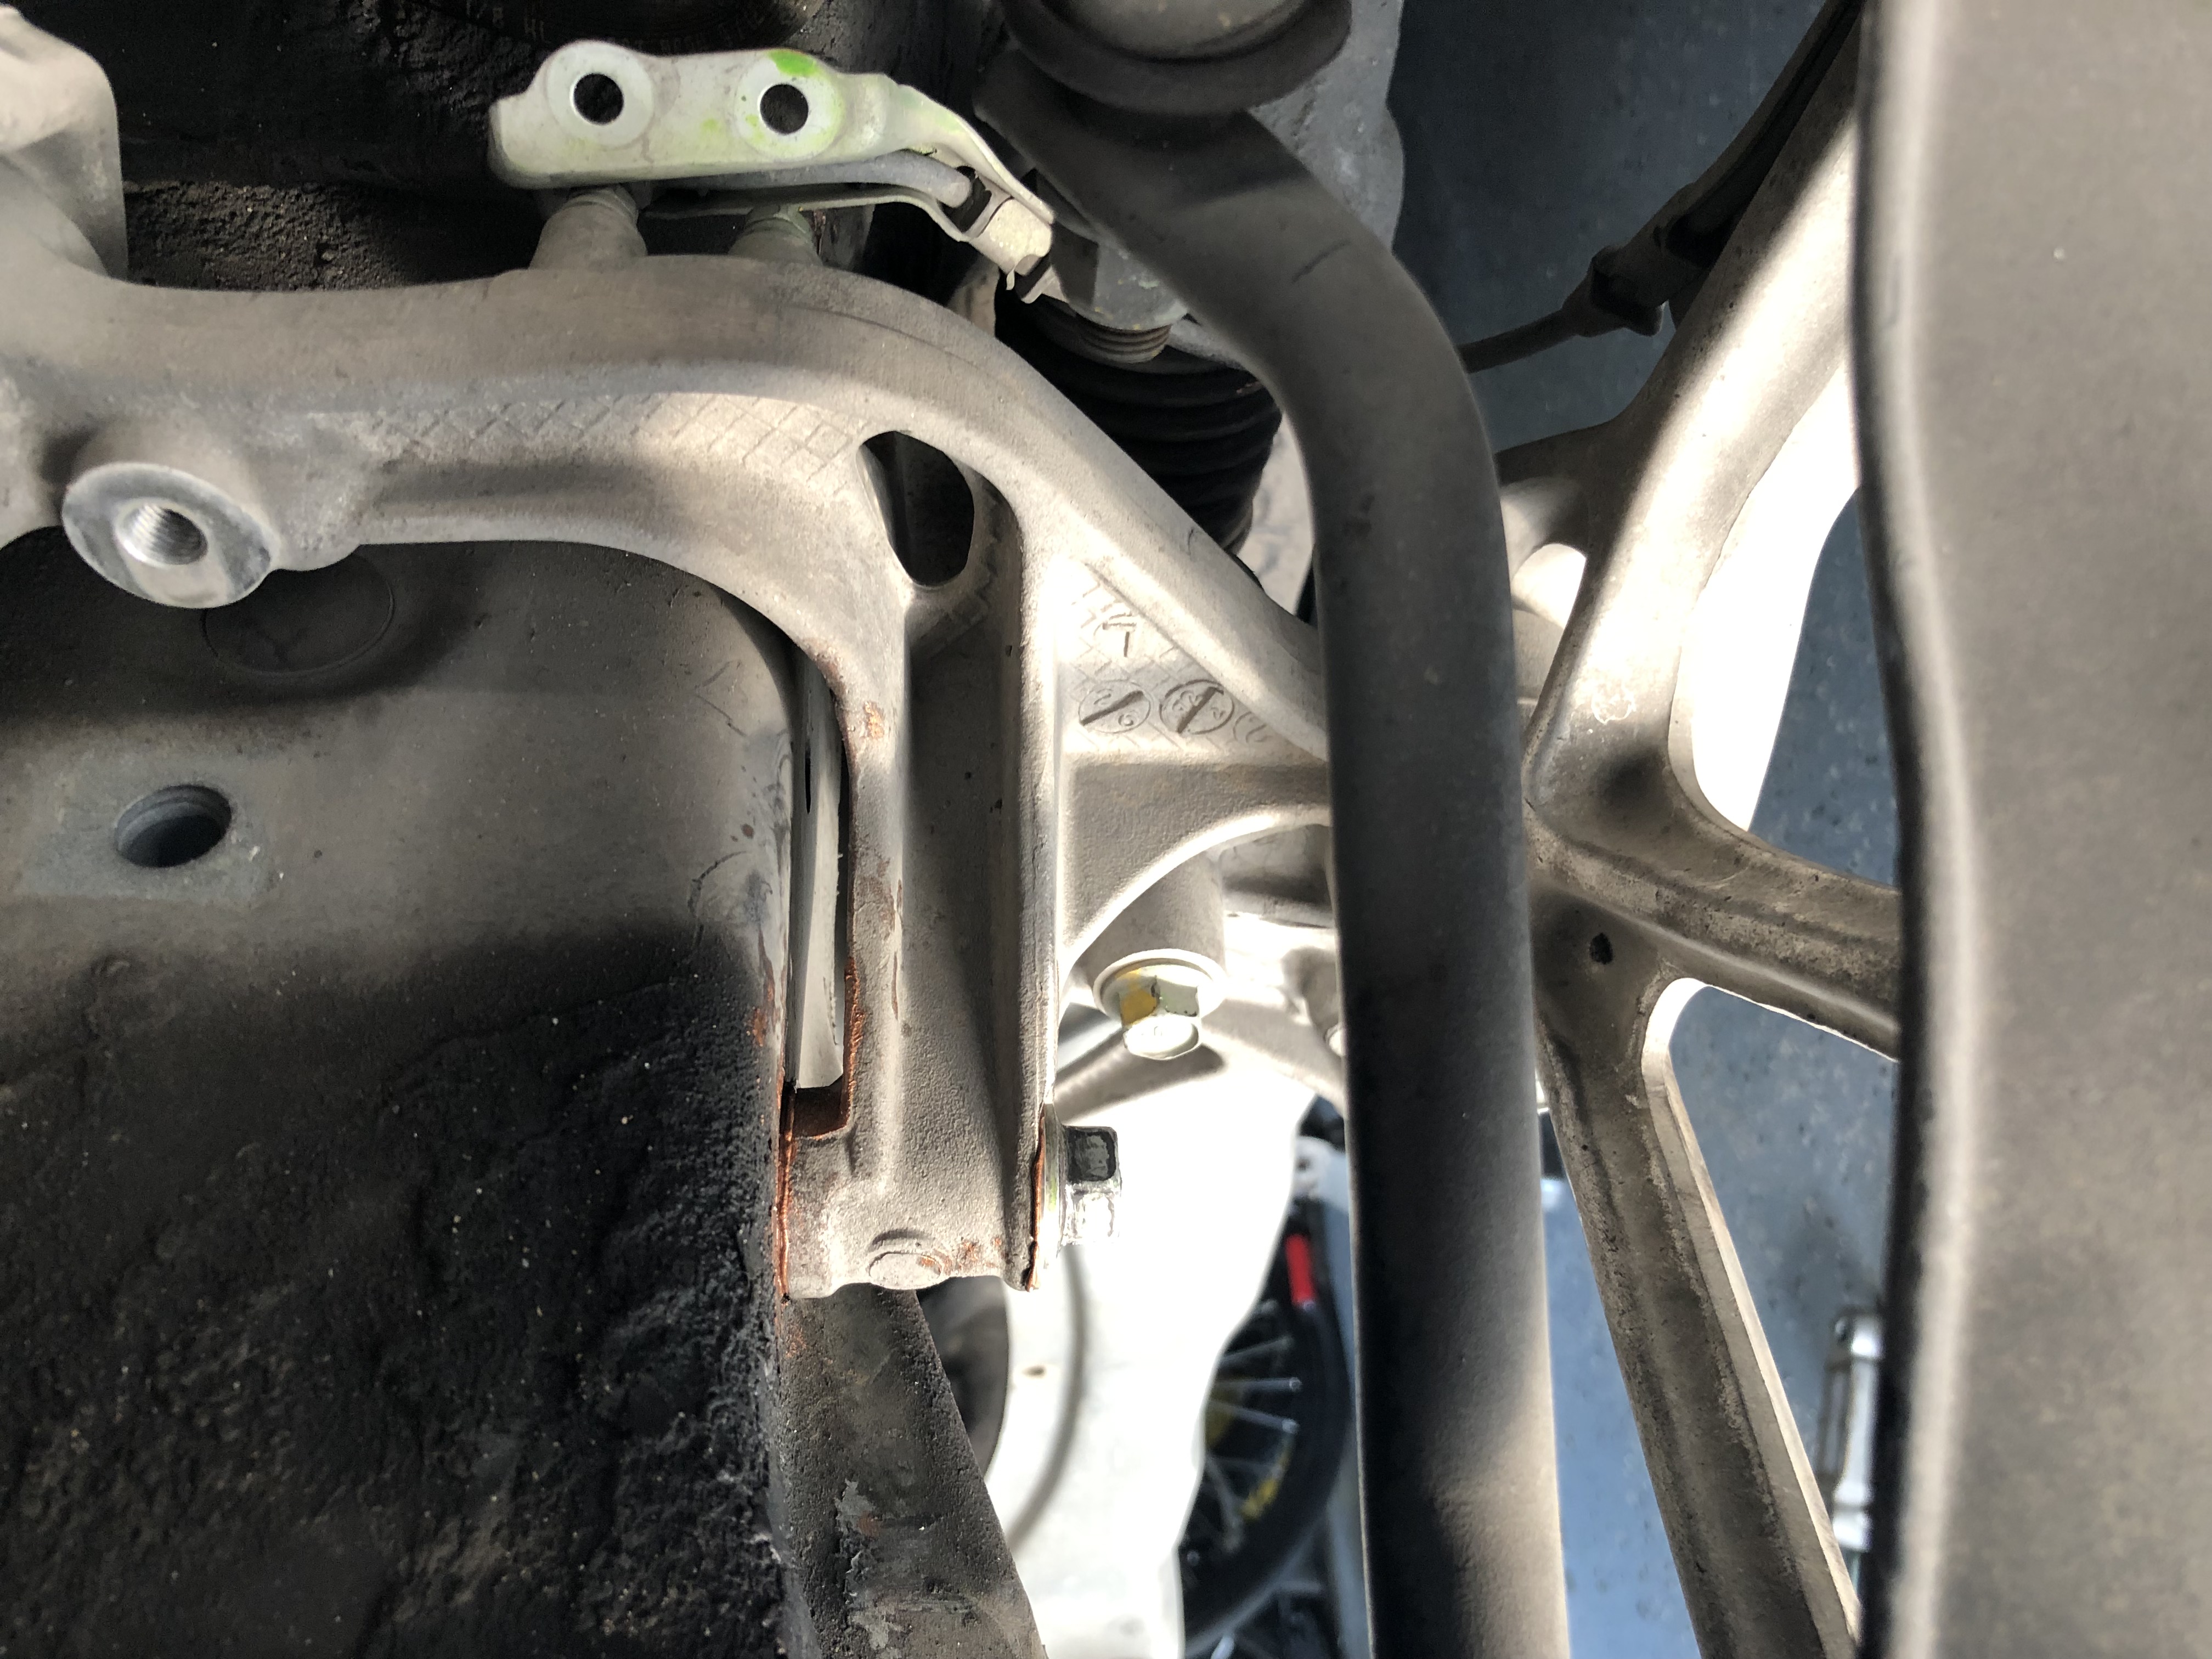
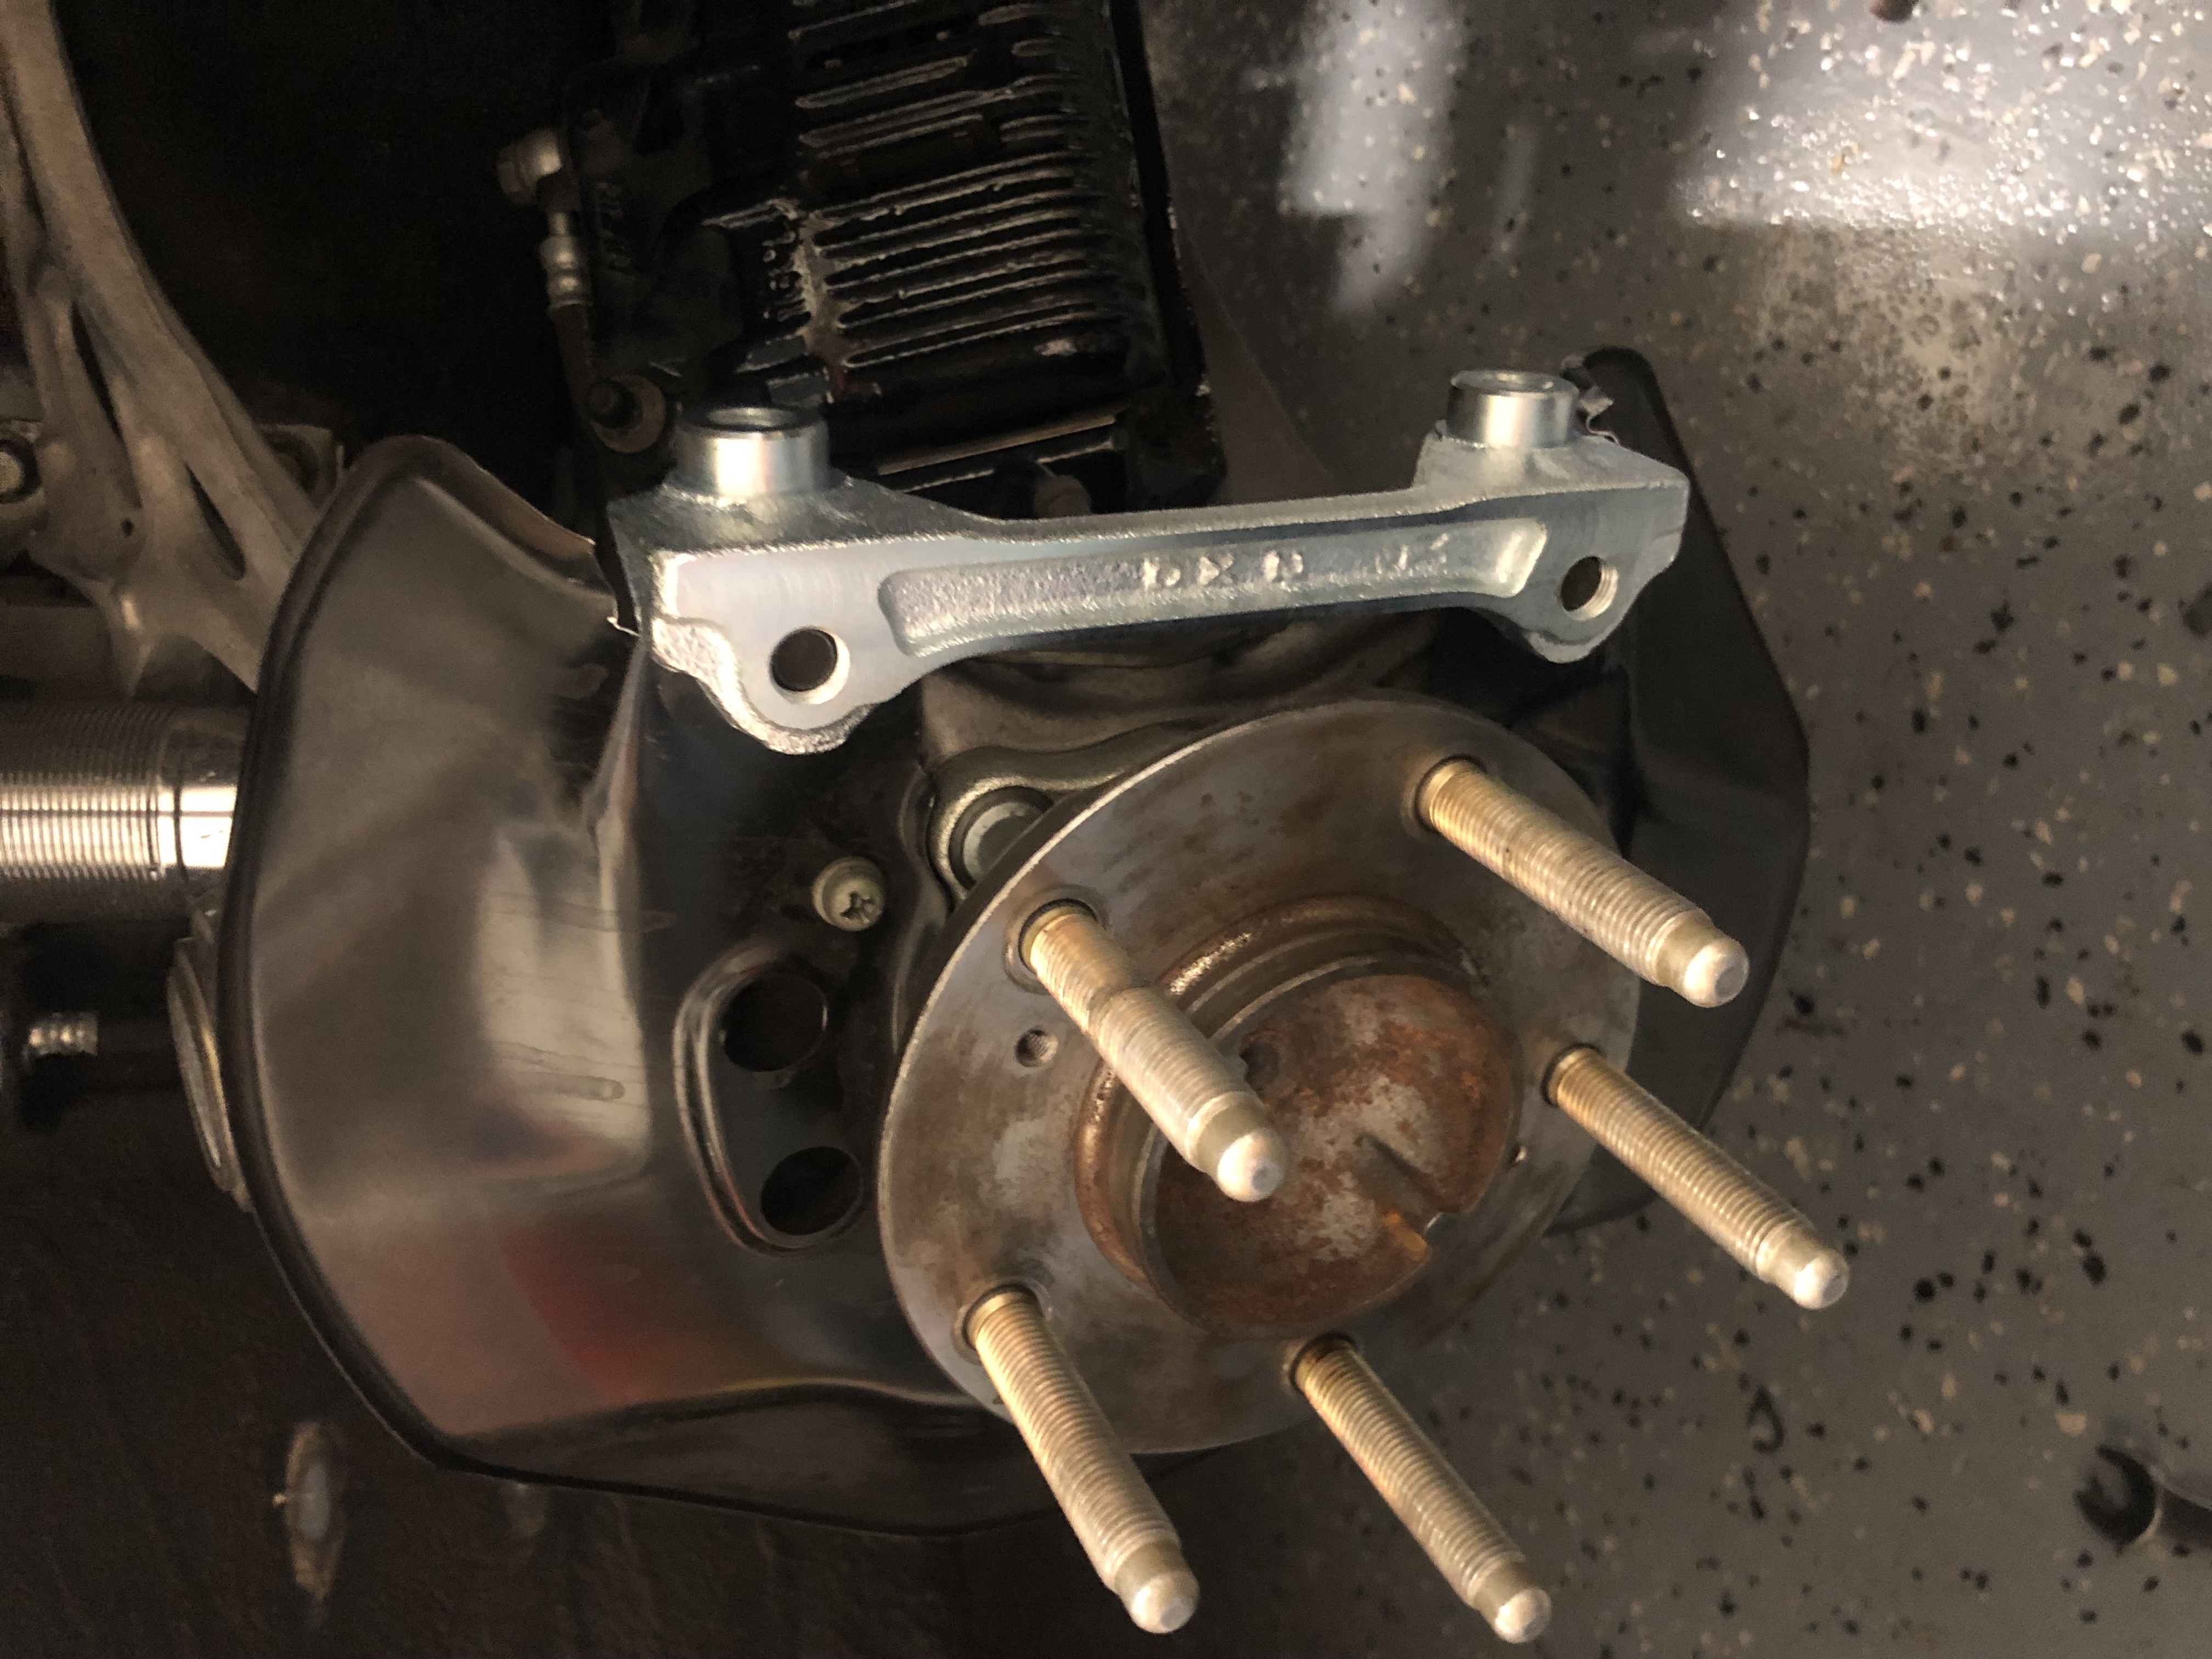
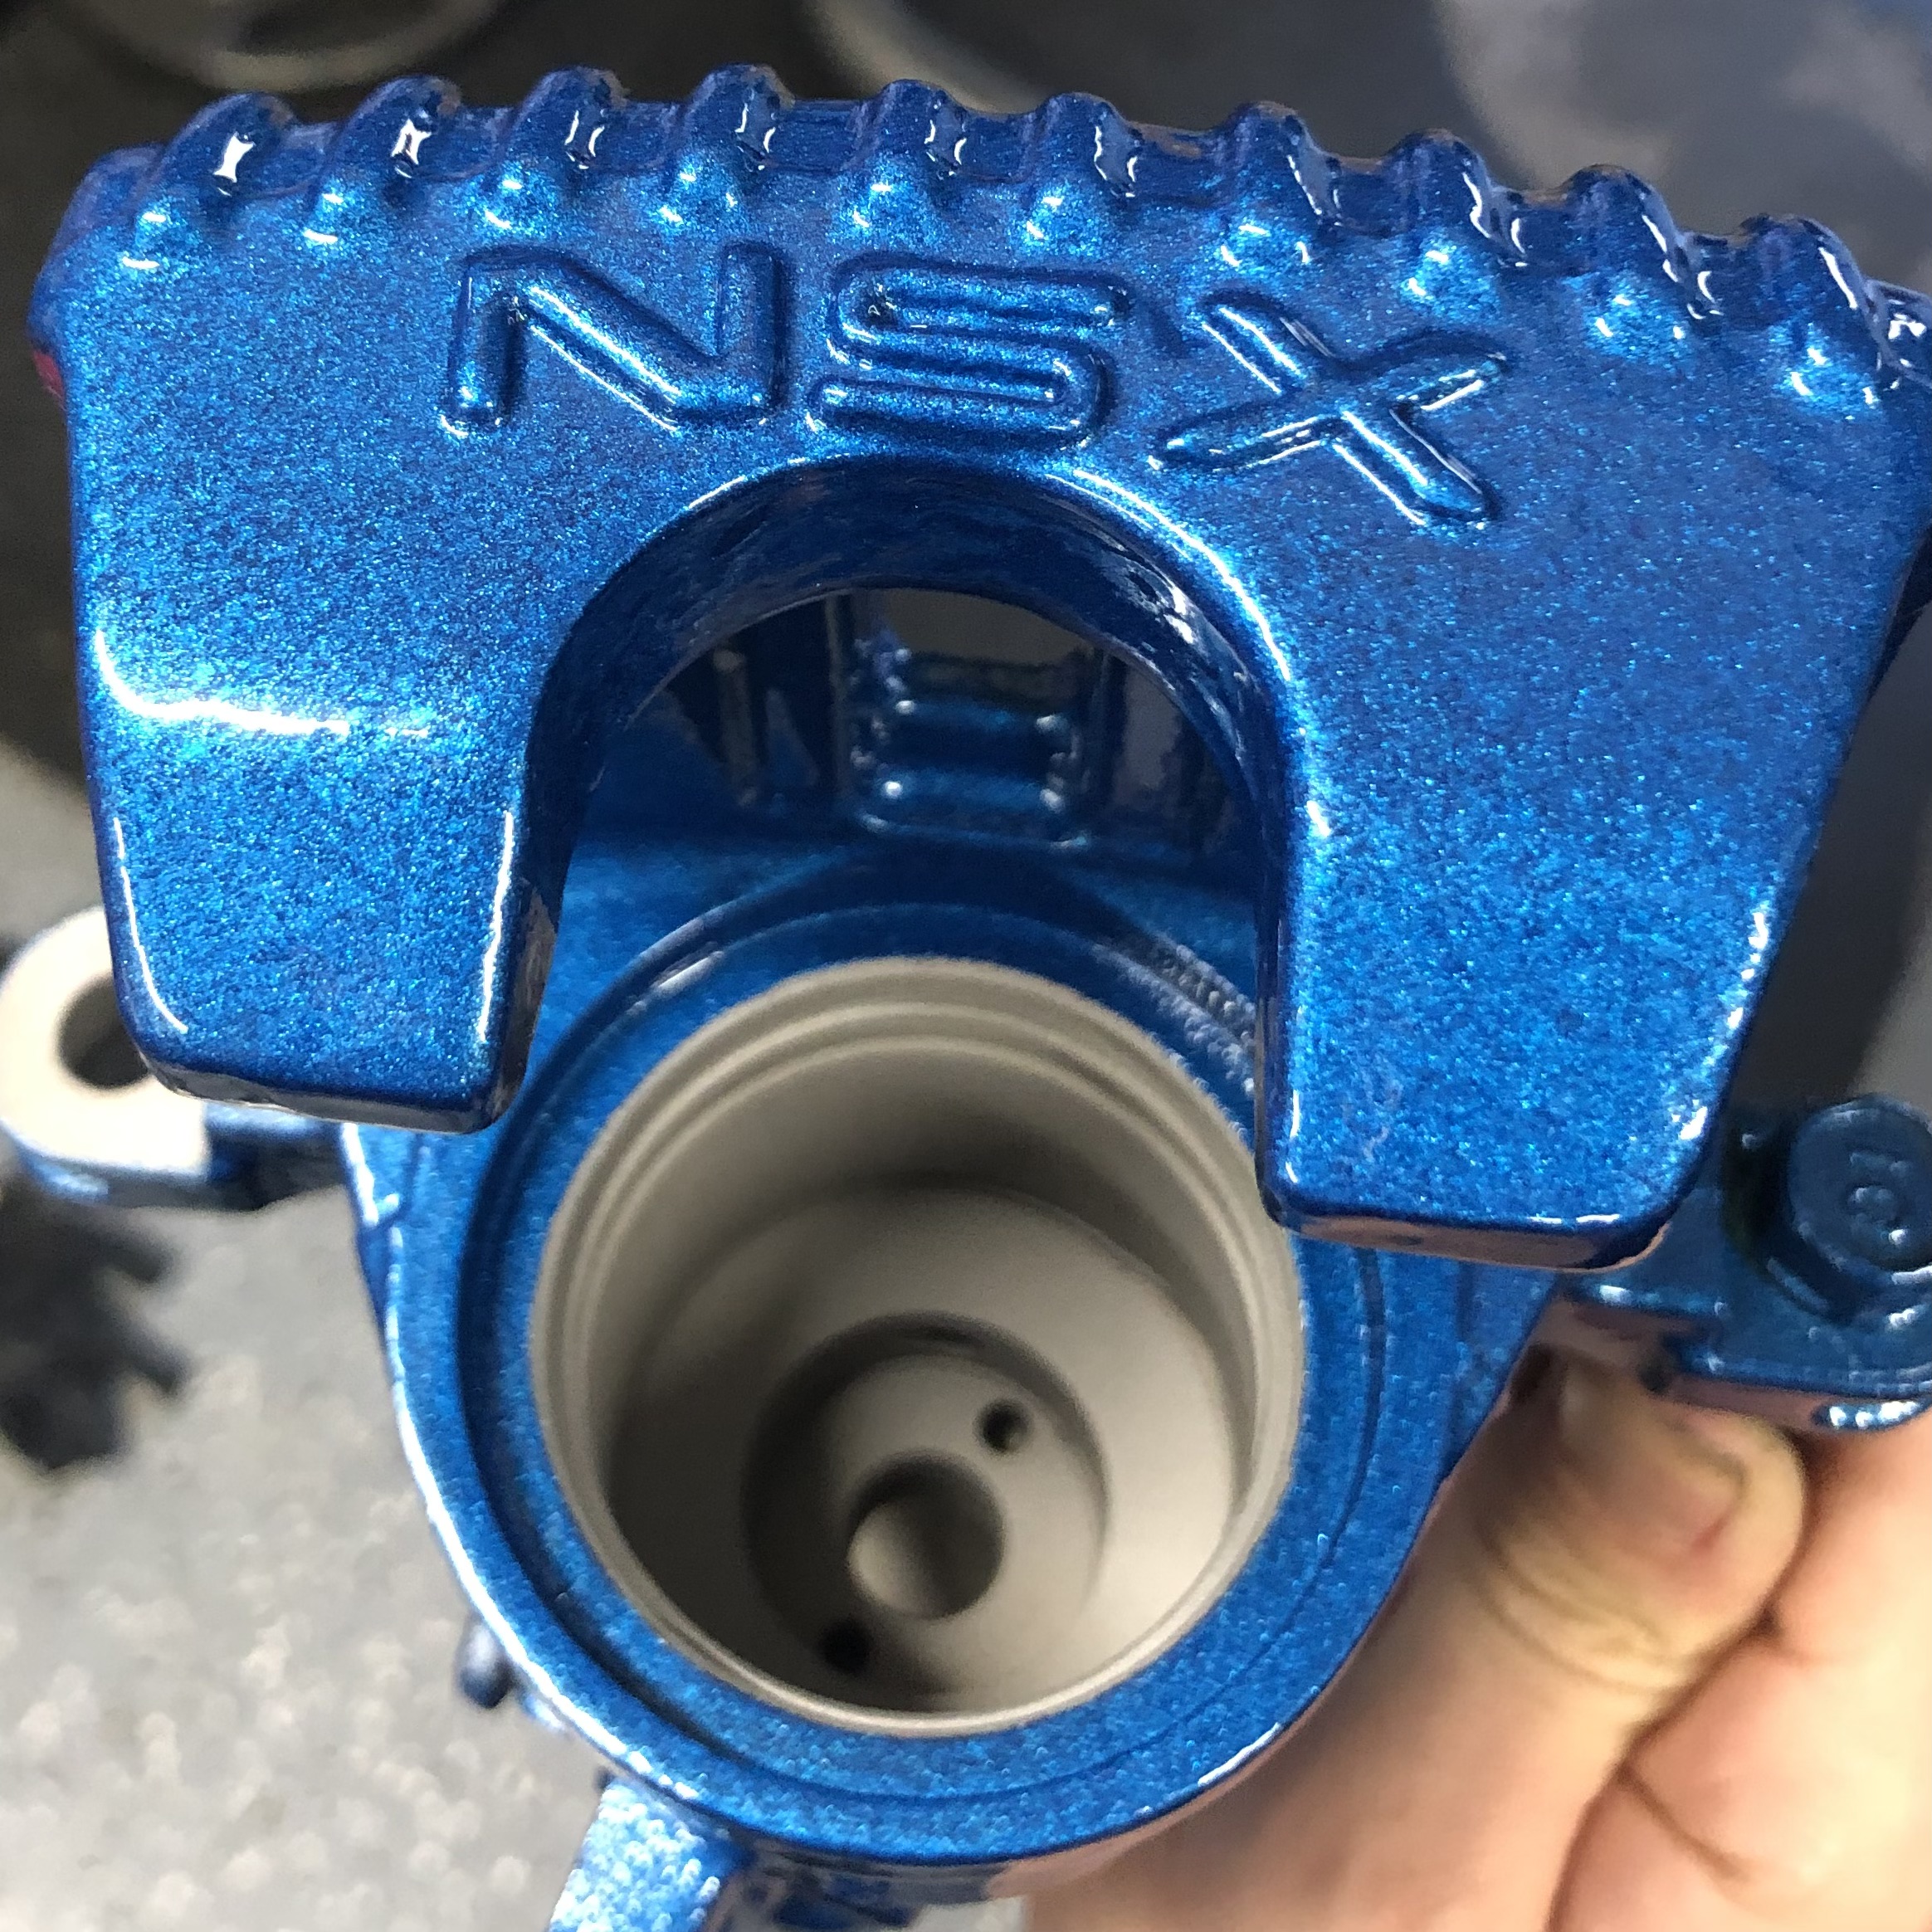
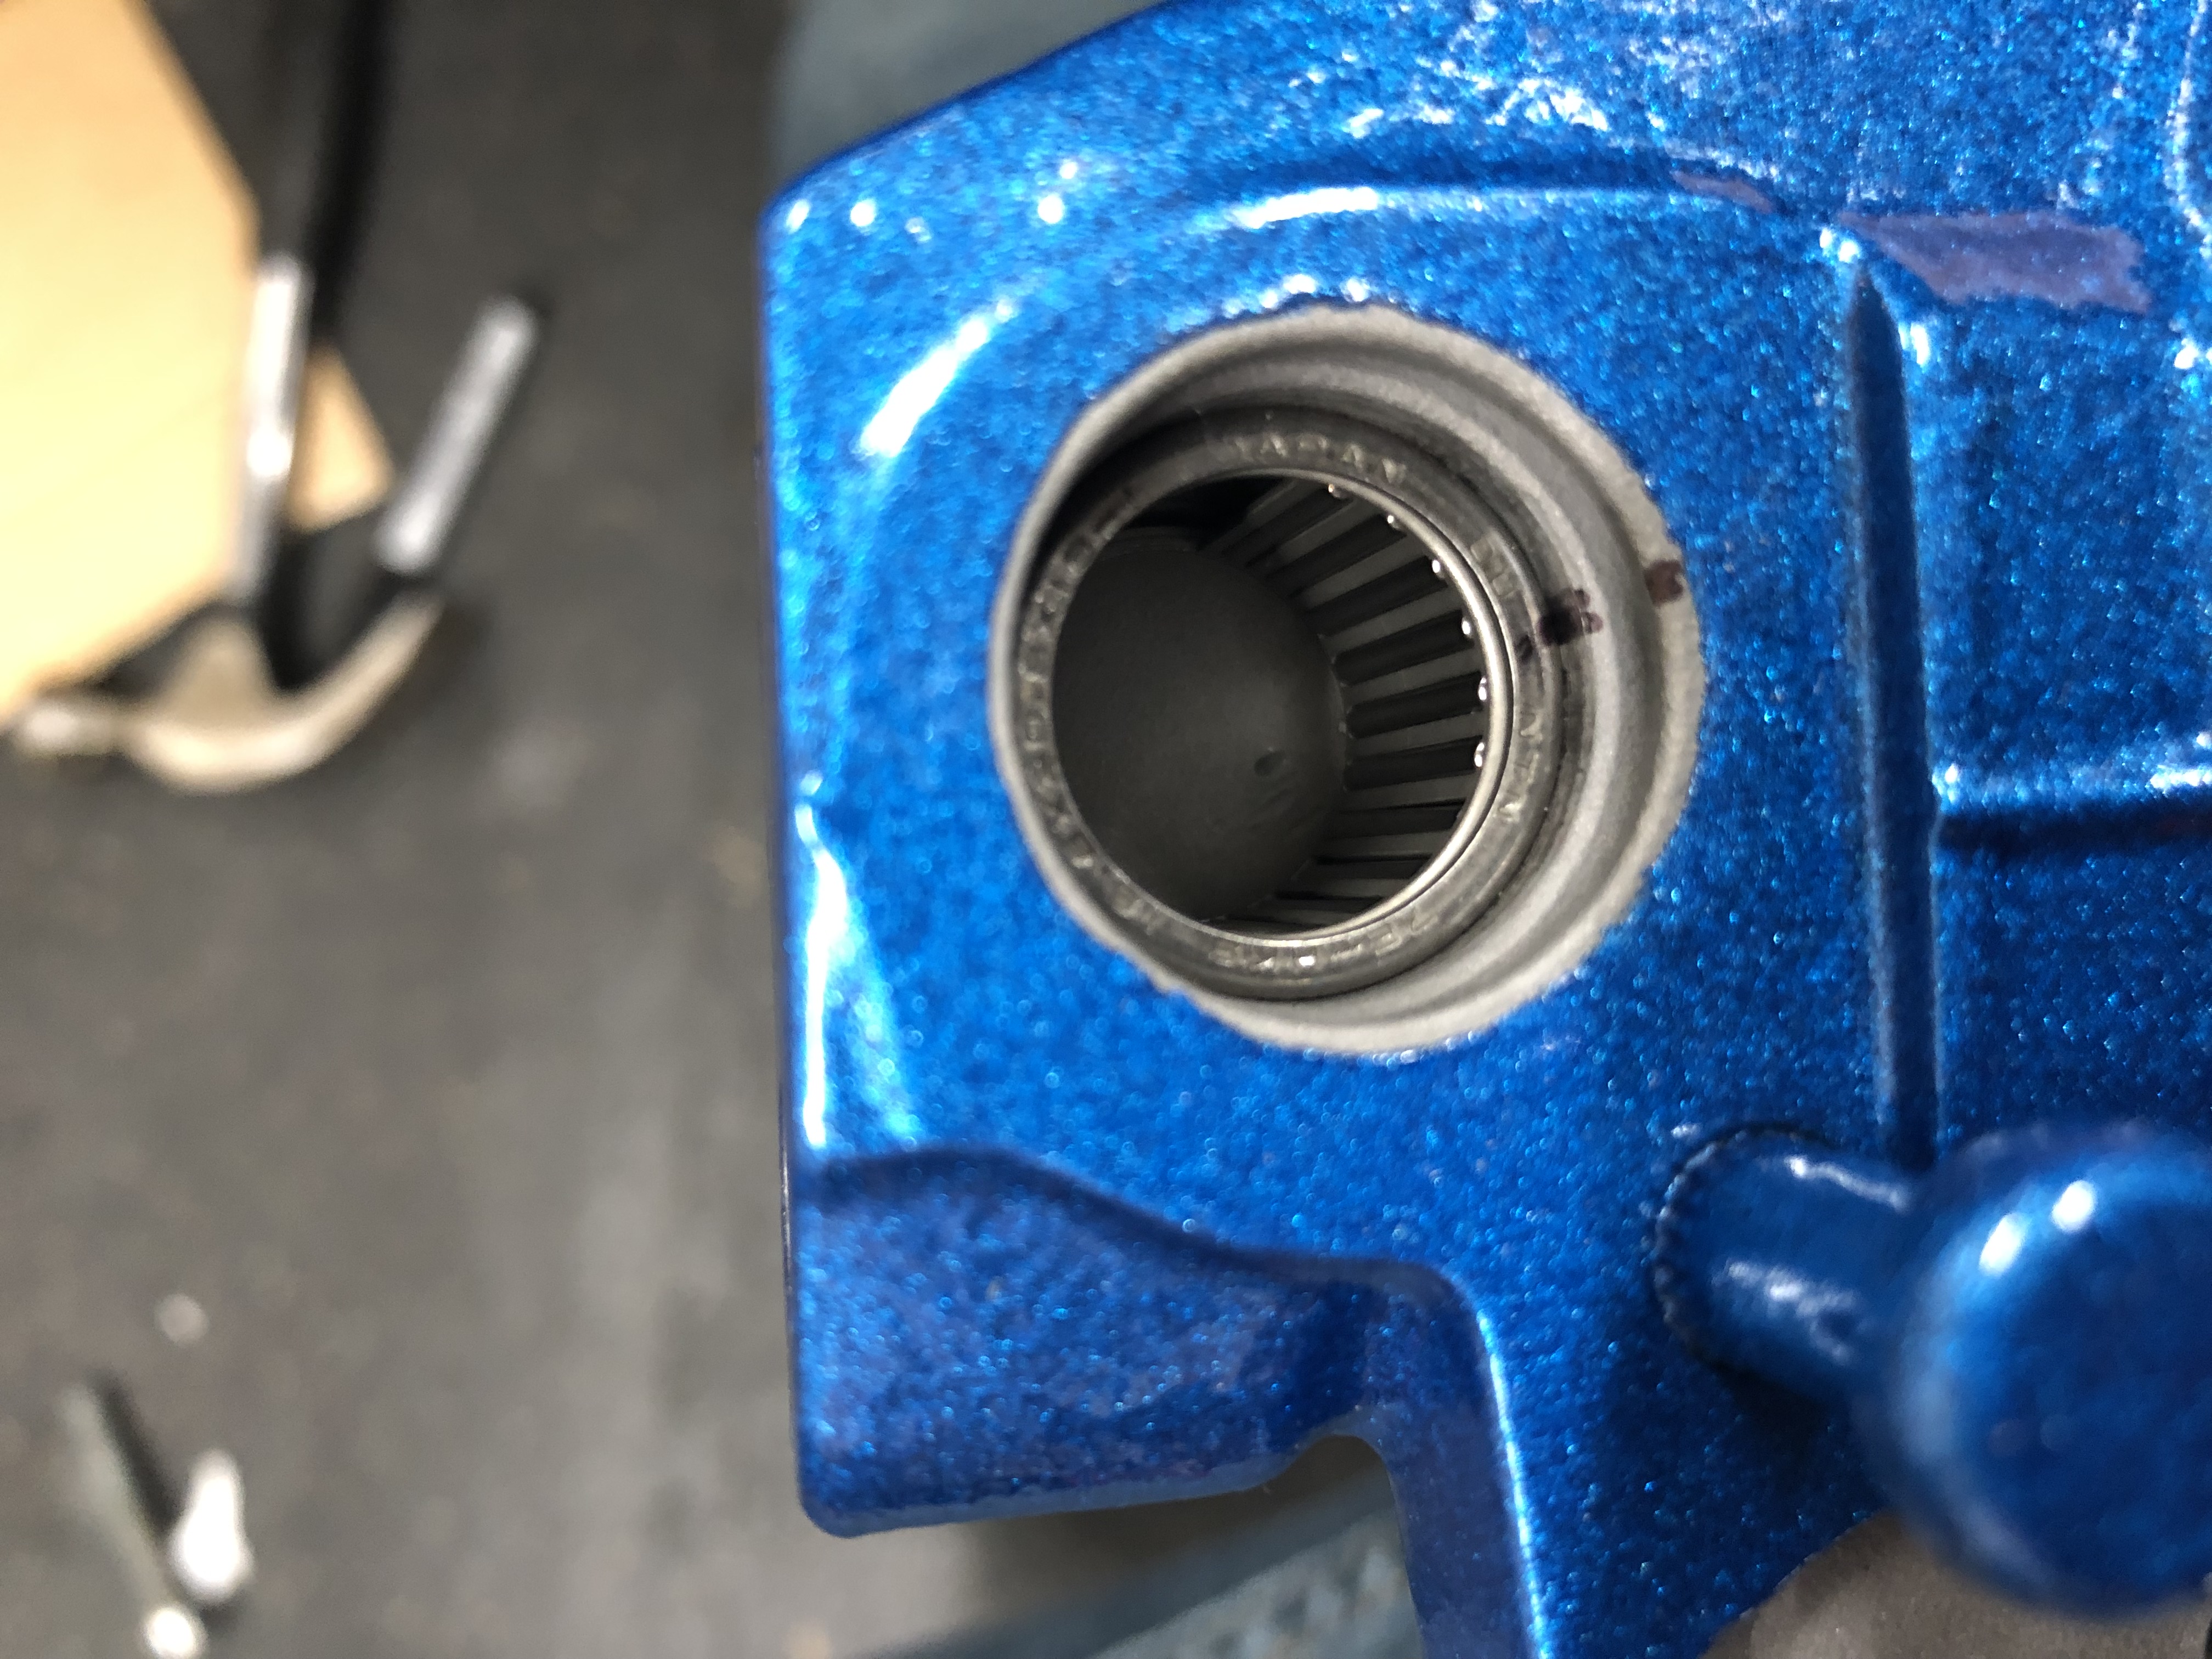
You can see here the limited clearance above the ball joint, which makes using a normal ball joint press difficult to impossible.

IMG_3752.JPG


And thats how I ended up replacing 2 ball joints that didn't need to be replaced. I used anti-seize paste on the new ball joint tapers this time so hopefully they wont be hopelessly seized if they ever have to come apart. My next fun task will be popping the UCA ball joints to make sure they didn't somehow ruin that too.

Driving impressions with the rigid collars and 4.23 final drive:

The biggest difference with the collars is it seems like there is less high frequency vibrations in the chassis. The suspension just feels smoother and it handles big bumps a bit more gracefully. Placebo? Maybe, but the reduced vibration seemed like it was immediately apparent even when I wasn't looking for it, so if you install them @Big McLargeHuge I'm curious to see what your impressions are.

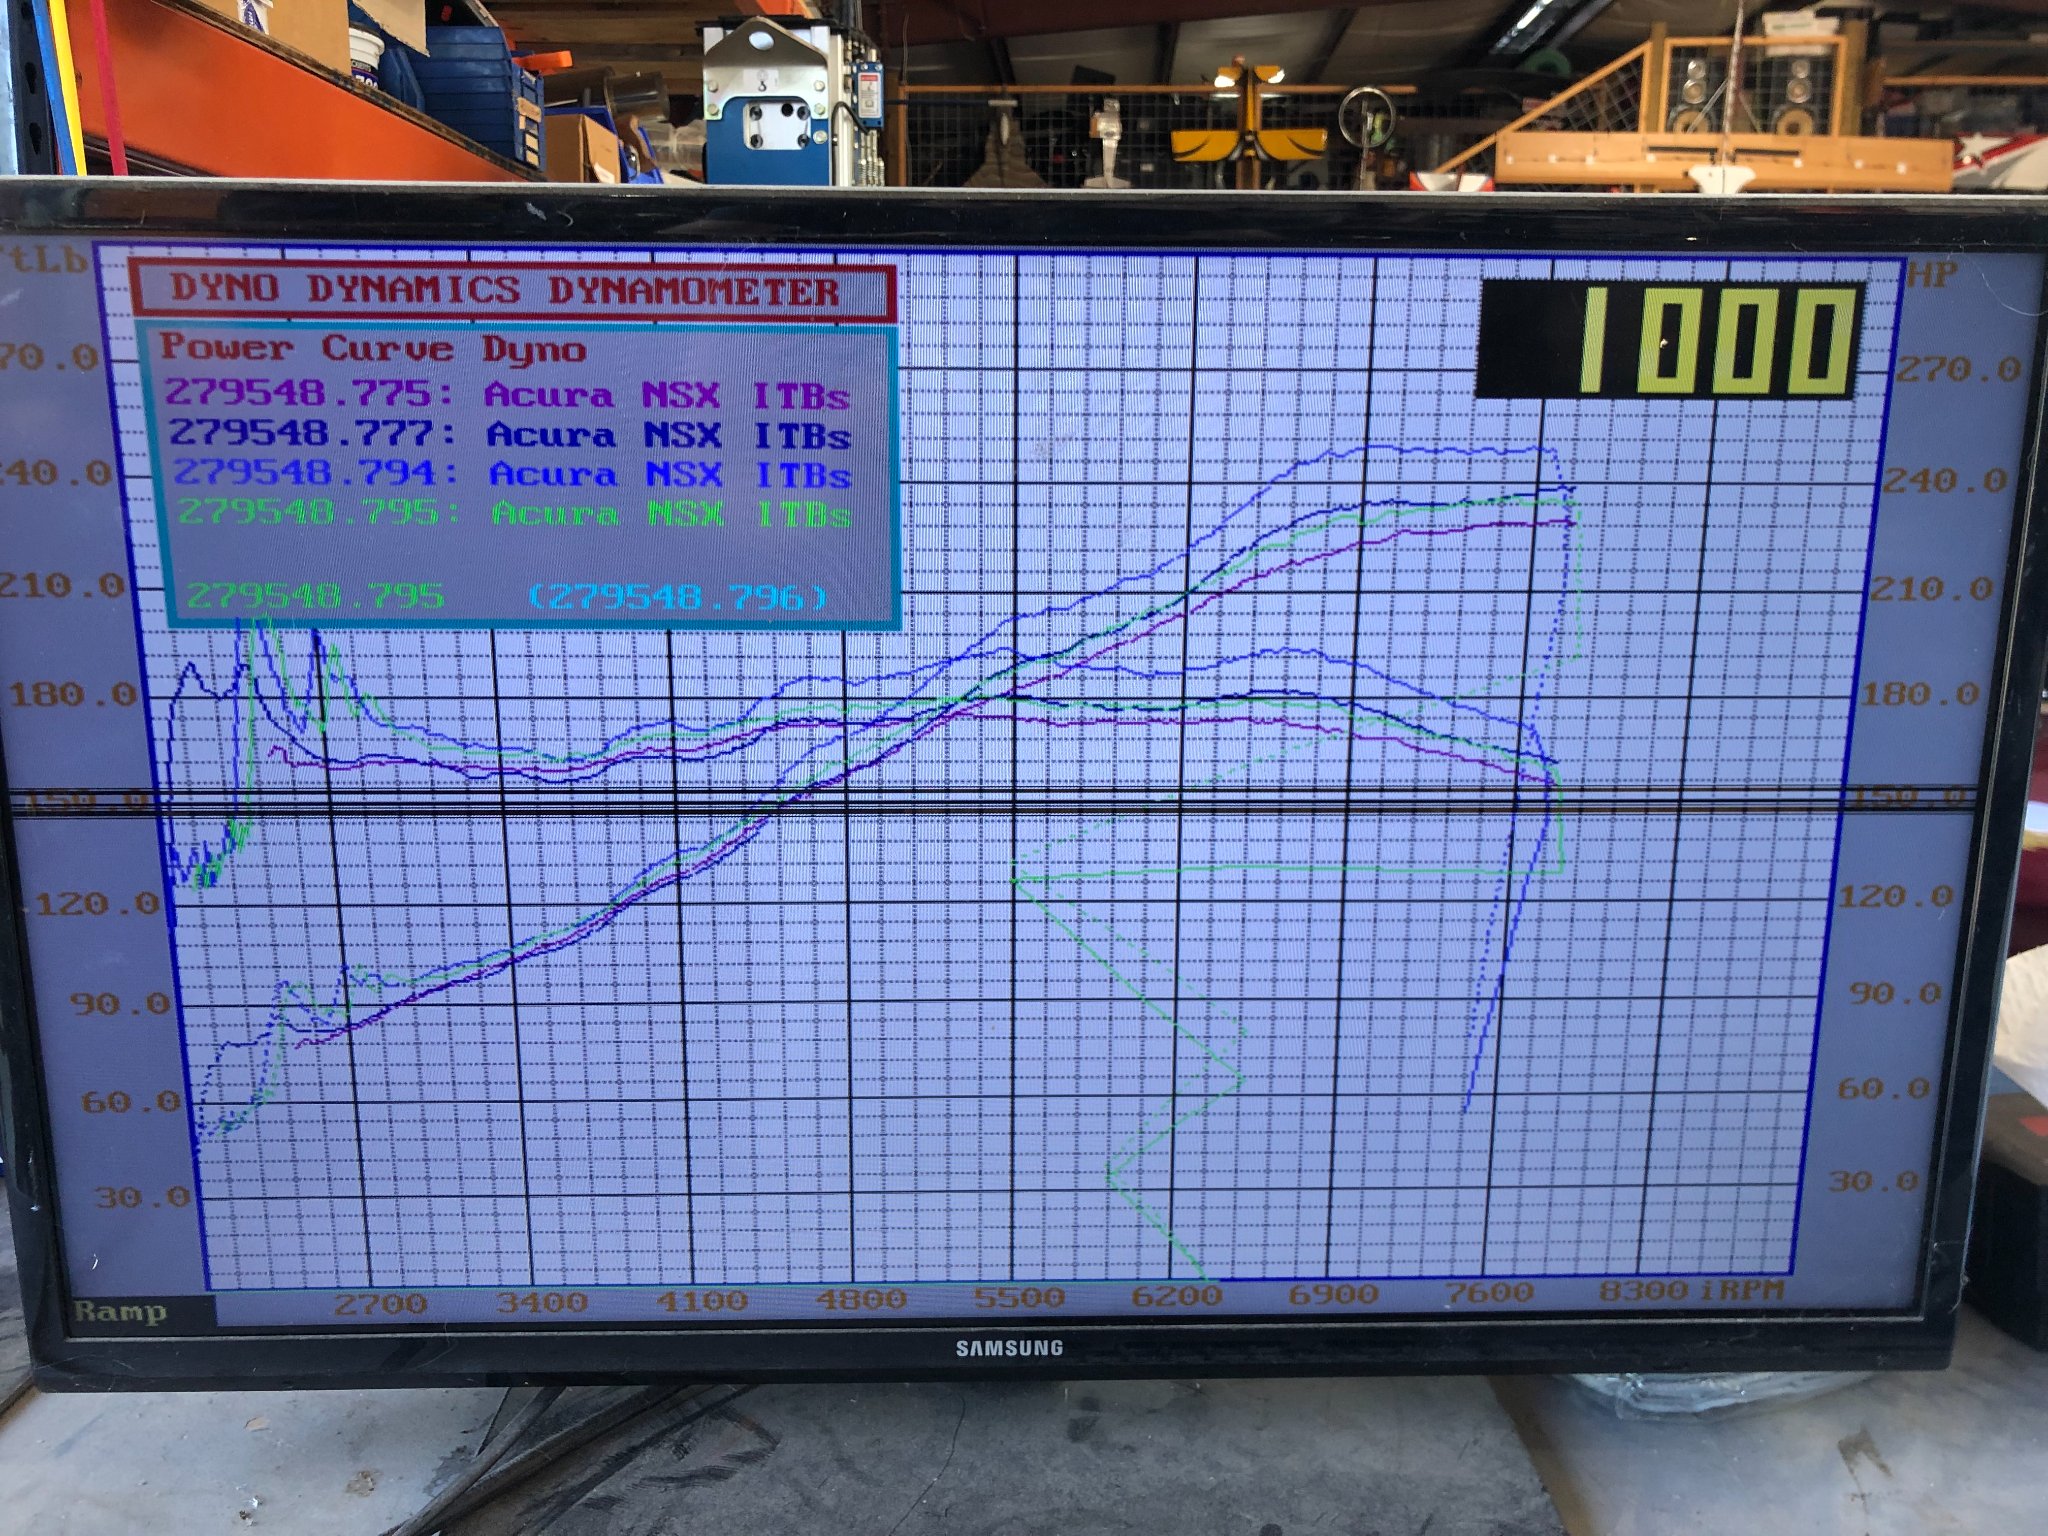
As for the 4.23 final drive, I love it, it feels like the car lost a few hundred pounds, and cruising on the highway isn't really any louder.

And for the transmission, 2nd gear seems completely fixed, I haven't had it grind at all yet and I've ripped the 1-2 shift pretty good. I have a very faint "winding down" type sound coming to a stop though that's speed-dependent so maybe thats some noise from the new final drive gears? I did an experiment where I used Pentosin FFL4 fluid at first, drove for 30-40 miles, then switched to Honda MTF to see if I noticed any difference in feel and I can't tell the difference at all so maybe the FFL4 is a good synthetic alternative to MTF? I drained it into a clean pan so I might try to filter it somehow and run it for a few thousand miles then get an analysis done on it. During the fluid change I cleaned out the transmission filter and found some small metallic flakes in it which is expected with new components, nothing too concerning there.
 
Last edited:
I can't believe I forgot to post here. I rented some dyno time a few weeks ago to play around with the ignition timing at wide open throttle.


512489d1658294429-1994-nsx-41-dynoresult.jpg


To add some context to the dyno results, this is a Dyno Dynamics setup that reads extremely low, a stock NSX would likely be in the 200-210whp range.


The lowest purple line was the baseline run we did before changing anything at all in the tune, basically just locked it down and ran it. It was about 230whp.


The dark blue line was with the sock filters removed from the intake trumpets but no tuning. Instant gain of 10whp to about 240whp.


The highest light blue line was after tuning, it was about 250whp.


The green line is putting the filters back on, which took us back down to about 240whp.


The long trumpets included with this ITB kit resulted in a fatter torque curve than I expected but also ran out of steam way earlier than I expected with pretty substantial torque falloff starting at about 6700rpm. I suspect this is a combination of trumpet design but mostly my restrictive stock cats and Pride V1 muffler setup so changing those is something I'll probably do soon. I found a used Comptech muffler for a good price and bought it, and am currently trying to figure out what catalytic converters I want to run. I could probably get away with going catless but that smells disgusting so I'd rather avoid that. [MENTION=20915]RYU[/MENTION] is sending me some of his 3d printed test trumpets so when I go back to the dyno I'm going to play with different trumpets to see how that affects things.

Bottom line is sock filters suck, and I need to hurry up and build a cold air intake plenum and filter setup.

Something I might do in the next week or two is pull the ITBs off and go back to the stock intake manifold, retune the car, then go back to the dyno so I can get an idea of how much power the ITBs are actually making on their own. I also want to test the RDX injectors vs stock injectors to see if there are actually any meaningful gains to be made there since the old Prospeed dyno tests were pretty sketchy.
 
I hadn't realized it had been almost a year since I updated this thread.

I've mostly been driving the car and occasionally going to shows or meets. And changing the tune up constantly.

I turned the narrowband O2 sensor feedback back on at low load a few months ago which has fixed some things and introduced other challenges. I got rid of the factory switching between open and closed loop fuel maps and instead use a target AFR multiplier table with the closed loop fuel table tuned to 14.7:1 AFR. When the AFR target is 14.7 the O2 sensors are on, and if its anything else they shut off and the table is load vs RPM so its a very nice predictable switch between open and closed loop. The idle has gradually gotten a little less smooth so I think the throttles need to be adjusted again. ITB problems.

A friend finally got his viper running again after several years of engine problems so we go to meets sometimes. Before I bought my NSX I was cross shopping with Vipers, I don't regret my choice but I am envious of the endless amounts of torque those cars seem to have.

IMG_4608.jpg


A coworker I have yet to meet has a really nice DA Integra.

IMG_6038.jpg


meet1.jpg


meet2.jpg


The wheels I ordered in January of 2021 finally arrived, in February of 2023. I was able to raise the car up quite a bit which has been really nice, I can't do the slammed stance thing again. This was after I'd gotten the ride height where I wanted it and had the car aligned and corner balanced. The car drives and rides so much better. The wheels also fit a lot better.

IMG_6610.jpg


IMG_6609.jpg


I converted to Denso Audi ignition coils with the Foundry3 kit since my coils were getting old and I don't care to deal with that when I finally get the new engine together. It took me maybe 5 minutes of fiddling with the coil settings in the stock ECU to get them running properly. Runs like stock, zero difference, and coils are completely weatherproof and $30 each, just what I was looking for. I can make ECU chips to do this if anyone else wants to do it but doesn't have a standalone. TBH I'd probably go with K series coils if I did it again since they have a better mounting mechanism but these work fine so I'm not going to redo it. (yet)

IMG_5738.jpg


Some of you might also remember my weird Porsche brake project from a year or so ago. That ended up being an expensive waste of time and money after discovering that no wheels would fit over them and I ended up just getting Spoon calipers up front and NA2 calipers for the rear.

The Spoon kit specific to the NSX has been discontinued but you can get the Spoon monoblock kit for other front mount caliper Hondas and use that. The included washers won't center the calipers perfectly on the rotor though, so I had to use my lathe to turn the thinnest included washers from 0.062" thickness to 0.042" which worked perfectly. If you could find 0.040" shim washers that would work too. I paid around $950 before shipping for thanks to the favorable USD to JPY conversion at the time.

I ended up needing 3mm spacers to clear the new wheels, these are temporary ones I had laying around and were replaced shortly after by much better ones with integrated hub centric adapter rings.

IMG_6648.jpg


Bleeding these was a little annoying. Eventually I just couldn't get much air out and the pedal was still a bit spongy so I just had to drive the car for a little while then go back and bleed it again to let the air work its way out from (presumably) around the pistons.

IMG_6650.jpg


IMG_6652.jpg


The rears were a little more work. If you remember, I got lucky and managed to find NA2 calipers in stock on Rockauto, then tore them down and painted them orange. Well, the Spoon calipers are not orange, so I had to strip them down again and start over. I did some research and found that the Ford blue color code "UU" from the 2003 Australian market Falcon was a very good approximation for the Spoon anodized blue and ordered this color from G2 caliper paint. I applied the paint with a small HVLP gun and it ended up looking really nice, about like if I had just had them powder coated, but with much better heat tolerance.

IMG_6967.jpg


IMG_6973.jpg


I replaced these little bearings again since I had to blast the calipers which results in media getting in the bearing.

IMG_6995.jpg


You can see here the color is pretty close. It's not perfect since the anodized finish is more matte but a matte paint finish on brake calipers would be a pain to keep clean and dirt would stick to it and stain it badly. Also better spacers.

IMG_7020.jpg


IMG_7036.jpg


I used Carbotech 1521 brake pads which feel darn close to stock once bedded in, and apparently Carbotech compounds are compatible so I can easily switch to track pads if I ever want to do HPDEs or anything. Overall I'm pretty happy with this upgrade. I'm waiting on a new NSX ABS module before I replace the ancient original system but I suspect I'll be waiting another few months at least for that to arrive so I can finally finish my brake system modifications.

The next development is going to be a "double chipped" ECU. I was able to get my hands on a few programmable Hitachi H8/532 microprocessors which is the main processor in the NSX ECU, so a few small critical code changes will remove the remaining limitations of the ECU and allow me to do pretty much whatever I want with it. The first thing will be running the ITB-specific code out of the internal ROM which will allow it to run much faster, and from there I'd like to try to implement a modern full time wideband PID control loop for the air fuel ratio.
 
Last edited:
Back
Top