• Protip: Profile posts are public! Use Conversations to message other members privately. Everyone can see the content of a profile post.

My let's see where this one goes "build" thread

The Honda logos look way better than the Acura ones. Unfortunately, it comes with a price. You have to school people about North American Honda/Acura and Honda Japan. I was even asked if I had a Honda with an Acura NSX body kit once.

This is so true. Second day I had the car I’m walking into a store as 2 USAF members were walking out:

Kid 1: oh man look, a NSX
Kid 2: nah man look, it’s just a Honda

The car show yesterday was a long day of explaining why my Acura has Honda badges, etc. And then of course the follow up is always, “Well I don’t understand, why would you do that?”


Sent from my iPhone using Tapatalk
 
another alfista ..my first car was a silver 80 sprint veloce...
 
Hah, classic. But they serve our country so we’ll let it slide... :biggrin: QUOTE=NSX_n00b;1976132]This is so true. Second day I had the car I’m walking into a store as 2 USAF members were walking out:

Kid 1: oh man look, a NSX
Kid 2: nah man look, it’s just a Honda

The car show yesterday was a long day of explaining why my Acura has Honda badges, etc. And then of course the follow up is always, “Well I don’t understand, why would you do that?”


Sent from my iPhone using Tapatalk[/QUOTE]
 
I have been working way too many long days so I haven’t had a chance to do anything, found 5 minutes to put the carbon fiber radiator cooling panel on but that’s about it

4ed61663cb623d3711ad9b371e721b04.jpg


I need to find a day to get the Type-S steering wheel installed and get these on:

cc3adf7cc2d66d7ced5100ea89fb92d8.jpg


But it may have to wait until after I get back from Europe in September.


Sent from my iPhone using Tapatalk
 
My let's see where this one goes "build" thread

Took 15 minutes last weekend to install this engine chassis brace from Cedar Ridge Fabrication aka [MENTION=9035]titaniumdave[/MENTION]

93fdad65359bcac03aff4a5adcc9a5ee.jpg


Sent from my iPhone using Tapatalk
 
Last edited:
Door emblem looks really good! Do you have a picture with the complete car?

While she was out of the garage this weekend I snapped this really quick...it's the best "complete car" photo I have at the moment with the door badges and CF Side Vents in. She's a bit dirty, and damn do I need to clean the wheels

NSX_side.jpg
 
Plans Change

I know it has been a while and this is going to be a long one so bear with me...

Those of you subscribed to @Honcho build thread http://www.nsxprime.com/forum/showthread.php/207052-Honcho-s-Long-Road-to-Imola-Type-S-Zero may already know I have been lending a hand here and there with his project. I am having a blast working with him and helping him start to bring Project S-Zero to life. The NSX education is absolutely priceless and I can't thank him and his family enough for allowing me to continue to work on and learn from this project. His car is going to be something truly special when all is said and done.

It didn't take long for Honcho to convince me that I'm really not "that" far off of having a USDM version of a Type-S. Yes I know the Zanardi is basically that but I digress. After talking things over with him and figuring out where I stand and bouncing a few ideas back and forth I have settled on a new way forward. I am going to start the process (albeit slow) to build up my car to be the sister car to Honcho's. He will have a USDM Type-S Zero and I will have a USDM Type-S. There will obviously be some differences between mine and a real Type-S but it will be close enough.

Here is what we have identified will be needed for my '91 to become a Type-S (green items I have and are installed; orange items I have but need to install):

  • Type-S Rear Sway Bar - On it's way from Japan now
  • Single-Pane partition Glass
    • This will be skipped, not sure it's worth the trouble
  • Type-S Lightweight Rear Spoiler (PN 900ZZ)
    • This will be one of the last things done when the $$ is there
  • Type-S Battery/Battery Tray/Holder
    • I have the Shorai battery in now but I am strongly considering pulling it out and going the Type-S route
  • Type-R Engine chassis brace
    • I have the Cedar Ridge Fabrication version and I will keep that in for now
  • Type-R Engine Cover
    • The plan is to eventually buy Honcho's Coupe Cover and DIY my own Type-R replica
  • Type-R Coolant Overflow Tank Silicone Cover
  • Type-S Suspension
  • Type-S Door Emblems
  • Type-S Rear Badge
  • Type-S Steering Wheel
  • Type-S Steering Wheel Hub
  • Type-S Horn button
  • Zanardi Shift Lever/stalk
  • Type-S Shift Knob
  • Type-S Shift Boot
    • I have the Type-R mesh one and I like it so I'll stick with it
  • Door Switch Panels/Center Console/Air Vent in correct color
  • Type-S Center Taillight Piece
  • JDM Tail Lights
  • Type-S BBS Wheels
    • This will be something I go back and forth on for ages as this is easily one of the most expensive items for this conversion but I LOVE the way the car sits right now on the bronze Prodrives
  • Recaro seats
  • Perforated Door Cards
    • I am going to DIY these with an extra set of door card inserts I have. With help from @MexiRicer we discovered that Ultrasuede Cobalt Blue or Alcantara Tobago Blue are the closest match to the OEM blue color used in the Type-S
  • 3.2L Engine
    • This will just never happen, but right now with Headers, Exhaust, DF Intake Scoop, Overbore TB and Dali Hot chip I'm closer to the HP of the 3.2L than a stock 3.0L. I will take some of Honcho's suggestions for a few other modifications to get me closer and call it good.
  • 6 Speed Transmission
    • I am really enjoying my 5 speed with JDM gears and Type-R Final Drive so I'll stick with that for now, maybe one day if the stars align I will consider upgrading to a 6 speed.
  • 1997+ Brakes
    • Honcho is teaching me how to rebuild my brakes via his rebuild method so I will do that in the early part of 2019, and maybe one day upgrade to the 97+ brakes.
Items That May Be Needed:
  • Type-R Front Upper Chassis Brace
  • Type-R Front Lower Chassis Brace
  • Type-R Door Arm Pads
  • Type-R Center Arm Rest
  • Type-R Black A Pillars/B Pillars/Visors/Headliner

The good news is a lot of the cosmetic items I already have. The bad news is the items I still need are $$$ and the engine is due for some of the major maintenance items next summer; hence why this will be a slow process.

The plan is to also wrap the car in a color as close to B-82 (Phoenix Blue, Paul Ricard Blue, Circuit Blue) as possible; there is also an aftermarket sub and amp I will need to remove and go back to stock. And not that it is needed for a Type-S, but I'll probably remove my antenna as well. I don't use the radio except for the GROM Bluetooth so I don't need the antenna.

I'm still working a "Phase" plan that will keep my wallet happy but allow for progress over the next few years. Once I have a better idea of what that looks like I'll post it up.
 
Last edited:
What a great start so far Spencer! I love the detail of your build thread and I am definitely subscribed for what's to come. Let me know if you need help sourcing parts or part numbers, just helped a buddy win a set of used type-s wheels on japan auctions and in case you decide to scrap the DIY door cards, I have the part numbers with your name on them :tongue:
 
I didn't know honchoitis was contagious....:biggrin:
 
Spencer is underselling his NSX- his car is one of the cleanest I have ever seen. Seriously, the bolts in the engine bay look like they just rolled out of the factory. I think his detailer has wizard powers or something. Spencer is quite a capable wrench and we'll be turning to his car in the coming months, including some Type-S and S.Zero dual DIY features! Seriously though, his project is going to be one of the coolest NSXs out there. LBBP is nice, so is Monte Carlo, but B-82 Paul Ricard blue? No one does that!

I didn't know honchoitis was contagious....:biggrin:

We are going to drag the forum back to life one view at a time!!! :D

[*]Honcho is teaching me how to rebuild my brakes via his rebuild method so I will do that in the early part of 2019, and maybe one day upgrade to the 97+ brakes.
[/LIST]

Just, ahem, skip the part about boiling the paint off the calipers...:redface:
 
[MENTION=34522]NSX_n00b[/MENTION] Spencer! Dont know how i missed this thread! You stopped emailing me so i assumed you found the car you were looking for. Glad to see the progress you've made. Looks good!
 
What a great start so far Spencer! I love the detail of your build thread and I am definitely subscribed for what's to come. Let me know if you need help sourcing parts or part numbers, just helped a buddy win a set of used type-s wheels on japan auctions and in case you decide to scrap the DIY door cards, I have the part numbers with your name on them :tongue:

When I figure out my build plan I will definitely be reaching out...the door cards are very very tempting right away. Awesome to hear there are sets of wheels out there too!

I didn't know honchoitis was contagious....:biggrin:

It is quite contagious but a bug I am happy to have caught :)

Spencer is underselling his NSX- his car is one of the cleanest I have ever seen. Seriously, the bolts in the engine bay look like they just rolled out of the factory. I think his detailer has wizard powers or something. Spencer is quite a capable wrench and we'll be turning to his car in the coming months, including some Type-S and S.Zero dual DIY features! Seriously though, his project is going to be one of the coolest NSXs out there. LBBP is nice, so is Monte Carlo, but B-82 Paul Ricard blue? No one does that!
Just, ahem, skip the part about boiling the paint off the calipers...:redface:

I'm excited to see where 2019 takes both of our cars.

Haha, I mean the paint did technically turn gold :biggrin:

@NSX_n00b Spencer! Dont know how i missed this thread! You stopped emailing me so i assumed you found the car you were looking for. Glad to see the progress you've made. Looks good!

Thanks man, and thank you again for all your help and advice when I was looking earlier this year it was extremely helpful and I've tried to pay it forward to a few people looking at NSX's this year.
 
Beautiful car that's only going to get better! Love the thread and I appreciate you always reaching out for advice. I don't think we live to far apart so if you ever need a second set of hands that Honcho can't cover please message me, I would be happy to help!
 
A Plan Is In Place

Well it took...a month? Wow, didn't realize how long that took. Anyways I think I have finally settled on a Phased plan of attack for my Type-S project.

Phase 0: When I bought the car and the items that came with the purchase
Phase 1: The items I have purchased since May 2018 - a lot of which are still not on the car...oops
Phase 2: Will be most of 2019, it's light mostly because I need to get some major maintenance items done (TB/WP, LMA's, ETC)
Phase 3: Will be the final major pieces to bring Version 1 to completion
Phase X: These items will have to be purchased if/when they are found
Phase Y: These items would complete Version 2 if I decide to go that route...basically the '02+ Type-S Style
Phase Z: These items would complete Version 3 and we'll call this "Pipe Dream" as I just don't see myself spending that kind of money for such small details.

I'm sure I am missing a few things so if you see an error in my research please let me know. I have a few other things planned that aren't listed after discussions with Honcho but it will come down to timing and money if those happen. I also need to decide if I'm comfortable selling off 1991 OEM parts to help fund some of this or if I want to keep EVERY stock piece. There are some aftermarket items that will come off the car to pay for their replacements (Exhaust and suspension to name a couple).

Without further ado:

Phase0-1.jpg

Phase2-Y.jpg

PhaseZ.jpg

Version1.jpg

Version2.jpg

Version3.jpg
 
My let's see where this one goes "build" thread

Because everyone loves pictures...a good amount of Phase 1 parts that still need to be installed...

CRF Crank Pulley Shield
CRF Short Shift Kit
Type-S Rear Badge
Coolant Tank Cover
Antenna hole grommet
Trunk stopper rubber
Spare Fuse Box Cover
119c81210d90661774694eb36925ec6e.jpg


Brake rebuild kits...more items from Japan for the brake refresh are on the way
f7c25d254406ed838479549bdb8e37bd.jpg


Type-S rear sway bar
f9d7f69b811c56ea56886c16cfbf3d0b.jpg


New version LMAs
edaaa5e99b123ed5ccf00c755a255a91.jpg


Type-S Steering Wheel parts
ec4e5d45f36f6d878f71938240755aa2.jpg


Type-S Steering Wheel
a6df6b525b3de188aa9fd43ff93ea15e.jpg


New rear fender liners
2f90e5eb6c24f5bdf5e26bc8110b0e1e.jpg


NC Auto CF Radiator Stays
7b202540749233c51b23b021e1ebc28c.jpg


Carbon6 Series 2 Mirrors
40e5fbcd63d959a1cfafcea3327c11ac.jpg


Sent from my iPhone using Tapatalk
 
Last edited:
Car looks really good.

Hoping to someday grab a set of those mirrors. Can't wait to see them installed on your NSX.
 
I dont know if I have enough popcorn to last me until 2020 so cross off Phase Y as a possibility :tongue:

Haha. I have all of the chassis pieces (except the bumper) and I might need to sell those to help fund Phase 2/3 pieces so Phase Y might go the way of the Dodo anyways. Though I do kind of like the idea of the all black interior kit.
 
Interior Update

BLUF: I made my own Type-S Style Blue Door Cards for less than $100.


With the weather making for a rather chilly garage lately I decided to work on a DIY project indoors for the car. I had been trying to source OEM Type-S blue door cards for probably 9 months but was having no luck. I was told they were NLA new from Honda so I didn't even try. So the only option left...I will have Type-S style cards made!


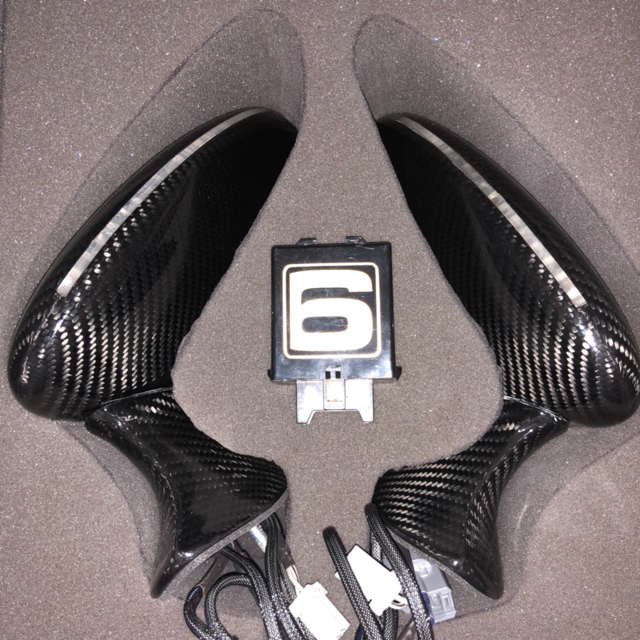
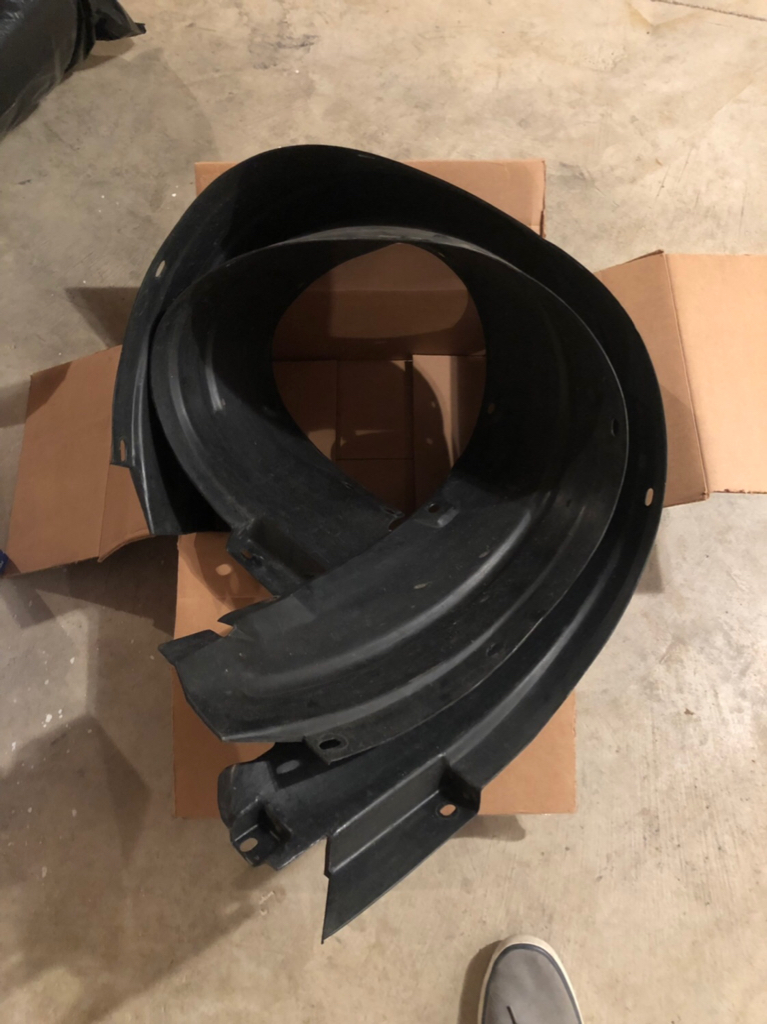
I sourced a used set of door cards (I really want to keep my originals):


4_9MVpHv_1h5iU8q4R767n9b_oa3IhNl5hy2RQ7gV_ypz2ZxN7WgV-t4XqqidQ2stVdy972fpJTmFtiCjrZN-BCQ5t02dhymXK-0pQyrecthcJqendPsbIOeymvK_jhnLWCL09XW9276V02T4ckdri9sW6hm6x22YFqTHhMQcyL57U0H_yg1g4qyXl92ZE7xQ8XA36Eht88HODyDqZYzidG4Wb6hvFy0ByZkQjkgiGzyW1oQ-CNUT5T3o2GPv2WNKqDv6tNJAdSxjyOV_twXRDZDIs3JZjn-Tti3vRHnH5u_PeTQhxtaWY_StaNCsb408a2ShMvll3AsahexP0vdHQdRgYtPj66PLxTNBjHpyvk06hhk_A8HmrQGkvD3APKpJXQvDxy6bYUC1MJprYqYjLMcM5t1XYciaFkhOisGdAwzTPPVYlIcFXPvYuAoiagmAESByZQ3LPqzZugXNj17fCGuJED731dP7h7aqCTSU51xPEPfNhTPuqVu0Jq6tEHGj-kNBDKUdeYAL8cZFNkdfZHwlNyA-uobgM17pgPeXhh_a-z2PFXGKkxJqy9lK27S7EGzOFsuS5g3eIeOmcoWPIPVl8aBi7JC-6jtDP2mMopFbKksL70RsifMSSyMOXQ72I1pjQj-bTbvrZXpXOwa-T5L-rgpOwGC_eydxS1U7yxGymGRmV9qQjkg3FE6cych02h4RmRYMvUab7OawJwymTE=w685-h913-no


I got several blue swatches from Toray of their UltraSuede product and asked @MexiRicer for a favor. I sent him the swatches and he compared them to his OEM Blue Door Cards. He has a few swatches of Alcantara so he compared those as well. We came up with an Alcantara option and an Ultrasuede option that were pretty damn close under most lighting conditions. I started watching a site that @Honcho alerted me to for Ultrasuede remnants but was having no luck finding the right color there or eBay. I knew at this time I only needed about a yard but I was hoping to find close to 3 so I wouldn't have to source the material again for the Recaros later on.


I went to a well known local auto upholstery shop, took in the door cards, told them they were for a 1991 Honda :smile: and that I wanted blue ultrasuede. I was only going to be able to order whatever blue his suppliers would supply...strike 1. Then he told me that I would have to order at least 2 yards at $120/yd. Thanks to @Teej I knew I only needed about 1/2 yd...strike 2 against the shop. The icing on the cake, he wanted $50/card to do the job!!!! $240 for fabric + $500 for material/labor = $740 BEFORE TAX! Plus what I paid for the extra set of door cards this would make my replicas more than the cost of the real ones. STRIKE 3. New plan...I will find material and make them myself!


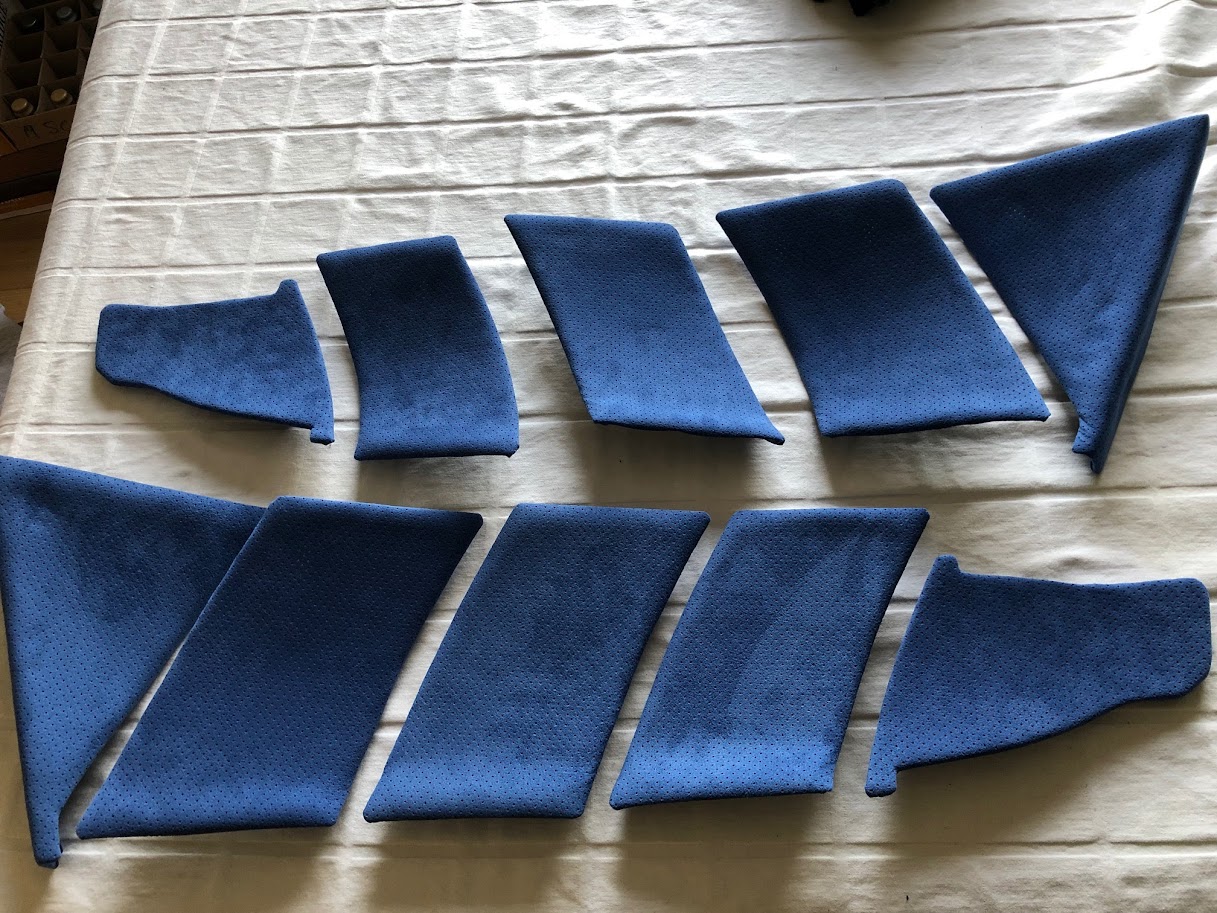
Then MexiRicer delivered an early Xmas gift, he found a product on eBay that was already perforated and the sample he was sent was a DEAD ON match for the OEM color in every light. I immediately ordered 3 yards ($69/yd) and a few weeks later this beautiful blue ultrasuede showed up from Korea:


5vIU392YB6BWutFAeA-4R6GHUeKrYCgKV3_6UttwKoe6_XmGm_VC4GJ1a3QP-2movIoCT0KSKNhdtjMSwMTFINZs2fJijm8uxKw63FEyMIZvPUhcnZFa-3VCAPZ_YfITgVVPJyJWeQme-fET0SJ72-jKbBUU0gEVMET1FPJfxfiqI4LR0txm45EAAHEThcM6rYJ_yATCWK2oiEH3lpnsCRM3CpSp2_tJdxkQsTS3qkRI-aZ8QDvj4ZmMbx2tHlSGGzsUr-y3AMUq2sSbB-__TTVmAMMFAz9yvb22zZIMimFoeTueF15dUGrBPb8zW3WKEuykYXfgnfgT0O17rQx4lX2oE4yYNbTLodqOBjoJzQ_0BCeSGx3o3zVsMeY-koEUvnKpWjtDKjvqRs09CQvILbKfkiMDdY49ZLEuOvZO1dVDuvYHaYQU4MbYXABXA0m2JZjfcCl-Jf4eT1ql__T_H8Nlya6wi4_bhGiqbu_uXHD0pm8-zqFQNyiDk5xSEE-qVHnOys4U0X1rYeWzfB6l9I9XPe5v_R3rSgLgxv9Z8szcgT-bAvdDRSMtoSoyFhgwY9j-XEuHZbkHo0jwLG5o1peyPzW3yquVecp2wRAYD2MK7vz-Xp-KLZdWXbPbwTvQECUToeyY3BVy736DPuvsD2nsbW3RPg=w685-h913-no


I used Johan's old DIY thread for some tips and research but I discovered a few things. He used 2mm foam for under vinyl flooring, the issue here is it's only sold in rolls of 100sq ft and I didn't need anywhere near that much. I also noticed that he wrapped the foam and fabric around the edges of the cards. Anyways I asked Teej for a few tips and he mentioned he got his foam at the fabric store and to use at least 3M Super 77 or better spray adhesive and he only took the foam to the edge of the cards and didn't wrap the foam around the edges. I couldn't find any decent foam at the fabric store except for craft foam and it was 2mm thick but it looked way too thin to me. An employee told me that they sold headliner foam, would that work? Brilliant idea actually, so I bought a yard of headliner from JoAnn's ($9) and went home to start tackling this project. The fabric headliner actually came off the foam with extreme ease:


jLLmW7nb7RFOuOrjivSl50mtn77TH9lmJZuJ7muNeh_Ytaqj3Xm6Hy2sIqVsm2d089u2MXjC64KWgJvbapJ0FWqCDq4Vg6Nb8cUdKxNFqMGWTcltiIyyqQV16wWRBZVA_OrpmxXV4Ky9bazQvT32g31OIku9db-6BUqlG_nKalJWExgIUGrdYN9SQoTBh6vWPIbMY9ScaEE0tfsdsK-FlJaZijYButkPDSPP6pmPSK1GfS2dbgrrVBsG3Pt7BM2P0slw6H6_IEUYugyWChHH1lPshzQljLOA4FYDwCM3W54Q6GpehoUn8_TiTsb-UCSwLHUE-6bg12nCzUhb-wDgjfA_Blq1ArZROBQDLoh9zALLPjgQEUj9U_ckrodV3cnERgCJrpHwTojubyN0wJki88gRboyQD96Km49BLPb1GPVqZG1phVGsMRZOKtM3x6WE8nk3sFOqRrVvb9dBk6Cp4ZLS8oLnZNv-O8cqIp2QKN-_zdxp2E8_V7vyiZ4sosKLcDSsyxqZnBqzhuKCme1ZokCVkR80w1X34zbuHeZk83fi8HZ5xvXpWTOSXTSfziRKA0EGfEXQ0vCeG1CjGPbC98GFquO3EWixlxfLE0bYaShVV2vHtv_6NSz88A62MmYp6HJ938TXGOI2g1DAFgcBBFGIcVvC1Q=w685-h913-no


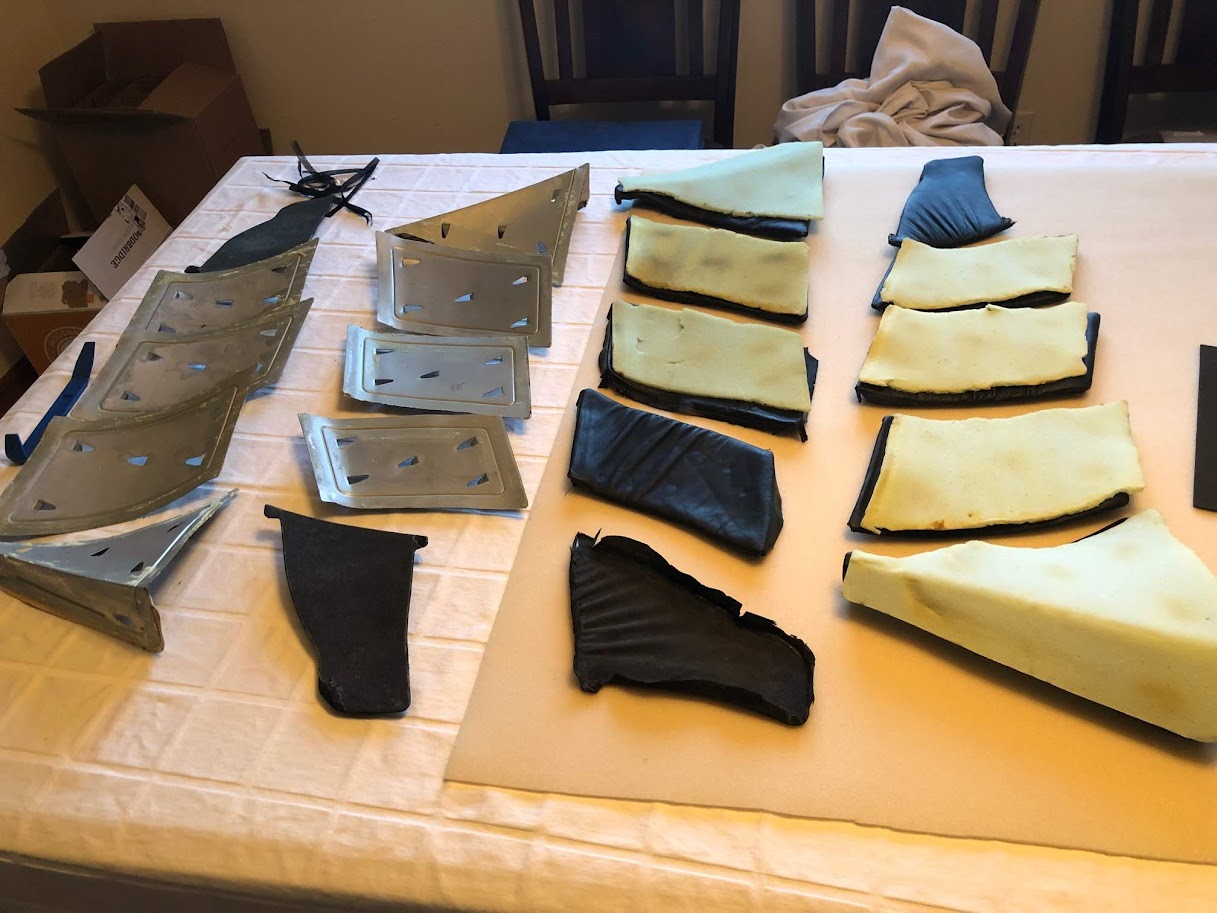
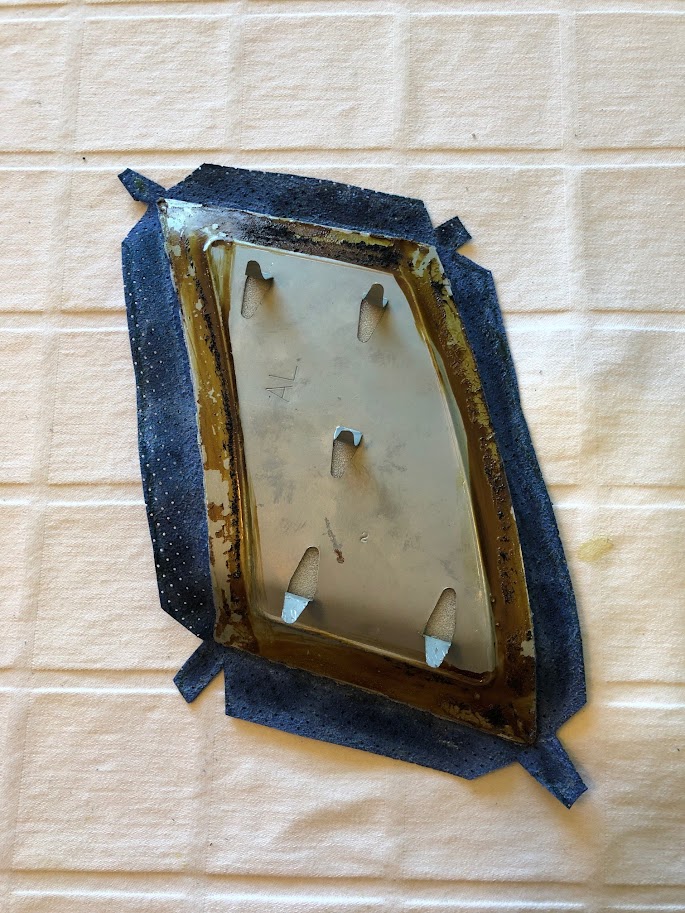
Next step was to remove the old leathers from the door cards. I knew that Johan had said they were glued on with some out of this world glue...ya he was right. My fingers were KILLING me after just the first door handle insert piece was done:


QJiqvq3Em8B9iYjQFjquw--2BiuA1hTo4u86rt7F0UEdfPfGgxHA37sxybVXQxGxfDkPcPNWSmxFSSgGeosSefzJ3Ylbqm9g97LB9n-nQBGnCFc3MppDury5u78MmorEEie_8evxEhIgChP6alXwidkYXVndwP5wtESSY04CxZKjMp0VLvdN3yJWWrE-XLAMNFCXdHNN_LdJUxsjQ_uMFNP2isHuHDFcC2xgLS2Xm8Wv_7lEXW_duQmmWaU8iQHCoLVyZTIsLbb3DEAY8mhJiZj94U_JlTW3J8WtV5f92laJJQ7Z3vQdpq55jG9hsSyK3jIl0qQLxnyDiJPr_YKAYU0eE5FAuJJd-zA66vFJIIaCfn_YDK_zFVPOBhZwJwPIphAWdu5E-gE3Y4XehzOLH1nFe0kKdPQvI76mrki3-iyNg7Cx_qIQ_aynP7gvO7mMtaNJEs_7_SVEzuTCVojmBms6_ChVX2fmEuBfwtzX9xLECr1Qz_49skDgAzv7pGM6CcSqE2wZTFwMK9GO-uR7OO-RPr1cRQdUCGmgDZ4d-S9K0C7beY1BDlLcT3uayWpBeAIEaaMC5YueZCIwWaMe5p2nLEbtUW1LxWVJERJOBXJPoAgdiVh17fvmQAiMDObBST56Kv2NfMqNsnj4xXWKIIt8pS6oGjDQ2QwmLAdCp8BzOs3OCTurmwBSbvP65Lk4fOrES5f7k5gKG83isp2OMi8=w1218-h913-no


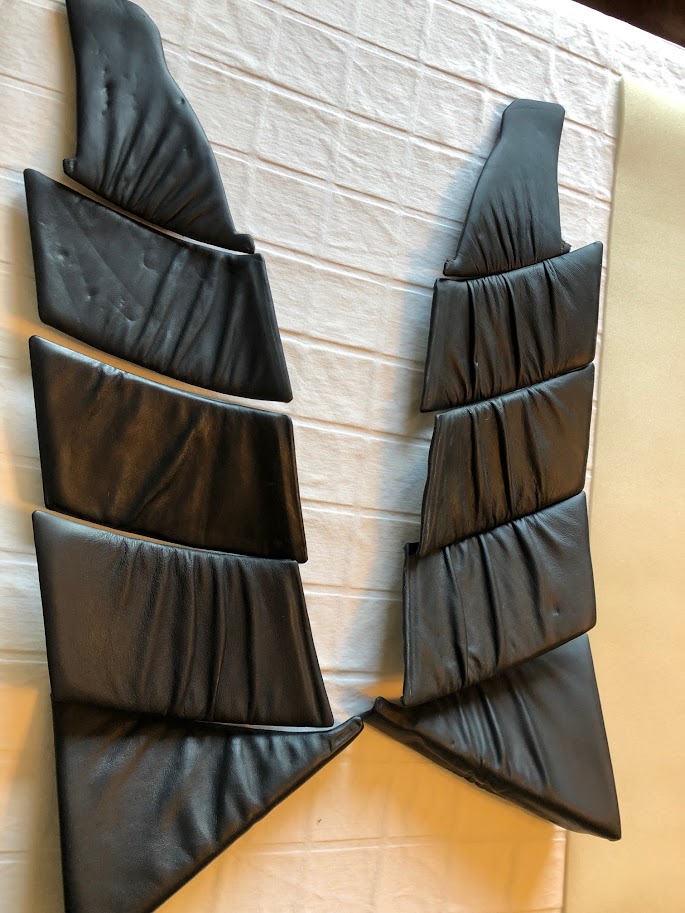
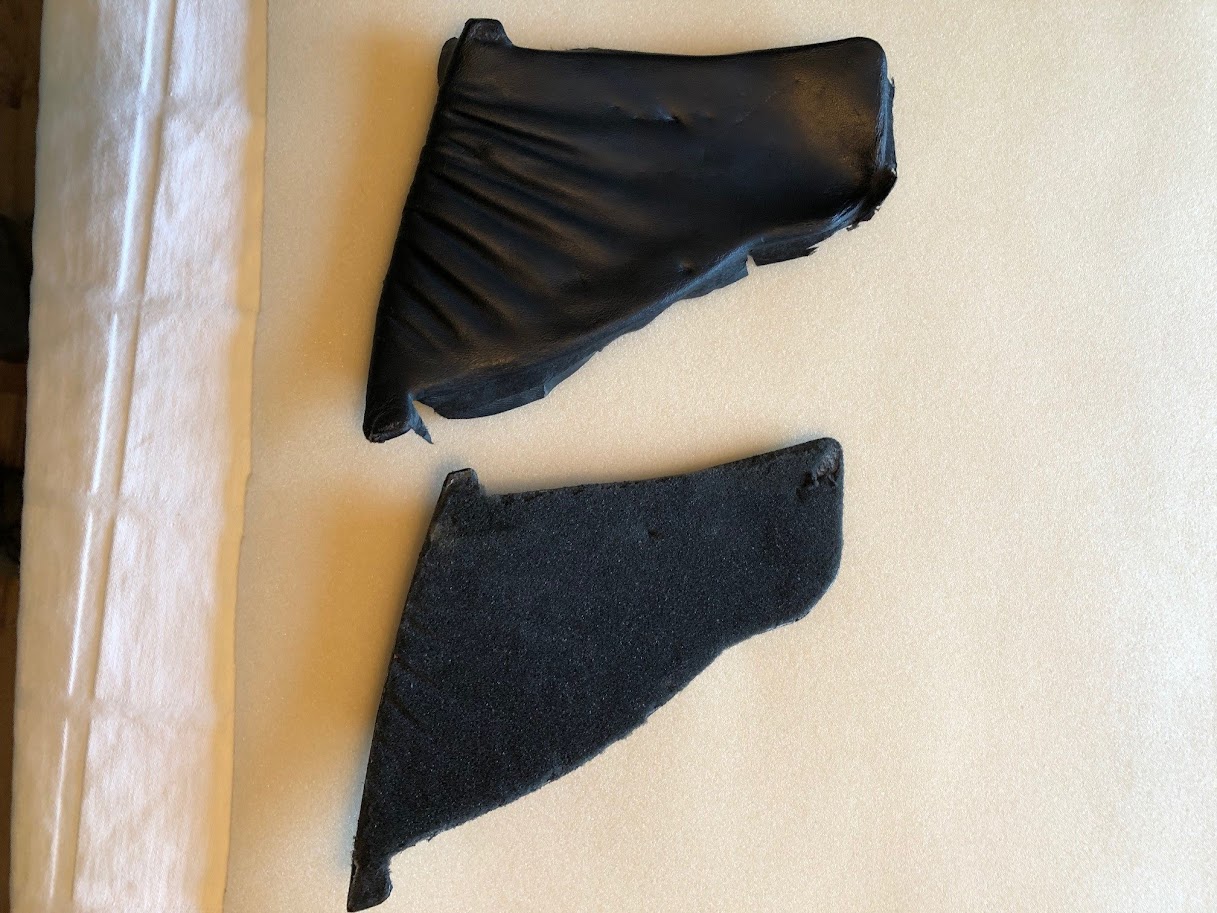
New wrinkle discovered...The foam for the door handle insert pieces is EXTREMELY thin, like 2mm. So back to JoAnn's I went to get some craft foam ($1). Not only that but the foam used on the Door Handle Insert pieces was not easy to remove, I had to scrape it off with a trim removal tool. Which is also what I used to remove the rest of the leathers since my fingers would not have survived. But as you can see 2 photos down, the other 4 pieces for each side have what appears to be 4mm headliner foam on the original pieces, and this foam was barely tacked onto the cards so I was able to preserve most of them to draw patterns for the new foam (later found out this wasn't necessary), and it was only on the front side of the cards not wrapped around.


h8cXdbv2X6oFYqLgCcAjx0PBji66zWQht5kFhXzZpeZ-DD194wk0NzlWPO-dOHXSOnpg_lluz-9yurYjIo6Cmaw4xKwd7zJ4hMSM0DzyRRO6CcCbZuEDgdH_D_3Fat4lBuRQvaTMN7b7_wYEoua7hjaMUOkS_-5sIIW7GavFZ2aI03L05oYVVf1oGXtG4WoKBYDc5sV_aJceBx3XHTB-J7rdvvIx0YqK9MqxUrFSpDPAJh_EZapk-9W5BnAtsQzZTY5IP4b0HfjfJqBK5WHKEqEM6iXGm2cJgHiW2oi3TZK-Gjc0nXvtsAaMyCtHQHb1G0xDNnLjsts9kQwVY697qhEa356ElSOlqdSjqiPCL1pufTeKSv2FitLceH6-5rwop7E6qiyAklEi8lFgugqh5hfjcI-dKY1XPhh4lKn5-4VfozQATCFm9zMwGOtDc8F3XmUXdKoz7jWkmHRRE3bbgGL3yv6xI19akcB1TvJ5FJsskM9wL6ZNR0vM0Mxo0iHTZ-C94xbsPbt2J_Gufgw8BTAIKy3AWc5QsBUH8pQP6U_EhH5NPmKqUPakP3FXIy04j0vmGRgpr3f1Wf_EMQJJALxd4-cCRb27Qo0Bt2KXZc6NBxZuHEWdcjJPIGWhAv9NQ7ZLNgBUvhXs4y2rfHs9IVx90p6uZF7_lIIK4drkQovqNNb7JJLItdhYcwH3iVF3C8gbXgW6SwCkYm7tp8olIok=w1218-h913-no


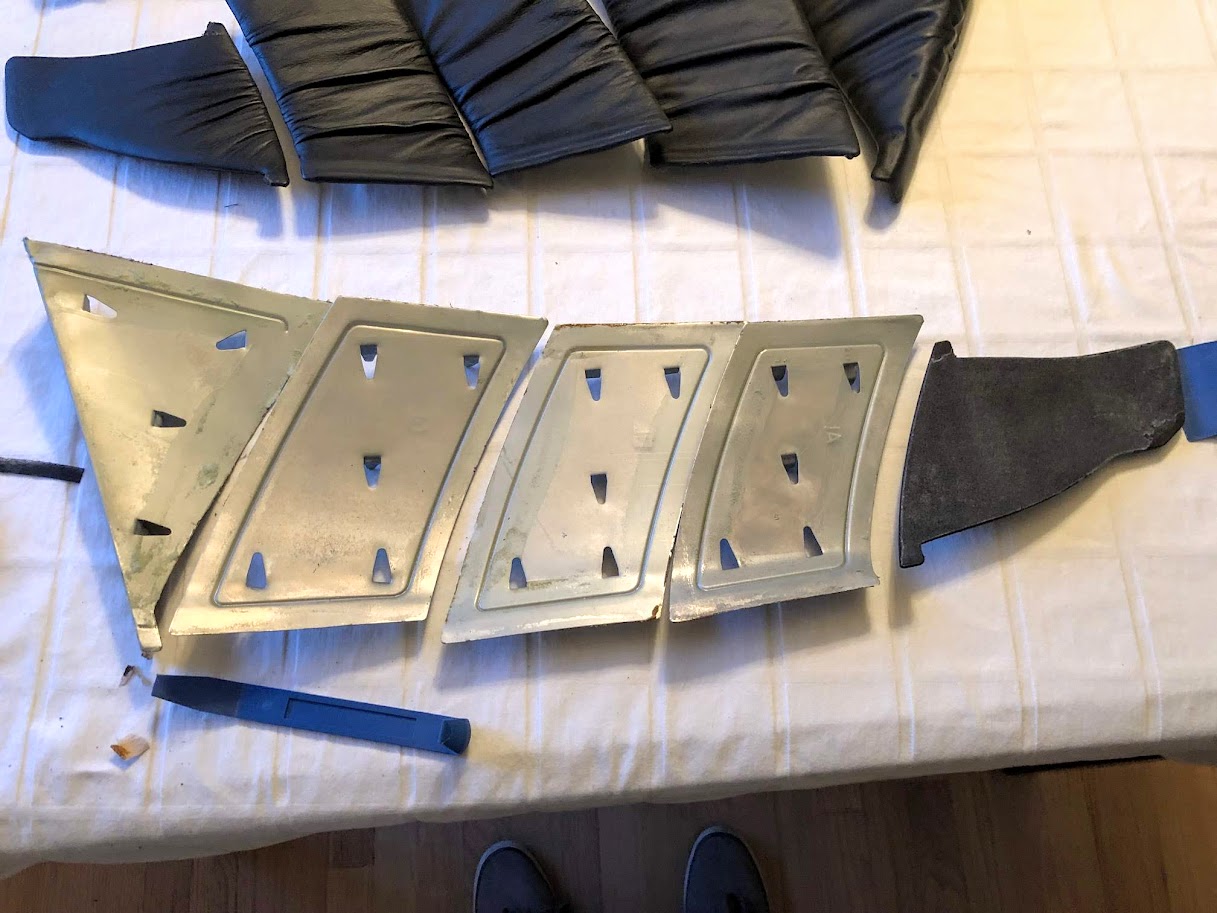
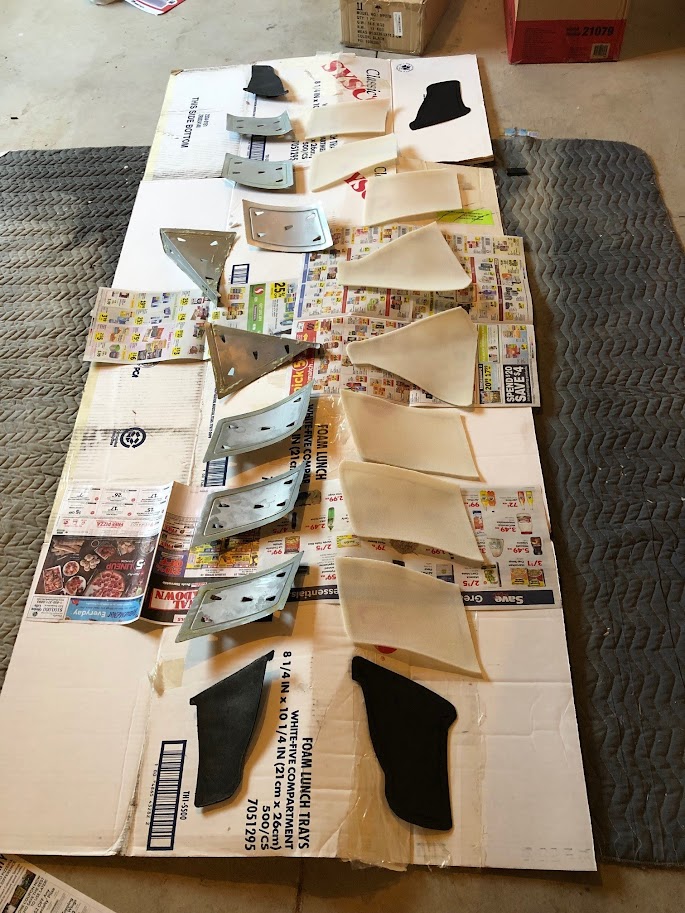
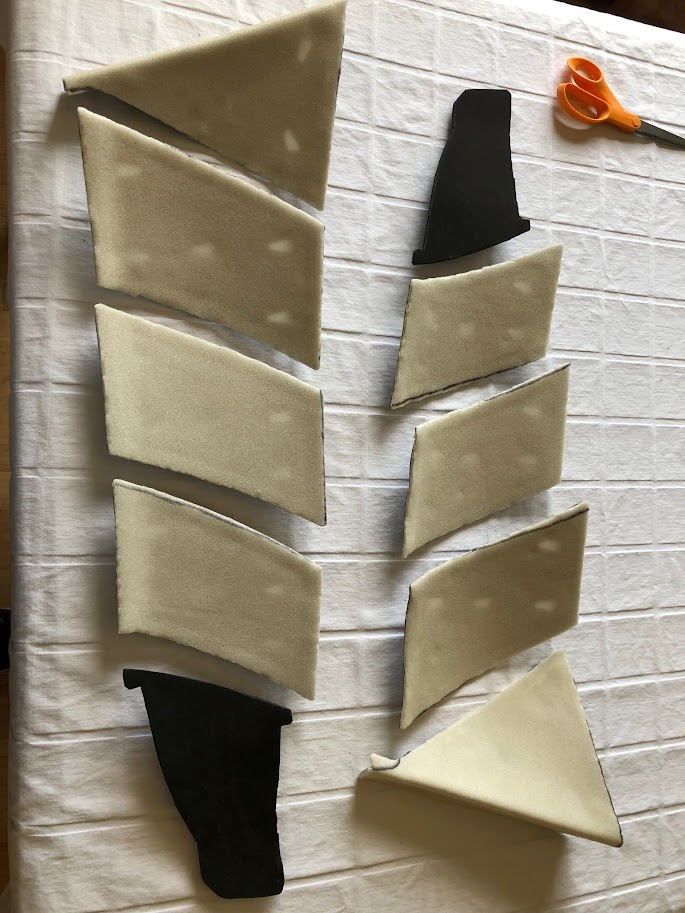
Here is all of the cards with old leathers and foam removed:


N151jnKhNt1D0EhCoCY7q1DFtIvrjVZ97UTXsKjCLFGCbfyEHAxvDe7ZJ5T-8U5-gXgl0vByyzdp9KwfquW5HO7oBZoWtN0Eam5_8Alz7xYhZa64BwAtwd9LriF2kNOc4xVOYH0EkgPG-rf_MEemOna9KpfY120lz1hsIKz73p5sIx0_S8cC6iXPI3Onjmq2hdvSSpmC1BUxGnYijKrpywD5obt3of2axXqYspx-hFBqFNOcRhi9FMD0elTPPbdikGZ_x5QGLUnlh5bDcQJ6j0E4piFIFHj_BIPhVjz_RAi9jLNDJwU-DSAfDGB_tSA95KBoOpbEmqul6H92nldcDqg-4ik9zhQmuvzx5ivqMQ_587bi3l-tjfOLPUbnhSdxPPHsNcMe6tYQMJaMXc_85GbBBy2eTXGELIcFNOy7GmMni38YNRzZ9rOmWlEg8oloHTgWPci2qYWzj_YLsR5MClWai-QLrsY8Dsm9Fu8p5qtrdLcGek99VhzGFG_O_D6jnuZyyRRBDV7sqYzSZOXRFNF2BWVxrsUiYp23qitWyDvMaSA6U5HPih00cmctQ31TBifC4CvzhUa5YHMIJ7nvCMAEz0ESItx5zHWZ1AAmlE61SDu3CQfaMyW-q0TCsKwiDOKInfC3yNoLpWsv10b90mruYNCwXnfbNVulbJB-_zoaaoGqTy8BEwhNHxV3-7vqyj54Wl2_rZYM9zd-FETeN5k=w1218-h913-no


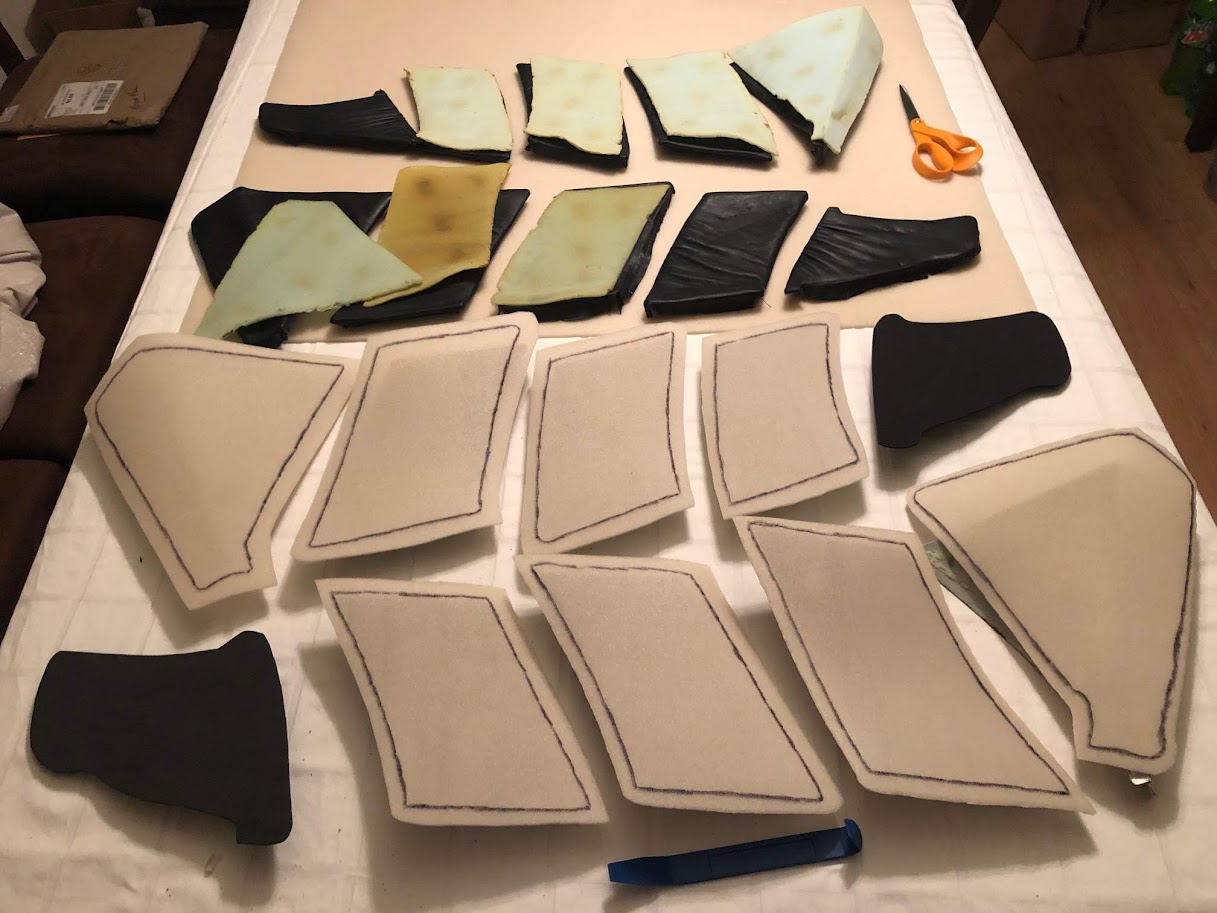
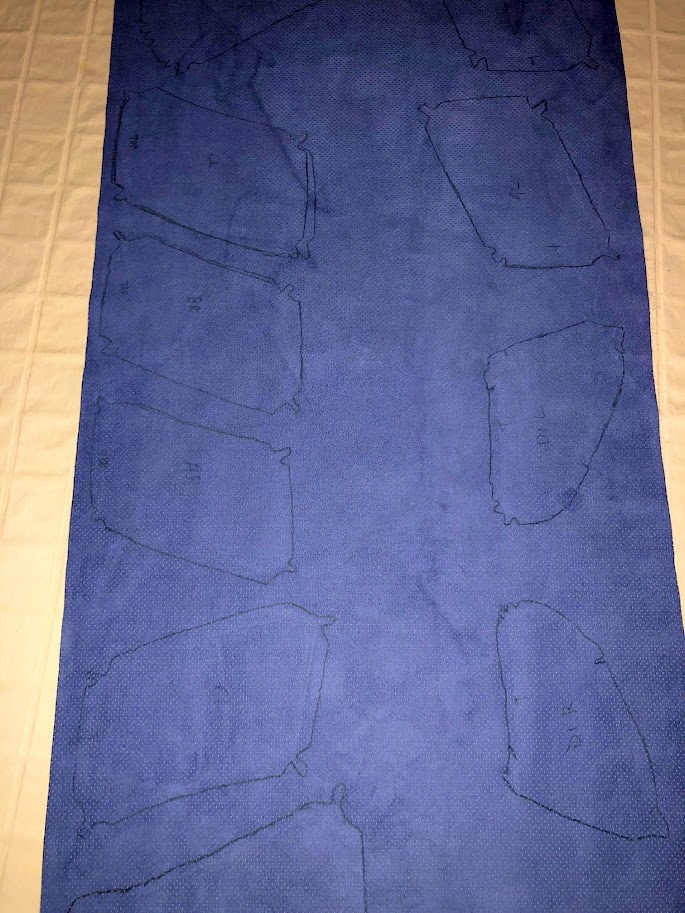
I used the old foam to draw patterns for the new foam and then added a little buffer just in case:


_LAYx7eRodqGfXTfarerZW3nAo-1oq7CEwEmYadRNsnnykmgxKXe_LbX0Jq4UGspurfFSldVjqyUPwm1ml3ZNpTw8YxrRQxIckw1EvG0LIhEhe1CK7RYY9k7-Xn9p4NGcpgawS6iSCeeSx2FYhqiLI64pINY_4zu3F2sG-P5VVYP2z5UVT7TBwuR7hfrKPaA6gTk8Ld8gcqweNGVwxbGU2Y-kOU-XAGDi6cK9Npslb8slyZZwWWK_BLWXDeFSVphWeLIaxgbHi4A67s6Nv6CSL_UpcAGUYmZ7JeWQ07yS1WXGD4E9UbyqvEeIDn44-AuRif9ugYgOU2cvExcYUMYiqp8pUgDlzvPaiLzVBNLKX4_cLp9i90YQjPt1GahoYXmkMsqalcfBhGEb01I0Re36nweRT24VVor_cYz5D9QPfKZaocRLX0nqoupy51_g6qNdqibk7ezCDbEhozQ9ser2P19KZbBHyQk4xH6uE3hBWzpHjlXhYKdGZ18fUahD57gWTWw6JXkDy1Arw7J9uz767K9c01n5endLzokUvX_aCT2XhFftudV_pkMUGNAZtrZYZvEMWp0n48YPOgPog65tJTdxfSu9gFpaSLQKiRdHP91qjs6E6OYOdynnlsY5XxV53OJ77xQwtfR6Xt3--EKQbjmA_layqNSZaibJRO8Lhq1XpRsCT-l3XXcD38bONePzS-0EHCj67e3XtmaF6RmaAM=w1218-h913-no


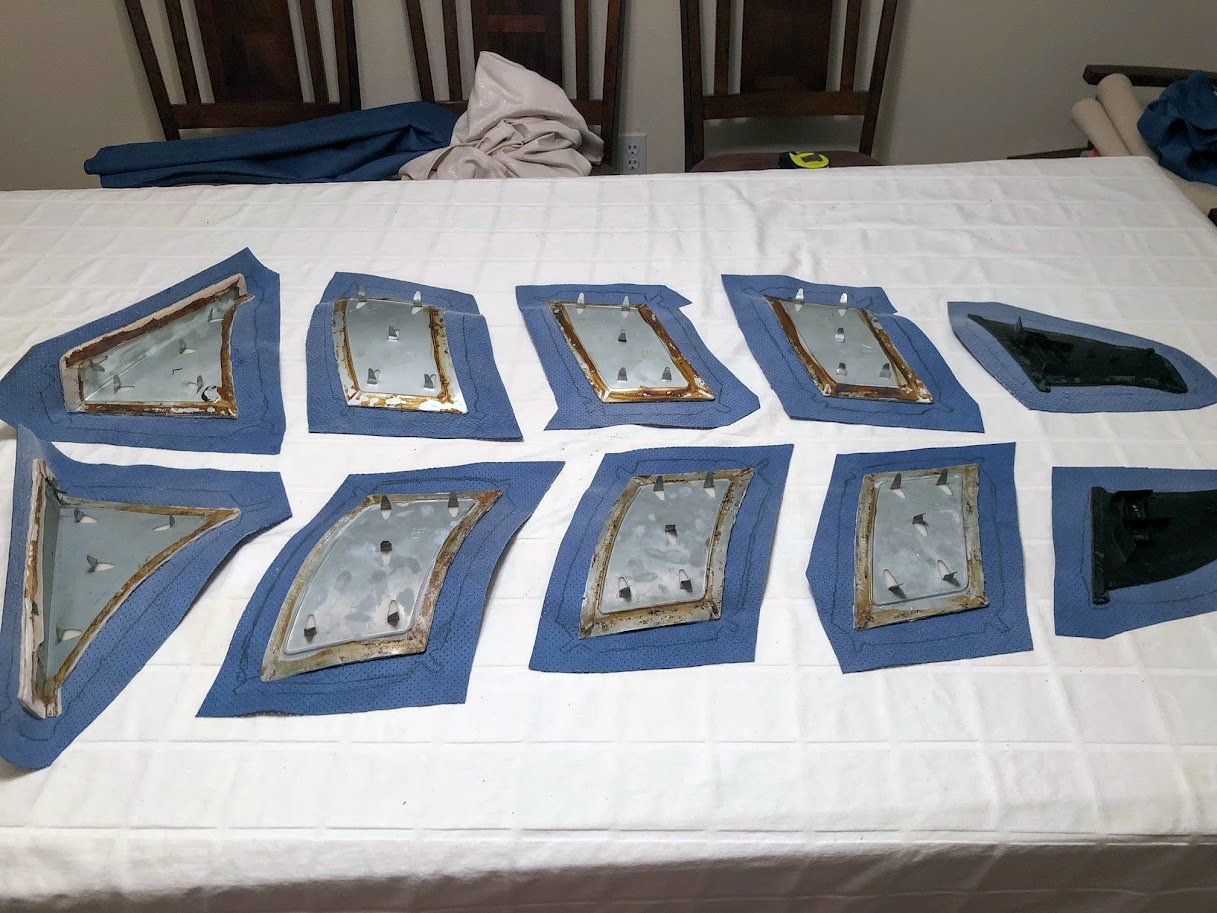
Next Step was to glue the foam to the cards so I spread everything out and sprayed it all (the foam pieces and the door cards) with 3M Super 77 spray adhesive ($8), waited about a minute and then carefully placed the foam on each card. Because the glue stays tacky for a while I waited 48 hours before i trimmed the excess foam off of the cards. You don't need patterns, just cut big enough squares of foam and glue them on then trim.


RJALlXzSf4AUES-Mx7ARZU0aa0aeAfC00wXxpbAeUb3DqJBq2bYLhUVhBiMNcrvTUhEFyiNOzayCA7iA6FCFw7Lj5fr4heg-_ML0w-dkmi27gdVHmZ0XUuTrEzfZ4NbrQJKqk4oOY_vTgmkYe1jpOq3HBmwMEbsXjkgyG78HTb4lOBS1kOl6TNtNaLKu9qDkkHiCGEGjHiRf0y39fLSdpuxemq5xbCzPsJ3fJFVzGUdD-h1Frwgop8Hkh3gyZXauEqY9216S7gVpPrtewjPtGeTrELBjLJtYoFoZOjGx_H1fjuWwzTzIgDj8htWed4nBWcf2SdXY7UyZ6NvcgQNSRaPr0dh707ZV_47O0pvRn0rKIUouVl8v5WatEJ67yD6G_1litJijBj46I3dj6F8nsiSsER5dhhT_qrgEq8FxgAdcAjQYTbO2G-CzEO9Lzc10cy6hJ5nugoc8h32DaGGA0xe5Itnn097uc-IrX0I3b5kMuRnMM10lLGAgpGmxSrxJJbMmX4JcsCHY_-BOCD7JnNRGf5gUx4l7g4XhXC-hd444-mLn8HySHAfiC76hU4EIiW3WYySQ5HrybZrE7dq6UuncsY3spg_hfqjqnI7MQ7Nx-ZKDEtZhpS6bhGteUaEPn4i1XGSu4p1uDctLy8kttTr9I_pfC5kNYsOC28EM3NH2NjtUOPoCEpGW7QcfDcVz7ohlSB2qVwpkLWW7iBYCe8s=w685-h913-no


T6mD8WvX7YTgSmVwO2S4MZSIw4x8MejQBAnvdbJmZJ6En6DbYs1MnOTFaAO37tGokD9-y7eGnSWJs3t7Qh90YZSeM6fRieOF92NbT2sjWKZCMJIbzYSVDs2ezpZ2L2dN1mBSYB9vuozKBIJQBz9oZlSSW1IU6FyUvKcBQVMsPCjMXDTDm5o_c2IvrY-1gZL2CdYyrUps2eUqllHuiEOb-p3jzYcxZgaXKA8MOCQEuLxAXeJMQy2IhnPgvXeqaGbf1J7TVRcGytTWazIrYTxdENXWk6MUeFybLYmdtOdffxAMs1Ew58yfQfmGAcpML-NRGS-Q9PDWm4hHf2Q7PCzaM9x-WQ4hWwnYauiViyi-O-DC69K1lV6vtRubNjvnRWCY19iOw25Sa6A6ZjL3eagQ0aD9_IWrpJ6YDi8yt7cccwQ5Y_tndwqoPeSzxsPv0x-cgw6wj9O8b3Iyw_PPcBGmgY9ky6Vxd4I7_zErBzPOWddVT8LLN2faWCUF23-21h1u7k0_FqQVVPfUSB4CZqyFxmzrEphAhR1W4nKA2qFX6RvS_7hUtGrbintq_dhdD4VeDp8VWpeKbd9bO4im8uA9ken0wL4tWvdiMNnb2YQyy_65BTsJsrsa9DEGSGWYxSeatsLYQHgJ6q5ts0sWo-fHVdvpp8sxP07IUob2LLeqbNWFXKYarpWuh_Xpsdt2EYx15GTlt1Gpdnc9sDkK-aNnwqM=w685-h913-no


I only used about 1/2 of the yard of foam (like Teej said) so I didn't want to cut a whole yard of the ultrasuede off. I know supposedly I need right around 2 yards to recover the cushions of the Recaros but I figured if I could save more for "whoops" moments on that project I should try. So I measured off and cut 25" of fabric because I wanted to make sure I had room for error on the door card patterns. Well stupid me didn't look first and there was a giant crease in the fabric right down the center. I found conflicting recommendations on the safe way to remove creases from ultrasuede online so I asked the manufacturer. That was no help, it actually was a rather comical exchange of messages because of the language barrier. So I tried the old shower steam trick, threw it over the shower curtain rod, turned the water on full heat, closed the door and waited 20 minutes. Worked like a champ! Waited another 24 hours for the fabric to dry because it was a bit damp and then used the old leathers to make patterns on the fabric. REMINDER: put the fabric and the old leathers FACE DOWN when you do this!


-Z_kcB5_qPhfd9pj8hP5sKyWgUQ76u3UHIR3MEdzfQ0C_bIdUf0XUISMwWwsG86WVDmEm9WSsSNgos8Fua0fLkWJHD2PiO6OAR7mSZMk24yCaOSiBdU8EZcM0YuKtvrdNzyUIBBVjbkLU7D3K6tQuDdIt1wylNAeV5VJ_ULgWd_XSeaqex80H1n9Rq7Pa6UHXSLTeUYRkmVa7pXyfV2fdImdoptym_cFsS8K--l41JSs-LUkwyogTxMw83VqzXiYcieIAO2lCXIkQ9_aSKGC08WQzCp_jYoO6pxfB5VgAr565E2Pyw3KvYDxfhr5KpAw8TjMQW09k3y1E4uDJUQm7TM1IiJhym0wnJIA4C8XtrwTTjnHk_XrhrQEo1e2IE8EVg0ERPNVBvsI-93dPz8RxCCdovr0cvdEvzhwCzKS9AsfdJX4J-Ux73V71kTU_10Z629SSbf4z6Wjno52cMtDBFKC3O-JPsNxzXIx5fc2AzCW5n10c_cs7ctVPPEPN8jjGX9al2gSnC7h-VJpn2W4bIVKVNKQu6vAD3Nj3Rt6hiPbMgSkR6PIT9N8lc6qTrGzjJE3hFZf5WaqFS0Rlc5M01K94R3Dow2Gm0wITmCJ8Lr4o49Q5I-QnT7WyKrKxvEP_y4yFIiMfHeT-0xqM7DlETF4g5r6iLybTZ3TP49X6Hs0GCou4Jwf8M_KDmjVOmmEmNlSo4o4CWSQ6dnNkKwxKQo=w685-h913-no


Next step, cut out the patterns but give yourself a buffer. Then spray the backside of the fabric and the front side of the door cards again with 3M Super 77 spray adhesive and attach the fabric to the door cards. I didn't really line a few of them up so that bit me in the ass later.


TMFXjNLNsaf7xQyvTdxUKa2zqf_Migiu5AnTTgh_v5OCnAd87_re6B6coXTeXORTlP45pyYO0WDllFh_6Hk0kySPUwSB_99bxBDhW0urJeG9hnfW94tpoQFfxltzqFSboZReN5mLHOJkSe7oiRAjzLtoLvbTeJEbQlIMNs4cLGS4b9H9h-zuvEElr_8N3Sv4apfAxY5gv2JETt6AN1QsWma8_4KIuS_qLah430XAP2HXGTaTwGdJwmZ1XzDo2W12y7nItzFybzmqHU_GG9pnREUFUWG7xBxcBUo-UfKI-c4SQ4bXqvBbyWm7EivP8A6gaMuE8EJ8DAxJ2a7mz7wcVaO8SokvpBmQ1ETqog1LuwDkjwJ1G75TF7pAA2vAHVWgZlwZq07ueMM96hf8EgcewiZez1SRWZd-pNAOnsdRO2ZkRF1wCq8VM3lB4StOCQeuInByDnA0-wjlsiF-XftIDg0ZDSttFCJHzF1OxxUGVSe4zLDSf8jcfBZntAoA561DcIDbtoDntmy97OOpixxYt4nMnIdZ8VF68R-xyrgsyQxGsYC8wpkrqmR2xx5bFdH0FZVle897I5nbMVrjrGy1aXcOAMbGwkB5gmacdayZe6W0EzVrAYS7u6FquXkx_5hvT-gfDAbMfPIHEQ-AzNw1t5Voyo4JtDbZAYeGTd2NLotxL9BL57dC8E9PKH5P4OZeFxTGWrEIOKGHeFldwLWs1SJC=w1218-h913-no


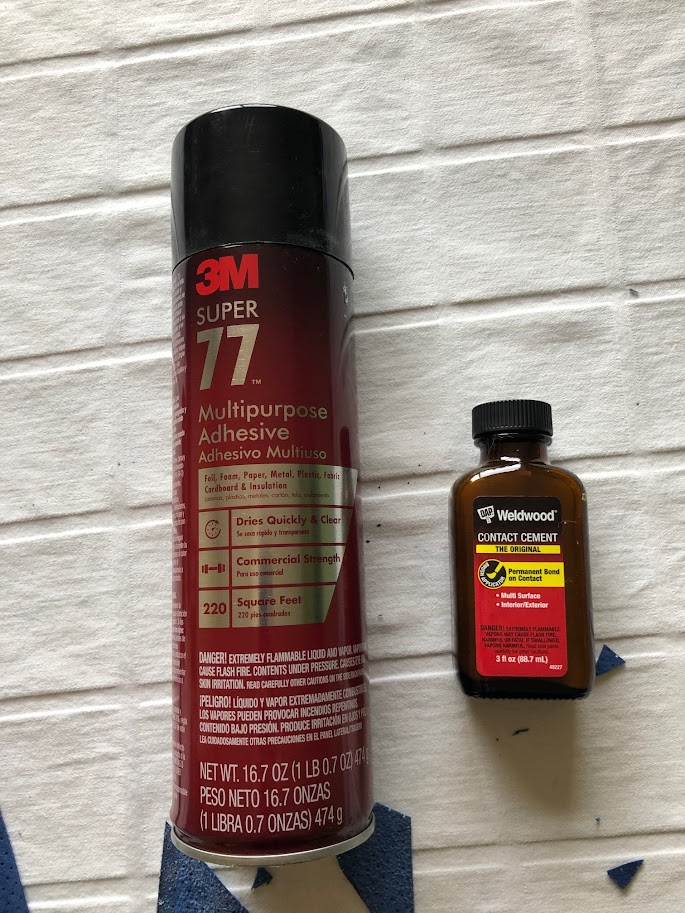
Finally I decided I wanted something strong to hold the fabric after I wrapped it and not just Super 77 so I ran to Lowe's and picked up DAP Weldwood contact cement. It worked really well and it comes with a little brush so I could get the glue exactly where I wanted it. I had never done any kind of upholstery before so it took some time to figure out how to wrap these and how/where to make the proper cuts.


syIO4yrvKxboGpIsmst8cgoBtxHaoAzYcjhnB-ofzySG9hJarXHHEHuqLLgitrBlgJZwyU5NpJKPGEl_gKoHqc4w609ip9PRVjAwupSXboy0bWQq9rDRntd3cFRdg8bHDPg6JA6H6n1BEvvLky09IldkaKxdLKsPQA7-SsOpYn-hZswfEINixIV1AB1Pdphb4lOf3_G7c7VYxPQHsz7H_4AW0pJxKZfPGN5eR7K6fWhTuVKMF12aqSa61Wbimr2YFOfix-yckoXolbJyze1U8cvw3cBEVItPpV_JOV-I8gvFoIE19SwtWH3dq5ibdZuezJa08kdD3_8iEDHkwXCjl29ihgYSlilJZXKnr2nijwb_AM45Ue-xjBU7GD2h71s-sVjcWeZ04FdedWX14nFHmzNreAzWaYTf7ywngUuPLpz2WclgZfjm-rDSDo1MI0EWy1Cj_8oYJTZ979Vj0NrPLtdsoWve1bXi7puLILQrtpG5efiGxFrsmear2BTxT2aVoL-HFt2wI0YOZvIC-e7UGmnX0tWCTCVlDXh9-ulwJQ_rpn4wkqSPgz07U1Kc4KTFpMSCx0UzIbDkxuNylTadSIZGIDExa2XKIw2E7rs7OV0aiyk6cgKD_2zCiuRDWh_AaV8FutHyqzwEPOalyBL94CkA0mugOUYlAX4k03ETsA8NL0JZ8AInXPa4E-pMKMySnJKMyqkscuhwmvOEFCRNQ6s9=w685-h913-no


They aren't perfect but my few imperfections I think will be hidden. But anyways after several hours of cutting and trimming and pulling my Type-S Style Blue Door Card Inserts are complete!


NcVlWhfrd8QLRTs0YJleWn-iYH4XJ97xuXu0Cp4pdd59GEdP08QmbXzfgVjK4tQ_c6zKuROZsxGX8kHIAuxxV2PfJTvQP_wlBfUkkXFc-KKQJT4F-cb4TupfngEuZnro0xkDah7Dnc-jP9A64NdnllT-n9mF8XW3XxMAVQRqZiDM_Uk6c4j7jK1p2rFwCBrGpzikqTEObyg5sp6wjrl8qjFy2_xOfmkBwNGGXRzZ2J6TCvXyesKDSm7dspl0w6su2GP1Bo5n2Ktk--r2NOXtxw8x0kPWFl4gJKbAahjBA0IbdtkHXtkk7w7UJrMl8UOHaiOOumde4acxITNrOtOaDsI9e-5XamDPW_7cNds81ZCA517iEqmvPg5w8mel383F_1M-KSL-PuEd0acyCUjQKmxvgeYmc4jNizNCb-OqFpoW4yI0Y12o0mEgOLi_dCcdrdQYdlmNPnhC2iAHWM6Iozsn25l4m1I2uoxNsy9bZ_pk5Ws4B6797BQwKYVFi8UaG_Lv6e0q0EKVWilG3nUkGJdse-F29amkZZ2wAhJACOHpTmZDAJI3J0ED-kPLEOOV7Y48W7T0sYTJPQCWDORJVmrqdyrDHkJ_Z6nHmbEx9uN1s4gUEQISrWiwaBgngjR8VdSiFweoWbi3pAa0Cqc_Y6vxNj0QL_Sitle6kFde-s43OvkIQ4gxGNwuO-KJIFZUDeK2apHSgYNGzwrXqFwFS9kU=w1218-h913-no


Now when the garage warms up I'll take the door panels off and install these.


So to recap: 1yd of material + 1 yd of headliner + craft foam + 3M Super 77 + DAP Weldwood = $69+$9+$1+$9+$6 = $94


Just for reference here are the 2 glues I used:


Twe9PXy4-V5BQyE906P2TLkBJyNnqaiWzoLzglLBq4ZKQ8CZs1YX4GVnYpThaVcCdiNCr4coPbmeZL87aiCRwZ5VKz27o88M-JIwjGg66KHDx3DntEwzAk_s3zIWCDcKln-VGIGqeygGv1wrQf1oGdLCfjXwZgR0Y2iWAC2bQ0tvwE2SCN_F9m7CrcrK9XW0QaW1JGmVXNbFARsDiywaaXZdyCnJM0sB03fEYtEDfyowlQNAs5jKL2fUzUAjN-IulmvKFmSkz7iw6DfEMhGj3yA-IQ143VzxfhpcPk38btmJUUD_i4eczc9euGdOVoT2irc1Ktvmeh7FU7lrf_RVn03dN2pDlsLqx04038zgMTjIc59WTfaIeygrBKAlMCFCEan2s0mtC_iJBN_H6ZyLgET6dzC9-DR7cSzdIlU3QYTtW7tIhKflXmhTmLhideSw_Q_PDkCgbba5cMLO41mFmfbR07fkxs1fXk9CnHN5qcxLdH6WUG9l6wNRkREIU0milYwsAbXZc7wHnfTsKnBYtSo35fCtvMlG-YUKd9w4XyddSfeXT-O-RWu03yBbX4UjfMrQhq8ZNxZNp47MEqJv9Y-zj1mKYx9ysomT6R9NSKklKheeJgWrlqzO-1eUI0hQ1VHyMJxnQZudULzo1LlhUmFVtwQABg4ydnNf-gMw9xV7aKILeOQgI84uPs2HF_CPGq4UAgQH8zOmND_MqwFTFDd_=w685-h913-no
 
Last edited:
I see you have money burning a hole through your pocket.:biggrin: Nice mods and good work!
 
Back
Top