• Protip: Profile posts are public! Use Conversations to message other members privately. Everyone can see the content of a profile post.

My let's see where this one goes "build" thread

Teardown 8 - At home projects

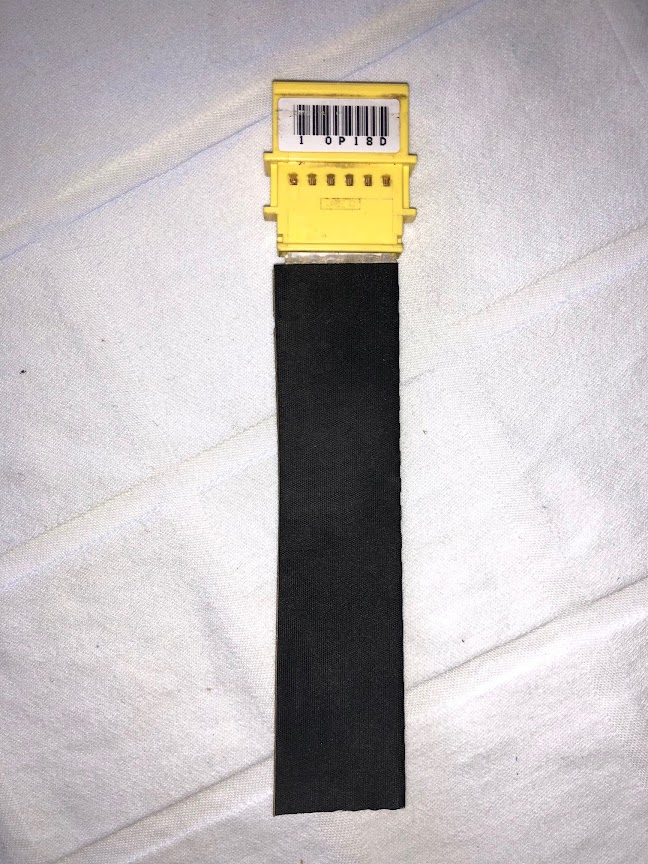
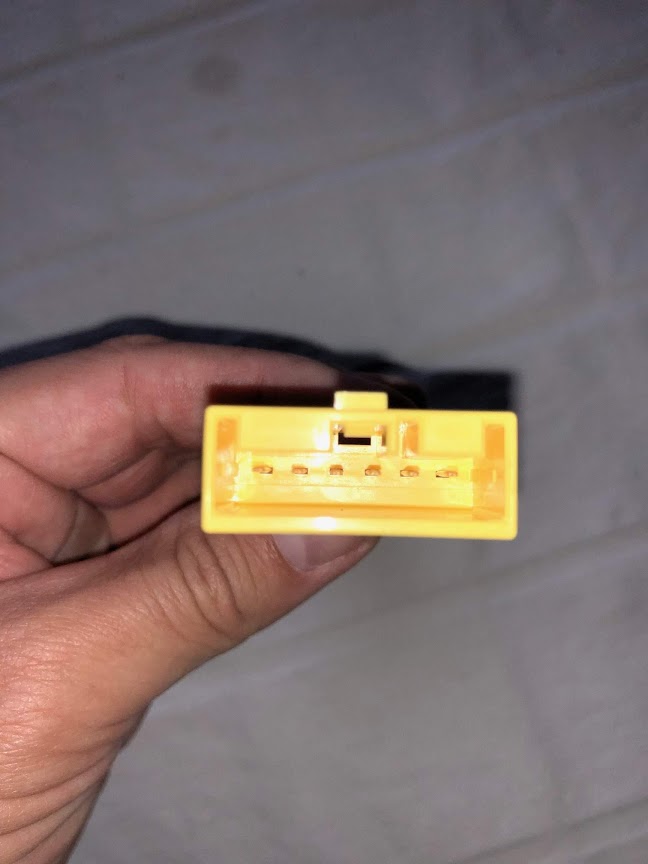
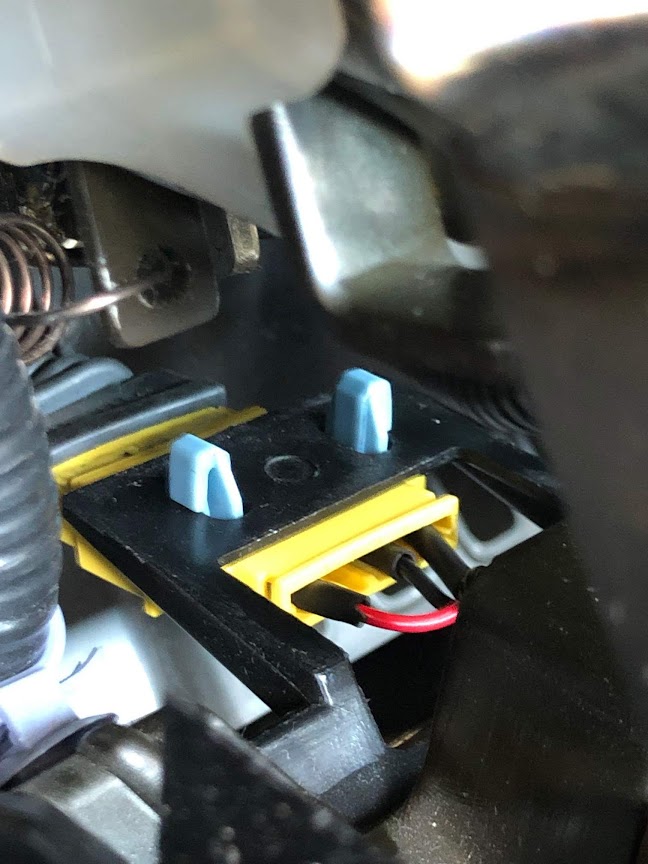
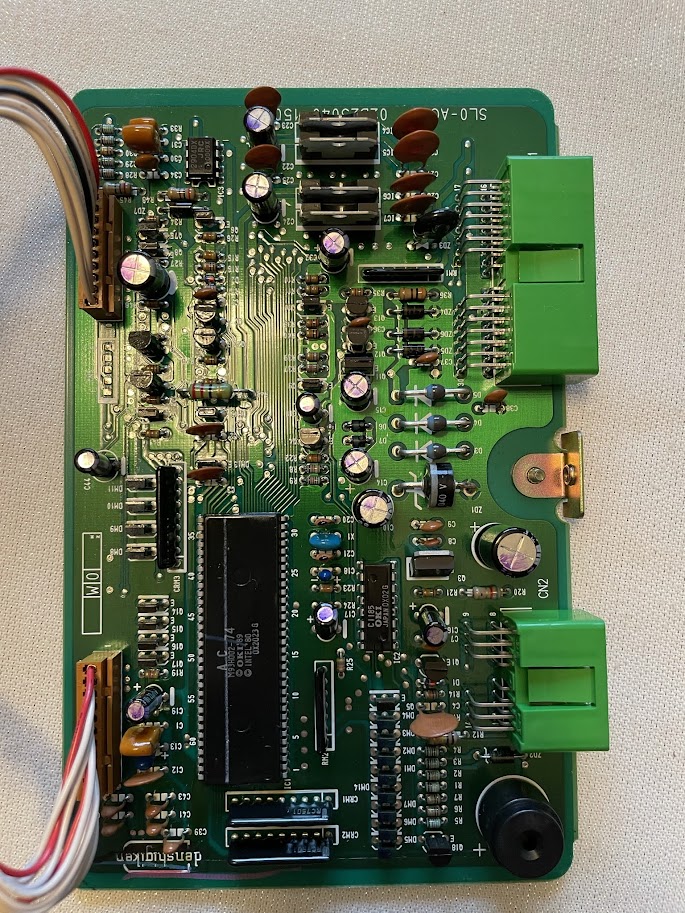
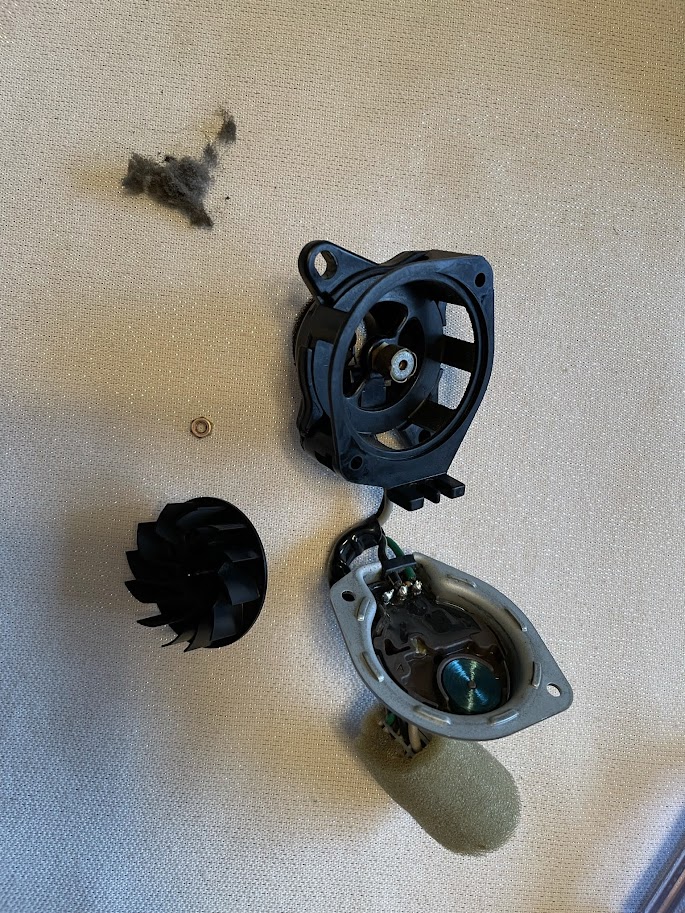
Took some time one morning to do a few things at home...pull CCU for Brian K, clean the aspirator fan, remove door panel plastic trims, swap out old door switch panels for Type-S ones:

ACtC-3d6SE5K6KuHzuffK9i1uiB98NaWr6qE0p-QVe4XrpqW60v66HwfZbSIiQ9KVGZv94YDrS0UkBBs4vCrYOw86XriIMMec0cs0IsT_CwXLIH5ezcqvgVDY1nLuX0DVr3-WfsJRmZ1yrFky8uLtEe2Oe53=w685-h913-no


ACtC-3e5wnljRq8XPaho8iitYhROHmY_kgcTK1Zy5K1mMqnLRq5KN9Jz1rYhitD_punp6IwkHf-txKJBKyEk-4qj4KXrA3sgsj4koYOG4UyOO8XU8EZjWvL_PIXxyWiBBxwagYmVmt_XgMvwno8uBgSMxYvH=w685-h913-no


[PLACEHOLDER FOR DOOR PANELS]
 
Teardown 9

Plan was to get all fluids drained for the day, maybe a little too ambitious. I was moving fast so I will go back and get a few pictures but found a few not so pleasant surprises.

Looks like the right side of my oil pan gasket might be leaking, it's not enough to cause a drip but it's wet and cruddy and I may have had a small seepage from the oil pan drain plug, it was wet on the underside of the pan but I swear I used a brand new crush washer and torqued it to spec last year so who knows.

ACtC-3cf_Ot9iiTbCJCsFEfbFKbC-xzlg-AMjENsL7ibNymjR8dXfD4hhk26Wkz9KSgRAc6rGOtNTYrnfwmChkHbwlpD_3nzt8IZV_s5JunnHy8FN_VZLmpjZM8JFLwNp_lhf_BogTMr4gInoT722DUVQsfw=w1218-h913-no


ACtC-3fCMJ3CxV4lR-CnvoPlZ82ggkdQb526BrAV2DlkkV2J24e_mbsNrS95w8dWgCIPY731H5YIvBQO3gio_1Q8P41PshQTXGlcjR1gz1UNGa0JMpm2Q_dBPMmxBOdzBMT_ouRo90PmLAH5ErZH3F2xEzBa=w1218-h913-no


ACtC-3c4jMkH7aUpwkEDSUSsp-DtHM6CVcjg5jCzZBx2H6wFCHRuUJyzuf-RF3SzP6Fcw1FA0ba8a7hEIhE4nfrtIvPHt8n9IDl8SqCIiBQcMjZu8HH-XFAn33-qpP8RhFNLcKLW1NadRSfqkz4StPtwsyaa=w1218-h913-no


Also discovered I had some kind of coolant leak coming from the lower coolant pipe drain bolt in the center tunnel. I had the water pump replaced two years ago so I would think if this was going on then they would have seen it so my best guess is it's been slowly leaking for two years. I cleaned up the pipe/bolt so I could drain the coolant but here is the center tunnel cover to give you an idea.

ACtC-3fW_nq4afzK00RlxNVK7XKiDBmtFoUhnCfrukdleuhy-Kg4Ry8Zf_n3cVMrXT-hG6JR1l6W2yjM63pxocCtbRVxUHcnaVwfX5PcvdaPzQ35fGPvzr9rXkoaVcXPSpmbWa8x5VGJWqbfSUo-xU9eq6gd=w685-h913-no


I then moved up front to drain more coolant but then got distracted by removing the old ABS system. Thanks to @VANSXTC and his T-Bleeder it made relieving the pressure a piece of cake. Good news is the system was under A LOT of pressure. I actually had to open and close the bleeder several times to fully bleed the system. Means it's working properly so that makes me happy for whoever uses it next since I'm going 00+ ABS upgrade. My hands were covered in brake fluid so I didn't get many pictures.

ACtC-3cjTRr1NlAb-hBWNK-bXR7fQkKfyY0WEy41oKjyPTZmWCzC0UG56fA9P4nFJR2xCyTG4RSrAostNZePmNrnEAhAh4VuMKT3aIg3mCD9EGbpY_E7b5BtMB_Lj0CY9uAXpZyMejTbJh63EX2ADJdKUxHZ=w685-h913-no


I struggled with brake lines for the better part of the afternoon and lost sight of the coolant. I forgot how back breaking removing all the lines are. Not to mention the stupid cruise control unit gets in the way of a full rotation for the wrench so I took a few minutes to dismantle that.

ACtC-3dIaeUI-6HGNlLGxci3wsyD9v72A2t2NuUltWJS7Cc1D0S0FiQddTCo31mBbKPrPOkScfuFJDLUDEKyWa0XL34uNxpOsLVwqBAEKAZz-5zokrvknhmWde6IzAwywrxXAWWsWQm5KakET3P8rZZhWDbl=w685-h913-no


ACtC-3f4KYvepGY7RCE4tPyIO5shUpkJrwtn6li42TcWWMRMFkcc9fvKEzRbJzeWYTm0sQzOgxBkFtoDUxCJAp4le84BAhzYrcWjMSRcF8PaGzw-LO3kwHaGkAZNop7VzuMwsTQ8LYfBRJeFhkww7BGham-Q=w685-h913-no


ACtC-3eQ4xpVg3urLMulFN0_64L3Mwg8m660q7zA_OeJOhM-aNyT9JJ2T5s5VwXd0dHKfwMTnEM4Gx4nlUtWoBP7WSlI38NrScawtFbUQUjfdyWEgh9-xI_KDVH01jut1isrY6S8pIEJYi1thOOh4FQDWlip=w685-h913-no
 
Teardown 10

Reattacked the old ABS unit, I should have just disconnected all the brake lines but I thought I could outsmart the car, and my back was killing me from being hunched over. Finally gave in and took off the spare tire guard and then was able to lift the whole unit right out.

ACtC-3dzVJ9WrTLOOcpHj0K6g2Tul8RocQRApey44Y7QzMKZCOjlGQoMLj0565yg4ELSVI5j8i5d8ezWYcP7pmKXDWVKVADVRKeehmxVMf-raf0odCjJtbjfZriuKaKEJpEnK7FlbUMfaAB9ty7MFEFo8L7_=w685-h913-no


ACtC-3dsSRD4zD0wkvUEDh2fq_H8y-nBSpRIDVeTOpsqSmbxOgZQ9c7sM3HEPOvgQPHl0k3ej3RiBuC0XvmHAatxbKWOLTH63MysgmDlP2wTJsRwslCdvj-i_pN-YFQ_hiApkEzyKa3zBrt--G0XT_WfYhB_=w685-h913-no


ACtC-3credh7Lc455i6e0YcYkRAGdr2L3SHS4Ooobf0gBJhR2fmgKU8TE2AUnVgDFgPXn0FEwgPVLLqWSd_Y5awA_CWUoL0xo_oF10zS-xGtca_GTSdPnW3N6BGR6DEKOktMYoFhFZBSvRHDiqjqG3-0VZns=w685-h913-no


ACtC-3eLW6oC0GSXFops5bpTKdnLPgewgKUOyuMNreUvf-HpqUJOuSBu9uzRzci-KZtQKXSPCzi-wIvfVBrMqiFU35DlfIcqmqZnKawfuAWF9TLLzF2rXE3NHV1PpIf4DHBgfPpXK_ZdOCTTFVuycdOqpiXs=w1218-h913-no


With that out of the way I needed to dump the coolant from the radiator since it will be replaced by a Koyorad. Here's what a 30yr, 57k mi, Colorado radiator looks like:

ACtC-3epwYE7fWIhF9qH7sYOWRgUTlj_r2zuDkBoGvYpesvgSzio_UlMLPaSI6rG6863IXIX7J6zFJw4j90OBLiDhY8eWVAbopBeZ_XoOyb-aYDPZryOok_CpuG4522azca0_P4mJsJpS0vsBEn_55DHLFG4=w1218-h913-no


ACtC-3dILJI7tEeA702vEIzHBWv0rAW0Y1XNuF-bErI5wkb-Ue9uRQT4PoqkSsN9aIVIFYXtwBTLv-aV7D51QLmh78b_e5Vhx78qOI2gY7DMp9y4TZmzi9dwdqqFAQ5UCuuS75z6DrOrAbqI3oWMKSHunT0G=w685-h913-no


With that all done I decided I was tired of leaning over the bumper to work on the front bay so off came the bumper.

ACtC-3eua7A5HNyeN0UO8rc1mWXTmDn0qs-UYQmOUty34OPi9eUbPy5wMfElBm0o0NCg2ST-wh2wCtvn1yEmLT0IqwM1iNCPlfFBbGgDn8_rORaXc5Fp71mw9MmYRfjy7pFTenTHCiaVJmKHFpcSNTVLqQaC=w1218-h913-no


ACtC-3cglLouvlbo9yZShJoKGXWP2-X7Pk88VAbA_LuUVtaCxNP4uBZPhwzSa9-TUowuCWWHKlVHlk5W79CvSmeqOTcEWnXEQZE0dGdlnVPRbt6zxuG1QSH0L8NIvycrPGFHJYGJokCtmWy06pCmefeeZuQ-=w1218-h913-no


The previous owner had the bumper resprayed a few years back and the shop that put it back on had put two screw clips in holes they didn't belong in so that made for a frustrating 45 minutes while I tried to figure out why the bumper cover wouldn't come off, but thankfully figured that out before I forced something and broke the lower bumper cover.

After that, 6 bolts and disconnecting the windshield washer fluid line and the bumper beam was free! My windshield fluid tank was empty, I had no idea, thinking back I don't know that I've ever tried to use the washer fluid.

ACtC-3ey-W1bpUJlrOdhAN5nOL-5Bwl6JeJgDh5UIx3h-5MeftjJnjyCIG4lhv0AaTW-OBfO_V3iOMhVtFQYStj-7jJoX1HckQeyVMRzbcmZ1aiePPBS-o6it6EWA_YjNQGCrZAtcXtD5Rwo09CZdloQKZfC=w1218-h913-no


ACtC-3fw5HbTBPahWPSEml2OPKIuX8iY1ABG4-hXcbEbyTcP_33DNO2conhrloF8xWByt1nlNseQwasHWb7YMfWHl9dNZ8DpdGyGhqzIip9F-4Wr8DCpjJUWZ0Lq77K9cYa-EwhsOtPmD9QN64oEV4muRDjA=w1218-h913-no


ACtC-3d0R66diFtnpCdBfNDfd6UiO5gaVowPIw6jlBxAbIUNLCWblZ9jztsjjd2riFfw5NhInmqK2W9C0WcjTXNRa2ytmqll_9HpLiOcWWT0zp7dTesSPfntuy7yPbPyXpsG_gmipcFbhgYG0XDqlzG9Am6Q=w1218-h913-no


Now I just have to decide if I want to go with carbon fiber bumper beams or stay with OEM. The weight savings is intriguing but the weight savings in the wallet not so much. I have time to think about it thankfully.

Pulled the Radiator Shroud off and called it a day

ACtC-3cOKIABW7rxBve-UZk6EdlQJuCncPrd9-MBrvhq1BHcILVehT7JUCqwruj1_CAIoCAdMLKYvtty8I1LYY4S2jjcunymNAvEENyt0eR6XF8AUJ4nBNr-bNLyvc4rAyrf0uVDUWqyOPaO-0CUajExXNsR=w1218-h913-no
 
How do the door switch panels for a Type-S work, are they not all RHD-specific? Maybe that's explained by the pics.

Is there a way to depressurize the ABS without a T-wrench? Just eek it open and hope for the best? Lol

Lastly, is Paul really letting you store your disassembled car parts in the house? :biggrin:

They are Zanardi panels, so same as Type-S but for LHD. :D

For the ABS, you can just use a home-made switch to open a solenoid- when I do it, I cycle the solenoid rapidly as if I'm exercising it until the pressure bleeds off than I leave it open to relieve any additional pressure. But, the T-wrench works better for sure.

Mrs. Honcho gave the OK to keep some of his parts here, but others went back to his house for refurbishing or painting. :)
 
How do the door switch panels for a Type-S work, are they not all RHD-specific? Maybe that's explained by the pics.

Is there a way to depressurize the ABS without a T-wrench? Just eek it open and hope for the best? Lol

Lastly, is Paul really letting you store your disassembled car parts in the house? :biggrin:

Get yourself one of these square drive socket fittings (the wall thickness is key to fit into the recess in the ABS modulator).
https://www.ebay.com/itm/1840028978...MI1MS_i8Lw8AIVwht9Ch2k7QNdEAQYASABEgKtvPD_BwE

You then loosen the fitting open just enough to relieve the torque on the bleeder, but not enough to actually get any brake fluid out. Don't crack the bleeder open. If you do, immediately shut it if you see pressurized brake fluid spraying out from the socket fitting.

Then, remove the fitting and attached some tubing to the bleeder (much like hooking up tubing to a brake caliper bleeder bolt) and run to a suitable collection container.

Then take a set of needle nose pliers (anything that can fit into the recess and allow you to turn the bleeder.

Crack open the bleeder and SLOWLY depressurize the system by allowing brake fluid to run into the container.

As pressure in the system drops, you can slowly open the bleeder a little bit more.Bleeder fitting for ABS modulator.jpg
 
Last edited:
Any updates? What happened to NSX_n00b? He hasn't logged onto this site since June 2022.
I'm still here! Good news is that I'm alive. I had a lot of personal and professional things happen to me between Aug 2021 and just recently that required me to take a step back from my build and focus on other things. That being said progress did continue albeit slowly. Body panels all went to paint in June 2022 and were finished up around Dec '22. The chassis went into the paint booth just before Xmas and is now sitting my garage.

@Honcho came down last weekend and we started doing some tinkering. Bad news that I need to do some rearranging of some things after my vacation next month so that I can really start going full send on completing the build. The end is in sight and my hope is by my birthday in June to have her road worthy again. It's going to be a big task but I think we can make it.

I should get back to being more active and have more updates here starting in March
 
What is Colorado trying to challenge California for the hottest NSX's? I loved watching Honcho's, equally excited for this one. I'm doing the same with my CRX Si, although I'm stroking a check not doing the heavy lifting. The whole build is being documented on YouTube on the AHC channel. At least I'll have that to watch.

What color are we going with? Please tell me JDM lime green metallic!

Hopefully I can start providing some more frequent updates. We worked on pulling my intake manifold off this weekend so I can get it cleaned up and ready for the RDX injector modifications, but came up a bit short on a tool so we got 95% of the way done with the removal.

It's not lime green metallic, but it is another JDM only color!
 
I'm still here! Good news is that I'm alive. I had a lot of personal and professional things happen to me between Aug 2021 and just recently that required me to take a step back from my build and focus on other things. That being said progress did continue albeit slowly. Body panels all went to paint in June 2022 and were finished up around Dec '22. The chassis went into the paint booth just before Xmas and is now sitting my garage.

@Honcho came down last weekend and we started doing some tinkering. Bad news that I need to do some rearranging of some things after my vacation next month so that I can really start going full send on completing the build. The end is in sight and my hope is by my birthday in June to have her road worthy again. It's going to be a big task but I think we can make it.

I should get back to being more active and have more updates here starting in March

Cool, I appreciate the updates! I was looking at your helpful NSX color code chart and some older posts of yours but saw that you haven't posted in a long time so was beginning to worry. :)

That's great that you are still pushing forward with your NSX project. The car looks great, and I'm looking forward to seeing how things turn out.
 
What is Colorado trying to challenge California for the hottest NSX's? I loved watching Honcho's, equally excited for this one. I'm doing the same with my CRX Si, although I'm stroking a check not doing the heavy lifting. The whole build is being documented on YouTube on the AHC channel. At least I'll have that to watch.

What color are we going with? Please tell me JDM lime green metallic!
Is this it?
 
Teardown 11? ish?

I know I haven't updated in umpteen thousand years. My apologies. So the build is back underway. Spent the last few weekends doing a bit more teardown (and some reassembly, more on that in another post)

@Honcho helped me strip down the engine bay a bit with the removal of the airbox, the throttle body, and the entirety of the Intake Manifold (fuel lines/fuel rails, egr, and all).

Here is what she looks like:

IMG_7424(1).jpgIMG_7430(1).jpgIMG_7429(1).jpgIMG_7425(1).jpg


The IM will go to the ONLY shop in Colorado Springs that has a hot tank and for liability reasons they need to do the work so probably means no fun pictures but that's on the schedule for next week.

Once she's back and the new gaskets arrive from Japan I will made the RDX Injector modifications, slap her back together with the loctite butterfly assembly that @MotorMouth93 was gracious enough to send me a few years back. I'm also deleting the EGR so I'm waiting on ATR's kit to arrive for that.
 
Teardown 12 / Cleaning Part 1

My dad came out to visit and it so happened to coincide with my roommate actually being home and she has been itching to help do something on the car. So what better activity than have them do the stuff I did plenty of on @Honcho's car and didn't want to do again...clean!

While they were cleaning I crawled into the car and carefully removed all of the sound deadening material from the firewall. It's POUNDS of dead weight, yes it will be louder, no I don't care *insert grin*

Here are some before pictures of some of the parts:

IMG_7205(1).jpgIMG_7194.jpg

Armed with some simple green aluminum, 50/50 rubbing alcohol/water, and some degreaser they did an AMAZING job!

IMG_7413(1).jpgIMG_7417.jpgIMG_7416.jpgIMG_7415.jpg

And my roommate KILLED it with the simple green and the subframe components. She's back out of town for work now but will finish when she gets back. She was meticulous and determined to make it gleam, I only wish I had before pictures:

IMG_7427.jpgIMG_7426(1).jpgIMG_7420(1).jpg

And the firewall sans material:

IMG_7423(1).jpg

You'll also notice the ECU is missing, it's in the trusting hands of @MotorMouth93 having the Demon II chip installed and refreshing all the other bits inside.
 
Teardown 13 / Reassembly 1

Well just like @Honcho and just like almost ALL of us have experienced the damn rotor alignment screws are the bane of existence. I had to drill out all 8 screws. Only 3 rotors came off (I get to do the 8mm bolt trick on the final one). Oh and the screws for the front Brake Shields may as well be WELDED in place!! I can't get vice grips on them well enough on the RH side to crack them. Paul got one loose but the other 3 ya...not happening. Next step, bigger vice grips. Next step heat and Aero-Kroil? Next step drill? I can't access the screws on the LH side yet since I haven't gotten the rotor off yet. I can't wait to dip these hubs in EvapoRust.

So while some final tear down is happening there is also some reassembly happening too:

Paul and I got the two front new brake lines routed for the 2000+ ABS upgrade, not the most fun but went smoother than when we did his. So with the new lines in place I set the new Pole2Flag stainless brake lines in and attached them. Still need to do the rears.

IMG_7420(1).jpgIMG_7419(1).jpgIMG_7418(1).jpgIMG_7422(1).jpg


We also started routing the front bay wire harness back into place a bit and hit a small speed bump, the paint shop forgot to mask the grounds in the front bay, so like Paul go to do in the engine bay I get to sand off the paint carefully from the 4 contact points in the front bay. And I'm also waiting on new orange/brown, white, and blue zip ties that have broken. (Yes there is a reason the pictures are black & white...trying to keep the color reveal under wraps just a LITTLE bit longer).

IMG_7478.jpgIMG_7479.jpgIMG_7480.jpgIMG_7481.jpg
 
Brake Adventure Part 1

So I made the determination a LONG time ago that I was going with the 97+ brake caliper set up. Was originally going to do black and then decided nope I'm doing OEM gold calipers. Found a set of used calipers that needed to be stripped and rebuilt, and after helping @Honcho with his I figured slam dunk let's do it. Thanks to @JohnWayne setting me up with a used setup I figured I was ready to go. They weren't the best calipers ever, someone had painted OVER the OEM Gold with some kind of Red paint, well shoddy prep work means that the paint not only didn't stick but they also didn't mask certain areas. No big deal because I was going to strip them down anyways.

Well time was of the essence as I thought maybe I could find a way to still make it to NSXPO this year, I was going to sell this set and just buy brand new OEM ones, selling the 91 set and this set would net me almost enough money for a new set. Well 2 years ago when I was considering that route my logic was sound. Imagine the sticker shock when you haven't checked part prices in 2 years. So nope not gonna work, time to go to Plan C. There is a local powder coating shop here that does amazing work and I've talked to them in the past about this and they were always on board. I took a ride over there today and of course a few things have changed...

They no longer chemically strip the calipers (hooray!) they now use aluminum oxide blasting material to clean the parts. BUT they no longer disassemble calipers with the integrated parking brake. Too high of a liability, and the moment he rolled the caliper over and say "NSX" he immediately said, NOPE sorry, not touching that. I asked him if his hesitance was simply the disassembly and reassembly and he said yes. So I told him that I will disassemble all 4 calipers and bring him just the calipers and brackets if he'll do the job for half price. I've sent a lot of business his way so he agreed. Having worked with Paul on his and having bought every piece to fully rebuild the calipers I feel good about this.

These things are a PITA! The bracket bolts are torqued WAY TOO HIGH and then of course it started raining on me so I didn't make much progress but here's what I have so far...

All dirty and soaked in brake cleaner


IMG_7471(1).jpg
IMG_7477(1).jpgIMG_7474(1).jpgIMG_7475(1).jpg

Cleaning them up a bit...

[Hold for Pictures tomorrow]

Not that I'm in a rush, but hopefully these will get to them this week. I need to re-read the manual and remind myself how to disassemble the rears all the way down.
 
So Where Are We At?

Again my plan was to make NSXPO this year, bought tickets, blocked the room, rented a trailer for the car and my roommate's BMS S1000R so we could do Tail of the Dragon on the way home, etc. That plan is KAPUT! :cry:

I was going to skip the clutch and transmission job. The car currently has the OS Giken clutch on it. It was on the car when I purchased it and thought over time I would come to love it but after 3 years and almost 4k miles I never did. I also started having some issues getting the car into reverse. The plan was to go back to the OEM clutch which I have from the previous owner and then crack the transmission to make sure all was happy. I was going to skip this for now in order to make XPO but @Honcho and I had a very good conversation about things and the clutch/transmission job has to happen now. We suspect what was causing the hard shifts and the reverse issue is due to the OS Giken not being in proper alignment, I thought I had read somewhere that it's not uncommon to have to readjust this clutch every so often as it's designed to be a racing clutch that's adjusted at each track day. The big fear now is that since the clutch was not fully disengaging and was shifting while still partially in gear I may have some badly worn internals that should be remedied now before parts become even more scarce.

So this means axle, trans, and clutch all come out as originally planned. Sucks to miss another XPO but peace of mind is greater.

I'm going to need Paul's help with that job (plus he just did an amazing job on his ;)) so my attention turns to other areas for the time being

  • Blower Foam Refresh (kit ordered from Joe)
  • Finish Front Bay reassembly/routing of harness
  • Remove/Flush A/C Lines
  • A/C Compressor swap
  • Removal of Cluster for Brian K repair (also sending CCU and all audio amps)
  • Clean old grease from Window guides.
  • Start replacing coolant hoses
  • Removal of SRS harness/controller/system
  • ABS assembly
  • Reattach weather stripping to A Pillars
  • Keep debating deleting the windshield wipers and washer fluid tank/lines.
Not an all inclusive list but it's a start.

I am going to be more active again now, I had a lot of personal and professional things happen to me over the last few years and I've been taking more time for myself lately which is something I haven't done since 2016 so it was high time I did so. But I'm back now!
 
Last edited:
Reassembly 2

I spent most of the weekend sorting through the hoarder's den that has become my basement and pulling out all NSX Parts for organization. @Honcho and I spent what he's guessing is days looking for parts when we did his reassembly so in order to prevent that from happening I decided to organize what I had as best as possible. I had so many parts bags that were unlabeled that it took hours to cross reference the parts catalog with my orders and try to figure it out but I think I have it 97% done. Total organization is probably about 89% complete, I have to bin together like components still but I can't bring myself to go near Wal-Mart or Costco on a Sunday.

With all of the organizing my brain could handle for one weekend I turned to some relatively easy projects, reassembling the A/C Condensers and the Radiator. Not much to say here so I'll just let the pictures do the talking:

IMG_7493.jpgIMG_7494.jpgIMG_7498(1).jpgIMG_7500(1).jpgIMG_7502(1).jpgIMG_7543(1).jpgIMG_7545(1).jpg
 
Teardown 14

I called the only shop in town with a hot tank on Friday and I'm set to take the Intake Manifold and components down there tomorrow for a good hot bath so I had to tear it down the rest of the way:

First up the Fast Idle had to come off:

IMG_7525(1).jpgIMG_7529.jpg

Then the EACV:

IMG_7531.jpgIMG_7530.jpg

Then the EGR Pipe and cable clip on top:

IMG_7532.jpg

And then finally the VVIS and bottom could come off (I drew myself a little picture of the pieces for quick ref):

IMG_7533.jpgIMG_7535.jpg

Actually a lot less oil than I had expected based off of Paul's

IMG_7534.jpgIMG_7536(1).jpg

The butterflies all look good and are at 90 degrees. I am going to replace it with one that @MotorMouth93 sent me since he applied loc-tite to the screws on it but I am impressed with the condition and none of the screws are loose.

IMG_7541(1).jpg

Parts are ready for bathtime

IMG_7542(1).jpg
 
Reassembly 3

Not a major update. I've been spending a lot of time organizing parts and making sure I know where everything is to help speed things along once it all starts going back together. I'm also taking stock of the last few bits and pieces I need that I keep forgetting about. Needless to say...3 orders from Japan later...and I still forgot stuff.

I got the IM back from the hot tank and was actually rather disappointed with the job the shop did. So I soaked it in a bunch of simple green and scrubbed it with a soft bristle brush and I think she came out MUCH better. Also pulled out the VVIS I got from @MotorMouth93 a few years back. I need to drill out the fuel injector holes for the RDX Injectors and then when the gaskets arrive from Japan I can put it back together and back on the car.

IMG_7575.jpgIMG_7576.jpg71383488809__05A82EA4-51B4-4E5C-9C93-B25E00F61E73.jpgIMG_7577(1).jpgIMG_7581(1).jpgIMG_7580.jpgIMG_7589(1).jpg
 
Reassembly 4

I decided I'd tackle the trunk and put it all back together today, I didn't feel like contorting myself in the car to keep attacking the SRS harness or the Cruise Control Cable.

IMG_7618.jpegIMG_7619.jpegIMG_7620.jpeg

What I thought would be simple turned out to be anything but. I had originally left the wire harness completely in place because there was no need to pull it out, the trunk wasn't being painted. But for some reason the body shop that did the paint pulled it out and in doing so broke 90% of the clips and didn't catalog where the bolts came from, I just have bag that says "Rear Trunk" :mad:

I laid the harness in place and reassembled the trunk lock/release as best as possible, made my best guess where the proper bolts went, I clipped the wires for the rear markers since I won't have them any more and called it a day. I have 2 bolts and a bracket that I have no idea where they go so this will be fun. I also may have used the wrong bolt for the lock cylinder. The diagram calls for a 6x25, I had several 6x15 and then I had a 6x23 and a 6x28 so I used the 6x23 *shrug*

IMG_7623.jpegIMG_7624.jpegIMG_7627.jpegIMG_7626.jpeg

Oh and I also filled the rear marker grommets with silicone so I don’t have to order plugs

IMG_7628.jpeg
 
Great tips. I especially like this plug idea as it makes for a cleaner install of the steering wheel. Any idea what the name of this plug is or where to source it?

I would like to buy it separately if possible. I found some used SRS reels on Ebay but they are going for around $150 for dirty ones, ouch.

However, if I can find the yellow connector brand new, I am willing to pay $300 for it.

I'm trying to do things as cleanly as possible and I really didn't like the, "just stick bare wire into the SRS connector," approach a lot of owners do. Thanks to @MotorMouth93 I went to the junkyard and ripped out the SRS connector from a '93 (I think) Honda Civic:

nyGv0v0Xc2FL3ZDaH9VsYsYn_CszRjy1fG8CIuA90fsQJHme0Av3ChOBDGU37tHtqPARJ5Hd_WZz8EWbfla1OwnY_qdBBC5iQxA7MBjWTTmr-cKV30TomXORaAY5EFvgPQhI6FEADdCkr2DegwnVWzBNuNrGdVF8-sXXvAy688UE-crWJzrMlBd_MITFnSaQ4oeR7RRbF5PDQeOpq9e6VAHEfmQvpazvV2PjGTngZK1bx_J3zdm5ElQDImdtqDFdjqwjgwxn57lGy0n_tJfwM1RUBRX1grXteJLrV6s3SIM5I2L1IV420ZmXIYULOHBsVl_2pi0KIaUq2sHnIR8GkfZ5y09DtbW2GHxBMVNOtfEif7kthwMa6-M6OOgUKC2YP8DClFLGVmkT44NYoL--nKZFJlZfN13DapsTVtJz1ZcDzfhrcDTwhf0AWsWyxxPr3_un8F88kY-r1GY0zwwosDSitISLofS40QAWaovcfeMfAWu61ydW-LFo2rdNd5Bb9HU308GCYn2QHBcQS4P6RvbCKvRgTwO7UuyhGIT_pX4Hc-PnGJ_M23B0rNQgXV5Y9Jz-phwfAzkva-XncLOuYuUUFN4cpHfGeE6-s9G9aVRvhSlDBtyby6h_8Kd6rBUnTIPtVJlpqiZ2N5wQU5ztZVs4XT9Y59DgxdzlR1UdJazQvUr4OO1AF--t3bxsicVYlcDvdhd7T-paMKdCbf2Ji7KTEZh4liSiFOciw-GYsNAxfJRe=w648-h864-no


cUj8hRZToE4nb0sBkXTK6orU3yxTn4YWszQCdITigs8Lg9Y8uDzJV97ZUHTR8vWibD97V0e5FmdYGKuPpIdbRHJHovVIthdbYP1u-8LRUPi8qkbgIZpfXi8DHaSRGMCLGF4wDaz7-SUceARJESh6vsJ4mDz8efev-VPEsSv0jo53YGCQScO0LEGNisjtpiylnFvm7SyJBX7fyYkhmAyi3dDnzIgdh9N2Vj1cBKUHr0vERmxLiRQPsbaVTYMxePlyK6KIDQkF6FwKCbp5BxB57jA95u4w9u-Dwm3G510kCM2WoOS0Gqn1d6C4KucRqDprGRDaS0v8tG9TL514D5Z1cWoEwske9fFIHTaReG5KdJ1w38XjtOIhih3h72XbakhUy_DQOMPA8yFCGpz7IH31nkeiMYD8mDDSONUF-MjzVZT4j1u7X7TOGHsF0cJy-EShGEW8LJMP2-66t7rcPCRlt6PLsLFbfFLDPja_BNF2ZCOu30-7ZfHFNaajOQzBgCjKJqt9n6PG31O_u9ag9eIMcQnkdh2Hk9BOPn6NruIvK1qeU4Cz1Kuyz3jJXHEQdMybsqUvHnlniQuj9F01ugeEahWxlRYoH6Dft3yDmOq92T3wttcJZPDObKv0y3DxNIT1AvdMPY_klANAGfD0y2-_TFoLgQP43aLVkj8DGMrRxAPT-vpn1OafcOWxPHqwhgJqVuy57EKaZJulzUU_6k--JkvQhSP8e2HrHG3l6WVQCHCFotb0=w648-h864-no


I de-pinned it and then took the pins off the ribbon cable. I soldered a line for the horn to the pin and crimped a male connector to the other end to fit the horn shoe. Then I took the fuse from TheNSXShop steering wheel wiring kit and soldered the wire to the pins for 4/6.

I forgot to take a good picture of it but you can kinda of see it here clipped in place:

DlFeeOmUQRa_e2iI3wnjtV7Pzbt3ccZNXeWUrlBuo05KA7lMcC2vbSi9BY__AOkfEX-HwIk_xprULIVGpTGluWPpdJu1zX9mbQQDKGR2j5HI1am2HAzGSVFI63JT1oKESnbnzI7Z38hVRHn6E88BAUjpndiqsNgi5YmeH30-78scEWauaYv32wvOQ8ZuokMeMGpFeQAIqUQDled0uoyqp3qzARubQ5BfPljCUgne7GDGvPaCWvg_-VYrIos3xL0KdeMBLjgNSXtguf0u4lLe_s44m7NLxO-_ECJVtSauOhvh5KcRZbOGEPGLrCnPHCT3lVlU7MrepSpB3KlJve-C7pdtvpFeIlKdm3q7gFulyKYLOcVaeERLxrfQh20YYiql-NZdd2M-MZAfzj1EbkcWsTOz9LIqWObN_COgKwH2D1NgkVoZkyPfnoPMrSTIOUzVNBTt5pM7PgEm-oIDnXM1yCcui3Q1BroICdvmL__JFb2r1wmDiXat6XaMVrw4xRms_jqiVPCAlEkz0bXD86KHUstf7EPhONxByRbbwK2peeIgJzl4zNHkti-44e8BUG8itBXefnCbv3jnI2_IV5M4y3Kzque0Dy0eWnPqLuHXG--X2Nm7IN3iD1cfXyfjRqQYGu74q8eulYyUJZqcoqhSrnhanTlrmMass91Cj2hwm7S66p8Jgl7TXweVtb0jZ9Rzs-cmyblQ-foclK0dPCySSILR4kmAgwdlzoBCu4m_o_f8PEBW=w648-h864-no
 
Last edited:
Back
Top