-
Protip: Profile posts are public! Use Conversations to message other members privately. Everyone can see the content of a profile post.
You are using an out of date browser. It may not display this or other websites correctly.
You should upgrade or use an alternative browser.
You should upgrade or use an alternative browser.
tbox's first project car - 1993 GPW restoration & learning journal
- Thread starter tbox
- Start date

[MENTION=32087]tbox[/MENTION], I think your car may have been Bosch supercharged at one point. They require relocation of the rear fuse box for the compressor to fit.
Great project so far!!
One of the best threads on prime. Glad you updated it and didn’t give up. I’m surprised you didn’t just drop the motor and tranny and tear everything apart that way.
Thanks! That last post just reminded me of how much work it is to maintain a build thread, so that next part might take awhile.....And I did seriously consider dropping the subframe, but it would've required some special equipment/tools to lift or raise the frame. I was too stubborn and wanted to know that everything can be done with a simple tools that everyone has in their garage. Plus I needed access to the bottom of the engine/trans for a good portion of the job, which would've been very difficult if I had dropped the assembly, so it all worked out in the end.
Now having done it, I can safely say there was sufficient space to do everything I needed thanks to the excellent serviceability of the car. I didn't come across any bolt/nut that was hopelessly inaccessible with the engine still in. The only area that got tight was the rear bank on the passenger side, but tilting the engine from near the oil pan gave me enough room.
@tbox, I think your car may have been Bosch supercharged at one point. They require relocation of the rear fuse box for the compressor to fit.
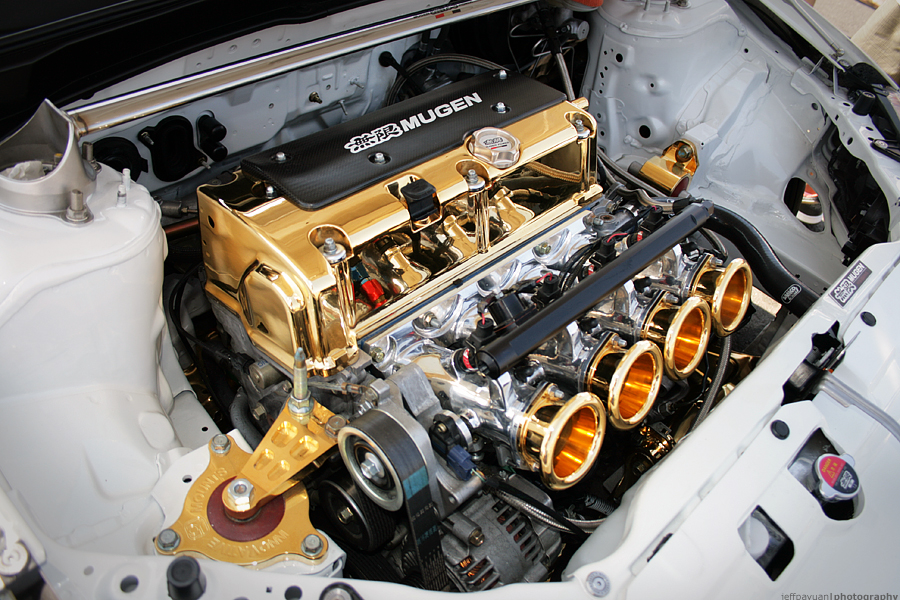
Very interesting insight, but I sympthasize with you for attempting to rationalize an irrational action. Here's a picture of a rather stock engine from the PO's build thread when he first bought the car. And I'm fairly certain he didn't install a SC, so it was likely just for shits & giggles

Great project so far!!
Thanks Nick! How'd your 02+ conversion turn out?
This thread continues to deliver, can't wait for the next installment!
Great Job Tim, car looks great
That just seems so strange why someone relocated the fuse box. But anyhow, it looks as though you have things well in order. So glad this car was saved from the hella flush insta-fam band....
That just seems so strange why someone relocated the fuse box. But anyhow, it looks as though you have things well in order. So glad this car was saved from the hella flush insta-fam band....
Honda Tuck scene
:-dhonda tuck scene
Hi,
Is it me, or the mesh inside the "sucker" is different between the 2, being thinner in your old "slammed" one ??
Thanks,
Nuno
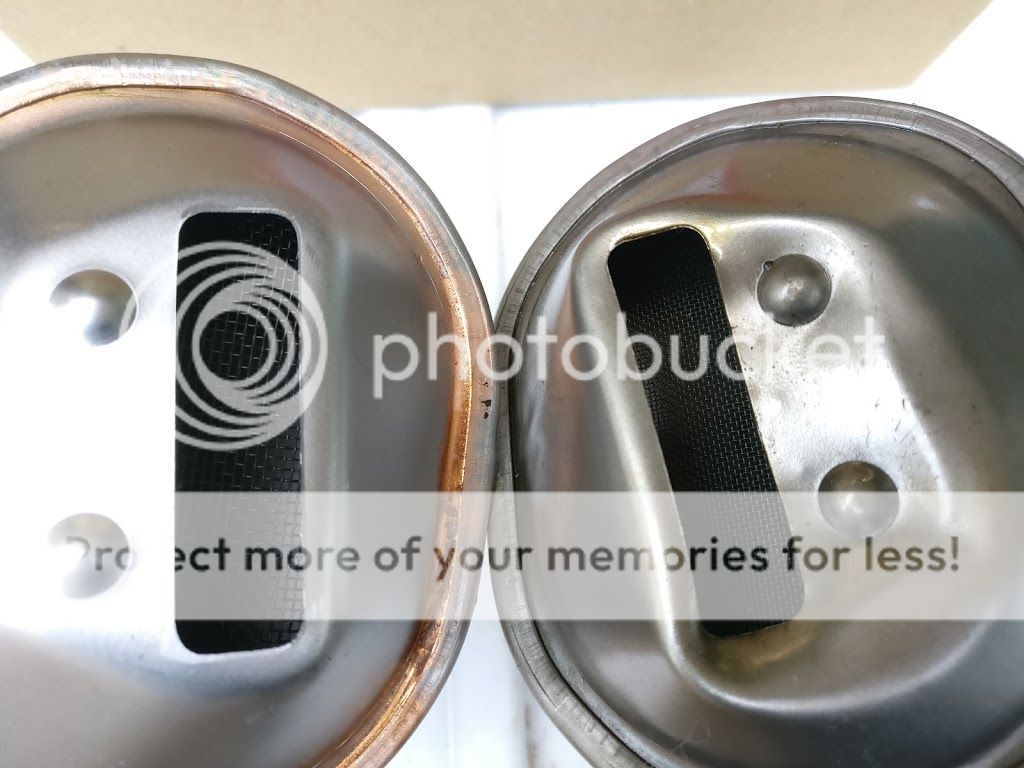
Is it me, or the mesh inside the "sucker" is different between the 2, being thinner in your old "slammed" one ??
Thanks,
Nuno
Thanks guys. @Hass and @Jinks, don't let my experience tarnish wiring tucks for you. When executed correctly with a custom built harness, it can be an effective method of showcasing a meticulously polished engine. It's also not limited to imports, as I've seen it done on many classic American cars and trucks as well. The results can be quite stunning.
Good eye. You are correct, the mesh inside older strainer is indeed thinner. Part number on the new strainer is 15220-PR7-J00, which replaced 15220-PR7-A00. It's common for the OEM to update parts over time, so I suspect Honda went to a bigger mesh to improve oil flow through the strainer, reduce clogging over time, and/or cut cost.
Is it me, or the mesh inside the "sucker" is different between the 2, being thinner in your old "slammed" one ??
Good eye. You are correct, the mesh inside older strainer is indeed thinner. Part number on the new strainer is 15220-PR7-J00, which replaced 15220-PR7-A00. It's common for the OEM to update parts over time, so I suspect Honda went to a bigger mesh to improve oil flow through the strainer, reduce clogging over time, and/or cut cost.
Last edited:
- Joined
- 1 July 2011
- Messages
- 219
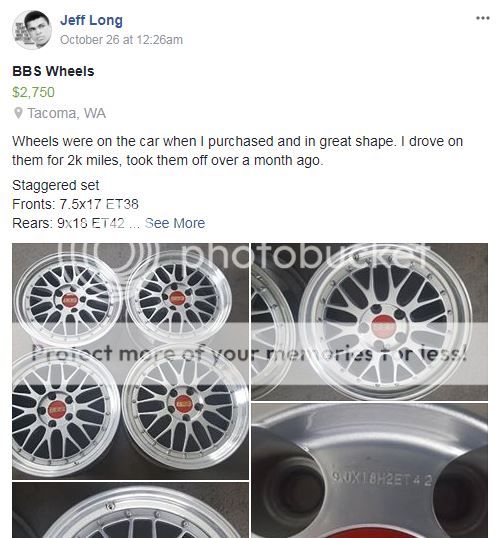
I'm also digging what you did with the LM's. How long did it take you to find a decent set?
That's probably the major thing setting me back on LM acquisition, lol. Brand new is too much for me.
That's probably the major thing setting me back on LM acquisition, lol. Brand new is too much for me.
awesome ride
damn what a build/restoration process so far! AWESOME job man. the refinished LM's look fn gorgeous too!!!
Thanks guys, really appreciate the kind words!
I'm also digging what you did with the LM's. How long did it take you to find a decent set?
That's probably the major thing setting me back on LM acquisition, lol. Brand new is too much for me.
I got pretty lucky and there happened to be a set for sale right around the time I got the car, so I didn't have to search for long at all. But generally speaking, I've seen a used set in proper 17/18 NSX spec come up every 3 months or so between the forums, facebook groups, and Yahoo Japan auction. Going rate has been around 1.5 to 2.5k for a set depending on the condition. Today might be your lucky day because there is a set for sale right now in the "NSX Cars & Parts For Sale" Facebook group:
Last edited:
- Joined
- 1 July 2011
- Messages
- 219
Damn! I’m really looking for an 18/19 setup, but I dunno, I may settle.
If I end up getting a set, I’ll be following your polish process. That looks fantastic.
If I end up getting a set, I’ll be following your polish process. That looks fantastic.
Damn! I’m really looking for an 18/19 setup, but I dunno, I may settle.
That's the same sizing I'm looking for as well. It's like looking a unicorn at this point.
WOW i cant wait to see your restoration on this car!
i always wondered what he meant when he said wire tuck......
don't do polish engine bay......i did all the accessory in my engine bay and my god its a pita to keep clean lol. but if you can keep it clean it will look great!
i always wondered what he meant when he said wire tuck......
don't do polish engine bay......i did all the accessory in my engine bay and my god its a pita to keep clean lol. but if you can keep it clean it will look great!
WOW i cant wait to see your restoration on this car!
i always wondered what he meant when he said wire tuck......
don't do polish engine bay......i did all the accessory in my engine bay and my god its a pita to keep clean lol. but if you can keep it clean it will look great!
Thanks Thanh! Pretty underwhelming wire tuck huh? :tongue: Don't worry, I'm keeping in line with the wrinkled finish, as you'll see very soon

-----------------------------------------------------------------------------------------------
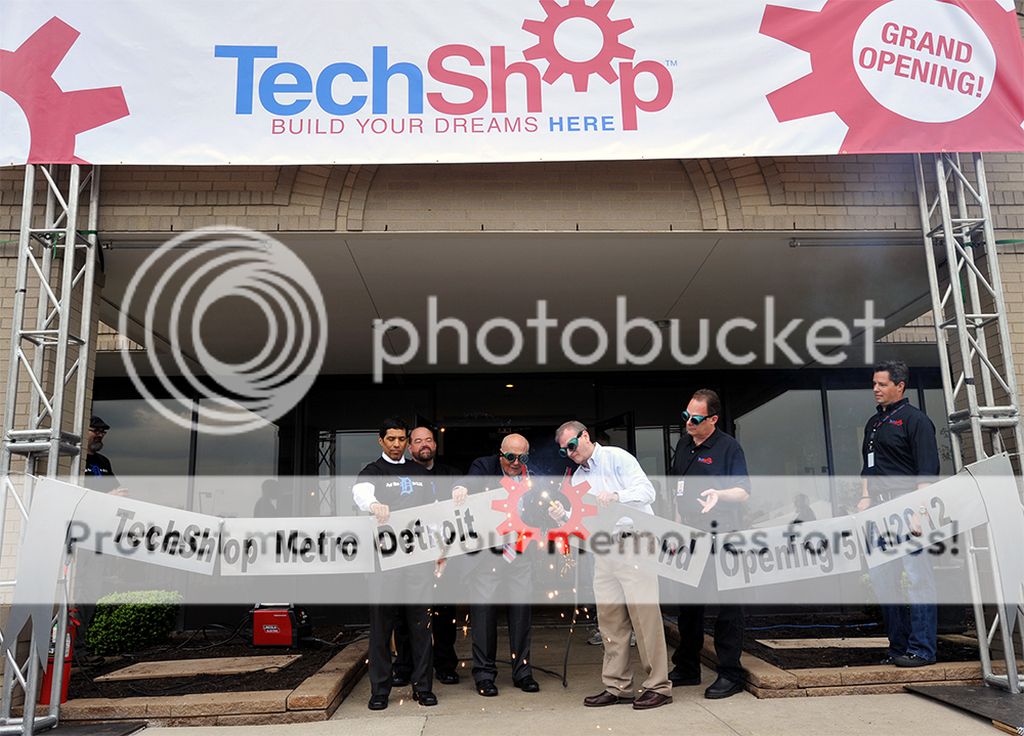
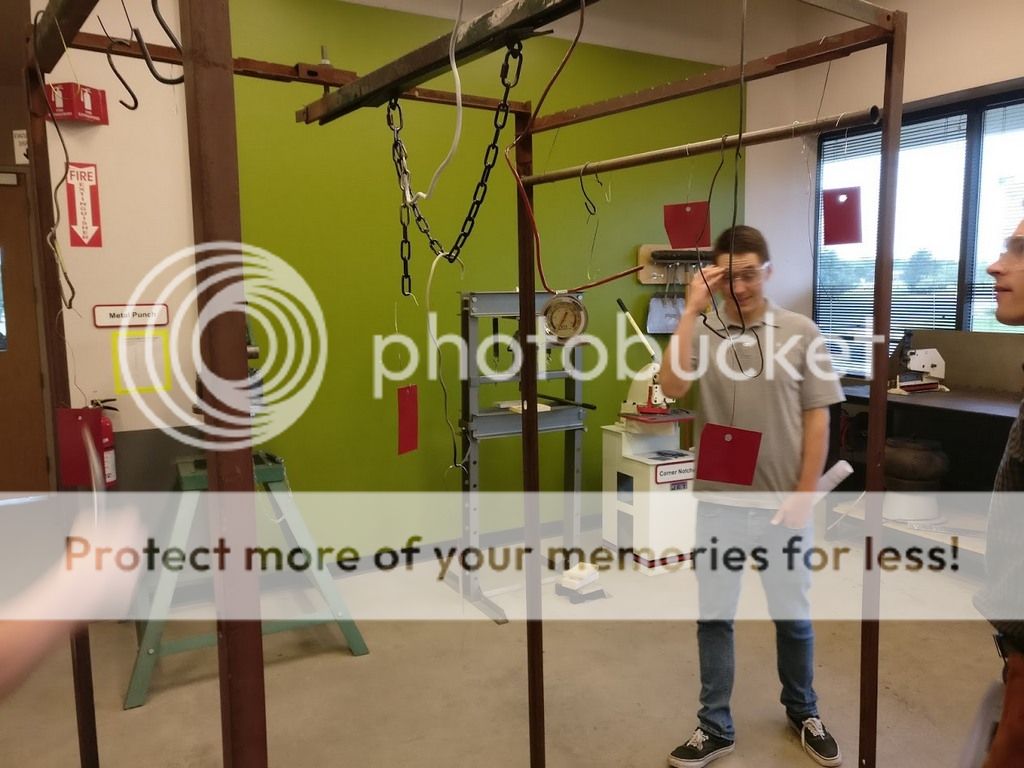
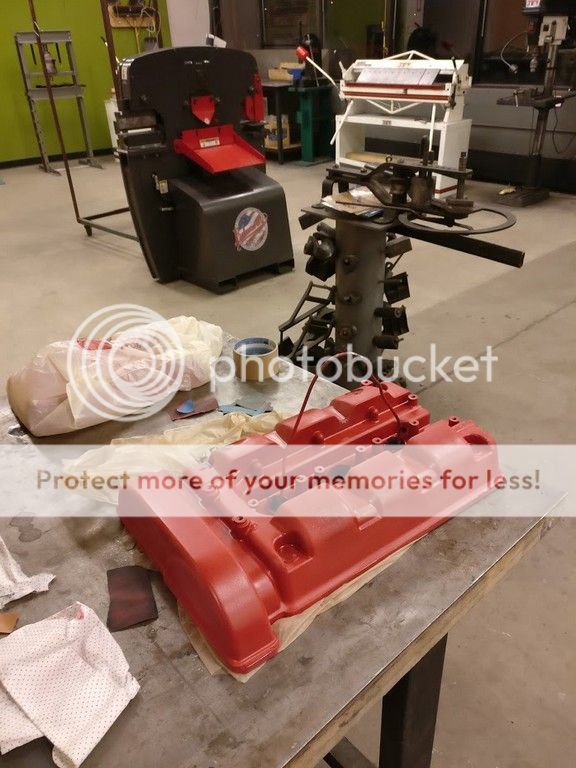
In light of the recent news about TechShop’s bankruptcy, I’d like to dedicate this post to show how it became the main enabler for one of my favorite DIY projects for the NSX. For those who are unaware, TechShop was a membership-based open workshop/hackerspace for people to work on any projects people can dream up. There were 10 US locations that not only offered every tool imaginable, but also classes that taught people the skills to use these tools. I was able to obtain a 3-month membership and some credit for a few class through work, and I’m very glad I got to put it to good use while it lasted.
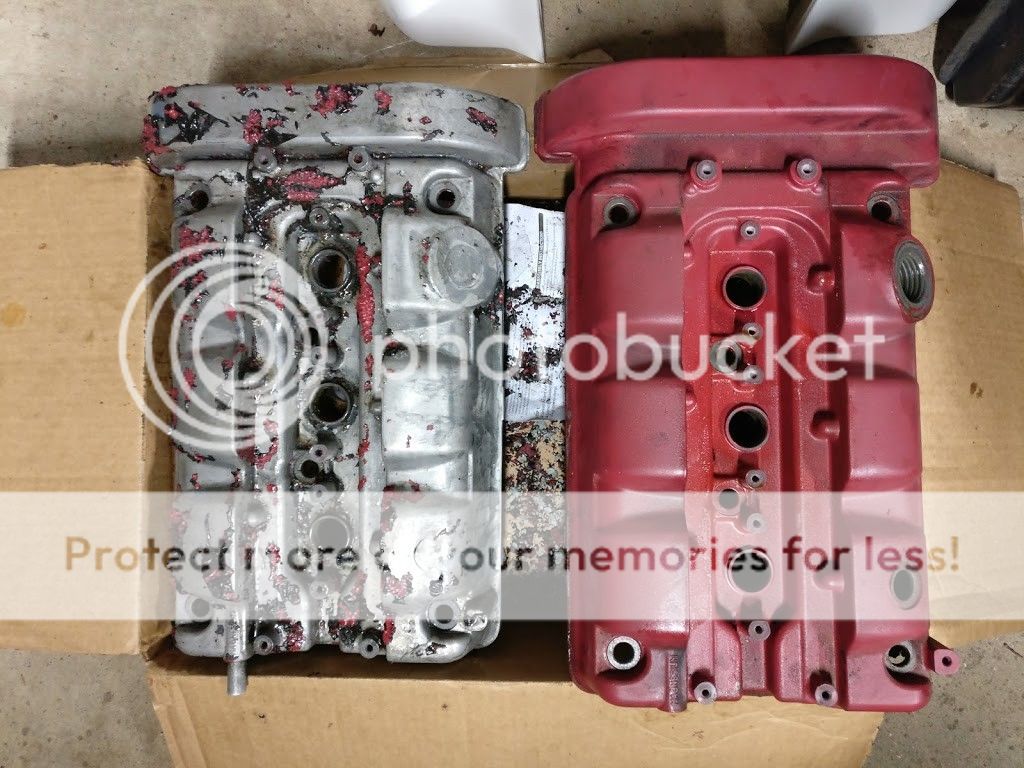
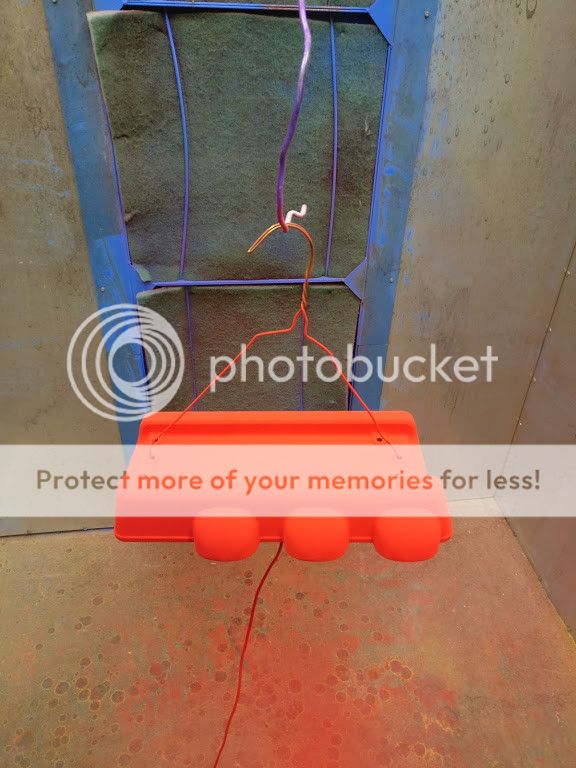
I was originally planning on sending my beat up valve covers off to a professional, but after learning that TechShop in my area had a sandblaster and powder-coating booth, I decided to give DIY a shot and signed up for the class after work with some friends. Throughout the 2-hour course, the instructor taught us how to properly operate the sandblaster, prep the medium for powdercoating, actually applying the powder, and baking/curing the powder in the oven. The hanging red squares started as a bare piece of metal that each student sandblasted & powdercoated during the class.
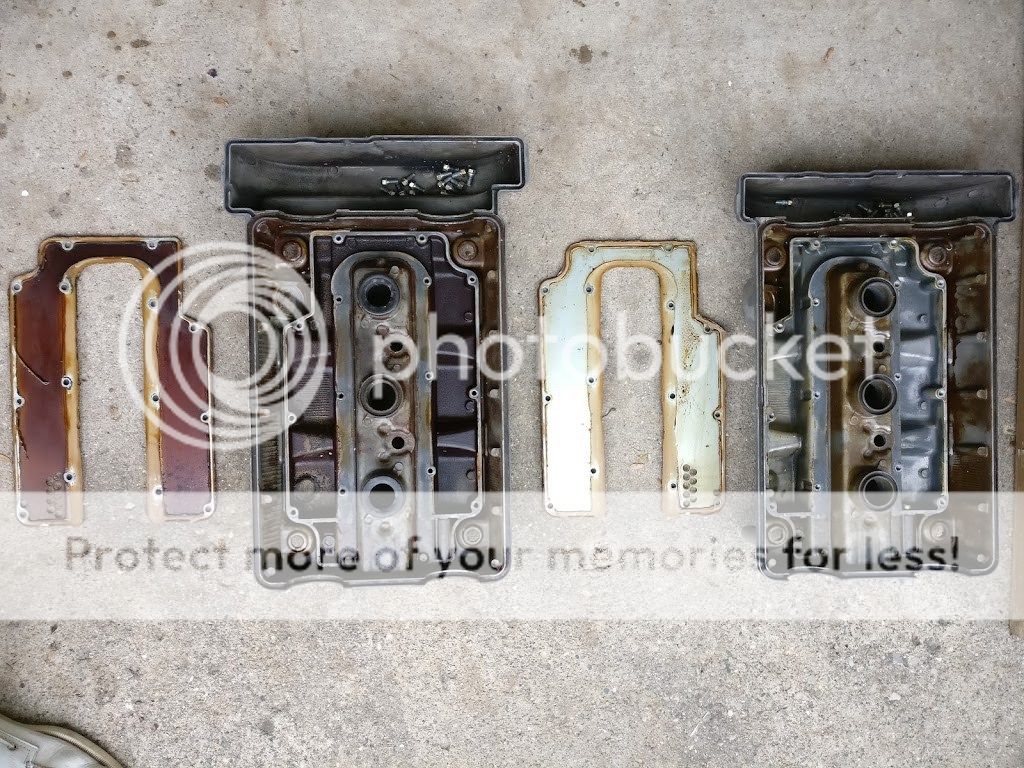
First step to refurbishing the valve covers was removing the baffles on the inside. You can see how oil vapor trapped inside has turned to a dark layer of gunk over time. Unsurprisingly, the front baffle was much dirtier than the rear since the front is where all the vapor escapes through the PVC. Also note that there was liquid gasket to seal the baffle to the valve covers.
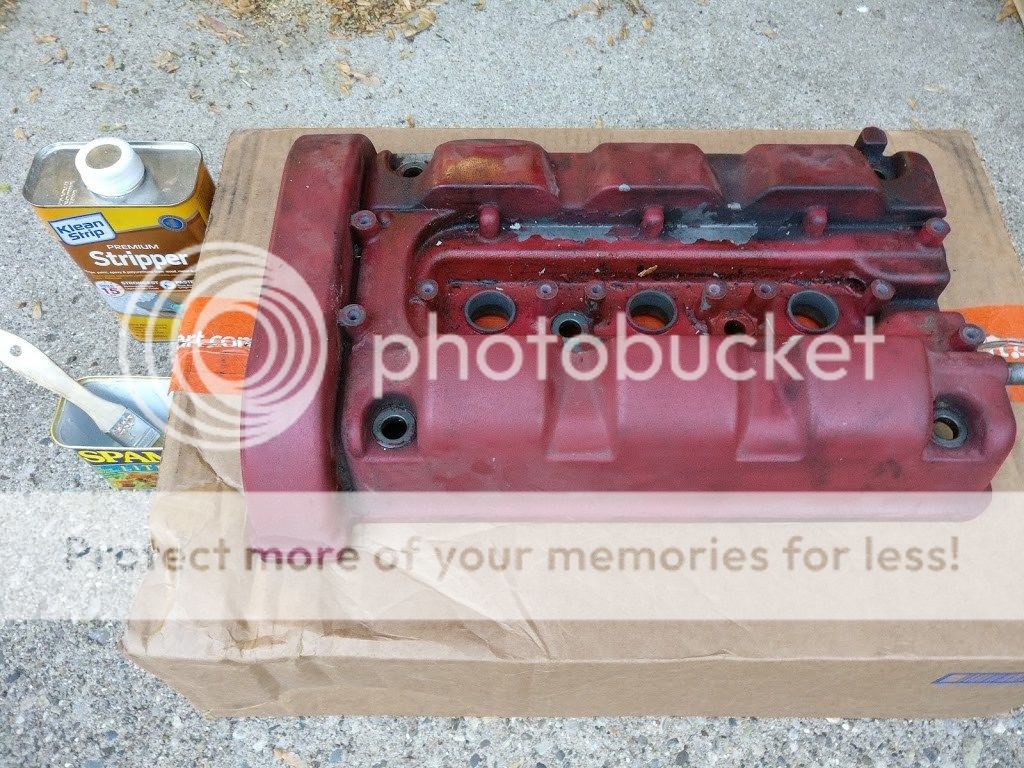
Second step is to remove the original paint from the parts. I initially wanted to avoid sandblasting and tried to remove all the paint with chemical stripper, but it soon proved incredibly difficult to remove all the paint hidden in the little crevices on the valve covers. After some experimentation, I found that the most optimal method was using the chemical stripper to remove 98% of the paint and let the sandblaster took care of the last bits in the crevices.
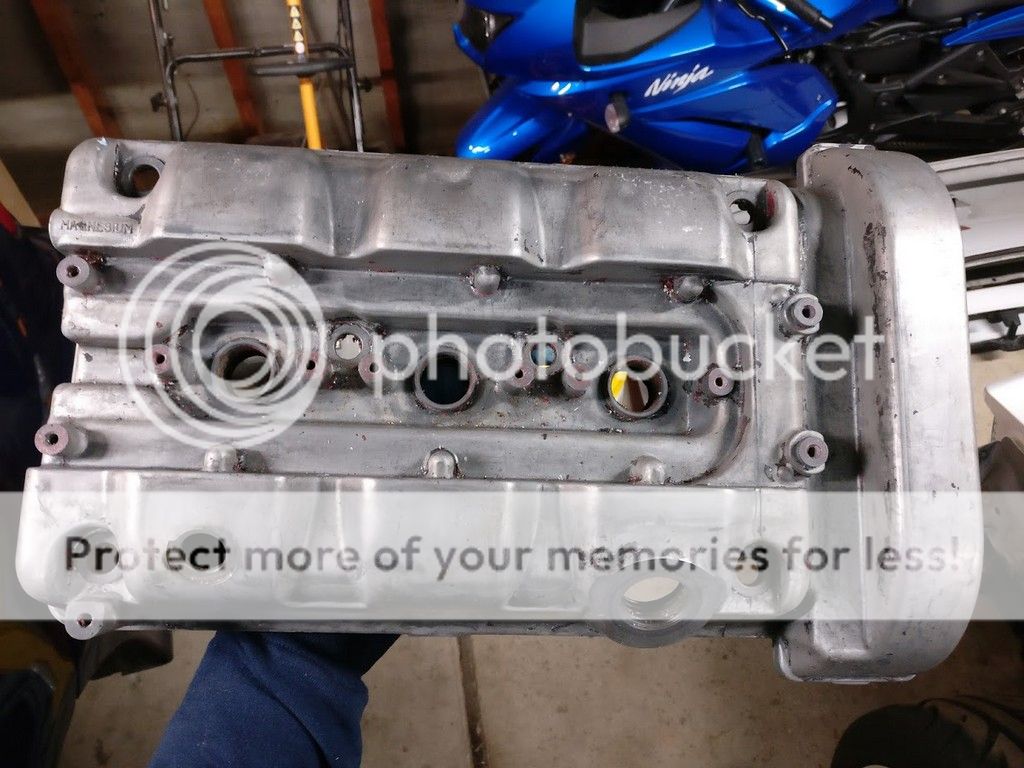
To prepare the valve covers to be sandblasted, I first washed off all the chemical/paint residue with soap with a pressure washer at the local DIY car wash, dried/cleaned the parts and then covered the interior of the valve cover with blue masking tape since I wanted to leave the inside, mating surfaces, and screw bosses untouched. An exacto knife helped a lot with this step.
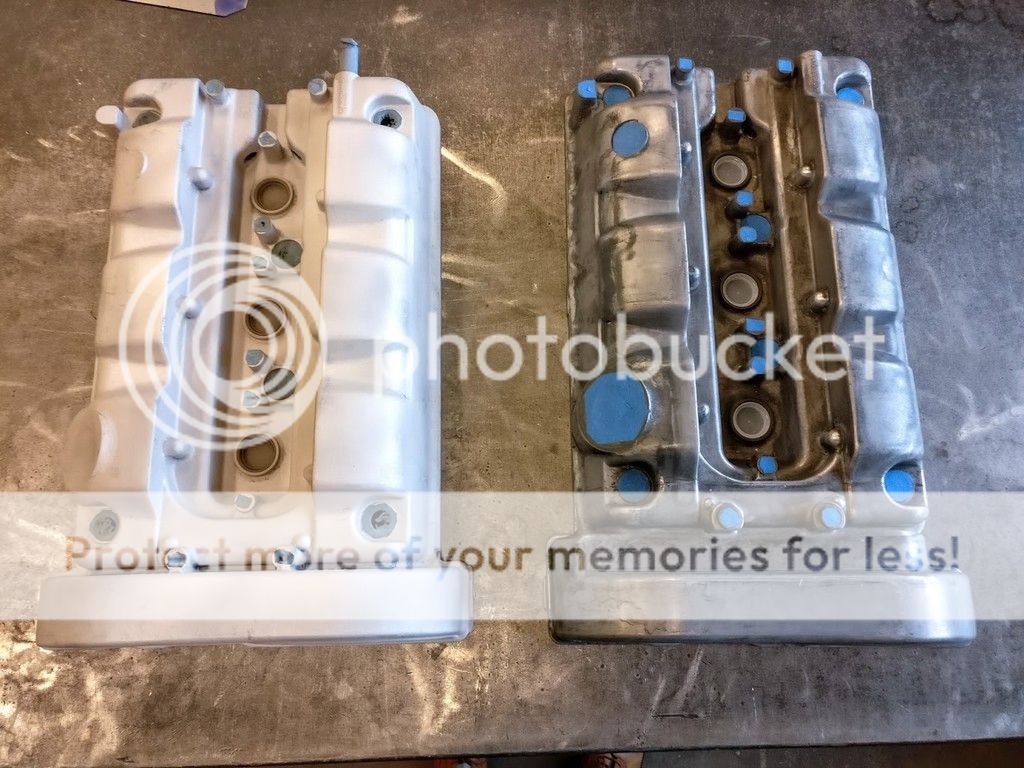
Using the sandblaster was fairly straightforward. I just had to place the part inside the cabinet, make sure the nozzle was kept at least 10-12 inches away from the part, and moved evenly across the surfaces without dwelling on any particular location for too long. It was surprising easy and satisfying to use, and was very effective at removing not just leftover paint, but also rust on old brackets. You can see how the raw magnesium valve covers compared to the sandblasted version.
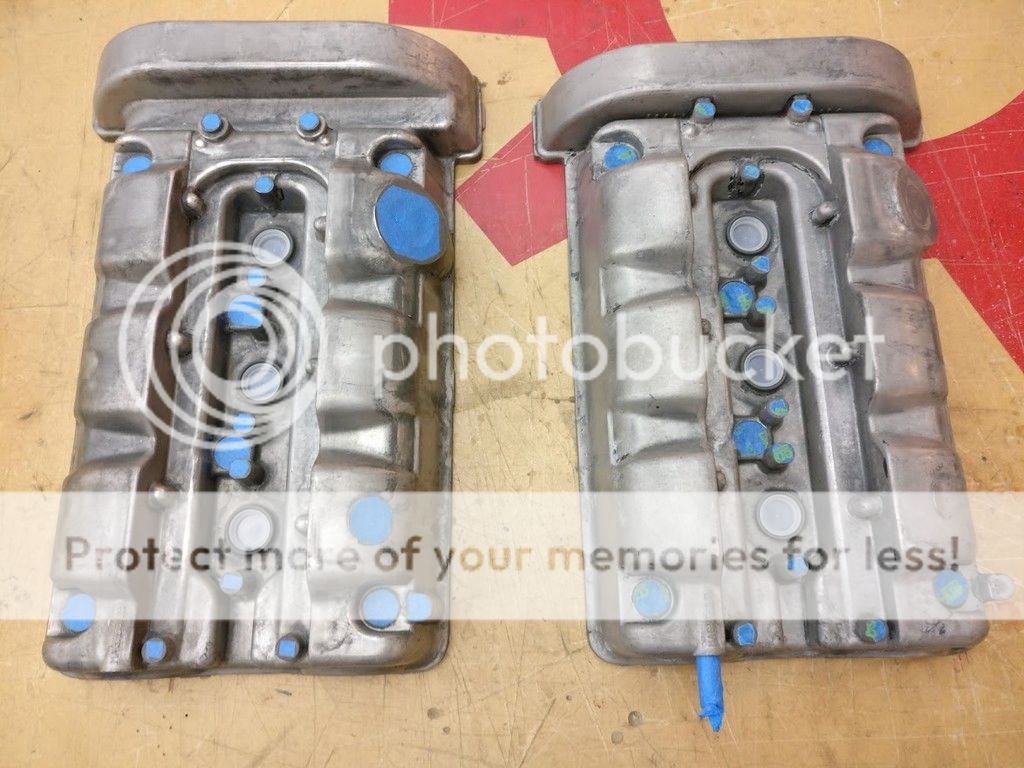
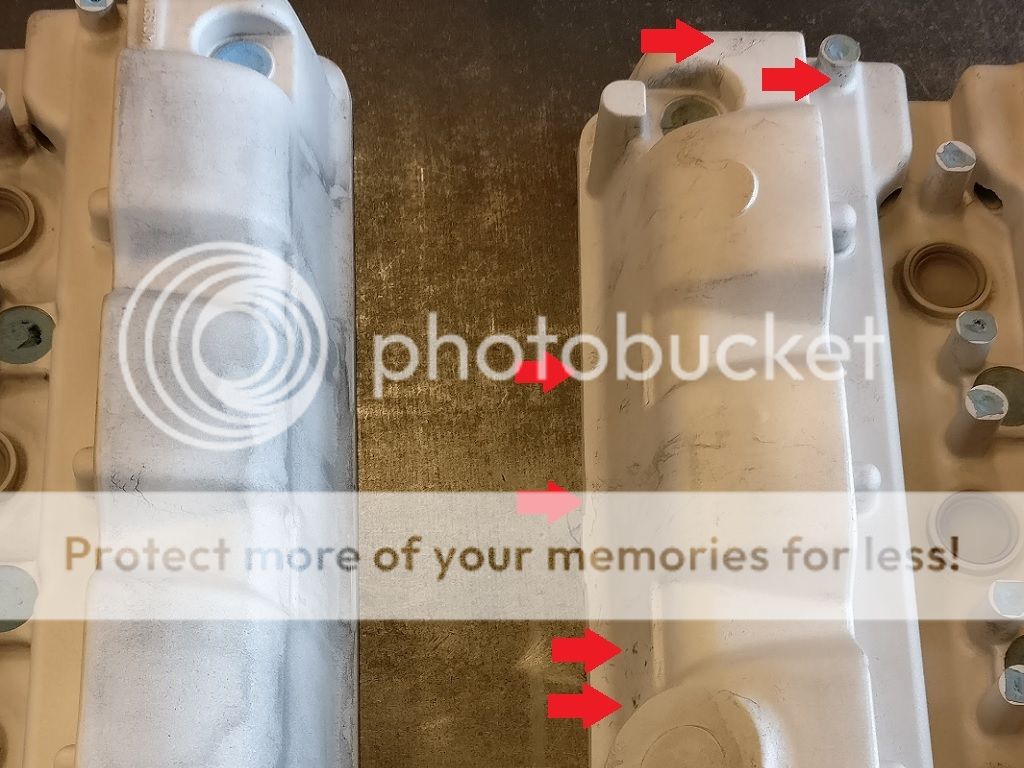
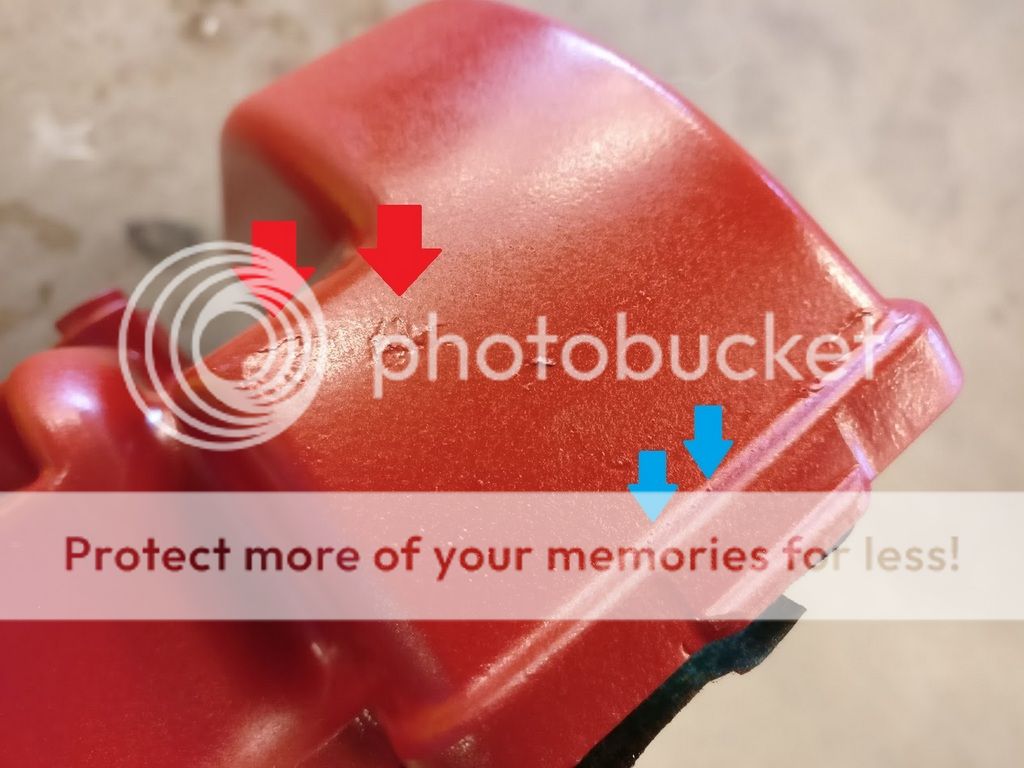
One thing to note was that as a result of imperfections during the valve cover casting process, there were parts that got etched by the sand quicker than the surrounding parts, leaving some undesirable cracks/grooves/dimples in the surface, which can be seen even after the powder has been cured. Not sure how to get around this part but to pray that it’s not that noticeable….
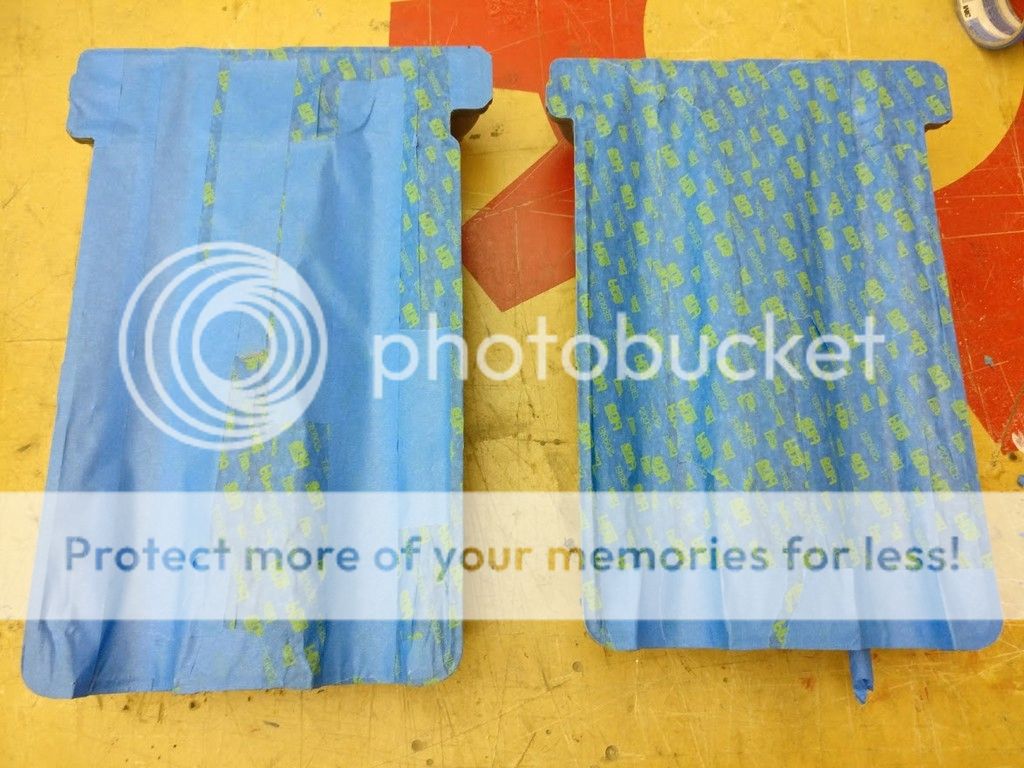
After sandblasting, one has to clean the parts very thoroughly rinse off any remaining sand particles, especially for parts that will come in contact with engine internals. Soap, water, and pressure washer did the trick. I also had to re-apply the masking tape since sandblasting and washing destroyed much of the old masks. The washed part looked duller for some reason...
Now that the part is finally ready to be powdercoated, we need some powder. It was an easy decision to go with wrinkled red to match the NA2 valve covers (also bcuz racecar). I ordered some free swatches from prismaticpowders.com, which offered excellent product selection and great customer service. After comparing against bmac’s NA2 valve covers, I picked out the closest one (Red Wrinkle II) and placed an order for 1 lb of powder, which was more than enough for a sets of covers.

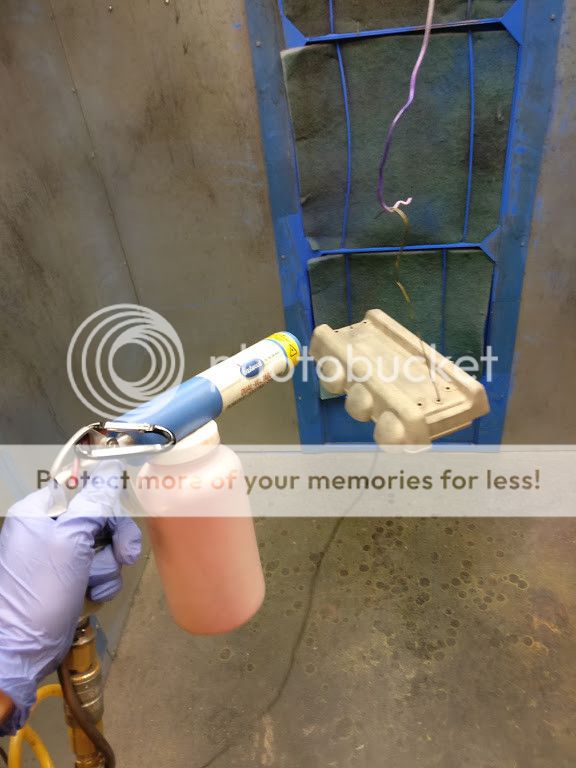
To apply the powder, one had to use a ray-gun like device that is connected to an air compressor. When you pull the trigger, mists of electrically-charged powder shoots out and sticks to the metallic part, which is also electrically grounded to the ray-gun. Safety first: make sure to wear a respirator since the powders can easily be inhaled. Having an LED flashlight helps a lot when checking for powder coverage. It took some practice, but it didn’t take very long to have the part completely coated. Then it’s time to cure it in the oven.
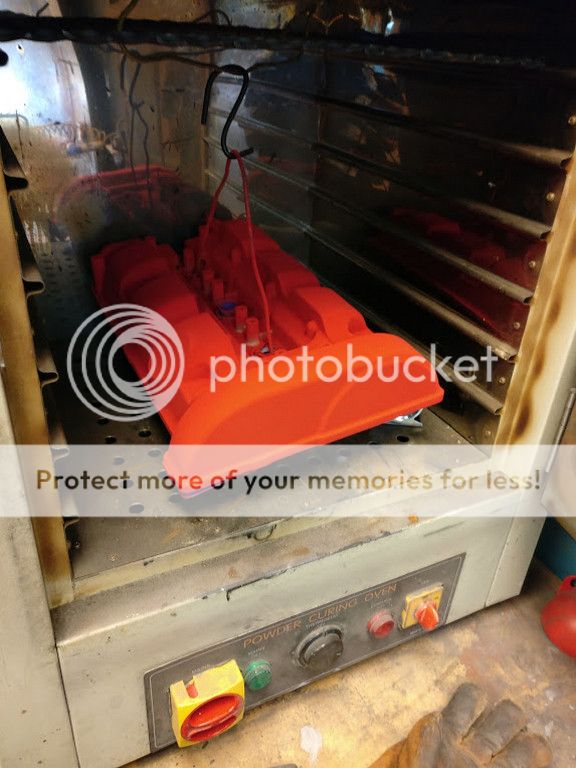
The powder came with curing instructions specific to each type of powder (and there are many), so be sure to follow it closely for the correct temperature and duration. Even when I followed instructions, I still struggled a lot with the final piece, which I worked on during the last day of my TechShop membership. For some reason it wasn’t wrinkled enough after curing, so I had to sand the entire surface down and reapply the powder. It literally came out of the oven 5 minutes before they closed shop at midnight.
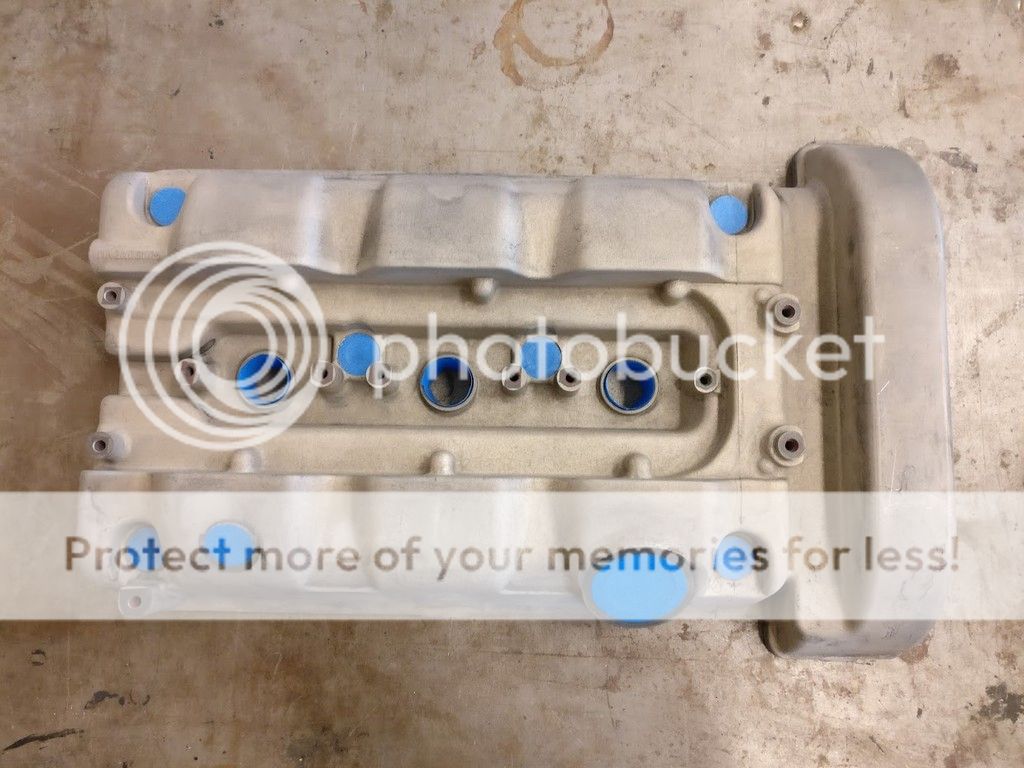
Another surprise I ran into was out-gassing. During the curing process, metals will release gas in the form of little bubbles along micro-cracks on the surface, which can result in a tiny bubbly streaks across an otherwise perfectly powder-coated surface as shown by the blue arrows. One way to alleviate this problem is to pre-heat the part to the curing temperature before applying the powder, which did seem to help a little bit.
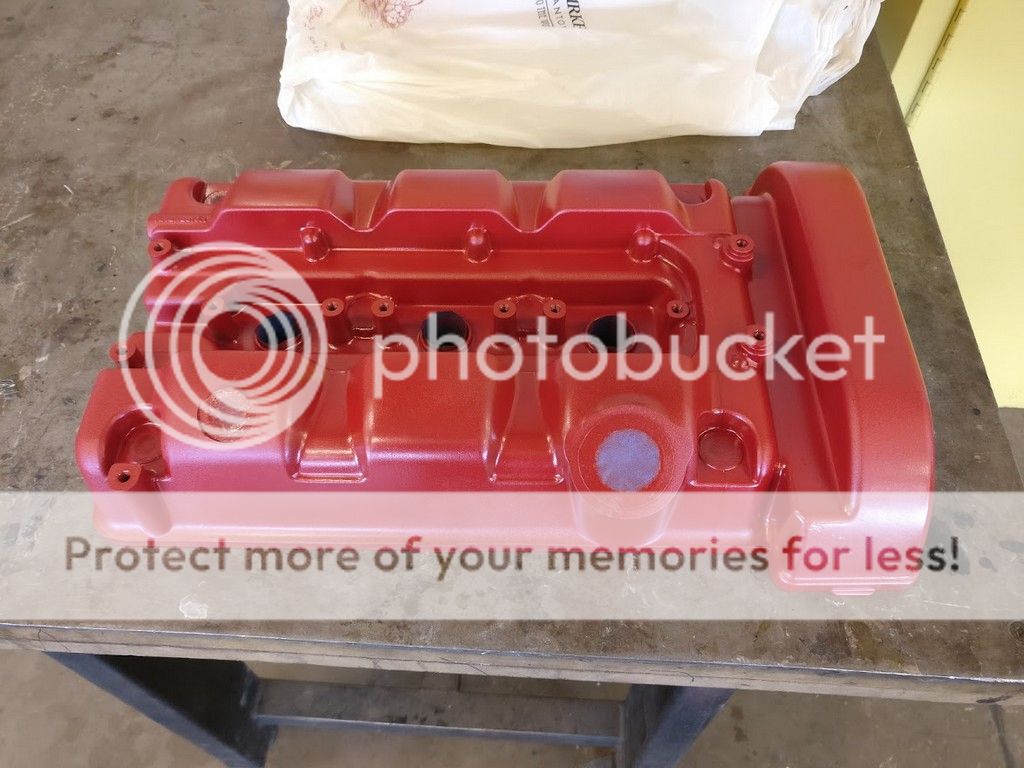
Alas, here’s the finished product. Dare I say they look pretty damn good for my first time powdercoating. It wouldn’t have been possible without TechShop, and I’m extremely grateful for being able to experience it before they officially shut the doors last Friday. I was really looking forward to doing many other NSX-related DIY projects there in 2018….Fingers crossed that someone brings it back!
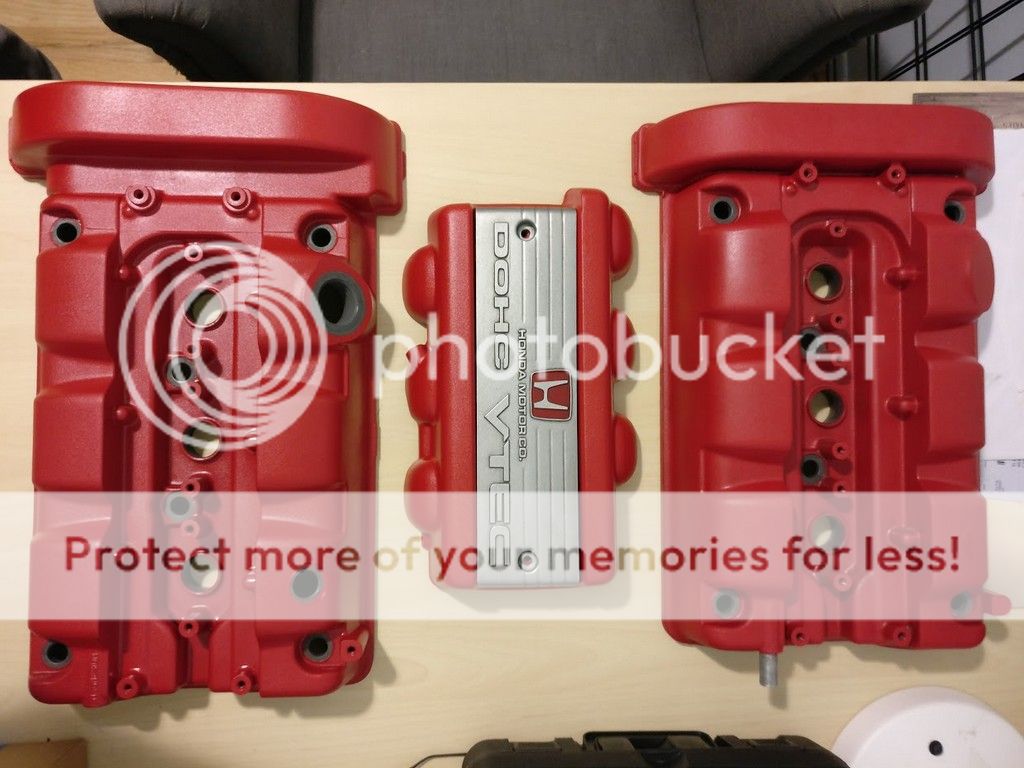
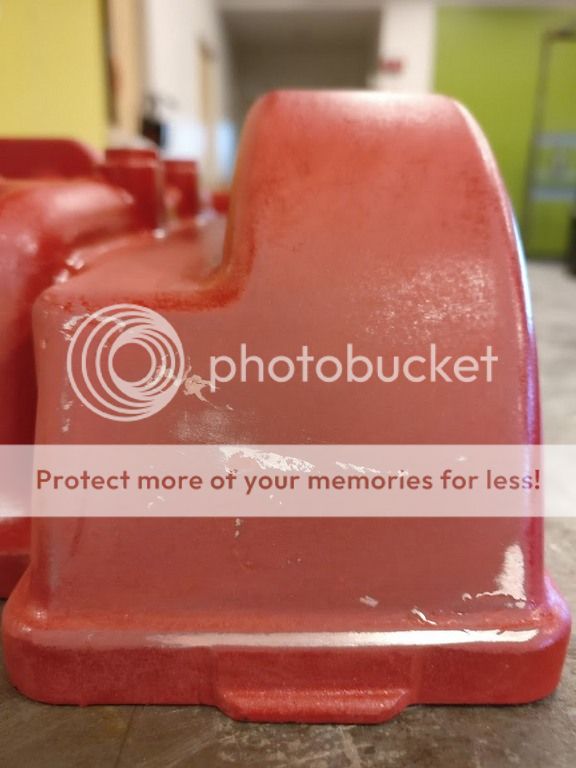
Here’s a close up of the wrinkled finish:

One of the most fun and satisfying mini-projects so far! I highly recommend everyone to give DIY powdercoating a shot if you have the opportunity.
To be continued...
Freakin' amazing progress, photos, and write-up tbox.
Gotta love it!
- Joined
- 11 January 2018
- Messages
- 11
Beautiful car, and a very thorough build thread! I worked at Ford for the past two summers, surprised I never saw it around.
Had*Man you have a lot of time on your hands writing these posts
 but then life got busy as it always does...and working on the car and driving was more fun than making long forum posts.
But thanks for reading & necroing a 5 year old thread!
Seeing this thread for the first time. had to read it all from start to finish. Great enthusiasm and your writing skills are quite entertaining. Keep up the good work and please post up what else you may need to complete this project
Similar threads
- Replies
- 10
- Views
- 426
- Replies
- 3
- Views
- 299