• Protip: Profile posts are public! Use Conversations to message other members privately. Everyone can see the content of a profile post.

Preludeking's 1995 NSX-R styled conversion -www.teknotik.com CANADA

Hi, I'm new to the form, and wish to own a NSX someday too (love the out come of your build). I have been reading a lot of build on this form, and was wonder how come the NSX-R don't look like the attach pic? Don't get me wrong your NSX is beautiful, and I would pay top $$ for it. Every build I see got the paint, the black top, the rims & the wing, even the back hatch, but the front & the back bumper don't really match. Is it because they don't make after market fro it.
Just wondering BTW keep up the good work.

honda_nsx-r_GT_manu_01.jpg
 
That is the NSX-R GT not the NSX-R


This is a NSX-R
Honda_NSX_R_by_Fireboy96.jpg
 
^ yes there are three GT replicas in the US i believe? one white the other red and the newest one black.
 
DSC08697.jpg


DSC09062.jpg


DSC09070.jpg


And one for all the Type R lovers..... Canada's Fastest FWD Time attack car!

DSC09417.jpg
 
PreludeKing Are you going to add the Type R diffuser?
 
To me, nothing is more satisfying than taking and old car (or house) and bringing it back to its full glory (in your case beyond its original full glory). I love these threads....

Excellent work.
 
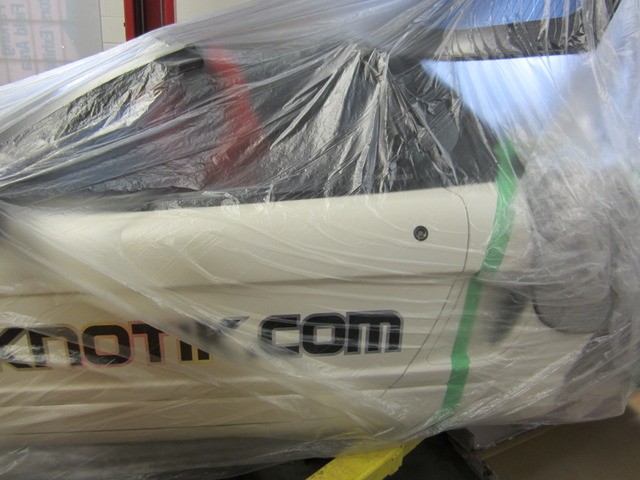
Here goes the updates to Round 2 of the rebuild....

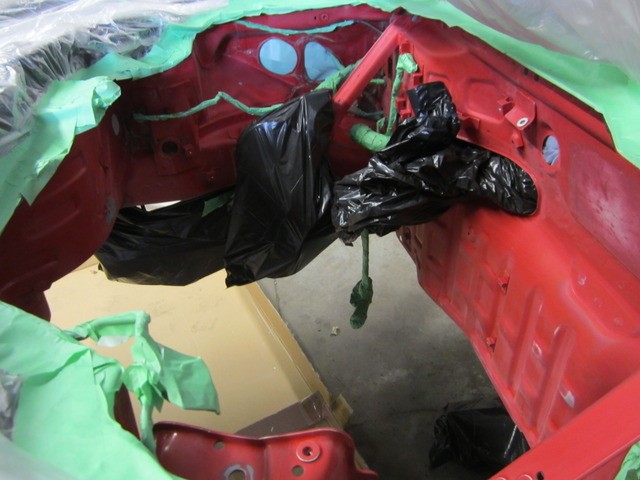
As you can see from this thread the car was previously Red. When i had the car painted I had the whole chassis painted without the body panels but didn't tear down the engine or front bay. I wanted to do a major engine cleanup and overhaul/maintenance but it was to much to stomach doing that all in one shot, so i took some time this year to go back to where i left off and work towards completing the car and the type R style conversion.

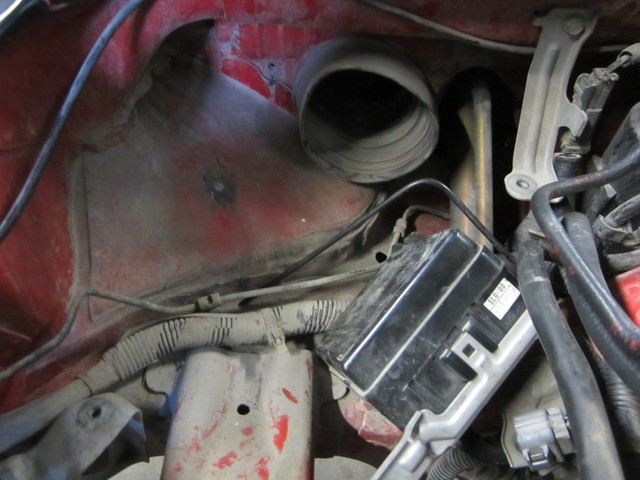
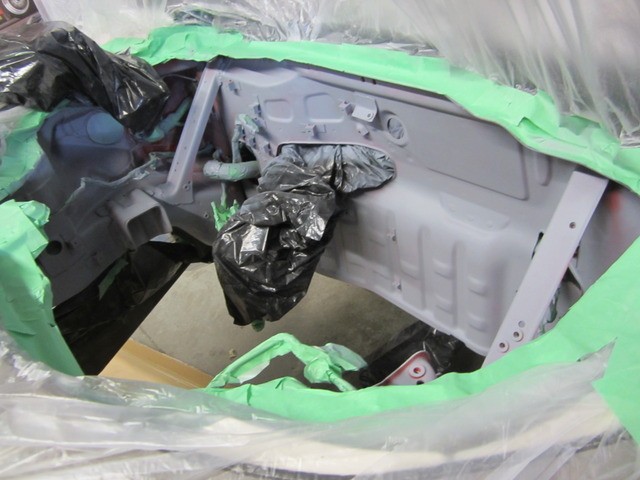
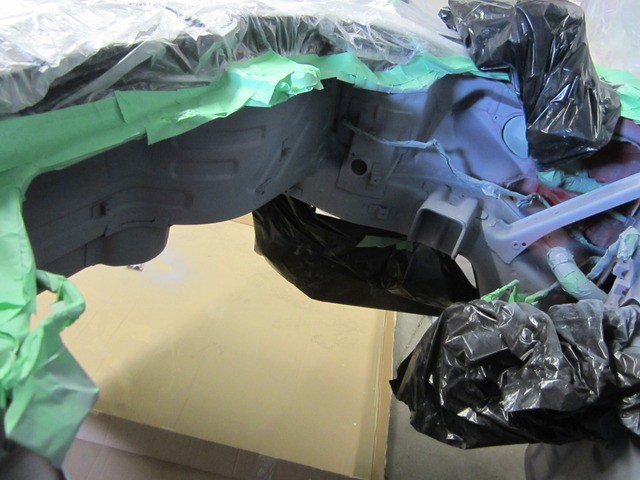
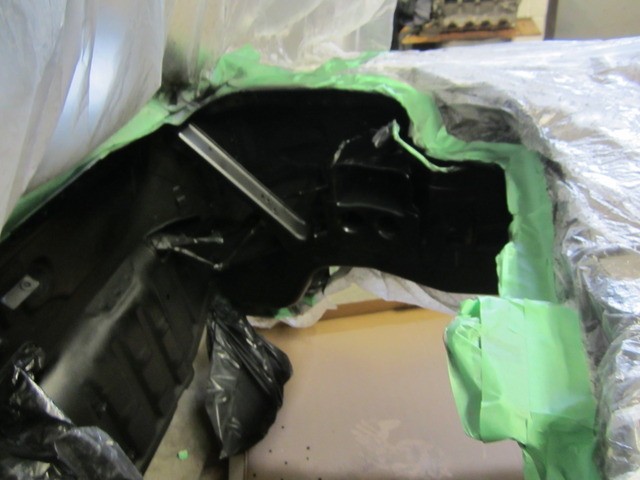
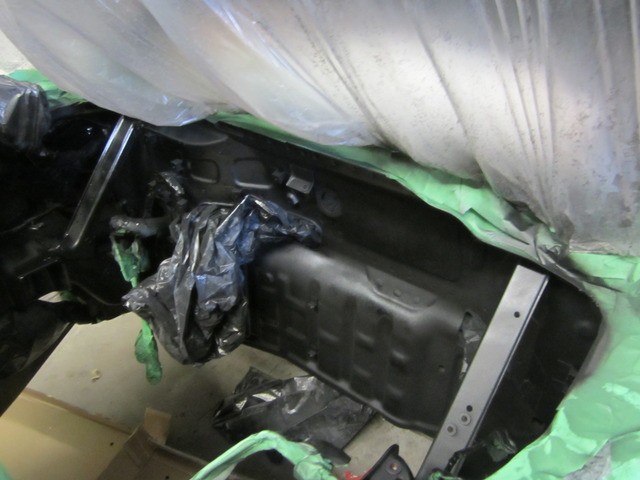
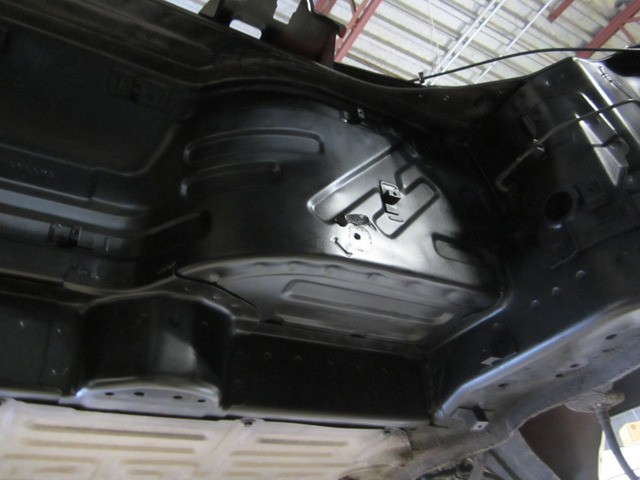
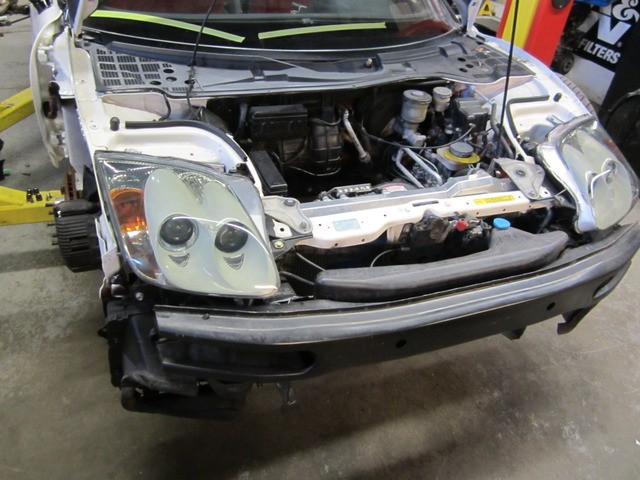
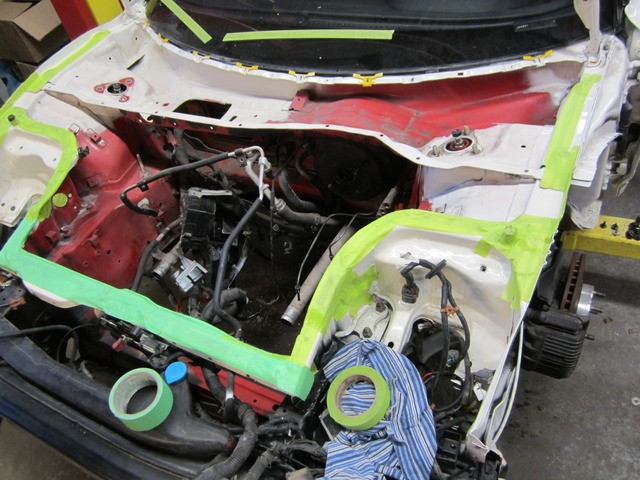
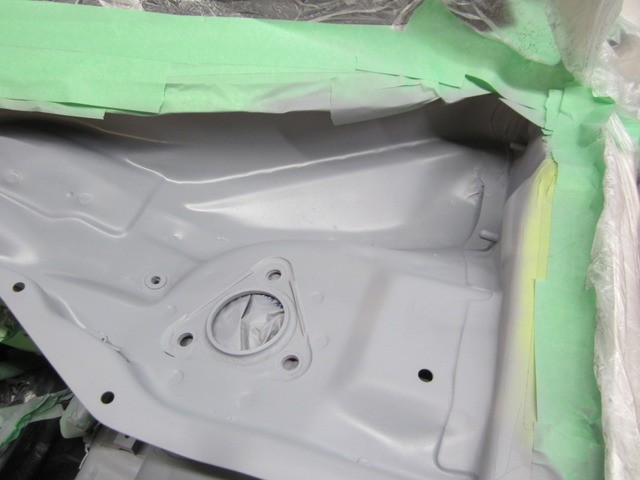
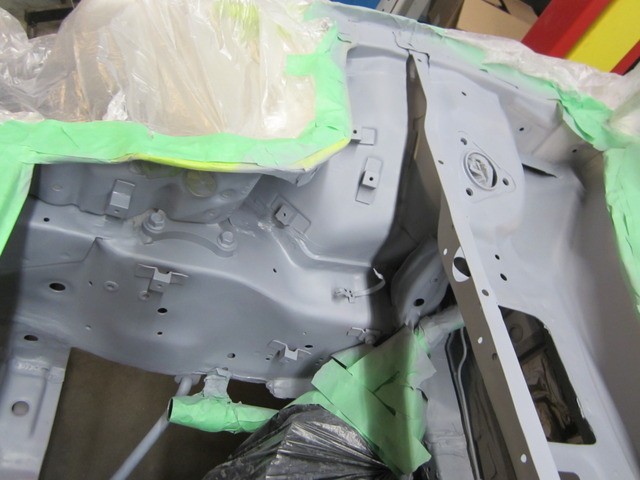
The body shop had painted some sections of the bay white, but there was still some red exposed, so on we went to strop the entire front bay down and remove every component to paint it properly.

I wanted to take this chance to do everything necessary and everything that could possibly present an issue in the future. Some of these things didn't really need doing ( replacing parts that were not broken), but i wanted to do this once...and do it the best i could.


j52c.jpg


ugh6.jpg


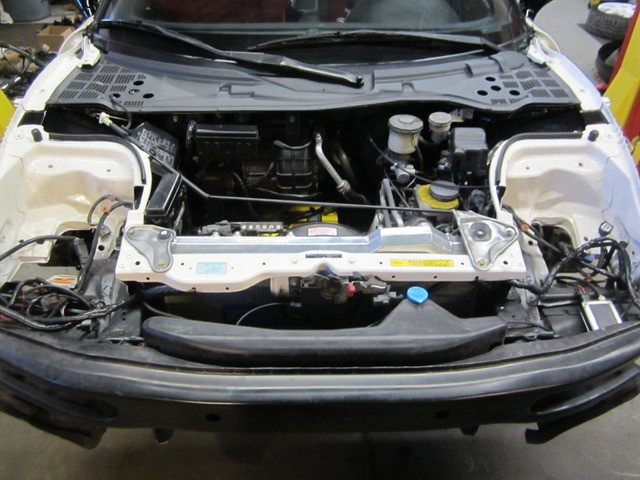
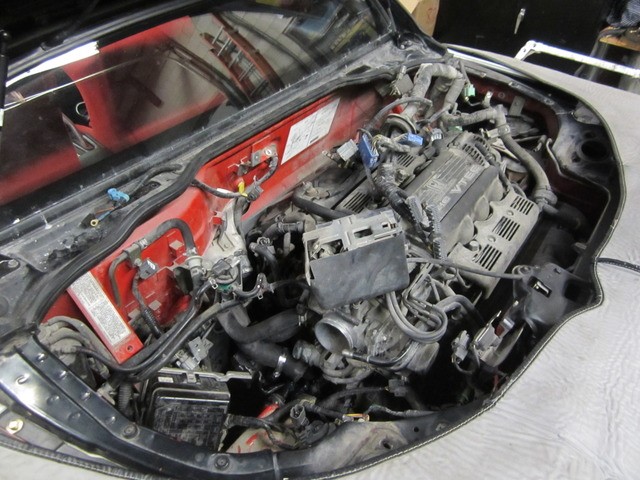
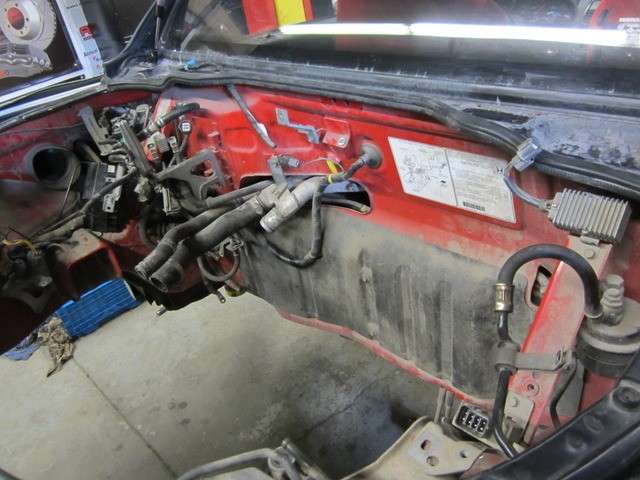
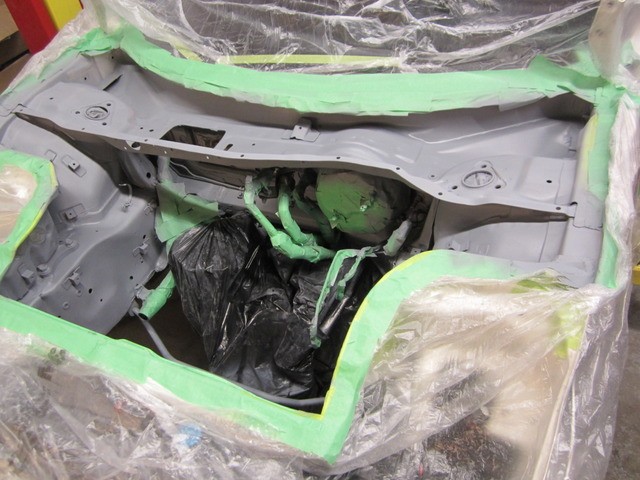
Certain this bay has seen better days. Extremely dirty

23kj.jpg


Another shot of the bay we were starting with

0tid.jpg

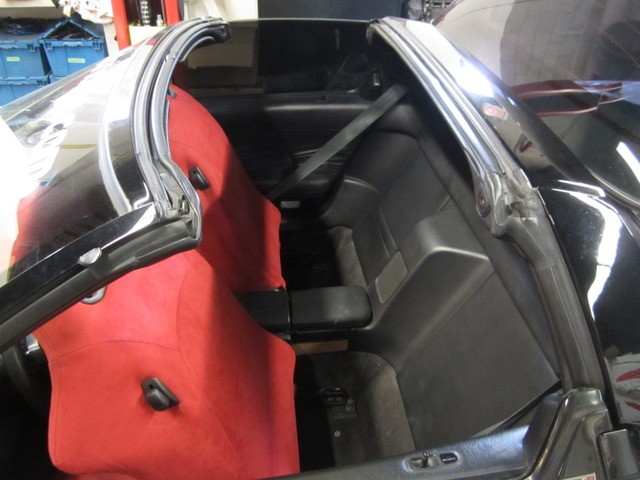
This car started with a Brown interior. I had converted most of it last year but there will still a few pieces left to do. The rear interior was removed again to pull the engine harness through.

3ibz.jpg


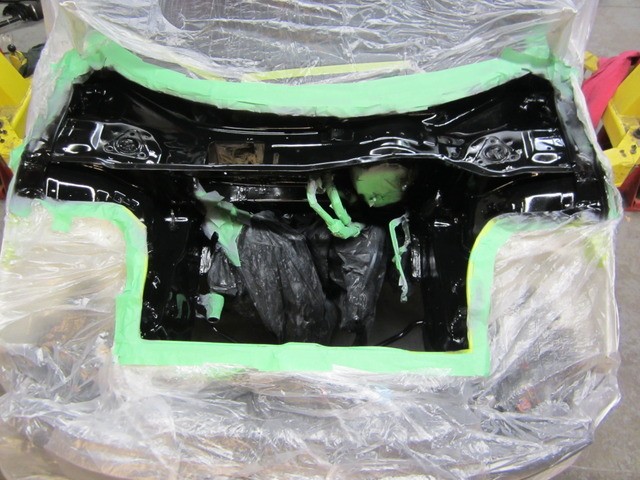
On with the cover and to work we go...

ojb3.jpg


zc49.jpg


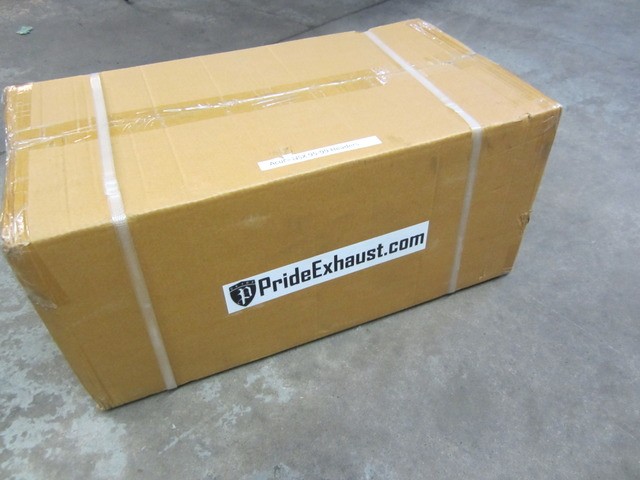
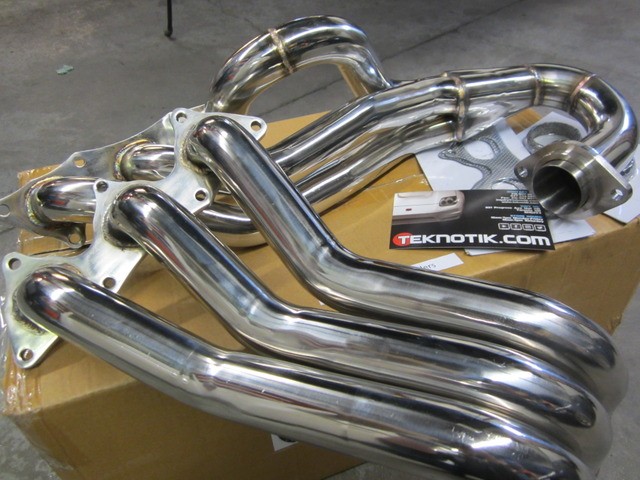
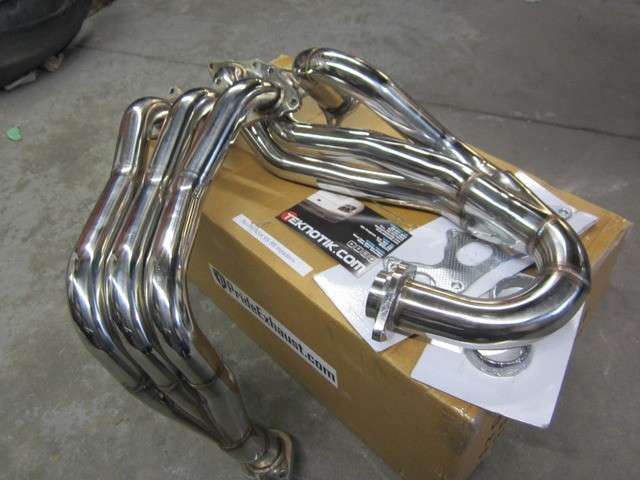
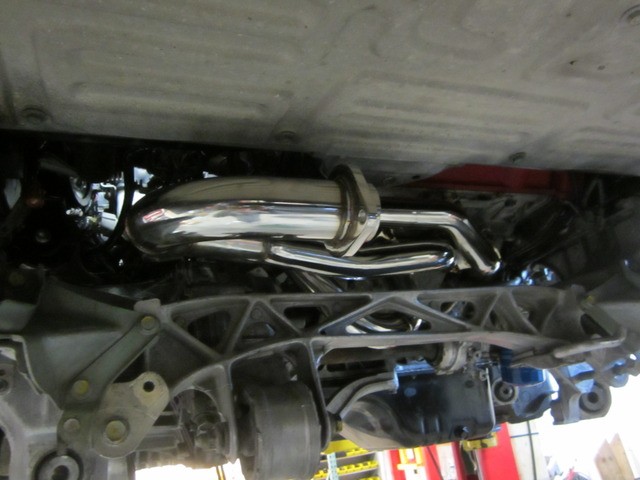
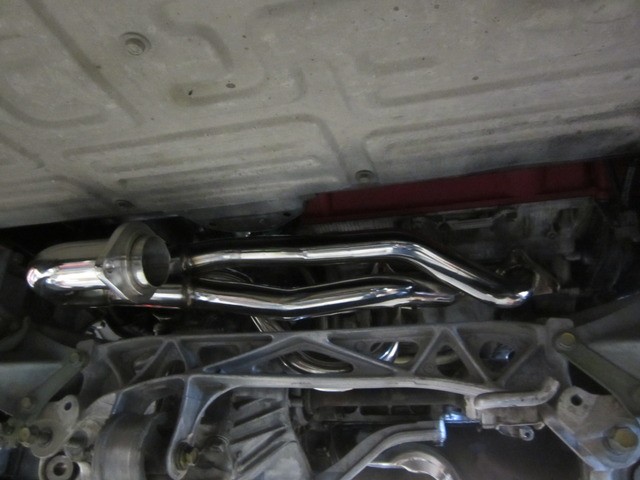
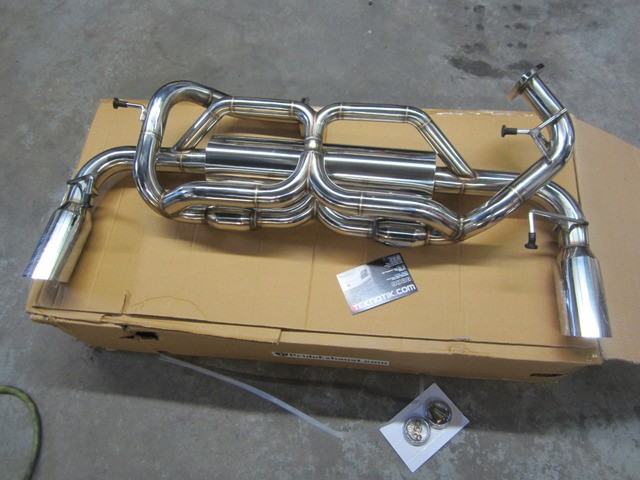
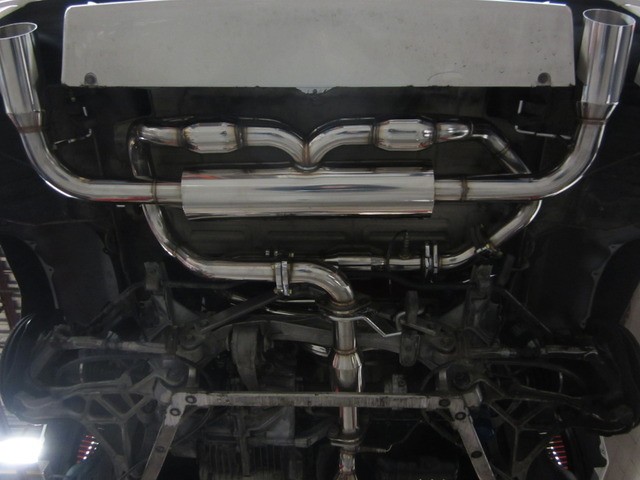
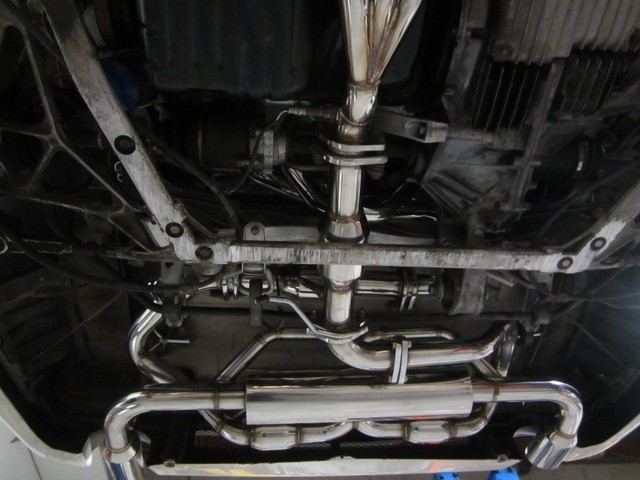
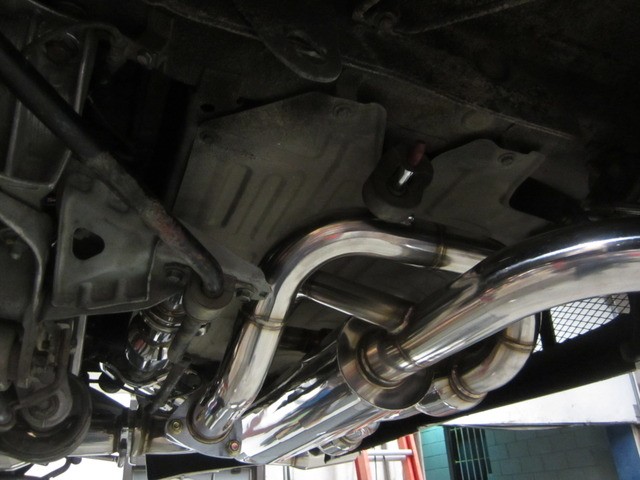
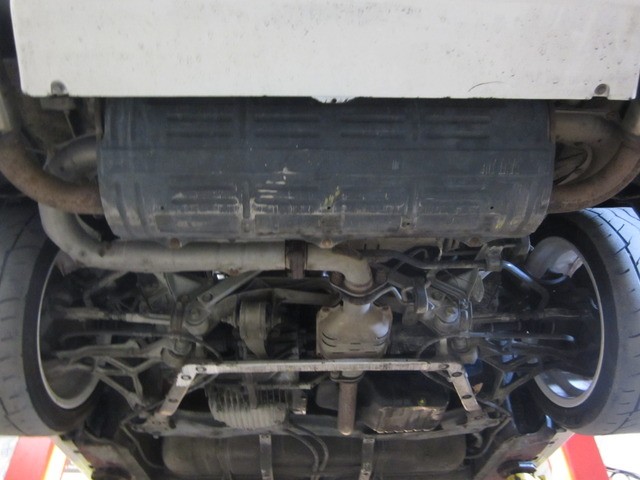
All stock under here. Cant wait to replace this all with the Pride Exhaust components i have been saving.

0vh9.jpg


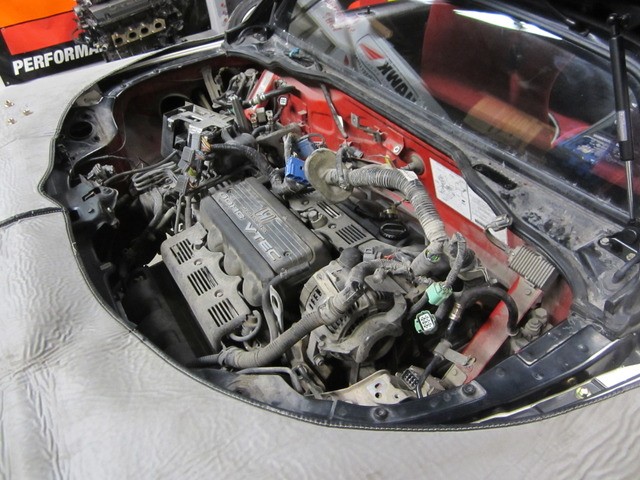
The engine bay teardown begins
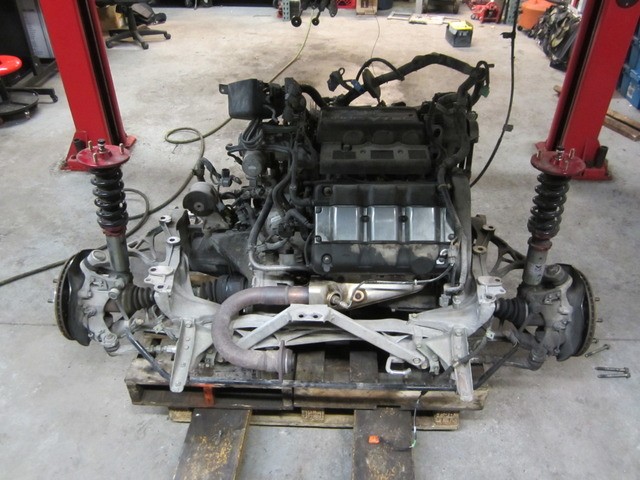
o4ds.jpg


ayiio.jpg

k4yf.jpg


2ag3.jpg


u6iz.jpg


Out it goes....

g7ts.jpg


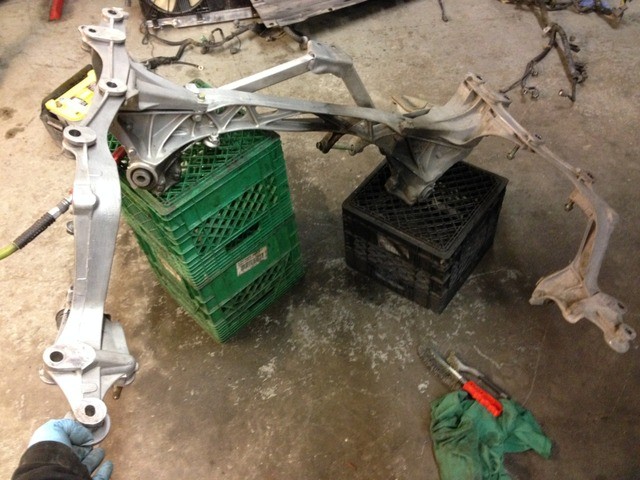
And off the subframe

0gvo.jpg


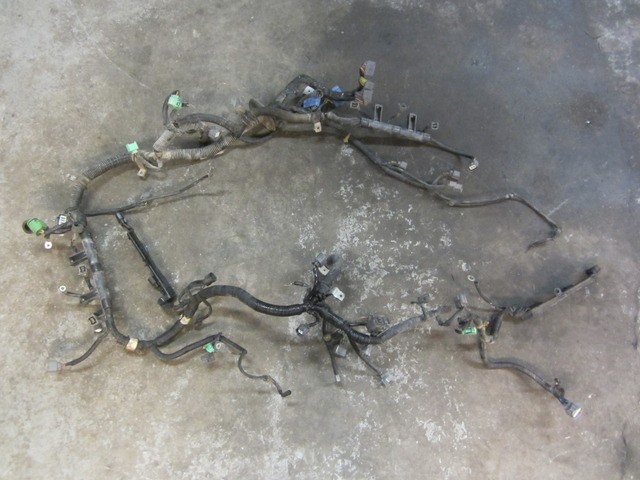
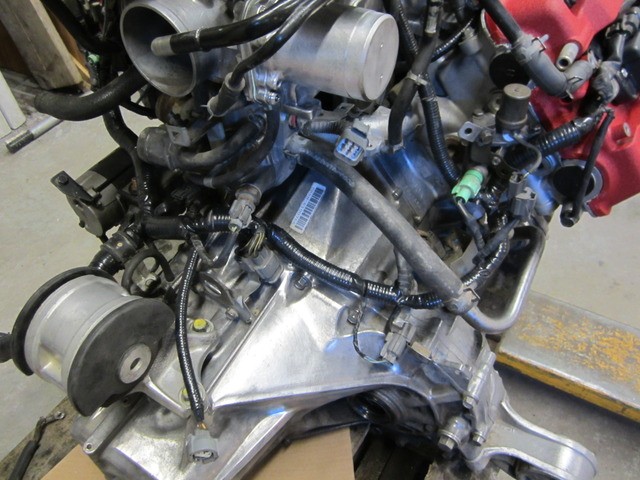
Stripped the engine harness off to clean all the plugs and reloom the whole harness.

94dh.jpg


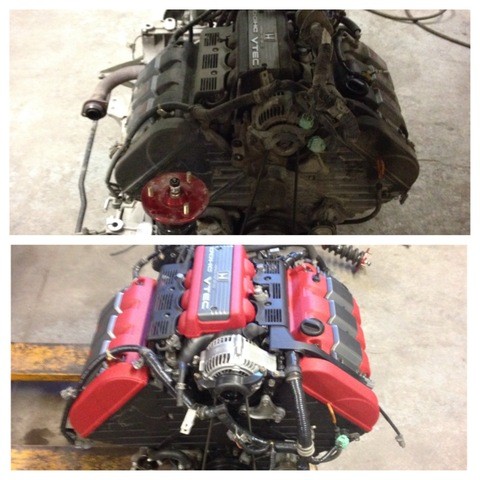
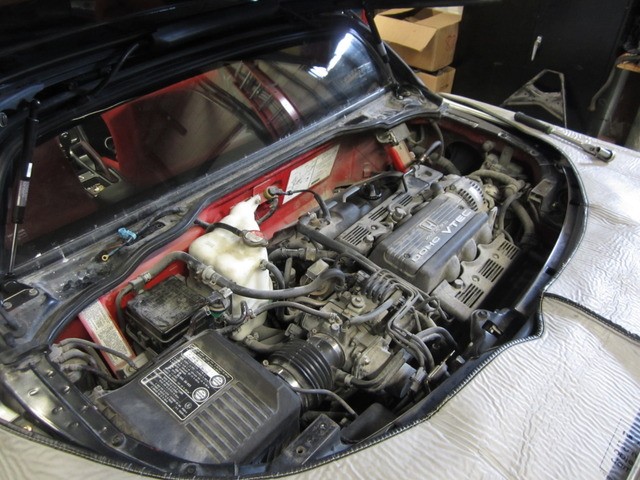
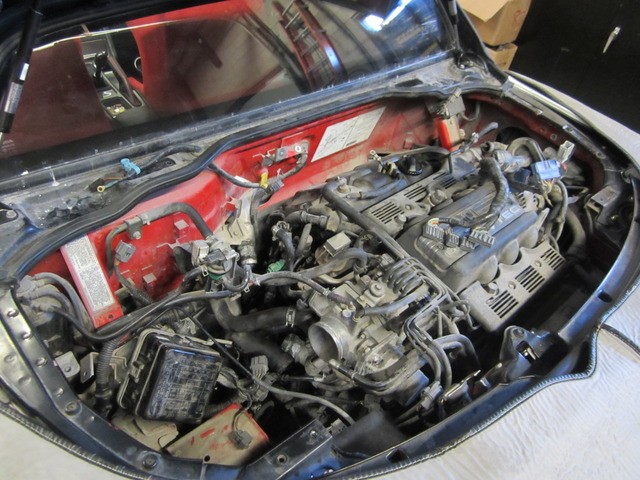
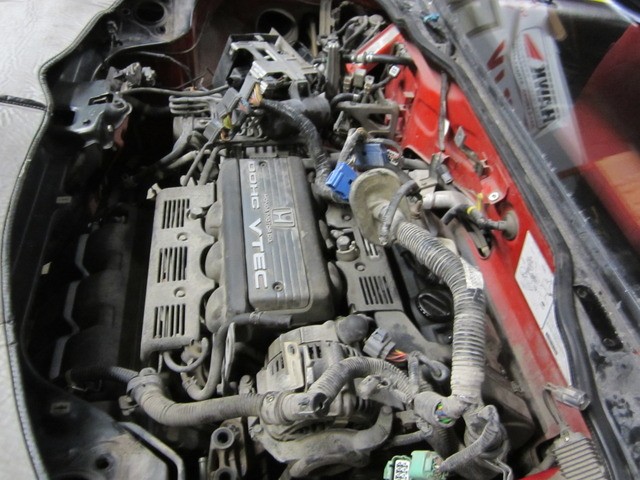
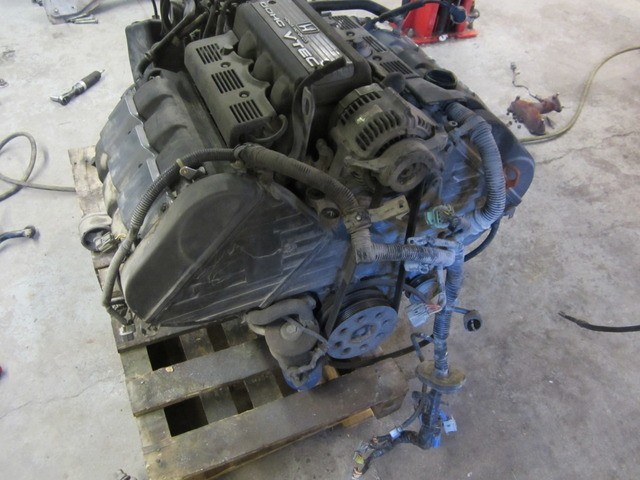
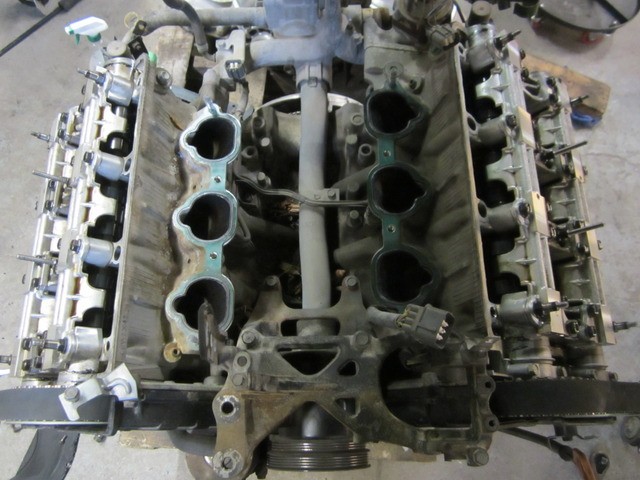
Dispite the outside of the engine, the inside is very clean of this JDM C30A.

rbxd.jpg


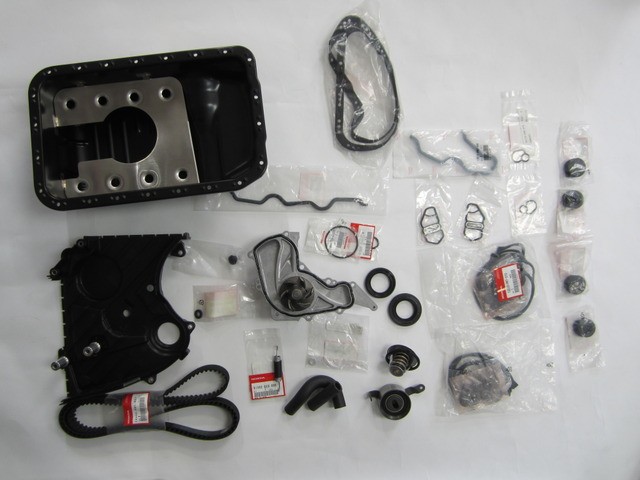
Basic maintenance for good measure

whwb.jpg


bu5p.jpg


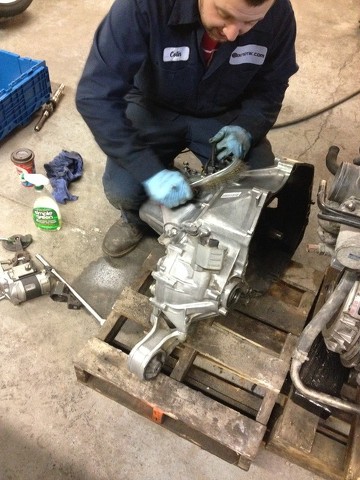
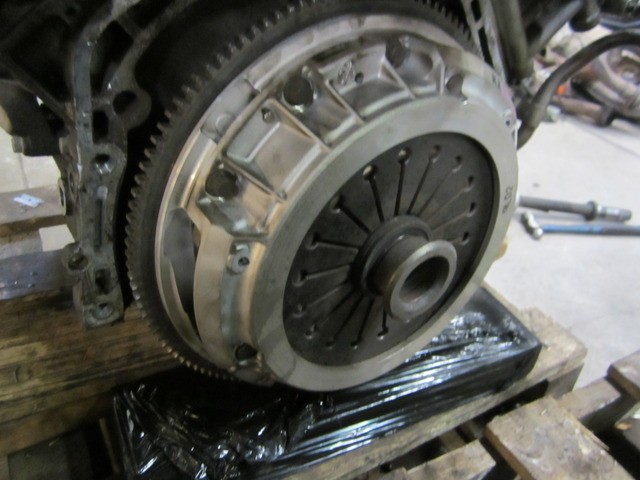
The dirty transmission getting ready to be cleaned

6te5.jpg


e6g9.jpg


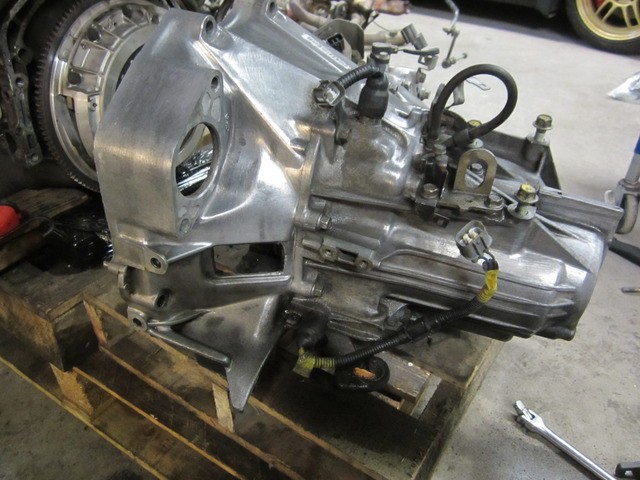
Transmission all cleaned, clutch done and ready to go back on
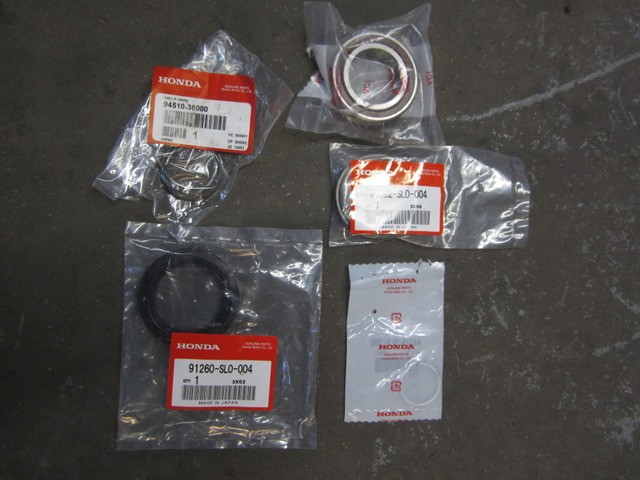
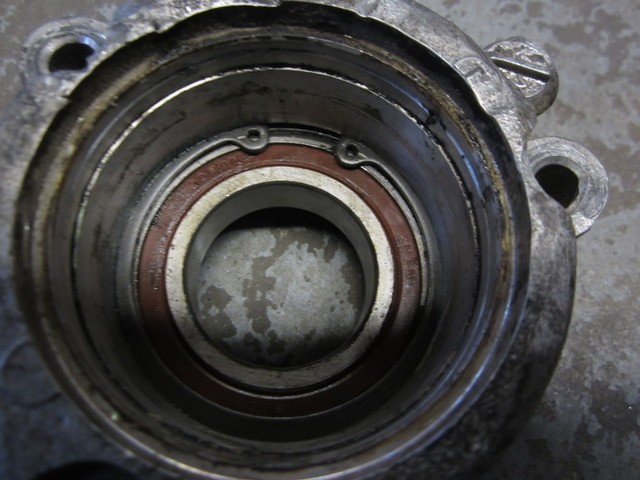
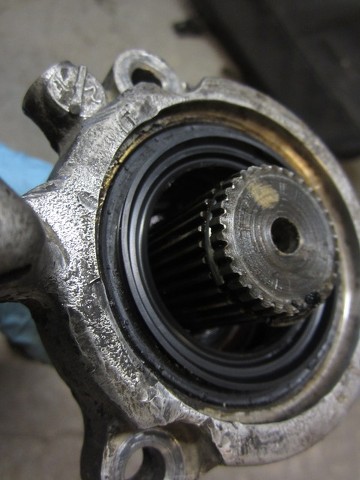
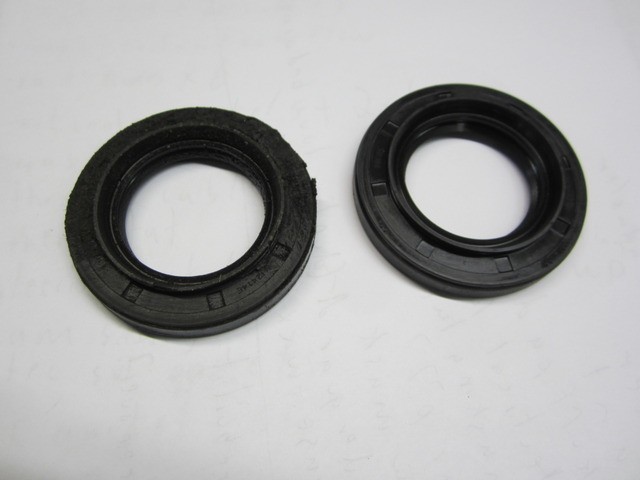
ejqh.jpg

URL]


New axle seals
lvm8.jpg


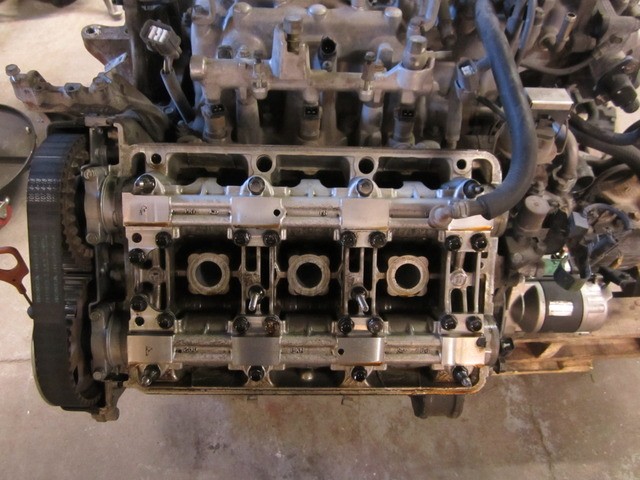
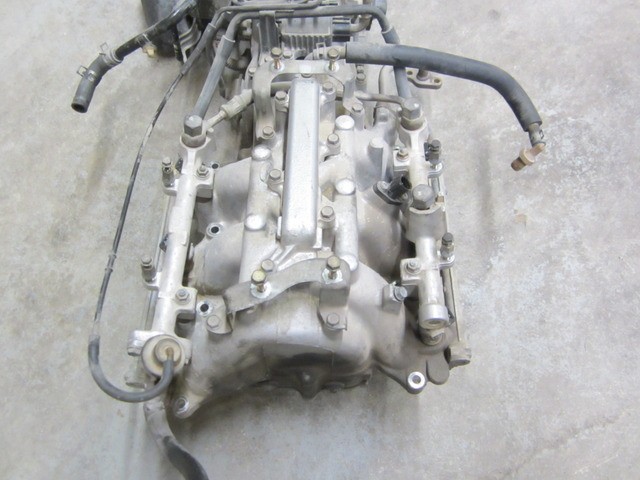
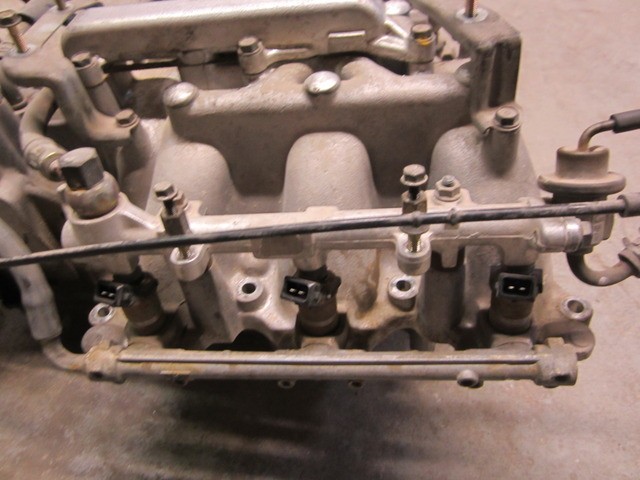
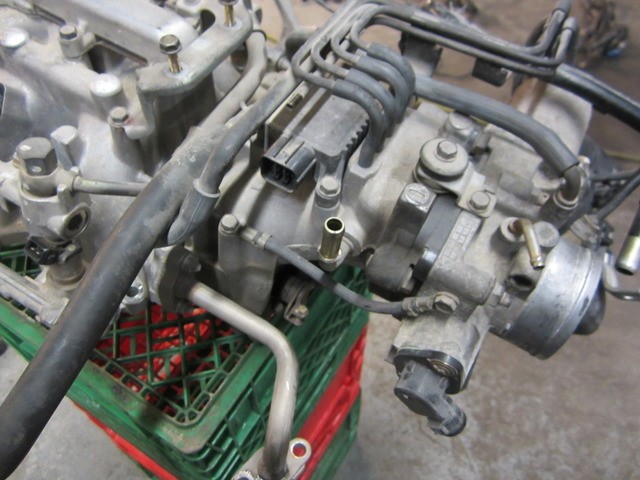
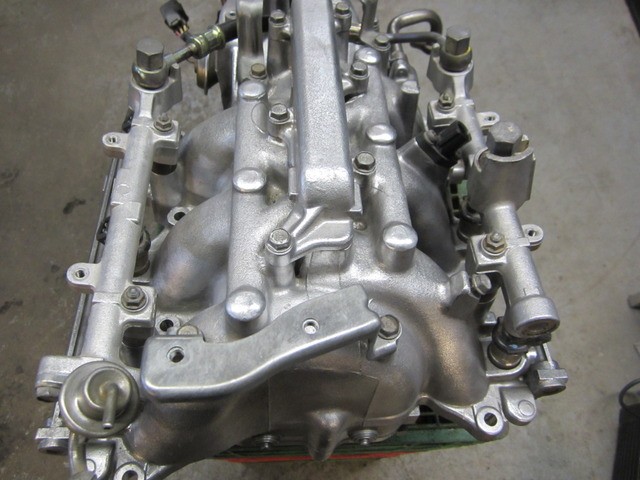
Removed the intake manifold to replace all gaskets and cleaning
9v4h.jpg

7jij.jpg

eufp.jpg


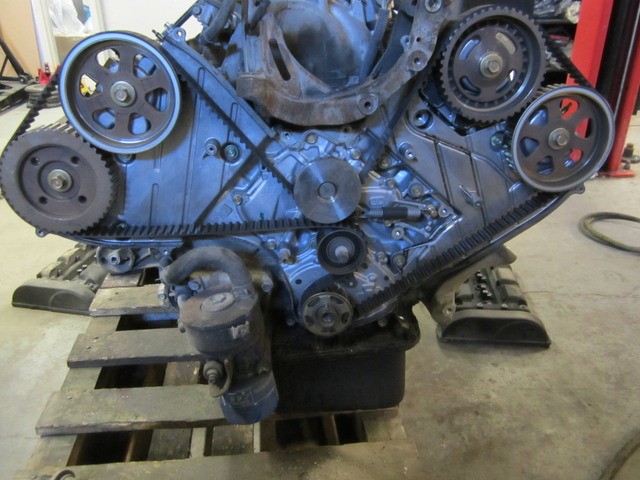
Getting ready to clean all that aluminum back to original look

shwn.jpg


n25t.jpg


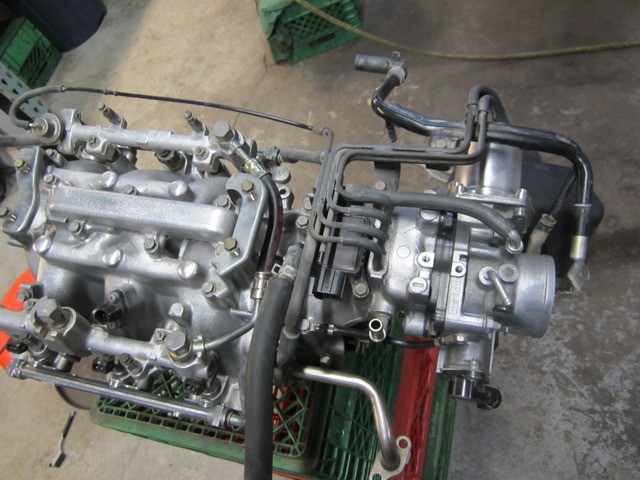
All cleaned up, pre hoses replacment

tg4g.jpg


Getting ready to sandblast and repaint the alternator bracket

40ccu.jpg


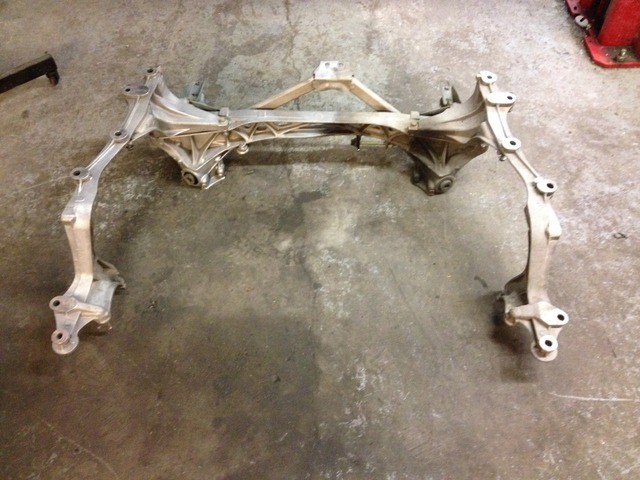
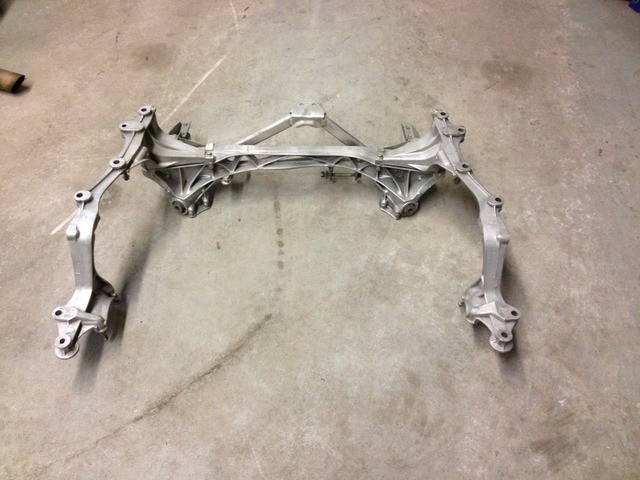
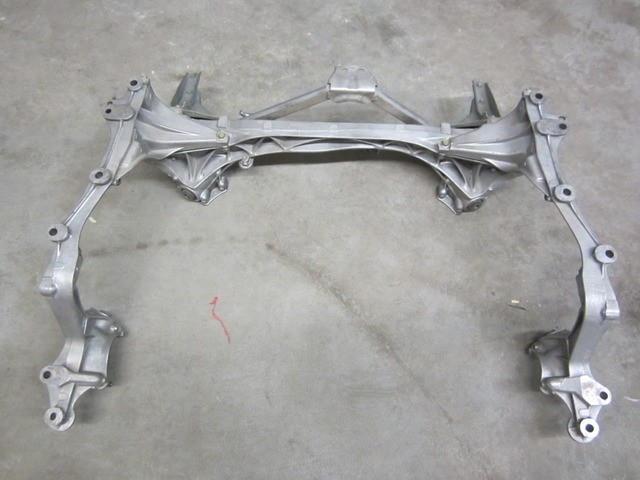
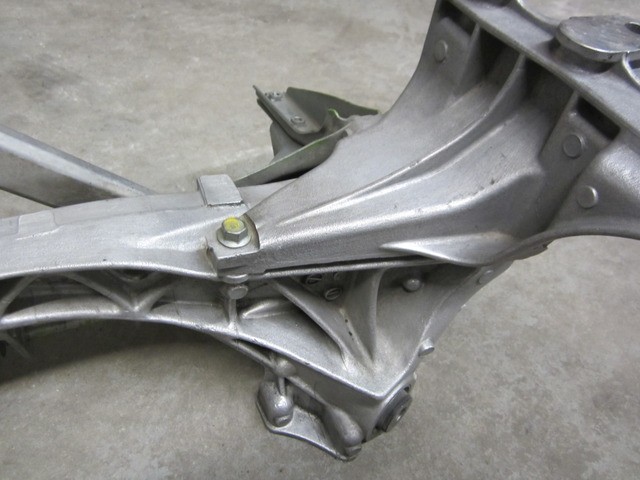
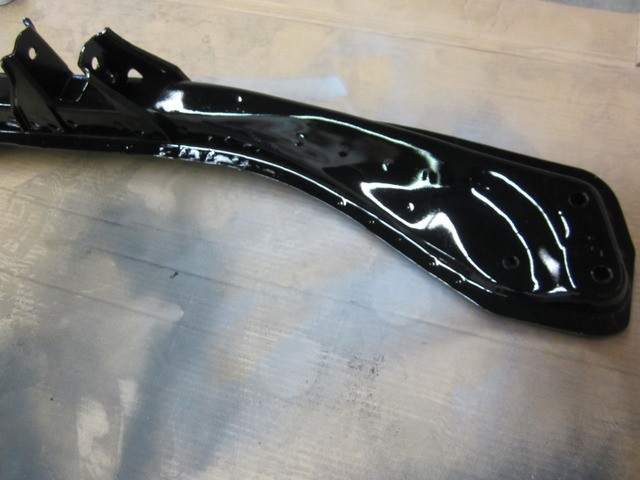
Hand cleaned the rear subframe

rcvl.jpg


0lx7.jpg


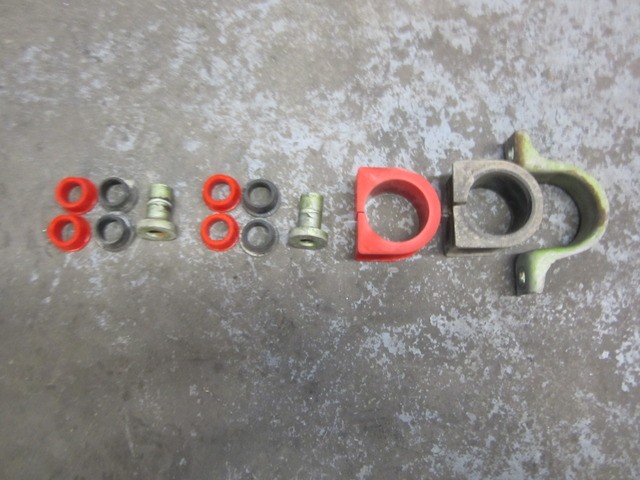
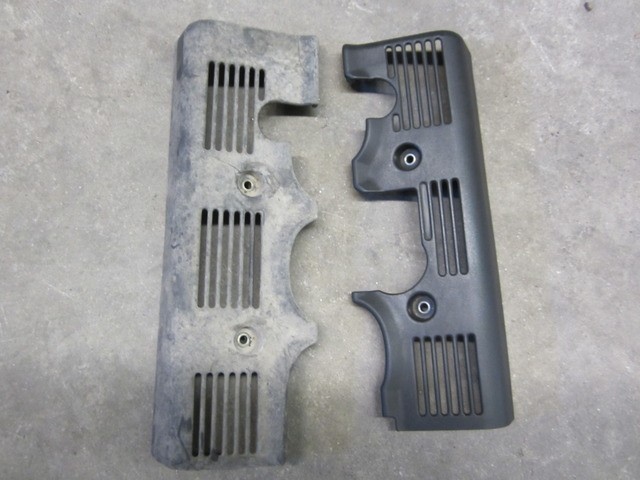
Washed/ and or replaced all the old plastic covers

pz8y.jpg


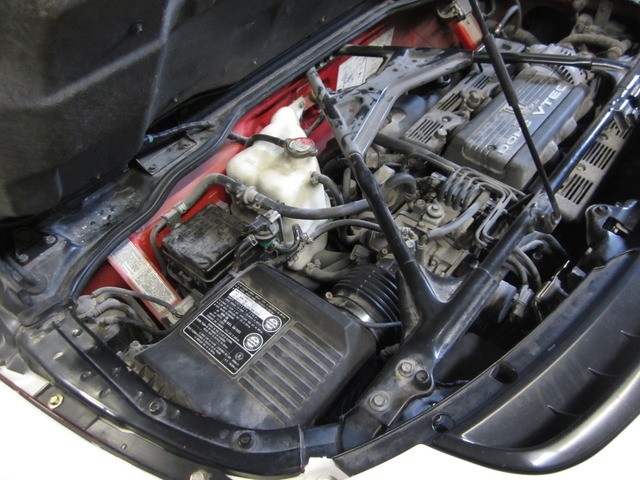
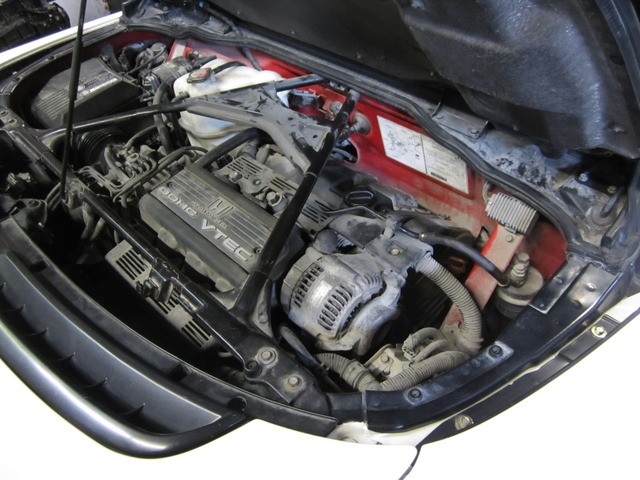
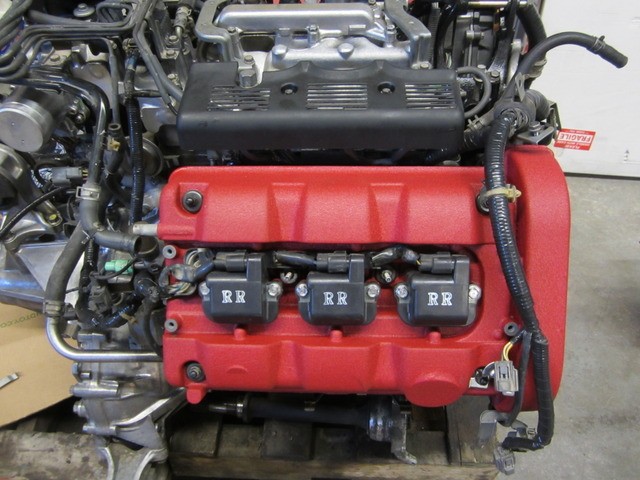
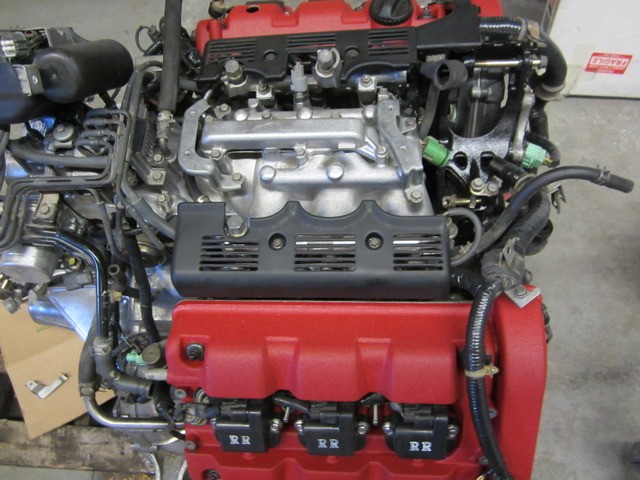
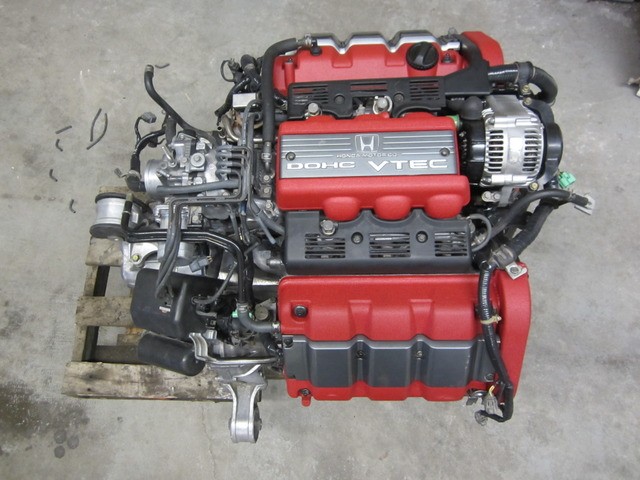
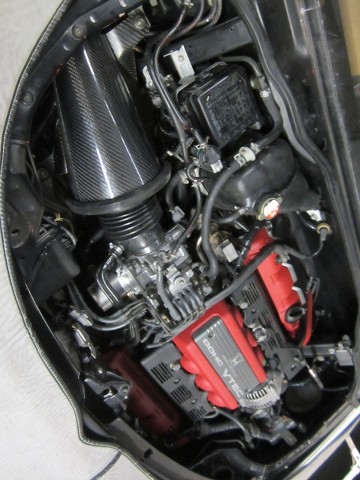
New Coils packs for the front and rear banks and TYpe R style red valve covers with new gaskets

x1f6.jpg


Reloomed engine harness back on

3xvm.jpg

9thn.jpg


Rebuild the alternator and starter for good measure.
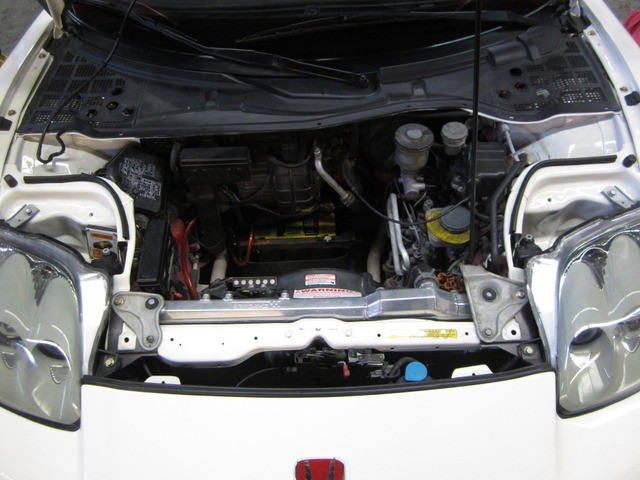
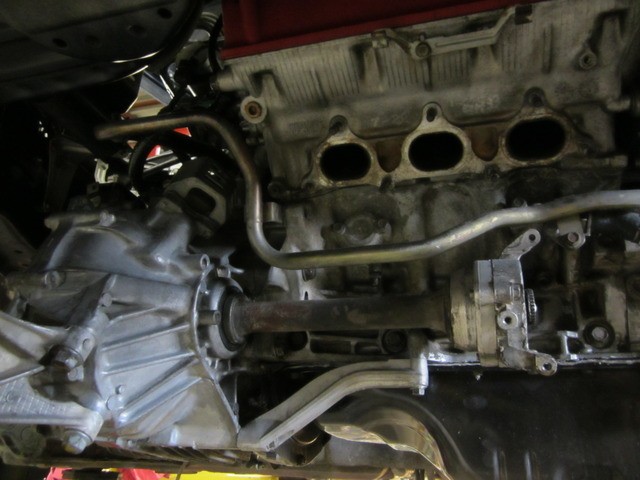
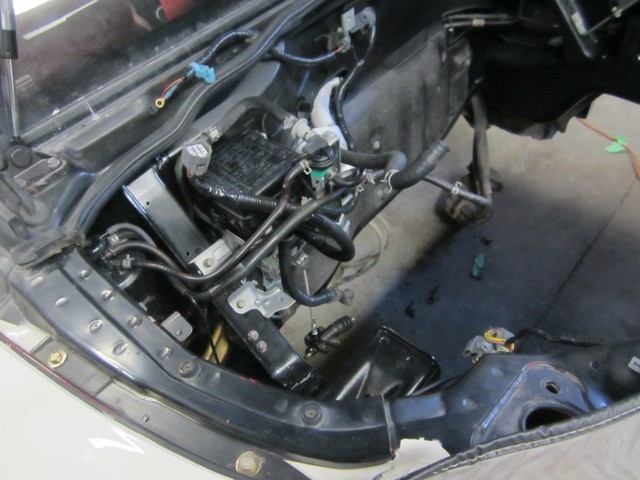
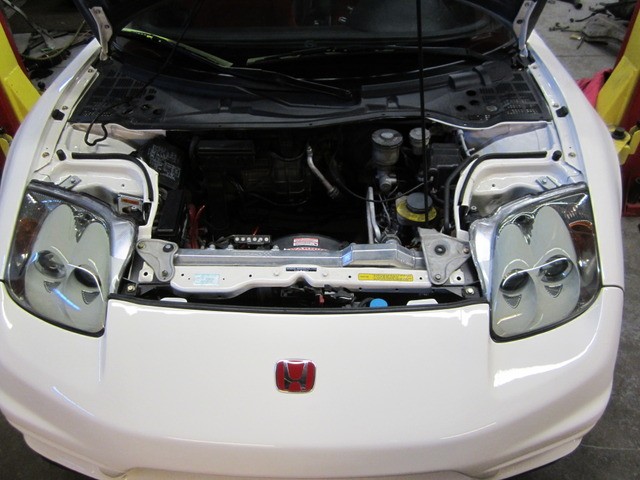
co061.jpg


Ready to go back in

nsfy.jpg


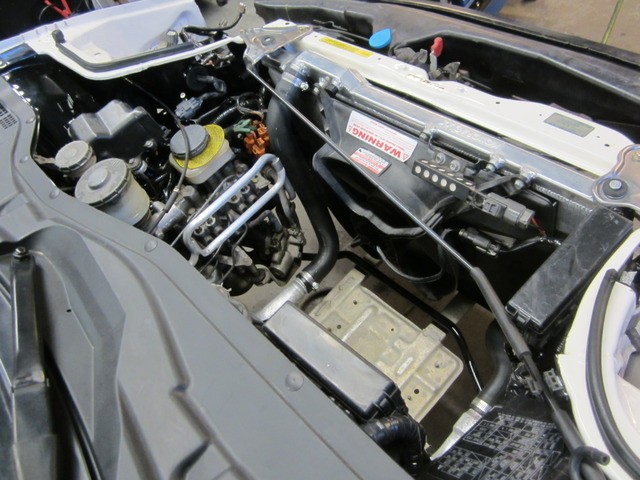
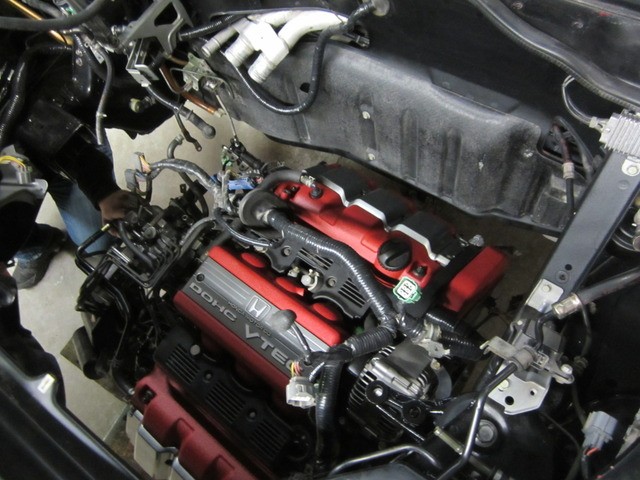
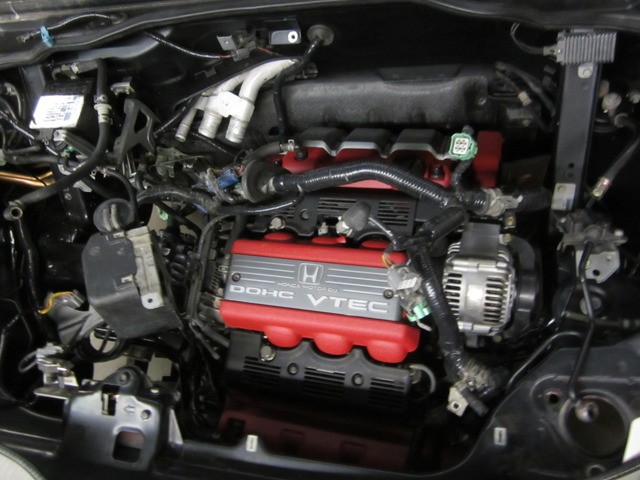
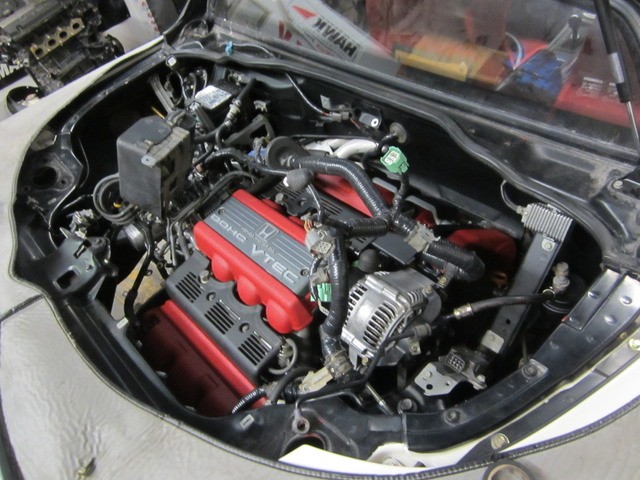
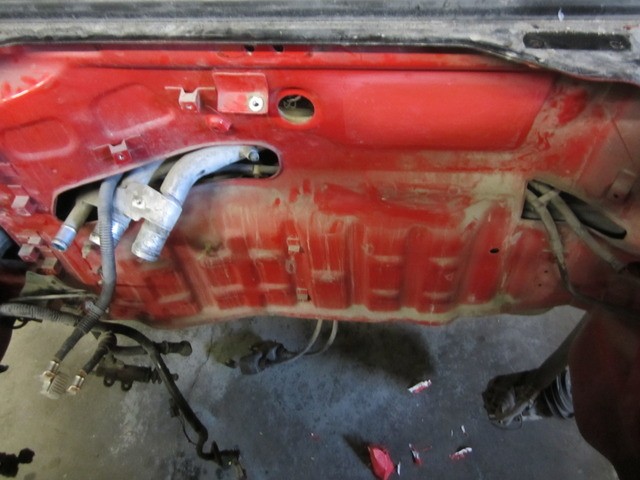
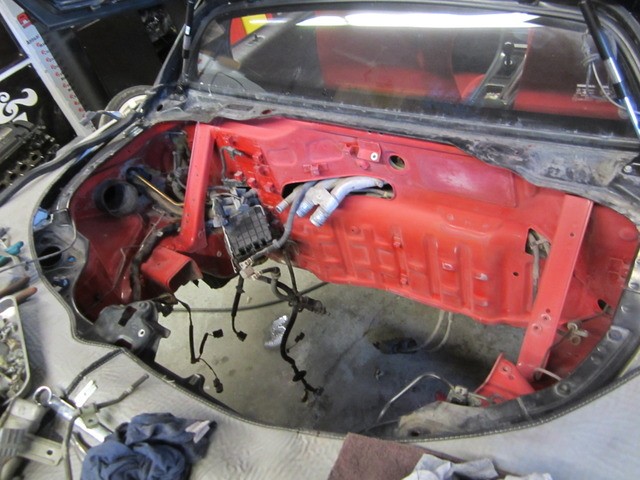
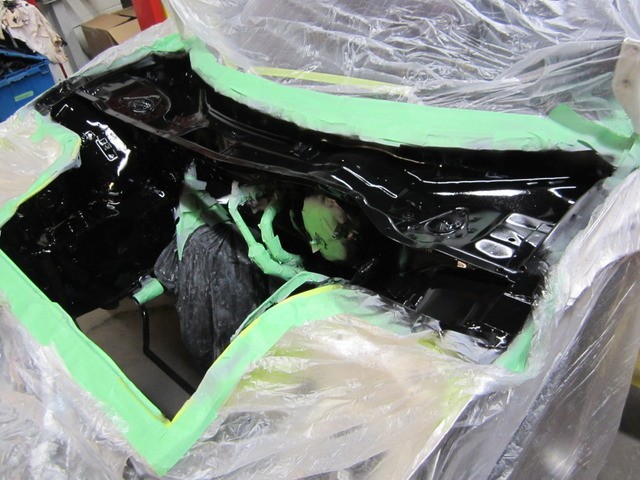
Sorry these pics are a little out of order.... Engine going back in after the bay has been painted (pics to follow)

ftql.jpg


foo8.jpg


34ex.jpg


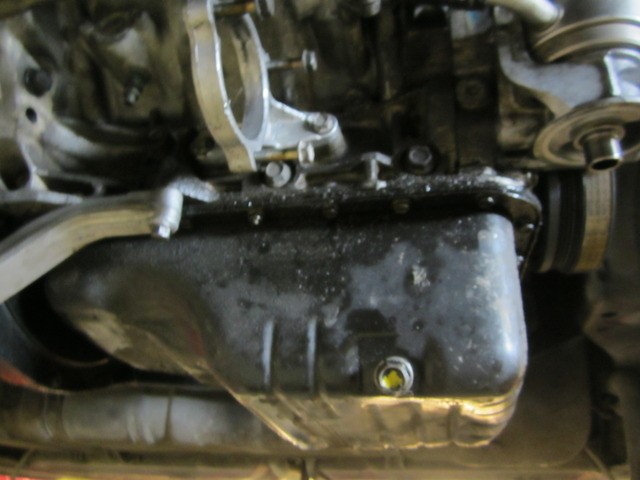
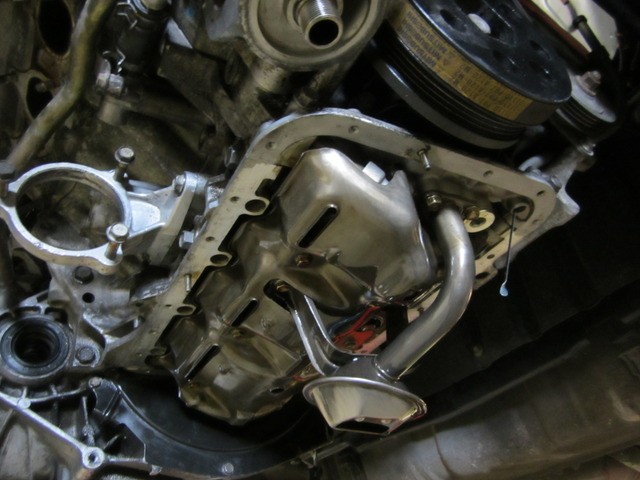
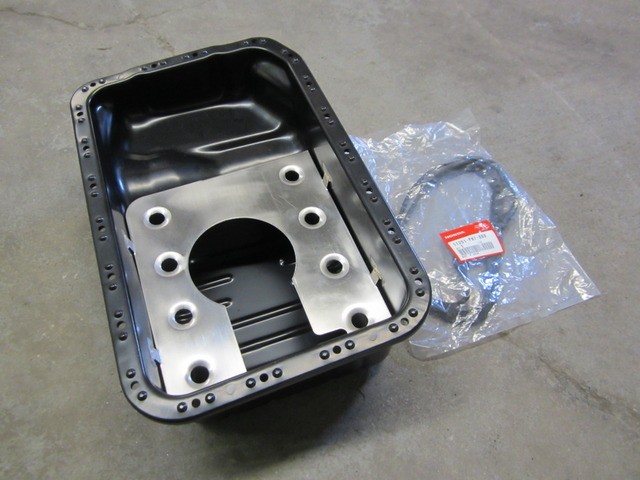
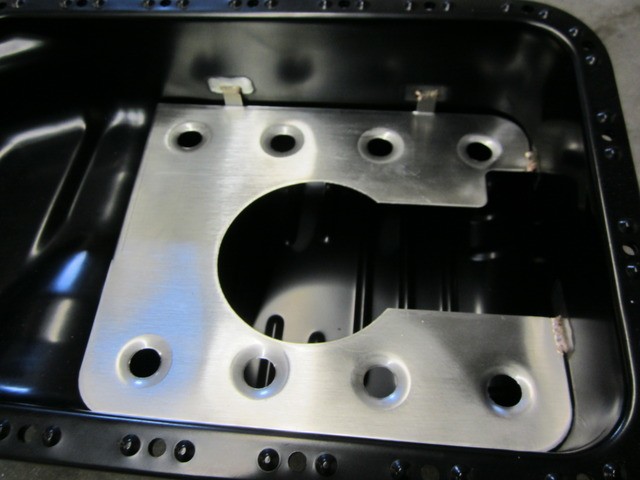
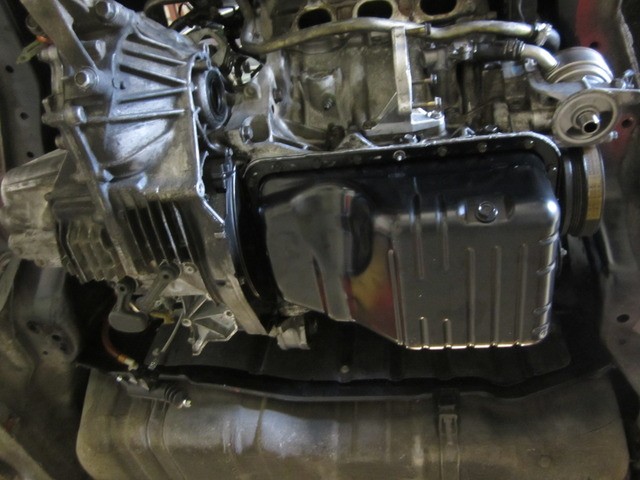
Oil pan had a dent, so got a new one and installed an oil pan baffle and new pan gasket.

66nj2.jpg

q2mh.jpg

hopl.jpg

k0o8.jpg

34rn.jpg

kj6c.jpg


Downforce Carbon instal installed in replace of the stock airbox

6cxt.jpg


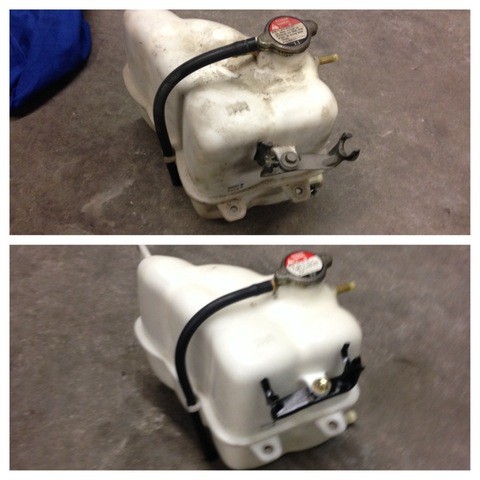
JDM Coolant res cover installed

a0r1.jpg


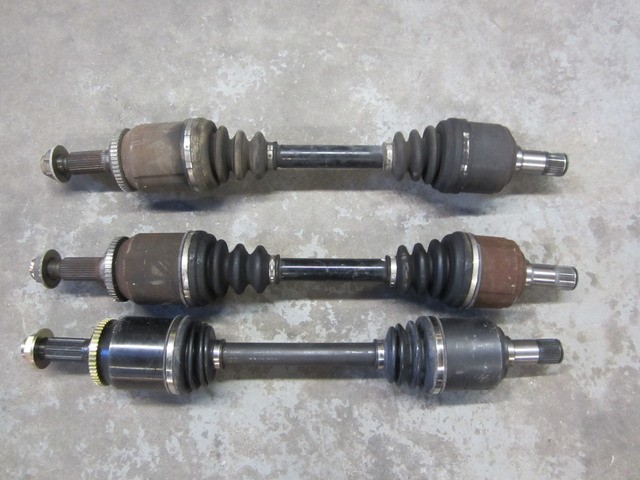
Rebuilt axles ready to go in to avoid any future issues.

4yue.jpg
 
Last edited:
Here is some of the paint process and stripping down the engine bay

ytxj.jpg


Sooooo filthy.....

u6w7.jpg


Stripping everything out of the bay

o6kg.jpg


Sanding the bay down

y28e.jpg


Scuffed and sanded

6hs8.jpg


6iq1.jpg


URL]


l8ox.jpg


Ready to be painted

9mo1.jpg


Primer coat on

dwgm.jpg

7xwi.jpg


90sf.jpg


First coat of black

67o3.jpg


n7rk.jpg


URL]


pegu.jpg


Start to reassemble the bay

z2zr.jpg


Sanded and repainted the rear cross member

g9mc.jpg


9nwq.jpg


6ovl.jpg

ddc0.jpg


68fvk.jpg


g4it.jpg


Getting the front bay prepared


bjgq.jpg


Getting ready to be sprayed

4hd5.jpg


First coat of primer

onmd.jpg


The front bay all primed and getting ready for paint

xmwt.jpg


thy87.jpg

xutt.jpg


The first coat of back (mimic the type r prototype)

q6es.jpg

3xid.jpg


URL]


re assembly of the front bay

qgdl.jpg

0a3j.jpg

[[URL]http://imagizer.imageshack.us/v2/640x480q90/191/3ton.jpg/img][/URL]
[IMG]http://imagizer.imageshack.us/v2/640x480q90/841/e91k.jpg

New bearings in the intermediate shaft and seals

f5y2.jpg


lx8q.jpg


q7vg.jpg


lfg1.jpg


Replaced all the steering back bushings

oiru.jpg


- - - Updated - - -

All set to install Pride Exhaust Headers, test pipes and V2 Exhaust

dc8n.jpg


Pride Exhaust NSX Header Set

tizy.jpg


99vo.jpg

8odf.jpg


mf6p.jpg


g0pp.jpg


Pride V2 Dual Tip Exhaust


x6i6.jpg


Test pipes installed with Resonators

5ekr.jpg


Exhaust installed ( not aligned yet)

c7a6.jpg

75us.jpg

bqsh.jpg


Stay Tuned for Part 3 as the car is now off the MS Auto Body Shop for some work.....


Coles notes of what just happened:


BEFORE:

ojb3.jpg


AFTER:

1xce.jpg
 
Last edited:
WOW!!!
Well Done!!
 
wowwwww, thats done right!!

How did you clean the engine/transmission parts?

A a wide selection of soft/stiff brushes, simple green/ worth cleaners

c235.jpg


Here you can see the subframe half done.... very time consuming

w9tq.jpg


xthk.jpg


ik6h.jpg


kgds.jpg


xdfs.jpg


gqx5.jpg


Every part that come off, was hand cleaned or replaced before it was put back on.

qtz1.jpg


subframe after cleaning

c6ml.jpg


Engine before and after

8wi1.jpg


beauty is in the details as they say....

qov0.jpg


- - - Updated - - -

Here was my "replace/repair" list for anyone thinking of doing a freshen up...

Spark plugs (NGK) x6
Ignition Coil (Front) x3
Ignition Coil (Rear) x3
Coil Cover Gasket (Front)
Coil Cover Gasket (Rear)
Fuel Filter
Oil Filter
Dip Stick 0 ring
PCV Valve + grommet
Timing belt.
Timing belt tensioner.
Tensioner Spring
Water pump.
Valve cover gaskets and grommets.
Thermostat + Gasket
HOSE, RR. WATER (LOWER)
HOSE, FR. WATER (UPPER)
HOSE, FR. WATER (LOWER)
HOSE, RR. WATER (UPPER)
HOSE, WATER MIDDLE (UPPER)
HOSE, WATER MIDDLE (LOWER)
Drive Shaft Seal L
Drive Shaft Seal R
Clutch Master Cylinder
Slave Cylinder
Release Bearing
CAM CAP COVER SEAL
Cam Seal
Alternator belt
AC Belt
Oil Pan Gasket
oil pan
oil pan baffle
vtec sol gasket
vtec sol gasket
Oil filter o ring
HOSE, OIL COOLER IN.
HOSE A, OIL COOLER OUTLET
HOSE B, OIL COOLER OUTLET
ABS Hose High Pressure
Gasket ABS Oil Bolt
Transmission Drain Plug
Trnsmission plug washer
Oil Pan Drain Plug
Oil Pan Washer
Valve cocers powdercoat
Tig Weld Baffle in Oil pan
Rebuild Alternator
Rebuild Starter
Hose pack random ( OEM)
front arm right Control Arm
Shift Boot for shifter fork
Tires - Yokohama AD08R
Front Bumper OEM
Hood pull release black
throttle cable
gas door cable
front air duct OEM
Downforce Undertray for Front Bumper
Aluminum Battery Tray
Pride Exhaust V2 Dual
Pride Headers
Pride Test Pipes
Downforce Air Duct
Downforce Carbon brake ducts
Downforce Inatke
Downforce Rad Duct JDM RHD
Fuse Box Cover
Intermediate shaft bearing
Intermediate Shaft Seals, circlips
Left Axle Rebuild
Right Axle Rebuild
Intake Manifold Gaskets
Engine Bay Decals OEM

<colgroup><col></colgroup><tbody>
</tbody>

<colgroup><col></colgroup><tbody>
</tbody>
 
I agree, devil is in the details. It's always worth it to go that extra step. I've wasted tons of hours doing the same thing as shown above. But in the end, all of it shows. Maybe not to everyone but at least I know it's done.
 
Back
Top