- Joined
- 13 August 2015
- Messages
- 114
Arc-Light LEDs - The Install Guide
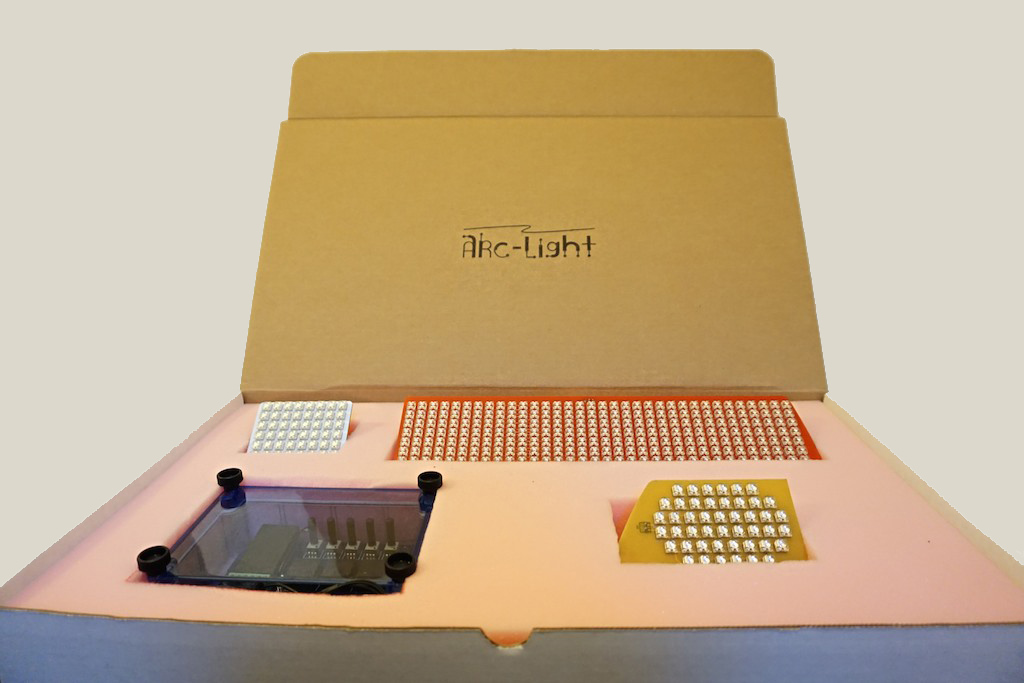
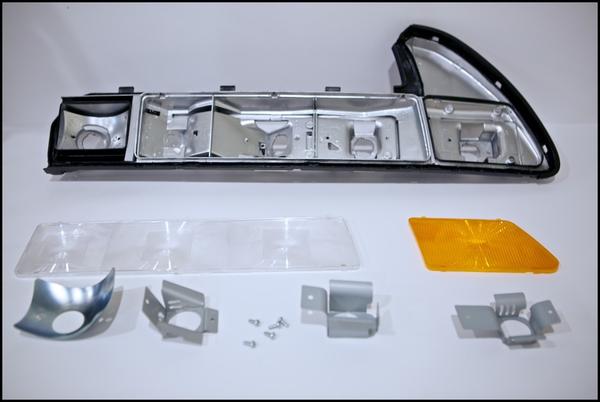
Thank you for your time to take a look at the Arc-Light DIY install guide. Within this post is a how-to guide for installing LED kits that we are making available for you in the Vendors section. I know there are many kits out there some good and some bad but I believe our kit complements the same level of quality, detail, and spirit that the original engineers had when creating the NSX. Inside each kit you'll find LED panels, controller, sealant, and this install guide that outlines other common tools that will aid with your install.
As always please take your time during the install. Although it will be intimidating at first you will find that the install process is not difficult at all and actually a rewarding experience. You can do it! s always, if you encounter any issues or have questions during your install please feel free to contact me.
Lastly, I must stress not to use any type of chemicals to aid in the install. Go-Off, Windex, paint thinners, etc can damage the tail lights and alter its appearance. If any cleanup is necessary water and a mild soap can be used.
MATERIALS AND TOOLS
- Heat Gun - http://www.amazon.com/Wagner-0503008-HT1000-200-watt-Heat/dp/B00004TUCV/
- Painters Masking Tape - http://www.amazon.com/3M-Scotch-Safe-Release-Painters-Masking/dp/B0049CW9PY/
- Slotted screw driver 1/8" tip - http://www.amazon.com/Klein-614-6-Slotted-Electronic-Screwdriver/dp/B00B9HICNK/
- Stove - http://www.amazon.com/COLEMAN-Portable-Camping-Powerhouse-2-Burner/dp/B0115NC2K6/
- Steel Water Tub - http://www.amazon.com/Behrens-3-OV-16-Gallon-Oval-Steel/dp/B002YJJJQ6/
- (10) C Clamps - http://www.amazon.com/Tools-QUICK-GRIP-C-Clamp-4-inch-225104/dp/B0000CCXVT/
- Box Cutter - http://www.amazon.com/IRWIN-2082300-Utility-Standard-Retractable/dp/B0001Q2EOS/
- Epoxy - http://www.amazon.com/Loctite-1366072-Minute-Instant-Adhesive/dp/B001AW0B3S/
- Rubber dishwashing gloves - http://www.amazon.com/Atlas-Glove-WG772L-26-Inch-Nitrile/dp/B001PBEIZQ/
- Dremel - http://www.amazon.com/Black-Decker-RTX-B-3-Speed-Rotary/dp/B000MUSLCC
- Toothpick - Any fine dining establishment – preferably one that serves artisan beer served by a dude with a handlebar mustache
TAIL LIGHT SEPARATION
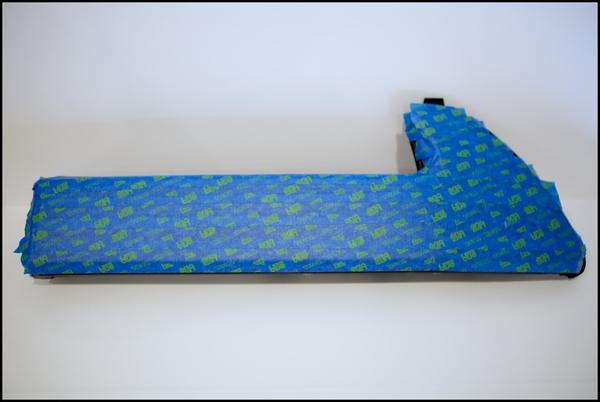
2) To protect the lens with several strips of masking tape. This will protect the lens while you work with the tail light.
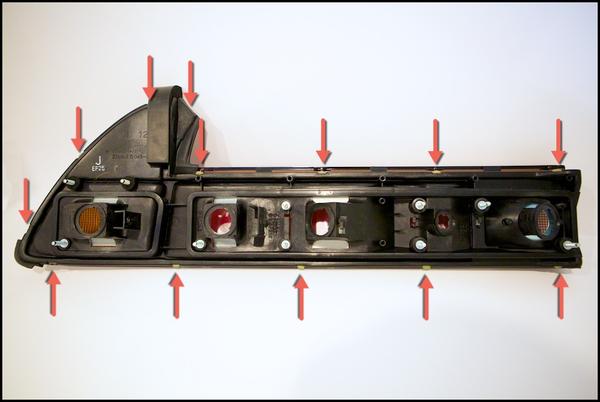
3) Looking at the backside of the tail light assembly, take note of the 13 areas where the tail light snaps into the assembly.
4) Place the tail light into the hot water bath with the lens facing up to you and wait 15 minutes. This will allow a heat to evenly penetrate the tail light and cause to sealant to soften.
5) Remove the tail light assembly from the water bath and using the flat head screwdriver gently pry the lens from the 13 snaps. There is no need to remove the lens beyond releasing the snaps. Also, it is best to start at a corner where there the lens snaps into the assembly and working your way around. At best, you will be able to undo one snap at a time before having to put the light back into the water bath for another 5-10 minutes.
6) Once all snaps are released, place the tail light assembly back into the water bath for 15 minutes.
7) Remove the tail light assembly from the water bath and using your hands (gloves are recommended) gently pry the lens from the assembly slowly and be sure to work your way around the lens so that it comes out evenly. Failure to do so will put stress on the lens and cause it to crack. As always, please be very patient. The sealant, while difficult to work with, will slowly give way and release the lens from the assembly.

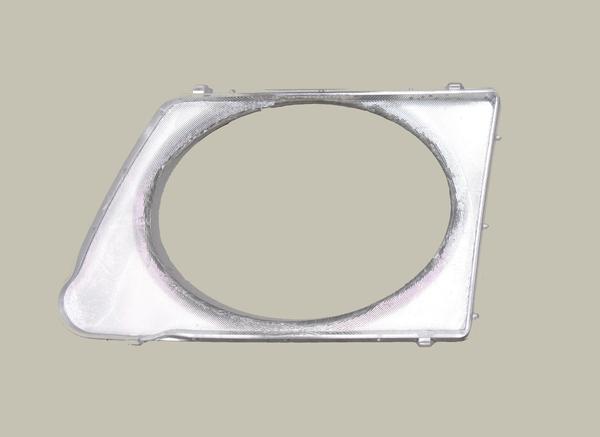
8) With the lens removed use the flat head screwdriver to work the old sealant out of the channels. Be sure to remove as much of the sealant as possible.
9) Moving onto the lens it is quite possible that the lens also has a good amount of sealant on it as well. Using the old sealant that you collected earlier heat it up in the water bath and use it to remove the sealant from the lens by getting the old sealant to stick to it – eventually removing the sealant from the lens. NOTE: you may have to place the lens in the hot water bath to loosen up the sealant.
LED PANEL INSTALL

1) Remove the lenses from the tail light assembly as shown above for the lights that will be replaced by LEDs.
2) Now remove the bulb heat shields for the lights that will be replaced by LEDs.
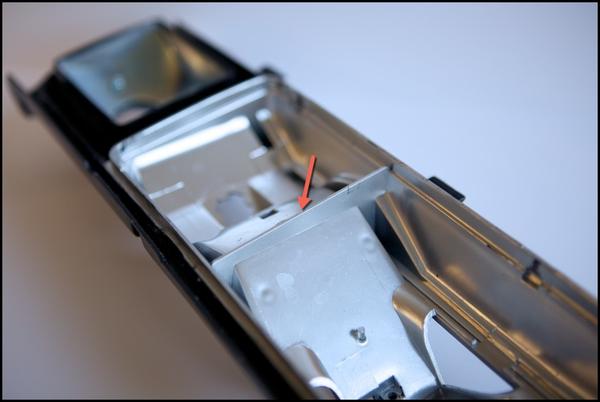
3) Using a box cutter, carefully cut the plastic ridge. This will allow the LED panel to sit flush in the tail light.
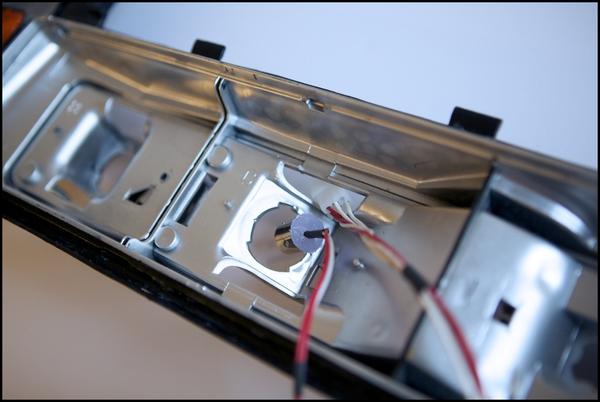
4) For each LED panel, route the connector and bulb socket towards the rear of the tail light housing as shown.
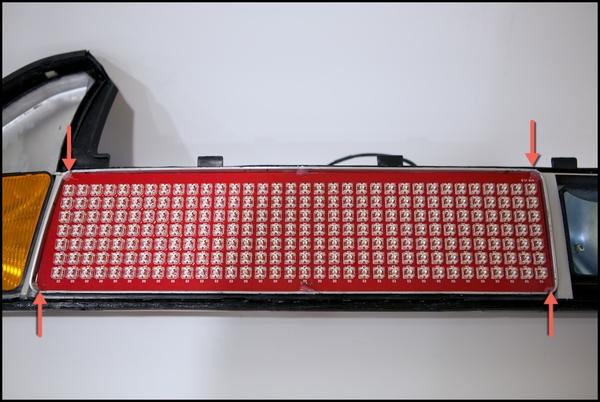
5) Secure the LED panel into the recess and secure it with dabs of epoxy glue on the conrners of the panel as shown above.
6) Repeat for the remaining LED boards being installed.
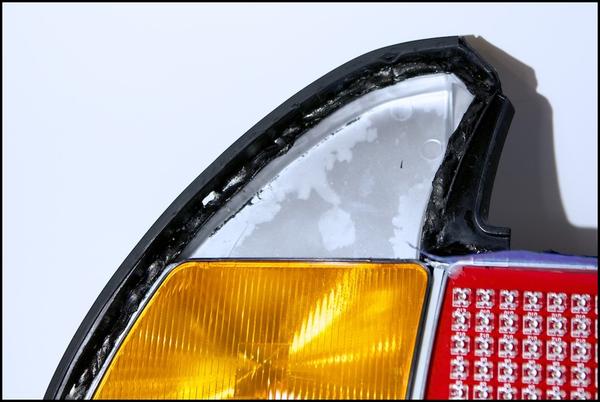
7) NOTE: If you are installing a 2002+ style turn signal light you will need to cut out the diffraction lens as shown and secure the LED board onto it.
REINSTALLING THE LENS
1) Locate the sealant that was provided with your kit And place it in the fridge for 30 minutes. This will slightly harden the sealant and make it much easier to handle.
2) Remove the sealant and fill the channels of the tail light housing with the new sealant. The amount of sealant you use should sit flush with the top of the channels.
3) Take your heat gun and set it to 400F and start heating the sealant in the channels while moving the heat gun steadily around the tail light. You will need to gradually heat the sealant so this step may take up to 15 minutes.
4) To check the readiness of a sealant take a tooth pick and stab the sealant. The sealant should be soft soft and the toothpick should sink in with very little effort.
5) Once the sealant is ready, take your lens and line it up with the assembly and using only your hands start working the lens evenly into the assembly and start engaging the tail light clips.
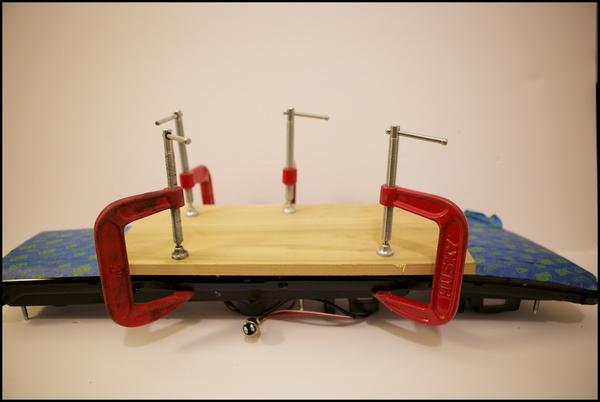
6) Eventually it will be too difficult to work the lens any further. Take a set of your clamps and start clamping the lens to the assembly. Be sure NOT to over tighten the clamps as doing so will crack the lens. To get an idea of how much force is needed, imagine pressing your two pinky fingers together. That should be sufficient force that will allow the lens to settle in. NOTE: A piece of wood can be used to help you clamp the lens.
7) Check the clamps every 15 minutes. Be sure to loosen and tighten them and move them around the tail light. Repeat this step until the clamps have effectively been around the taillight twice.
WIRING THE LED CONTROLLER
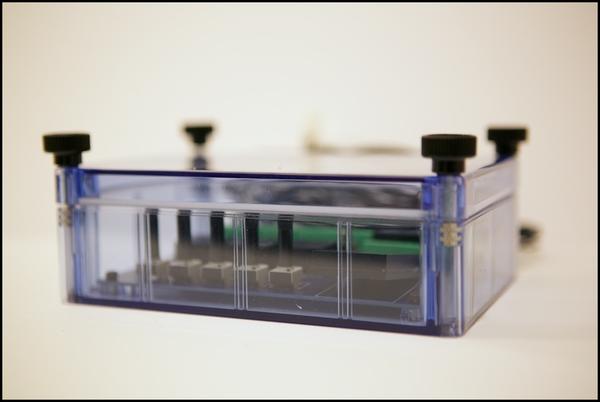
1) The LED controller provided is a simple plug and play unit.
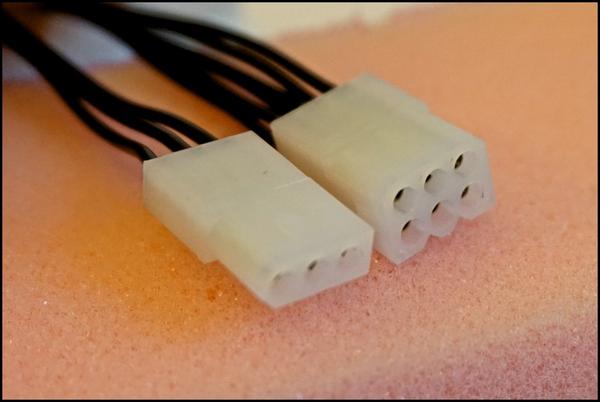
2) Find each plug on the controller and match it up to the LED panels plug. NOTE: each plug is unique and can only be matched with it's respective board.
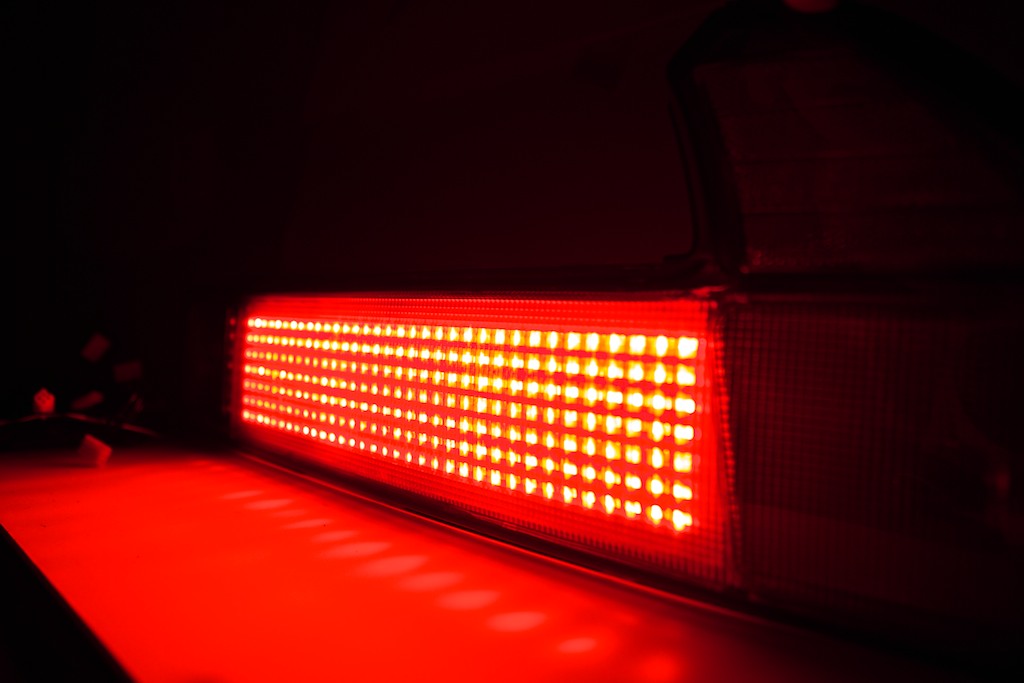
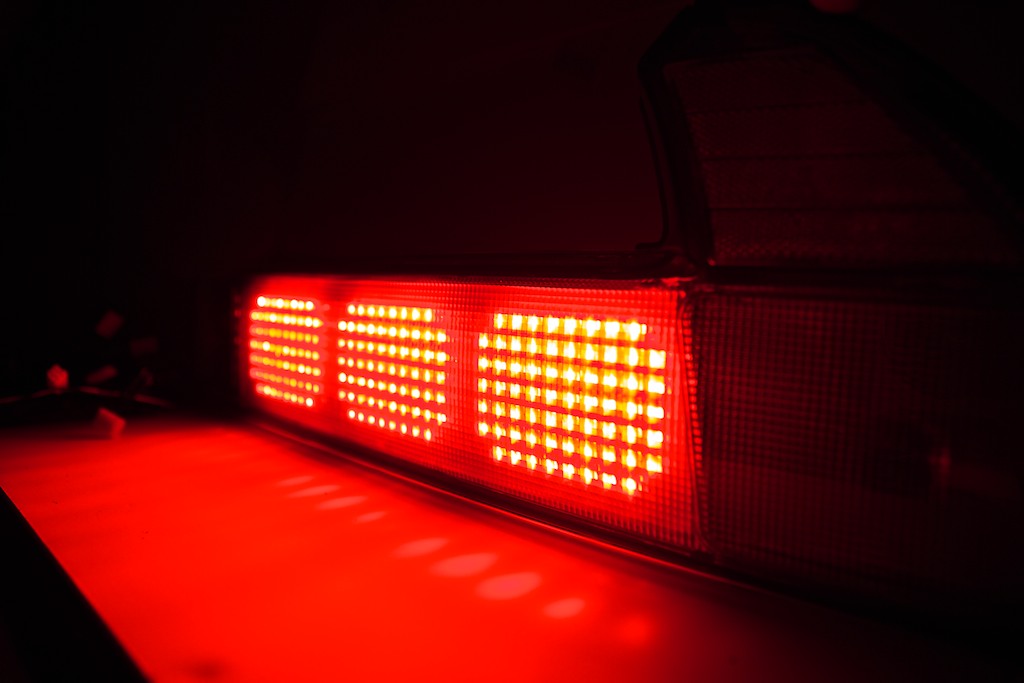
3) Congratulations!!! Once all connections are made it is time to finally reward yourself and turn it on! Note: The controller is shipped with all brightness adjustments set to 0%. To adjust the intensity of the light simply open the controller using the thumb screws and adjust each knob until the desired brightness level is achieved.
Last edited: