
Looking good [emoji106]. Looking forward to the powdercoated calipers and new wheels!
-
Protip: Profile posts are public! Use Conversations to message other members privately. Everyone can see the content of a profile post.
You are using an out of date browser. It may not display this or other websites correctly.
You should upgrade or use an alternative browser.
You should upgrade or use an alternative browser.
Big McLargeHuge’s 1990 JDM NSX Adventure Thread
- Thread starter Big McLargeHuge
- Start date
-
- Tags
- 1990 build jdm rhd transmission
Brakes pt.2
Brake jobs are just one of those things that takes way longer than you expect.
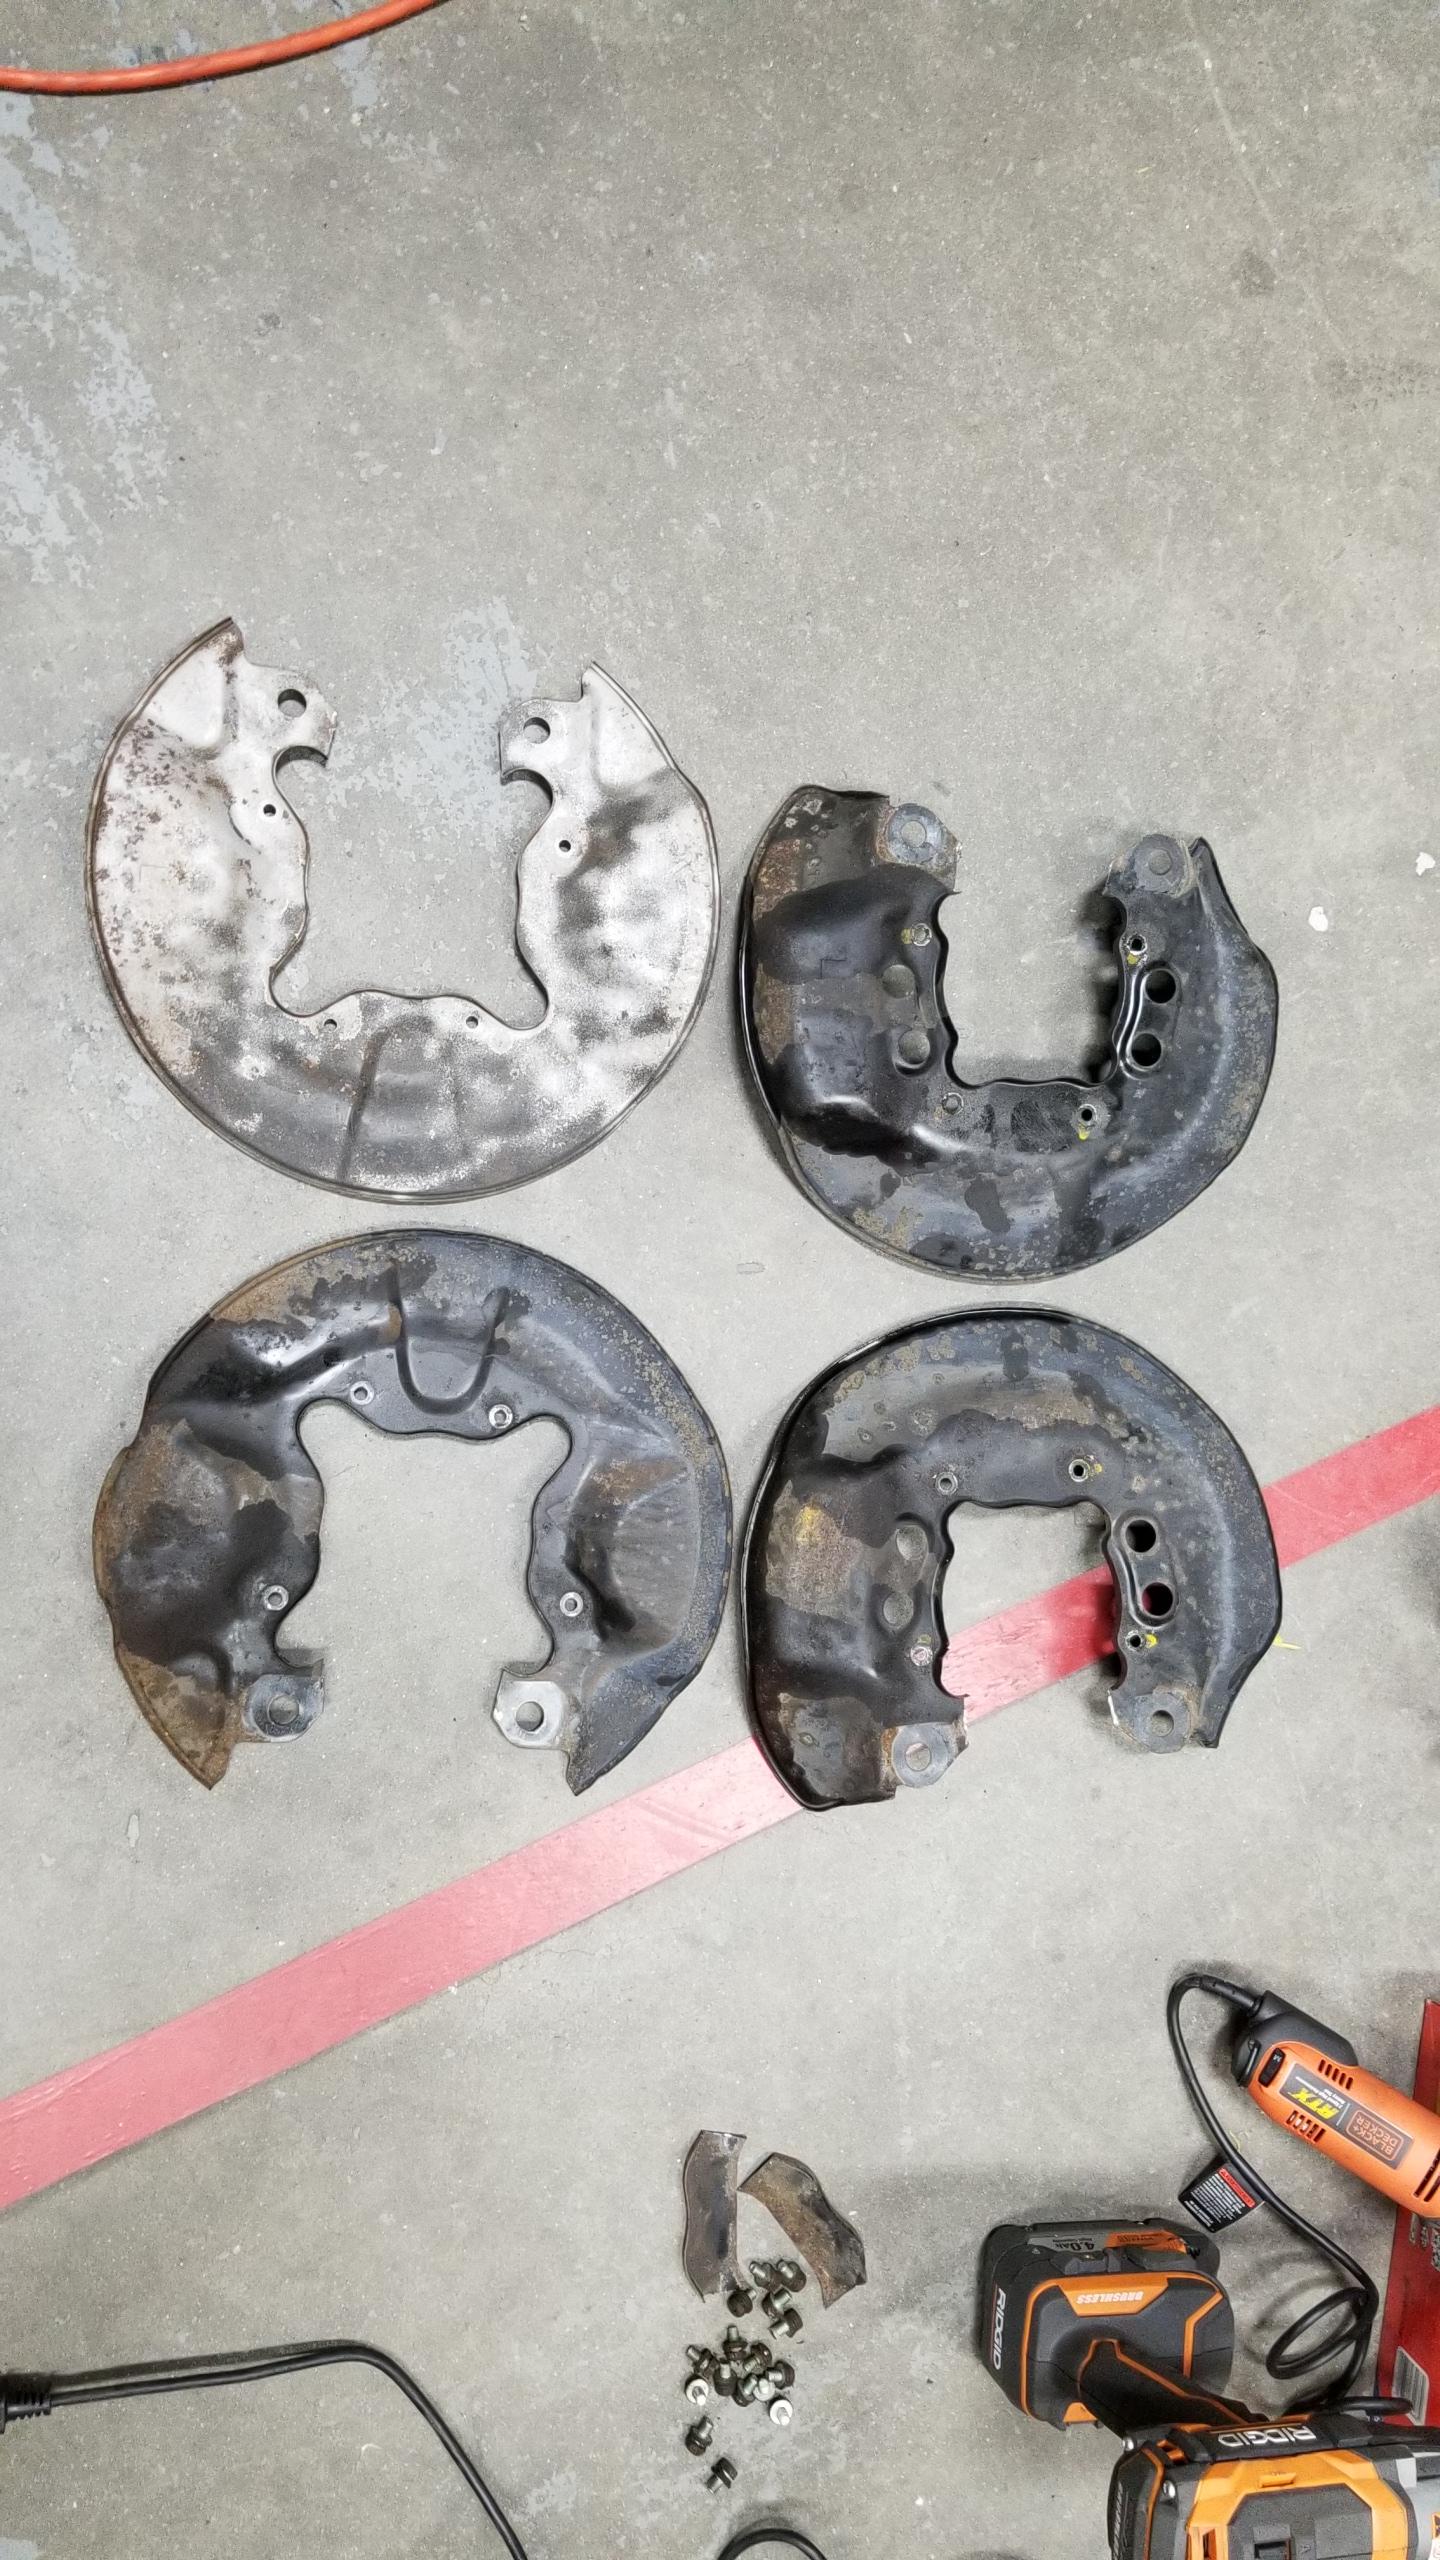
Dust shields removed. I dremeled off the small bits on the sides like suggested earlier to remove them without taking the hubs out. The only downside is that the bits cover two of the wheel speed sensors which might expose them to more heat.
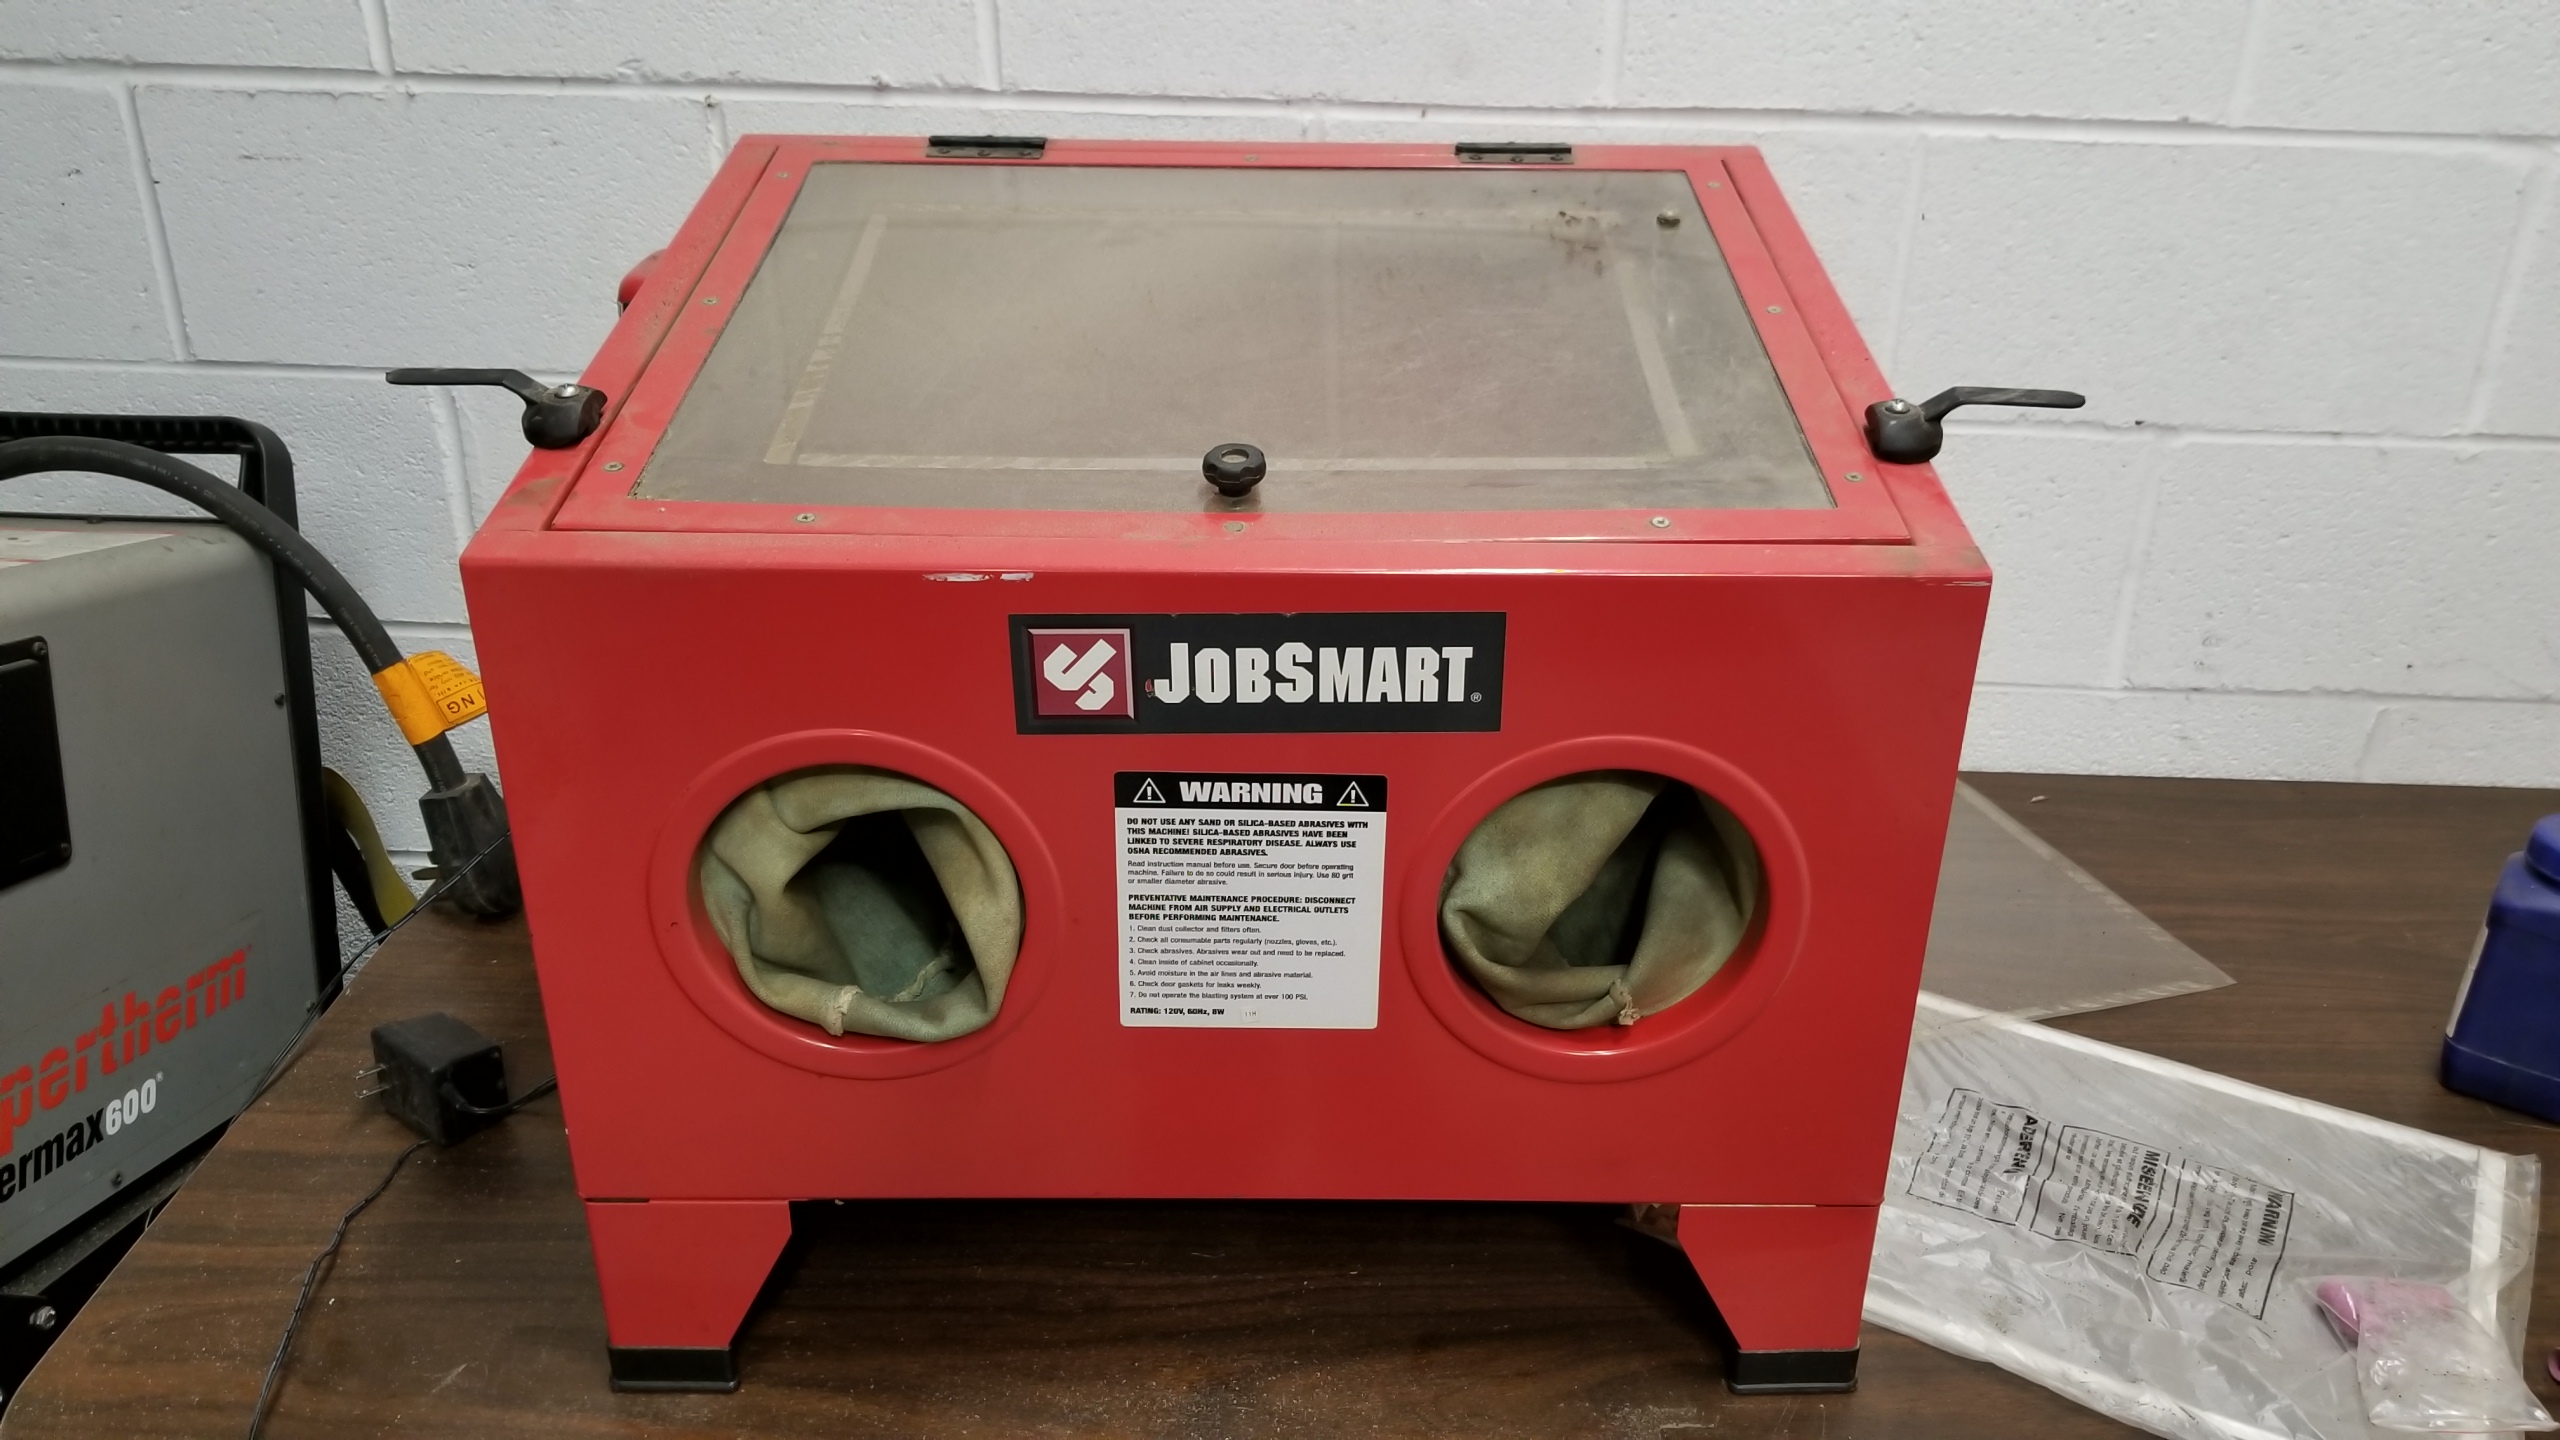
One out of four media blasted. The front shields use screw head bolts instead of 10mm, those had to be removed with vice grips instead of a Phillips head to stop stripping them.
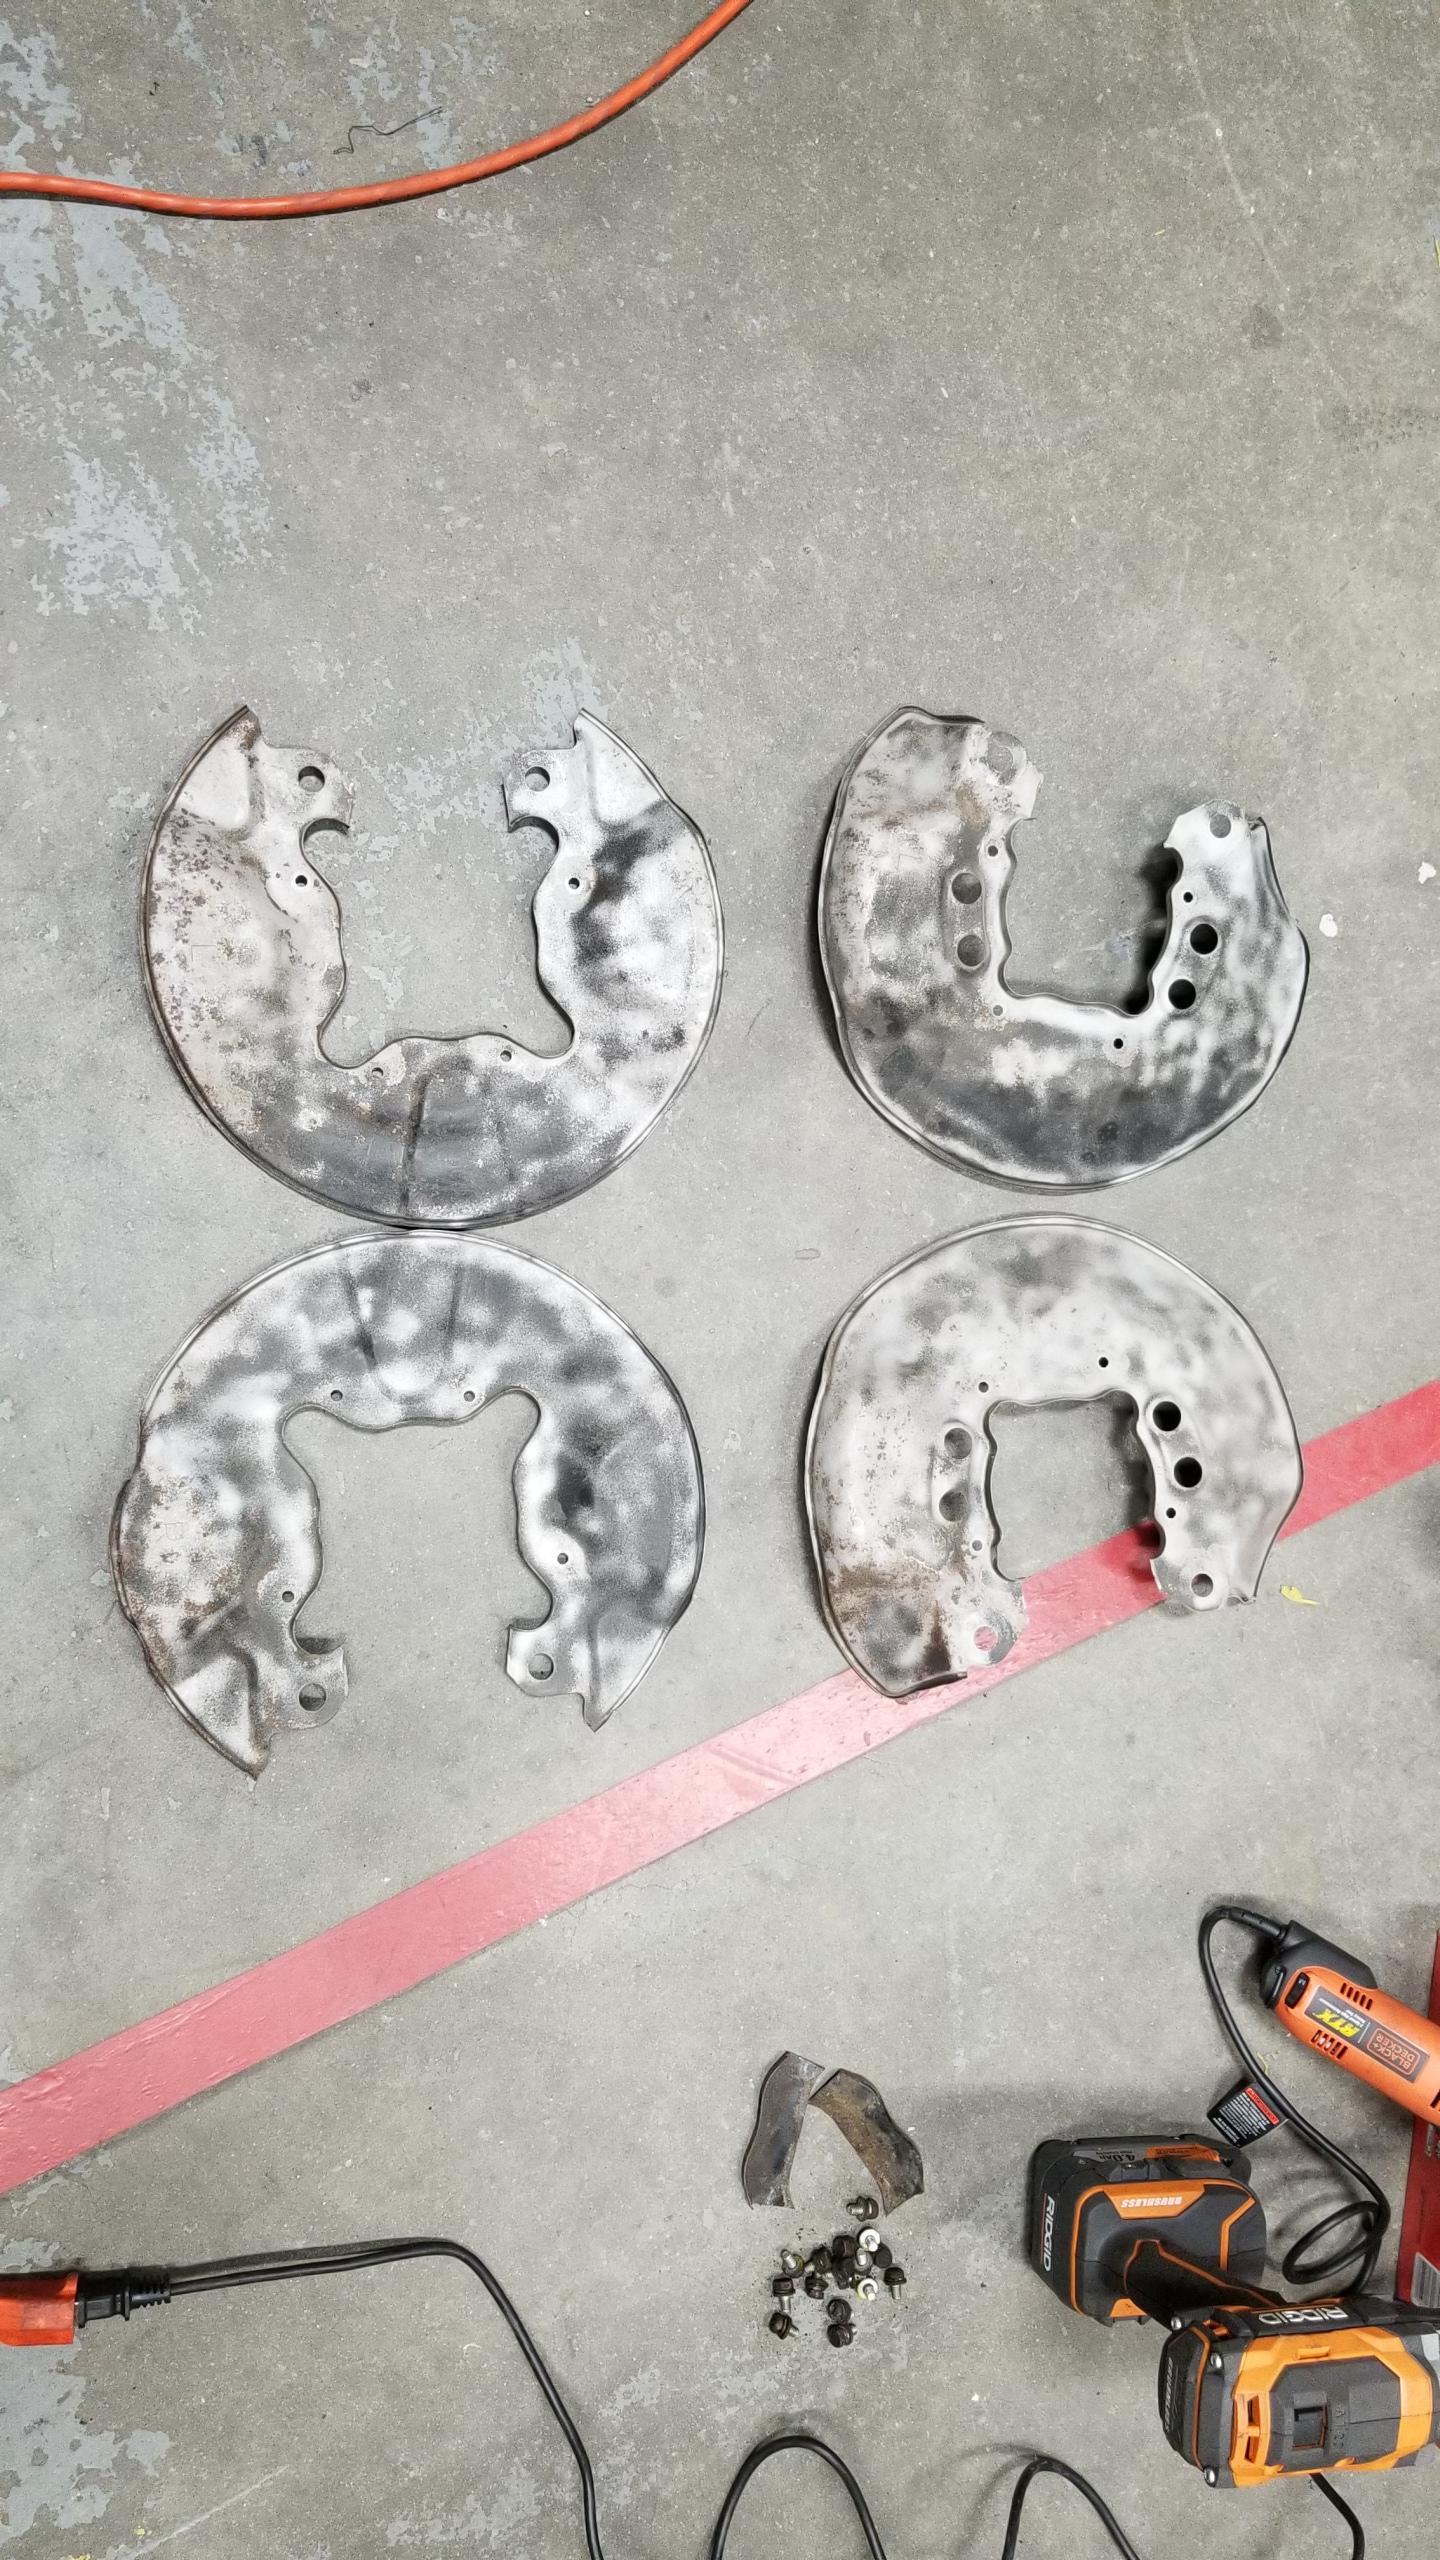
All four media blasted. It makes quick work of old chipping paint and corrosion.
This thing is great but could use a better hatch gasket, I was covered in dust afterwards.
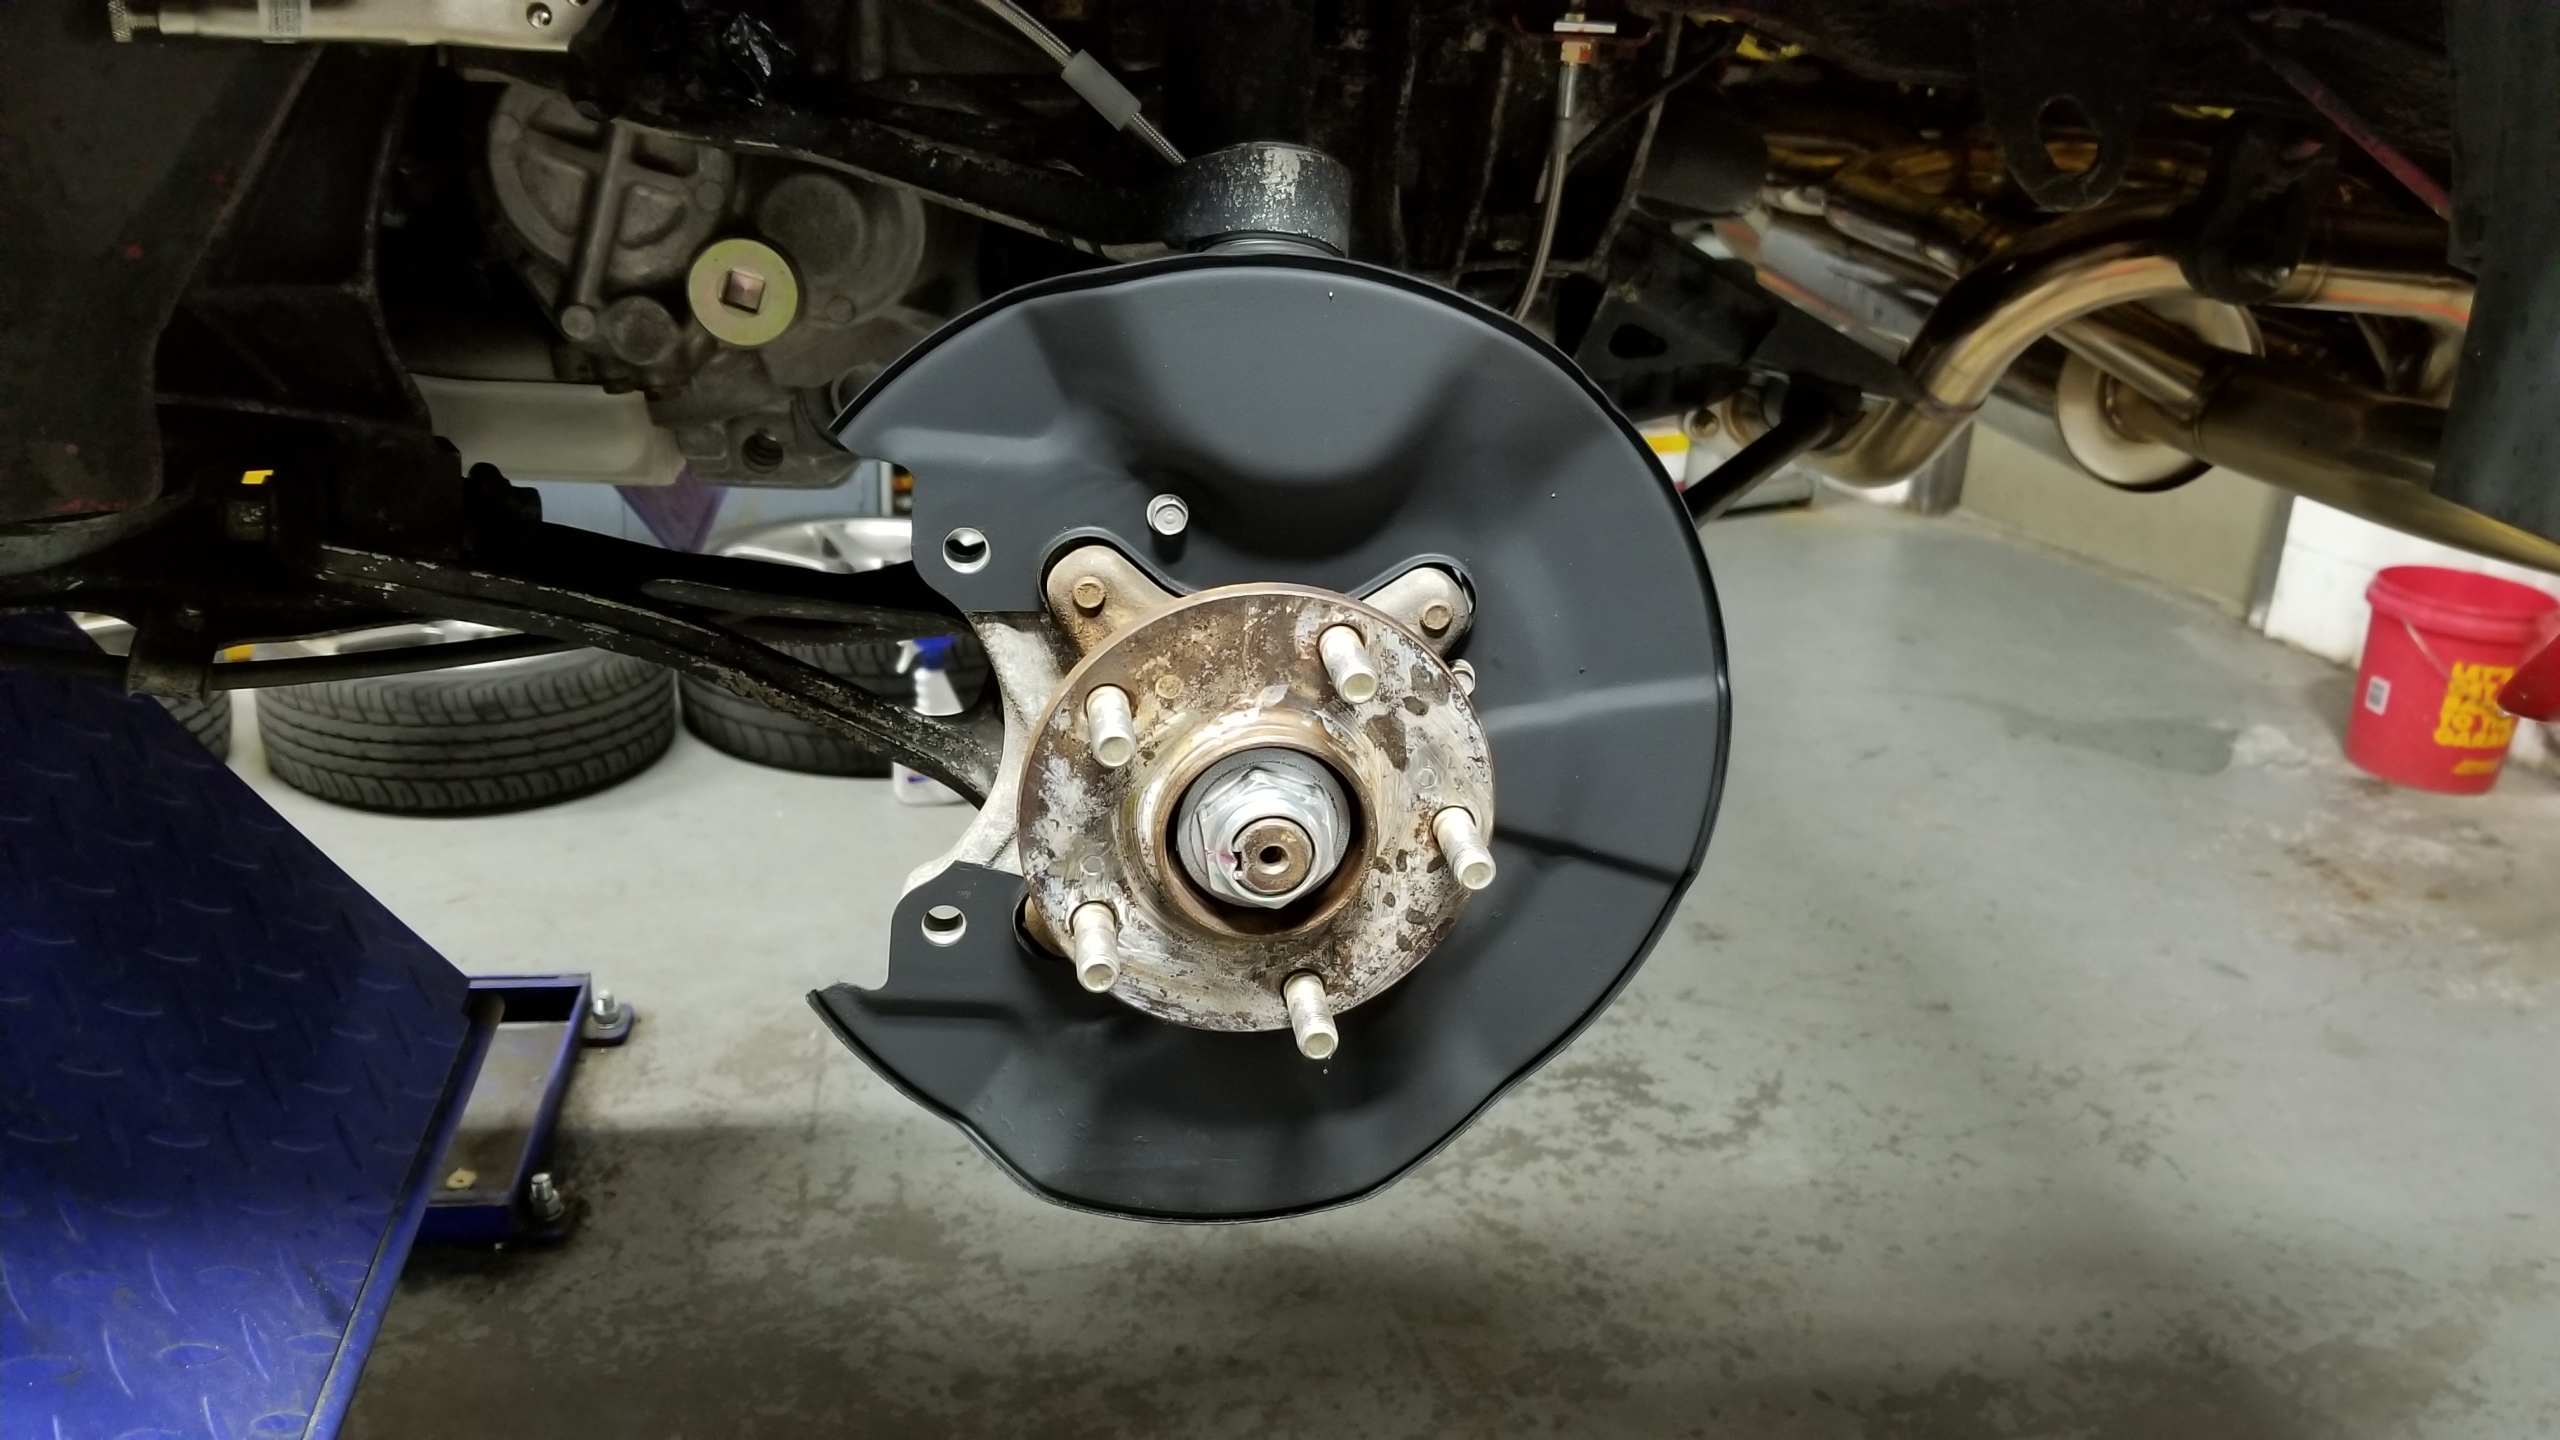
Dust shields painted with rust converter and hubs treated with rust remover. Dust shields have no right looking this good.
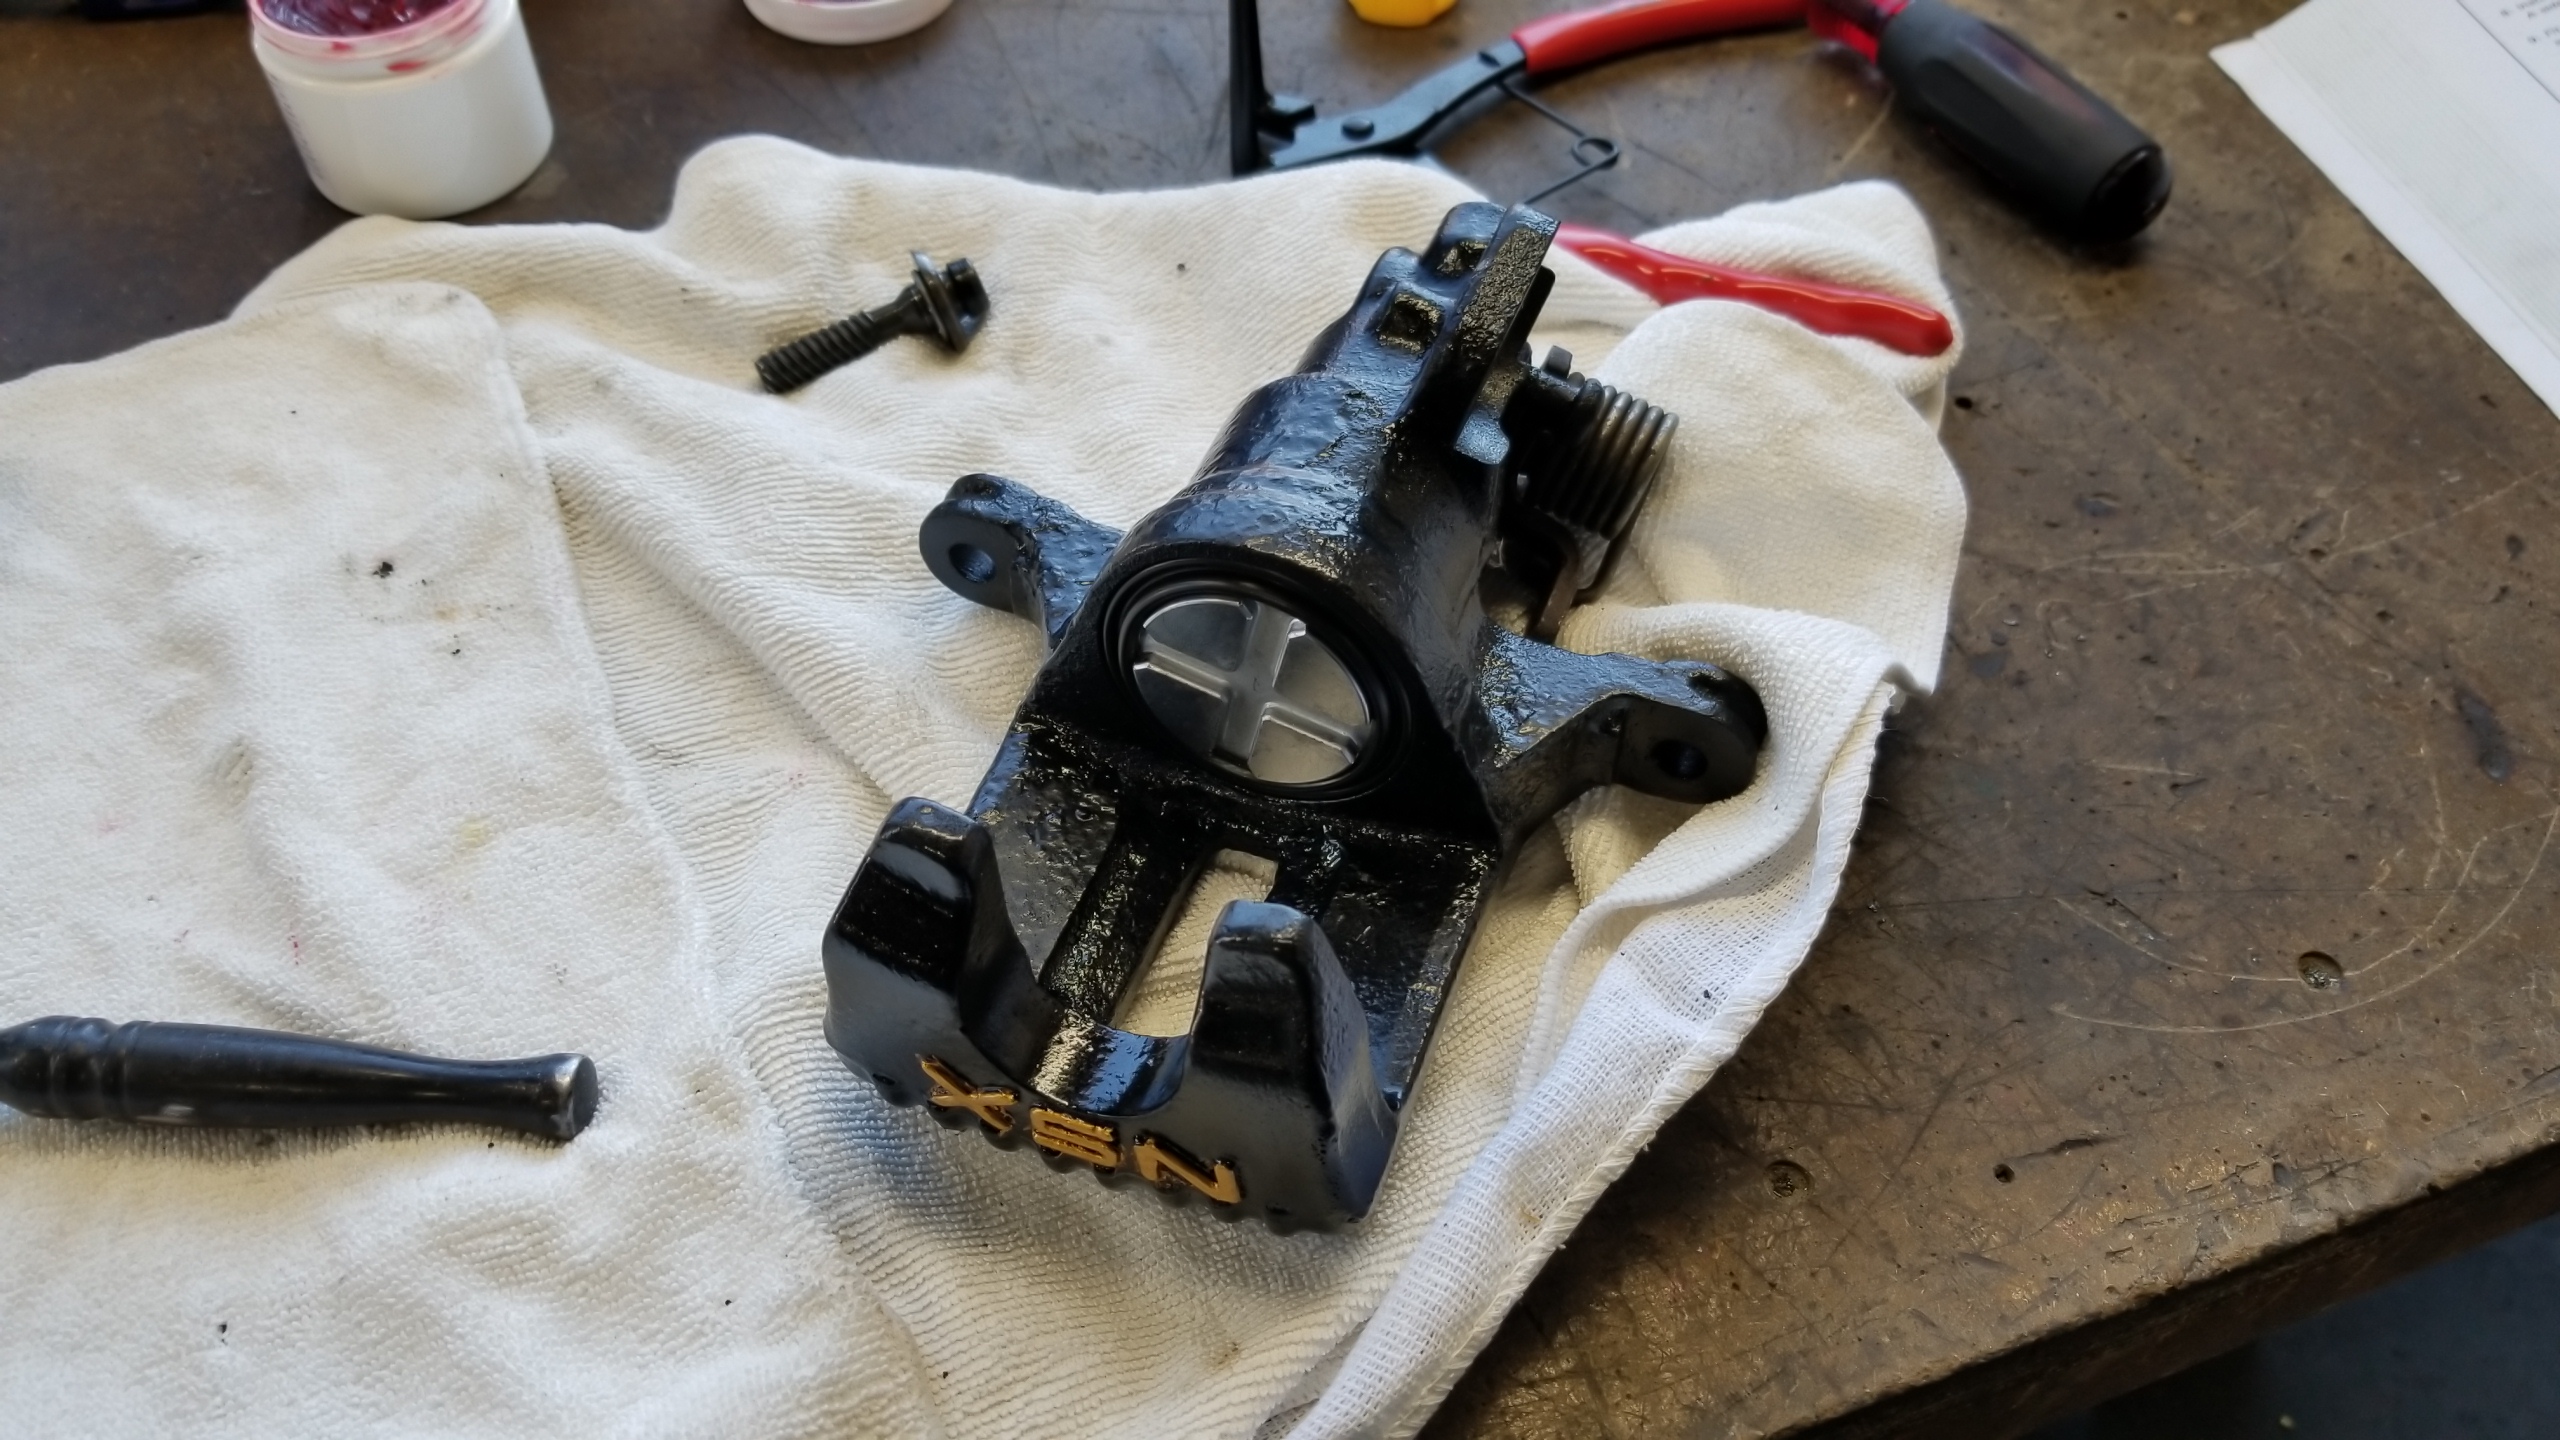
Got the calipers back from paint but didn't get a good pic for whatever reason. I really wasn't too happy with the quality of work for what I paid, they discounted a bit afterwards but I could've done better myself with a cheap caliper coating kit. Poor masking and they weren't media blasted like I (ass)umed. They didn't want to do the lettering either so I did myself.
Lettering stripped and masked.
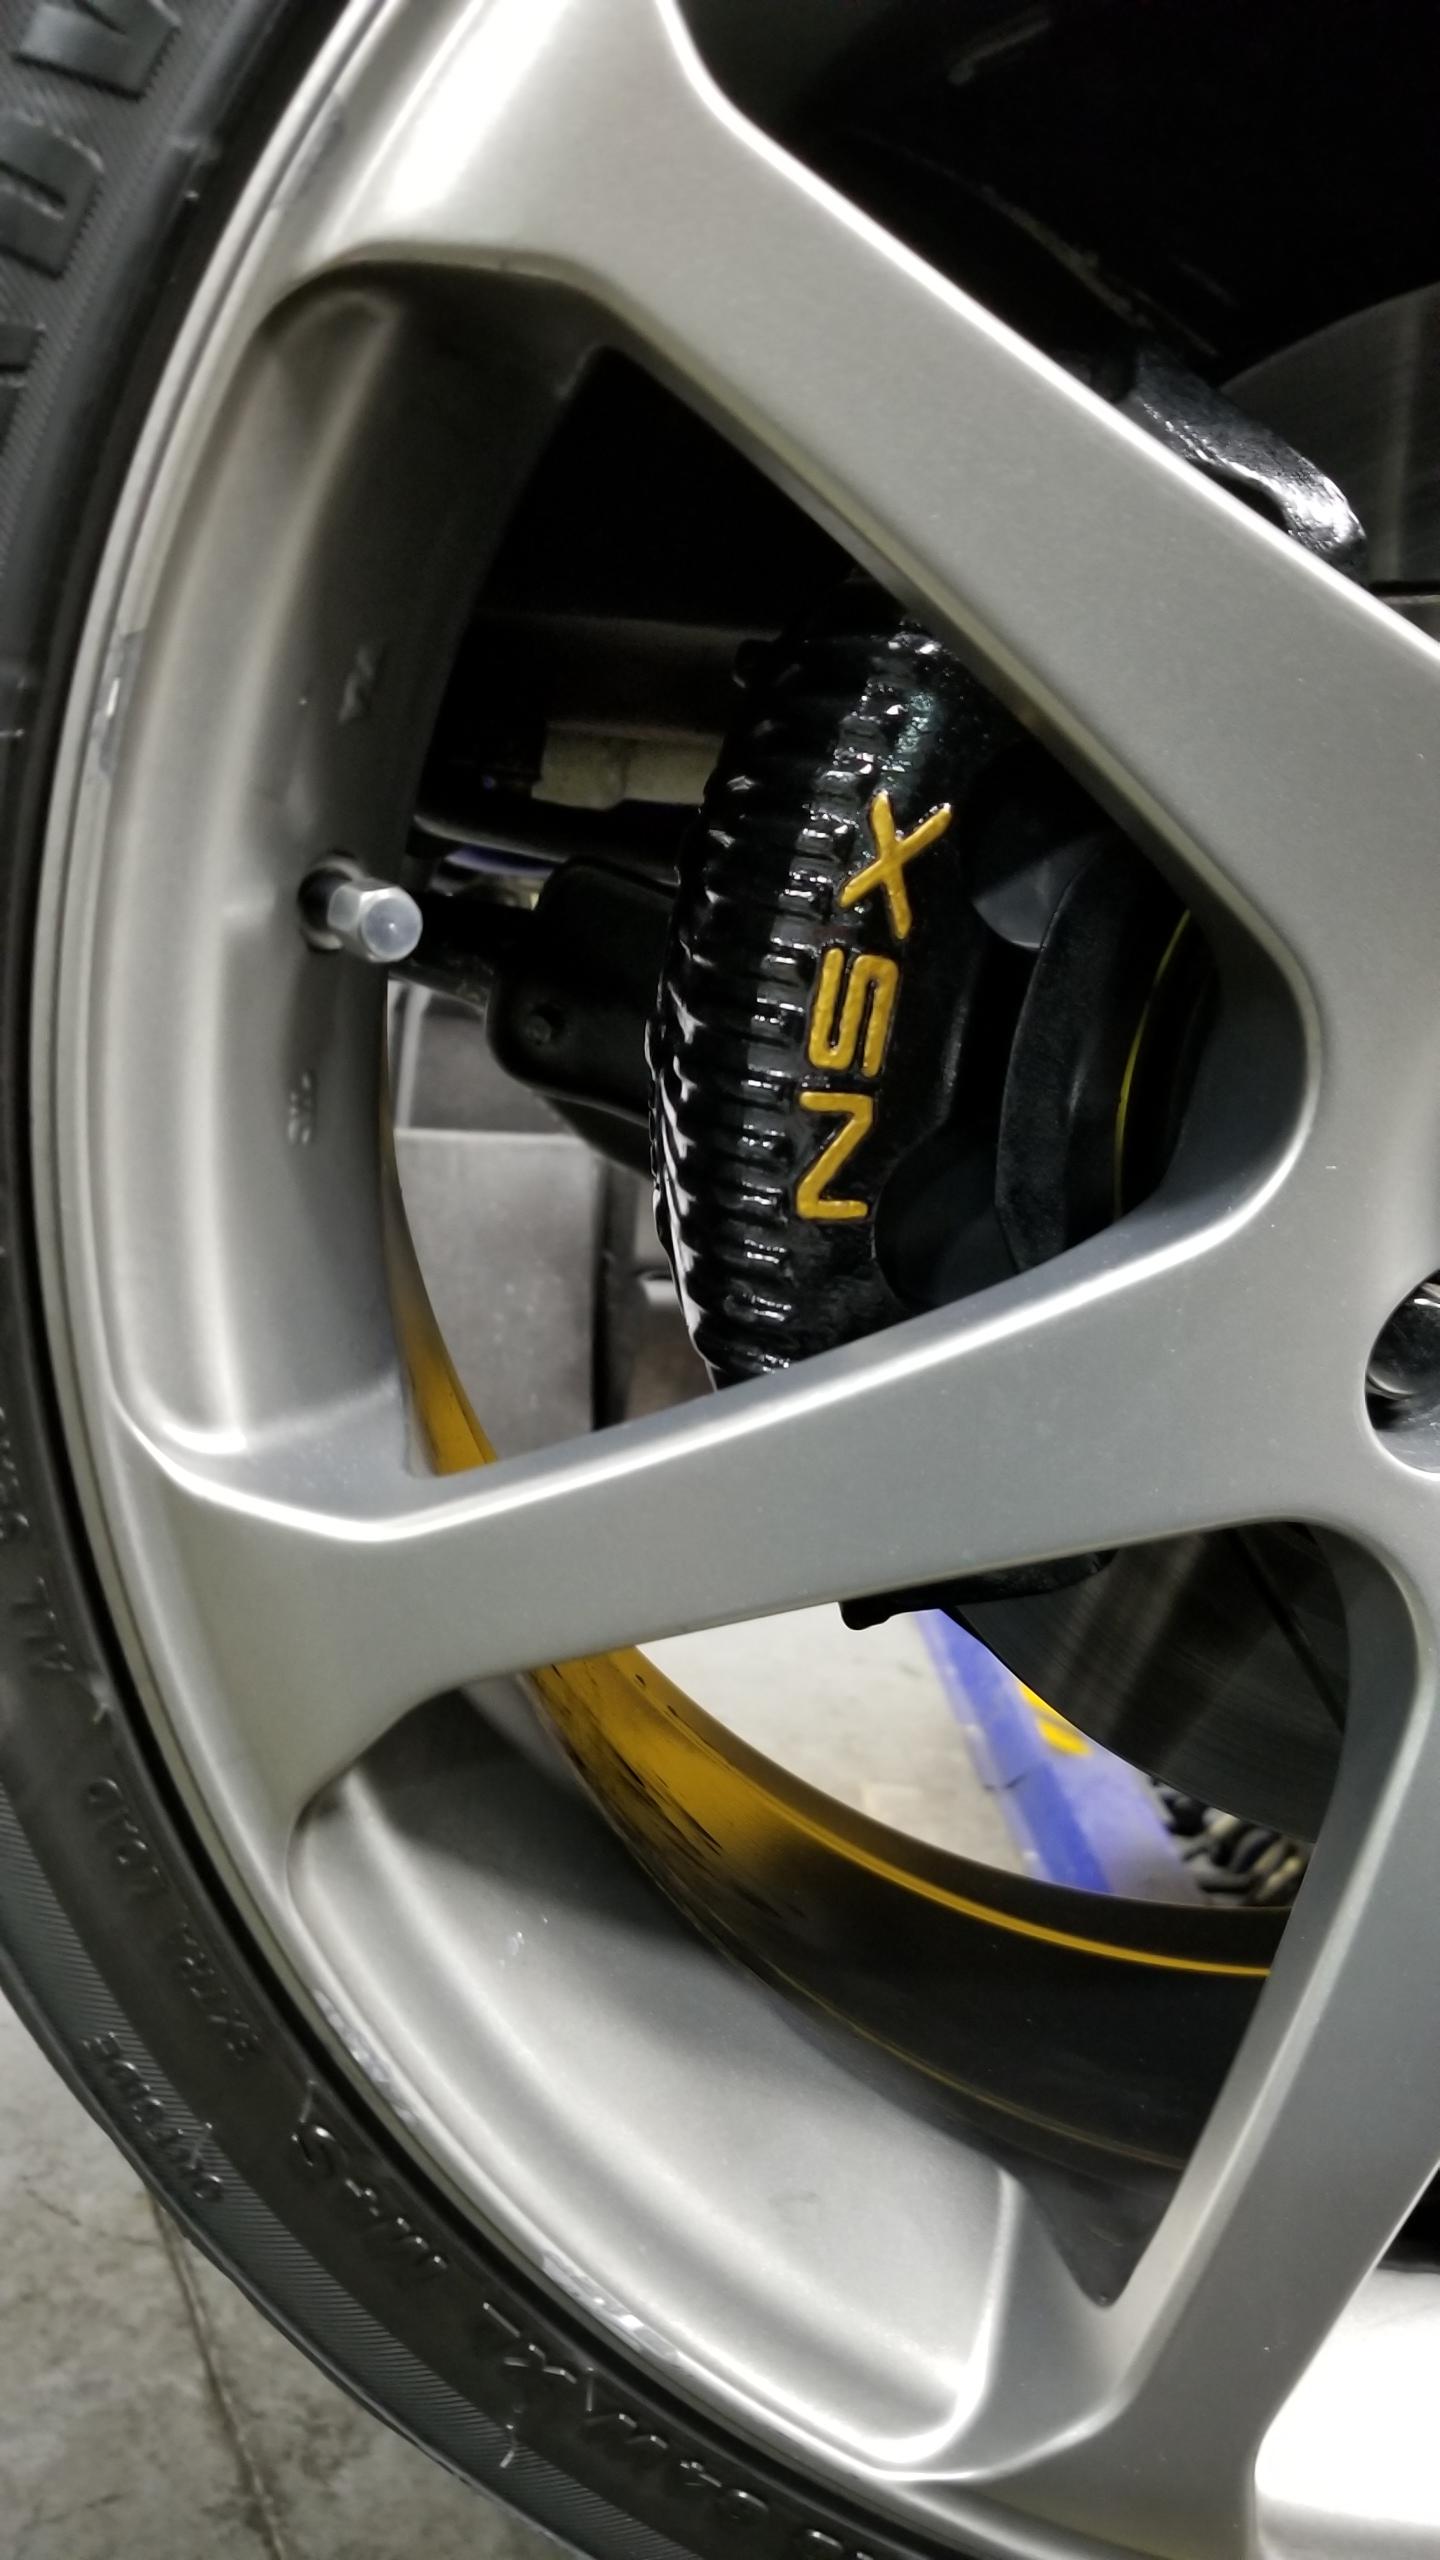
Done with gold VHT. The masking tape let some spray bleed through so next chance I get I'll fix the small bits of overspray with authentic hand-brushing. All in all, I think they turned out well regardless, just needs a bit more touchups.
If you bothered reading this part, my number 1 near-future wheel choice are the Advan RGIII 17/18 in racing gold which I think will match these calipers really well. I think they look fantastic on the NSX, very light, seem more creative than the normal brands, and not exorbitantly expensive. TSW Bathurst are my 2nd choice but they don't get me as excited.
Goodridge stainless brake lines to be installed. Perfect length and fitment and included all the hardware needed. The 10mm flare nuts were pretty easy to remove from the stock hardlines with a flare wrench and a bit of penetrating fluid, which is good since stripping them would suck big time.
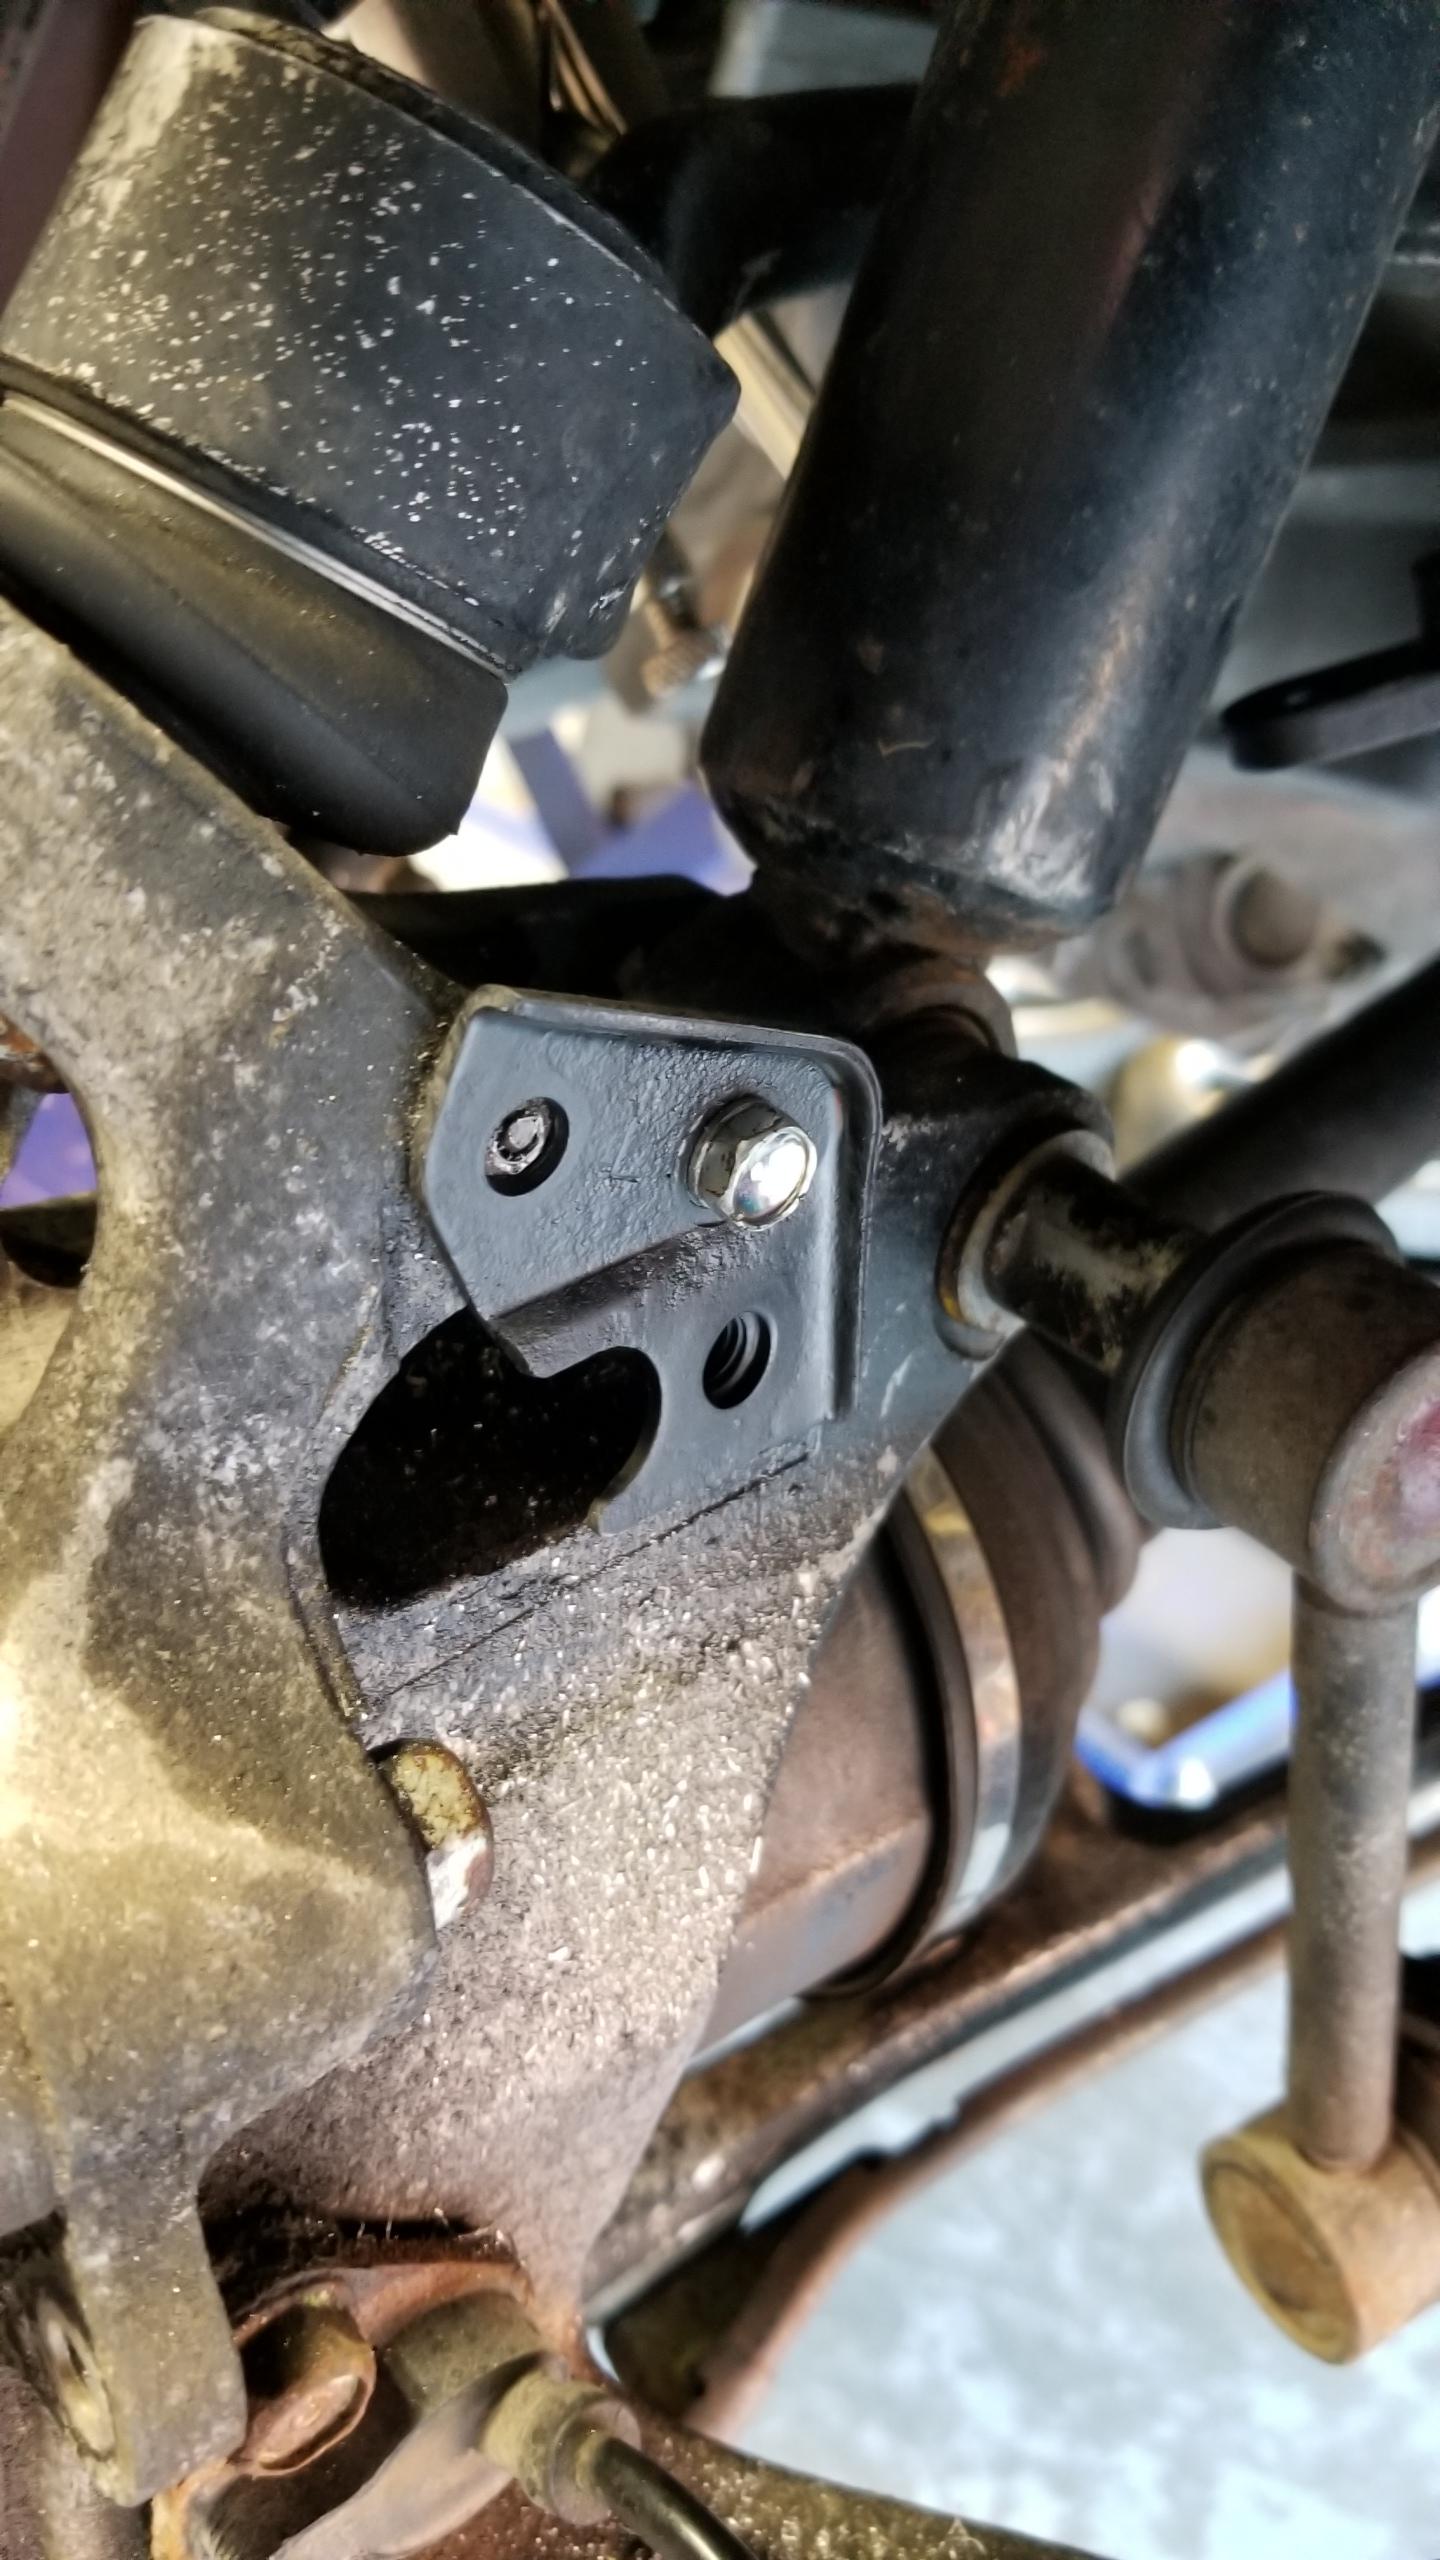
Now's a good time to prepare the RR knuckle for the new sensor I had to order. The remaining head basically had fused itself to the car, absolutely zero chance of it coming out the easy way.
The hard way involves drilling, chipping, etc. until the sensor is no longer part of the hub. Kroger came in clutch to protect the driveshaft ABS ring teeth during the process. As long as the hole is kept the same shape and the mounting points are kept intact, the new sensor should still work just fine at the same distance from the ABS teeth. Labor intensive but the driveshaft didn't have to be removed.
What was formerly an expensive and hard to find sensor is now reduced to a fine dust. This, of course, is the only one discontinued in the US and no aftermarket one is available, so a new OEM one is on the way from Amayama. What would I do without them.
The car drives fine without the sensor BTW, at startup it stumbles a bit before it figures out the signal is missing and then the ABS/TCS lights come on and lets you drive normally. Neither of those are particularly helpful anyways according to quite a few owners..
Anyways, back to caliper rebuilds. I bought Centric seal kits and pistons all around and OEM pistons for the rears. OEM on the right. Could easily be reused in this condition, but the inside of the piston had quite a bit of rust inside and I didn't feel like cleaning it out. I measured both pistons with calipers and they were within +/- 0.02mm diameter and the same length so the dimensions checked out.
Centric/aftermarket piston boots on top, OEM on bottom. DO NOT BUY THE AFTERMARKET CALIPER SEAL KITS, THEY SUCK. The size of all the piston boot openings are way too small to use, it is impossible to fit them around the pistons when you're shoving them back in. I tried and tried and it never worked, even if you did manage it, the seal would probably be pulled out of the caliper by the friction against the piston. I had no choice but to reuse the old piston boots. They were all in good condition save for 1 or 2 small tears overall but I was super pissed to do that after all this work. This process was almost as bad as rebuilding my driveshafts, with just as much, err, "frustration outlets".
Rear pistons completed with new OEM pistons. Fortunately, all the other seals from the kit worked, including the square cuts, o-rings, and other misc. ones specific to the rear calipers. If possible next time I'd probably order the same kits for those seals and order the OEM piston boots separately and you'd still save money.
I found the closest readily available equivalents to the 3 magic greases Honda includes in their rebuild kits, Castrol red rubber grease and PAG grease for the slide pins to replace Niglube. We'll see how well they do during a future caliper rebuild with the proper seals.
Old rear hardware, couldn't find an easy replacement kit.

Now made basically new again. Centric makes a front hardware kit that's cheap and fits perfectly fine.
If the other stuff wasn't enough of a nightmare, I wanted to replace some "easy" brackets as well with new OEM and ended up snapping all the 10mm bolts off the knuckle, and snapped a bolt extractor into an old bolt. The other was drilled out and re-tapped to M6 with my new tap & die set and left it at that, I think one bolt is fine to hold a bracket for the hose...
Brackets mounted and EBC Yellow pads fitted. Normally pads are a quick replacement, but with the extra mils of paint on the bracket and pad, some had to be scraped off or the pads wouldn't slide freely in the brackets. Nothing's ever easy.
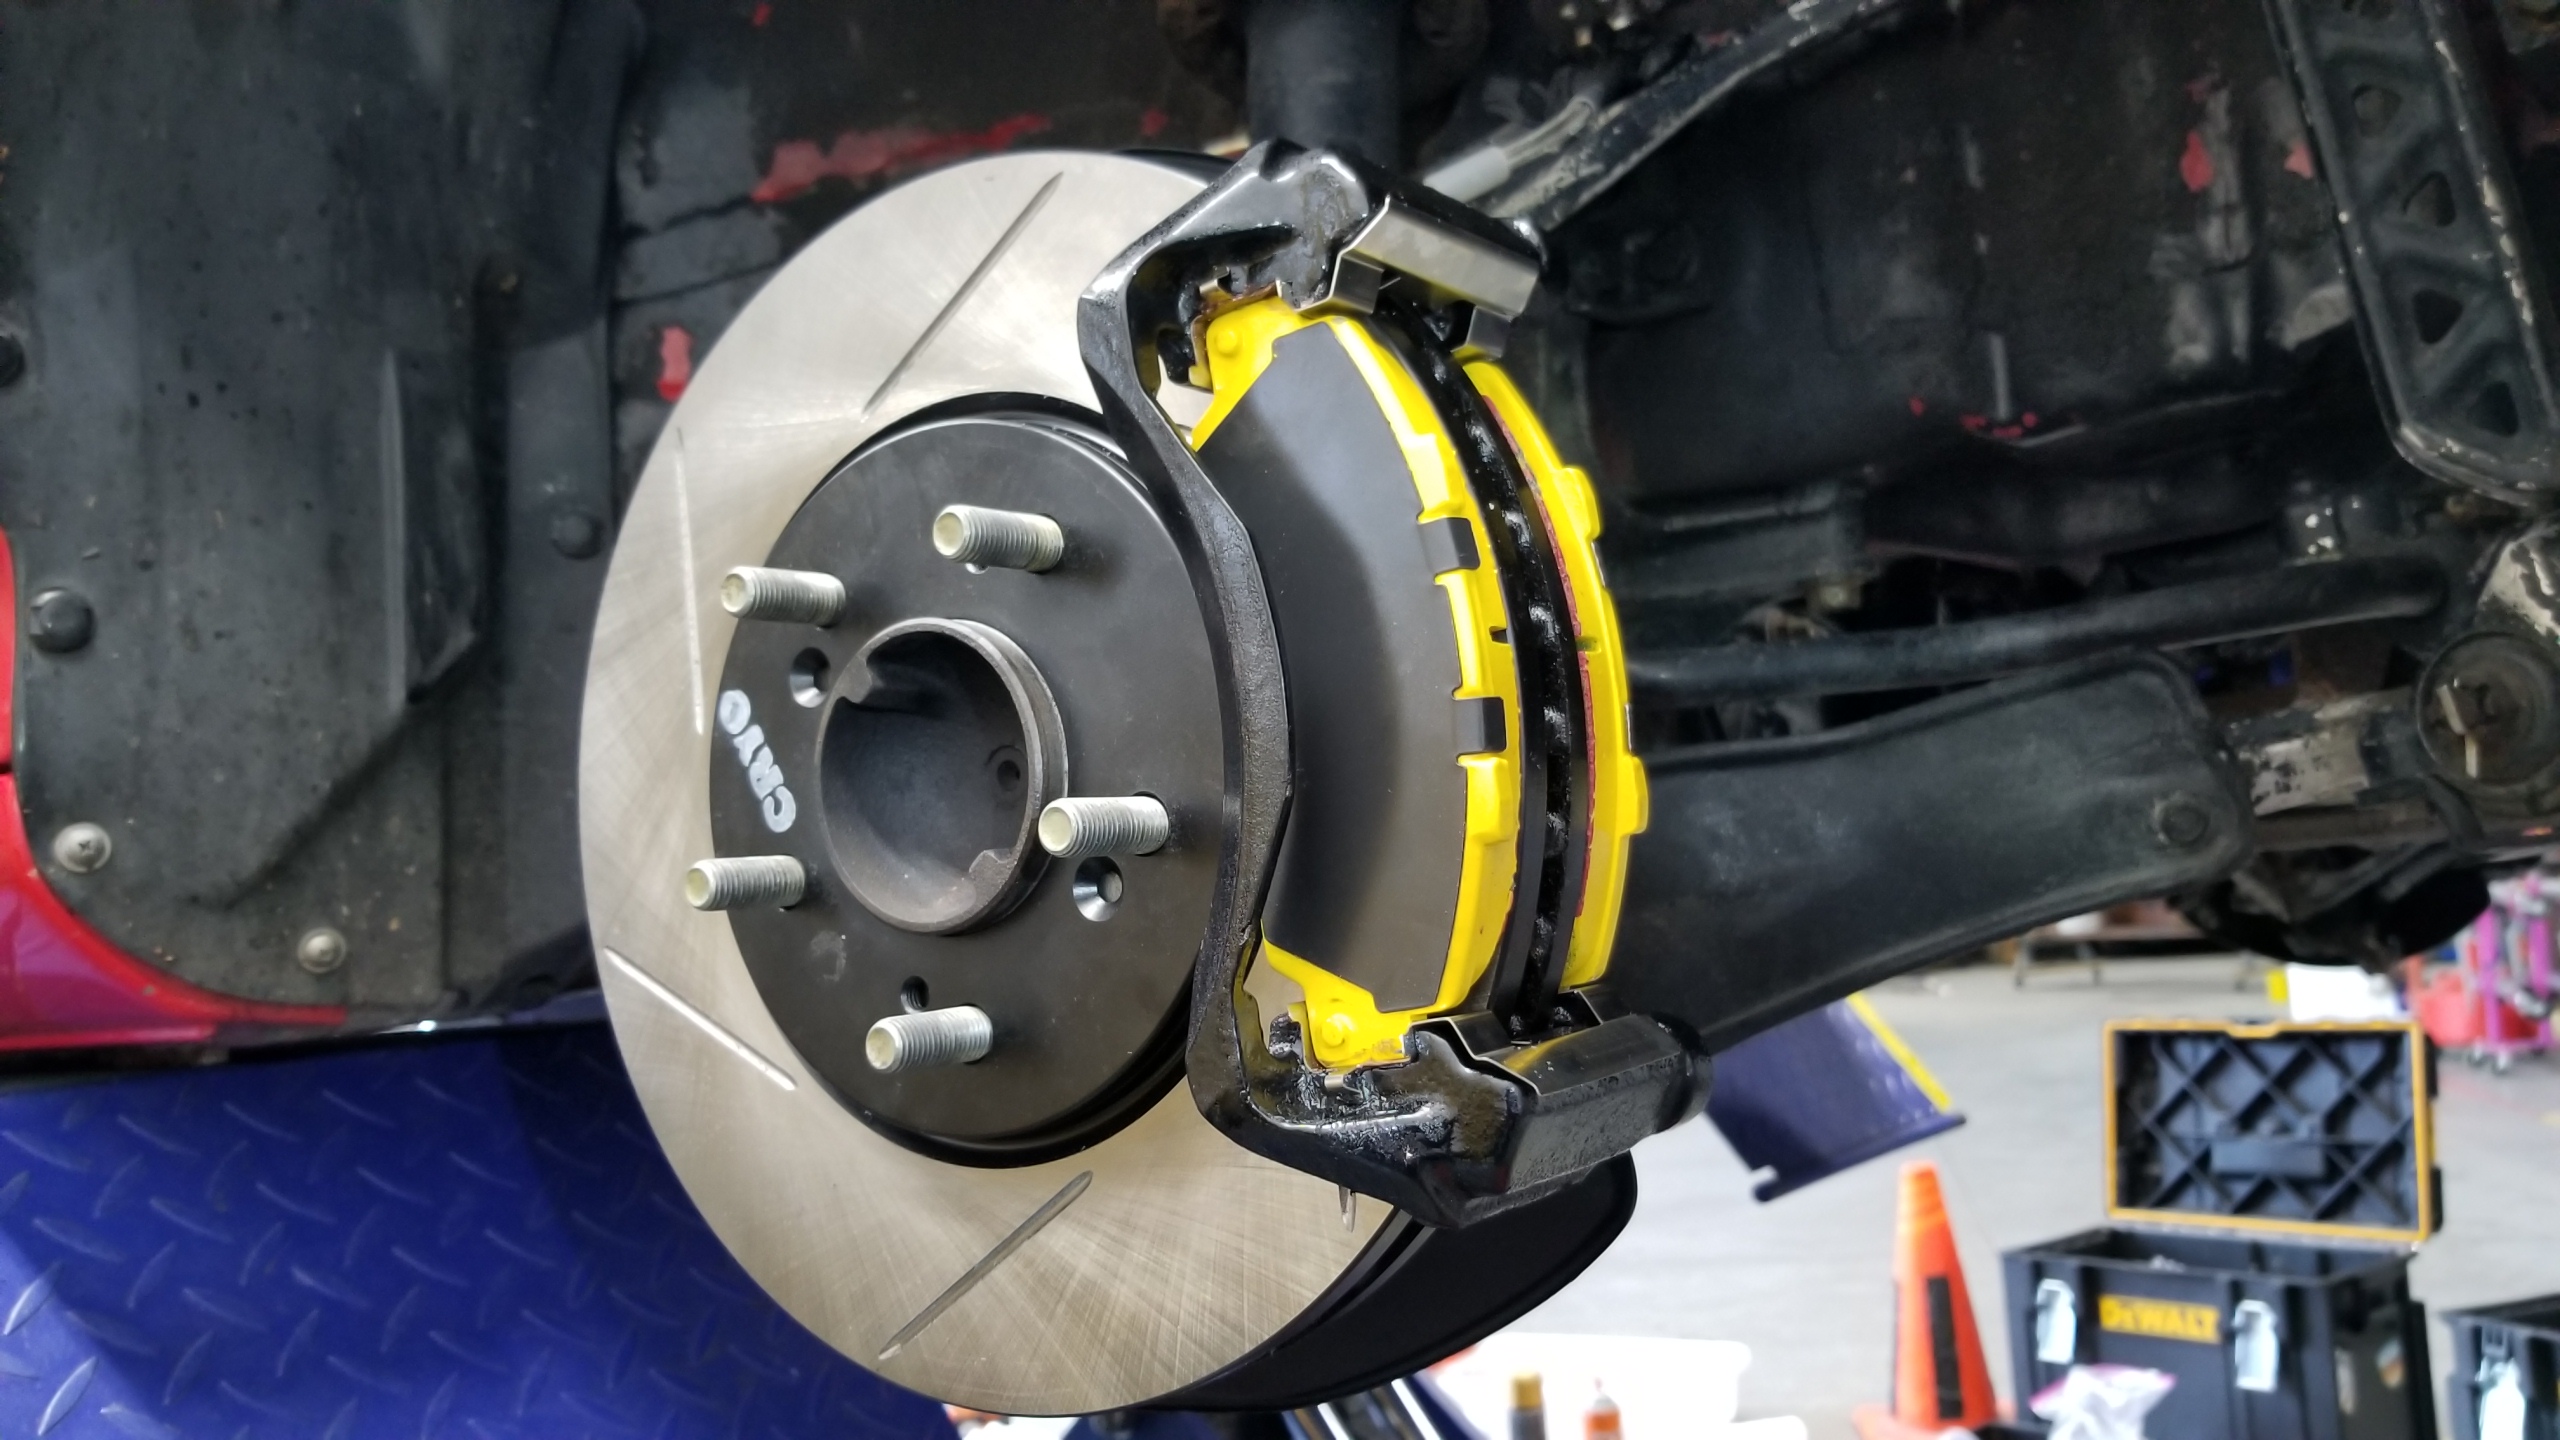
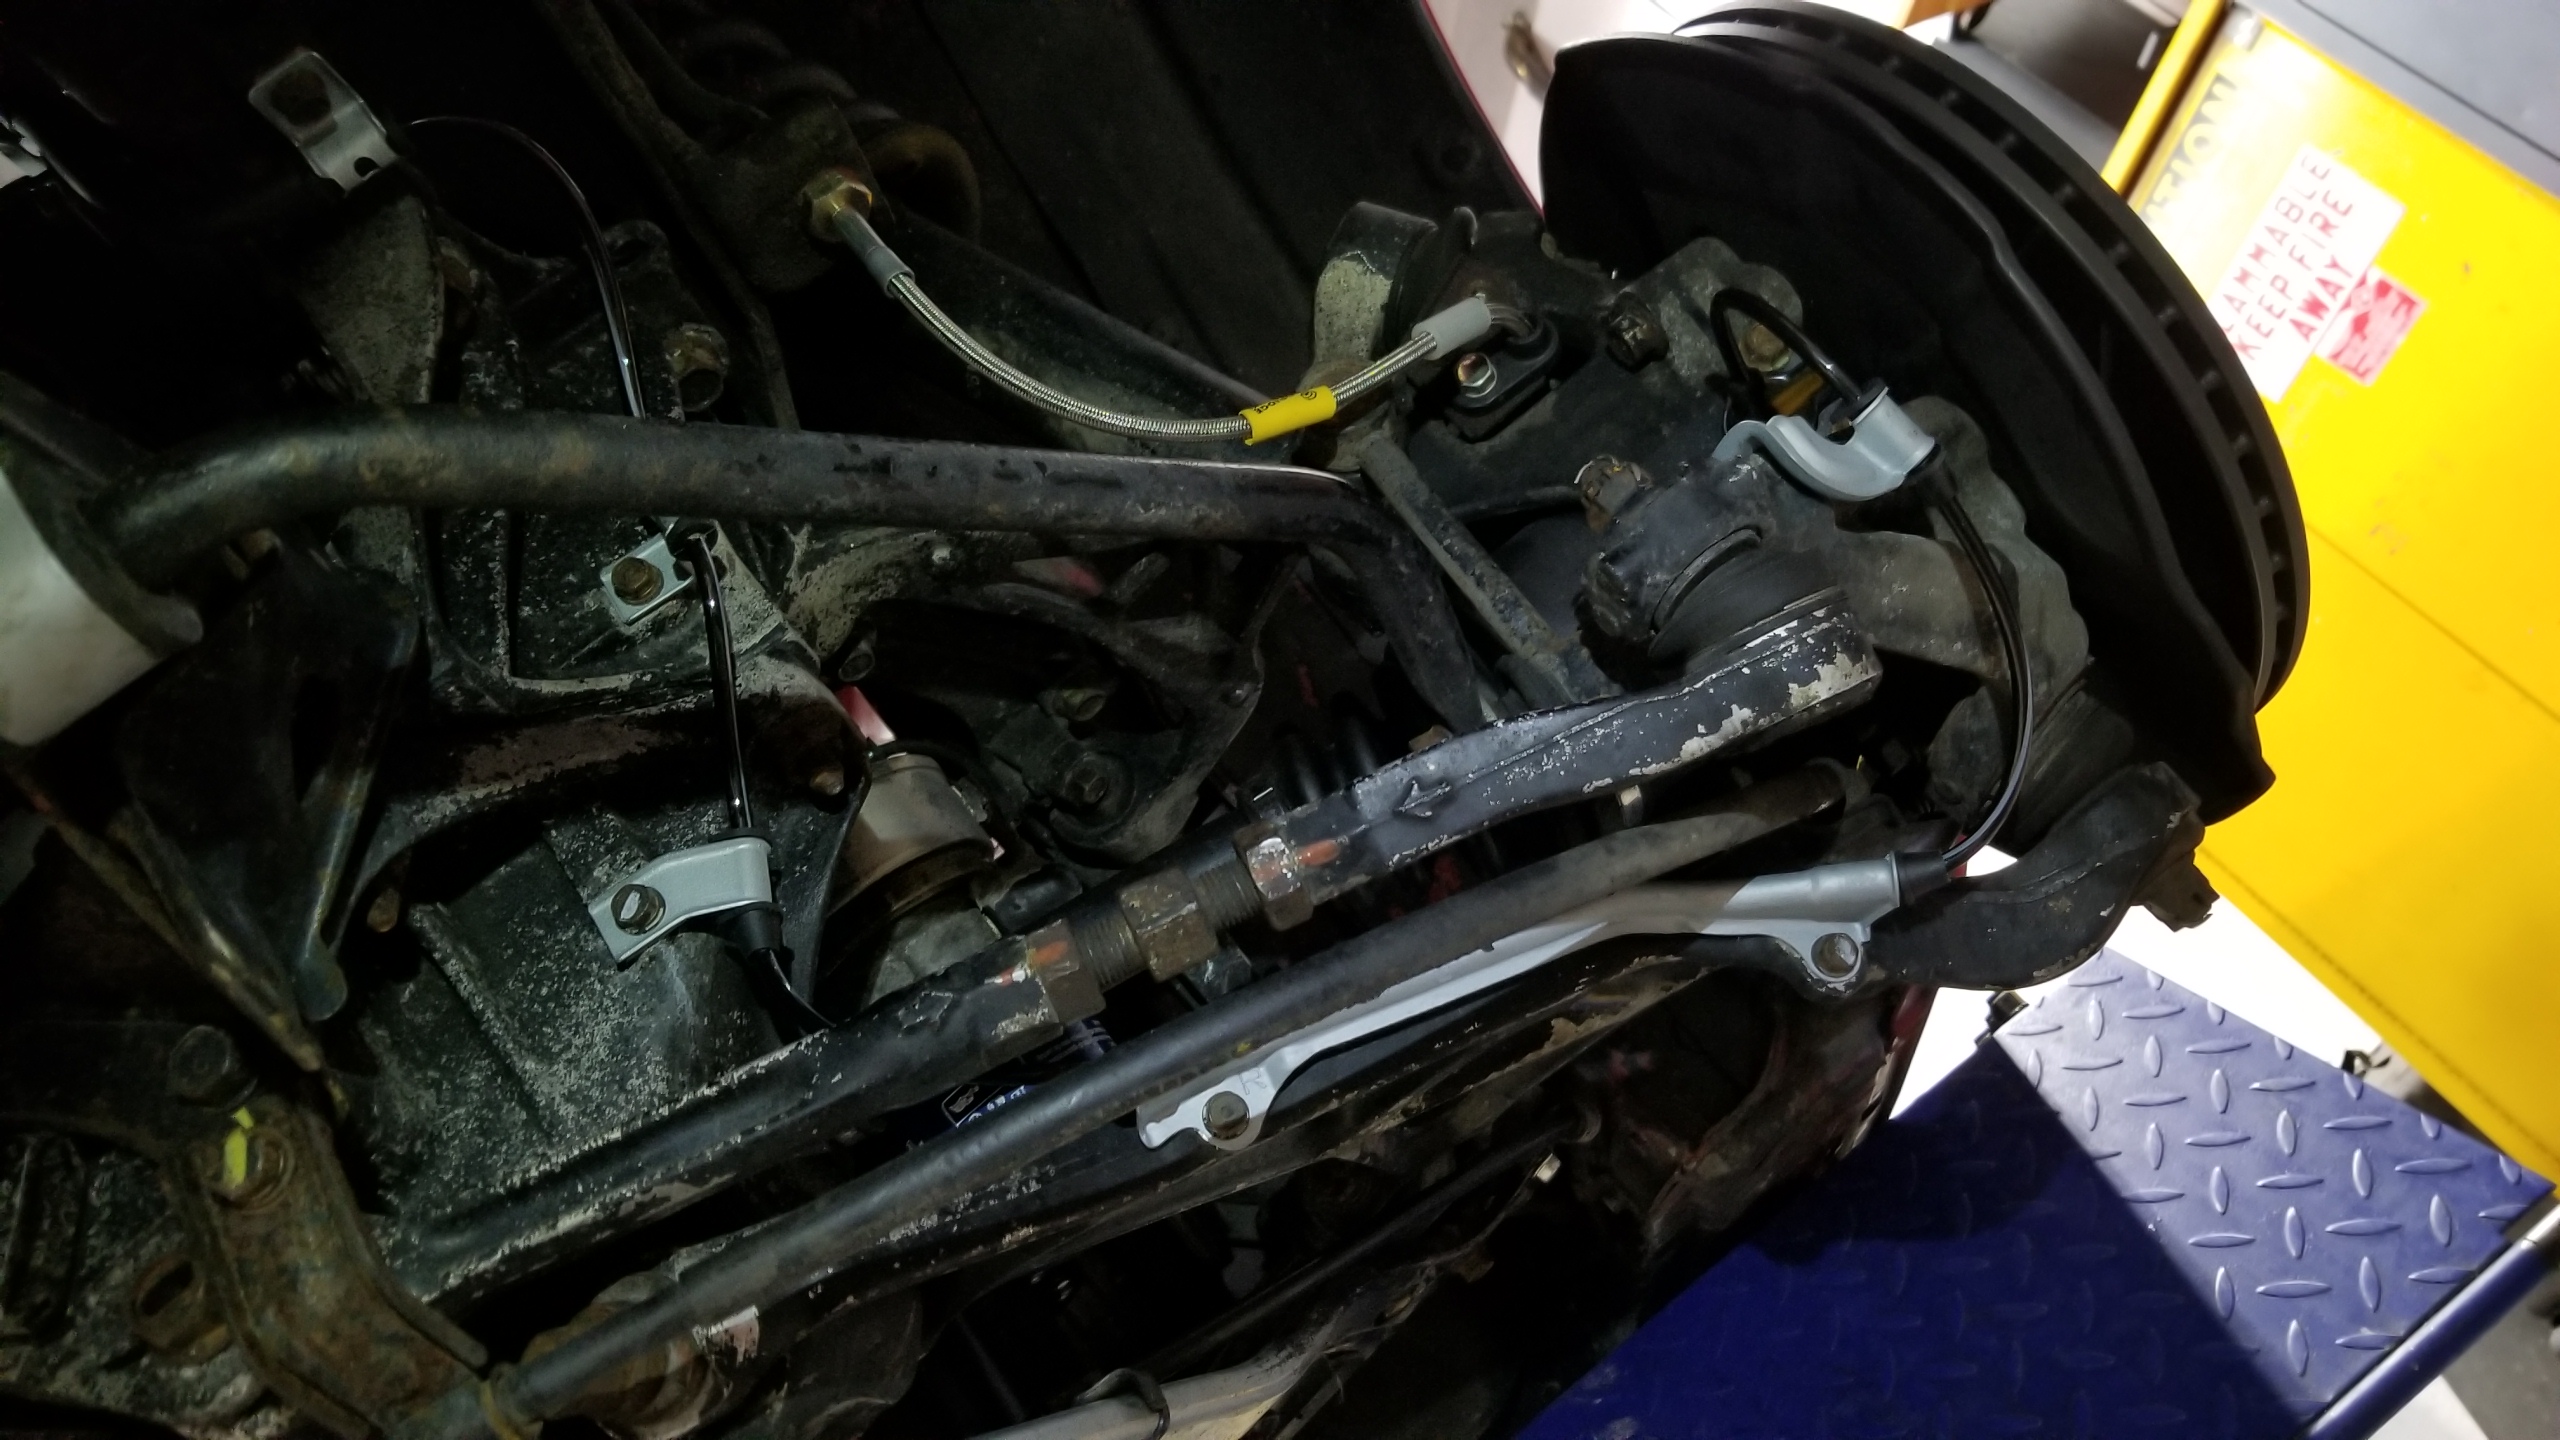
Calipers fitted to the brackets with completely new hardware (bracket bolts, pin bolts, bleeders, banjos, etc.). The extra cost is worth it to clean things up a bit and make future maintenance that much easier. The undercoating in the wheel wells is peeling off and looking drab, I plan to strip and re-coat it when I put in new coilovers to get more space to work.
This took a bit longer than anticipated since I had to reposition some of the new brake lines to eliminate twisting, so I loosened the flare nuts and made sure everything was set up to relieve any tension from the lines.
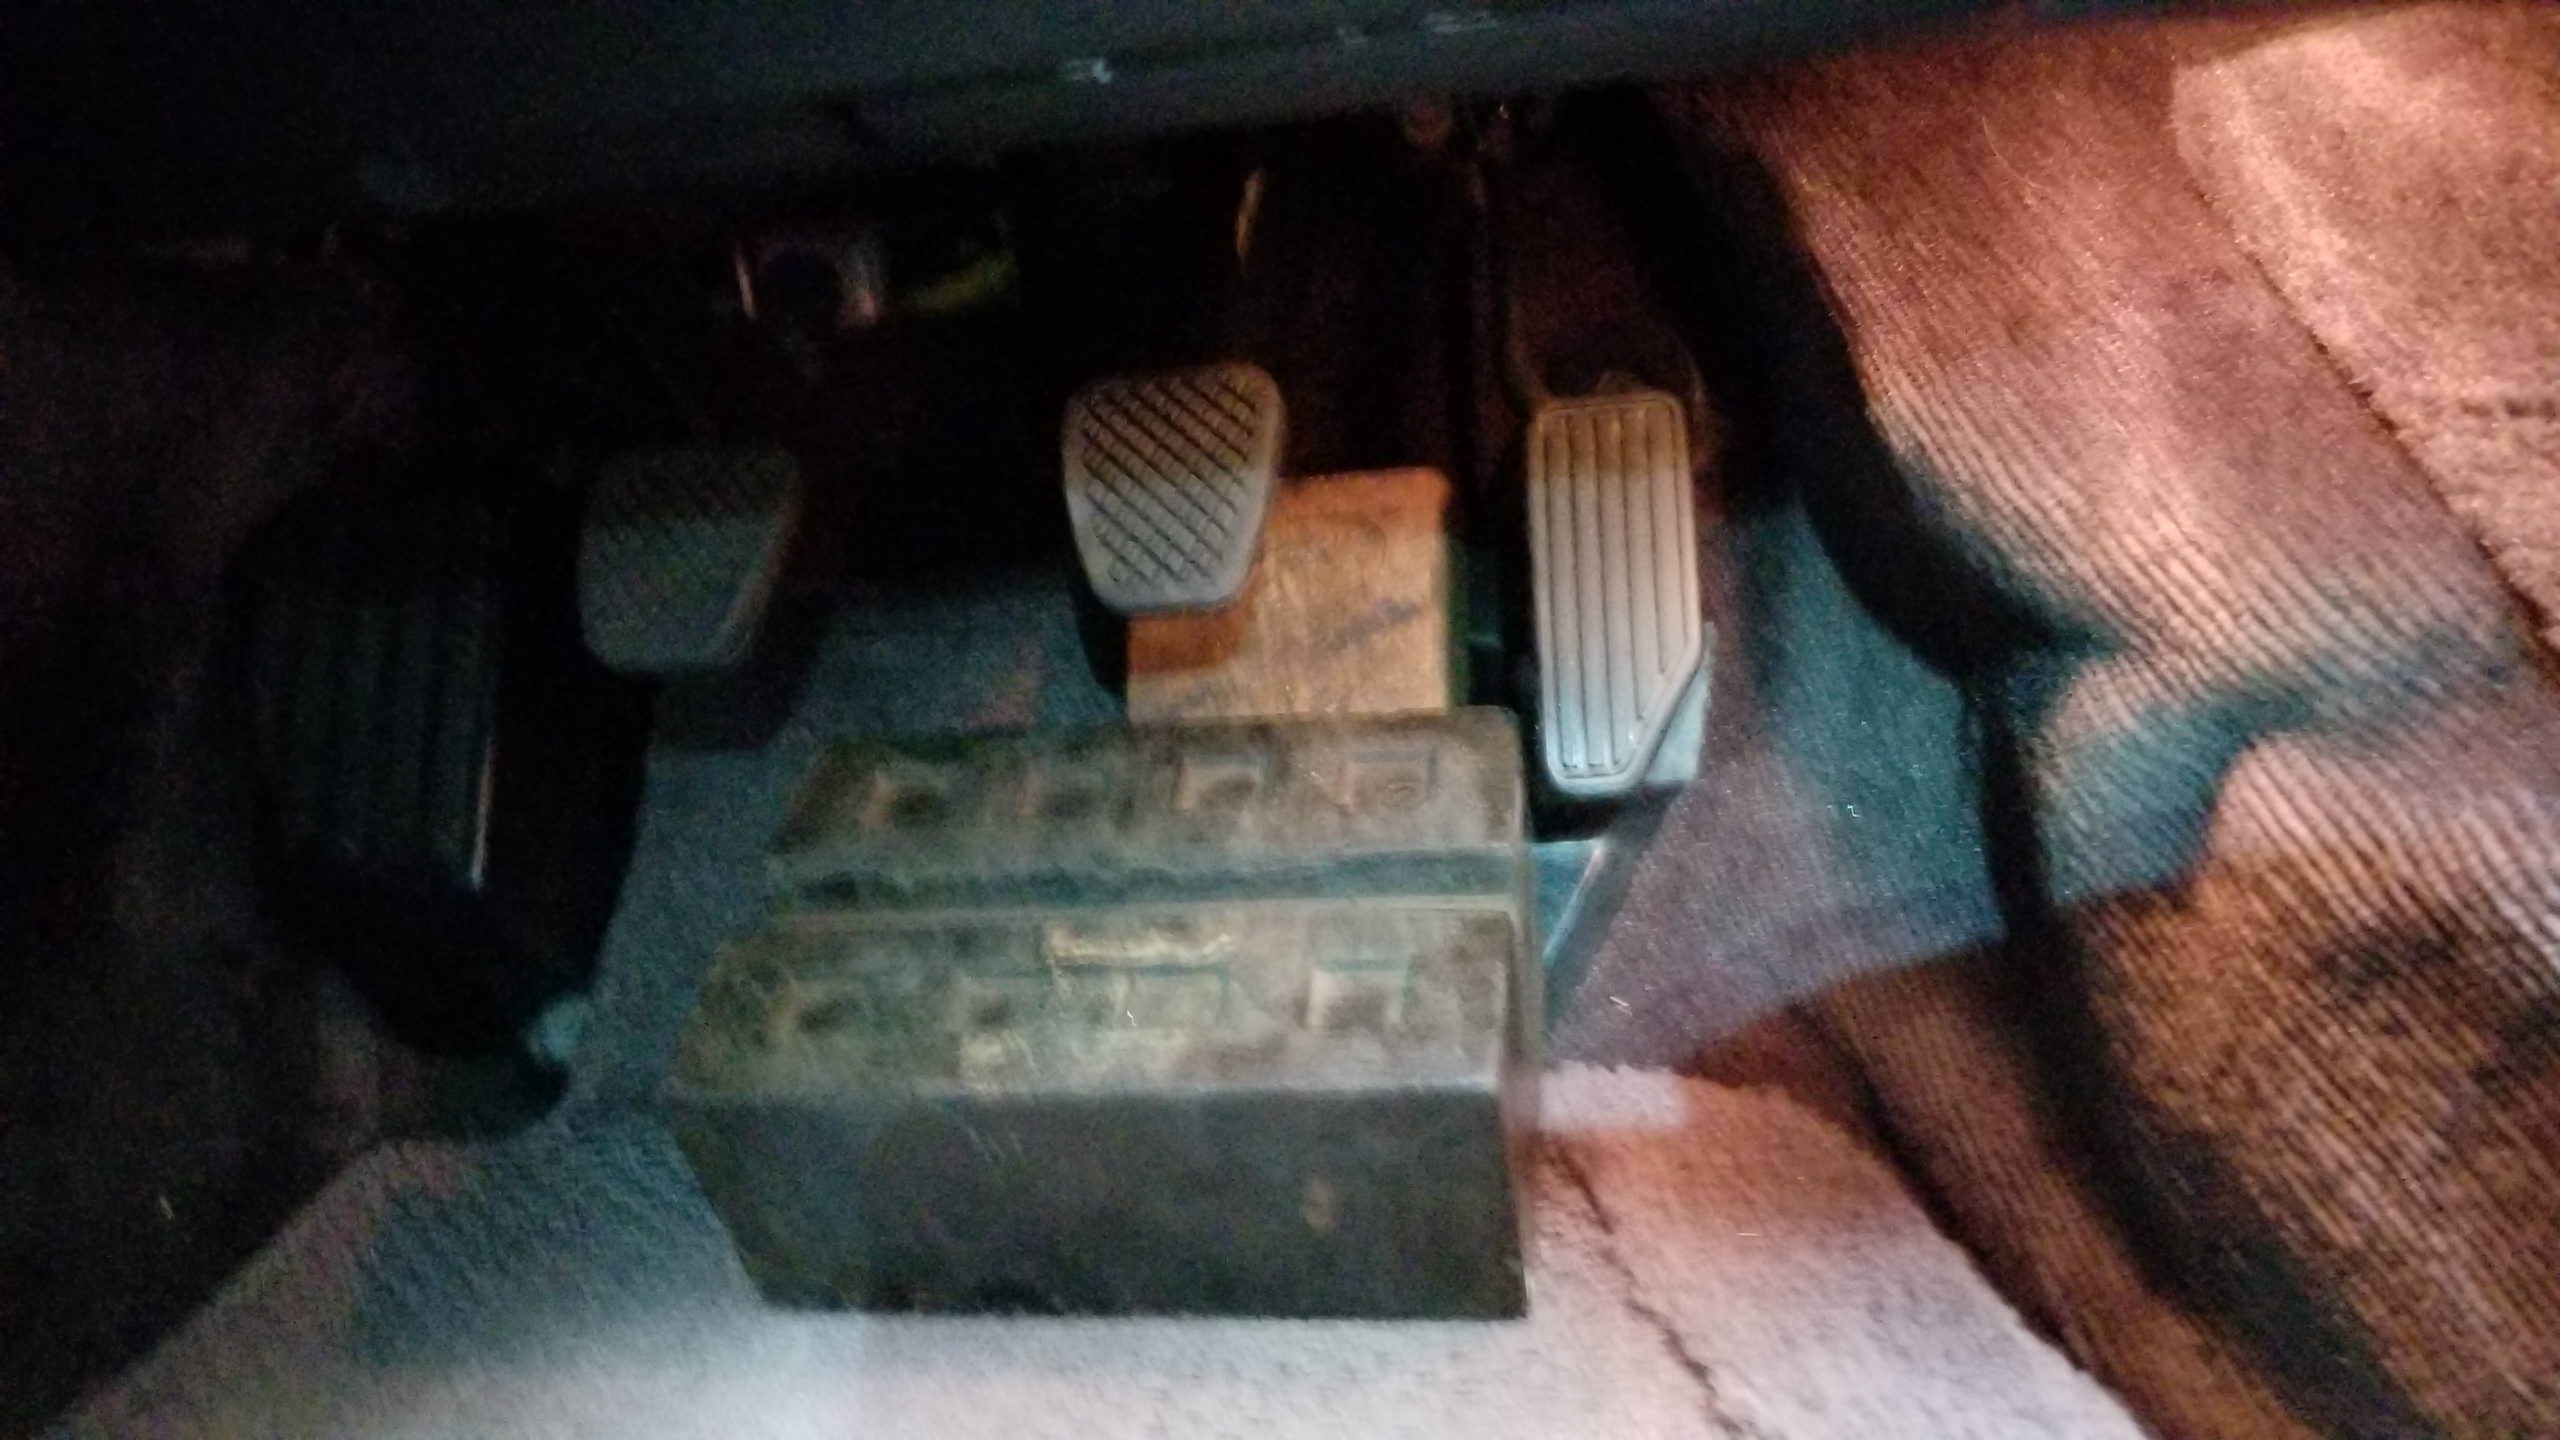
Finally time for brake bleeding. I had big and fancy plans for this, but I was very low on time and someone else needed the lift I was on so I enlisted a friend to help with the old fashioned way. I put a block under the pedal to prevent us from pushing it to the floor and potentially ruining a seal in the master cylinder, I'm good wish just destroying one or two parts during a project.
Fluid used was ATE TYP 200 DOT4, I'm sure it will be more than adequate for my purposes. Some friends use it in their dedicated track cars so good enough for me.
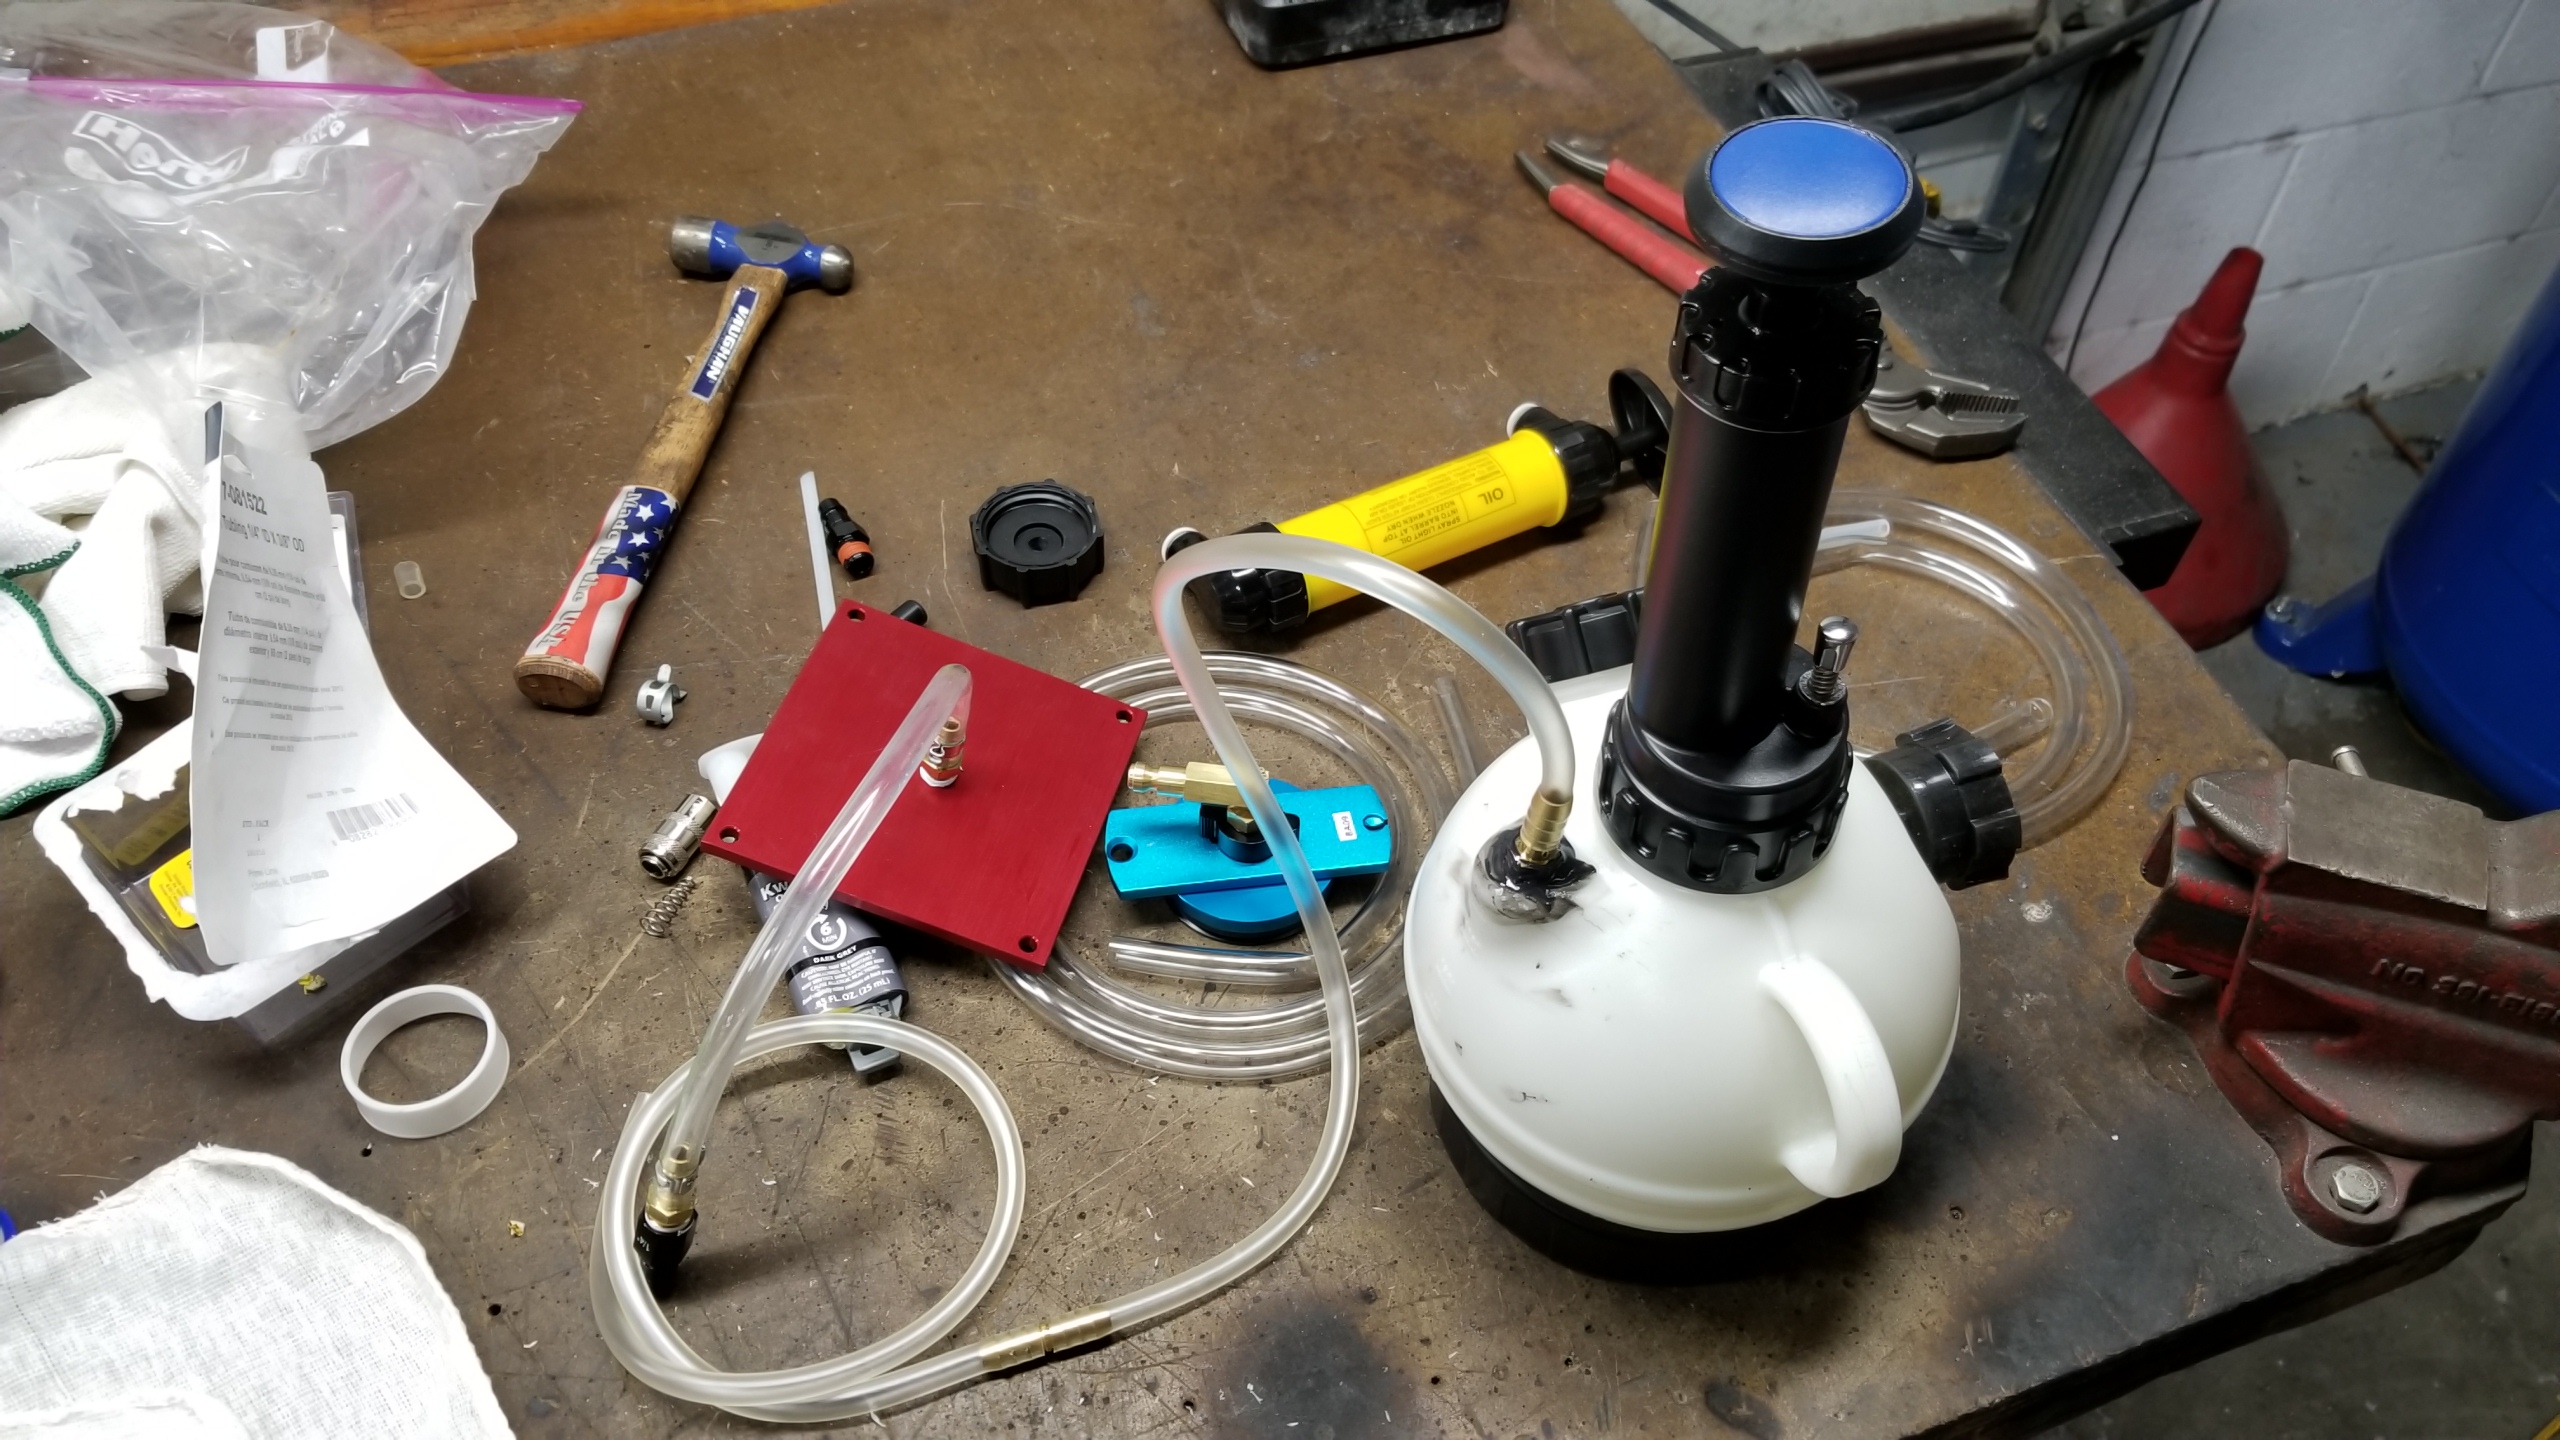
I had big plans for this thing, it took forever to find all the right fittings and hose sizes, and I had to modify the Ares pressure bleeder barb to a 1/4" fitting which is the only size readily available.
The red cap is a Motive universal bleeder adapter which is strapped to the master cylinder and just covers it with a large rubber grommet, I haven't tested how well it holds pressure yet. The blue Power Probe adapter is juuuuuust too small to fit snugly inside the master reservoir and the quick disconnect is 1/4" but doesn't hold pressure well with the QD fittings I bought.
I ended up wasting money buying all this stuff but hopefully can find a use for it during future brake jobs, I think it will work but I didn't have time to test it out.
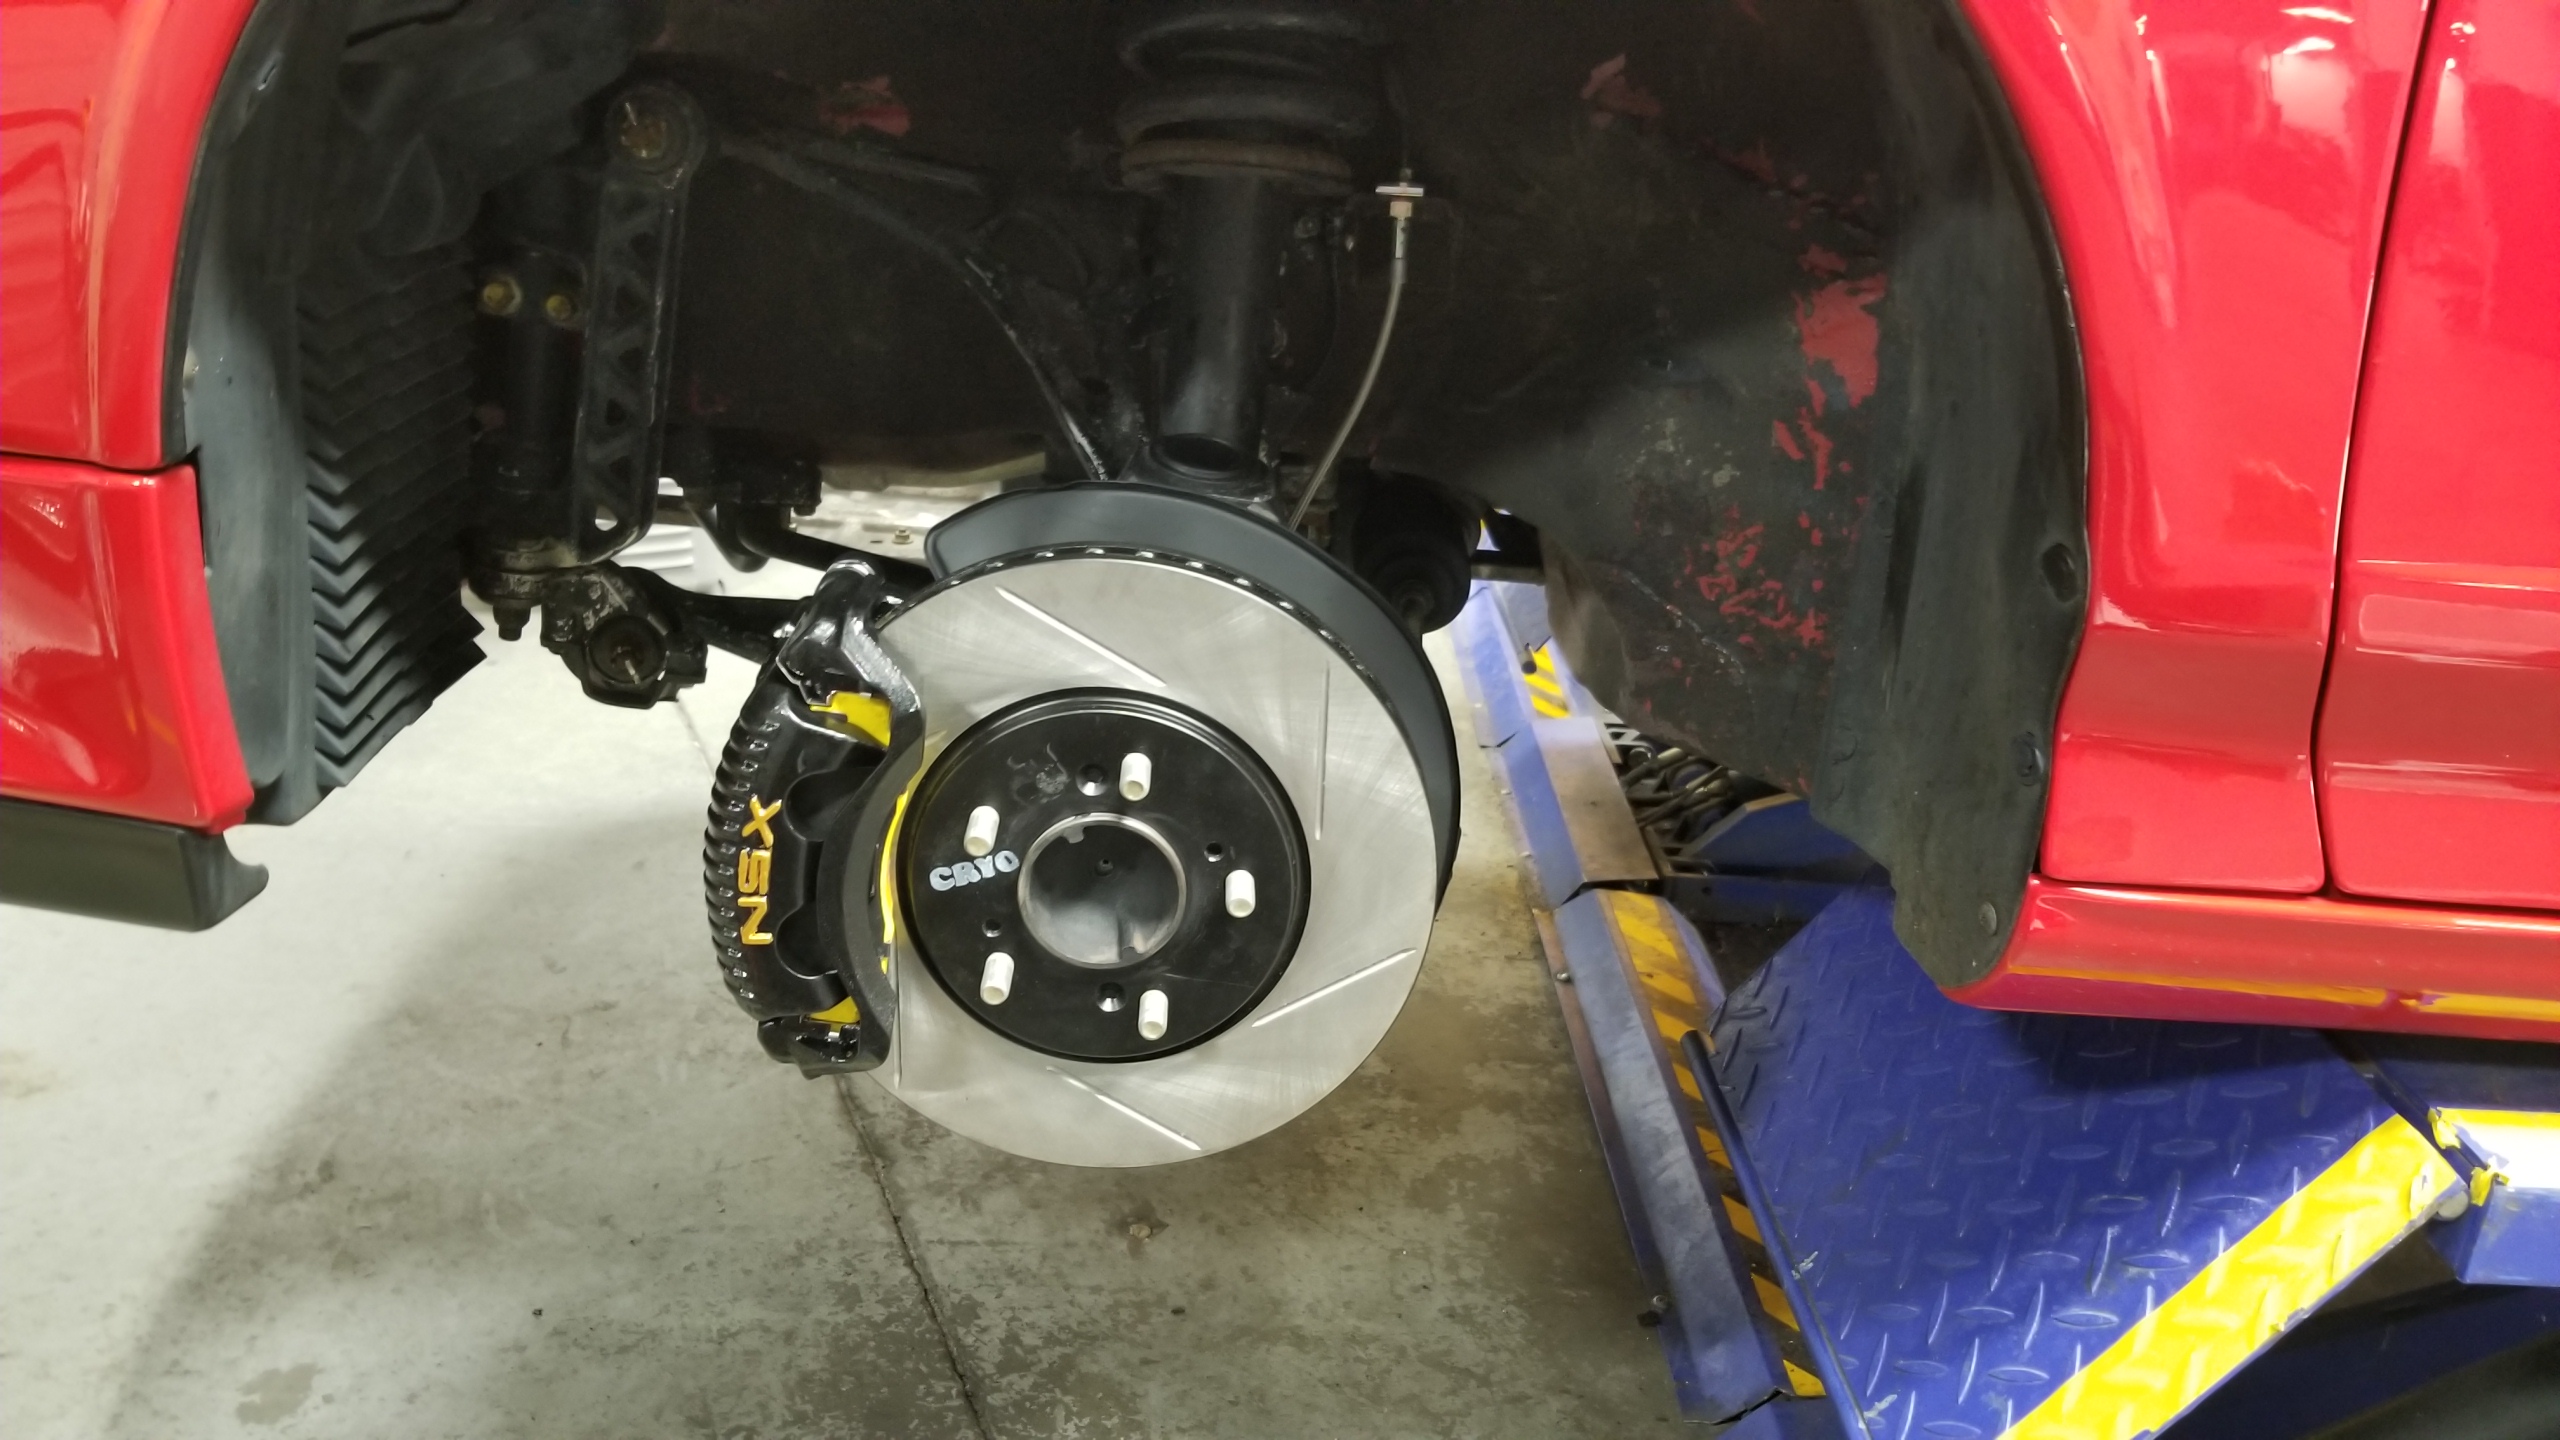
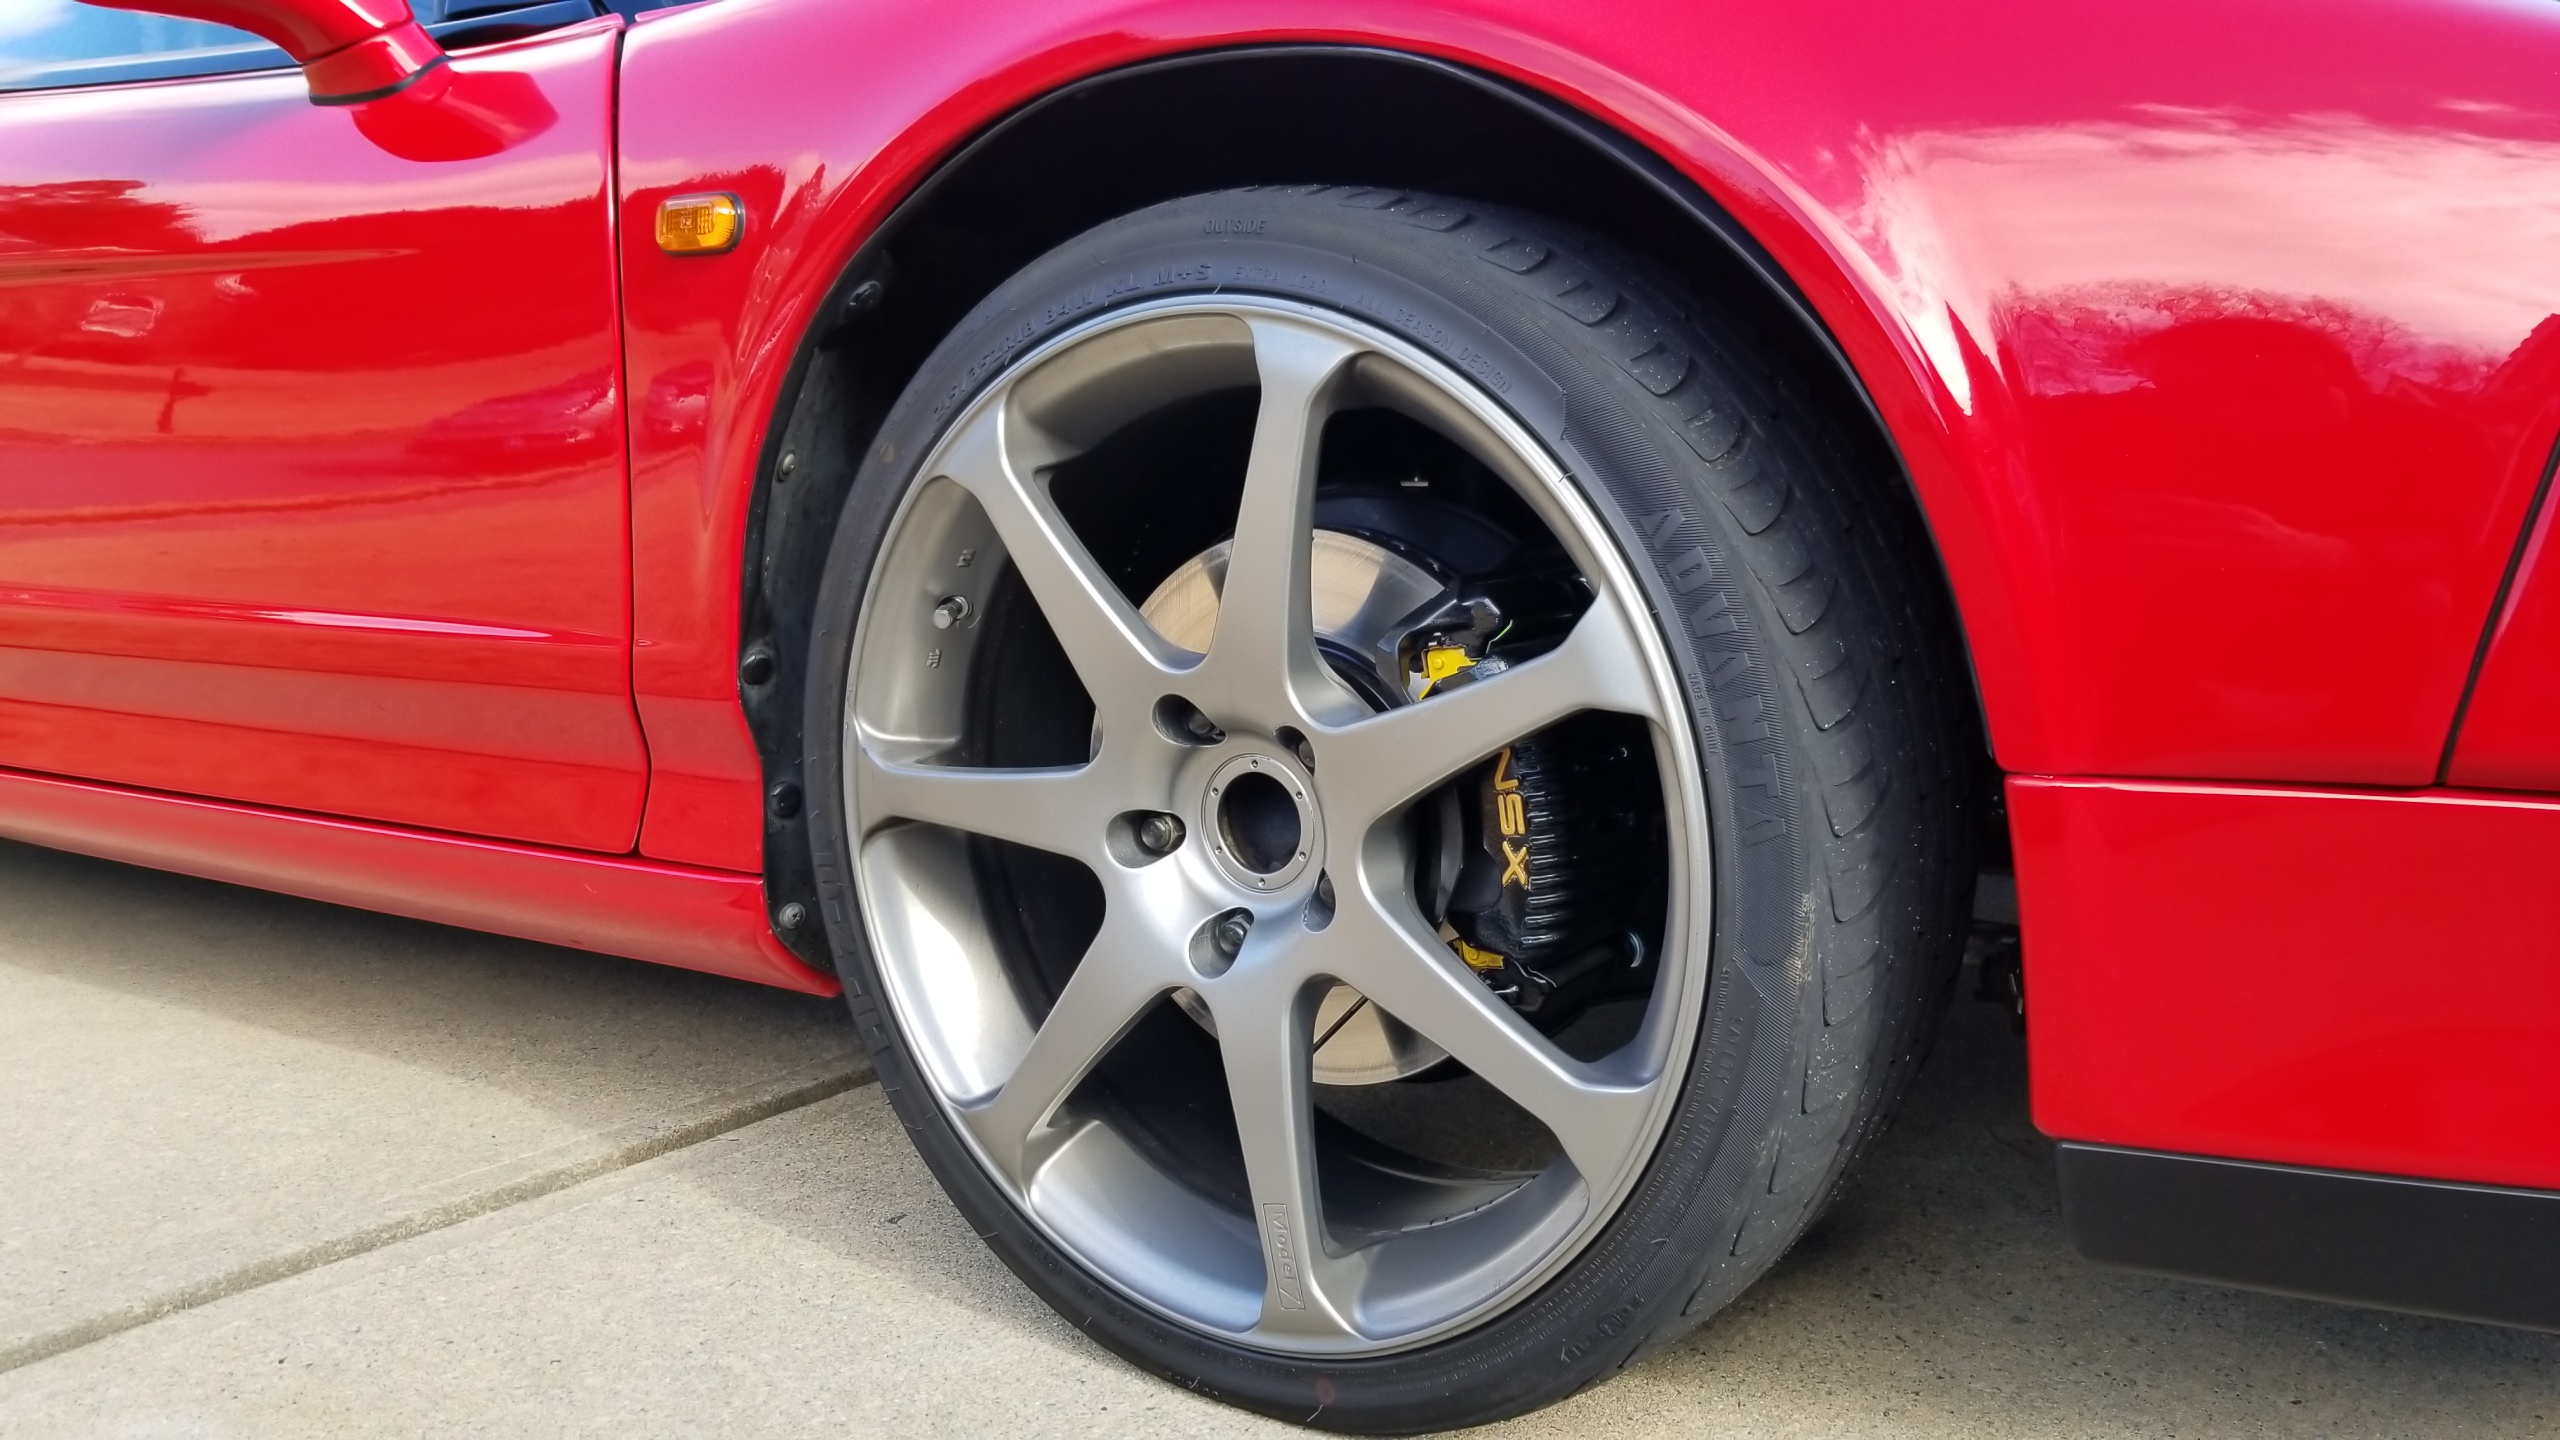
Looking real good with everything back together, and with some proper wheels & coils they should fit the overall look even better. I'll do some touch-up on the paint when I go to replace the RR wheel sensor.
Oh yeah, and the performance is great too. No leaks (yet) which means I didn't unknowingly bugger anything up. I'm still breaking in the pads and rotors (EBC says ~100 miles street, then hard stops, then ~1000 mi total until full performance) but they grab much harder than the stock pads without being hard to modulate. The pedal travel is further before they start grabbing which feels odd but I read is normal from Kaz's blog after a full rebuild since the pistons slide back & forth much easier.
This took way longer than I thought it would, but I ran into a lot of issues with doing this for the first time on the car, not to mention all the work that went into restoring various parts. Future brake jobs should go much smoother now that everything is sorted and easily swappable without a dremel, drill, hammer, chisel, stress ball, what have you. Overall success but with lots of challenges along the way :wink:
Next up is fixing a few things like the sensor, front wheel bearings, adjusting windows, and also installing the GROM adapter and the new leather steering wheel & ebrake covers to replace the gross looking stock ones. After that, finally some new wheels/tires/coilovers to treat myself a bit, I'm getting a bit sick of what the car came with. Thanks for following along.
Brake jobs are just one of those things that takes way longer than you expect.
Dust shields removed. I dremeled off the small bits on the sides like suggested earlier to remove them without taking the hubs out. The only downside is that the bits cover two of the wheel speed sensors which might expose them to more heat.
One out of four media blasted. The front shields use screw head bolts instead of 10mm, those had to be removed with vice grips instead of a Phillips head to stop stripping them.
All four media blasted. It makes quick work of old chipping paint and corrosion.
This thing is great but could use a better hatch gasket, I was covered in dust afterwards.
Dust shields painted with rust converter and hubs treated with rust remover. Dust shields have no right looking this good.
Got the calipers back from paint but didn't get a good pic for whatever reason. I really wasn't too happy with the quality of work for what I paid, they discounted a bit afterwards but I could've done better myself with a cheap caliper coating kit. Poor masking and they weren't media blasted like I (ass)umed. They didn't want to do the lettering either so I did myself.
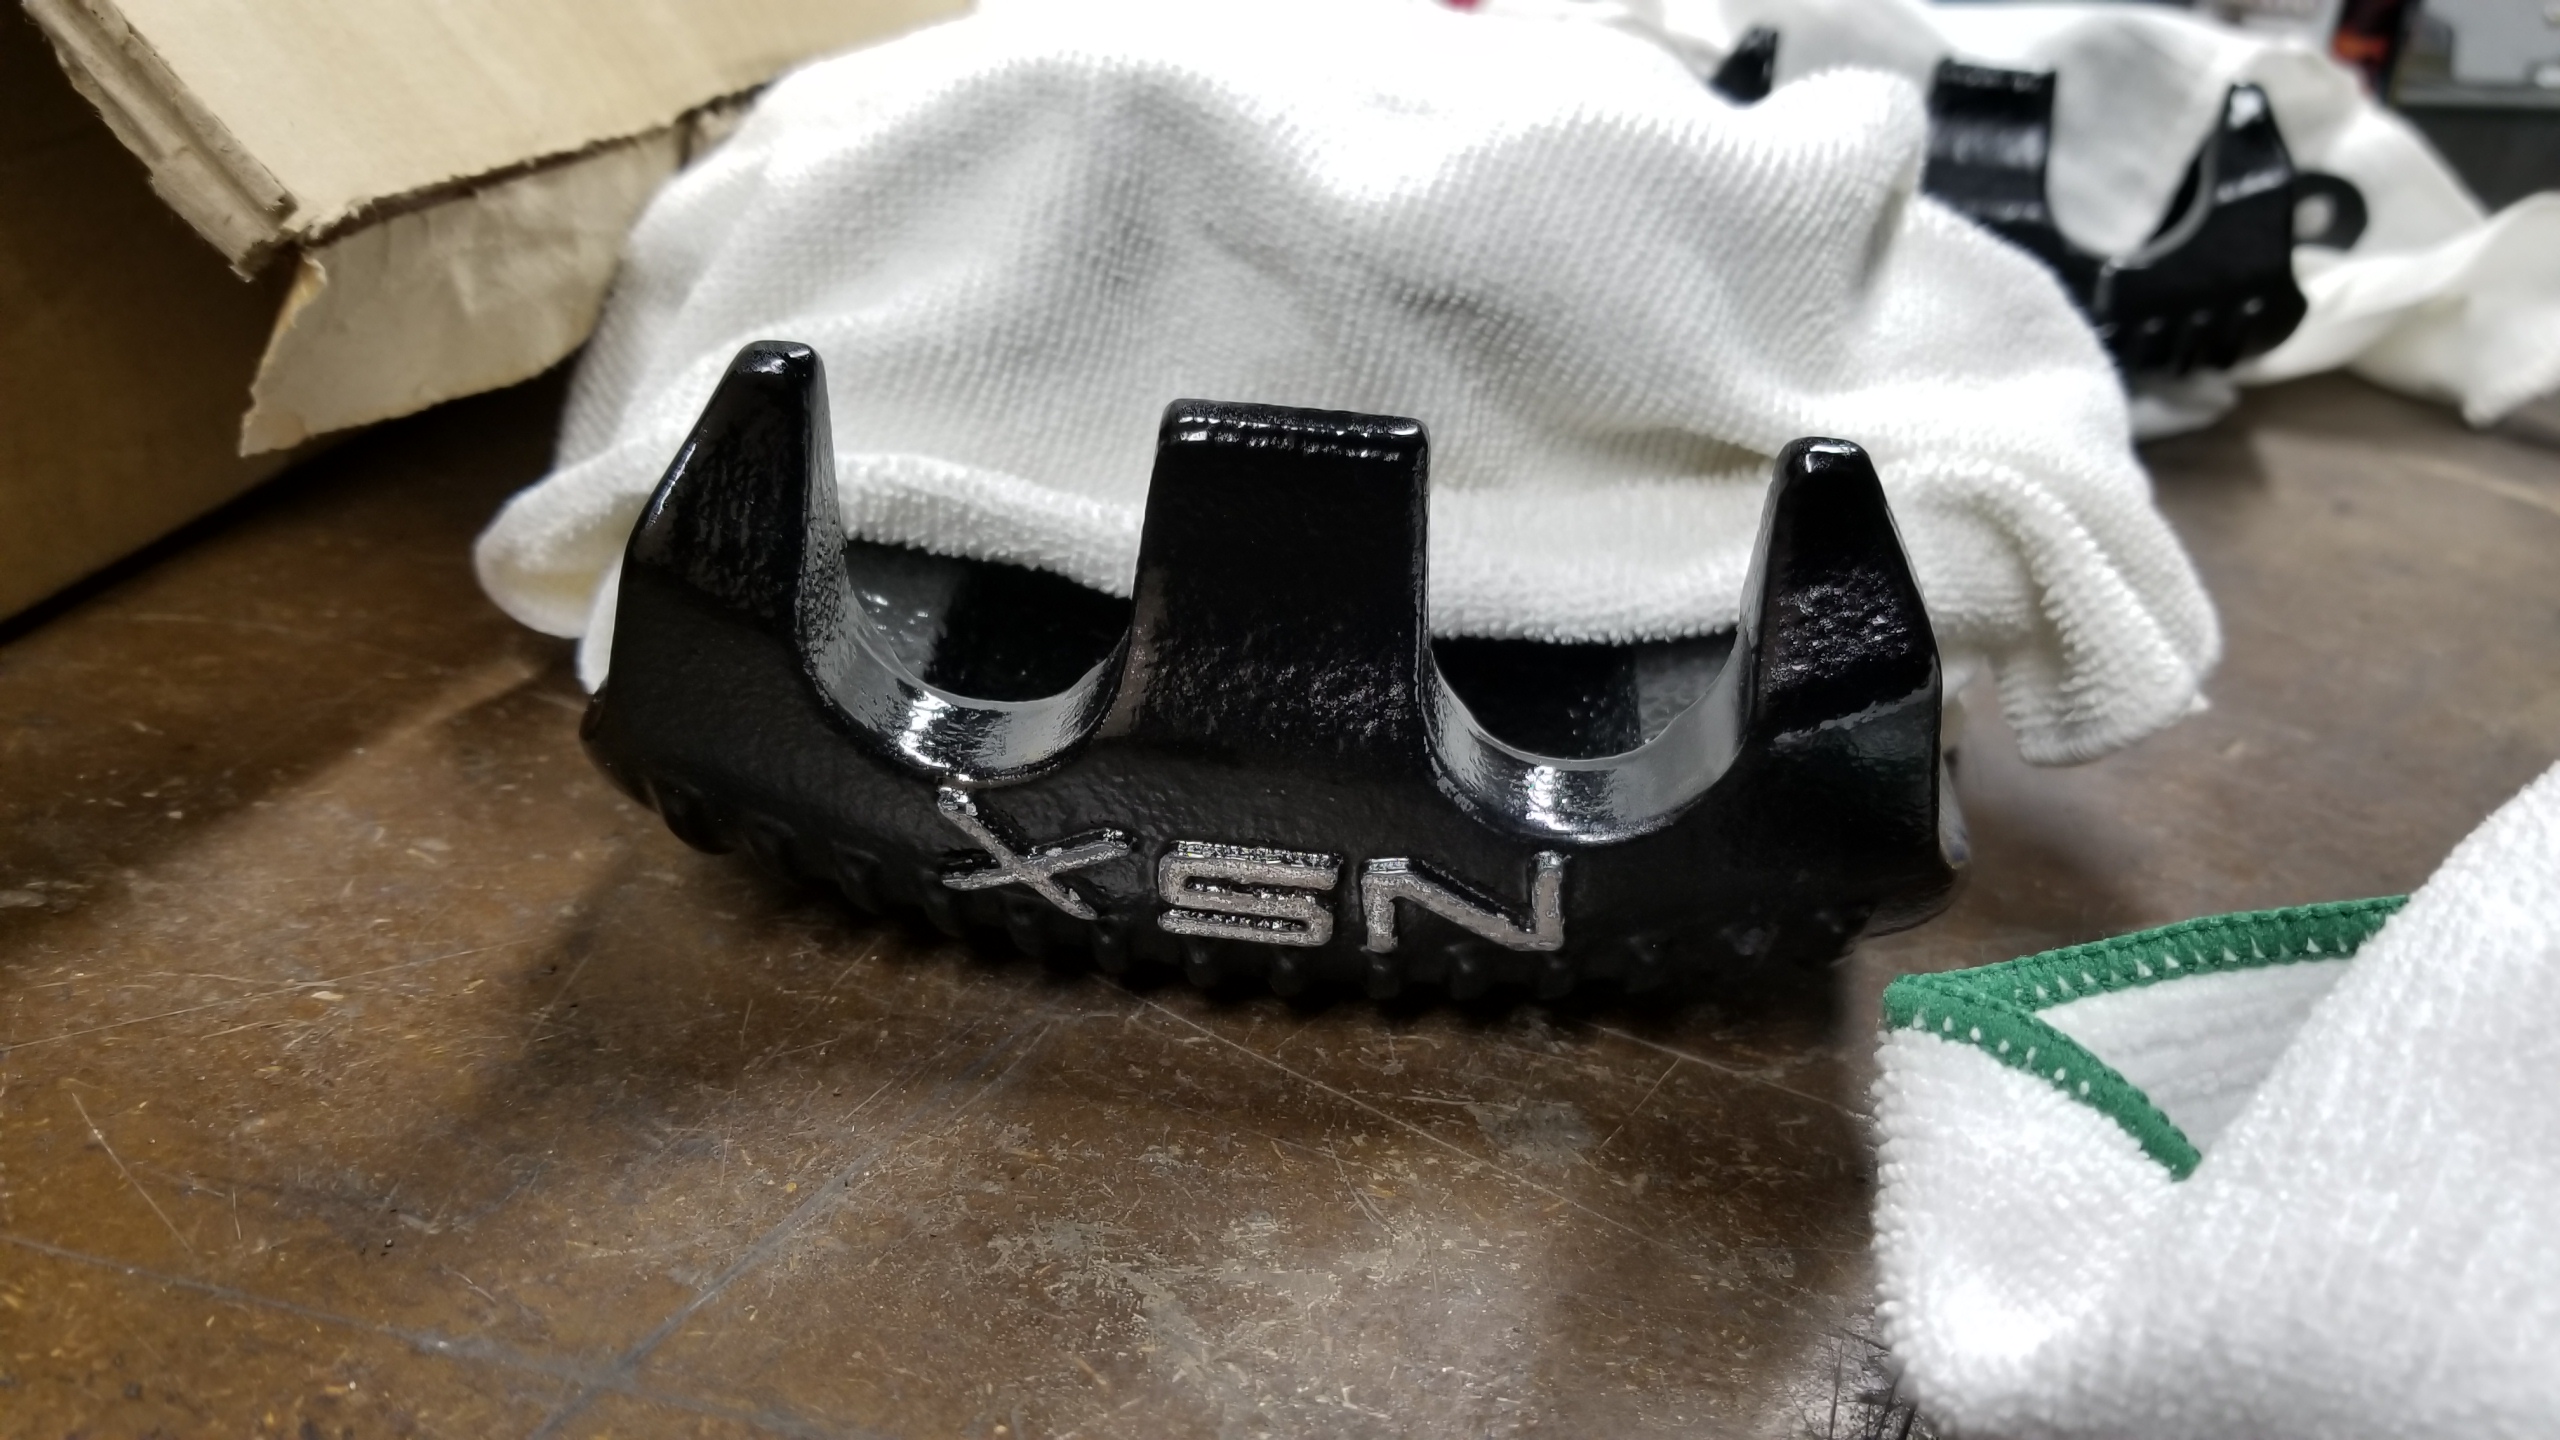
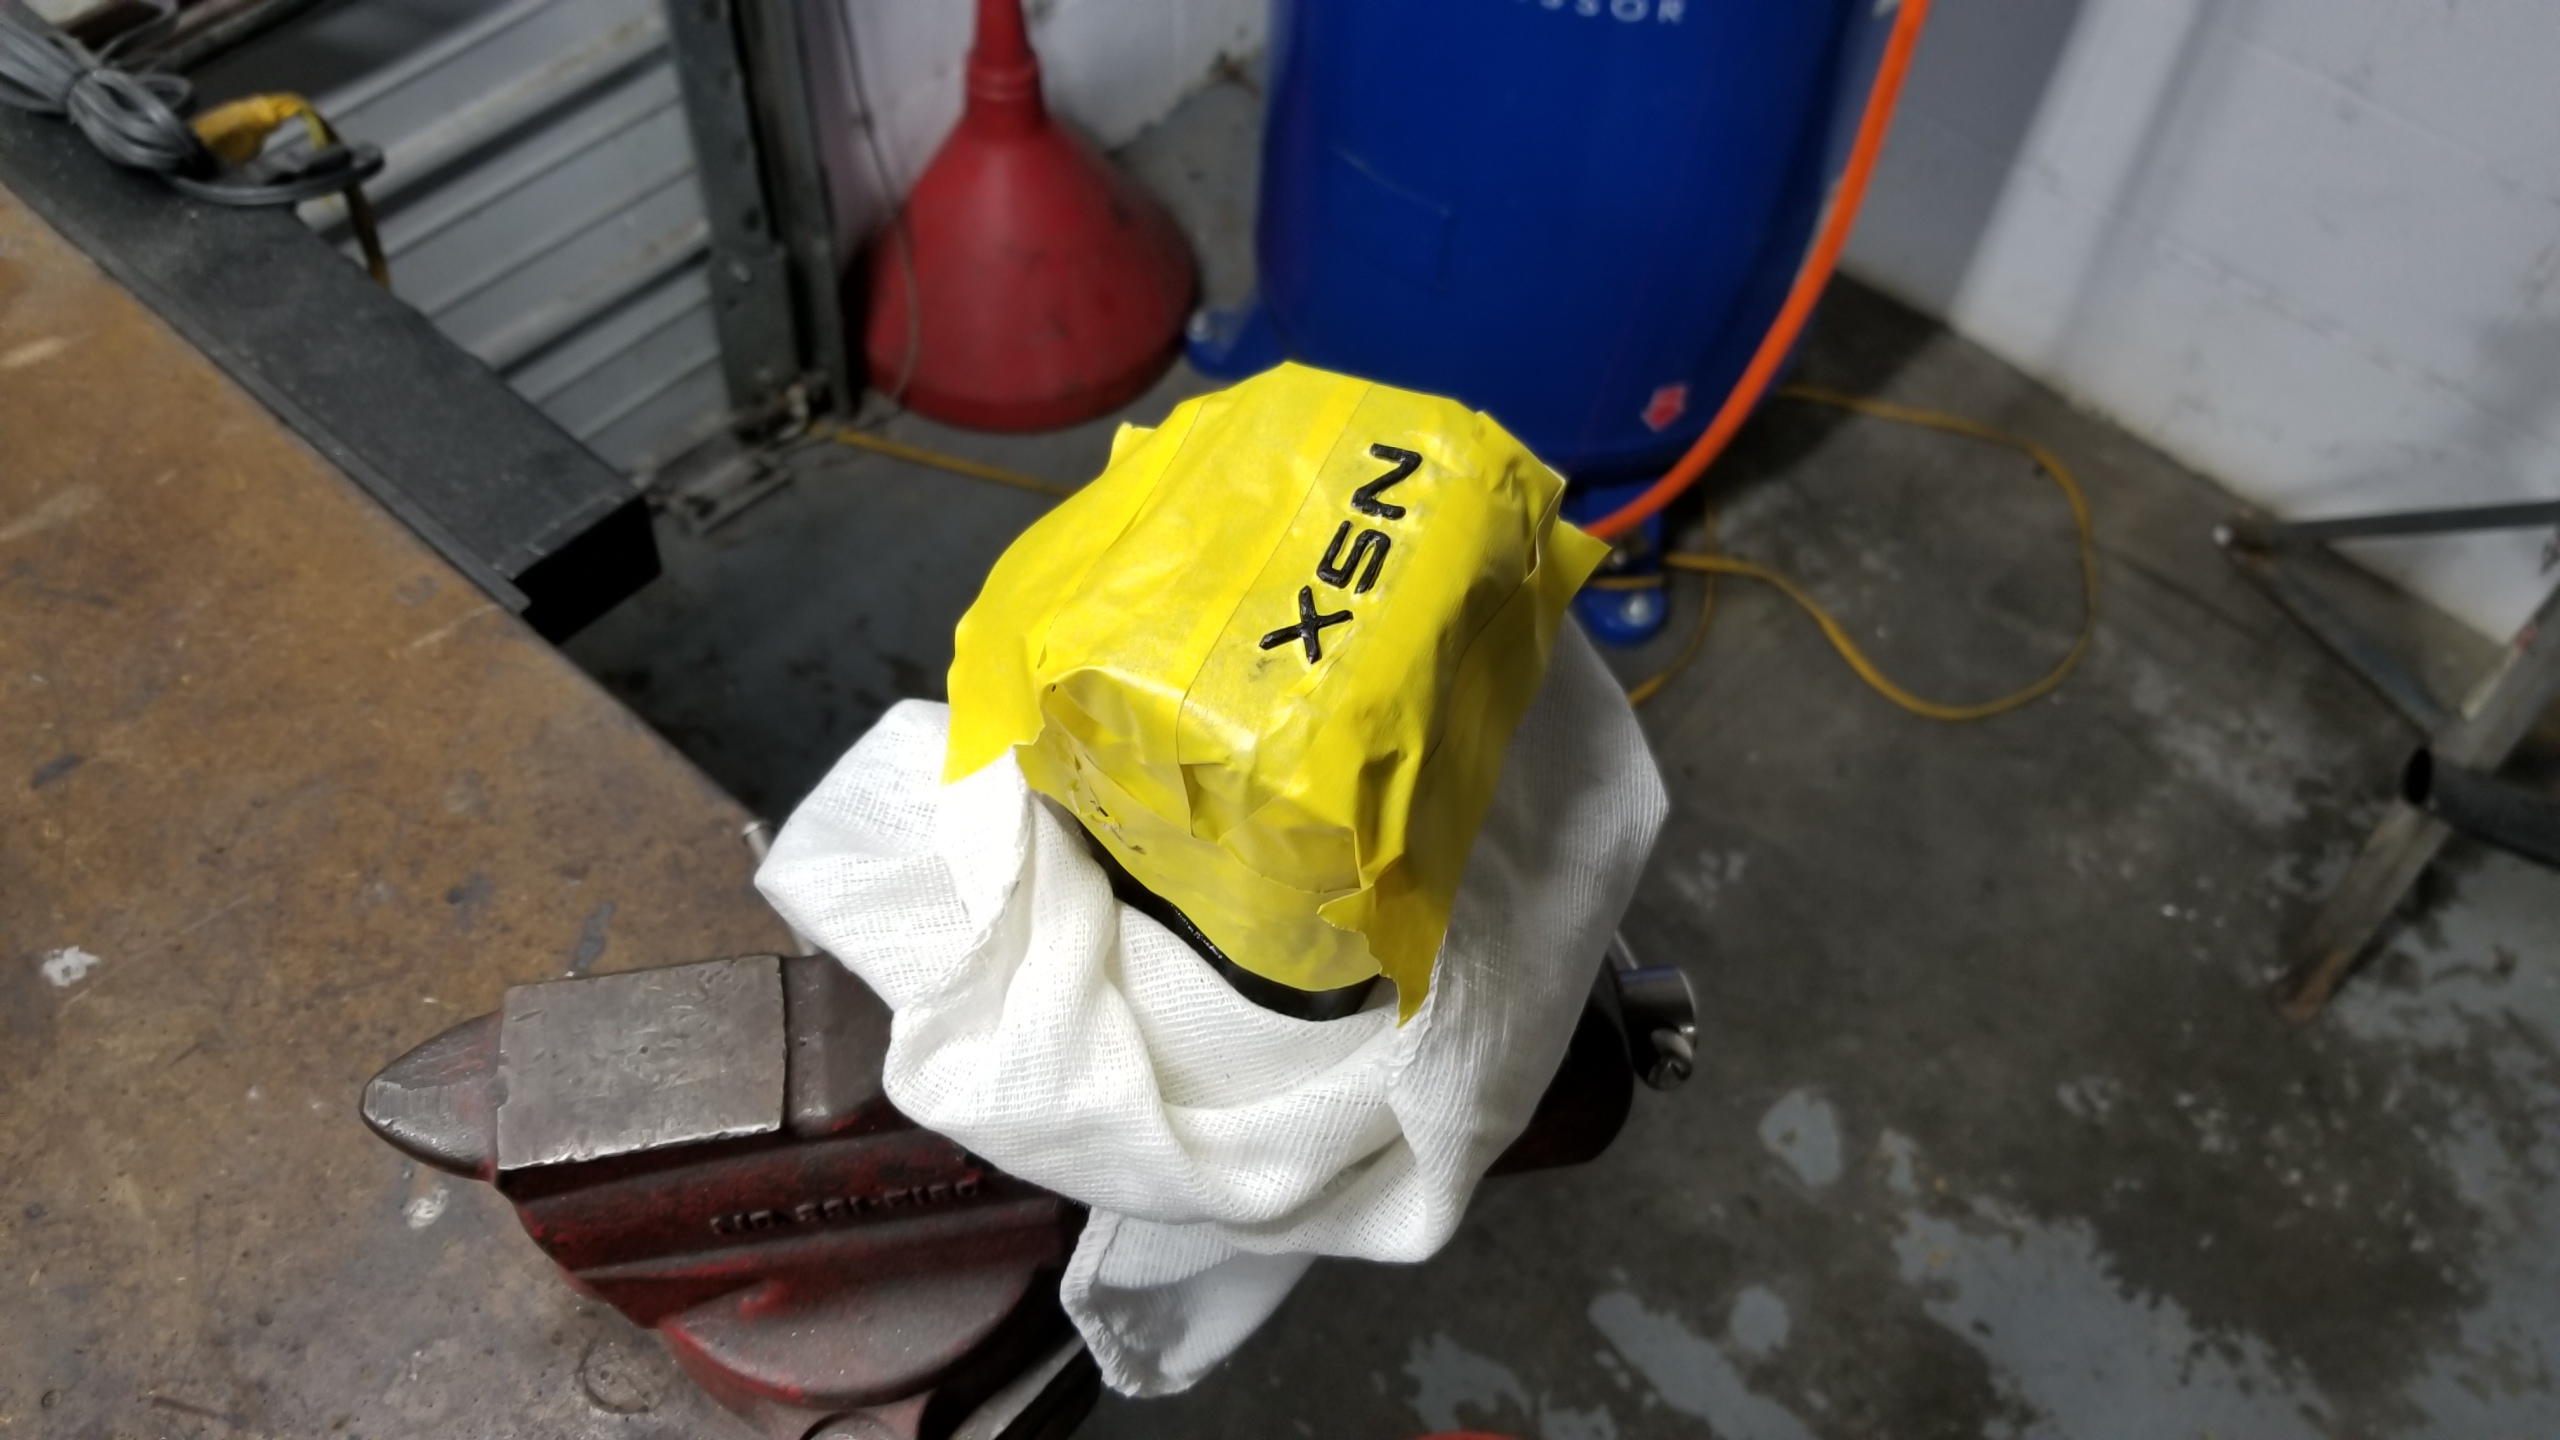
Lettering stripped and masked.
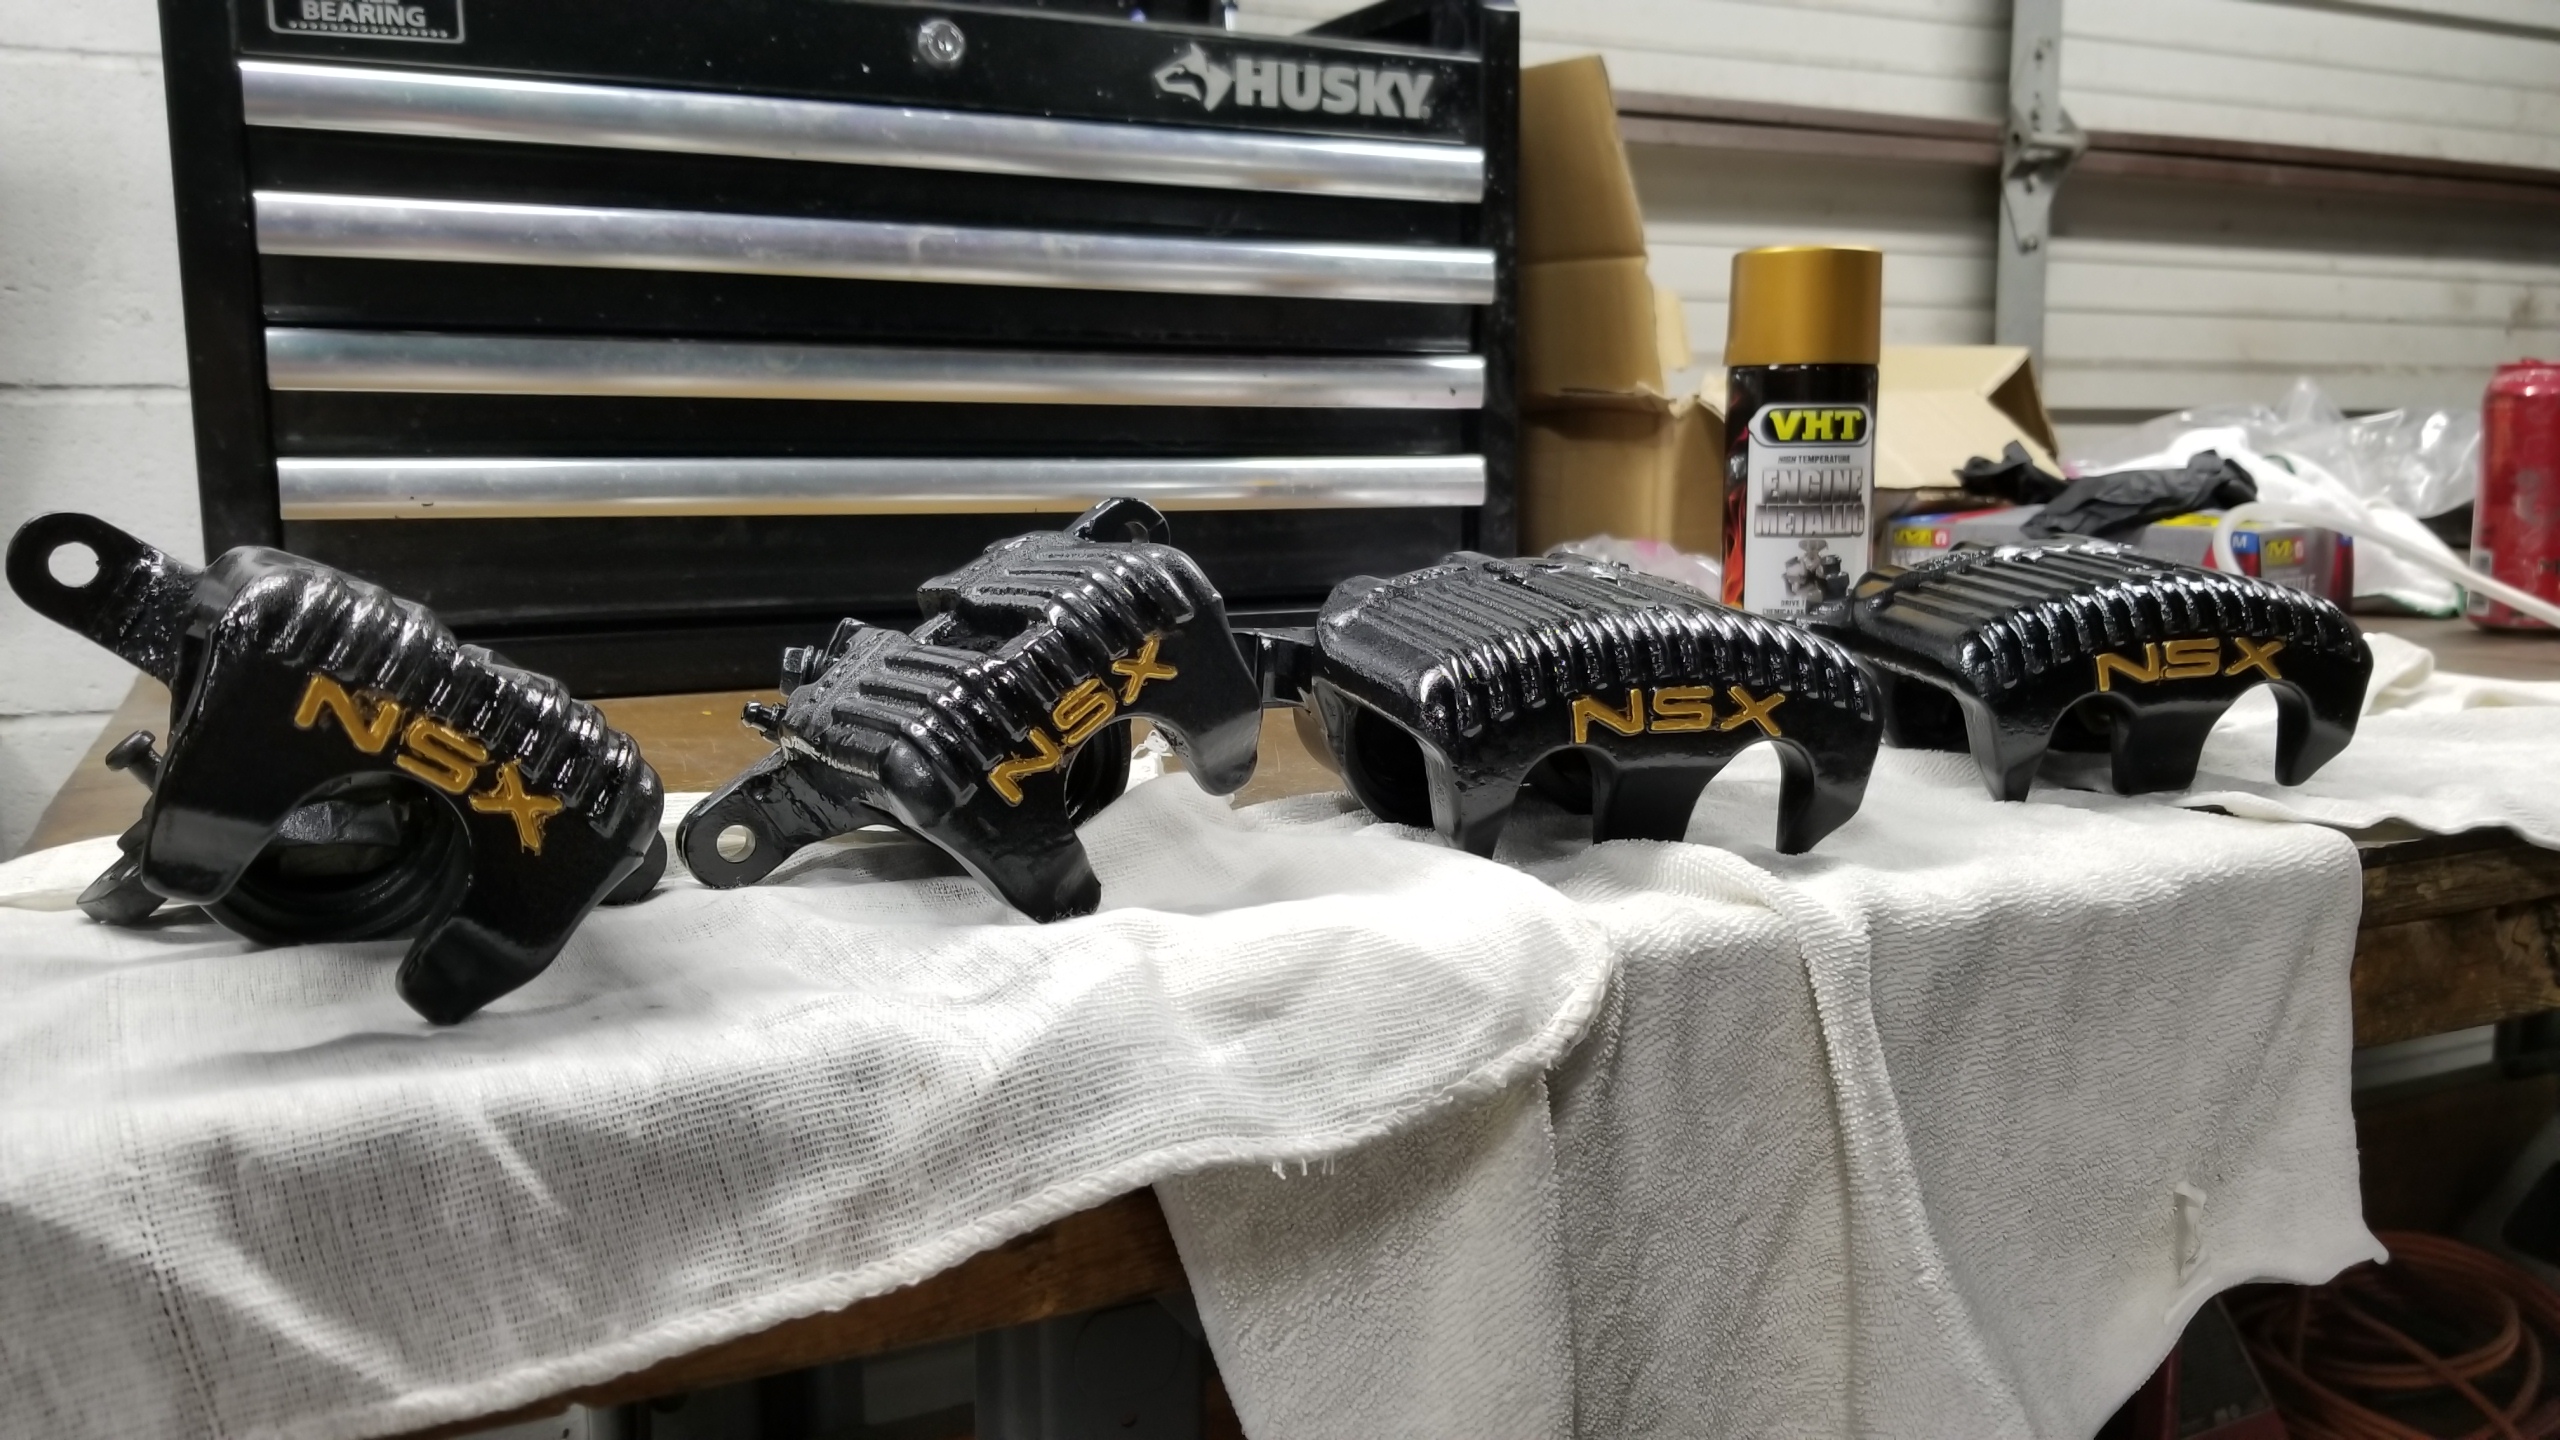
Done with gold VHT. The masking tape let some spray bleed through so next chance I get I'll fix the small bits of overspray with authentic hand-brushing. All in all, I think they turned out well regardless, just needs a bit more touchups.
If you bothered reading this part, my number 1 near-future wheel choice are the Advan RGIII 17/18 in racing gold which I think will match these calipers really well. I think they look fantastic on the NSX, very light, seem more creative than the normal brands, and not exorbitantly expensive. TSW Bathurst are my 2nd choice but they don't get me as excited.
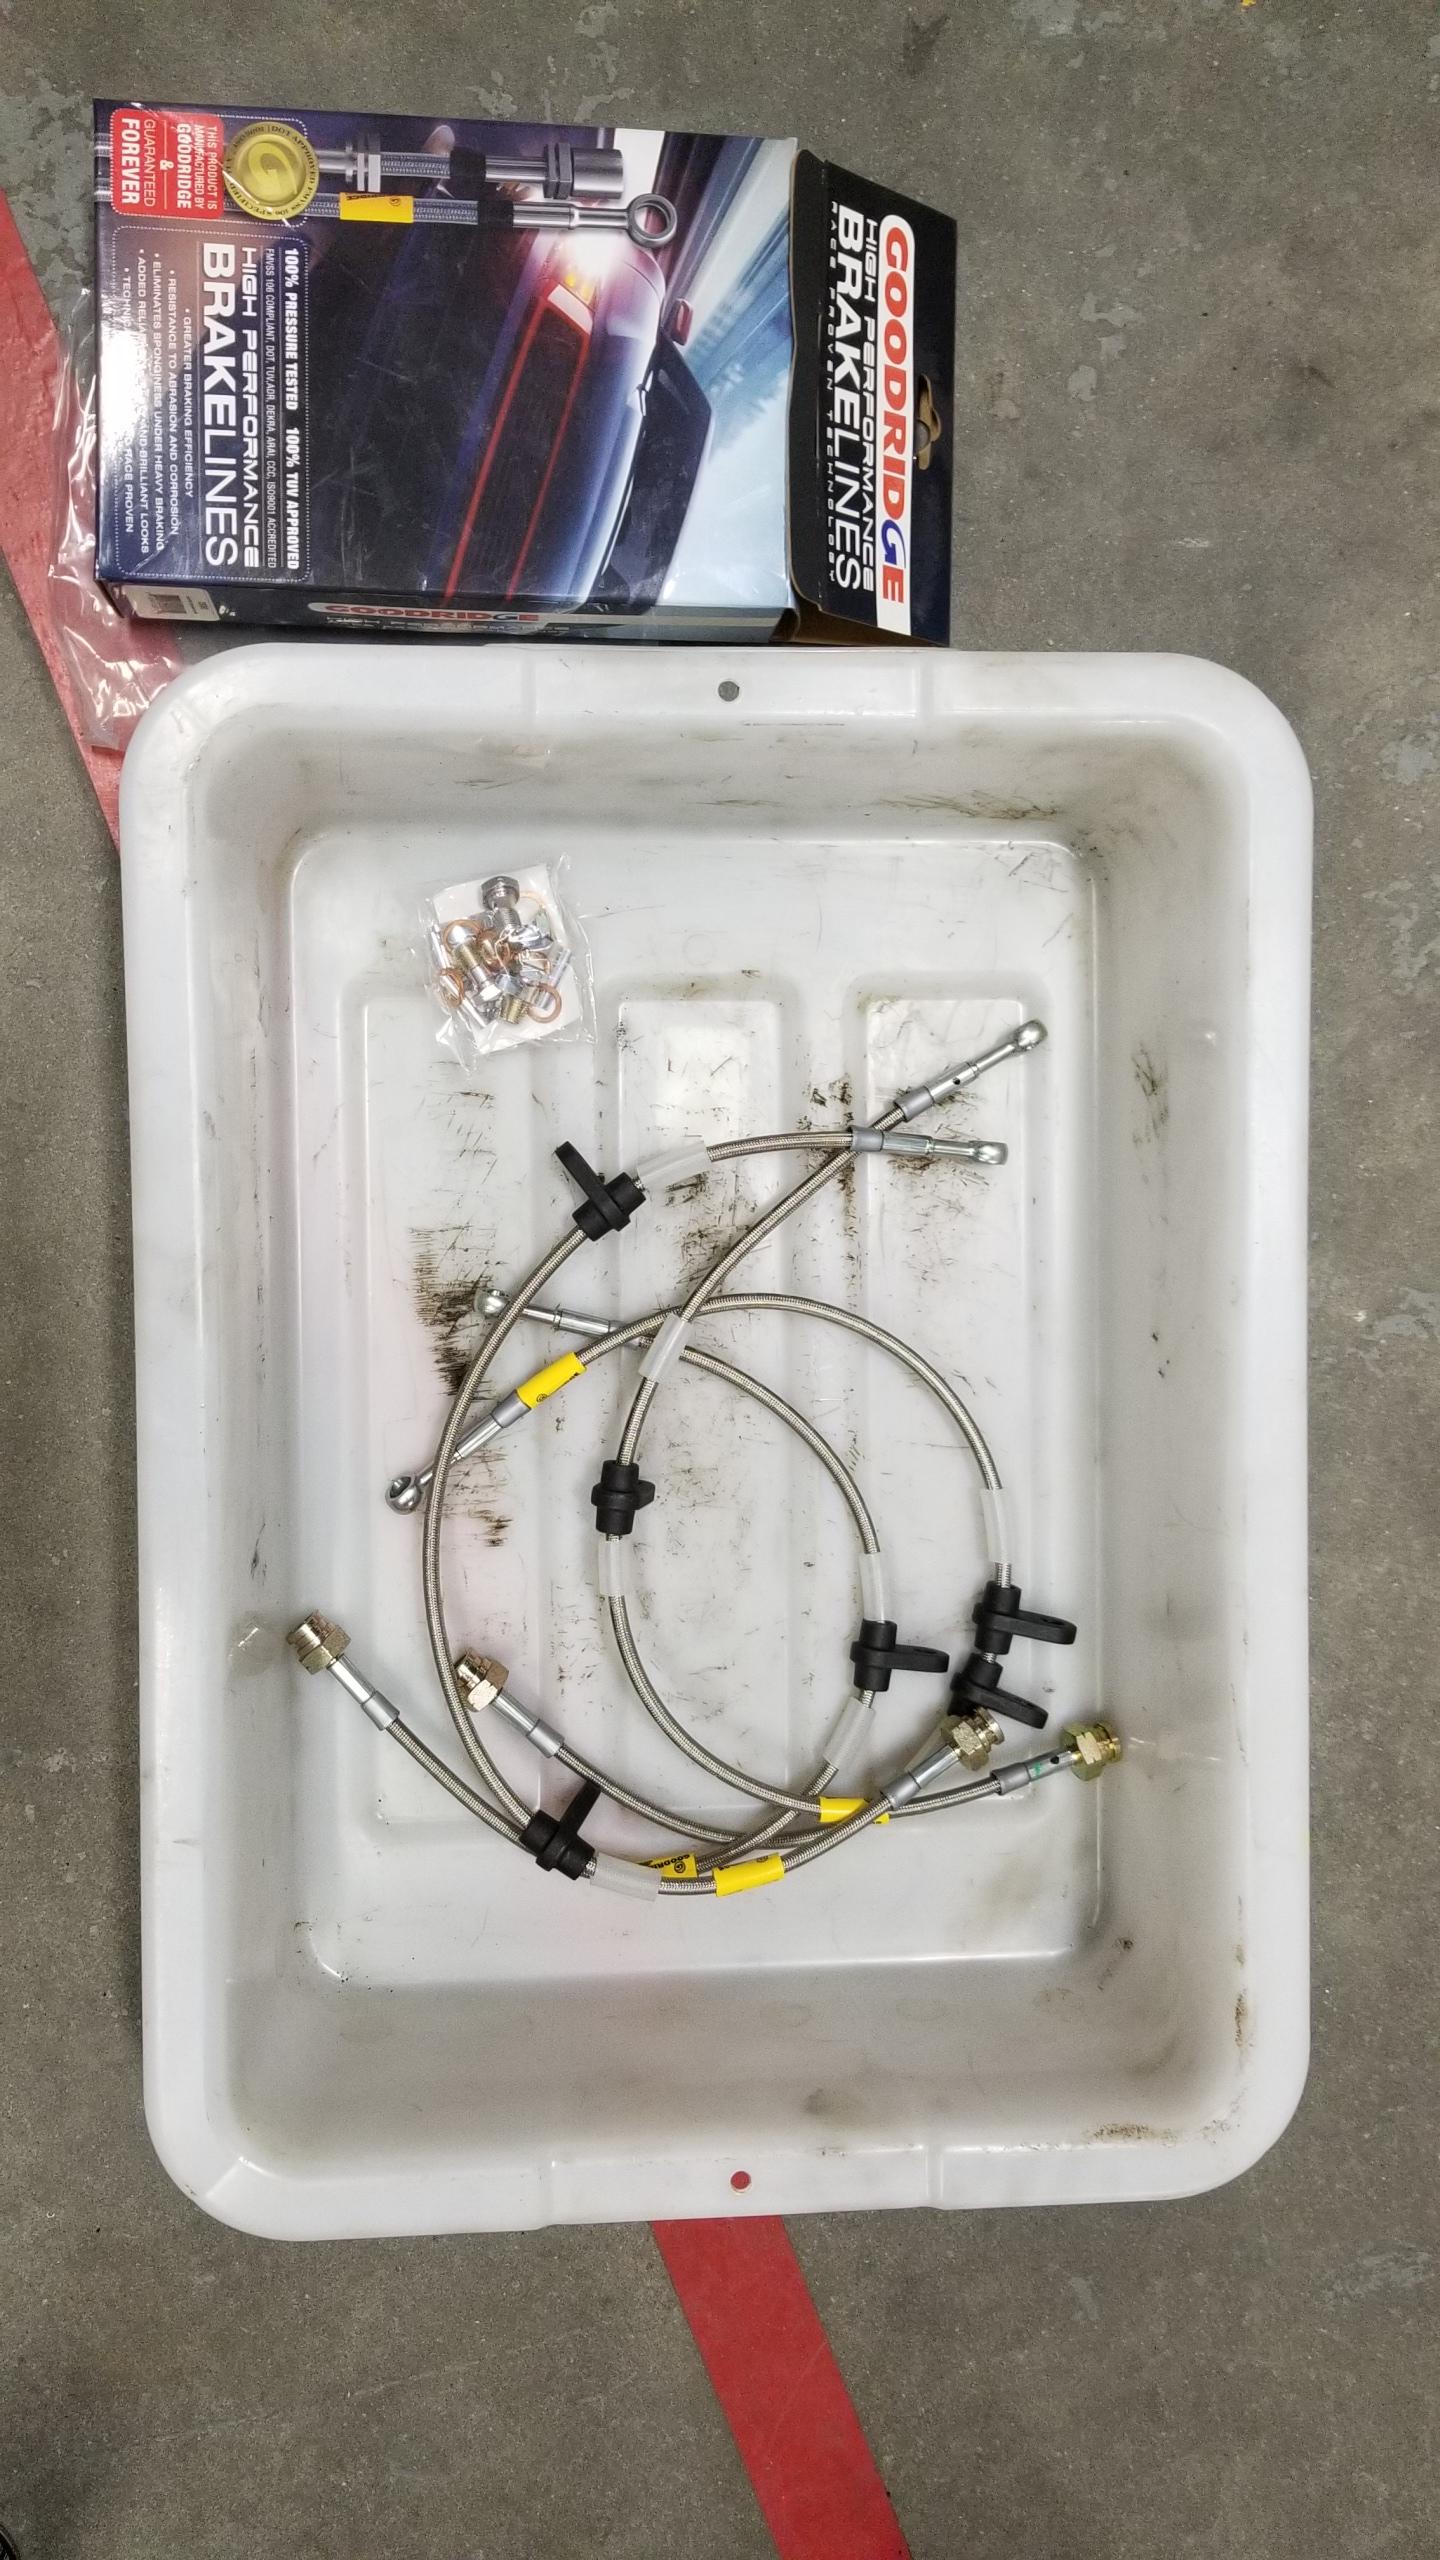
Goodridge stainless brake lines to be installed. Perfect length and fitment and included all the hardware needed. The 10mm flare nuts were pretty easy to remove from the stock hardlines with a flare wrench and a bit of penetrating fluid, which is good since stripping them would suck big time.
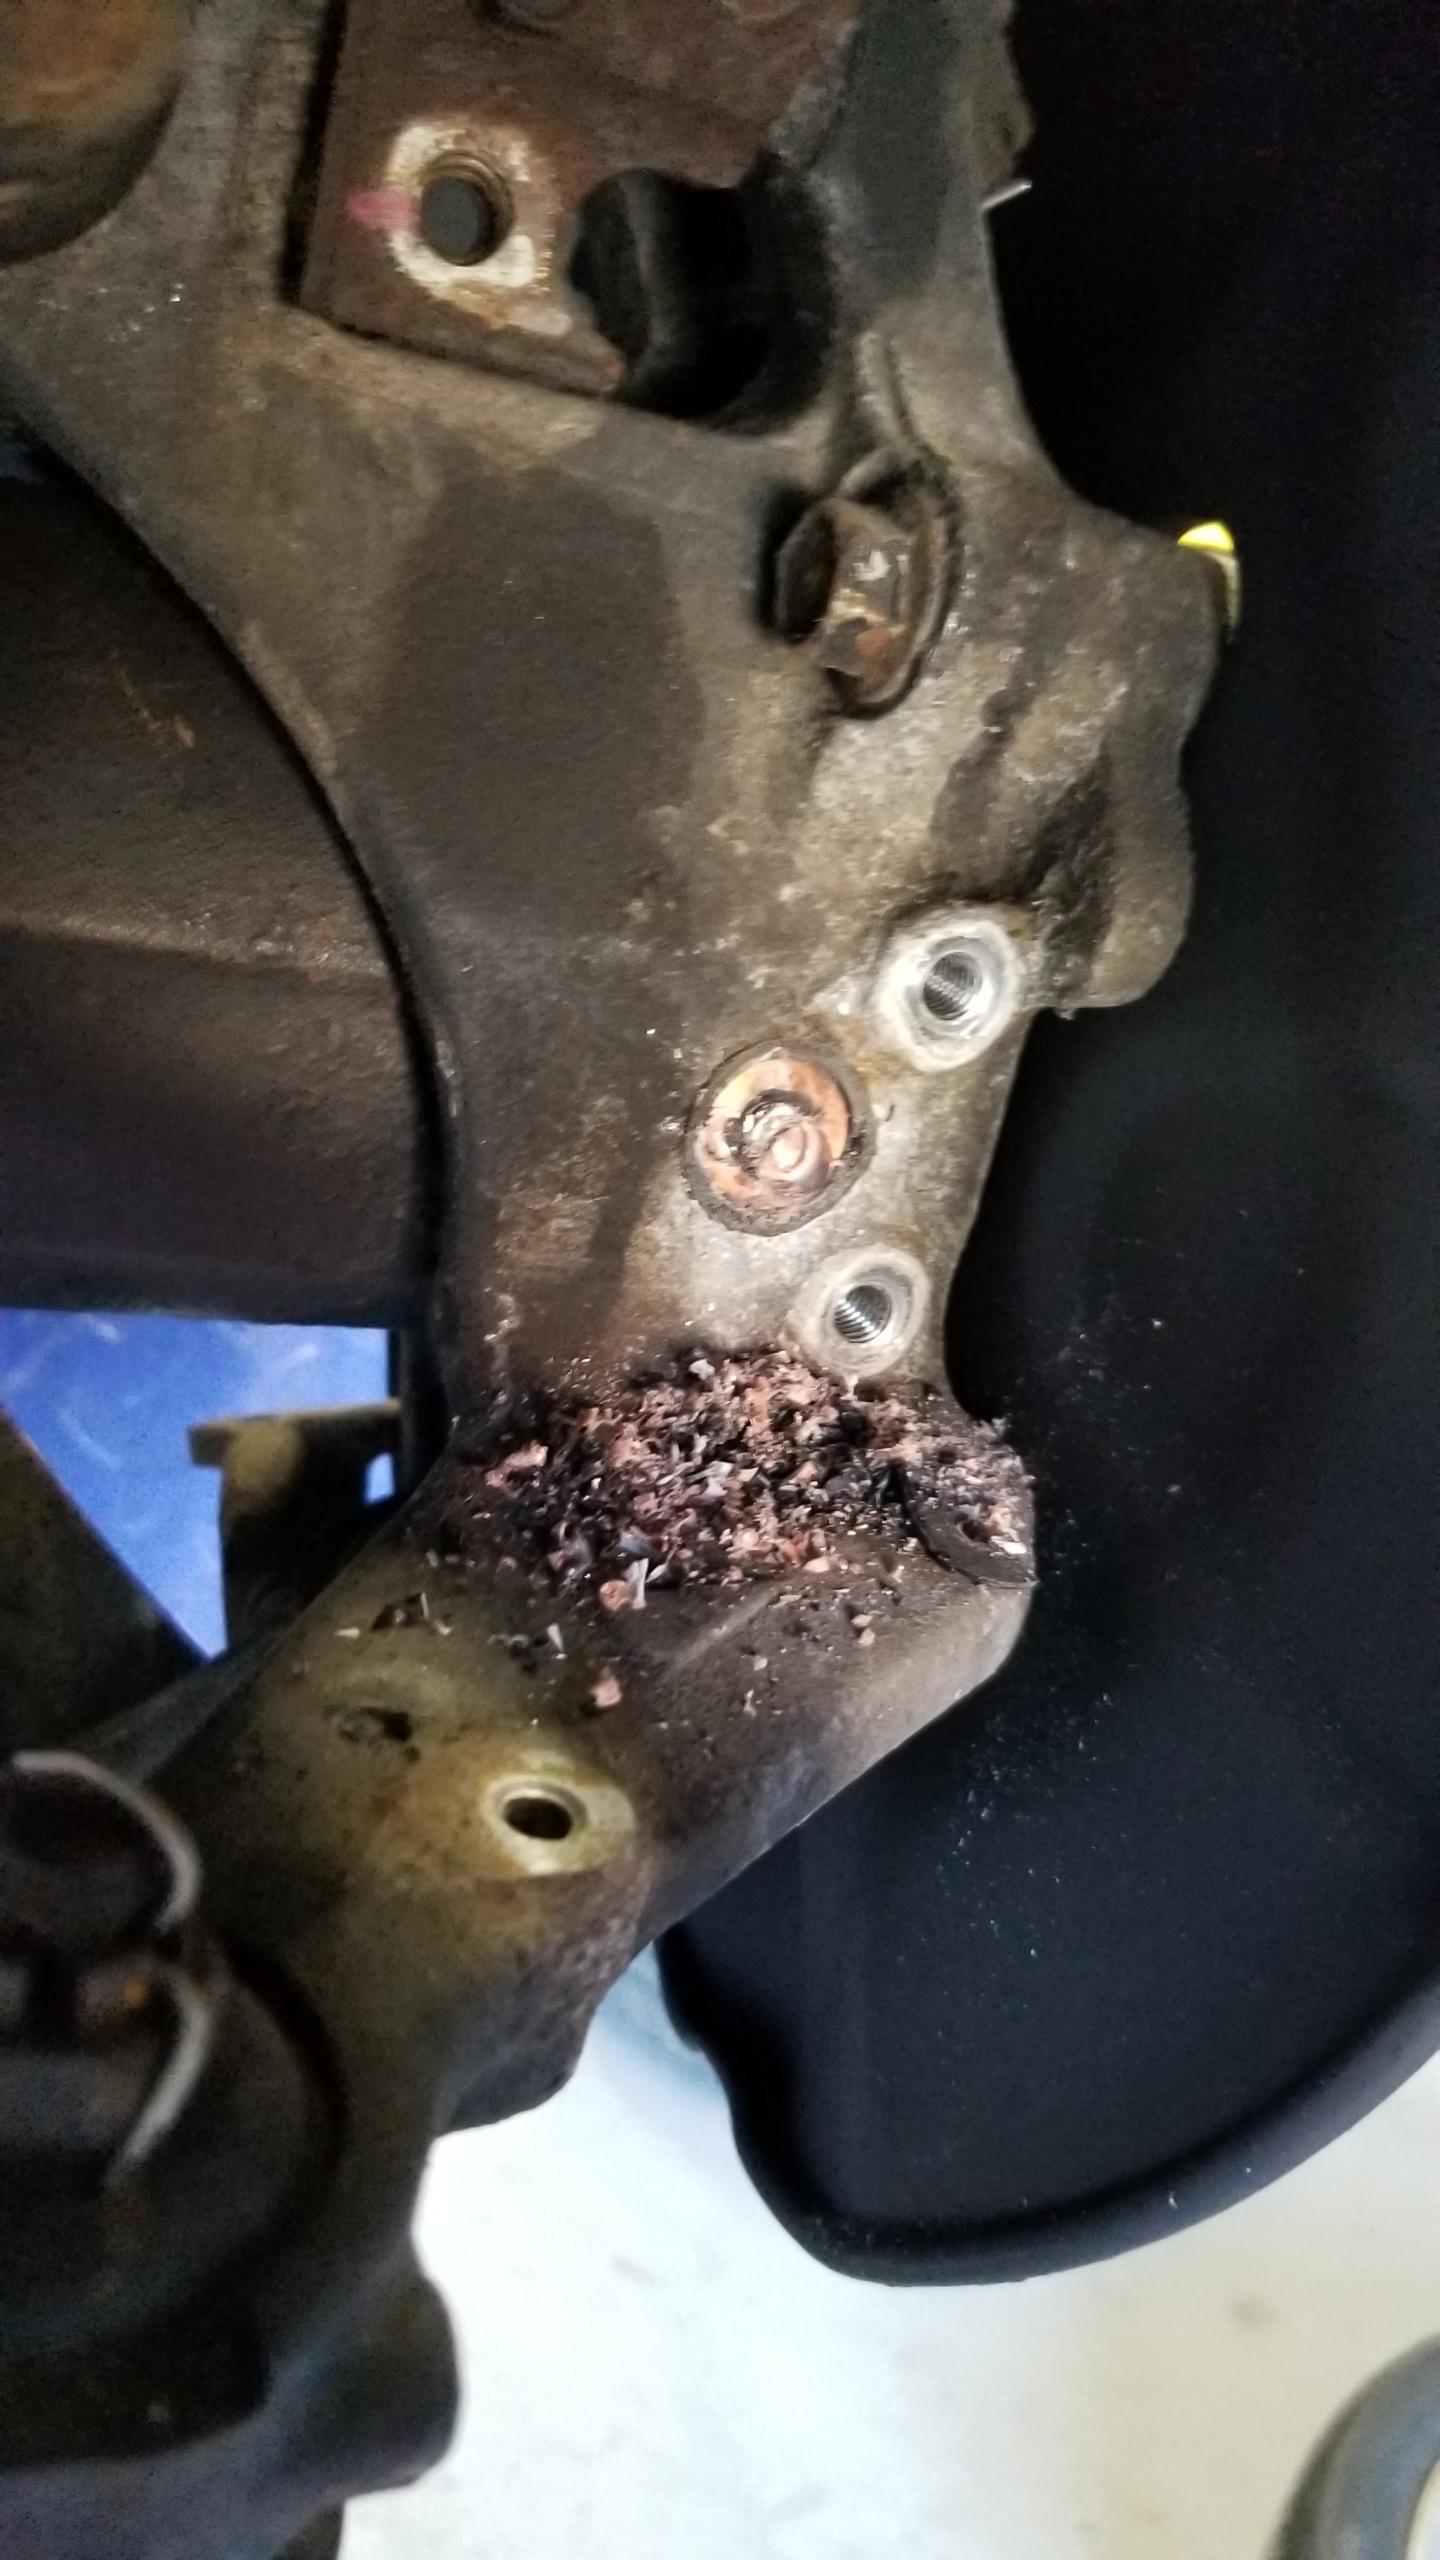
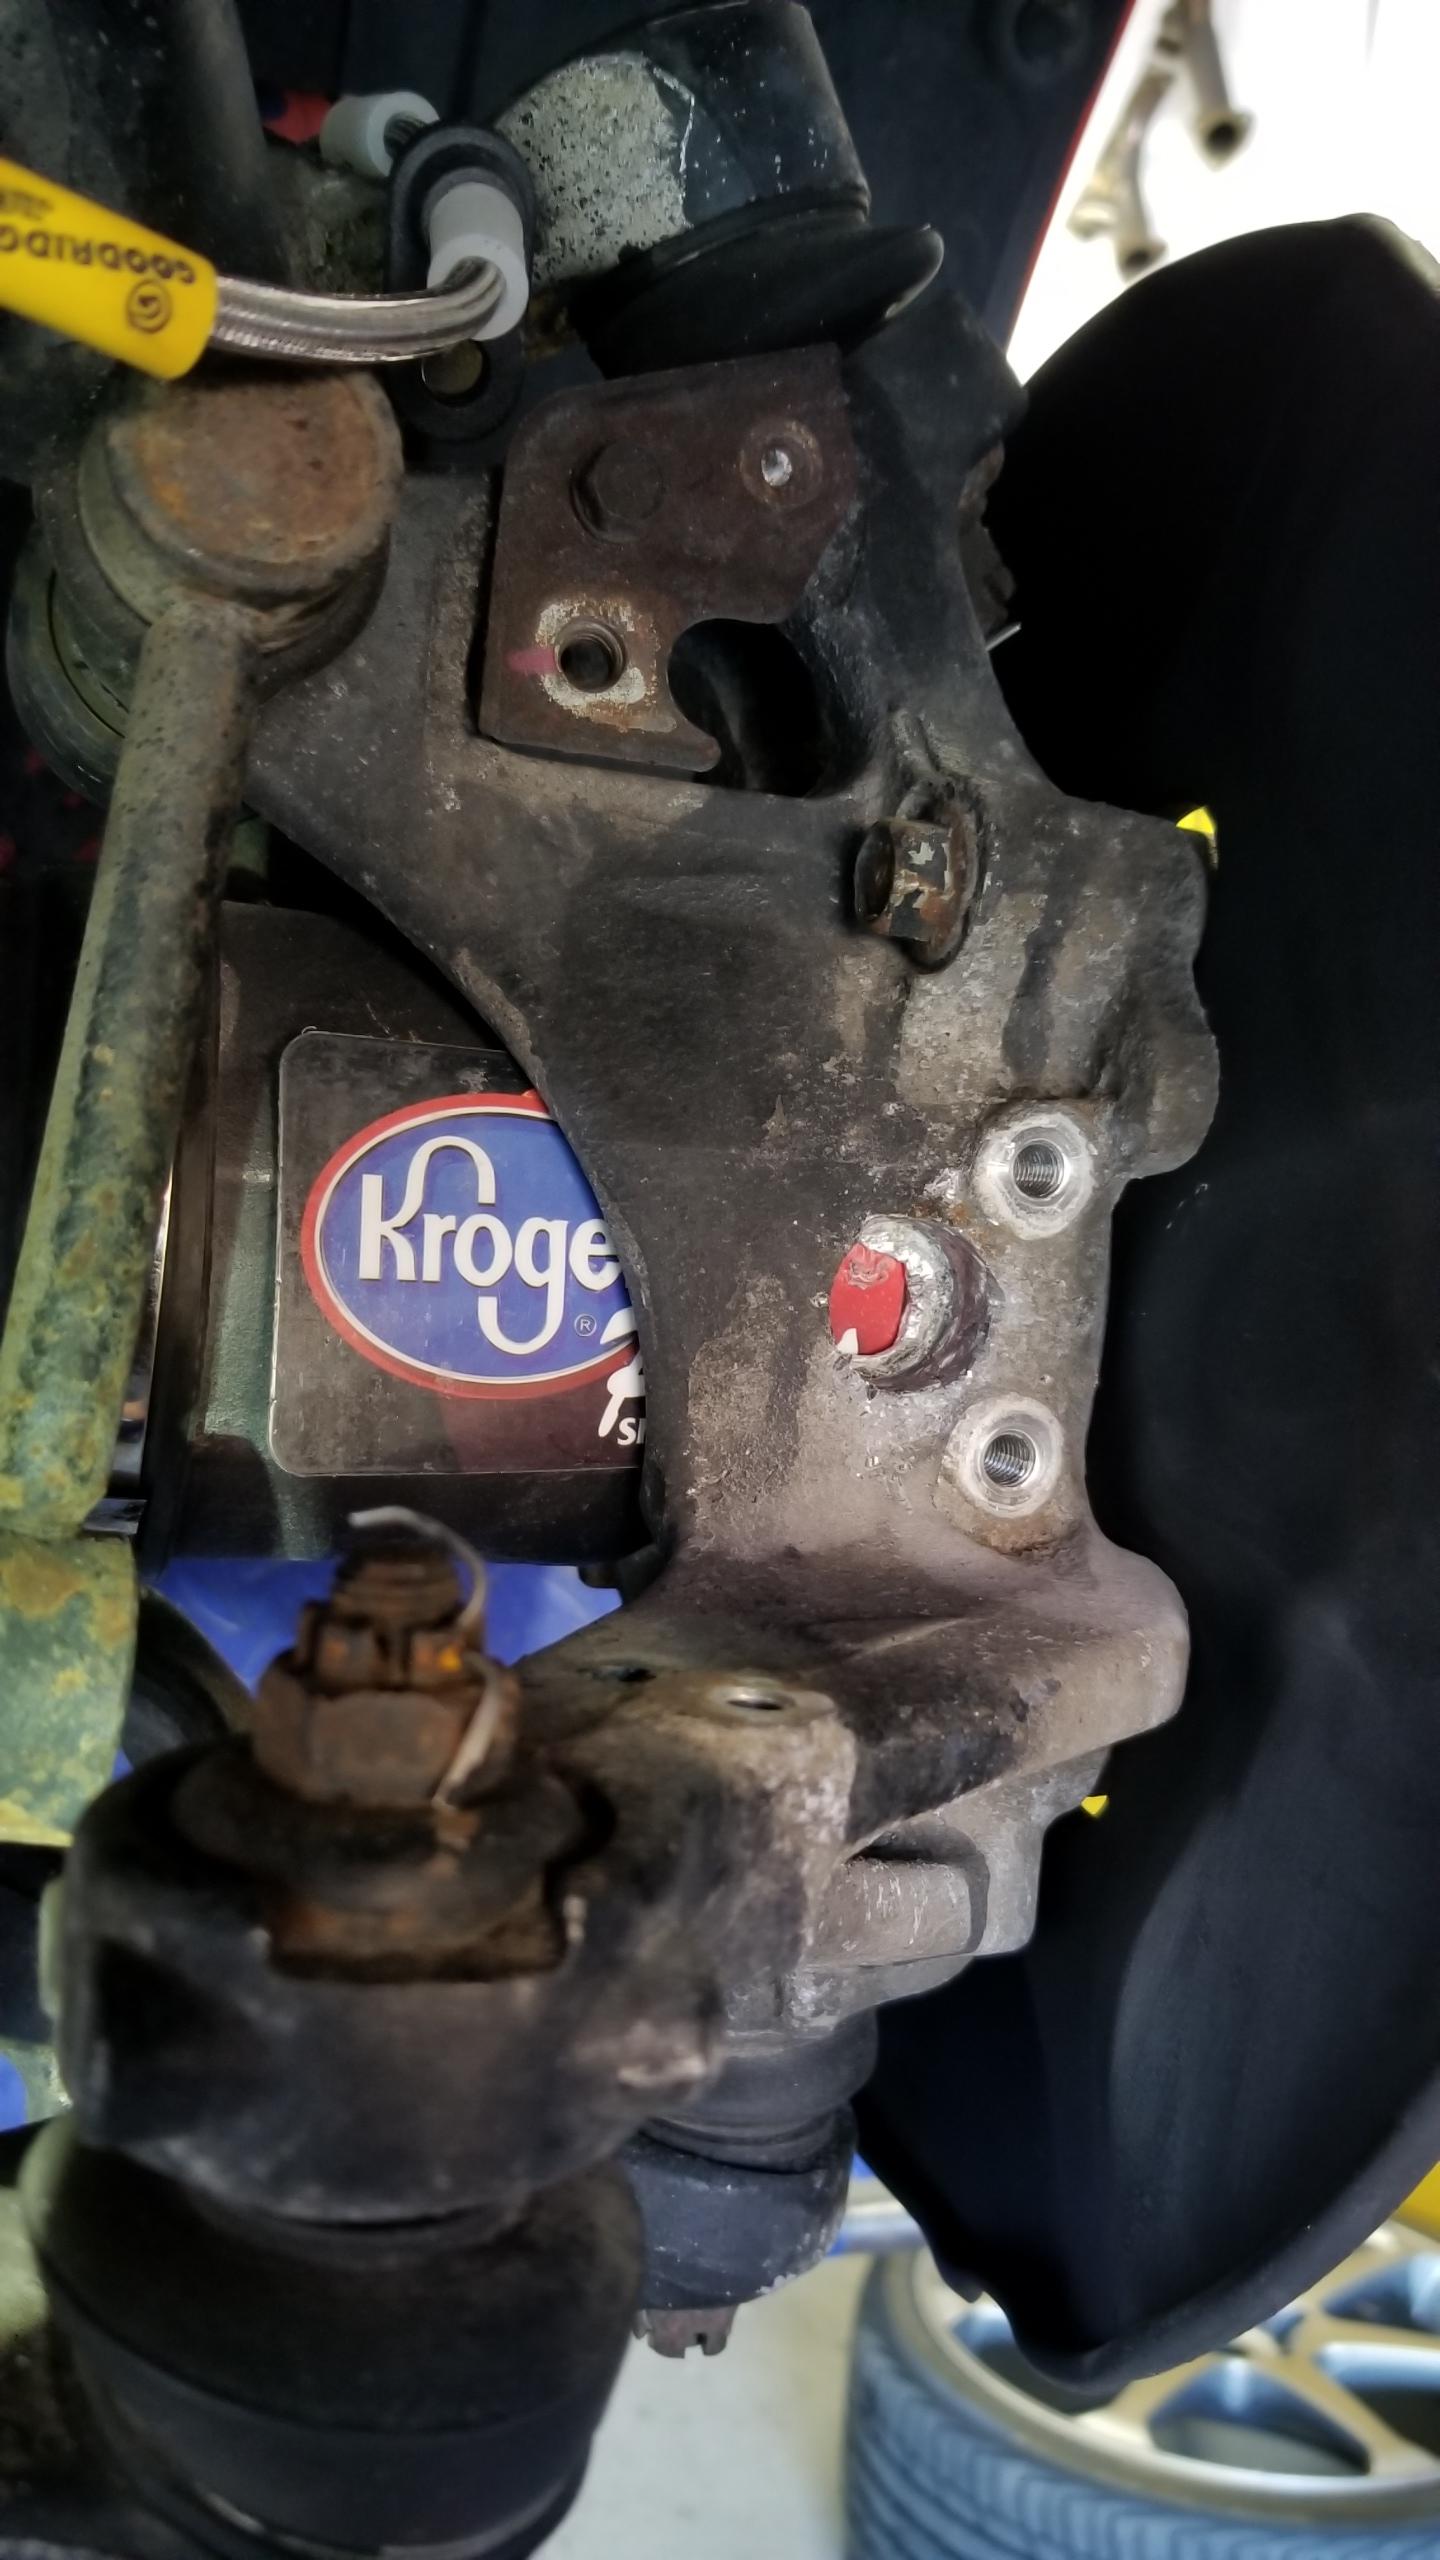
Now's a good time to prepare the RR knuckle for the new sensor I had to order. The remaining head basically had fused itself to the car, absolutely zero chance of it coming out the easy way.
The hard way involves drilling, chipping, etc. until the sensor is no longer part of the hub. Kroger came in clutch to protect the driveshaft ABS ring teeth during the process. As long as the hole is kept the same shape and the mounting points are kept intact, the new sensor should still work just fine at the same distance from the ABS teeth. Labor intensive but the driveshaft didn't have to be removed.
What was formerly an expensive and hard to find sensor is now reduced to a fine dust. This, of course, is the only one discontinued in the US and no aftermarket one is available, so a new OEM one is on the way from Amayama. What would I do without them.
The car drives fine without the sensor BTW, at startup it stumbles a bit before it figures out the signal is missing and then the ABS/TCS lights come on and lets you drive normally. Neither of those are particularly helpful anyways according to quite a few owners..
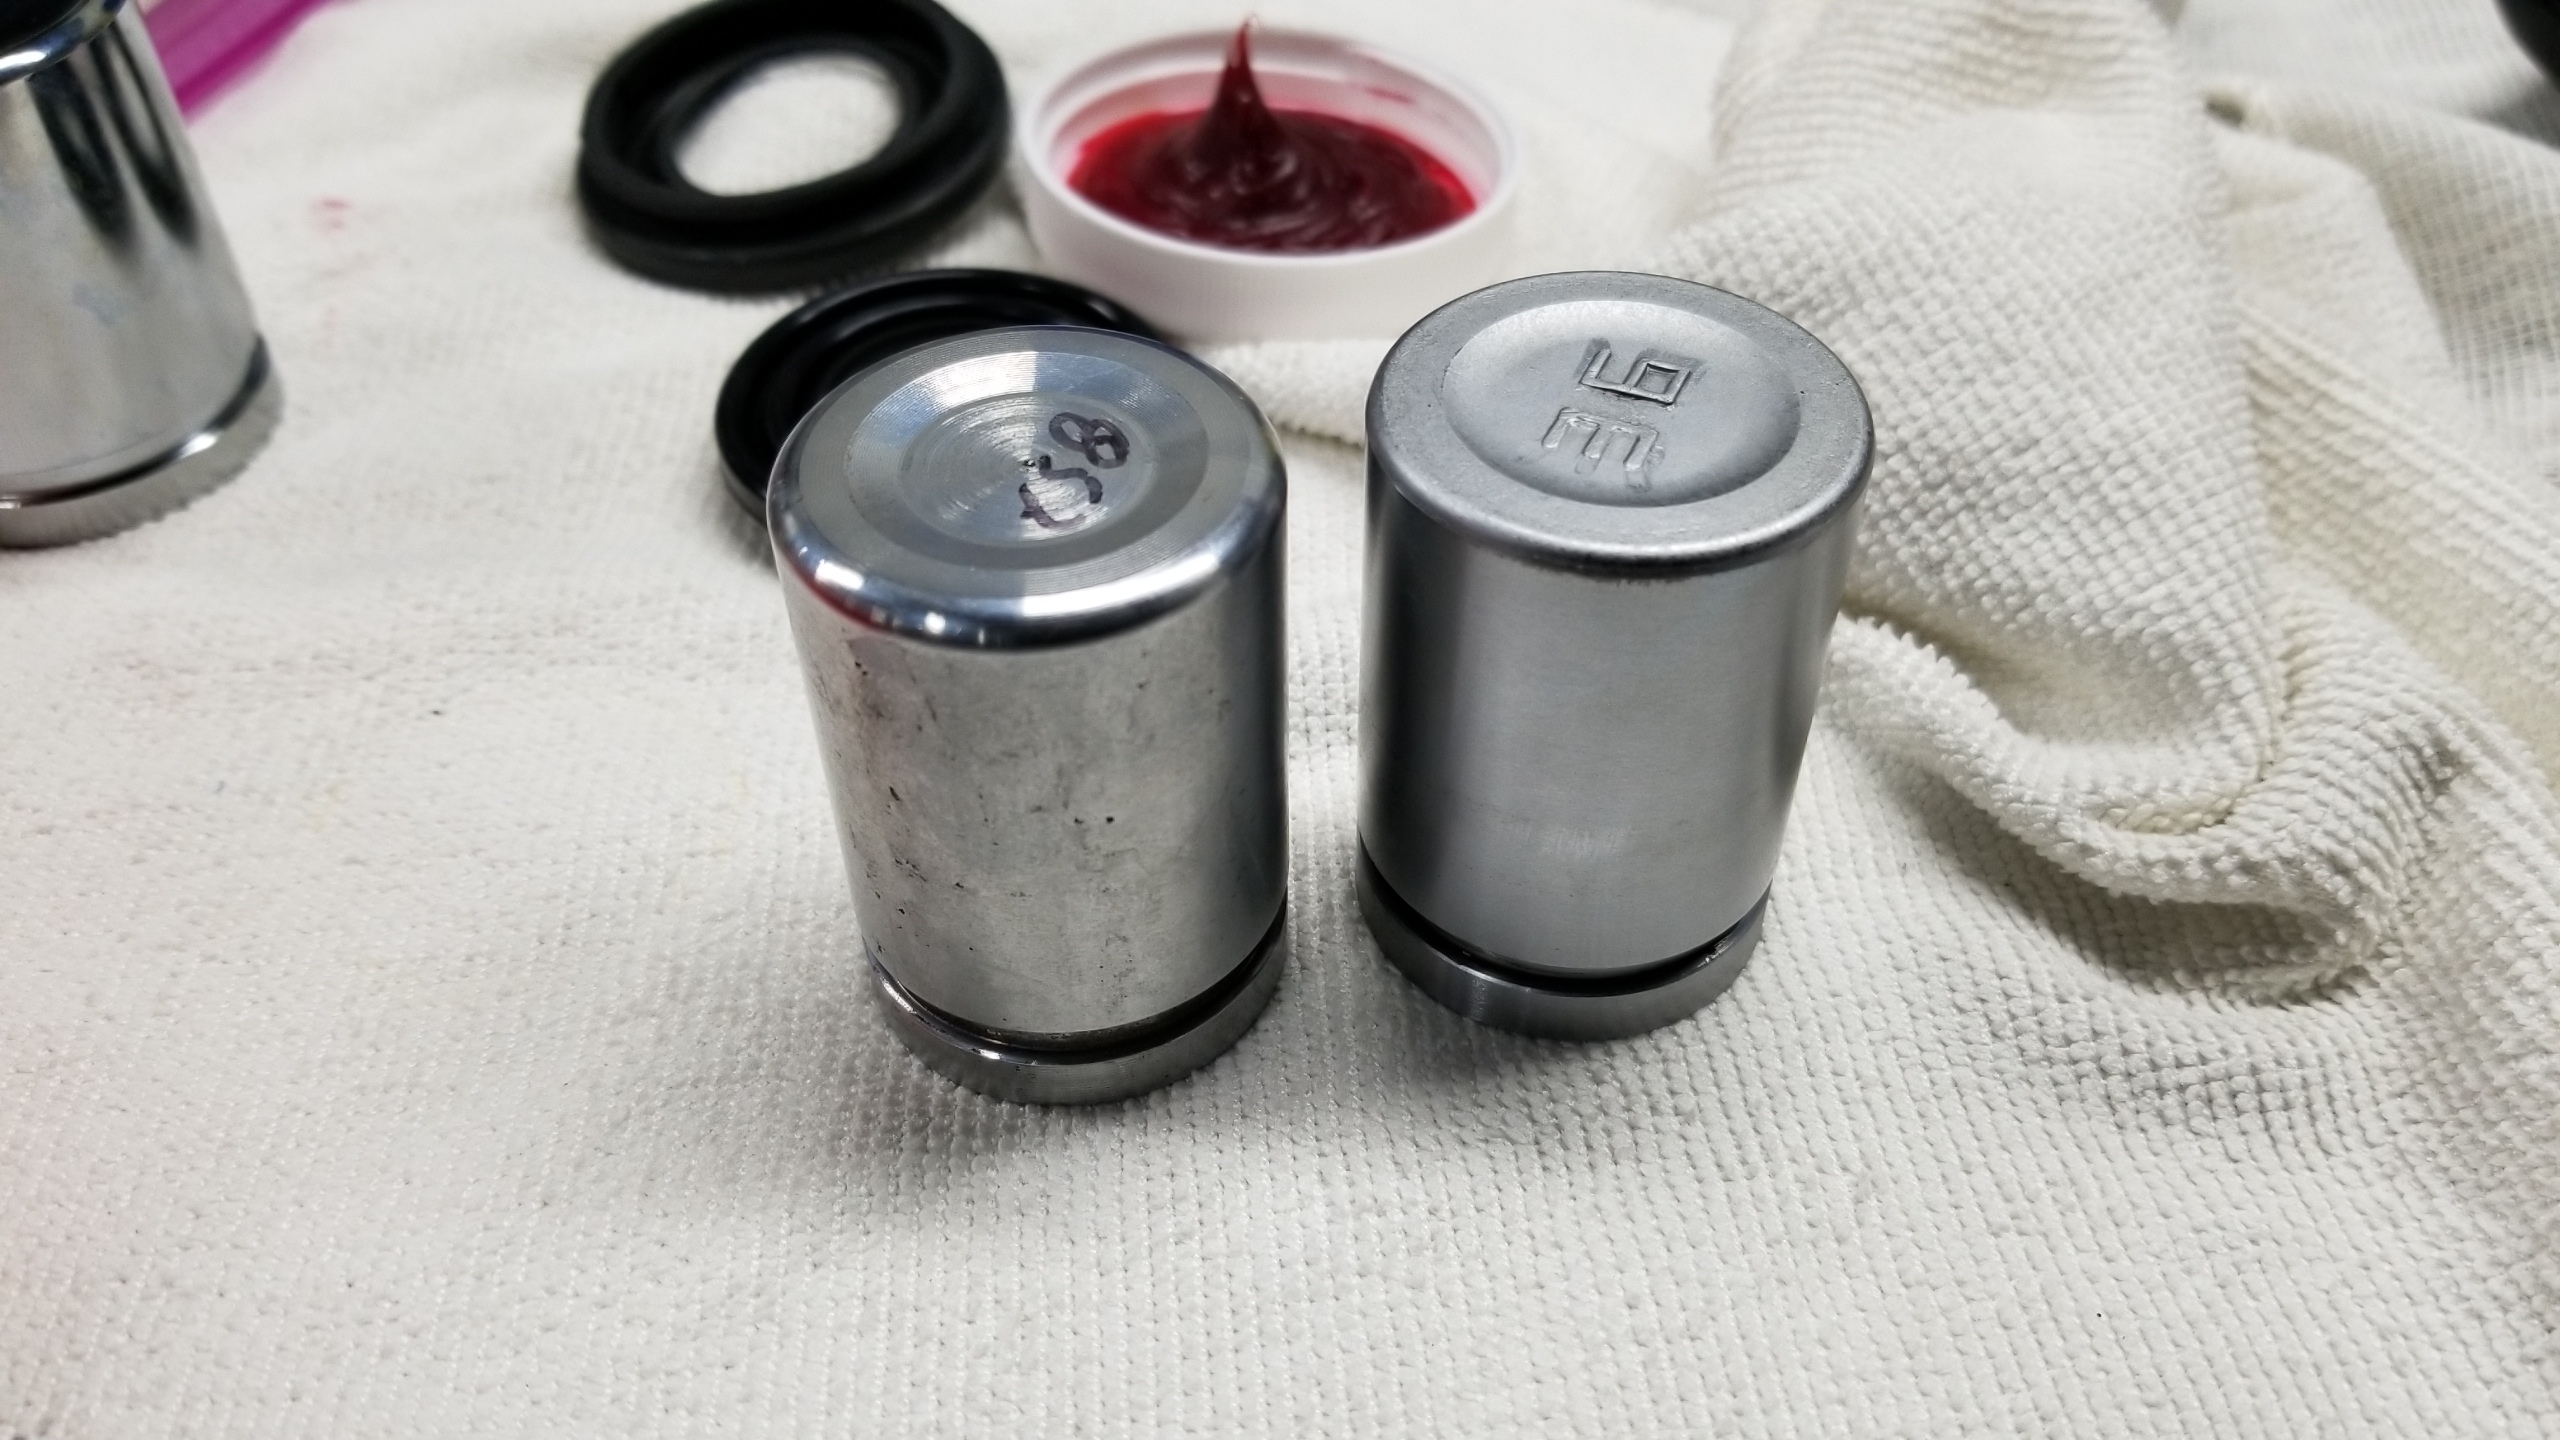
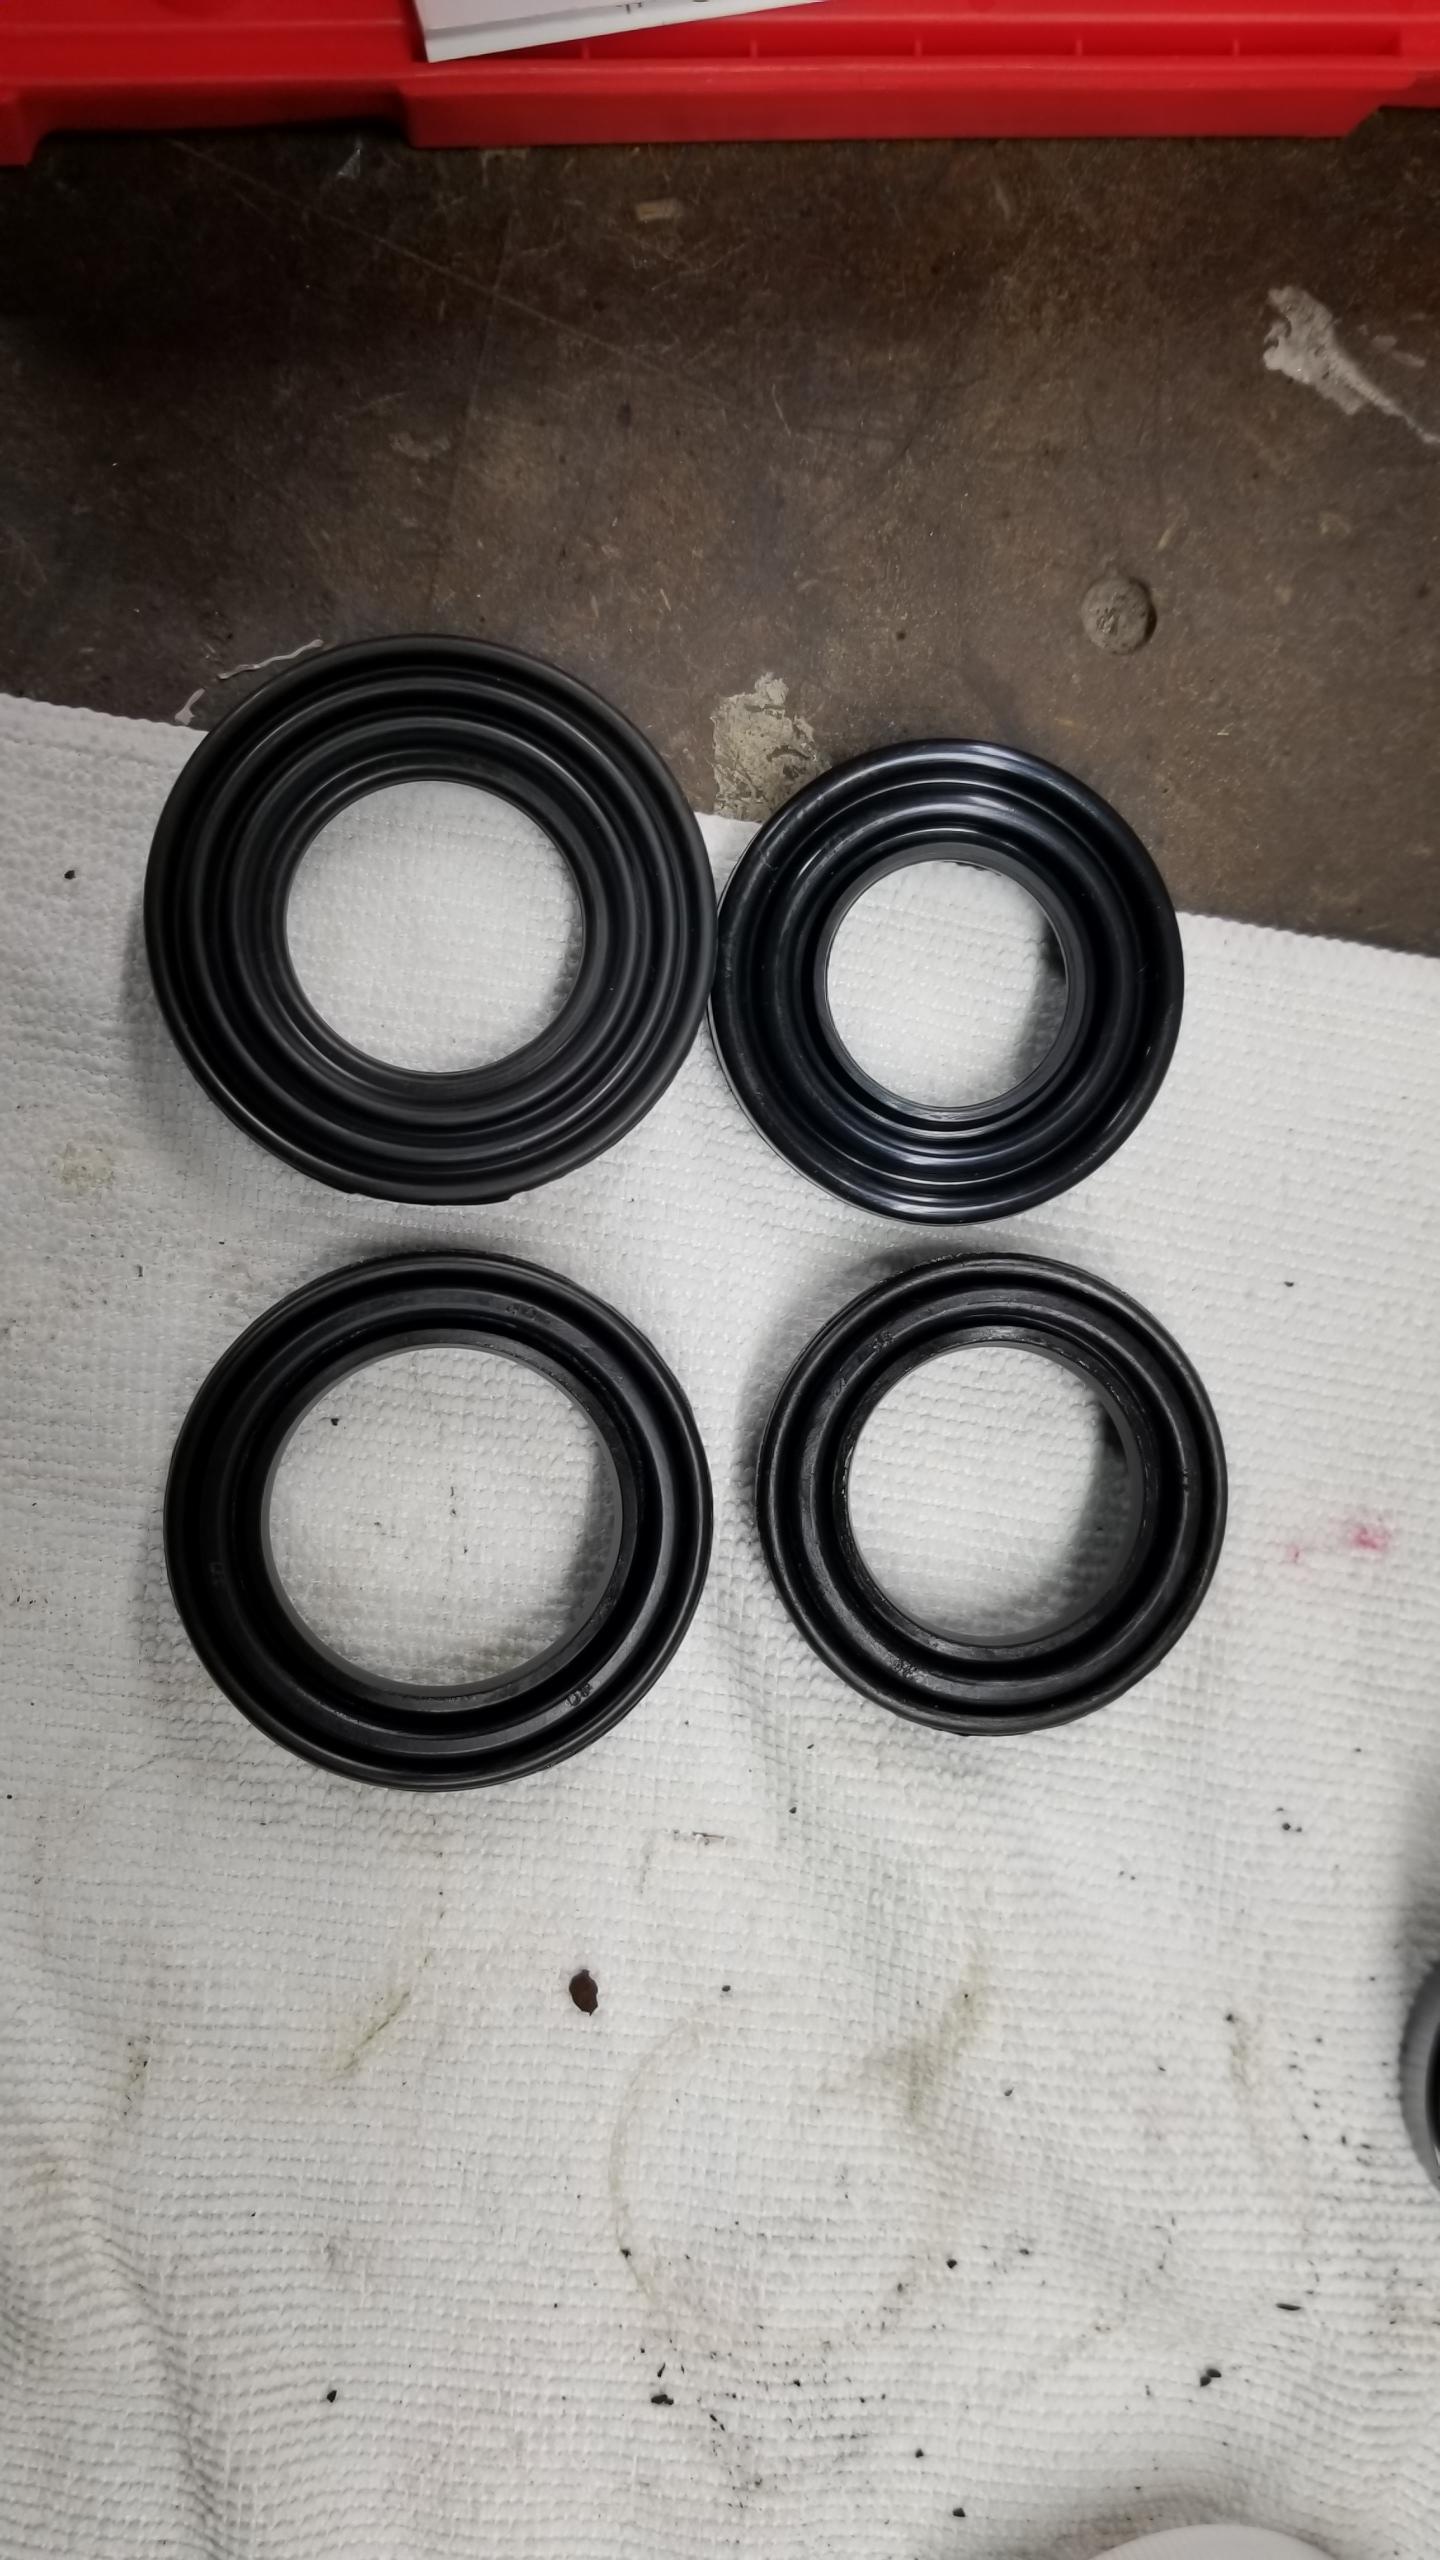
Anyways, back to caliper rebuilds. I bought Centric seal kits and pistons all around and OEM pistons for the rears. OEM on the right. Could easily be reused in this condition, but the inside of the piston had quite a bit of rust inside and I didn't feel like cleaning it out. I measured both pistons with calipers and they were within +/- 0.02mm diameter and the same length so the dimensions checked out.
Centric/aftermarket piston boots on top, OEM on bottom. DO NOT BUY THE AFTERMARKET CALIPER SEAL KITS, THEY SUCK. The size of all the piston boot openings are way too small to use, it is impossible to fit them around the pistons when you're shoving them back in. I tried and tried and it never worked, even if you did manage it, the seal would probably be pulled out of the caliper by the friction against the piston. I had no choice but to reuse the old piston boots. They were all in good condition save for 1 or 2 small tears overall but I was super pissed to do that after all this work. This process was almost as bad as rebuilding my driveshafts, with just as much, err, "frustration outlets".
Rear pistons completed with new OEM pistons. Fortunately, all the other seals from the kit worked, including the square cuts, o-rings, and other misc. ones specific to the rear calipers. If possible next time I'd probably order the same kits for those seals and order the OEM piston boots separately and you'd still save money.
I found the closest readily available equivalents to the 3 magic greases Honda includes in their rebuild kits, Castrol red rubber grease and PAG grease for the slide pins to replace Niglube. We'll see how well they do during a future caliper rebuild with the proper seals.
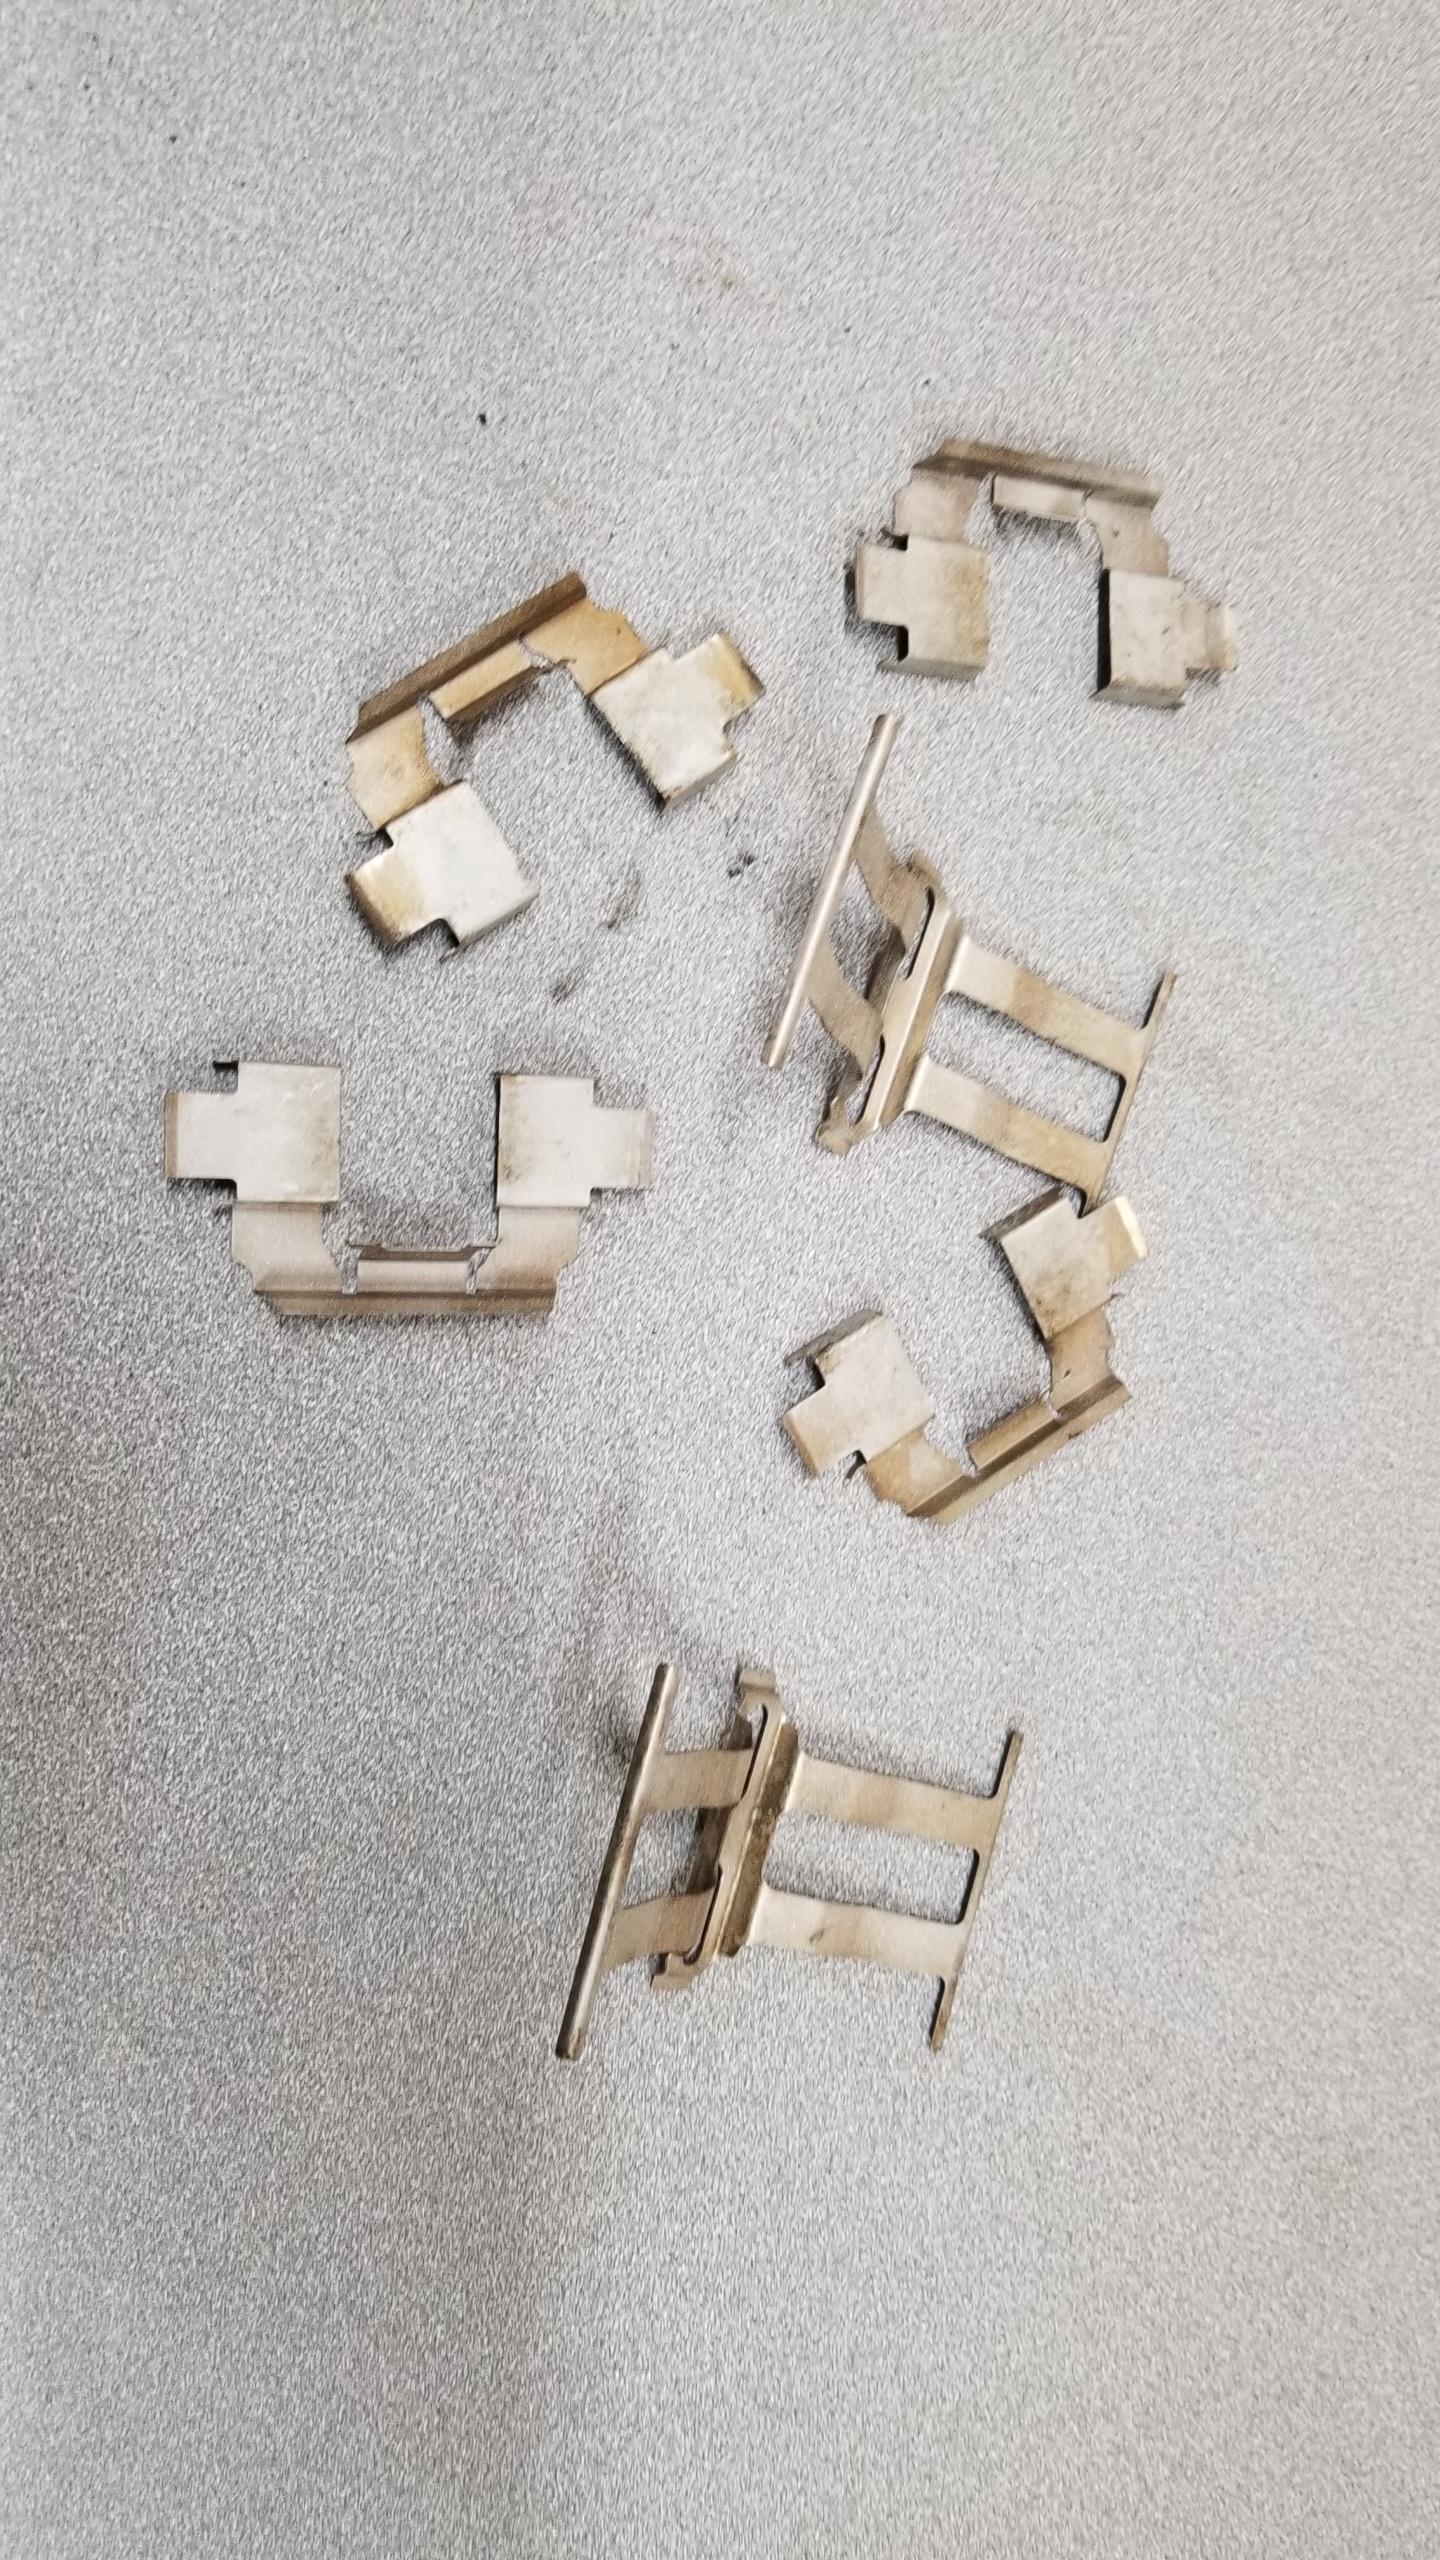
Old rear hardware, couldn't find an easy replacement kit.
Now made basically new again. Centric makes a front hardware kit that's cheap and fits perfectly fine.
If the other stuff wasn't enough of a nightmare, I wanted to replace some "easy" brackets as well with new OEM and ended up snapping all the 10mm bolts off the knuckle, and snapped a bolt extractor into an old bolt. The other was drilled out and re-tapped to M6 with my new tap & die set and left it at that, I think one bolt is fine to hold a bracket for the hose...
Brackets mounted and EBC Yellow pads fitted. Normally pads are a quick replacement, but with the extra mils of paint on the bracket and pad, some had to be scraped off or the pads wouldn't slide freely in the brackets. Nothing's ever easy.
Calipers fitted to the brackets with completely new hardware (bracket bolts, pin bolts, bleeders, banjos, etc.). The extra cost is worth it to clean things up a bit and make future maintenance that much easier. The undercoating in the wheel wells is peeling off and looking drab, I plan to strip and re-coat it when I put in new coilovers to get more space to work.
This took a bit longer than anticipated since I had to reposition some of the new brake lines to eliminate twisting, so I loosened the flare nuts and made sure everything was set up to relieve any tension from the lines.
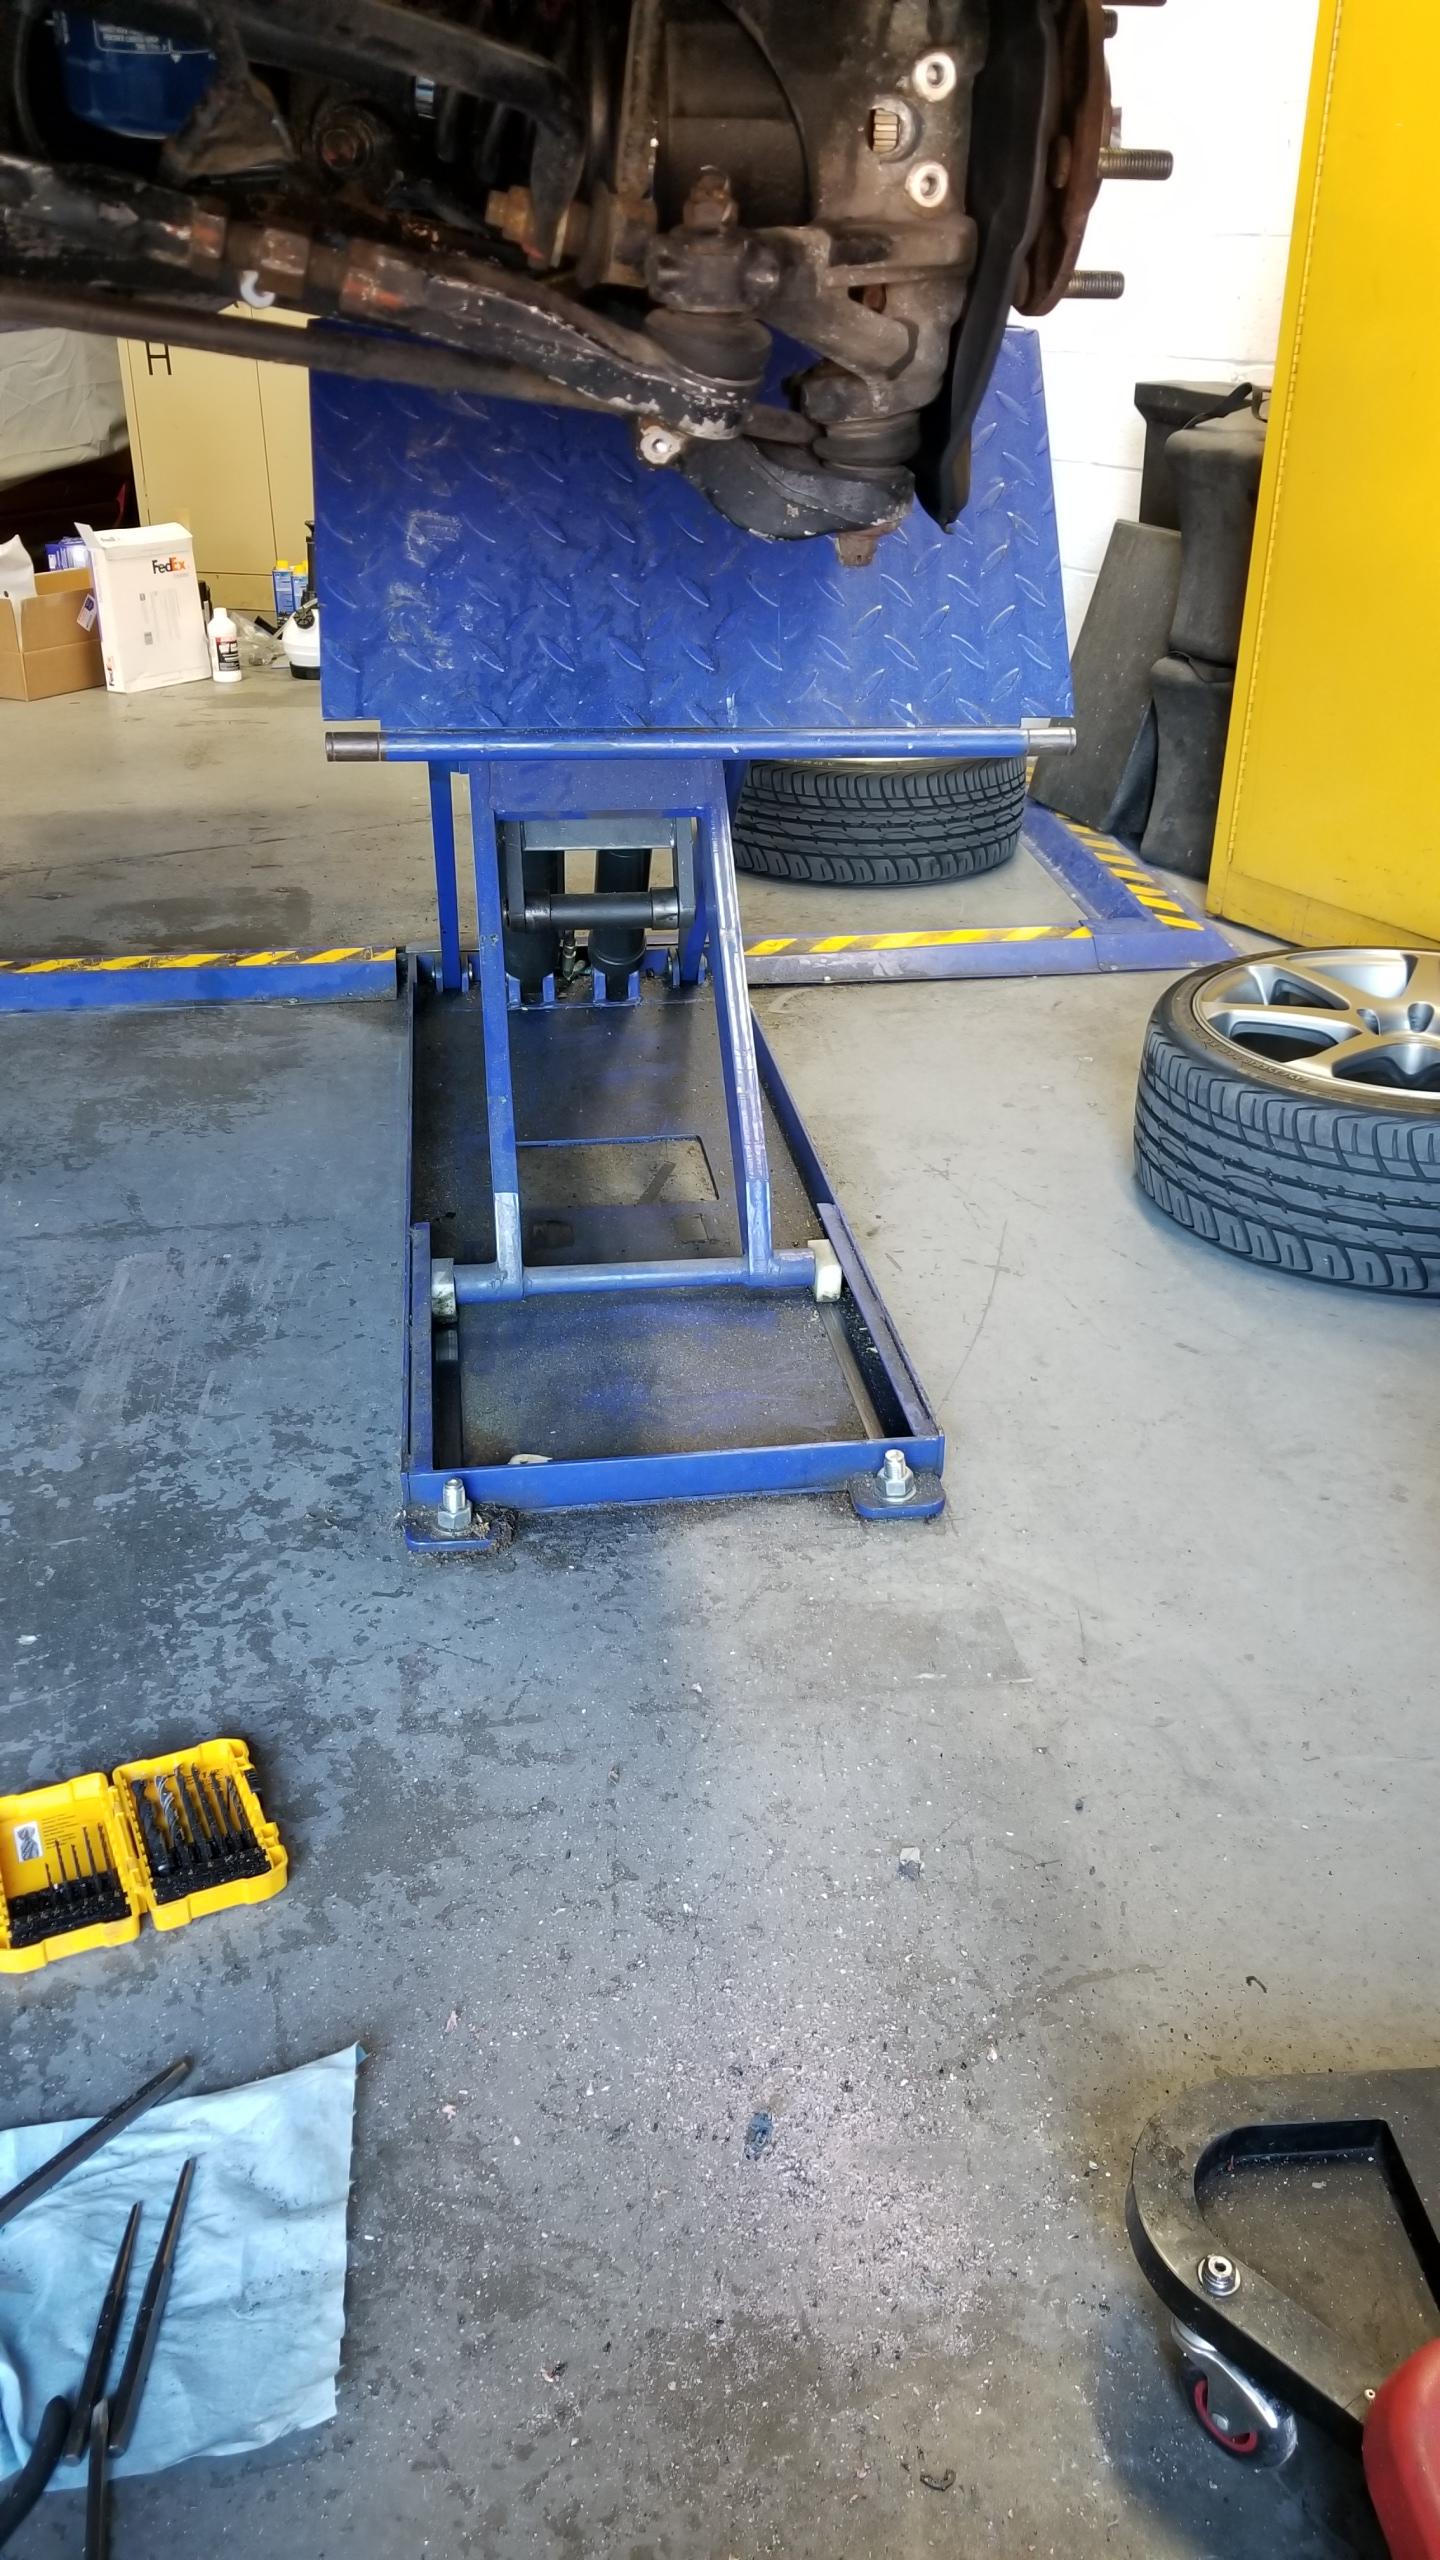
Finally time for brake bleeding. I had big and fancy plans for this, but I was very low on time and someone else needed the lift I was on so I enlisted a friend to help with the old fashioned way. I put a block under the pedal to prevent us from pushing it to the floor and potentially ruining a seal in the master cylinder, I'm good wish just destroying one or two parts during a project.
Fluid used was ATE TYP 200 DOT4, I'm sure it will be more than adequate for my purposes. Some friends use it in their dedicated track cars so good enough for me.
I had big plans for this thing, it took forever to find all the right fittings and hose sizes, and I had to modify the Ares pressure bleeder barb to a 1/4" fitting which is the only size readily available.
The red cap is a Motive universal bleeder adapter which is strapped to the master cylinder and just covers it with a large rubber grommet, I haven't tested how well it holds pressure yet. The blue Power Probe adapter is juuuuuust too small to fit snugly inside the master reservoir and the quick disconnect is 1/4" but doesn't hold pressure well with the QD fittings I bought.
I ended up wasting money buying all this stuff but hopefully can find a use for it during future brake jobs, I think it will work but I didn't have time to test it out.
Looking real good with everything back together, and with some proper wheels & coils they should fit the overall look even better. I'll do some touch-up on the paint when I go to replace the RR wheel sensor.
Oh yeah, and the performance is great too. No leaks (yet) which means I didn't unknowingly bugger anything up. I'm still breaking in the pads and rotors (EBC says ~100 miles street, then hard stops, then ~1000 mi total until full performance) but they grab much harder than the stock pads without being hard to modulate. The pedal travel is further before they start grabbing which feels odd but I read is normal from Kaz's blog after a full rebuild since the pistons slide back & forth much easier.
This took way longer than I thought it would, but I ran into a lot of issues with doing this for the first time on the car, not to mention all the work that went into restoring various parts. Future brake jobs should go much smoother now that everything is sorted and easily swappable without a dremel, drill, hammer, chisel, stress ball, what have you. Overall success but with lots of challenges along the way :wink:
Next up is fixing a few things like the sensor, front wheel bearings, adjusting windows, and also installing the GROM adapter and the new leather steering wheel & ebrake covers to replace the gross looking stock ones. After that, finally some new wheels/tires/coilovers to treat myself a bit, I'm getting a bit sick of what the car came with. Thanks for following along.
Last edited:

Dang, that's a bummer about the caliper paint job and the centric seal kits, I've used centric seal kits a few times and never had any issues like that but that definitely doesn't look like its even close to the right size.
The final result turned out great though!
Somewhat related, I learned a hard lesson about extractors when a 6mm bolt broke off in my 540i engine block, then I broke an extractor off trying to get it out. Fortunately the motor was already out of the car, so dragging the whole engine to a machine shop and paying the "u dun f*cked up m8" price to have the bolt removed wasn't near as bad as it could have been.
"It's twice as hard and half the size, that's not gonna work!" - Wise words from some geezer on YouTube who makes a living EDMing broken taps and extractors.
Last edited:
Maybe their seal kits changed over time and they threw in different piston boots. Everything else but that worked just fine.
Thank you") . Hopefully the finish lasts a long time.
. Hopefully the finish lasts a long time.
Seems like those bracket bolts break all the time, I just came across another Kaz blog post where he had to drill and tap both of them as well. My only solace is that at some point I will have removed or broken/tapped every bolt on the car and won't have to deal with it any more. I hadn't heard of EDM before, had to look it up.
Thank you
. Hopefully the finish lasts a long time.Seems like those bracket bolts break all the time, I just came across another Kaz blog post where he had to drill and tap both of them as well. My only solace is that at some point I will have removed or broken/tapped every bolt on the car and won't have to deal with it any more. I hadn't heard of EDM before, had to look it up.
The brakes came out looking great!
For the inner fender touch-up, some black Plasti-Dip spray would more than suffice.....that's what I used on our purple NSX a few years ago and it's held up just fine.
For the inner fender touch-up, some black Plasti-Dip spray would more than suffice.....that's what I used on our purple NSX a few years ago and it's held up just fine.
Thanks! Everyone seems to like plasti-dip but me, lol. It turned to mush on my daily after a few summers. For the inner fenders I might try it for ease of application and it's not exposed to UV.
100 mile review, the brakes are much different to the stock setup. Before, I had to stomp the brakes to try and lock the wheels up, now it takes moderate to 75% pressure to lock up the fronts (ABS/TCS off with the missing wheel sensor). The back gets a bit loose which corroborates the overly front biased system discussions, either way the cold bite of the Yellows is fantastic. Of course, even after this new install my wheels are absolutely covered in dust already when the stock pads didn't dust at all, so I'd probably just go with the Redstuffs next time and keep the Yellows for performance driving.
100 mile review, the brakes are much different to the stock setup. Before, I had to stomp the brakes to try and lock the wheels up, now it takes moderate to 75% pressure to lock up the fronts (ABS/TCS off with the missing wheel sensor). The back gets a bit loose which corroborates the overly front biased system discussions, either way the cold bite of the Yellows is fantastic. Of course, even after this new install my wheels are absolutely covered in dust already when the stock pads didn't dust at all, so I'd probably just go with the Redstuffs next time and keep the Yellows for performance driving.
I've used the EBC Red Stuff pads for years, you get a lot of dust while they bed in but calm down after a short while. I would think the Yellow Stuff pads are a more track day focused pad?
I've used the EBC Red Stuff pads for years, you get a lot of dust while they bed in but calm down after a short while. I would think the Yellow Stuff pads are a more track day focused pad?
I have both of these pads, and the Yellow Stuff work just fine as an upgraded street pad (at least during Michigan Summers).
That makes sense, I still haven't bedded them fully yet so hopefully the dust reduces over time. The Yellows are one step more aggressive than the Reds, from what I've read it can be used for both street/track. For my usage %'s I probably should've just gotten the Reds but they're an easy swap if I want and I can save the Yellows to swap in for autoX/mountains/w.e.
Out of curiosity, would it be advantageous to put Reds on the front and Yellows in back to pull some braking power to the rear wheels? I was considering that kind of setup but have never mixed pads before. EBC seems to allow it in their FAQs.
Oh yeah, and today is my 1 year anniversary with the car :biggrin:
Last edited:
More small updates.
New wheel speed sensor arrived from Japan. All nice and clean..

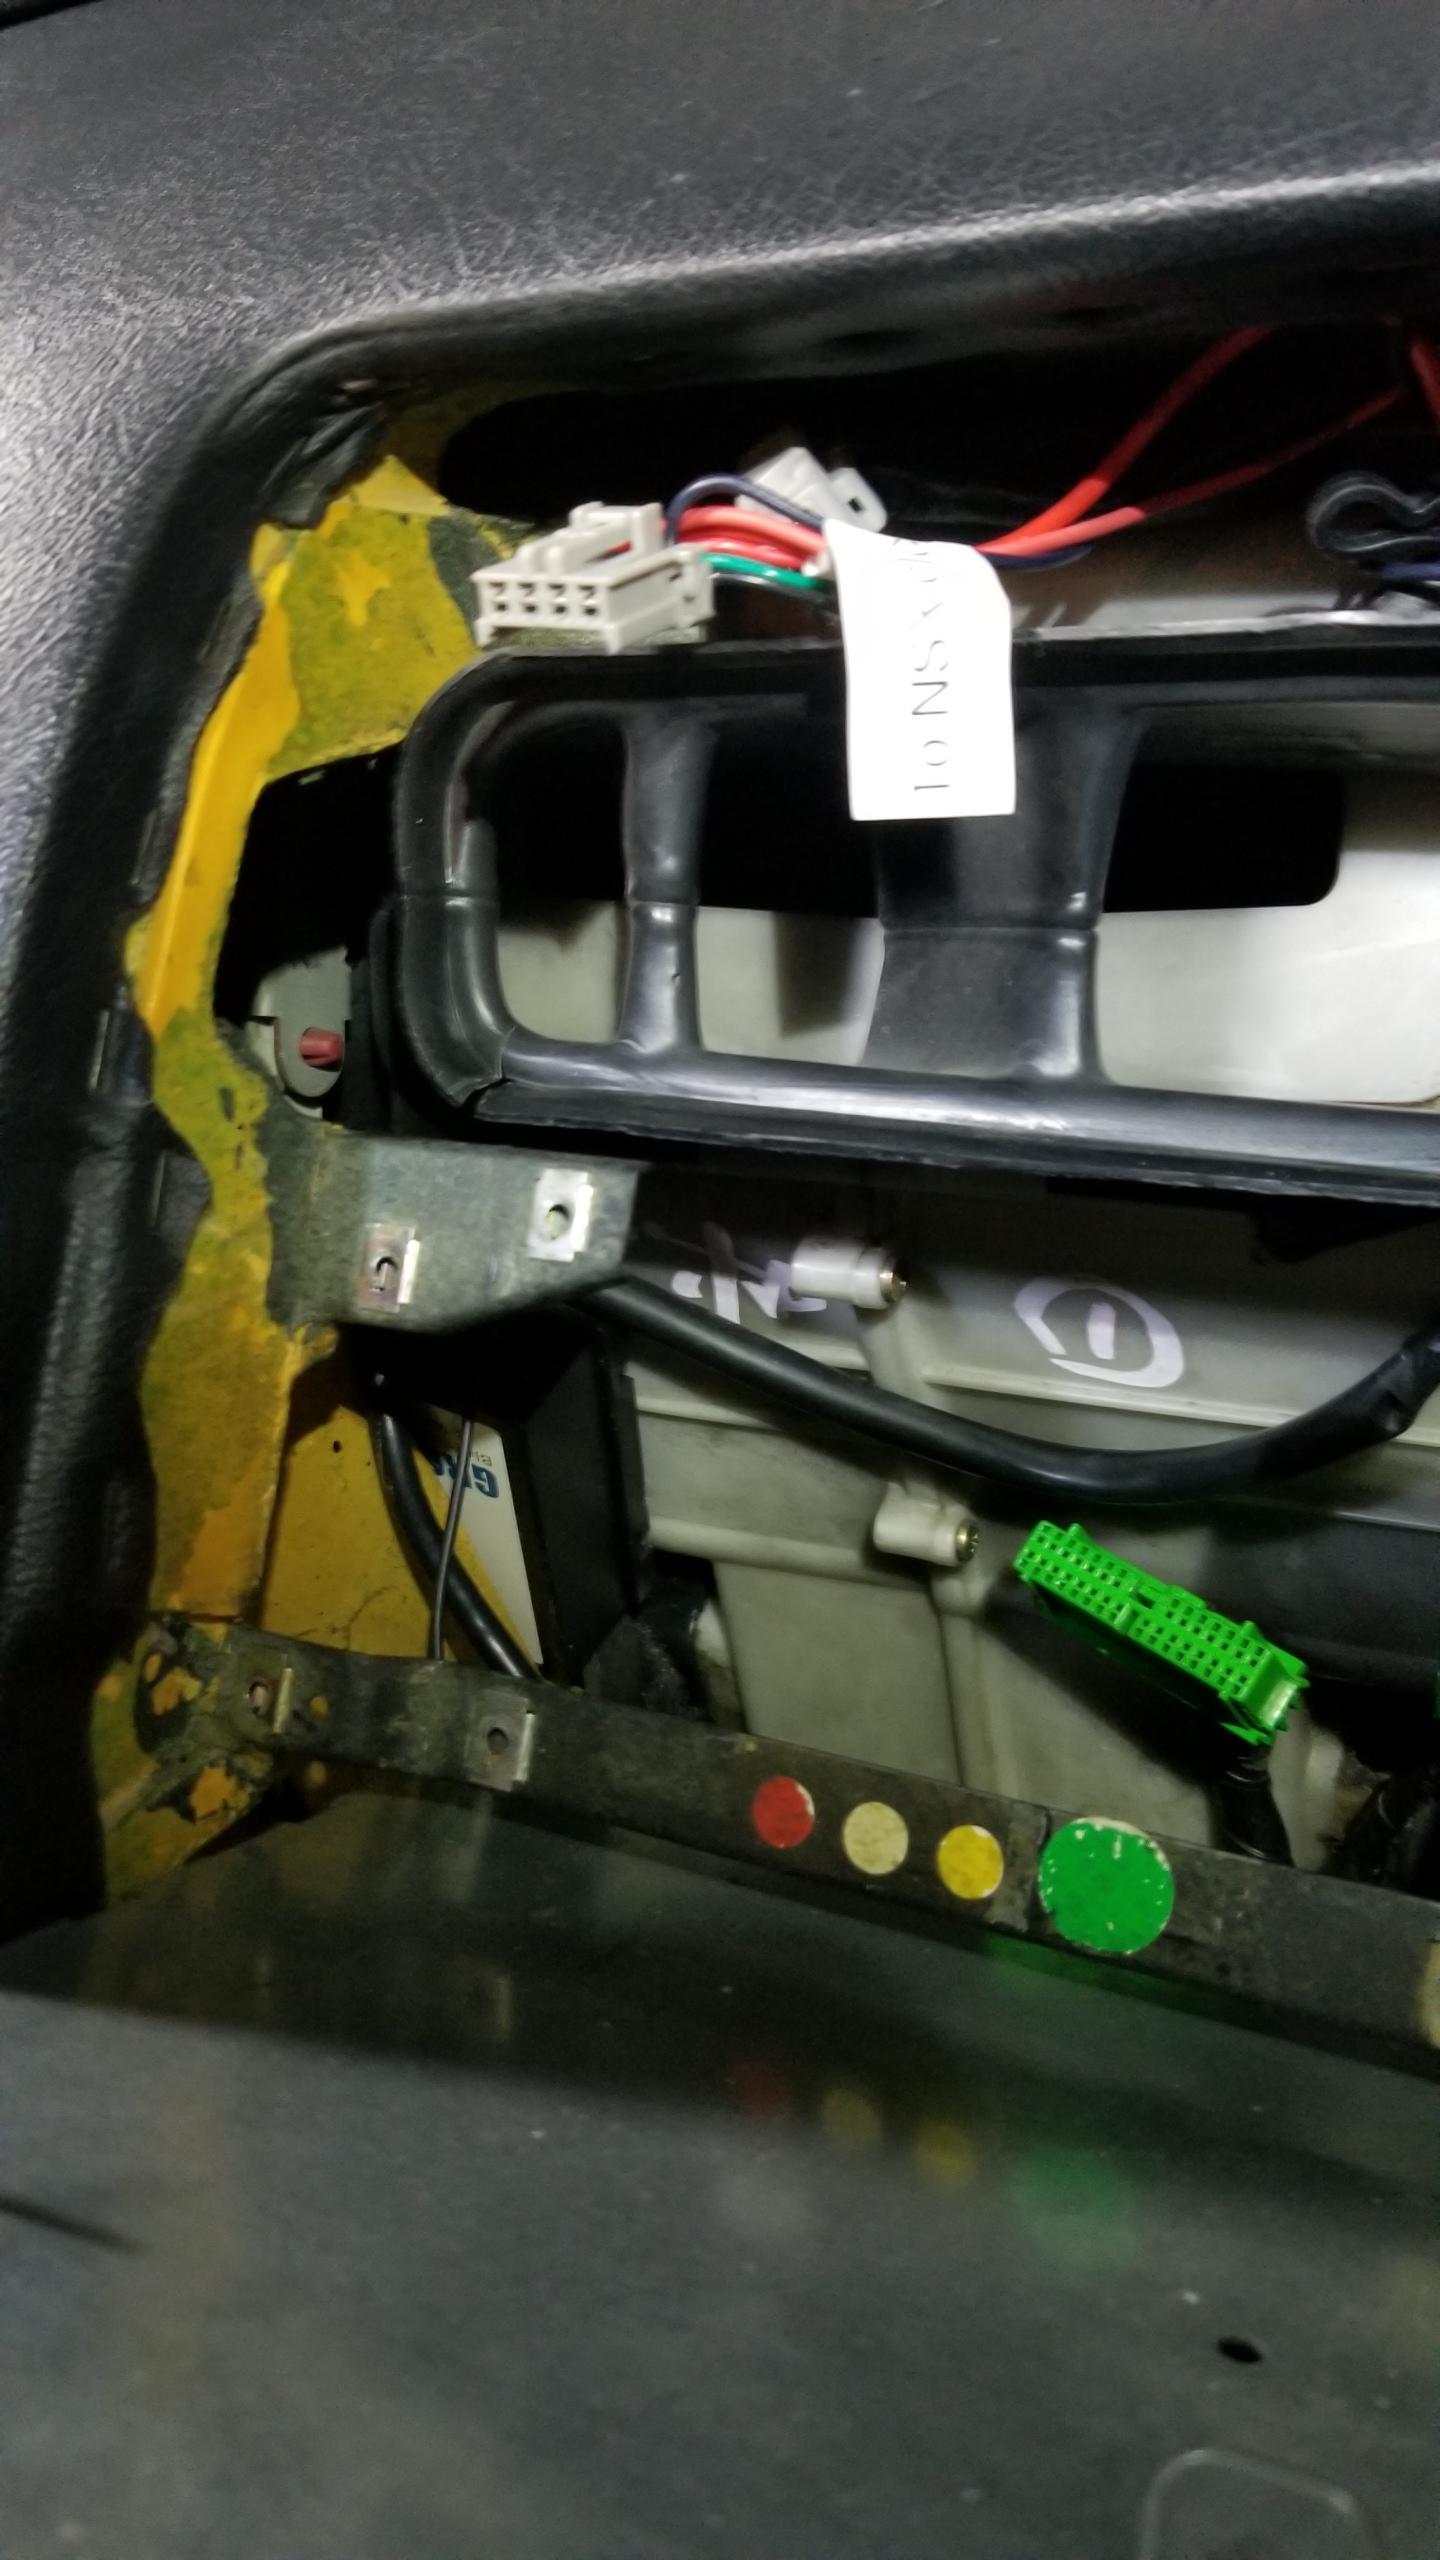
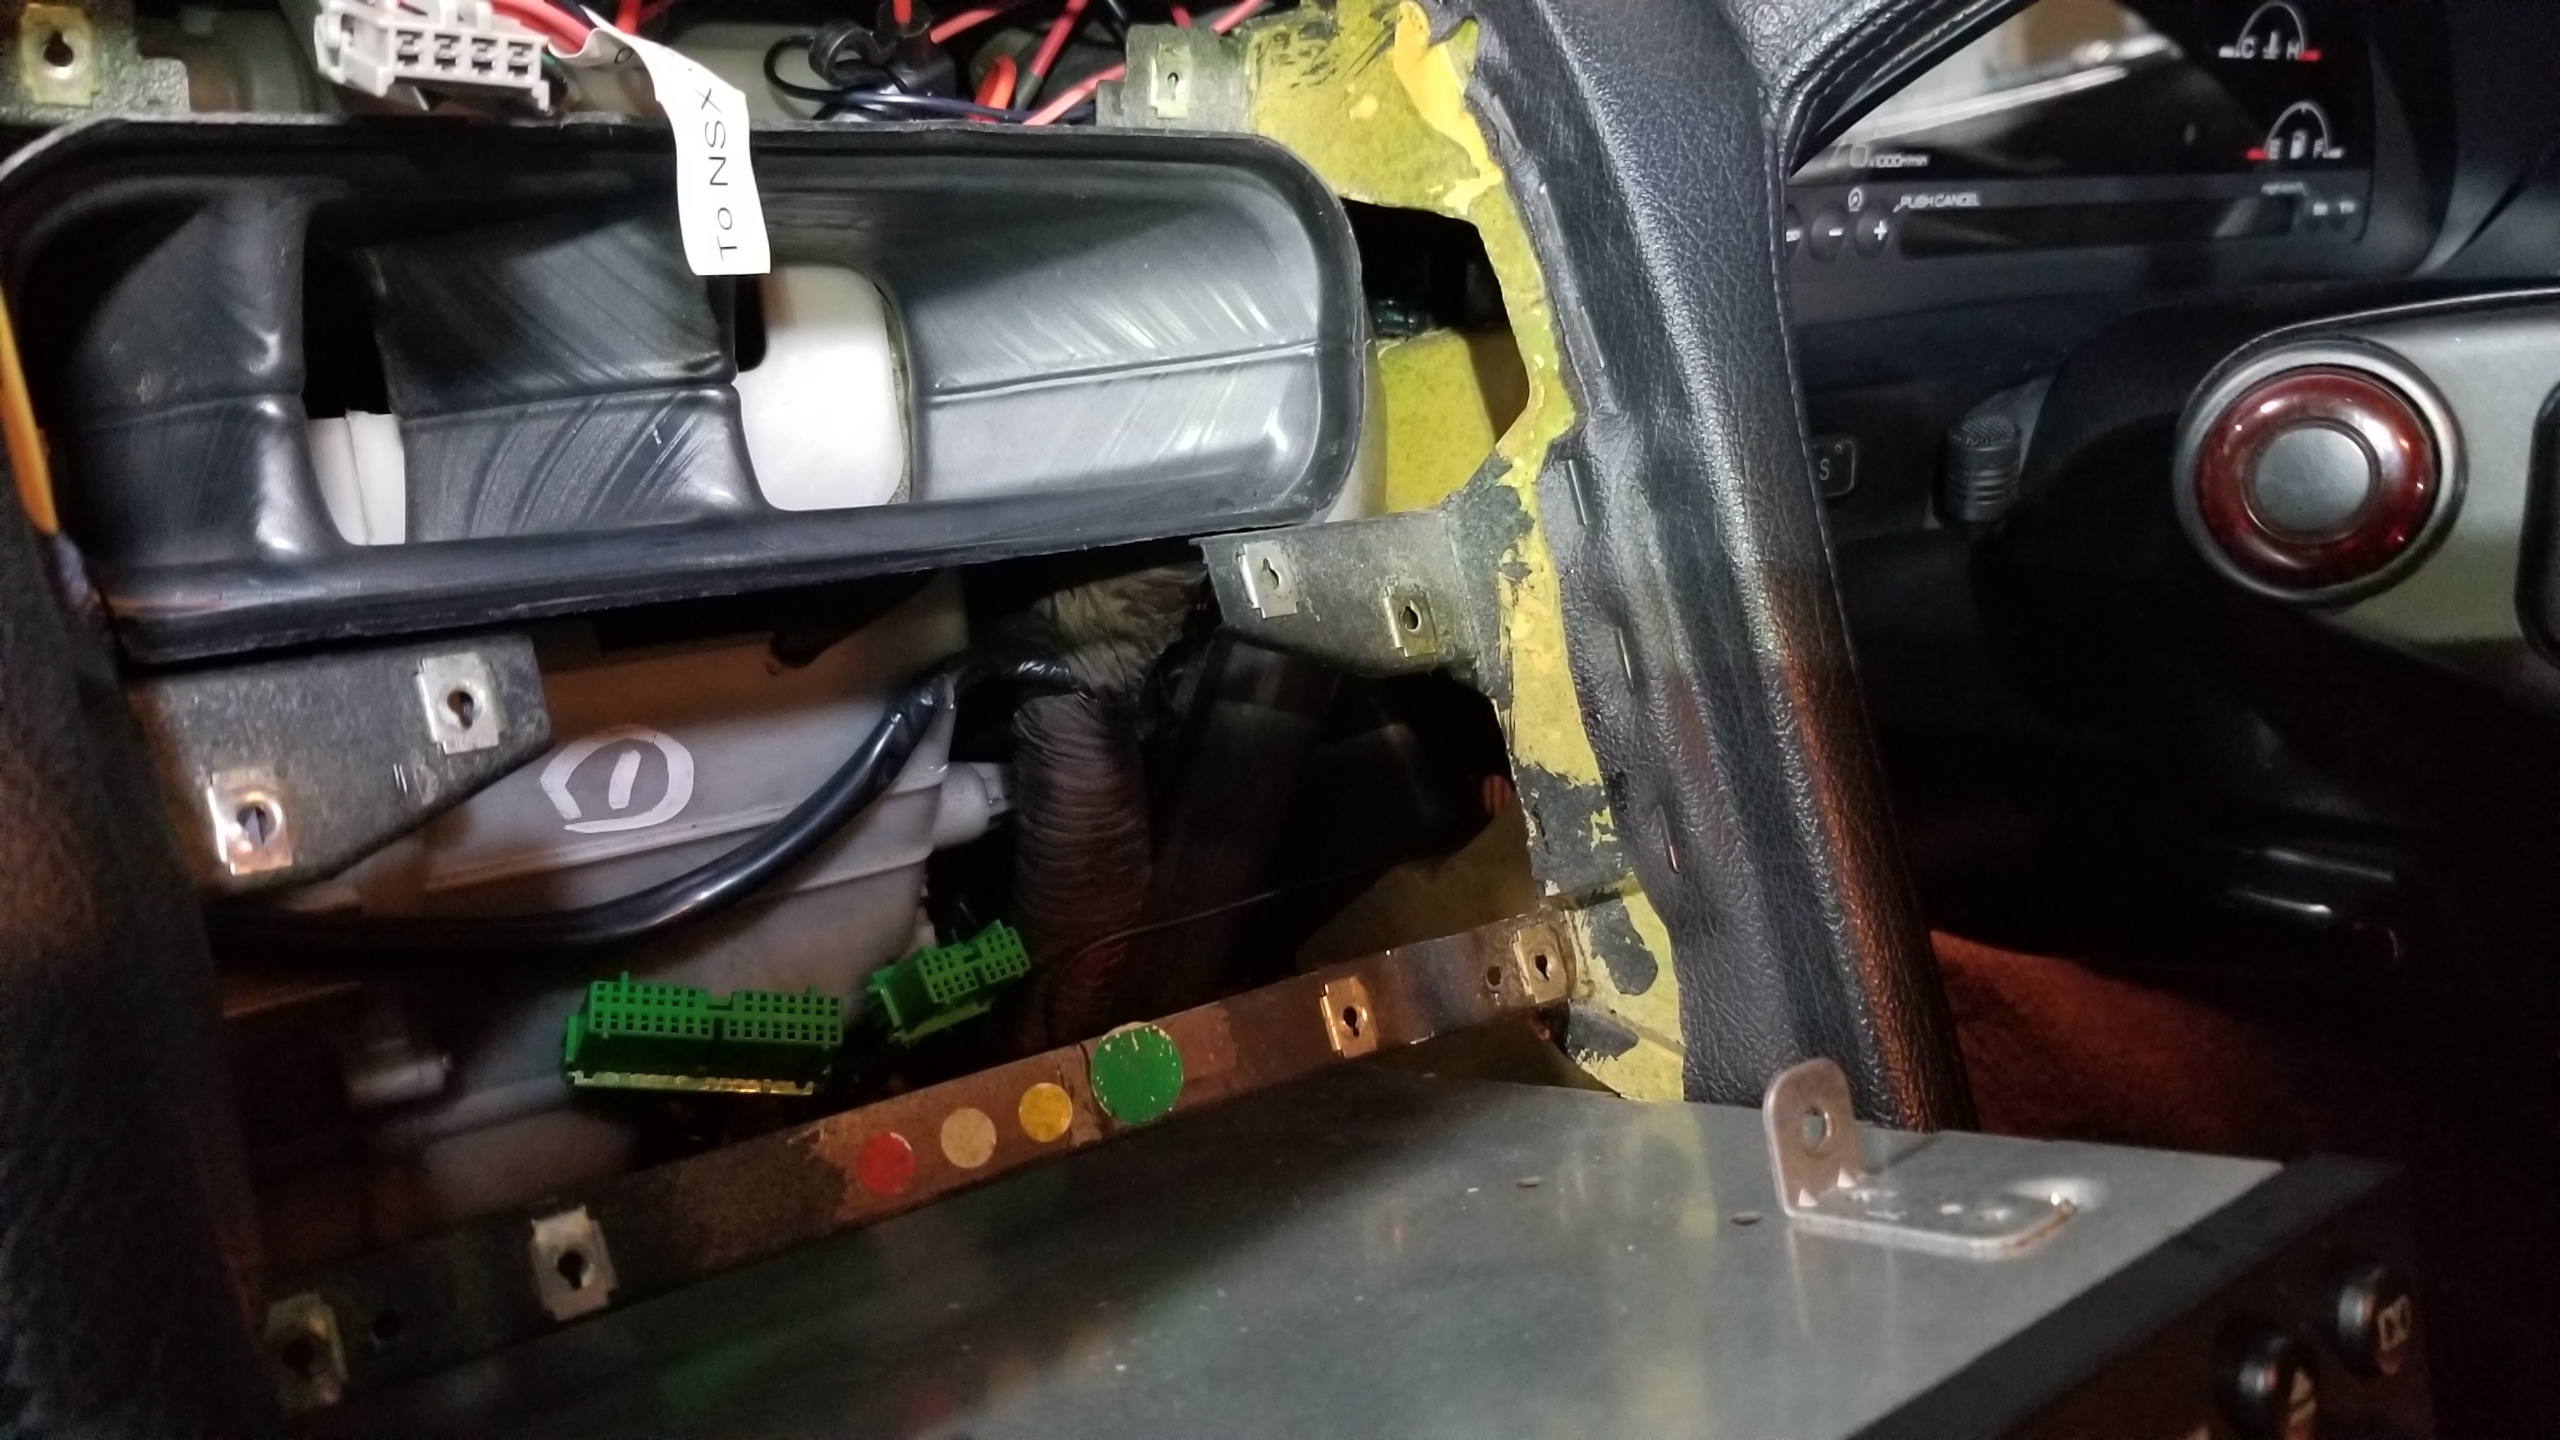
This is the plug for the RR sensor inside the trunk. The two other connectors were for the JDM catalytic converter temperature sensors.
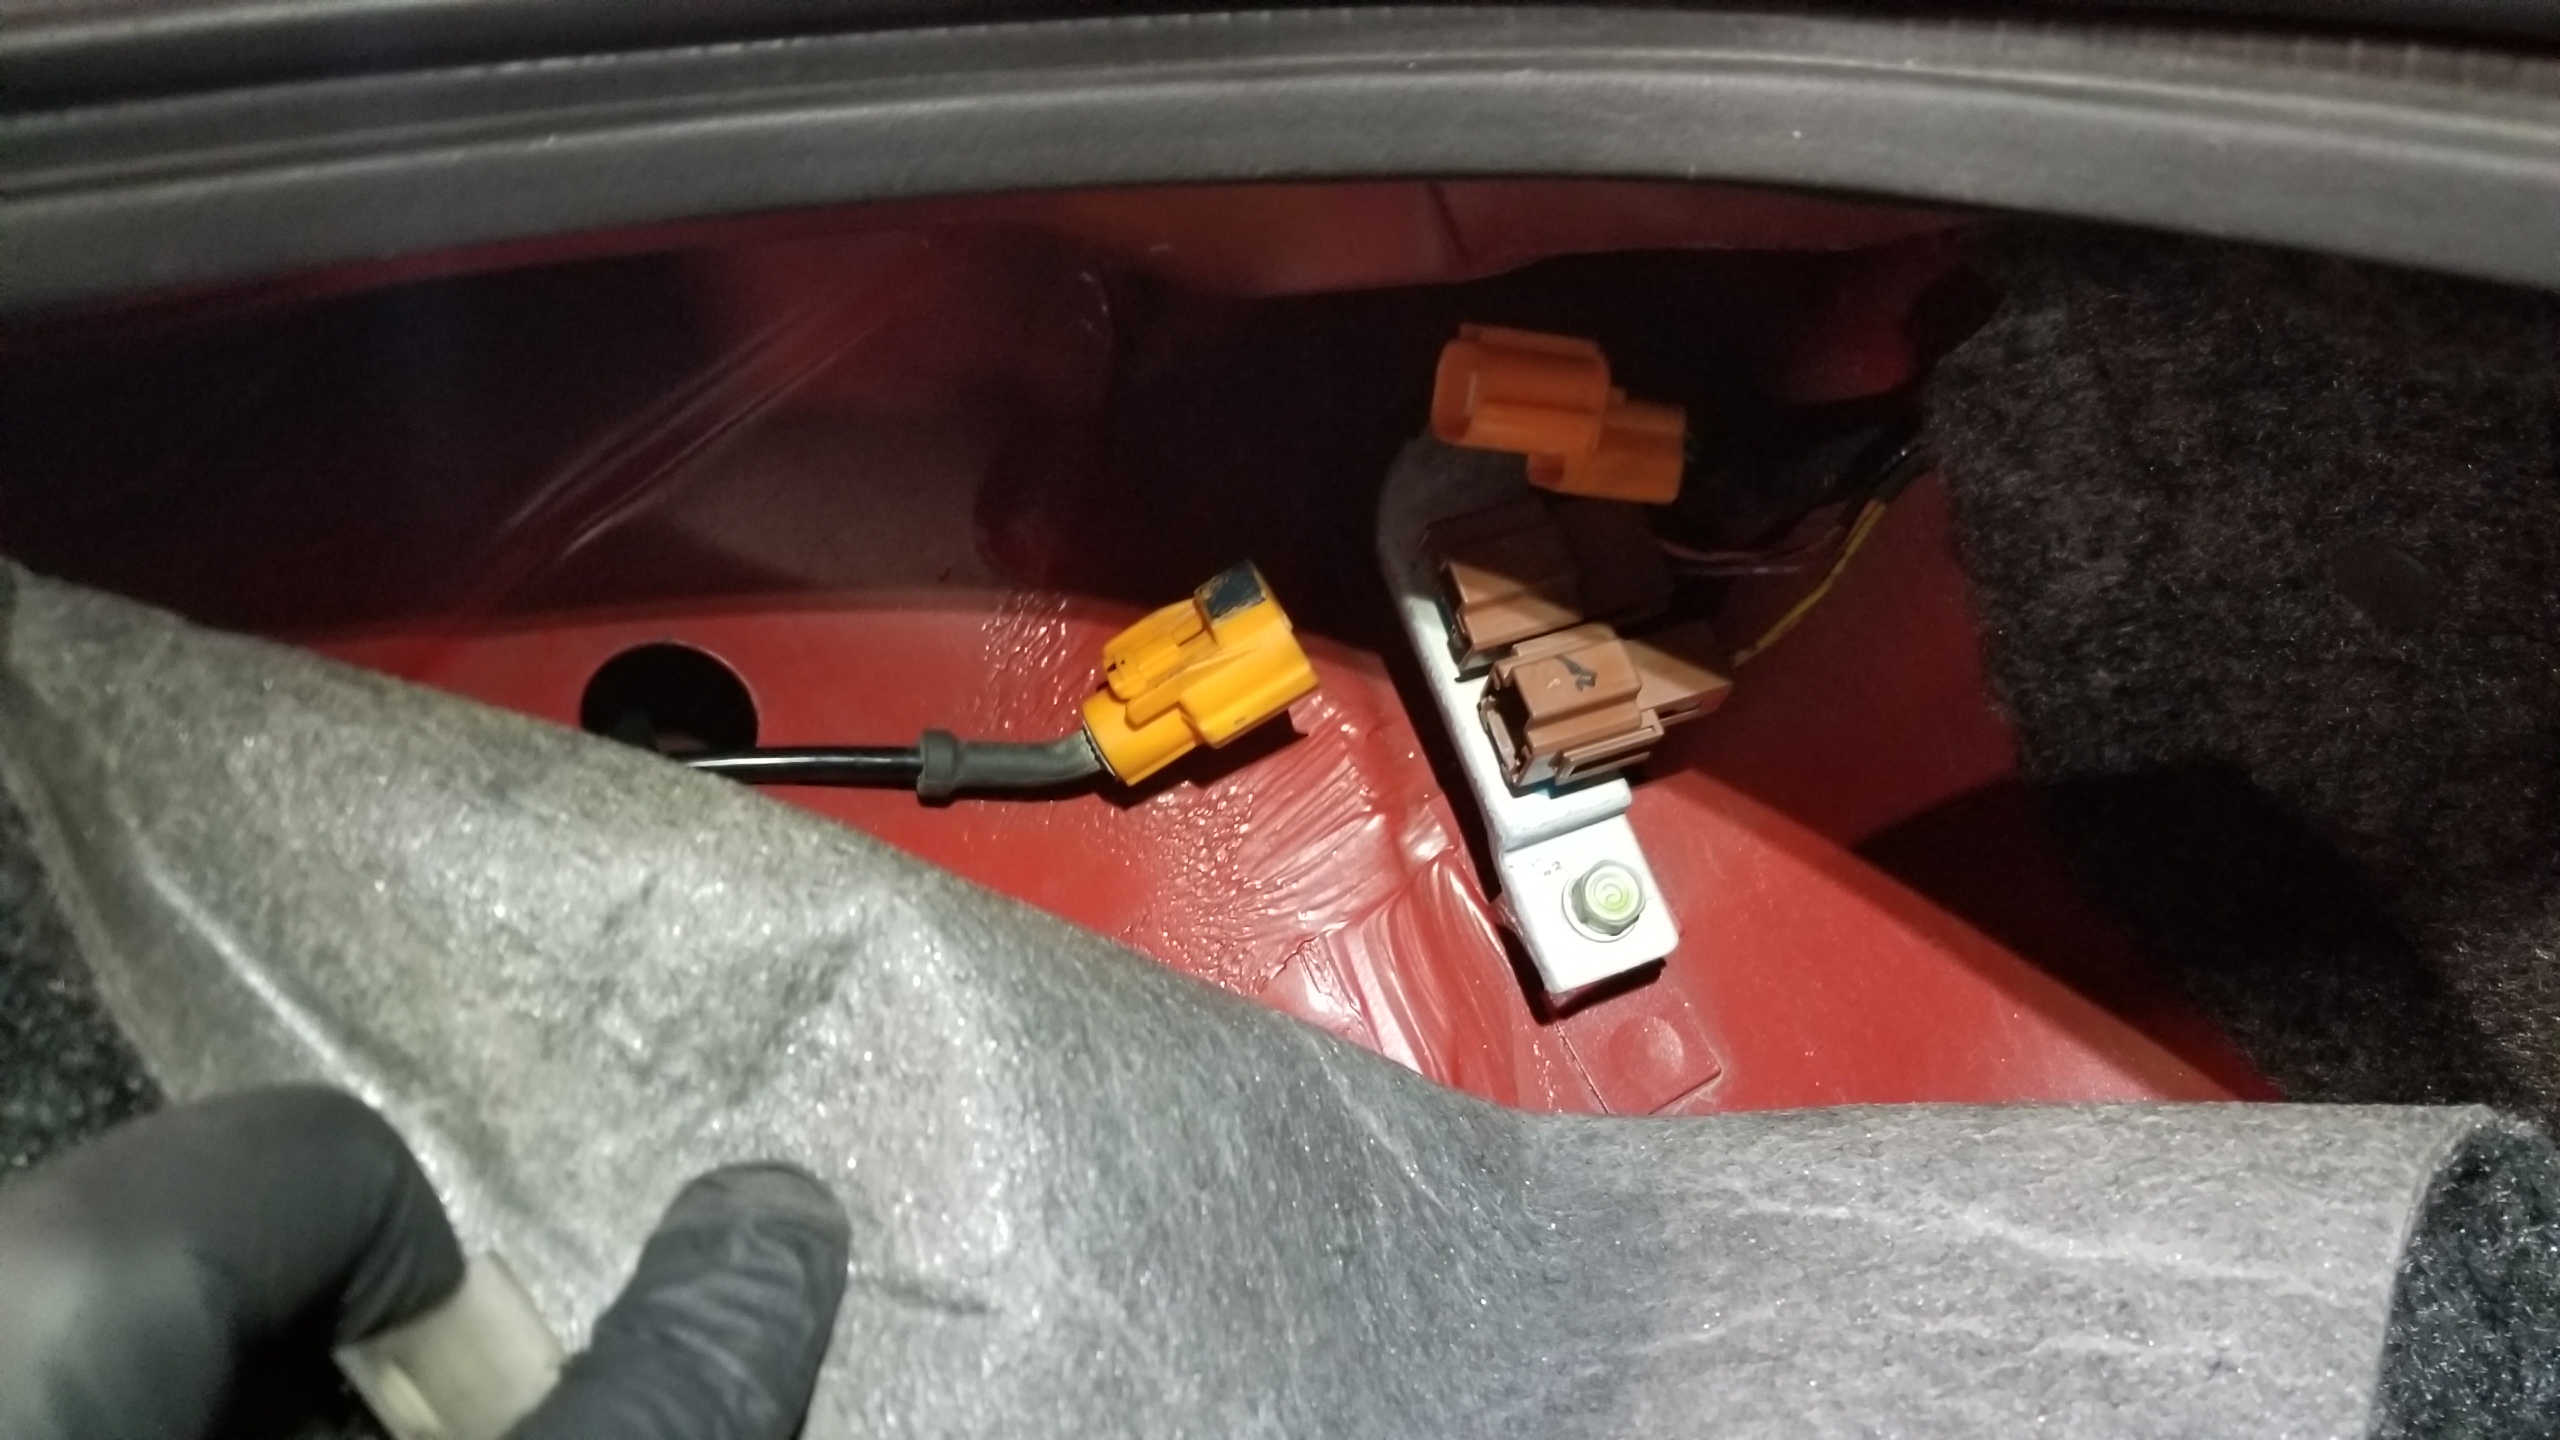
New sensor installed, of course the hardest part was pushing the grommet back up into the trunk properly. The topmost bracket is the only difference between early model year NSX and the later years, it can be bent a bit into shape. Not pictured.
Everything works again, back in business. The new sensor was coated in silicone paste to hopefully facilitate future removal.
Buried behind the center console is the new GROM bluetooth adapter which plugs into the unused CD changer port on the back of the radio. Once my phone was paired, it's super easy to use. It connects quickly when the car is turned on and plays music without any issues at all, no tape deck to aux cable adapter required.
Though my radio repair was a success and made the tape deck work again, the sound quality was pretty bad and inconsistent between channels. The GROM bypasses that and now the radio sounds like new again, there's no more capacitors left to replace there..
Honestly, I'm not sure if I care much about putting in a new audio system anymore. It's the best mod I did to my daily car, but I don't see much point in the NSX anymore, half the time I have it turned low anyways so I can hear the car. I'd like Android Auto but I can make that work with a Honda Navpod and a tablet or something when I get around to it, probably not anytime soon. I'd like to refinish the center console first, probably when it gets a bit warmer outside.

Got around to fixing the lettering on the calipers by hand.
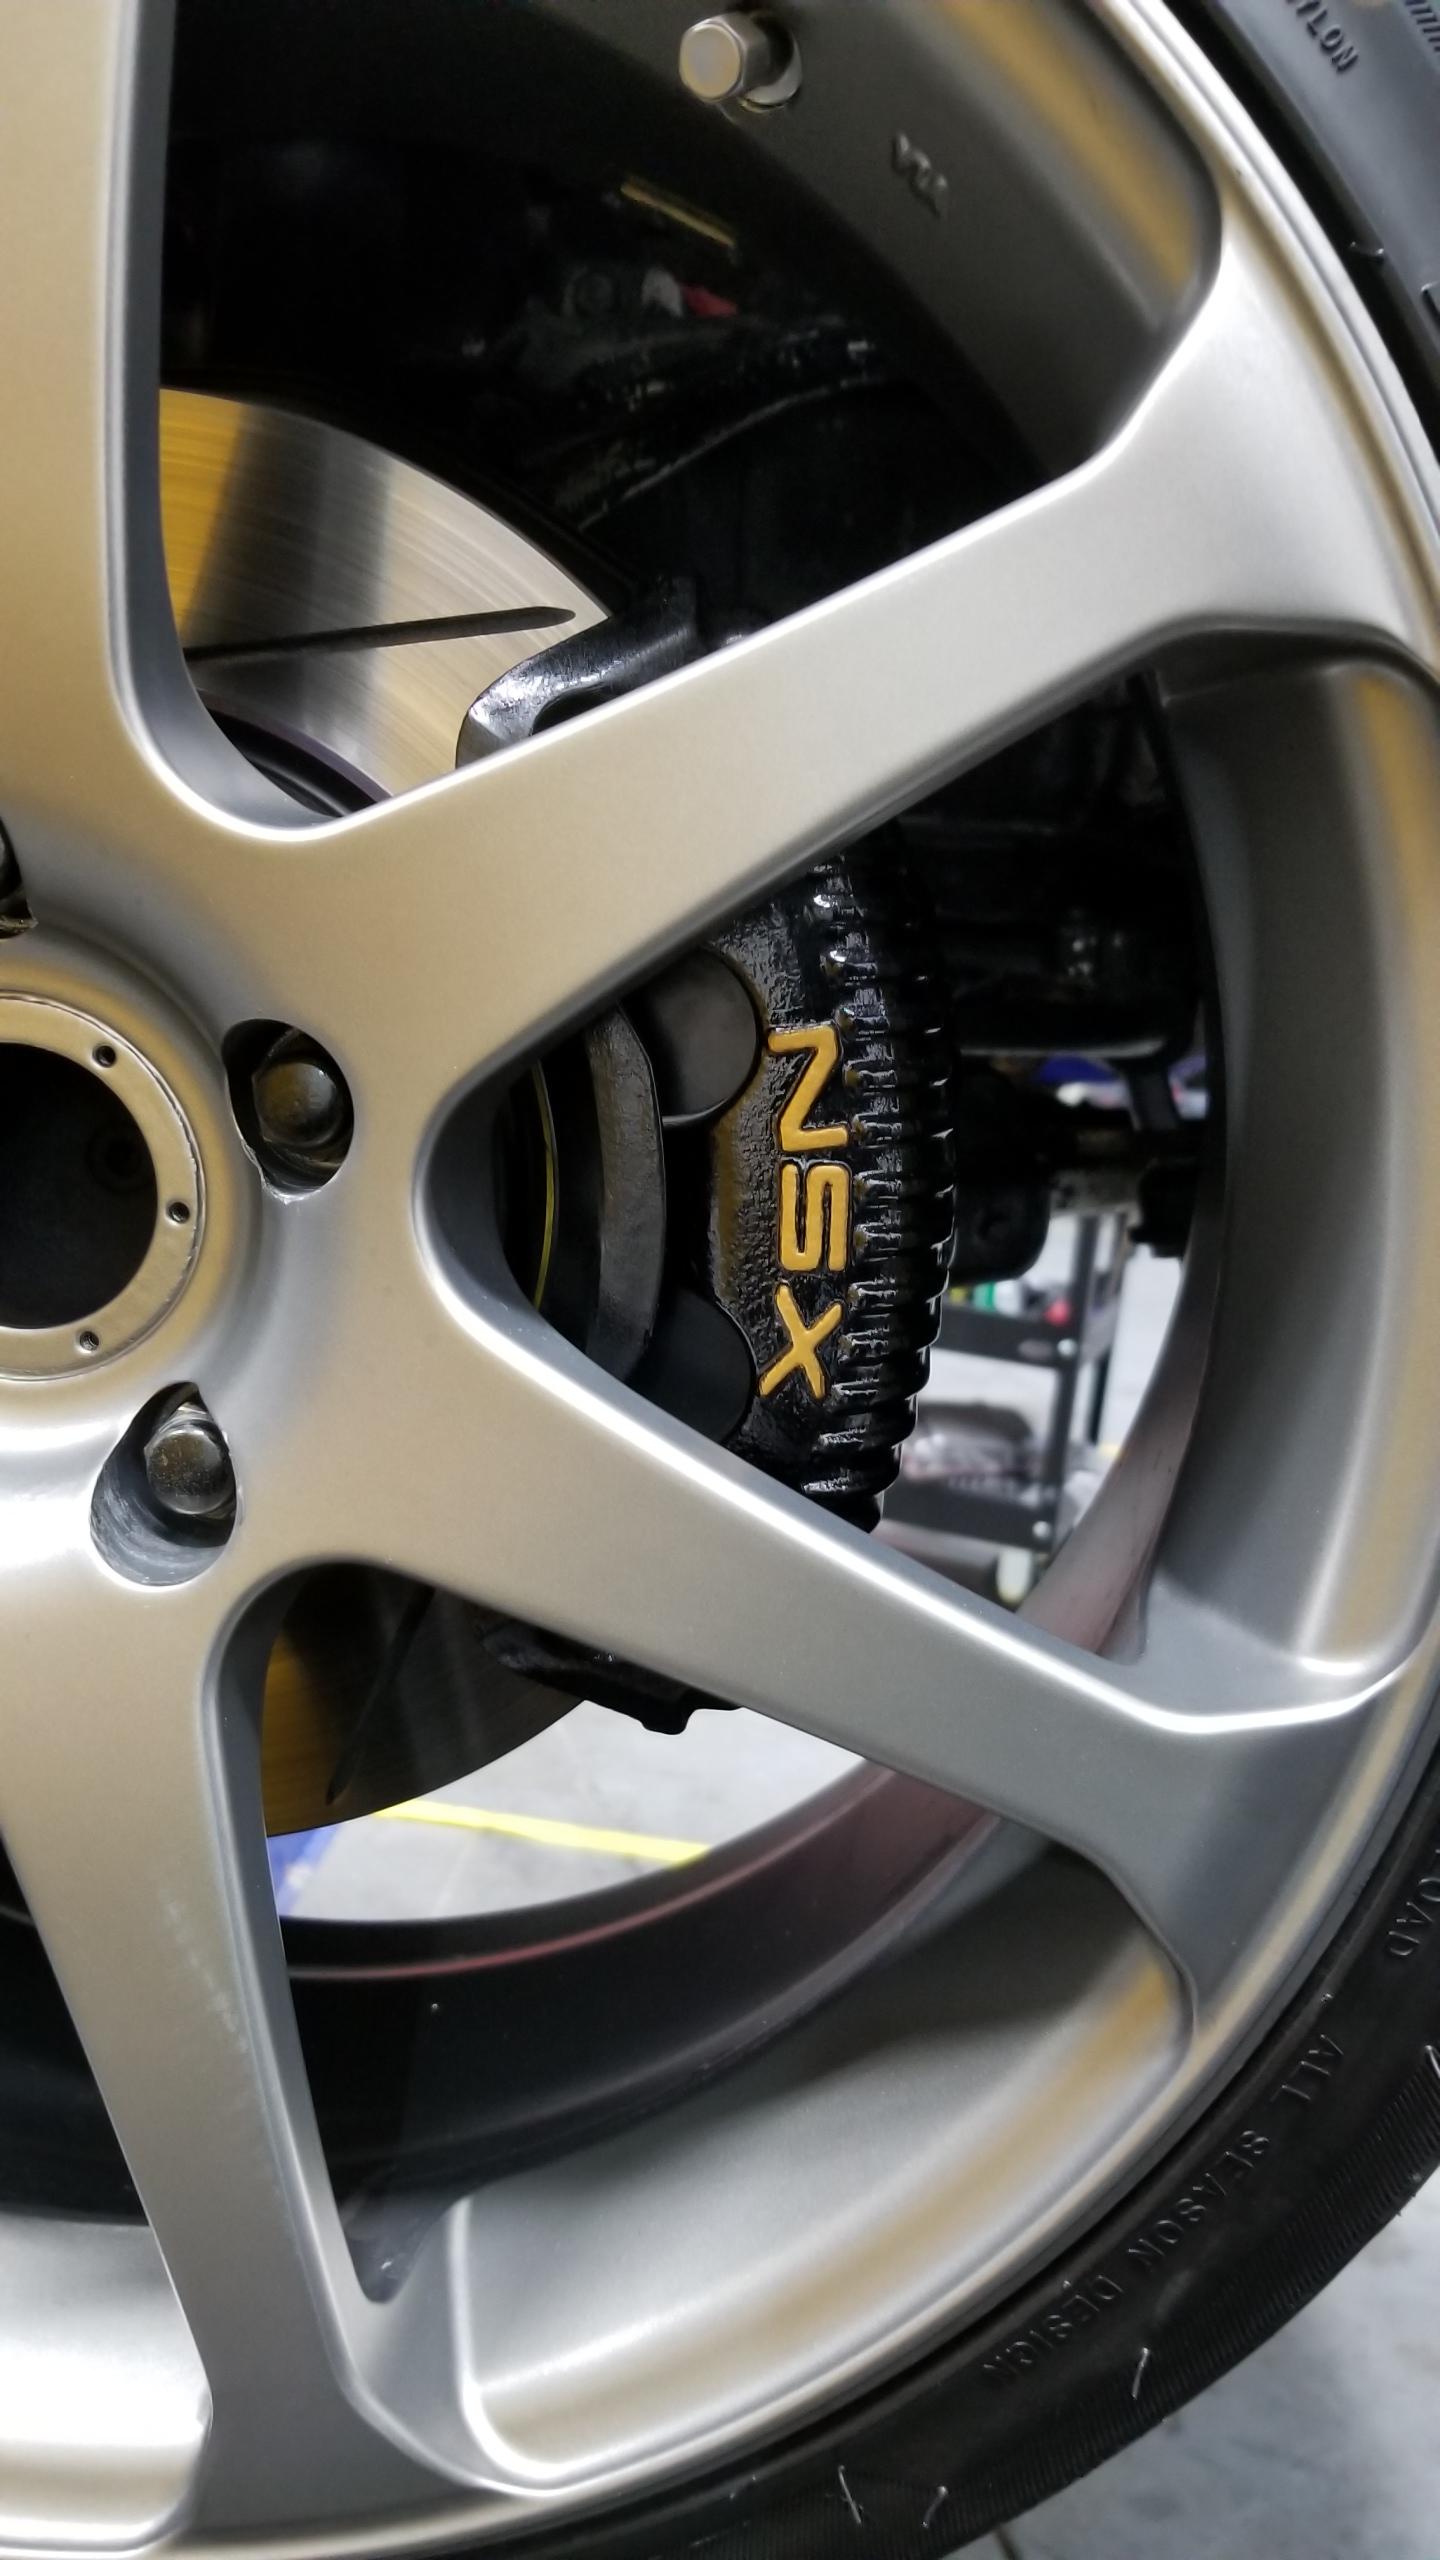
Fronts fixed. I should probably clear coat the gold letting so it doesn't get damaged by cleaners.
Davis Design cupholders installed. It's a well designed piece, no way it's going anywhere and reachable from the driver's seat without being intrusive.
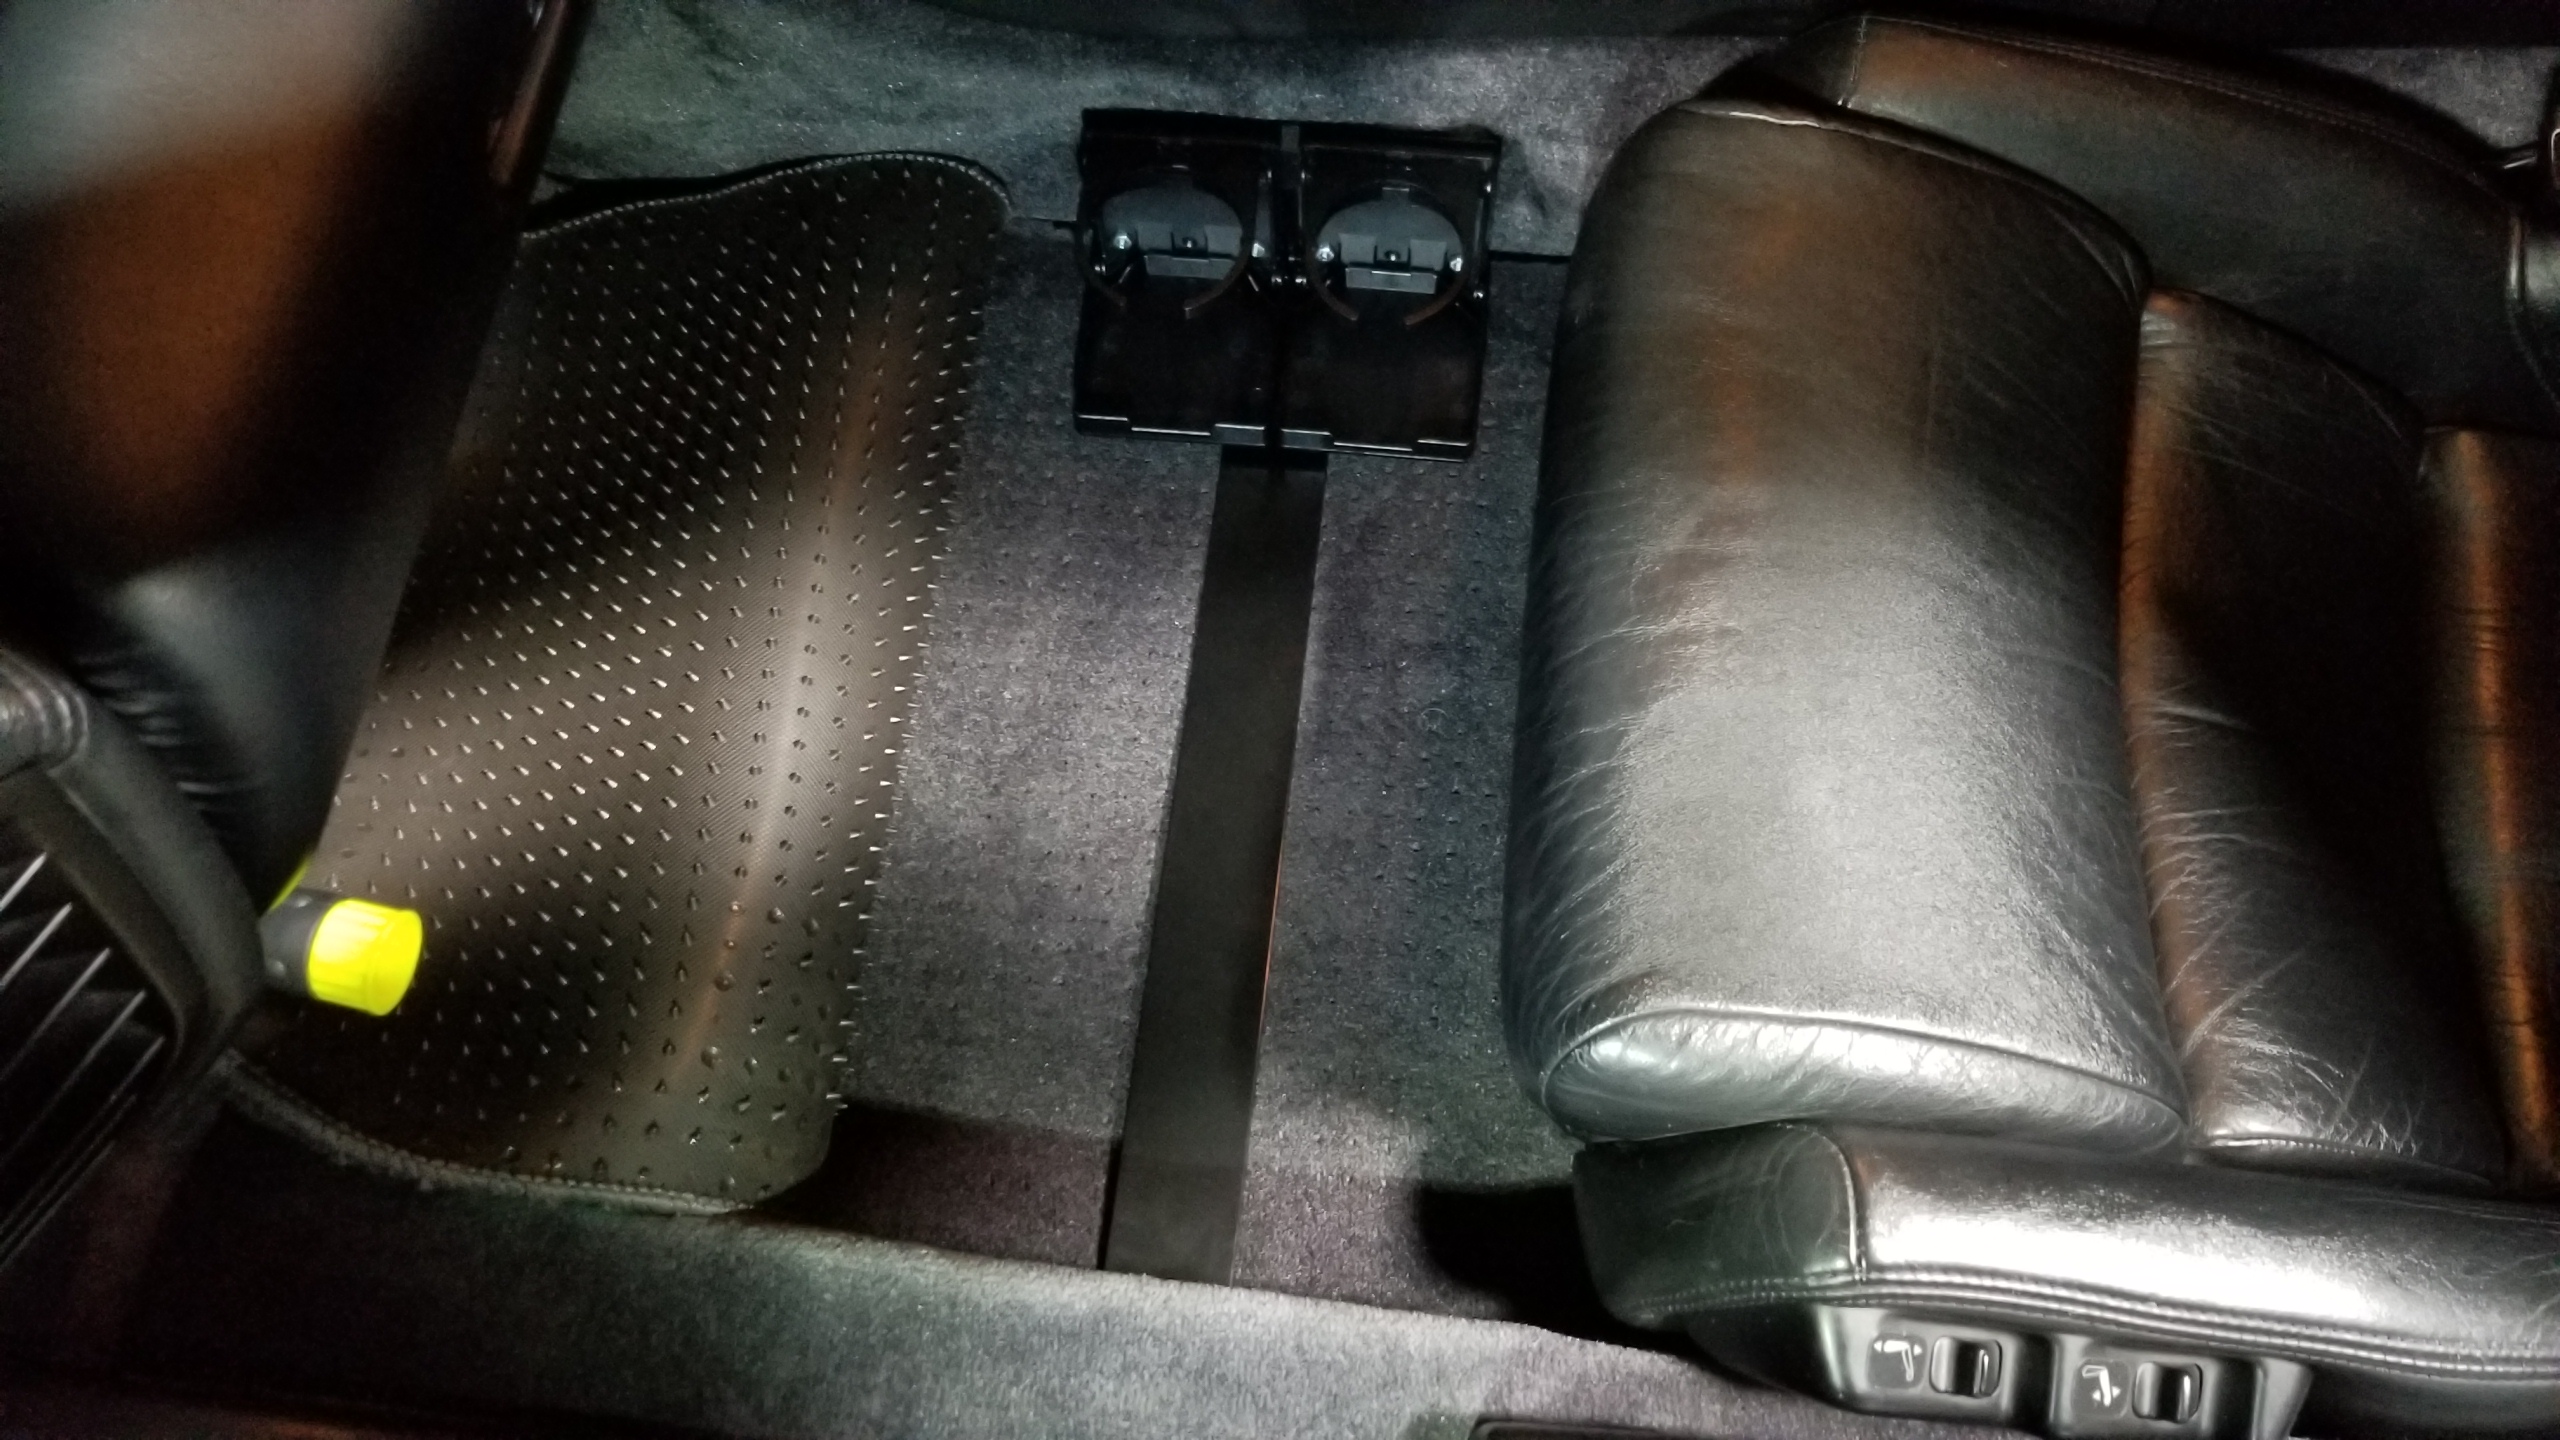
Now I can actually store drinks without wedging it in the passenger seat! The can is a prop I promise.

I've got some misc. stuff left to do, like putting on the David Design coil guards, CRF pulley shield, getting the wheel & armrest re-covered, adjusting the windows properly...the last one I've been avoiding for a good while and have been keeping the windows down a bit in storage to prevent the new door seals from setting in the wrong positions. I'll bite the bullet on that shortly, I'm sure it will be an adventure.
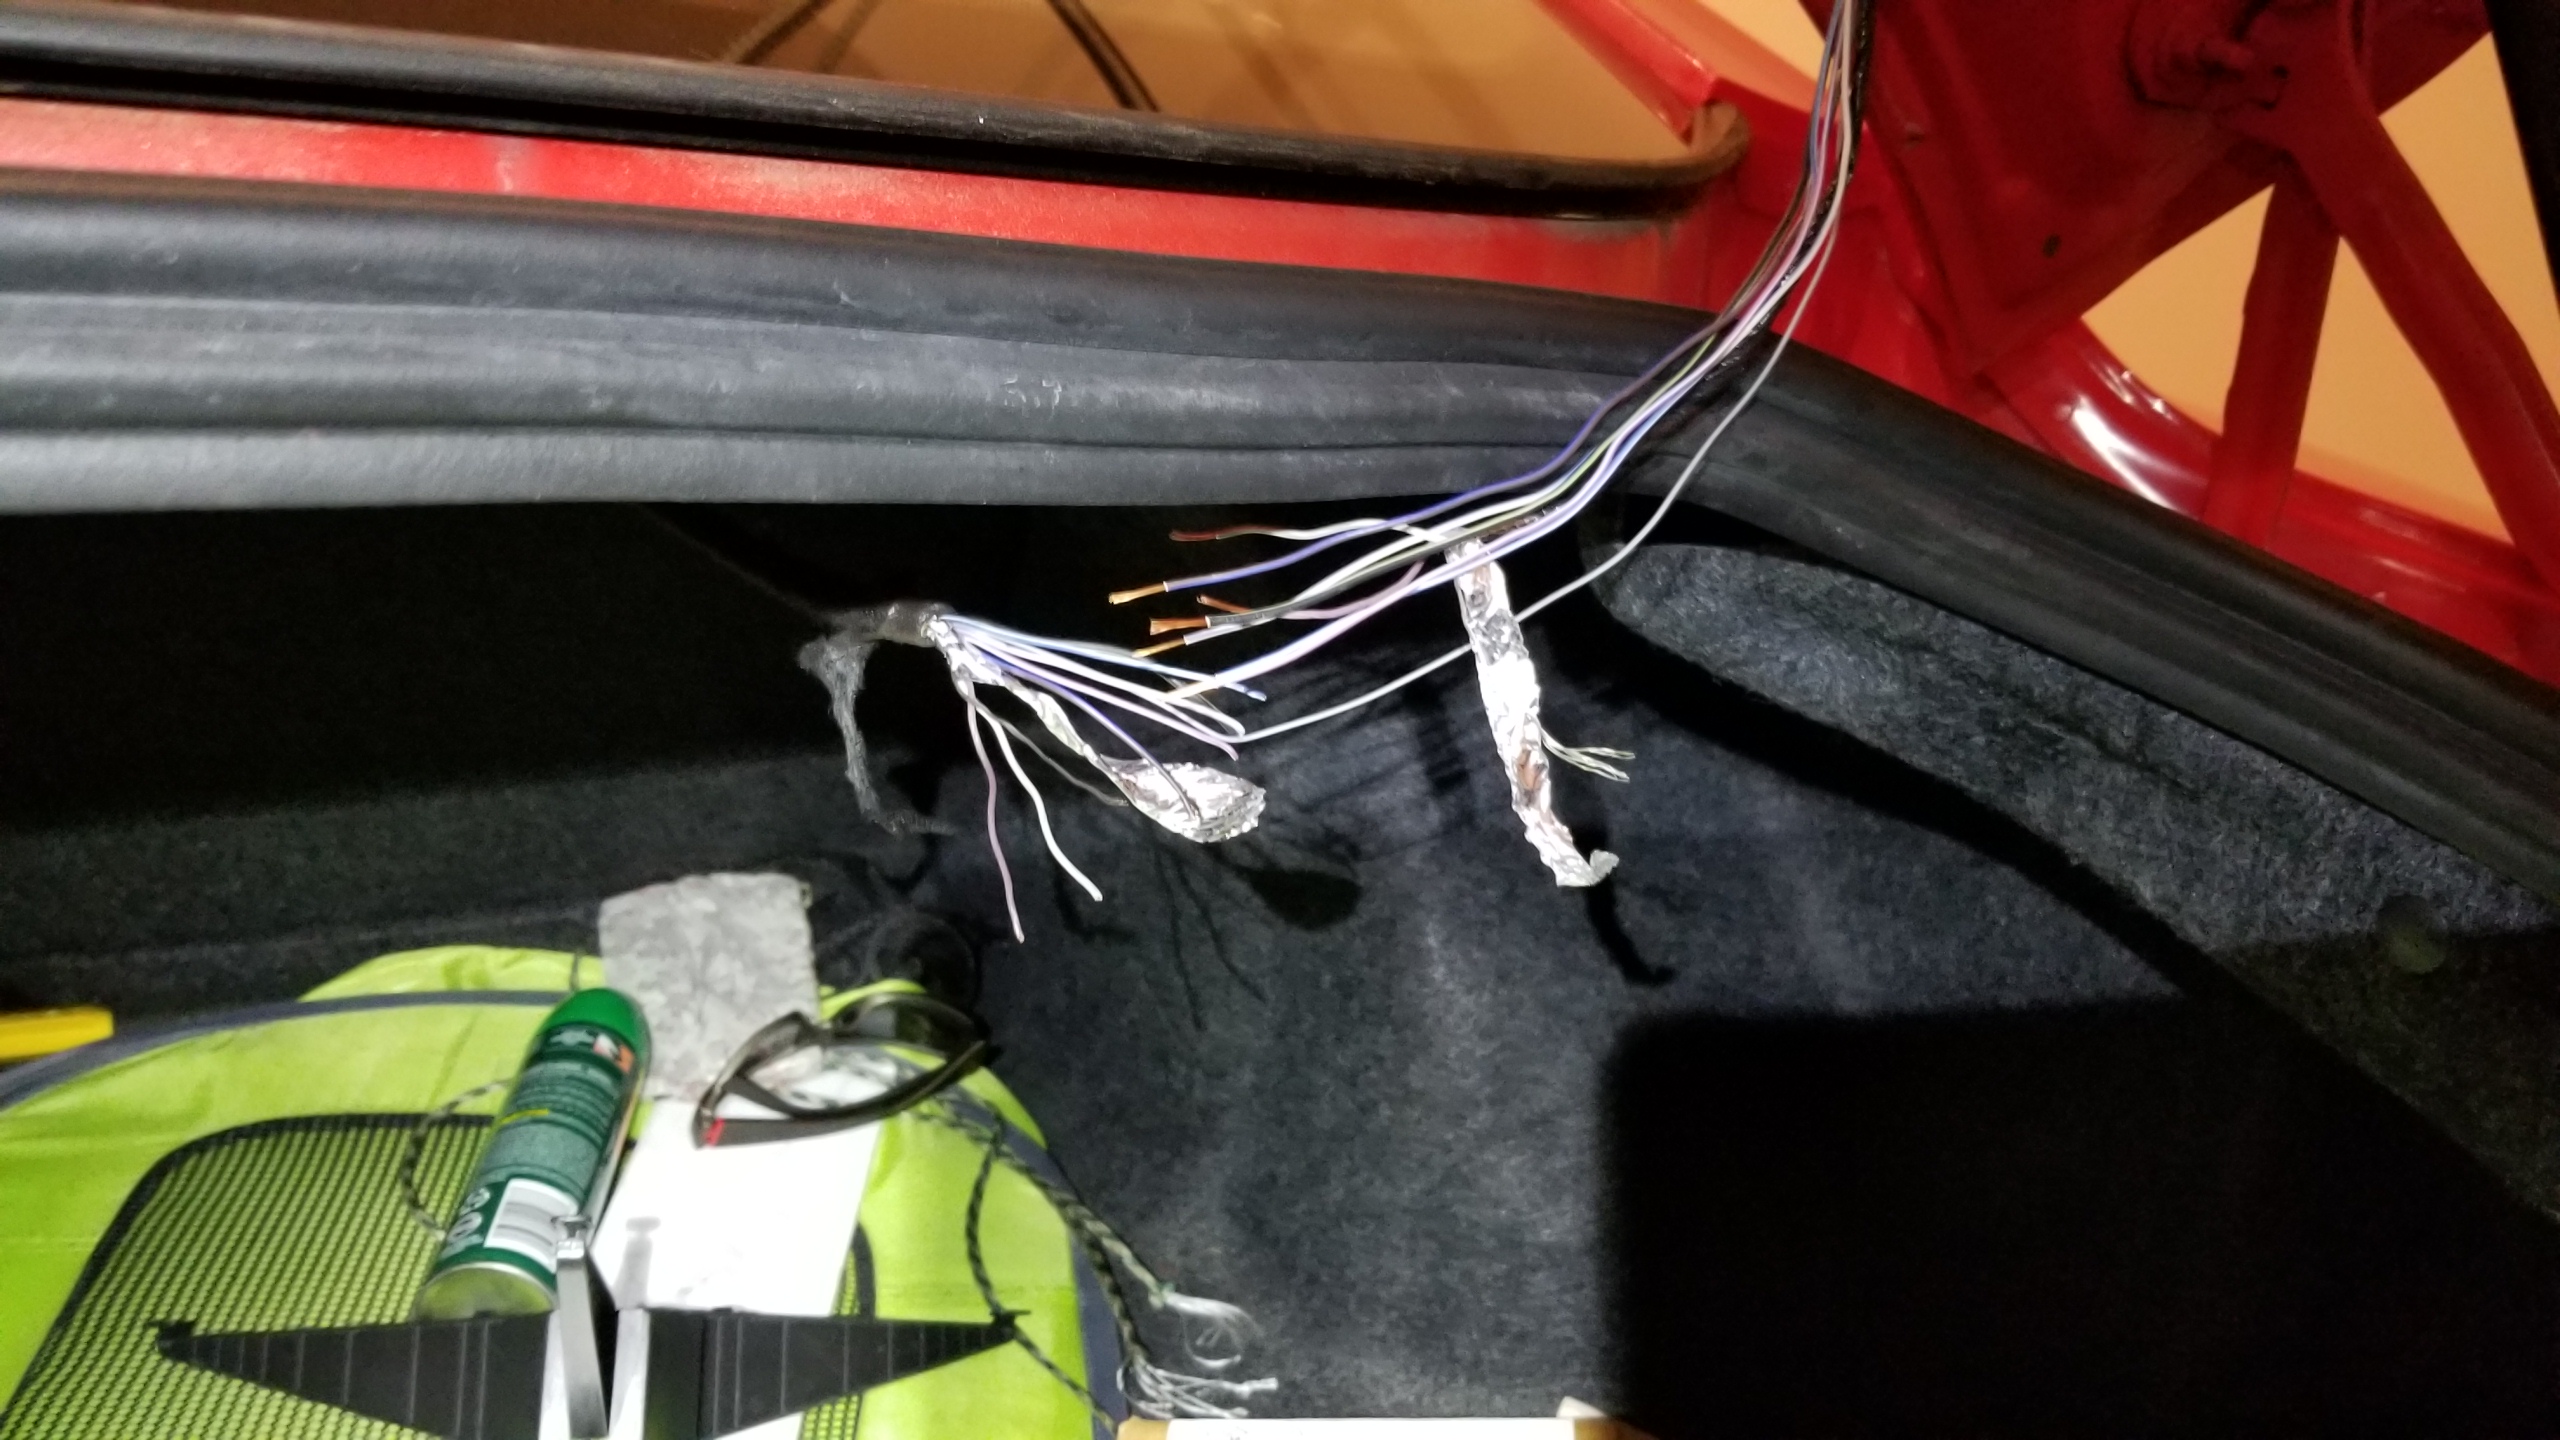
Bonus, this is a family member's new-ish Mustang. They all have an issue with the trunk harness wires breaking in half from the opening & closing of the trunk, which disables the reverse camera and trunk release. Just Ford things. Being the honorary family mechanic, I was tasked with fixing it. Just some simple soldering to extend and reconnect the harness back together, taping, split loom, and a zip tie and it should last longer than the factory Ford harness.
Also here's a really cool Lancia from today for no reason. I have a soft spot for rally cars even though I've never seen or been involved in the sport.
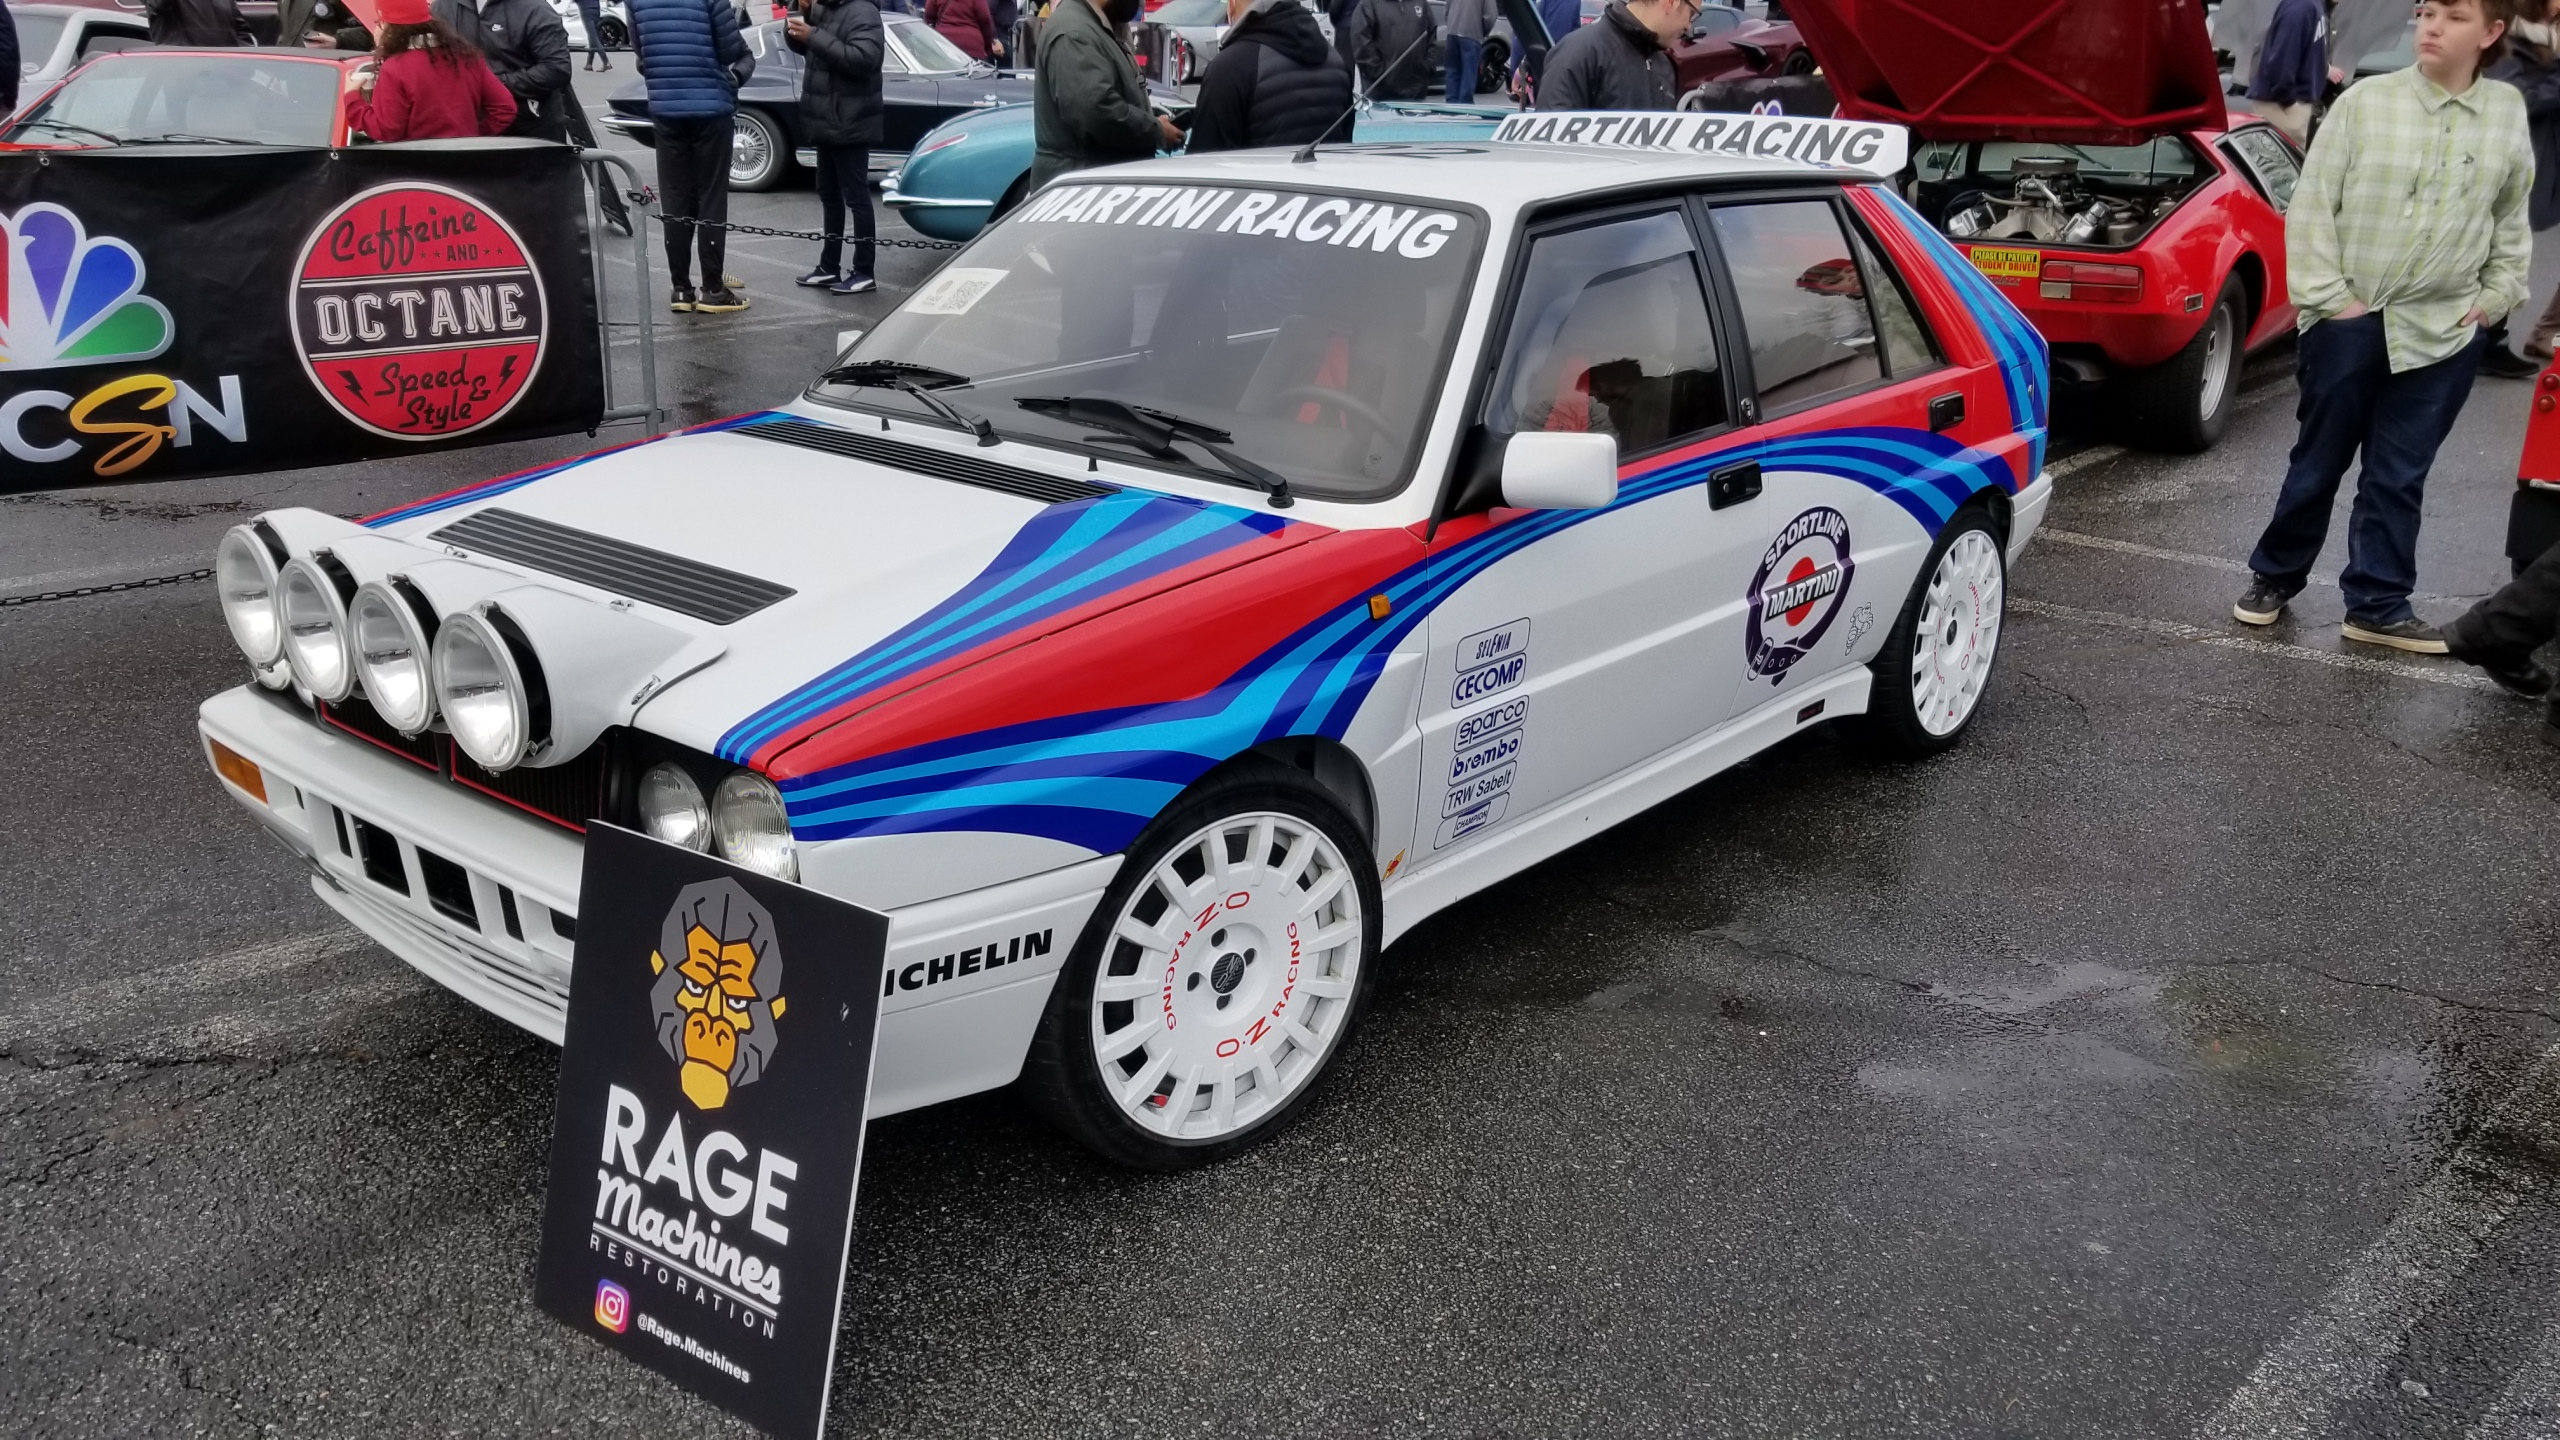
Not my pic, credit to Connor Danos on the Prime FB group. I didn't get a picture myself of the three musketeers but we held down the ATL C&O exotics section while most other people stayed away from the "weather".

New wheel speed sensor arrived from Japan. All nice and clean..
This is the plug for the RR sensor inside the trunk. The two other connectors were for the JDM catalytic converter temperature sensors.
New sensor installed, of course the hardest part was pushing the grommet back up into the trunk properly. The topmost bracket is the only difference between early model year NSX and the later years, it can be bent a bit into shape. Not pictured.
Everything works again, back in business. The new sensor was coated in silicone paste to hopefully facilitate future removal.
Buried behind the center console is the new GROM bluetooth adapter which plugs into the unused CD changer port on the back of the radio. Once my phone was paired, it's super easy to use. It connects quickly when the car is turned on and plays music without any issues at all, no tape deck to aux cable adapter required.
Though my radio repair was a success and made the tape deck work again, the sound quality was pretty bad and inconsistent between channels. The GROM bypasses that and now the radio sounds like new again, there's no more capacitors left to replace there..
Honestly, I'm not sure if I care much about putting in a new audio system anymore. It's the best mod I did to my daily car, but I don't see much point in the NSX anymore, half the time I have it turned low anyways so I can hear the car. I'd like Android Auto but I can make that work with a Honda Navpod and a tablet or something when I get around to it, probably not anytime soon. I'd like to refinish the center console first, probably when it gets a bit warmer outside.
Got around to fixing the lettering on the calipers by hand.
Fronts fixed. I should probably clear coat the gold letting so it doesn't get damaged by cleaners.
Davis Design cupholders installed. It's a well designed piece, no way it's going anywhere and reachable from the driver's seat without being intrusive.
Now I can actually store drinks without wedging it in the passenger seat! The can is a prop I promise.
I've got some misc. stuff left to do, like putting on the David Design coil guards, CRF pulley shield, getting the wheel & armrest re-covered, adjusting the windows properly...the last one I've been avoiding for a good while and have been keeping the windows down a bit in storage to prevent the new door seals from setting in the wrong positions. I'll bite the bullet on that shortly, I'm sure it will be an adventure.
Bonus, this is a family member's new-ish Mustang. They all have an issue with the trunk harness wires breaking in half from the opening & closing of the trunk, which disables the reverse camera and trunk release. Just Ford things. Being the honorary family mechanic, I was tasked with fixing it. Just some simple soldering to extend and reconnect the harness back together, taping, split loom, and a zip tie and it should last longer than the factory Ford harness.
Also here's a really cool Lancia from today for no reason. I have a soft spot for rally cars even though I've never seen or been involved in the sport.
Not my pic, credit to Connor Danos on the Prime FB group. I didn't get a picture myself of the three musketeers but we held down the ATL C&O exotics section while most other people stayed away from the "weather".
Last edited:
Good progress!
Link to those cup holders???
Link to those cup holders???
Good progress!
Link to those cup holders???
Available here http://davisdesignfab.com/Products/, I emailed him to get an invoice. I haven't put on the coil guards yet, I think they were just re-designed recently as well.
I actually ordered a set of covers from Redline back in Nov that I've received recently. The e-brake cover above is one of their pieces, and I have a new brake button to match the shift knob. The leather on the bottom is a bit gathered like you mentioned but the old cover was nasty.

I have their wheel cover as well which I was going to keep a secret until I had the chance to ship my wheel off to get it installed, but it should be ready by next week. Looks a bit dorky in the pic but the final product should look good, I was getting tired of the hideous old worn cover. No plans for an aftermarket wheel right now but certainly still a possibility as I get fatter.
I had an armrest cover on order as well, but they don't have a pattern for the 1-piece style, only the 2-piece from later years. I'd have to ship mine to their shop in Poland to get it measured which was too expensive, so I'm getting a local shop here to make one, should be done this week.
I actually ordered a set of covers from Redline back in Nov that I've received recently. The e-brake cover above is one of their pieces, and I have a new brake button to match the shift knob. The leather on the bottom is a bit gathered like you mentioned but the old cover was nasty.
I have their wheel cover as well which I was going to keep a secret until I had the chance to ship my wheel off to get it installed, but it should be ready by next week. Looks a bit dorky in the pic but the final product should look good, I was getting tired of the hideous old worn cover. No plans for an aftermarket wheel right now but certainly still a possibility as I get fatter.
I had an armrest cover on order as well, but they don't have a pattern for the 1-piece style, only the 2-piece from later years. I'd have to ship mine to their shop in Poland to get it measured which was too expensive, so I'm getting a local shop here to make one, should be done this week.
I'm jealous you at least have a dash in your car right now lol.
You're gonna jinx me, lol. One day I'll have to pull it for an HVAC/heater core job or something similar.
Minor updates to keep me busy while waiting for parts.
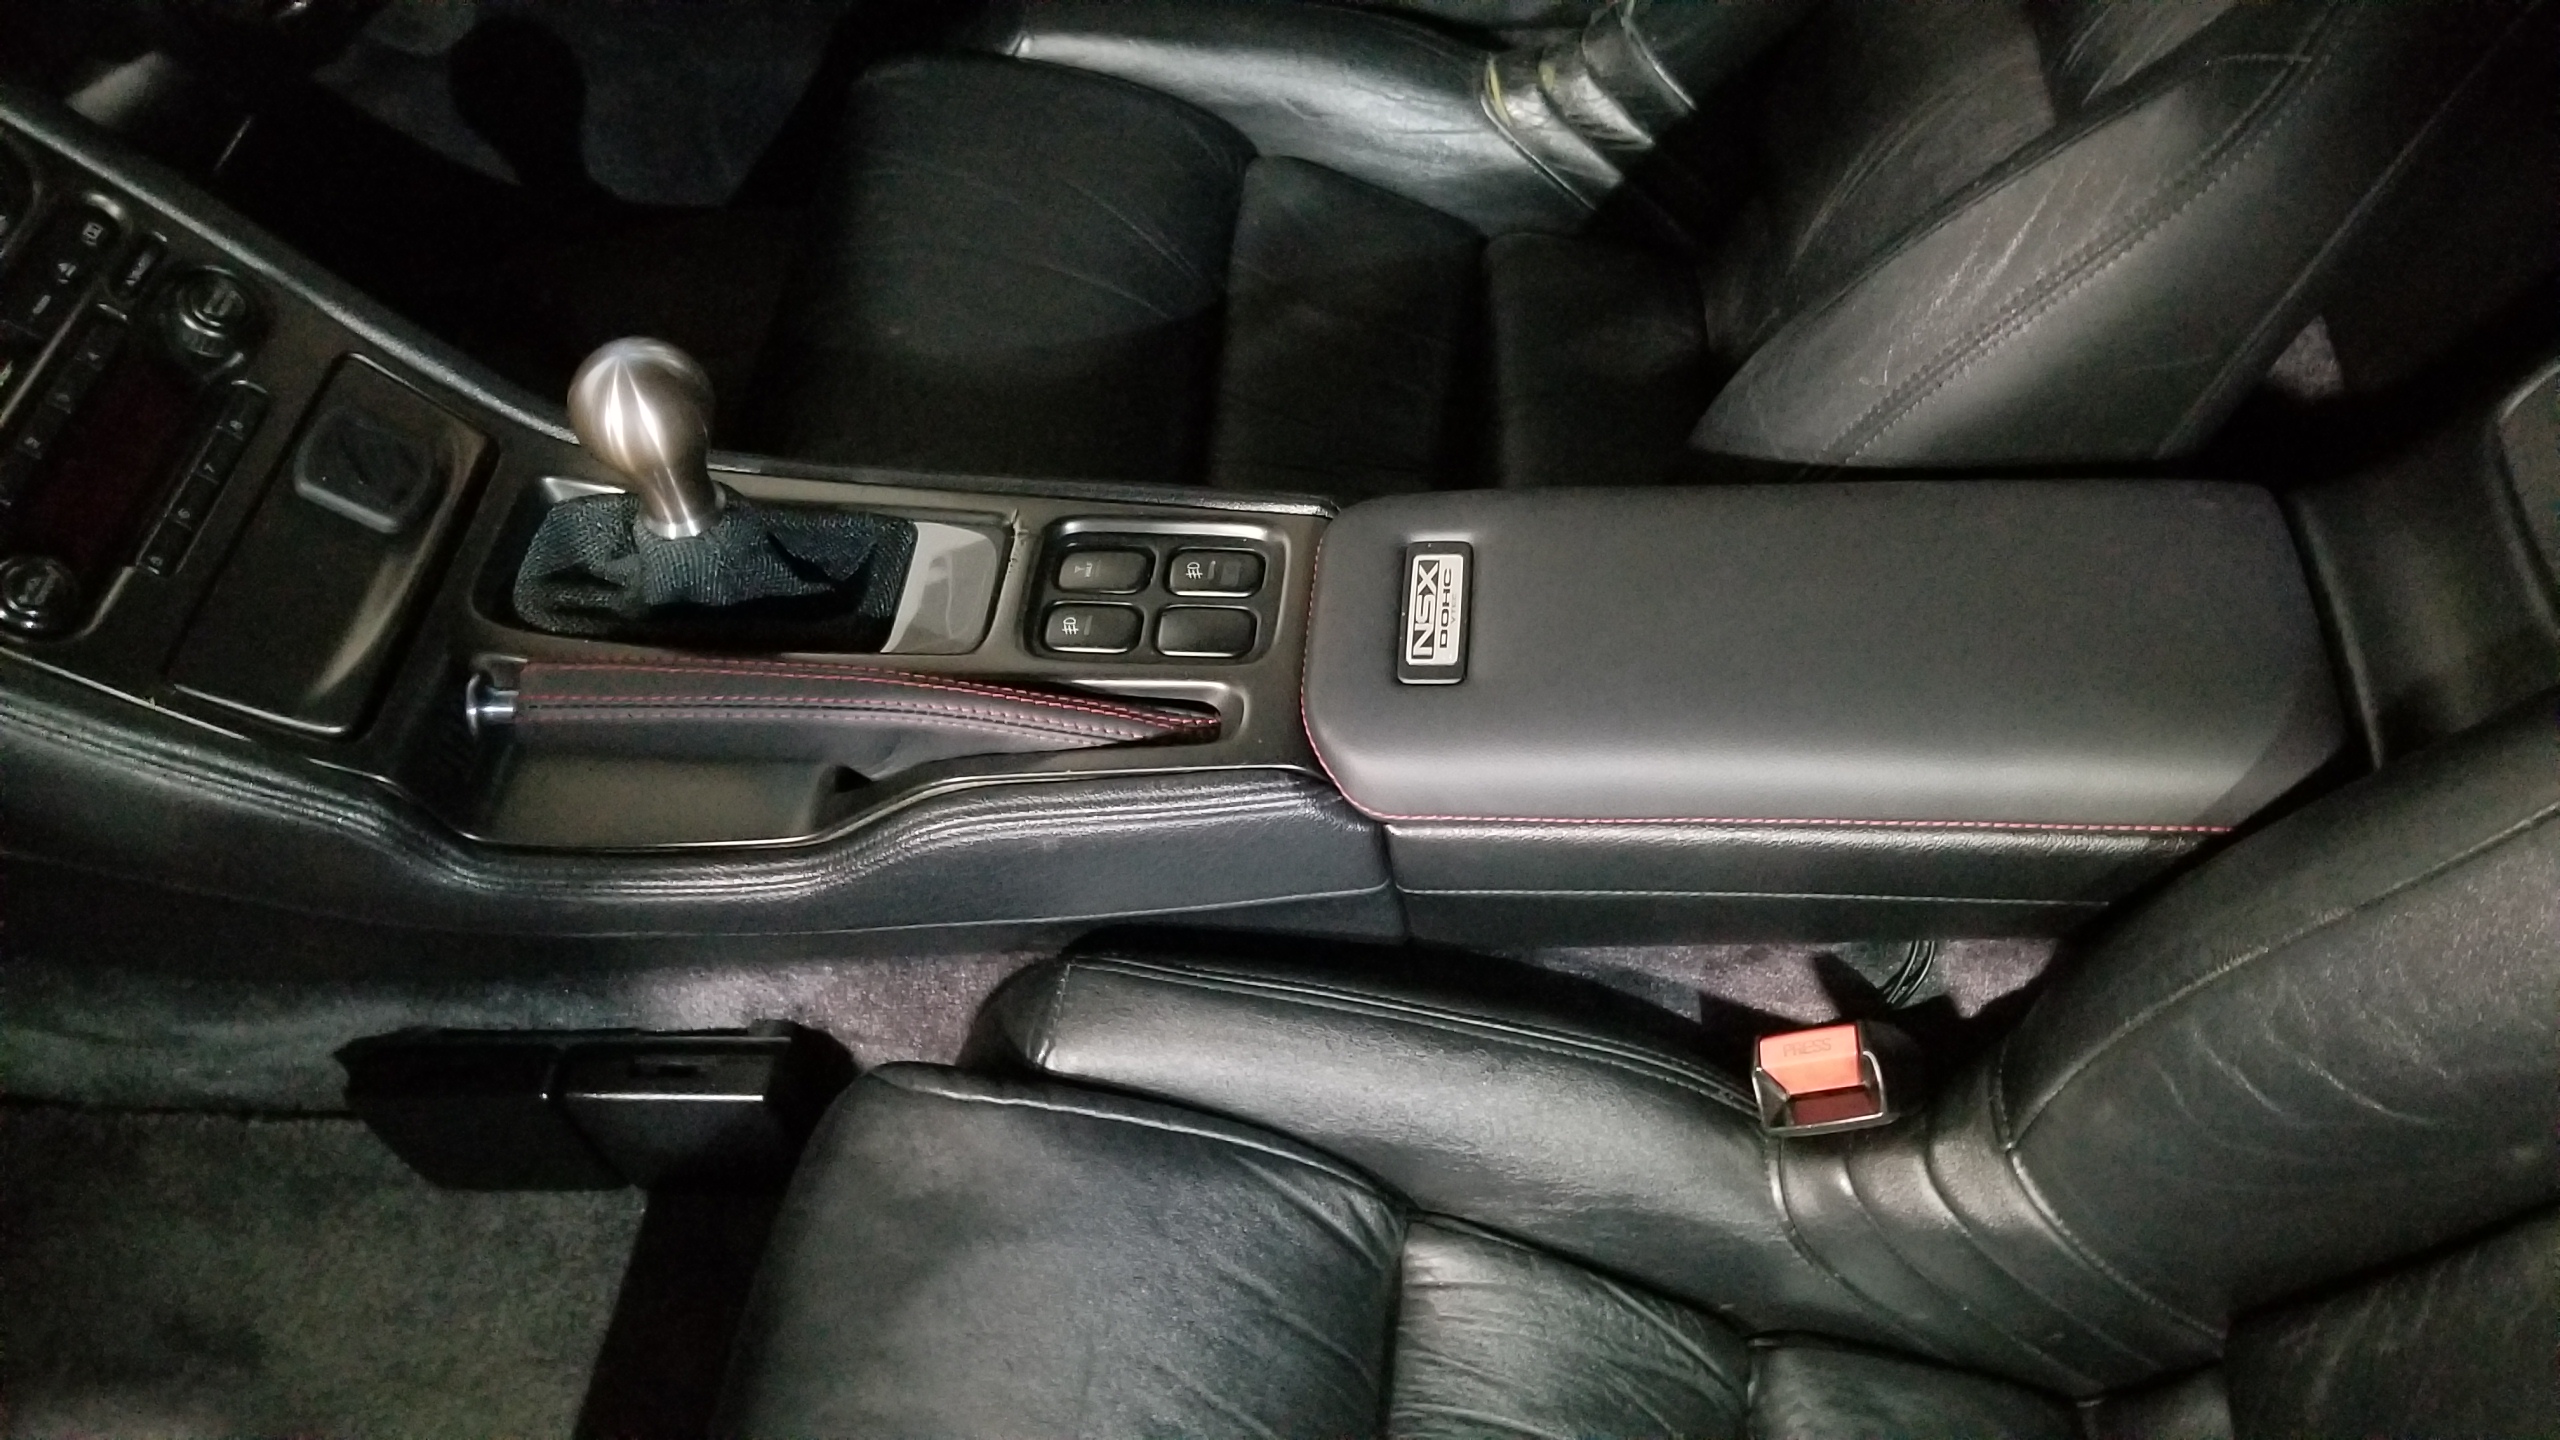
The armrest came back from the upholstery shop. They did great, and suggested using vinyl over leather since it's more durable and looks the same anyways.
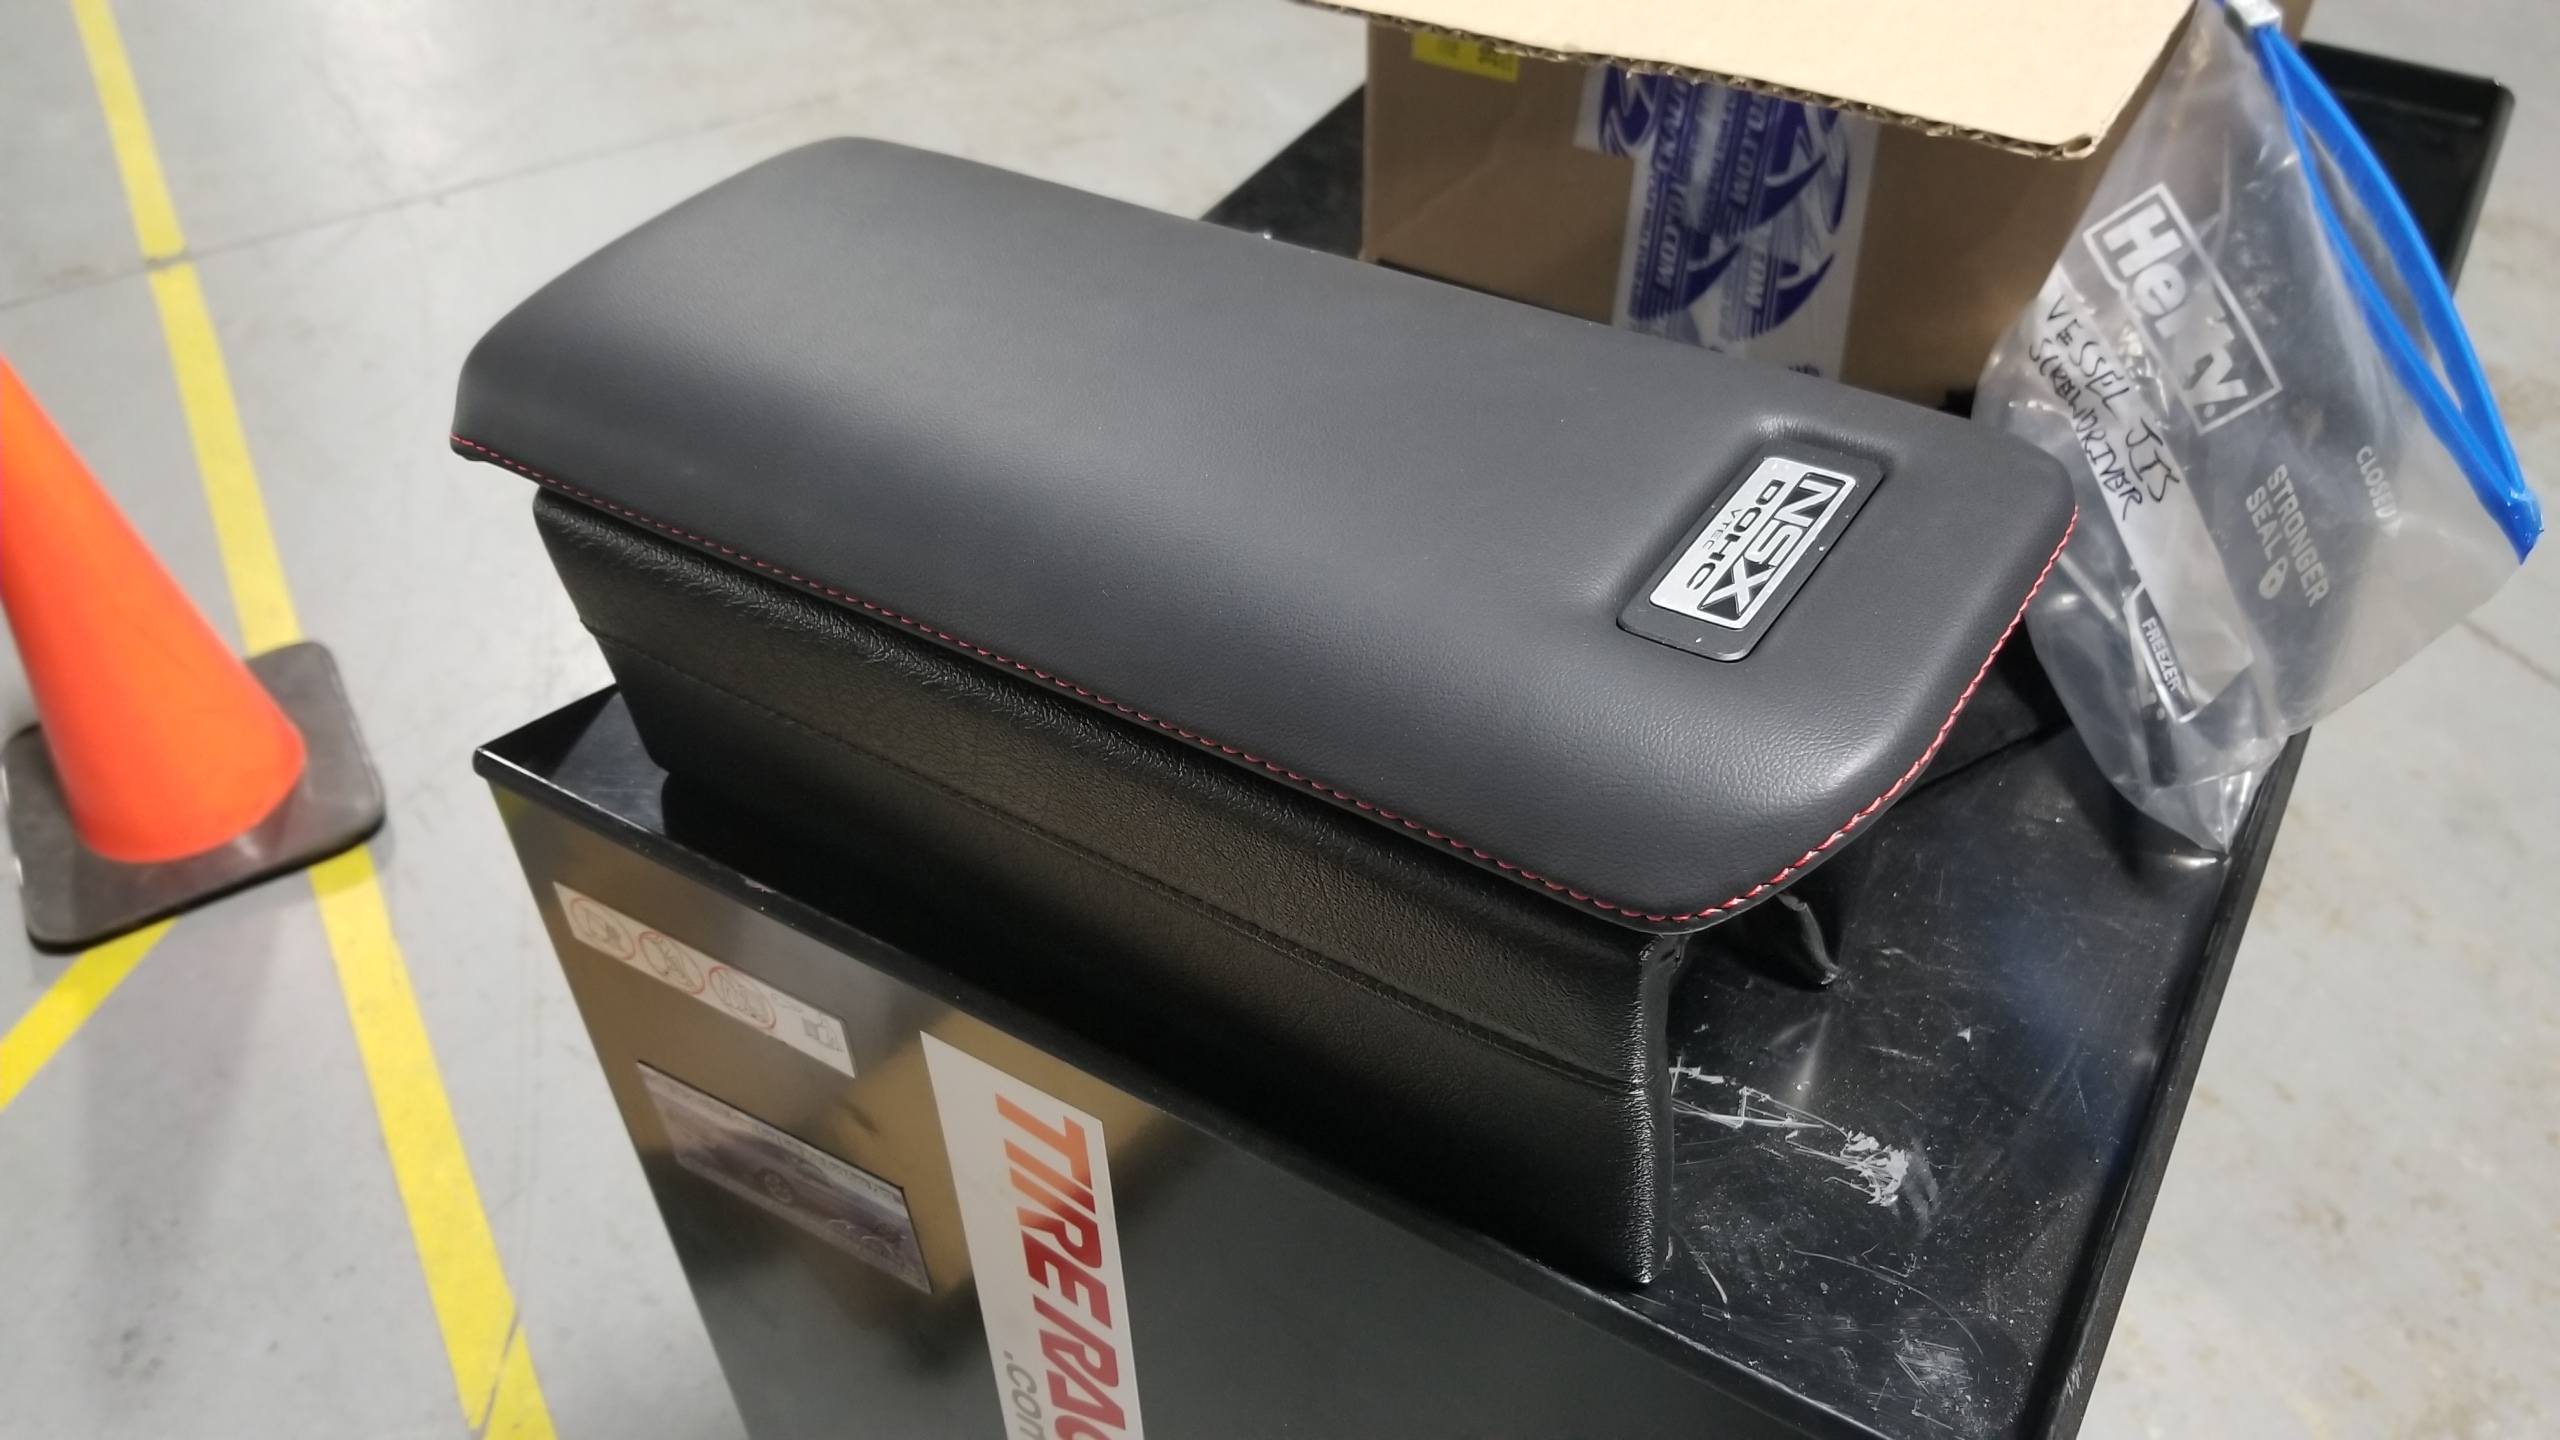
The NSX DOHC emblem is secured by these two tiny nuts from the back. I found them on the carpet and didn't know what they were for, lost one, and somehow found a replacement around the house. I could get a new emblem for $50 if I wanted.
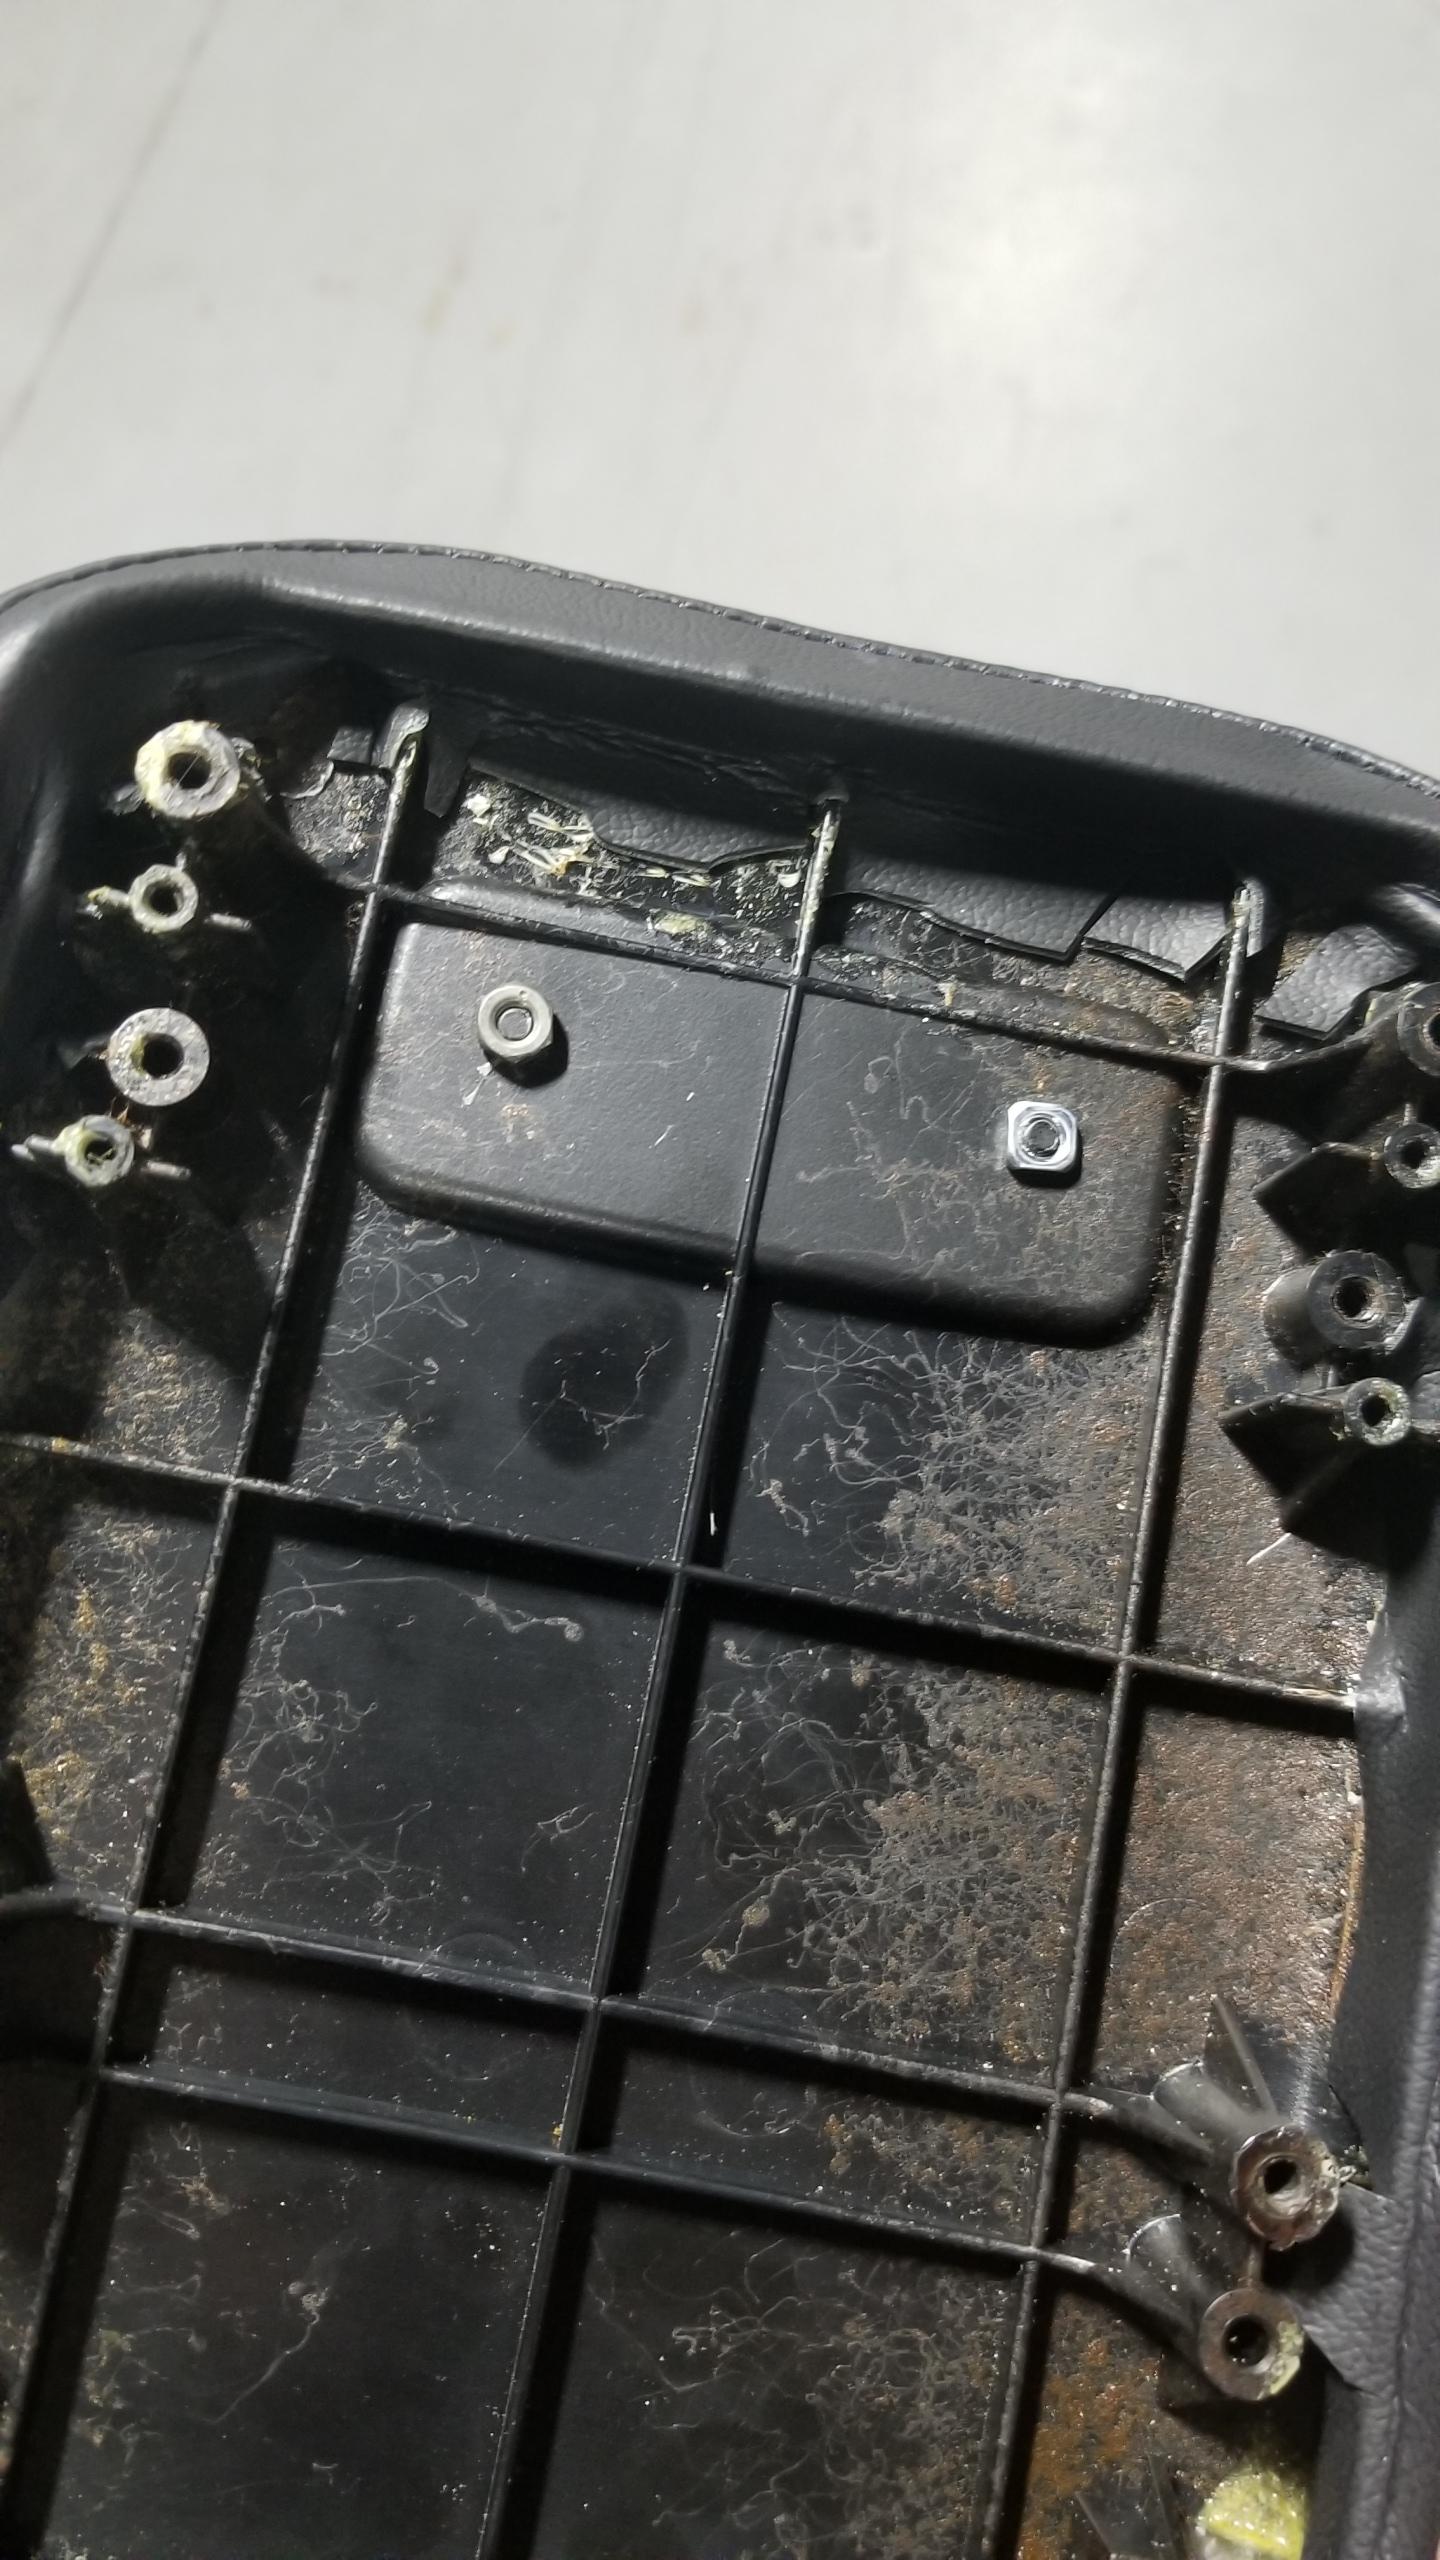
Installed loose along with a new WC Lathe Werks e-brake button to match the shift knob I got previously. The interior is slowly coming together. The more I use my Note 8's camera in low-light the more I hate it.
I bought all the chemicals & paints to refinish the center console now that it's the worst-looking thing on the interior and peeling horribly. Ferric chloride and aircraft paint remover to strip the old paint and metal foil, and all SEM products to paint with. I'm planning on using their Landau Black Color Coat and satin clear to go for more of an early NSX-R look, not interested in trying to match the old OEM color and satin black is my personal favorite OEM console color out of the many variations of grey/silver.
Final install of the GROM unit which can be shoved against the glovebox to make room.
Microphone ran to the steering column since it needs to be used for your Bluetooth calls to have any audio. Easy breezy install and reversible.
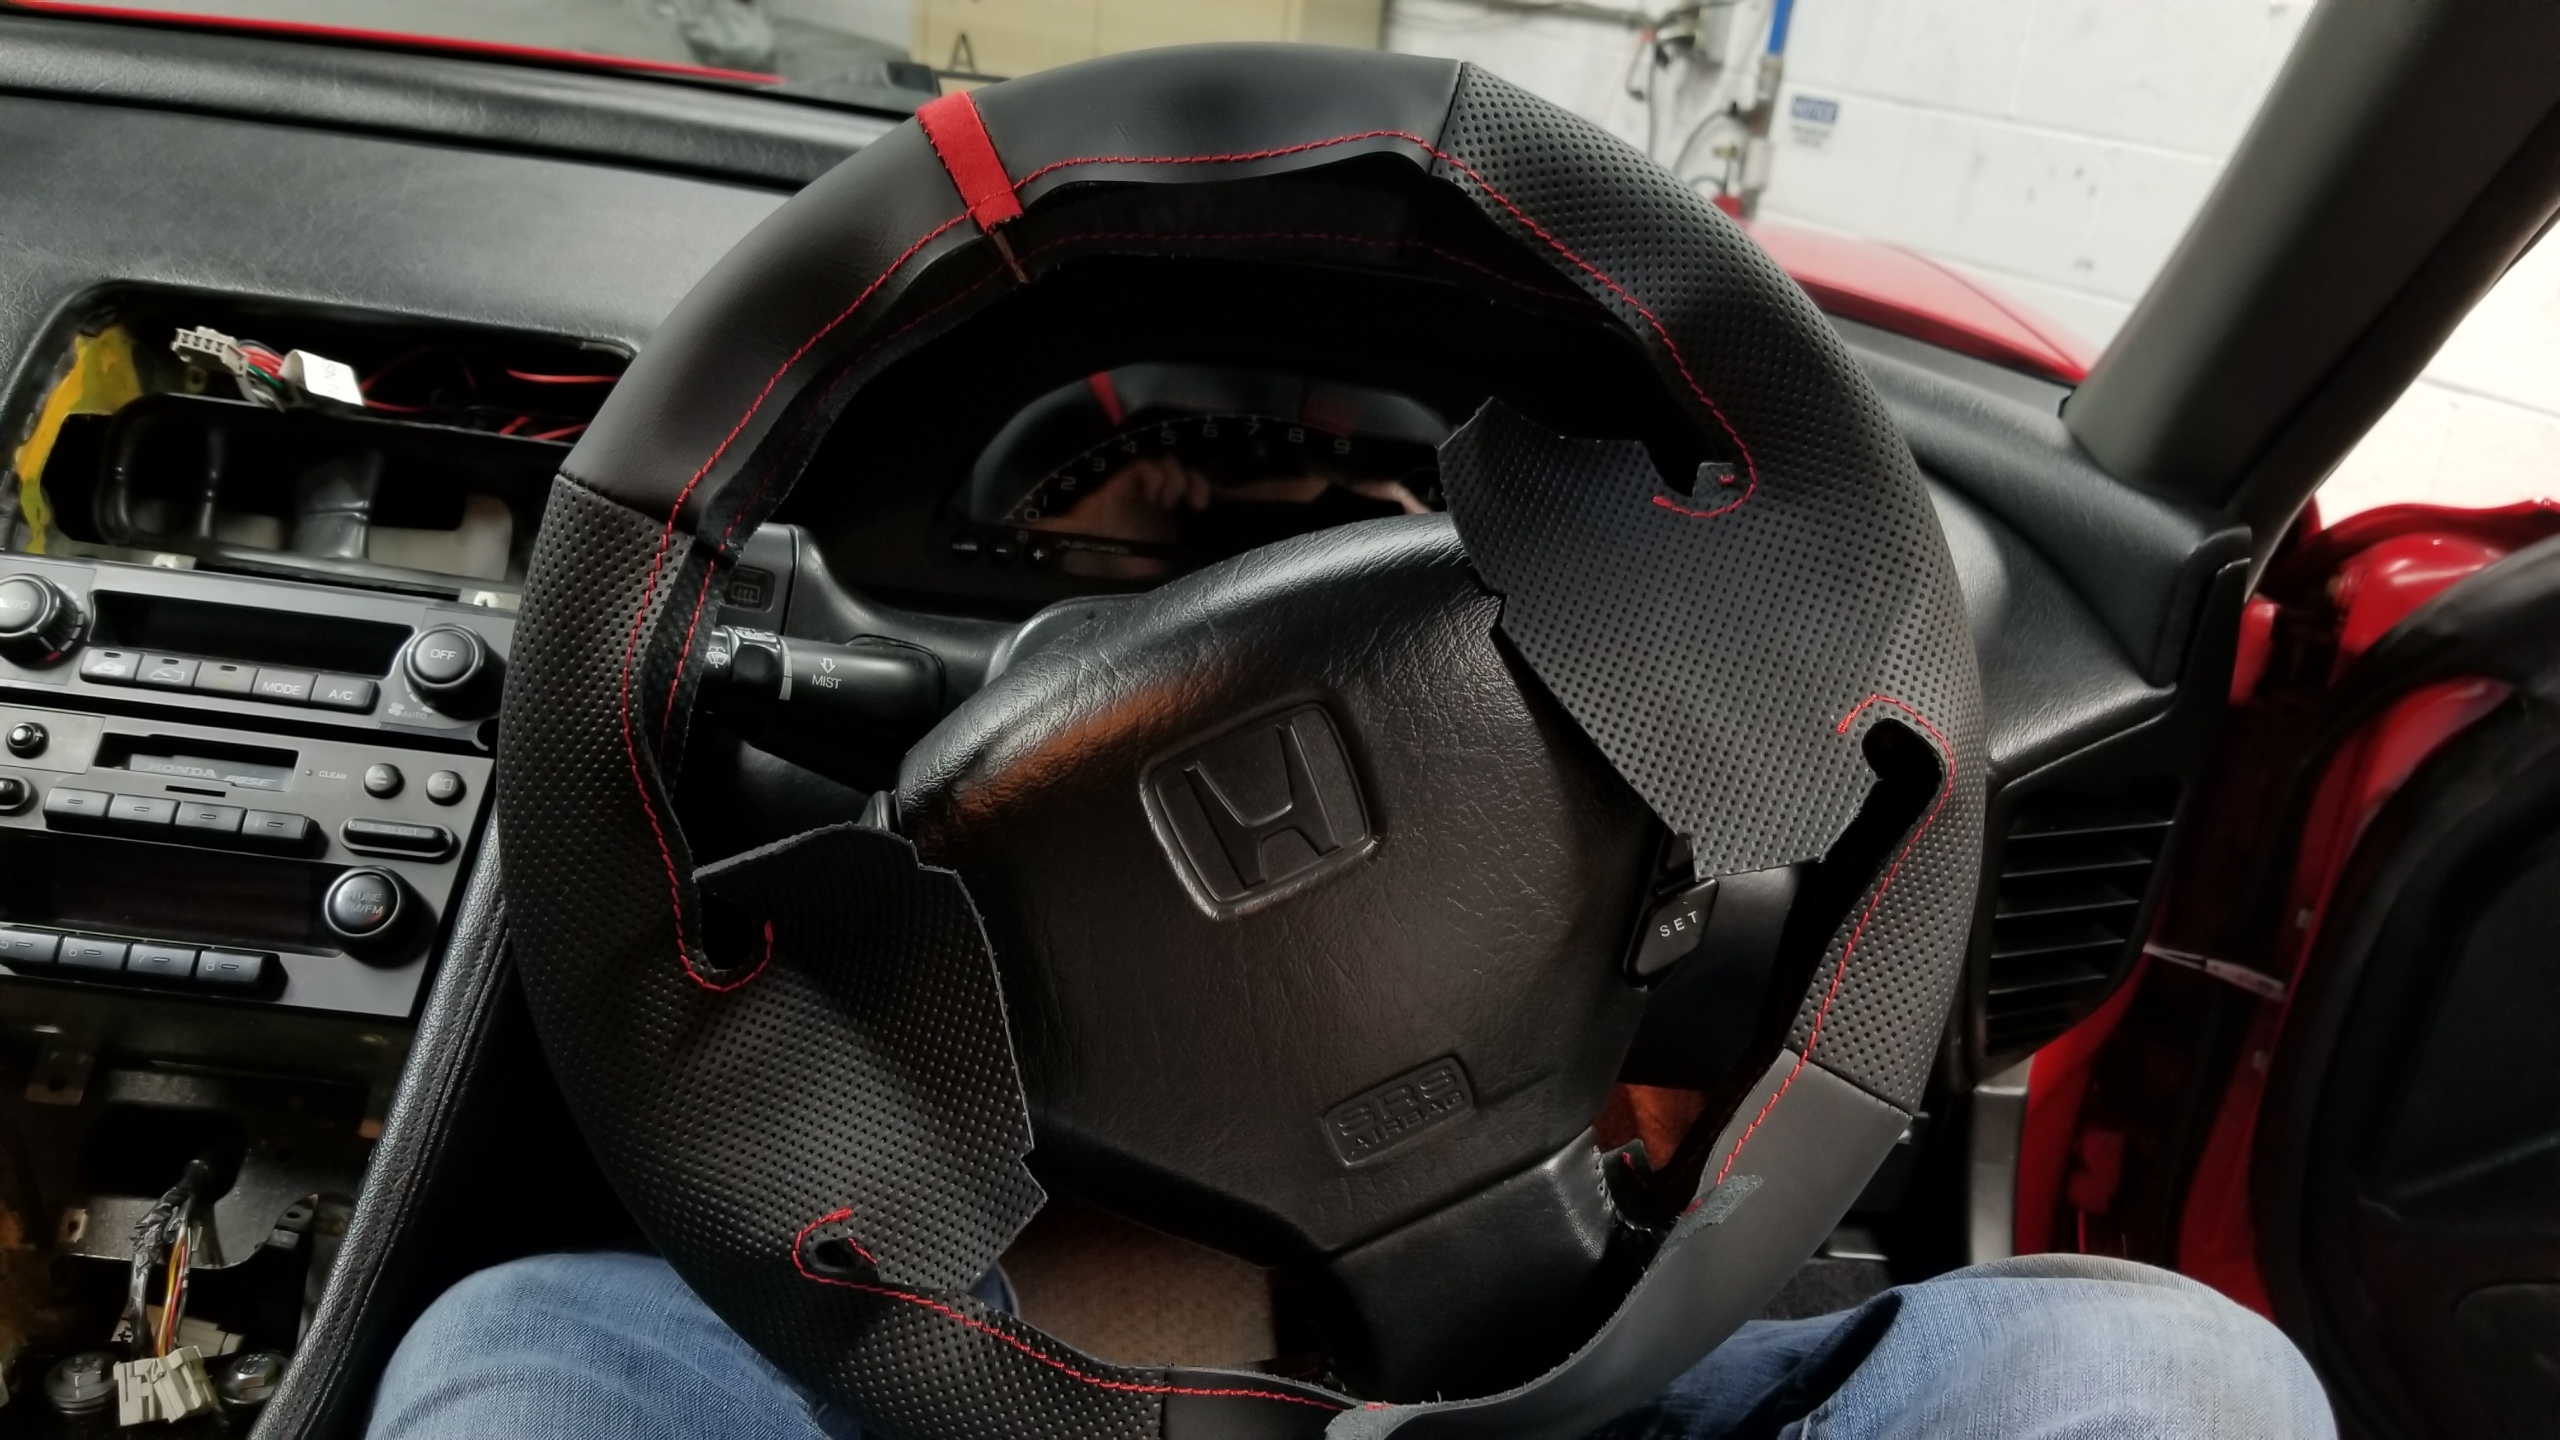
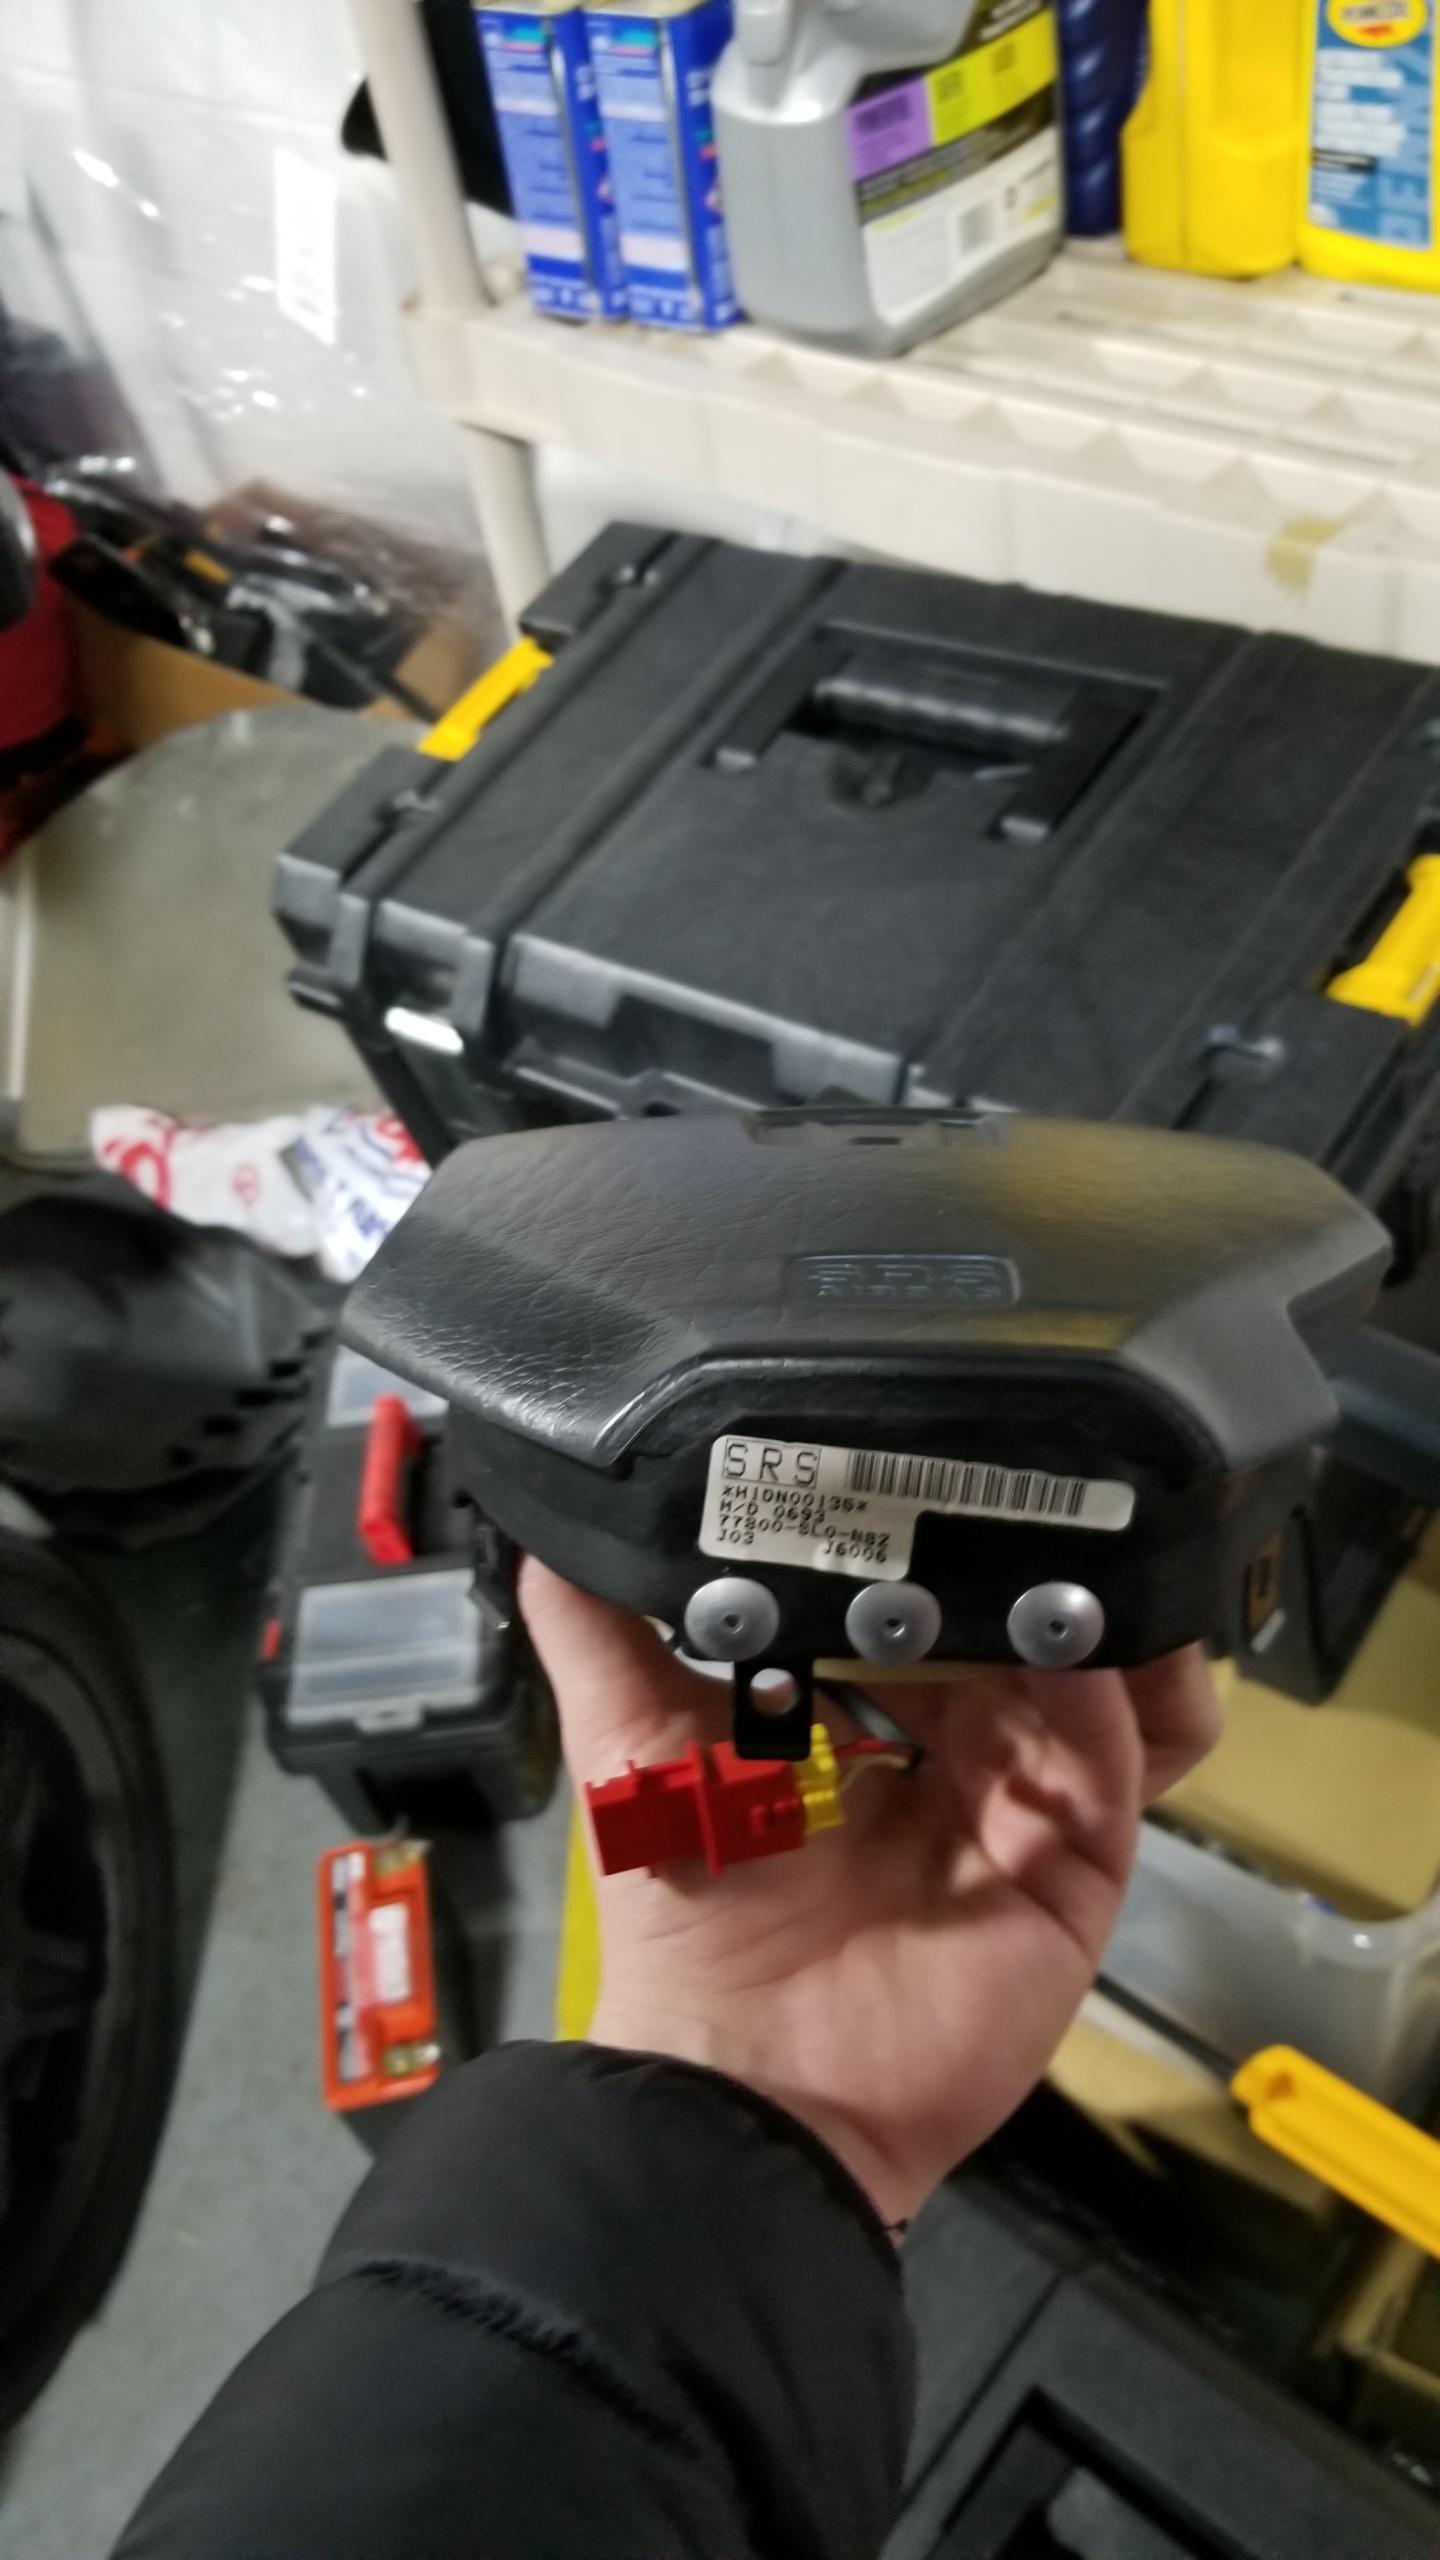
Time to ship off the steering wheel for re-covering. Airbag is easy to remove with the FSM instructions.

Front toward enemy.
Complete disassembly for shipping. The horn buttons are tricky, they are press-fit from the front and have to be carefully pried out from the edges. Made easier since I don't care about damaging the leather but you'd have to take it really slow if you weren't getting the wheel re-covered.
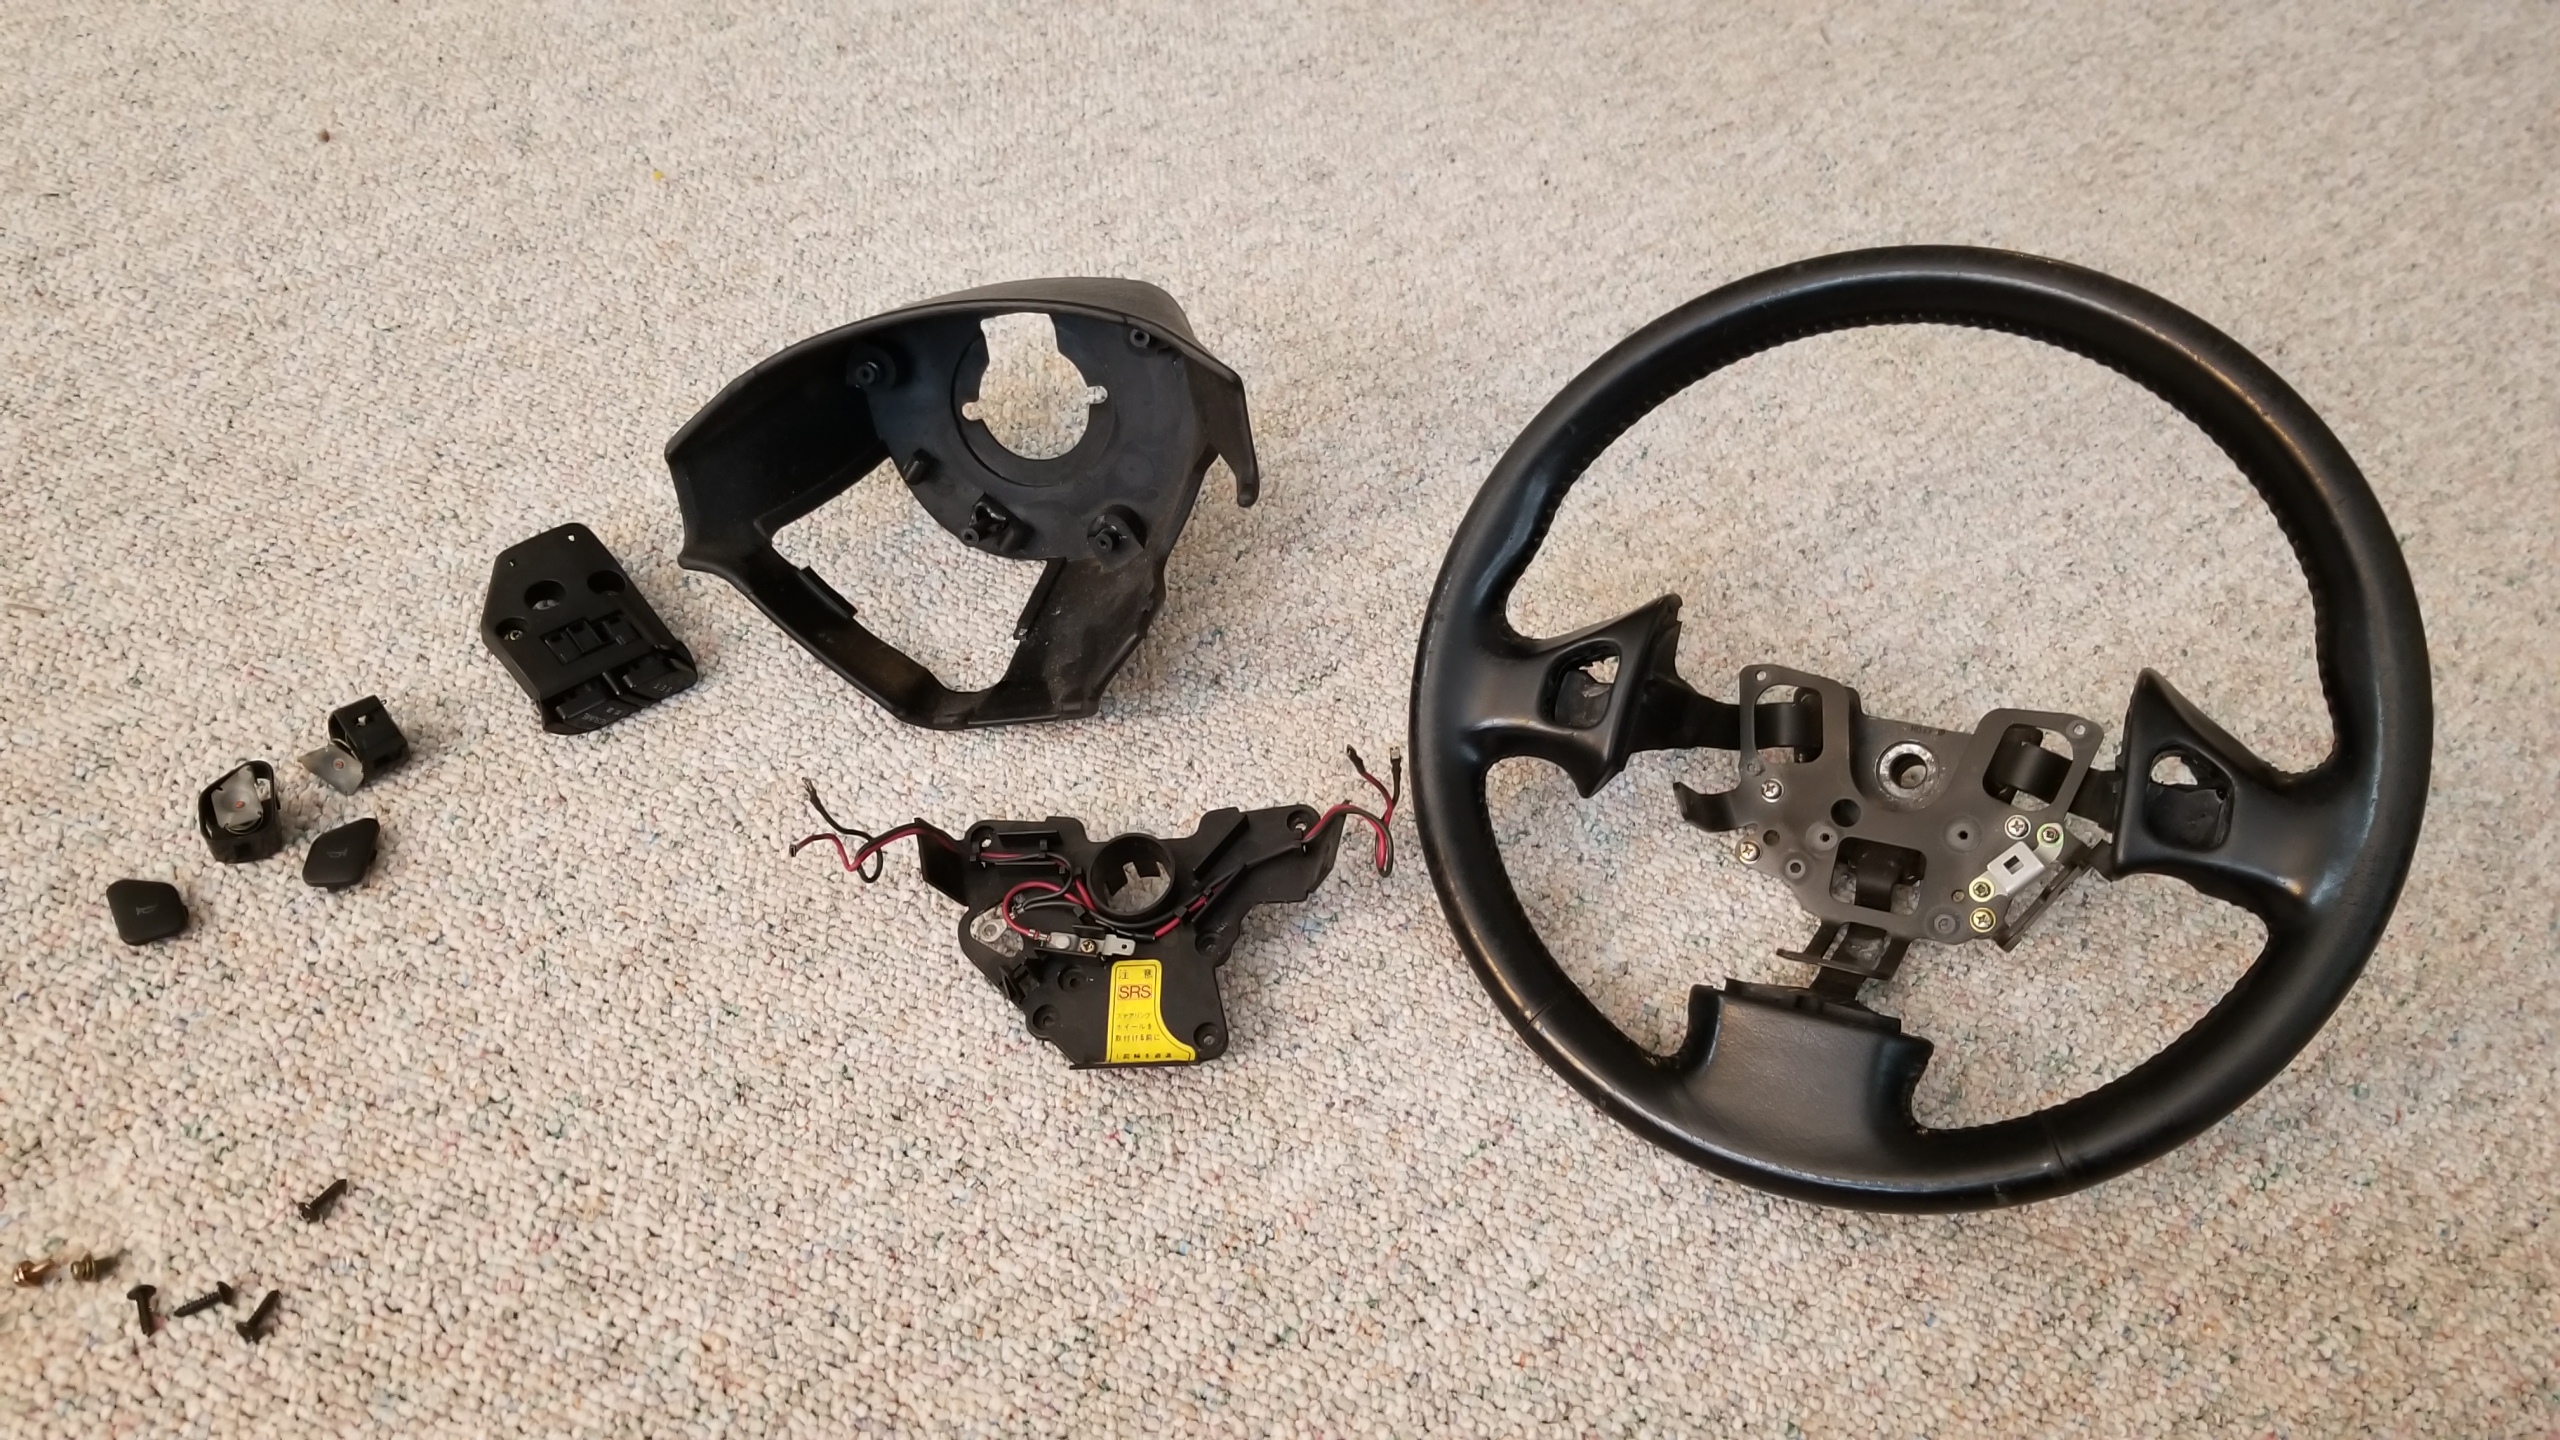
The old leather is nastayyyyyy. I'm guessing a combo of UV damage and maybe one of those aftermarket wheel cover koozie things. Really needed a replacement to bring the interior condition up another level.
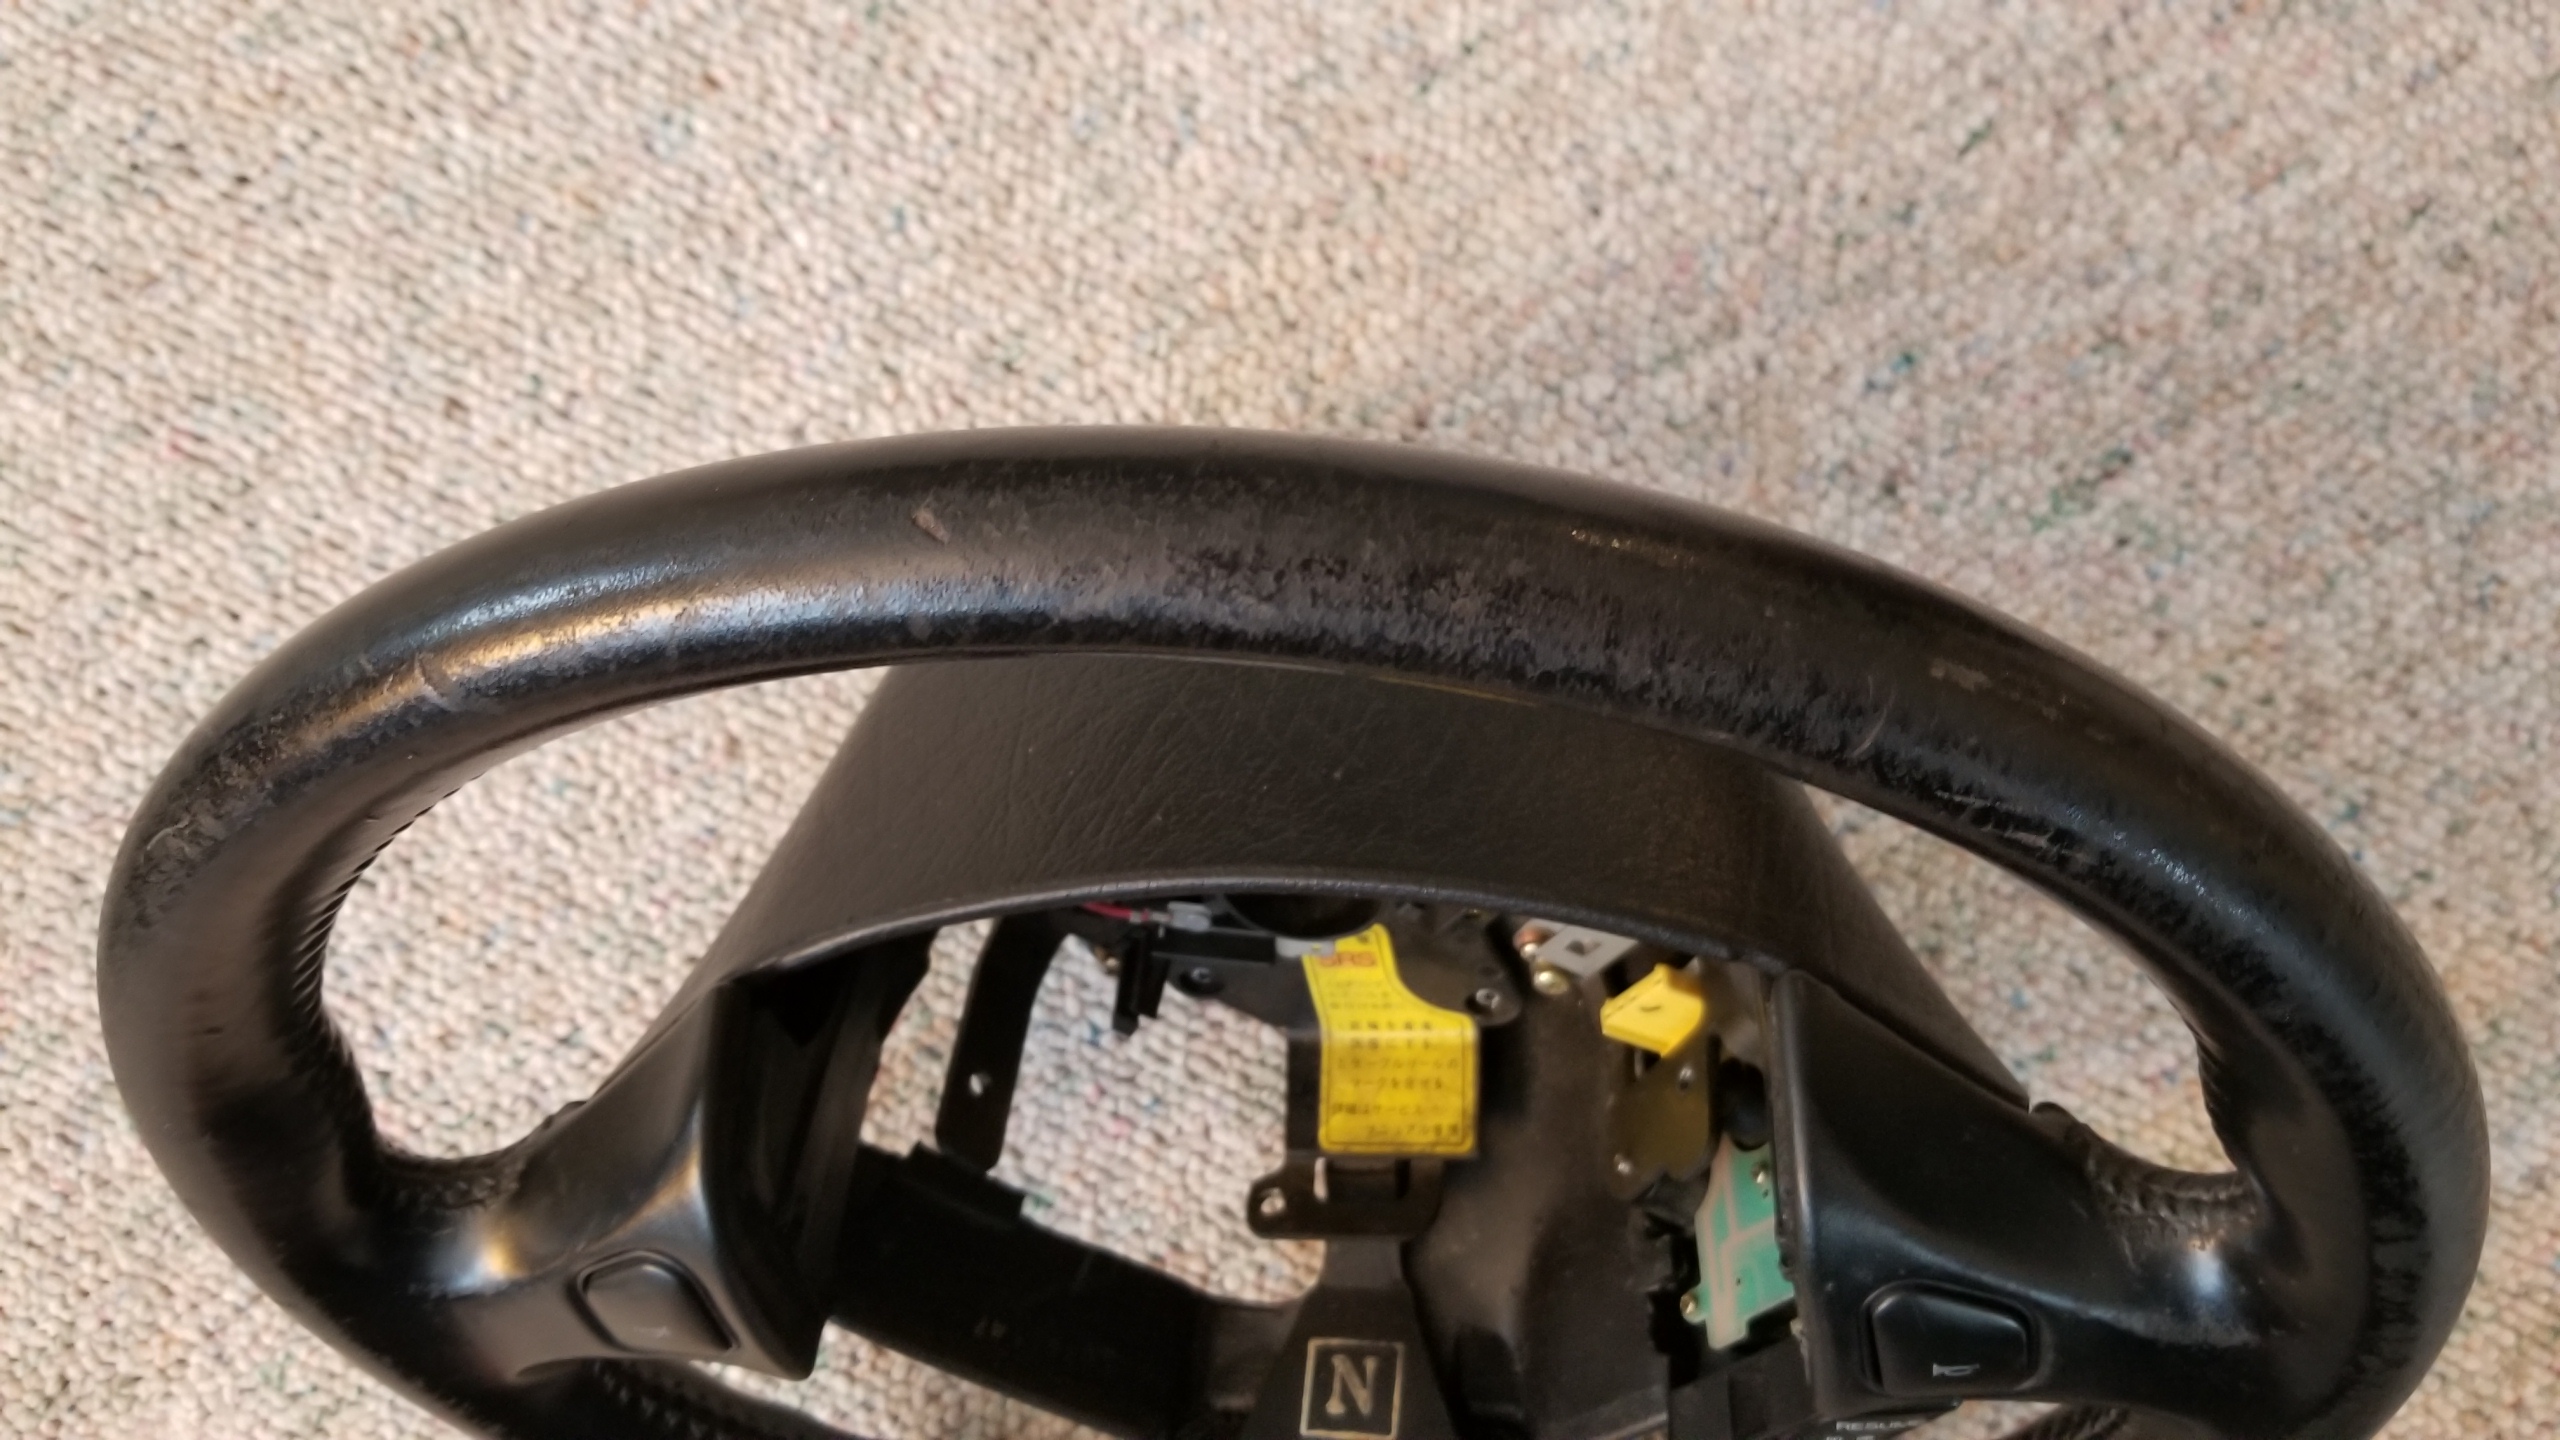
Because nothing's ever easy, I shipped the wheel and new cover on Tuesday to Texas which naturally is having major winter weather issues this week, so the package is stuck in limbo with no ETA. Hopefully that clears up this upcoming week for everyone's sake, lots of more serious issues with power and water going on there.
My custom Autostyle UK floor mats were supposedly delivered Monday while I was traveling but there's no package to be seen, so those are a wash too. It would be nice not to have to pay for them twice.
I ordered a set of Fortune Auto 500 coilovers too which have a 3-4 week lead time, hand-assembled and all that. They're a bit later of an entrant into the NSX coilover world vs. BC, KW, Tein, etc. but I like what they have to offer and they have great customer service and are rebuildable. For my mostly street use they suggested the 500's with 10k/12k default springs; they offer more aggressive springs and 510 shocks for more track-oriented cars. They also offer an air-lift system for most cars but unfortunately the NSX suspension geometry is incompatible with their setup. I don't plan on slamming the car anyways.
Wheels are in the works too, I have some options available to get them faster than the 5 month made-to-order lead time.
The armrest came back from the upholstery shop. They did great, and suggested using vinyl over leather since it's more durable and looks the same anyways.
The NSX DOHC emblem is secured by these two tiny nuts from the back. I found them on the carpet and didn't know what they were for, lost one, and somehow found a replacement around the house. I could get a new emblem for $50 if I wanted.
Installed loose along with a new WC Lathe Werks e-brake button to match the shift knob I got previously. The interior is slowly coming together. The more I use my Note 8's camera in low-light the more I hate it.
I bought all the chemicals & paints to refinish the center console now that it's the worst-looking thing on the interior and peeling horribly. Ferric chloride and aircraft paint remover to strip the old paint and metal foil, and all SEM products to paint with. I'm planning on using their Landau Black Color Coat and satin clear to go for more of an early NSX-R look, not interested in trying to match the old OEM color and satin black is my personal favorite OEM console color out of the many variations of grey/silver.
Final install of the GROM unit which can be shoved against the glovebox to make room.
Microphone ran to the steering column since it needs to be used for your Bluetooth calls to have any audio. Easy breezy install and reversible.
Time to ship off the steering wheel for re-covering. Airbag is easy to remove with the FSM instructions.
Front toward enemy.
Complete disassembly for shipping. The horn buttons are tricky, they are press-fit from the front and have to be carefully pried out from the edges. Made easier since I don't care about damaging the leather but you'd have to take it really slow if you weren't getting the wheel re-covered.
The old leather is nastayyyyyy. I'm guessing a combo of UV damage and maybe one of those aftermarket wheel cover koozie things. Really needed a replacement to bring the interior condition up another level.
Because nothing's ever easy, I shipped the wheel and new cover on Tuesday to Texas which naturally is having major winter weather issues this week, so the package is stuck in limbo with no ETA. Hopefully that clears up this upcoming week for everyone's sake, lots of more serious issues with power and water going on there.
My custom Autostyle UK floor mats were supposedly delivered Monday while I was traveling but there's no package to be seen, so those are a wash too. It would be nice not to have to pay for them twice.
I ordered a set of Fortune Auto 500 coilovers too which have a 3-4 week lead time, hand-assembled and all that. They're a bit later of an entrant into the NSX coilover world vs. BC, KW, Tein, etc. but I like what they have to offer and they have great customer service and are rebuildable. For my mostly street use they suggested the 500's with 10k/12k default springs; they offer more aggressive springs and 510 shocks for more track-oriented cars. They also offer an air-lift system for most cars but unfortunately the NSX suspension geometry is incompatible with their setup. I don't plan on slamming the car anyways.
Wheels are in the works too, I have some options available to get them faster than the 5 month made-to-order lead time.
Last edited:
Maybe one day I'll find out :crushed:
Lmaoooo :glee:
Interior Bits
So I took everything out again. For good reason though.
Begin disassembly of the center console & door card pieces for refinishing. The center vent has 4 teeny screws and a few small clips to pop the vents out of the surrounding piece, which you can see if you look closely appears to look like it's peeling horribly.
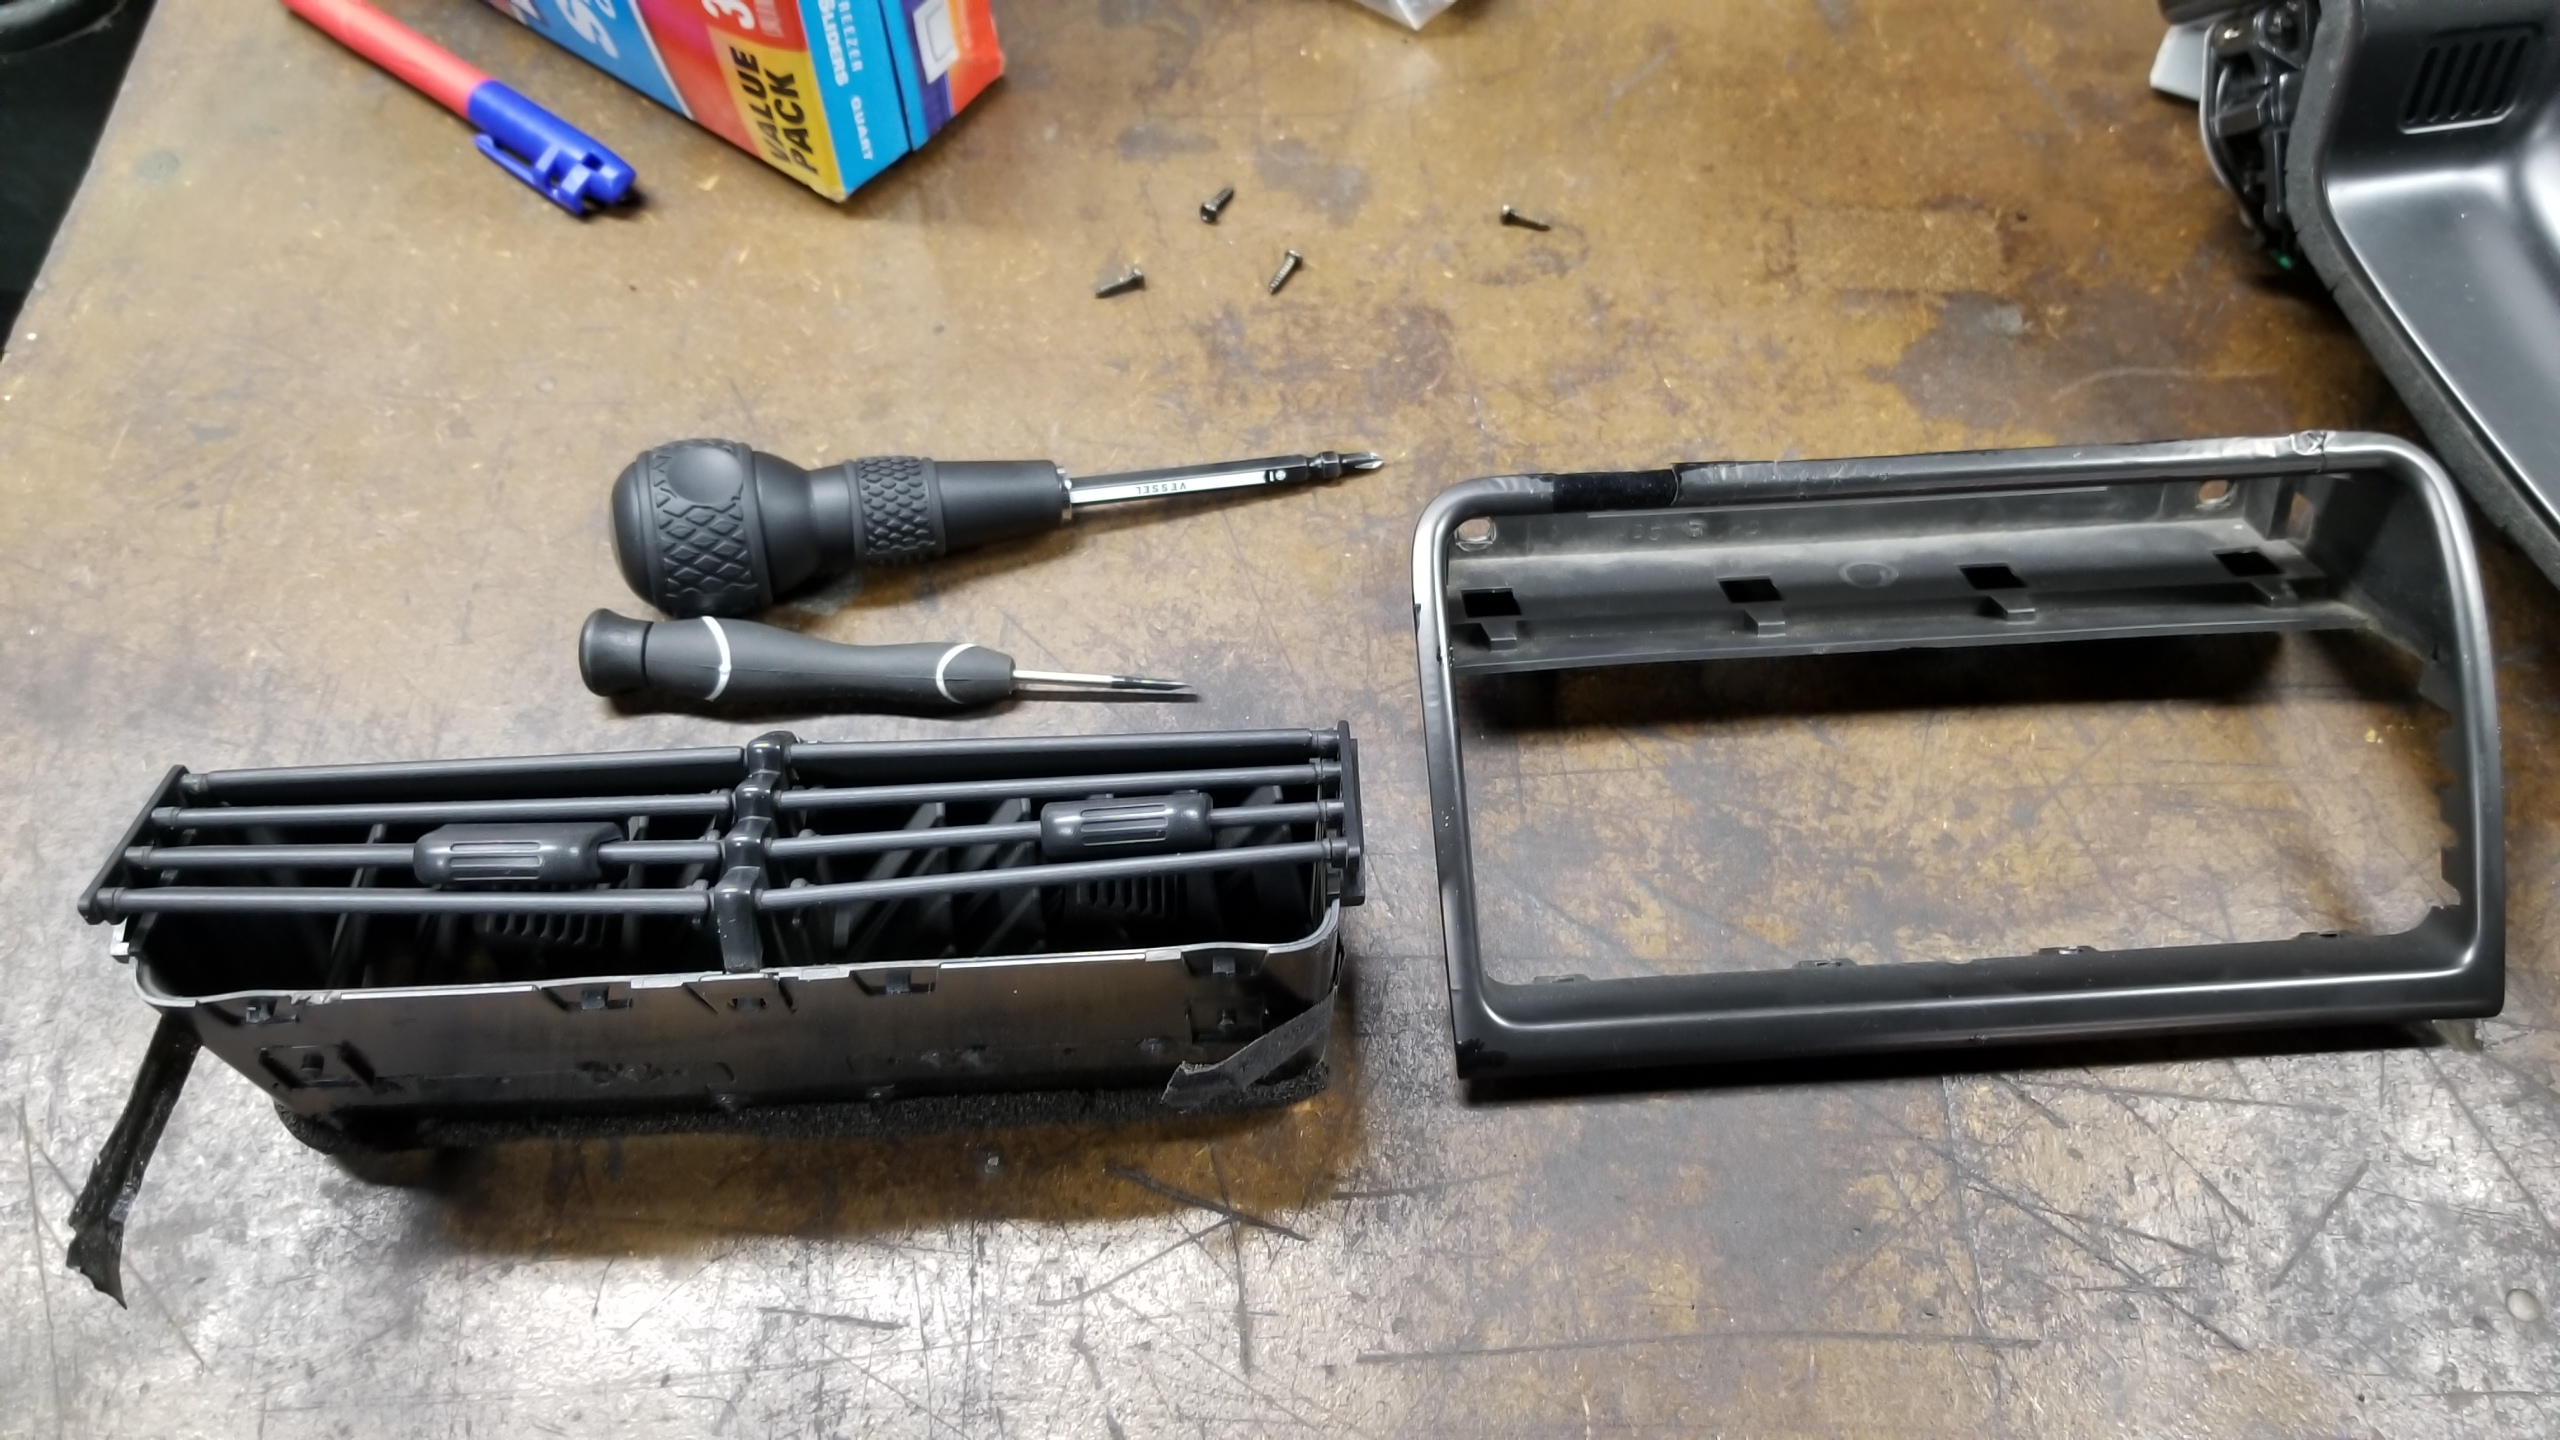
The door switch panels are pretty easy to remove as well. The vents have some spots of factory glue that can be separated with a razor blade, after which the vent can be unclipped and carefully removed. The panel is very thin and easy to break.
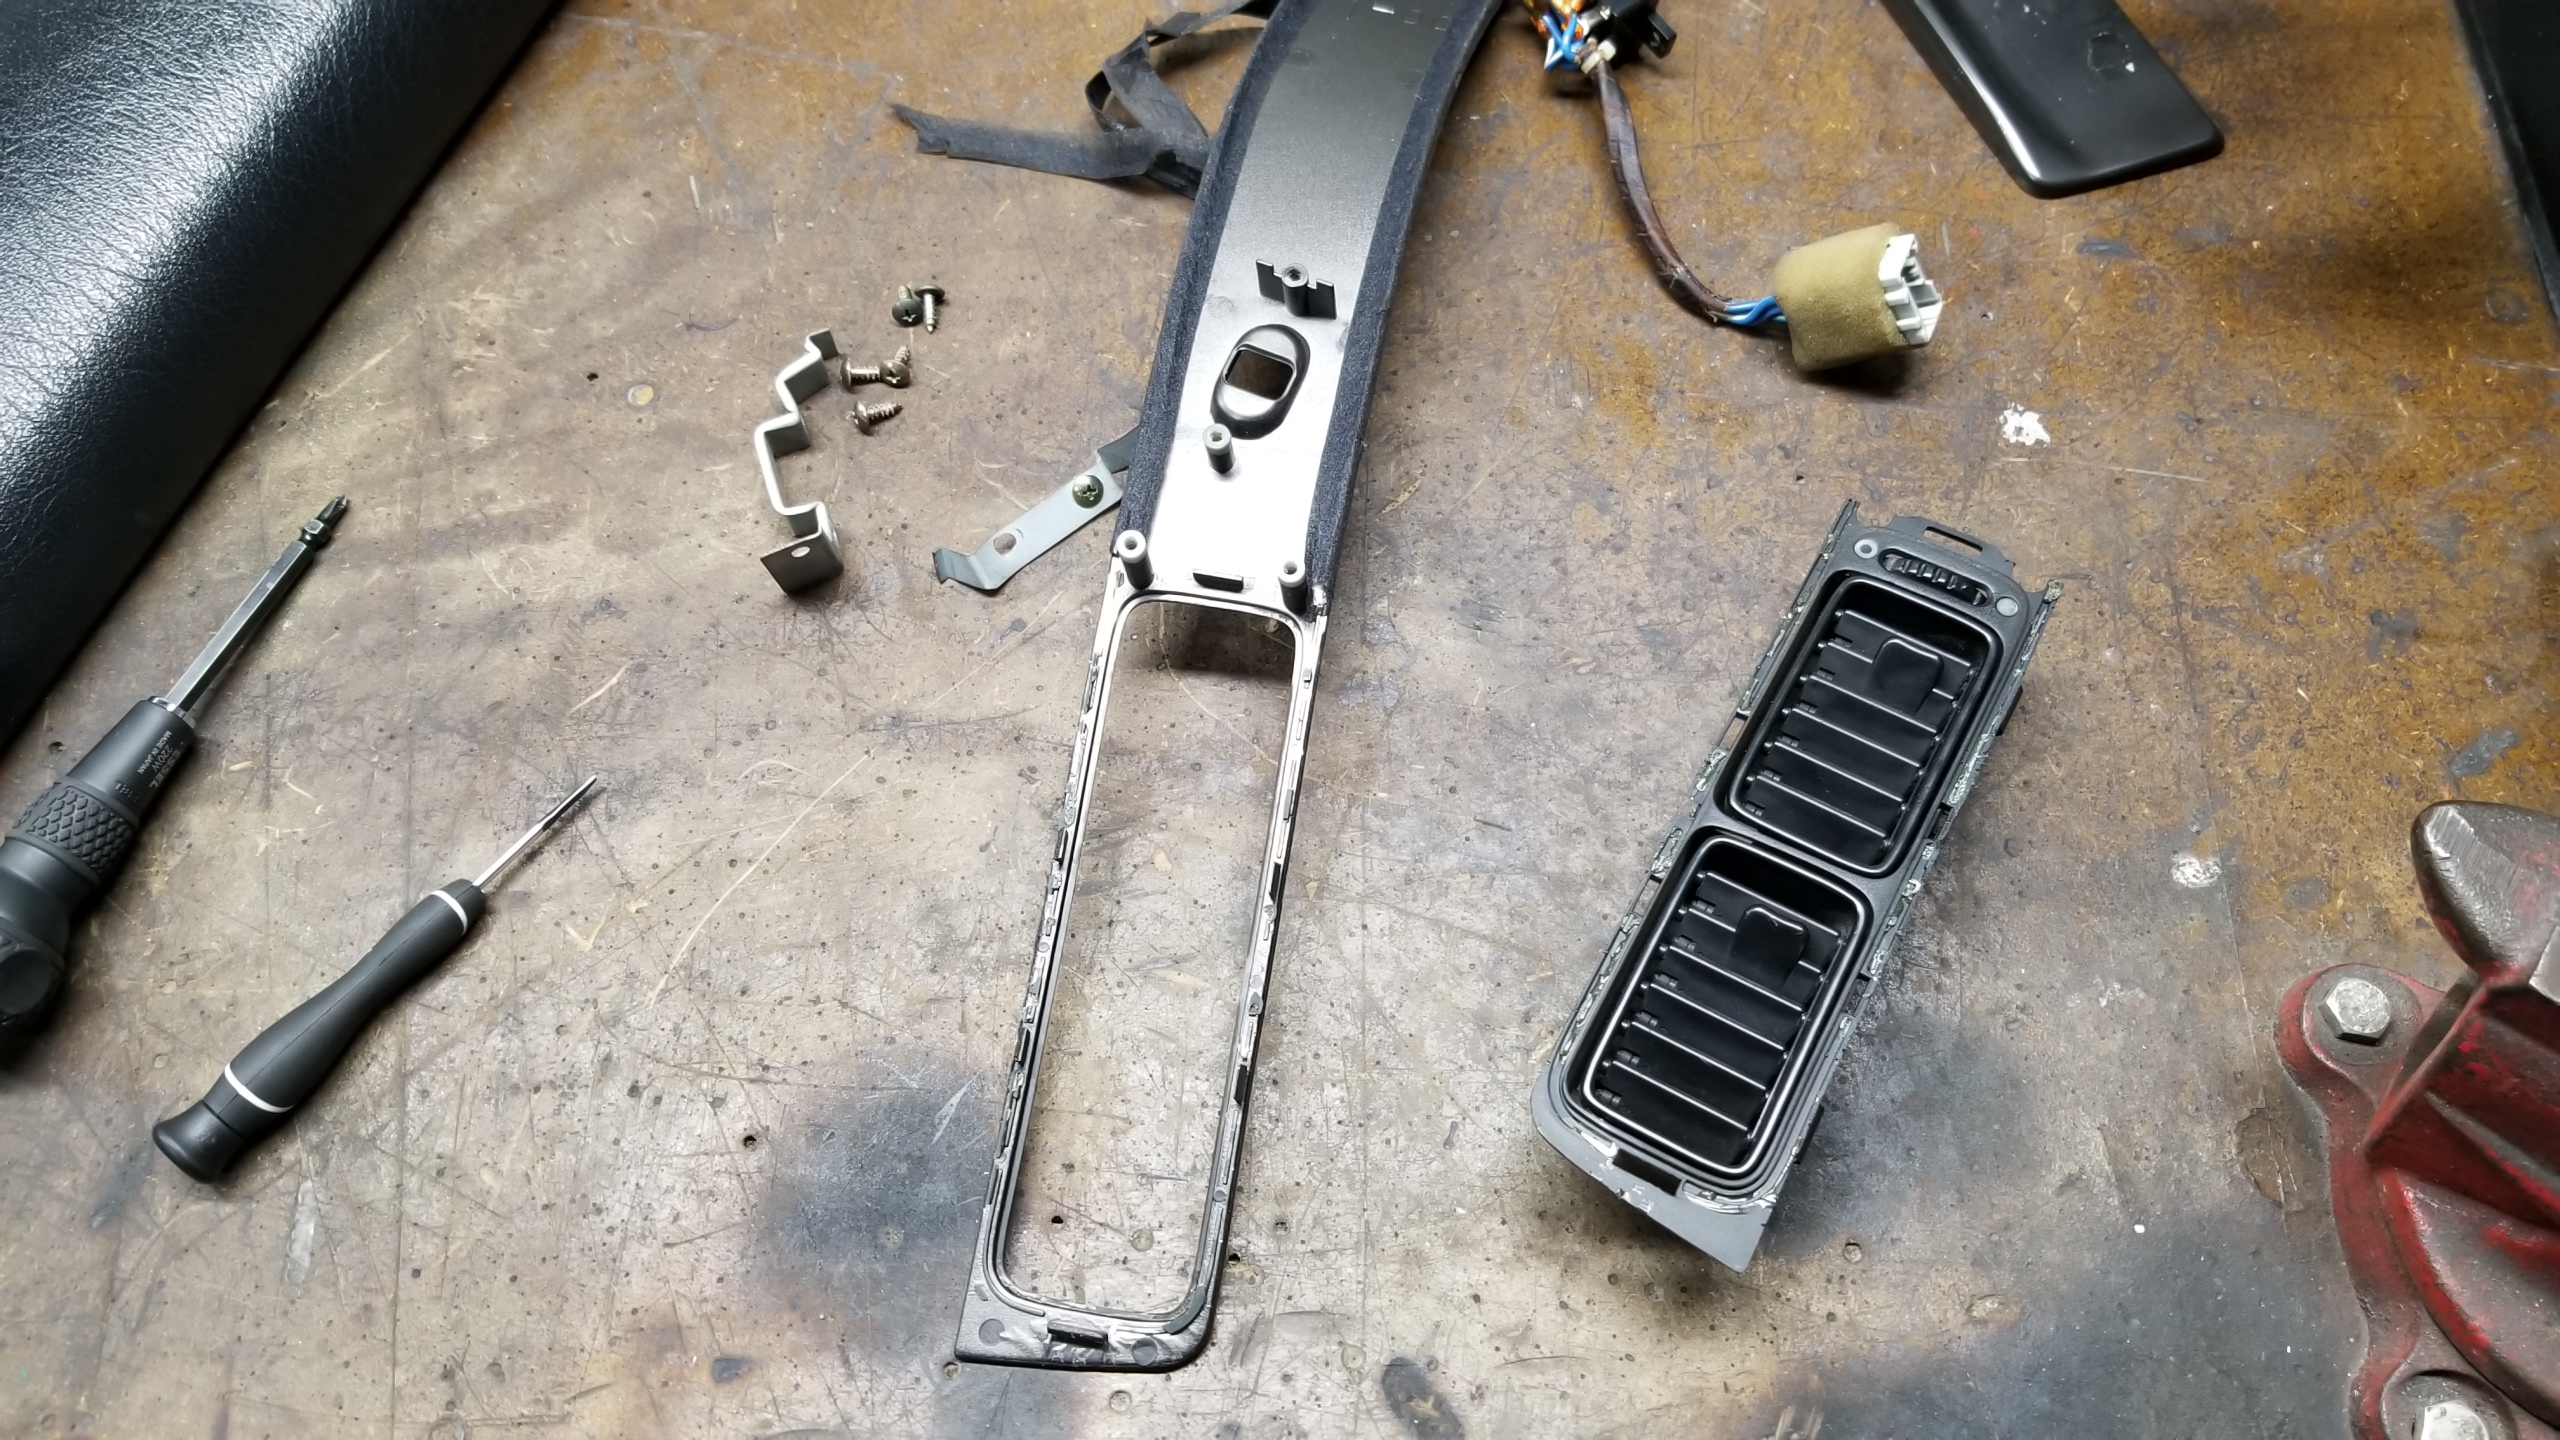
The ashtray cover is also just screwed on from the back in 4 places.
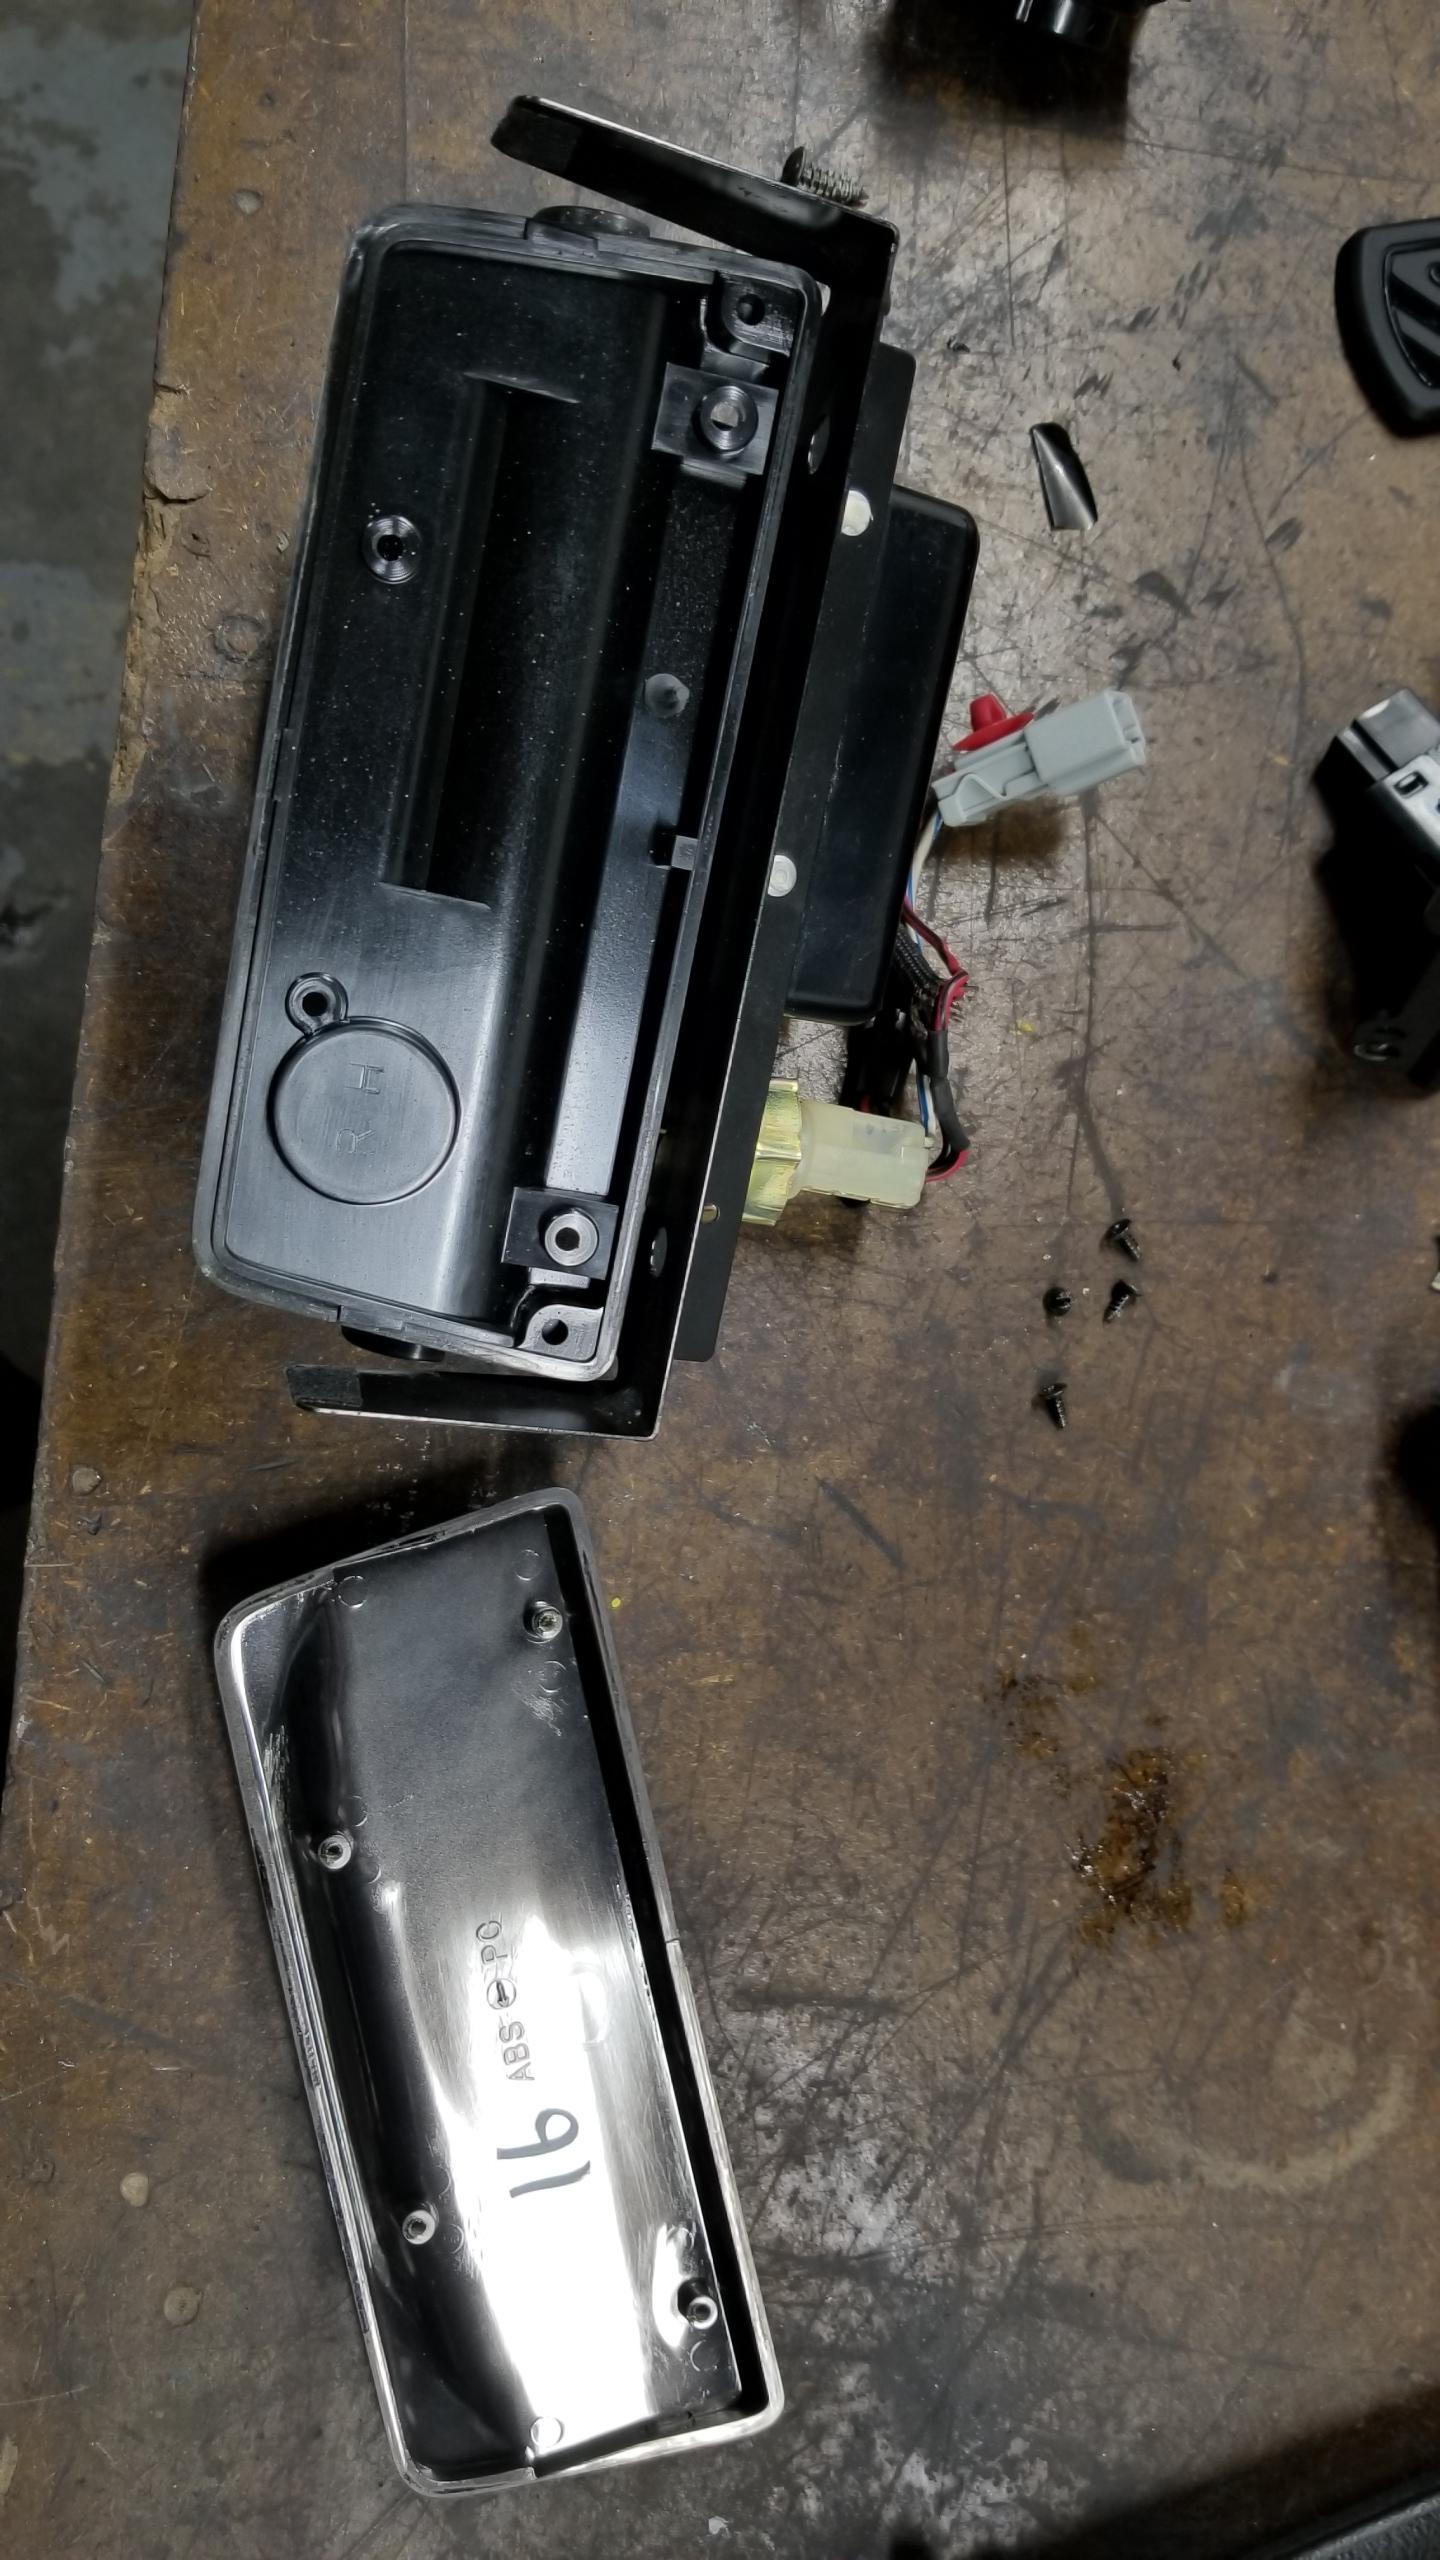
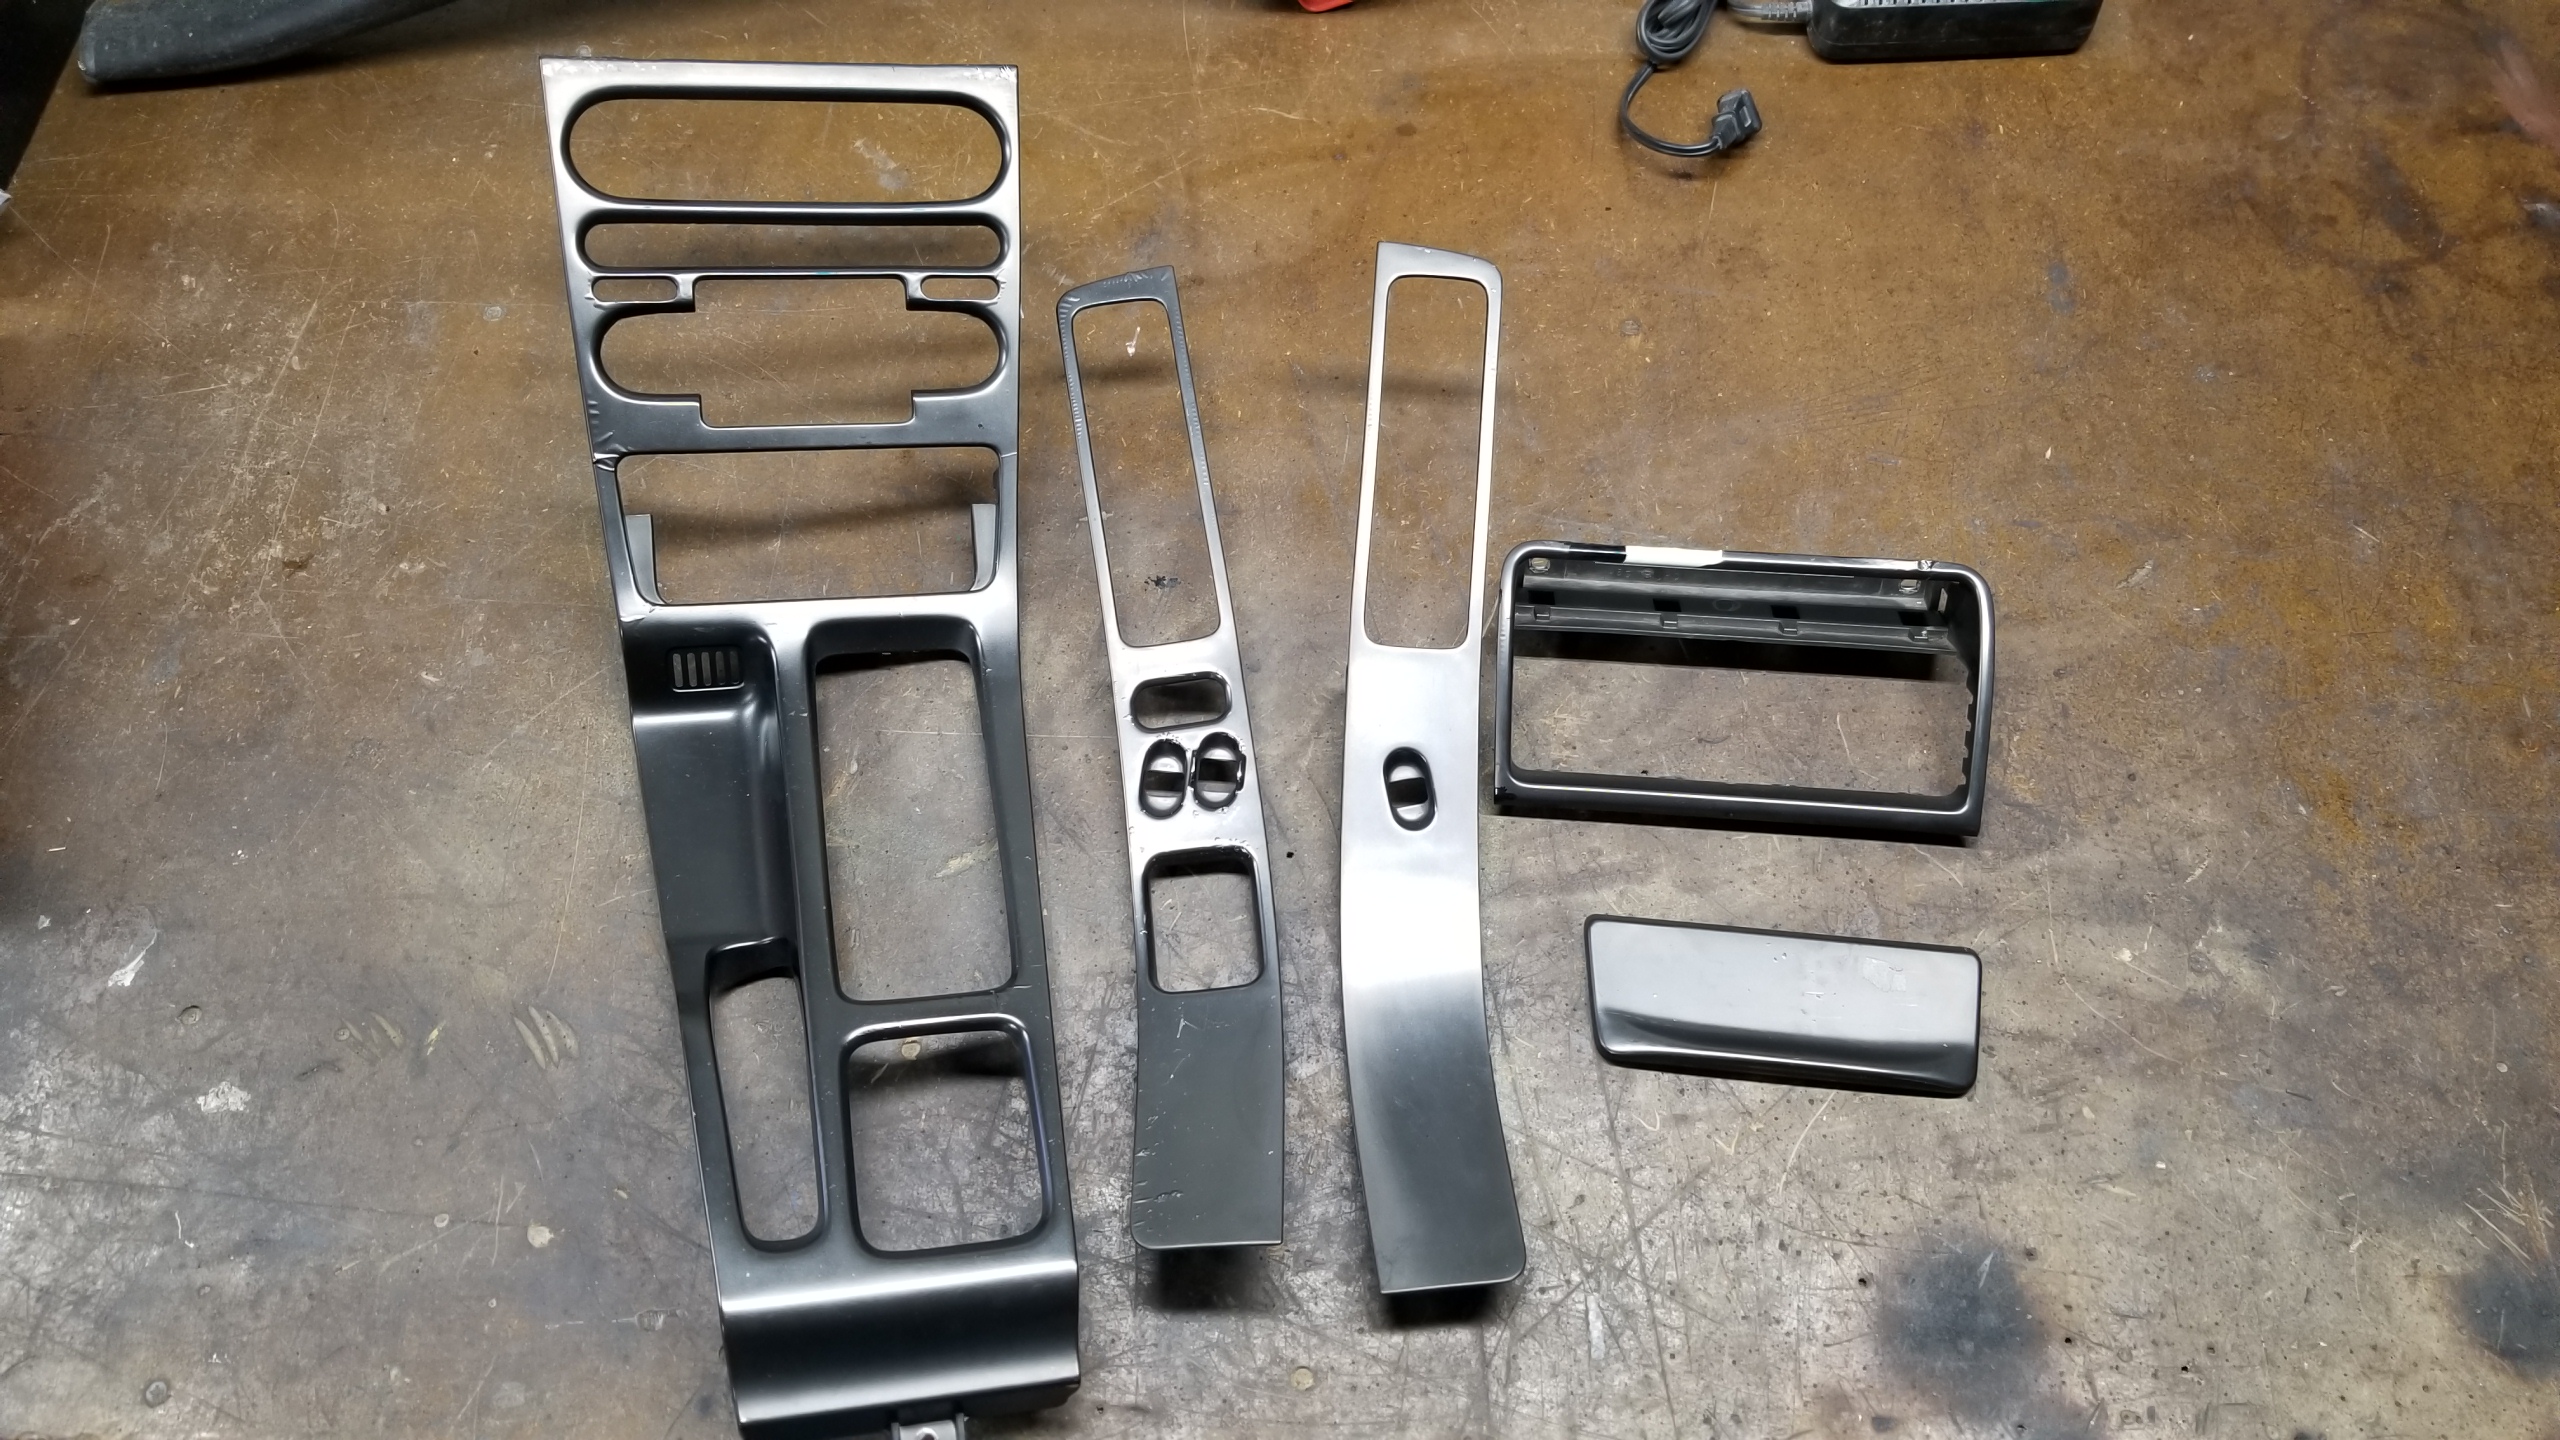
Pretty much every panel is in poor shape and peeling terribly. I was getting tired of looking at them. The sides of the pieces have felt tape that I've removed and bought some quality tesa felt tape and foam to replace the factory trimming.
These will get the classic combo of paint stripper -> ferric chloride -> prime -> paint -> satin clear with SEM products in the next few weeks when there's good weather. After that, I'll probably try upholstering the door cards and decide what to do with the seats.
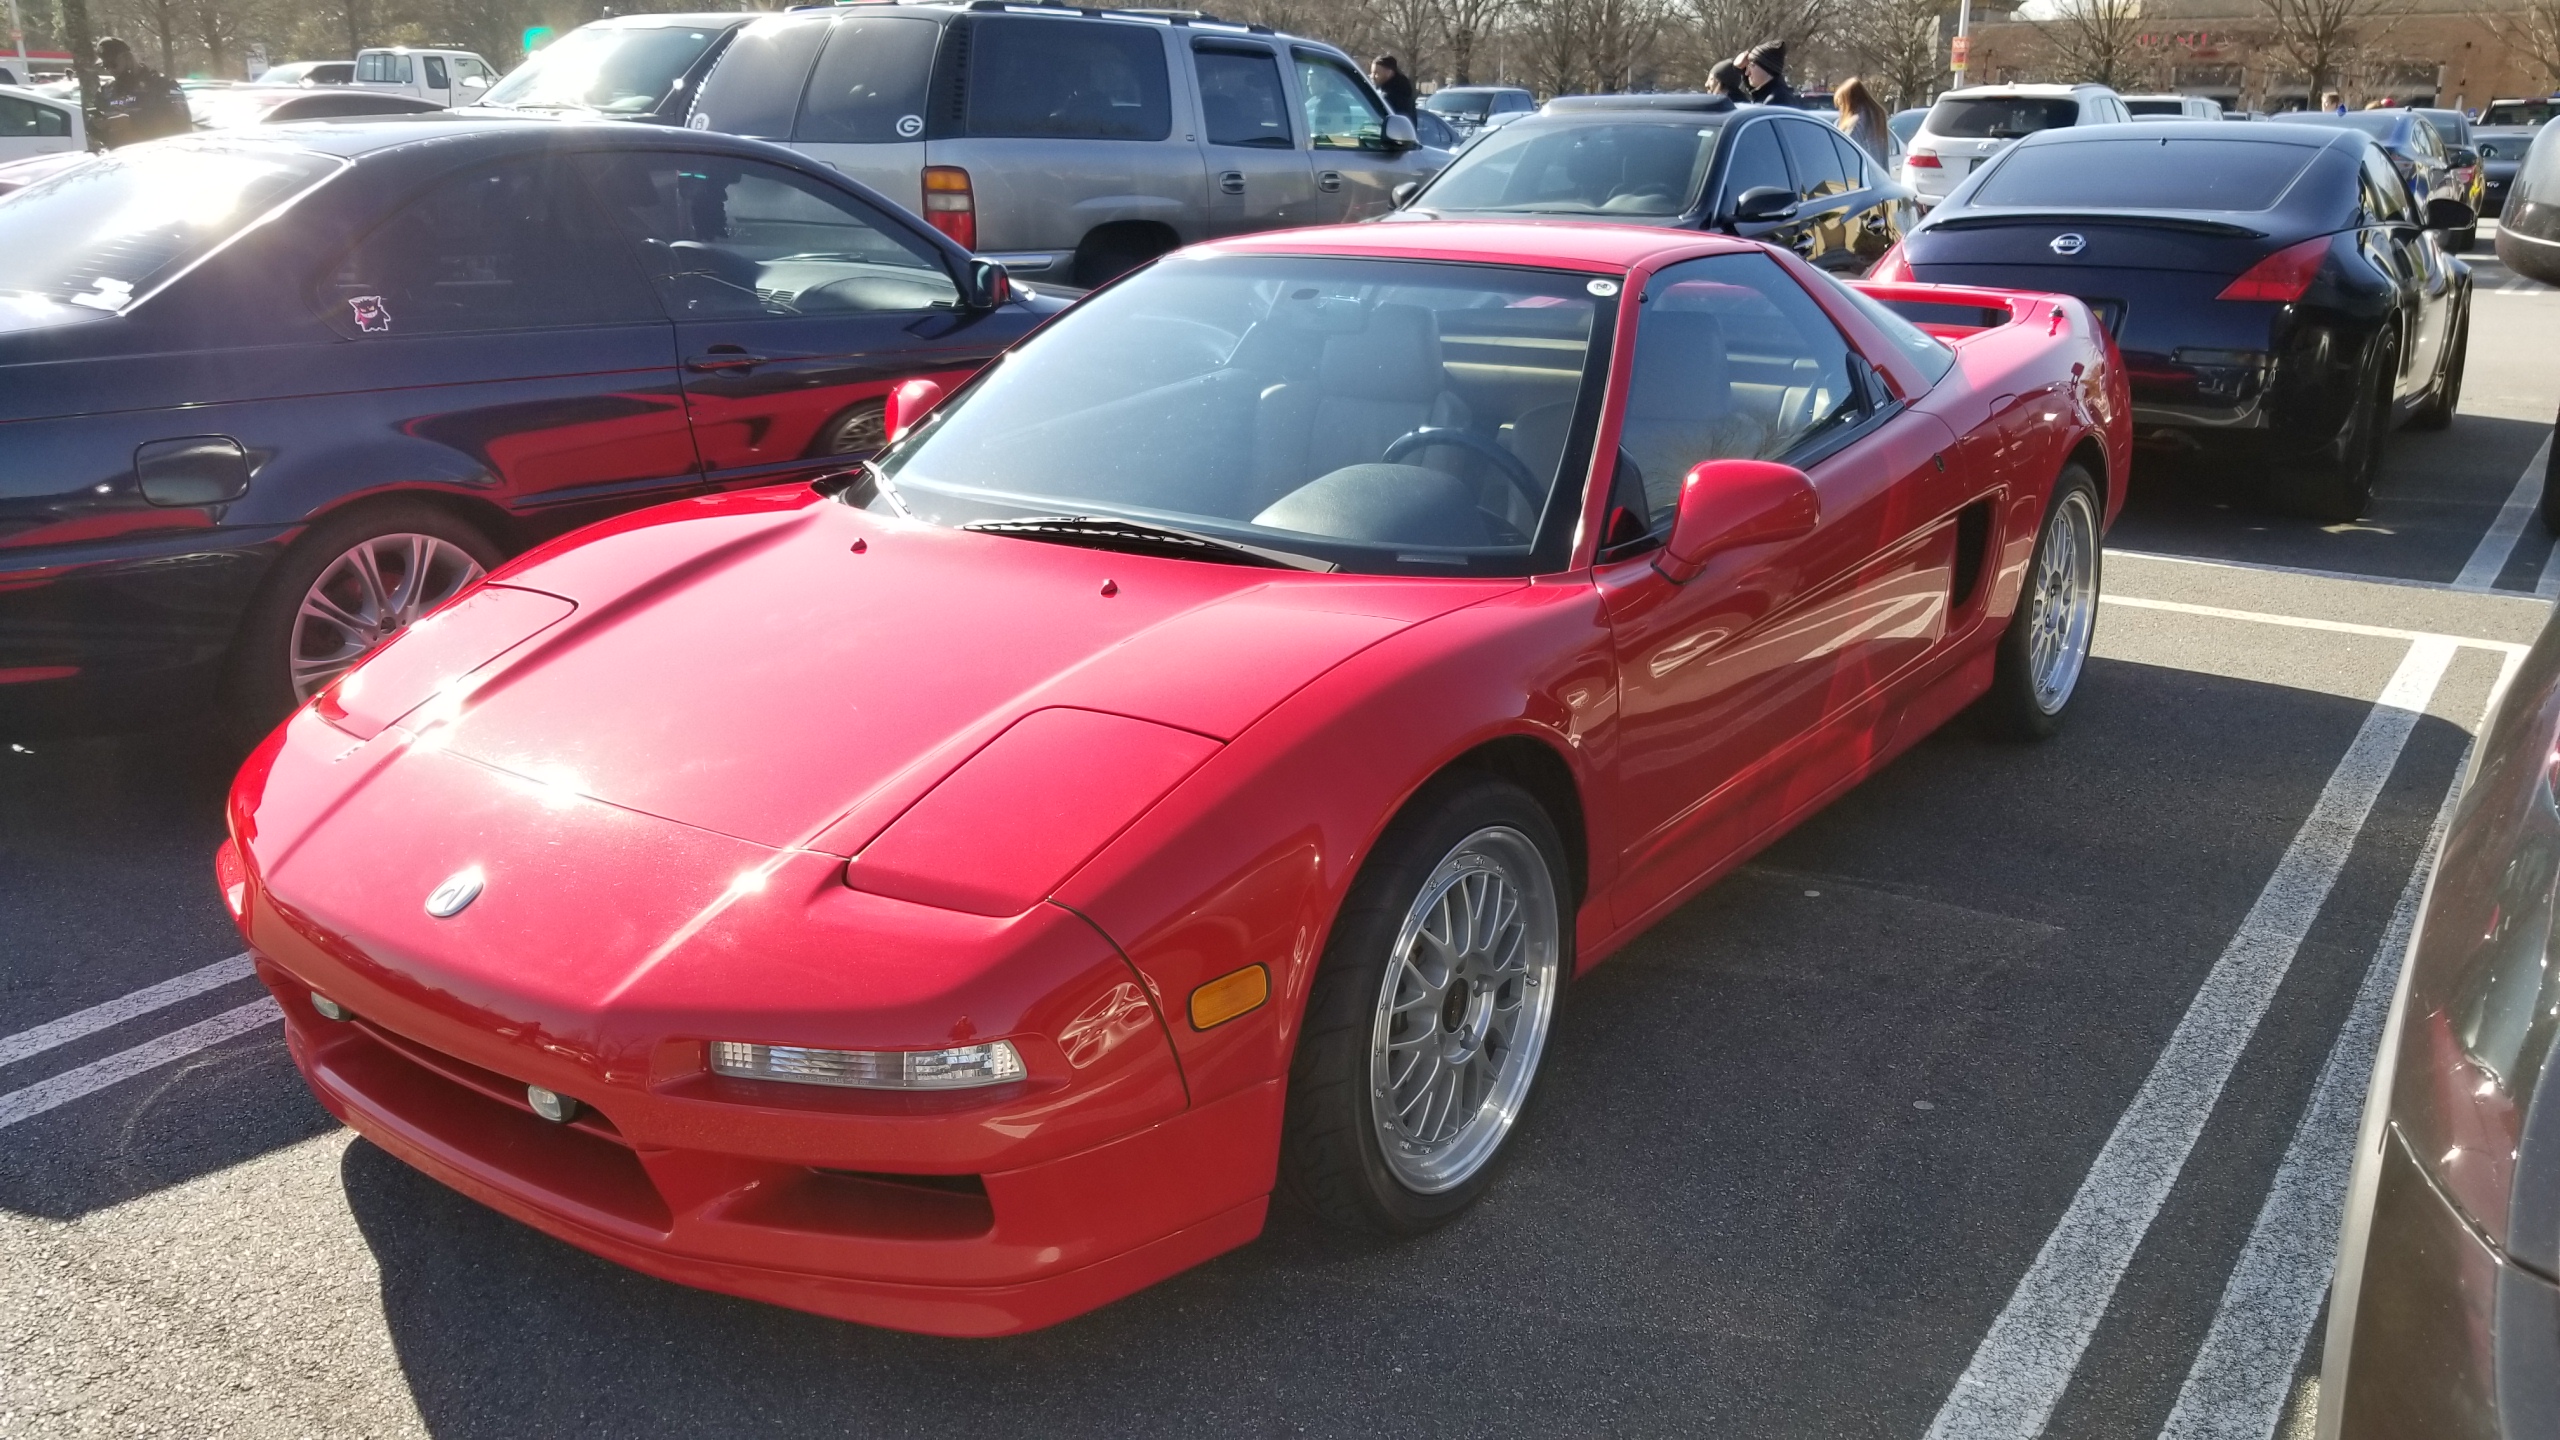
Bonus: I saw this very nice CT supercharged targa NSX at this month's Atlanta C&O just hanging out in the overflow parking. I haven't seen this one around before but it's one of the nicest I've seen in person. Unfortunately I couldn't bring my own since I'm stillllllllll waiting on my steering wheel to get back, I seem to have very bad luck with package shipments.
So I took everything out again. For good reason though.
Begin disassembly of the center console & door card pieces for refinishing. The center vent has 4 teeny screws and a few small clips to pop the vents out of the surrounding piece, which you can see if you look closely appears to look like it's peeling horribly.
The door switch panels are pretty easy to remove as well. The vents have some spots of factory glue that can be separated with a razor blade, after which the vent can be unclipped and carefully removed. The panel is very thin and easy to break.
The ashtray cover is also just screwed on from the back in 4 places.
Pretty much every panel is in poor shape and peeling terribly. I was getting tired of looking at them. The sides of the pieces have felt tape that I've removed and bought some quality tesa felt tape and foam to replace the factory trimming.
These will get the classic combo of paint stripper -> ferric chloride -> prime -> paint -> satin clear with SEM products in the next few weeks when there's good weather. After that, I'll probably try upholstering the door cards and decide what to do with the seats.
Bonus: I saw this very nice CT supercharged targa NSX at this month's Atlanta C&O just hanging out in the overflow parking. I haven't seen this one around before but it's one of the nicest I've seen in person. Unfortunately I couldn't bring my own since I'm stillllllllll waiting on my steering wheel to get back, I seem to have very bad luck with package shipments.
Last edited:
Rimz
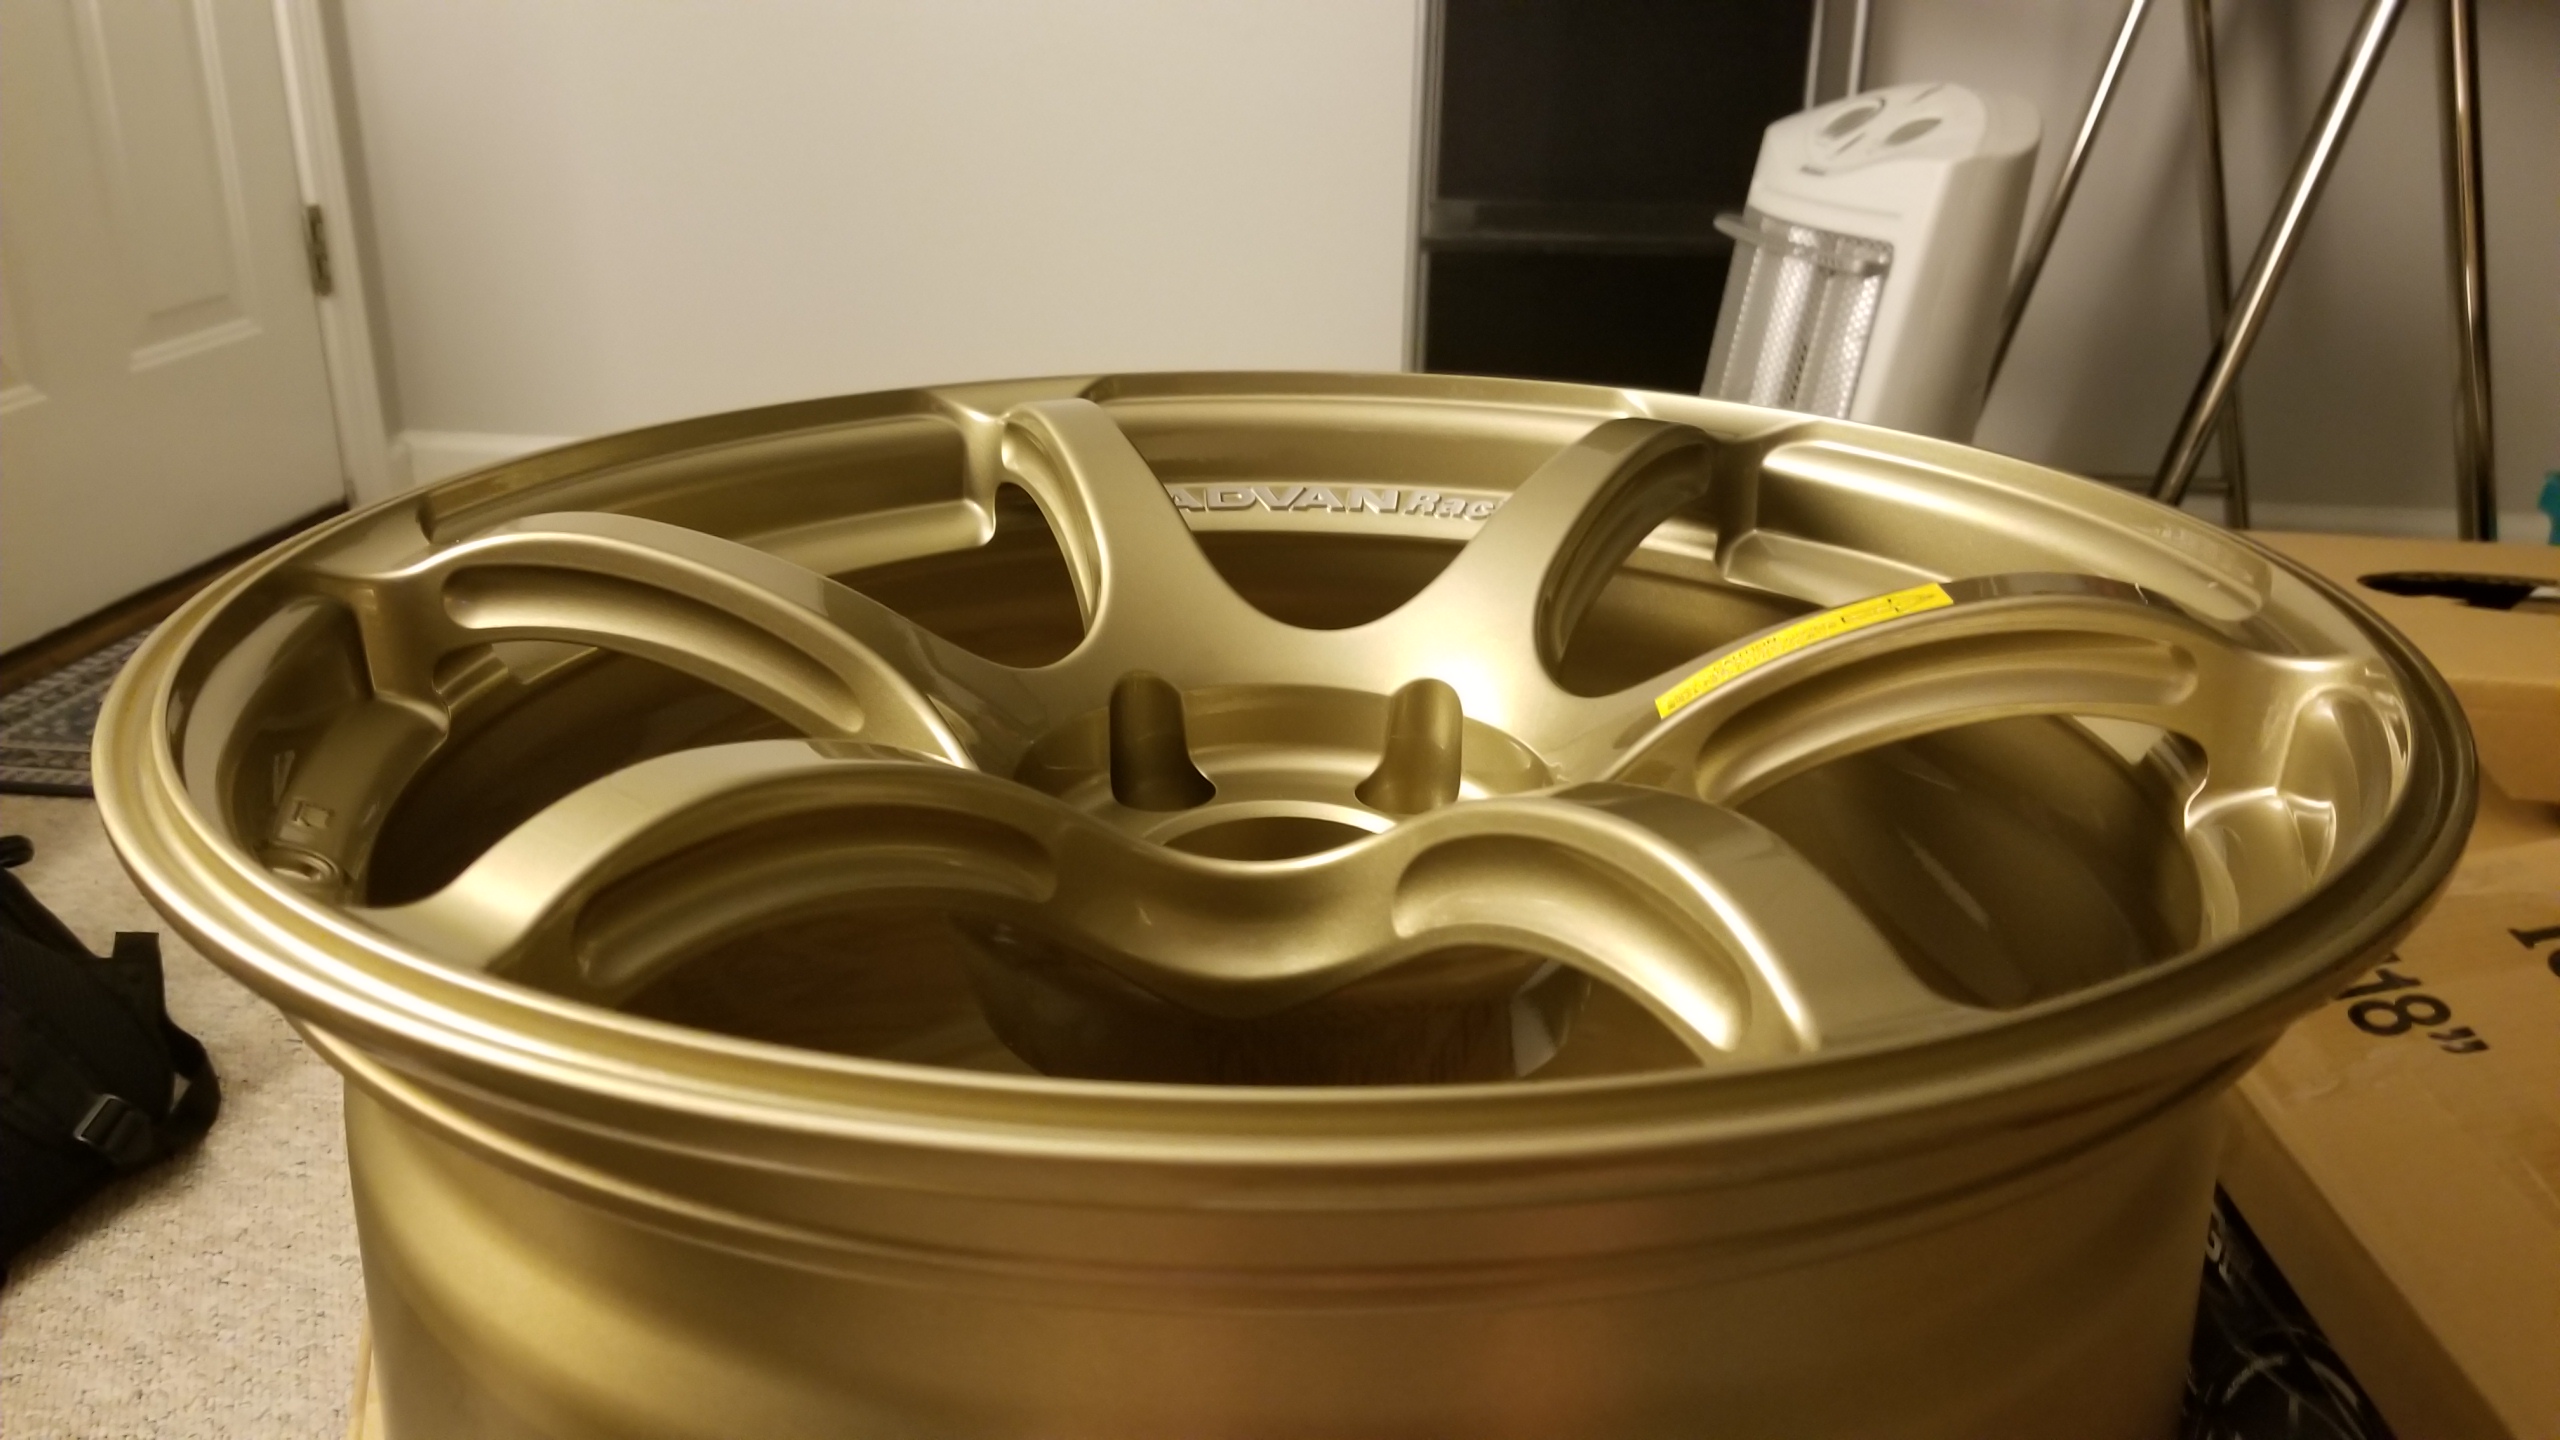
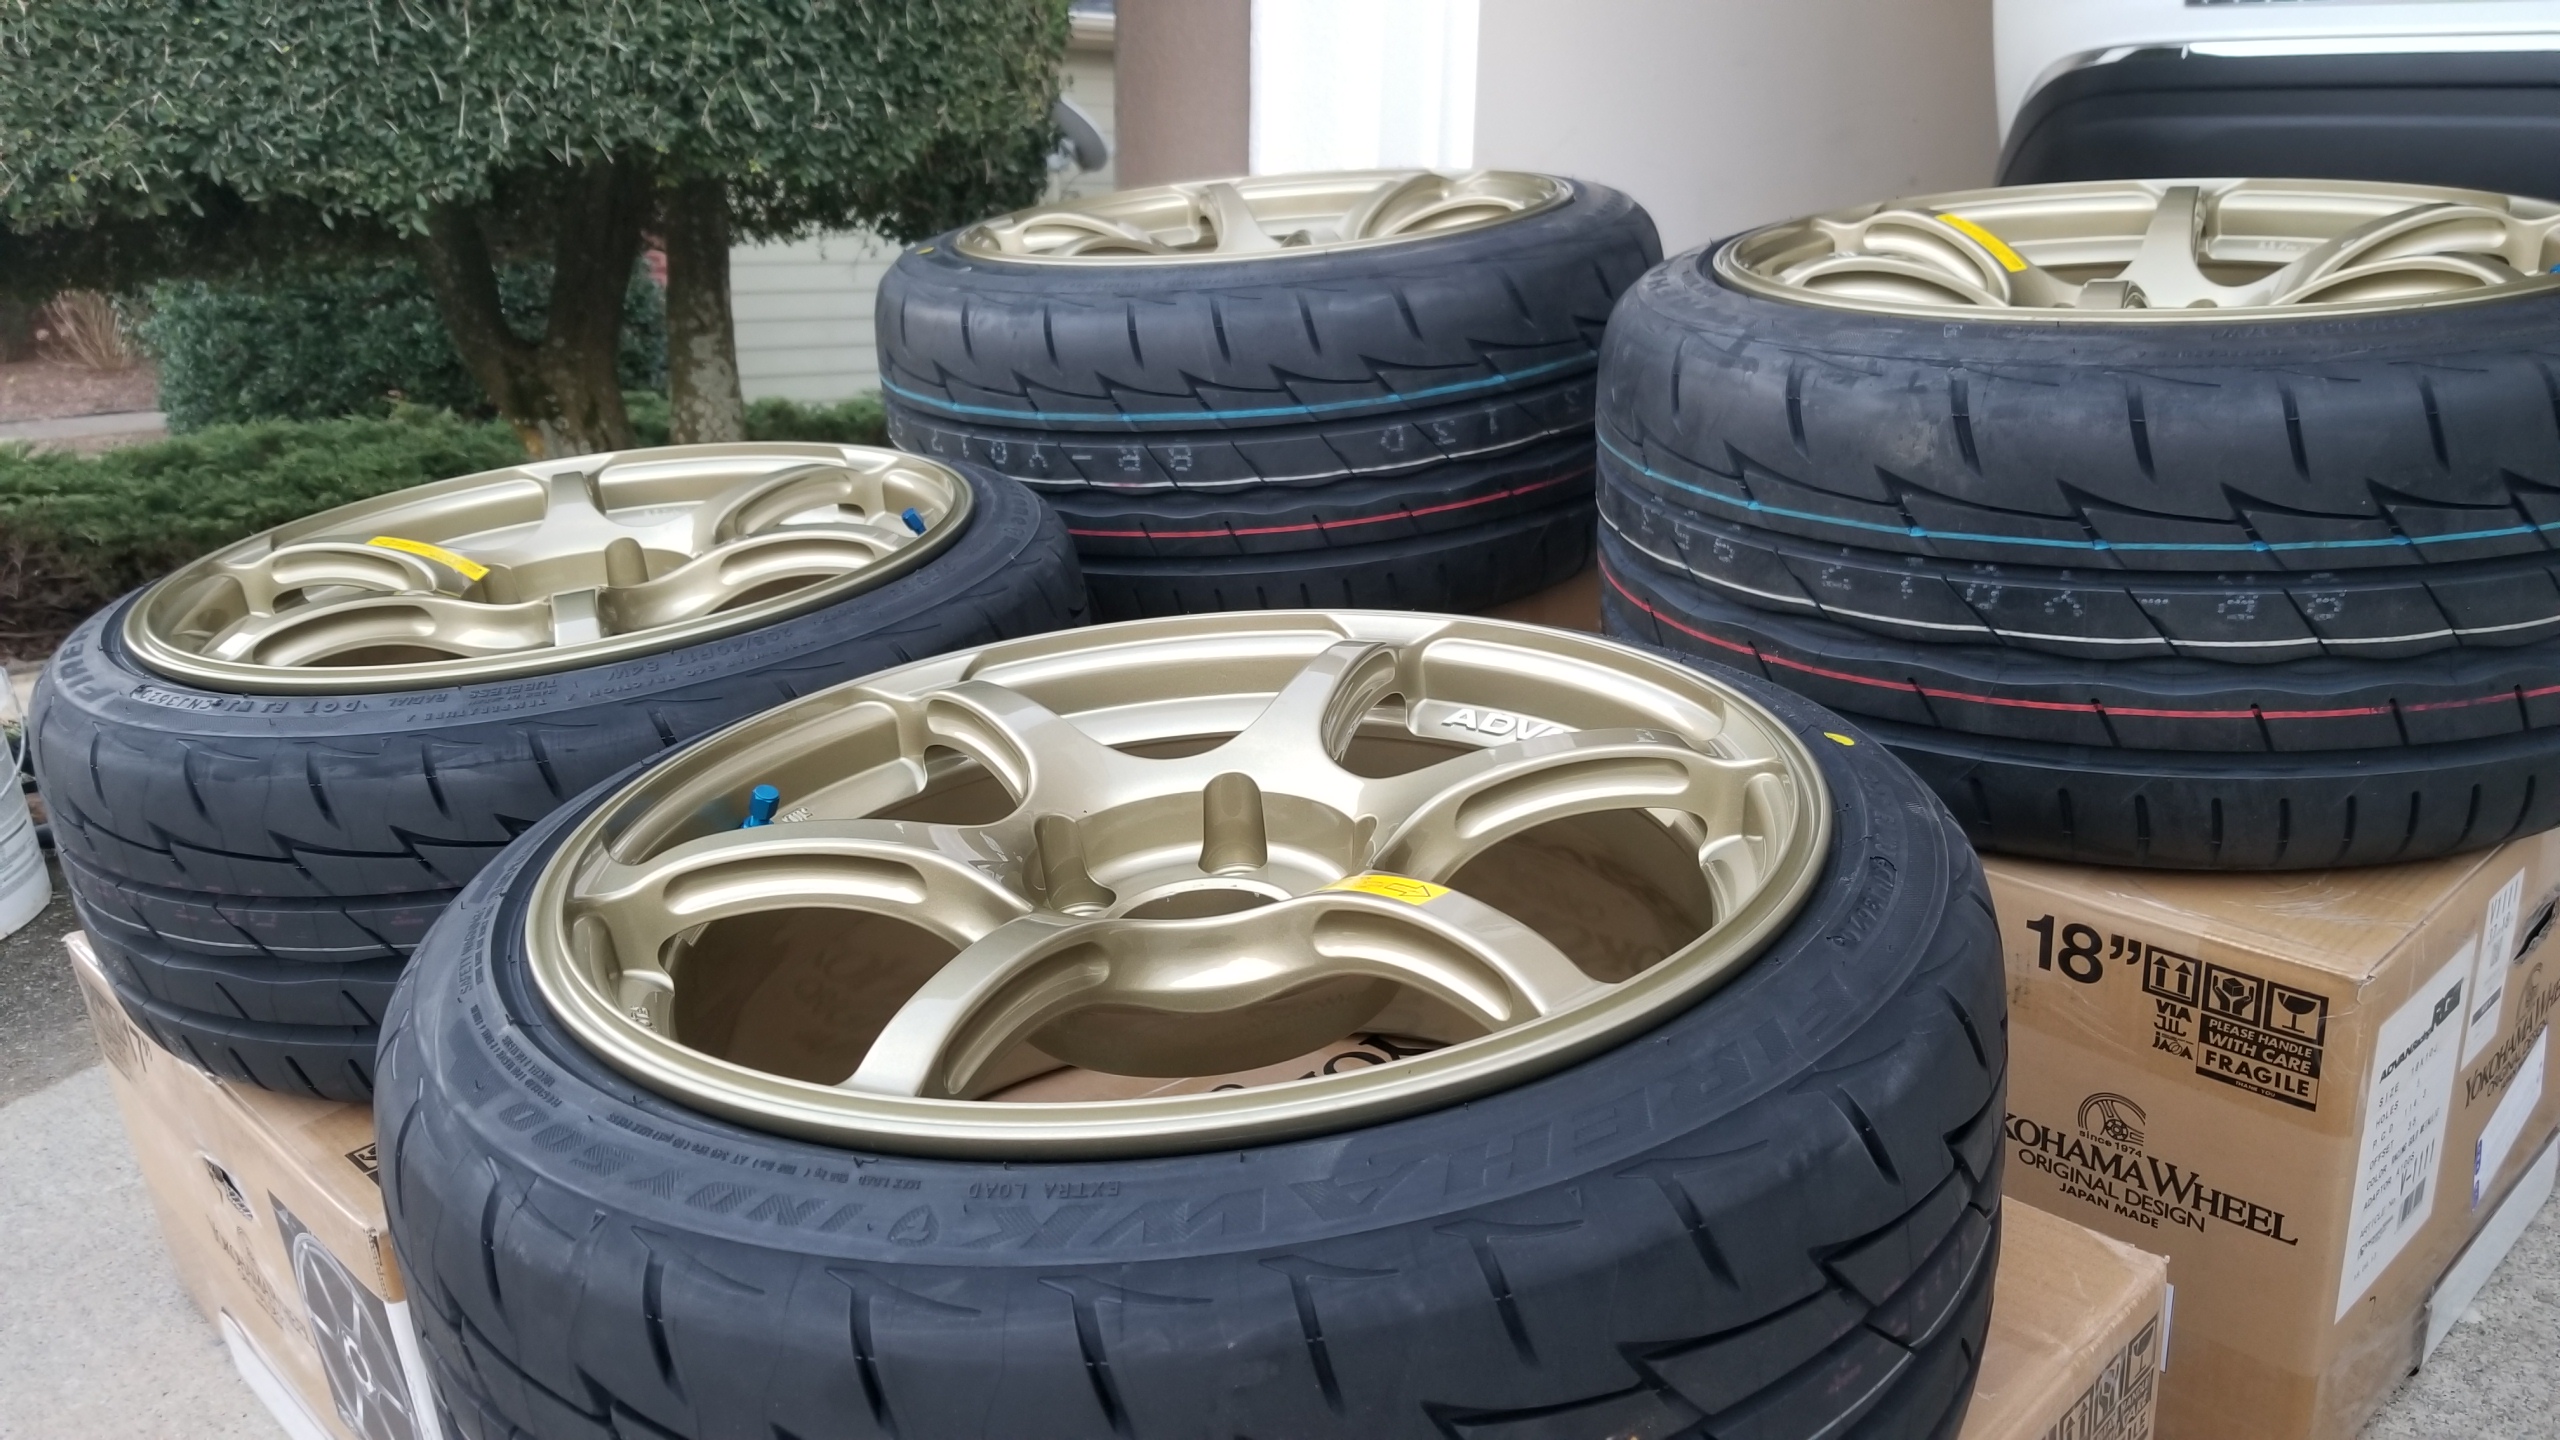
A very nice fellow on FB just happened to have a set of the exact specs I wanted on these Advan RGIII's, brand new. Actually the first wheels I've ever bought.
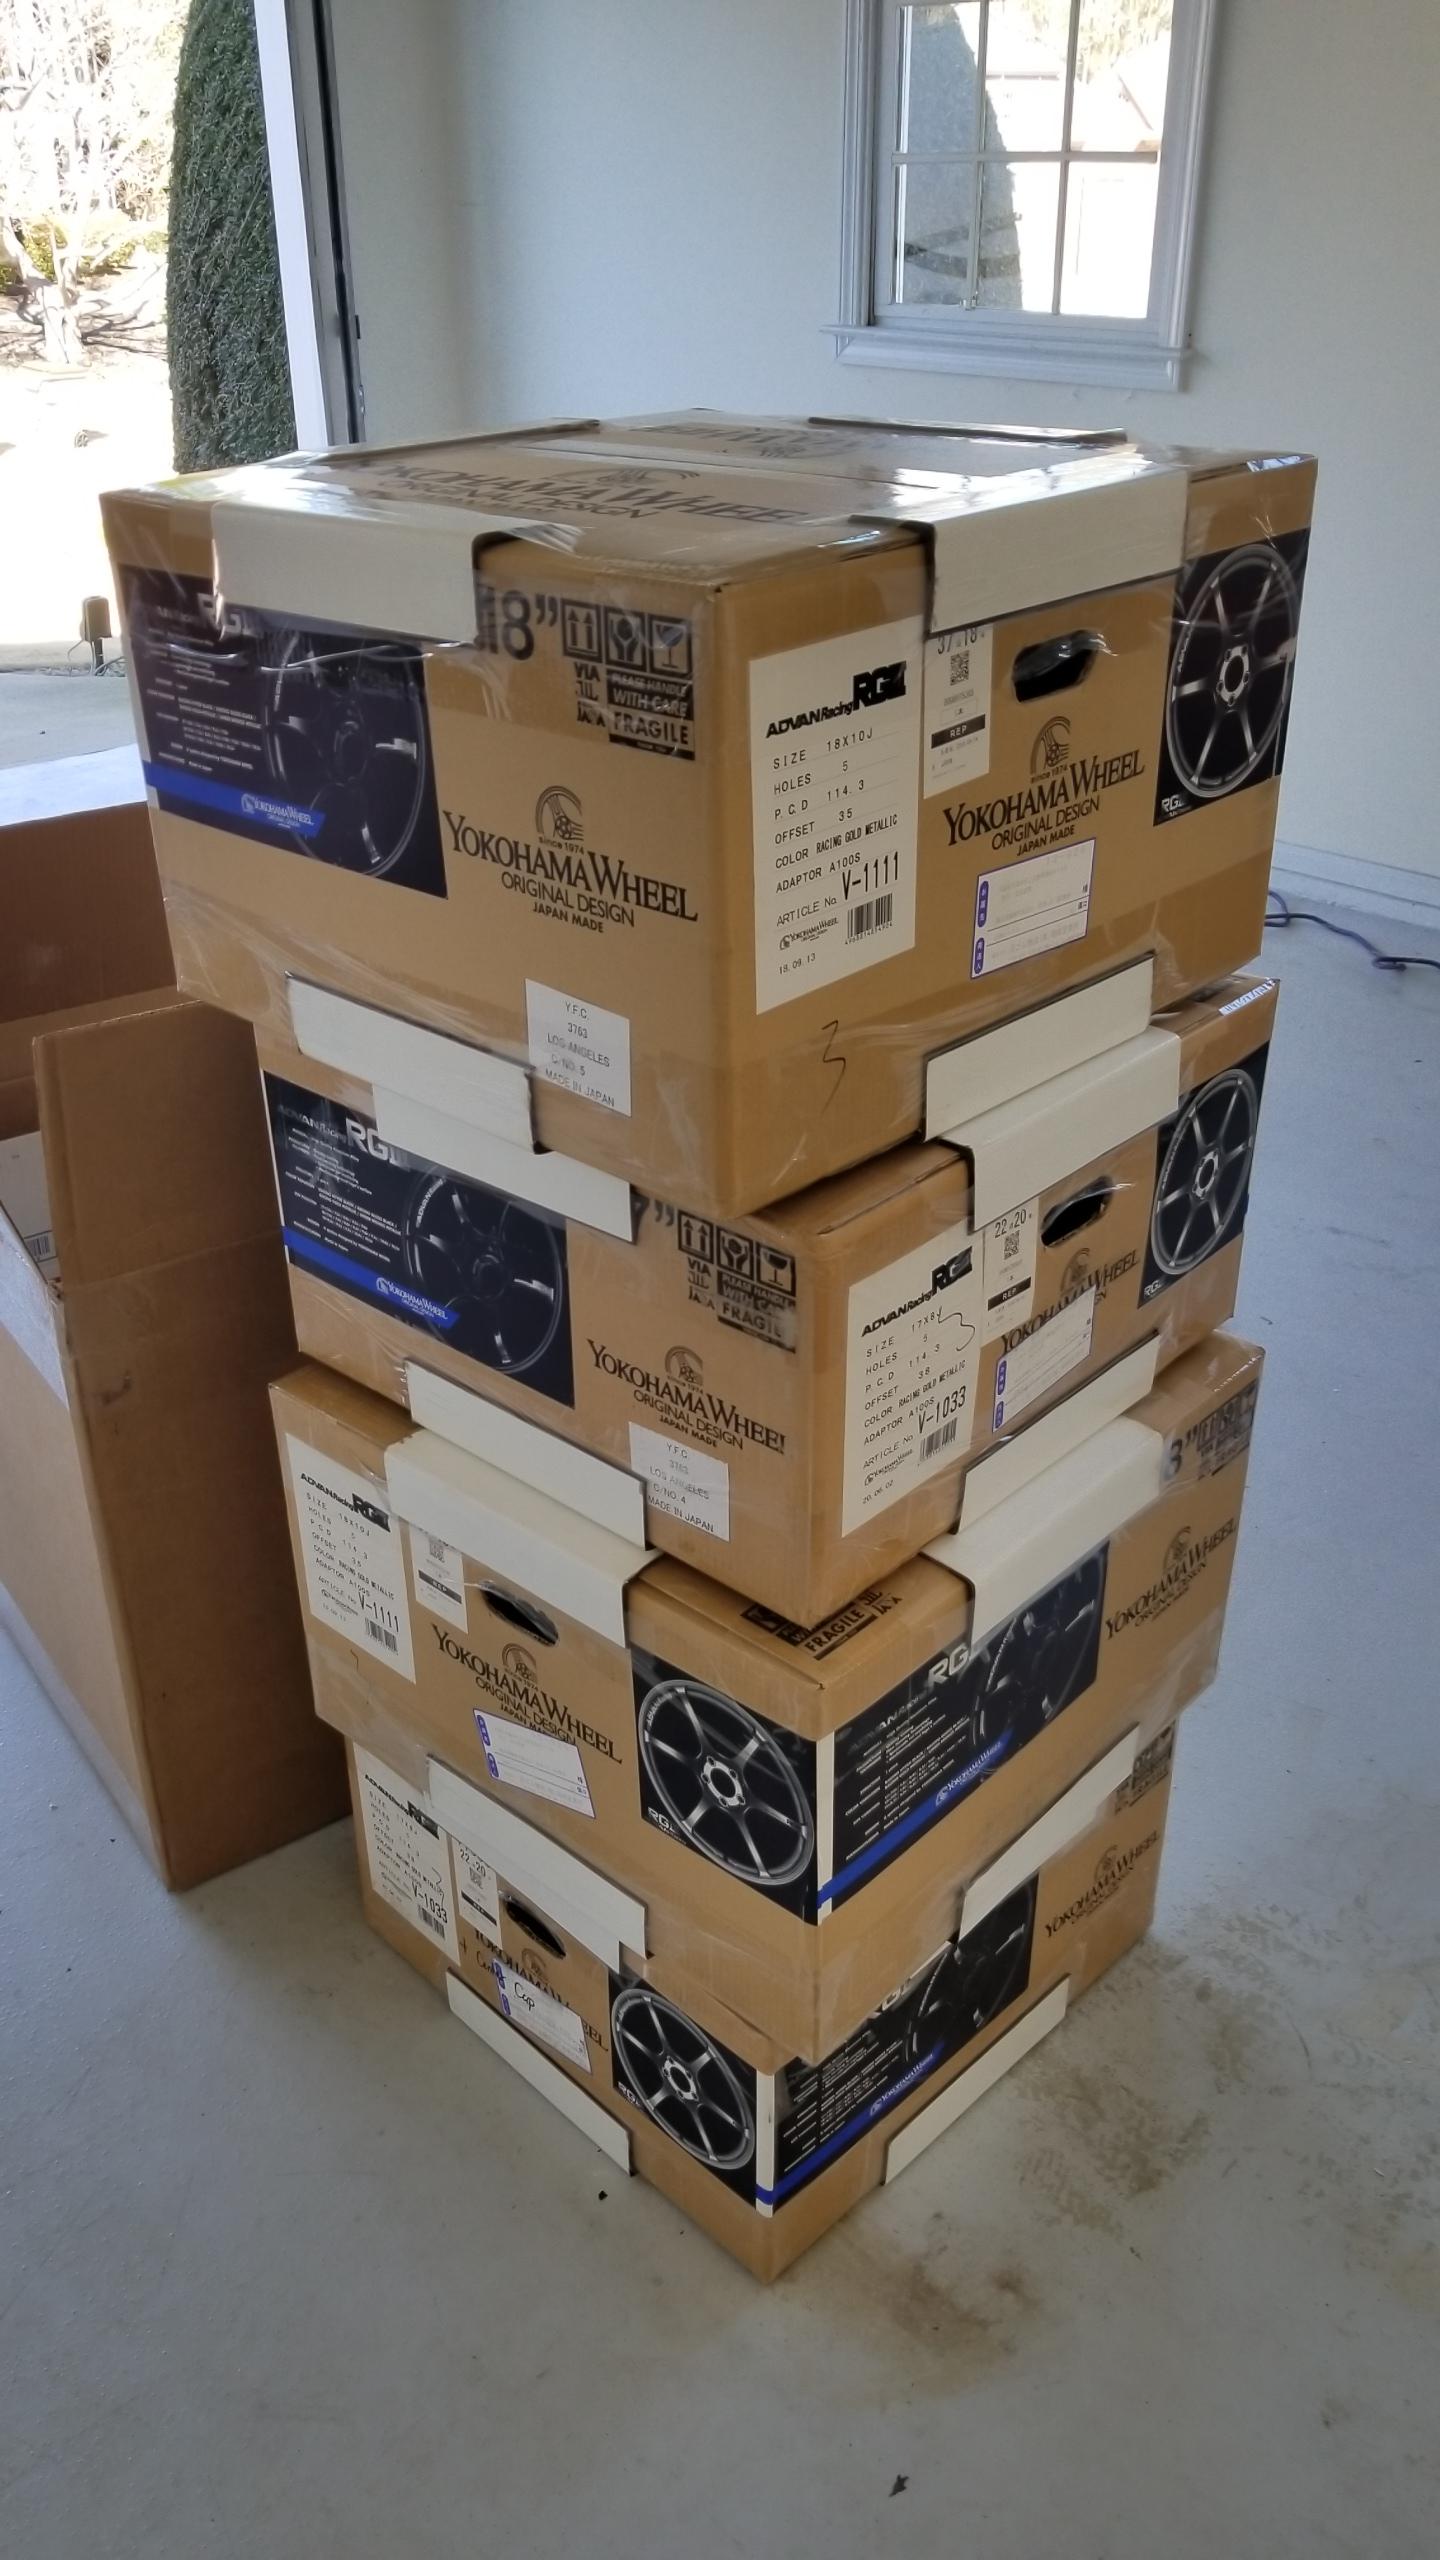
Some experts say tires are also important for a car. These are Firestone Firehawk Indy 500's in 205/40-17 and 265/35-18, which I believe are the same as Bridgestone Potenza RE003's. I deliberated for days on end on what go choose for my first summer tires, these have great reviews, are 340TW for a big more longevity, and are hundreds of $ less than an AD08 or Direzza. I'm not looking to blow the doors off with my largely street driving but I'd like to start doing more soon and these should be a good entry point.
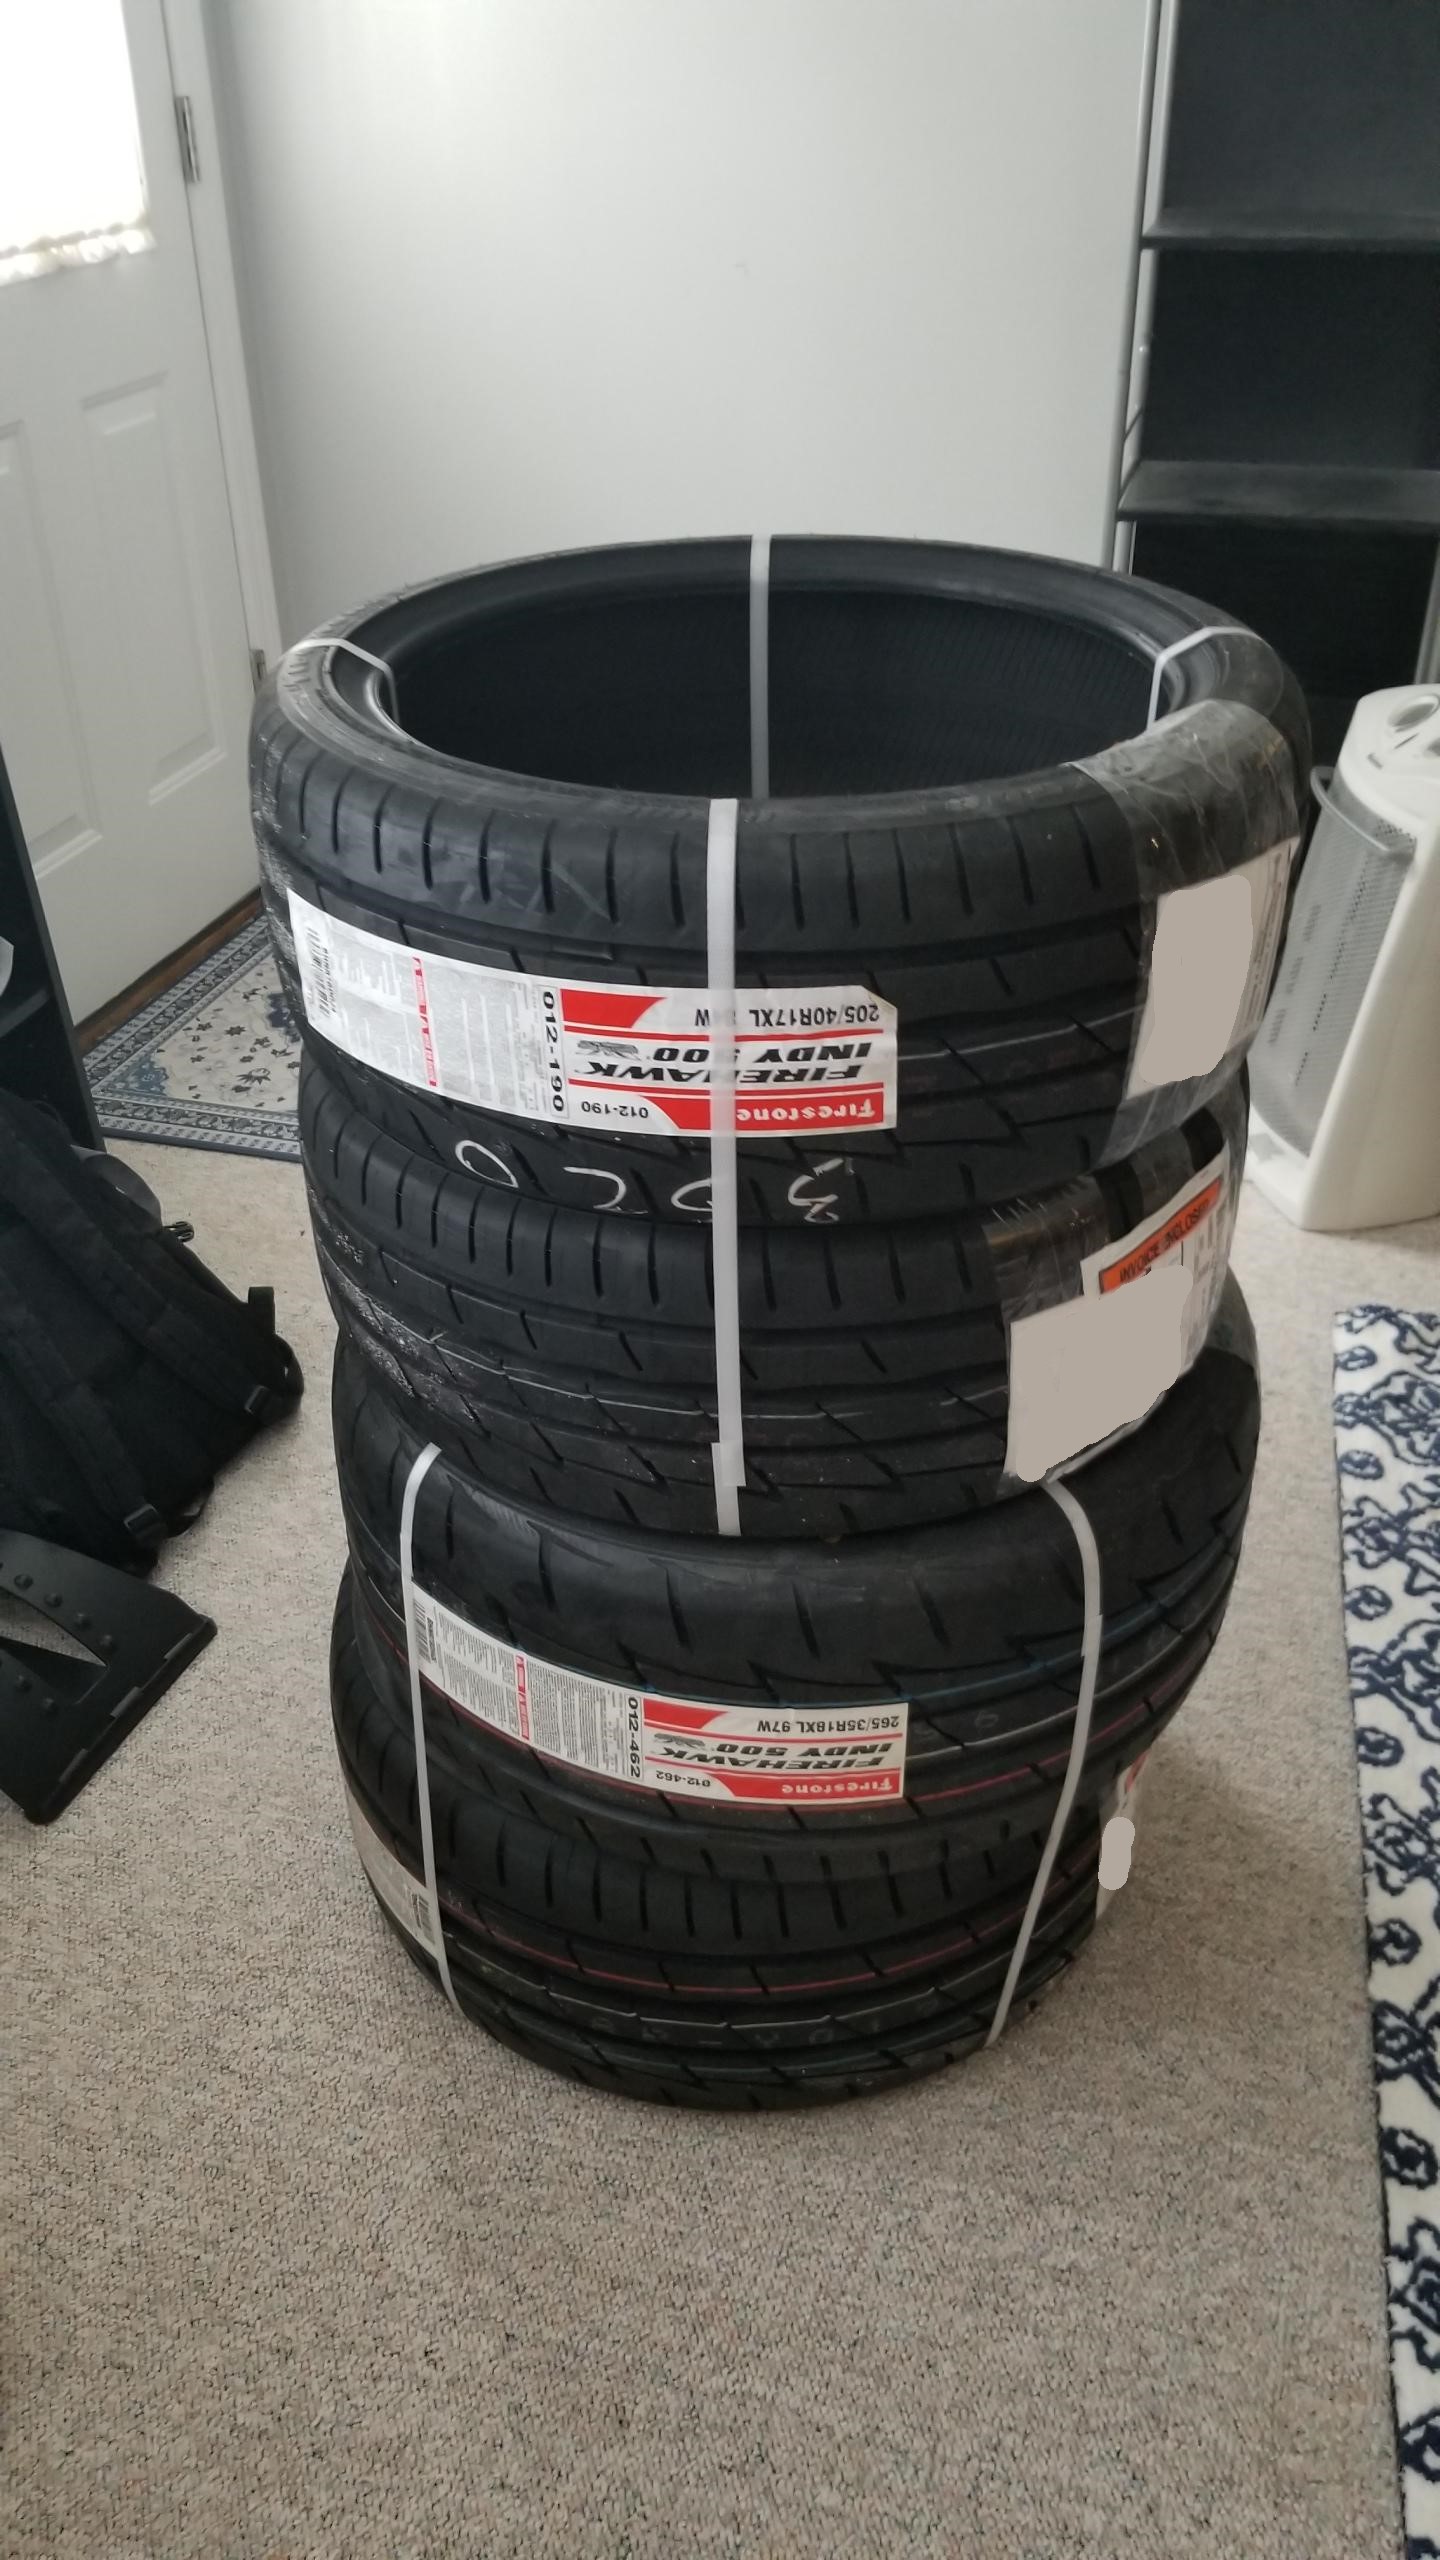
Here's one fresh out of the box.

Love the huge concavity on the 18" rears. The fronts in 17" still have some as well.
Mocked up with Muteki SR35 neo chrome lug nuts. I'm not entirely sold on the style, I know lots of people have the long lugs but I kind of like the recessed look. I might change these out for a longer version or different color but I wanted wheel locks and there weren't a lot of sets with them. The Kicks R40 lugs would be the next logical choice but I have a hard time paying $300 for lug nuts.

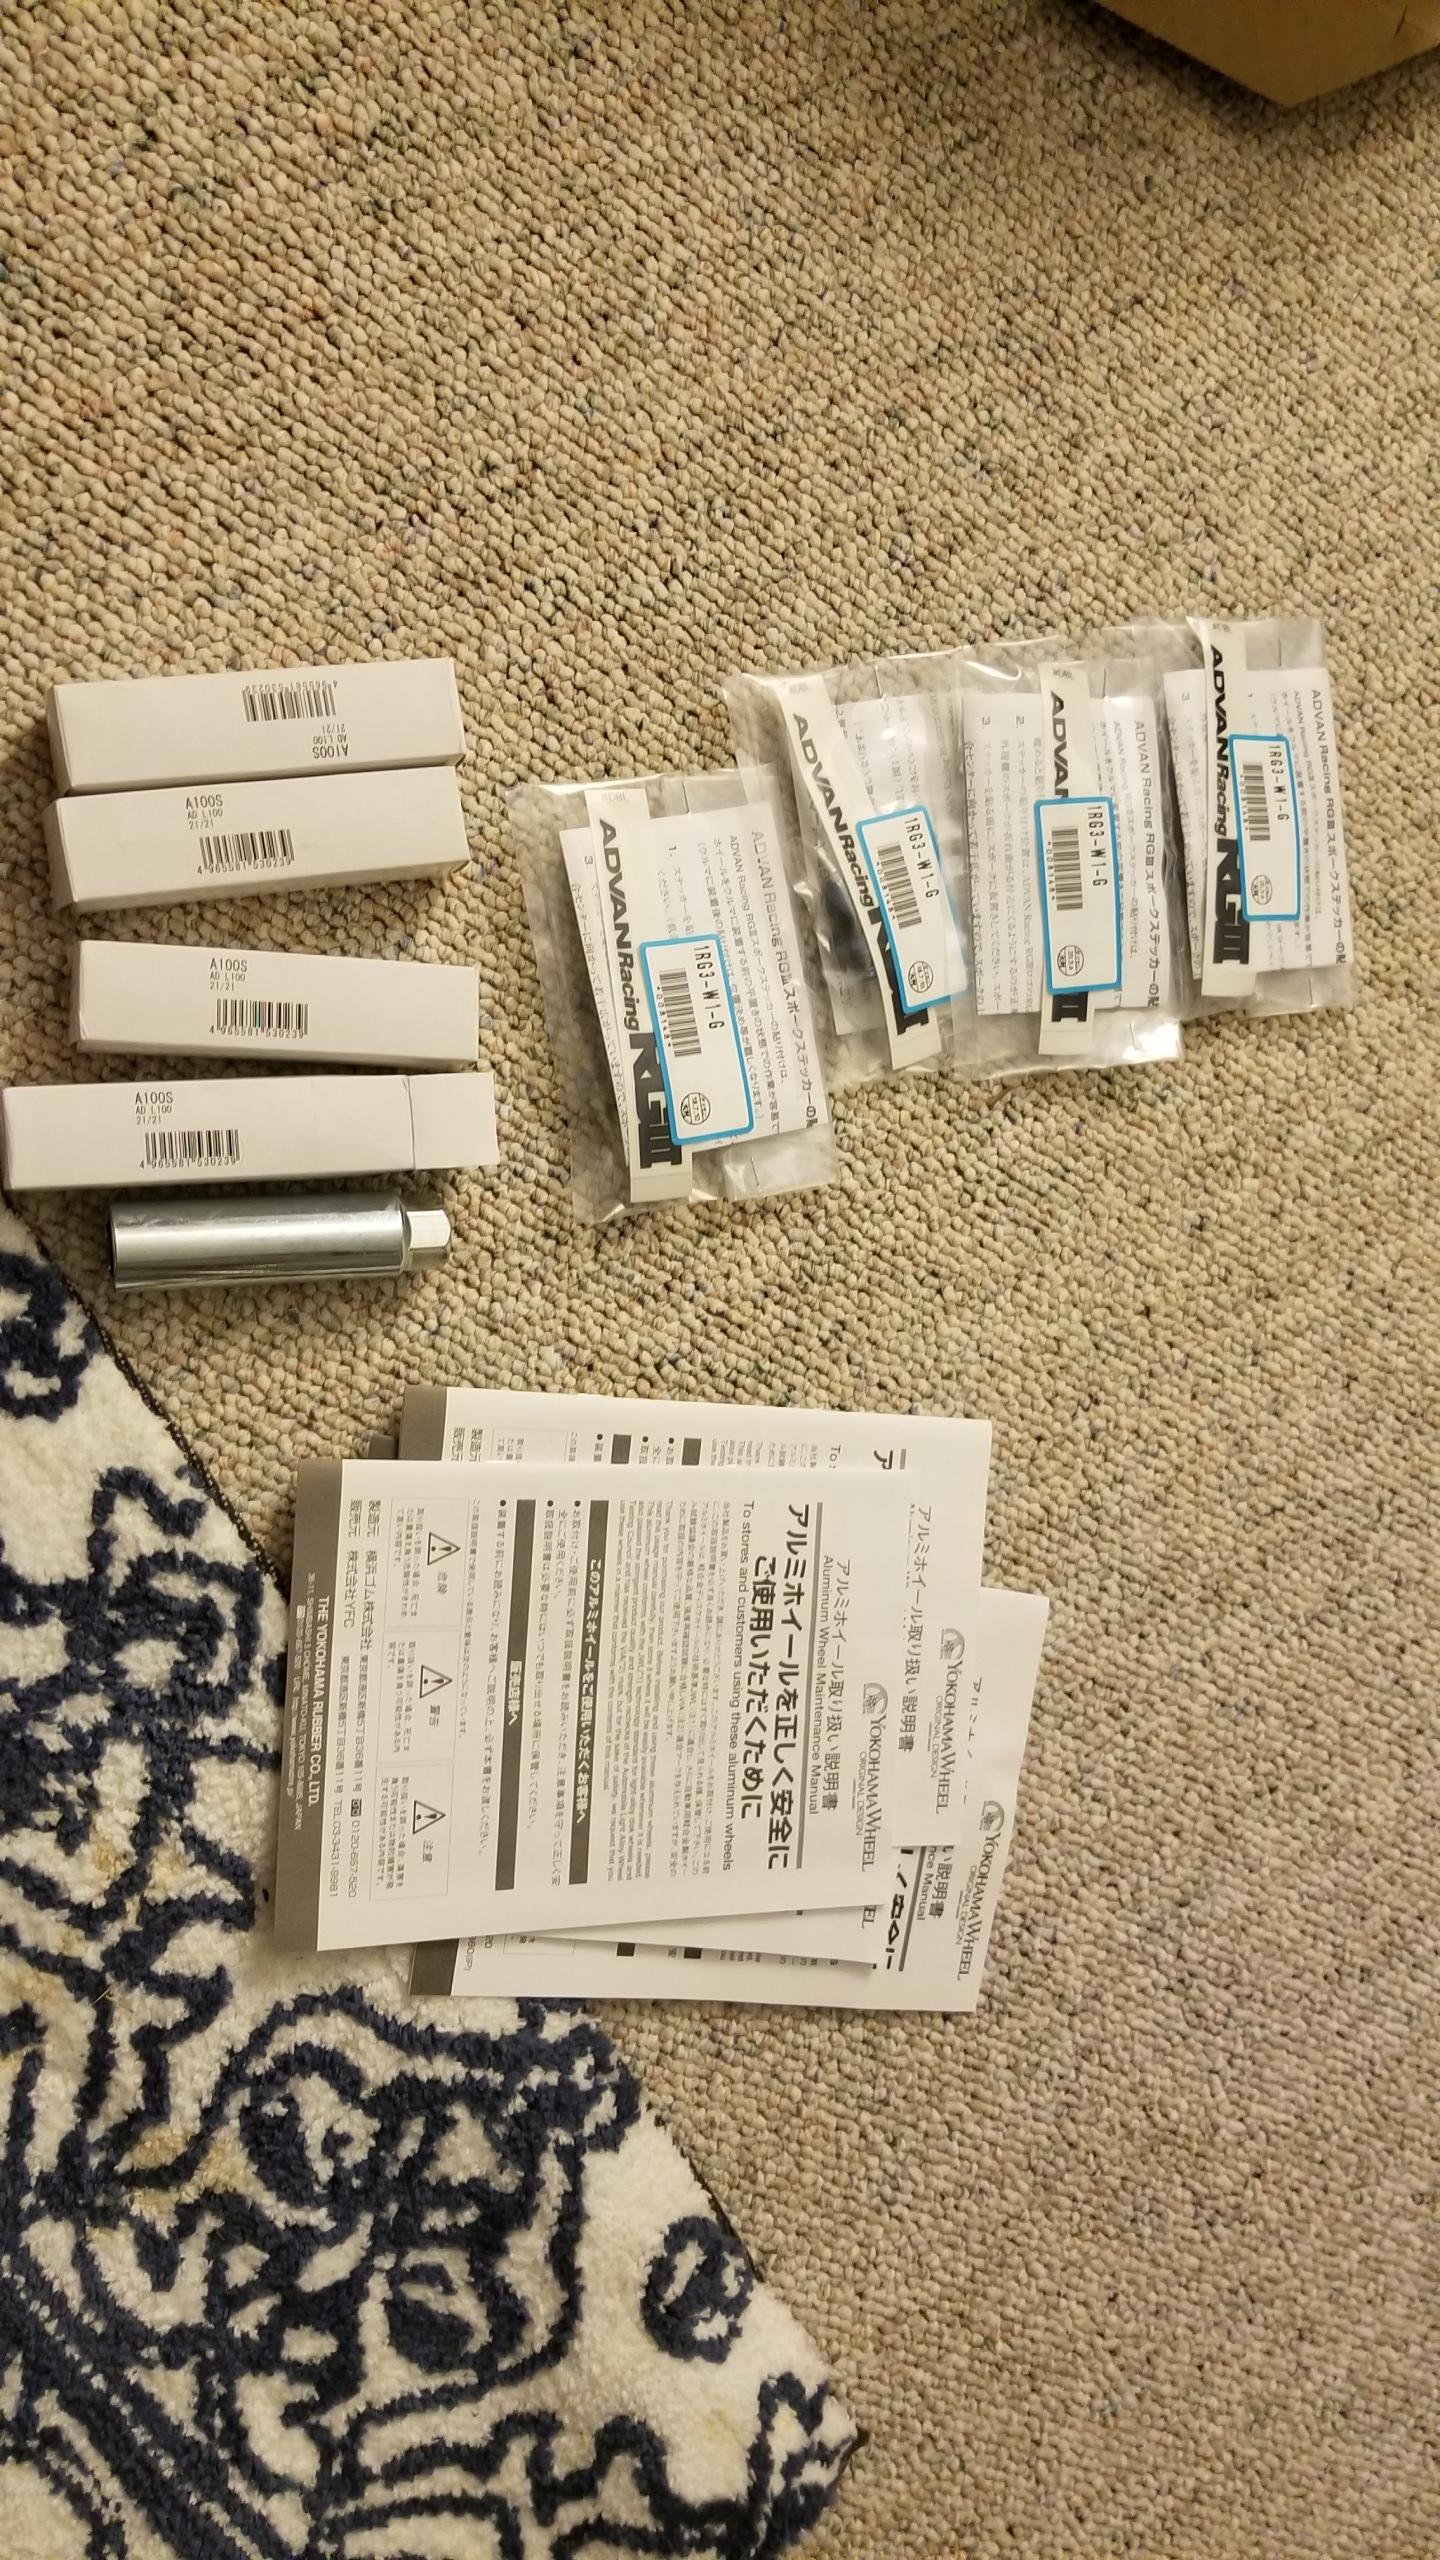
Funnily enough each wheel comes with its own 19mm deep socket. The lugs are 17mm anyways, and these wheels are so pretty that I want to keep them pristine with no chips.
Tires mounted and balanced by a local shop I've not been to before so I was biting my nails the whole time. I was "that customer" that kept reminding them to be careful with the finish but they came out perfect and balanced well.
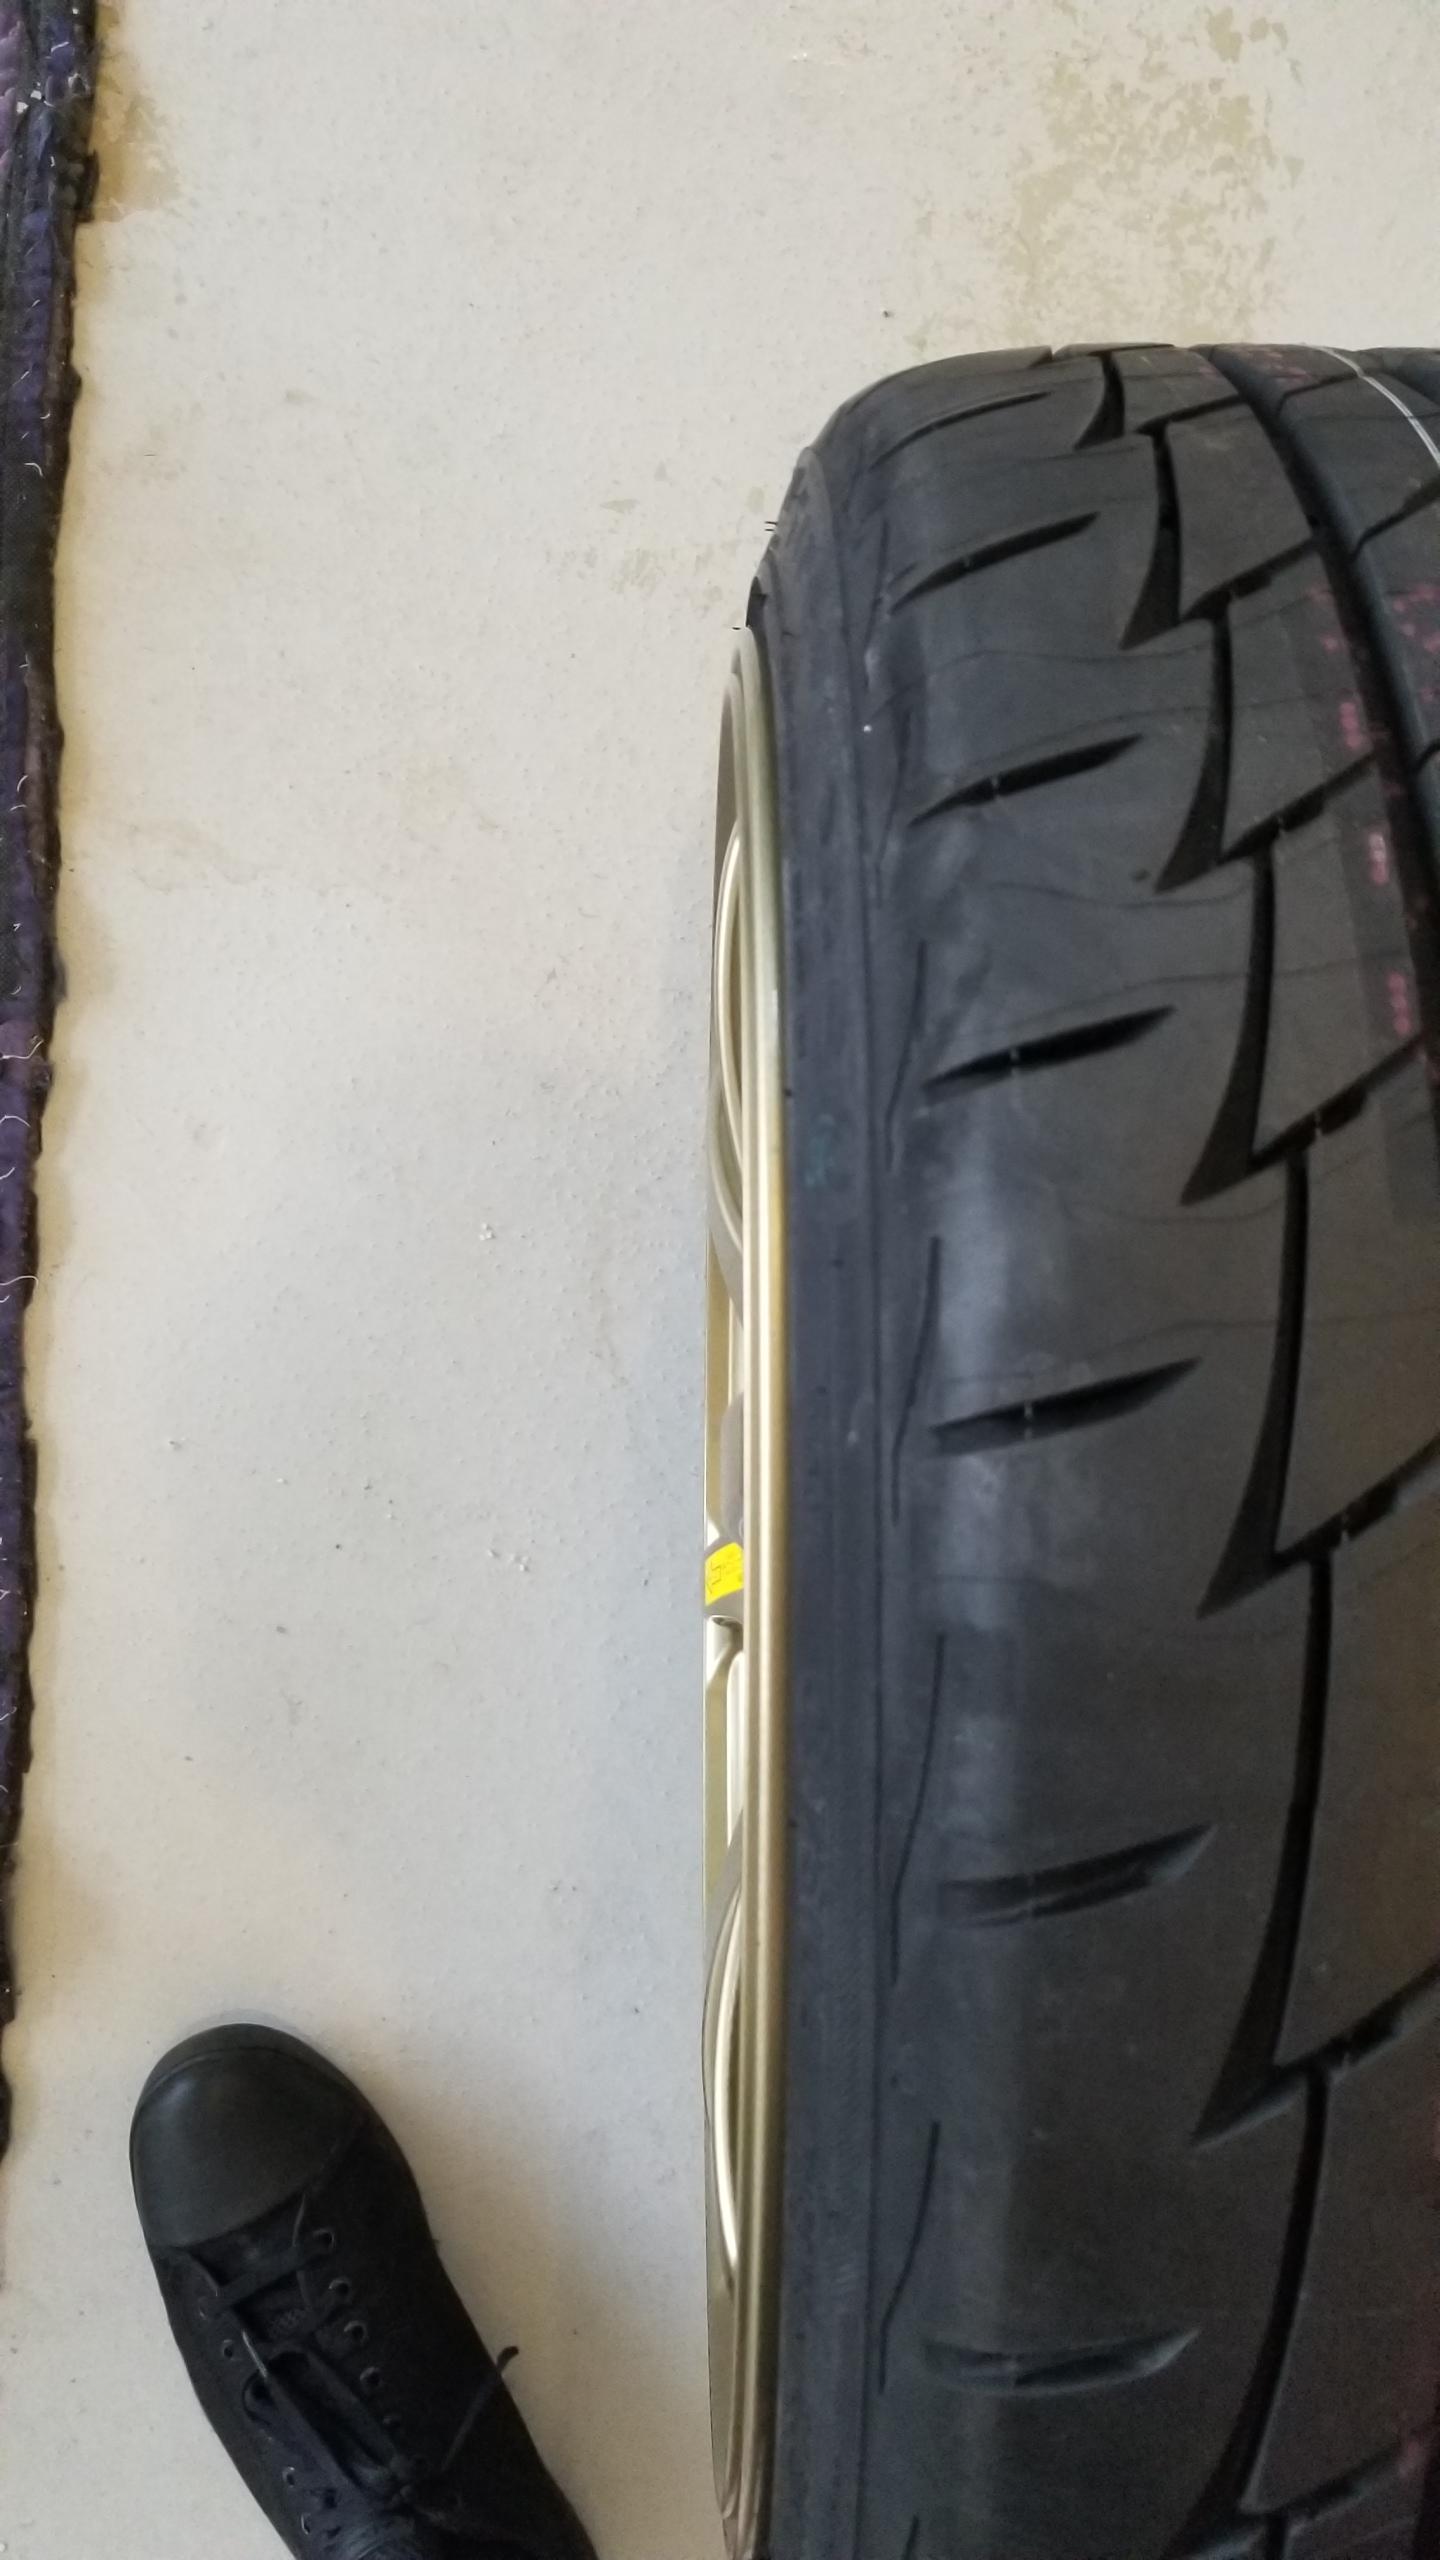
The front tires are 205 width which is a bit smaller than the 215 that's normally chosen (wasn't available for the Indy 500's), so they have a slight stretch but are still approved for an 8" wheel. Stuntman posted a very helpful thread in the Tires & Wheels subforum and I think this setup fits the bill performance-wise in terms widths. They aren't R888s but that's unnecessary for me.
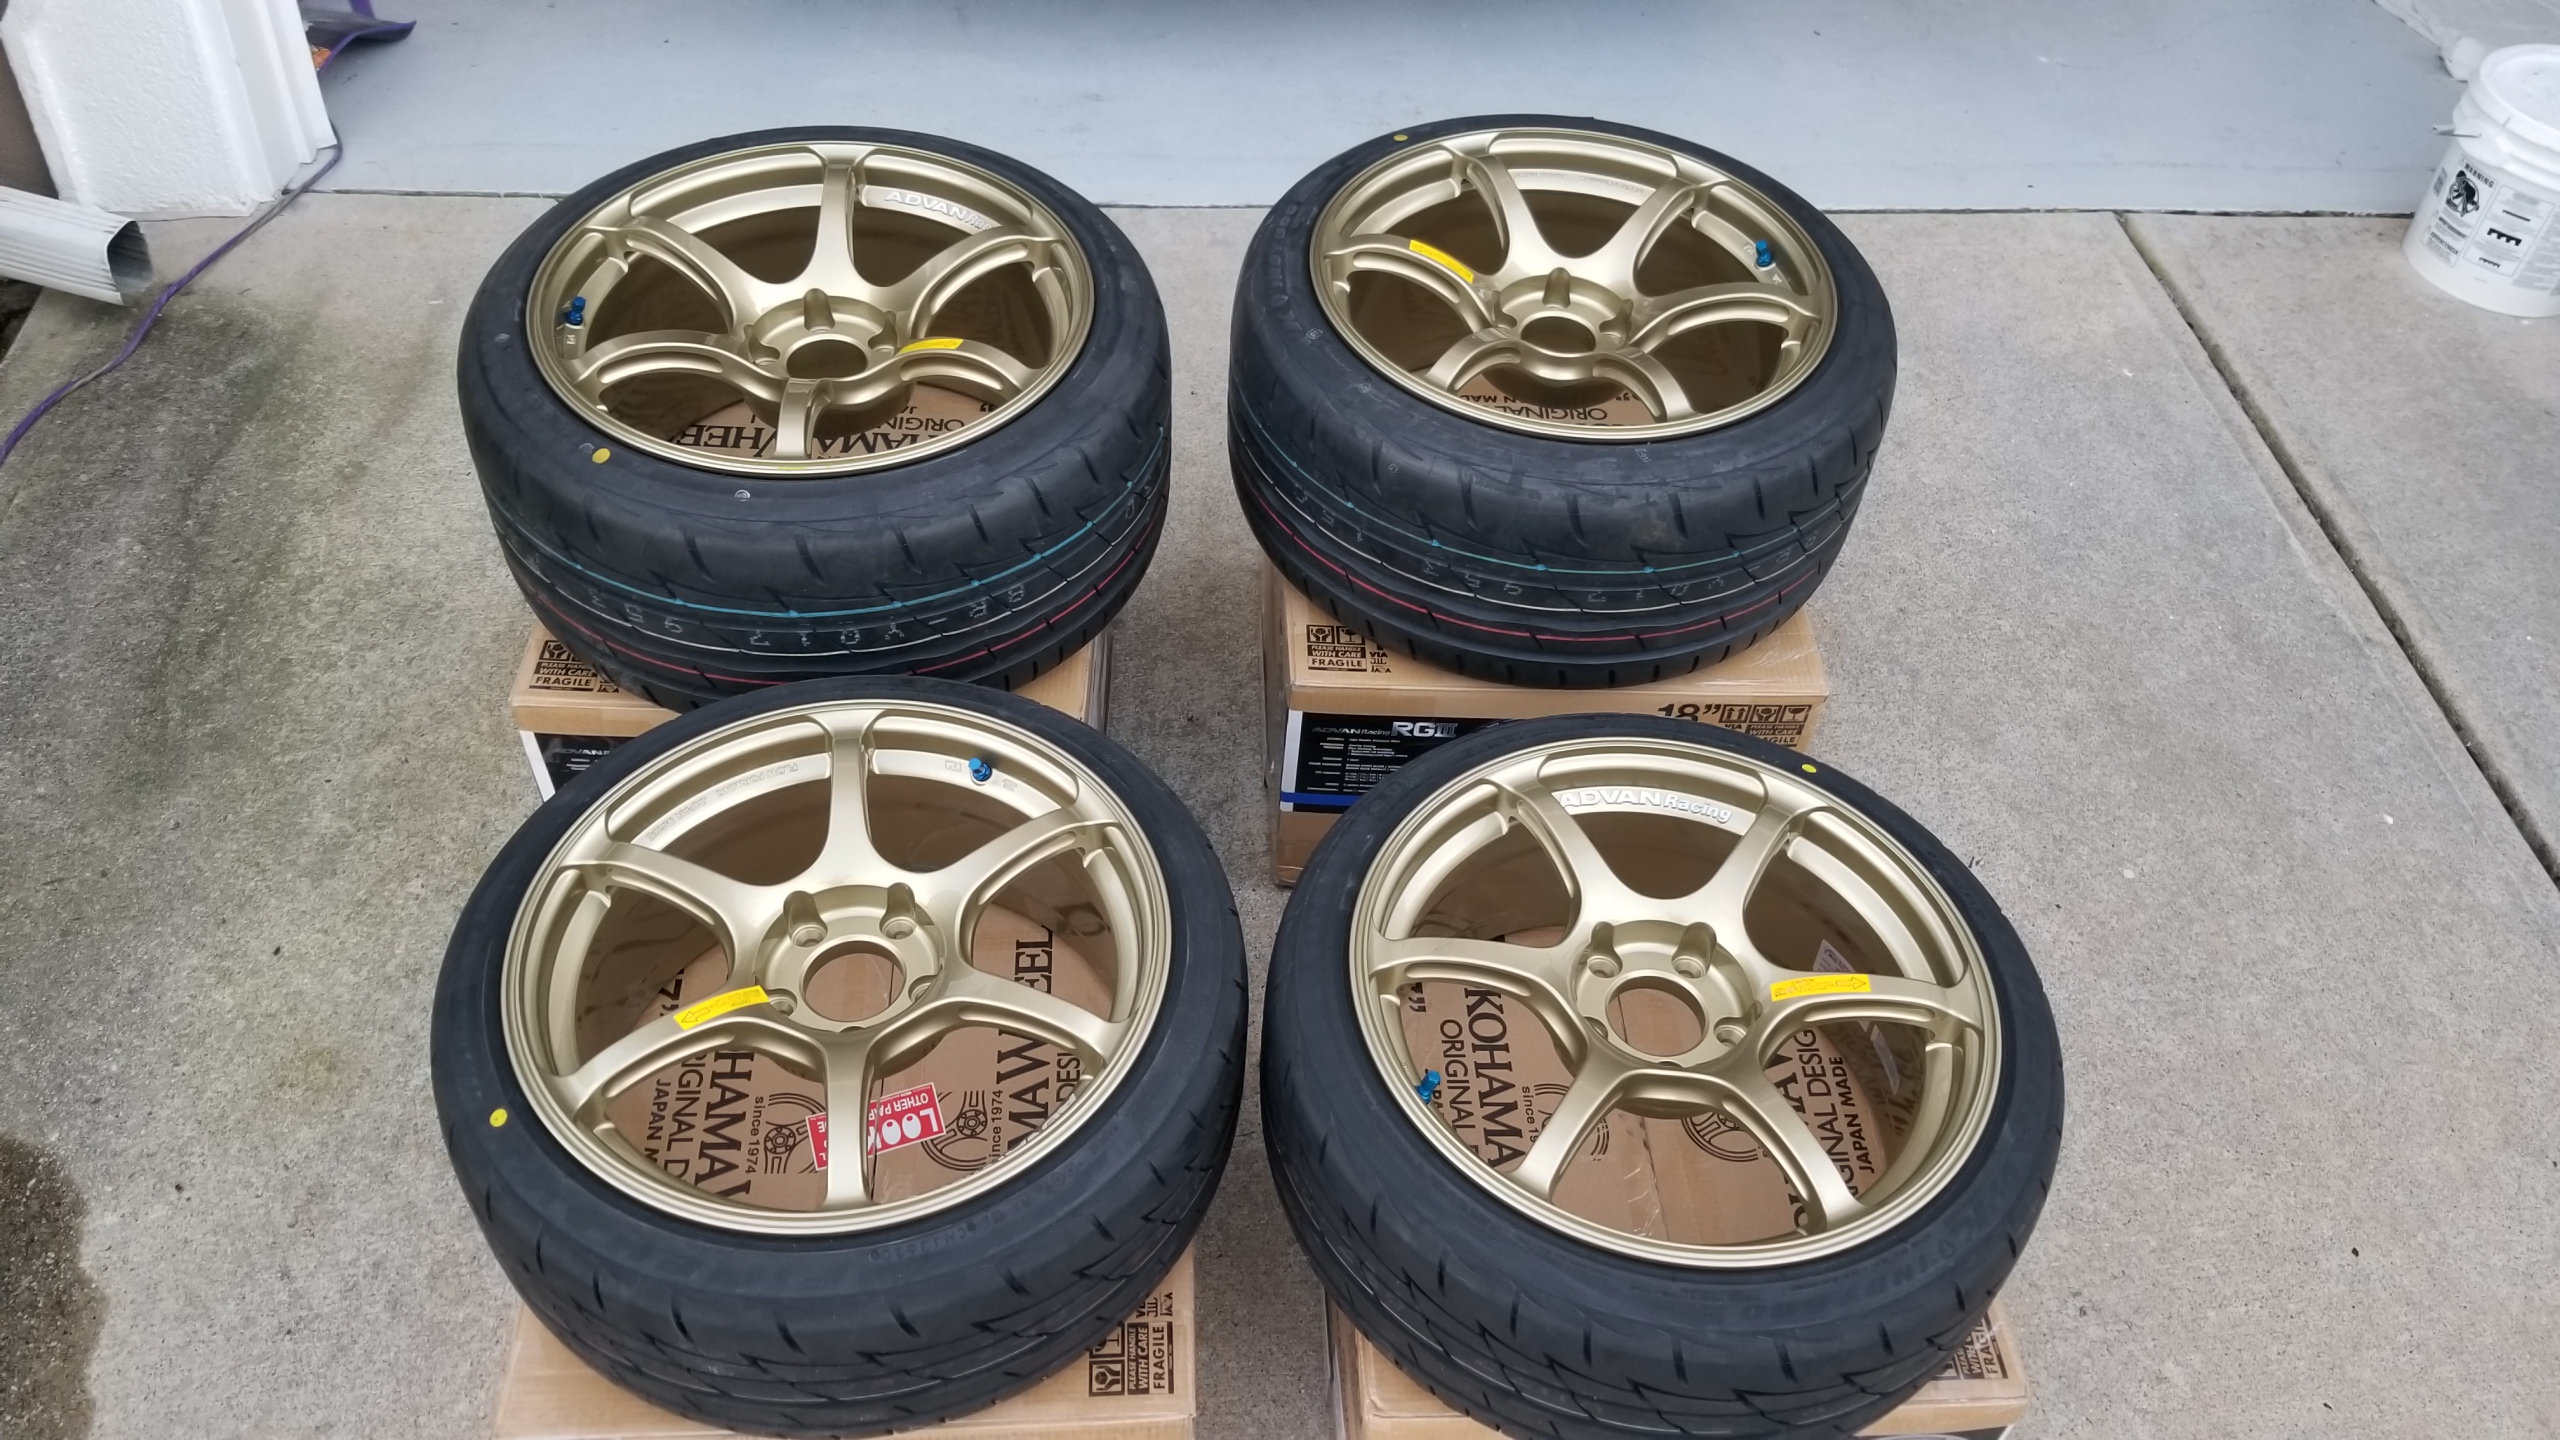
I freakin' love how these look, the Note 8's camera doesn't do them justice. I've been researching what wheels I want since I started looking for the right car to buy in in 2019 and recently found out about the RGIII's, honestly one of my personal favorite designs of any wheel for most any car. They're light too (<20 lbs) and flow formed. I have black Advan center caps too, and some custom Honda vinyl cap logos on the way to test out. The 73mm bore is not used by any other Honda wheel to my knowledge.
I was close to getting the TSW Bathursts as a second choice but these speak to me a lot more. I just have to avoid getting close to any curbs or these will get instagibbed with curb rash.
Close up of the fronts. The protruding lip makes these look a lot more stretched than they are. Some in the scene even prefer this look
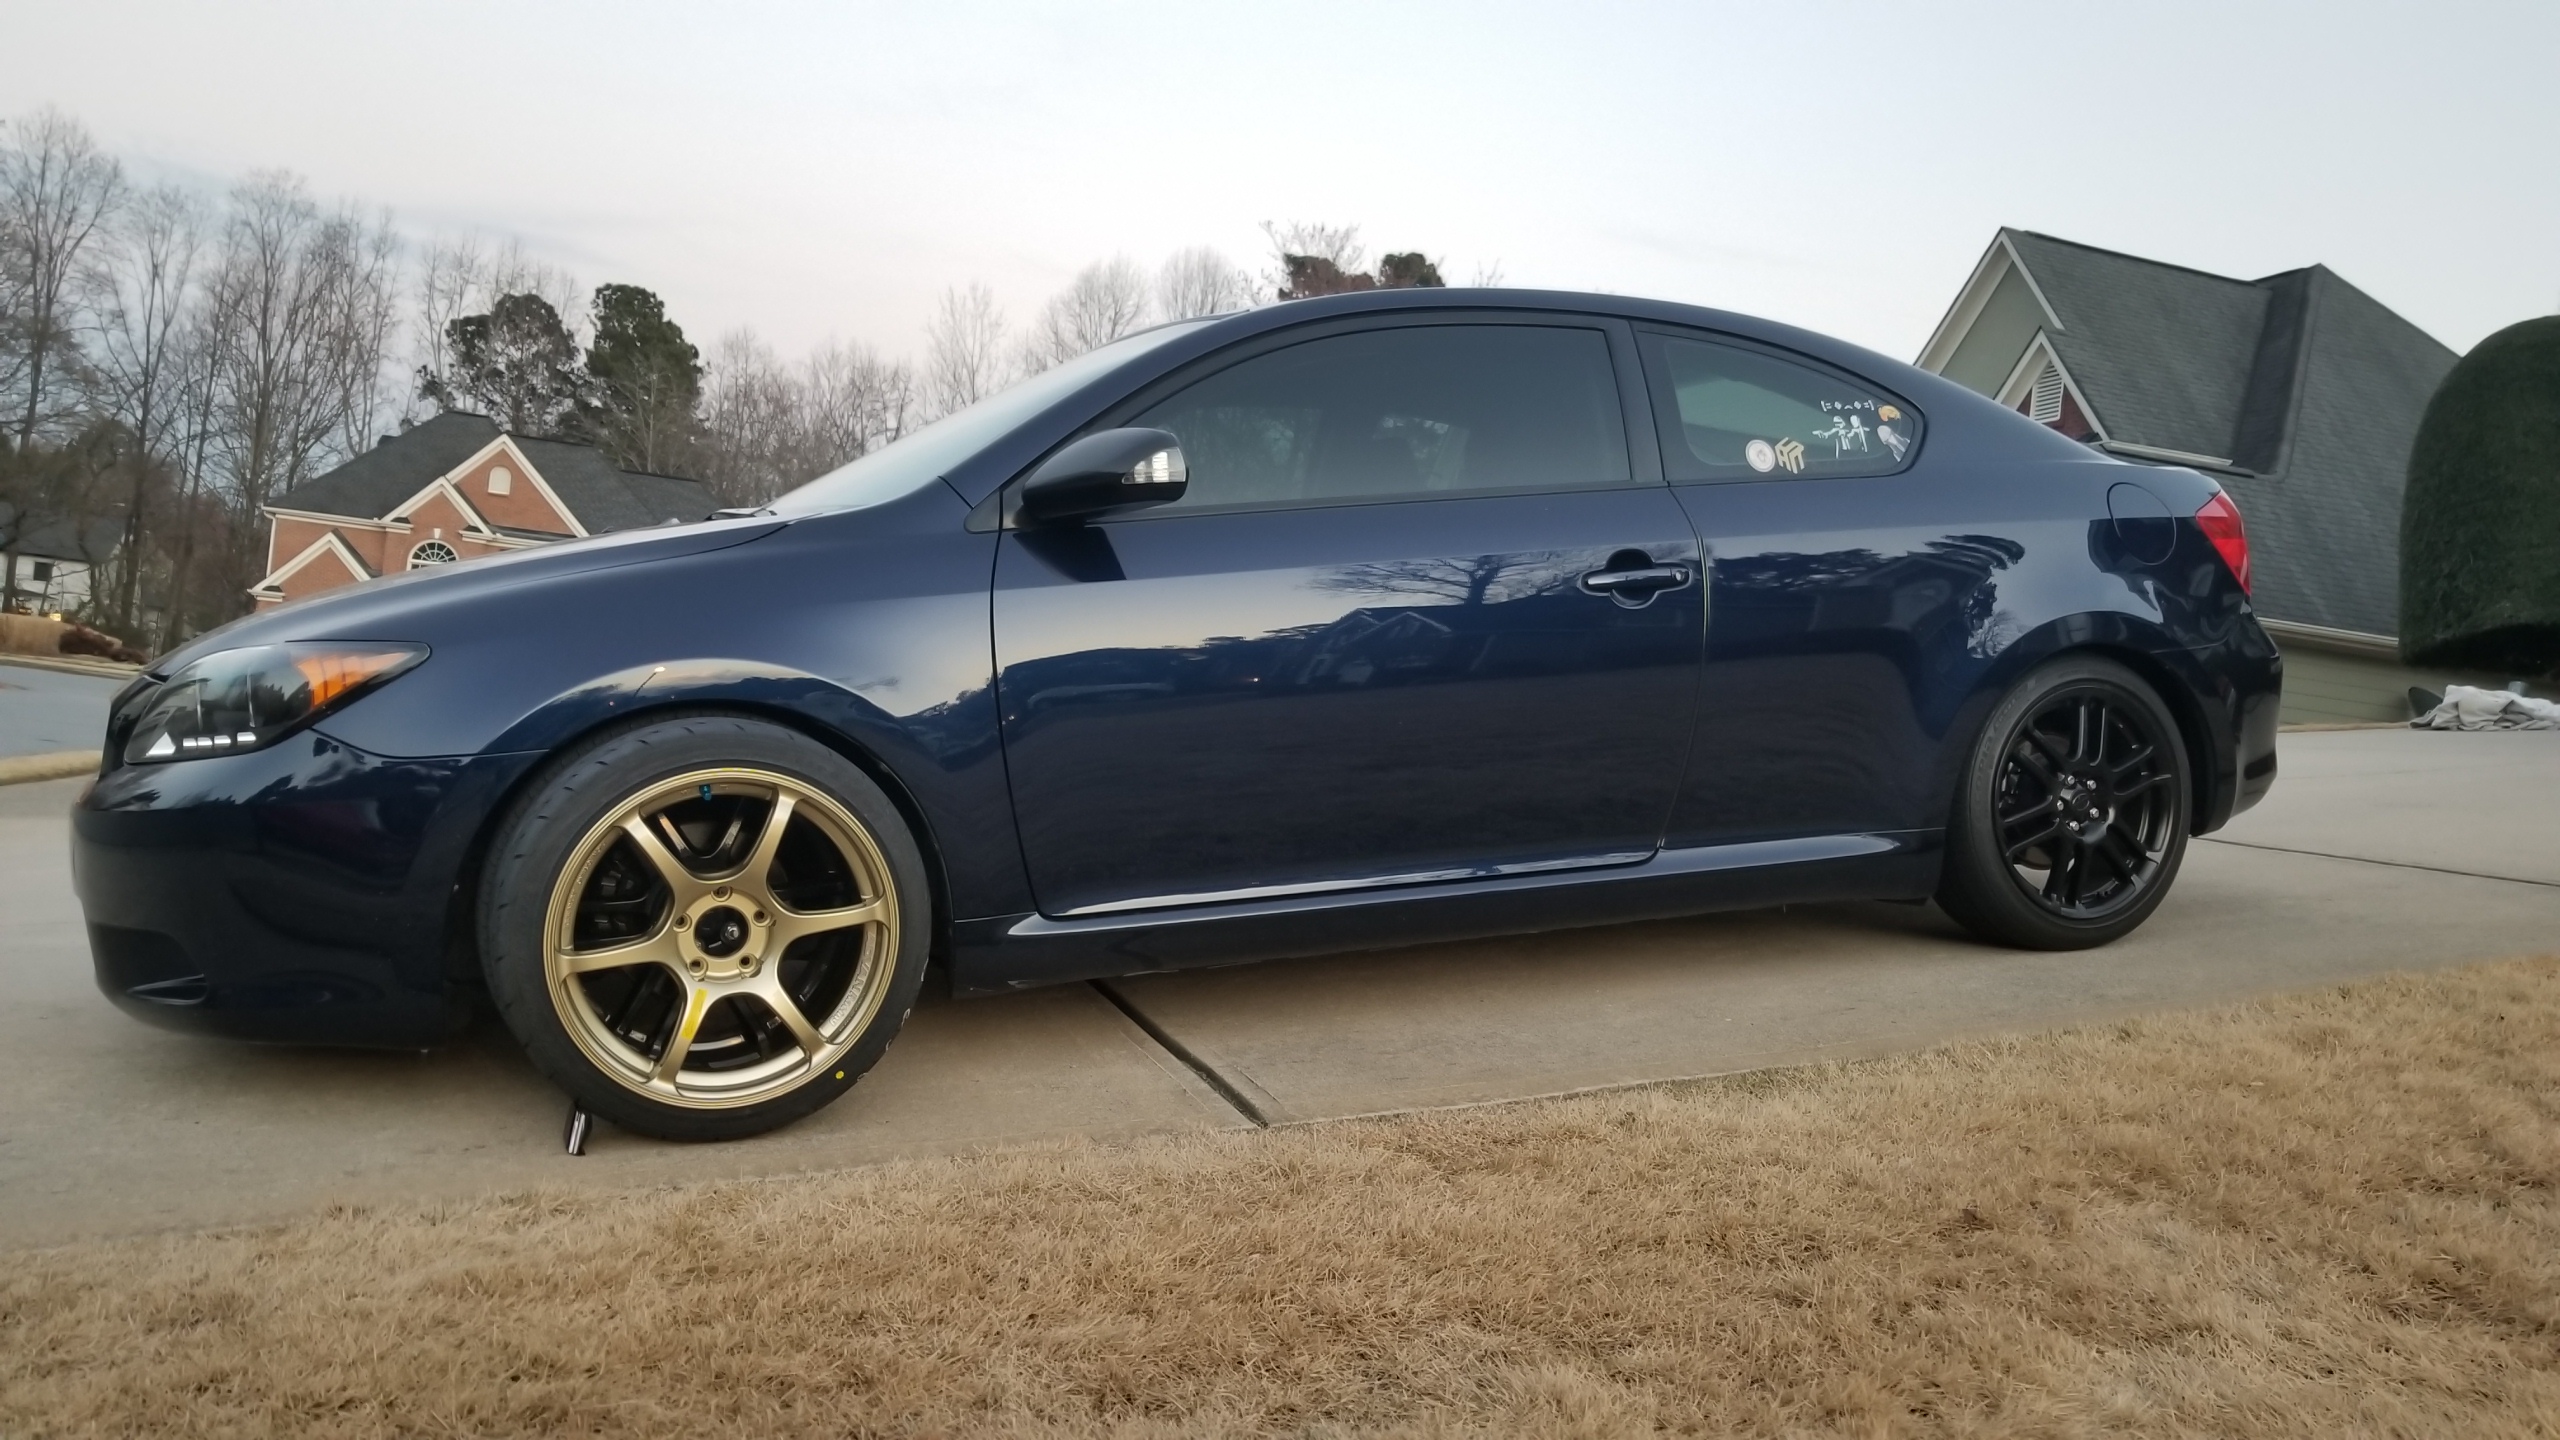
Just kidding, I bought these for my daily which I've never posted a picture of for good reason. Really getting the same vibes as a mid-2000s Civic with 200k miles on TE37s.
Bad pic of my new Fortune Auto 500's, which I think fit my use cases and budget nicely, I've heard and seen lots of good things about them and they have great support.
I'll post pics of the actual mounting on the car soon, but I purposefully waited to be able to install these coilovers at the same time to be able to set my ride height correctly all in one go. I've been monster-trucking it until now with the stock spring & strut setup which is admittedly still nice and comfortable.

Once I get my steering wheel back (approaching 1 month wait now, deja-vu), I'll take a long weekend later this month to install all the parts I've been collecting, including refinishing the fender liners and inner fender area to fix the peeling undercoating. Plus the front wheel bearings and TB shield if I get around to it..
A very nice fellow on FB just happened to have a set of the exact specs I wanted on these Advan RGIII's, brand new. Actually the first wheels I've ever bought.
Some experts say tires are also important for a car. These are Firestone Firehawk Indy 500's in 205/40-17 and 265/35-18, which I believe are the same as Bridgestone Potenza RE003's. I deliberated for days on end on what go choose for my first summer tires, these have great reviews, are 340TW for a big more longevity, and are hundreds of $ less than an AD08 or Direzza. I'm not looking to blow the doors off with my largely street driving but I'd like to start doing more soon and these should be a good entry point.
Here's one fresh out of the box.
Love the huge concavity on the 18" rears. The fronts in 17" still have some as well.
Mocked up with Muteki SR35 neo chrome lug nuts. I'm not entirely sold on the style, I know lots of people have the long lugs but I kind of like the recessed look. I might change these out for a longer version or different color but I wanted wheel locks and there weren't a lot of sets with them. The Kicks R40 lugs would be the next logical choice but I have a hard time paying $300 for lug nuts.
Funnily enough each wheel comes with its own 19mm deep socket. The lugs are 17mm anyways, and these wheels are so pretty that I want to keep them pristine with no chips.
Tires mounted and balanced by a local shop I've not been to before so I was biting my nails the whole time. I was "that customer" that kept reminding them to be careful with the finish but they came out perfect and balanced well.
The front tires are 205 width which is a bit smaller than the 215 that's normally chosen (wasn't available for the Indy 500's), so they have a slight stretch but are still approved for an 8" wheel. Stuntman posted a very helpful thread in the Tires & Wheels subforum and I think this setup fits the bill performance-wise in terms widths. They aren't R888s but that's unnecessary for me.
I freakin' love how these look, the Note 8's camera doesn't do them justice. I've been researching what wheels I want since I started looking for the right car to buy in in 2019 and recently found out about the RGIII's, honestly one of my personal favorite designs of any wheel for most any car. They're light too (<20 lbs) and flow formed. I have black Advan center caps too, and some custom Honda vinyl cap logos on the way to test out. The 73mm bore is not used by any other Honda wheel to my knowledge.
I was close to getting the TSW Bathursts as a second choice but these speak to me a lot more. I just have to avoid getting close to any curbs or these will get instagibbed with curb rash.
Close up of the fronts. The protruding lip makes these look a lot more stretched than they are. Some in the scene even prefer this look
Just kidding, I bought these for my daily which I've never posted a picture of for good reason. Really getting the same vibes as a mid-2000s Civic with 200k miles on TE37s.
Bad pic of my new Fortune Auto 500's, which I think fit my use cases and budget nicely, I've heard and seen lots of good things about them and they have great support.
I'll post pics of the actual mounting on the car soon, but I purposefully waited to be able to install these coilovers at the same time to be able to set my ride height correctly all in one go. I've been monster-trucking it until now with the stock spring & strut setup which is admittedly still nice and comfortable.
Once I get my steering wheel back (approaching 1 month wait now, deja-vu), I'll take a long weekend later this month to install all the parts I've been collecting, including refinishing the fender liners and inner fender area to fix the peeling undercoating. Plus the front wheel bearings and TB shield if I get around to it..
...take your time..that is an expensive mod to "undo"....
Just a simple transfer of furniture. Along with everything else.....
[emoji106] on the wheels. Love the RG line. Need pics on the car! Also any profile shots of the mounted tires? I’m curious how much stretch there is. I’m in the market for tires, and the options are thin. rn I’m thinking Azenis 615... these firehawks didn’t even come up cause I was looking at 215 fronts only.
Also looking forward to seeing how the interior panels turn out. My door switch panels are all bubbly and chipped. I’ve been contemplating carbon, but seems like a big expense for minimal gain.
Also looking forward to seeing how the interior panels turn out. My door switch panels are all bubbly and chipped. I’ve been contemplating carbon, but seems like a big expense for minimal gain.
Similar threads
- Replies
- 9
- Views
- 1K
- Replies
- 10
- Views
- 449