• Protip: Profile posts are public! Use Conversations to message other members privately. Everyone can see the content of a profile post.

Big McLargeHuge’s 1990 JDM NSX Adventure Thread

I must commend you on your perseverance and documentation skills. I have a medical condition called "Gethomeitis" that doesn't allow me to take pictures along the way of accomplishing anything. I really appreciate you taking the time to do this.

Thank you, I'm glad it's useful. I've learned I tend to take more pictures when things are going well, but have none after I've been lying on the ground for hours trying to get a bolt in or when I start putting stuff back together, same idea I guess.

Not that I'm trying to tempt you to do this, but you certainly CAN drive the car with the gauge cluster removed.....just stick a GPS up there for your speedo, and GO!


BTDT :wink:
Brian

Lol, I was thinking about the possibility. As long as my repairs next week go well, I don't mind mothballing it for a few days. I should wait until I get the trim restored and the new door rubber installed, I'm sure the wind noise will be deafening :eek:. Plus, I'm saving the doors themselves for a little later, but I need to take them apart soon since the front sashes need to be replaced along with the door rubber trim to prevent more noise/water intrusion. And maybe fix the electric mirrors and the window regulators while I'm in there..
 
This was a fun read. Thanks for sharing. It's inspiring and making me anxious to jump into my garage.

Haha, with the snow I guess the best thing to do to stay warm is polish the car. Will this be an annual activity. haha! (this comment coming from a guy who lives in snow-less CA)

Any tips on polishing the glass? I just want to remove the hard water spots.

Lucky for you someone had tools for you to borrow at the carshow. With an old car, it's wise to bring tools. Also, bring a battery jumper starter (if you haven't done so already)
I went to a meet once and a fellow member could not start his car (he probably had it sit too long in the garage). I had a battery powered jumper and got his car up and running without moving cars for jumper cables.

Good luck with the mechanics upgrade and maintenance. Keep us posted. We will be cheering for you along the way.

Of course :).

Usually it only snows here maybe one or two days a year, I just happened to pick the right/wrong days. I'm already planning my next polishing session to get rid of some more defects...

For the glass I used a dual-action polisher with felt pads (very aggressive, not wool/foam/microfiber) and Carpro Ceriglass (or any cerium oxide based polish), all of which can be found easily online, not so much in stores. If you're doing all the glass or a whole windshield, having a polishing machine would be much easier on your body, but you can go at it with a microfiber towel and the glass polish by hand if you want.

Alternatively, you could try a product like 3D Eraser or Optimum MDR (or a vinegar solution if you're cheap) as liquid solutions for water spots. You might have to use a combo of both polishing and liquid, since some spots in my experience are very difficult to remove and are actually embedded/etched into the paint clearcoat or glass. That's most of the reason why a lot of online reviews for the liquid products are so mixed.

It was lucky, I've had a battery jump box on my wishlist for a while, haven't pulled the trigger on it yet. I should add a decent toolkit as well.
 
Thanks for the tips about the glass. I will try a small spot first.
good luck with the rest of your project.
looking forward to see what’s next.
 
The tach needle can be removed with two eating forks positioned 180-degrees from each other, make sure to protect the instrument face with a clean pad. The recalibration process is a bit opaque, but I'll be working on that in a few months...or maybe sooner when/if I get quarantined.*

Also, the JP Timing Belt sticker is in the YMD format. Mine seems to have the odo reading, but the date seems to be in the future.

Also, WhrdNSX should have forwarded you a 11-page guide for AT->MT conversion. Another NSXer has compiled an exhaustive list of parts and that list has yet to be integrated into the guide.


(plug: I'm working on a cluster project if anybody has extra/broken cluster parts [body, tach, speedo, PCBs. I already have a bunch of fuel/oil/temp/voltage]: give me a ring. I freely update and disseminate my knowledge base and currently, I'm working on the keyless.)
 
Last edited:
Well, I ran into some issues unfortunately.

#1 , the two largest capacitors on the board are fairly stubby but the ones I ordered are longer, so the board no longer fits inside the housing because the tops of the new caps hit the inside of the plastic housing. Annoying, but I'll have to order 2 new ones plus the 2 other caps I didn't realize were non-polarized. Not a huge deal.

#2 , I'm sure I've repaired the brake light issue (haven't put back in the car to test), but interesting development with the tach needle & coils. Since it looks like someone attempted to repair the board before (some conformal coating, a jumper wire to a shift light, cracked screw base on lens), I think when they went to put the brass screw/washers on the circuit board, they overtightened one on the tach like so many others I've read about on Prime and had to re-solder one of the coil wires back to the post after it was ripped off to get the tach working again.

There was obviously a large non-factory solder blob on the wire to reattach it, but my theory is that they removed the A/T tach face and needle to remove the motor from the plastic gauge backing to get more access for soldering, and when they put the gauge back together the needle didn't sit properly inside the motor/windings. I say this because when I went to put the needle back in, it moved very slowly back to position like I saw while the car was running, not like the speedo needle which quickly resets to the 0 or max positions. This leads me to believe the tach problem is not with the PCB but with the winding/needle.

I haven't figured out how to put the needle back properly yet to have it function like the speedo does, it came out easily enough but concerned either I or the previous person buggered something up. I read on another thread there's an internal magnet that the needle post sits against that might move out of position, maybe that's my issue. I'd like to get it working as intended again, but not sure if that's realistic at this point :(
 
Last edited:
You need to power up the cluster and then physically set the needle into the stepper motor.

For those reinstalling their tach/speedo, the cadmium (gold) philips head machine screws at the back of the gauge screws need to be torqued to the official factory spec of "just barely snug".

If you under-tighten the tach/speedo may cut out during operation and you have the penality of removing the cluster and tightening the screws just a tiny bit.

If you over-tighten: you get to buy a new tach/speedo at US$700 each and you still have to remove the cluster again and adhere to the "just barely snug" spec.
 
So basically leave the tach needle off, put the cluster back together, connect back up in the car with the lens off, turn key to ON, and push the needle back in at 0 RPM (or turn the car on and wait for it to reach idle RPM?)

I can feel the magnet position by turning the needle past the "0" peg and the 9k RPM position to make sure it's centered correctly, but pushing in the needle in any position seems to not allow it to move freely. So powering the gauge coils is the only way to get the needle back in correctly?

Someone previously overtightened one of my tach screws like I mentioned above, but soldering the hair-thin wire back to the post should fix it, right? Big annoyance but it seems like removing the needle invites even more problems, but it's been done successfully in the past I'm sure. Either way, I want to avoid dropping hundreds on just one gauge like you said...if it came to that I'd just get the S2000 conversion kit. I contacted a local speedo shop here to see if they'd look at it, but I'm not sure if they'd be able to fix the needle/magnet/coil issue.
 
>push the needle back in at 0 RPM

Yes.

You can likely power it up on the bench. I'm trying to test and doc all this, but I won't get to it for several months....

>is the only way to get the needle back in correctly?

I rarely agree on absolutes.

If you are going through all of this, you midas swell get a MT tach face.

**

S2K conversion here
https://www.sjoebergdesign.com/nsx2s2k
[MENTION=6927]nsxmugen[/MENTION] is doing some very cool stuff too.
 
Okay, I will try that. I saw nsxmugen's thread with the pin location for the tach, but I'm not sure how much/where exactly to apply voltage so I'll just put it in the car instead of potentially busting a cap. I'm hoping the speedo shop can get the needle set in correctly, if they fail I'll try the in-situ tip since I'd like to minimize the possibility of me having to take apart the cluster again.

I did get the MT gauge face from Wayne to swap over, that's the only reason I took off the needle in the first place :biggrin:. Would be nice to get a complete face + needle assy but that quadruples the price.

Still pondering the Sjoeberg kit, I have no doubt it's good but just a combo of price and wanting a working OEM cluster just in case.

EDIT: Speedo shop said initially that they get plenty of cases where people go to replace a needle and it borks the gauge completely, but they're giving it a closer look tomorrow to see what they can do. Either way, my tach was already nearly useless when I got the car, so I didn't make it any worse. I'll see what they say, try to put in back in when the car's on, and then go from there.
 
Last edited:
Doubtful the speedo shop can do better than you. If you can resolder the motor wire then you have a good chance of success.

An inexpensive signal generator from AliExpress should do the trick. Tach = 100rpm = 300 pulses per min.

Looks like this quarantine is just what we all need to get collective data together. I'm a couple of weeks out on this...
 
Last edited:
I hope everyone's still doing well, we're all living through a history book moment, but otherwise life continues on, just from home :cool:.

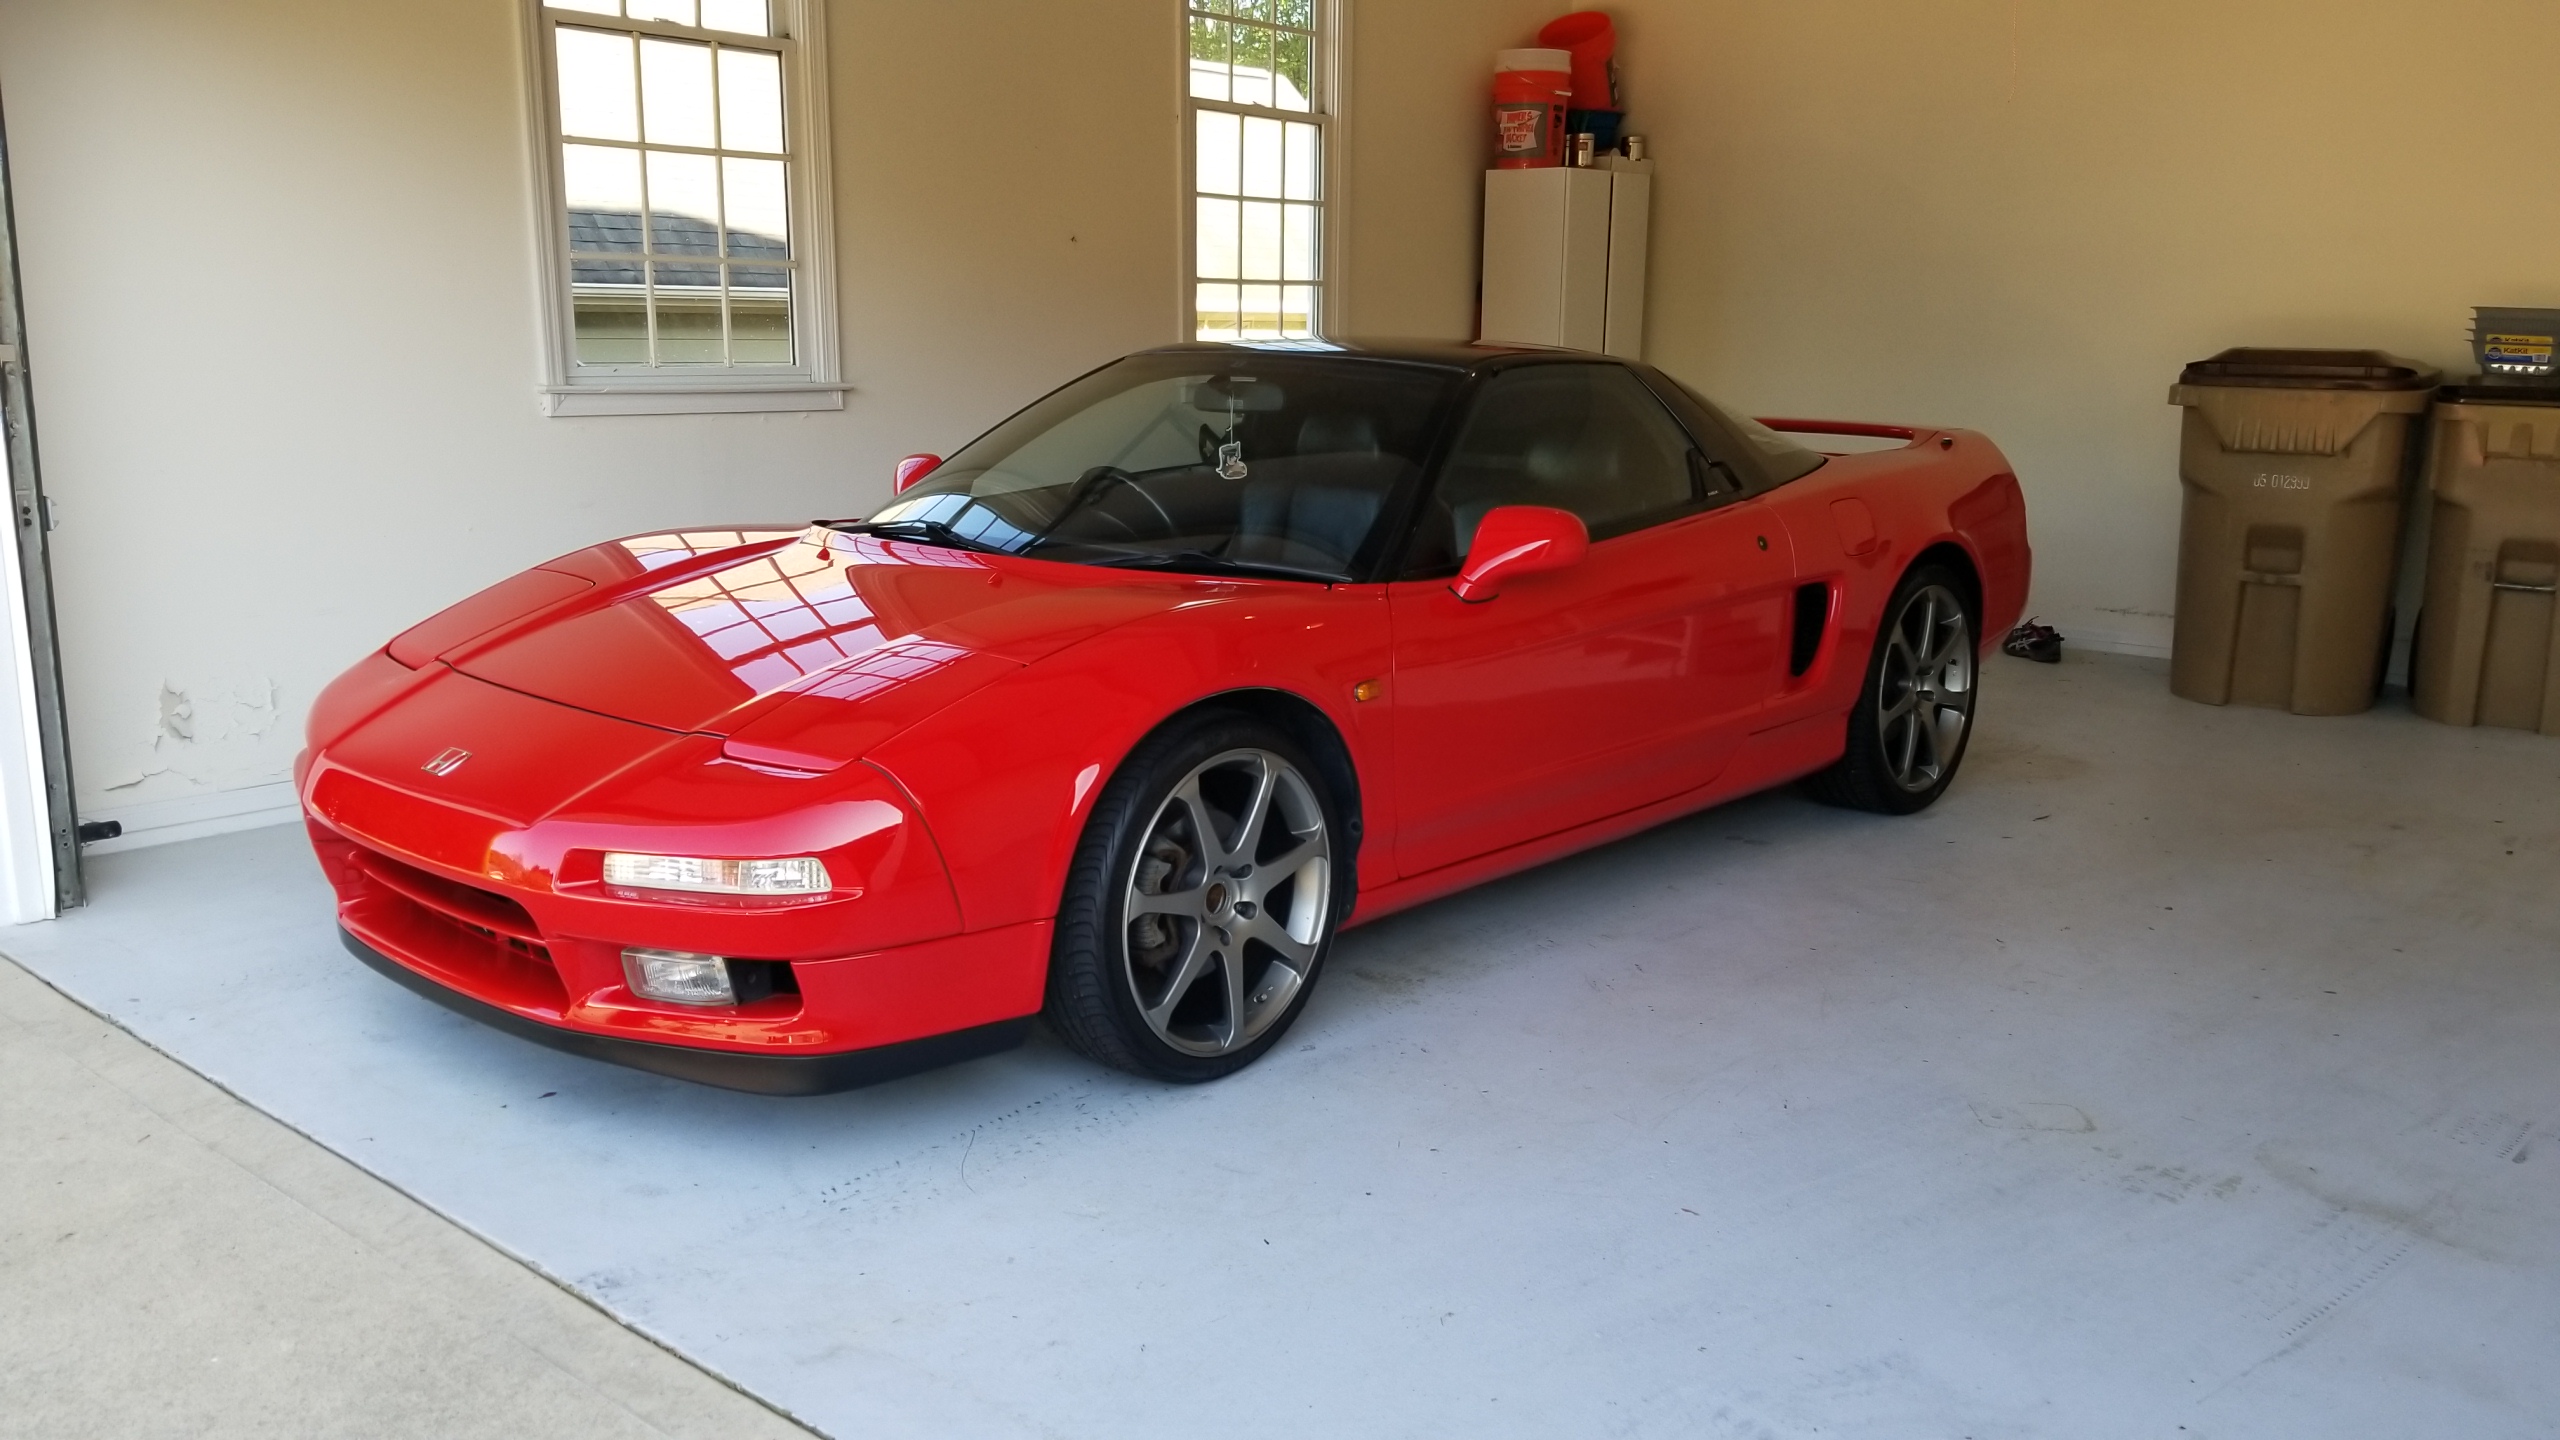
Some interior work updates. Bit of a mixed bag of results.

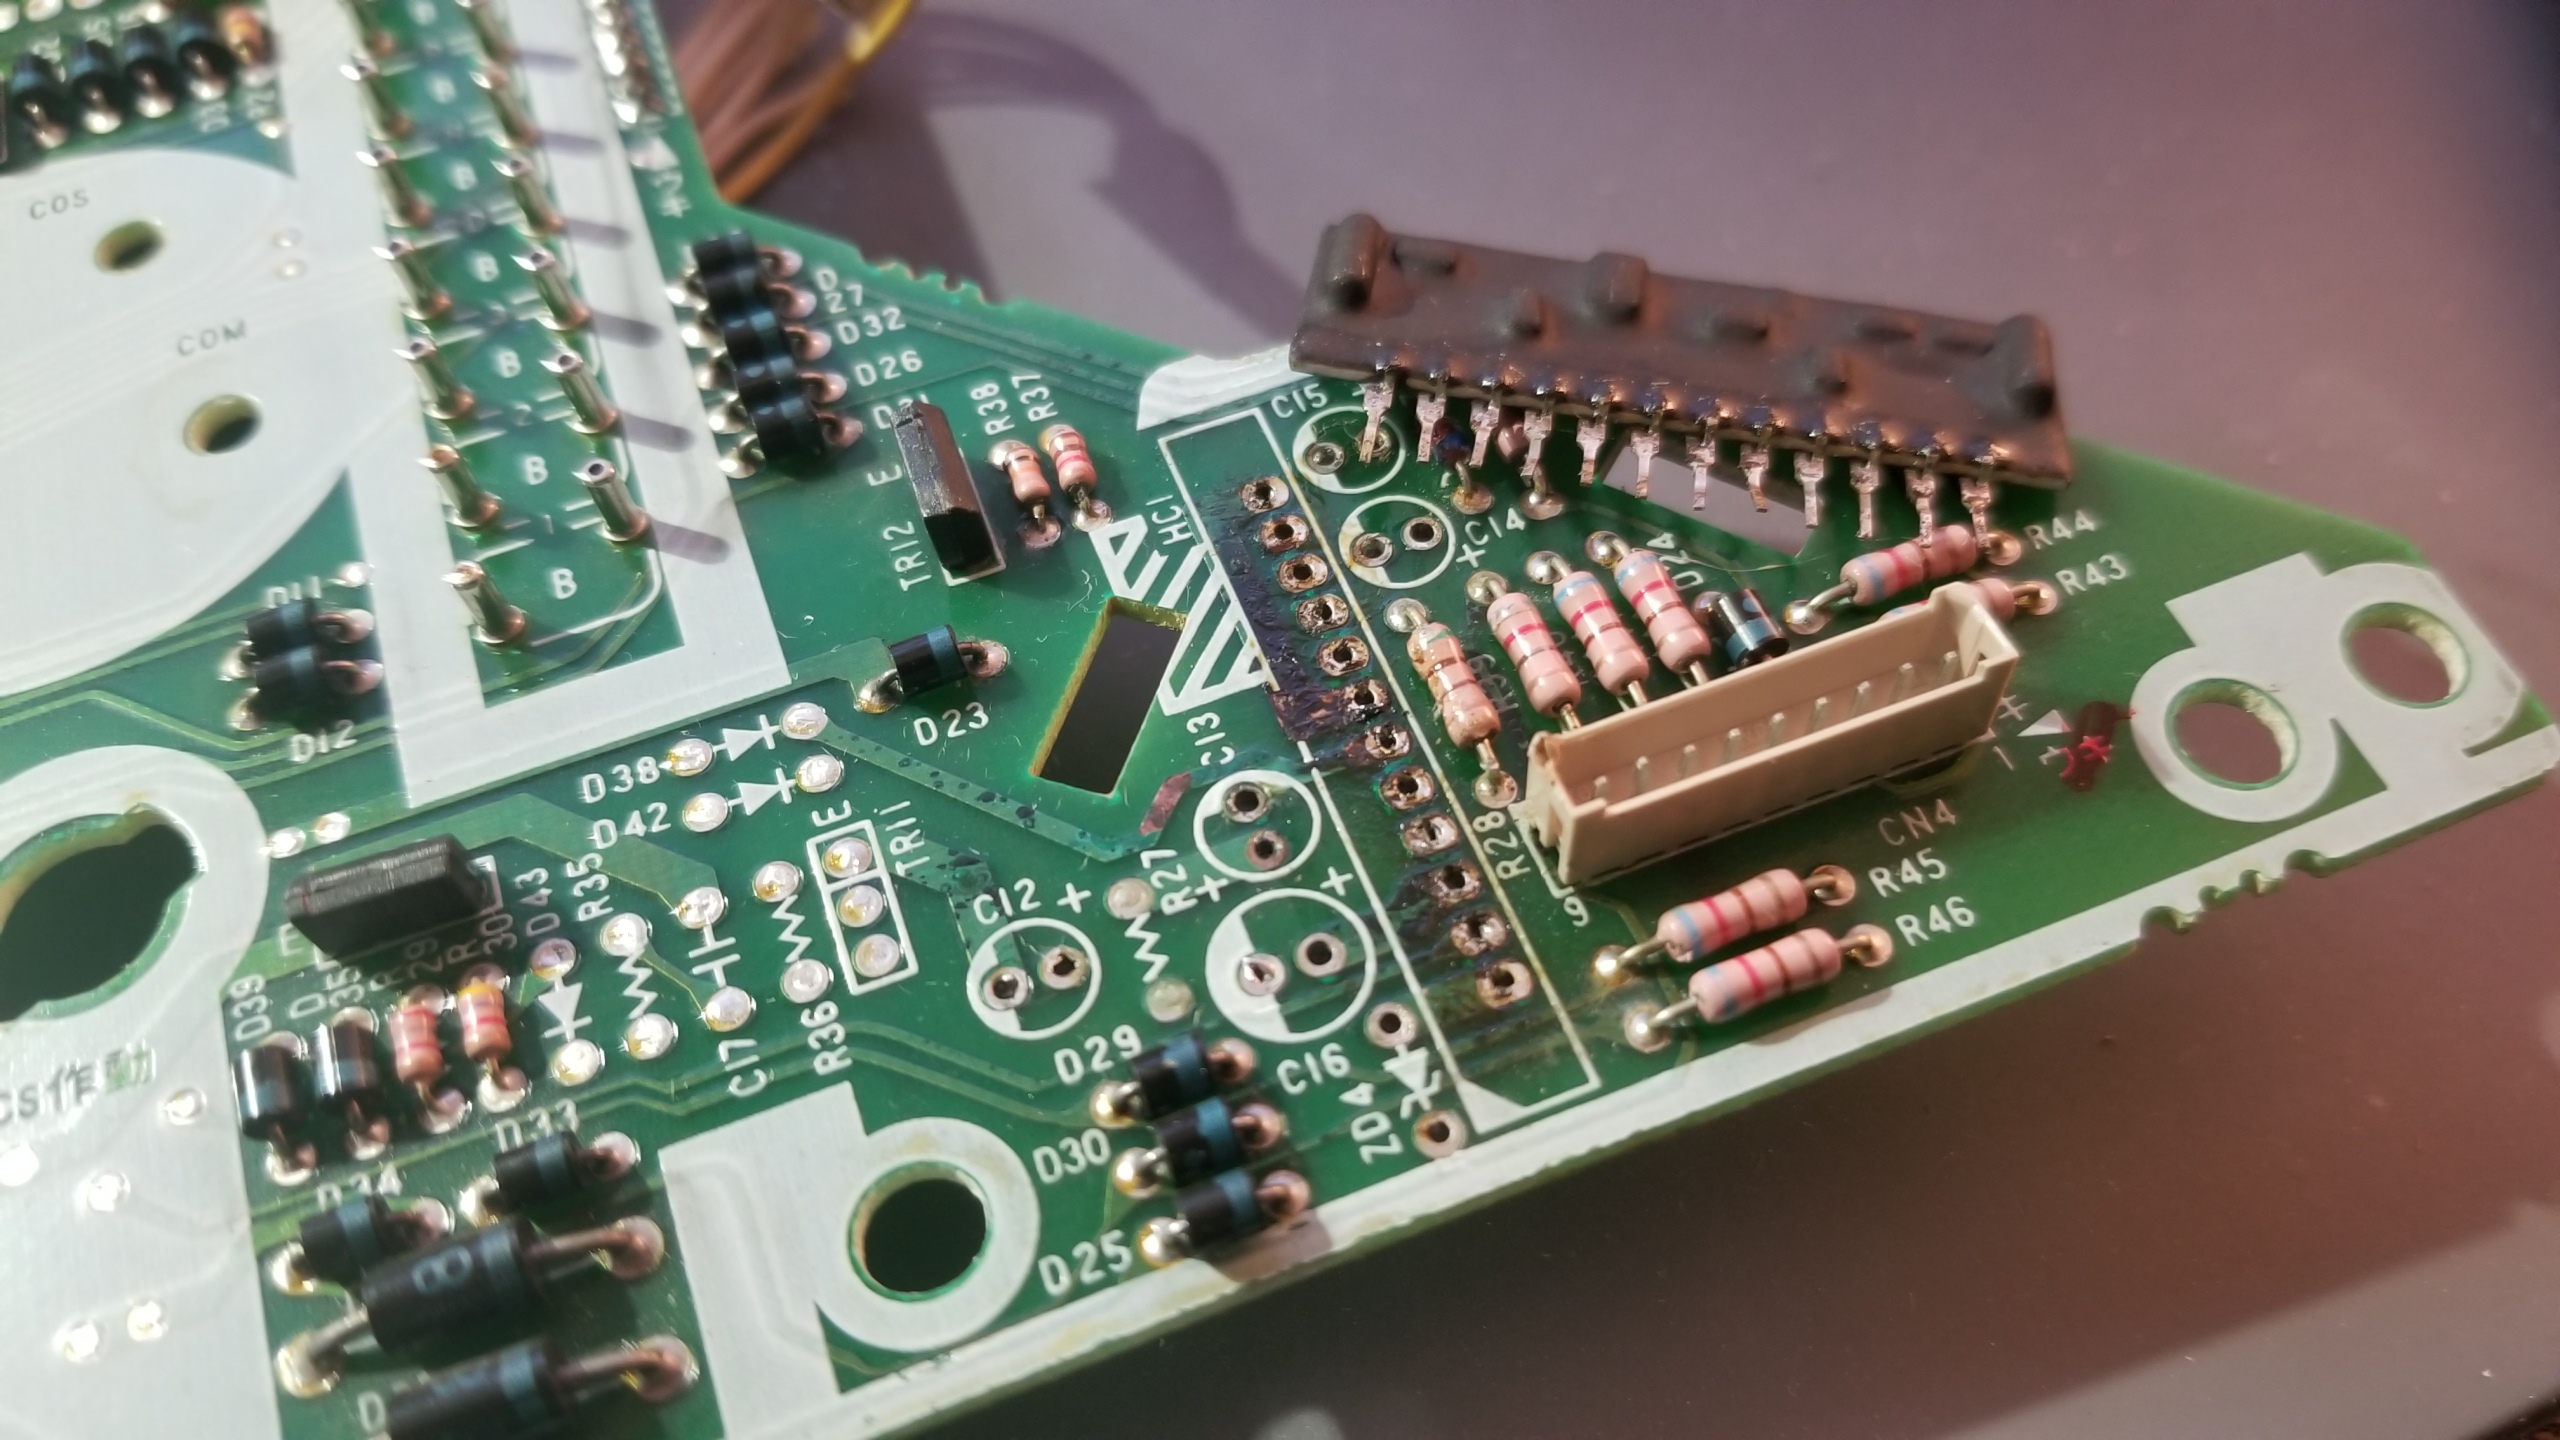
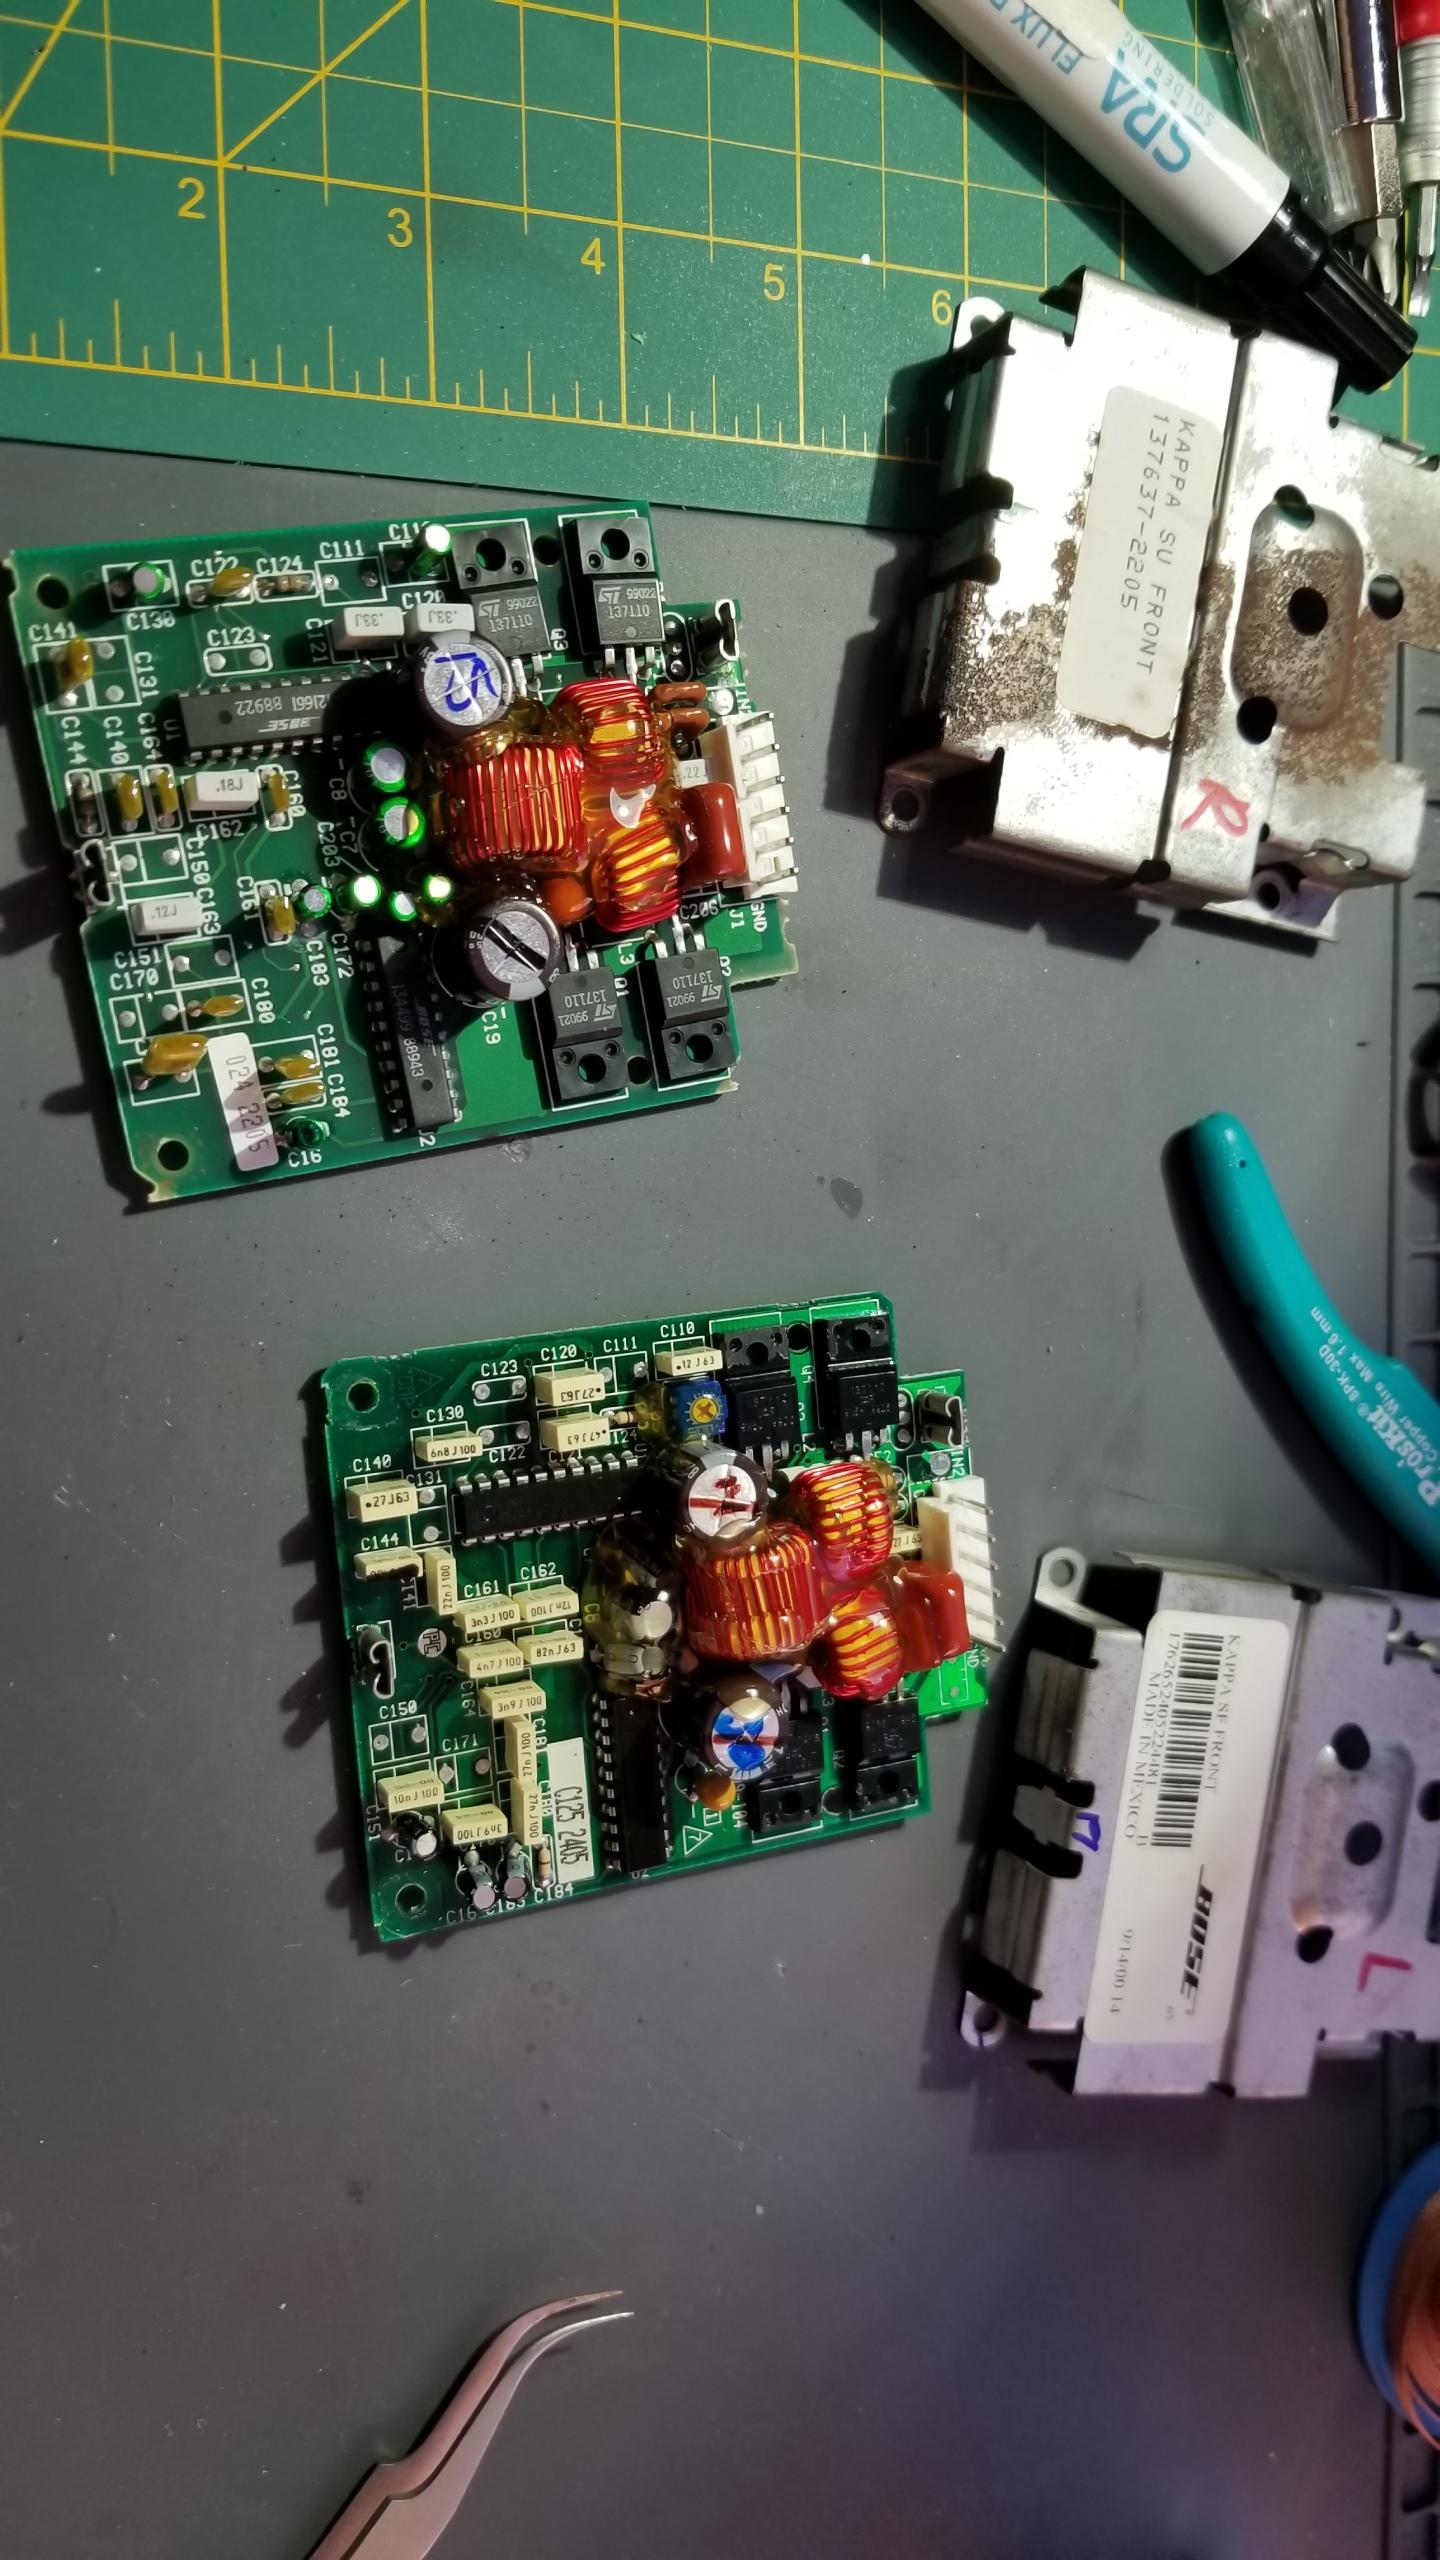
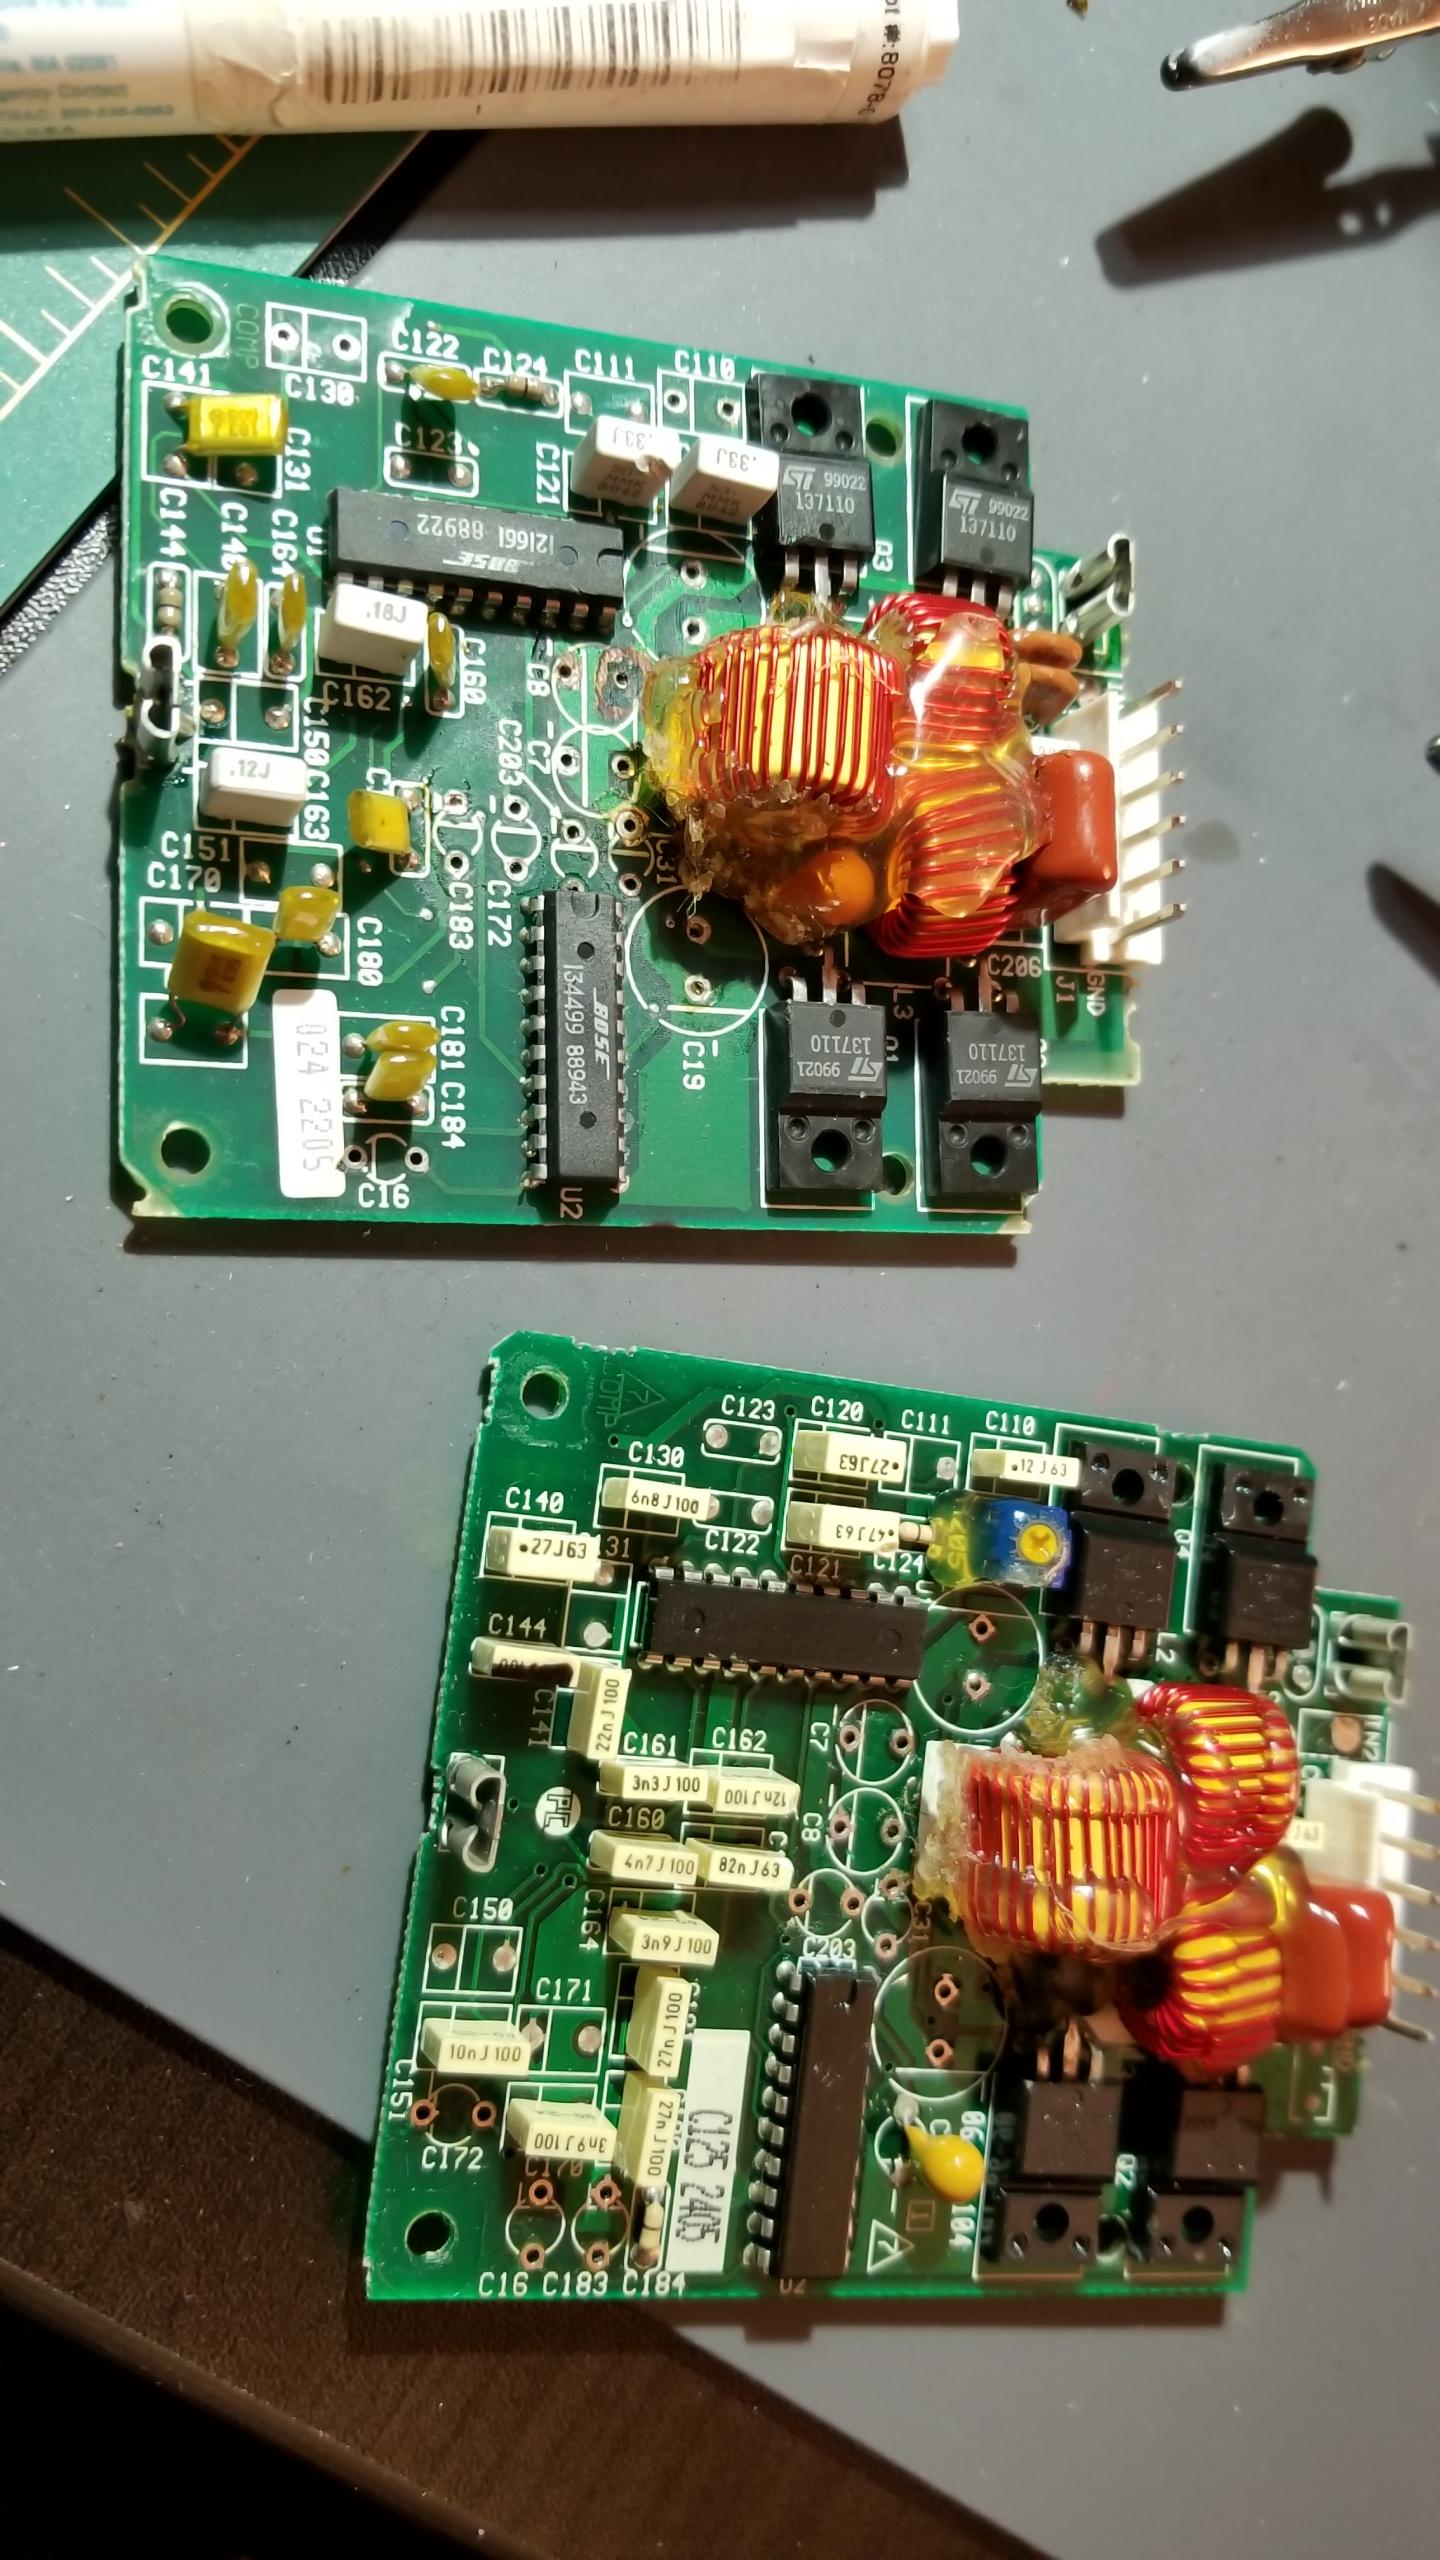
Here's the damaged area that results in the permanent brake warning lamp. I removed HC1 (the large black IC) to repair the traces and pads around it, was a pain in the ass with just a single tip soldering iron but managed to remove the chip eventually. Lots of black surface corrosion, but fortunately it wasn't major enough to break any of the traces.
dpECsbw.jpg


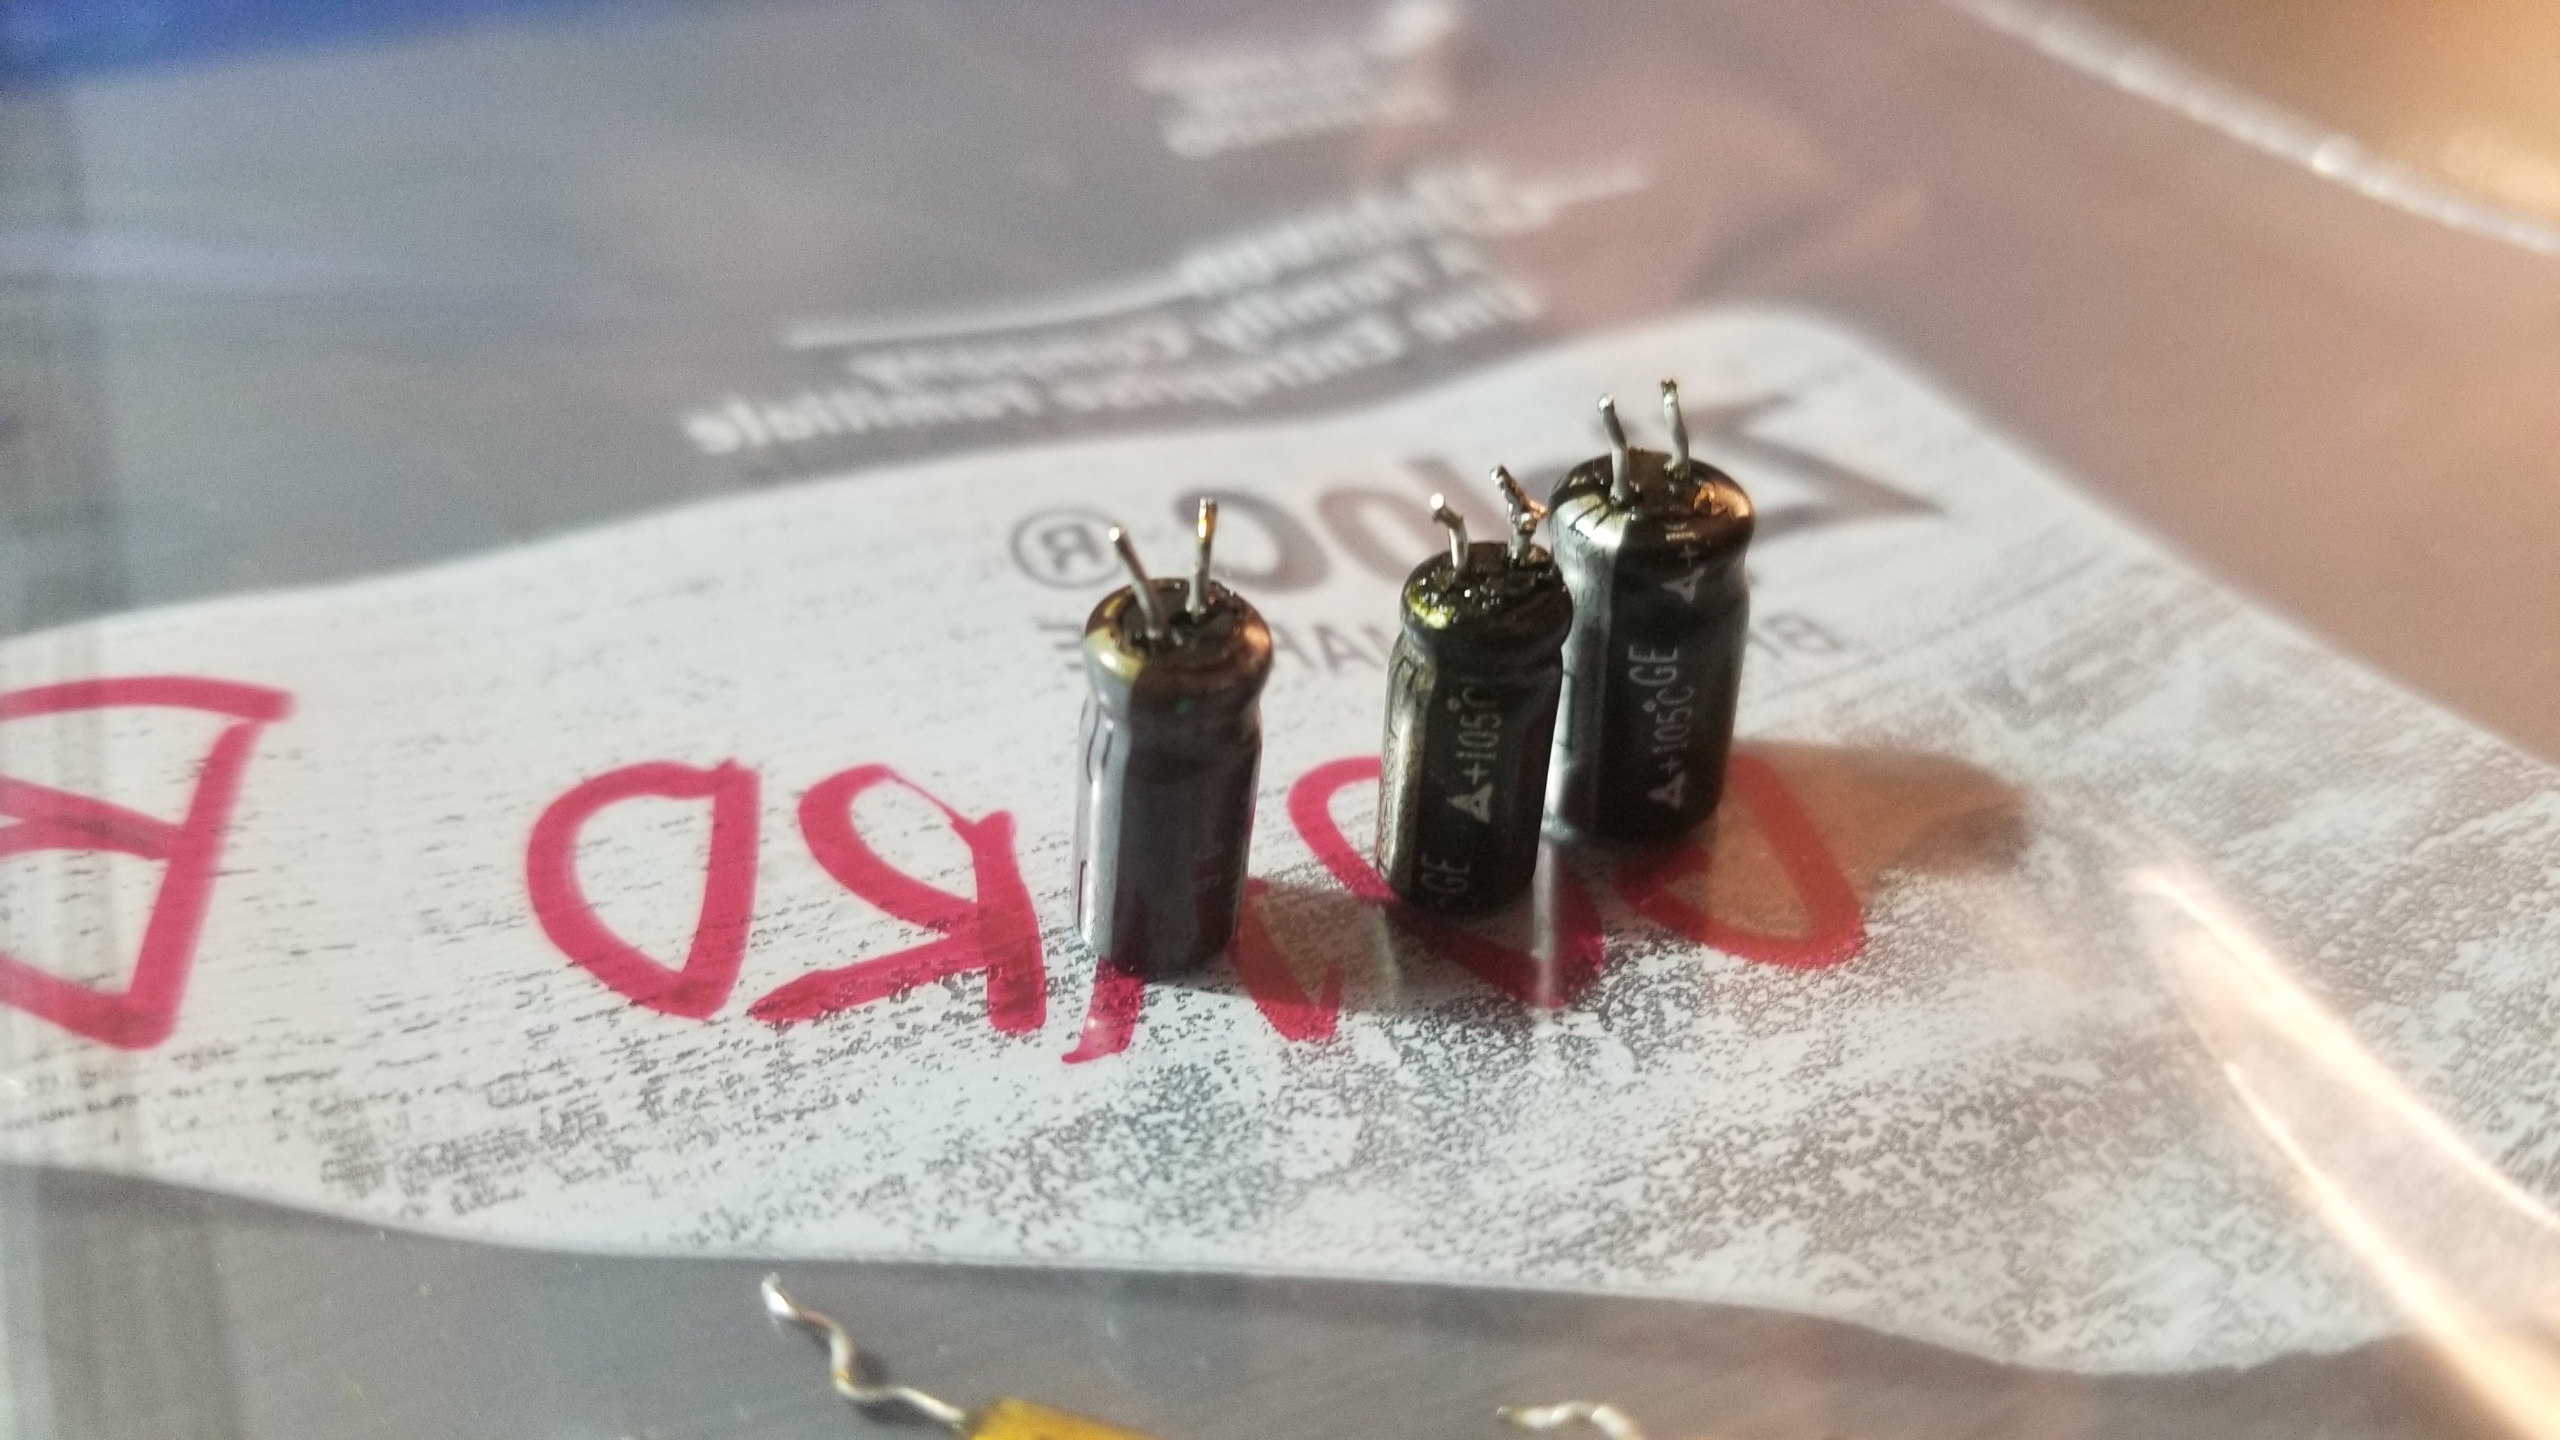
Here's caps C12, C13, and C16. Looking a bit worse for wear. Really, the whole problem came from the middle cap which obviously was the one to burst, but the others weren't far behind.
0YfCUtY.jpg


Everything cleaned up and soldered. The bare copper traces lead to dead ends on D38 and TR11, so I wasn't too worried about making those look pretty. Seems like most USDM board I've been online have components there, maybe for the security system? Not sure. I put on a thicc layer of conformal coating around the area to protect it from future leaks or shorts since the traces are bare.
lfCd6Qh.jpg


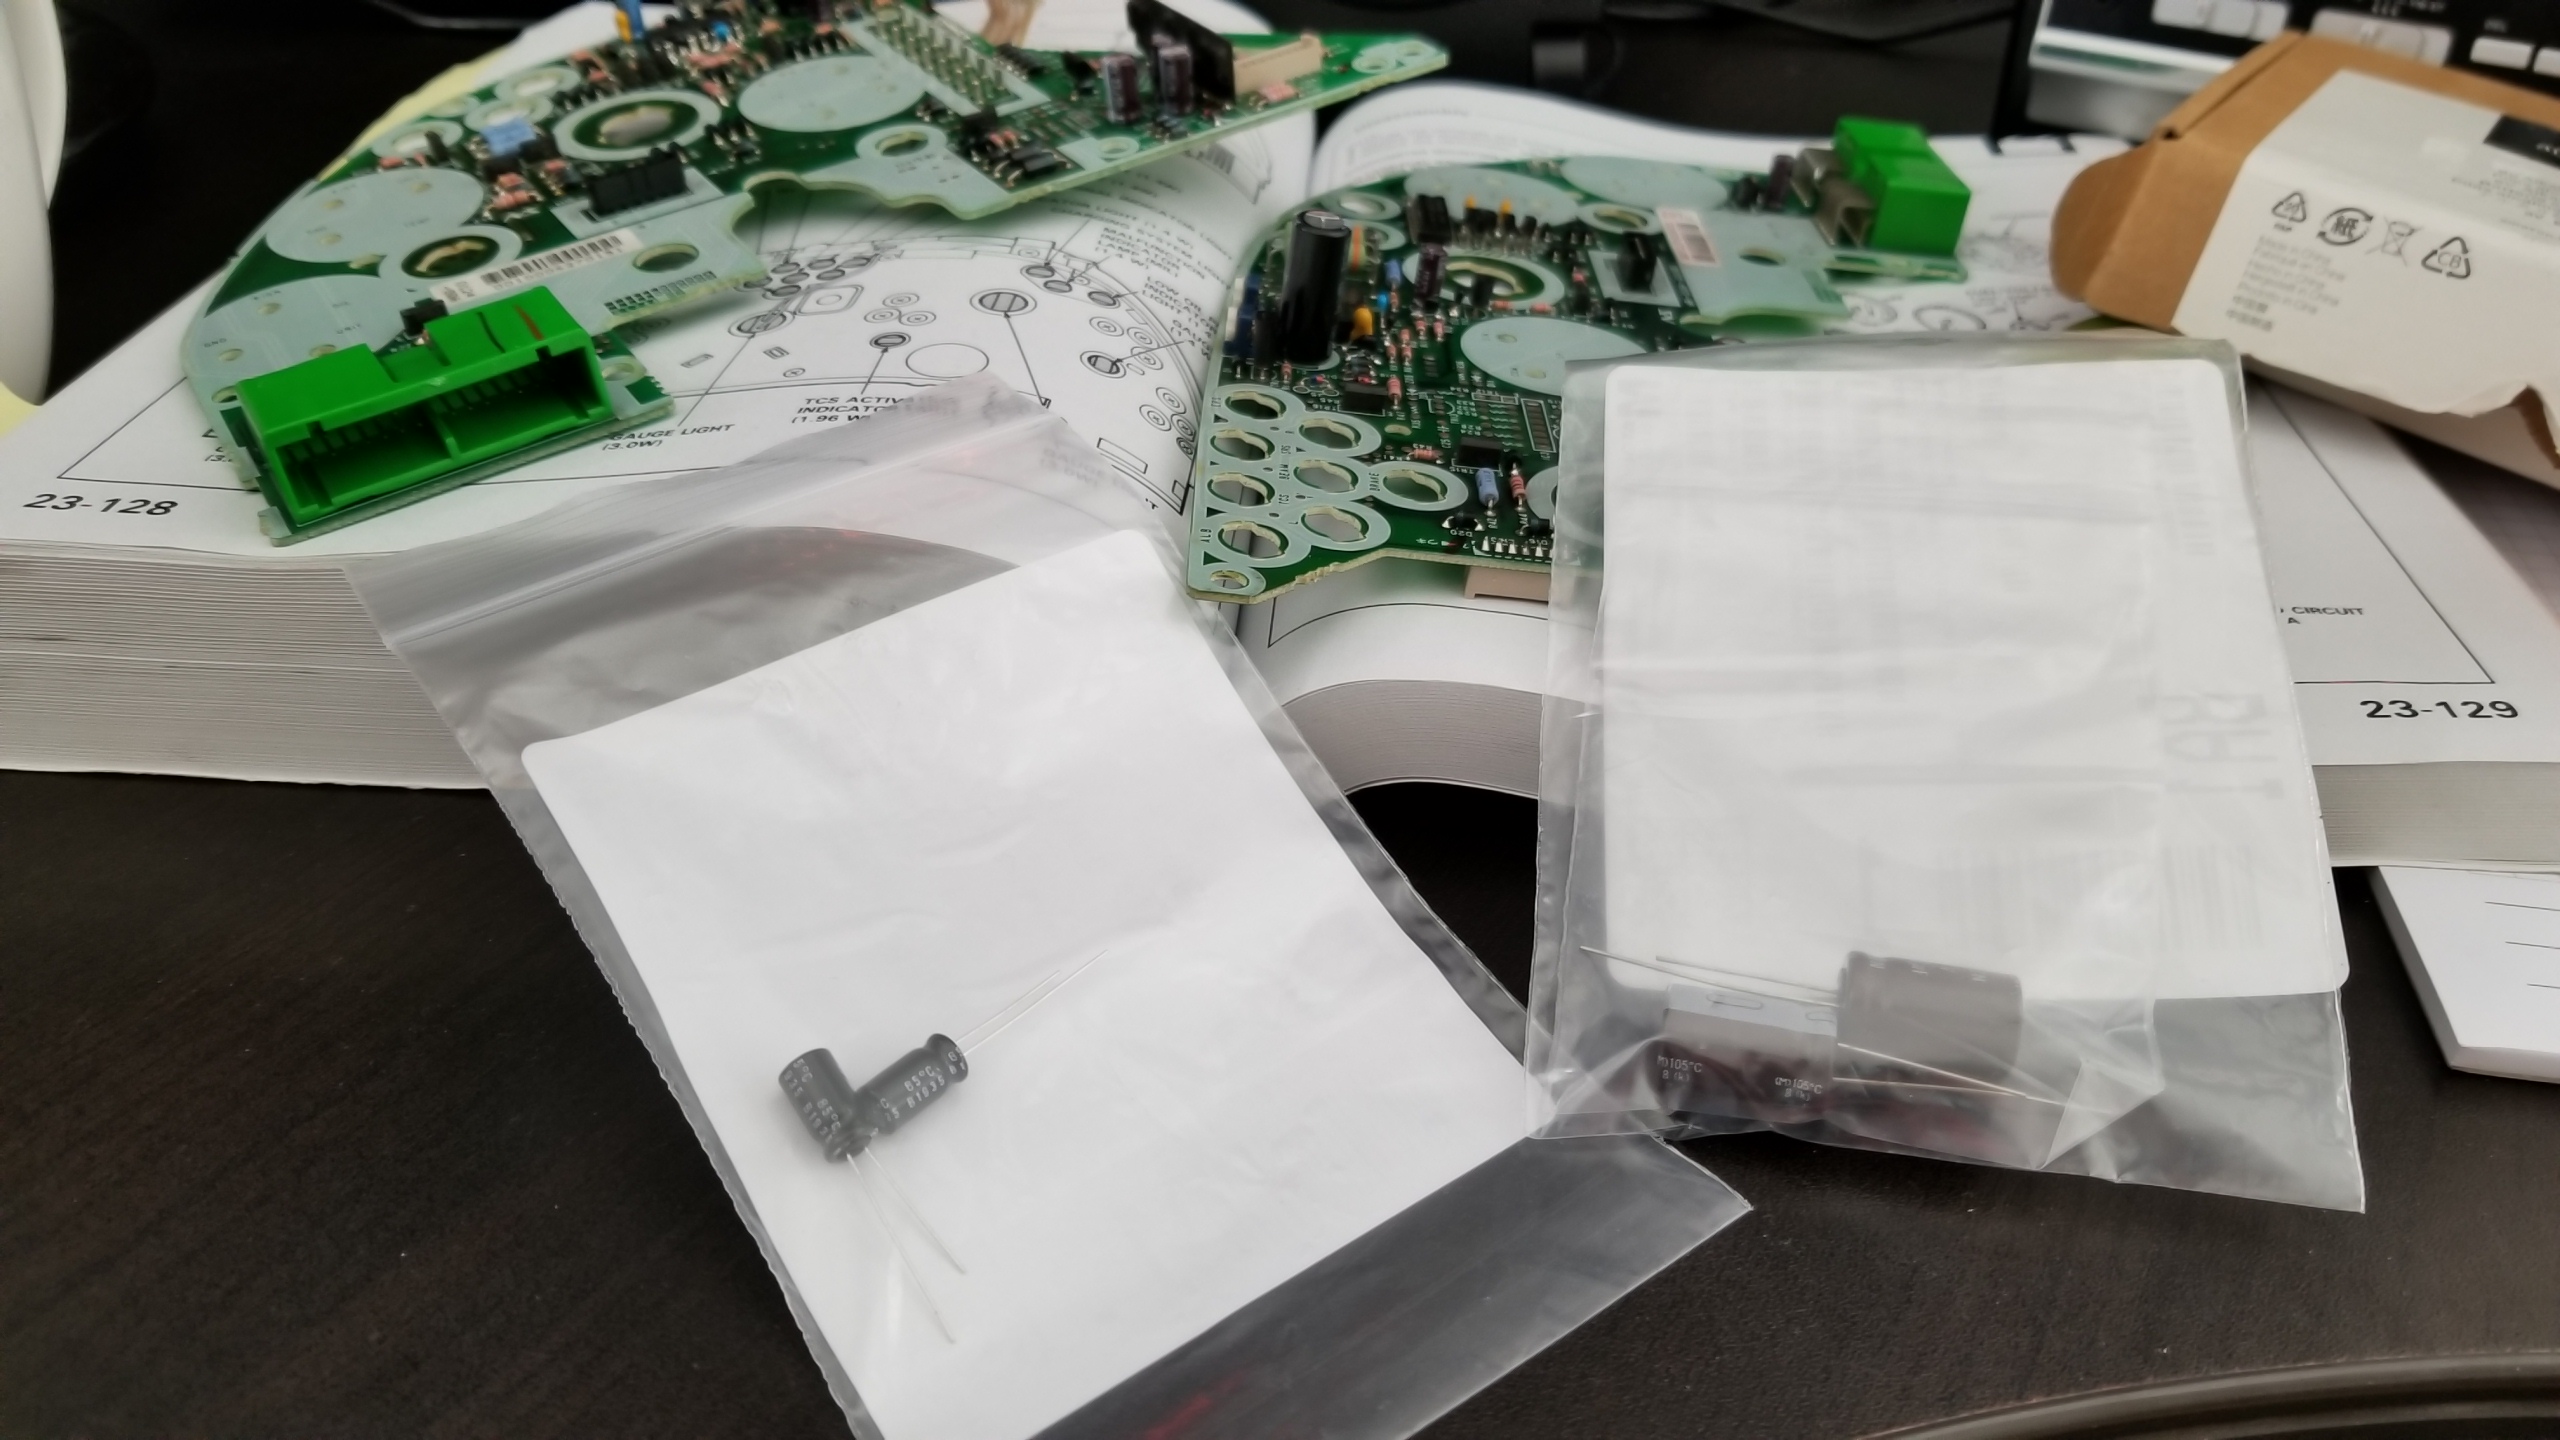
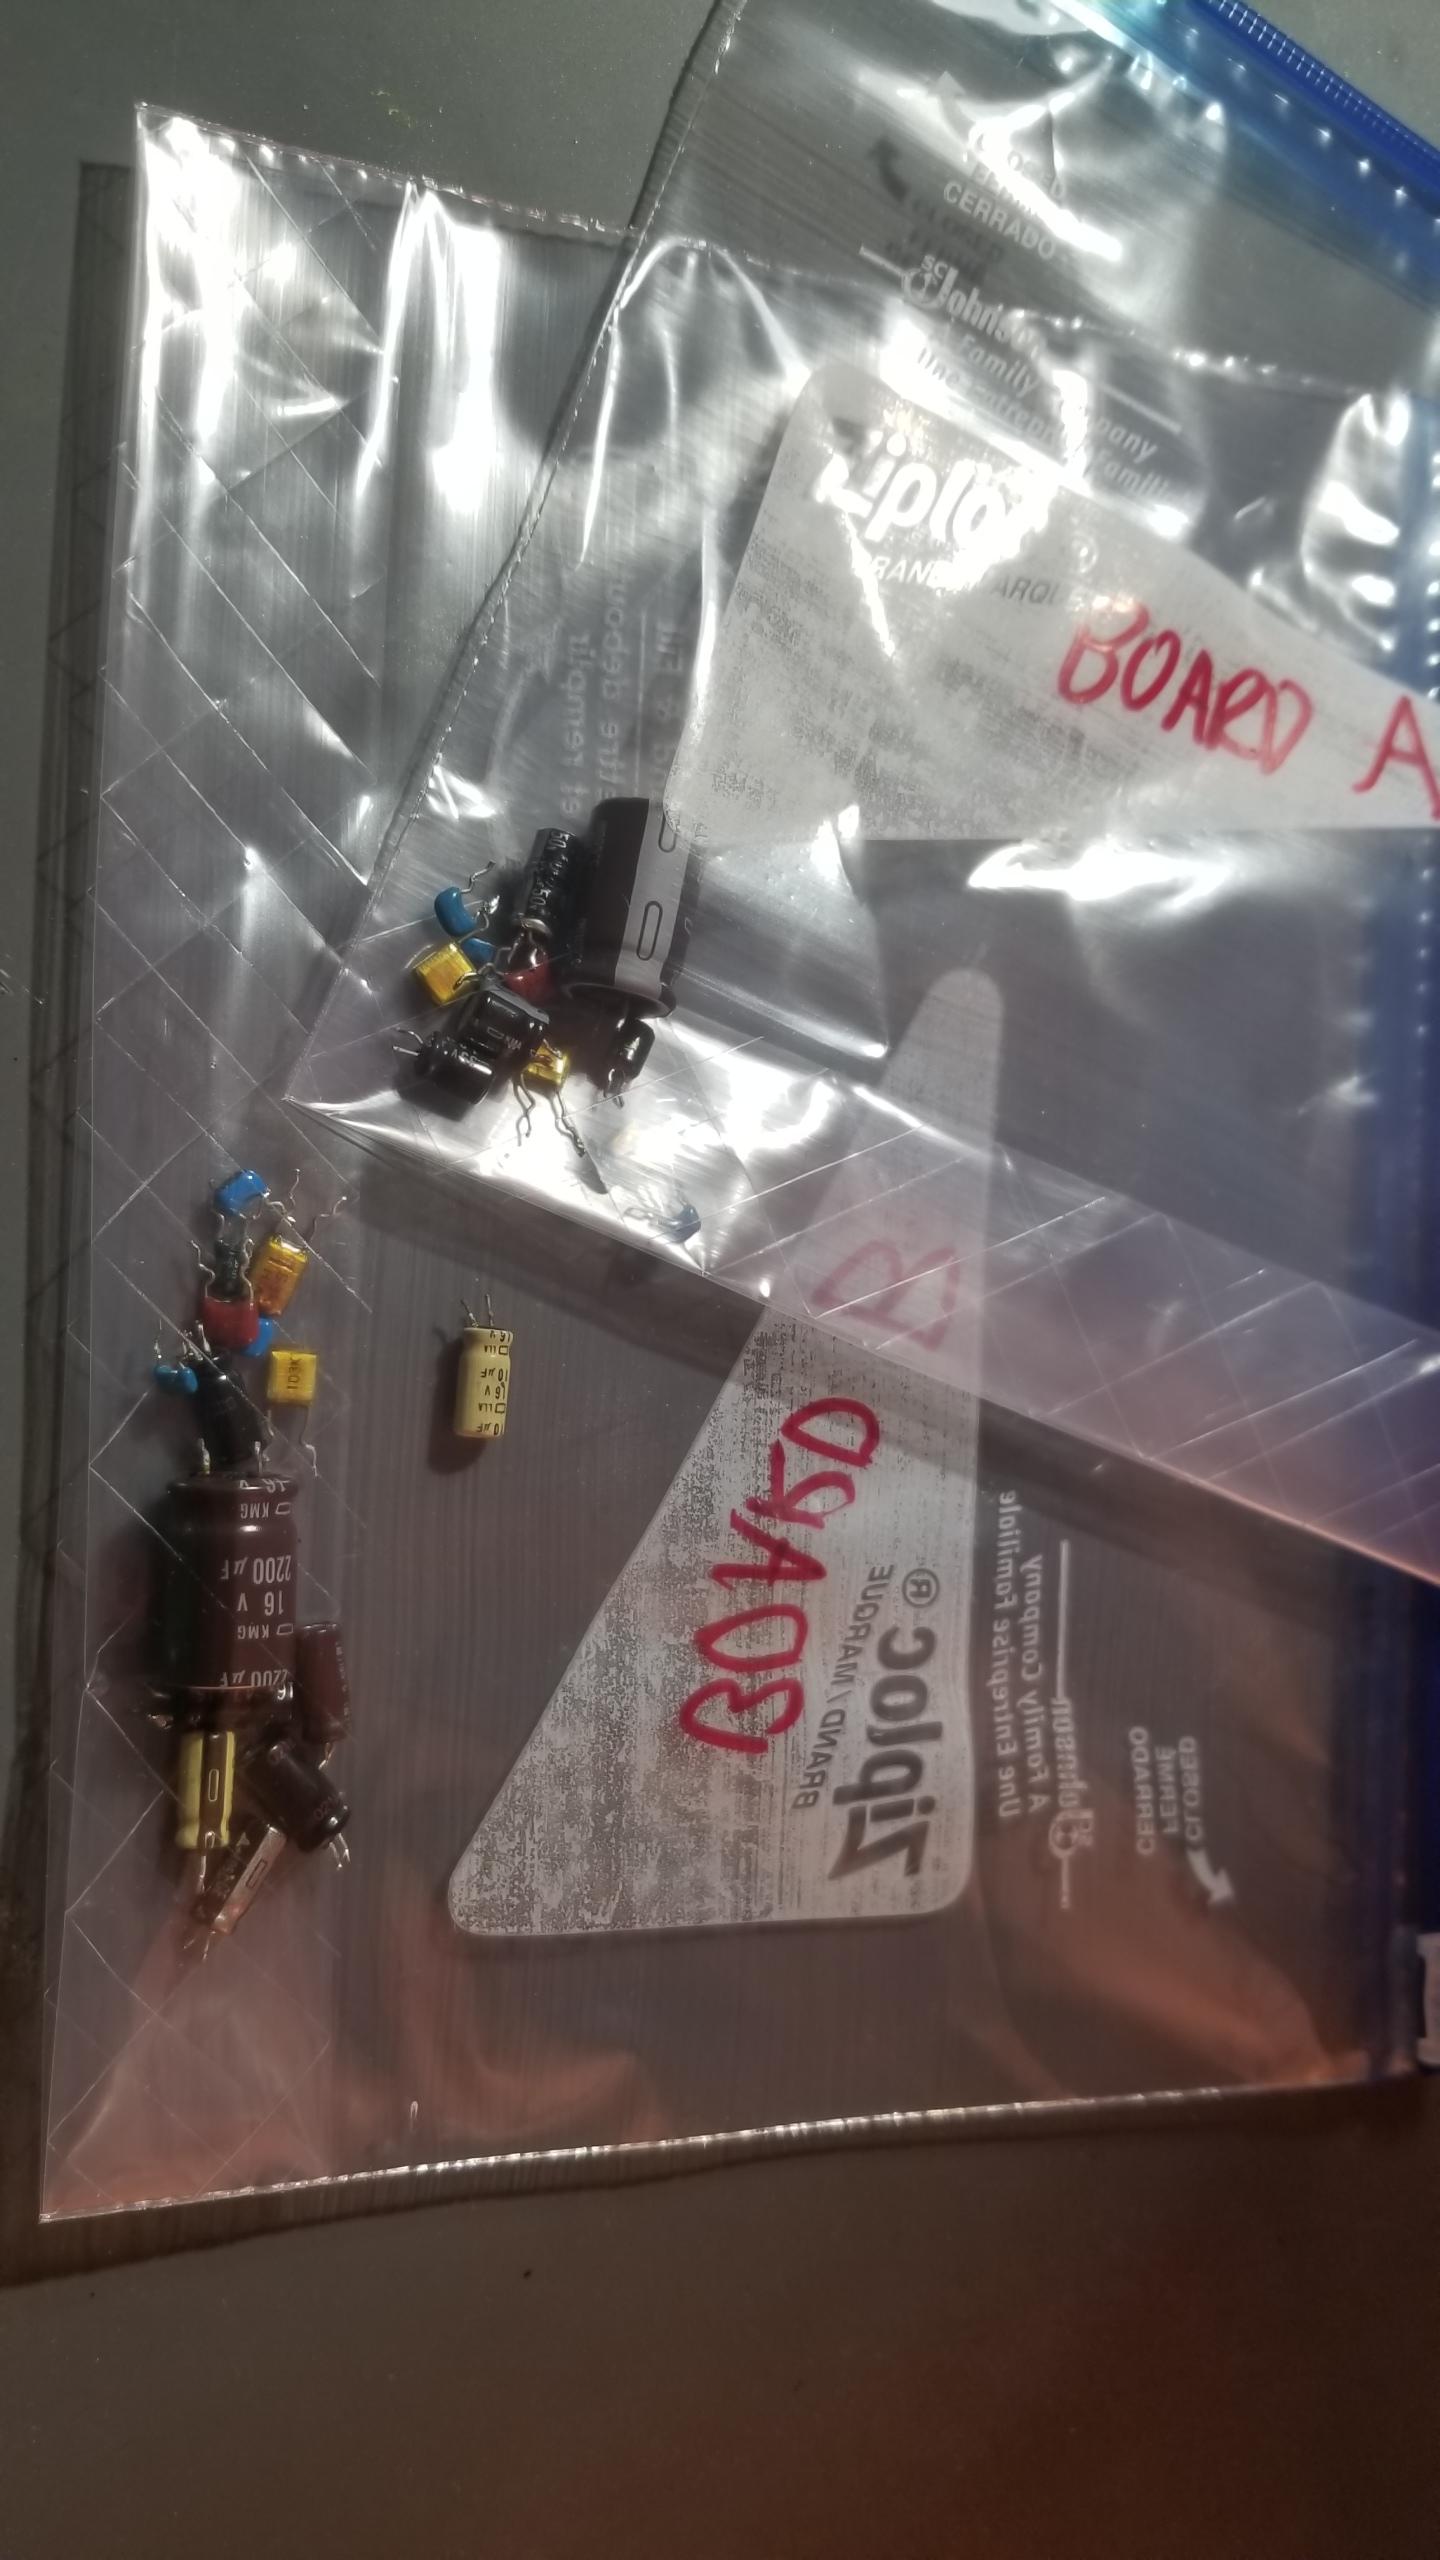
Here's the two extra bipolar capacitors I missed with my first order and the two largest caps that are ~5mm shorter than the ones I originally ordered so the boards would fit back in the backing plate.
QlZEMM7.jpg


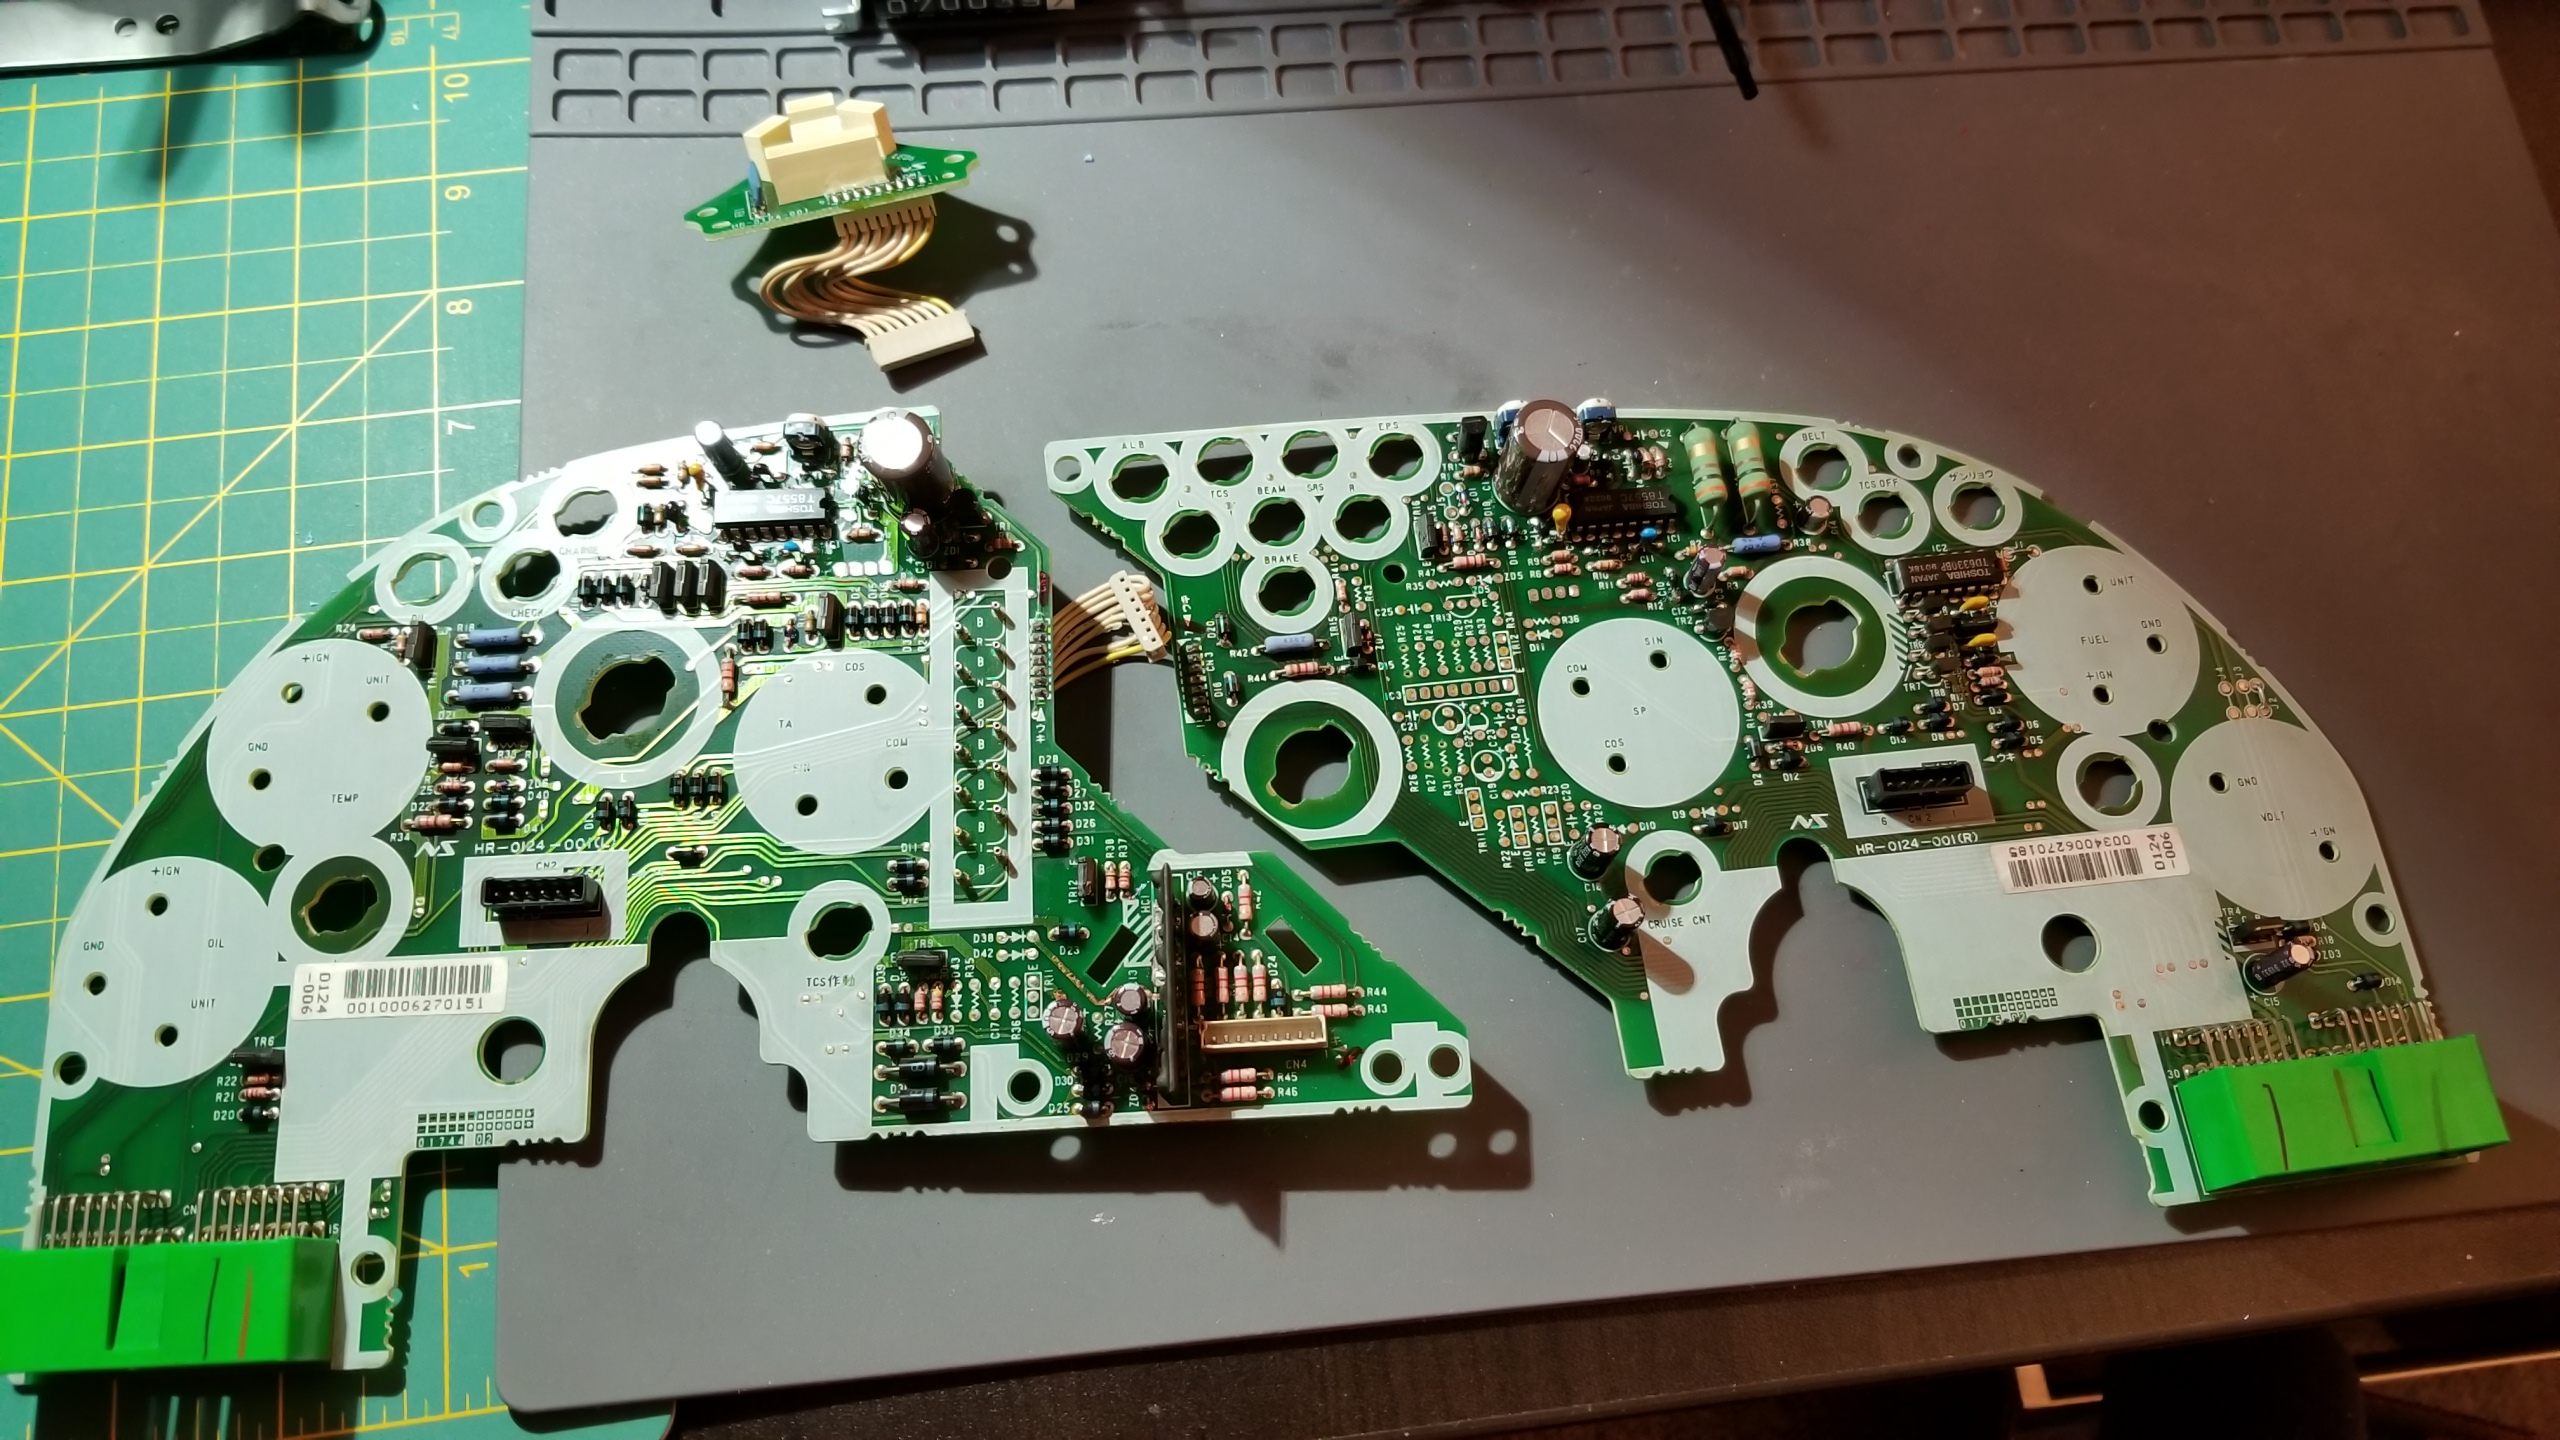
And two fully repaired boards :^). The right-hand board looked perfectly fine anyways, but might as well work on it "while you're in there".
PvieYYH.jpg


All the old replaced components. I'm sure it was completely unnecessary to replace the MLCCs and tantalum capacitors as well as the electrolytics, but it makes me feel better. What's a few brain cells lost to solder fumes anyways?
D2g47dJ.jpg


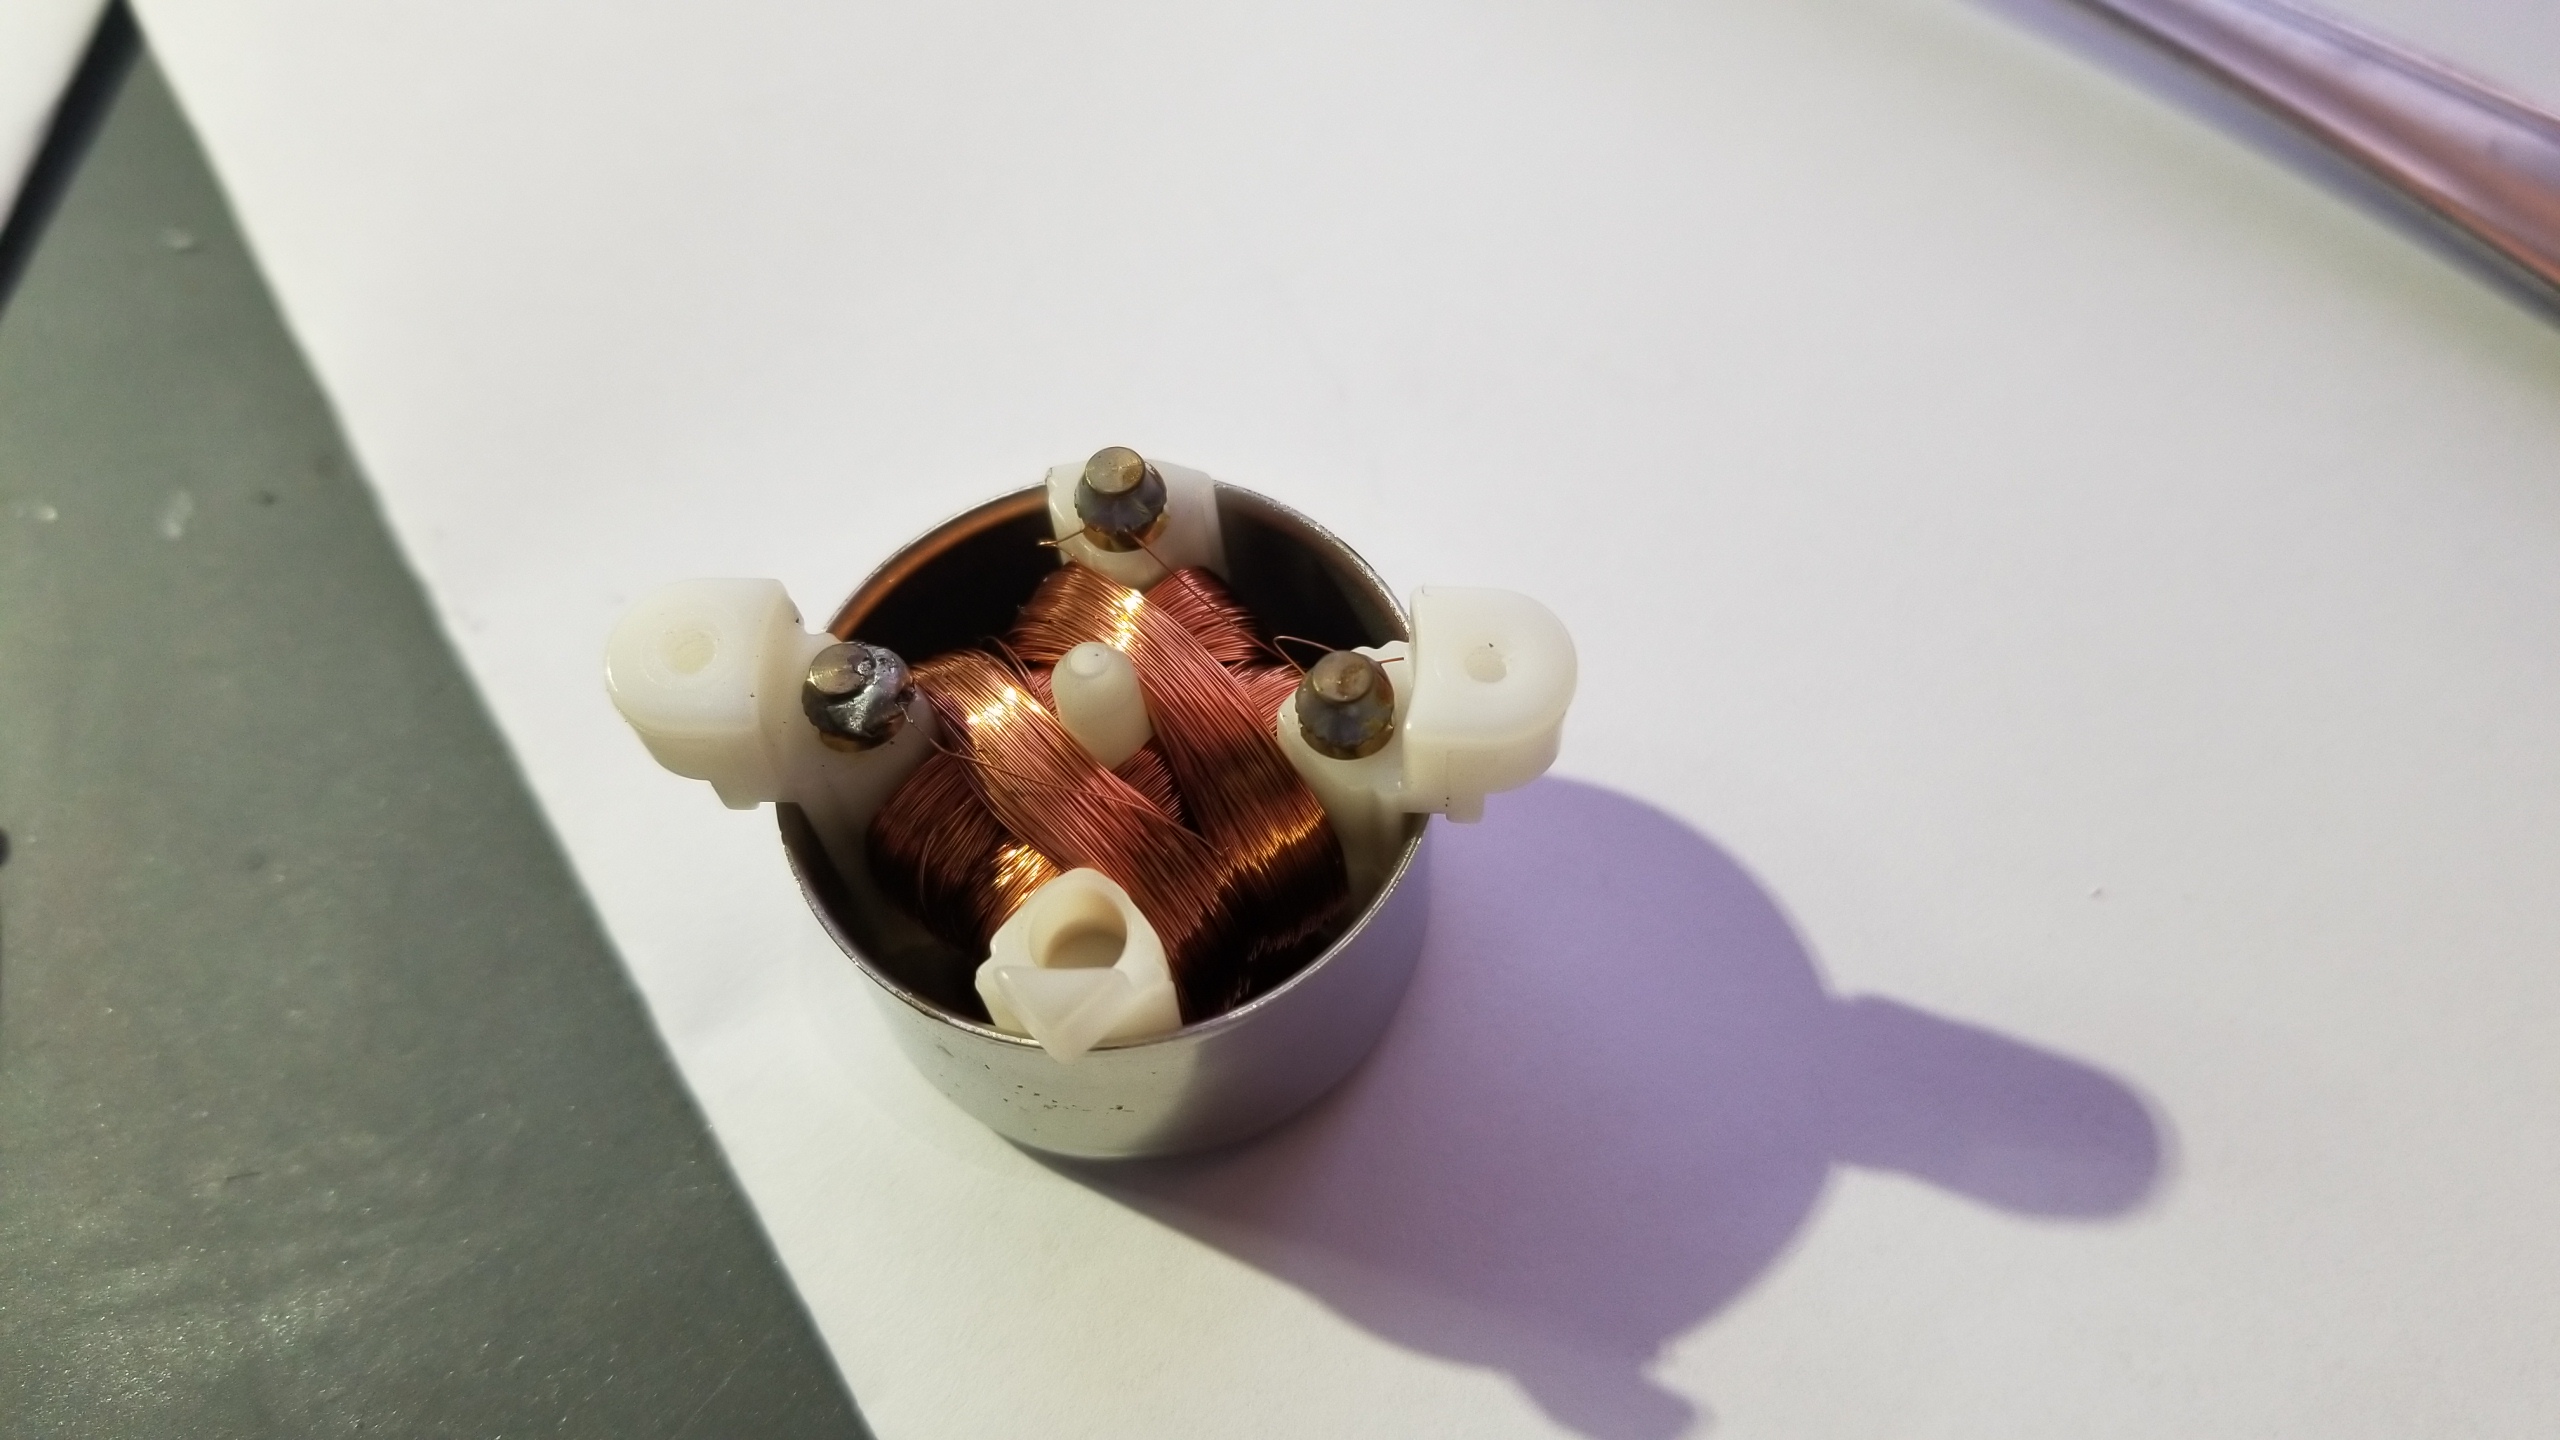
Now for the not so great stuff, this was the tach eddy current/motor/whatever the hell you call it before I touched it, though obviously I had removed the needle and gauge face to swap over the M/T face already. It was pretty obvious someone before me had disassembled the cluster before (which was evident from some other board repairs), but overtightened one of the tach posts and had to re-solder one of the wires. I was hoping my tach issue was circuit board related, but not so lucky.

Normally soldering the wire back to the post will fix the issue, but I think they pulled off the needle to perform the repair and messed up the whole gauge by pulling the internal magnet out of its track as I've read on another Prime thread. Of course, my removing the needle didn't help either, but it explains why the tach needle was basically non responsive before I got to it. Whatever way I tried putting the needle back in, it never moved as freely as the speedo did, so here's another +1 to Sudesh's old post about needle removal probably breaking the gauge completely.

I gave the tach to a local speedo shop, they said that even they have trouble removing needles without breaking the gauge and they couldn't do anything to fix my tach. Okay..........great news.

Moral of the story, do NOT under any circumstances remove a gauge needle completely. Maybe you can break the needle itself away from the metal post by holding the post inside the holder, but I would've much rather kept the old A/T face than try to swap a M/T face on, not that it would've helped me in this circumstance. Give it to a pro shop so you're at least covered if they break it. Not worth the risk to replace yourself.

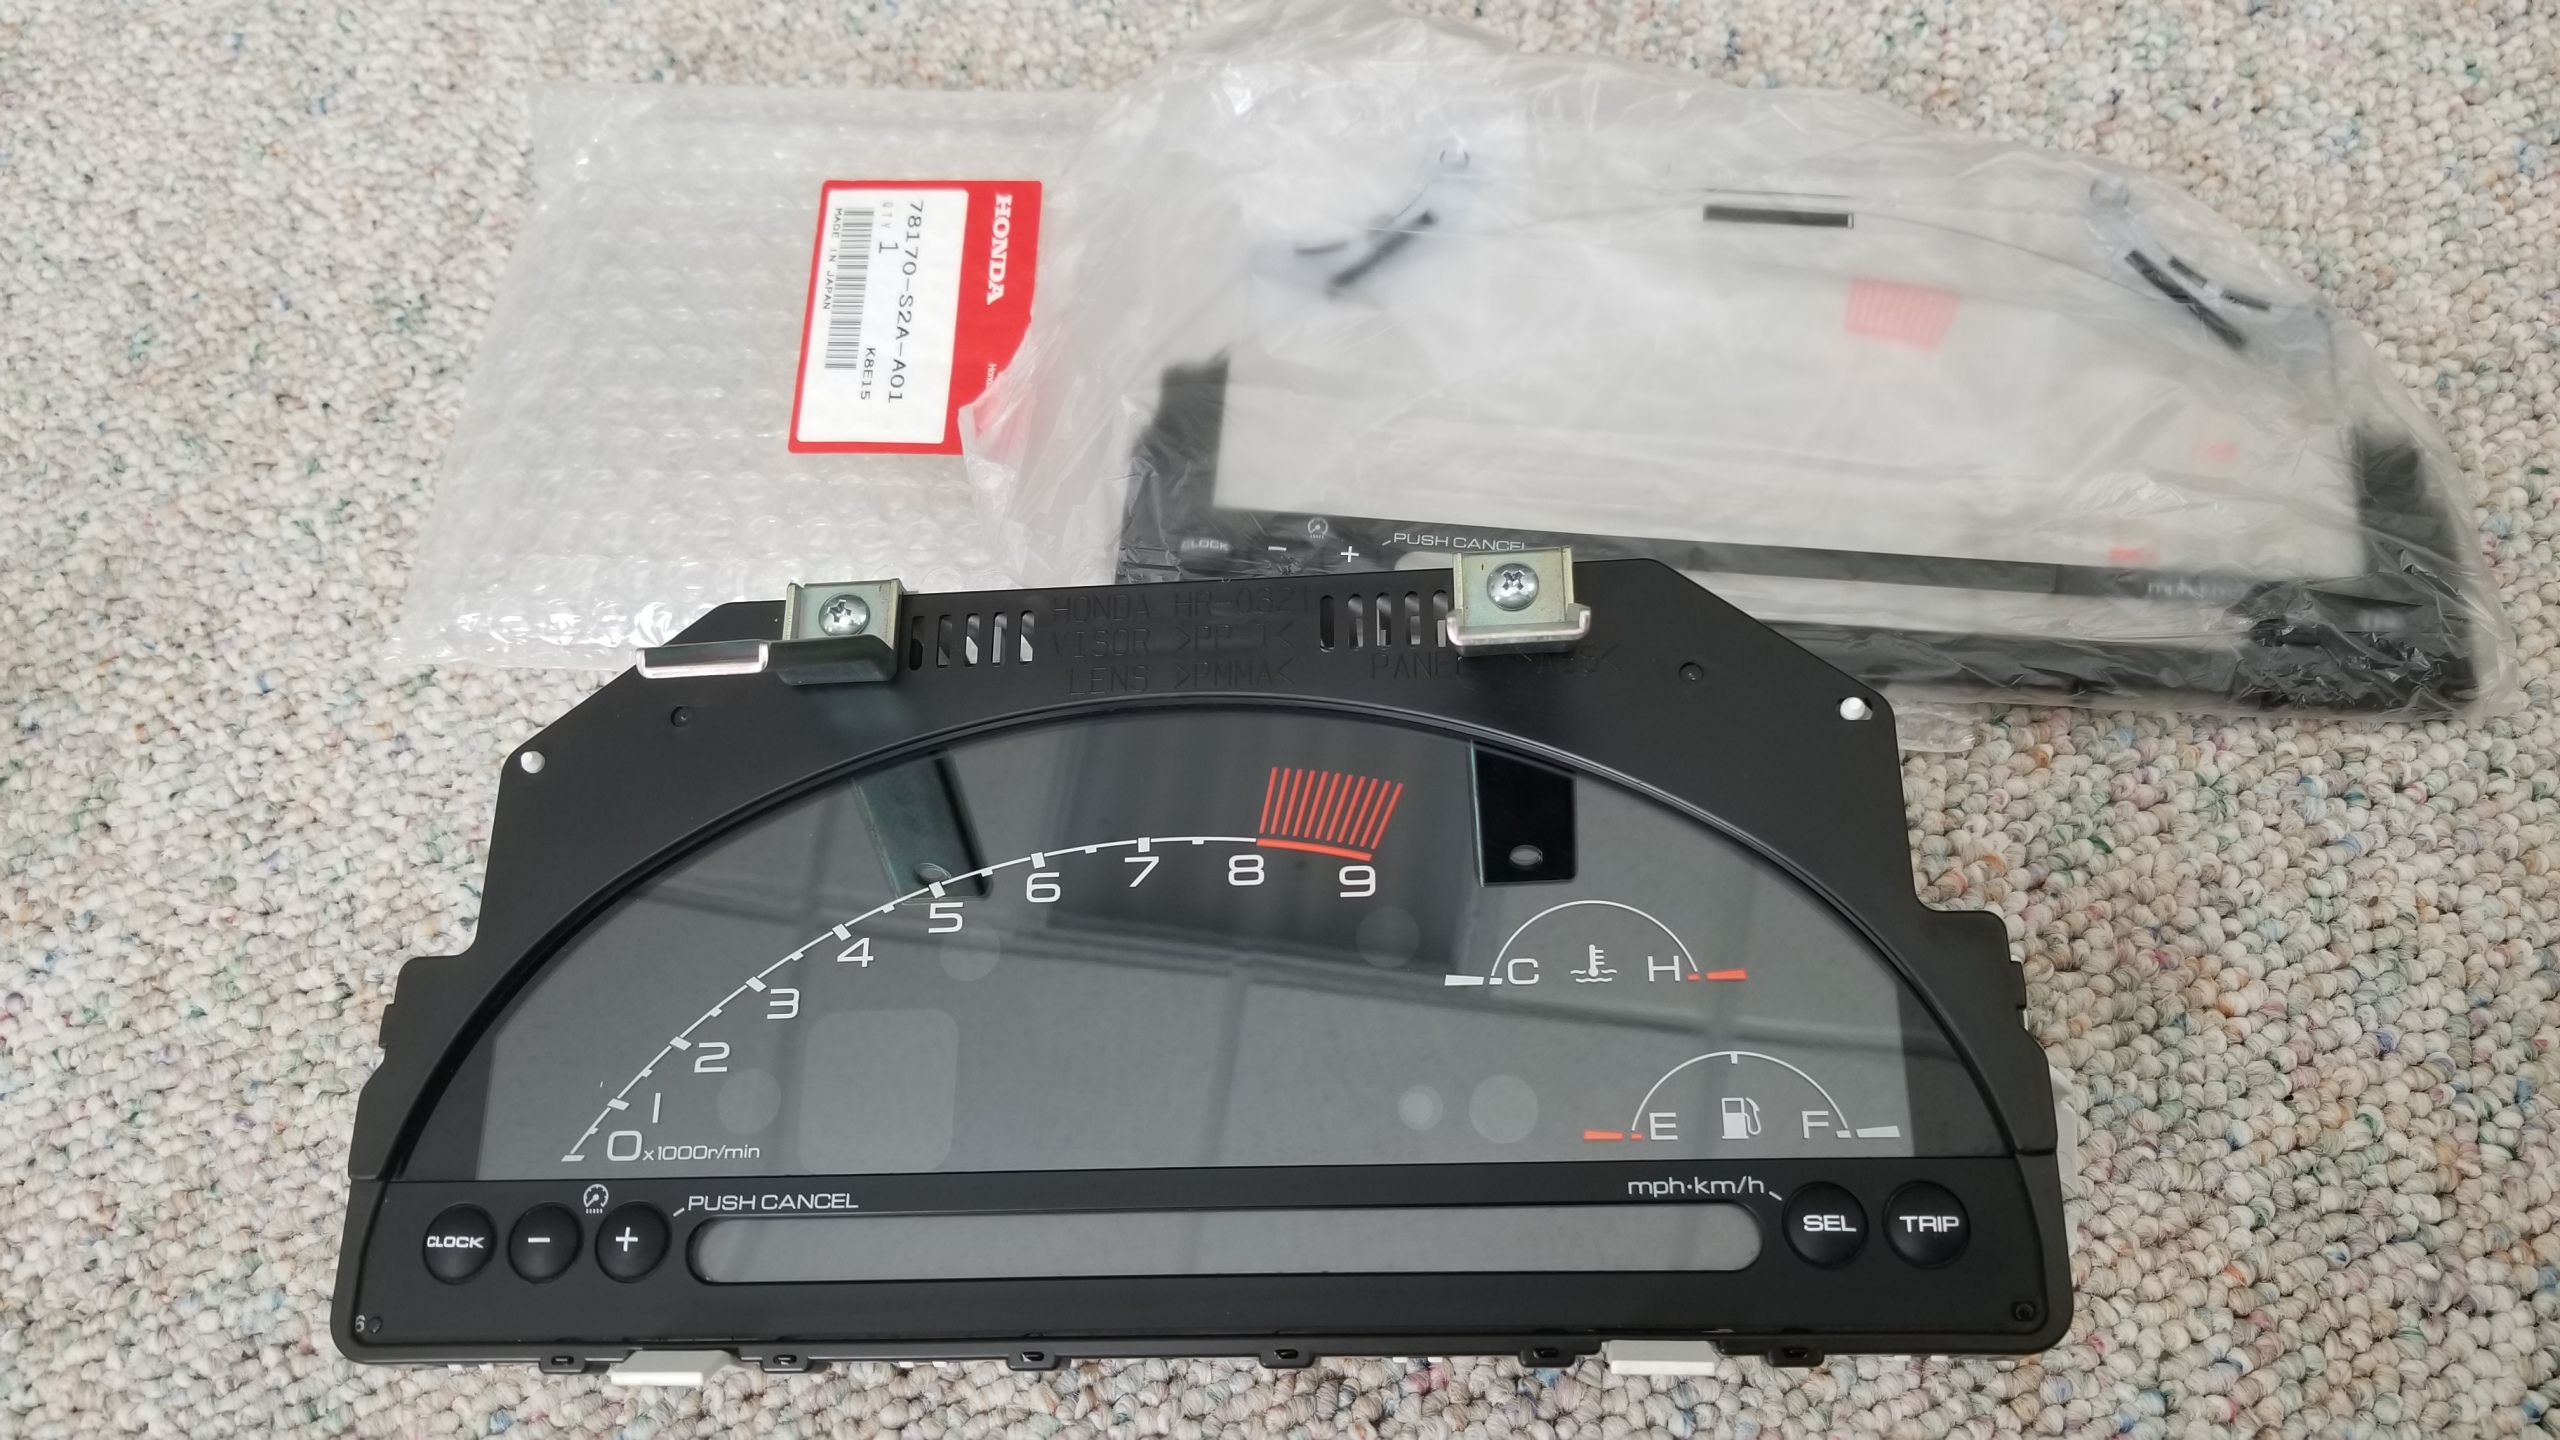
To have a fully functional OEM cluster again would be a cool $700+ at this point for a new completely tach assy, which really rubs me the wrong way. I would like having an RPM reading for when I do the M/T swap, so S2000 cluster conversion it is. It was already something on my future wish list of projects, I guess this is as good of an incentive as any to do it earlier.
m3UQrq4.jpg


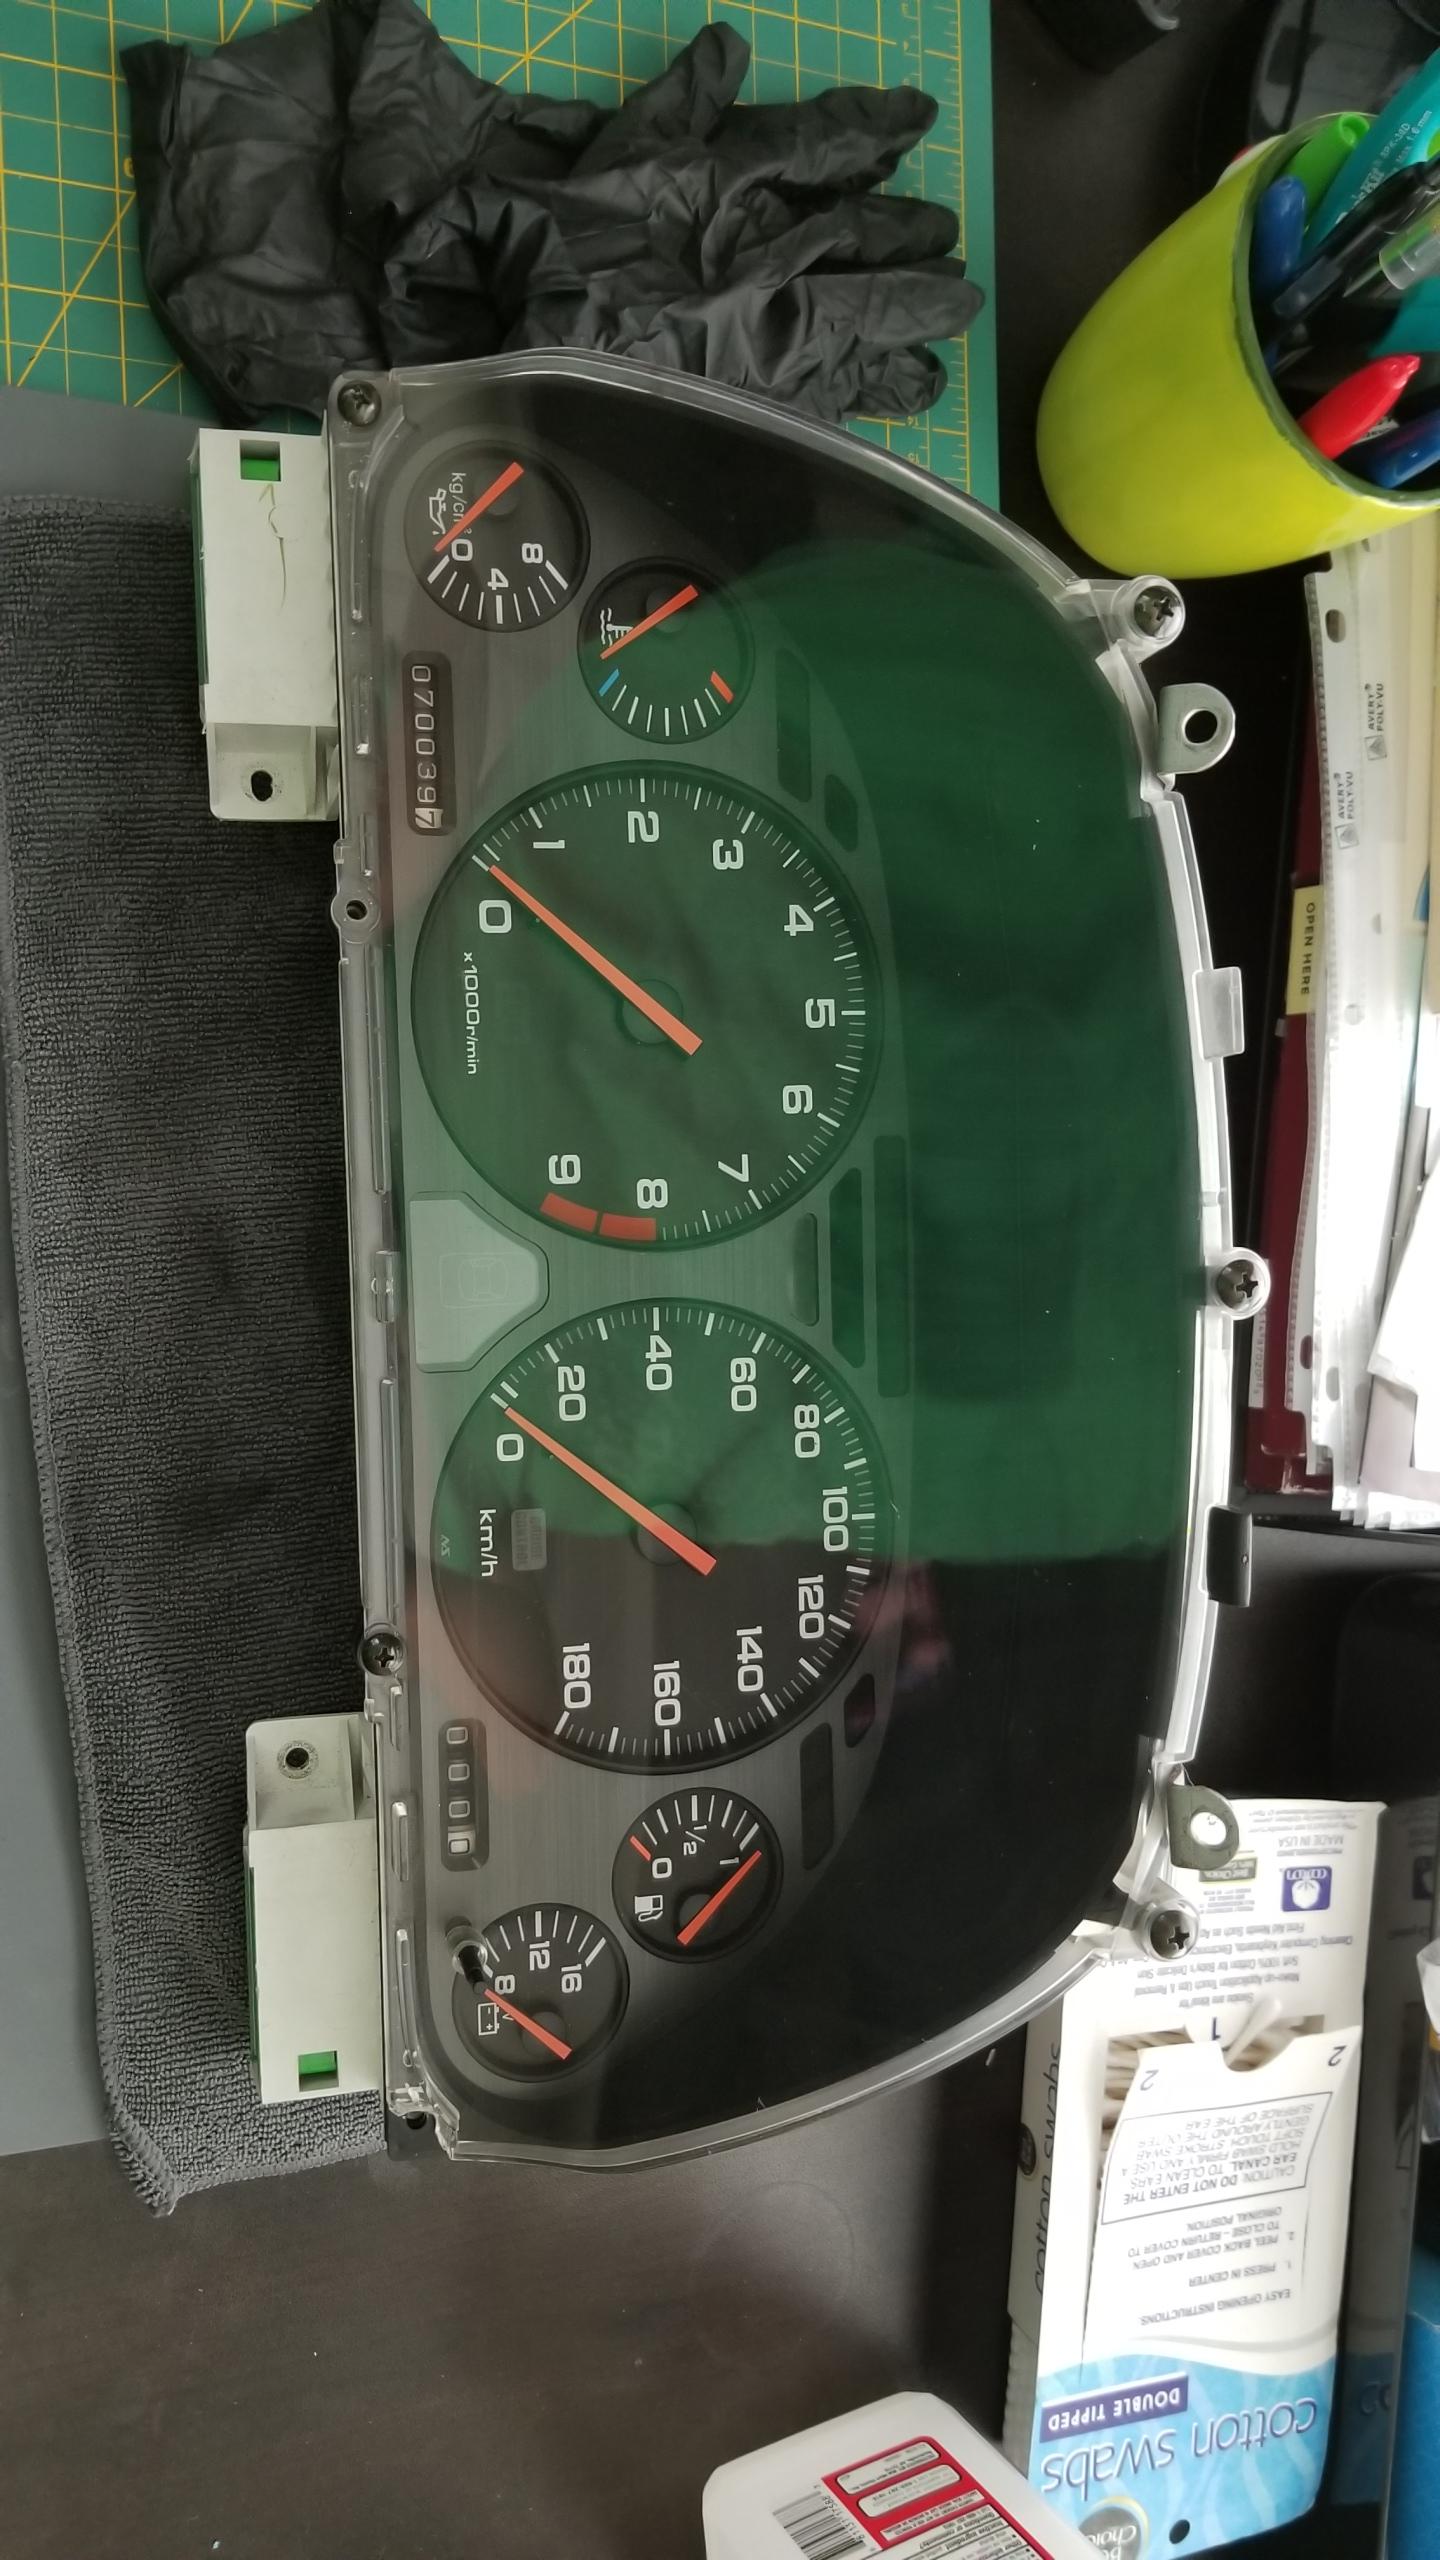
Anyways, here's the reassembled cluster after I picked up my tach. I did have a new lens and bulbs/felt/rubber tips ordered from Acura, but the lens was on backorder for a week. I ended up cancelling the order since I didn't see the point if I was planning on an S2000 cluster anyways.

Also, don't use canned air/computer dusters on the cluster. Predictably, the can shot out a teeny burst of freezing propellant onto the face and mottled it slightly. I cleaned it as best I could with gentle microfiber towelling and water, but it's not 100%. You can't see it under most lighting, but annoying nonetheless.

Whoever touched this cluster before was pretty careless, besides the tach gauge thing, they tightened down the bottom-right lens screw so hard they broke off the mounting tab completely. And two of the lens screws were missing. I thought the Japanese were supposed to take better care of their cars :rolleyes:?
s8SWbzy.jpg


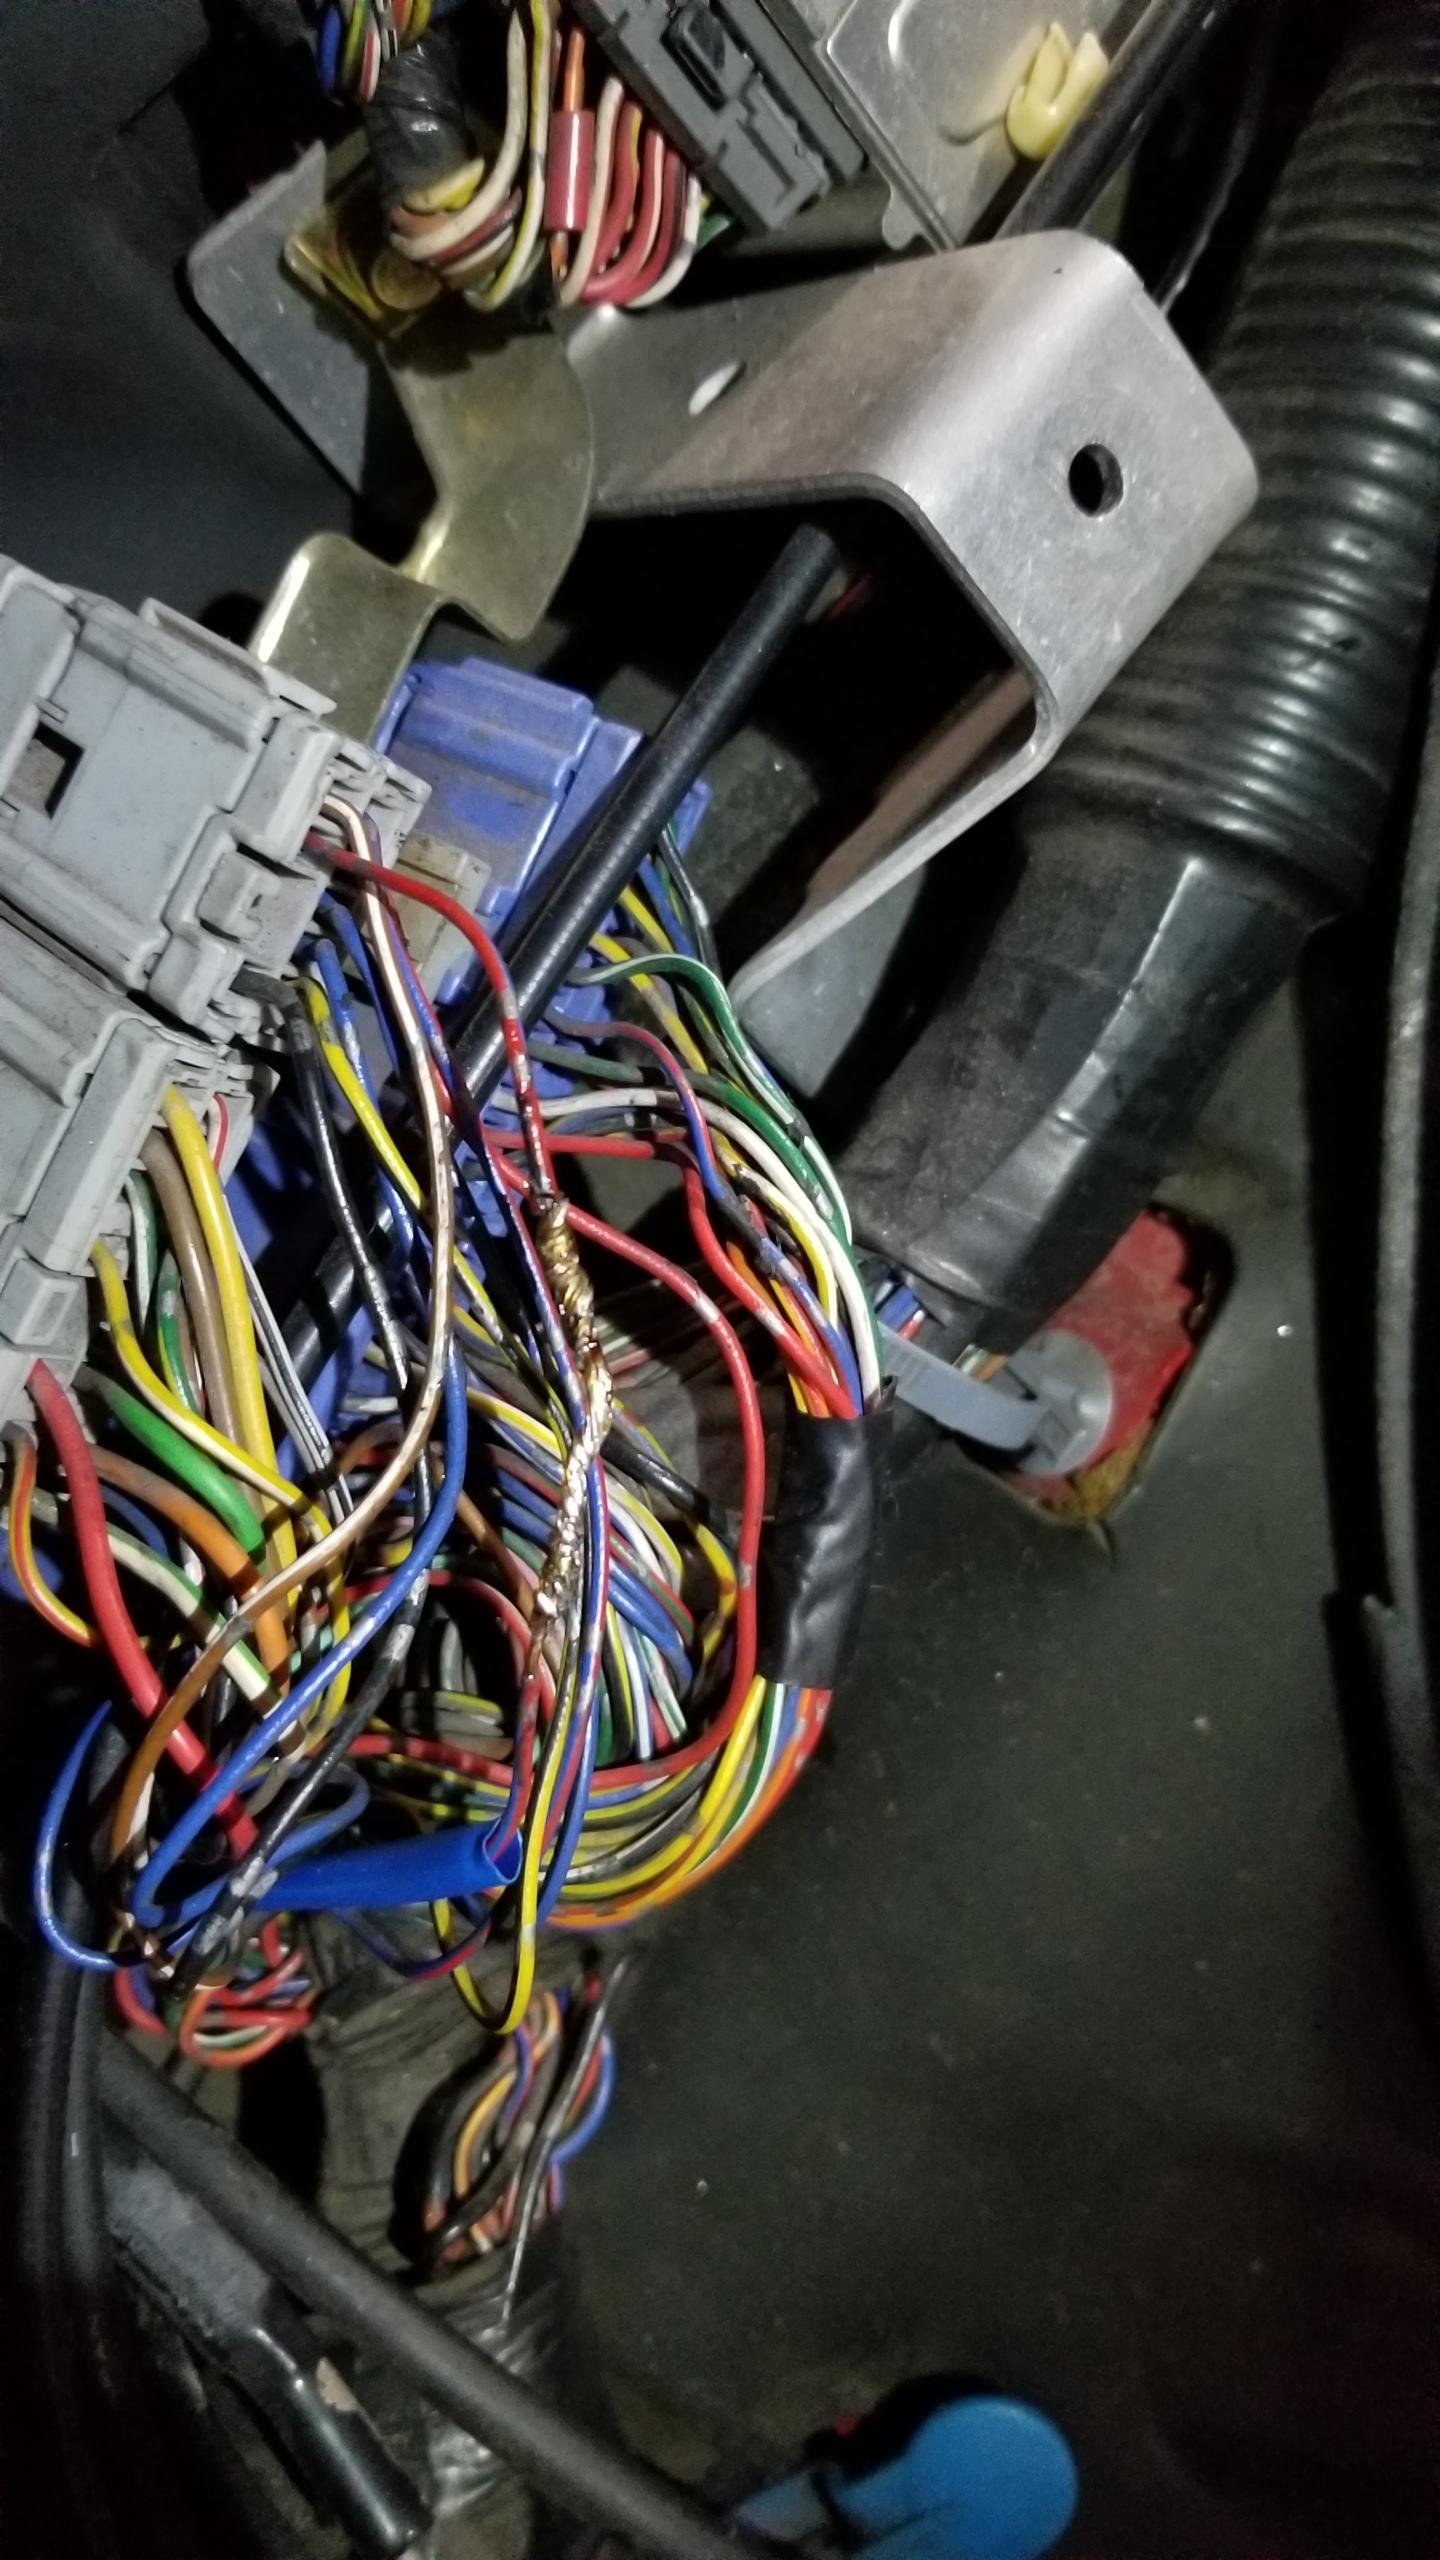
Back in the car, brought my soldering station to fix this mess. Soldered, greased, and heat shrink'ed. That ain't comin' off.
Arzn77o.jpg


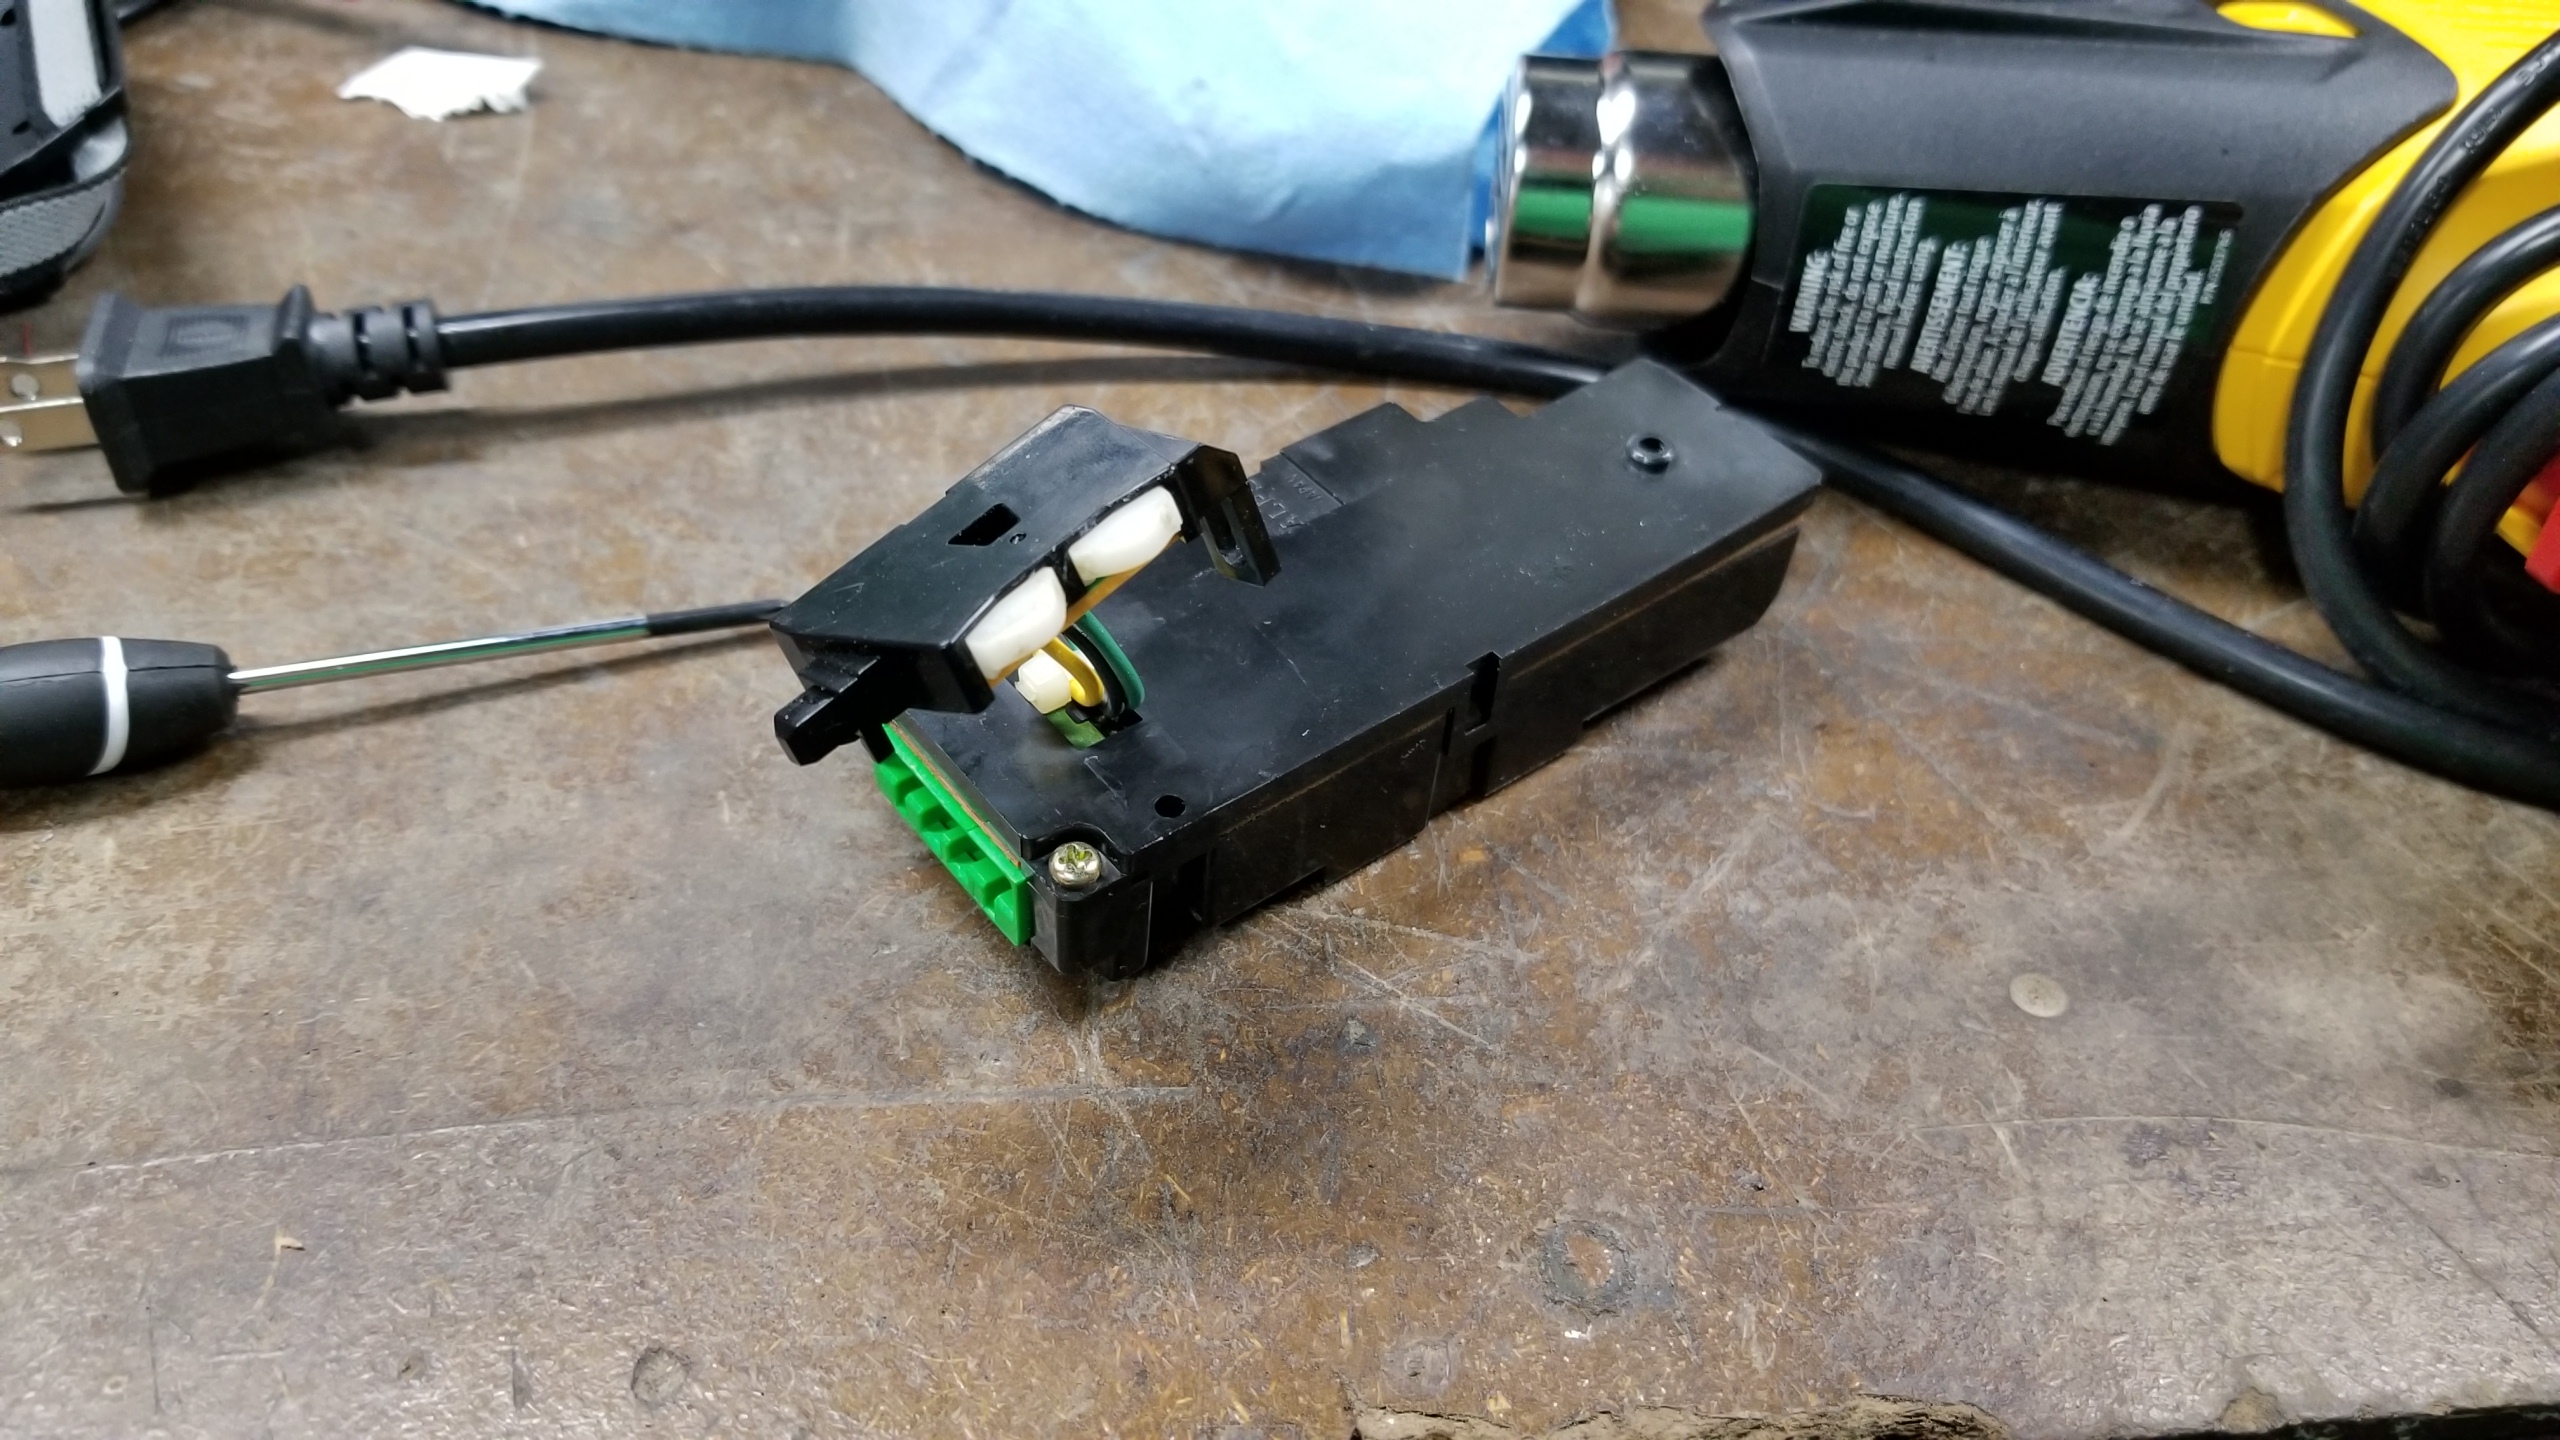
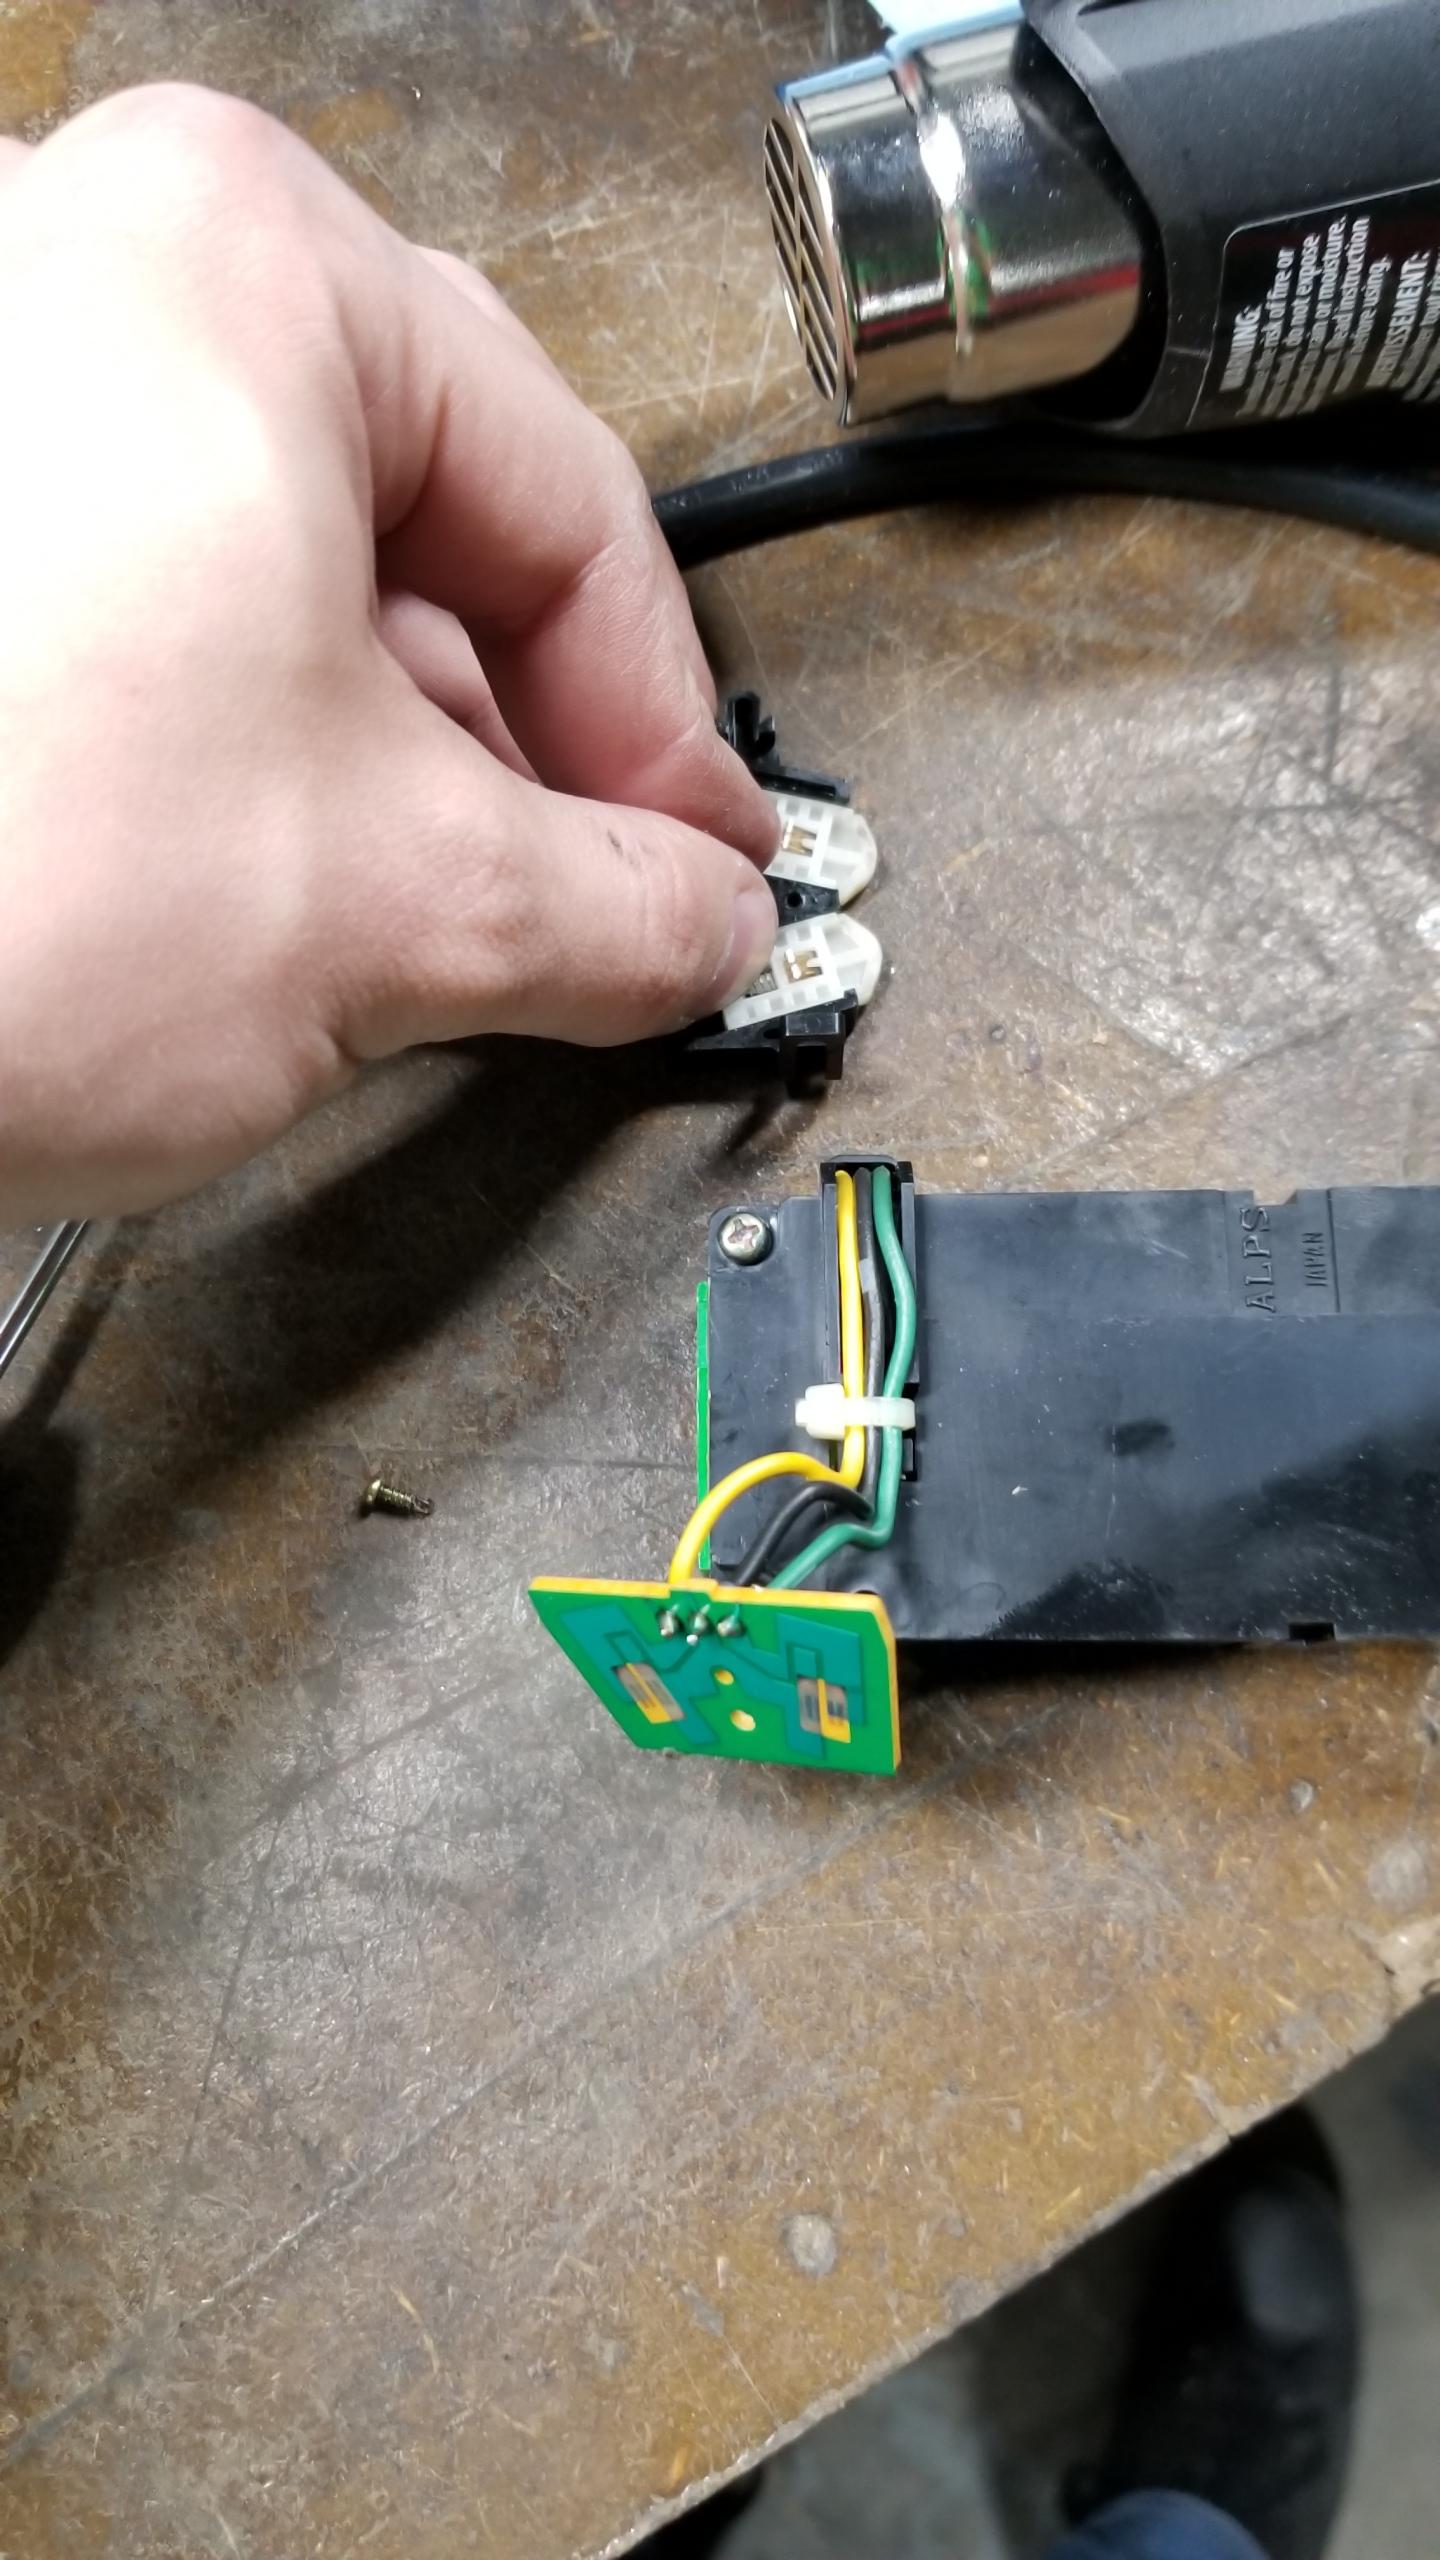
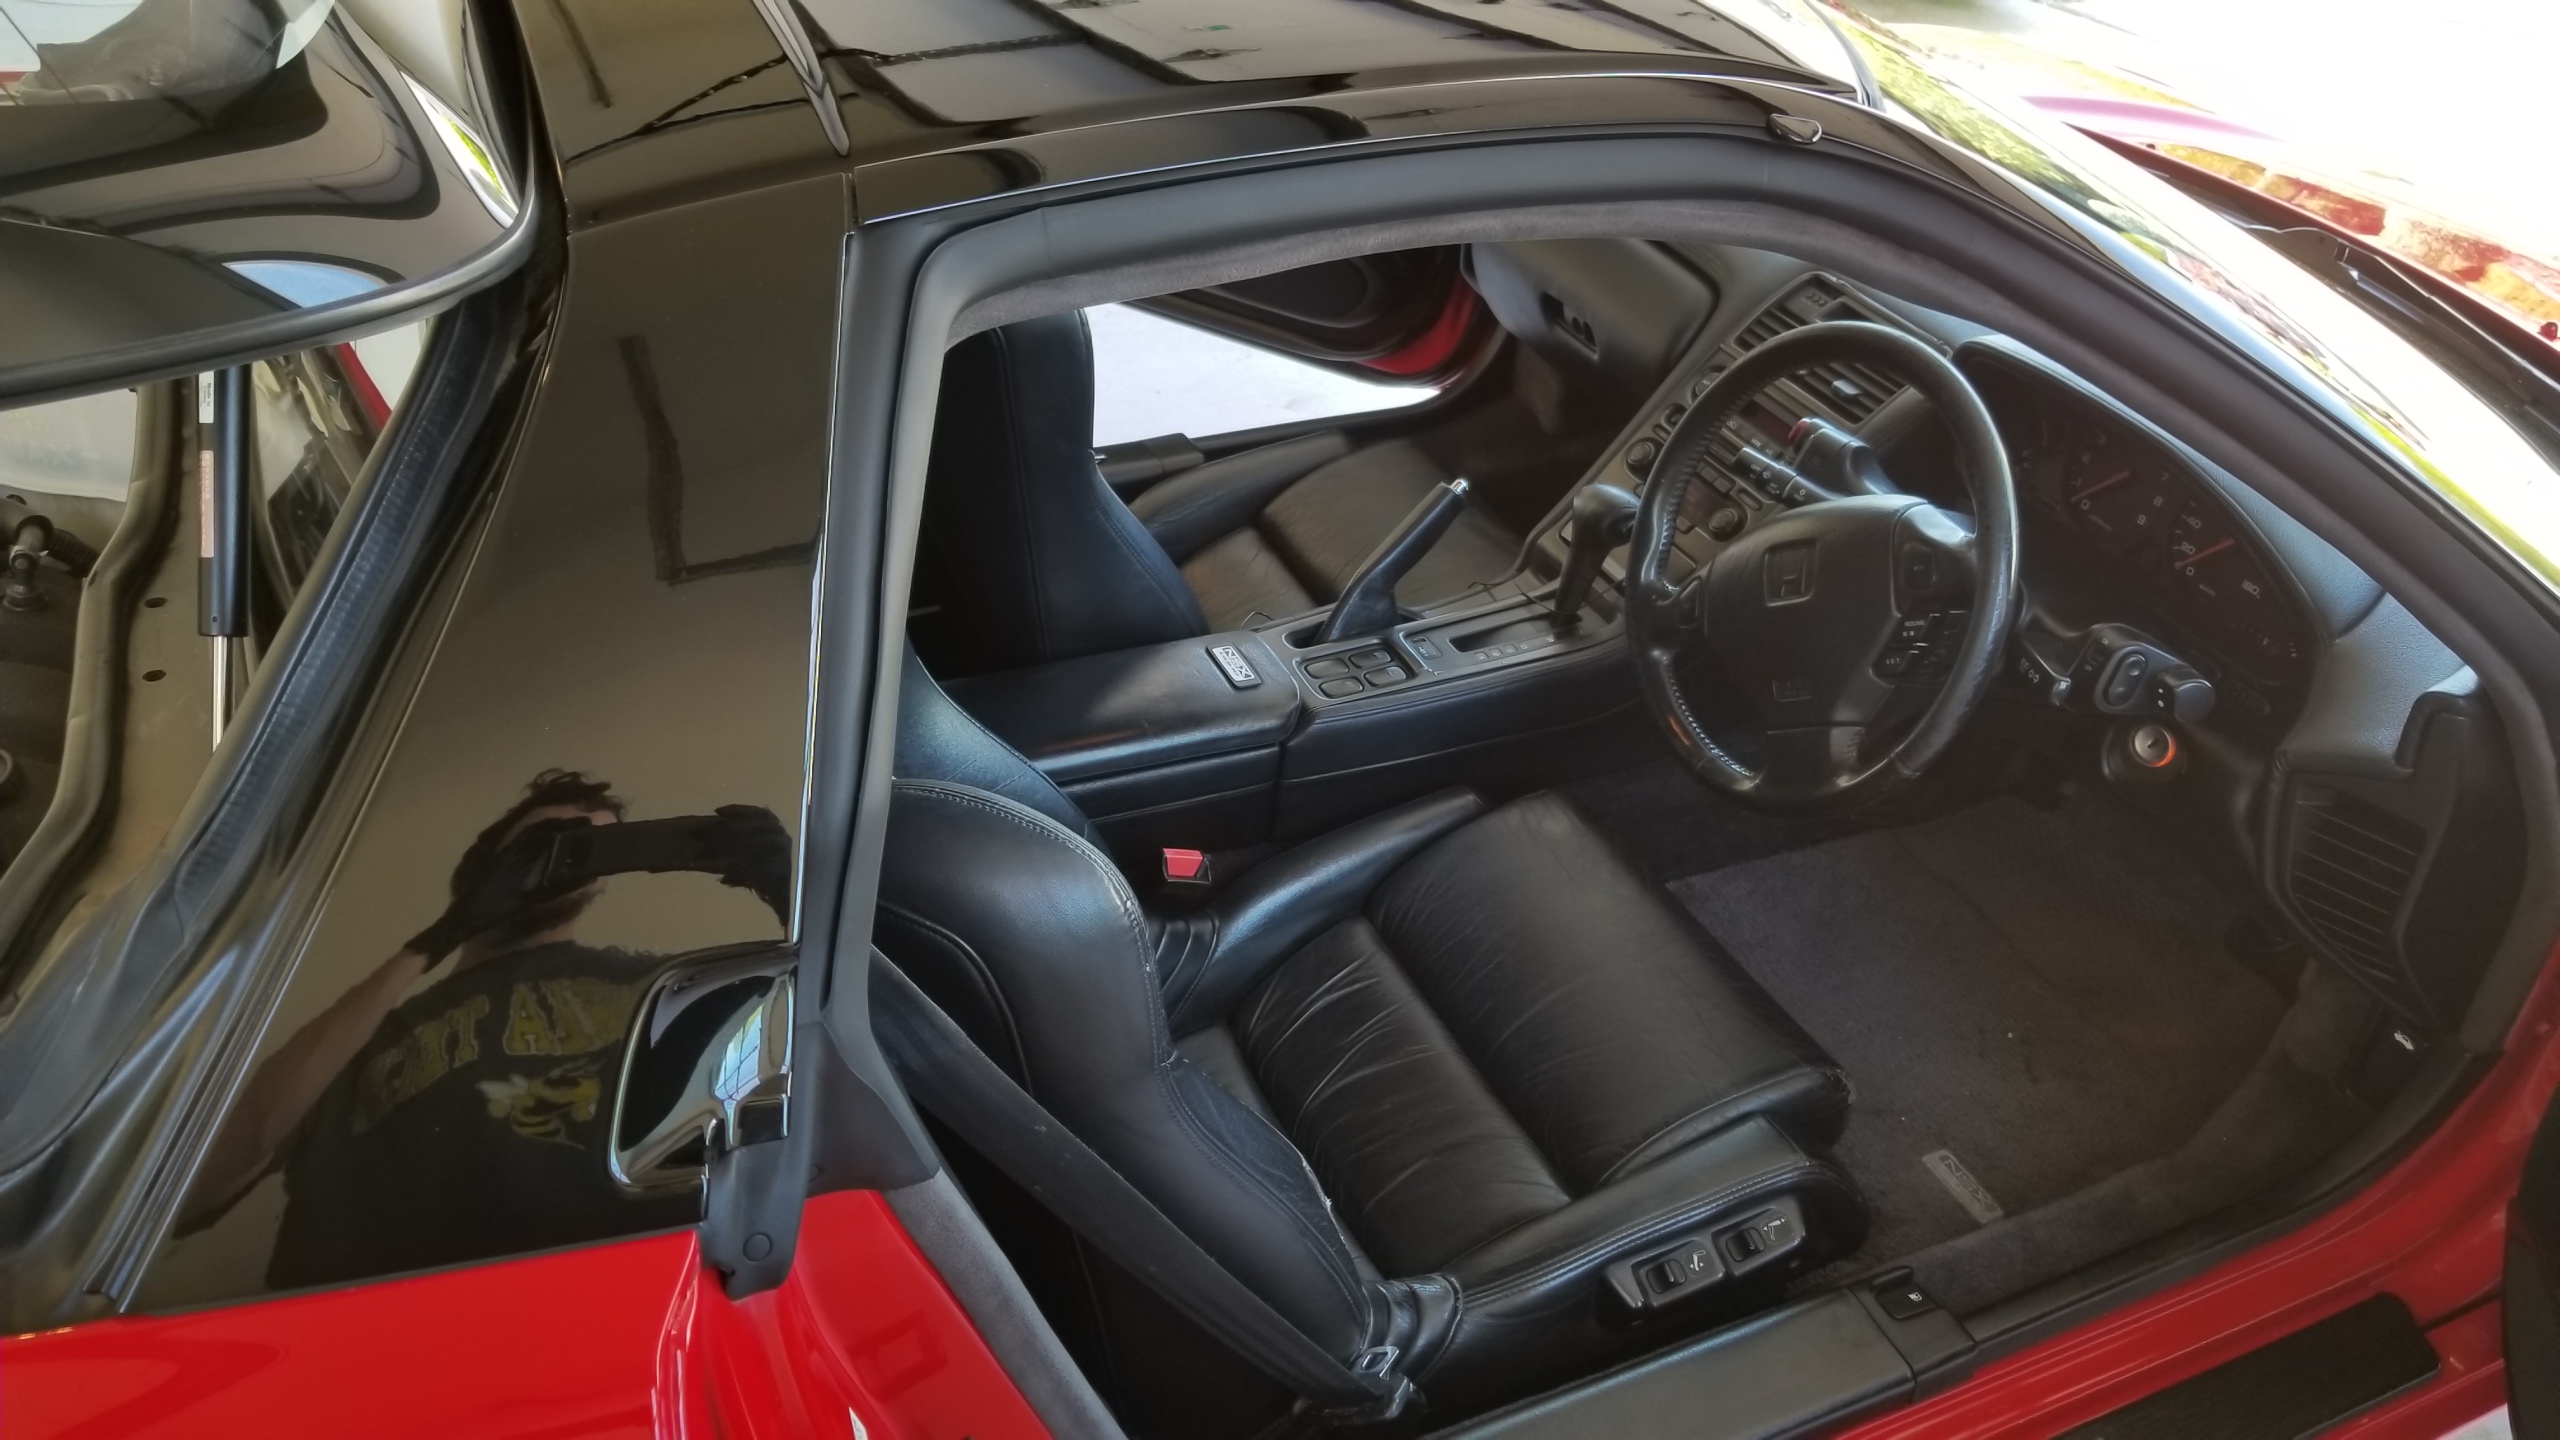
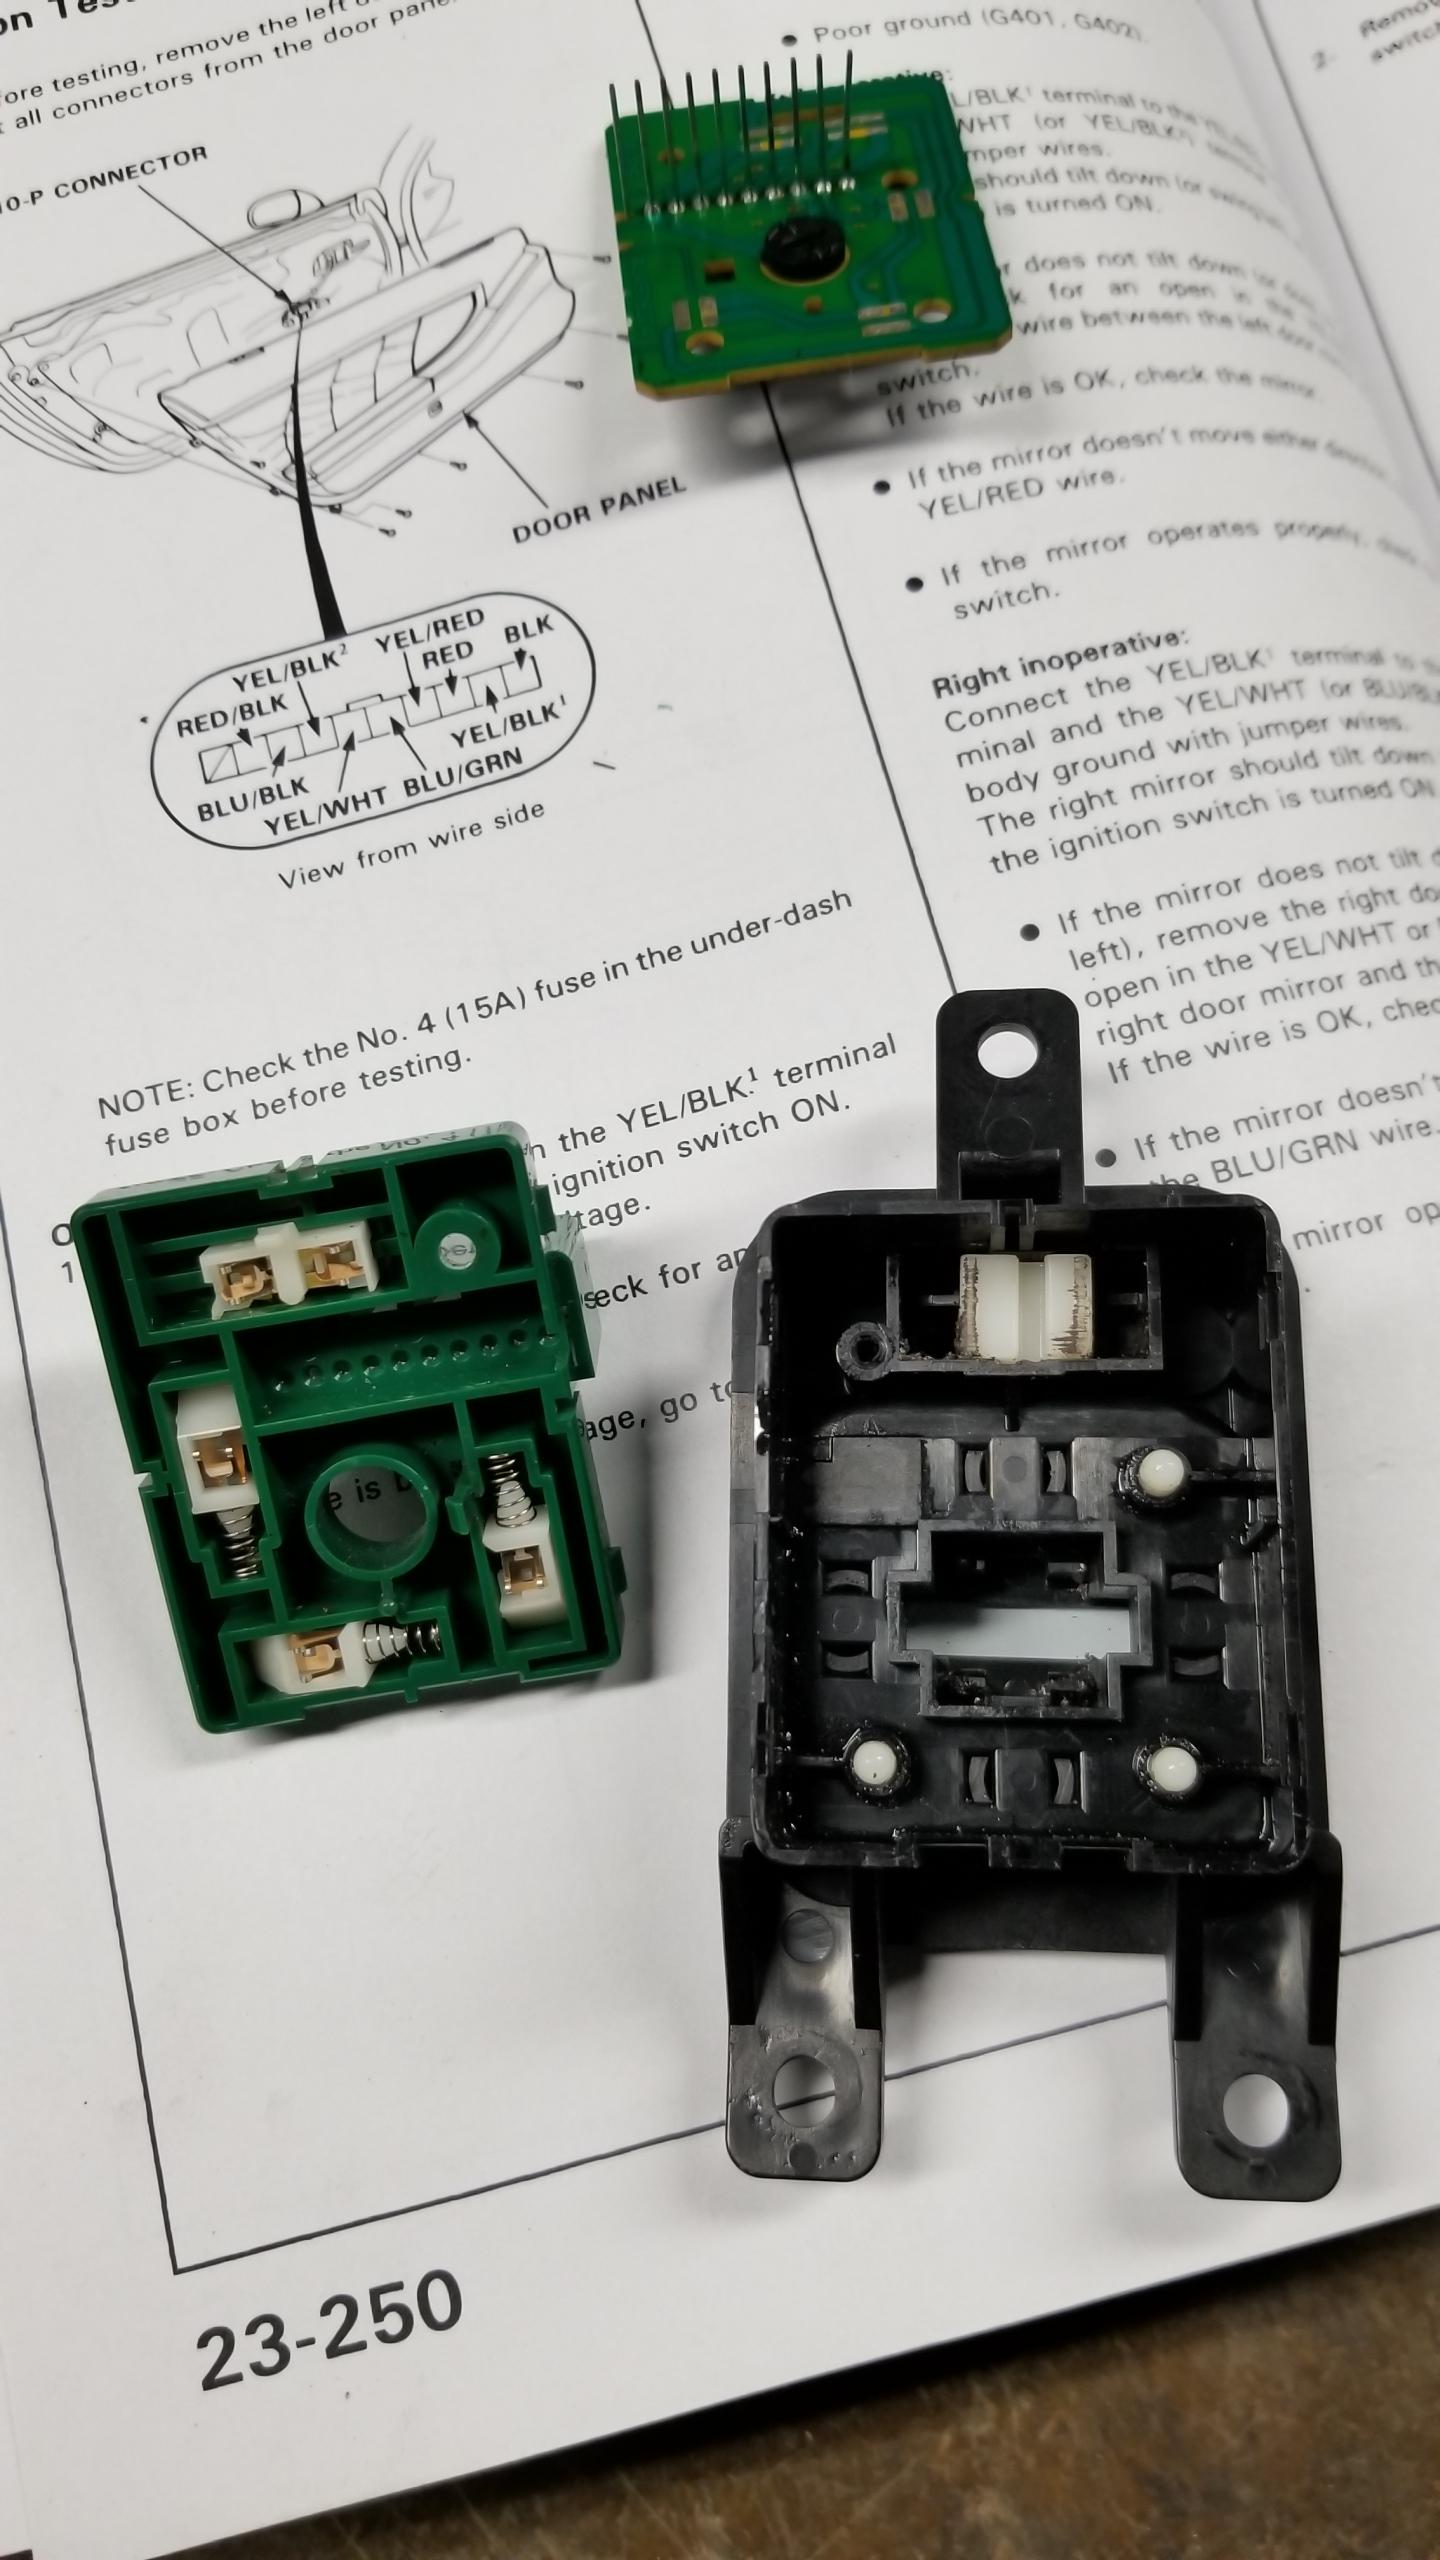
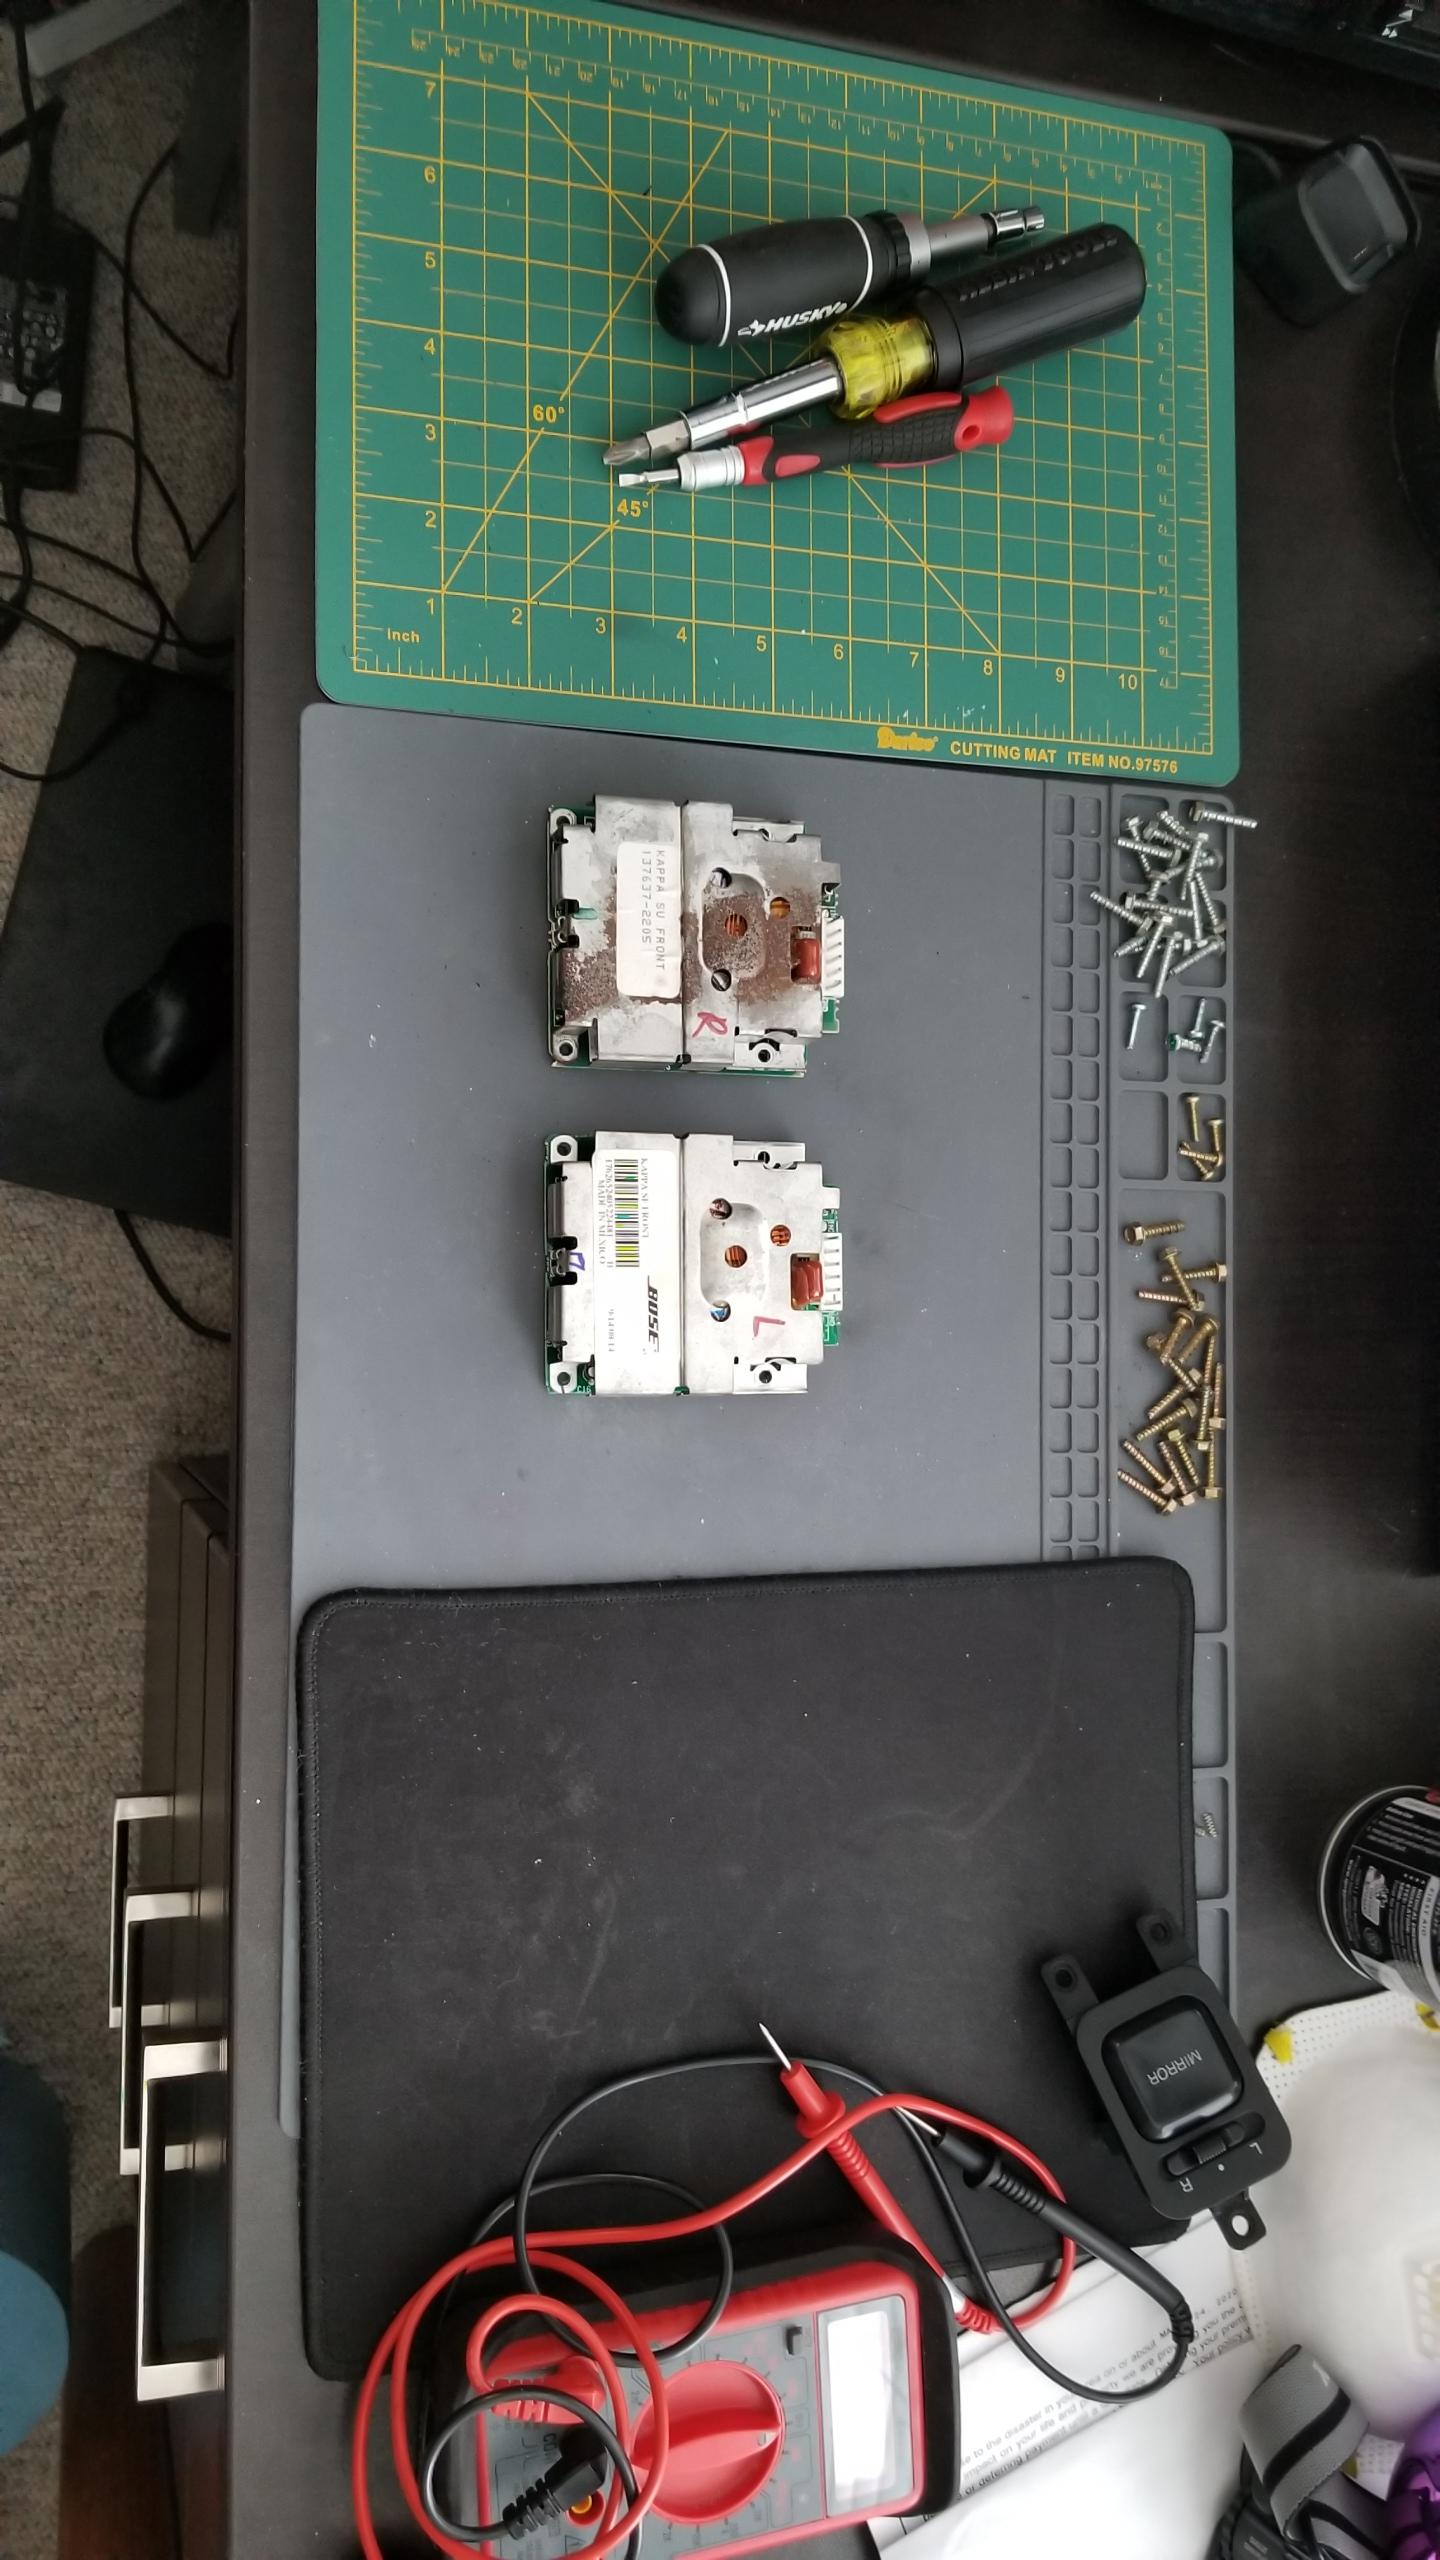
With the steering column covers off, I remembered to take a look at the turn signal cancel assembly to clean the contacts and try to fix my turn signals not cancelling at all. This module sits on the top of the steering wheel, two small screws on the large black box and one small one holding the little assembly on underneath the bigger box.
u4TlKGe.jpg


Here's the contacts to clean (board and spring-loaded teeth), they were pretty greased up. The teeth I'm holding down love to explode out of the case and scatter everywhere, so make sure you don't lose any of these parts.
IcRAEJB.jpg


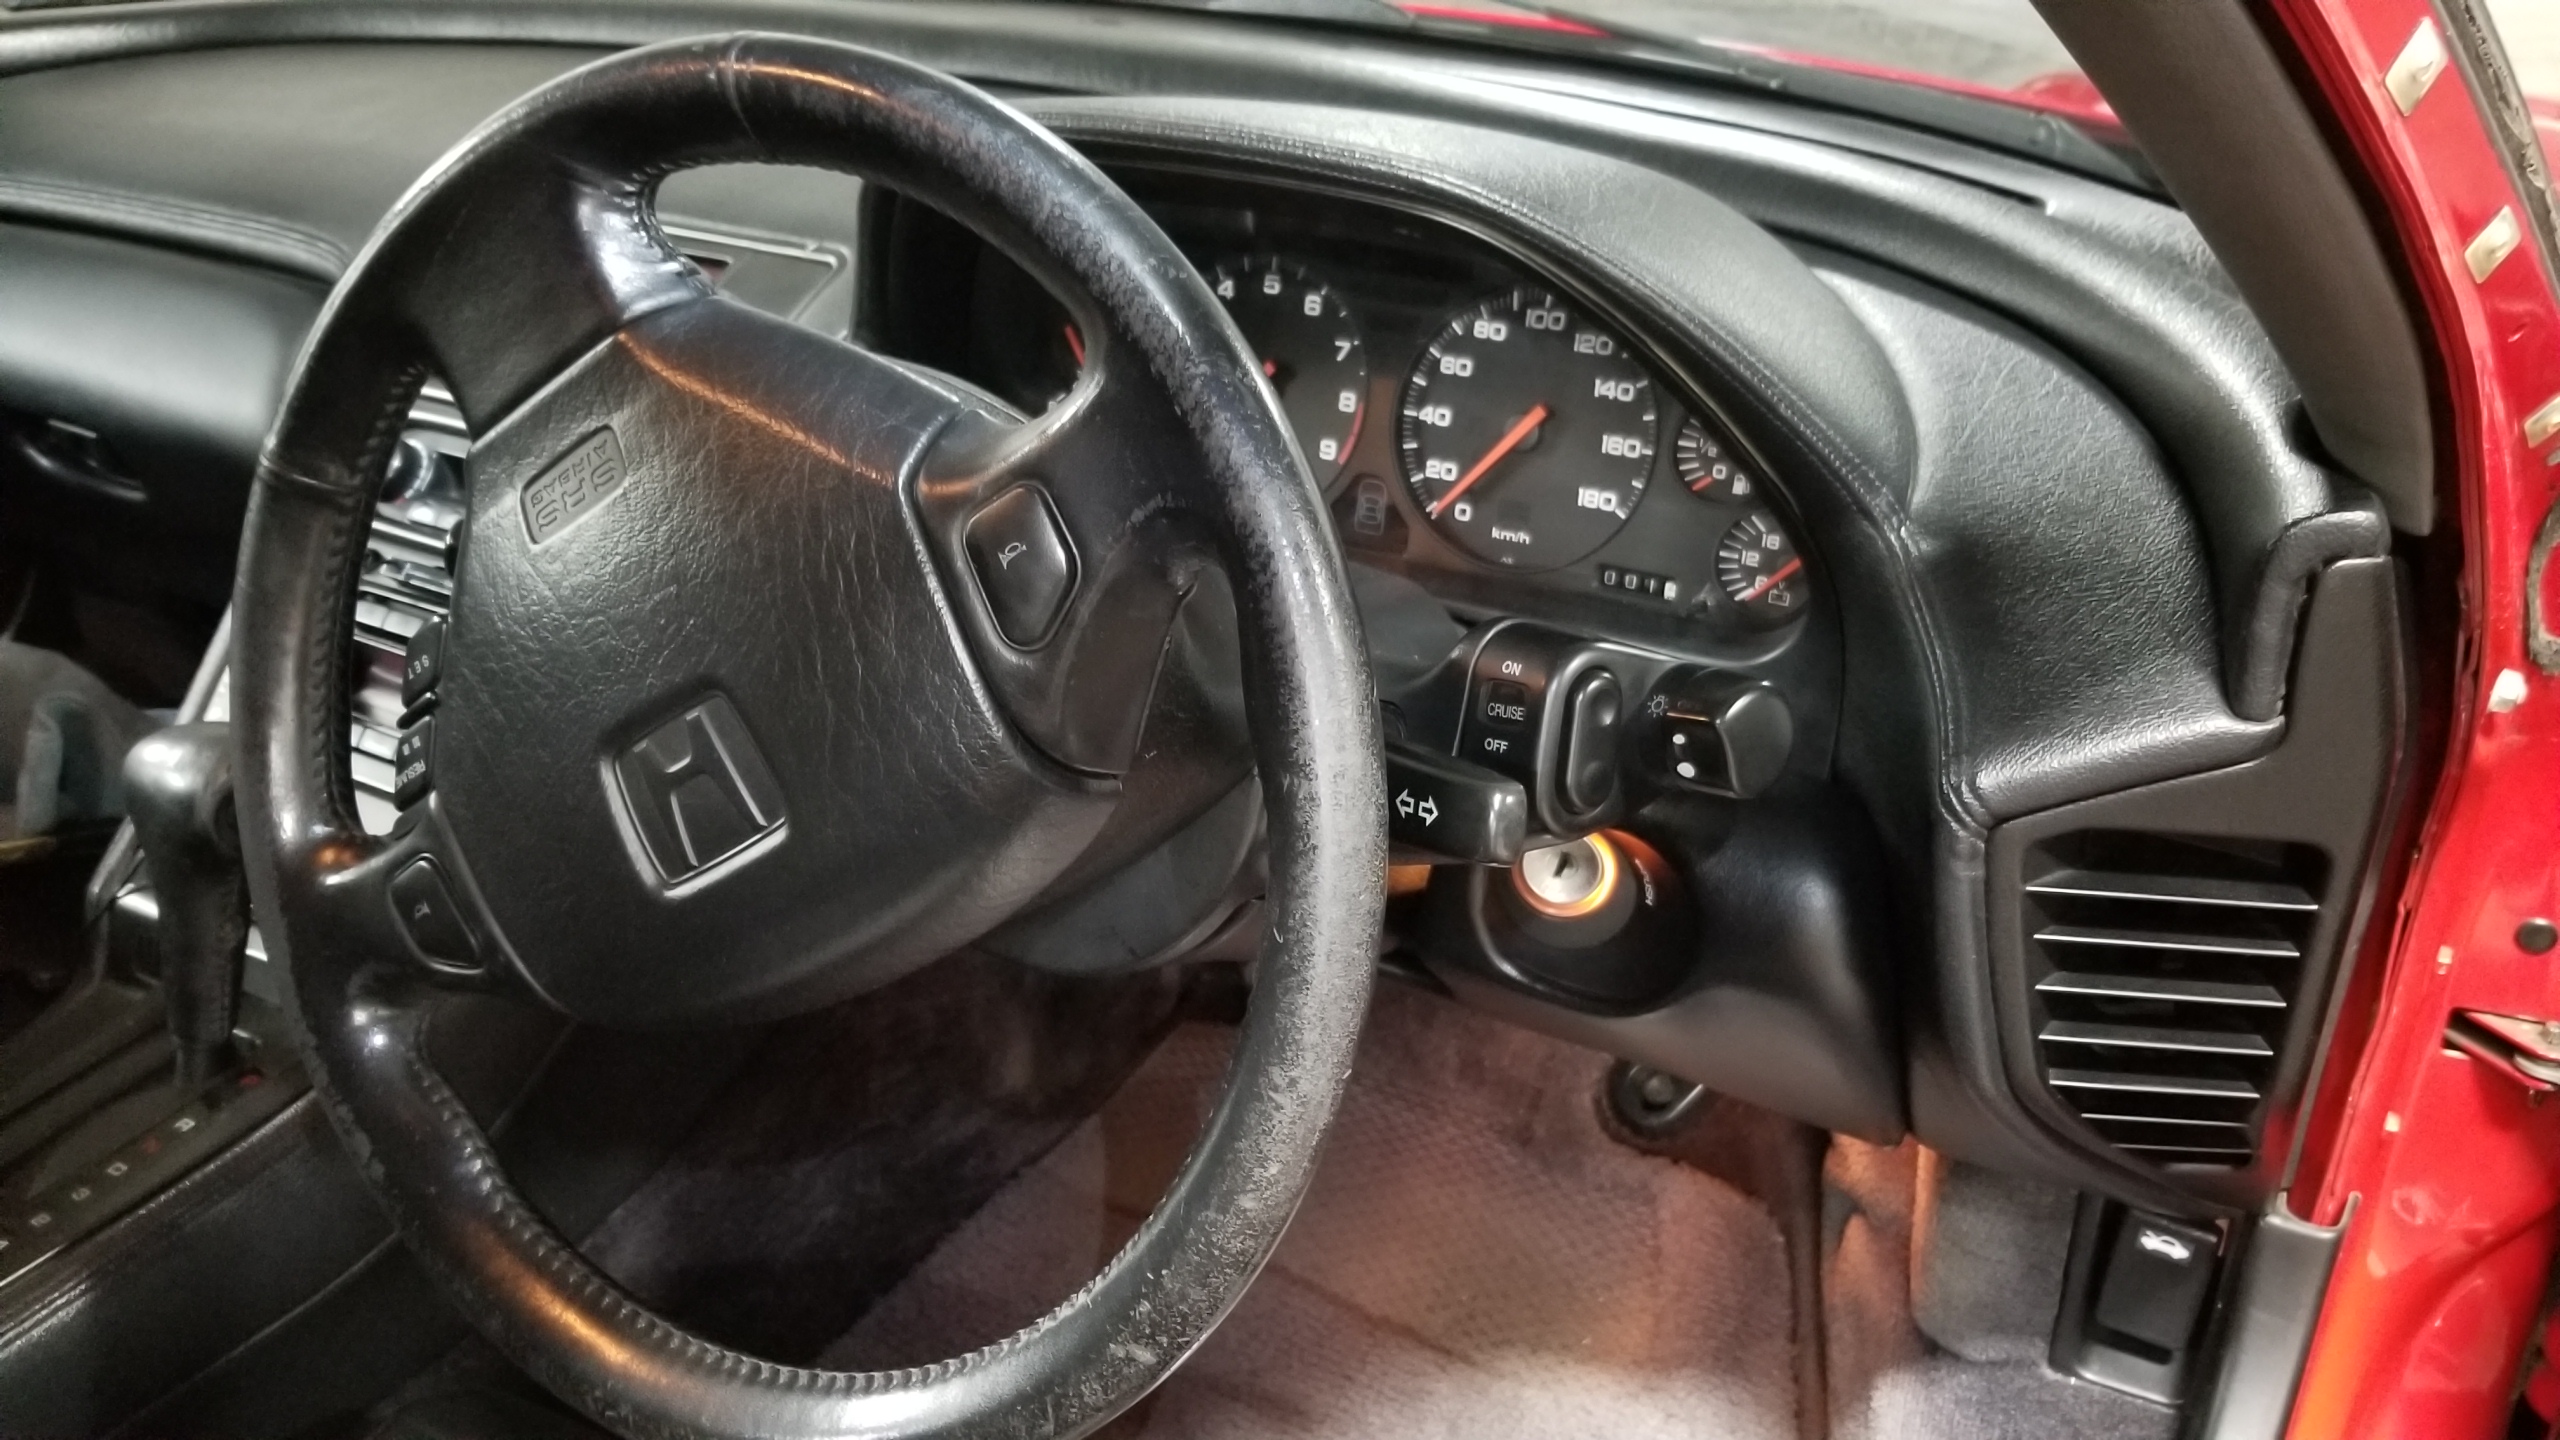
Cluster put back into the car for testing, all the lights seem to turn on which is a good sign. I replaced the smaller lightbulbs with #74 Phillips ones (all the black casings), the leads were slightly bigger than the old bulbs so they didn't quite fit perfectly but they seem to work fine anyways.
jUPVAvM.jpg


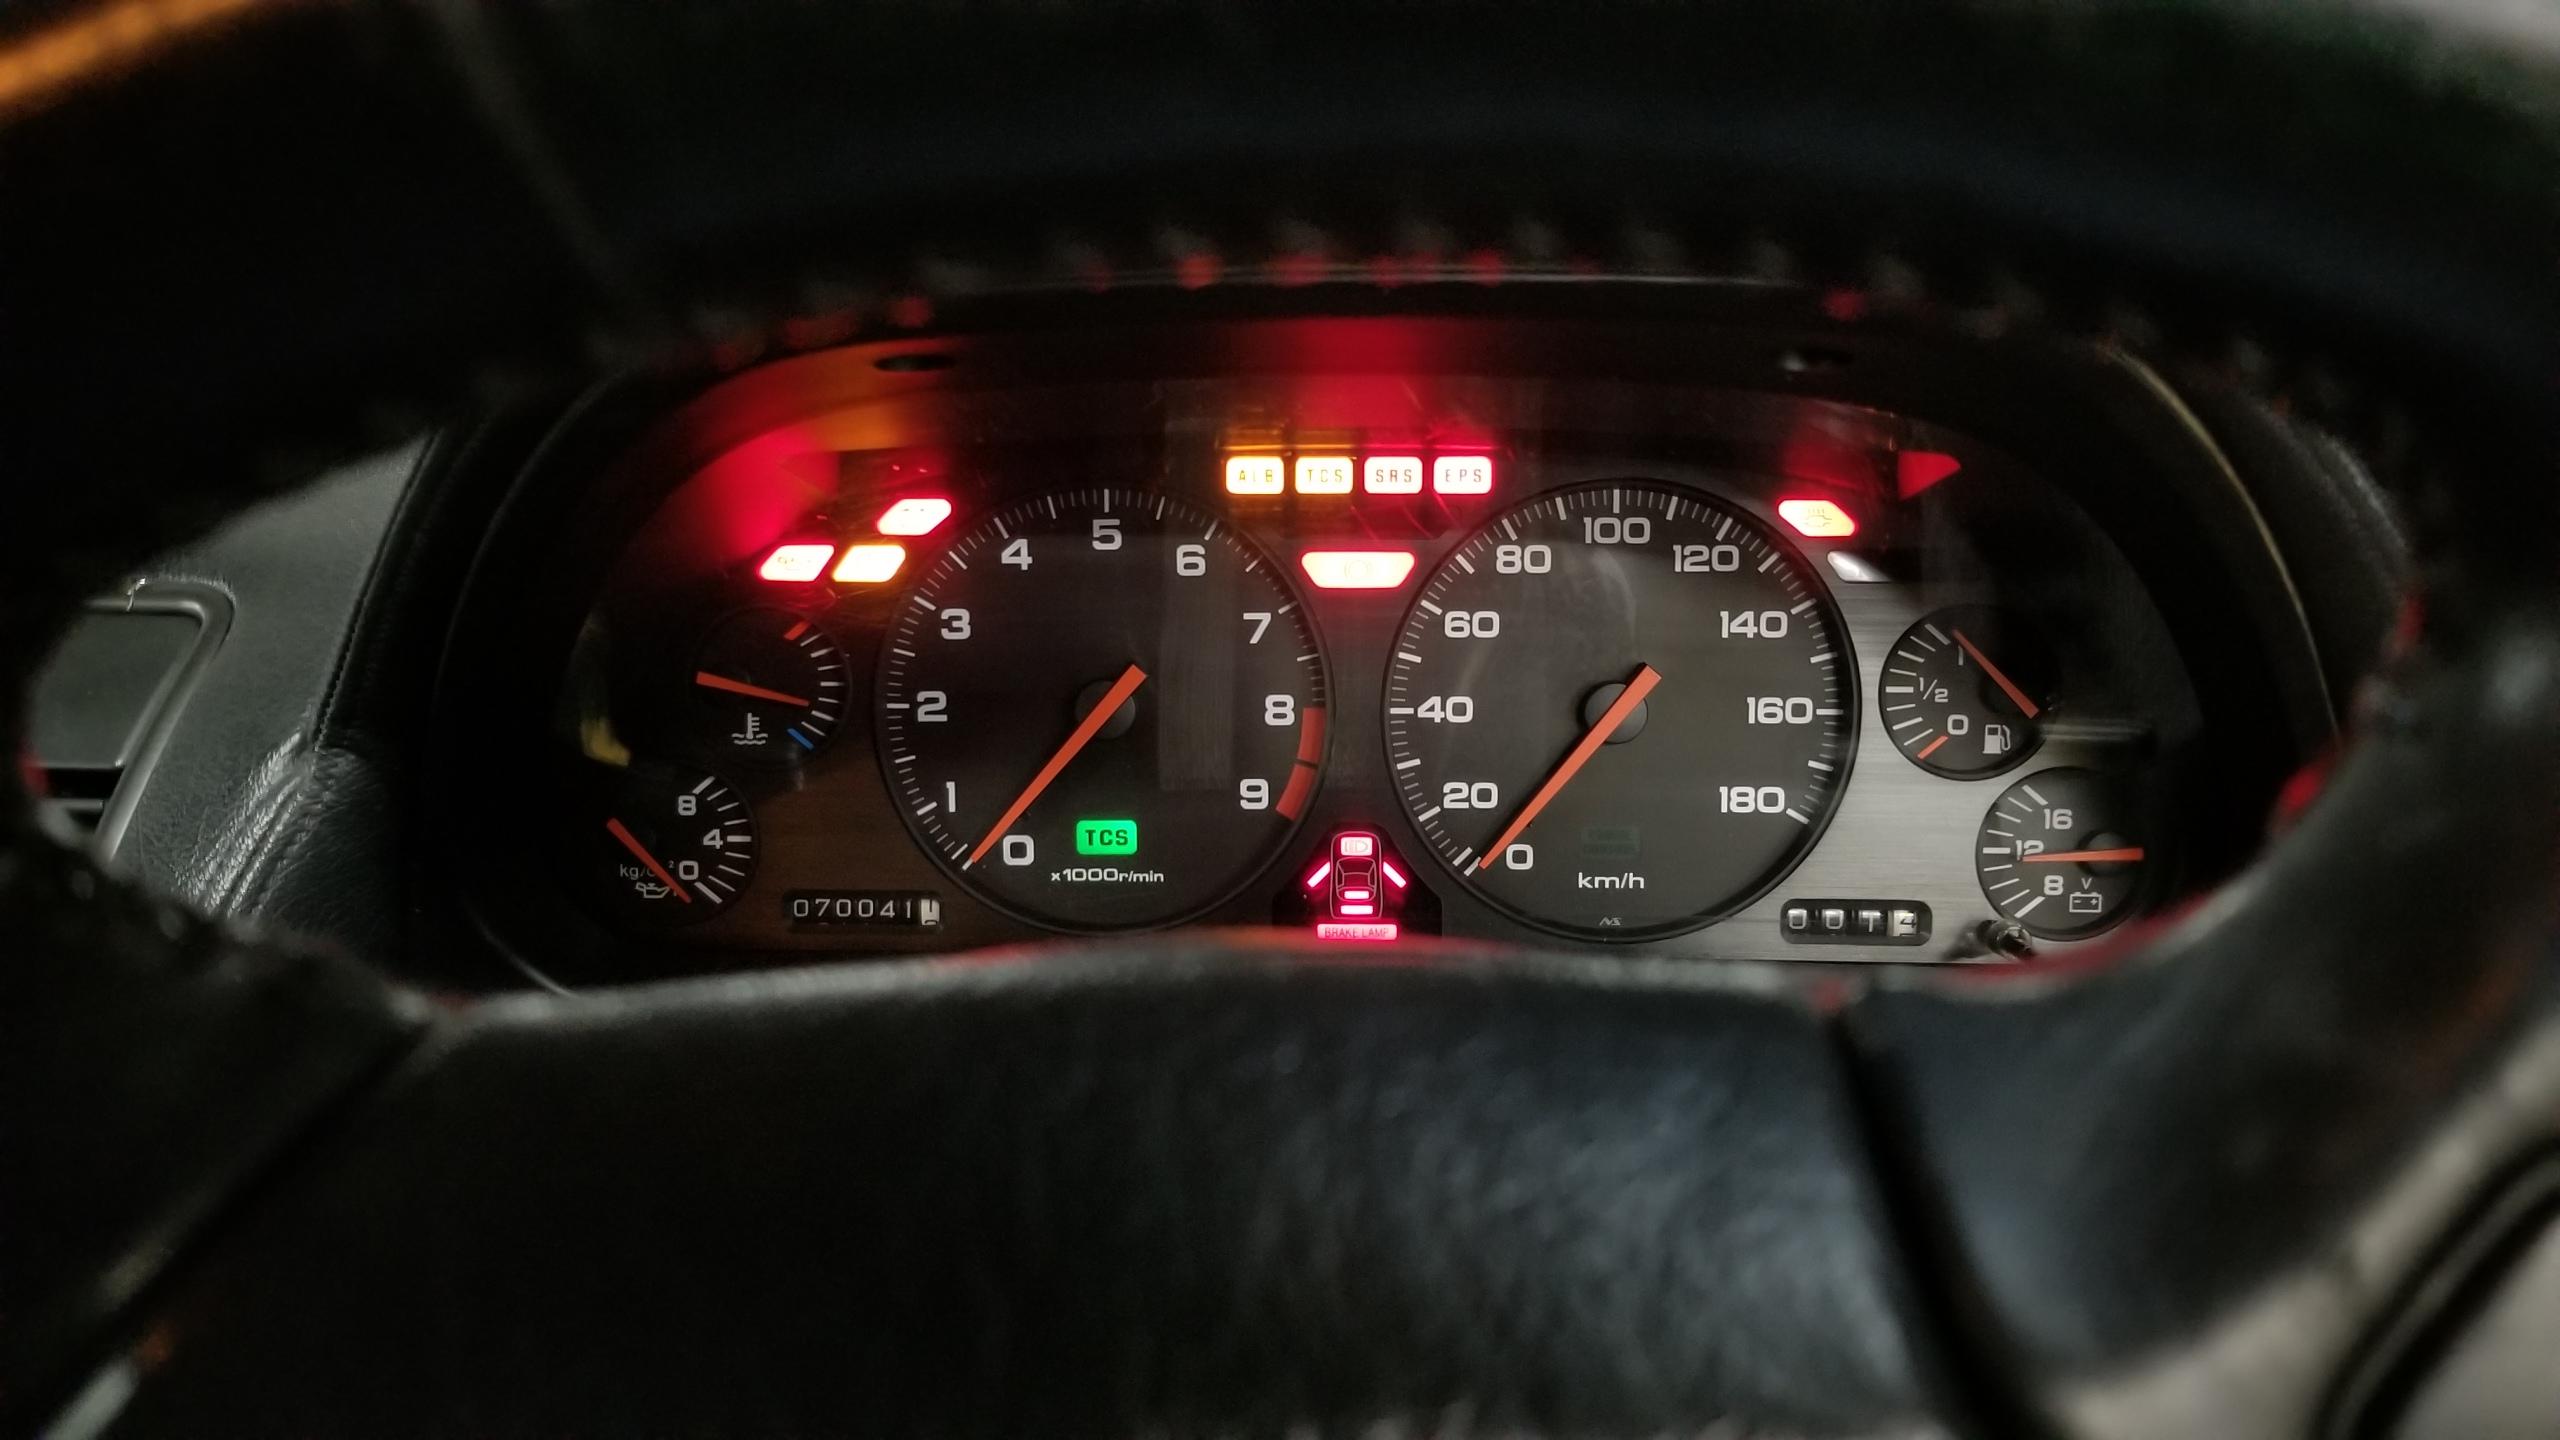
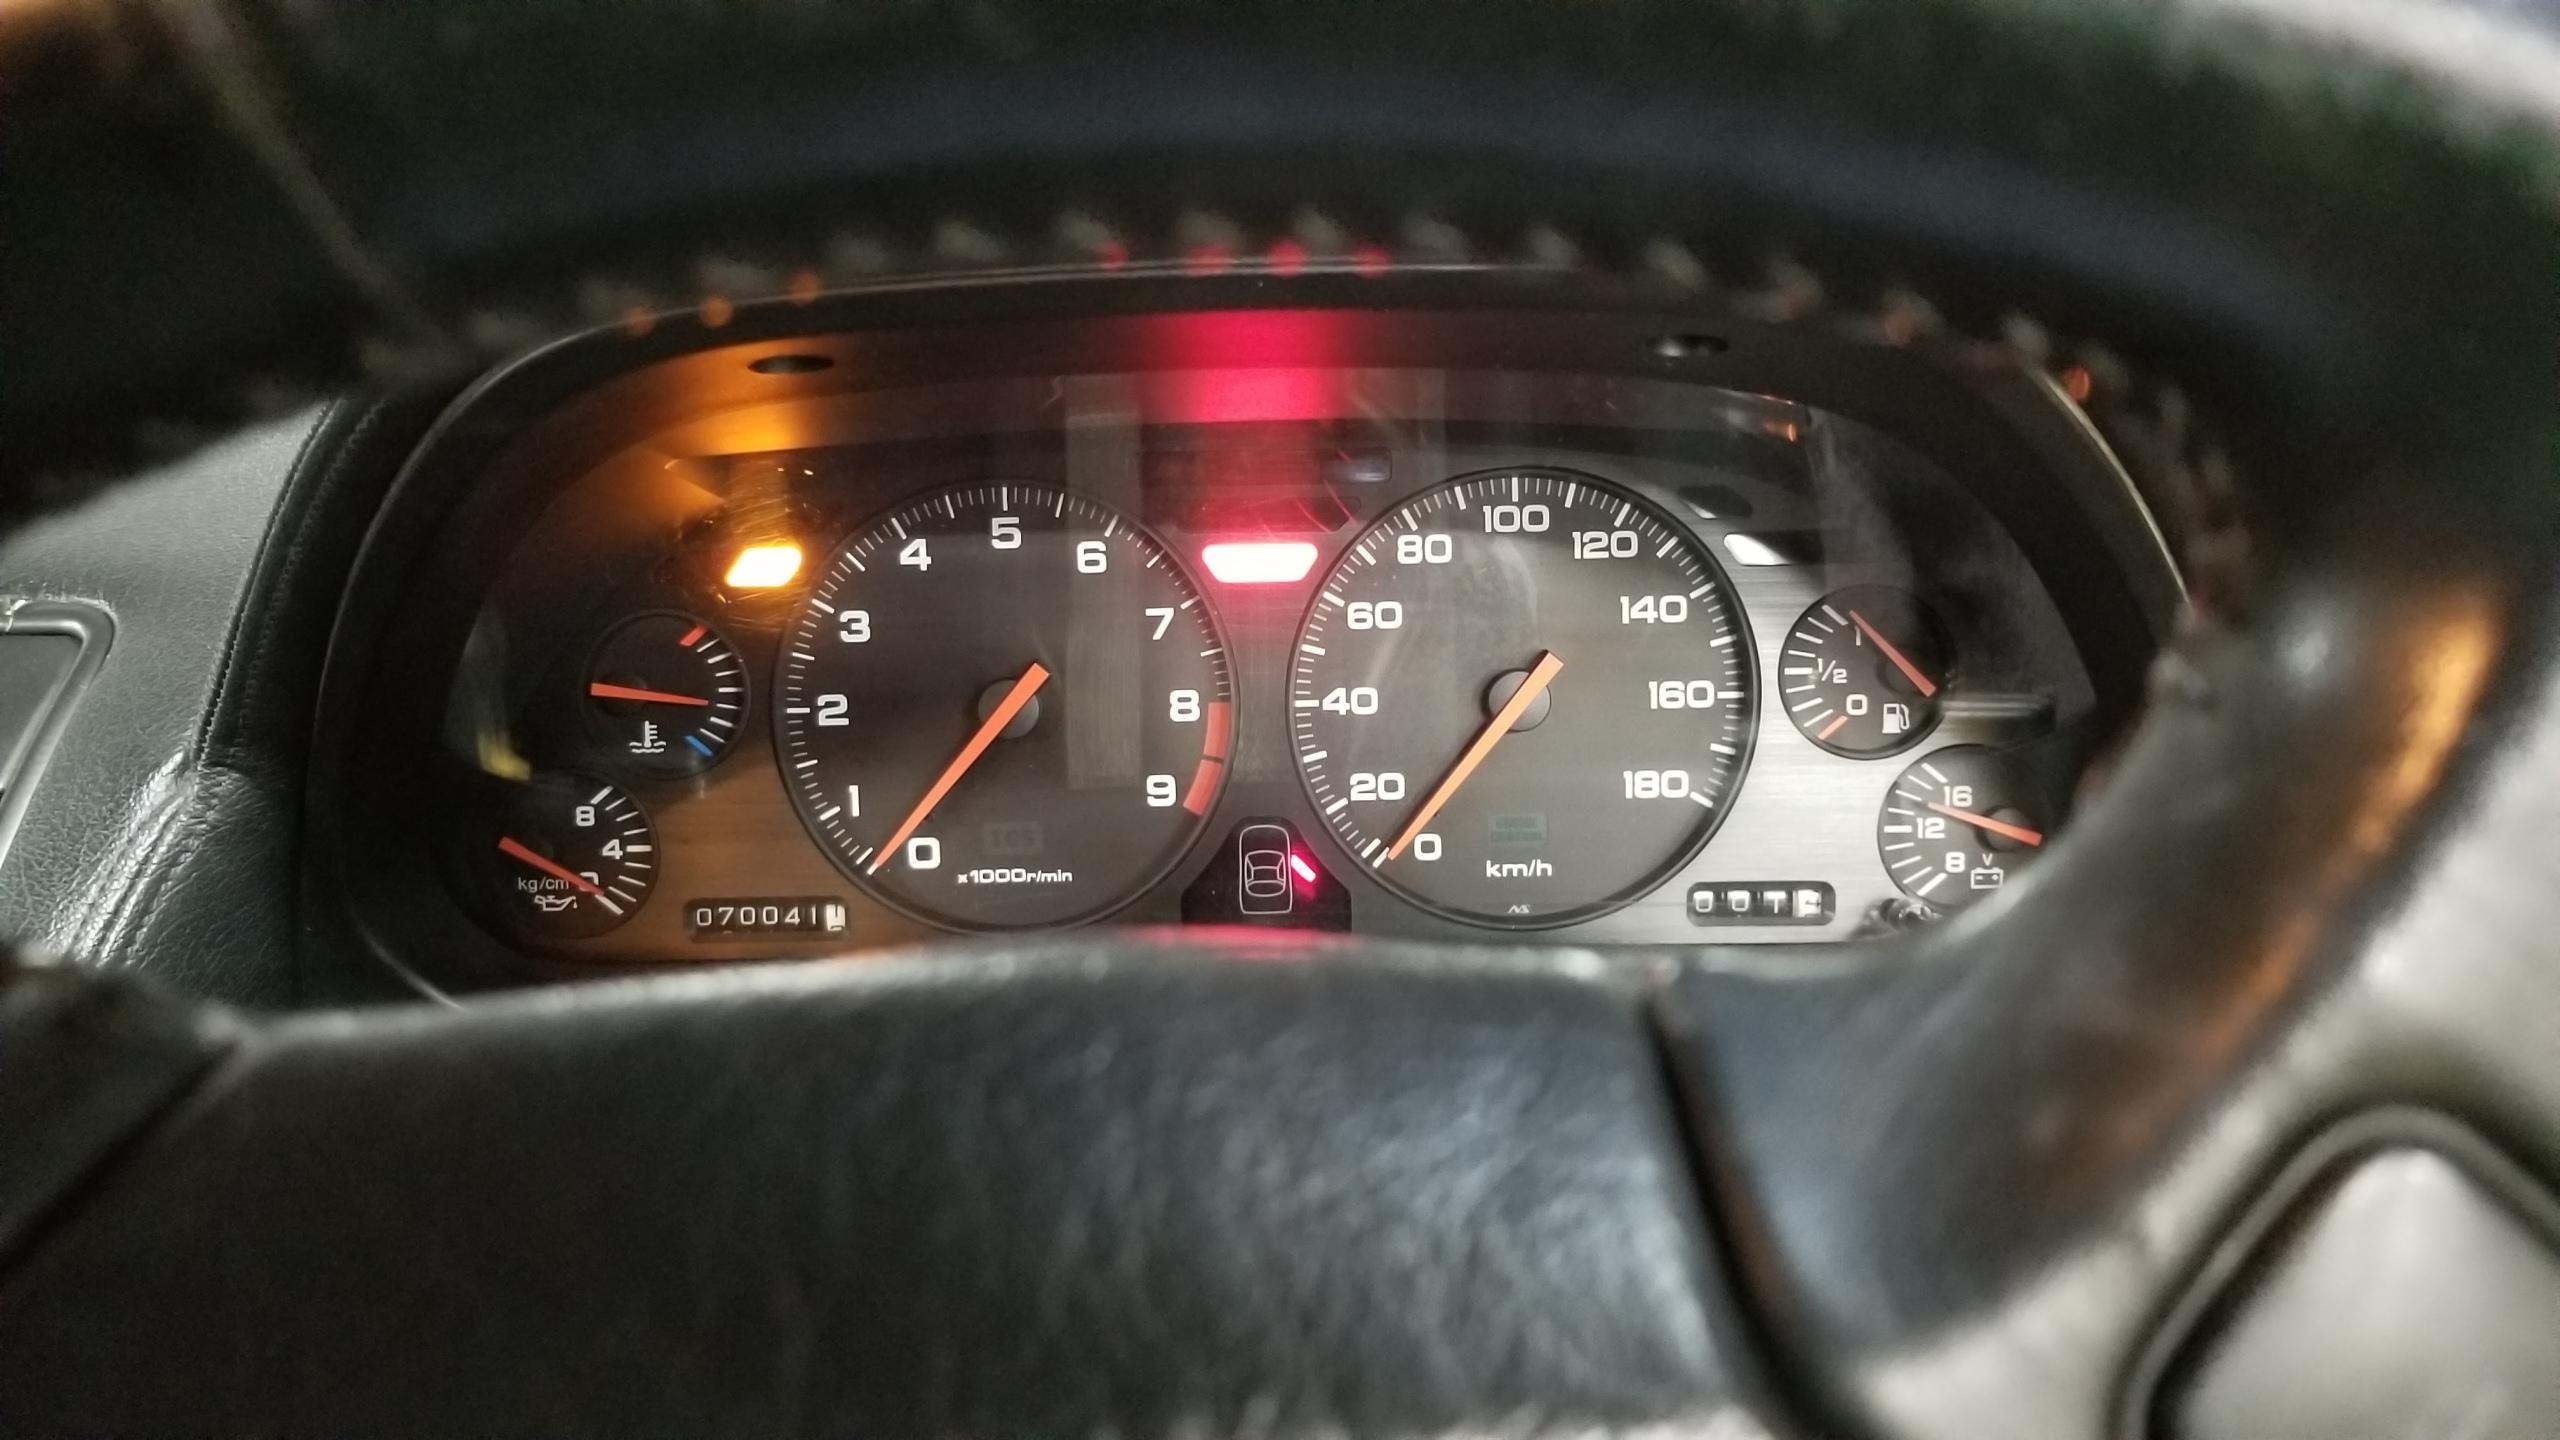
Moment of truth, she chooches! Mostly. My CEL is for the rear O2 sensor I still haven't replaced yet. But the brake light warning is gone! But my tach still doesn't work...and my TCS button doesn't seem to do anything anymore.

The TCS OFF light doesn't appear when I press the dash switch, not sure why. The switch switches just fine, the PCB isn't pushed out the back, and the green connector is seated correctly, so I'm stumped. All I can guess is that maybe a pin was bent on the connector side or the light bulb on the cluster isn't working. EDIT: Judging by another pic of an NSX cluster with the key in the ON position, it looks like the TCS OFF light is supposed to come on, so my best guess is the light bulb isn't working. Hopefully so, that's the easiest fix.

Fortunately, all the other gauges still work, so I didn't over-tighten any of the cluster screws that caused the tach issue in the first place. My speedometer seemed to read just fine, I tested at 20 and 40 KPH just putting around and it seemed spot on, though I didn't test if that held true for higher speeds.
TdPMFJA.jpg


And everything put back together. I swear, this took me twice as long to put back, some of the panel screws were a major pain to put back properly, though I'm sure I could do it again in 10 minutes now...

To be honest I'm a bit bummed out with the results of this project despite fixing the major cluster issues (brake light, PCBs, potential fires), I couldn't fix the tach issue and most likely can't fix it without spending hundreds more on a new tach gauge. I like the S2000 cluster, but it's in the back of my mind that when (if :biggrin:) the day comes to sell the car, I'm sure some smart-ass on Bring a Trailer will bomb my auction's comments section since the cluster isn't original. I probably won't sell my OEM cluster just so I have the part for the future, but it really bugs me that it's still not 100%.

Also, cleaning the turn signal cancel unit contacts did nothing, lol. My signals still don't cancel at all, no discernible change which kinda surprised me. Hit somewhat of a dead end with this as well, maybe replacing the turn signal unit itself would fix it but just throwing parts at that point. I'll just live with it for now, doesn't bother me much. Maybe I'll take another look in the future.
3cgr3QQ.jpg


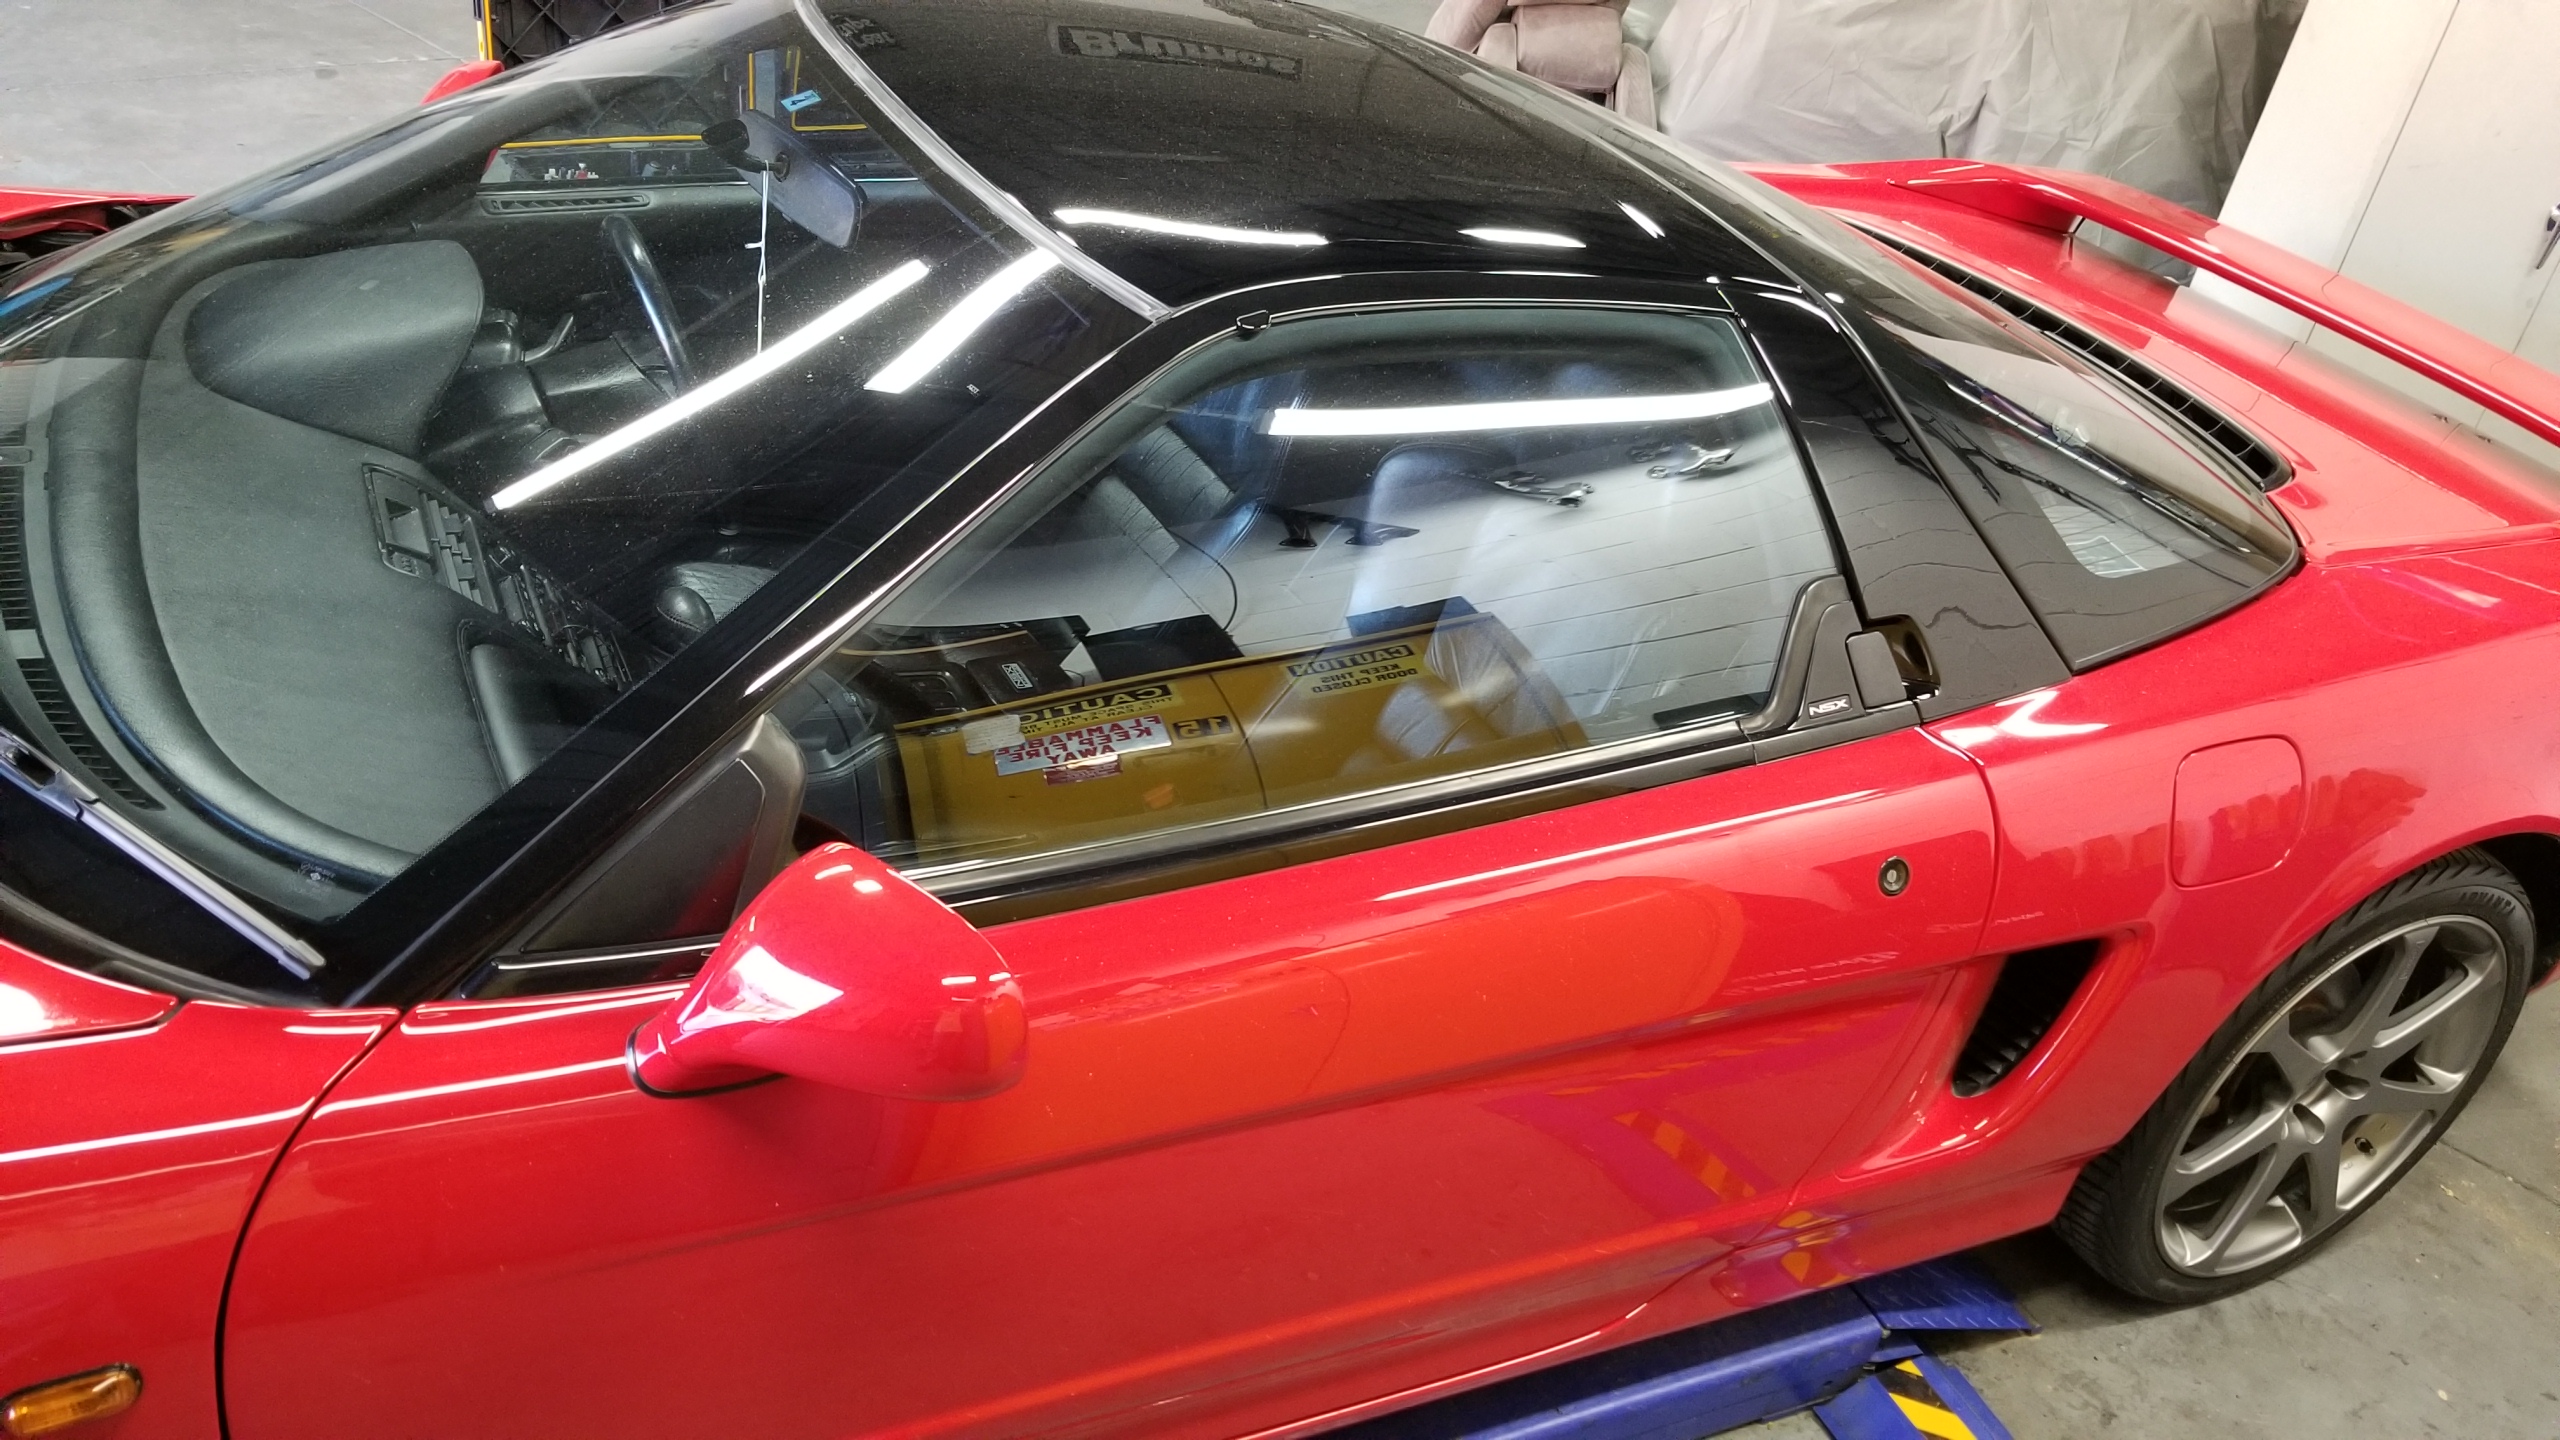
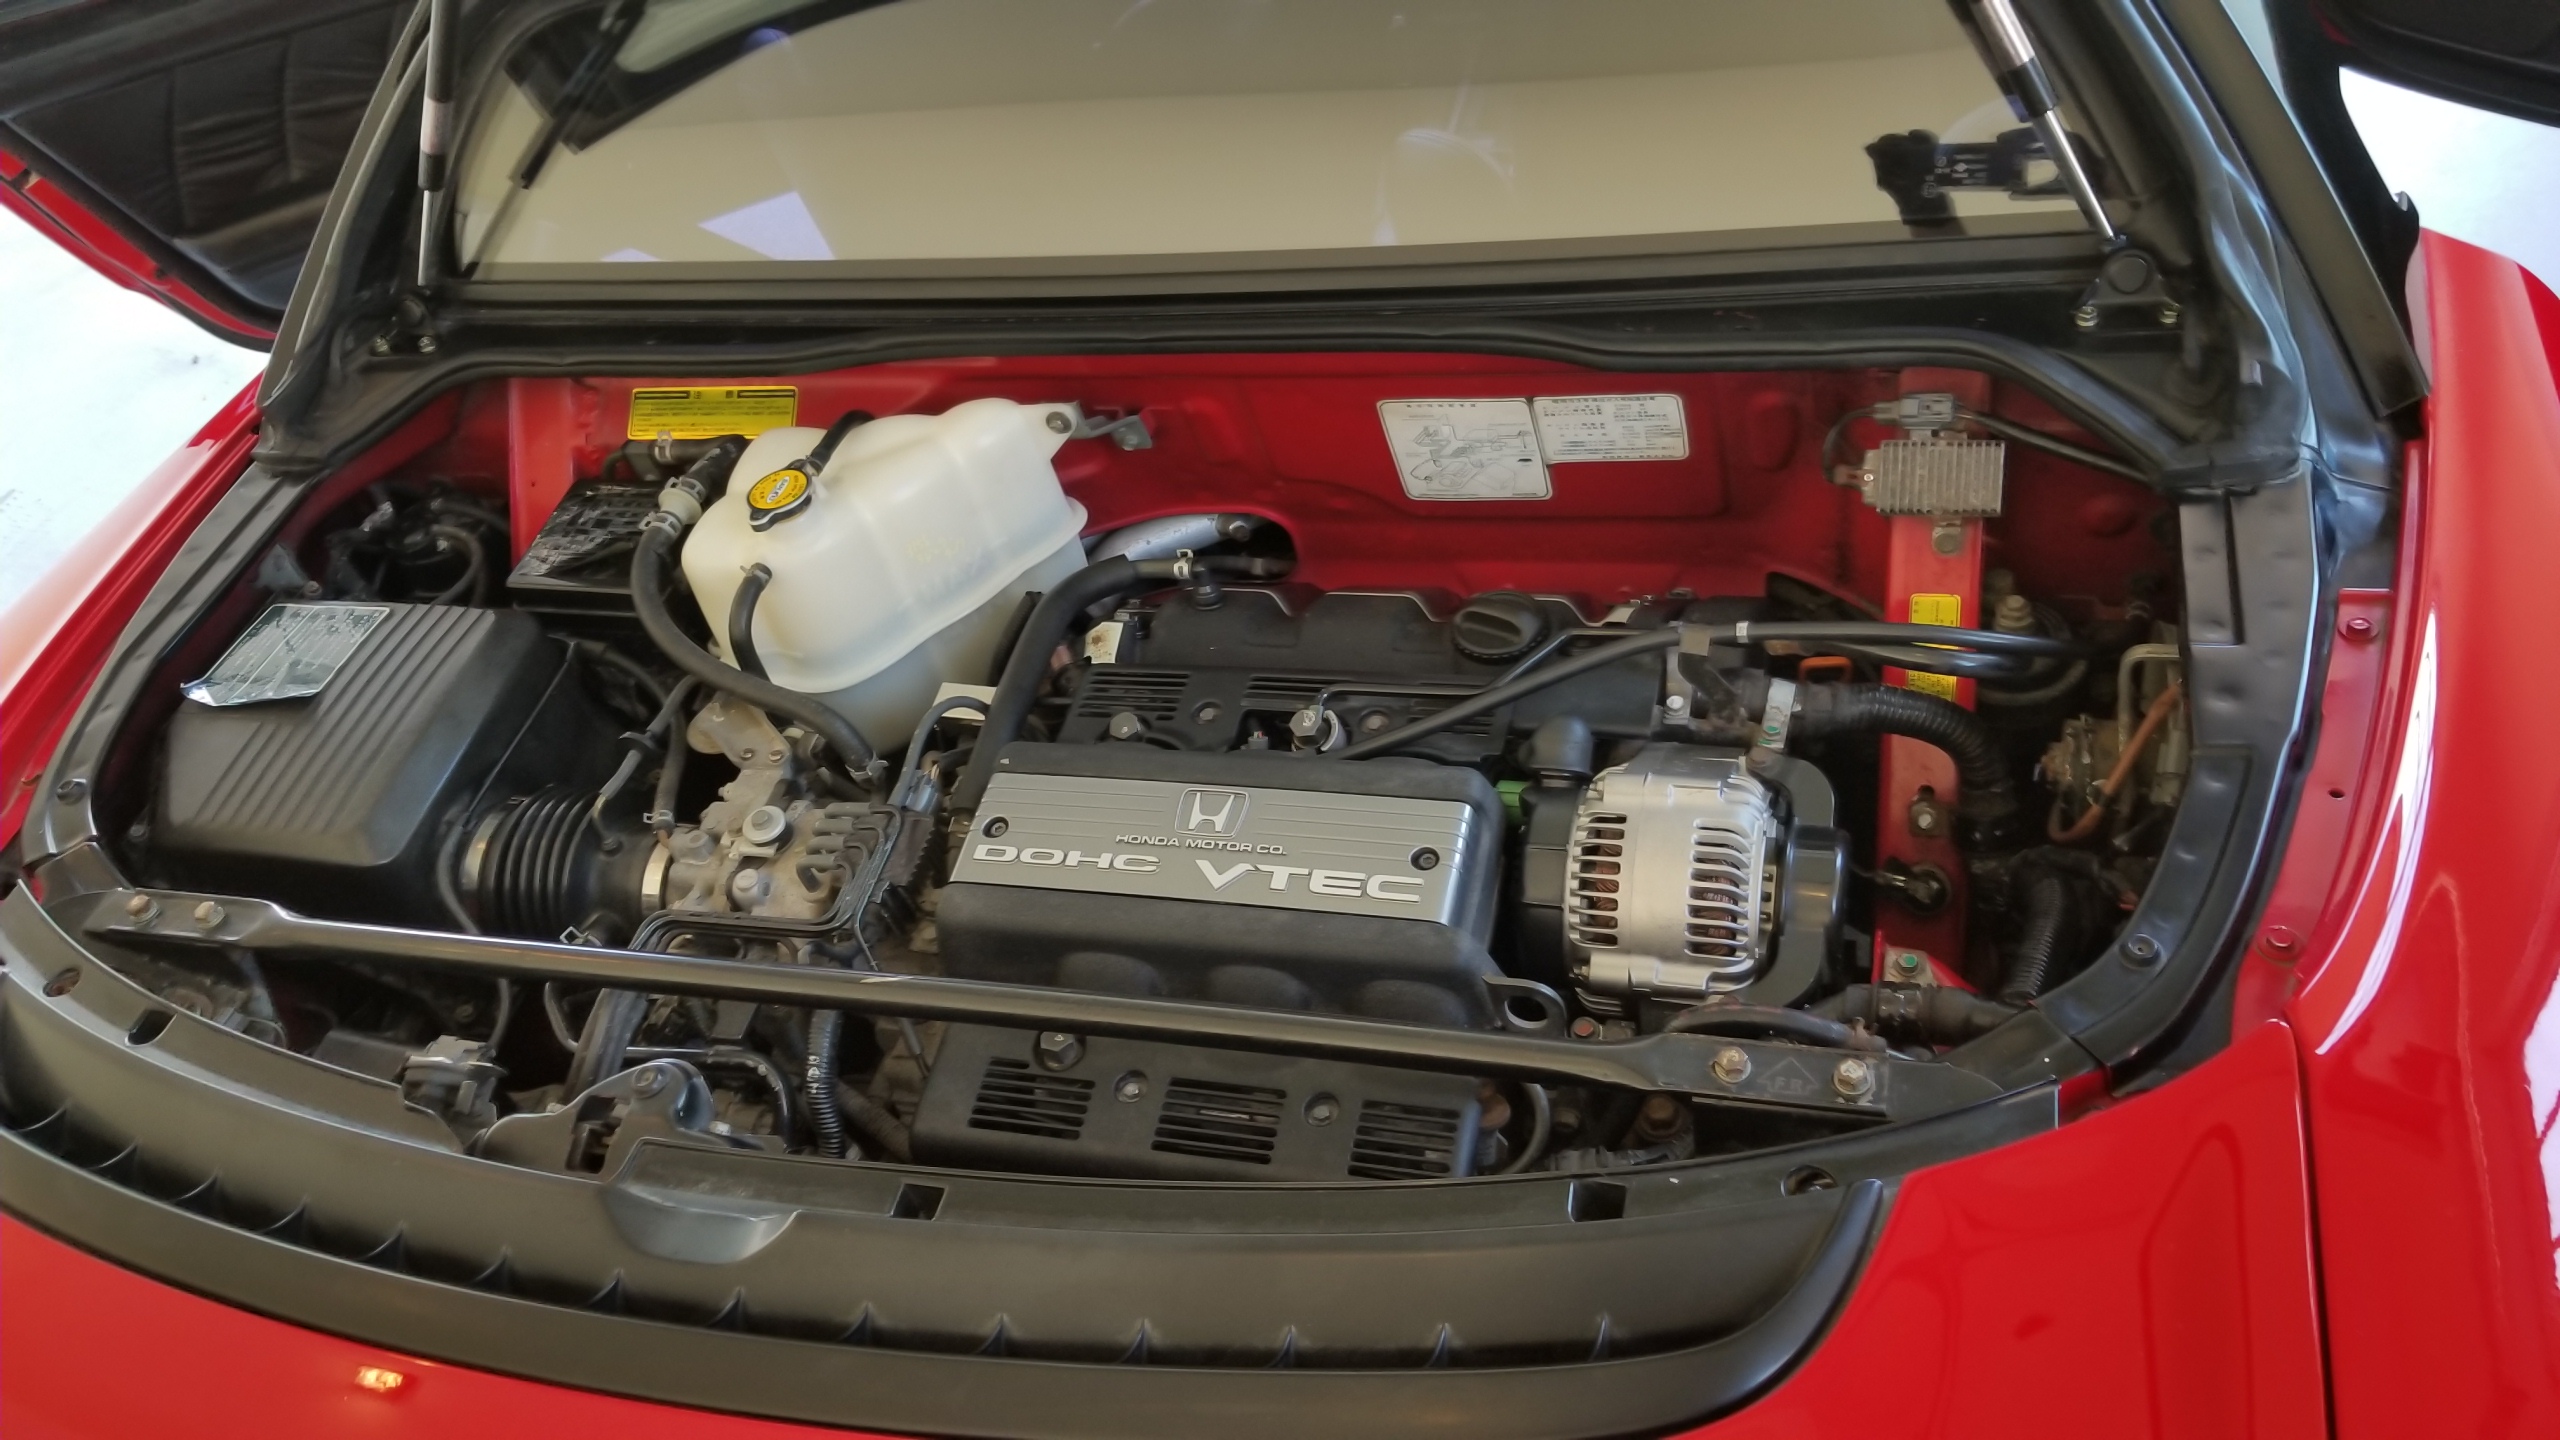
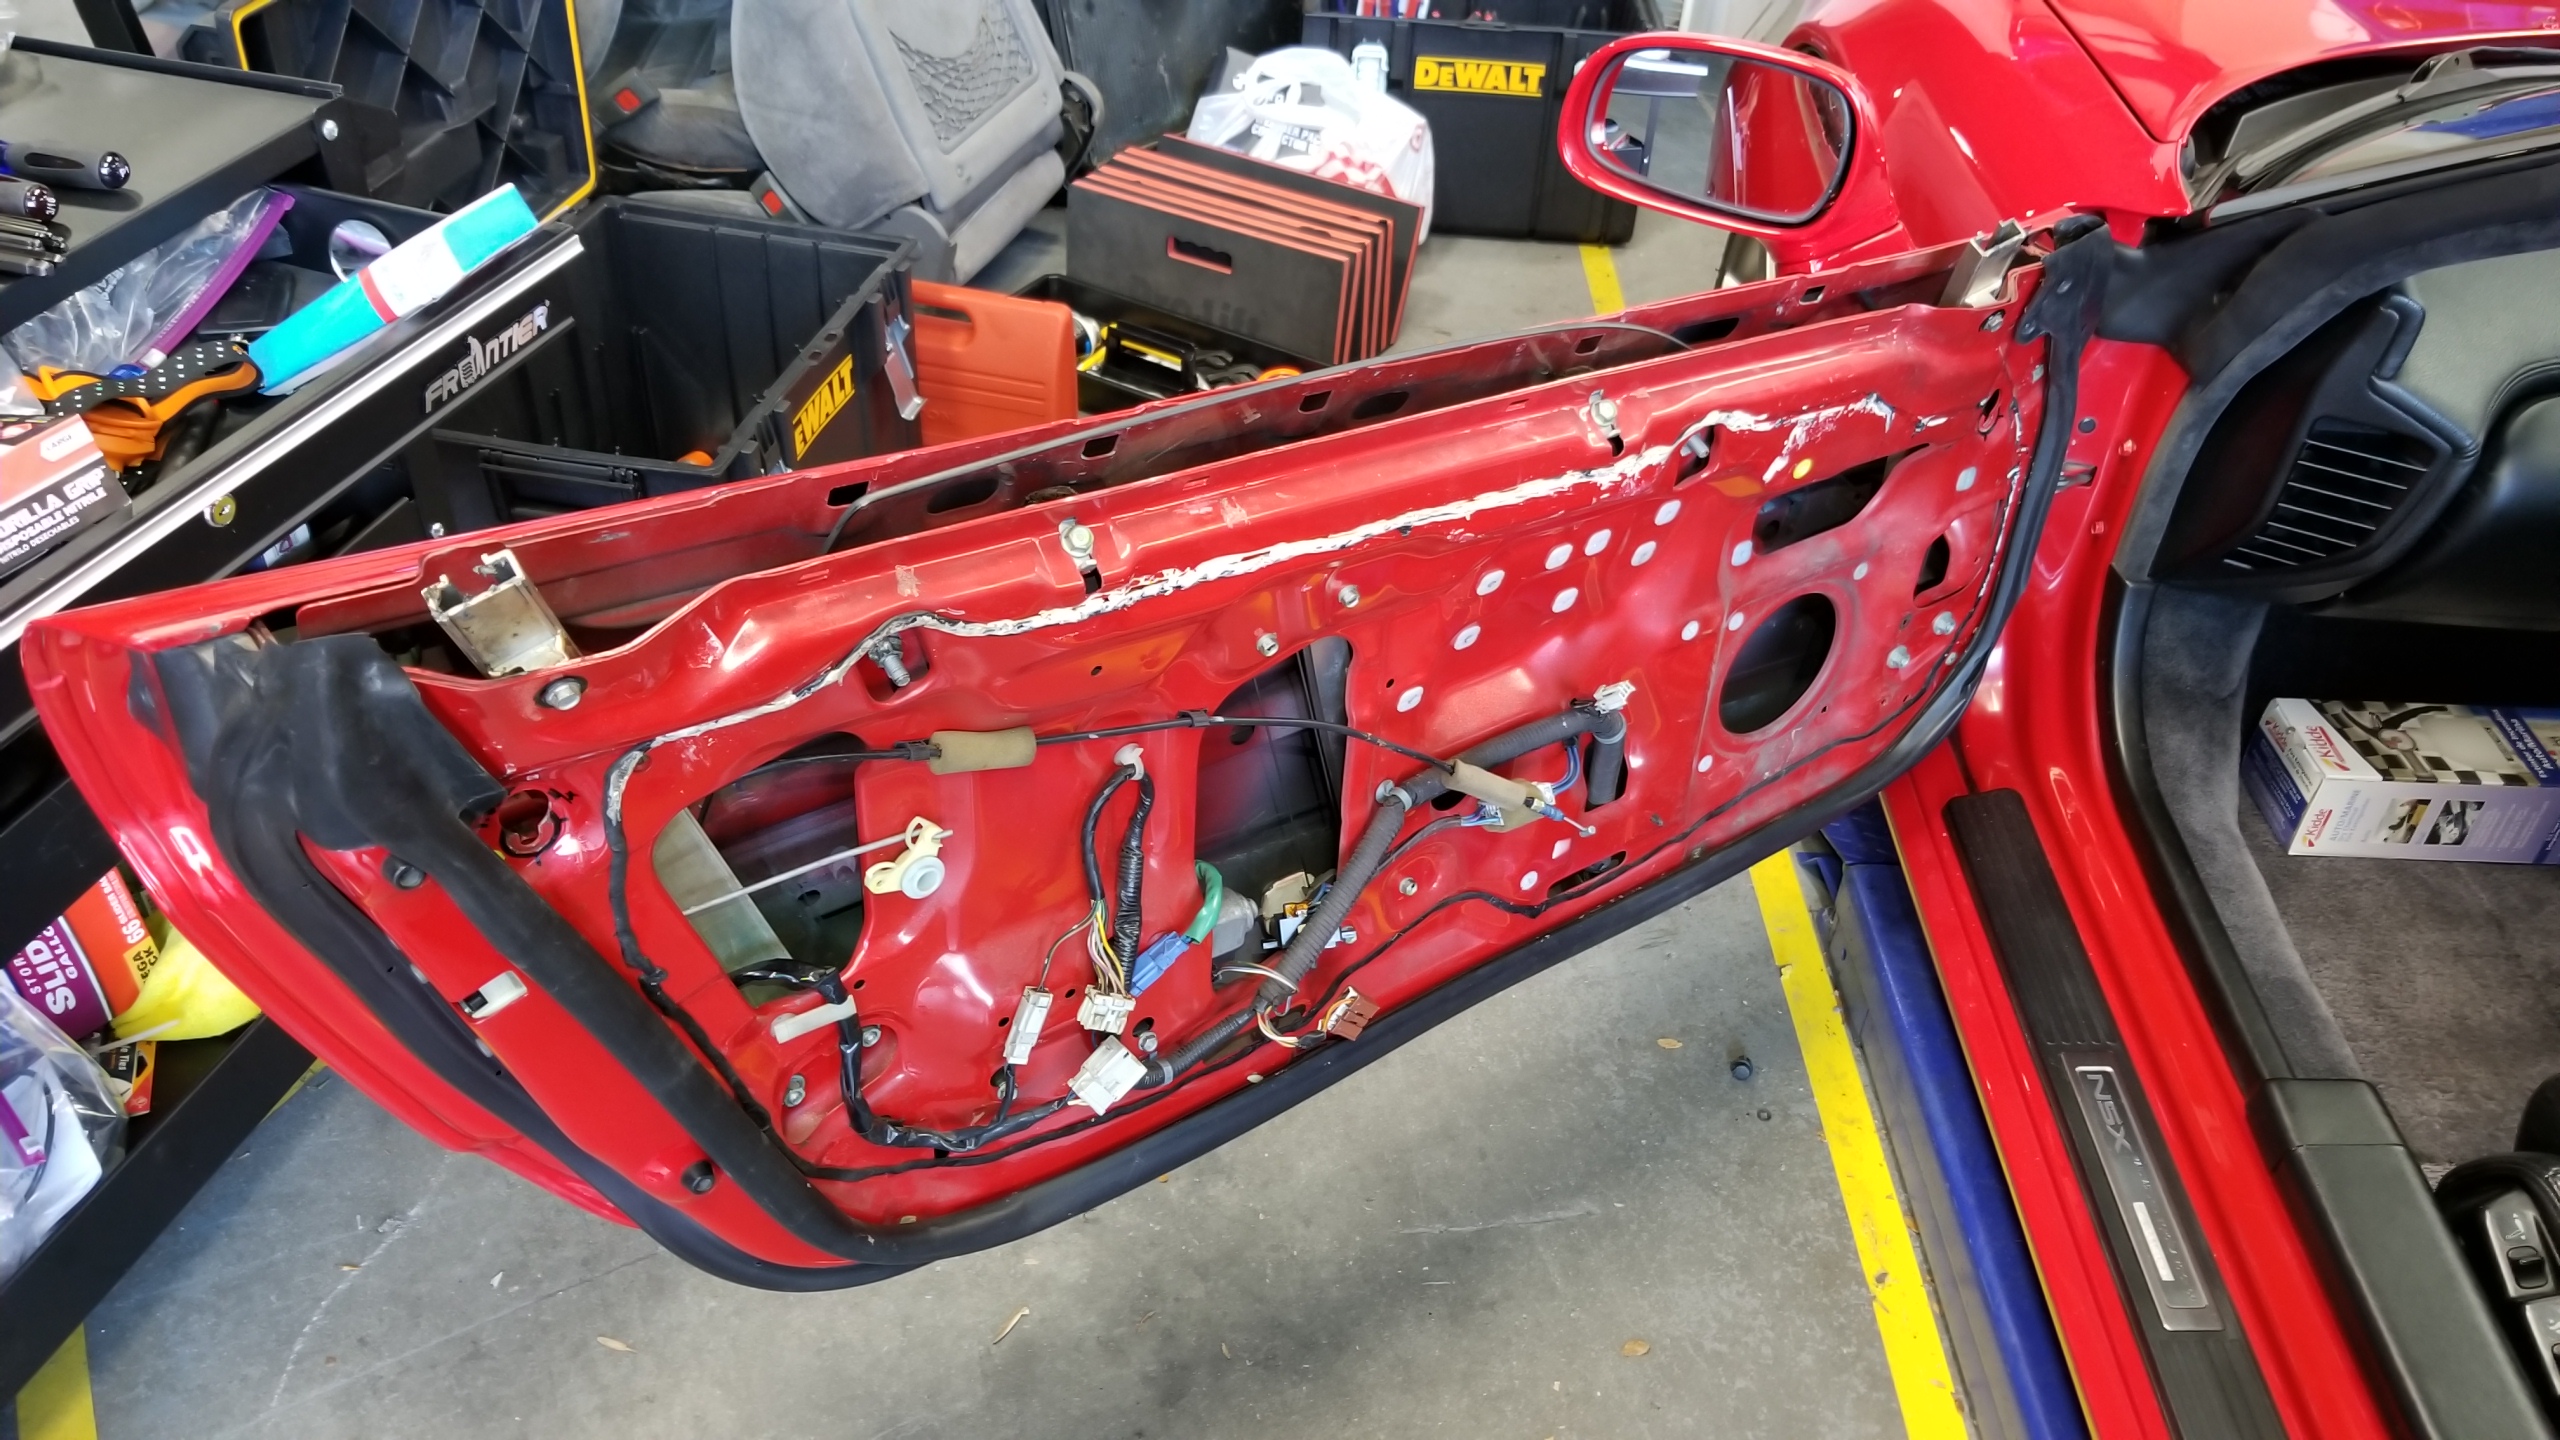
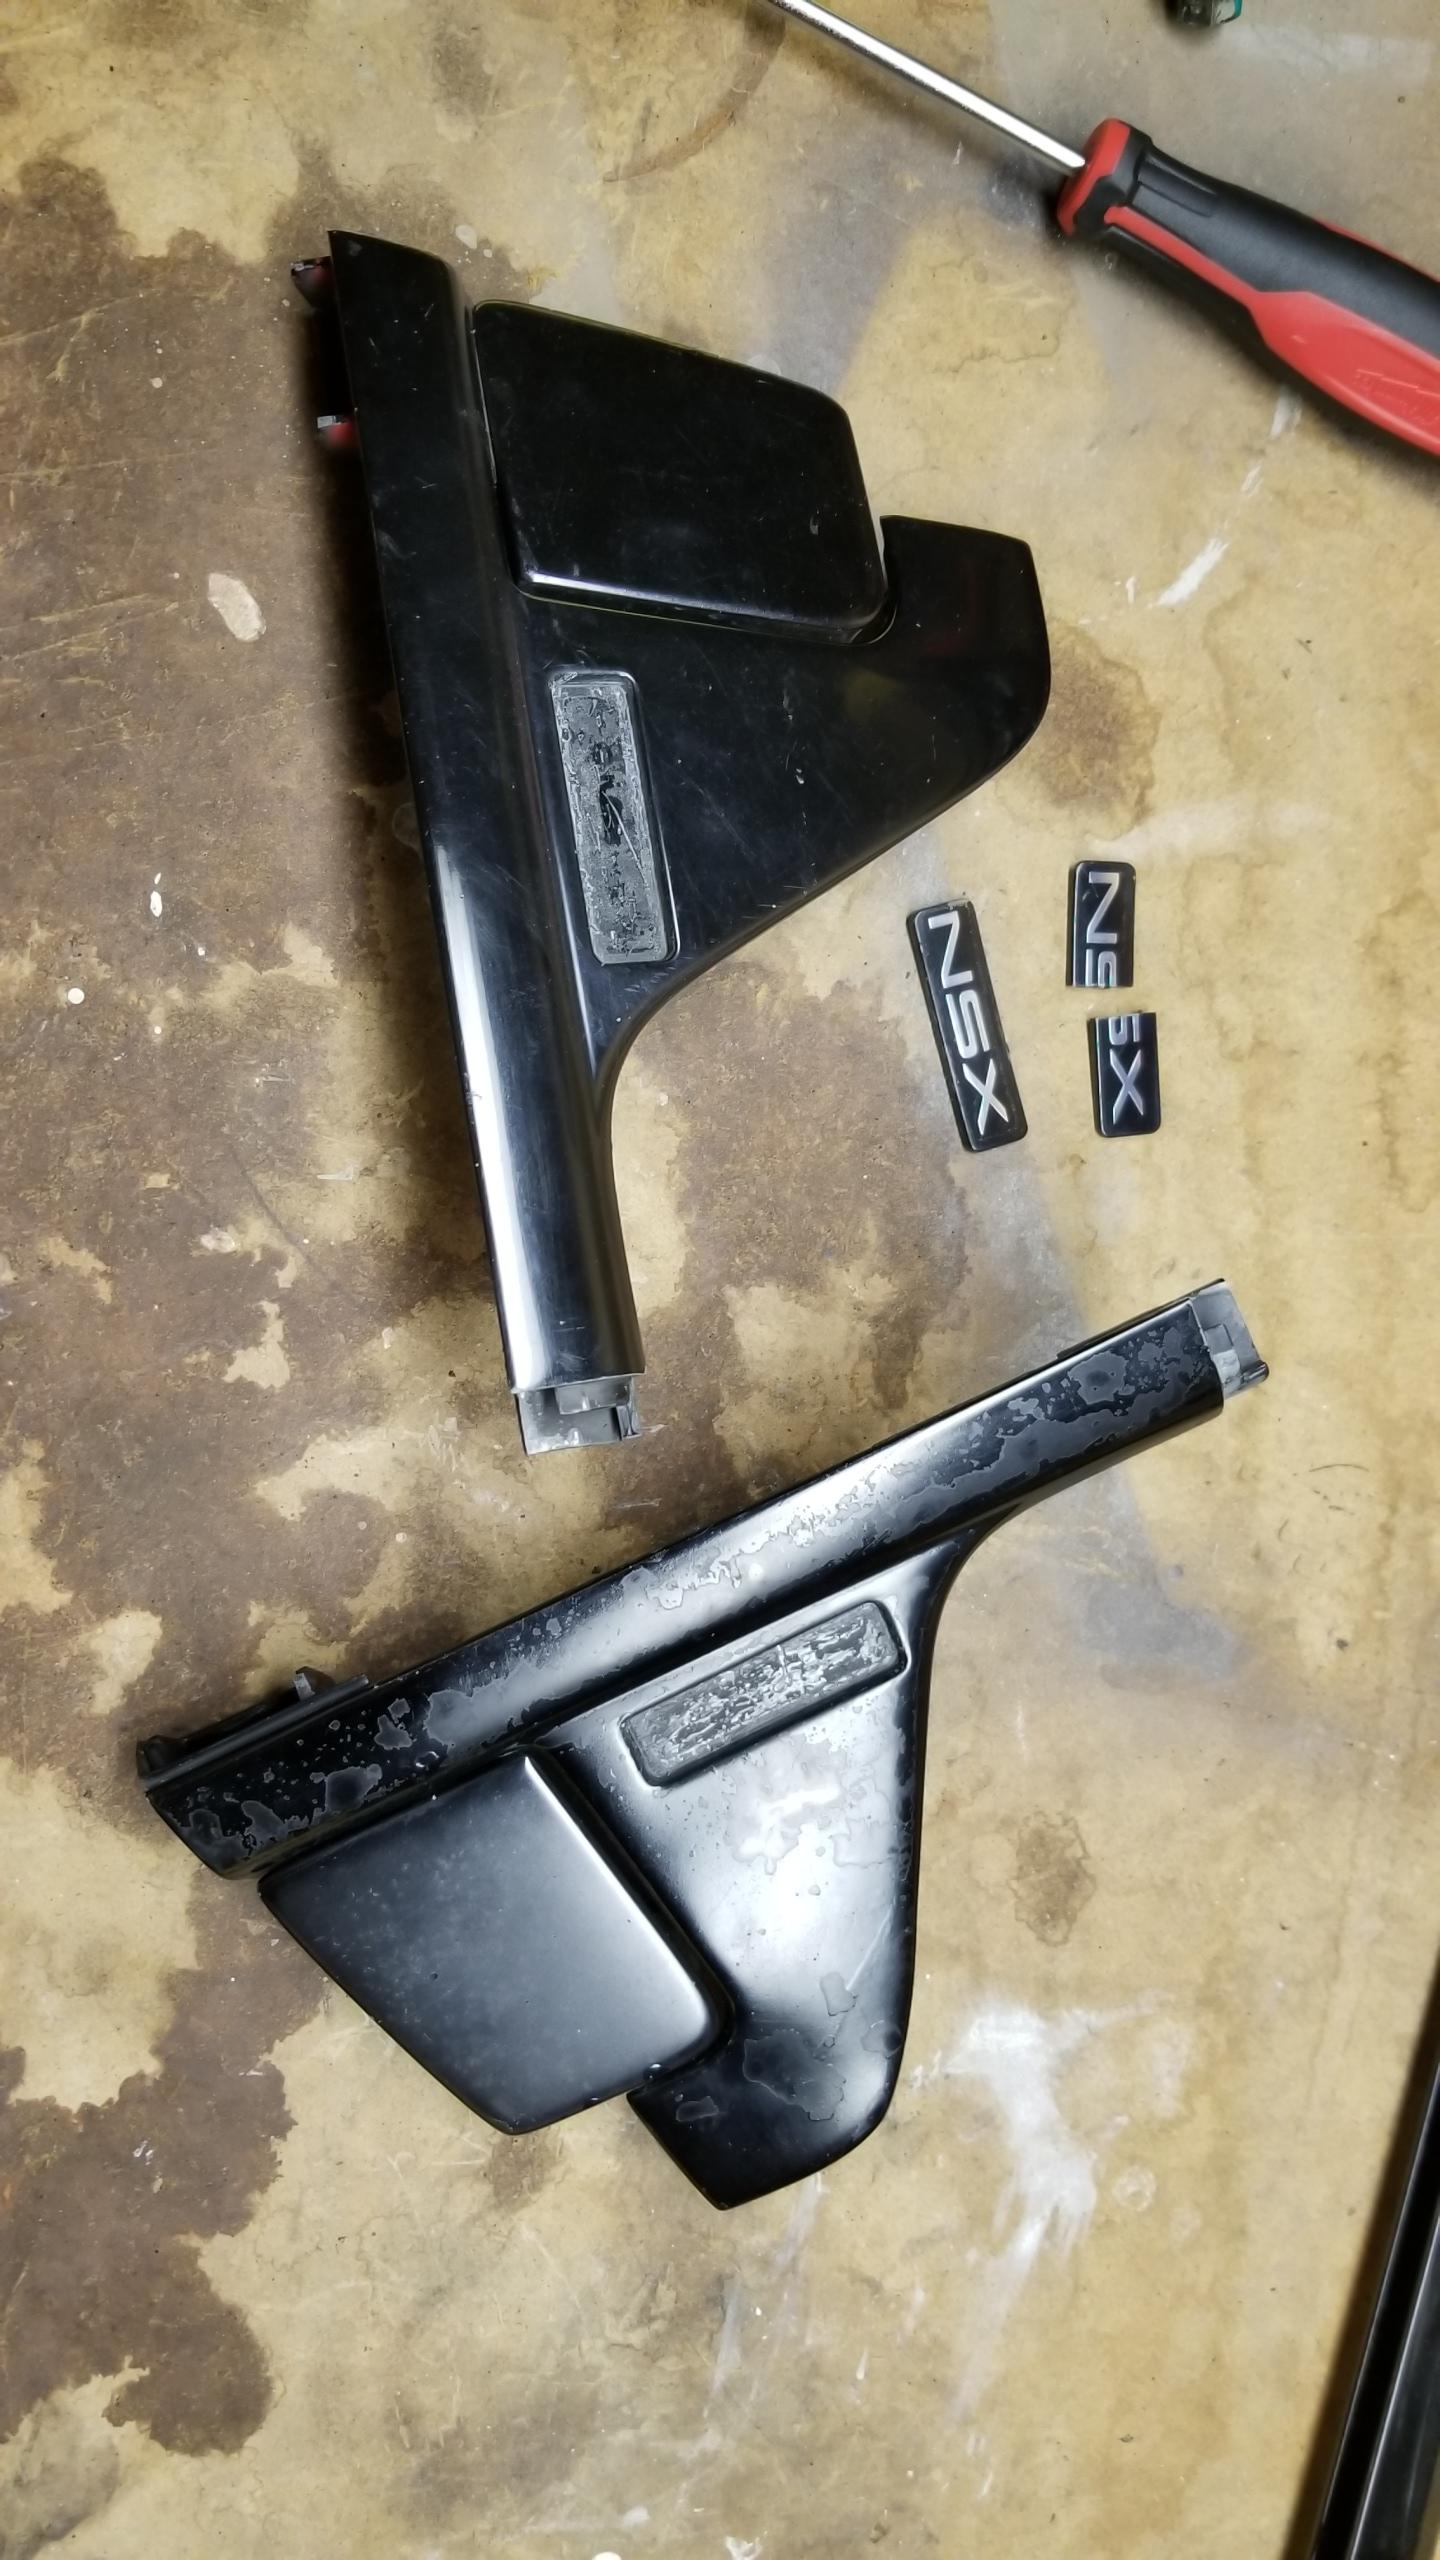
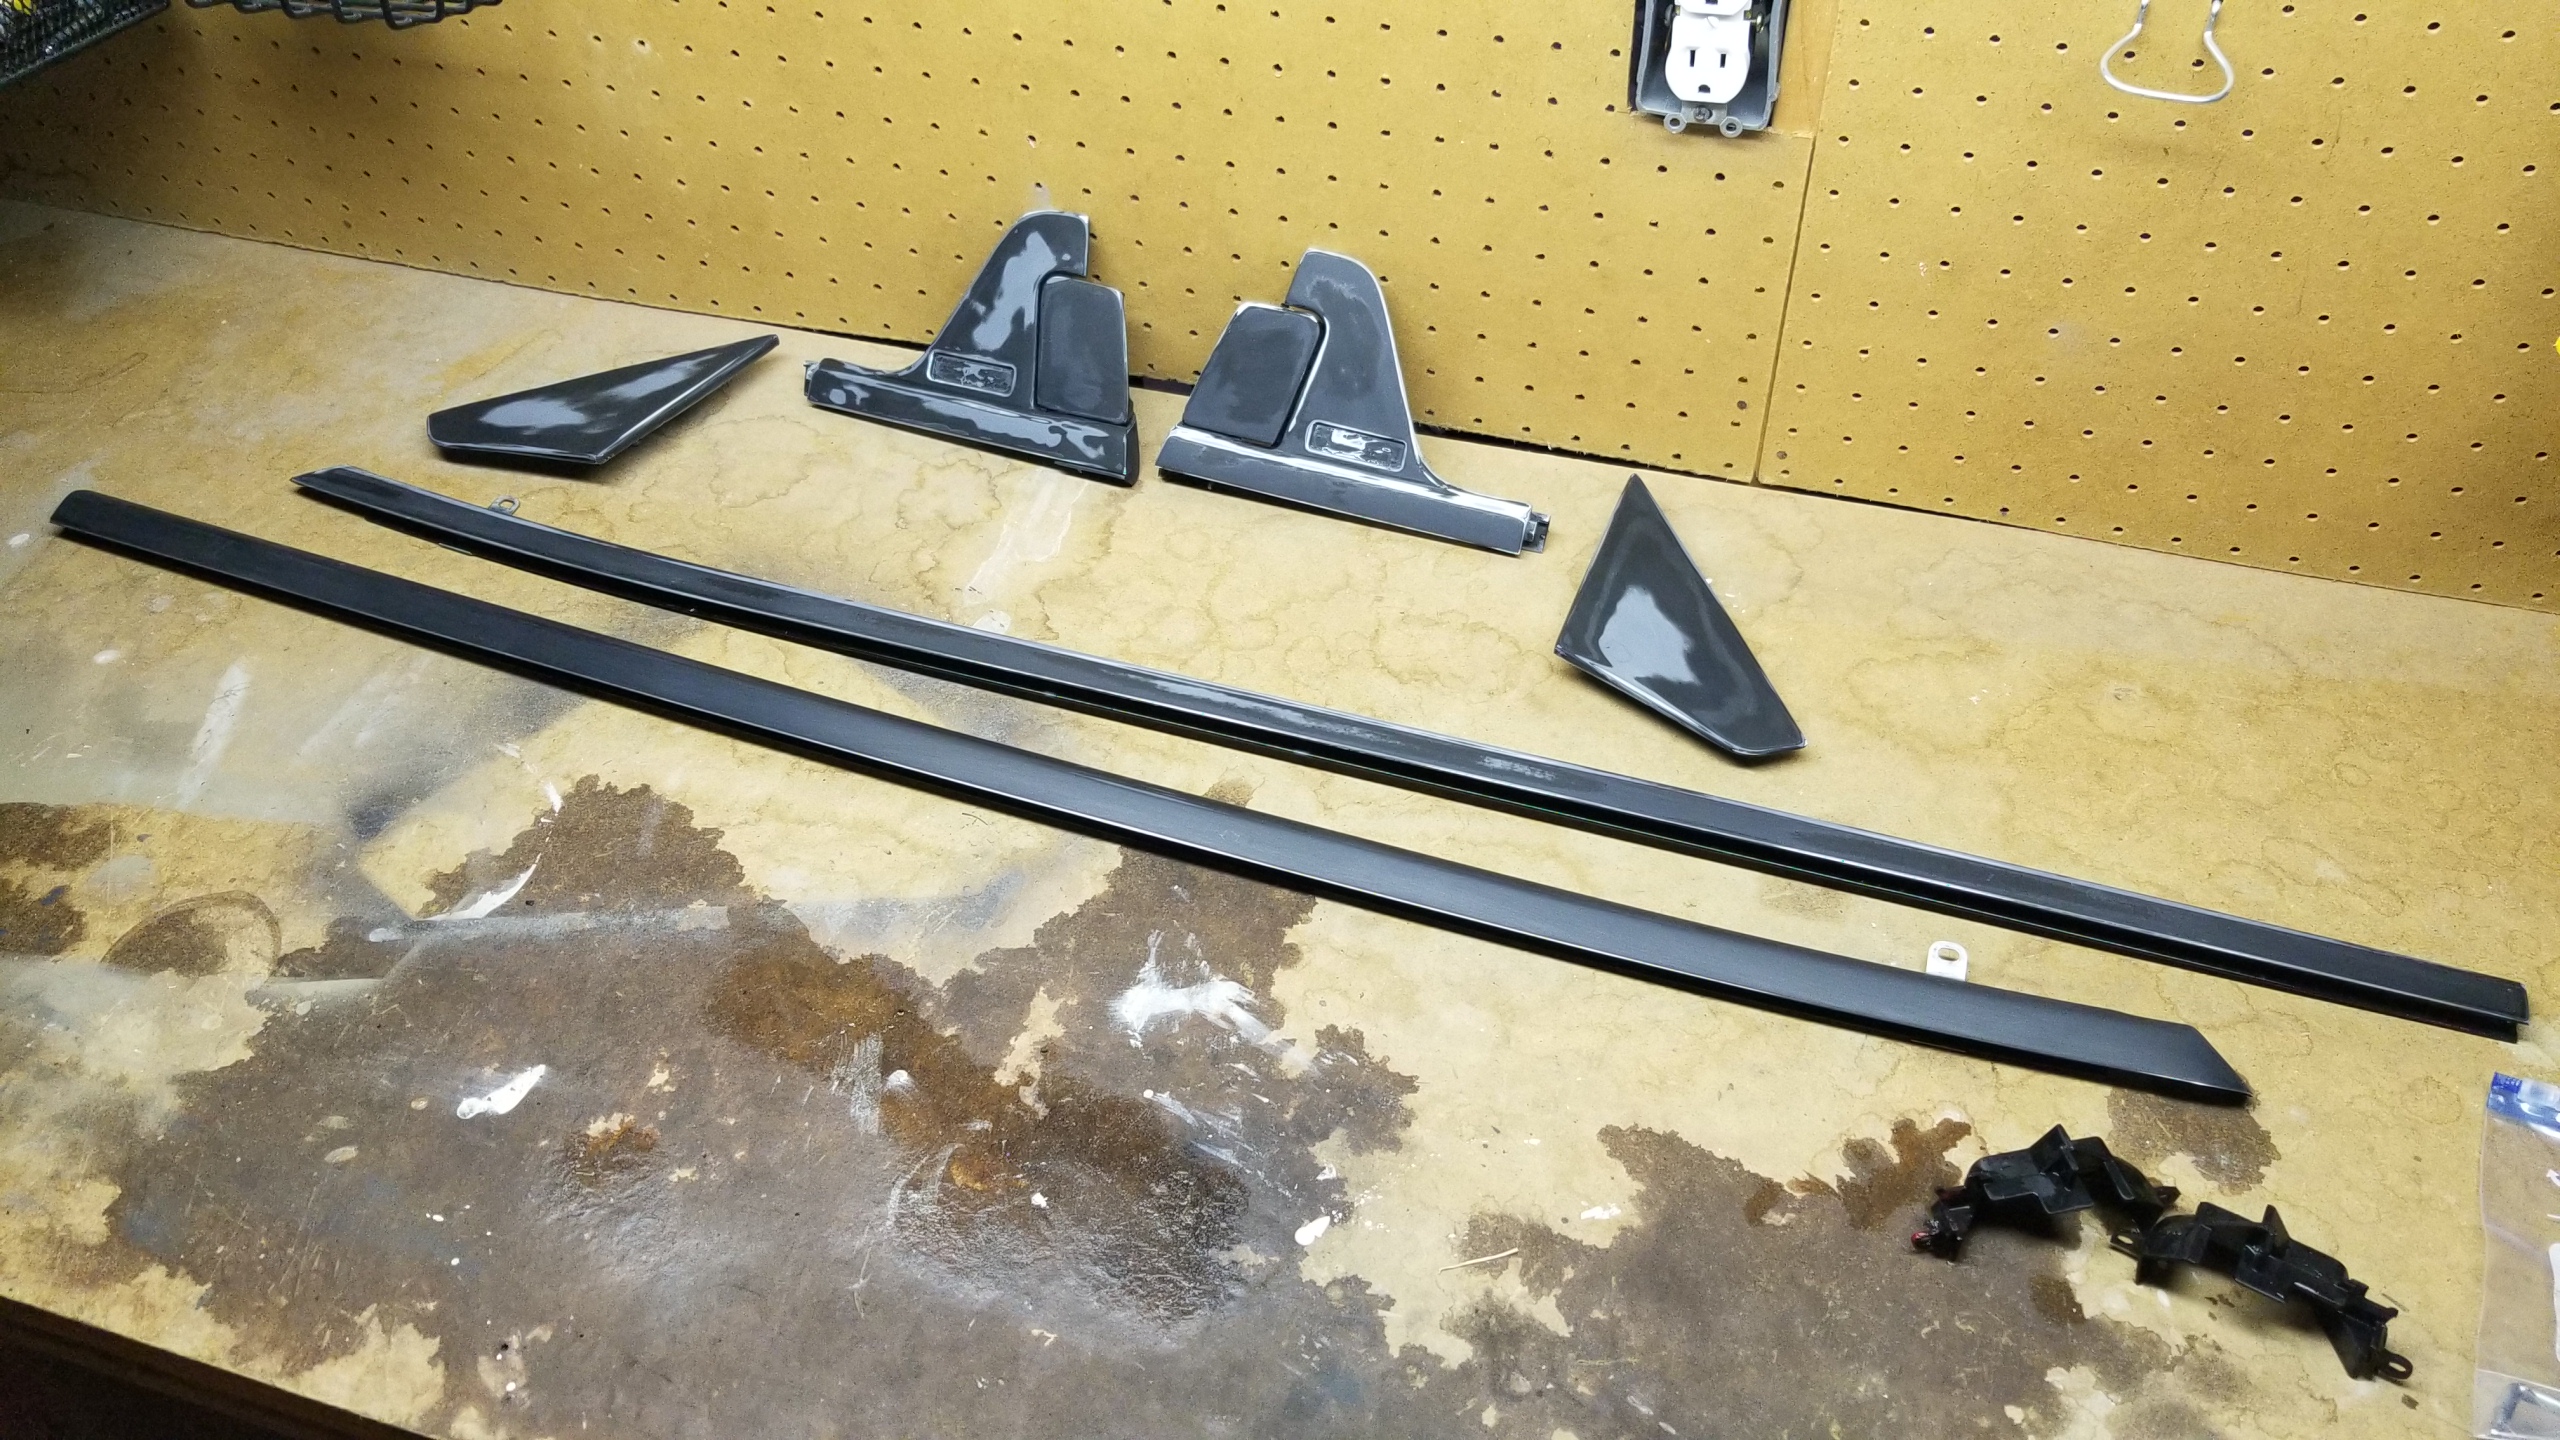
In other news, still have some final wet sanding to do on the exterior black trim panels which I just finished painting, then those will be reinstalled and my car will be back together again until I decide to mothball it again next week, probably to start fixing the door-related issues. Still waiting on my MITA shipment for the upper windshield trim; it's still stuck in the Jamaica, NY customs thing according to USPS and it's been two weeks now without updates. Hoping that makes it here soon, I don't want to put the trim back on just to have to take it off again for the windshield rubber replacement.
 
Last edited:
Finally looking at ordering the 5-speed rebuild parts, and I just learned that the NSX-R 4.23:1 final drive is not compatible with any EPS-equipped cars, and is also not compatible with 95-96 differentials since they were changed slightly from the 91-94's. News to me. This presents some choices..

1- swap a manual rack in, swap in an older spec diff or ATS/O.S., and get the 4.23. Pretty expensive and I don't mind the EPS currently, but it might save me from another expensive ~$1800 EPS rack repair in the future since I'm sure it could use one being 30 years old. There is a bit of play in the wheel currently but not enough to drop that much money yet.

Is all this really worth the extra work and $3000+ for a 0.2s faster 0-100 and an LSD? Maybe once/if I start doing some real performance driving, but at the moment it's probably overkill. Might have just talked myself out of it, lol.

2- just rebuild the 5-spd I have with basic parts, already has JDM gears, leave in EPS. Cheapest (at least initially) and easiest, but I don't like having my plans changed :rolleyes:. Maybe the leftover money could be used for the EPS rebuild.

Just some thoughts on a path forward. If I eventually do the option 1 work, not sure how much sense it would make to rebuild my trans right now since it would be taken apart again in 1-3 years or whatever, but would be nice for peace of mind to have a fresh one to swap in.

Because everyone likes colorful pictures, here's a peek at my repainted B-pillars after wet sanding. I have everything ready to put back on, again just waiting for my windshield trim to arrive so I can install it with the A-pillar drip covers off. It's almost been 6 weeks since my order was placed, which I think is mainly because my order included some newly cut keys that added some time, but no updates from USPS. Don't know what I would do if my package was lost, but probably too early to call.

JwMAsui.jpg
 
Last edited:
1- swap a manual rack in, swap in an older spec diff or ATS/O.S., and get the 4.23. Pretty expensive and I don't mind the EPS currently, but it might save me from another expensive ~$1800 EPS rack repair in the future since I'm sure it could use one being 30 years old. There is a bit of play in the wheel currently but not enough to drop that much money yet.


It's almost been 6 weeks since my order was placed, which I think is mainly because my order included some newly cut keys that added some time, but no updates from USPS. Don't know what I would do if my package was lost, but probably too early to call.

You may want to give Matt & Charles (NSX Rack Repair) a call and see if they have a rebuilt manual rack sitting on the shelf. Then maybe see if you can work a trade, your EPS for a manual. That might help save some money and get you the NSX-R Final Drive

Also if those parts are coming from Japan just sit tight if they haven't landed stateside yet. With the massive cut back in air travel in/out of Japan they are experiencing massive backups of packages being shipped to the US.

Good point, might give that a try. Hopefully they have a RHD unit available.

They've been in USPS' possession for a few weeks, just submitted a package update request so hopefully that gets it moving again. My trans parts would be coming from Amayama, so I'm sure that will take much longer. All for good reason of course, but I'm willing to wait to save the extra couple hundreds versus getting it from Acura..
 
Last edited:
re: RHD manual rack. I had the same issue and waited until [MENTION=10956]whrdnsx[/MENTION] sourced a used one from JP. The u-joint is used on several models. I just stowed the manual rack away until I have issues with the EPS. The manual rack also wears out too and appears to be a lot easier to repair.

As for a transmission rebuild, wow you are going to have enough to do with a AT->MT conversion. I would get it all together, functioning and then do the highly optional.

If you opt for the no-cut harness adapters for the MT transmission switches you may acquire the proper steering u-joint while you are visiting the boneyard for extra connectors.

As for the b-pillars: be sure to pack rags in the body cavities so you don't lose your nuts! I was tempted to leave the rags in place but considered that there might be some integrated air tunnel or FUD so I removed them.
 
It might be good to have a rack on standby, since that would certainly be the hardest to get item of the needed components (between the 4.23 & diff). Will probably take me a while to find one anyways. I assumed the U-joint was included on the rack or transferable between manual and EPS, I'd have to do more research.

A close friend of mine in a similar line of work was just laid off, so it would be prudent for me to slow down a bit. Smart thing would be to put the trans in as-is or after a simple rebuild and save the rest for later, my main hangup would be having to pull the trans again but I suppose the couple extra hours of work wouldn't be a huge deal since it would be a few months or so down the road.

I think I'll save this as a "performance package" upgrade (manual rack, 4.23:1, NSX-R diff) for the future when I get the rest of the car sorted and start taking it to autoX or beginner HPDEs. Especially since that's when the extra performance would actually be useful. (EDIT: Went ahead and ordered the 4.23 parts anyways. I still need a better idea of the compatibility between the 90-96 EPS system and 4.23 ring gear before I install though.)

Thanks for the B-pillar tip, two of my nuts were already missing before I got to the panels (assuming for prior repaint of the roof) so I only have two anyways, lol. Didn't notice any looseness before.
 
Last edited:
From my experience pulling several NSX engines and occasionally just the transaxle, the transaxle R&R by itself is a pretty big PITA.....even with a lift.
I would go through the trans and at a minimum replace synchro's & do the diff swap before installation.
I know you're having to make some tough choices on this project, and my hat's off to you for not only tackling it but also sharing it with the NSX community.

Cheers,
Brian

Thanks for the input Brian. I tend to agree, I don't like the idea of pulling the trans any more than necessary so I'd like to do everything at once.

Sorry for the below wall of text, thinking out loud a bit.

Interestingly, I can get a new full manual rack from Amayama for ~$800, which seems like a pretty good deal to me, especially if I sell the EPS. The joint (assuming it's "Joint Comp. B") is $66 new. A rack swap wasn't in the plans, this would certainly be a huge undertaking to say the least. I'm looking into some local shops to see if they can help me out with the trans rebuild and relieve some of the workload.

I read on another thread (http://www.nsxprime.com/forum/showt...or-4-44-LSD-with-power-steering-on-a-1997-NSX) that Larry says the 1995-96 EPS systems just need a spacer on the speed sensor to clear the 4.23 gear and has installed the 4.23 with EPS before and it works, still doesn't work on 1997+ cars according to him. This would greatly simplify this option and would let me keep the EPS, again less work involved.

The diff is a bit more nebulous, I'm not as knowledgeable about them. I'm operating under the assumption that my (or your ;)) trans has the updated 1995 torque reactive diff as opposed to the torque control diff in the earlier 90-94's, which can accept the NSX-R diff spring. This doesn't seem worth it to change in a vacuum since the reactive diff probably accomplishes much the same goal, however the 90-94 diff is required to use the NSX-R 4.23 ring which is where the real benefit is. Probably worth it for me to crack open the case to make sure which one it is, but the trans serial # makes me think it's a 95-96.

If I can find an OEM 90-94 diff I might be able to get it for a few hundred, not too bad especially with selling the original diff. This seems like the most likely path forward as long as I can verify the EPS works with 4.23.

The ATS and OSG aftermarket diffs seem way overkill for me at the moment. Maaaybe I'd consider the ATS w/4.23 combo, but the utility I would get from them is limited for now.

Unfortunately the U-joint is not the same between manual and eps


Sent from my iPhone using Tapatalk

Right, looked it up and the EPS is 53323-SL0-A51/53323-S04-003 (shared with 90-94 EPS and all 95+ cars and tons of other Hondas), manual rack is 53323-SM4-013.
 
Further updates, lots of things going on concurrently.

My MITA shipment was likely lost by USPS somewhere between NY and ATL, last scan was March 17. I submitted a few missing mail/international inquiry claims with USPS and they're "working on it", but my money is that 1-2 weeks from now they say it's been lost with no further updates. Might be the kind of thing where it shows up a few months from now out of the blue, but I'm working with MITA to get a Japan Post claim sorted since they have insurance through them. Hopefully that avenue works out, I have faith since MITA has great reviews anywhere you look.

Since my upper windshield trim isn't coming anytime soon, I put together the side pillars again in the meantime and spent another few hours cleaning the car after the height of pollen season.

I'm happy with the repaint, it matches pretty well and the new door seals look much nicer and seal out water a lot better. I haven't replaced the front sashes yet, but they should seal even better since the design was updated and the original sashes are too stiff.
qxWJ53T.jpg


HeIK4nR.jpg


I still have to repaint the door handles, belt molding, and front sash covers, but I saved that for when I tear into the doors in the next week or two. I wanted to have all the parts beforehand, which includes SoS billet window retainers to go with the Hugo window regular upgrade kit. I want to see if I can fix the electrical mirror adjustment not working, and see if I can improve the door lock operation. Hopefully something easy like a worn wire or obvious corrosion on a connector.

So lots of work for the doors. Repainting trim & handles, fixing two electrical issues, rebuilding the window regulators, and whatever else I find while I'm in there, times two doors. I just placed another huge order for the 5-spd rebuild parts, plus the 4.23 parts, plus a bunch of other misc. bolts and pieces for the trans swap and missing hardware (clock lid, E-brake pin, etc.) Those will probably take a few weeks to get here due to flight delays, so it should give me plenty of time to fix the doors beforehand.

Not that it necessarily matters now, but my brake warning lamp came back on yesterday :mad:. Haven't checked if I actually have a light out, but I'm a bit sick of dealing with all the OEM cluster issues so I'm glad I'm going ahead with the S2000 conversion. I just shipped out the AP2 cluster and lens to Sweden the other day :).
n5aBykD.jpg


I tried again to remove the other half of my rear O2 sensor with some Aero-Kroil and new extractor bits, but no luck. It's so stuck in there that I'm just drilling out the inside of the O2 sensor bigger with the extractor bits. So, I'm trying to get a used OEM rear header and I'll have to remove the entire header and replace it. Sucks but at least I can use the updated 1997 nuts + studs to make it easier on myself when I replace the entire exhaust system in the near future, so I would've had to do this soon anyways.

Did a bit of engine bay detailing as well. I only used a moist microfiber instead of spraying down the engine since I didn't want to cause any more issues or start corroding the ign coil packs and other bits. Also replaced the expansion tank cap with the SoS version just for fun. I'd like to get the valve covers and manifold cover powder coated in the future, the factory paint is coming off in flakes already.
1nFUYUJ.jpg


Final pic after a good wash. Sometimes I feel like I'm taking 2 steps forwards and 1 step back with the car so far, but once I get the O2 sensor and cluster replaced I'll feel a lot better. No more CEL and actually working instrumentation.
5IIbWyQ.jpg
 
Transmission parts should be arriving tomorrow :cool:. Japan Post/EMS just suspended shipments from JP to US so it was fortunate mine made it into the US earlier in the week.

In the meantime, I'm keeping myself busy by taking stuff apart again. This time, the doors. Things to fix include:
Speaker amp repair
Door panel tab repair
Door lock switches
Power mirror switch
Vapor barrier
Window regulator rebuilds
Window track cleaning & greasing
Front sash replacement
Door handle, outer molding, front sash cover repainting

I'm shooting to finish all this before the end of the month.

Door panels off. Pretty much every screw tab on both door panels were broken off, which was not too unexpected. I bought some metal hanger strap and foam tape to try and make some new tabs to affix to the door.
Mxy594a.jpg


The vapor barriers on both doors were nowhere to be found, besides some leftovers behind the speakers. I bought some vapor barrier sheets and butyl rope from HD to cut to size instead of buying the overpriced OEM ones.
y9OUBKq.jpg


The connectors looked mostly decent, I thought these towards the rear were gummed up and corroded but it looks to be just some really old grease to pack the connectors. Planning on cleaning them out and repacking them with silicone grease.
hoZ91Qx.jpg


Front and rear sashes out after marking the adjustment bolts carefully. They are involved in the alignment of the window, so I'm hoping putting them back in the exact way they came out will work.
t4VxCT5.jpg


This is the left door handle. Obviously has seen better days, so a refinishing is in order. In addition, I can glue on new weatherstripping and re-grease the door handle mechanism to make it smoother to operate.
rdhVgVL.jpg


Here's both window regulators removed, again after marking every bolt to make sure the alignment doesn't change during re-installation. Maybe the passenger one was replaced before? It has a different color connector and wire.
To remove them from the window itself, I followed the FSM and lowered the window ~3/4 down until both bolts were exposed through two holes in the door panel. I held the window up and then pulled it out completely since I had already marked & removed the two stoppers at the top.
UqcYRM4.jpg


Since I was concerned about the state of the window guides, I wanted to get a better look at them. Some of the sliders looked like they had backed out somewhat from being fully tightened down, so now I can re-torque them and put loctite on to stop it in the future. This was causing some of the window rattle I was experiencing.
In addition, the front lower slider on the left window fell apart completely in my hands, so I'm ordering a new one. The other sliders looked okay, so I can clean & grease them and the windows should work better.
Side benefit is that I have much more access to clean the window guide tracks without taking them out of the car, so less chances to screw up the alignment of the glass. Soooooo much old and crusty grease everywhere.
rxvB6yH.jpg


The regulator track sliders were not in great condition, and the right regulator was slowing down a bit at certain positions despite not having a window to lift. Between cleaning the tracks & cables, replacing the sliders with Hugo's Teflon ones, replacing the plastic guide with the Hugo pulley, and replacing the plastic retainer with the SoS aluminum one, I should hopefully have a very robust window system after this job. Planning on actually doing this work over the weekend.
5RL2zUT.jpg


Taking apart the handles for repainting, the rubber backing & handle mechanism comes off with a few screws, but the NSX emblems have to be removed. You can do it carefully with a small prying tool and heat gun, but I was a bit careless with one emblem and snapped it, they are fairly brittle. Not really concerning since I was planning on replacing them with the Type-S emblems from MITA, though since those are lost in the Mail Void I don't know when I will get the new ones in.
Also, I was planning on removing the handles from the sash cover, but they are attached by a long "non-serviceable" pin that looks like it was threaded through one end and the handle return spring and mushroomed on the other with a press tool from factory. The pin could be removed, but I'm worried about destroying it or re-installing it and mess up the handle function since the tolerances are quite small.
do6uAzR.jpg


All the parts sanded down to prep for primer. I removed the outer belt molding top & bottom rubber. The top rubber can be re-installed, the bottom will be replaced with the SoS molding kit.
My only concern is still not being able to remove the door handles, so hopefully by jamming something behind the handle to push it out slightly will allow for even paint coverage. Either way, it would be very difficult to make them look worse than before.
t7yV9vx.jpg


Back to door electronics, I made a thread about the power mirror switch troubleshooting here (http://www.nsxprime.com/forum/showthread.php/213444-Power-Mirror-Switch-Troubleshooting). I had to take the switch apart and do some custom work to save myself another $140+ for a new one.
veP8ALr.jpg


Once that was fixed (yay!), I went back to remove the amps from the door speakers. You need a 1/4" SAE socket to separate the speaker housings, which is the only Imperial bolt I've found so far on the whole car.
It looks to me like the passenger side was replaced before, but the driver side was likely original. My driver speaker basically stopped working and my passenger was fine so it wouldn't surprise me.
d6Os676.jpg


Casings/heat sinks removed. Again, it looks like the driver/right side was original based on the design of the board and the green capacitor labels. The other board had a slightly different layout, was covered in conformal coating, different types of caps, and has a different brand of the four MOSFETs.
T498CbK.jpg


Caps removed on both boards. C8 on the old board had started leaking and damaged the surface slightly, and pulled the solder pad up off the board. Fortunately the damaged area is small and the trace for the pulled pad is on the backside of the board, so I have high hopes this one can be saved. The other board didn't really have any visible problems.

The hot glue stuff on the coils was pretty annoying since it gooped over the caps too, so it took longer to cut/melt it away to be able to peel the caps off. I'm not terribly familiar with audio circuit design, but is the goop there to reduce coil noise/vibrations during amp operation?
IXDua7H.jpg


I have the new caps on the way, plus 8 more MOSFETs just to replace the old ones because I might as well. Also some thermal grease to apply and hopefully increase their lifespan. I should be able to get everything soldered together and tested this weekend. Really, this is moreso a stopgap to have a functioning system since I'd like to redo the whole audio system in the future with some nicer speakers/amps/sub/head unit like in my daily, since I spend most of my drives blasting music.

That's it for now, again, lots of things going on at once. Opening up a 30 year old car for the first time will always reveal some surprises, but nothing so far has been too bad to fix. I dream of the day when I'm not afraid to use my windows and can listen to my music in stereo instead of mono.

Once this is all finished, I have my huge transmission rebuild/misc. item shipment arriving from Amayama scheduled for tomorrow, so I'll also have to dig through and catalog everything. I just need a few more bits and bobs to be able to rebuild the trans myself, but it's likely I'll have to stop in the middle of the job to figure out what to do with the differential if it turns out to be the 95+ torque reactive version. I ordered the 4.23 kit anyways, so I could either just sell it here or source an OEM 90-94 diff to swap out. I still don't have a clear answer on whether the 4.23 works with the 90-96 EPS brain though, I'm getting conflicting info from the forums and SoS.

I also potentially will be moving to the Midwest soon for a 6 month job contract, in which case progress on the car will unfortunately slow down significantly, but when I get back I'd have a mountain of new parts waiting for me :biggrin:. Is it bad that one of the main reasons I don't want to go is to work more on my car?
 
This thread delivers!!!

No, it's not bad of you at all....I think everyone here can relate to your motivation :cool:
 
Big McLargeHuge said:
I just need a few more bits and bobs to be able to rebuild the trans myself, but it's likely I'll have to stop in the middle of the job to figure out what to do with the differential if it turns out to be the 95+ torque reactive version. I ordered the 4.23 kit anyways, so I could either just sell it here or source an OEM 90-94 diff to swap out. I still don't have a clear answer on whether the 4.23 works with the 90-96 EPS brain though, I'm getting conflicting info from the forums and SoS.

Just FYI, the diff from your auto should fit the 5-speed. IIRC, they are identical.
 
Back
Top