
LoveFab Titanium Chassis Brace
Purchase:
I purchased titanium versions of Cody’s chassis braces because I love my NSX more than I hate my wallet. The buying process could not have been easier, I posted on Prime, called Cody, and made my payment. Cody was available for any and all questions I had regarding the braces throughout the entire process from purchase to delivery.
My original order was for the coupe rear four point and front lower chassis brace. I was not sure I would be able to run his upper front chassis bar due to my Dali Racing “two scoops” hood. After taking several measurements and talking with Cody about the space needed to clear the bar we deemed it should fit just fine. I placed the additional order.
The waiting game…

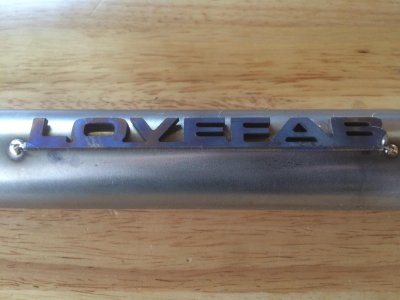
Finally my parts arrived! My Mother always told me not to judge a present by the box it comes in; boy was she right on.
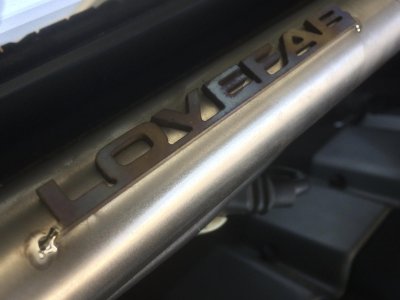
These parts are works of art. So pretty that I felt like displaying them on my wall instead of relinquishing them to a life hidden underneath the NSX’s aluminum bodywork, but my car isn’t a show NSX….so these parts have a job to do!


Installation:
With very few exceptions, chassis bracing offered for the NSX has been multi-piece. Cody’s simplistic approach offers more function and better fitment than most anything I have seen installed on the market. If you are looking to install these bars you may be convinced that some of these parts just don’t fit, but rest assured that they DO…it’s just a VERY precise fit.
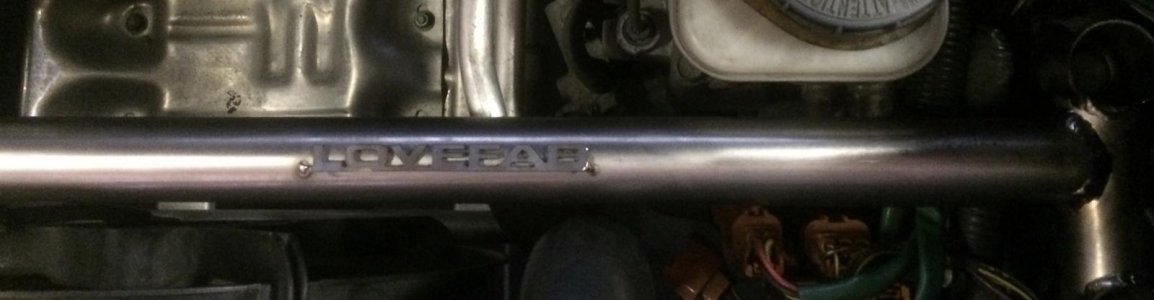
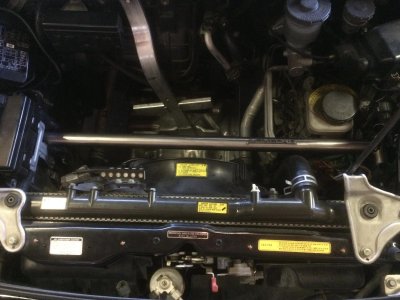
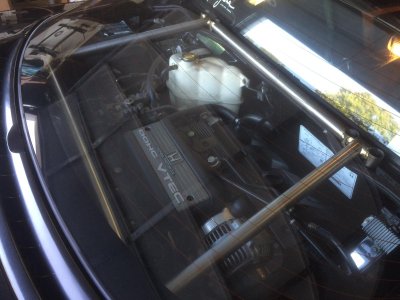
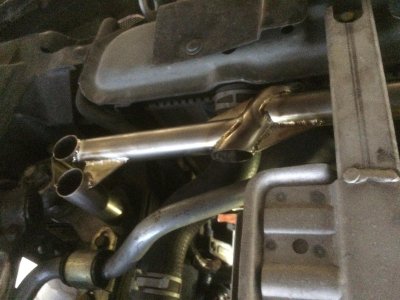
Front Upper Bar:
The first bar I wanted to install was the one I was most anxious about. Would the measurements that Cody and I took lead to a real-world success?
The front bar installation begins with removal of the fuse box that resides near the passenger headlight. This is the only thing I had in my car that interfered with installing the bar. I then removed the four M10 bolts from the frame rail that would end up securing the bar into place.
Finagling the bar into position was tricky to say the least, but patience pays off. If you’re installing this bar yourself then I would highly recommend that you only start a few threads on each individual bolt before applying any torque to them, the tiny amount of wiggle room that this provides is invaluable.
After torquing the M10 frame bolts and placing the fuse box back in its proper spot this installation was over.

The moment of truth came when I attempted to close the hood….

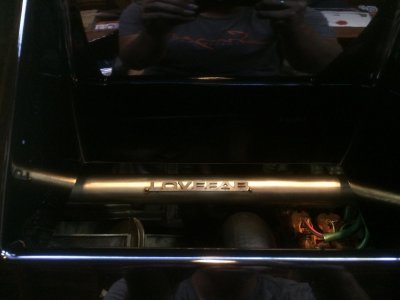
It fit perfectly! not only is there plenty of space between the hood and bar (as Cody said there would be), but the measurement we made for the “LoveFab” emblem was spot on in the center of the driver’s side vent in my hood, I could not have been more impressed with Cody for the quality of detail in his work on something hundreds of miles away that he has never seen.

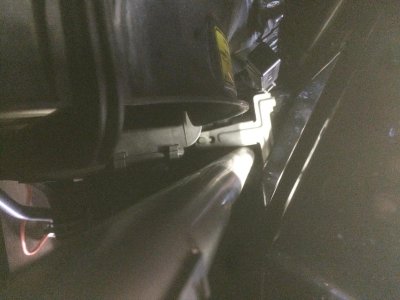
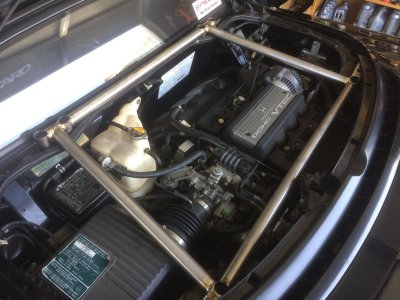
Rear Coupe Four Point Brace:
This brace was much more work to install than I had originally anticipated, not that the install was difficult per se it just took a higher level of thinking to install than appears on the surface.
The first step was to remove the engine bay vent (black plastic that surrounds the rear hatch glass), several phillips screws later that was out of the way, leaving just the factory strut bar in the way between me and my functional engine bay “bling”.
The OEM strut bar is secured by some M8 nuts that double to hold the shock/springs, remove these and loosen the M8 bolts located on the strut bar itself and chuck that Honda piece in the “good for OEM, but not good enough to stay on my car” pile.
Putting the brace on now will lead most to think that Cody’s jig is a few millimeters off…don’t freak out, this is where things get really impressive.
***Tricky Part*** Now, break out your floor jack and raise the car (use jack stands). Once the rear of the car is in the air loosen the last bolt on one of the shock towers, but don’t take it completely off. Lower the shock assembly (I stood on my wheel to articulate the suspension, but whatever works for you) until it is almost flush and you should be able to get the brace into position.
As with the front brace, only start the bolts/nuts a few threads and you may need to apply a light amount of torque to center the two front M6 bolts to allow for hand threading of the hardware. Once all bolts and nuts have been started, torque to factory spec.
If you’re lucky enough to have bought the four point brace and patient enough to have read this whole brick of text you can now enjoy the extra rigidity that the LoveFab bar allows after putting everything back the way it came out.


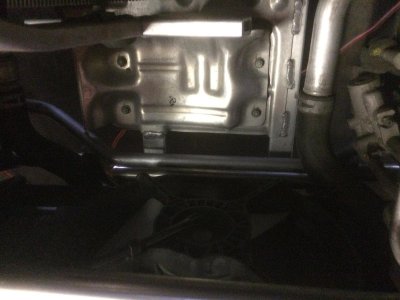
Front Lower Beam Brace
This bar was the quickest and easiest to install of the three. With the car raised, remove the spare tire holder (if installed), the four M10 bolts that locate the LoveFab bar to the frame rail, and the front four M8 bolts that secure the battery tray to the chassis, then loosen the remaining two M8 bolts that are holding the battery tray to the car. You should be able to create a large enough space between the chassis and the now detached battery tray.
Carefully slip the LoveFab bar between the battery tray and chassis, align the holes, and hand-thread the M10 bolts back into place. Torque frame rail bolts to factory spec and put everything back the way it was and you’re done!

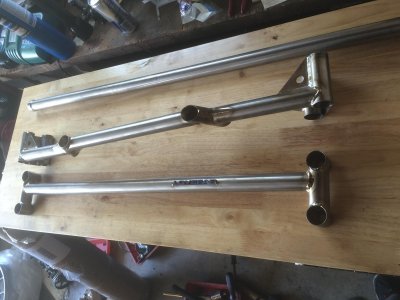
Passenger side

Driver's side

Top view (from above)
Driving Impression:
My initial impression of the bars was during the Lake Arrowhead NSX drive (See SoCal section of Prime). The tight mountain roads and high speed sweepers informed me quickly that the purchase of LoveFab’s chassis reinforcement package was a wise investment; my NSX is even more in tune with my steering inputs. Switchback turns posed no issue for my car as the front end felt incredibly solid and maneuverable over stock.
Not often do I find that an aftermarket piece adds performance benefits without costing some type of drivability. Cody may have struck gold with these pieces; I did not notice any change in ride quality with the LoveFab bars installed, my NSX traversed the highway with as much poise as I can remember.
The benefit from the rear coupe brace was not as immediately noticeable as the front during my canyon drive. I feel that this could be for several reasons, but what I can say for sure is that I wasn’t going that fast during the group drive (despite what some prime members may say), my tires weren’t very sticky, and I wasn’t able to experience the same few turns repeatedly for an accurate comparison. I believe that the coupe four point brace is a great and functional piece, but I have not been somewhere under controlled circumstances to give an in-depth impression. I will be more able to list the rear brace’s benefits from a heavy track weekend. Stay tuned for that update when it comes.
One drawback to the rear four point brace is maintenance, in order to do routine maintenance that requires removal of the valve covers (or similar type of labor) will now require you to remove the brace before, adding time to the procedure. That said, it is a small price to pay for the bar.
Conclusion:
What’s the verdict? If you’re in the market for a product that fits great, improves handling, and doesn’t hinder drivability, you should consider the LoveFab chassis reinforcement bars. The bonus to everything is that Cody made these out of my favorite metal, titanium, they weigh virtually nothing compared to their chromoly counterparts AND I got tons of comments and people wanting to see the bars during the drive (lots of “oh’s and ah’s” followed). These titanium chassis bars are amazing, to put it simply.
Purchase:
I purchased titanium versions of Cody’s chassis braces because I love my NSX more than I hate my wallet. The buying process could not have been easier, I posted on Prime, called Cody, and made my payment. Cody was available for any and all questions I had regarding the braces throughout the entire process from purchase to delivery.
My original order was for the coupe rear four point and front lower chassis brace. I was not sure I would be able to run his upper front chassis bar due to my Dali Racing “two scoops” hood. After taking several measurements and talking with Cody about the space needed to clear the bar we deemed it should fit just fine. I placed the additional order.
The waiting game…
Finally my parts arrived! My Mother always told me not to judge a present by the box it comes in; boy was she right on.
These parts are works of art. So pretty that I felt like displaying them on my wall instead of relinquishing them to a life hidden underneath the NSX’s aluminum bodywork, but my car isn’t a show NSX….so these parts have a job to do!
Installation:
With very few exceptions, chassis bracing offered for the NSX has been multi-piece. Cody’s simplistic approach offers more function and better fitment than most anything I have seen installed on the market. If you are looking to install these bars you may be convinced that some of these parts just don’t fit, but rest assured that they DO…it’s just a VERY precise fit.
Front Upper Bar:
The first bar I wanted to install was the one I was most anxious about. Would the measurements that Cody and I took lead to a real-world success?
The front bar installation begins with removal of the fuse box that resides near the passenger headlight. This is the only thing I had in my car that interfered with installing the bar. I then removed the four M10 bolts from the frame rail that would end up securing the bar into place.
Finagling the bar into position was tricky to say the least, but patience pays off. If you’re installing this bar yourself then I would highly recommend that you only start a few threads on each individual bolt before applying any torque to them, the tiny amount of wiggle room that this provides is invaluable.
After torquing the M10 frame bolts and placing the fuse box back in its proper spot this installation was over.
The moment of truth came when I attempted to close the hood….
It fit perfectly! not only is there plenty of space between the hood and bar (as Cody said there would be), but the measurement we made for the “LoveFab” emblem was spot on in the center of the driver’s side vent in my hood, I could not have been more impressed with Cody for the quality of detail in his work on something hundreds of miles away that he has never seen.
Rear Coupe Four Point Brace:
This brace was much more work to install than I had originally anticipated, not that the install was difficult per se it just took a higher level of thinking to install than appears on the surface.
The first step was to remove the engine bay vent (black plastic that surrounds the rear hatch glass), several phillips screws later that was out of the way, leaving just the factory strut bar in the way between me and my functional engine bay “bling”.
The OEM strut bar is secured by some M8 nuts that double to hold the shock/springs, remove these and loosen the M8 bolts located on the strut bar itself and chuck that Honda piece in the “good for OEM, but not good enough to stay on my car” pile.
Putting the brace on now will lead most to think that Cody’s jig is a few millimeters off…don’t freak out, this is where things get really impressive.
***Tricky Part*** Now, break out your floor jack and raise the car (use jack stands). Once the rear of the car is in the air loosen the last bolt on one of the shock towers, but don’t take it completely off. Lower the shock assembly (I stood on my wheel to articulate the suspension, but whatever works for you) until it is almost flush and you should be able to get the brace into position.
As with the front brace, only start the bolts/nuts a few threads and you may need to apply a light amount of torque to center the two front M6 bolts to allow for hand threading of the hardware. Once all bolts and nuts have been started, torque to factory spec.
If you’re lucky enough to have bought the four point brace and patient enough to have read this whole brick of text you can now enjoy the extra rigidity that the LoveFab bar allows after putting everything back the way it came out.
Front Lower Beam Brace
This bar was the quickest and easiest to install of the three. With the car raised, remove the spare tire holder (if installed), the four M10 bolts that locate the LoveFab bar to the frame rail, and the front four M8 bolts that secure the battery tray to the chassis, then loosen the remaining two M8 bolts that are holding the battery tray to the car. You should be able to create a large enough space between the chassis and the now detached battery tray.
Carefully slip the LoveFab bar between the battery tray and chassis, align the holes, and hand-thread the M10 bolts back into place. Torque frame rail bolts to factory spec and put everything back the way it was and you’re done!
Passenger side
Driver's side
Top view (from above)
Driving Impression:
My initial impression of the bars was during the Lake Arrowhead NSX drive (See SoCal section of Prime). The tight mountain roads and high speed sweepers informed me quickly that the purchase of LoveFab’s chassis reinforcement package was a wise investment; my NSX is even more in tune with my steering inputs. Switchback turns posed no issue for my car as the front end felt incredibly solid and maneuverable over stock.
Not often do I find that an aftermarket piece adds performance benefits without costing some type of drivability. Cody may have struck gold with these pieces; I did not notice any change in ride quality with the LoveFab bars installed, my NSX traversed the highway with as much poise as I can remember.
The benefit from the rear coupe brace was not as immediately noticeable as the front during my canyon drive. I feel that this could be for several reasons, but what I can say for sure is that I wasn’t going that fast during the group drive (despite what some prime members may say), my tires weren’t very sticky, and I wasn’t able to experience the same few turns repeatedly for an accurate comparison. I believe that the coupe four point brace is a great and functional piece, but I have not been somewhere under controlled circumstances to give an in-depth impression. I will be more able to list the rear brace’s benefits from a heavy track weekend. Stay tuned for that update when it comes.
One drawback to the rear four point brace is maintenance, in order to do routine maintenance that requires removal of the valve covers (or similar type of labor) will now require you to remove the brace before, adding time to the procedure. That said, it is a small price to pay for the bar.
Conclusion:
What’s the verdict? If you’re in the market for a product that fits great, improves handling, and doesn’t hinder drivability, you should consider the LoveFab chassis reinforcement bars. The bonus to everything is that Cody made these out of my favorite metal, titanium, they weigh virtually nothing compared to their chromoly counterparts AND I got tons of comments and people wanting to see the bars during the drive (lots of “oh’s and ah’s” followed). These titanium chassis bars are amazing, to put it simply.
Attachments
-
 IMG_3076.jpg189 KB · Views: 688
 -
 IMG_3077.jpg133.1 KB · Views: 668
 -
 IMG_3078.jpg168.8 KB · Views: 704
 -
 IMG_3087.jpg57.7 KB · Views: 251
 -
 IMG_3088.jpg99.7 KB · Views: 673
 -
 IMG_3085.jpg183.8 KB · Views: 676
 -
 IMG_3101.jpg212.8 KB · Views: 670
 -
 IMG_3079.jpg210.7 KB · Views: 665
 -
 IMG_3105.jpg178.5 KB · Views: 668
 -
 IMG_3092.jpg239.4 KB · Views: 658
 -
 IMG_3095.jpg237.4 KB · Views: 660
 -
 IMG_3099.jpg178.5 KB · Views: 663
 -
 IMG_3083.jpg100.1 KB · Views: 663