-
Protip: Profile posts are public! Use Conversations to message other members privately. Everyone can see the content of a profile post.
You are using an out of date browser. It may not display this or other websites correctly.
You should upgrade or use an alternative browser.
You should upgrade or use an alternative browser.
NSX Chassis brace, rear tunnel Dali Racing
- Thread starter titaniumdave
- Start date
Can you feel any notable differences with the addition of this brace? Sorry for dumb question.
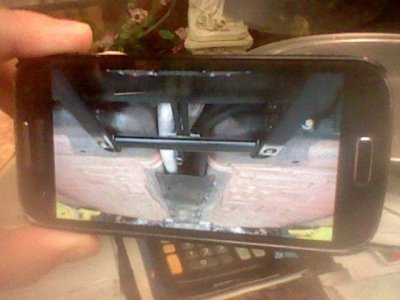
I just installed the brace. As usual, top quality stuff from Dave (I think I'm collecting every item he's making for my NSX lol). The only issue was that I had to slightly enlarge the holes because one of the chassis bolts was catching on the edge of the hole. But overall very easy installation. On my NA2, there's already a small cross beam but it's very small and thin, I can almost bend it with my bare hands. So you take that one off and put on the Dave's real brace. You'll also have to disconnect and remove a clamp on the OEM cross beam.
So I have a T-top, and from the factory it's soft as a noodle when I take the top off (I saw the entire dash flex the first time I took it out my driveway). So I have pretty much every brace ever made on my car, short of a cage. Do I feel a difference? Maybe a little more "solid" or "direct" feel when I have the top on. With the top off, there's actually some more shakes when going over rough road or expansion joints, probably because all the bracing has amplified the weakest point: the lack of the roof. However, if the road is smooth, it feels again more direct (could very well be placebo though).
Thanks for the feedback, we made a running change to the holes so the last stainless steel bars have a 2 mm bigger hole. There was enough variation in manufacturing tolerance a few folks found the holes were tight, easy to mod the part with a few strokes of a file, but better if you don’t have too. Plenty of parts in stock if anyone needs one.
Dave
Dave
I bought one from Dave recently but haven't installed it yet. Dave always is more than helpful when I've called him. I've bought probably 5-10 parts for my NSX that he makes.
- Joined
- 12 January 2017
- Messages
- 281
Money sent boss
Sent from my SM-G950U using Tapatalk
Sent from my SM-G950U using Tapatalk
- Joined
- 12 January 2017
- Messages
- 281
Do you need addresd
Sent from my SM-G950U using Tapatalk
Sent from my SM-G950U using Tapatalk
Dave any update on the progress of the engine compartment/shock tower brace you are/were working on?
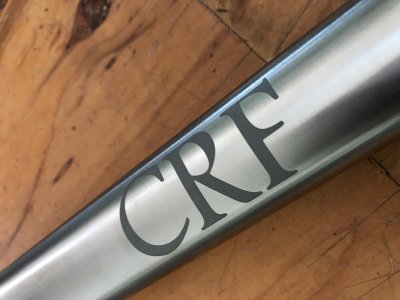
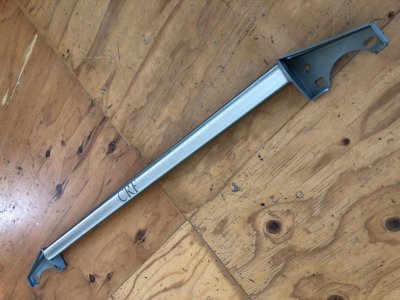
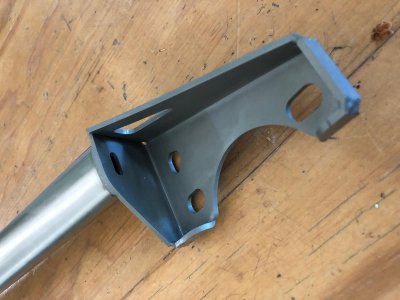
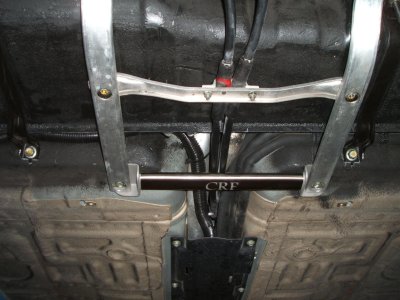
The first one are finally done! Coupe chassis braces made with stiff stainless steel tube and brackets. These came in at 3 lb. so very light for how stiff they are. Only use 2 nuts (like OEM) for attachment so easy to remove for service and you don't need to mess with the hidden nut that is so far out of the way...
I made couple of these to make sure the fixture is set up correctly and they are great.
$400 for one of these so grab them while they are in stock! PM if you want one.
Next up will be the Targa CT supercharger brace...much tougher nut to crack but they are no longer being made so I will step up.
Dave do you have any pictures of it installed?
Sent from my iPhone using Tapatalk
Sent from my iPhone using Tapatalk
I will get a pic this week, hopefully Thursday eve!
Recently installed one of the bars. Can't comment yet if it makes a noticeable difference yet.View attachment 154761
I looks great, isn't that enough?:wink:
Recently installed one of the bars. Can't comment yet if it makes a noticeable difference yet.View attachment 154761
Stallion, it looks like you re-installed the middle clamp on top...curious how did you end up connecting it to the tunnel brace?
The tunnel brace goes between the aluminum gas tank opening reinforcements and the body. The brace is sandwiched in between and this locks it in place.
So the OEM bar that we're replacing has a bracket (see below) that secures the shift cables and it looks like in Stallion's pic that he reinstalled the bracket. I was just wondering if he drilled into the tunnel brace or did something else? Do most people just let the shift cables float right there? I know that at the next cross bar towards the rear there's another set of brackets to secure the cables in place...is that considered sufficient? Here's a pic to better explain...


Folks have been letting the cables float, the second clamp is enough to keep the cables in place and aligned as well as prevent wear from vibration. It's also possible to sandwich the OEM bracket above the new brace by letting it bow when everything is bolted together.
Last edited:
I just undid the bolts. I also had to undo the two rear bolts so I could align the bar. Not a big deal. Once aligned I tighten the bolts and done. The bracket for the lines didn't move at all.
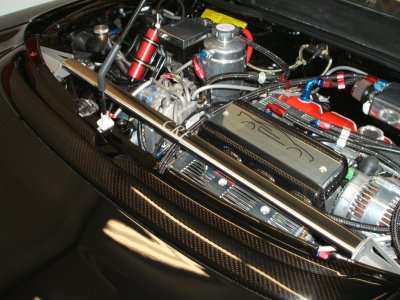
Those look great installed! I just did a couple of the engine braces in black, I'll post pics soon. Standard brace for the engine compartment now has a cut out to clear the OEM engine cover prop rod hinge so they look a bit different.
These look awesome! Can’t wait to get my engine brace installed when I get home from vacation next week.
Not to steal thunder from the thread but which CF rear window garnish and intake manifold cover are these?
Sent from my iPhone using Tapatalk
Blood Stone, your PM box is too full to accept messages...
Hi Dave,
Sorry about that, I cleared some msg, you should be able to PM now. Thanks
Sorry about that, I cleared some msg, you should be able to PM now. Thanks
Blood Stone, your PM box is too full to accept messages...
Hi Dave,
Sorry about that, I cleared some msg, you should be able to PM now. Thanks
PM sent
Similar threads
- Replies
- 29
- Views
- 3K
- Replies
- 4
- Views
- 3K
- Replies
- 12
- Views
- 3K
- Replies
- 0
- Views
- 2K


