• Protip: Profile posts are public! Use Conversations to message other members privately. Everyone can see the content of a profile post.

NSX LED Headlights?

I got the bigger cups for the high beams. Everything looks great now!

What are your suggestions for sizing? A friend is going to print some up for me, but Im not sure if sizing is based on the bulb you get, or if you should just make X and Y sizes to cover all bulb sizes? TIA.
 
You really need to measure the amount you need behind the bulb. This depends on the transformers, etc. These are vented so it is much better than what I had before. Russ is on this thread and he was an invaluable resource.

I believer I used 90mm for the low beams and 105mm for the High Beams. It doesn't matter as long as they fit. There is ample room in the enclosures but the High Beams were getting close.
 
Done! http://www.nsxprime.com/forum/showthread.php/216287-Vented-Dust-Caps-for-LED-Headlights?p=2036244

Thingiverse link: https://www.thingiverse.com/thing:4885847

If you don't have a 3D printer you can freely download the .STL files you need and have it printed at one of the many online 3D printing services.

Thank you very much, Russ! We might need this for the incoming NSX project. Need to finish first the installation of the suspension and bumper from 4Wheelonline onto the Wrangler this week before we can take her in. Gonna try your designs here soon.
 
I had the car out Saturday night and had issues with the right side low beam not coming on for a little while. I decided it was time to replace them. The first set I got from Amazon was no good so I returned them and got these:

Fahren 9006/HB4 LED Headlight Bulbs, 120W 20000 Lumens Bright LED Headlights, 6500K Cool White LED Headlight Conversion Kit IP68 Waterproof, Quick Installation, Pack of 2

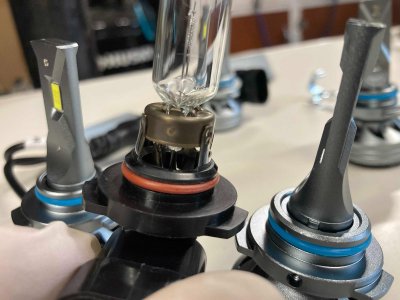
There was a question about what to do with the clips that hold the headlights in. These have an allen wrench and a small retaining bolt that you can loosen to remove the light clip. You can then slide the metal retaining clip over the bulb and then put the light clip back.

My low beams have the 90mm cups and these fit fine as long as I carefully placed the transformer and cable clip into the cup. I am going to take the car out tonight and try them out. They look a lot brighter than the Brevilles that I had before.
 
My low beams have the 90mm cups and these fit fine as long as I carefully placed the transformer and cable clip into the cup. I am going to take the car out tonight and try them out. They look a lot brighter than the Brevilles that I had before.

Looking forward to a review. My cups are in production now.
 
Just a heads up, those lights have a $30 off coupon you can get applied directly from Amazon. Not sure how long it will last, but $40 is a steal for these.
 
So I just got done doing the install with the lights listed above and things went pretty good. A few things of note:

Tools needed:

Flat head screw driver
Phillips screw driver
Plastic removal tools (ideally)
10mm socket
12mm socket
Light for when you're in the wheel well

1. You have to remove your headlight housings which requires removing your wheel, some wheel arch plastics and the housing. If you have a higher mileage car order some replacement plastic retainer clips as you will likely break some in taking them off.

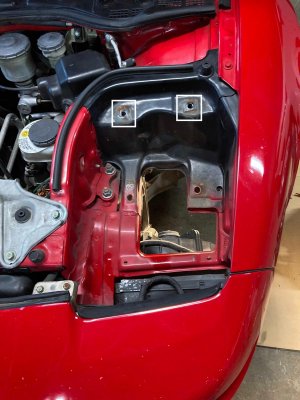
2. Mark the position of your headlight assemblies in relationship to the chassis. I didn't do this and it took about a dozen tries to line up the panel gaps. You're removing the headlight cover, and then separating the headlight frame in two (4 10mm bolts). These all have a slight play to them so using a paint pen or something of the sort might make the re-alignment easier.

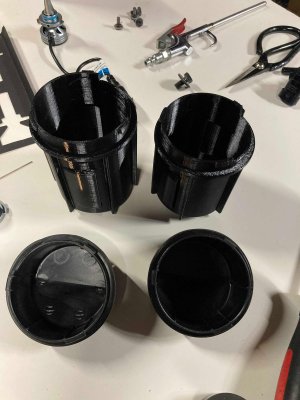
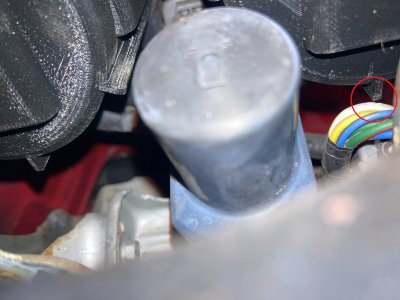
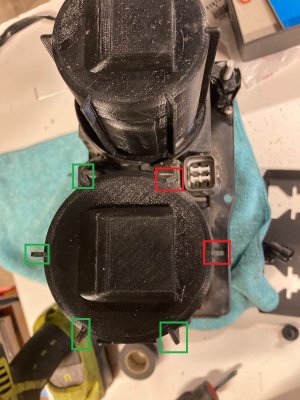
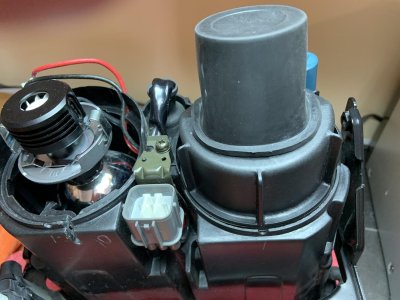
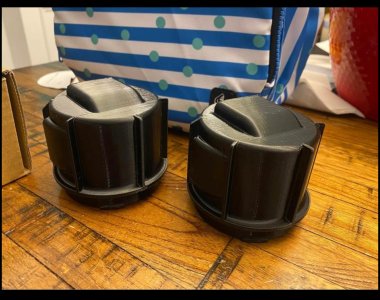
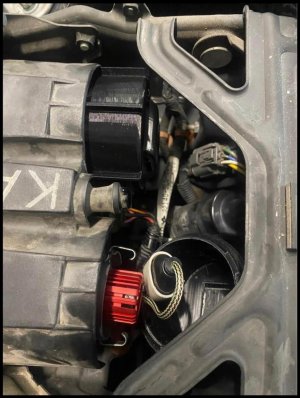
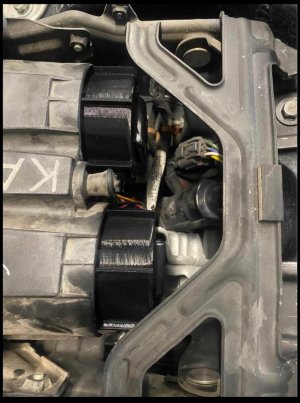
3. If you use the big cups keep an eye out for rubbing. I had to modify my cups on both sides to fit. Bit in the long run it's worth it to use the bigger cups because it's just easier to fit everything in. I used the 90 and 105 cups. In the photos below I highlighted the cup that has an issue (both sides). One fin hit the wiring, and the other hit the motor assembly. I used a dremel to sand mine down to sharp angles on both of the marked fins. The others were ok.

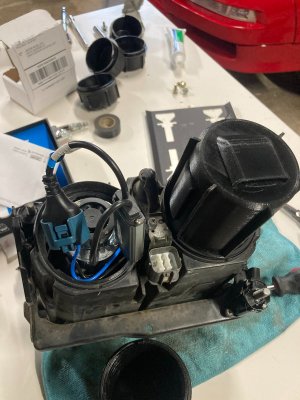
4. Removing the OEM wiring from a small clip in the headlight frame allows for a much easier packaging inside the caps. The clip is fragile though so go slowly.

Pics:

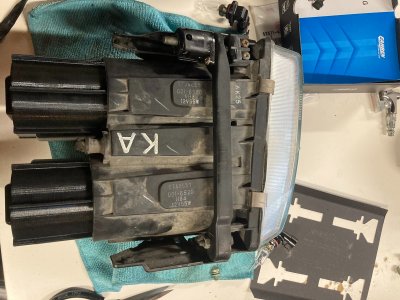
Cup comparison
signal-2021-10-10-175659_006.jpg

Headlight comparison
signal-2021-10-10-175659_009.jpg

Headlight packaging
signal-2021-10-13-082624_016.jpeg

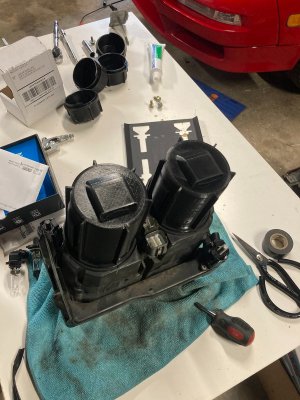
Covers installed
signal-2021-10-13-082624_017.jpeg

signal-2021-10-13-082624_018.jpeg

Trouble spots
signal-2021-10-13-082624_019.jpeg

signal-2021-10-13-082624_023.jpeg

Frame attachments to mark
signal-2021-10-10-175659_007.jpg

I don't have a side view pic, but mark the 4, 10mm bolts on the frame.

Summary:

It takes about 1.5h per side if you know your way around some tools so set aside an afternoon. The second side goes faster for sure, but 3h is a safe bet. The light is much improved, and I do need to adjust my headlights a little I think, but the low beams are just ok. I think were going to struggle with that as were needing to overcome being 2' off the ground and using 80's headlight technology. The high beams are great though. I went for a night drive last night and felt some confidence in the dark for the first time with these lit up. Well worth the time and $, especially if you can get the cups printed for a decent price.

I have a friend who will do them for a very reasonable price if anyone is interested, let me know.
 
This thread got my attention today. [MENTION=4740]Russ[/MENTION], thanks for the great 3D designs! [MENTION=30329]Superhatch[/MENTION], more info on this friend who will print/sell them for reasonable price, please.

Which lengths of these special dust caps, if any, can be installed without removing the headlight housings?

According to the VLEDs website, their Micro Extreme LEDs can safely run behind a dust cap.

When I look at their site (9006/HB4 low beams for 1991 NSX), I see mention of dust cap being OK for the Micro Limited and Micro Evolution, but not the Micro Extreme. But having three different choices (each with a different lumen output) made me wonder which ones to get. Don't want to go too low of output and not have significant improvement over OEM, don't want to go too bright and blind oncoming traffic. Some data...

The car we all know and love, and want to improve...
1991 Acura NSX (low beam) HB4 51W = 1095 lumen
1991 Acura NSX (high beam) HB3 60W = 1700 lumen

I consider the low beams on my 2005 RL to be amazing, and folks say similar about 2002+ NSX...
2005 NSX/RL (low beam) D2S 35W (4300k HID) = 3200 lumen
2005 NSX/RL (high beam) HB3 60W = 1700 lumen

VLEDs Models...
Micro Limited = 2500 lumen ("25W HID equivalent")
Micro Evolution = 3500 lumen ("35W HID equivalent")
Micro Extreme = 4500 lumen ("55W HID equivalent")

Interestingly, I don't believe there is such a thing as 25W or 55W HIDs. HID bulbs are made to run at 35W, but I guess some folks make (or at least market) ballasts with other outputs.

I kept coming across things which effectively said "2513 lumen is limit in CA" - which makes no sense given OEM cars coming with at least 3200. Maybe this is for open reflector style (not projector) headlights? Or just totally incorrect info?

[MENTION=4740]Russ[/MENTION] mentioned a JDM Astar brand, but most the 9006/HB4 stuff of theirs I can find for sale right now seems to be for "fog lights" and has LEDs pointing forward, so not appropriate. I found something similar to what he posted (no fans/heatsink, just OEM connector/form-factor) but it was only 800 lumen.

Then there are the Hikari 2020 [MENTION=18194]Honcho[/MENTION] has which claim 15,000 lumen and the 20,000 lumen option mentioned by [MENTION=31515]Kenwould[/MENTION]. I'm really not sure what to make of these (false advertising, totally irresponsible, something else?).

I think I may order the VLEDS Micro Evolution (5000k color option, 6000k probably too blue) and compare output (in the 1991 NSX headlight housing) to my RL.
 
Last edited:
I think in most cases you want to take the housings out. First, there is a pesky clip that you need to maneuver around the light bulbs. Unlike most cars this clip is what holds the lights into the housing. The lights I bought had an allen screw that when loosened allowed the housing to come apart so that the clip could be installed onto the light. It is also important to make sure to arrange the light transformer and clip in a way to make them fit along with making sure the cups are in place.

I asked Russ to make an even larger cup to make sure there was room for the low beams.
 
This thread got my attention today. ... When I look at their site (9006/HB4 low beams for 1991 NSX), I see mention of dust cap being OK for the Micro Limited and Micro Evolution, but not the Micro Extreme. But having three different choices (each with a different lumen output) made me wonder which ones to get. Don't want to go too low of output and not have significant improvement over OEM, don't want to go too bright and blind oncoming traffic. Some data...

The car we all know and love, and want to improve...
1991 Acura NSX (low beam) HB4 51W = 1095 lumen
1991 Acura NSX (high beam) HB3 60W = 1700 lumen

I consider the low beams on my 2005 RL to be amazing, and folks say similar about 2002+ NSX...
2005 NSX/RL (low beam) D2S 35W (4300k HID) = 3200 lumen
2005 NSX/RL (high beam) HB3 60W = 1700 lumen

VLEDs Models...
Micro Limited = 2500 lumen ("25W HID equivalent")
Micro Evolution = 3500 lumen ("35W HID equivalent")
Micro Extreme = 4500 lumen ("55W HID equivalent")

...

I think I may order the VLEDS Micro Evolution (5000k color option, 6000k probably too blue) and compare output (in the 1991 NSX headlight housing) to my RL.

I went with the VLEDS Micro Extreme in the 5000k colour and mated them with the soft rubber dust boots that VLEDs sells. I have had no problem whatsoever with them overheating the dust boots. The full 18000 lumen when all four are on high beams is impressive. Yet on low beams, they do not blind oncoming drivers. I recommend that you go for the Extremes, I am sure glad that I did.
 
I went with the VLEDS Micro Extreme in the 5000k colour and mated them with the soft rubber dust boots that VLEDs sells. I have had no problem whatsoever with them overheating the dust boots. The full 18000 lumen when all four are on high beams is impressive. Yet on low beams, they do not blind oncoming drivers. I recommend that you go for the Extremes, I am sure glad that I did.

Please check your order receipt (email) for dust boot size, assuming you consider it to be correct sizing for the NSX.
 
Please check your order receipt (email) for dust boot size, assuming you consider it to be correct sizing for the NSX.

Here is a pic:

IMG_3845.jpg

As you can see, there is plenty of room. But I did not put the voltage regulator inside the cap. They are the 55 mm ones.
 
hmmm a bunch of guys talking about cup sizes....where is Hugh?
 
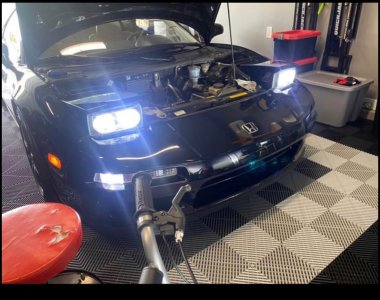
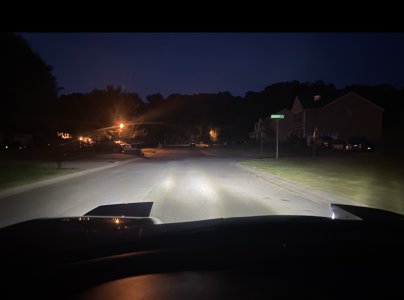
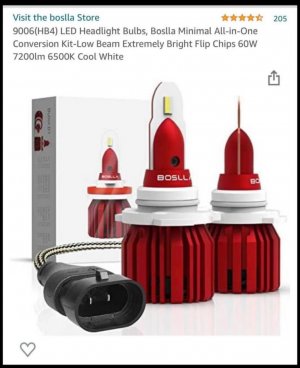
I went ahead and used the same bulbs that I ran across on Richard Graves YouTube Channel. He made a comparison video between Halogens and Boslla 9006/9005 LED Kits. Been using them for months now with great visibility and simple install as well.

I also printed out some Vented caps for myself and so far I have found that the 64mm version fit these bulbs and their harness well, but you can install them without having to remove your headlight assembly completely. You can just flip the headlight cover forward and drop them in and move them into place. A little more finagling if you do both HI and Lo beam but I was still able to position them into place.


IMG_4400.jpg
IMG_4401.jpg

IMG_4402.jpg

IMG_4444.jpg

IMG_4406.jpg

IMG_4404.jpg
 
Last edited:
what material did you print with?
 
FYI, there is another thread in the 3-D printing forum on these caps. If anyone is printing them, I've remixed Russ's design to print in 1/2 the time due to needing almost no supports, and also include options for unvented caps, since VLEDS and Boslla say they're not required, & my own testing did not result in the heatsinks getting that hot.
https://www.thingiverse.com/thing:5270491/files

I also made a thread detailing LED install with ++ picks, if anyone else is considering it. Note that you don't need to remove the retraction mechanism, just the headlight assembly from it. (4 bolts)
http://www.nsxprime.com/forum/showt...New-Headlight-Adjusters?p=2050171#post2050171
 
Last edited:
Back
Top