


Love the wheels Ben. One of my favs!
-
Protip: Profile posts are public! Use Conversations to message other members privately. Everyone can see the content of a profile post.
You are using an out of date browser. It may not display this or other websites correctly.
You should upgrade or use an alternative browser.
You should upgrade or use an alternative browser.
bngl3rt's "Midnight Run" build
- Thread starter bngl3rt
- Start date
- Joined
- 25 February 2012
- Messages
- 2,166
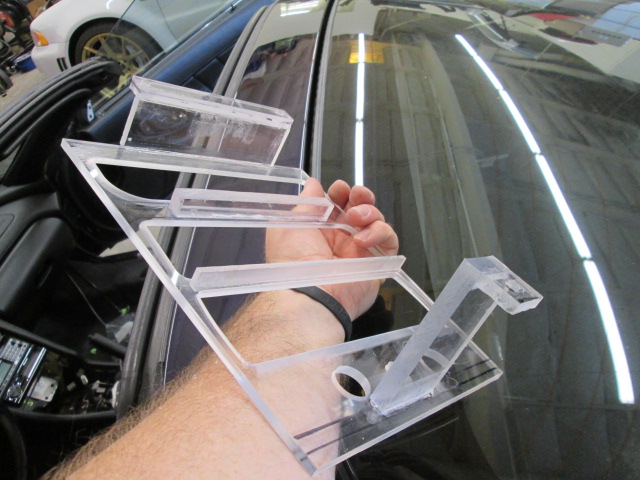
Is that two pieces, so the acrylic ends down at the bottom and then transitions to the lower portion of the OEM console?
Correct. For the rigidity and longevity of the piece in the case that it ever needs to be taken out and put back in again.
If you look at SIS's build log for Kris (Five Fifteen Autobody)'s NSX you'll see that they did substantial reinforcement on his OEM center console. I guess it was decided that mine was too far gone, or not customizable to my needs, so they made a new top section from scratch.
- - - Updated - - -
Love the wheels Ben. One of my favs!
Thanks! They're used and have some imperfections so they are off to powder coating next week to become brand new again.
Ben, which antenna are you using for your scanner? Last week i was stuck using the SRH789 b/c my Larson wouldnt stick to the aluminum body of the R8. Well.. Nabbed over 100 I was annoyed that i picked him up saying how he "got em". Was just out of range of my antenna in the car. Looks like the R8 will be my new rally car for 14/15 year. Just need something that will be able to get good range.
- Joined
- 25 February 2012
- Messages
- 2,166
Ben, which antenna are you using for your scanner? Last week i was stuck using the SRH789 b/c my Larson wouldnt stick to the aluminum body of the R8. Well.. Nabbed over 100 I was annoyed that i picked him up saying how he "got em". Was just out of range of my antenna in the car. Looks like the R8 will be my new rally car for 14/15 year. Just need something that will be able to get good range.
I have the three mobile scanner antennas from DPD productions. My concern is mostly California Highway Patrol and their low-band antenna covers that extremely well.
http://www.dpdproductions.com
- - - Updated - - -
Read lots of good stuff about this one, was planning to pick it up if I ever needed a great multi band:
http://www.scannermaster.com/Austin_Spectra_Mobile_Antenna_p/04-540720.htm
(ignore their price, you can find it for $80)
Last edited:
- Joined
- 25 February 2012
- Messages
- 2,166
Picked up the car from Simplicity in Sound today. Sound quality is amazing. Few small wiring issues to work through that I am sure will get sorted out next week.
They will be posting one of their eye-candy-licious build logs soon I'm sure. For now here is a teaser of the laser interceptor...
They will be posting one of their eye-candy-licious build logs soon I'm sure. For now here is a teaser of the laser interceptor...
- Joined
- 25 February 2012
- Messages
- 2,166
Ok, time for the biiiiig update!
You can follow the discussion here over on the car audio forum if interested: http://www.diymobileaudio.com/forum...construction-basic-sq-build-morel-am-arc.html
I will replicate the build log they wrote here.
You can follow the discussion here over on the car audio forum if interested: http://www.diymobileaudio.com/forum...construction-basic-sq-build-morel-am-arc.html
I will replicate the build log they wrote here.
NSX is a car we have a love/hate relationship with...we love how it looks, and from past experience, we think it actually sounds very good with the right kind of install, but our aging bodies hate it, as it is somewhat of a back breaker to work on and some of the parts in the dash are pretty darn fragile
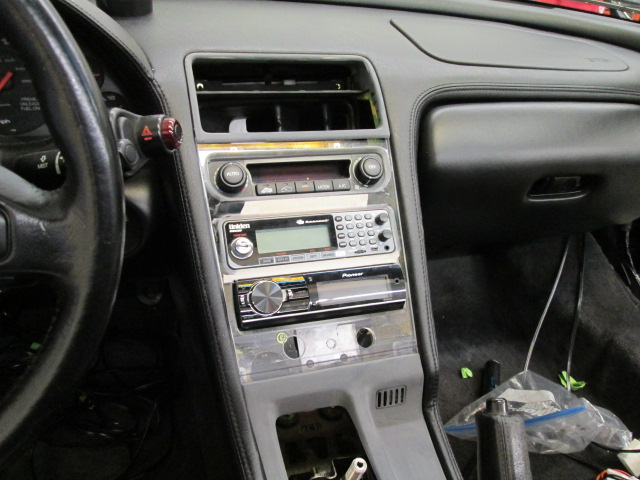
This particular 96 model came to us initially in dire need of a dash rebuild, as the previous attempt at mounting a single din pioneer 80PRS and a mobile police scanner did not work out well. after some discussions, it is decided a very simple two way active system with be part of the deal as well, with processing provided by the already existent 80PRS.
goals:
1. repair broken stock dash panel and integrate already existing equipment
2. achieve a nice level of sonic performance with all equipment located in the cabin
3. keep all equipment and installation as hidden as possible
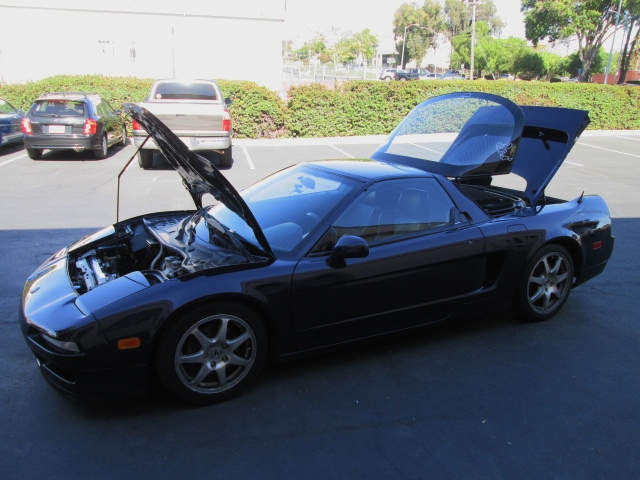
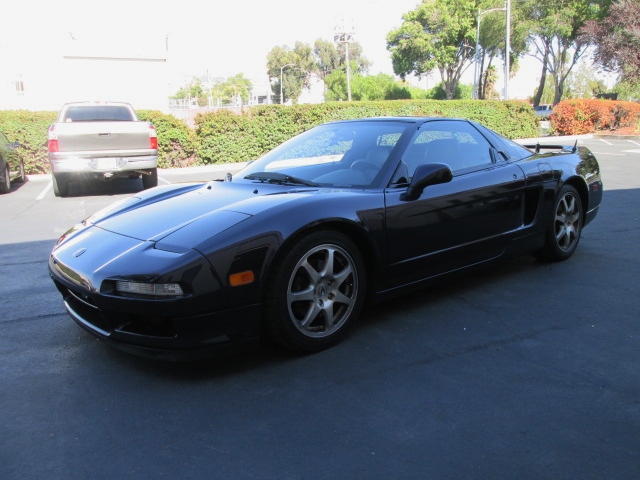
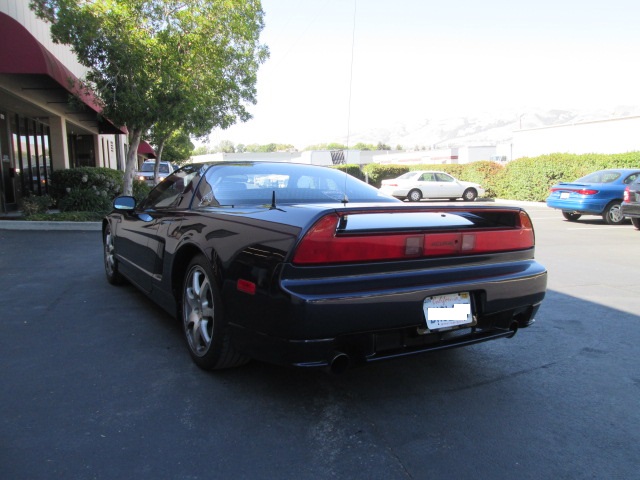
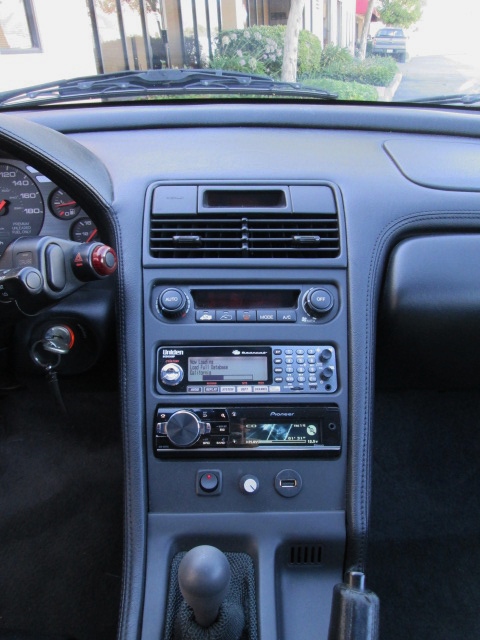
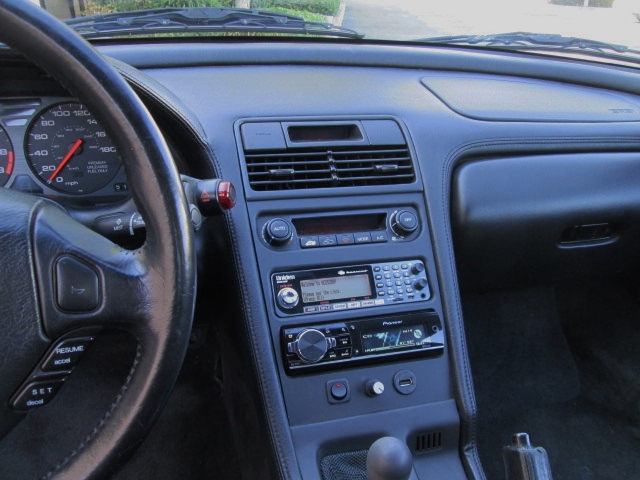
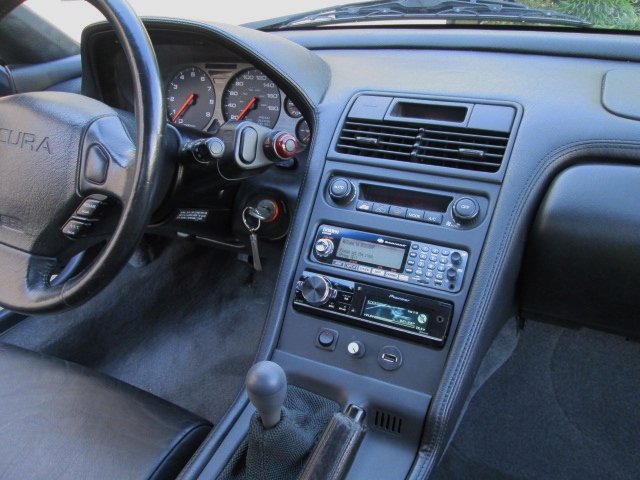
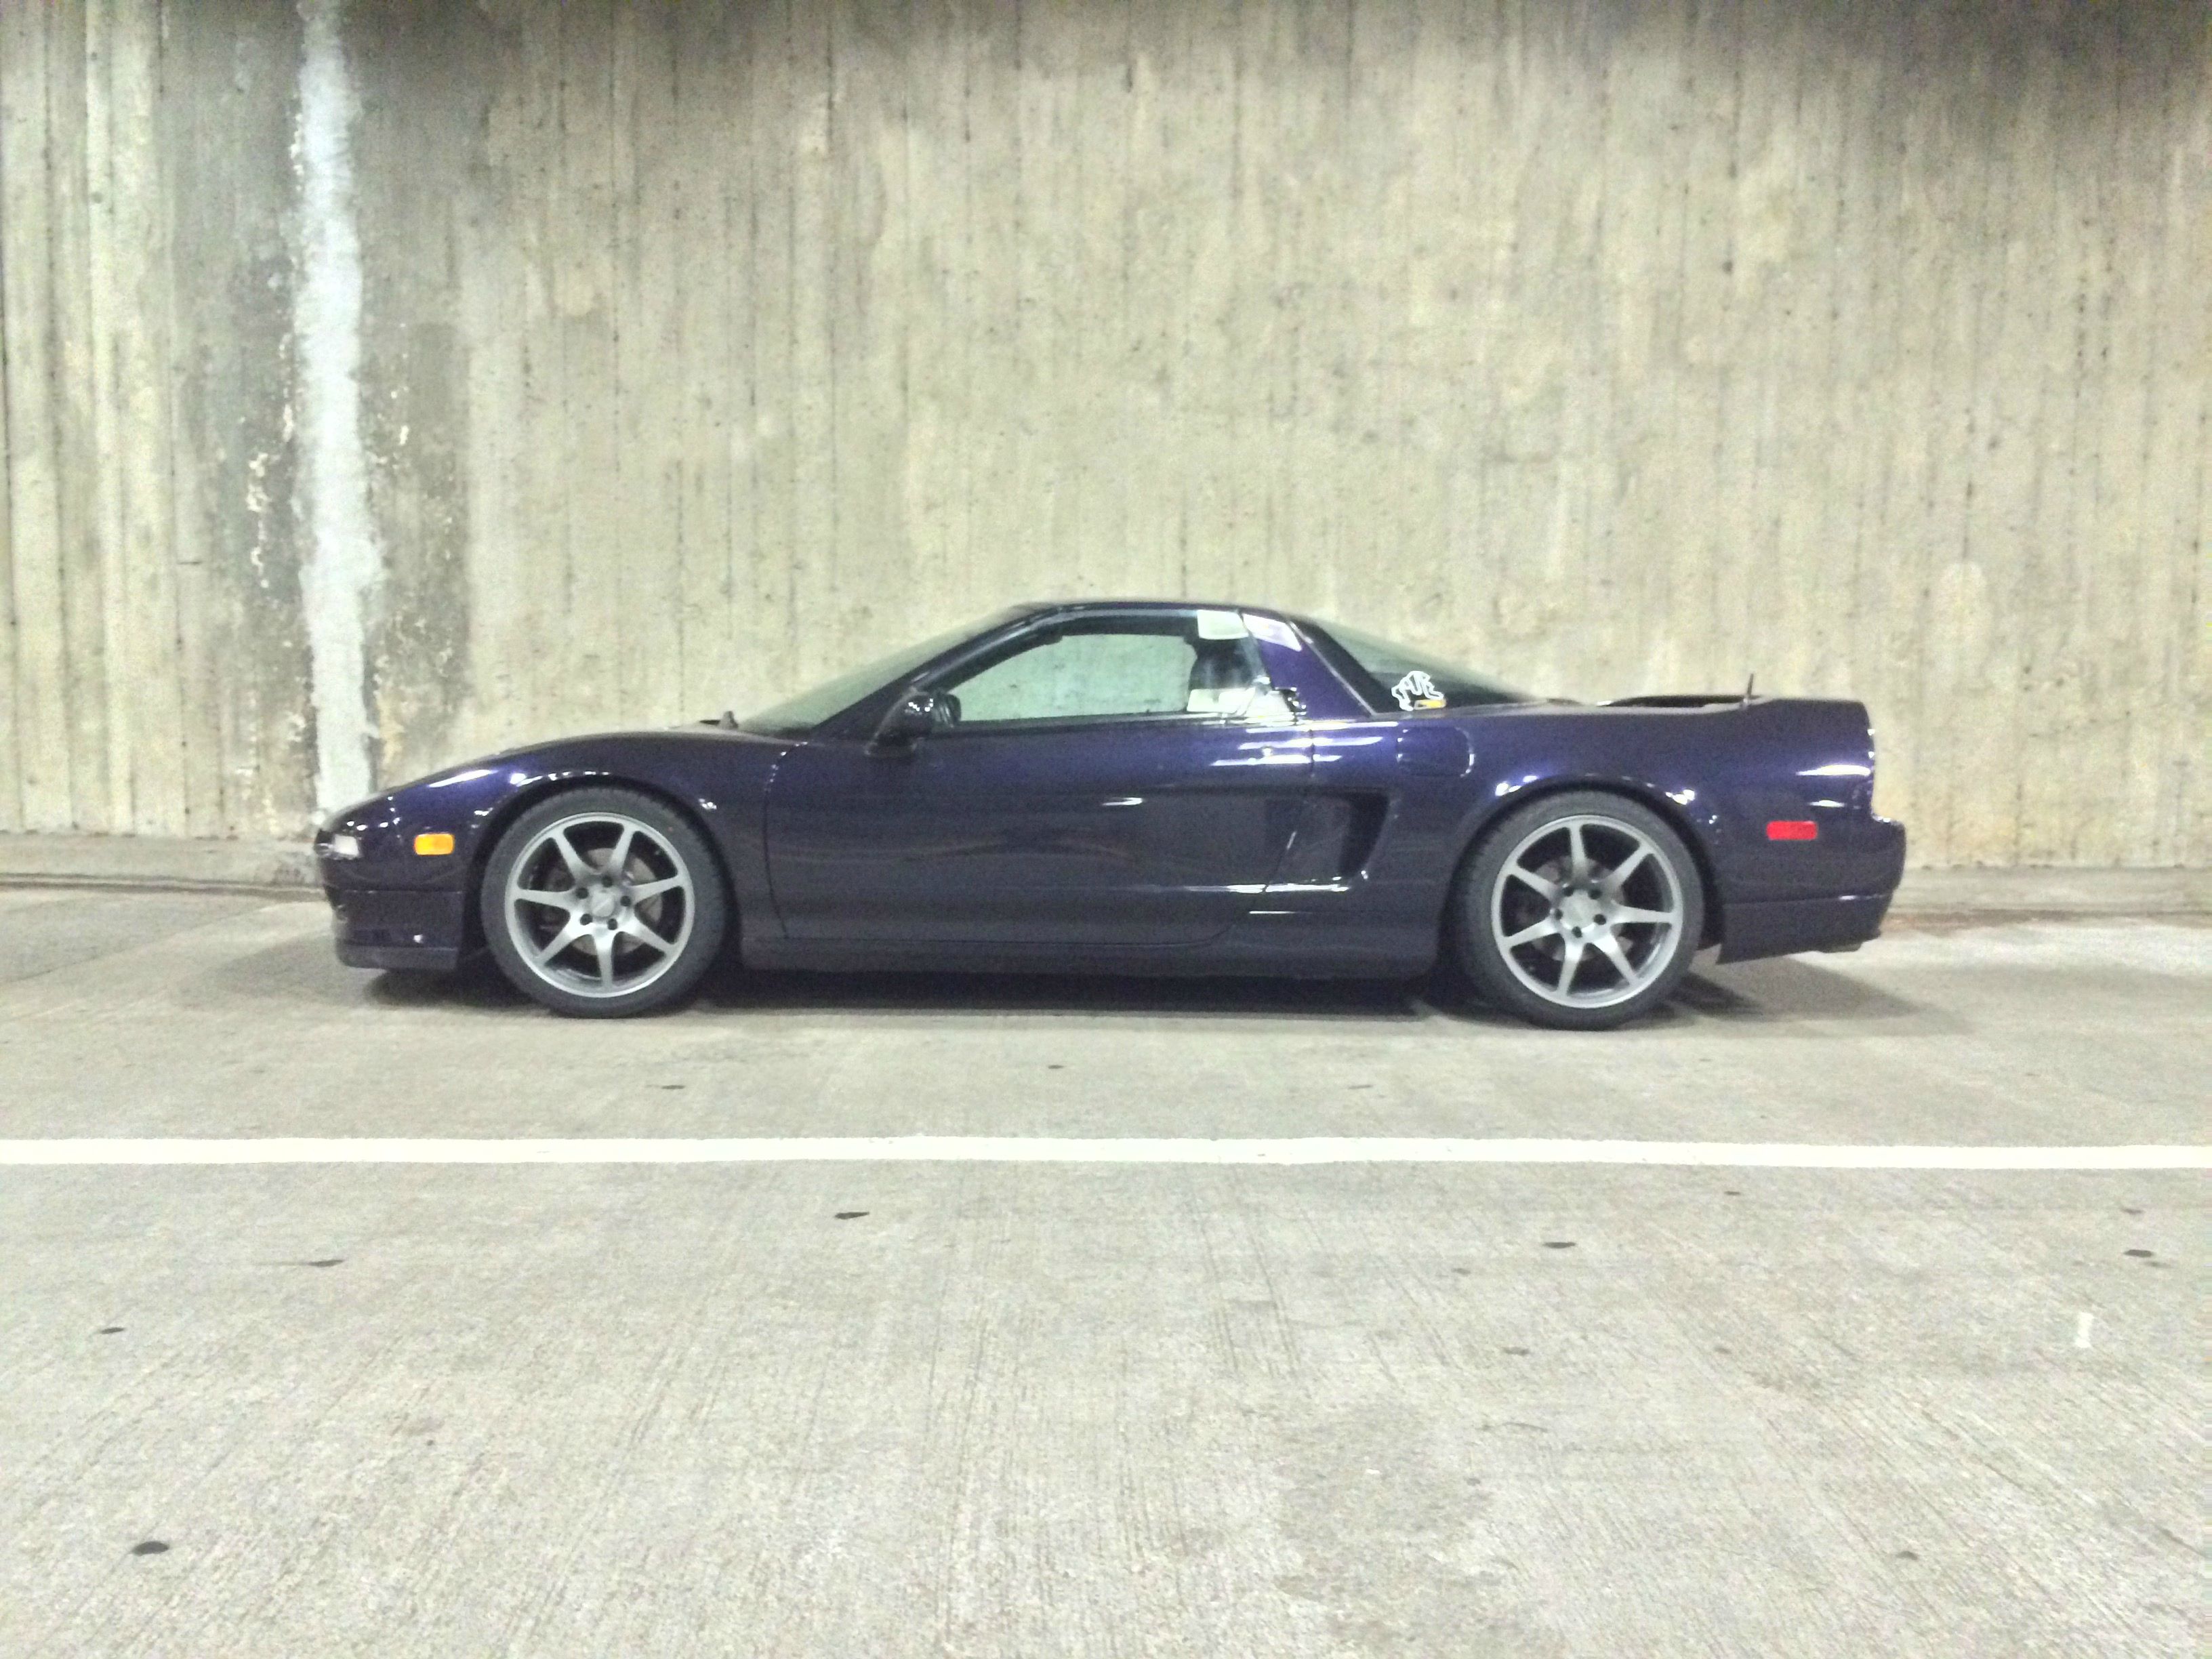
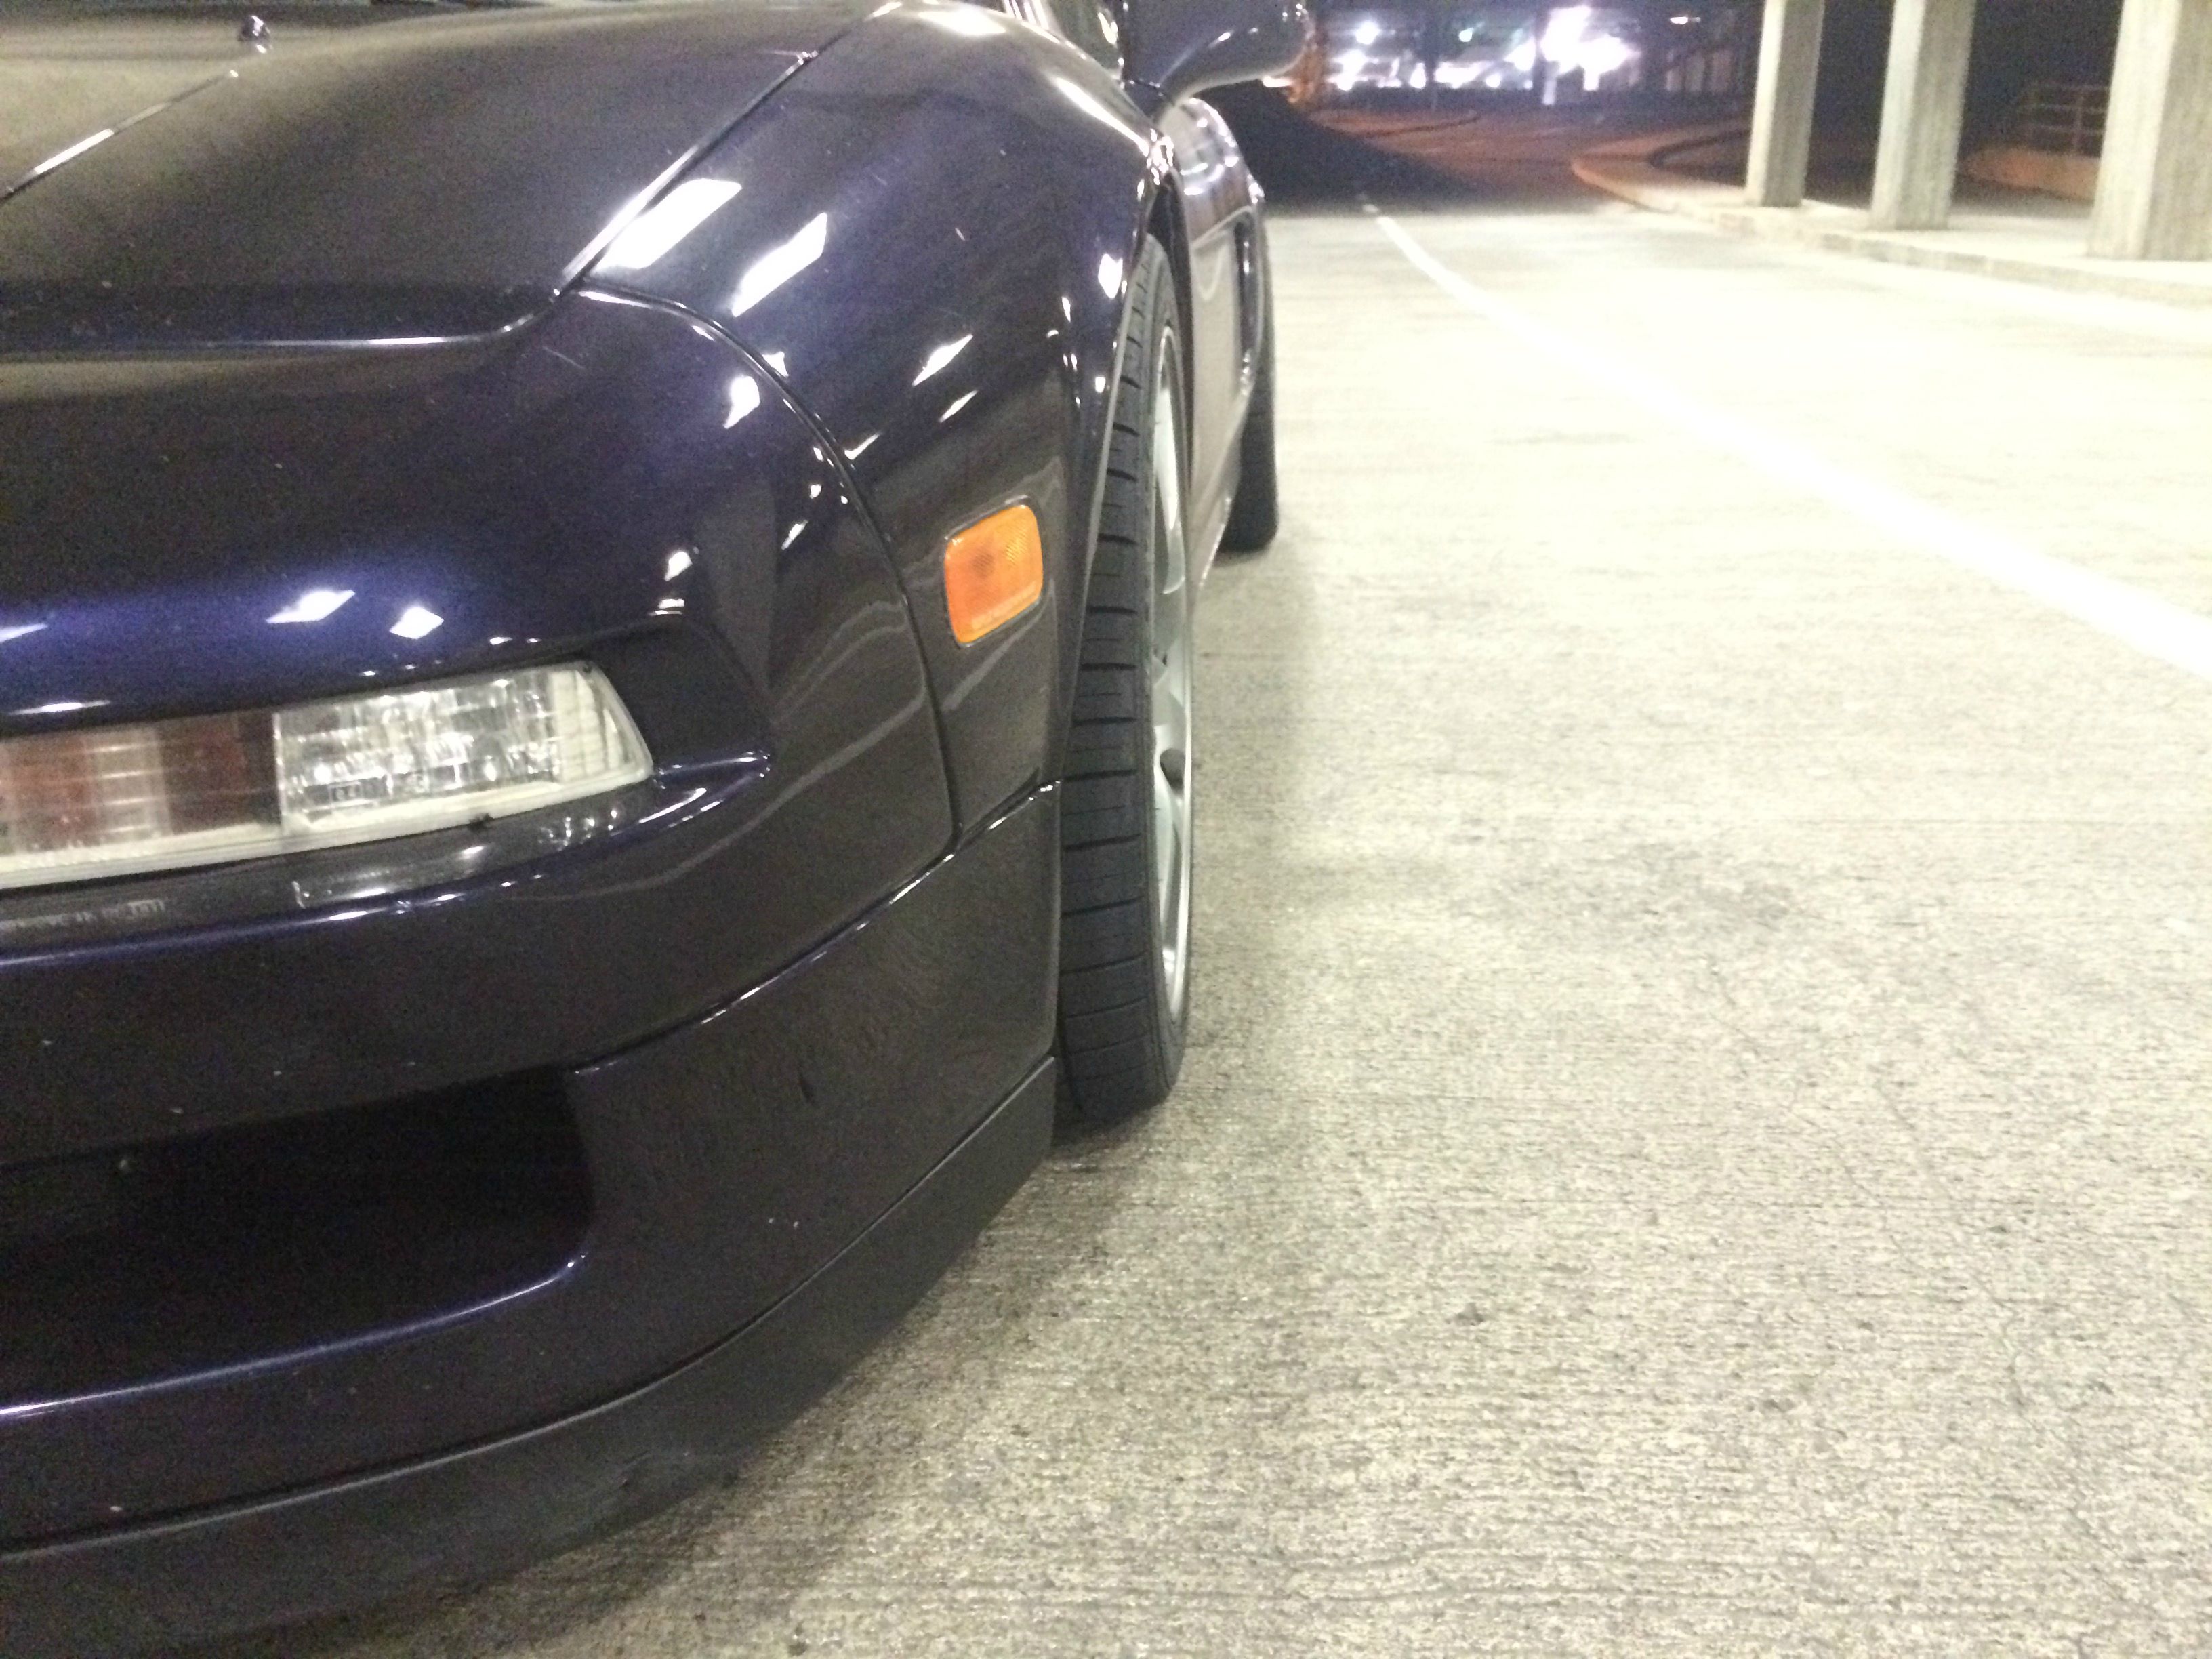
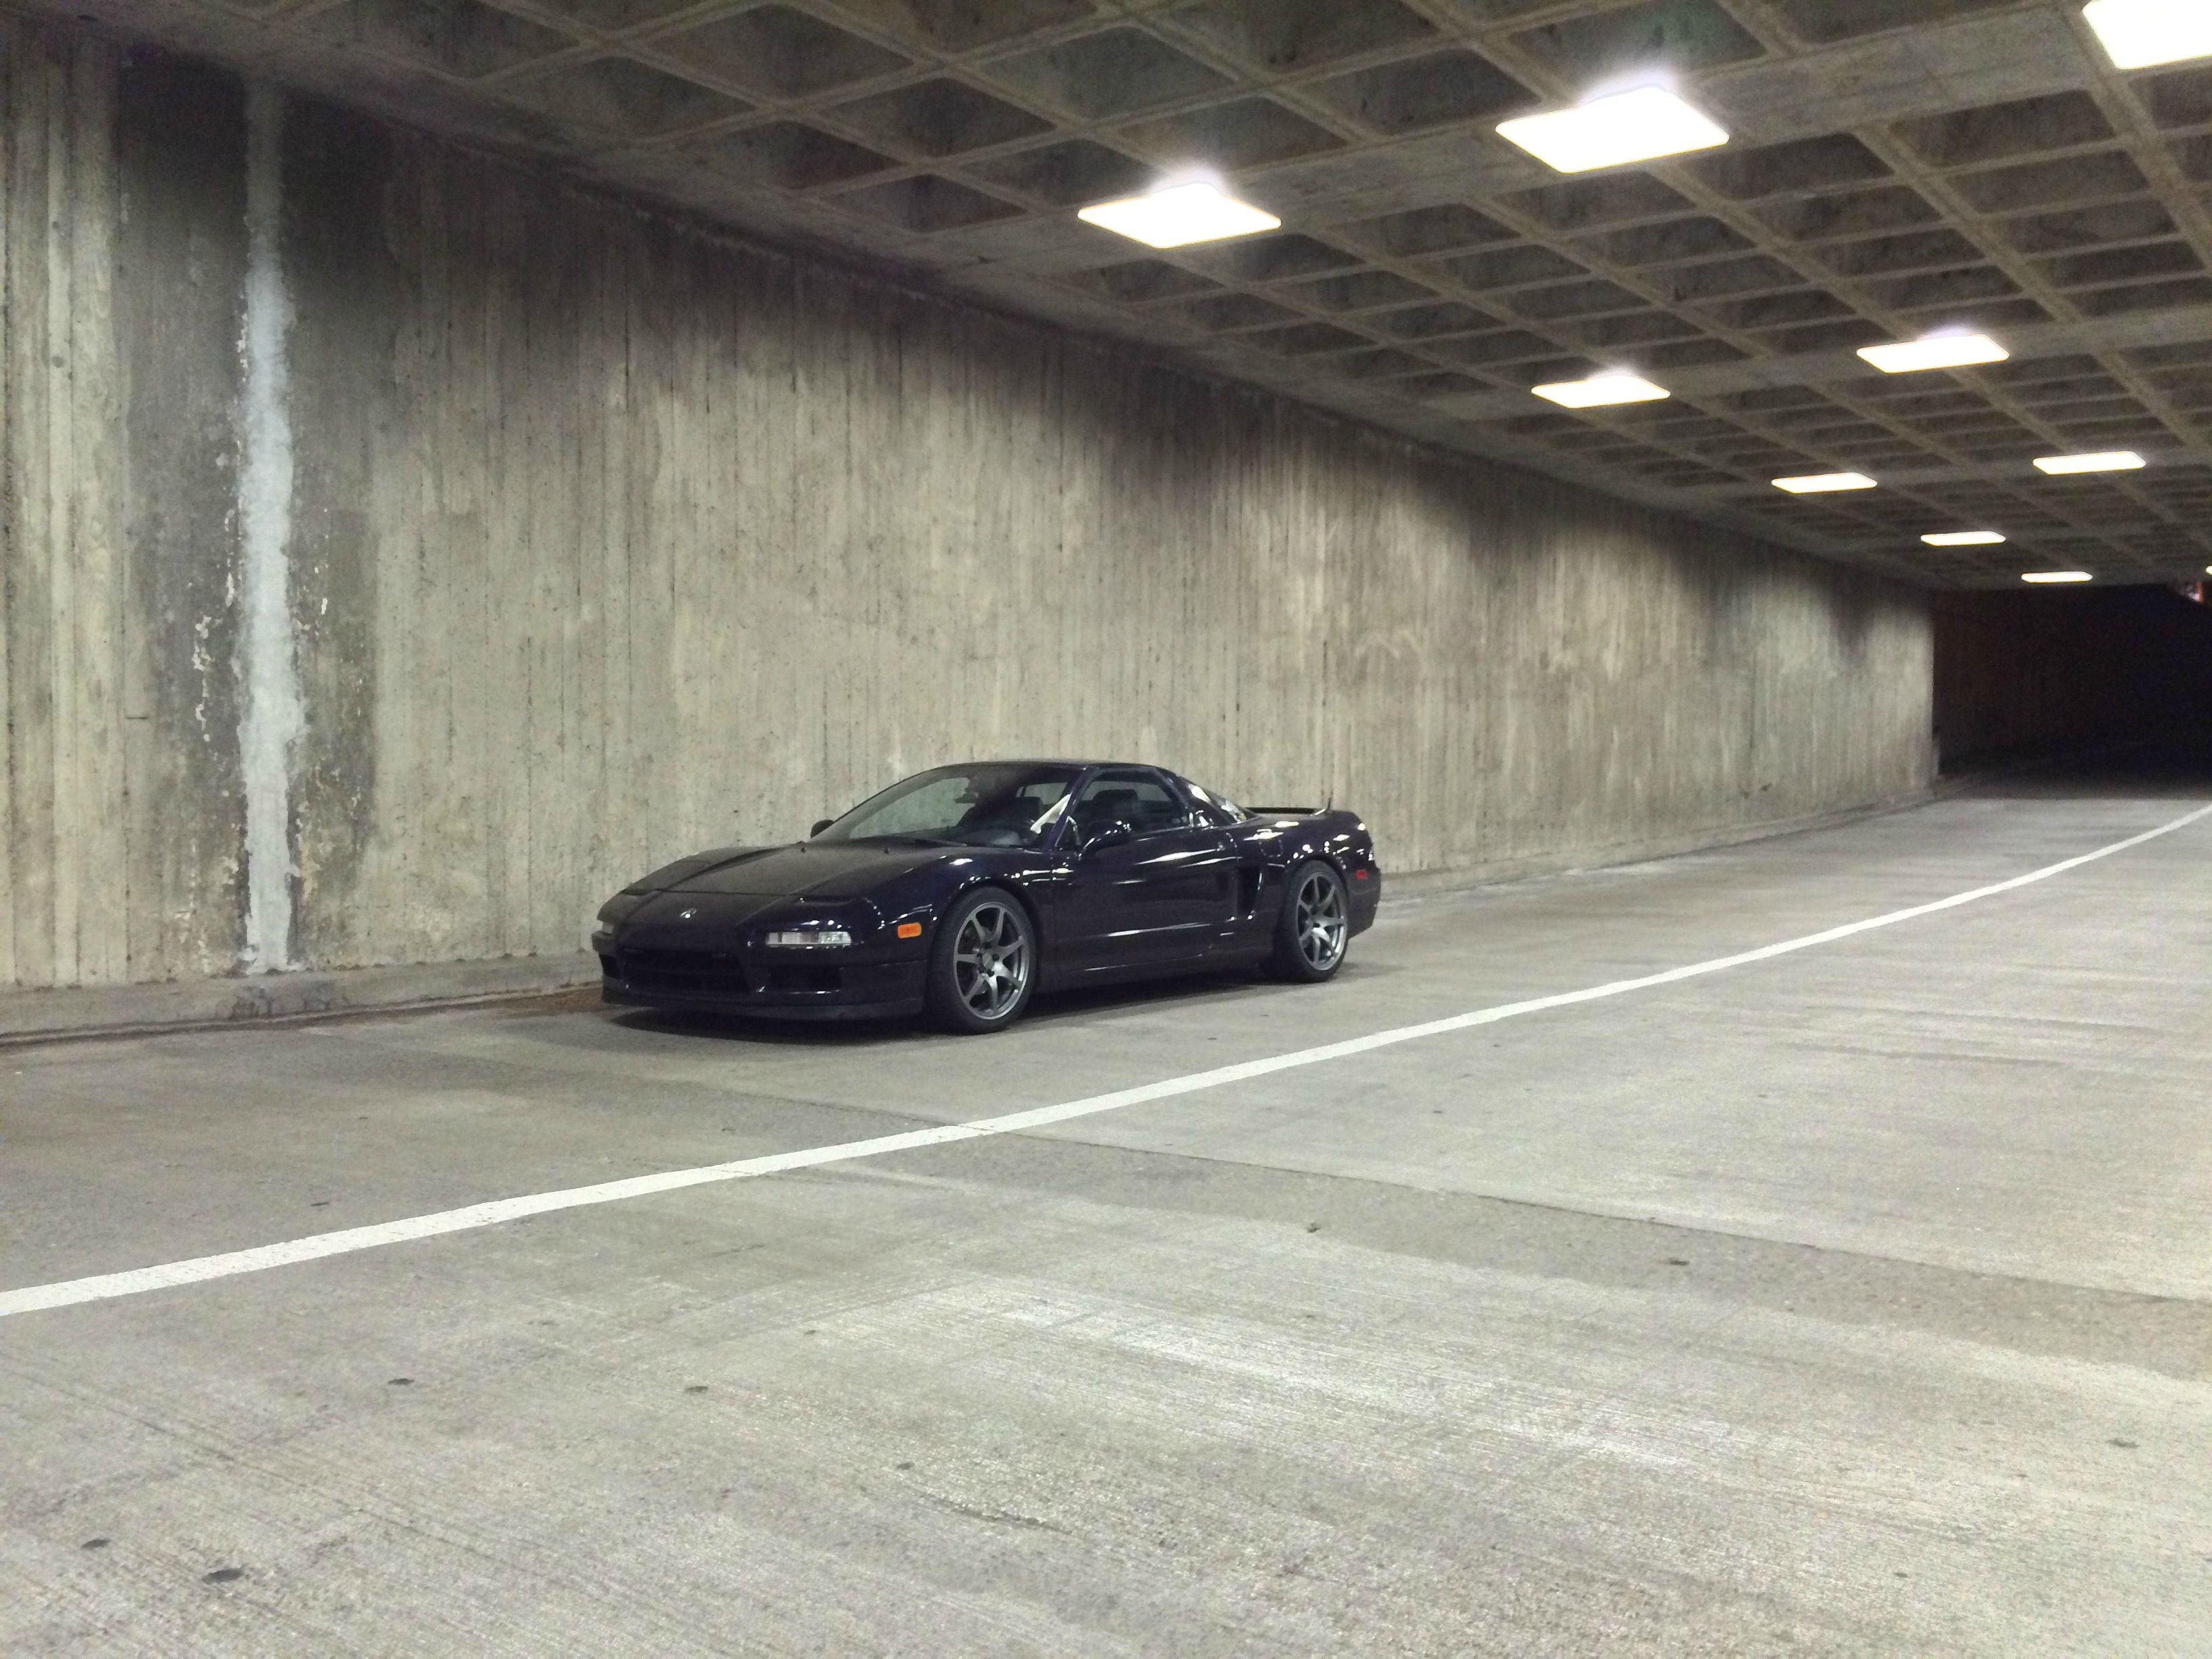
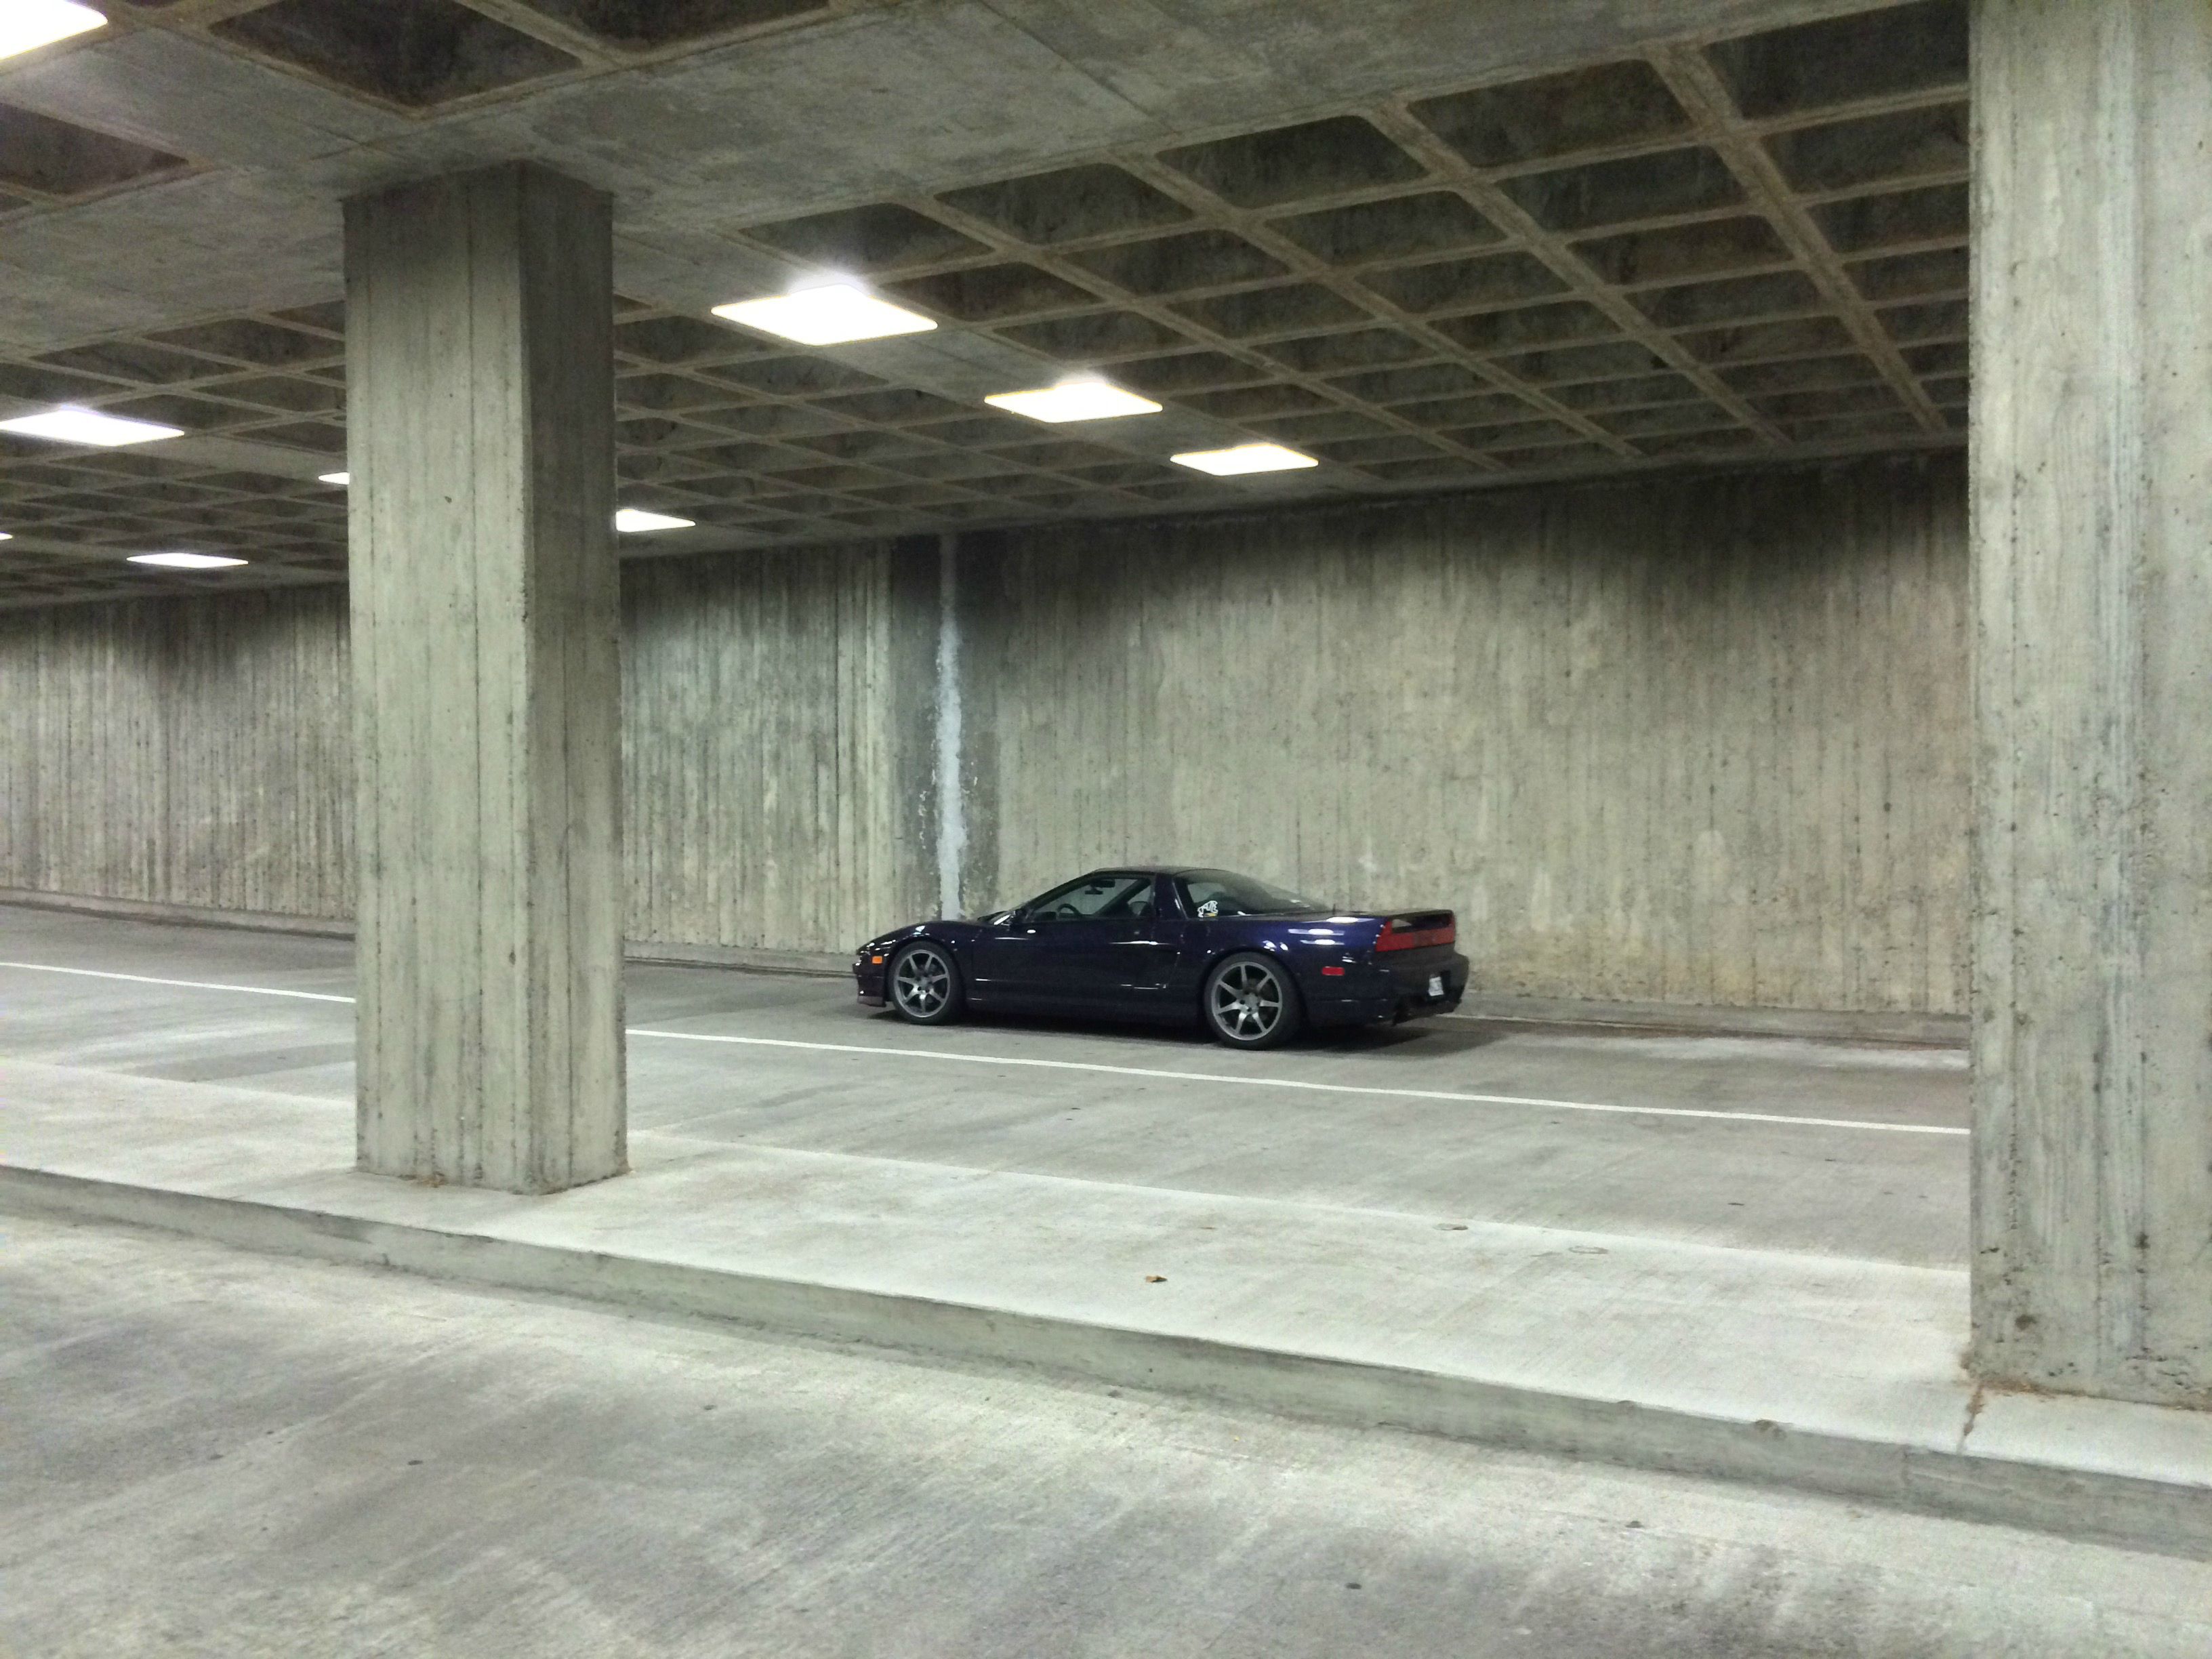
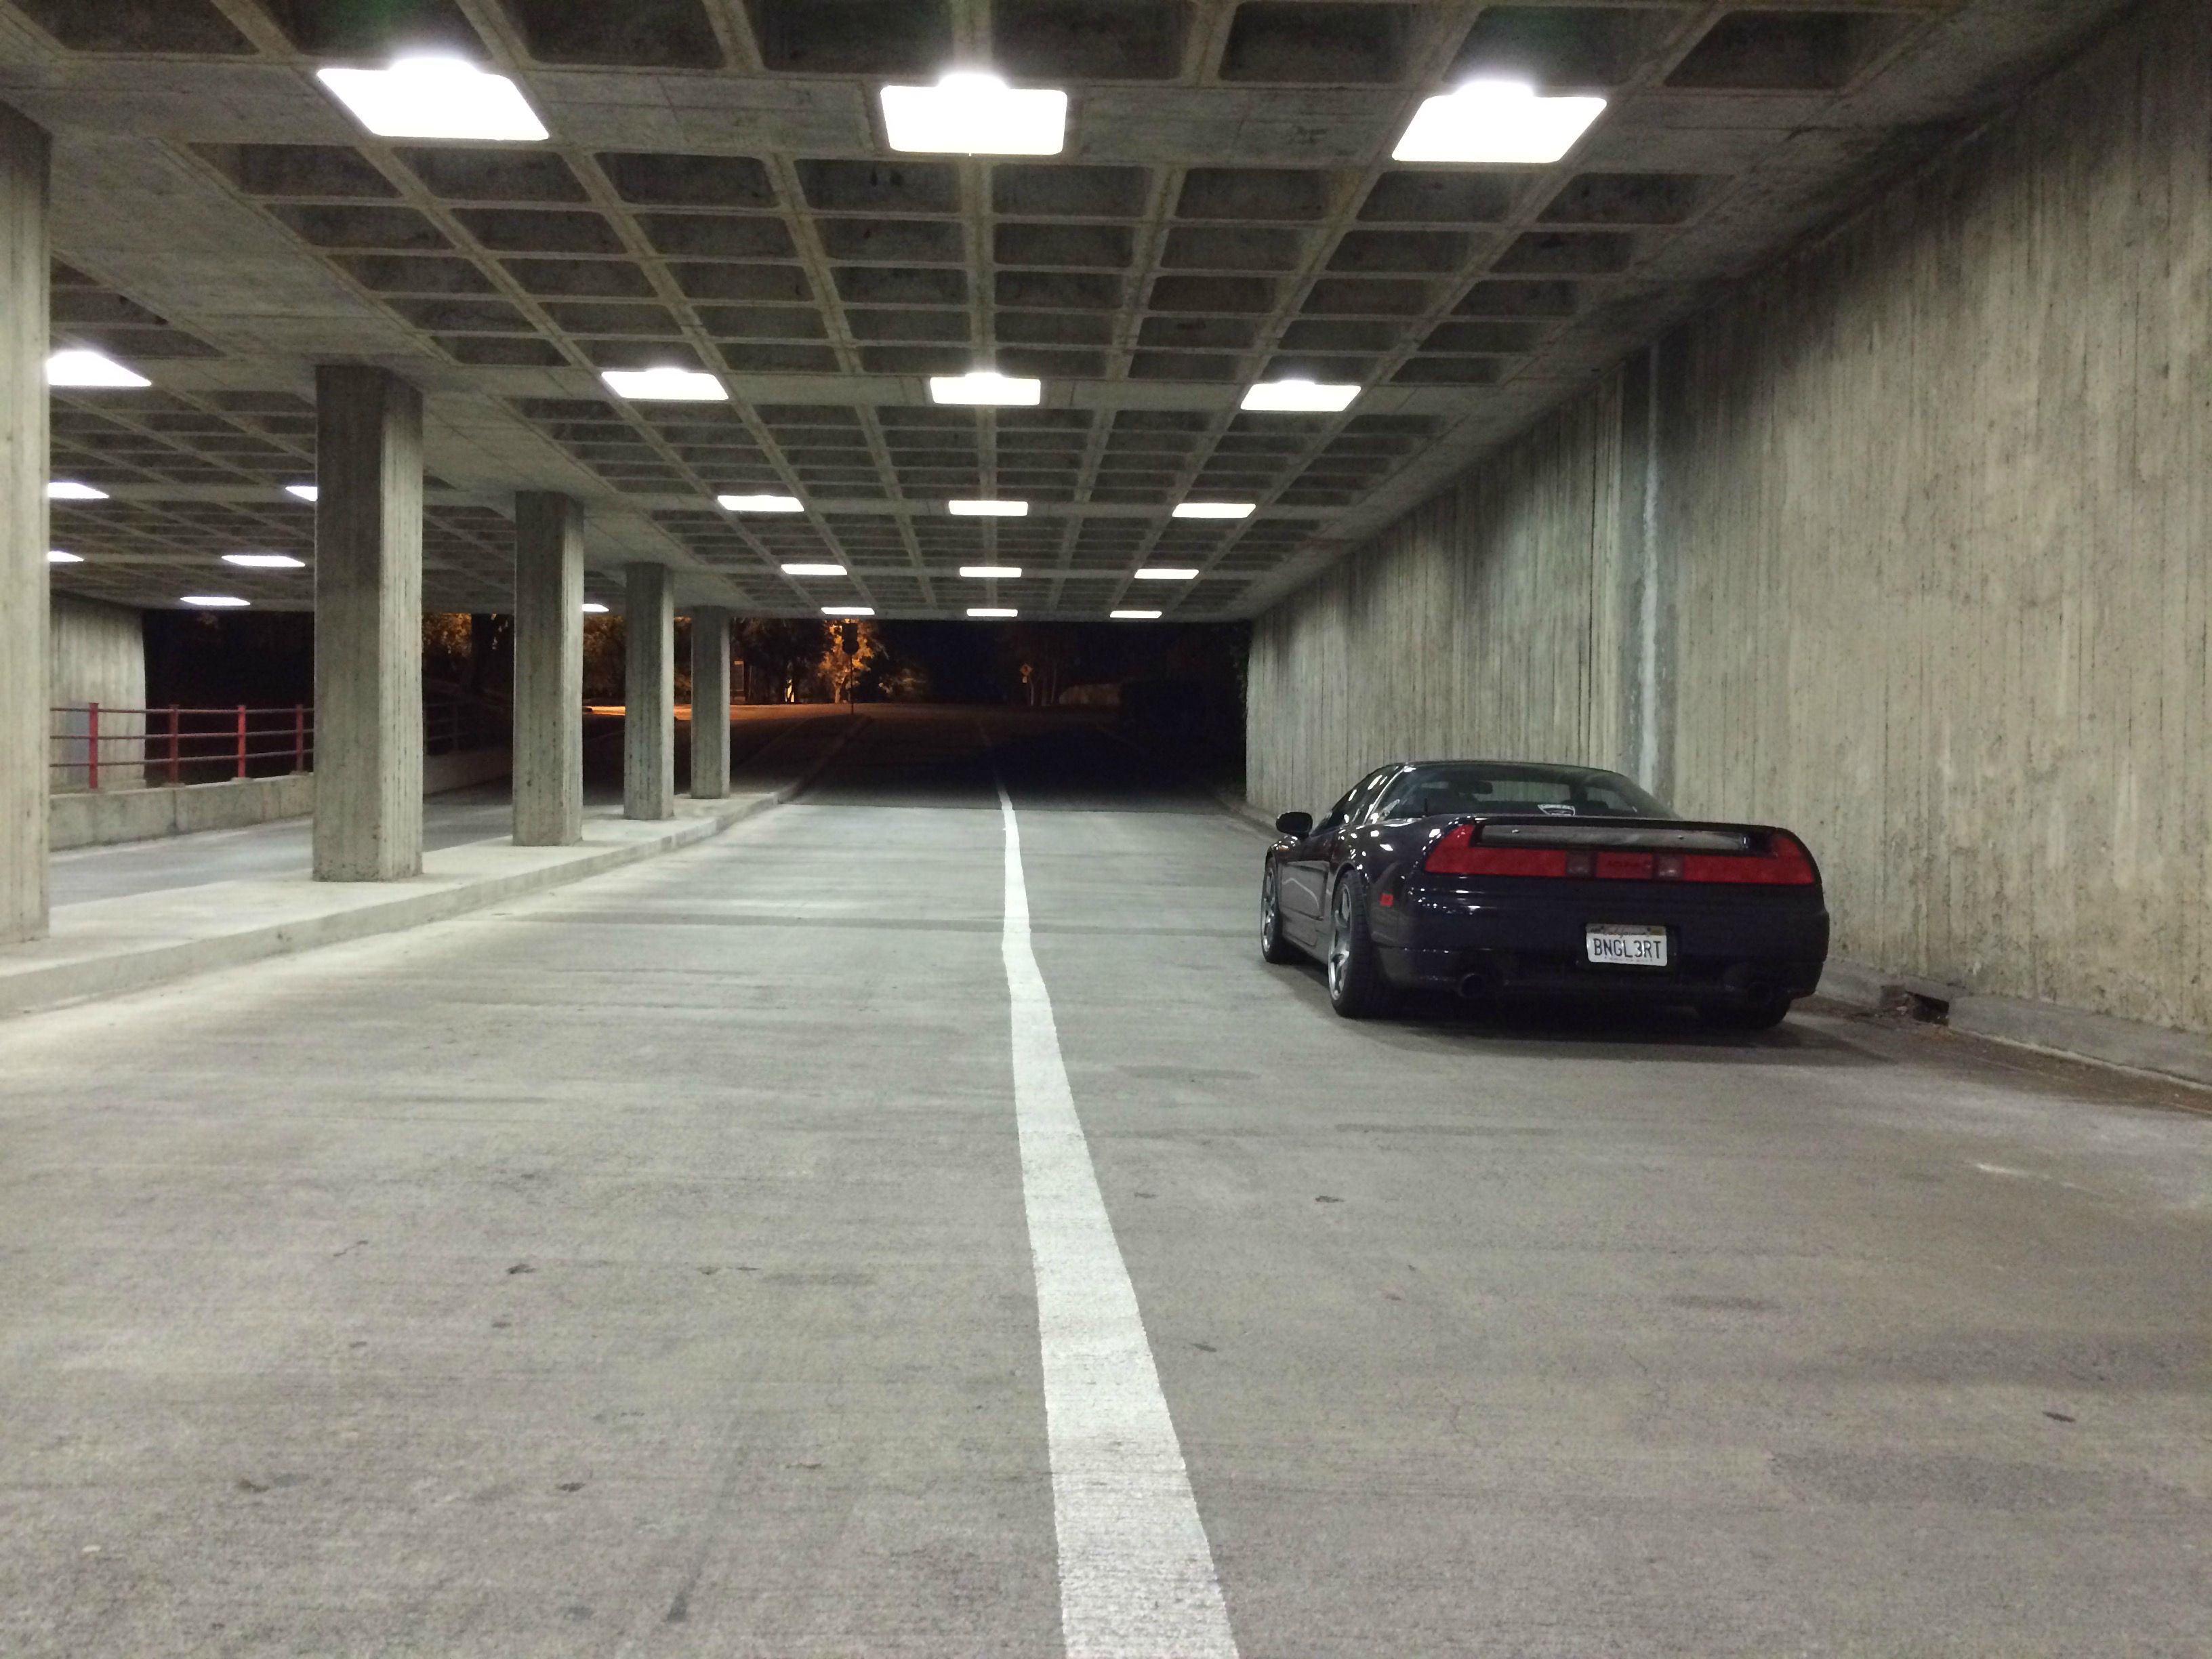
lets get started, first, three quick shots of the car, which came in a very unique color called midnight pearl, which actually is dark deep purple to my eyes, and as with any nsx, the car ages very well, and still looks great after all these years:
here is a quick pic of the original reason the owner came to us...to repair his broken dash...i dont think i need to say more other than it was for sure in need of some assistance
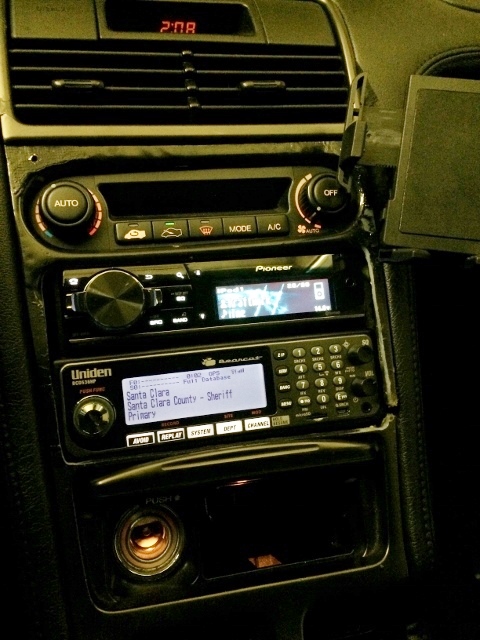
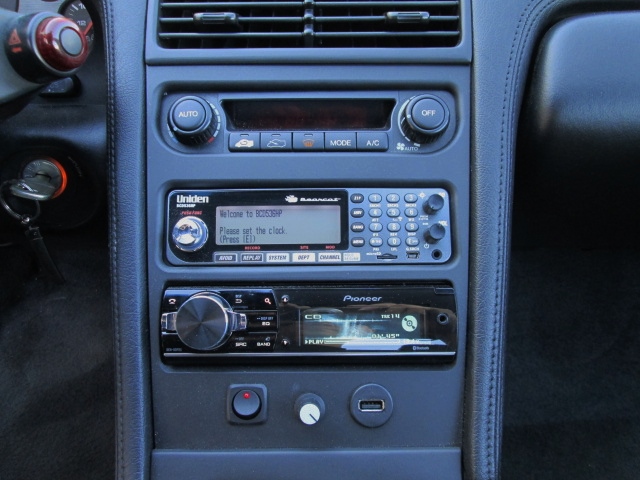
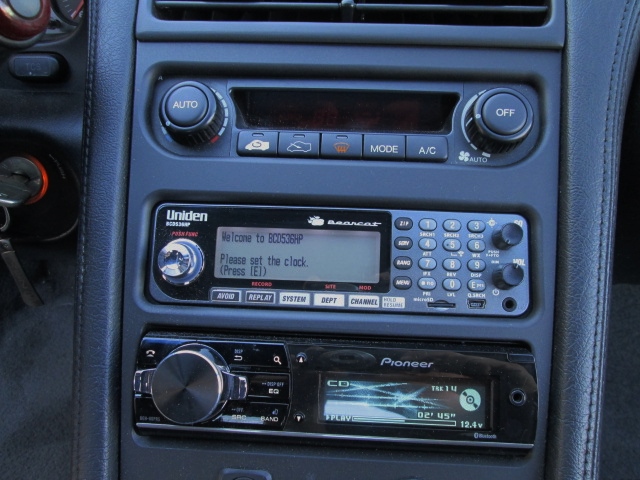
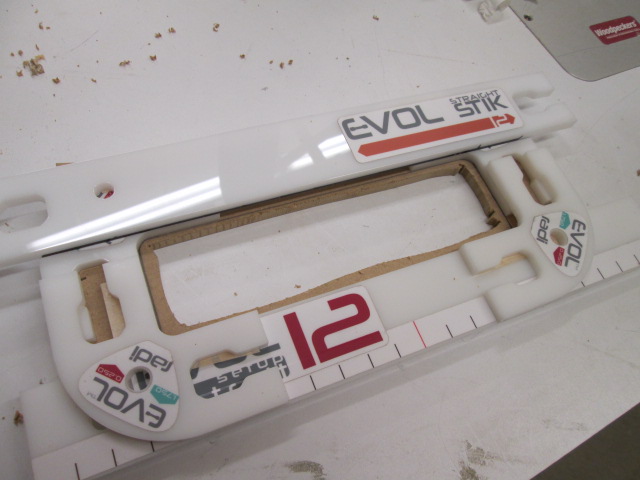
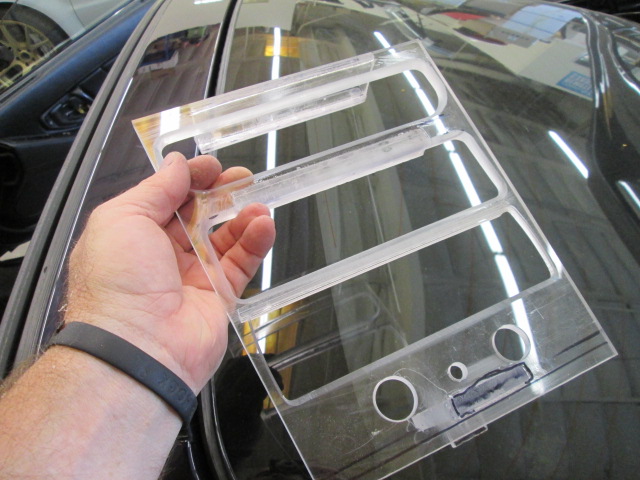
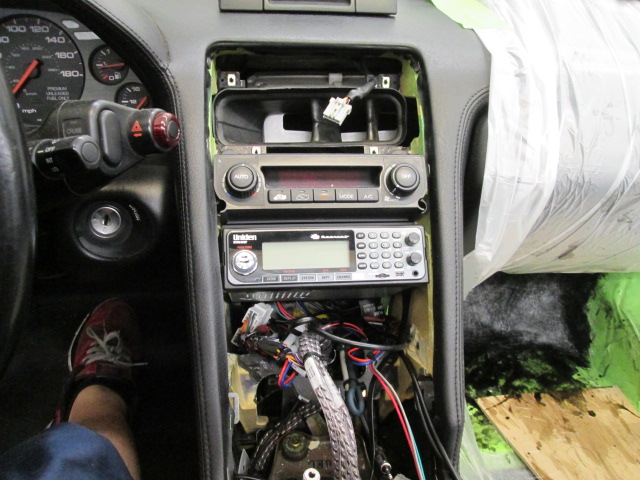
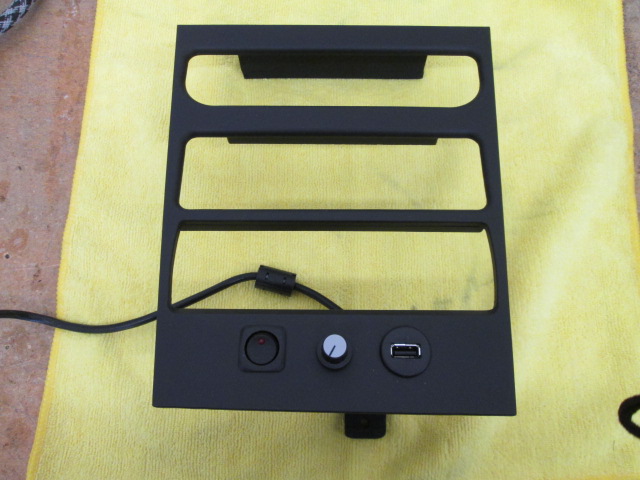
so after some work, here is what joey came up with. its hard to tell but the entire center portion of the console trim was rebuilt out of acrylic. now the 80PRS and the scanner are nicely flush mounted, and the customer wanted the bass knob, a switch his radar detection system and a usb ported mounted below the headunit, so thats where they went. note also the shape of the opening around the AC controls was modified
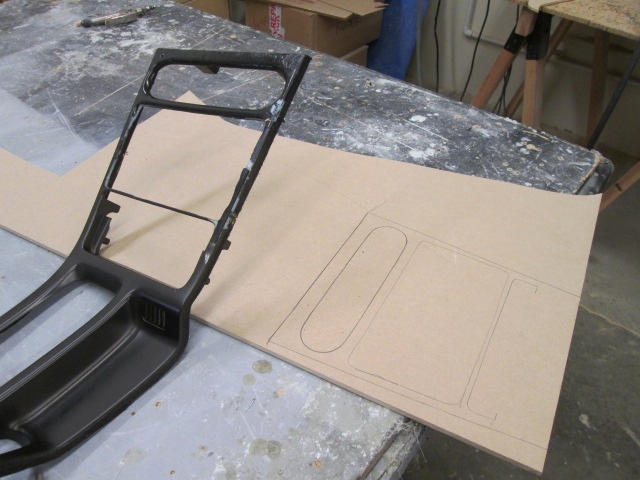
some build pics of the dash, first, the middle section of the dash was outline and transfered onto a piece of mdf. then, usning the sonus audio evol templates, joey was able to create an opening that matches the scanner and transfer that onto the wood:
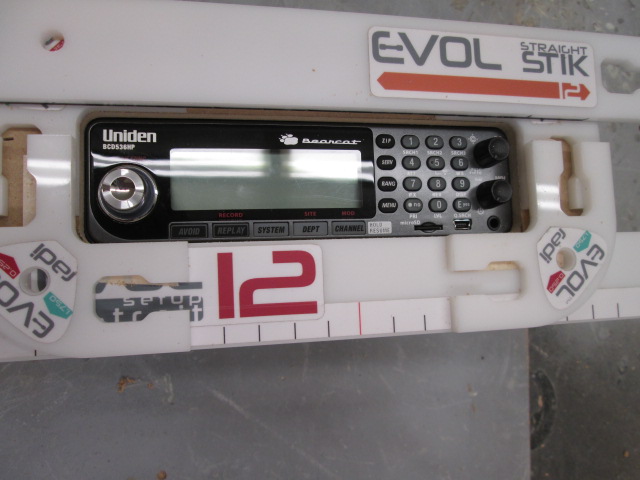
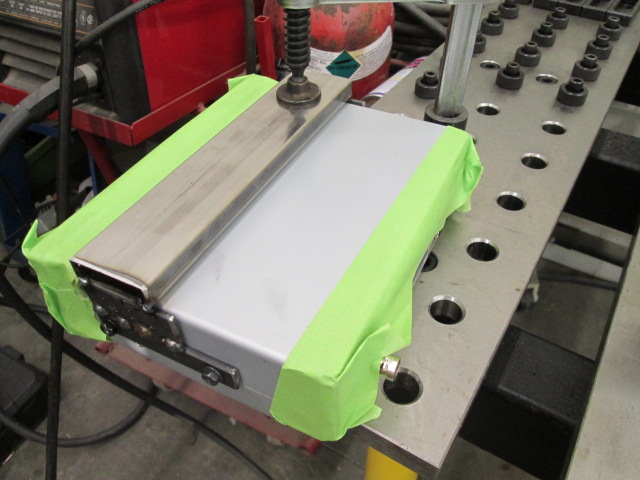
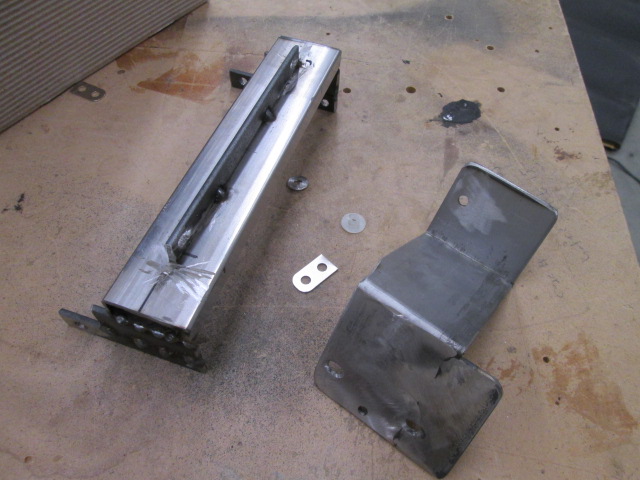
then joey fabricated a new mounting bracket for the scanner:
and after the same has been done for the 80prs, everything was test fitted to the car using the mdf piece:

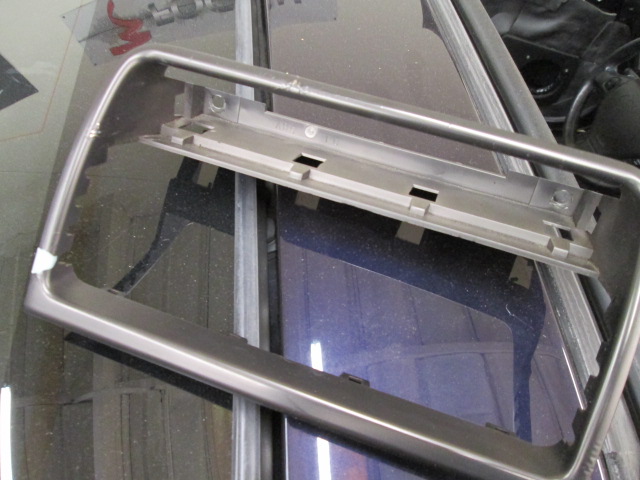
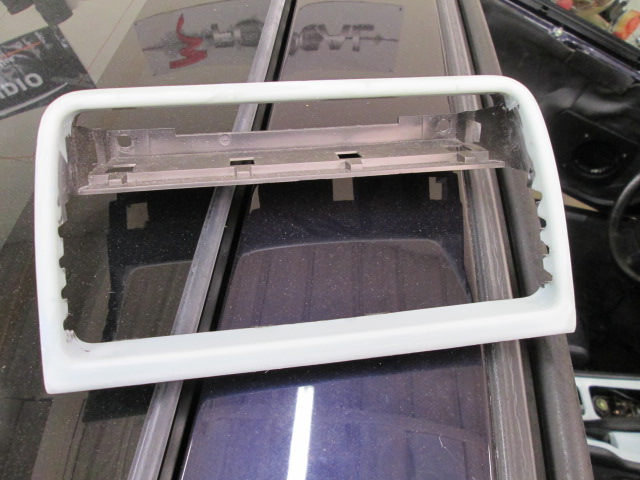
in the previous picture you will note the bottom portion of the console trim was stripped and prepped and is now ready for paint, the same procedure was done on the top portion of the panel:
and then, the mdf dash panel was transfered to acrylic, which is the actual piece that will be used in the car:
then it was time to test fit it once more:
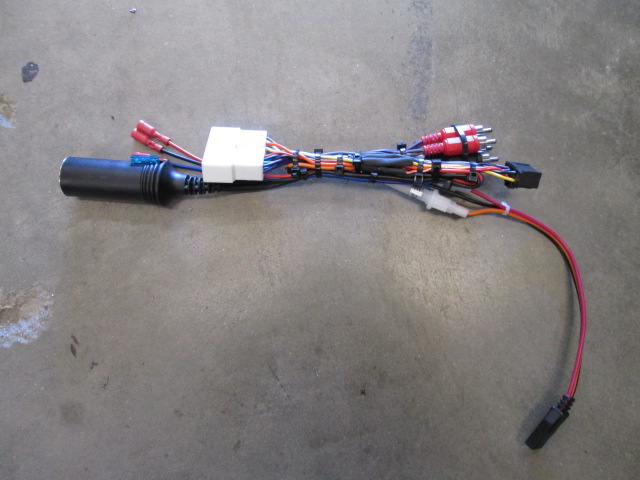
after that, the brackets for the mounting was ready to go back in the car, jesse rigged up the wiring harnesses for the two units, and the units were bolted into the dash:
and a final look at the painted middle section before it went into the car:
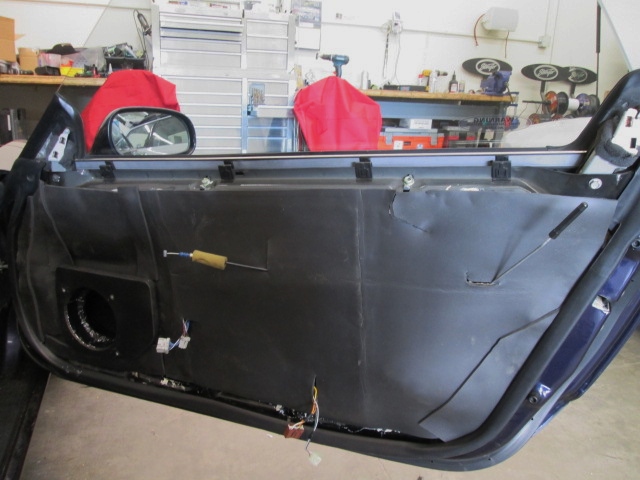
moving onto the doors, first jesse ran new wires into the doors, two pair per door:
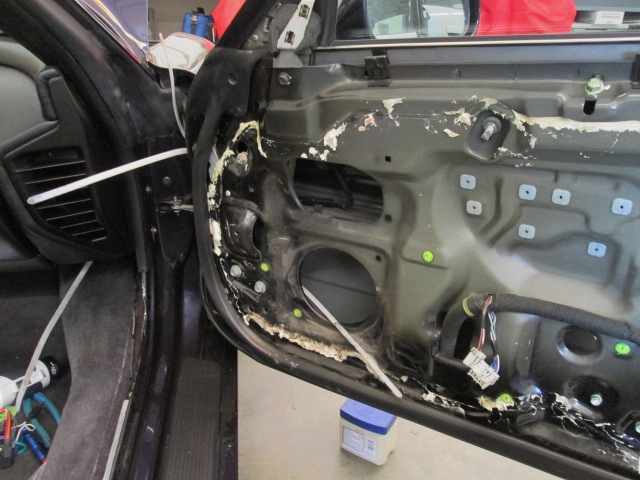
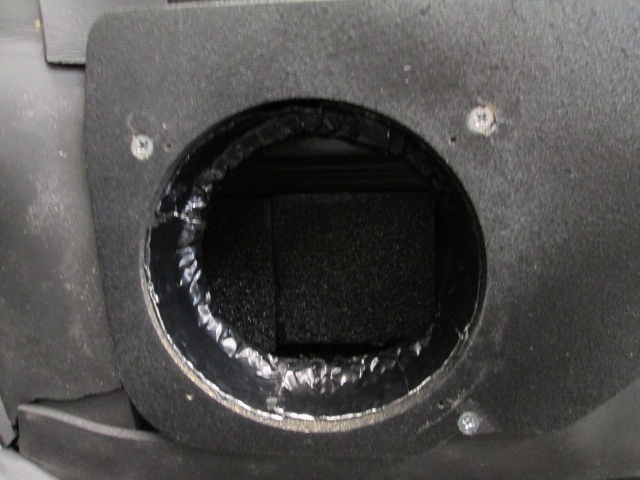
then he fabricated a pair of spacer baffles and coated them in truck bedliner to protect them against the elements:
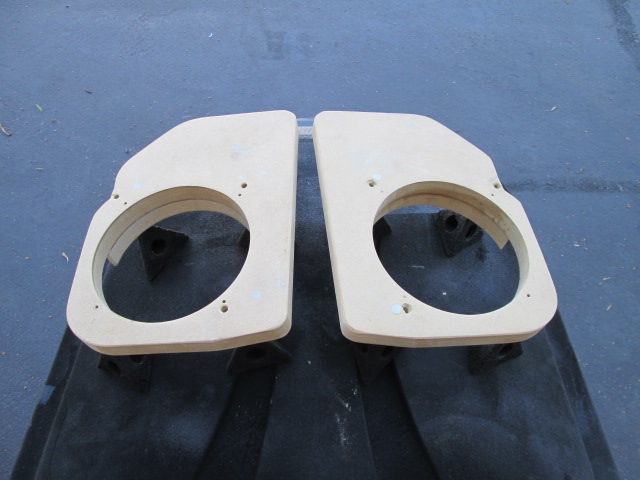
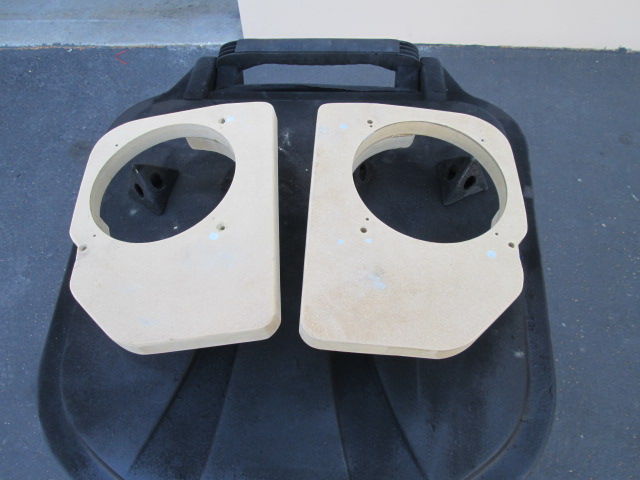
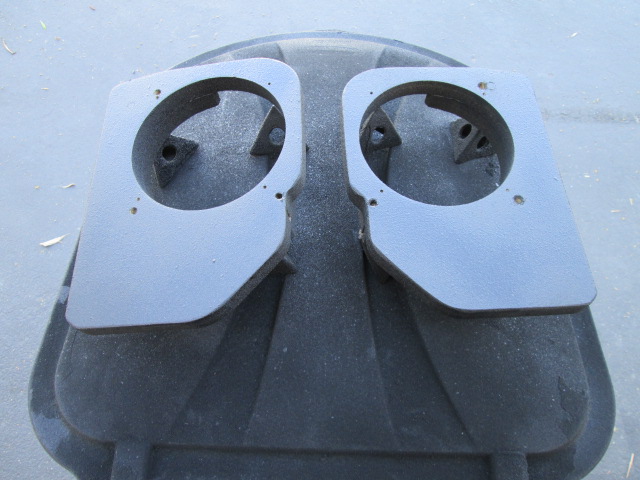
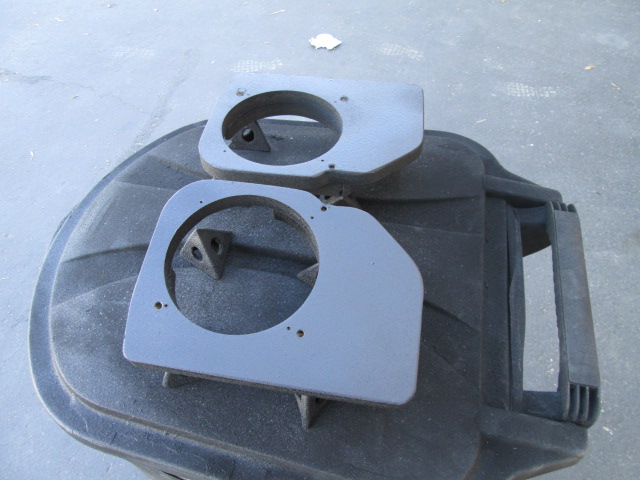
then the outter door was sound proofed with blackhole tile, while the inner door received some stinger foam, and the spacer baffle was bolted in place:
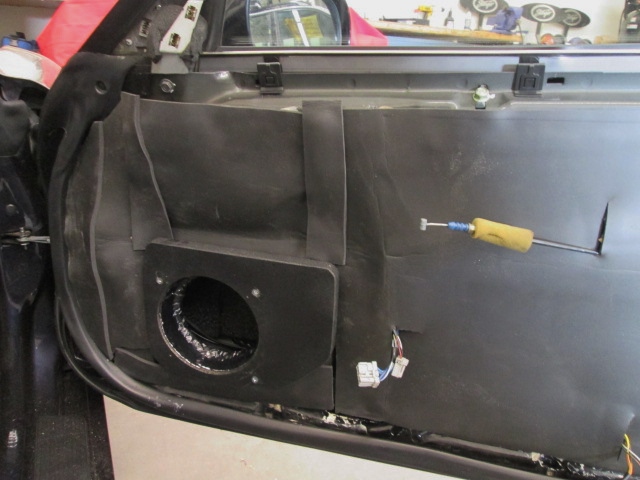


the outter door skin also got some cld damper treatment to help with resonance:

the same procedure was performed on the passenger side:


Last edited:

- Joined
- 25 February 2012
- Messages
- 2,166
Part 2!
- - - Updated - - -
And to echo what I said on the car audio forum, Bing is being modest. Everyone who gets in the car says two things:
1) Did you add a rear stage? Because I definitely hear "surround sound" (answer: no)
2) After hearing what parts you had and where they were mounted I was not expecting it to sound anywhere near this good.
Thanks for the awesome build and build log Bing!! You are a true disco wizard of the EQ and the TA and squeeze the best possible sound out of every component. I look forward to driving this car even more now and feel lucky that I can go sit and listen to it any time I want

- - - Updated - - -
I will also say that the soundproofing in the doors has made the car a much more enjoyable daily driver and long-distance vehicle even when the stereo is off, reducing road noise substantially. Of course if I want to listen to my glorious V6 it's still just a quick pull of the window switch away.
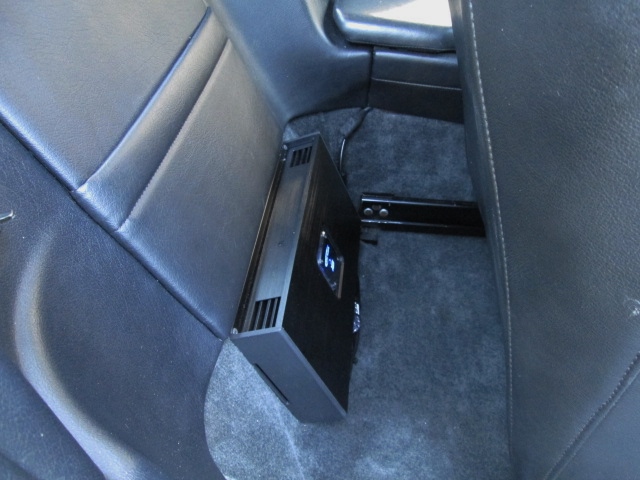
moving on to the amp mounting. a single arc audio 1100.5 powers the entire system active. the customer wanted all the components in the cabin and directed us to mount the amp behind the passenger side seat. so here it is after jesse mounted and wired it up:
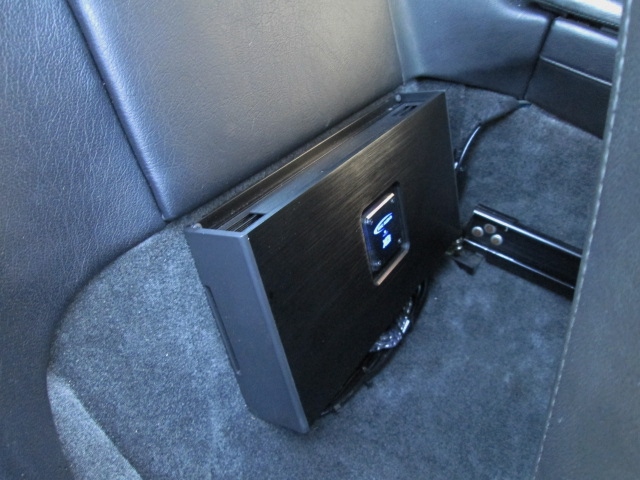
here are some quick shots of the amp mounting and the wires that are run to the area...first the fuse holder bolted to a oem brace next to the battery:

the power cable cam down the passenger side while the rca and speaker wires came down the middle of the car, ultimately meeting in the area around the amp mounting:


as for the amp rack itself, it is a piece of mdf that has been bolted via brackets to two mounting points at the top, and two rivetnuts at the bottom, the grounding point is also directly below the amp as close as possible, secured via a single bolt:


and finally, the amp mounted and wired up:

finally, the sub enclosure. as with the previous nsx install by us, we chose to do a front passenger foot well enclosure. it features an integrated grille so the normal view is pretty stealthy:

pull off the grille and a single audiomobile elite 2208 8" sub can be seen, it resides in a sealed enclosure of just below .5cubic foot:


some build pics of the enclosure, as performed by jesse.
first, he taped off the entire area:


and then the initial back mold was laid down:

once that cured, it was mated to a two piece front baffle and sealed with duraglass:


then the mold was extended to cover the wood forming a single piece enclosure:


then the enclosure was laid back into the car, the gaps backfilled with filler, and the result is what you see here:


then it was carpeted and bolted to the car, and finally, a shot of the press fit grille:

sonically, the car sounds pretty good, its tonality not to different than the previous nsx we did, which featured the same speakers, this one, being actively powered and controlled, offered a real sound stage and imaging...the stage height is really not bad at all consider the drivers are at the bottom of the door, i would say at or above dash level with some slightly rainbowing at the end. the audiomobile 8" driver provides a decent amount of bottom end reinforcement and works well with various types of music.
so overall, a cool car that is pleasing to drive is now also a pleasing place to enjoy music
cheers,
Bing
- - - Updated - - -
And to echo what I said on the car audio forum, Bing is being modest. Everyone who gets in the car says two things:
1) Did you add a rear stage? Because I definitely hear "surround sound" (answer: no)
2) After hearing what parts you had and where they were mounted I was not expecting it to sound anywhere near this good.
Thanks for the awesome build and build log Bing!! You are a true disco wizard of the EQ and the TA and squeeze the best possible sound out of every component. I look forward to driving this car even more now and feel lucky that I can go sit and listen to it any time I want
- - - Updated - - -
I will also say that the soundproofing in the doors has made the car a much more enjoyable daily driver and long-distance vehicle even when the stereo is off, reducing road noise substantially. Of course if I want to listen to my glorious V6 it's still just a quick pull of the window switch away.
First I have seen this thread. Very impressed with the work. This is a proper install by someone who understands audio. Very nice work with that dash too. I didn't read every single post but why do you have all the scanners and antennas? Is this to avoid the popo? LOL... maybe I should go read it all.
- - - Updated - - -
8" driver... proper size for that spot.
- - - Updated - - -
8" driver... proper size for that spot.
- Joined
- 25 February 2012
- Messages
- 2,166
First I have seen this thread. Very impressed with the work. This is a proper install by someone who understands audio. Very nice work with that dash too. I didn't read every single post but why do you have all the scanners and antennas? Is this to avoid the popo? LOL... maybe I should go read it all.
- - - Updated - - -
8" driver... proper size for that spot.
It sounds f******* great. Come listen next time you're in CA :smile:
8" sub is plenty and with the very capable 6.5" mids covering the mid-bass the crossover is set quite low so the sub is really just providing "fill" - meaning it can focus on being fast and punchy.
I can't say enough good stuff about the vertical imaging with these coincident tweeters either. Really tall soundstage without cutting up the doors.
Scanners and antennas are very useful when driving in large groups of exotic cars - it tends to attract lots of attention and so the gear helps everyone stay one step ahead. A driver who benefitted from some information I relayed to him via walkie-talkie after hearing it on the scanner dubbed the car the "Strategic Rally Command NSX." A member over at RadarDetectorForum said "You look like a high rolling LEO"
i love the custom dash trim. looks great! Nice work.

- Joined
- 25 February 2012
- Messages
- 2,166
OEM stereo sounds like shit and weighs a ton - car is currently at Simplicity in Sound in Milpitas, CA to take care of this. - DONE!
I bought and installed someone's DIY double-din center console and it's cracked and the paint doesn't match - ditto - DONE!
B-pillar covers missing, previous owner cut them for a harness bar - install new ones
Lots of little paint and body flaws - strip it & dip it
Glass engine hatch rubber seal is loose and flops around in the wind - ???? the part is discontinued so not sure what to do about this.
OEM 16/17 wheels are scuffed up and it's hard to find good tires for them - upgrade to a set of 17/18 that can run Michelin PSS - ok, so Michelin PSS are a no-go because of the front size, I've got some Prodrives ready to go on the car with Kumho tires on them, there's also a Pirelli P Zero that recently became available in 215/17 and 255/18 that I'm looking forward to trying
Previous-owner-installed HID kit flickers and sometimes the left headlight doesn't turn on the first time - brand new HID kit
Engine compression tests at 190-200psi, leak down between 10 and 20% and consumes some oil - more testing needed to determine the source of the oil consumption but either way it's an engine rebuild (head/block)
Oil pressure readings are essentially random - ScienceOfSpeed oil pressure sensor upgrade kit
Rear suspension bushings creak under braking - ???? not really sure I need noncompliance but it's cheaper than getting a new OEM rear beam with fresh bushings in it...
Seats are in 6/10 condition - leatherseats.com
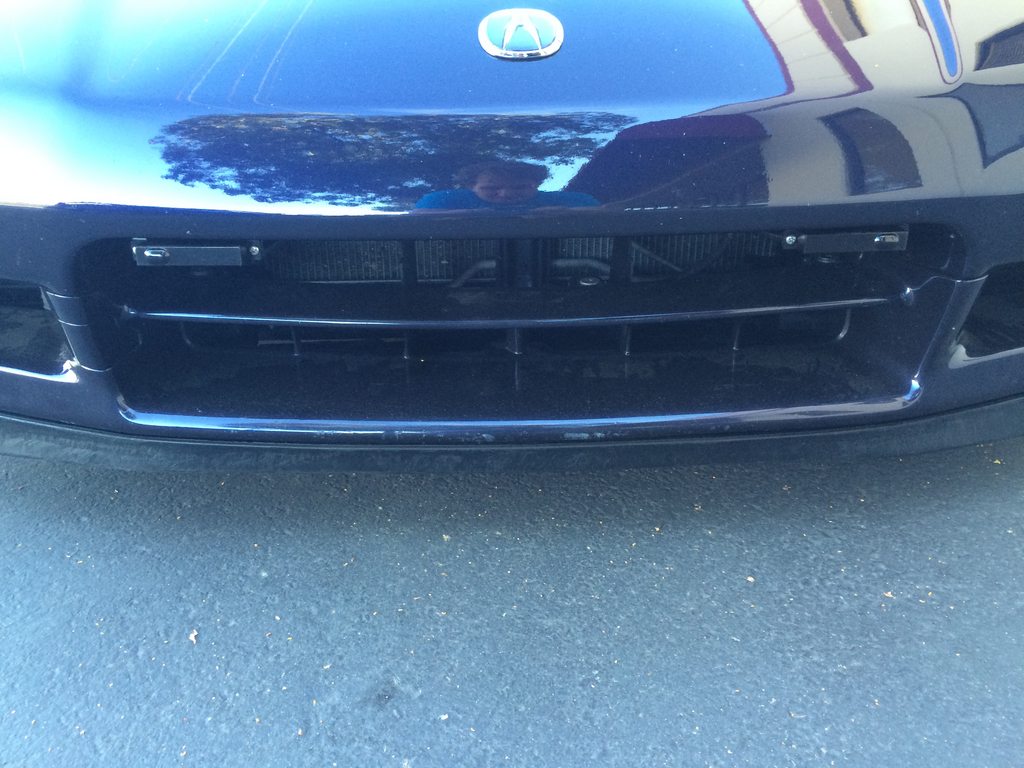
OEM 02+ rear valence fitment is an 8/10, I think this particular piece got warped by heat or something in storage/shipping - get a new one
CT Gen1 exhaust has never hung perfectly level, one tip always 1/4" to 3/4" higher than the other - I want a titanium exhaust, I'm inspired by Honcho's story of importing the Fujitsubo, I want this one: http://www.route-ks.com/parts/dk/dkr_muffler/index.html http://www.suzuka-gt.net/NSX/muffler/dk_ver_r/index.html
whistling/squeaking/whining noise between 3k and 4k RPM at part throttle, appeared after Uni Filter was installed - ???? maybe go back to OEM air filter or a different brand of a/m one to see if that helps?
HIDs or b-pillars next?
I bought and installed someone's DIY double-din center console and it's cracked and the paint doesn't match - ditto - DONE!
B-pillar covers missing, previous owner cut them for a harness bar - install new ones
Lots of little paint and body flaws - strip it & dip it
Glass engine hatch rubber seal is loose and flops around in the wind - ???? the part is discontinued so not sure what to do about this.
OEM 16/17 wheels are scuffed up and it's hard to find good tires for them - upgrade to a set of 17/18 that can run Michelin PSS - ok, so Michelin PSS are a no-go because of the front size, I've got some Prodrives ready to go on the car with Kumho tires on them, there's also a Pirelli P Zero that recently became available in 215/17 and 255/18 that I'm looking forward to trying
Previous-owner-installed HID kit flickers and sometimes the left headlight doesn't turn on the first time - brand new HID kit
Engine compression tests at 190-200psi, leak down between 10 and 20% and consumes some oil - more testing needed to determine the source of the oil consumption but either way it's an engine rebuild (head/block)
Oil pressure readings are essentially random - ScienceOfSpeed oil pressure sensor upgrade kit
Rear suspension bushings creak under braking - ???? not really sure I need noncompliance but it's cheaper than getting a new OEM rear beam with fresh bushings in it...
Seats are in 6/10 condition - leatherseats.com
OEM 02+ rear valence fitment is an 8/10, I think this particular piece got warped by heat or something in storage/shipping - get a new one
CT Gen1 exhaust has never hung perfectly level, one tip always 1/4" to 3/4" higher than the other - I want a titanium exhaust, I'm inspired by Honcho's story of importing the Fujitsubo, I want this one: http://www.route-ks.com/parts/dk/dkr_muffler/index.html http://www.suzuka-gt.net/NSX/muffler/dk_ver_r/index.html
whistling/squeaking/whining noise between 3k and 4k RPM at part throttle, appeared after Uni Filter was installed - ???? maybe go back to OEM air filter or a different brand of a/m one to see if that helps?
HIDs or b-pillars next?
HID, function + fashion.
- Joined
- 25 February 2012
- Messages
- 2,166
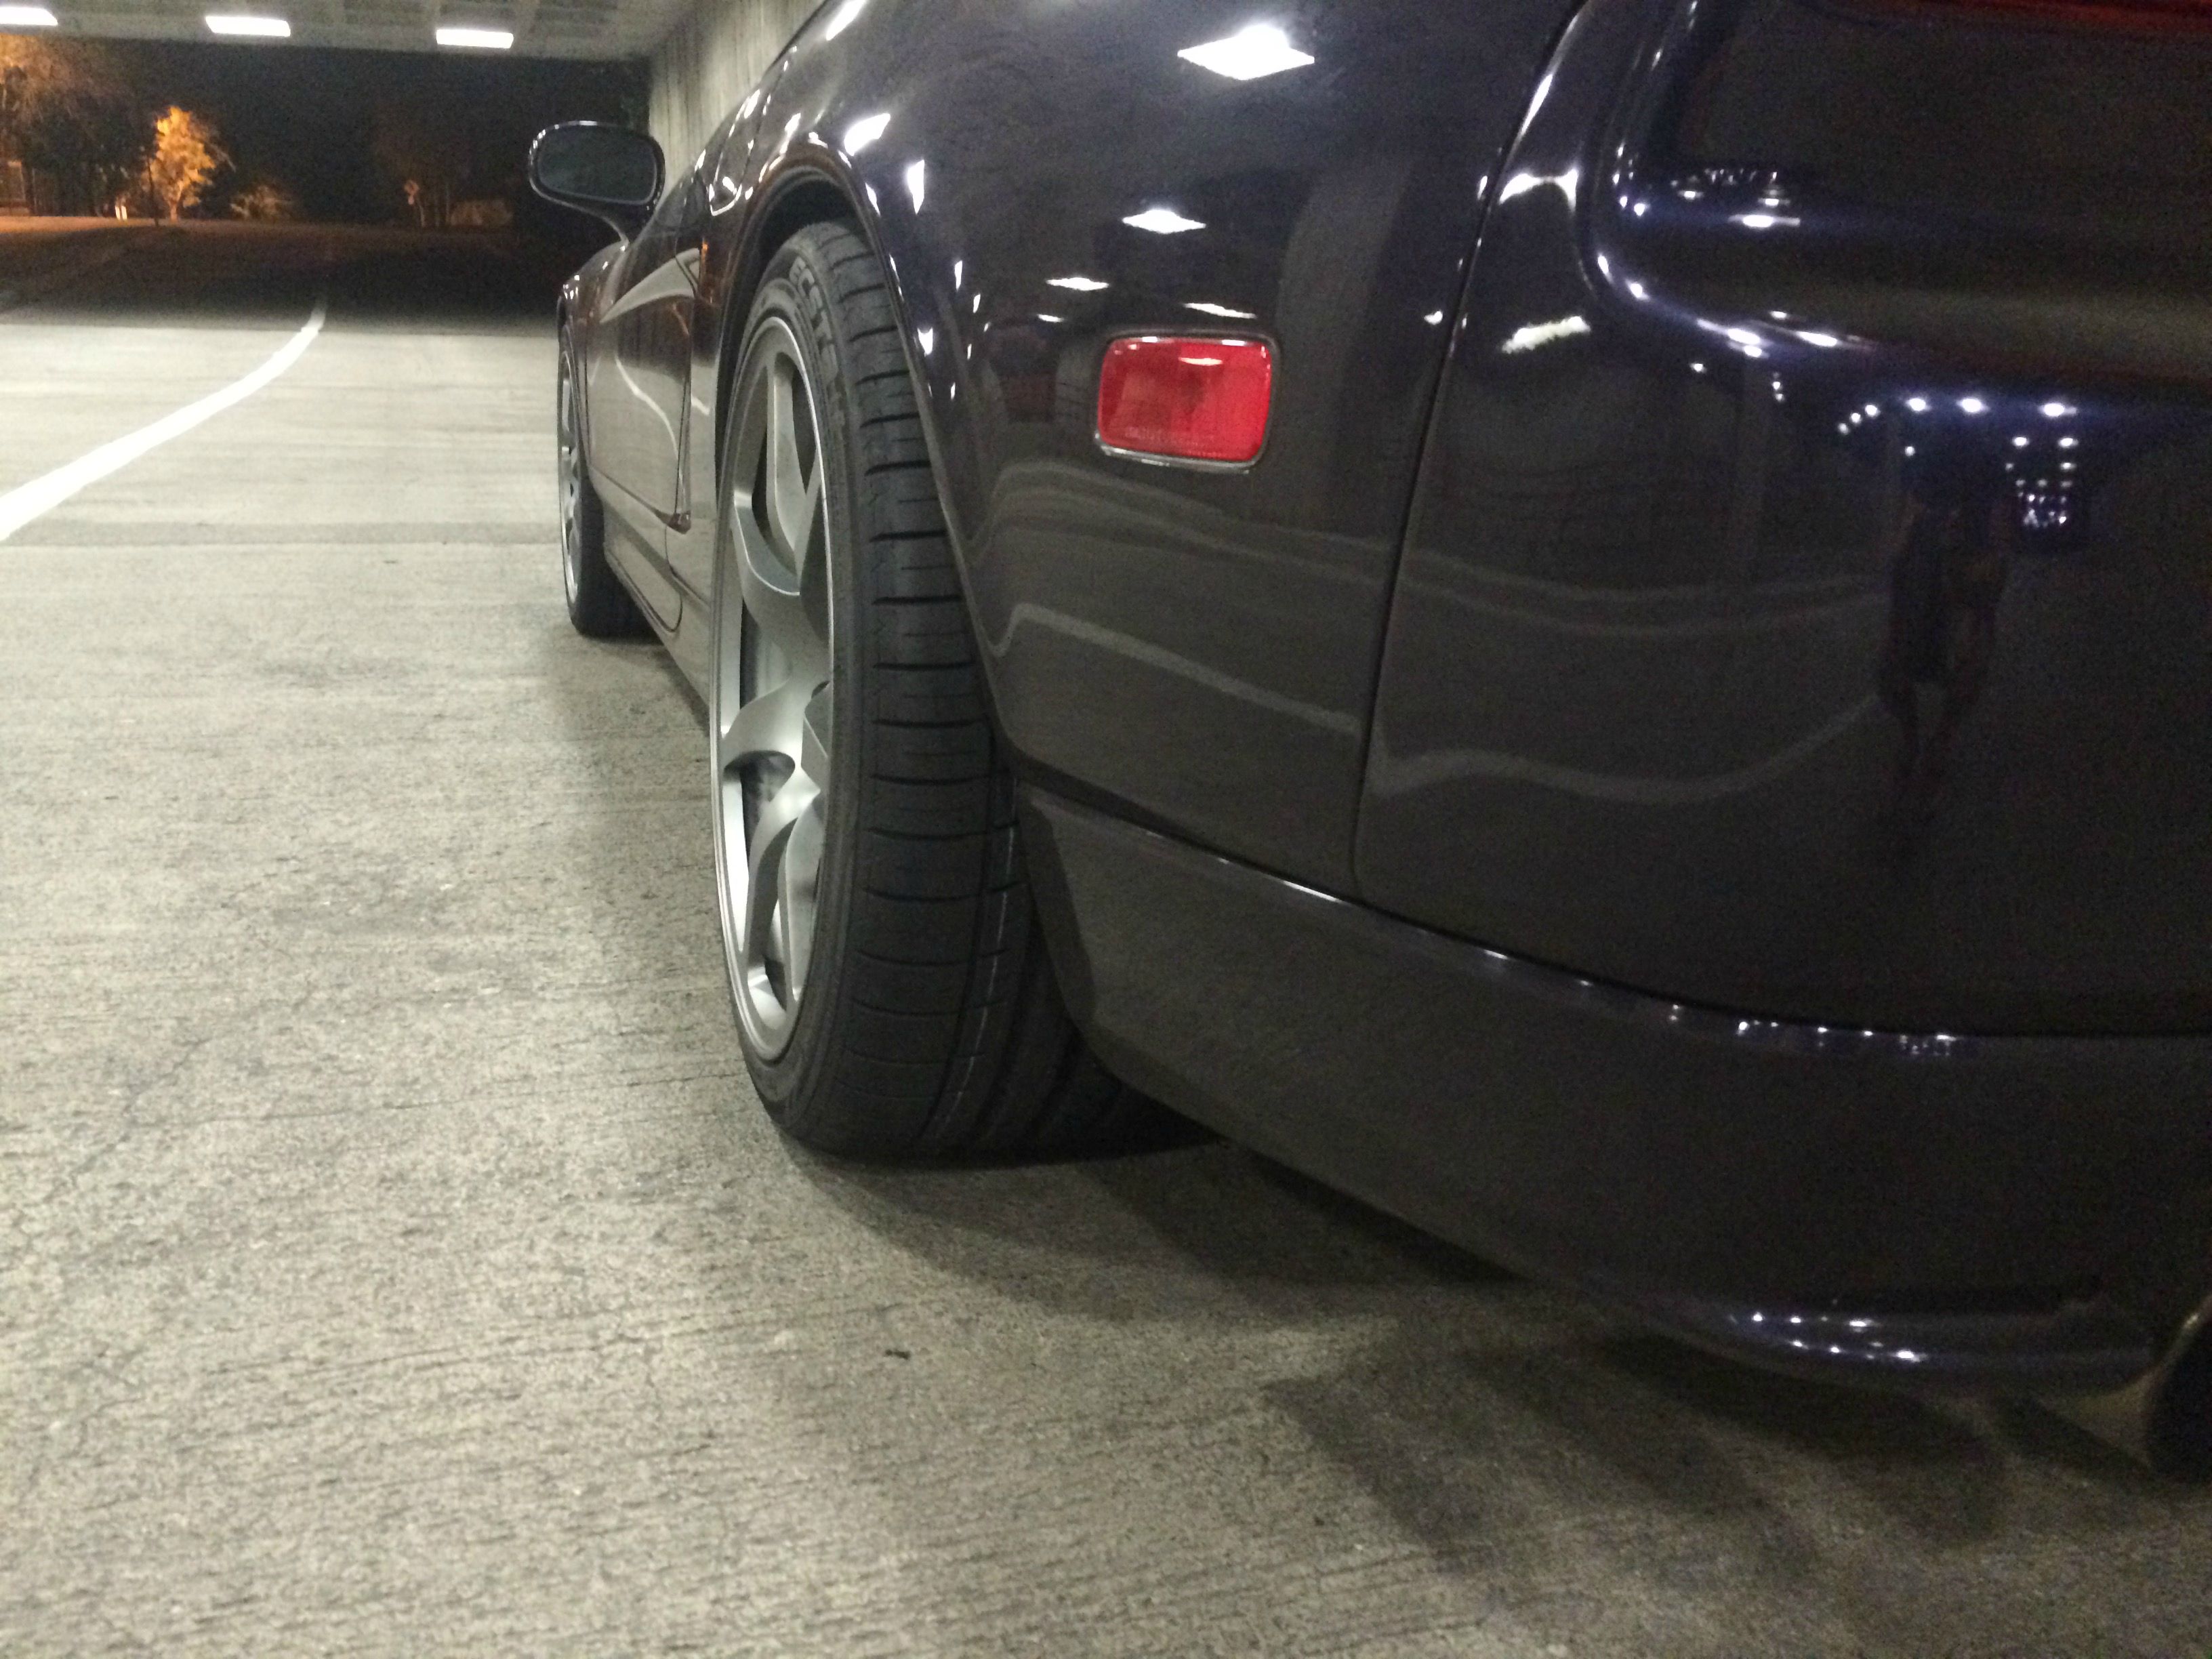
real nice Ben... Specs?
17x7.5+35/18x9.5+15
Flush as f**k haha. Bit of poke in the rear actually. I could have them machined to +38F/+19R, or slam the car a bit more to have the rears tuck...
215/40/17 and 255/35/18 Kumho Ecsta LE's for now... once I burn through these I will be trying those new Pirelli P Zeros that just appeared in these sizes.
- Joined
- 13 September 2009
- Messages
- 672
Nice wheels... Drop the rear and a little camber you will be set....
Get some more front neg camber in that bad boy. That looks like 1-1.25 of neg cam only. ")
- - - Updated - - -
I think the ride height is good. Looks athletic
- - - Updated - - -
I think the ride height is good. Looks athletic
- Joined
- 25 February 2012
- Messages
- 2,166
Why would you consider those pirellis when your sizing is quite standard and you can get any number of fantastic tires on?
- - - Updated - - -
Did you weigh these by chance
I'm told +15 offset in the rear means I should probably run 255 rears only - lots of the great tires for 18" come in 265+ only. But plenty of options in 215/255 as well, you're right.
Apparently I save 2lbs unsprung over my OEM 7-spokes. I like these because of the way they look but them being ridiculously light is a bonus:
Some quick math...
View attachment 115882
Get some more front neg camber in that bad boy. That looks like 1-1.25 of neg cam only.
- - - Updated - - -
I think the ride height is good. Looks athletic
Thanks! I'll see what my alignment guy says when I bring him the car... I do track it occasionally and I don't want to go through rear tires even faster than it did on the stock rims, plus I'm not a huuuuuge fan of the "stance" look, prefer the car to look more functional (cause it is!). So I will end up with whatever he thinks is the best street/track alignment.
Similar threads
- Replies
- 9
- Views
- 425