Which clips did you use for the cowl? I'm missing all but 1, strange I didn't notice it until this thread.(3rd time going through it)
Auveco 19231 - identical to OEM
Which clips did you use for the cowl? I'm missing all but 1, strange I didn't notice it until this thread.(3rd time going through it)


")


If you have access to a media blaster why would you use any other method of stripping the brake calipers? I’ve done calipers both ways and media blasting is so, so, so much better. It gets down into all the nooks and crannies that you can’t get with a wire wheel and is much faster. I used glass beads to do mine and just reused the media repeatedly so I didn’t need to buy more than a single 25lb box.
Also the OEM Honda horn button is very close to the shift knob in terms of finish, not perfect but the only way to do that would be to have one custom fabricated out of titanium which would be extremely pricey. I documented my adventures in trying to match the Type R shift knob in my build thread. There is no paint in existence that will come close to matching the shift knob, it’s shot blasted titanium. I was able to match it nearly perfectly for my titanium hand brake project using 70 grit steel shot.
The cars are heavily undercoated from the factory. Having been down the de-undercoatification trail a few times I feel for you. FWIW, what worked well for me was to soak the under coating for a few days with bug and tar remover. Then I would blast it off with my pressure washer hooked up to the hot water spigot for my washing machine. The bug and tar remover and hot water worked pretty good. If I had access to a dry ice blaster I think that would be the best.
I have pictures of the same parts in my thread. You need the photobucket plugin from chrome to see them though.
http://www.nsxprime.com/forum/showthread.php/187006-McDork%E2%80%99s-1998-Coupe-JH4NA2131WT000070-listed-as-%E2%80%9CZanardi-Prototype%E2%80%9D-in-the-wiki?p=1843189&viewfull=1#post1843189
Honcho, have you considered just getting rebuilt calipers and sending yours in for the core refund? I recently got a set of fronts from Rock Auto.
Sent from my R1 HD using Tapatalk
DIY rebuilding is a much better solution, OEM seal kits are much higher quality than garbage rebuilds from Rockauto. I bought reman ITR calipers from Rockauto a few years ago and ended up having to rebuild them anyways after one of the seals blew out because it didn’t fit correctly. I tore them all down and found all sorts of problems with the seals, stick with OEM if you don’t want to get burned.
But yeah that’s understandable Honcho, it takes more than soda blasting to clean brake calipers.
So I just got sucked into your thread, Chris and it looks like we are doing almost the same thing. It's funny- I don't recall the brace being undercoated on my 91. In any event, I'll try your trick with my pressure washer and the bug/tar remover. I'm going to have a lot of questions when it comes time for paint next year as to what to remove and put back during which step. I don't have a lift, so will be doing subframe removal Shawn-style with an engine hoist. I need to have the front bay painted Imola, so I'm going to have to remove all of the stuff in there- it looks like you left all of yours in during the repaint.

I didn't need paint the front and rear bays of my 98, as I wasn't changing the color. However, I did a color change on my first NSX, no lift pre-shawnstyle.
It's too late to tell you to buy a black NSX. So, as consolation advice I'd tell you to buy a lift. You can sell it when your done (but you won't).:wink: Even a maxjax would be so worth the money and you don't need 11' ceilings.
View attachment 156426
You could technically rebuild the "rebuilt" calipers to your standards. I've done that with a BMW caliper that the Piston was frozen like yours and I couldn't get it out with compressed air. I replaced with new OEM seals and inspected the Pistons. Basically I paid for them to do all the cleaning for me.
Sent from my R1 HD using Tapatalk


You can't go wrong with Black imo.
How'd you end up getting the piston out?
A huge box came today from the NSX Shop in Japan. While I was waiting for the primer coat to dry on the caliper before the next coat, I decided to open it up. I felt like a kid at Christmas time! Here are some highlights.
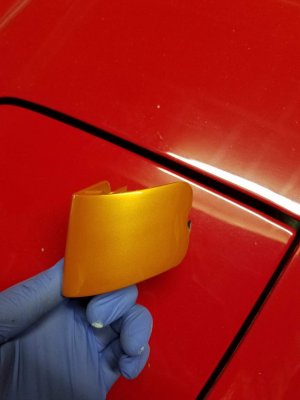
The real deal.

Lots more in the box, including a new coolant header tank, Type-S tank cover, correct NSX driver wiper blade, tons of bolts and brake parts, etc. More to come. I'm running out of room in the garage with all the basement stuff up here...
Definitely black on the calipers. Washi grey wheel color will contrast with that well. Some pictures in the last post are not loading.
Black wouldn't work for this project because the S-Zero did not have a black engine bay and front bay like the R. It is all body color, so I have to go further on the strip down.
FWIW, if you're going to painting a lot of parts I would suggest some good pre-paint cleaner that you get from the automotive paint stores. A gallon lasts a long time and I think it works better than brake cleaner. Having had the displeasure of getting a drop brake cleaner in my eye before it's a win win.
I'm pretty sure that my Monte Carlo Blue Pearl Type-S has a black engine bay. I'll post some pics when I'm back at home (overseas at the moment).