• Protip: Profile posts are public! Use Conversations to message other members privately. Everyone can see the content of a profile post.

Midnight_Raven's Build

Joined
21 September 2002
Messages
2,039
Location
Lawrence, MA
Hey guys,

So I decided I'm going to transfer my pictures and texts from the "Prospective/New Owners section" to the "Build section" since that is what it has become.

So back in July 2011 I purchased a NSX that was in somewhat rough shape. Definitely something most would walk away from but I decided to buy it and mod it to my liking. That way I wouldn't feel bad or hurt it's value any more as I changed it to my liking.

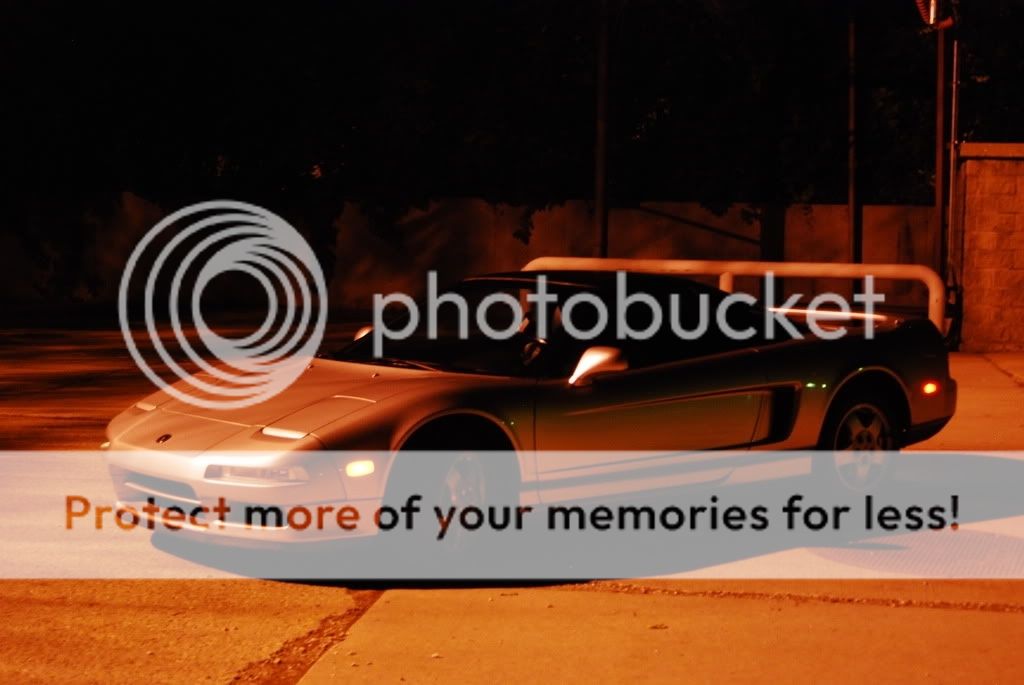
These are some of the first pictures I took of the car. The NSX was pretty much stock with the exception of the aftermarket stereo and the K/N cold air intake.

DSC_4065.jpg

DSC_4049.jpg

DSC_4048.jpg

DSC_4028.jpg


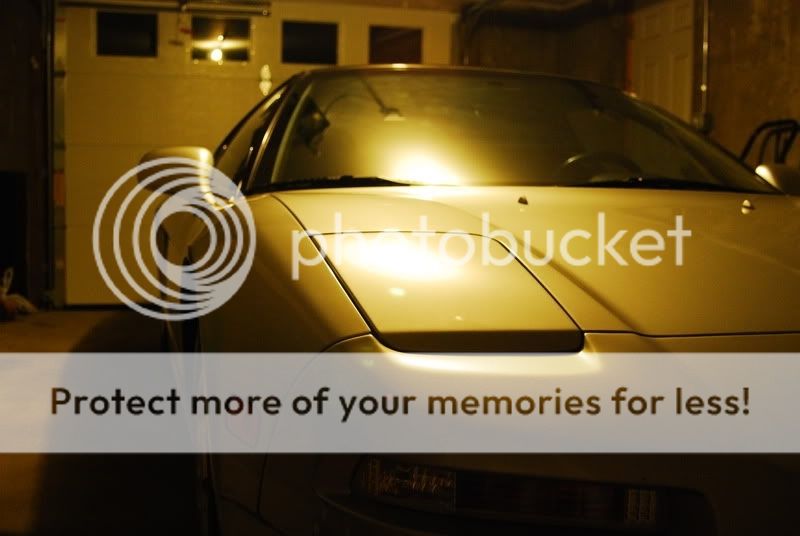
I then followed up with pictures of the car in the daylight showing its overall condition. At this point I had already replaced the damaged front chin spoiler with a Shine GT lip and installed SOS stealth liscence plate brackets.
Exterior Pictures
DSC_4442.jpg

DSC_4438.jpg

DSC_4437.jpg

DSC_4400.jpg


Interior pictures
DSC_4423.jpg

DSC_4413.jpg

DSC_4414.jpg

DSC_4432.jpg


Engine Bay Pictures
DSC_4429.jpg


Now the list of cosmetic issues that I found with the car:

Gouges/scratches on the side skirt:
DSC_4439.jpg


Scratches and cracking paint on rear bumper:
DSC_4436.jpg


Visible patch up on upper front bumper:
DSC_4401.jpg

DSC_4404.jpg


Damaged lower front bumper: (Also I want to get rid of these fog lights they look so tacky with the yellow blue bulbs.)
DSC_4402.jpg

DSC_4403.jpg


Scratches and fading paint on the roof/cabin area:
DSC_4405.jpg

DSC_4410.jpg

DSC_4411.jpg

DSC_4412.jpg


Bad touch ups to scratches :
DSC_4408.jpg

DSC_4428.jpg


Scratches/gouges on wheels:
DSC_4427.jpg

DSC_4426.jpg

DSC_4425.jpg

DSC_4424.jpg


Interior blemishes:
DSC_4418.jpg

DSC_4417.jpg

DSC_4434.jpg

DSC_4433.jpg
 
This was my following update:

Well update after almost half a year. My car been in restoration/mod mode this past two months. The underside and suspension components were covered in 21 years of road grime so it took alot of effort and some cut up hands to clean it up that much. I'm going to do a second pass over them to see if I can get even more of the smaller/harder crud off the parts. It was fun working on it so far and I hope to keep doing so for years to come. I do agree though it does turn into a money pit when you do this type of stuff lol. Oh well you live life onces right.

Interior:
-I sanded down and repainted my trim panels flat black. This was to remove the bubbling paint on the panels.
-I repaired a crack on my center console air vent panel.
-I replaced my main relay since the car seemed to take longer than usual to start up.
-I removed my carpets + mats and deep cleaned them. Helped a little but I think next year I'll just order a new set of carpets (I found some burn marks on the carpet so I'm guessing previous owner was a smoker, not all a loss though I found a 14K gold braclet in the car too and a dollar in change:D).
- I installed SOS door speaker and cross over mounts (Previous audio equipment installation was sub par imo so I improve on it)
- Rewired and replaced amp in sub box. (Now I have bass)
- Installed Dave's short shifter mod
- Installed NSX Type-S shifter rod and cut an inch off the rod
- Installed Civic Type-R aluminum 5 speed shifter ball

Exterior:
- Replaced slightly corroded radiator bracket and hardware
- Replaced corroded hardware for right rear fender
- Cleaned underside of car
- Cleaned suspension components
- Clear signal reflector/light installed.

Waiting to do the following:
- Install NSX Type-R mesh shifter boot. Waiting for parts to arrive.
- Reinstall door panels just waiting for parts to come in. (I had to reorder all 3 door plastic border peices for both sides because whoever did the audio installation destoryed 90% of the plastic tabs :mad: )
- Install KW V3. Waiting for parts to come in. Should help replace my 21 year old worn struts.
- New Rim and Tire package. Need to decide in the next two months or so
- Install missing misc hardware for fender liners.
- Remove and clean battery tray plate. Possibly install lighter battery.

Considering:
- Installing NSX Type-R Stabalizer bar to stiffen up the front of the car. Seems it might help negate the soft springs on the KW V3.

Here are some pictures of the trim panel that were installed on my door and interior.
Center console
2012-01-20_10-43-45_366.jpg


Cracked and bubbly air vent panel fixed :)
2012-01-20_10-42-21_471.jpg


Passenger door minus plastic mounting pieces
2012-01-14_12-07-55_828.jpg


Driver door minus plastic mounting pieces
2012-01-14_12-07-46_344.jpg


Pictures of all the damaged plastic pieces I have to replace
2012-01-20_10-54-20_62.jpg


Here are some pictures of the cleaned suspension components and underbody.

2012-01-20_10-21-21_127.jpg

2012-01-20_10-22-06_525.jpg

2012-01-20_10-21-49_991.jpg

2012-01-20_10-21-09_97.jpg

2012-01-20_10-22-48_778.jpg


Picture of front end with clear corner installed. I think it looks good on sebring silver. Doesn't stand out too much.
2012-01-06_14-58-56_70.jpg
 
My following Update:

Update: My Type-R shift boot is suppose to come in this friday. I can't wait to finish up the center console :). The KW should be coming in on Monday of next week and I'm suspecting my new wheels will arrive the week after. According to delray acura my door stuff should be shipping this Friday so I'm assuming I'll have it sometime next week. The wait for all this stuff is killing me.

I painted my calipers this during this week. I think they look great and will look good with the new black rims I'm in the middle of buying.


Up Close:
2012-01-25_11-49-32_236.jpg


2012-01-25_11-49-16_81.jpg


From a distance:

2012-01-25_11-48-32_50.jpg


2012-01-25_11-48-57_782.jpg
 
I purchased new KW V3 and a used set of Volks RE30s from a fellow prime member. Installed it and had the car corner balanced. Here is how the car sits after that.

DSC_1177.jpg

DSC_1178.jpg

DSC_1179.jpg

DSC_1182.jpg

DSC_1183.jpg

DSC_1184.jpg

DSC_1185.jpg

DSC_1196.jpg

DSC_1189.jpg


After this I purchased a set of blodi design tinted turn signal covers.
2012-06-09_13-55-22_463.jpg
 
Last edited:
New Update:

With a tip off from Turbo2Go I found a good local deal I couldn't pass up on. It was a combo Comptech header and exhaust sale for 750 dollars. Meaning I got them both for $375 each :D. As you can see below headers were rusted up. I took them to a local shop who does ceramic coating (New England Industrial Coating Inc.) and they sandblasted + ceramic coated my headers for $195. Not bad in my opinion still cheaper than buying new Comptech SS headers or buying the knock offs that go for $600 :).

Here is how they were Before:
IMG_2257.jpg

IMG_2256_2.jpg


Here's a pic of them ready to be installed. Actually I still have to finish polishing up the last pipe on the exhaust...darn I forgot I wasn't done with it.
2012-08-17_08-52-40_431.jpg


I'll try to post some before and after video of how the exhaust sounds when I'm done with the work. Hopefully I'll be done this upcoming Wednesday.

I'm so excited I can't wait to feel the power difference!
 
My most recent post is in regards to the headers I'm installing. My O2 sensors has seized up inside the old exhaust manifolds so I decided to purchase new O2 sensors for the car. So project is on hold until I receive the rest of the parts.

I was looking at my motor mounts and it looks like the rubber has a big crack in it. What do you guys think is this engine mount bad?

It's like this on both sides. A small crack on one end and a long crack on the other.
2012-08-20_22-14-55_299.jpg
 
Awesome build thread, MR! I know the NSX is a labor of love for you, and this particular NSX is extremely lucky to fall into such a caring owner's hands. She definitely has come a long way and looks great!

I'm in the process of restoring my newest NSX acquisition back to perfect condition, and I'm very fortunate to have some invaluable resources (such as SOS) and a few really good friends (especially NSXter) who are knowledgeable and handy with the car to assist me with my efforts.

Great job! :)
 
Really loving the black wheels on silver? Mind sharing the specs on your wheels?
 
Really loving the black wheels on silver? Mind sharing the specs on your wheels?

They are Volks RE30 in special order color "Diamond Black" with Yokahama S.Drives mounted on them. Sizes are
17X8.0 +38 with 215/40R17 at the front
18X9.5 +40 with 265/35R18 at the rear.
 
Just curious, why didn't you just take off the two bolts and remove your calipers to paint them, rather than taping around them and doing the work with them still on the car??
 
Just curious, why didn't you just take off the two bolts and remove your calipers to paint them, rather than taping around them and doing the work with them still on the car??

I didn't feel it was really neccessary to do the job. I basicaly just sprayed the paint into a cup and used a brush to free hand the paint onto the calipers. The tape was there just incase I accidently had some paint flick off my brush while applying the paint.
 
Last edited:
Worked a little on polishing up the exhaust today.

Now it's definitely ready to install :smile:.
2012-08-22_10-00-38_230.jpg


Also did a little more cleaning of the underbody. Nice and clean.
2012-08-22_09-59-53_103.jpg


Cleaned some of the cross members I removed.
2012-08-22_09-58-59_485.jpg


I took some pictures of the KW V3s since I haven't posted pictures of that yet.

2012-08-22_10-01-51_382.jpg
2012-08-22_10-01-32_840.jpg


Everything waiting to go back together.
2012-08-22_10-01-12_632.jpg


New updated to the situation. I always has planned to install an oil pan baffle on the NSX since eventually I do want to track it in the future. I noticed when I put the headers in place to look at were the O2 sensor goes, the header will prevent me from working on the oil pan. So I just ordered a oil pan baffle to install before the headers. It kind of sucks though because I wasn't really planning to do it now and it's going to delay me a bit more. :(
 
Last edited:
My oil pan + baffle is at a local shop who I just discovered is in my town. Went in to drop off the pan and while talking to them I see that they have some amazing cars in there. I spotted a couple of Nobles, Porsches, and a Ferrari F40! WTF seriously a F40. Looked beautiful from the quick glance I gave it. Hopefully I'll at least have my oil pan by tomorrow and installed ready for the headers to go in whenever the parts come in.
 
Last edited:
If doing the oil pan also once b pipe is removed take than pan off than you will ha
have much better access to rear manifold and ots bulky heat shield
 
What shop had the F40? You talking about fastrack?
 
What shop had the F40? You talking about fastrack?

No it's not fastrack. The shop is called KMC (Kachel Motor Company). Here's their website.
http://www.kmcauto.com/about_us.html

They specialize on European sport cars. I never heard of them but looking at their shop it definitely looks like a high quality place.
 
Last edited:
Nice! Mine badly needs some of this work. What are you using to clean the underbody? I've tried degreasers on some of the components around the engine with oil + gunk caked on but not much luck.

Btw, love the Volks, those are some of my favorite wheels
 
I used simple green + tooth brush/rag, rubbing compound, and a flat head screwdriver/putty knife to clean the underside. I first used simplegreen and a rag or tooth brush to clean the easy stuff off. Then I used rubbing compound to get some of the tougher stuff off. If I still couldn't get it off I would then used a flat head screw driver or putty knife to remove the hard gunked on stuff. Then worked back with the rubbing compound and simple green until it's clean again. Took a while but looks good.

Update:

I put the headers into place and ready to be tightened down when hardware arrives. Interesting thing though I could not get the rear header in at all. I had to loosen the right side of the rear crossmember to get enough clearance for the header to fall into place. The distance between the studs and the cross beam weren't enough for the header to fit between. The diy headers steps never specify the need to do this. I wonder if my headers are from a really early build or something where the design needed some rework.

Also anyone has any input on my engine mount?
 
Mine looked that bad and I just replaced it

Did you notice any difference on cabin noise afterwards? I might just keep it and have them replace it later on when they do my transmission rework instead.

Additionally I wanted to say thanks to you guys for the positive feedback/input.
 
Last edited:
I just finished putting the car back together with the new headers and the exhaust. It sounds much more aggressive BUT I noticed smoke building up in my engine bay. I let it air out and started the car again. Trying to source where the leak is coming from. From the looks of it none of the joints are leaking it appears to be coming from the top catalytic converter heat shields not from the joints. Does this mean the catalytic converter is bad?

I did a search and got this hit. http://www.nsxprime.com/forum/showthread.php?t=22092 No resolution was posted though. If I need to replace my stock Catalytic converter now that would suck.
 
Last edited:
Its probably oil under the cover on the cat body. A bad cat would smoke out the pipe. How would smoke exit it's sealed and welded metal case?
 
Now that you mention it I did spray BP blaster on the heat shield screws when I first started the job, thinking that I needed to remove them to get to the bolts that hold the headers to the cats. Maybe it's just as you said residual oil/PB left under the covers burning up.

Additionally it was smoking more when I first started it up. Now it's not smoking as much. I can still see some of it coming out of the engine bay vent but it's not as bad as before. I'll try driving it a couple of days and see if it goes away.

Also my next post will include a before and after clip of the exhuast :D. I'm at work so I'll have to do that tomorrow.
 
Back
Top