• Protip: Profile posts are public! Use Conversations to message other members privately. Everyone can see the content of a profile post.

Semi-DIY Mild Engine Build for FI

did you break 300hp?

damn superchargers and that raspy sound
 
Last edited:
Decided to take a chance and just bought these OBX headers for $230 shipped.

1.75" diameter primaries, 2" diameter collectors. Not equal length, but "close-enough." Already have O2 sensor bungs welded in each collector.

http://www.ssaccessories.com/servlet/the-305/OBX-Header-Manifold-Exhaust/Detail

a20791e131f8fa8b177705_m.JPG


I can weld (I use that term loosely), so even if these crack in a few years I won't be out much other than a little time. They have a limited lifetime warranty, but it would probably be easier for me just to fix them.

I'm pretty sure these are from the same supplier as Topspeed. If you get a newer set, these should fit great without having to notch your suspension beam :rolleyes:
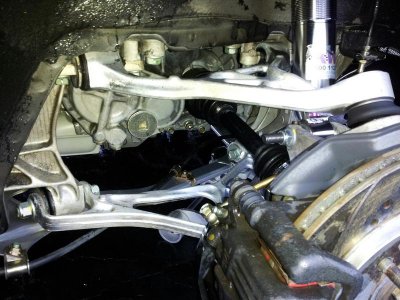
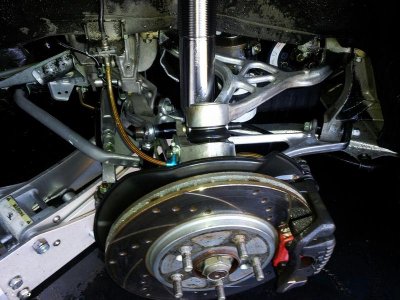
. If they don't, I will try to return them, or modify them myself. I will not cut into my suspension!


Hopefully I can pick up my heads next week when I get some time to run across town.
 
wow, they're so cheap. (from memory I paid around $1200 for my Top Speed headers, and I still think they were great value!)

what is the story behind your cutting suspension comment? did some of the TS headers rub?
 
It was rumored that earlier versions had incorrect jig positioning that lead to a batch where a crossmember had to be notched. It appears a large batch of those defects were found (or are being reproduced again) and recently put for sale in a group buy here:
http://www.nsxprime.com/forum/showthread.php?t=163673

From comparing the online pictures of the two, the Topspeed and OBX headers have different collectors and flex sections, and the OBX headers have a few intermediate pipe welds. Other than that, it is hard to tell how much further out the Topspeed front bank primary sticks out compared to the OBX one.

Keeping my fingers crossed I don't need to modify it!

Dave
 
Mac,

Have you ever seen anything made by OBX?

They are the epitome of "cheap made in China" crap...

No, I haven't. I did some searching on here, and they've been discussed before. It's just hit or miss if they fit (along with Topspeed). Other internet searches have been the same hit or miss.

When I asked Mark J. at Dali what he recommended years ago, he pointed me to these cheap $300 headers on Ebay :wink:

We'll see. It's hard to pass up for $230 shipped while my car is apart!

Dave
 
Hey Tuan, hope everythings going well for you!


The heads are at the machinist ready to be picked up... Just haven't gotten a chance to do so yet with both of our daytime schedules.

So, I haven't done anything on the engine other than to keep learning about tuning and the capabilities with the EMS Series 2. I'm patiently waiting for AEM to release the flex fuel update so I don't have to use the nitrous table hack for timing changes. I don't like that idea since ethanol fuels are allowed to be downblended and I'd only really be able to tune assuming E70 or something, even though a pump states E85. Fuel mixture ratioing is seamless though. Still don't know if I'd like to use the old, expensive and relatively unreliable capacitance and temperature ethanol sensors or try to use the newer OEM-style methods.

I need to figure all this out soon since it will dictate what fuel pump(s), filters, regulator, tank vent, and supply/return tank lines I'll be using.

I don't need the E85 or E100 to take advantage of the power since I'll limit myself to ~500WHP on my engine capabilities - It would just be nice so I don't need an intercooler and to keep my EGT's low to increase material longevity and reduce coking of the variable geometry turbos.... A lot to think about and I'm not very smart :smile:

Edit - With being able to accurately measure (sensor accuracy is typically within 5%) ethanol content, I'd rather set my tune to take advantage in the known ethanol content and engine timing change for maximum power instead of increasing boost on the turbos. Even though improvements have been made, I'm still concerned with their longevity. I just don't have $5k to keep spending on turbos if they go bad every 10k miles. And these variable geometry turbos are awesome. I'll admit it - I want a flat torque curve from 2500 RPM to 7500 RPM.


Besides, I'm doing some composite work now for appearance and aero mods. That stuff takes forever to do :rolleyes:

Dave
 
Last edited:
Dave, I am doing great. Hope all is well with you as well. I will continue to watch for updates! I know a build like this will require alot of research. I love your ABS set up as well! Very nice I might have to update mines as well! haha
 
Thanks, those brake lines took a long time!

I have everything back from the machinist and they look great. I have a little time off, so I was able to do some final cleaning on the block and prep it for assembly.

The block was:
*Time-Serted for my ARP head studs
*Bored
*Honed
*Decked
*Hot-tanked
*Main bores measured
*Line bore checked

And my special touches:
*All internal and external block casting flashing ground smooth (for looks and handling)
*All internal and external machined edges radiused by hand (reduced block stress risers)
*All oil internal passageways radiused and polished for reduced oil pump pressure drop
*All block internal walls polished for quicker oil gravity drain down to the pan.
*Final cleaning with multiple passes of Simple Green, hot Dawn detergent, engine cleaning brushes, pressure washer, steamer, and air compressor


I could have had the block tumbled in lieu of my manual labor destressing the block, but that leads to a matte block finish and I'd like the block/heads/valve covers polished in the end and then clear-coated like BatMans did....

The OEM main caps will get similar treatment to help reduce the stress risers. Every edge of those things are SHARP. This will help my peace of mind pushing them to 500WHP.

Bores have been cleaned with WD-40 and lint-free white wrags to remove hone grit until the rags are spotless. After all the final block cleaning, they were checked/cleaned again to ensure no signs of rust before a coating of oil. Then, the block went into a plastc bag.... It will be awhile more until I can get it back together - will be moving from SC soon. I need to make this into a roller to transport, and box up all of this crap on my floor somehow :frown: But the next garage will have a lift :smile:


152.JPG


234.JPG
 
Last edited:
Trying to make this into a roller so I can load it on a transport.

Cleaned the transmission, axle seals will be replaced:
tranny11.JPG


Even gave the inside (yuck) a nice once-over. The rear main seal should have been replaced at the last clutch change but wasn't:
tranny21.JPG


Cleaned the rear subframe:
subframe.JPG


All of the wheel-wells were removed and cleaned up inside. Now it's onto the engine bay. Started with the transmission and e-brake cables:
cables.JPG


Will tackle the engine bay tomorrow. It will be cleaned and painted a low-gloss black. All of this has been done with Simple Green, green Scotchbrite pads, some wire brushes here and there, as well as a little brake cleaner when needed. It's been a lot of work, but sure looks nice when done. For example, here's a front:
320.JPG
 
Hi,

i jsut loved to have the Simple Green you guys talk all the time.... my car is a mess on the wheel wells and all over the underside....

Nuno
 
Hi,

i jsut loved to have the Simple Green you guys talk all the time.... my car is a mess on the wheel wells and all over the underside....

Nuno

Hi Nuno,

It's not as simple as it sounds! You don't just spray on the cleaner, let it sit, and pressure wash off. It takes a lot of scrubbing with abrasive pads like the 3M ScotchBrite pads.

Here's the Simple Green MSDS sheet. It's labeled as non-toxic, and the active ingredients are less than 20% volume. Maybe you can find something similar there:
http://www.simplegreen.com/pdfs/MSDS_EN-US_AllPurposeCleaner.pdf

For the stubborn undercoating, you'll also have to use toxic cleaners too like brake cleaner or gasoline. Here's my thread on the undercoating:
http://www.nsxprime.com/forum/showthread.php?t=99118

And the inspiration:
http://www.nsxprime.com/forum/showthread.php?t=18328

Vrooom also suggested the 3M citrus cleaner. I haven't personally tried it, but it's non-toxic:
http://www.nsxprime.com/forum/showthread.php?t=131817


Even with gasoline, it's still A LOT of work.

Dave
 
uhhhh...care to share what it is?

I use this + this

I didn't scrub at all.

The only thing is that you need to make sure that the surface temps are not warm or hot otherwise it will discolor aluminum.
 

Attachments

  • 78224_4216141360149_979075982_o.jpg
    78224_4216141360149_979075982_o.jpg
    82.7 KB · Views: 154
  • 133686_4216139960114_1344779475_o.jpg
    133686_4216139960114_1344779475_o.jpg
    83.9 KB · Views: 146
  • 615131_4216137840061_1345921071_o.jpg
    615131_4216137840061_1345921071_o.jpg
    99.3 KB · Views: 143
  • 286453_4216139120093_460167970_o.jpg
    286453_4216139120093_460167970_o.jpg
    90.9 KB · Views: 960
Dave, while you have your subframe out will you be installing the non-compliance items? Or perhaps you already had those done?

The car is looking fantastic.

Thanks Regan. I like the front and rear compliance for my mostly street driving so I haven't tried to eliminate it.

I would like to try otherwise identical cars back-back on a track though to gauge the change :smile:
 
I didn't scrub at all.

The only thing is that you need to make sure that the surface temps are not warm or hot otherwise it will discolor aluminum.

Bat - Those pictures look pretty good, but there is still the petroleum-based undercoating on those suspension pieces. That's the part that's hard to remove without some scrubbing and strong solvents!

My undercoating was starting to flake off behind the wheels exposing red paint. Since my car isn't slammed, it looked like crap. So years ago, I took a few days and removed ALL of my undercoating and painted the wheel wells black. I bagged and weighed the undercoating... I removed at least 8 lbs :biggrin:
 
I have been wanting to purchase a set of OBX headers, but like you I read that there was a bad batch and could not figure out if it was a mistake that had been corrected by the manufacturer by now, other than that I read that they wear great (nice bends, same piping diameter as some branded with the more expensive price tag ),I hope you get a good set that does not require any cutting and let us know the place you got them from as I would want to order from them and hope to have the same luck. Did you get the NA1 or NA2?,as I have read that the flex part of the NA1 tend to be a weak link in most aftermarket headers in the long run, seams as it has nothing to do with them being defective, just a weak area due to the material/design.
 
Back
Top