
Foundry3 Titanium upper chassis bar review
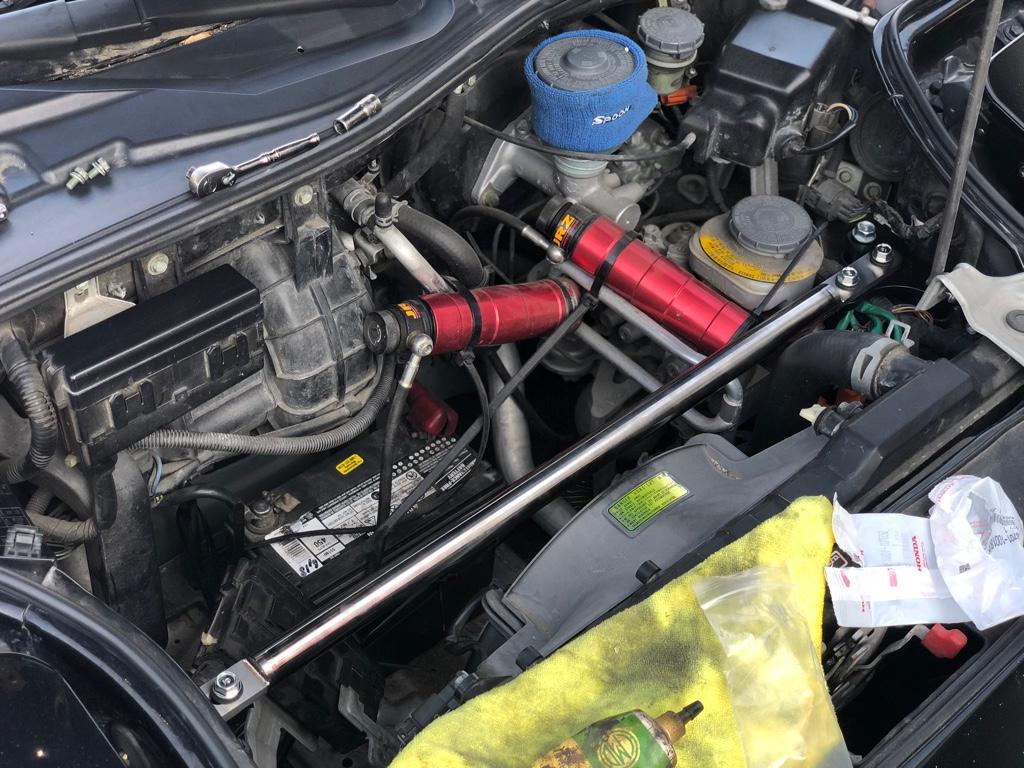
The NSX chassis is one of the best in the world, but that doesn’t mean it can’t be better. Thanks to this high quality titanium front upper bar from Foundry3 the NSX is more crisp and responsive during high speed maneuvers.
.
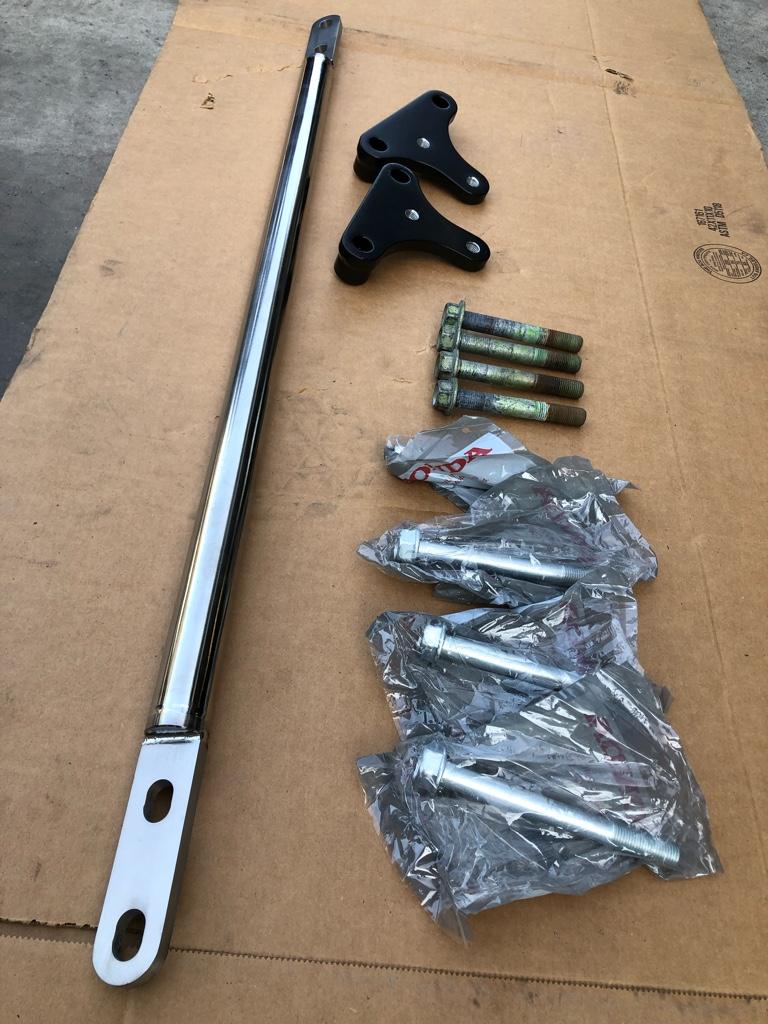
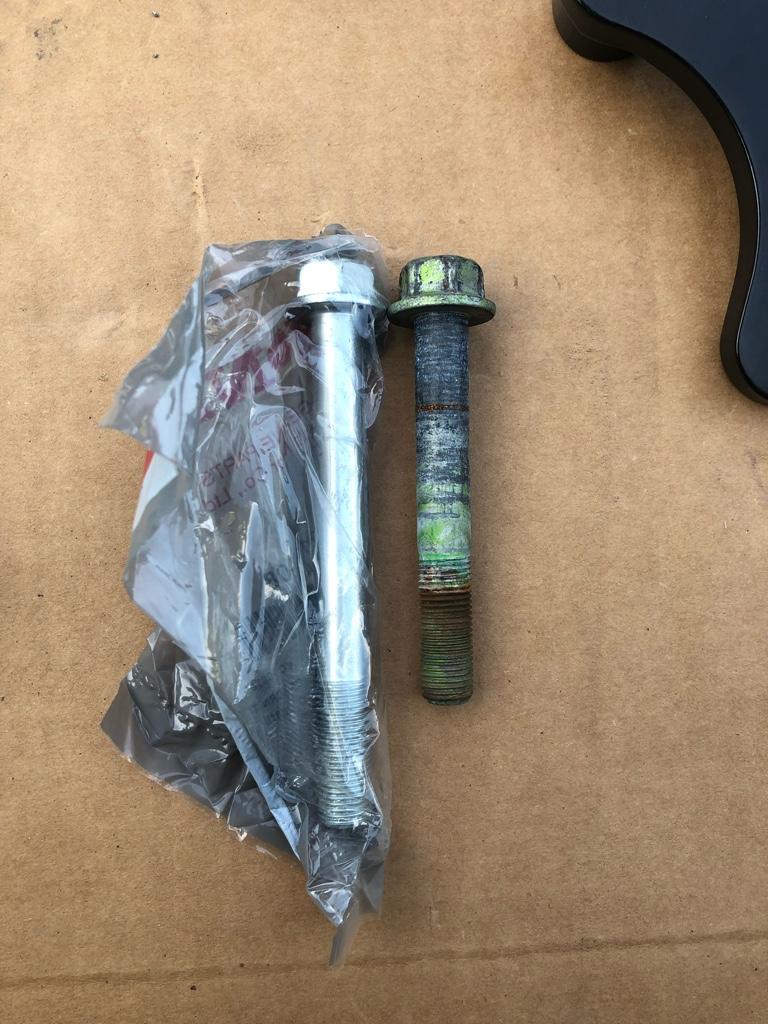
High grade titanium bar makes up the main portion of this brace while two CNC’d flanges are welded on to the ends for easy install and removal. The mounting brackets are CNC’d from aluminum to keep the package lightweight and powder coated so your focus on this excellent bar is unobstructed. Chris also included all the necessary hardware for the piece, going far beyond as to have sourced and supplied factory Honda bolts that work with the application’s new dimensions.
.
They say devil is in the details, and Chris leaves nothing to chance.
.
Installation of the bar was easy and the design allows for much easier service of everything in the frunk. Unlike the competitors design, the Foundry 3 crossbar unbolts and can be removed with ease to access parts like the radiator, battery, and ABS module.
.
You can install the bar with the car on the ground, first you need to remove the fuse box on the passenger side (two 6mm bolts).
.
After you have done that you can remove the four 12mm bolts (17mm head) that go down into the frame rails, these are tricky to access and remove without scratching the headlight bucket in the early cars (take your time and a universal joint is your friend here).
.
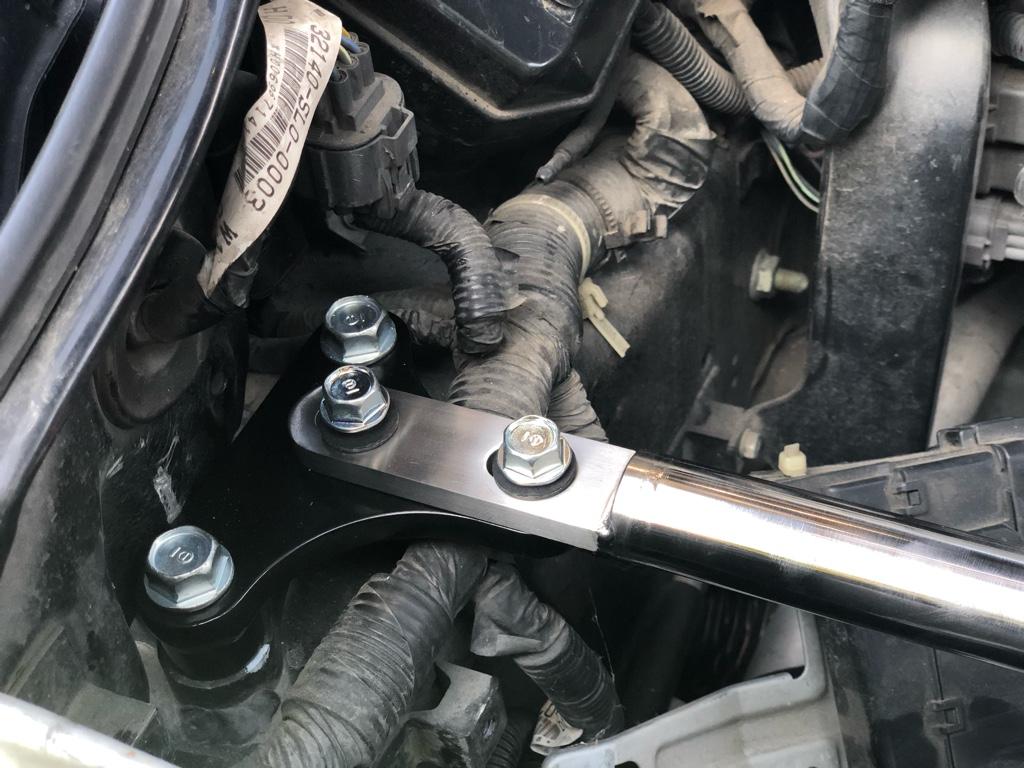
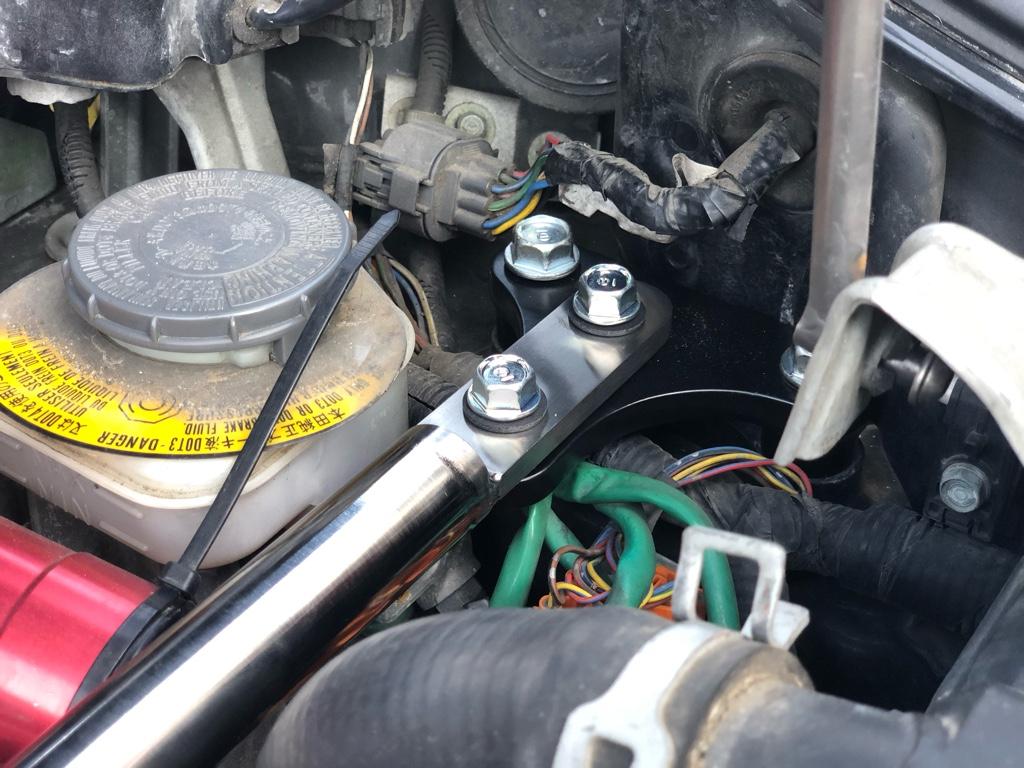
You may now great ready to install the powder coated pieces onto the frame rails. The orientation is important to make sure the cross bar will clear everything once the install is completed. You can mock up the two brackets and bar to ensure that you have the sides correctly orientated. Using the supplied longer 12mm hardware you can install the powder coated pieces, torque to factory spec (see factory service manual).
.
*INSTALLATION TIP*
You can “preload” the forward most bolt into the bracket to aid in installation of the hard-to-reach bolts (closest to the front of the car) place the supplied bolt in the bracket and install the two pieces together to ease the process.
.
Installing the bar is very simple with four 8mm bolts that Chris supplies. Use the fabric washers and torque the bolts until the washers start to deform.
.
Refasten your fuse box in place, make sure everything you unplugged is plugged back in and installed correctly. One last check for clearance and carefully close the hood.
. You’re done! Now enjoy the awesomeness that is the new Foundry 3 Titanium cross bar.
.
There is no substitute for quality. Foundry 3 has set the bar high. ^____^
.
https://www.foundry3studios.com/pro...1PNde3vf2-CFV1_40ISH-rHDAK4pkcJUtT2_MMiLkdCxA
The NSX chassis is one of the best in the world, but that doesn’t mean it can’t be better. Thanks to this high quality titanium front upper bar from Foundry3 the NSX is more crisp and responsive during high speed maneuvers.
.
High grade titanium bar makes up the main portion of this brace while two CNC’d flanges are welded on to the ends for easy install and removal. The mounting brackets are CNC’d from aluminum to keep the package lightweight and powder coated so your focus on this excellent bar is unobstructed. Chris also included all the necessary hardware for the piece, going far beyond as to have sourced and supplied factory Honda bolts that work with the application’s new dimensions.
.
They say devil is in the details, and Chris leaves nothing to chance.
.
Installation of the bar was easy and the design allows for much easier service of everything in the frunk. Unlike the competitors design, the Foundry 3 crossbar unbolts and can be removed with ease to access parts like the radiator, battery, and ABS module.
.
You can install the bar with the car on the ground, first you need to remove the fuse box on the passenger side (two 6mm bolts).
.
After you have done that you can remove the four 12mm bolts (17mm head) that go down into the frame rails, these are tricky to access and remove without scratching the headlight bucket in the early cars (take your time and a universal joint is your friend here).
.
You may now great ready to install the powder coated pieces onto the frame rails. The orientation is important to make sure the cross bar will clear everything once the install is completed. You can mock up the two brackets and bar to ensure that you have the sides correctly orientated. Using the supplied longer 12mm hardware you can install the powder coated pieces, torque to factory spec (see factory service manual).
.
*INSTALLATION TIP*
You can “preload” the forward most bolt into the bracket to aid in installation of the hard-to-reach bolts (closest to the front of the car) place the supplied bolt in the bracket and install the two pieces together to ease the process.
.
Installing the bar is very simple with four 8mm bolts that Chris supplies. Use the fabric washers and torque the bolts until the washers start to deform.
.
Refasten your fuse box in place, make sure everything you unplugged is plugged back in and installed correctly. One last check for clearance and carefully close the hood.
. You’re done! Now enjoy the awesomeness that is the new Foundry 3 Titanium cross bar.
.
There is no substitute for quality. Foundry 3 has set the bar high. ^____^
.
https://www.foundry3studios.com/pro...1PNde3vf2-CFV1_40ISH-rHDAK4pkcJUtT2_MMiLkdCxA