-
Protip: Profile posts are public! Use Conversations to message other members privately. Everyone can see the content of a profile post.
You are using an out of date browser. It may not display this or other websites correctly.
You should upgrade or use an alternative browser.
You should upgrade or use an alternative browser.
Honcho's Long Road to Imola Type-S Zero
- Thread starter Honcho
- Start date
Curious, can you reuse the old foam or does it get messed up when removing the old leather?
Curious, can you reuse the old foam or does it get messed up when removing the old leather?
That would be rather difficult. Chances are the glue they used on the backside of the inserts to hold the leather seeped into the fold over and adhered the foam to the leather in areas. So when you pull the old leather off it will rip part of the foam along the edge. If you look closely at the first picture in his post you can see what I mean in the two old leathers in the bottom of the picture.
I guess if you are SUPER careful it could be possible, but then again you are talking about potentially 28 year old foam, why not use new?
Last edited:
you know there are child labor laws in Colorado......:tongue:
If you view it as "labor" LOL. A 4 and 6 year old, scissors and expensive interior parts- what could go wrong?
Curious, can you reuse the old foam or does it get messed up when removing the old leather?
That would be rather difficult. Chances are the glue they used on the backside of the inserts to hold the leather seeped into the fold over and adhered the foam to the leather in areas. So when you pull the old leather off it will rip part of the foam along the edge. If you look closely at the first picture in his post you can see what I mean in the two old leathers in the bottom of the picture.
I guess if you are SUPER careful it could be possible, but then again you are talking about potentially 28 year old foam, why not use new?
Agree with Spencer. The leather is tacked to the foam with the same radioactive Uber-glue as the rest of the trim. I can't see any way of getting the leathers off without tearing at least some of the foam. New foam is only a few dollars, so it seems like a waste of time to attempt to save the old stuff.
Weight Reduction - S Zero Conversion 22
S Zero Door Cards Part 2
First, I needed to get the wrinkles out of the fabric using a steam iron. I was sper careful, as I did not know how much heat the small synthetic fibers could handle. Ultimately, I got all the wrinkles out, but the big crease was still there.
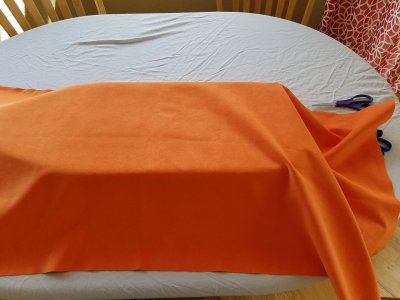
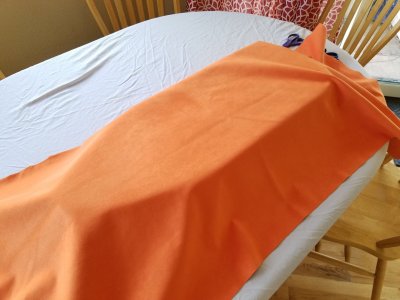
Using the old leathers, trace out the patterns on the back side of the fabric. Again, leave yourself about 10mm of room all around, as you can trim later. Note that, at least on the orange color, the marker bleeds through slightly, so keep your labels on and area that will wrap around the back side of the card.
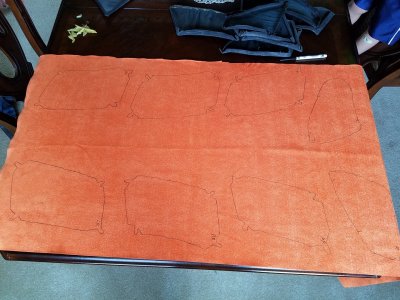
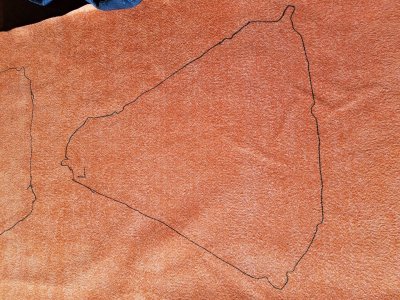
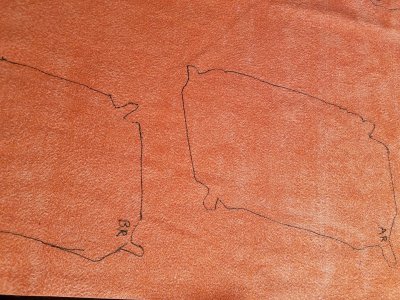
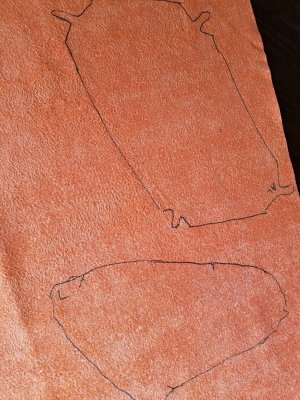
Next, just like with the foam, lightly spray the back of the fabric and the foam. We laid the pieces out on a clean sheet of cardboard for each set so that we would not contaminate the "good" side of the fabric with adhesive.
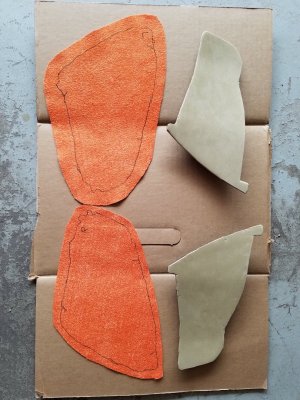
Tack one side and then pick up the piece, letting the fabric hang down like a curtain. Slowly and carefully roll the fabric onto the foam making sure there are no wrinkles or pockets.
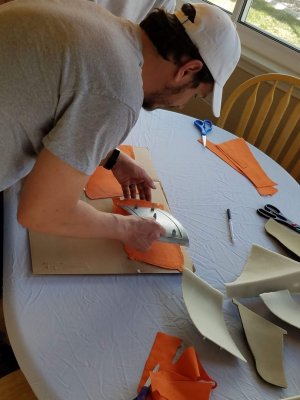
Once you have let the glue dry for a few minutes, you can start test folding and trimming the excess. You want to use the raised metal edges on the door card as a guide for how much to trim. The nice thing about the 77 adhesive is that it remains tacky for a long time, so you can pull, stick and unstick the fabric many times to get an idea of how it will lay down.
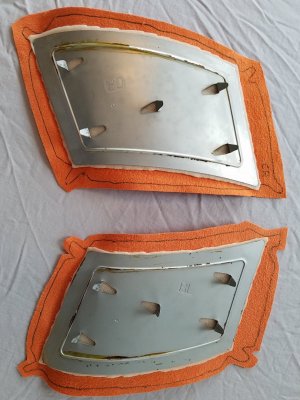
S Zero Door Cards Part 2
First, I needed to get the wrinkles out of the fabric using a steam iron. I was sper careful, as I did not know how much heat the small synthetic fibers could handle. Ultimately, I got all the wrinkles out, but the big crease was still there.


Using the old leathers, trace out the patterns on the back side of the fabric. Again, leave yourself about 10mm of room all around, as you can trim later. Note that, at least on the orange color, the marker bleeds through slightly, so keep your labels on and area that will wrap around the back side of the card.


Next, just like with the foam, lightly spray the back of the fabric and the foam. We laid the pieces out on a clean sheet of cardboard for each set so that we would not contaminate the "good" side of the fabric with adhesive.

Tack one side and then pick up the piece, letting the fabric hang down like a curtain. Slowly and carefully roll the fabric onto the foam making sure there are no wrinkles or pockets.

Once you have let the glue dry for a few minutes, you can start test folding and trimming the excess. You want to use the raised metal edges on the door card as a guide for how much to trim. The nice thing about the 77 adhesive is that it remains tacky for a long time, so you can pull, stick and unstick the fabric many times to get an idea of how it will lay down.

Weight Reduction - S Zero Conversion 23
S Zero Door Cards Part 3
Now that the fabric is trimmed so that it will fold correctly, apply your Weldwood contact adhesive to the metal border and to the flaps of fabric. Even though it says that the glue bonds on contact and no clamps are needed, I found the pieces will separate (especially if under tension) if you try to glue right away. If you wait about 60 seconds, the glue becomes tacky enough to adhere and stay in place.
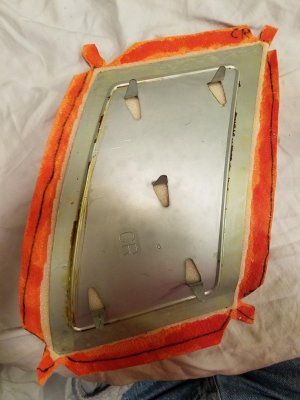
I chose to fold the big flaps first, pulling them tight and wrapping the foam around the edge of the metal. Then, I folded the "fingers" to round out the corners.
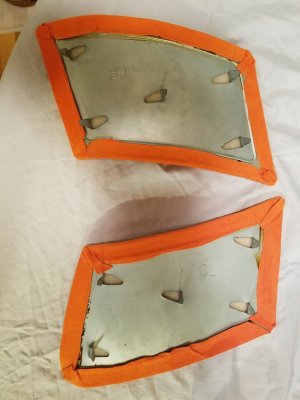
Once the glue dries overnight, the bond is extremely strong. And now, I have Type-S Zero door cards.
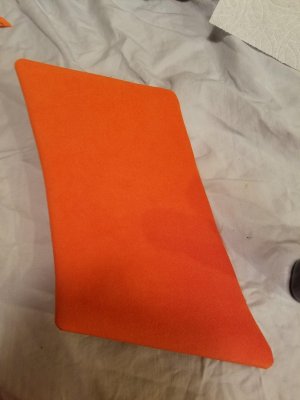
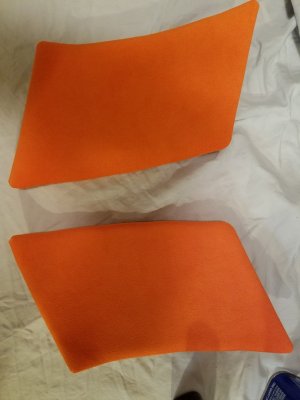
S Zero Door Cards Part 3
Now that the fabric is trimmed so that it will fold correctly, apply your Weldwood contact adhesive to the metal border and to the flaps of fabric. Even though it says that the glue bonds on contact and no clamps are needed, I found the pieces will separate (especially if under tension) if you try to glue right away. If you wait about 60 seconds, the glue becomes tacky enough to adhere and stay in place.

I chose to fold the big flaps first, pulling them tight and wrapping the foam around the edge of the metal. Then, I folded the "fingers" to round out the corners.

Once the glue dries overnight, the bond is extremely strong. And now, I have Type-S Zero door cards.


Last edited:
The directions for the Weldwood contact cement that I've used in the past say to let it dry for 10-15 minutes (depending on temperature and humidity) before joining the pieces. If you let it dry properly first it will hold just fine even under tension, I used the same stuff when reupholstering my center console and I had to stretch the leather pretty tight to get it to look perfect.
Also the photos aren't showing up for some reason.
Also the photos aren't showing up for some reason.
Last edited:
When you attached the "fingers" did you apply more cement to the surface since it's basically fresh material?
I can't see the photos either...I could earlier though.
I can't see the photos either...I could earlier though.
I was looking at the recent posts and it brought back a memory. I used to hang out with a friend's brother-in-law who was an auto upholsterer. He could do all this stuff at light speed. One of his pro tricks was the he used a steam generator on the fabric, leather or vinyl, before installing. It made the fabric stretchy and more flexible to deal with. It was the magic trick to stretching upholstery over seat cushions and seat backs. Obviously one had to work fast before the heat was lost, but he knew what he was doing. He did nice work.
I re-pasted the links. Hopefully they are showing up. Sometimes, Google photos changes the links after I upload the pics.
Yes! They love working on the NSX. My little guy (4) makes sure to remind me that the Type S Zero is "much, much, MUCH faster than a regular NSX." He about lost his little mind when I showed him the Best Motoring where the S Zero beats the NA1 NSX-R at Suzuka by 2 seconds!
Yes. If the finger laid on top of suede than I added cement to the "fresh" suede. In some cases, the finger laid down on metal, which already had cement on it.
good job kids!!
Yes! They love working on the NSX. My little guy (4) makes sure to remind me that the Type S Zero is "much, much, MUCH faster than a regular NSX." He about lost his little mind when I showed him the Best Motoring where the S Zero beats the NA1 NSX-R at Suzuka by 2 seconds!
When you attached the "fingers" did you apply more cement to the surface since it's basically fresh material?
I can't see the photos either...I could earlier though.
Yes. If the finger laid on top of suede than I added cement to the "fresh" suede. In some cases, the finger laid down on metal, which already had cement on it.
Weight Reduction - S Zero Conversion 26
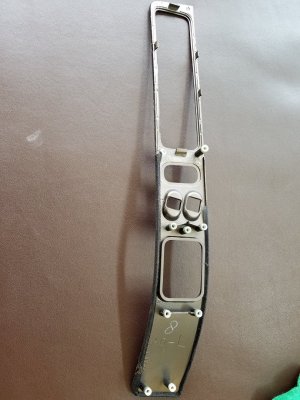
The careful disassembly of the door panels has begun. Lots of brittle, old ABS plastic. More broken screw tabs. Truly scary moments removing the vents from the switch trims (they are held on by thin plastic clips, adhesive and the sticky felt trim) but managed not to break any clips! One post on the switch trim piece is broken, but should be able to re-cement it. Now to do the other side and get the ferric chloride bath ready.
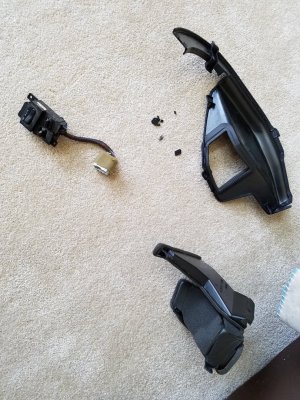
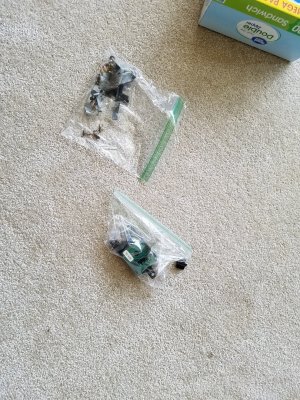
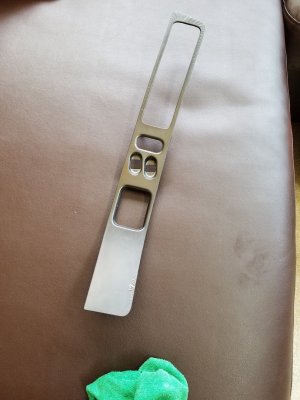
Test fitting the door cards. Unacceptable gap at the rear card, so I will have to fiddle with the fitment. Still, it looks amazing. The old vinyl was soaking up the 303 protectant like a sponge- so old and dry! I will have to do several more coats.
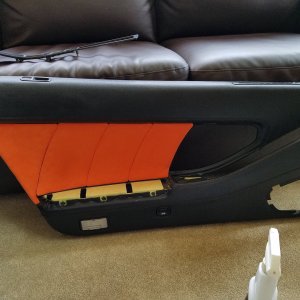
Next is to move to the passenger panel and remove the ashtray door and clock surround.
The careful disassembly of the door panels has begun. Lots of brittle, old ABS plastic. More broken screw tabs. Truly scary moments removing the vents from the switch trims (they are held on by thin plastic clips, adhesive and the sticky felt trim) but managed not to break any clips! One post on the switch trim piece is broken, but should be able to re-cement it. Now to do the other side and get the ferric chloride bath ready.


Test fitting the door cards. Unacceptable gap at the rear card, so I will have to fiddle with the fitment. Still, it looks amazing. The old vinyl was soaking up the 303 protectant like a sponge- so old and dry! I will have to do several more coats.

Next is to move to the passenger panel and remove the ashtray door and clock surround.
Last edited:
Love all the details about this thread. Question... is this the headliner foam that you used and do you by any chance know the thickness?
https://www.joann.com/headliner-utility-fabric-54in-gray/3496064.html#q=Headliner&start=1
Thanks
https://www.joann.com/headliner-utility-fabric-54in-gray/3496064.html#q=Headliner&start=1
Thanks
Love all the details about this thread. Question... is this the headliner foam that you used and do you by any chance know the thickness?
https://www.joann.com/headliner-utility-fabric-54in-gray/3496064.html#q=Headliner&start=1
Thanks
Yes that is the headliner foam that was used and it's around 4mm thick. We removed the "felt" from the foam first though.
Weight Reduction - S Zero Conversion 27
Taking apart the right side door panel. Pieces just crumbled out of the panel. Probably the same on your NSX. Lots of screw tab repair work to do. Luckily I still have a long roll of metal pipe hanger from the repairs on my first NSX. Just need to find my epoxy.
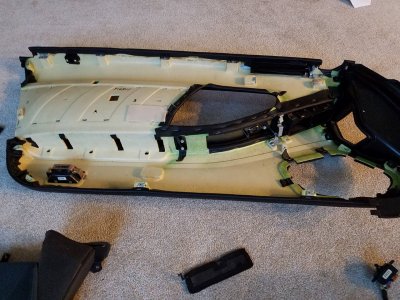
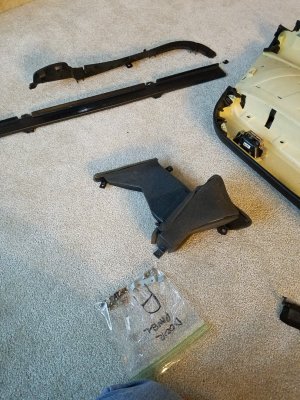
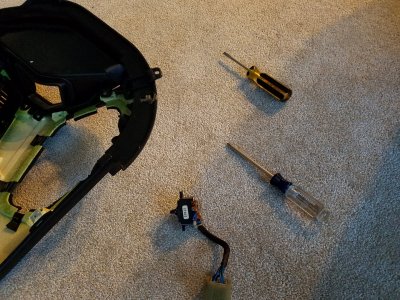
The vent door just fell out of the vent when I tried to pull the switch trim out. Doesn't look broken, but going to be a challenge to re-install considering the fit is under tension and the plastic is ancient and brittle. Also, the felt is rock hard and crumbling. Might have to find a replacement felt/rubber.
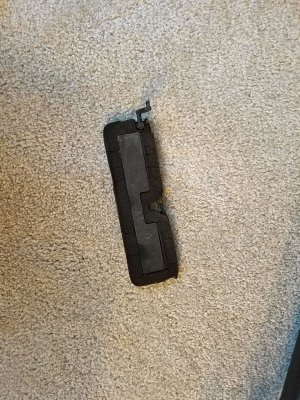
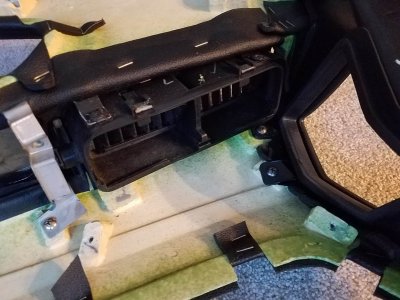

The switch trim piece is cracked. However it is in a spot that rests on the vent, so I will attempt a repair and refinish. Does anyone know if the material is ABS?
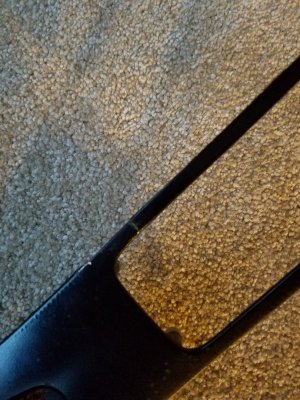
The right side door panel has much better fitment on the door cards than the left. I think these door cards are custom fit to each NSX. The cards on this side are all original to the car. The rearmost card on the left side panel is from a 1995 NSX and does not match the adjacent card. I might have to gently bend the metal...which is likely what some talented tech did at the Tochigi factory so long ago.
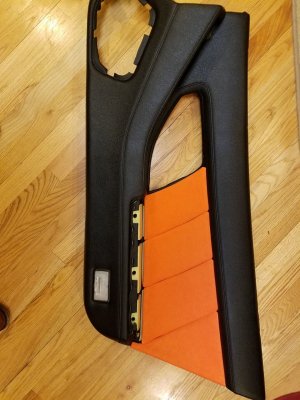
Taking apart the right side door panel. Pieces just crumbled out of the panel. Probably the same on your NSX. Lots of screw tab repair work to do. Luckily I still have a long roll of metal pipe hanger from the repairs on my first NSX. Just need to find my epoxy.


The vent door just fell out of the vent when I tried to pull the switch trim out. Doesn't look broken, but going to be a challenge to re-install considering the fit is under tension and the plastic is ancient and brittle. Also, the felt is rock hard and crumbling. Might have to find a replacement felt/rubber.


The switch trim piece is cracked.

The right side door panel has much better fitment on the door cards than the left. I think these door cards are custom fit to each NSX. The cards on this side are all original to the car. The rearmost card on the left side panel is from a 1995 NSX and does not match the adjacent card. I might have to gently bend the metal...which is likely what some talented tech did at the Tochigi factory so long ago.

Last edited:
I'm not seeing the pics from your latest post
I can't see photos either
Hopefully the photos are showing now. Weird behavior from the Google shared folder...
Great Progress! Question on the door cards: Do you have to remove the armrest to remove/install each card?
Great Progress! Question on the door cards: Do you have to remove the armrest to remove/install each card?
No- the cards fit behind the armrest. I removed the armrests here to repair and refresh them.
Coolant hoses, rad, etc. 02
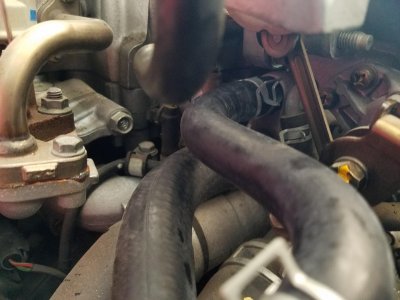
During the health check, I noticed that the lower coolant tank hose was using a jubilee style clamp, which is not good. Replacing the hose at the water jacket without removing the throttle body was a great challenge, but I succeeded. The condition of the engine is very dirty due to virtually 100% of my work effort going to the front end of the car, but I will wash and dress it when the car can be rolled back out onto the driveway. Soon.
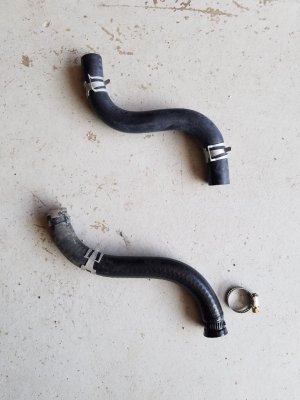
Old coolant hose. Look how smashed the end is from the jubilee clamp. Never use these on NSX coolant hoses.
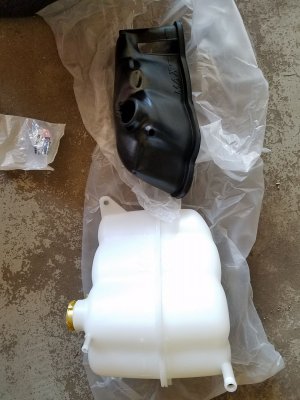
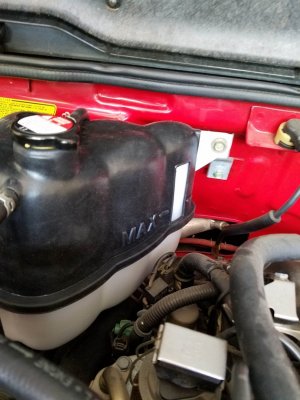
New tank, NSX-R/Type-S cover and pressure cap. All OEM. Special thanks to MITA for the great delivery and selection of these rare JDM parts.
Assembled and ready to install.
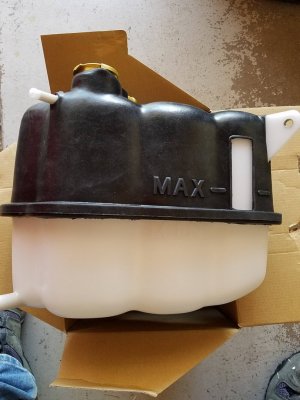
A lot of coolant spilled from the old aluminum tank when it got stuck trying to tilt it up after pulling off the lower hose. Another reason to wash the engine- otherwise I will smell coolant every time I drive.
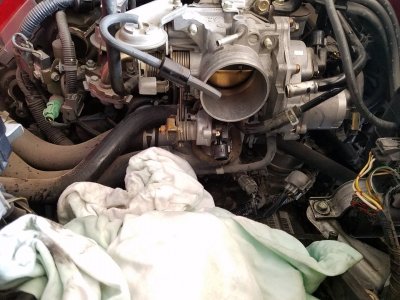
Very pleased to see the condition of the hose barb at the water jacket. Nice and shiny metal. These can become quite corroded and the water jacket is expensive to replace with a long lead time. Made sure to use silicone lube on installation of the new hose.
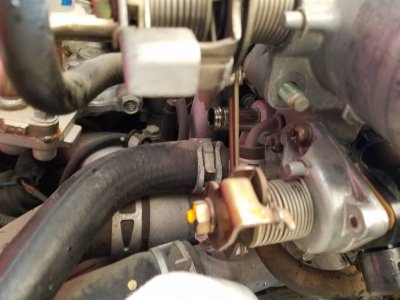
New hose installed with new OEM clamps
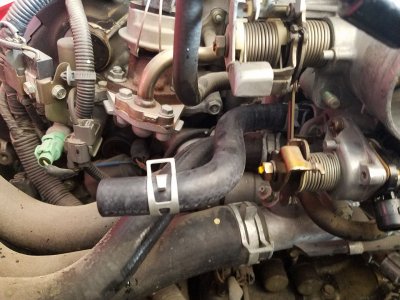
Very challenging to reach the clamp with the throttle body in the way.
One step closer to S Zero. I recovered enough coolant to fill to the MAX line, but with the air introduced into the system, I will have to add more after running the engine.
During the health check, I noticed that the lower coolant tank hose was using a jubilee style clamp, which is not good. Replacing the hose at the water jacket without removing the throttle body was a great challenge, but I succeeded. The condition of the engine is very dirty due to virtually 100% of my work effort going to the front end of the car, but I will wash and dress it when the car can be rolled back out onto the driveway. Soon.
Old coolant hose. Look how smashed the end is from the jubilee clamp. Never use these on NSX coolant hoses.

New tank, NSX-R/Type-S cover and pressure cap. All OEM. Special thanks to MITA for the great delivery and selection of these rare JDM parts.

Assembled and ready to install.

A lot of coolant spilled from the old aluminum tank when it got stuck trying to tilt it up after pulling off the lower hose. Another reason to wash the engine- otherwise I will smell coolant every time I drive.

Very pleased to see the condition of the hose barb at the water jacket. Nice and shiny metal. These can become quite corroded and the water jacket is expensive to replace with a long lead time. Made sure to use silicone lube on installation of the new hose.

New hose installed with new OEM clamps

Very challenging to reach the clamp with the throttle body in the way.

One step closer to S Zero. I recovered enough coolant to fill to the MAX line, but with the air introduced into the system, I will have to add more after running the engine.

Body and Paint Work 21
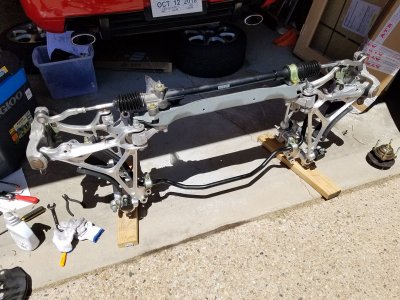
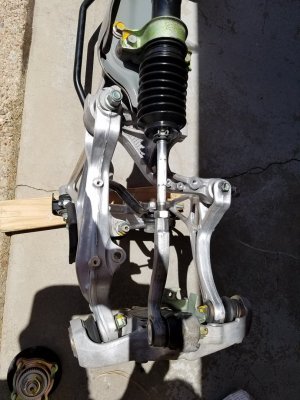
Front subframe is almost complete. Lots of replacement parts, including steering boots. Unfortunately, I broke a band clamp while tightening, so re-install of the subframe is delayed until I can get another band. Still, really nice to see the fully refreshed subframe with the rebuilt manual rack from NSX Rack Repair. Still have to clean up the hubs with a wire wheel.
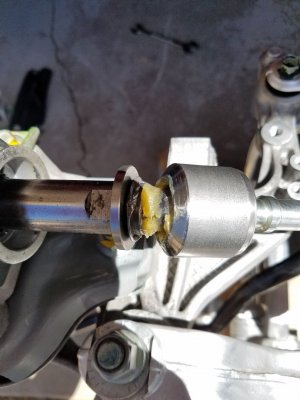
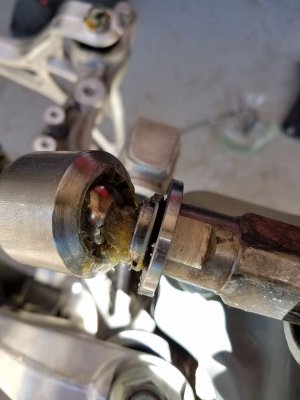
Greasing the rod ends.
New steering rack boots treated with 303 and installed.
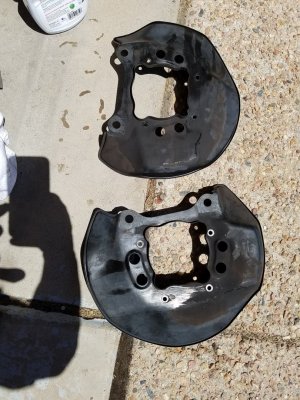
Tired old 1992 and new NSX-R brake shields.
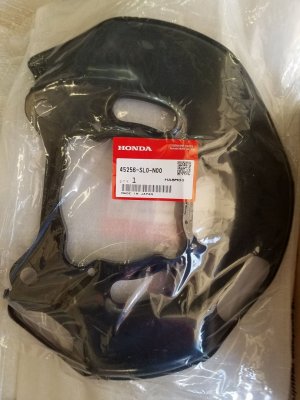
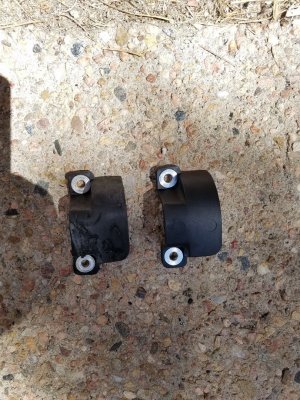
Small touches. New plastic covers for the compliance pivot.
Front subframe is almost complete. Lots of replacement parts, including steering boots. Unfortunately, I broke a band clamp while tightening, so re-install of the subframe is delayed until I can get another band. Still, really nice to see the fully refreshed subframe with the rebuilt manual rack from NSX Rack Repair. Still have to clean up the hubs with a wire wheel.

Greasing the rod ends.


New steering rack boots treated with 303 and installed.

Tired old 1992 and new NSX-R brake shields.


Small touches. New plastic covers for the compliance pivot.

I will never understand how people continue to pay 300'ish bucks for a black sheepskin coolant tank condom.:biggrin: The door cards came out nice.
I will never understand how people continue to pay 300'ish bucks for a black sheepskin coolant tank condom.:biggrin: The door cards came out nice.
Sometimes you gotta pay the NSX gods. LOL
Similar threads
- Replies
- 4
- Views
- 510
- Locked
- Replies
- 2
- Views
- 444


