$50?! That's basically any and everything you could purchase outside of a Big Mac meal. You need to adjust for inflation sir.
My vehicles would look pretty plain if I had to do that.
My vehicles would look pretty plain if I had to do that.
It appears that now is a good time to renegotiate your arrangement and get the threshold bumped up a bit. Strike while you can and use the excuse that it just cost you money!

$50?! That's basically any and everything you could purchase outside of a Big Mac meal. You need to adjust for inflation sir.
My vehicles would look pretty plain if I had to do that.


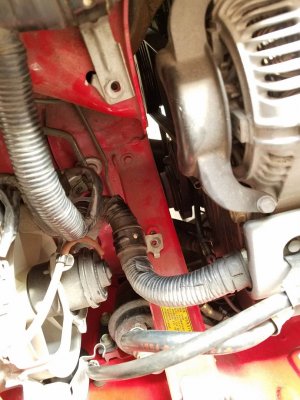
Had a few minutes last night to replace the old, bent battery negative cable with Ben's excellent replacement product.
How did you order the cable? I tried searching and found threads related to Daisy, but did not see any links about ordering.
Thanks.
Thank you. Great build. Keep it up and hope Mrs feels better soon so you can use the nosy power tools
Perfect conversion from the conversion Pro.


.jpg")


.jpg")

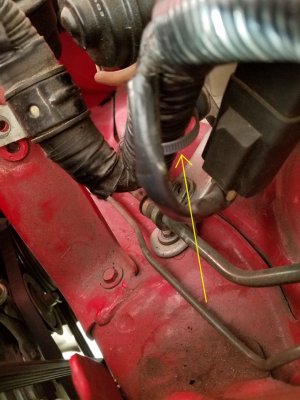
Despite not having the rubber rack boots, was able to get the new tie rod end boots and clips packed and installed. Even thought the ball joints seem ok, I am going to replace the entire tie rod ends in the paint stage. Just waiting on the parts from Honda...


My "spare" 1995 driver door panel turned out to have many defects, but it did yield the critical rear-most insert piece. Now I can finish them in the correct orange suede. My house is full of NSX door panels.


I will also re-cover the speaker grills, as they were all damaged on all of the panels!

Both the original and donor driver armrests were damaged. Thankfully, Honda still has them.

Virtually all of the damage to these door panels was the result of aftermarket audio work- people unfamiliar with the NSX trying to remove and/or disassemble the panels. I've seen several NSXs with panels in this condition now and I would caution any owners who are thinking about having audio components installed to take extra care to make sure they inspect the door panels after the work to ensure nothing was damaged.[/QUOTE
Hi! I've been following your build for awhile! I have some used door panel leather trim pieces if your interested!


.jpg")


.jpg")


Did you just use a generic puller to get the tierods ball joints apart or did you use the NSX specific one? Will be replacing these boots soon and starting to research this before doing it.Despite not having the rubber rack boots, was able to get the new tie rod end boots and clips packed and installed. Even thought the ball joints seem ok, I am going to replace the entire tie rod ends in the paint stage. Just waiting on the parts from Honda...
Have you used that for all the ball joints on the rear? If so that is great news cause I have that exact one from doing my TSX.^ this is what I have been using: https://www.amazon.com/gp/product/B0015PN010
Have you used that for all the ball joints on the rear? If so that is great news cause I have that exact one from doing my TSX.
Thanks for your great build thread. I am working on a very similar NSX to yours. So much good information and great pictures. You are an inspiration!


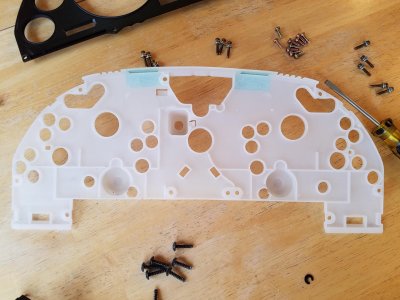
.
With a little ABS cement, it was as good as new. This stuff is vastly superior to epoxy, as it melts the plastics and welds it together rather than using glue as a binder to hold the pieces together. A great option for the NSX, as there is black ABS all over the car.