I have to say that this is one of the most exciting threads I've seen on any online forum in a very long time. I'm sitting on the virtual sidelines cheering you on [MENTION=18194]Honcho[/MENTION]!
-
Protip: Profile posts are public! Use Conversations to message other members privately. Everyone can see the content of a profile post.
You are using an out of date browser. It may not display this or other websites correctly.
You should upgrade or use an alternative browser.
You should upgrade or use an alternative browser.
Honcho's Long Road to Imola Type-S Zero
- Thread starter Honcho
- Start date

I have to say that this is one of the most exciting threads I've seen on any online forum in a very long time. I'm sitting on the virtual sidelines cheering you on [MENTION=18194]Honcho[/MENTION]!
Thanks!
Dropped off most of the body panels today and spent some time going over the game plan with the painter. There's a lot of little nits to repair and he's obsessive about prep, so it will be a few weeks before I see painted panels. He's going to double check the paint codes with PPG's corporate office in order to get the mix perfect and I'll head out next week to inspect some color cards after he sprays them. We're going to compare it against my tow hook to make sure the shading is perfect. Still have to remove the rear quarter panels and bumper. Hope to complete it by the end of the week.
Engine Refresh 6
With some snow and bitter cold weather moving in next week, decided to re-arrange some tasks to take advantage of the nice weather this week. First task is to pressure wash and de-grease the engine. The entire engine block was covered in a thick layer of black sludge- a combination of old oil leaks and driveshaft grease. After using an entire can of engine-brite and about half a bottle of simple green HD, managed to use the pressure washer to clean it to this level. While there is much more deep cleaning to do, I have removed most of the large contaminants and am comfortable opening up the engine at this stage.


With some snow and bitter cold weather moving in next week, decided to re-arrange some tasks to take advantage of the nice weather this week. First task is to pressure wash and de-grease the engine. The entire engine block was covered in a thick layer of black sludge- a combination of old oil leaks and driveshaft grease. After using an entire can of engine-brite and about half a bottle of simple green HD, managed to use the pressure washer to clean it to this level. While there is much more deep cleaning to do, I have removed most of the large contaminants and am comfortable opening up the engine at this stage.
Engine Refresh 7
Managed to get the front beam washed with the initial clean. But then my pressure washer broke. It won't hold pressure anymore. :frown: The whole day was like that, and I couldn't move on to scrubbing the subframe.

Still some sludge left over. This is about where the pressure washer died.

The oil cooler looked ruined upon initial inspection- the top appeared to be cratered and caked with rust, much like those in Kaz's blog. It appeared so bad that I bought a new one, but this NSX is full of good surprises too. Turns out the flaky "rust" was just baked on crud and after some serious scrubbing, the oil cooler is almost in brand-new spec! Virtually no corrosion at all on the top.

Looks like they re-used the original cover when doing the timing belt service. The water pump drain hole looks like they cut it out. I have a new cover, so not a problem.

Managed to get the front beam washed with the initial clean. But then my pressure washer broke. It won't hold pressure anymore. :frown: The whole day was like that, and I couldn't move on to scrubbing the subframe.
Still some sludge left over. This is about where the pressure washer died.
The oil cooler looked ruined upon initial inspection- the top appeared to be cratered and caked with rust, much like those in Kaz's blog. It appeared so bad that I bought a new one, but this NSX is full of good surprises too. Turns out the flaky "rust" was just baked on crud and after some serious scrubbing, the oil cooler is almost in brand-new spec! Virtually no corrosion at all on the top.
Looks like they re-used the original cover when doing the timing belt service. The water pump drain hole looks like they cut it out. I have a new cover, so not a problem.
Weight Reduction – S Zero Conversion 36
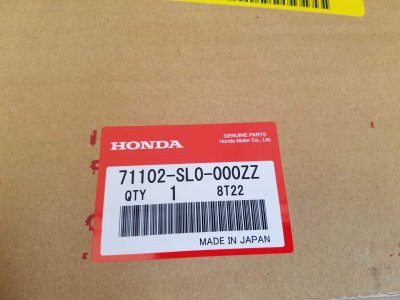
New clutch hard line is here from Acura. Normally, you should use the flex line from RF Yamamoto, as it is far easier to install. The hard line requires removal of the gas tank, interior and ideally the engine too. Since i have done all of that, I'm going to use it because it is OEM and will last forever. They shipped it in this enormous box along with the front bumper lower skirt.


New clutch hard line is here from Acura. Normally, you should use the flex line from RF Yamamoto, as it is far easier to install. The hard line requires removal of the gas tank, interior and ideally the engine too. Since i have done all of that, I'm going to use it because it is OEM and will last forever. They shipped it in this enormous box along with the front bumper lower skirt.
Attachments
Body and Paint Work 28
Brand new front bumper lower skirt still in its box. This will go straight to the painter along with the bumpers, trunk lid and rear fenders.


Brand new front bumper lower skirt still in its box. This will go straight to the painter along with the bumpers, trunk lid and rear fenders.
Fuel System Refresh 1
More good-weather tasks to complete before the snow and cold comes. It's time to wash the fuel cell. After losing the pressure washer, I am stuck with the garden hose and high pressure nozzle. Using a 50/50 mix of water and Simple Green HD.


Much better- it was a stream of black water running off of it. Now I can remove and replace the fuel pump with the new one.


More good-weather tasks to complete before the snow and cold comes. It's time to wash the fuel cell. After losing the pressure washer, I am stuck with the garden hose and high pressure nozzle. Using a 50/50 mix of water and Simple Green HD.
Much better- it was a stream of black water running off of it. Now I can remove and replace the fuel pump with the new one.
Nice to see somebody else installing the clutch hard pipe. I found this was well worth the effort as it makes a clean OEM install.
Make sure you get the pipe joint and bolt that goes in the gas tank cavity.
Removing the tank is 100% required, the transmission, the dash is highly recommended, and the engine can stay put. I tortured the pipe trying to get it in position for the front joint with the dash in place and I managed to do it, but it wasn't worth it. To do the AT->MT conversion you need to everything but the dash (cluster, steering column, center console, glove box, shifter, etc...) you midas swell remove the dash. This saves time, allows better access to everything, AND allows the hard pipe to go in without issue. Removal of the dash allows easier rerouting of the AT wires, servicing the evaporator/heater box, and your possibly cracked defroster grill.
It was difficult and time-consuming to separate the plastic pipe and wire harness retainers, there are a bunch of them and they require an assortment of flat screwdrivers, picks, and small wedges. Any minor bending of the hard pipe will make it harder to get the pipe to fit in all those retainers, so take your time.
The pipe is coated with an anti-corrosion paint, it is easily scratched, so make sure to repaint those areas, especially in the fuel tank area. Removal of the dash would allow a lot less, if not zero, scratching.
Nice to see somebody else installing the clutch hard pipe. I found this was well worth the effort as it makes a clean OEM install.
Make sure you get the pipe joint and bolt that goes in the gas tank cavity.
Yep, already have it- it's buried somewhere in my big Amayama box lol.
Removing the tank is 100% required, the transmission, the dash is highly recommended, and the engine can stay put. I tortured the pipe trying to get it in position for the front joint with the dash in place and I managed to do it, but it wasn't worth it. To do the AT->MT conversion you need to everything but the dash (cluster, steering column, center console, glove box, shifter, etc...) you midas swell remove the dash. This saves time, allows better access to everything, AND allows the hard pipe to go in without issue. Removal of the dash allows easier rerouting of the AT wires, servicing the evaporator/heater box, and your possibly cracked defroster grill.
You mean like this?


It was difficult and time-consuming to separate the plastic pipe and wire harness retainers, there are a bunch of them and they require an assortment of flat screwdrivers, picks, and small wedges. Any minor bending of the hard pipe will make it harder to get the pipe to fit in all those retainers, so take your time.
The pipe is coated with an anti-corrosion paint, it is easily scratched, so make sure to repaint those areas, especially in the fuel tank area. Removal of the dash would allow a lot less, if not zero, scratching.
Thanks for the tips! I anticipated that releasing the plastic clips would be the worst part of the job. Hopefully my assortment of picks and screwdrivers will get it done. I thought about lubing up one of the grommets with some silicone grease to allow me to slide the pipe easily to work it into place- hopefully that will reduce the risk of scratching.
I've been meaning to reach out to you regarding the wiring. I have a Japan-sourced AT-->MT diagram, but it is intended to be used to keep the AT computer. Since I am going with the MT ECU, I am concerned the wiring might be different. I'll shoot you a PM.
Yes, that is very helpful. You gonna color change the passenger compartment overspray too?
From memory:
The AT/MT wiring harness is the same except for one wire from the cruise control that needs to be rerouted to the ECU. For some reason the AT routes that wire through the cluster harness and the MT runs it along the main harness, just strange. It's almost like the AT and MT production teams did not talk to each other (there are a bunch of no good reason AT/MT differences that just doubled up the part count).
The AT shifter wires need to be routed to the neutral interrupt and backup lights. I managed to repurpose the external AT transmission harness and interface with back up lights at he the top blue big connector next to the rear LH bulkhead. Easy.

My notes are not complete, but pretty close to allow one to make a t-harness. The NSX service manual have good AT/MT diagrams without issue.
(If you can get other JP manual sections: I would sure like to know what all the wires on they 14P keyless interface body side connector are doing. )
From memory:
The AT/MT wiring harness is the same except for one wire from the cruise control that needs to be rerouted to the ECU. For some reason the AT routes that wire through the cluster harness and the MT runs it along the main harness, just strange. It's almost like the AT and MT production teams did not talk to each other (there are a bunch of no good reason AT/MT differences that just doubled up the part count).
The AT shifter wires need to be routed to the neutral interrupt and backup lights. I managed to repurpose the external AT transmission harness and interface with back up lights at he the top blue big connector next to the rear LH bulkhead. Easy.
My notes are not complete, but pretty close to allow one to make a t-harness. The NSX service manual have good AT/MT diagrams without issue.
(If you can get other JP manual sections: I would sure like to know what all the wires on they 14P keyless interface body side connector are doing. )
Last edited:
Engine Refresh 8
The snow came again. it was 12 degrees F last night. So, back inside for some more engine work. Today, it was machining the intake manifold for the 14mm-spec RDX injectors. Special thank you to [MENTION=13737]OLDMNSX[/MENTION] for providing the community with this fantastic and reasonably-priced kit. Brad gives you the metal spacers to properly seat and orient the injectors. And, he even provides you with a drill bit and machined guide collar to ensure a straight cut. While the manifold aluminum is much softer than the carbide steel drill bit, I used some Remington gun oil to aid in cutting.
Drill bit inside the supplied cutting guide.

The new 14mm hole.

Back into the "hot tank" for one last wash- making sure to remove all metal shavings and contaminants.

The snow came again. it was 12 degrees F last night. So, back inside for some more engine work. Today, it was machining the intake manifold for the 14mm-spec RDX injectors. Special thank you to [MENTION=13737]OLDMNSX[/MENTION] for providing the community with this fantastic and reasonably-priced kit. Brad gives you the metal spacers to properly seat and orient the injectors. And, he even provides you with a drill bit and machined guide collar to ensure a straight cut. While the manifold aluminum is much softer than the carbide steel drill bit, I used some Remington gun oil to aid in cutting.
Drill bit inside the supplied cutting guide.
The new 14mm hole.
Back into the "hot tank" for one last wash- making sure to remove all metal shavings and contaminants.

I did this modification on my intake manifold as well in preparation for the eventual RDX injector swap, and even with the drilling it is still completely reversible, the factory injectors still fit and work just fine.
You don't need to drill at all for RDX injectors, but you get a better installation if you use the OLDMNSX kit.
You don't need to drill at all for RDX injectors, but you get a better installation if you use the OLDMNSX kit.
Last edited:
Never checked but didn't realize drilling is required. Somehow thought it's fully reversible mod, not that it matters but good to know. Glad to see you making progress, stay well and safe.
You can still fit the OEM injectors into these larger holes- they seal on a rubber sealing ring that sits above the hole. Hope you're doing ok too!
Body and Paint Work 29
Received a call from the painter today. He was talking to the folks at PPG and it turns out they have two color mixes available for YR-514P. One is a simple 2-stage like was done at the factory back in 1997, but they also have a 3-stage version that has a greater depth of color due to the tinted mid-coat. We discussed the pros and cons of each and ultimately settled on the 2-stage. It's less expensive, true to the factory spirit of the car, and easier to get a good result with the paint process. He said if this was going to be a show car, he would lean toward the newer 3-stage product, but reminded me that my stated goal was to have a car that looks like it was a custom order from the factory. So, we decided to order a quart of the 2-stage to test the mix against my tow hook cover. Assuming it's a good match, we'll order the rest so that we can paint the car with a single mix and have some leftover for touchups and damage repair (if needed down the road). He was confident he could get the color to look amazing and said it was more of making sure the prep was perfect. He said by the time he was done, only someone who paints cars would notice the difference between the 2-stage and 3-stage mixes. I was really impressed- he didn't try to steer me one way or another, walked me through the costs and my goals, and made sure I was happy. Not too many operations like this left out there. Once the paint comes in, we'll spray a color card and do some comparing. Meanwhile, he's already working the dents out of the front fenders...
Received a call from the painter today. He was talking to the folks at PPG and it turns out they have two color mixes available for YR-514P. One is a simple 2-stage like was done at the factory back in 1997, but they also have a 3-stage version that has a greater depth of color due to the tinted mid-coat. We discussed the pros and cons of each and ultimately settled on the 2-stage. It's less expensive, true to the factory spirit of the car, and easier to get a good result with the paint process. He said if this was going to be a show car, he would lean toward the newer 3-stage product, but reminded me that my stated goal was to have a car that looks like it was a custom order from the factory. So, we decided to order a quart of the 2-stage to test the mix against my tow hook cover. Assuming it's a good match, we'll order the rest so that we can paint the car with a single mix and have some leftover for touchups and damage repair (if needed down the road). He was confident he could get the color to look amazing and said it was more of making sure the prep was perfect. He said by the time he was done, only someone who paints cars would notice the difference between the 2-stage and 3-stage mixes. I was really impressed- he didn't try to steer me one way or another, walked me through the costs and my goals, and made sure I was happy. Not too many operations like this left out there. Once the paint comes in, we'll spray a color card and do some comparing. Meanwhile, he's already working the dents out of the front fenders...
so what is the current time line ...ie... do you intend to paint then replace motor/trans ?
Ideally, I will rebuild the trans and perform the engine refresh while the chassis is off-site at the paint booth. The painter says it will be about 4 weeks to complete the chassis. Only two variables outside my control on this plan: (1) the machine shop and their turn around on the cylinder heads; and (2) further lockdowns due to the virus where I may not be as free to travel outside the house.
Our sample mix arrived today and the painter sprayed the color card. I'm heading over tomorrow morning to drop off more panels and do a final check on the color. Assuming I give the thumbs up, fenders will be orange on Tuesday.
Weight Reduction – S Zero Conversion 37
Cool upgrade part to the later spec. Yes, those are genuine Comptech cams in the background.

Cool upgrade part to the later spec. Yes, those are genuine Comptech cams in the background.
Last edited:
Engine Refresh 9
Almost finished with the intake manifold. Carefully cleaned the EGR cap using a razor to scrape the old gasket material. Must take great care not to gouge the soft aluminum with the hard steel of the blade.

Cleaned the oil-soaked VVIS plate to this level. Scrubbing, scrubbing and more scrubbing. I also triple-checked all the screws were full tight. Finally, I gently ran a nylon bristle brush along the butterflies to break loose any of the ancient sealing compound that was ready to flake off. I would rather have it come off on my bench than get sucked into the engine. Many people eliminate the VVIS, but they don't understand the design of our NSX engine. It should only be done on forced-induction engines.

Found this cool mark on the VVIS buried under about 1 mm of caked grease. Cool little surprise.

Spent ages cleaning the throttle body. This is the idle set screw hole. To properly clean, you need carb cleaner and a pipe-cleaner type bristle brush. Keep scrubbing until the cleaning fluid comes out clear. Don't forget the side hole that feeds this passage from the main throttle opening. Very important for a stable idle.

Cleaned to this level. Lots of staining on the butterfly plate from years of PCV blowby and using oiled air filters. Even the carb cleaner couldn't get it out. Stick with the paper filter.


Finished VVIS.

Just need to clean the rubber spacer in the "hot tank" and treat it with 303 protectant. Then I can reassemble the intake manifold.
Almost finished with the intake manifold. Carefully cleaned the EGR cap using a razor to scrape the old gasket material. Must take great care not to gouge the soft aluminum with the hard steel of the blade.
Cleaned the oil-soaked VVIS plate to this level. Scrubbing, scrubbing and more scrubbing. I also triple-checked all the screws were full tight. Finally, I gently ran a nylon bristle brush along the butterflies to break loose any of the ancient sealing compound that was ready to flake off. I would rather have it come off on my bench than get sucked into the engine. Many people eliminate the VVIS, but they don't understand the design of our NSX engine. It should only be done on forced-induction engines.
Found this cool mark on the VVIS buried under about 1 mm of caked grease. Cool little surprise.
Spent ages cleaning the throttle body. This is the idle set screw hole. To properly clean, you need carb cleaner and a pipe-cleaner type bristle brush. Keep scrubbing until the cleaning fluid comes out clear. Don't forget the side hole that feeds this passage from the main throttle opening. Very important for a stable idle.
Cleaned to this level. Lots of staining on the butterfly plate from years of PCV blowby and using oiled air filters. Even the carb cleaner couldn't get it out. Stick with the paper filter.
Finished VVIS.
Just need to clean the rubber spacer in the "hot tank" and treat it with 303 protectant. Then I can reassemble the intake manifold.
Last edited:
The second photo with the VVIS shows up, but the rest won't load at all. They all seem to be hosted on Google Photos, are all the sharing settings the same?
I keep reading about how using oiled aftermarket filters is basically smoking cigs but for your intake plenum, are there any cold air-style intake solutions that don't have that problem or aren't oiled? Not necessarily from a power gain perspective since the OEM box is already mostly optimized, mostly if you wanted more intake noise.
I keep reading about how using oiled aftermarket filters is basically smoking cigs but for your intake plenum, are there any cold air-style intake solutions that don't have that problem or aren't oiled? Not necessarily from a power gain perspective since the OEM box is already mostly optimized, mostly if you wanted more intake noise.
Similar threads
- Replies
- 4
- Views
- 514
- Locked
- Replies
- 2
- Views
- 446