• Protip: Profile posts are public! Use Conversations to message other members privately. Everyone can see the content of a profile post.

MotorMouth93's 1994 Berlina Black NSX Thread

Hi,

Yup, all the little plastic bits in the shifter assembly are available new from Acura and cost about $50 total, they can be found under the "Shift Lever" category on parts sites. The parts you need are listed below:
#5 (x2, 54109-SC2-003)
#6 (x1, 54110-SF1-003)
#9 (x2, 54113-SM4-000)
#10 (x2, 54114-SM4-003)
#19 (x1, 54210-SM4-000)
#20 (x1, 54211-SD9-010)
#26 (x1, 54340-SC2-000)
#37 (x4, 91301-SD9-000)

Thanks a bunch, i just added to the list of what i want to do ;)

Thanks,
Nuno
 
Nice work man. When I bought mine it was so busted. I paid someone lol. I think 5 k but it was a process. Broken tranny pieces, engine full refresh. But then when I bought the turbo kit I got to experience this right here which is remarkably frustrating yet fun. Lol. Great job sir.


Sent from my iPhone using Tapatalk
 
I was going to wait to post this but I'm too excited about it, I made up a design for the hand brake I want in Google Sketchup then gave that along with my chunk of TI to a machine shop so I should have my new hand brake within a week or two. If if turns out well we could possibly organize a group buy for more if there is any interest, I was quoted $250 to have the prototype milled on a lathe but the shop does discounts for larger volumes so it could be a good deal cheaper if we could get 10+ people in.


IMG_0333.png


And I finally finished stripping off all of the peeling finish on the trim pieces, I had to do the center console in 3 separate sections since I didn't have any bags the correct shape and size to hold it all at once, so I did each end then the middle as seen below. I am so, so happy to be done with the ferric chloride. I somehow always managed to get it on something, I have a few old tshirts that have orange/yellow stains on them now.


IMG_0320.JPG


I still have a bit of repair work to do on the center console as it has a crack in the bottom right, the crack was hidden by the peeling finish before so I assume it started under the previous owner. I drilled a tiny hole at the end of the crack to keep it from spreading any more then applied a solvent cement in the crack to try to melt it back together. I'm letting that cure for a few days before I fill the hole with epoxy and sand it smooth. I should be able to drop these pieces off to have them repainted this week sometime, it won't be possible to perfectly match the factory finish due to it being a shiny metallic substrate with a translucent grey finish over that, but a matte or satin metallic grey should get close enough to not know the difference. With any luck, my next post should include interior reassembly photos, having two cars with stripped out interiors is getting old...


IMG_0332.JPG
 
I wasn't planning on doing this yet but Euroboutique had a sale going with their custom NSX steering wheels being discounted pretty substantially so I went ahead and bought one. It looks and feels great and retains the factory airbag and horn buttons. They require a deposit and a core to be sent back so I picked up a rather beat up NSX wheel for cheap to use as a core return and a source for the various plastic bits and horn buttons (but I swapped over my original airbag since it didn't come with one) so I can keep my stock parts intact.


IMG_0365.JPG


IMG_0349.JPG
 
Been a while since I posted, but that was mainly because the car spent so much time in the body shop having the door dings fixed.

This is a fairly minor detail but the two main button/knobs on the radio were cracked and falling apart from use over time, so I sourced new knobs and buttons from Amayama since they aren't all available in the US anymore and replaced them. I couldn't replace the other buttons but those two were by far the worst and now they look brand new.

IMG_0372.JPG


As I mentioned earlier, I finally dropped the car off to have the two dings that couldn't be PDR'd on the driver side door fixed as well as fixing the spot I wetsanded through on the fender last year. I repaired the spot on the fender using touch up paint, and I must say that I did a pretty dang good job, but it wasn't perfect and it wasn't much more money to have the fender sprayed as well as the door so I went for it.

Turns out I did a bad job vetting the shop though, they had great reviews on Google but I forgot that most people aren't car guys, and that car guys have very different standards for a good paint job. I dropped the car off on a Monday. Two weeks later I get a call saying it's done, so I went to get it and immediately saw that the texture on the clear coat was way off (more orange peel than a new Escalade -- nothing like the factory wetsanded finish) and you could still see where the ding was, they didn't even get the sheet metal and filler right. So I point this out, the owner says sure we'll redo it. Two weeks later I get a call that it's done, this time the texture was spot on, they actually wetsanded it this time so it was great in that regard, but when buffing they used a rotary buffer with too heavy pad/compound so it has buffer trails and holograms all over it but I can fix that easily so I'm not too worried. Looking closer though, i can still see the dent. The owner tells me that they couldn't get it perfect, but since the initial quote was for a perfect job that they could either try again or I could pay a significantly discounted price and deal with it not being 100% perfect. Rather than let them add yet another coat of paint to my door I opted to pay the discounted price and get out, they fucked up twice so I had no reason to believe that they'd get it right the 3rd time either, it looks pretty damn near perfect though and I don't think anyone else would ever notice, so I'll just live with until I decide to have a full respray done, if that ever happens. What bothers me about this though is I straight up asked the guy if he could make it 100% perfect and he told me he could. I even offered to buy a replacement door shell so they wouldn't have to do body work on it and he said that wasn't necessary, but hey live and learn I guess.

IMG_0562.JPG


Anyways, in more positive news, I finally finished my hand brake handle. To no ones surprise the bargain bin harbor freight glass beads I had laying around didn't create a good finish at all, I started looking into other bead blasting media for titanium. The best results/closest match to the factory Zanardi shift knob I was able to find was a very fine steel shot blasting media (70 grit) with the pressure turned down to ~70psi or so, and while not 100% it's close enough that it's not noticeable and this way I don't have to blast the expensive shift knob. I'm really happy with the way this piece turned out, I like the look much better than the crappy factory handbrake handle so now I just need to sew the boot for it.

IMG_0566.JPG


IMG_0568.JPG


I've also had some other projects I've been working on (as well as the other car, I need to post another update in my Integra thread) so I haven't had as much time to work on this car as I'd like, but I should be getting my interior trim pieces refinished soon so I can finally reassemble the interior after having it apart for the past 3-4 months.
 
Not sure if you've done anything with your sound system but it only cost $457 shipped for all three Bose Speakers with amps and brackets from Bose. I also installed a Grom unit on the back of the head unit to connect Bluetooth. All stock look and sounds better than new IMO. I live in Denver btw and saw this car up for sale, glad to see it is in good hands! I also have a 94 Berlina.

In case you or anyone else needs it. Patty at Bose 508-766-9522
 
Last edited:
Love all the details. Nice work

Thanks.

Not sure if you've done anything with your sound system but it only cost $457 shipped for all three Bose Speakers with amps and brackets from Bose. I also installed a Grom unit on the back of the head unit to connect Bluetooth. All stock look and sounds better than new IMO. I live in Denver btw and saw this car up for sale, glad to see it is in good hands! I also have a 94 Berlina.

In case you or anyone else needs it. Patty at Bose 508-766-9522

Thanks for the tip, I considered buying new boxes from Bose but since I've dabbled in electronics repair before it was a fun little project to repair them all. I rebuilt all three of my original amplifier boards with new transistors and capacitors so they are working at 100%.

My Grom BT3 unit has been making me angry, the next track button mostly works but the back button just goes to the next track as well rather than going back. Have you experienced anything similar? I've actually started my own custom circuit board design that plugs into the CD changer port that will let me map CD1 to an aux input, CD2 to Bluetooth audio, and CD3 to USB audio input as well as allowing the playback control buttons to work properly.
 
Thanks.


Thanks for the tip, I considered buying new boxes from Bose but since I've dabbled in electronics repair before it was a fun little project to repair them all. I rebuilt all three of my original amplifier boards with new transistors and capacitors so they are working at 100%.

My Grom BT3 unit has been making me angry, the next track button mostly works but the back button just goes to the next track as well rather than going back. Have you experienced anything similar? I've actually started my own custom circuit board design that plugs into the CD changer port that will let me map CD1 to an aux input, CD2 to Bluetooth audio, and CD3 to USB audio input as well as allowing the playback control buttons to work properly.

Yea the buttons on the head unit do not work very well. I just use my phone to skip or go back to different tracks. Sounds like you've got it figured out more than I do.
 
I'm losing track of time here it doesn't seem like almost 2 months ago, progress has been slow lately.

I got the trim piece back from the body shop and am really happy with them.

IMG_0616.JPG


Here is the air vents being epoxied back onto the trim pieces, I broke the original glue to take them apart to get the best possible results from the refinishing.


IMG_0621.JPG


I also installed the shift boot and hand brake boot to get an idea how it would look.


IMG_0622.JPG


The climate control circuit boards in NSXs are known to fail due to capacitors going bad, so I went ahead and replaced all the capacitors in mine before they can fail and cause more work down the road.


IMG_0633.JPG


I picked up a set of 4 cedar ridge fabrication adjustable exhaust hangers since one of my hangers was touching the exhaust and burning as well as one side of my exhaust hanging too low. It's a subtle difference but it improves the look.


IMG_0660.JPG


IMG_0665.JPG


IMG_0666.JPG


More electronics repair, my radio backlight dimmer stopped working so I set it up on my workbench (dining table) and traced the dimmer circuit through. Then I found some burned looking solder underneath a transistor, did some Googling, and picked out a suitable replacement that has much higher current carrying capacity than the failed original.


IMG_0689.JPG


IMG_0690.JPG


And finally, I finished my dash cam wiring harness, this has been the biggest inhibitor to progress since I've been dragging my feet on it so much. This plugs into the fuse block power ports under the dash, goes to a switch mounted under the dash above the pedals, then up to the camera. The camera always comes on when the car is on, but if you flip the switch it stays on even when the car is off. I used diodes to keep the circuits from feeding back into each other and the switch is just a basic rocker switch I had laying around. The motivation for this is some vandalized cars (not mine fortunately) in my work parking garage and somebody threw hot sauce all over my car when i street parked it downtown a few months ago.


IMG_0752.JPG


Also, since my Integra was wrecked as you might remember, I needed a new daily. So after some deliberation I settled on this 2003 BMW 540i MSport w/6-speed manual. It needs some work as all 15 year old bimmers do, but damn is it nice to have a car that can cruise in silence at 2000RPM on the highway. The exterior and upholstery are almost perfect, there's some minor door dings that my PDR guy will knock out next week but that's about all that's keeping it from looking perfect.


IMG_0742.JPG


IMG_0744.JPG
 
I love how my build and restoration shares so many similarities as yours! I have the same exhaust, same shift knob LOL
 
How are you feeling about the brake release lever? Did it turn out as you expected? Still thinking about putting together a group buy? From here it looks like a stunning visual upgrade.

Sent from my Pixel using Tapatalk
 
I love it, I think it came out great and it looks far better than the stock handle IMO. As far as a group buy goes, shop time in my area is expensive and I don’t have any connections to possibly make it cheaper, so I gave up on a group buy. I’ll post up the CAD file and dimensions when I get home though if you want to try to have one made up.
 
After 2 weeks or so I got a new climate control circuit board installed and have AC again, which is really nice in the 95-100F weather we're having here in Austin.

I also started seeing low oil pressure on the in-dash gauge, initial research pointed to a bad pressure sensor, so I bought the ScienceOfSpeed oil pressure sensor and relocation kit which moves the sensor from the cylinder head to the firewall so it isn't subject to as much vibration. After that, idle pressure appeared to be even lower with the new sensor and I still wasn't seeing the pressure I should higher in the rev range either so I started to get worried. As a last ditch effort I ordered a new in-dash oil pressure gauge from Amayama (discontinued in USA) and then realized that there's no point in dealing with the factory gauge since they are notoriously bad. So, I bought an AEM electronic oil pressure gauge and sensor, installed it, and found my oil pressure readings to be just fine. Now the new cluster oil pressure gauge is sitting in my box of spare parts since removing the cluster is a pain in the butt and I have no real reason to install it anymore.

Here is my firewall pressure sensor setup, the SoS replacement sensor is on top, the AEM sensor sticks off to the side with the brass T fitting, and the braided hose goes to the cylinder head where the original factory oil pressure gauge used to be. I have to say, getting the SoS oil pressure block (on the other end of the hose) on there was a HUGE pain in the butt. Space is very tight where the original sensor was installed and I must have dropped the bolts 10-15 times before I was able to get them threaded in.

To make matters worse, I lost my trusty old made-in-USA Craftsman 10mm socket that I've had since before the Integra somewhere in the engine bay. I suspect I won't see it again until I pull the motor.

What I'm seeing on the AEM gauge is ~14psi at idle, ~60psi at 3000rpm, ~80psi right before VTEC, then ~70psi when VTEC kicks in up to redline. So all my worrying was for no reason, but still nice to have real numbers.

IMG_0923.jpg


IMG_0926.jpg


And just some more pictures I took the other day. I need to take new pictures of the interior, the old ones I took when my camera's image stabilizer was acting up and making everything blurry.

IMG_1010.jpg


IMG_1014.jpg


IMG_1017.jpg


Coming up in the next couple weeks: Upgrading to new spring-style LMAs. I'm starting to hear the telltale tapping of sticky hydraulic LMAs so I need to replace those before they damage the VTEC cam lobes. Parts are on order now I'm just waiting for them to come in, and since I have to pull all the timing crap off anyways I'm planning on swapping in a new crank pulley since mine is original and has over 100k miles on it.
 
Last edited:
I was told the oil presure sensor is not very accurate. I guess it would be nice to install an AEM one, but only if you could hook it up to the OEM gauge.

How is the shift knob and handbrake holding up to the Texas heat?
 
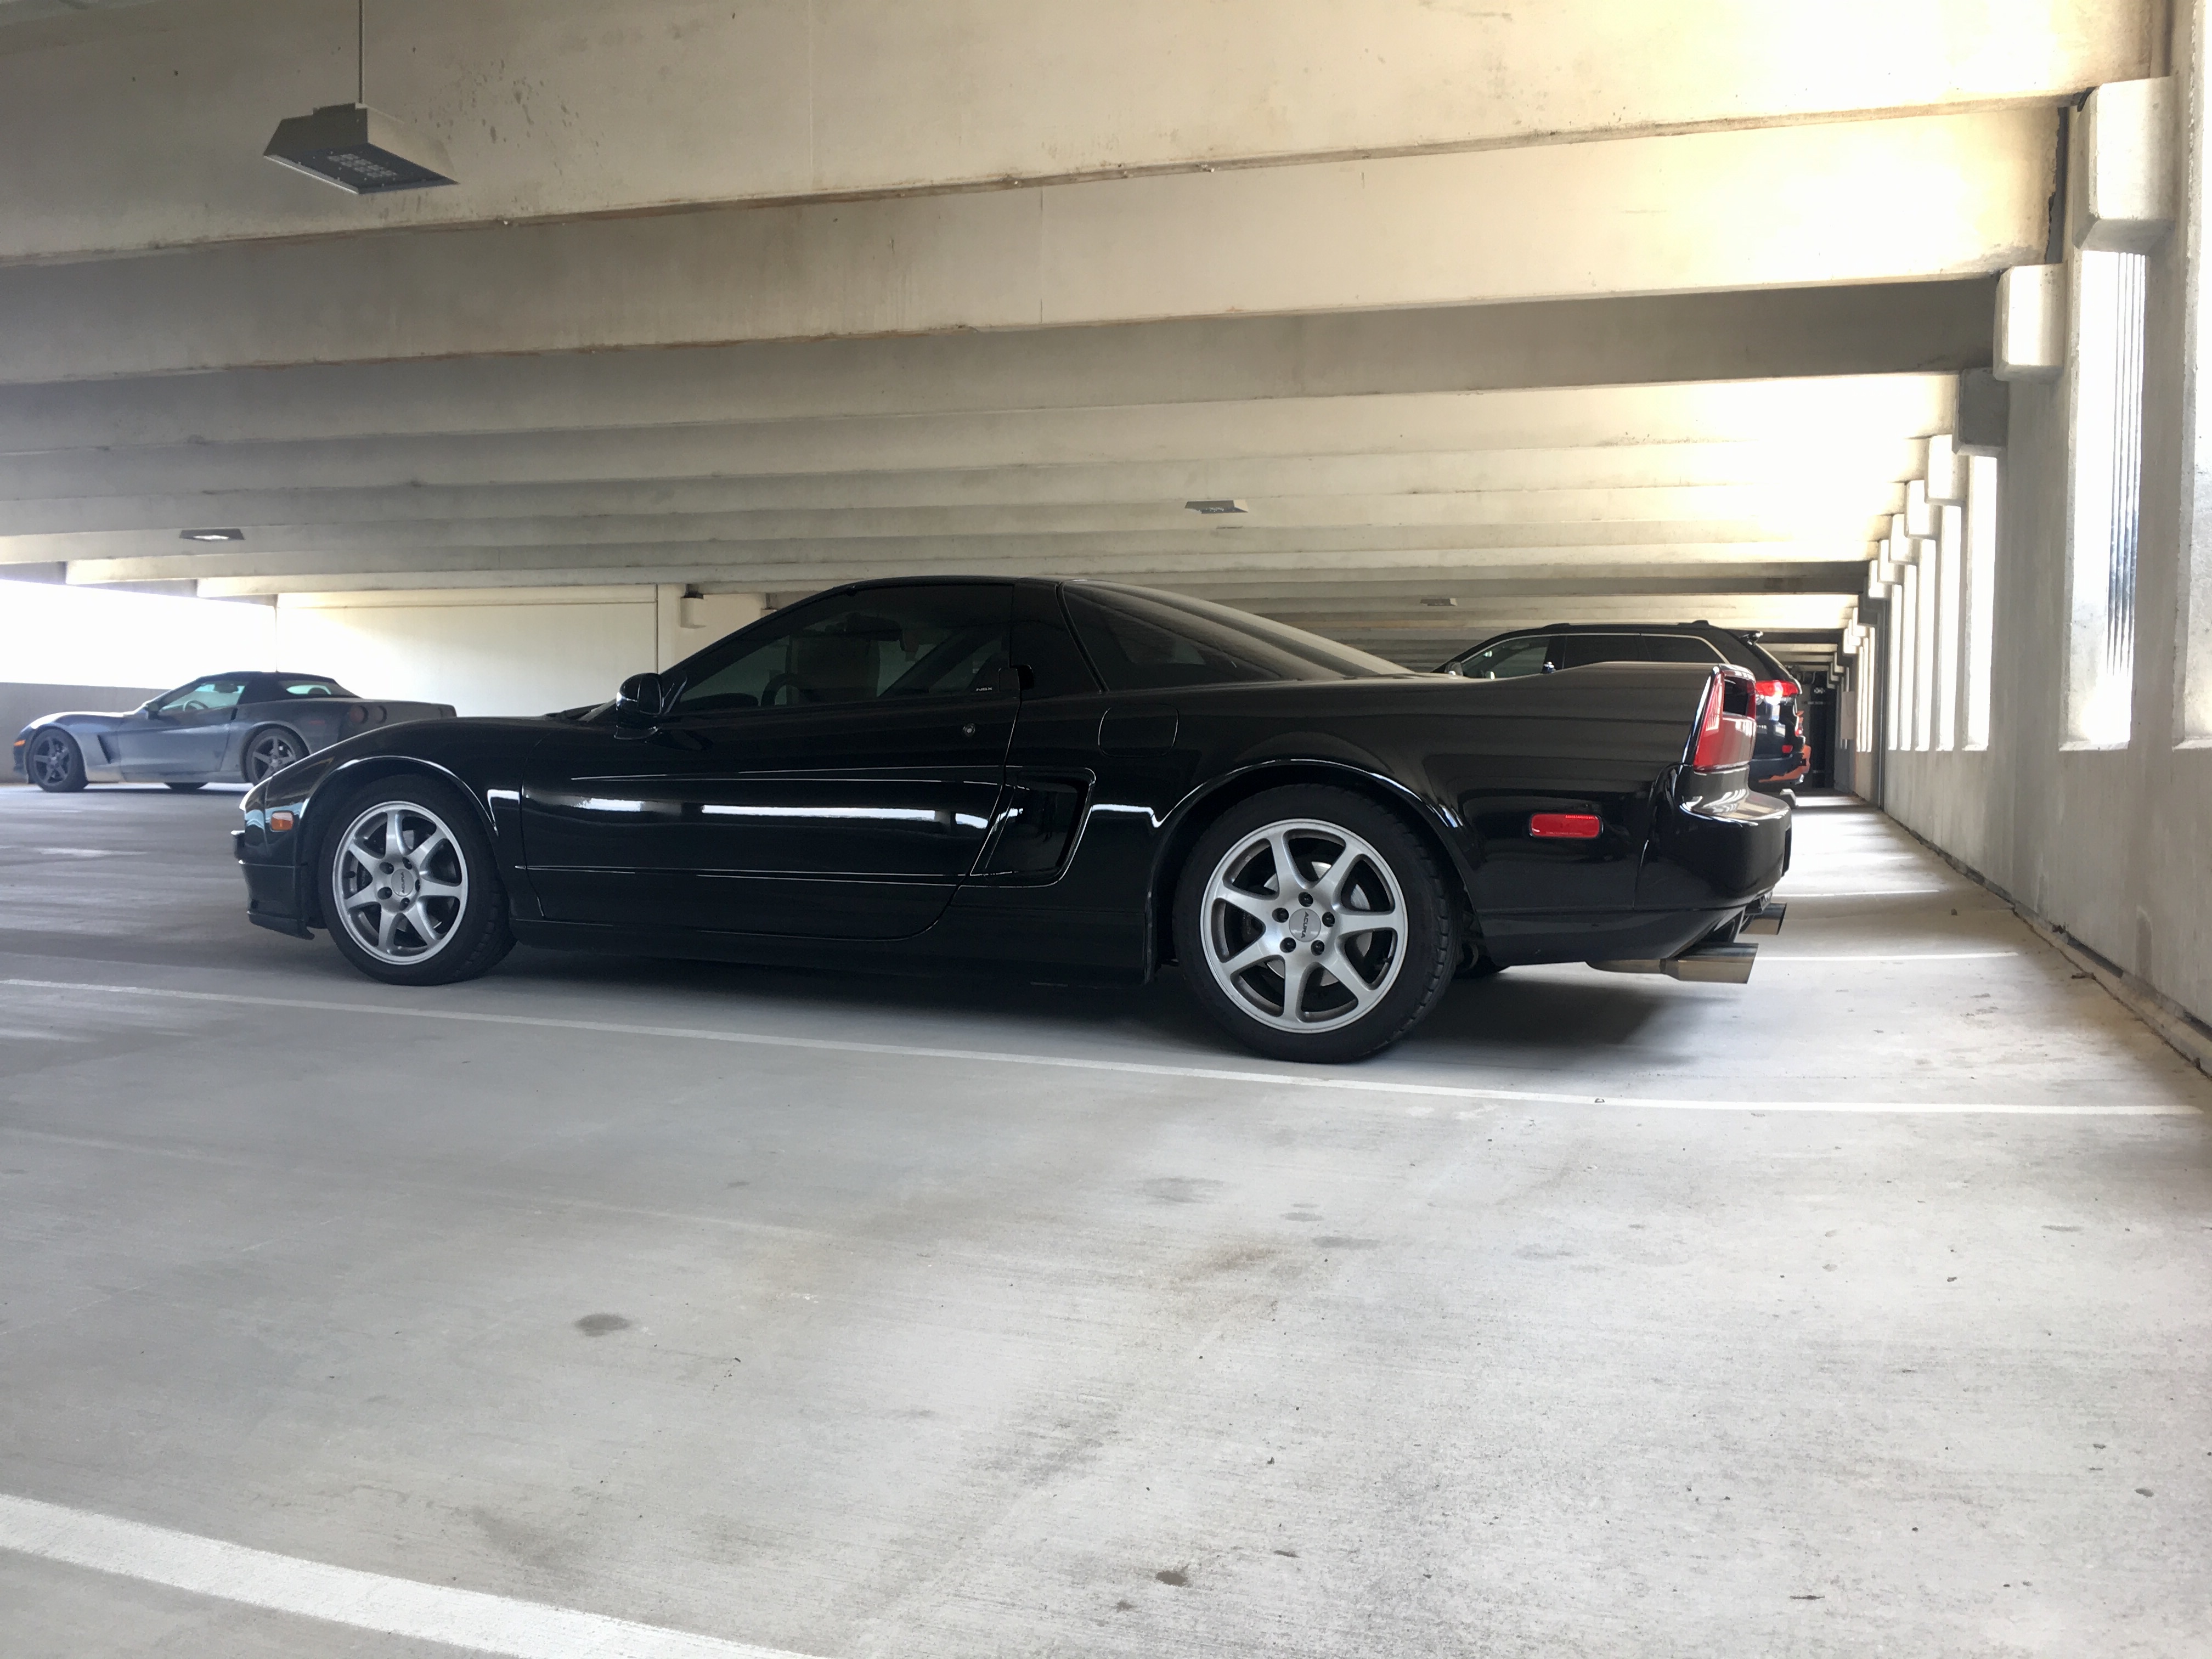
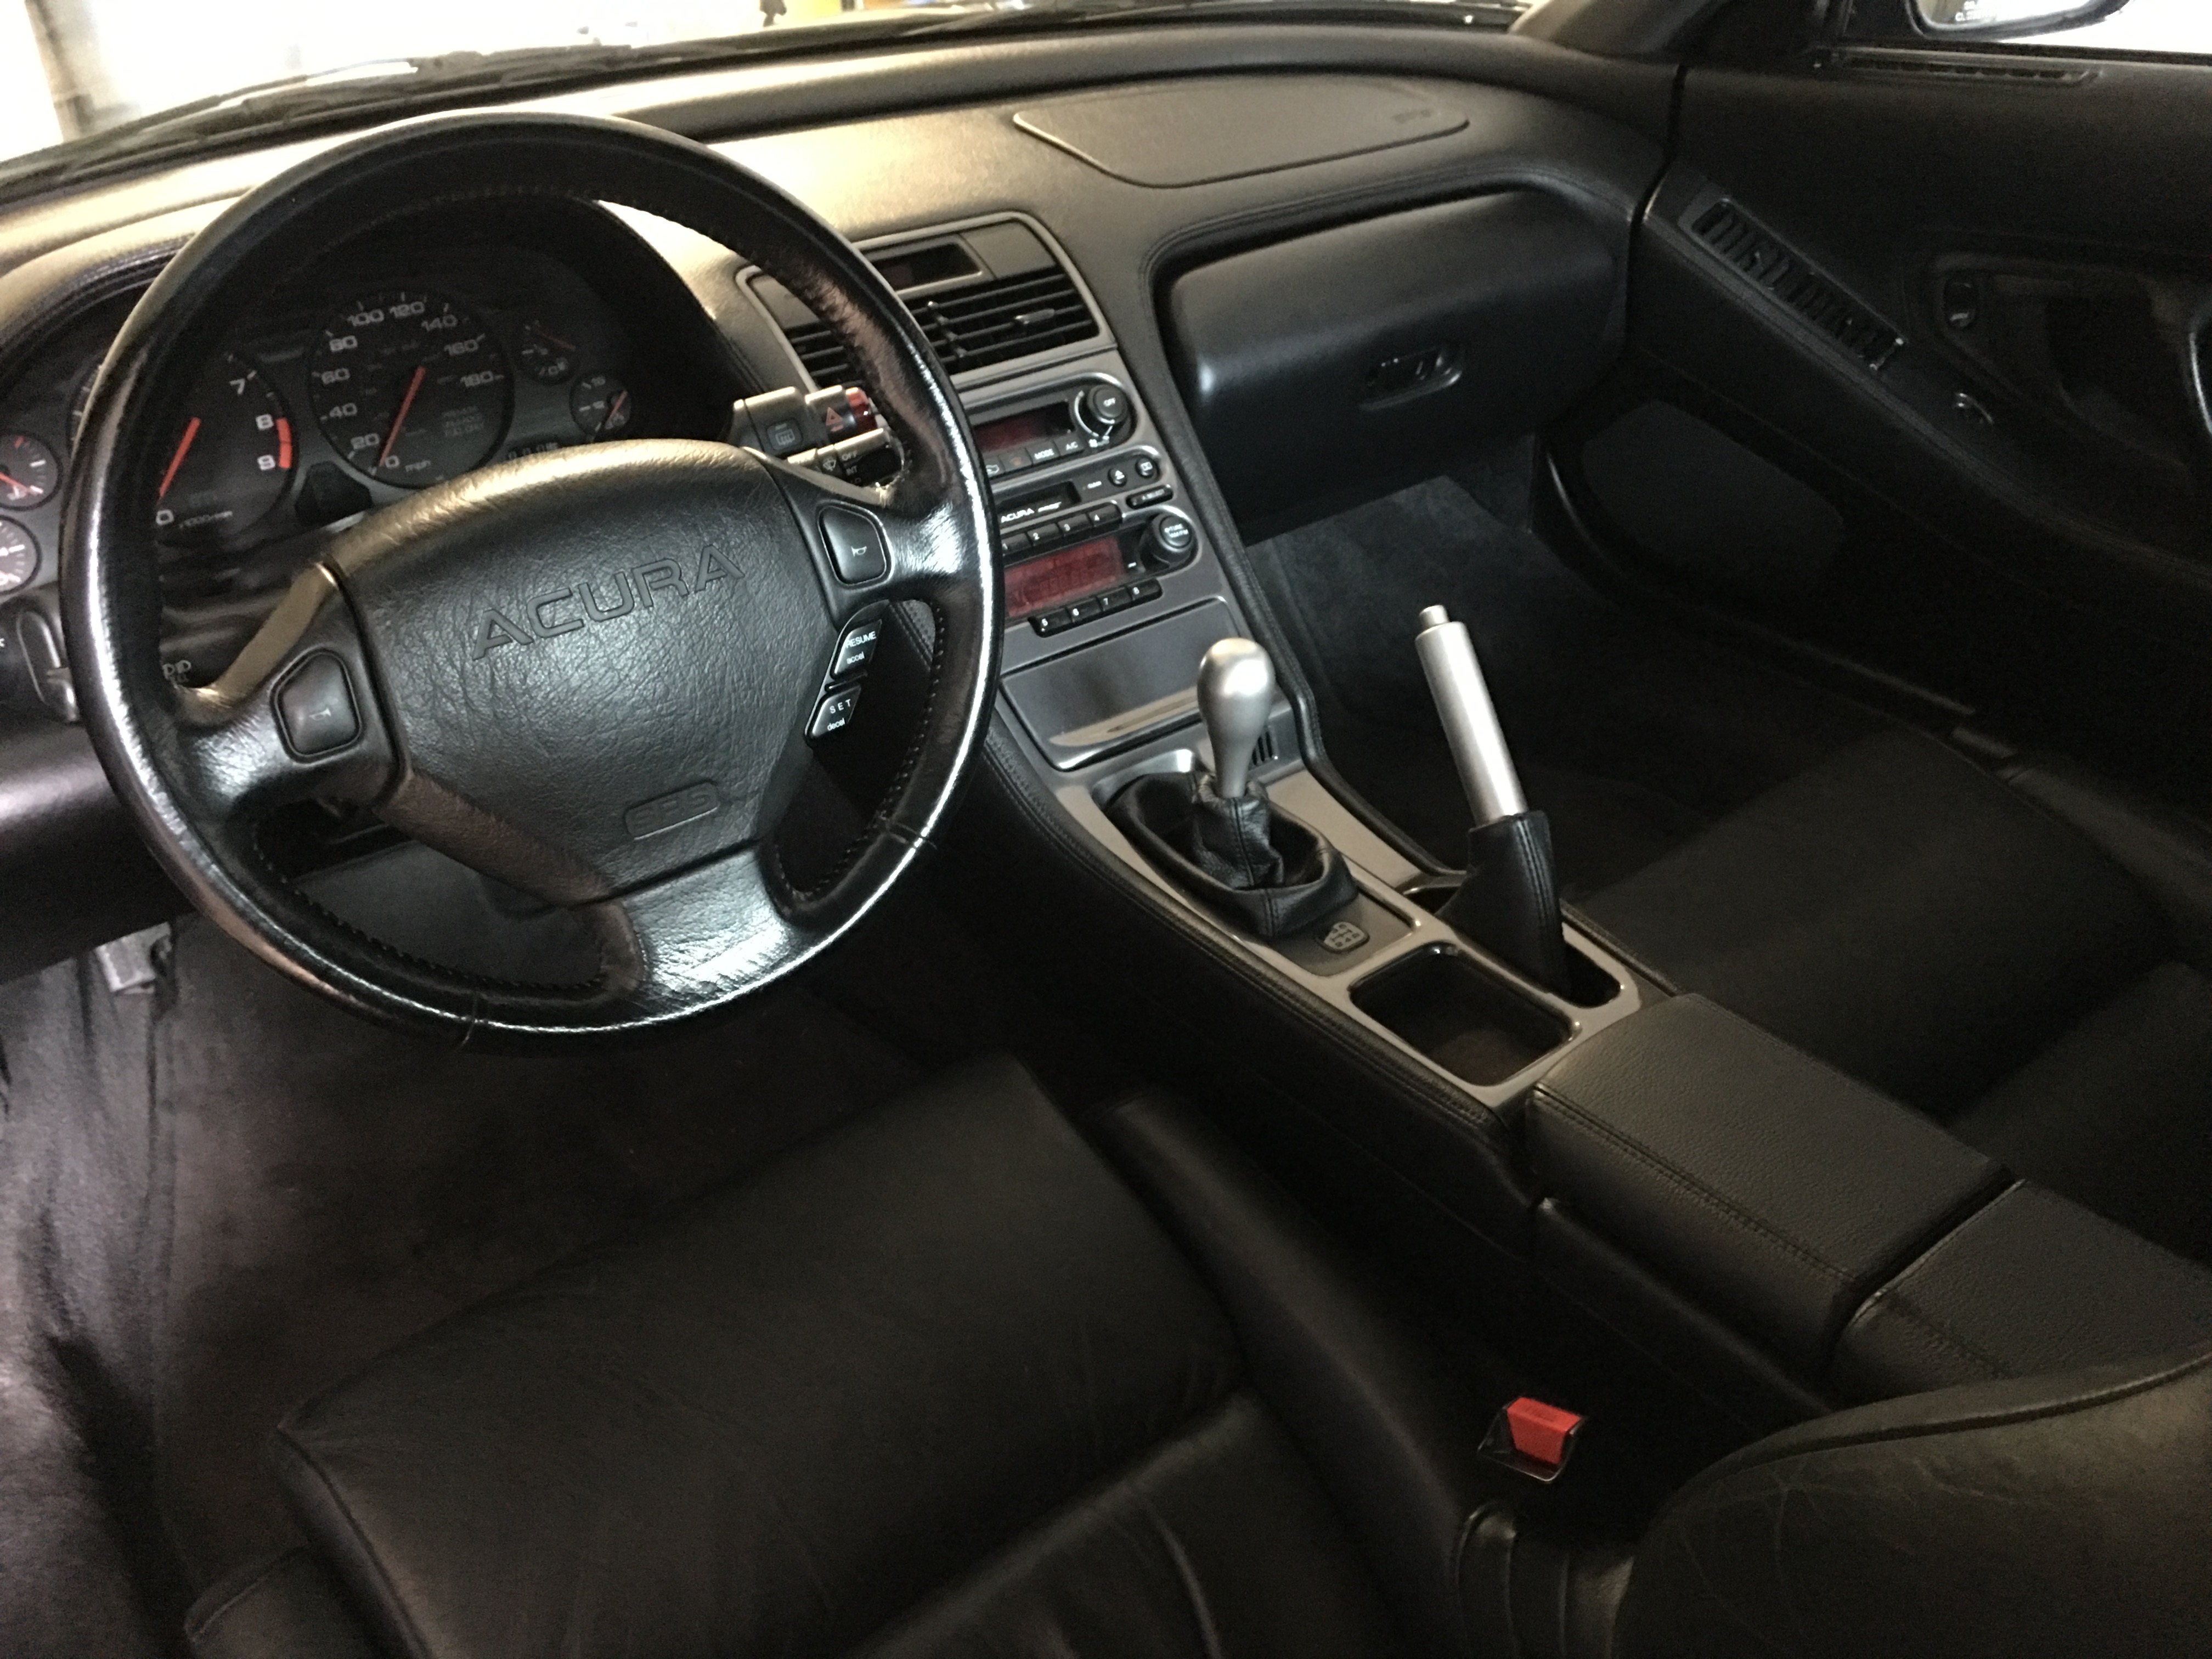
A month or so ago I got tired of the Euroboutique contoured steering wheel and it just looked kind of out of place in the NSX interior so I sold it and went back to stock. However, stock isn't great either since it looks like a pillowcase, so I started looking into an NSX Type R steering wheel setup.


IMG_1026.jpg


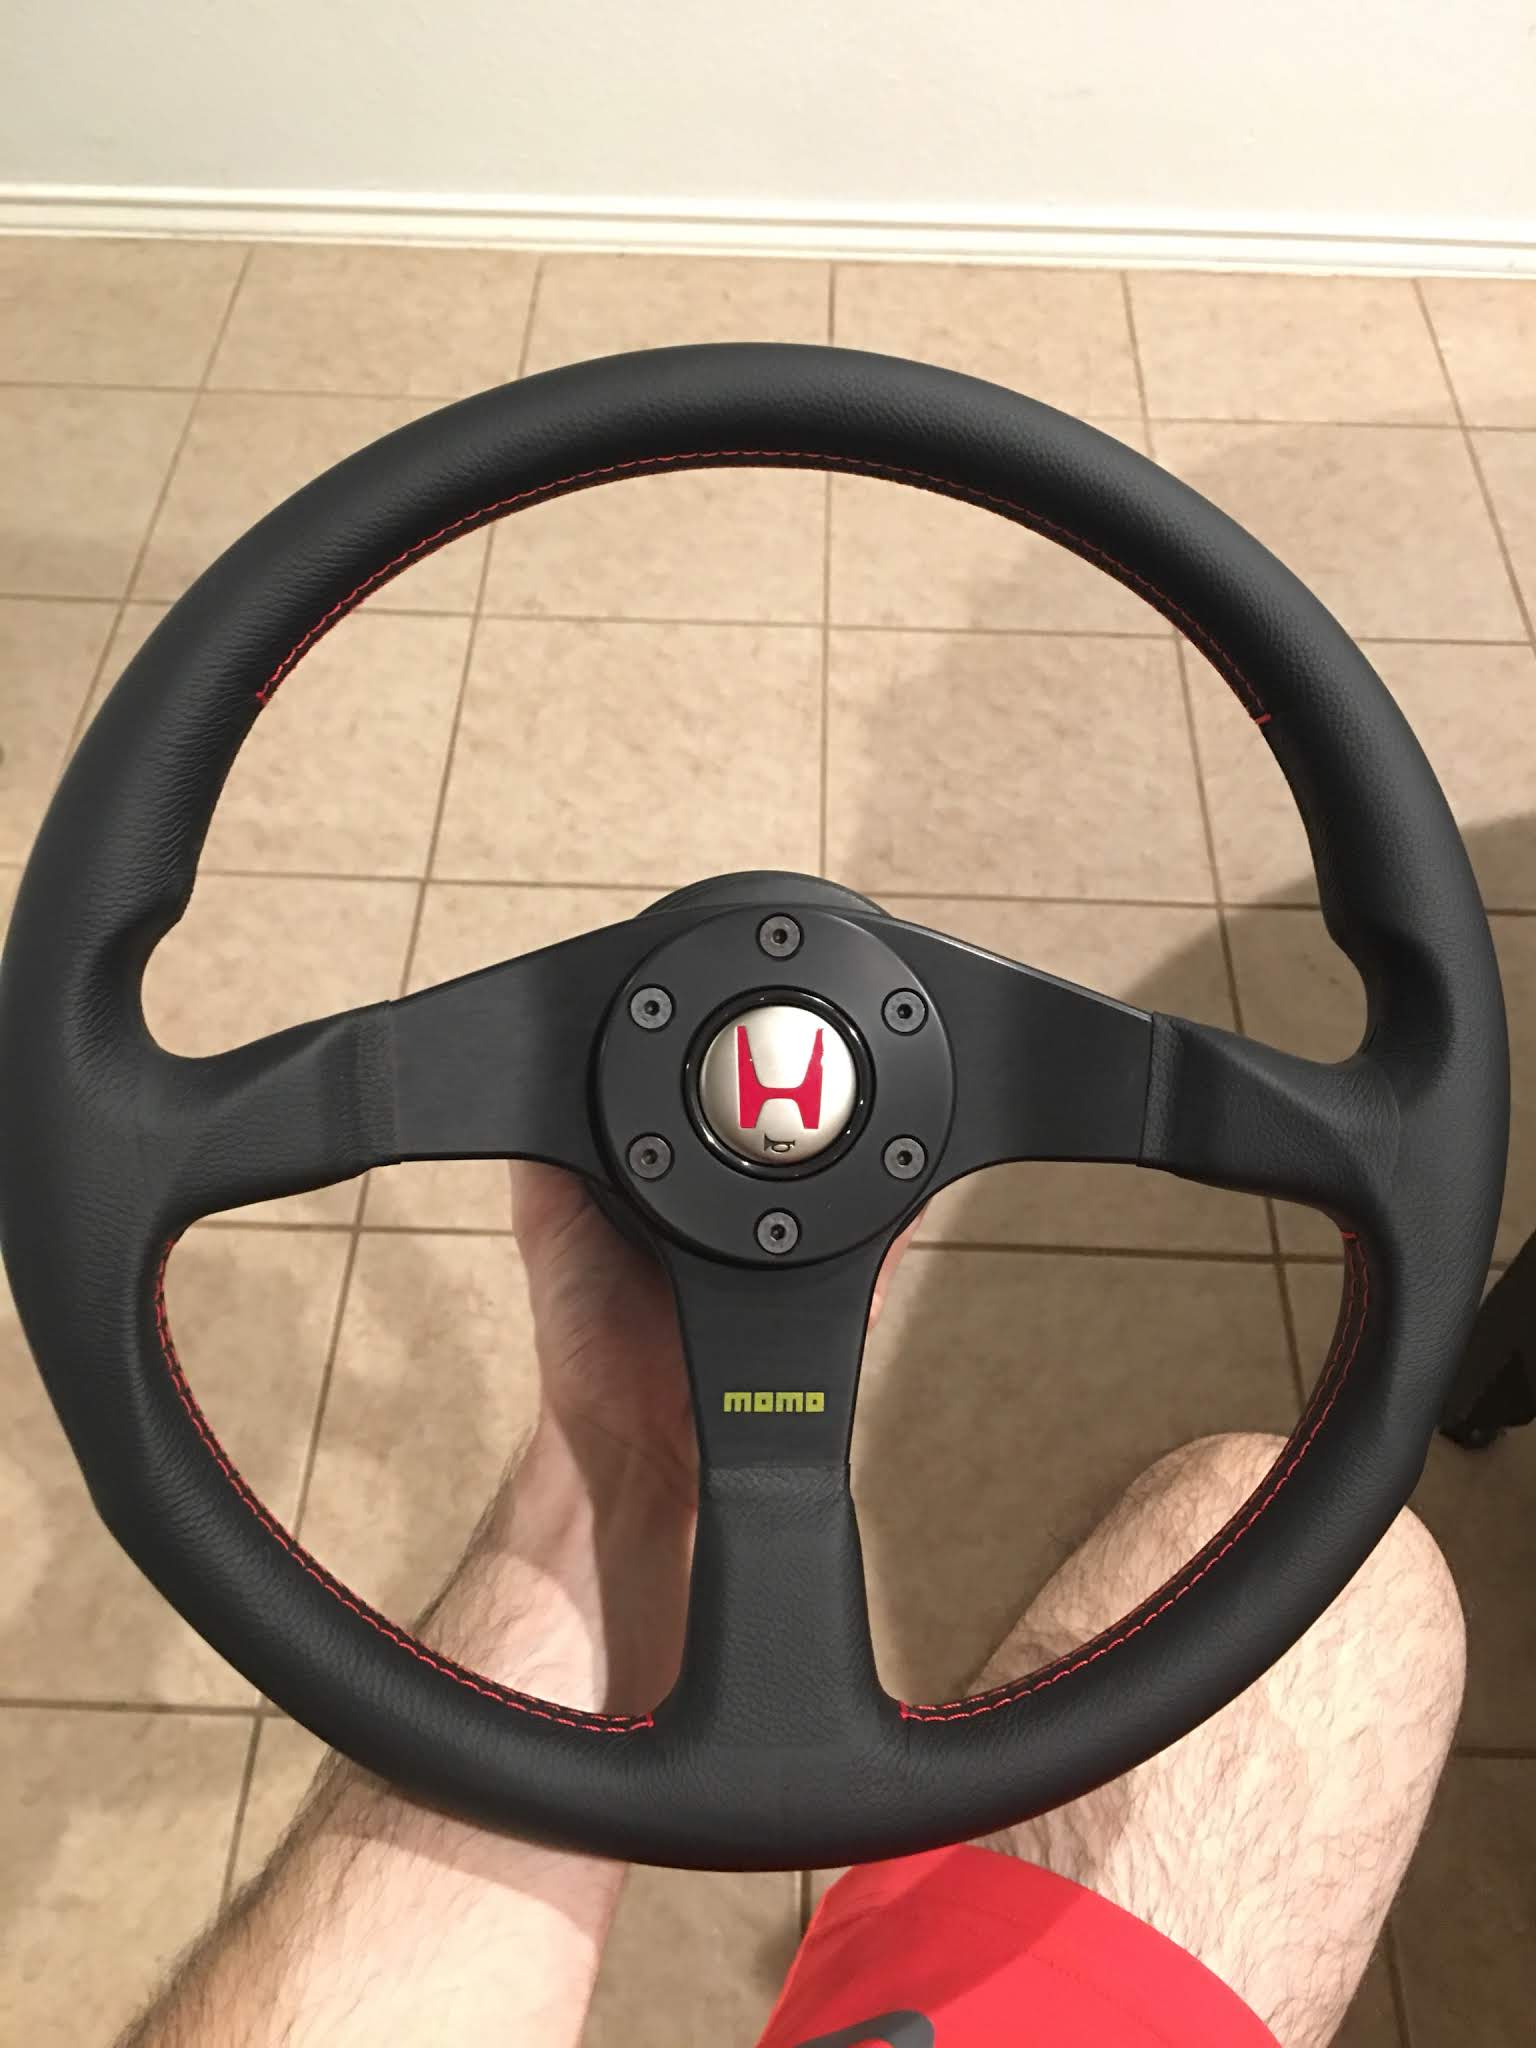
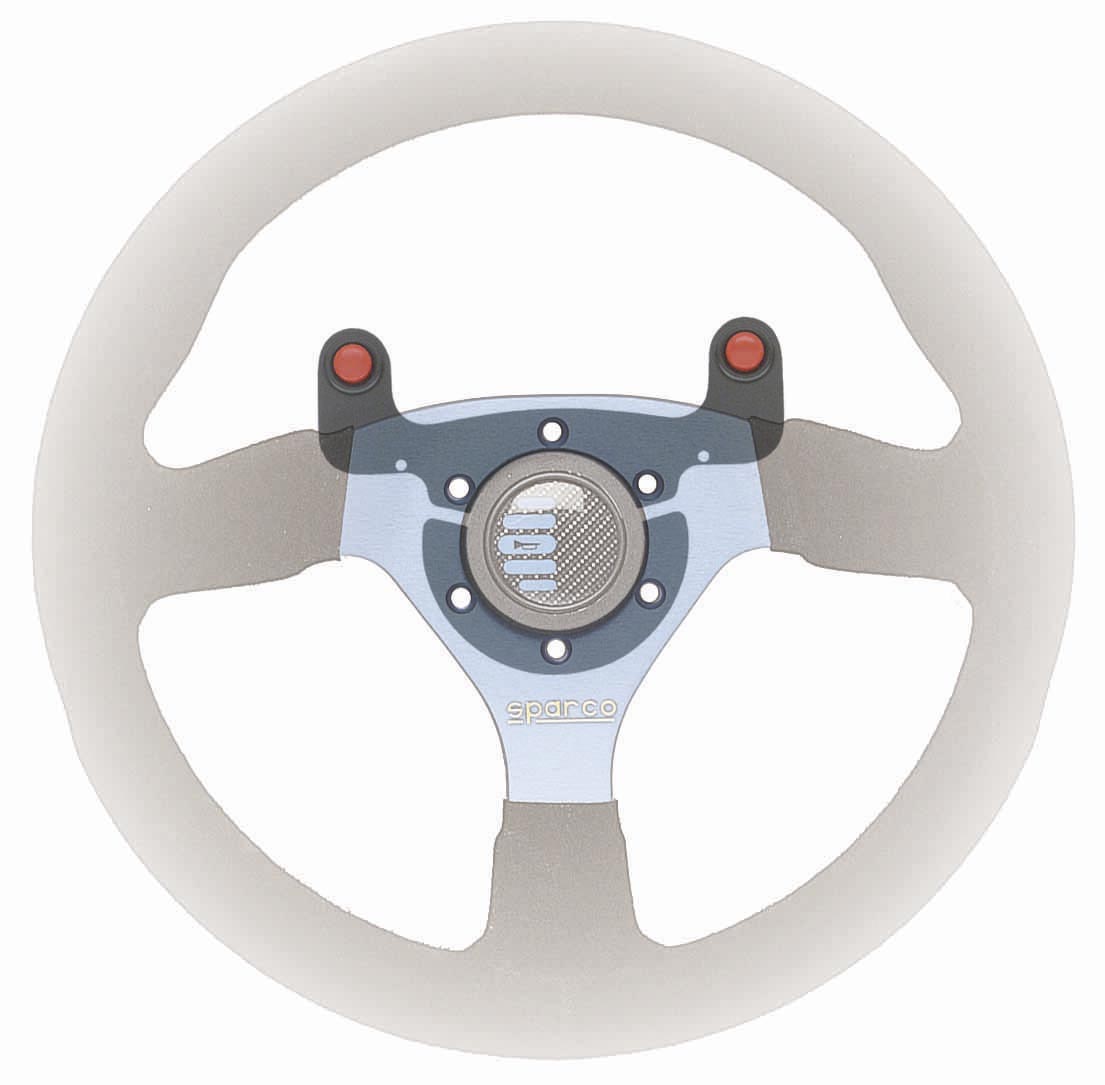
In case you aren't familiar, and NSX Type R steering wheel costs between $700 and $1000 depending on where you get it, and to me that's just insane considering the wheel is a rebranded 350mm Momo Tuner (A $200 wheel) with a different label on the front. So, I bought a 350mm Tuner wheel and used acetone to remove the "TUNER" logo, and the result is a wheel that is 99% identical to an NA1 Type R steering wheel, the only giveaway are some minor differences in the logo text on the bottom spoke, and the R wheel has 3 extra mounting holes to help center the wheel underneath the trim ring which aren't necessary and are covered by the trim ring.


Here is the Tuner wheel with the logo removed.


IMG_1026_1.jpg


The other Type R steering wheel parts weren't terribly pricey so I ordered the hub, horn button, horn ring, trim ring, and mounting bolts brand new from Amayama. Overall I spent less on this setup than I got from selling the Euroboutique wheel, so I'm happy.


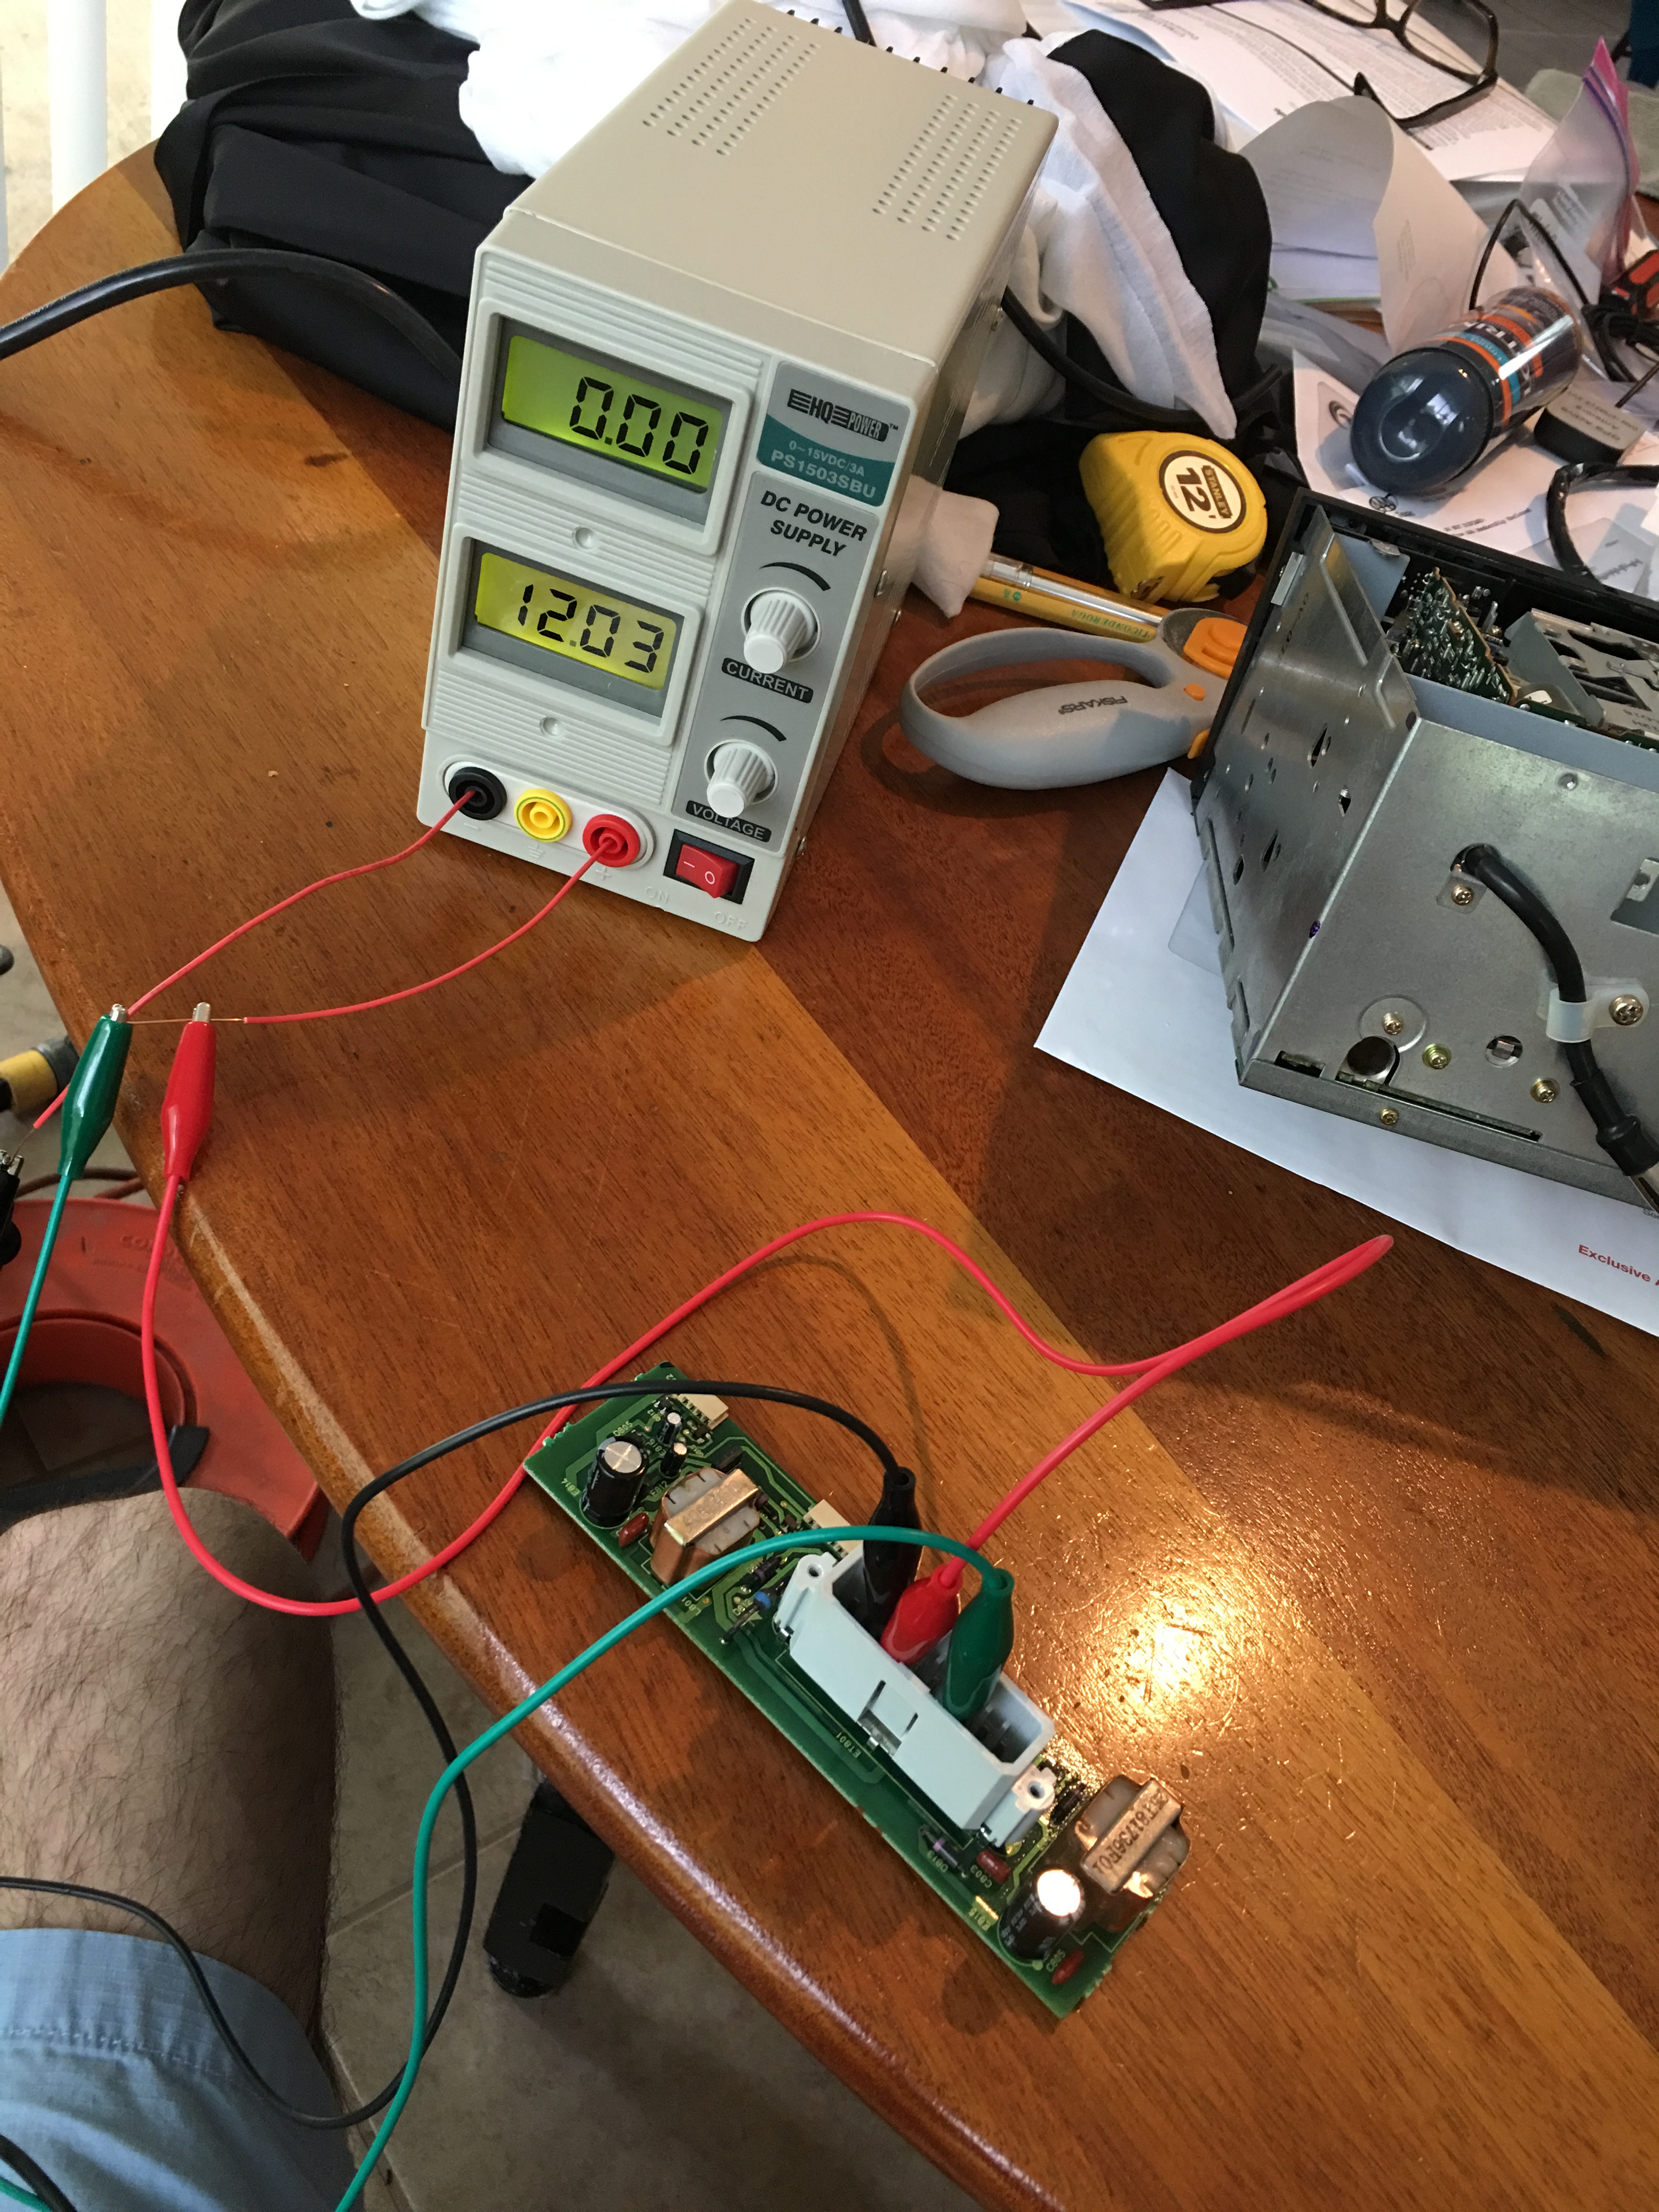
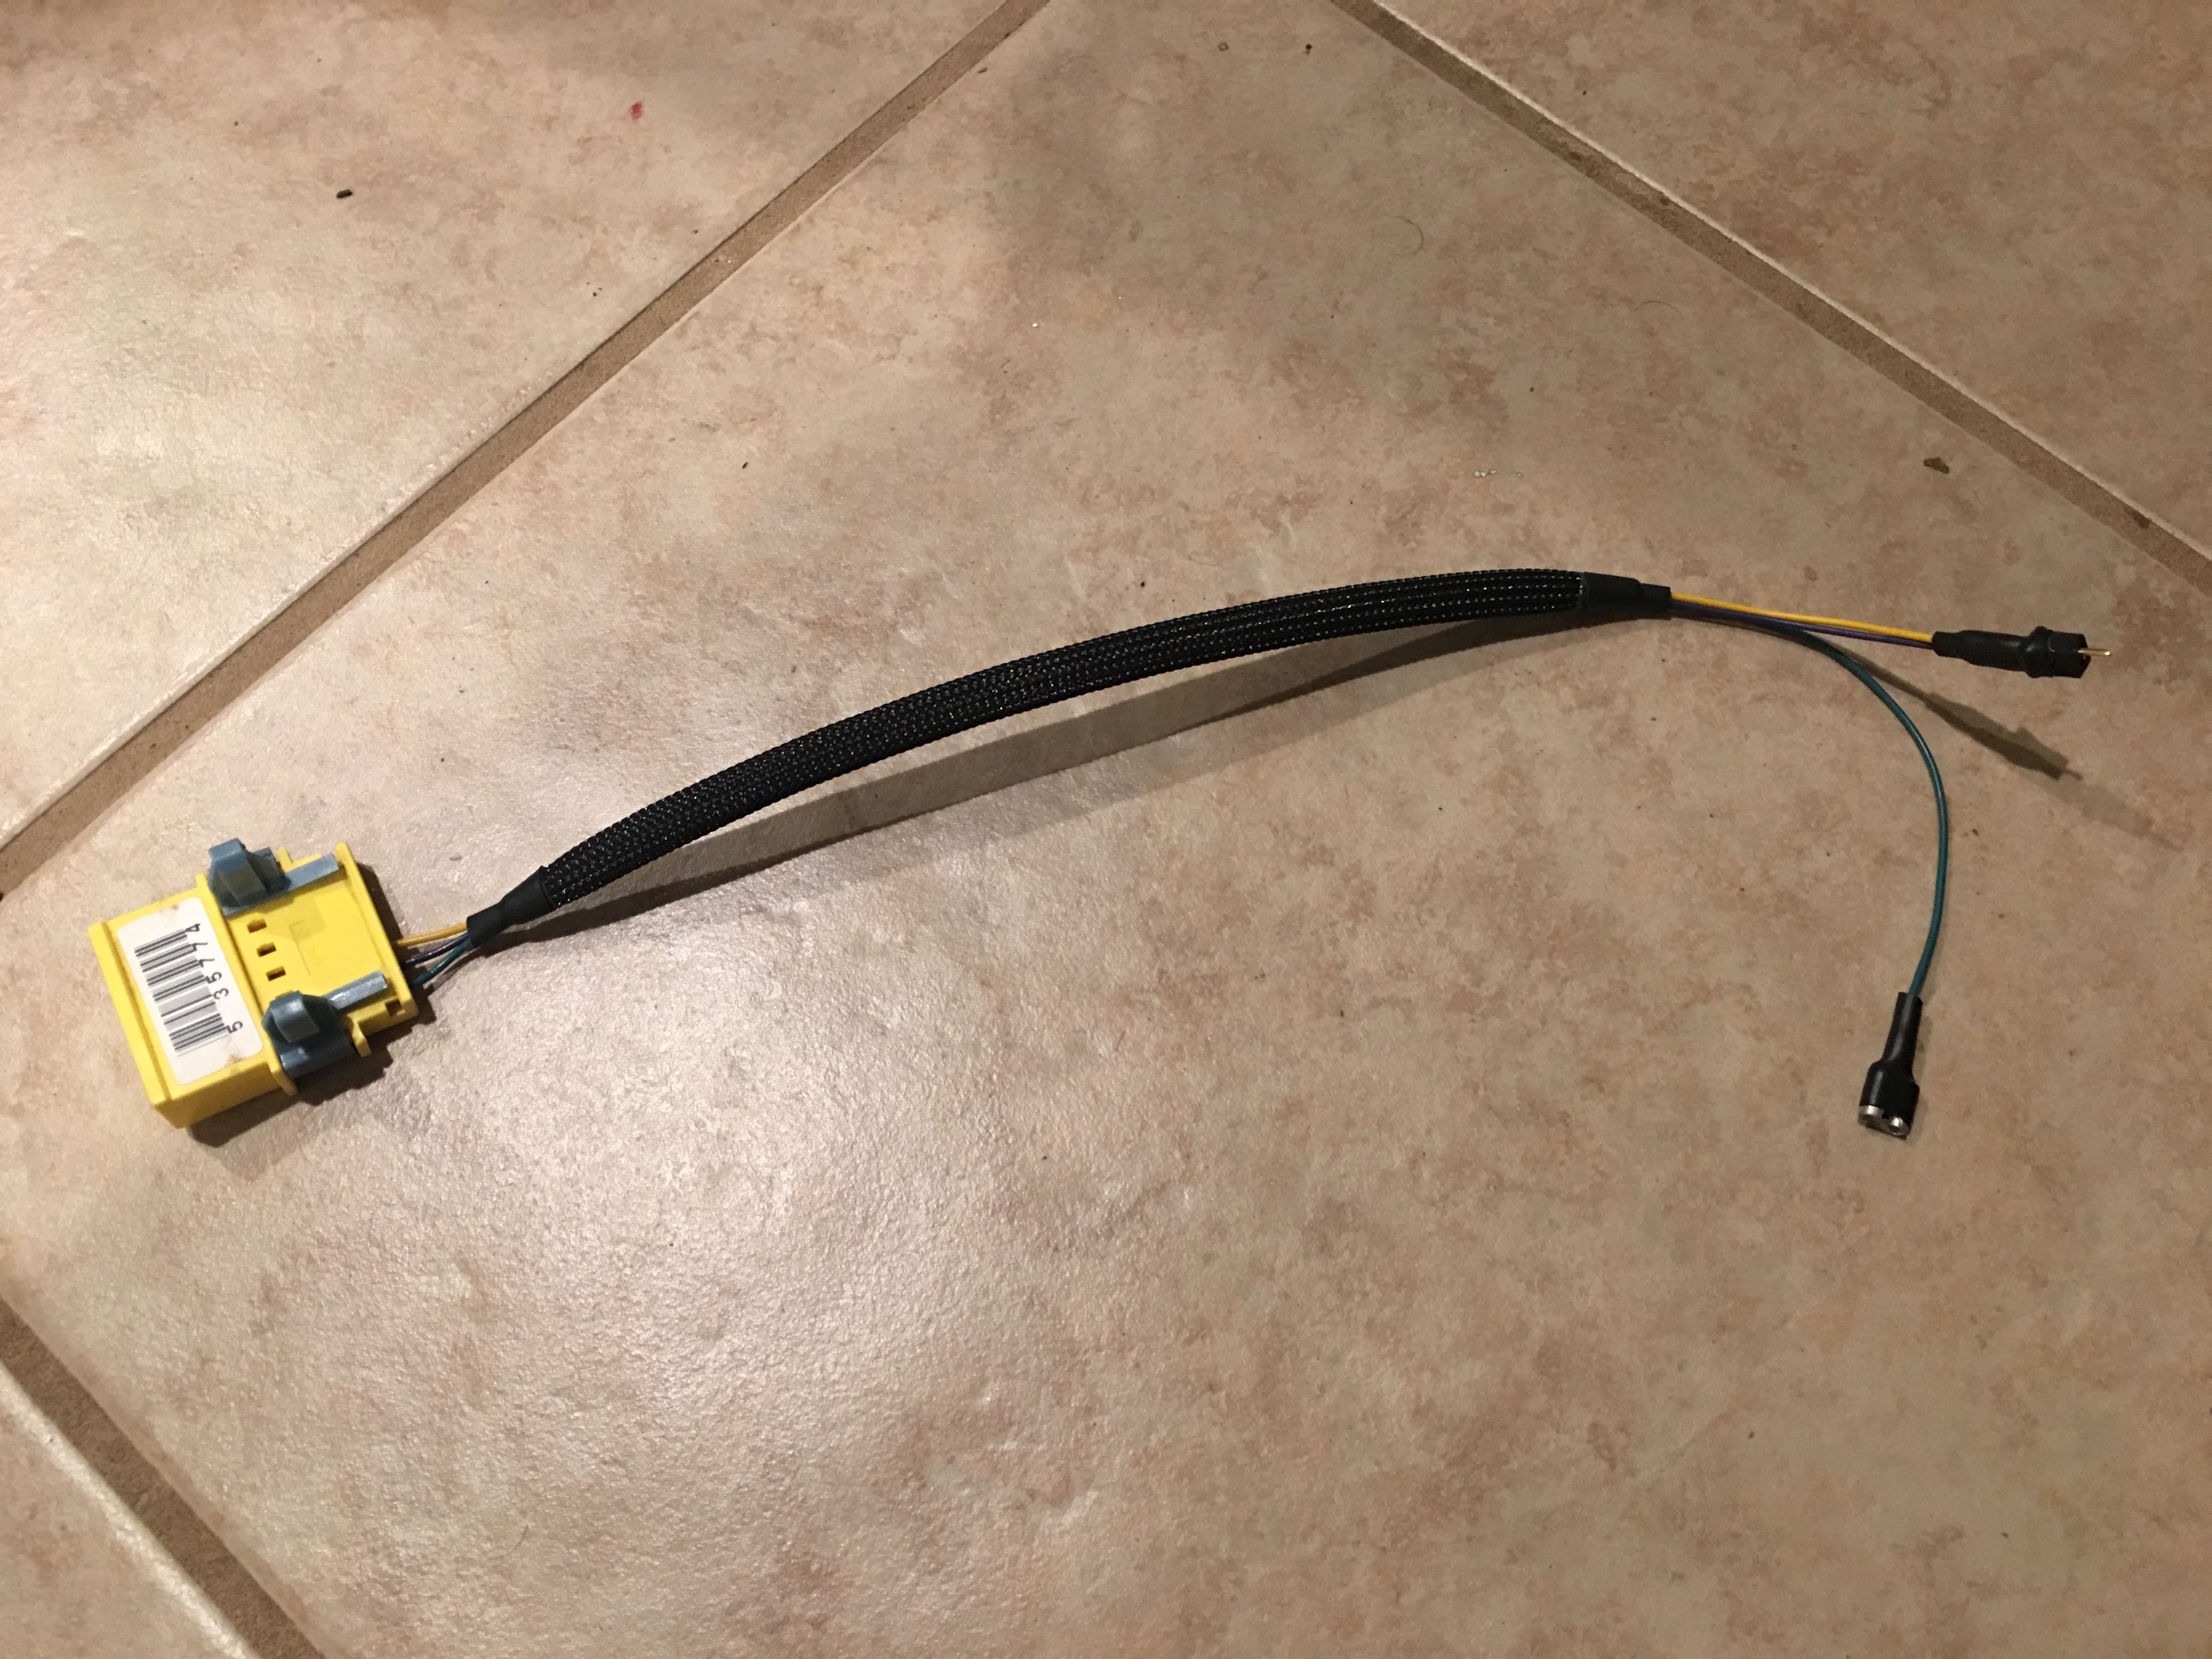
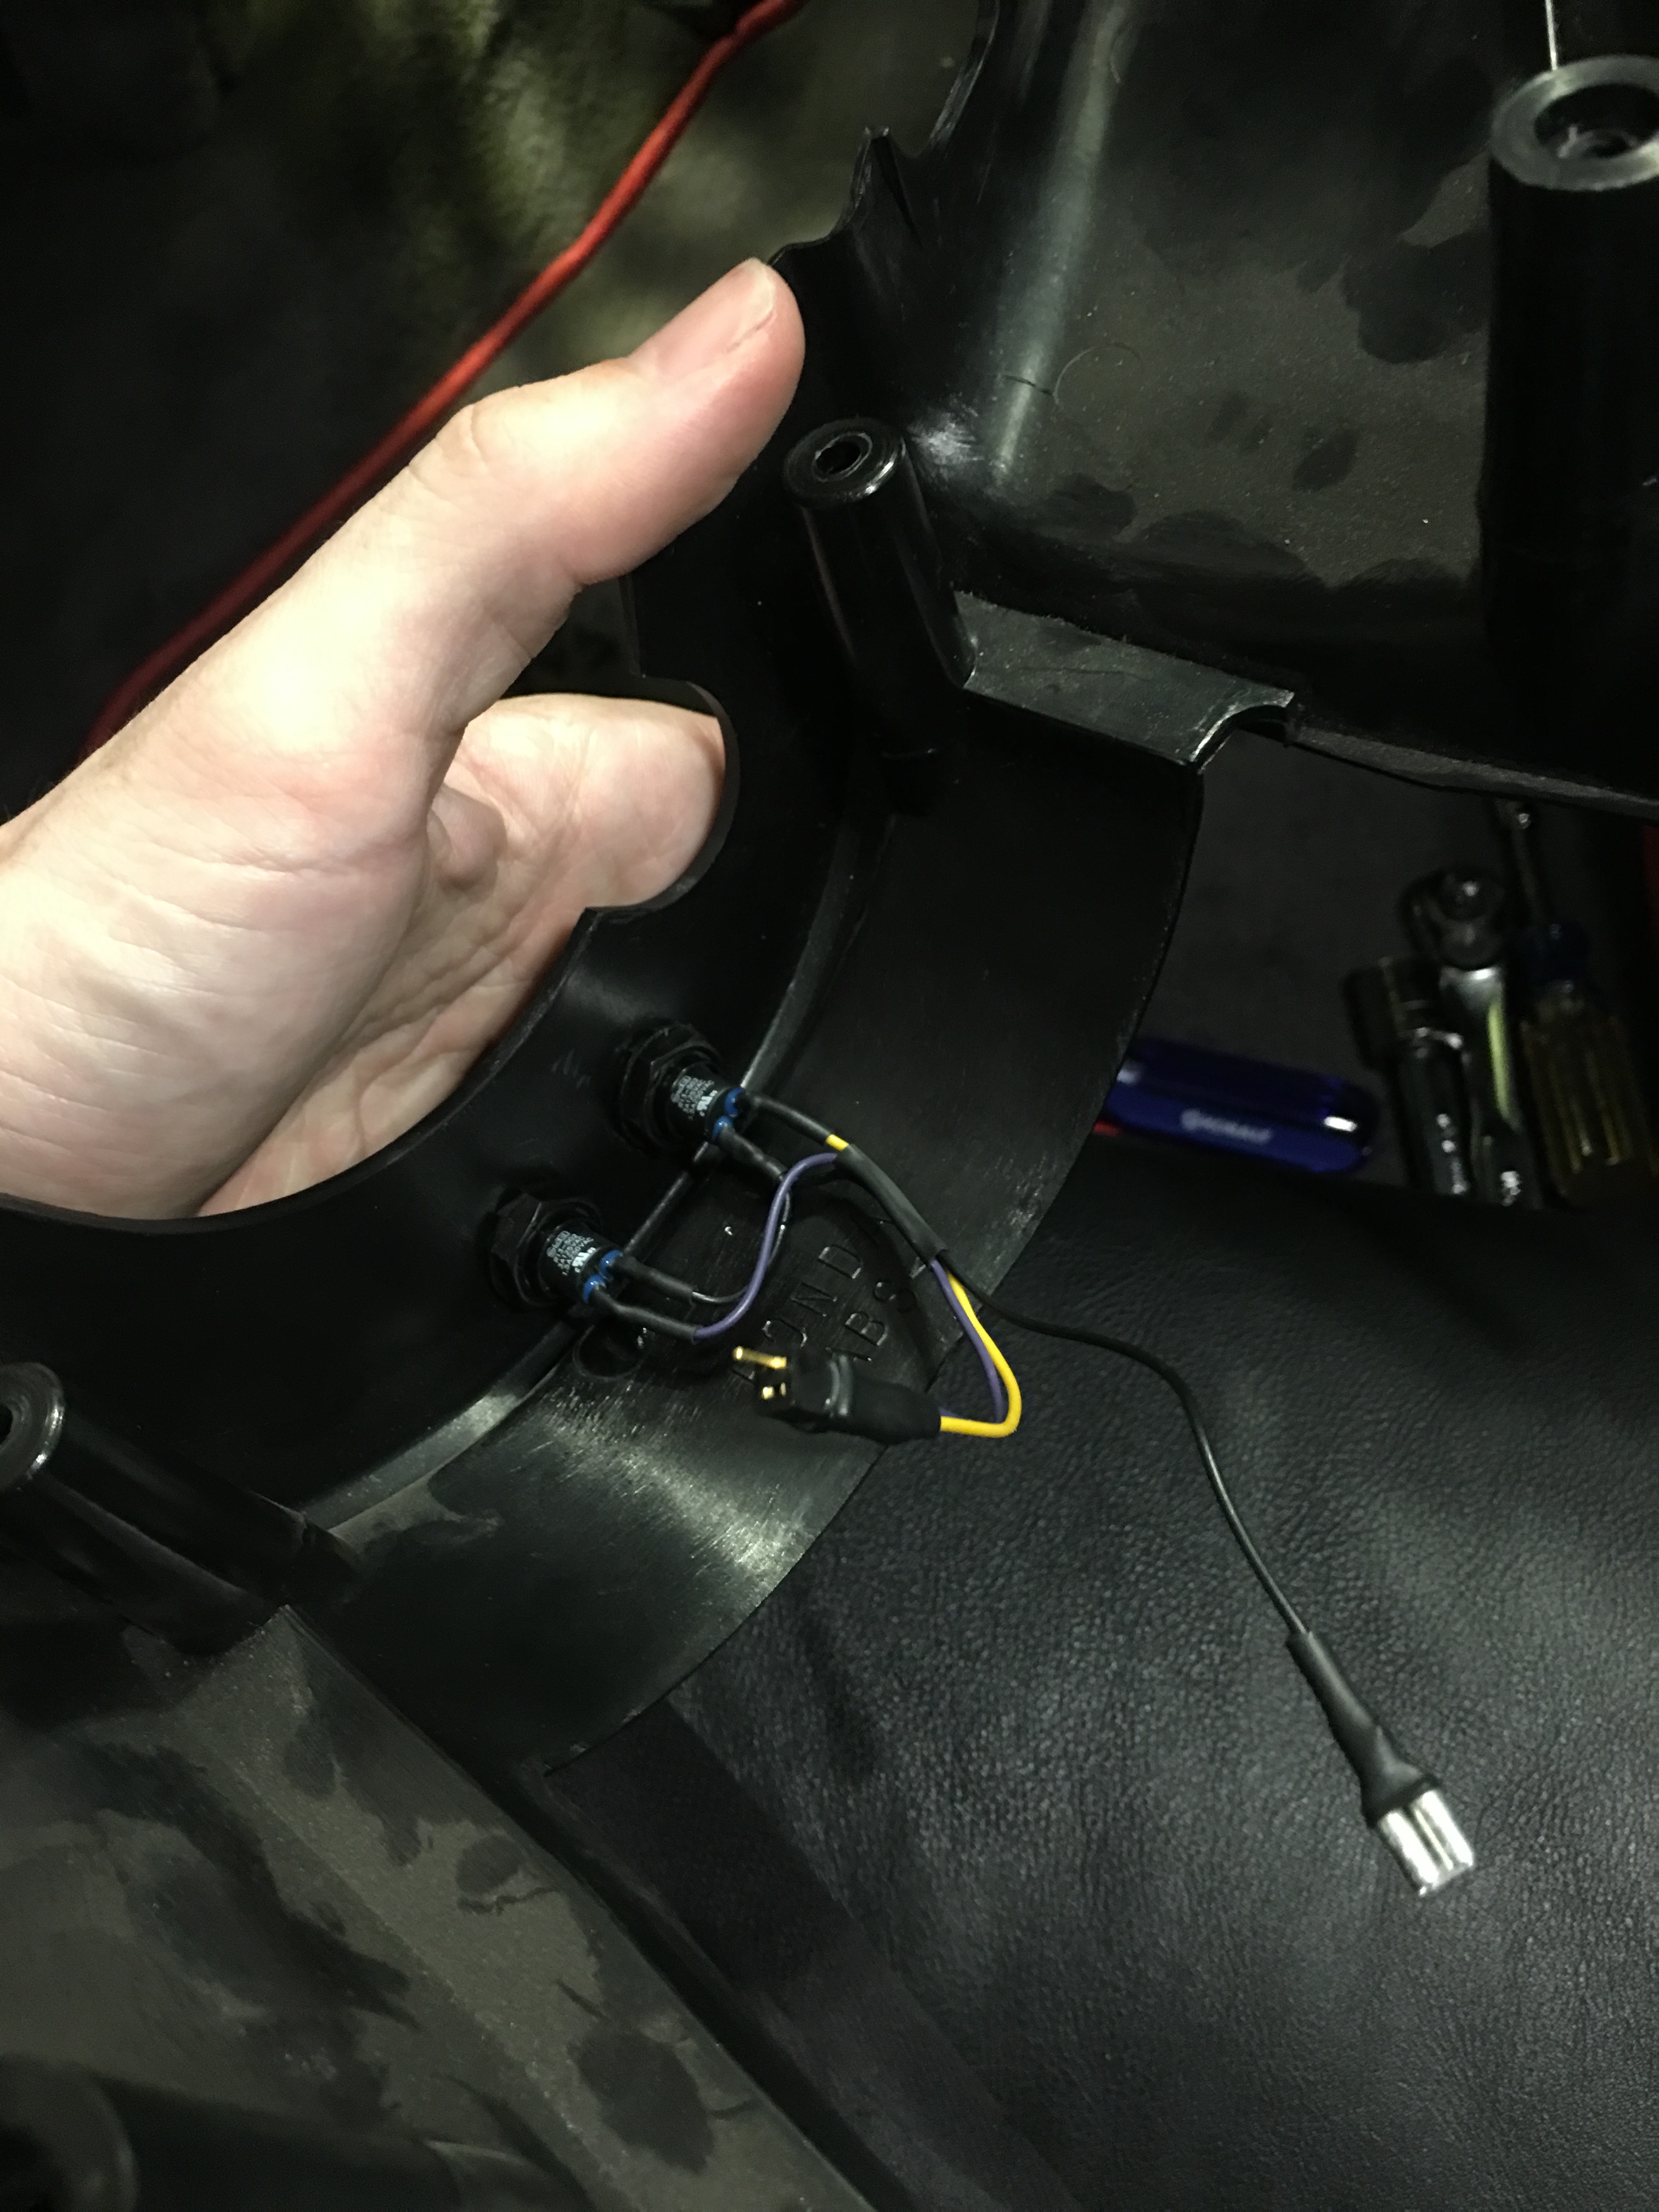
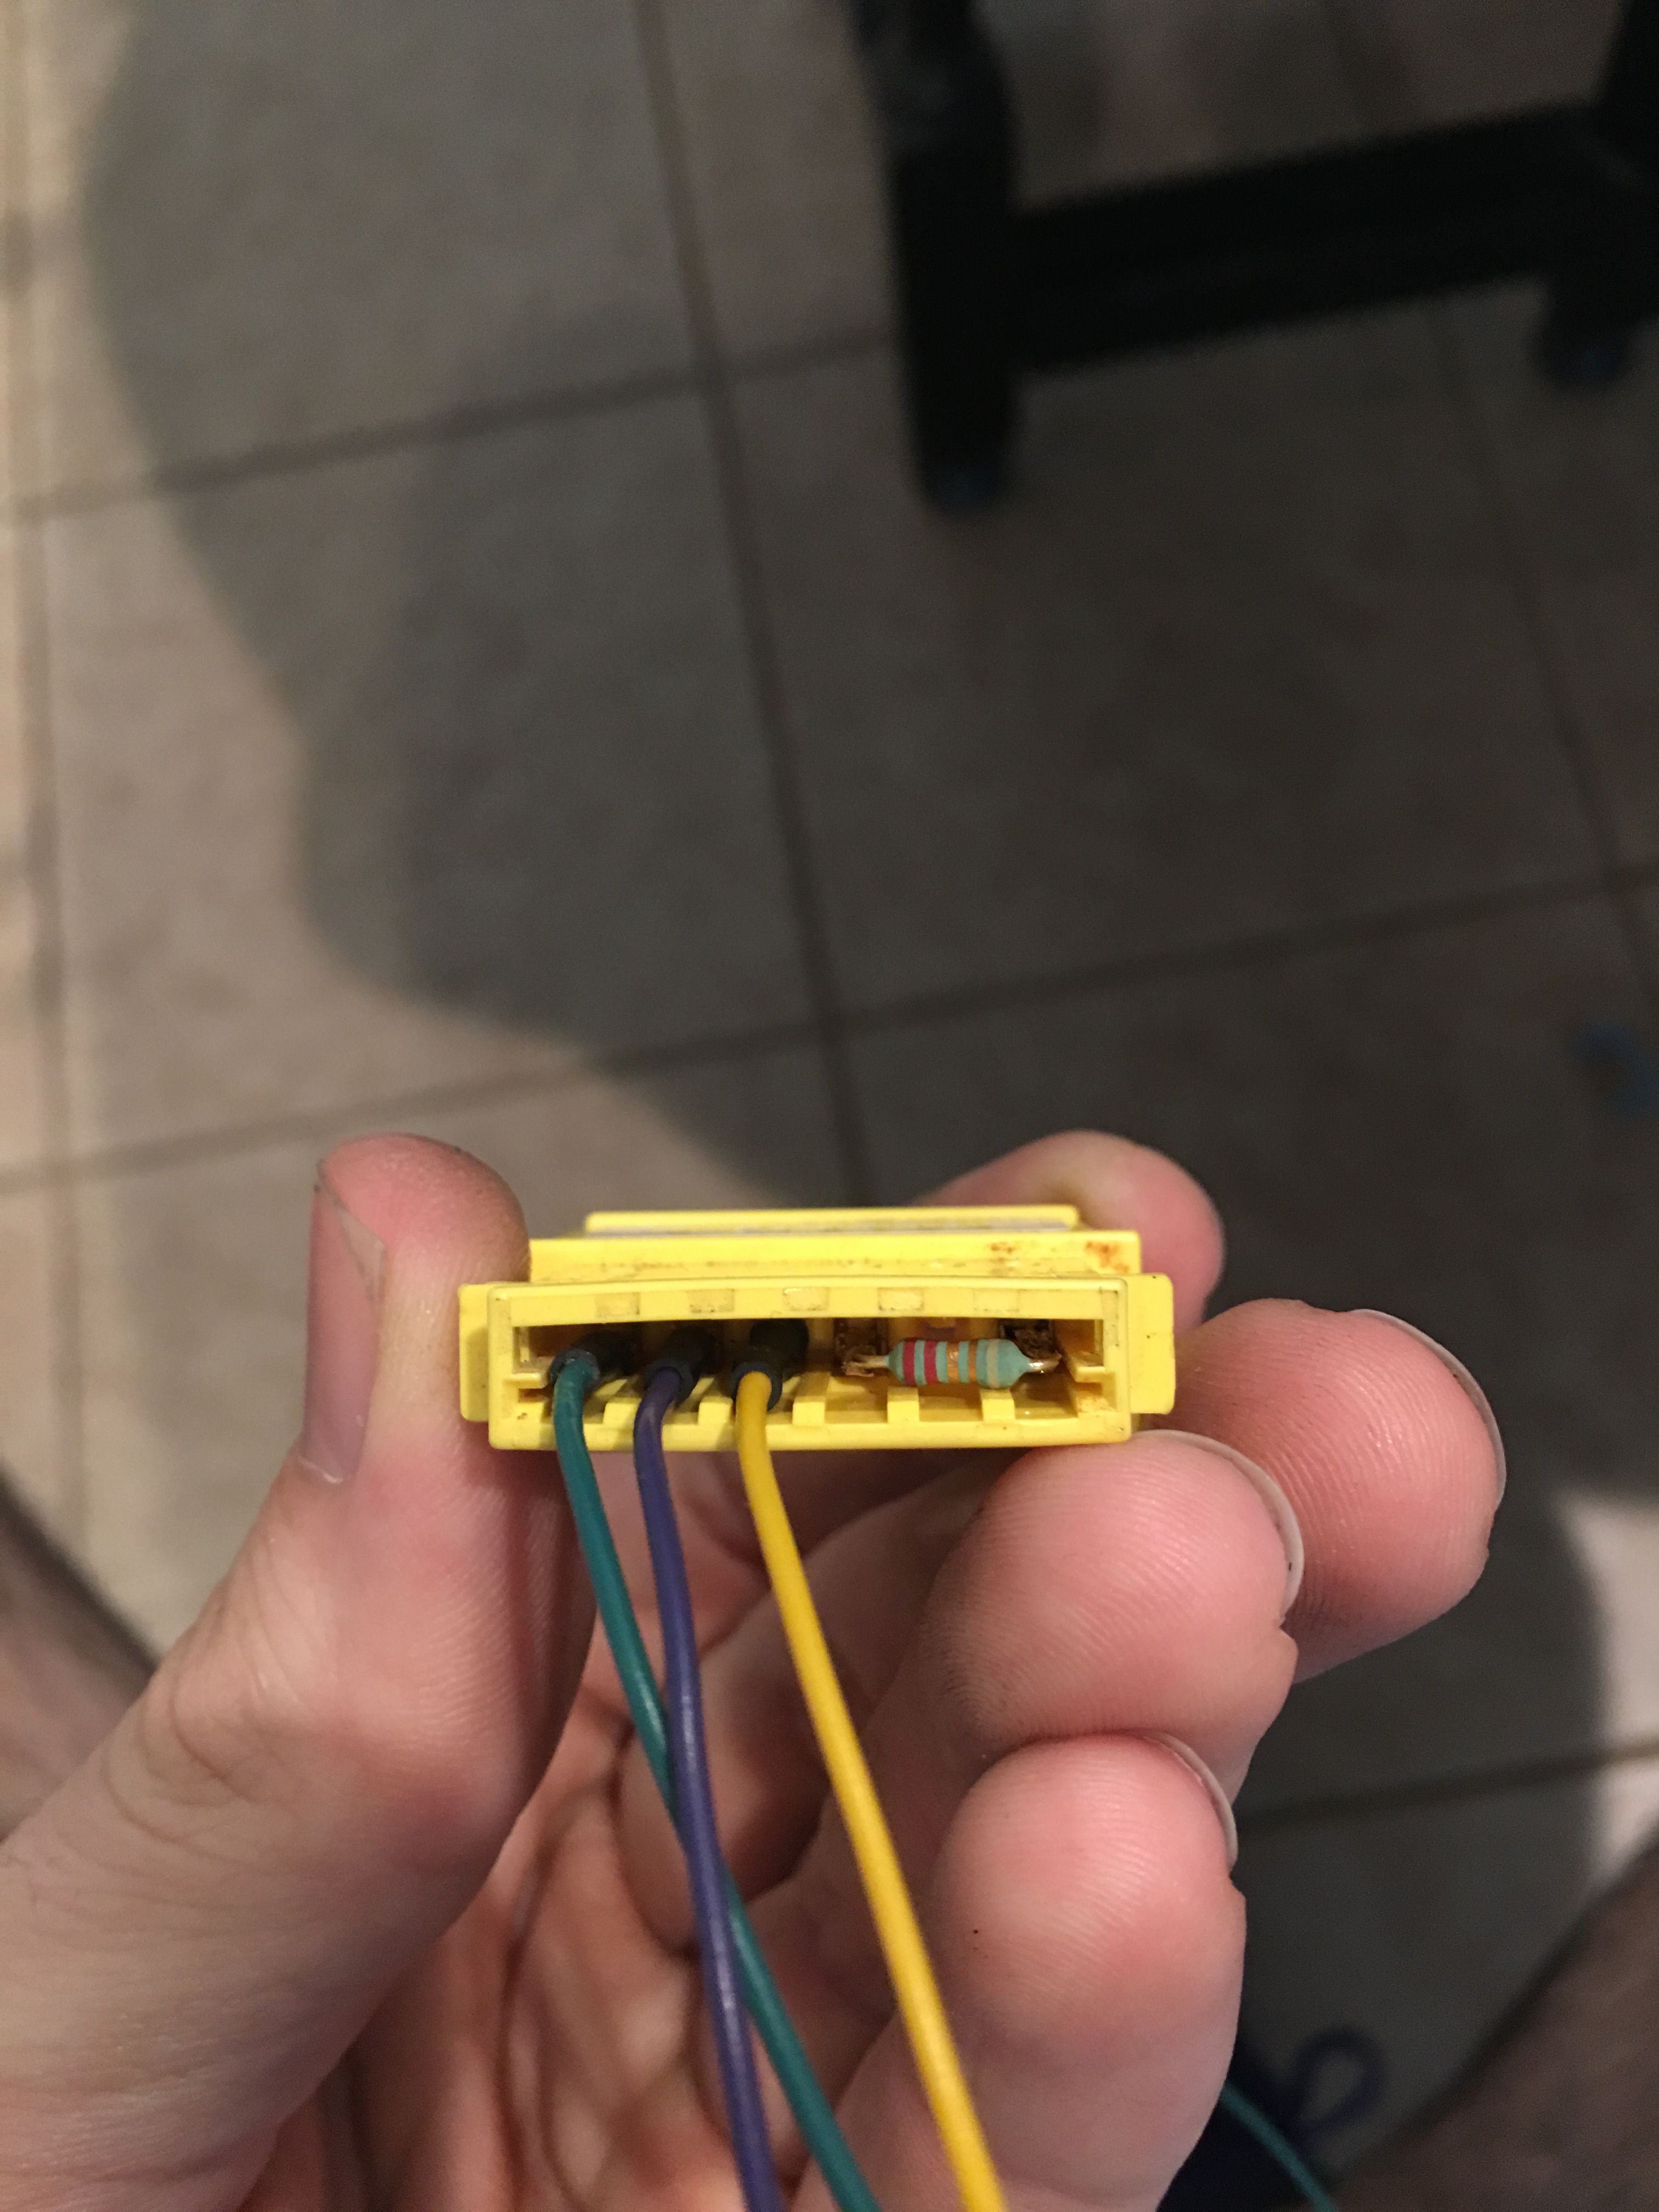
After that, I started working out the wiring. My car has a passenger airbag as well as seatbelt tensioners so I didn't want to completely remove the SRS system since I have some ethical concerns about removing the airbag in front of my passenger, so I need to keep the SRS functional. I also don't want to cut up the factory harness or do anything janky with the wiring, so I needed to source another SRS clock spring plug. The solution to all of this was an EG Civic clock spring connector, it is identical to the NSX plug and a friend had one left over from when he installed an aftermarket wheel in his Civic. I depinned the ribbon cable and soldered a 2.2ohm resistor across the airbag terminals to trick the SRS unit into thinking the airbag was still there. Turns out there was enough room in the back of the connector to hide the resistor completely, so that eliminates any issues with the resistor leads bending over time and eventually breaking, and make it look very clean.


IMG_1149.jpg


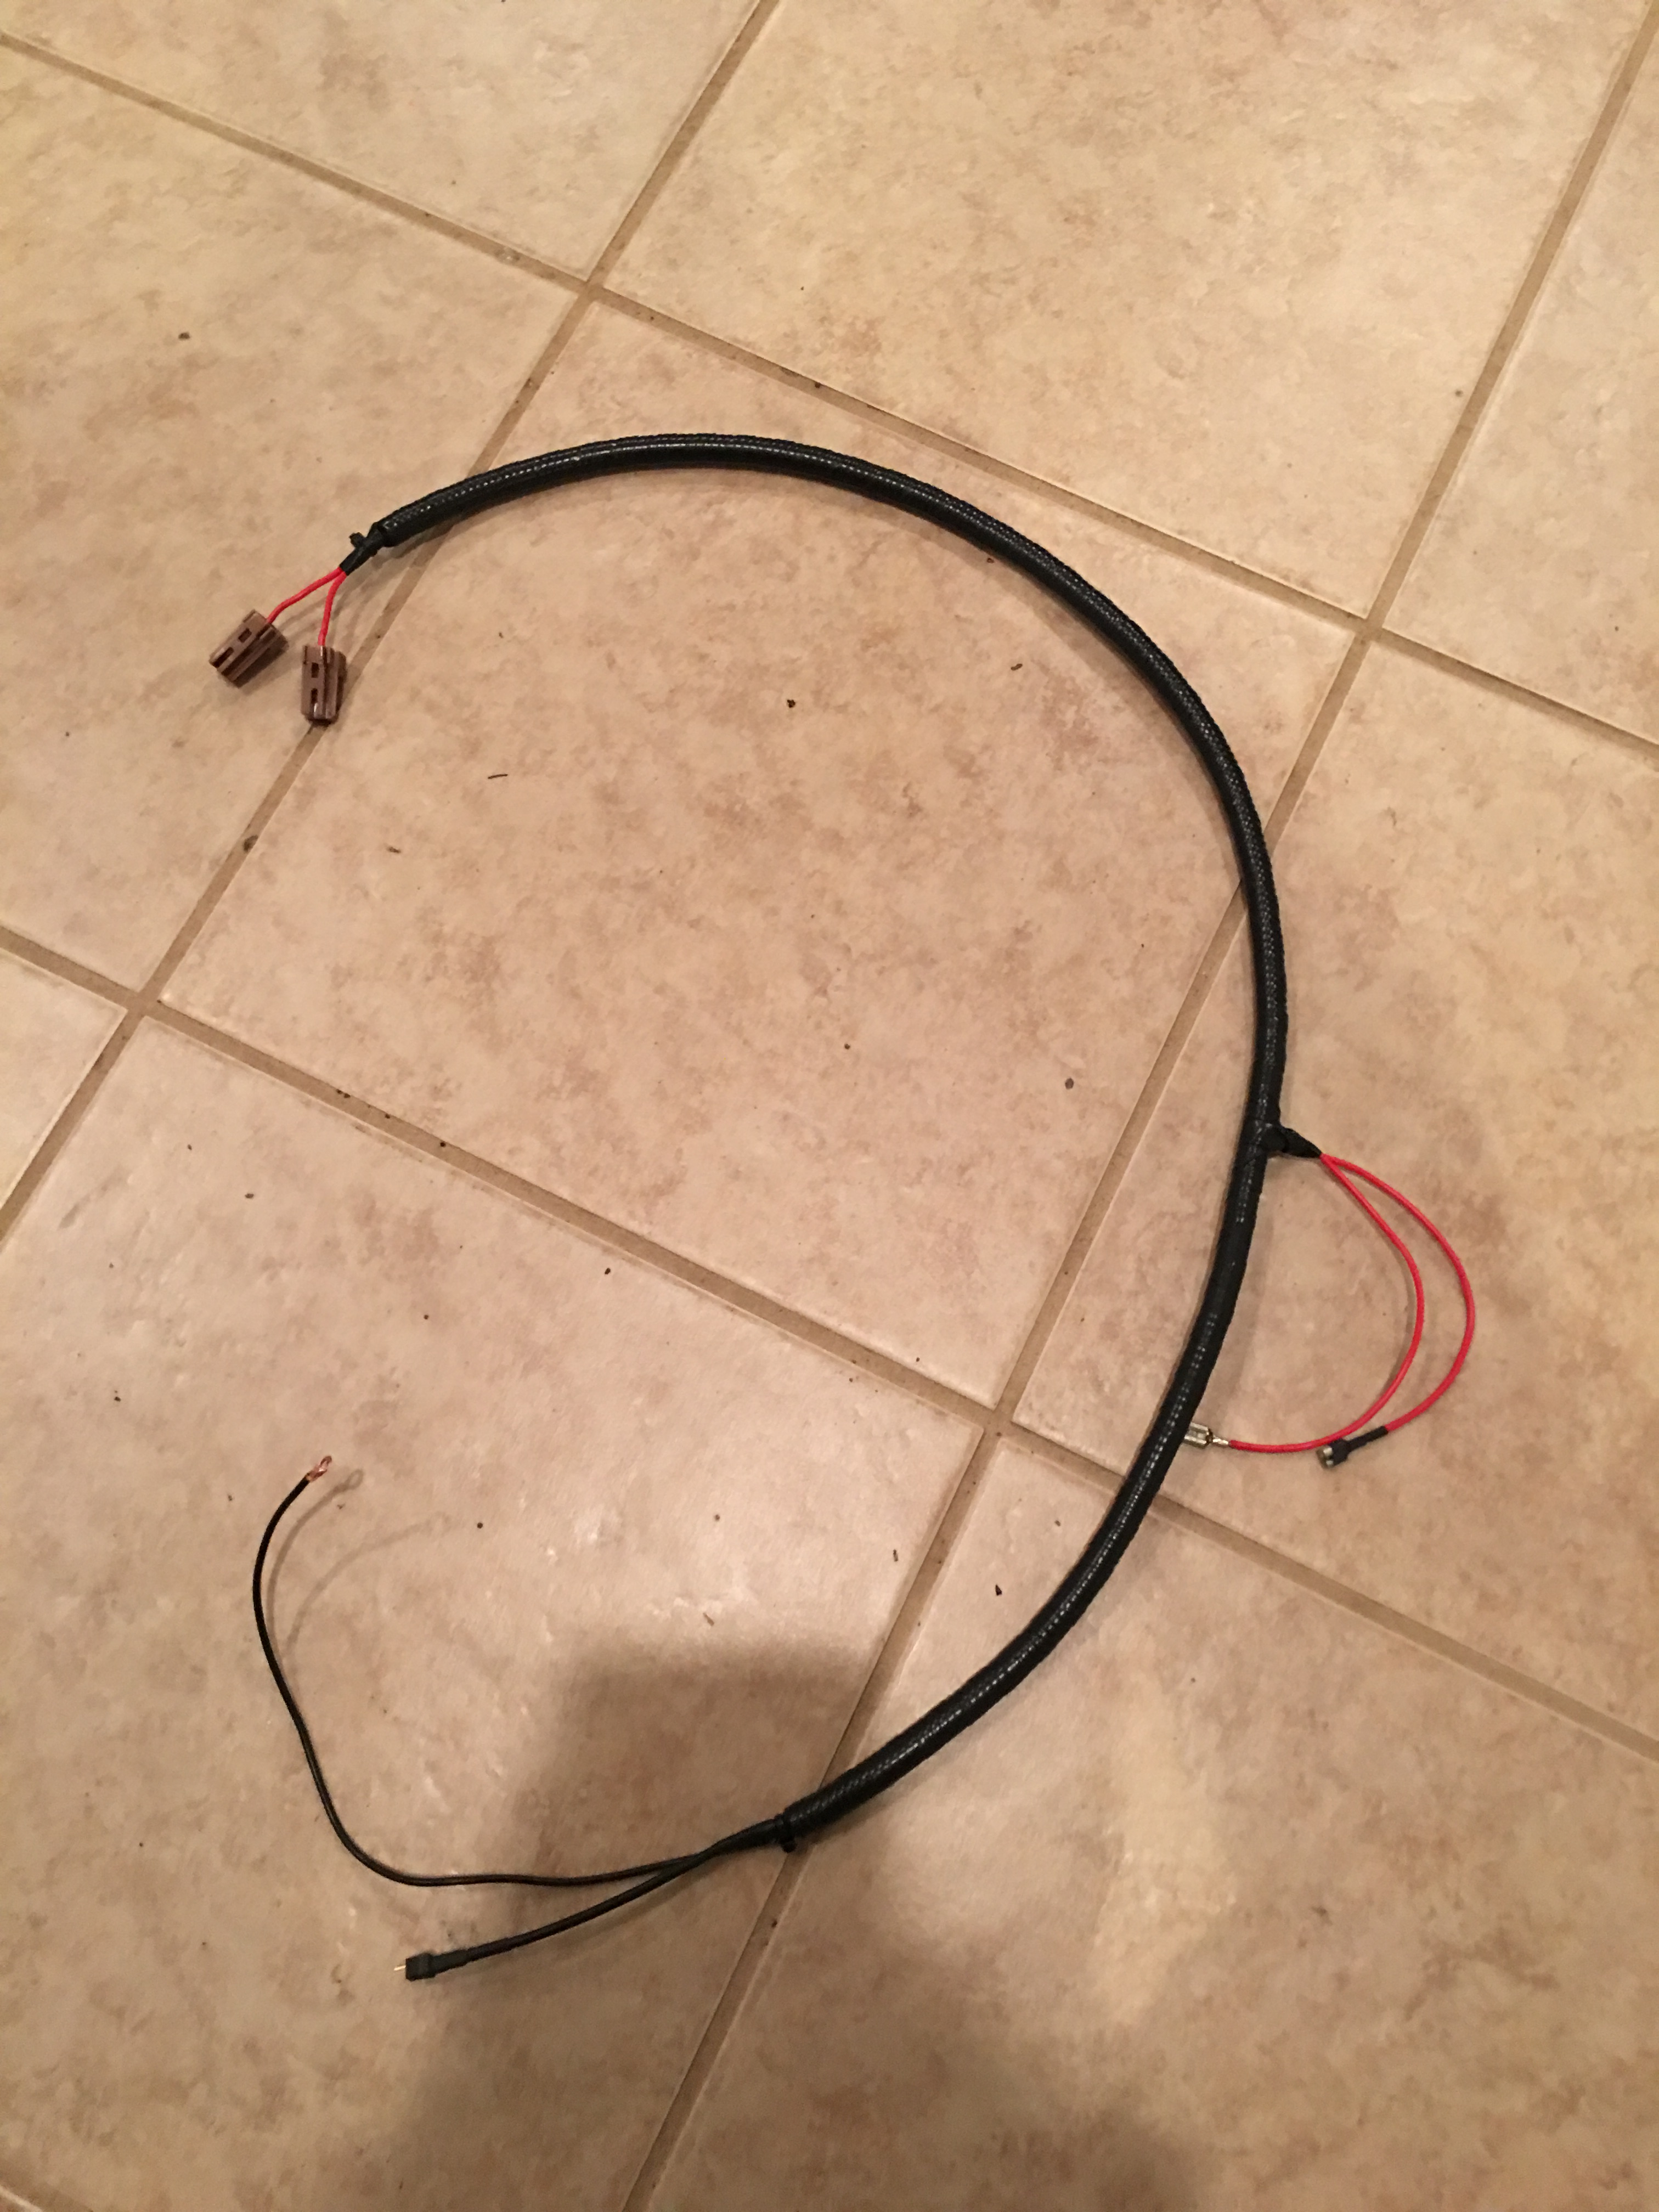
After that, I soldered wires to the pins for the horn and cruise control signals, added a braided nylon wire sleeve to make it look nice and protect the wire from possibly getting knicked by sharp metal edges in the steering column, then soldered on a quick disconnect for the horn and a Deans micro plug for the two cruise control buttons. You have no idea how much I love making wire harnesses, it's so satisfying.


IMG_1150.jpg


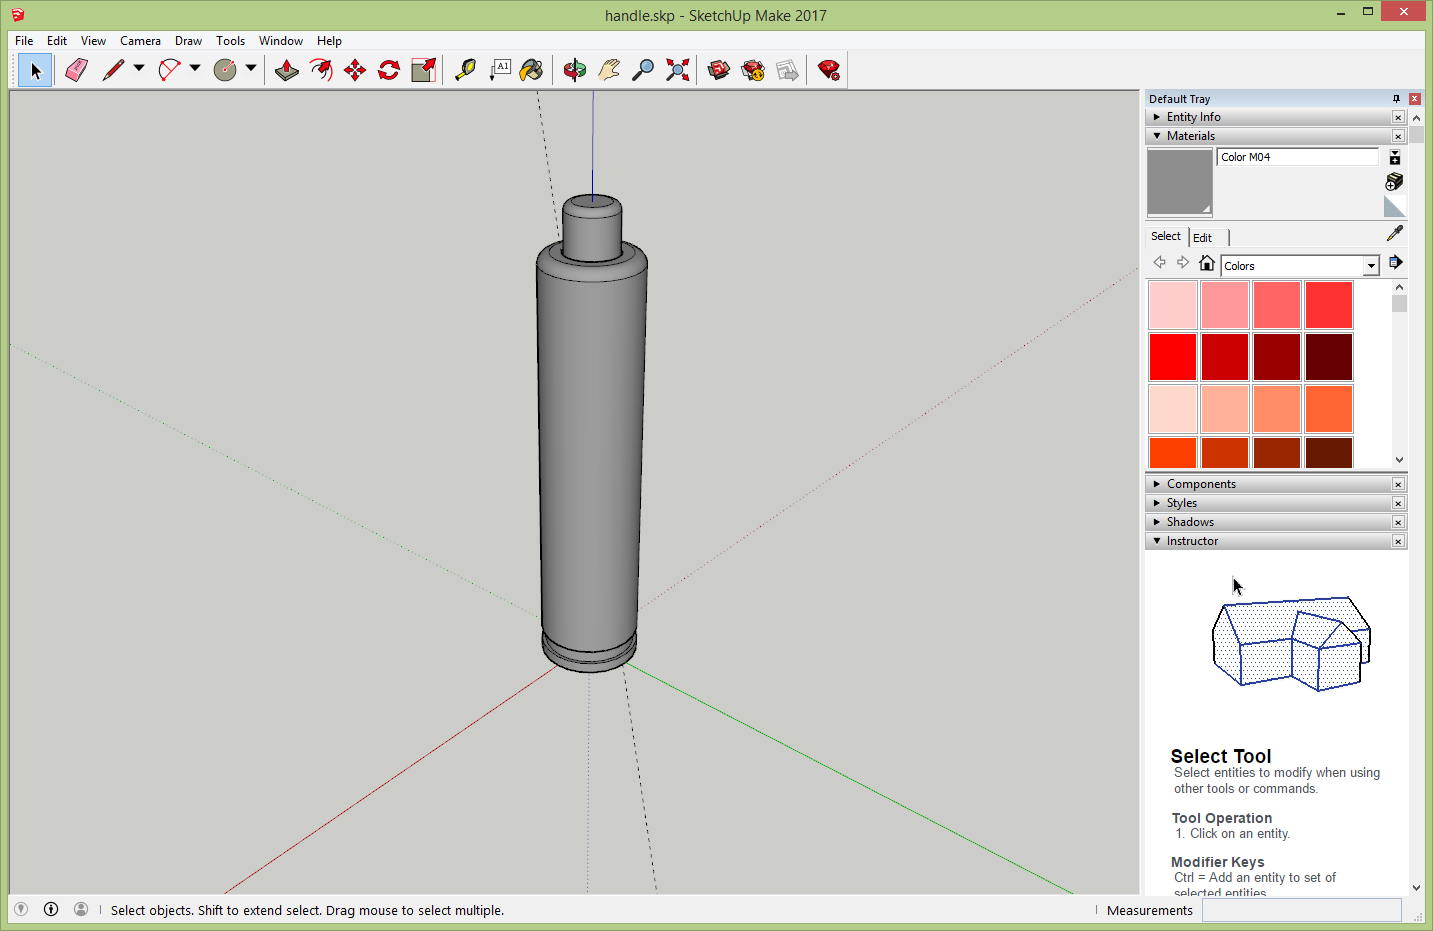
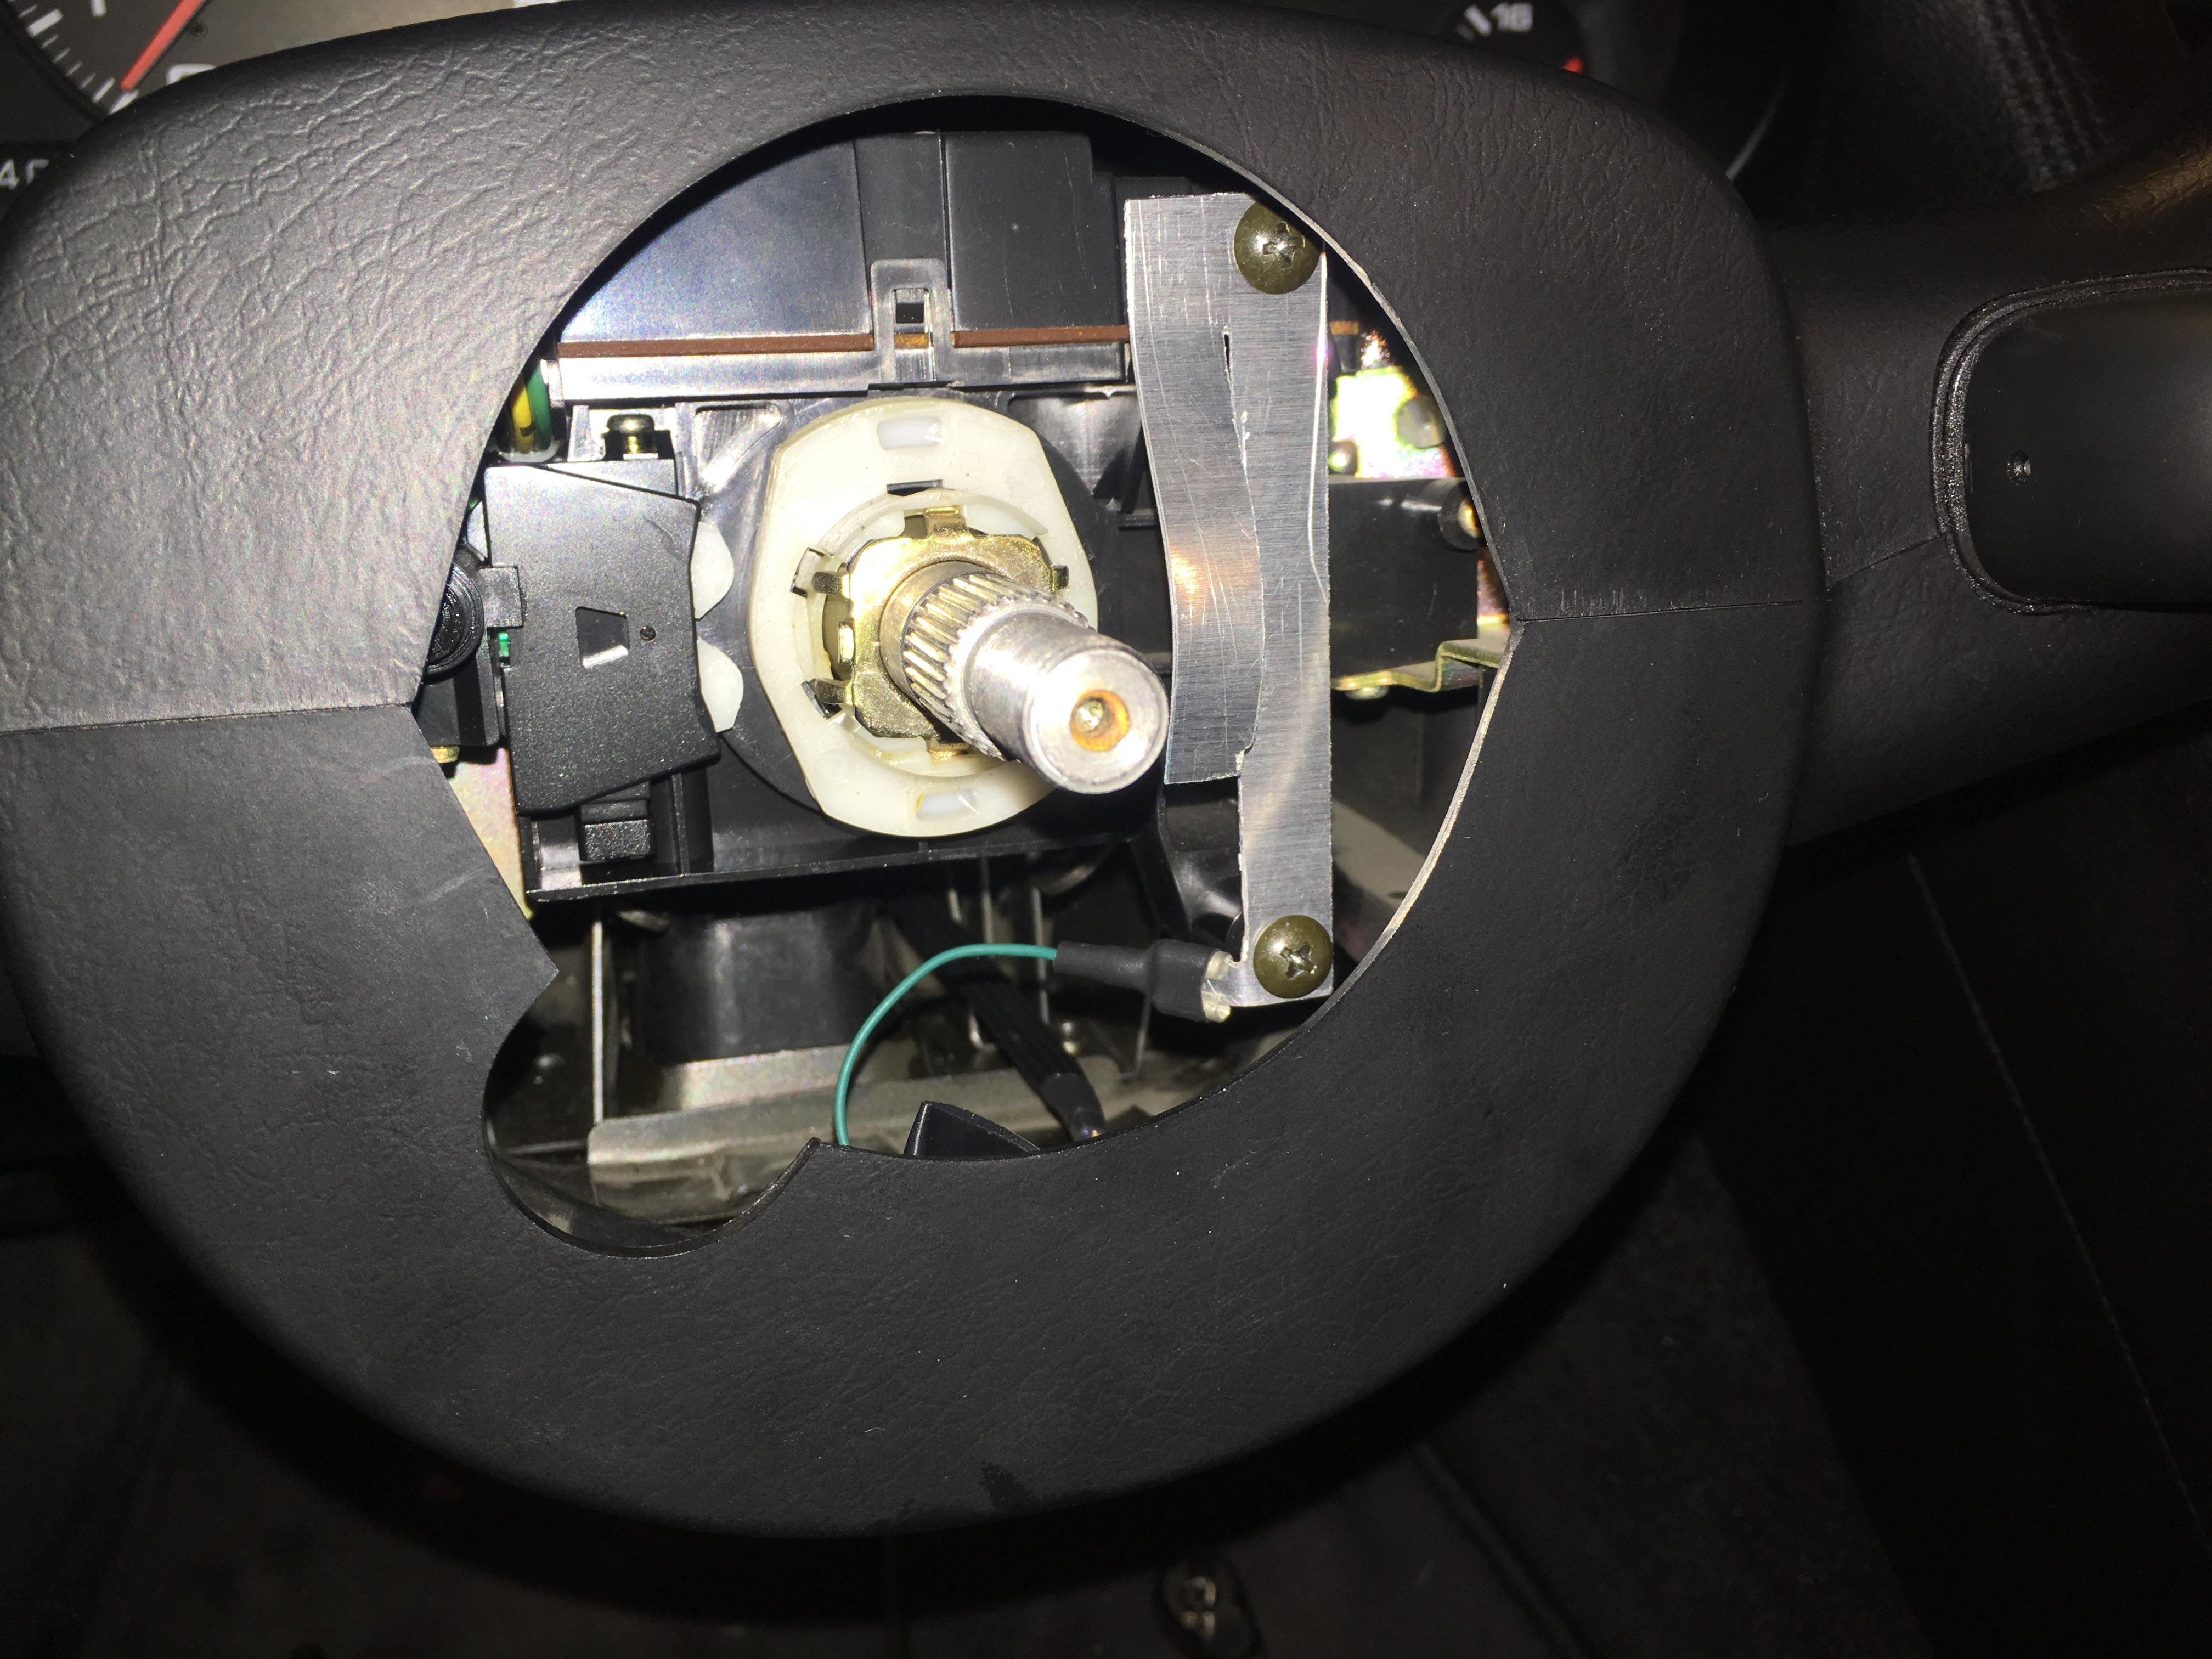
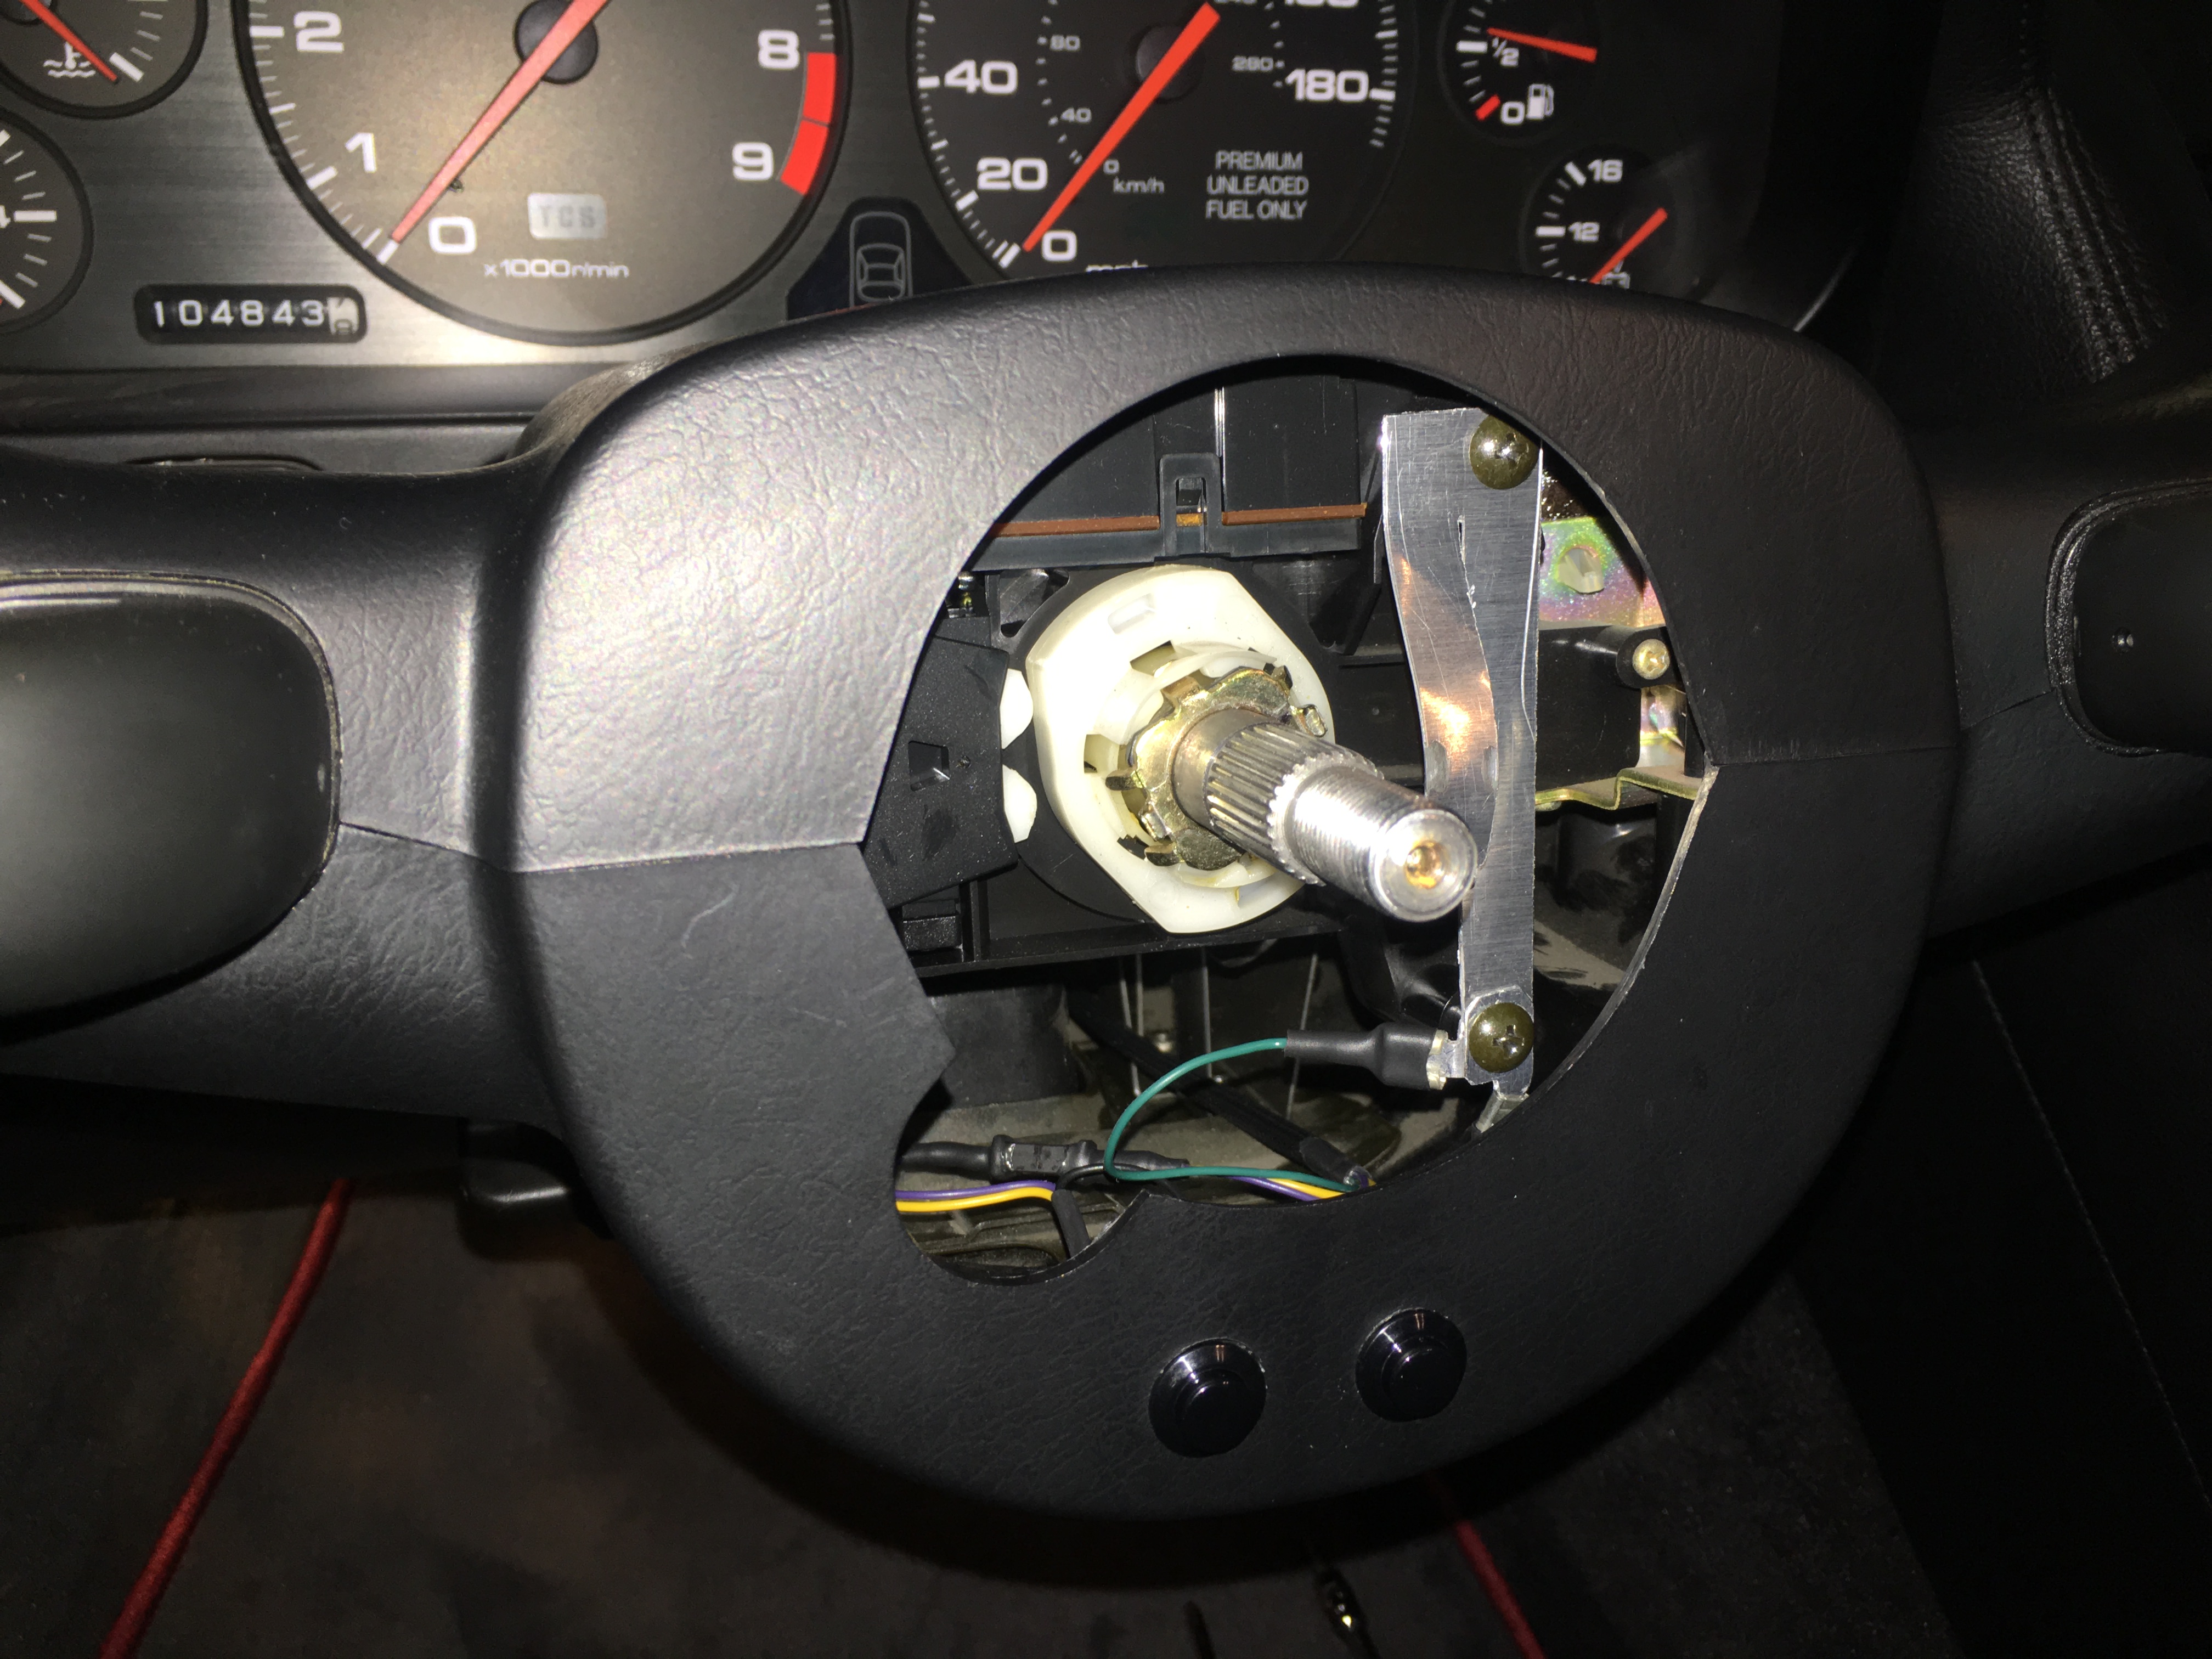
For the horn button, I fabricated this spring plate out of a sheet of thin aluminum and screwed it in to the clock spring mounting holes. I left a tab sticking out for a quick disconnect rather than using a ring terminal or just twisting wire around the screw since it's cleaner looking and easier to work with if I have to take it apart.
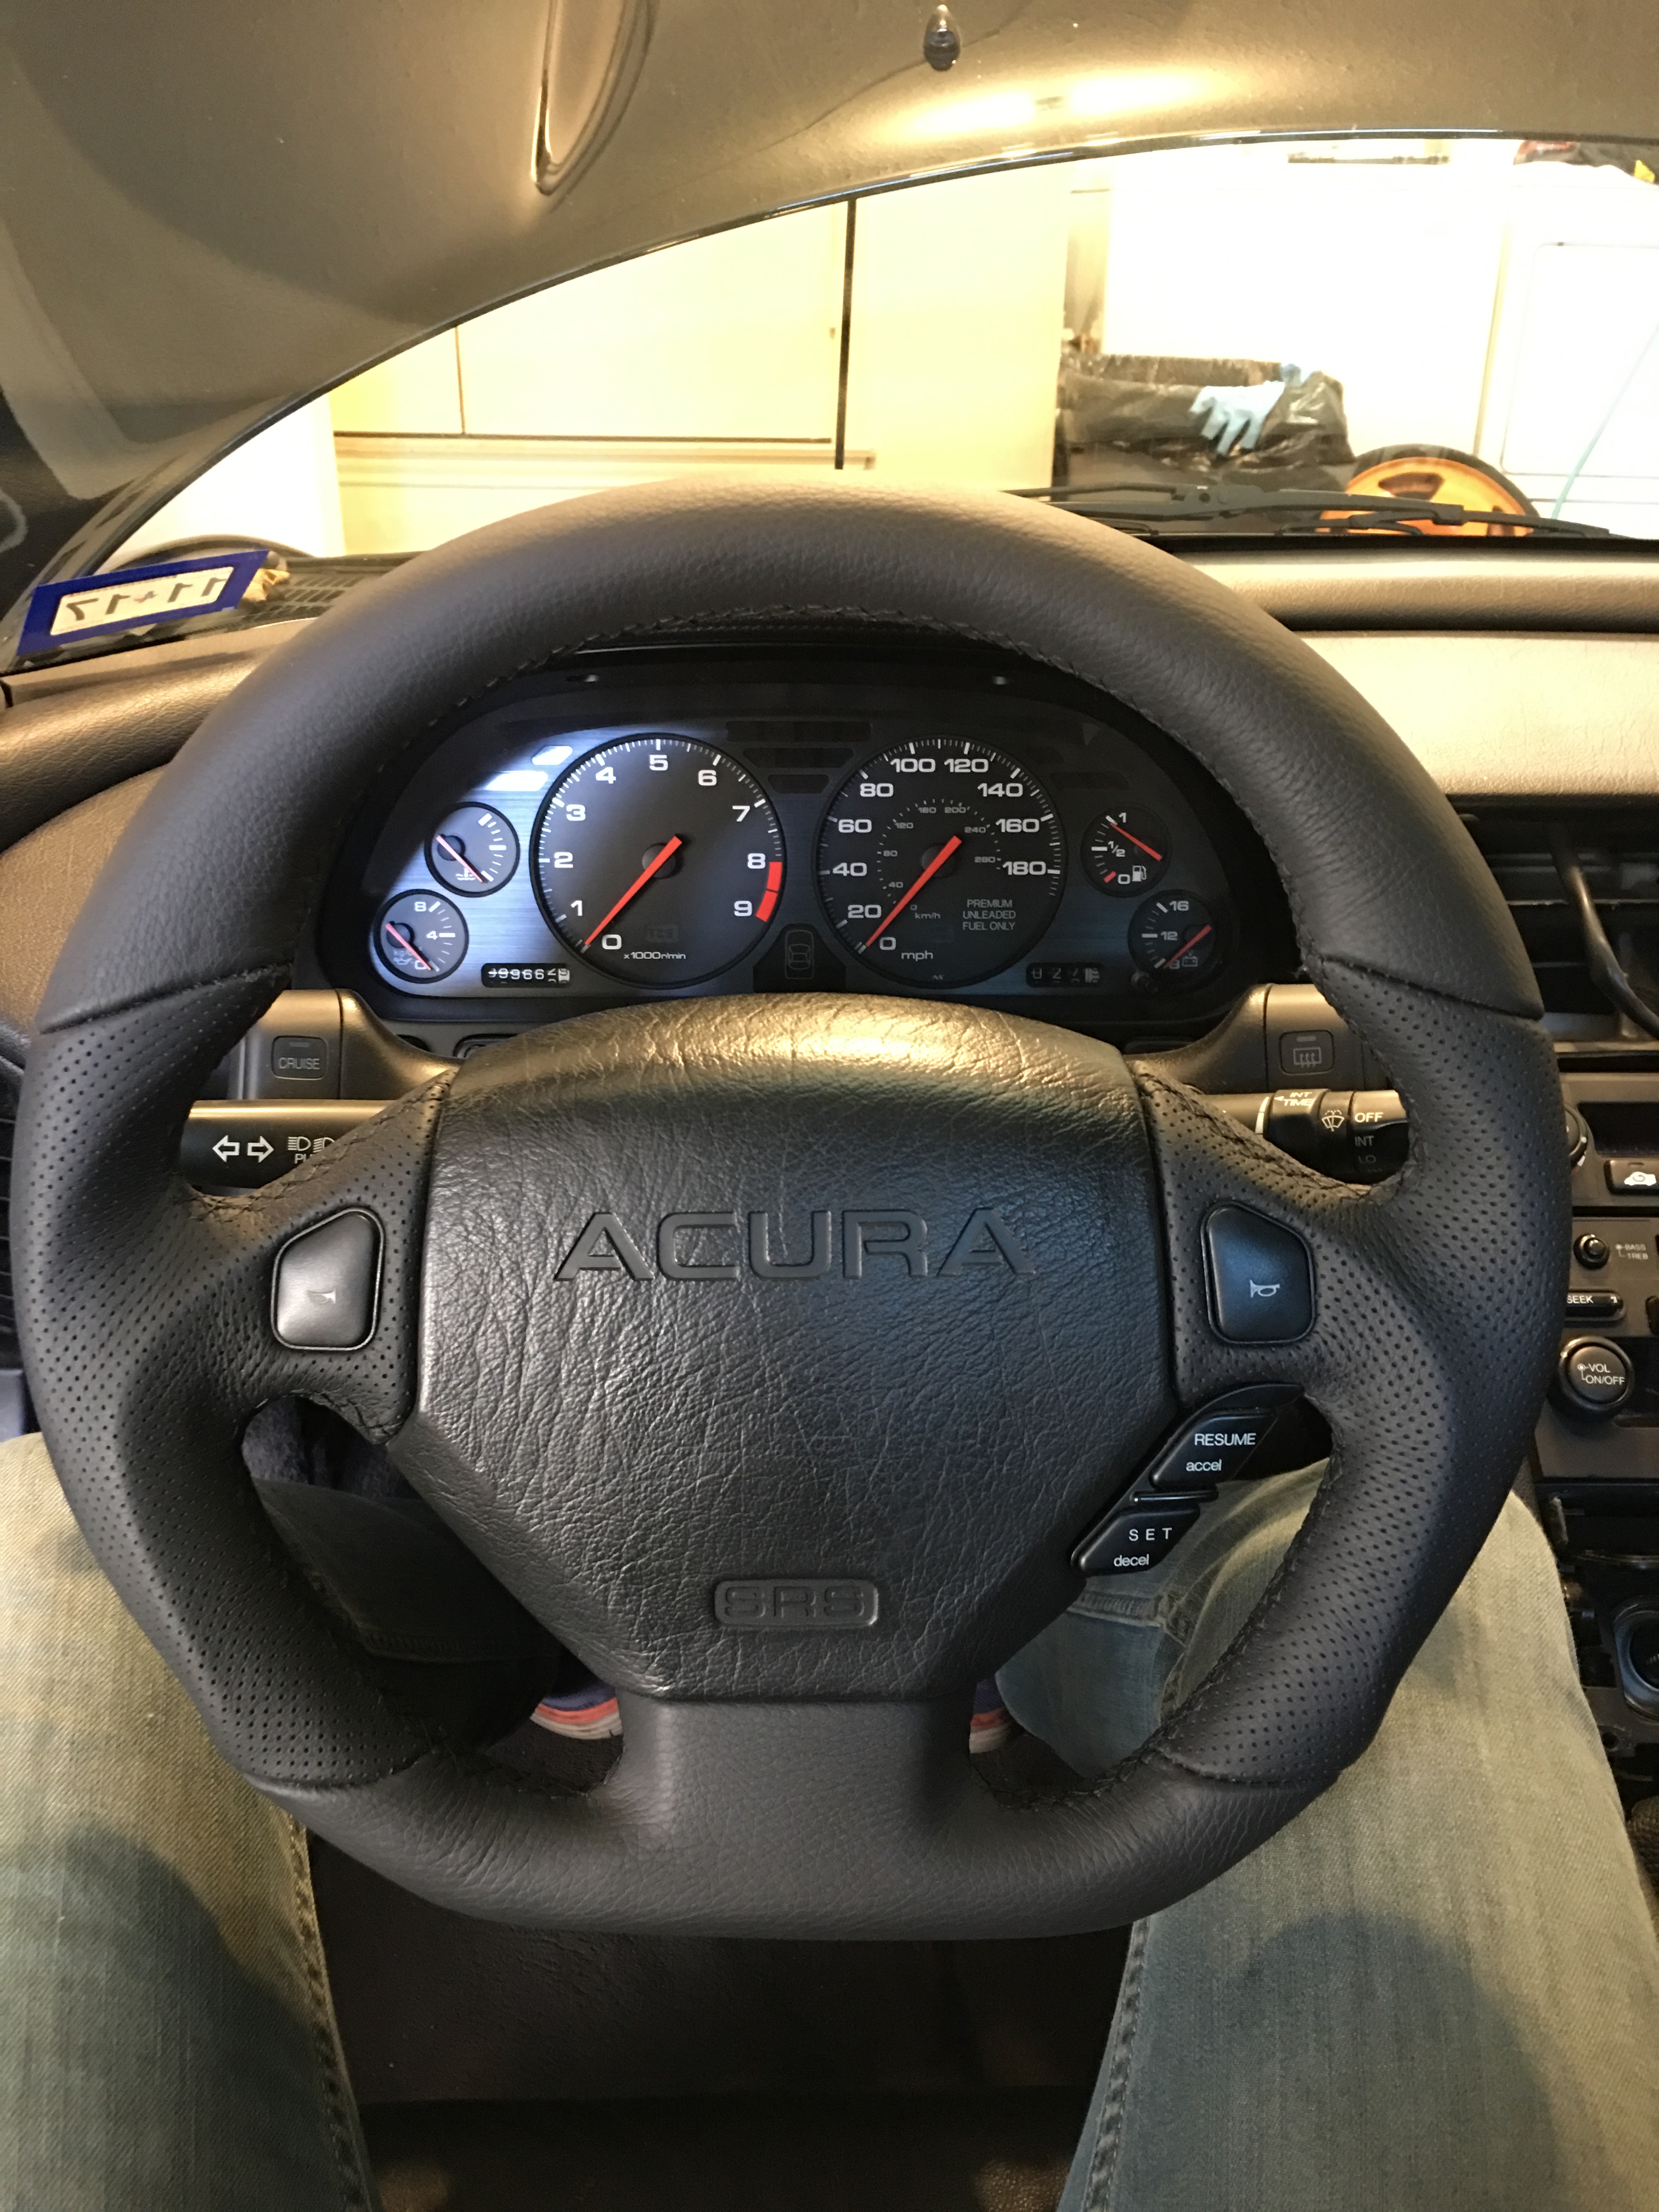

IMG_1151.jpg


Hub installed.


IMG_1152_2.jpg


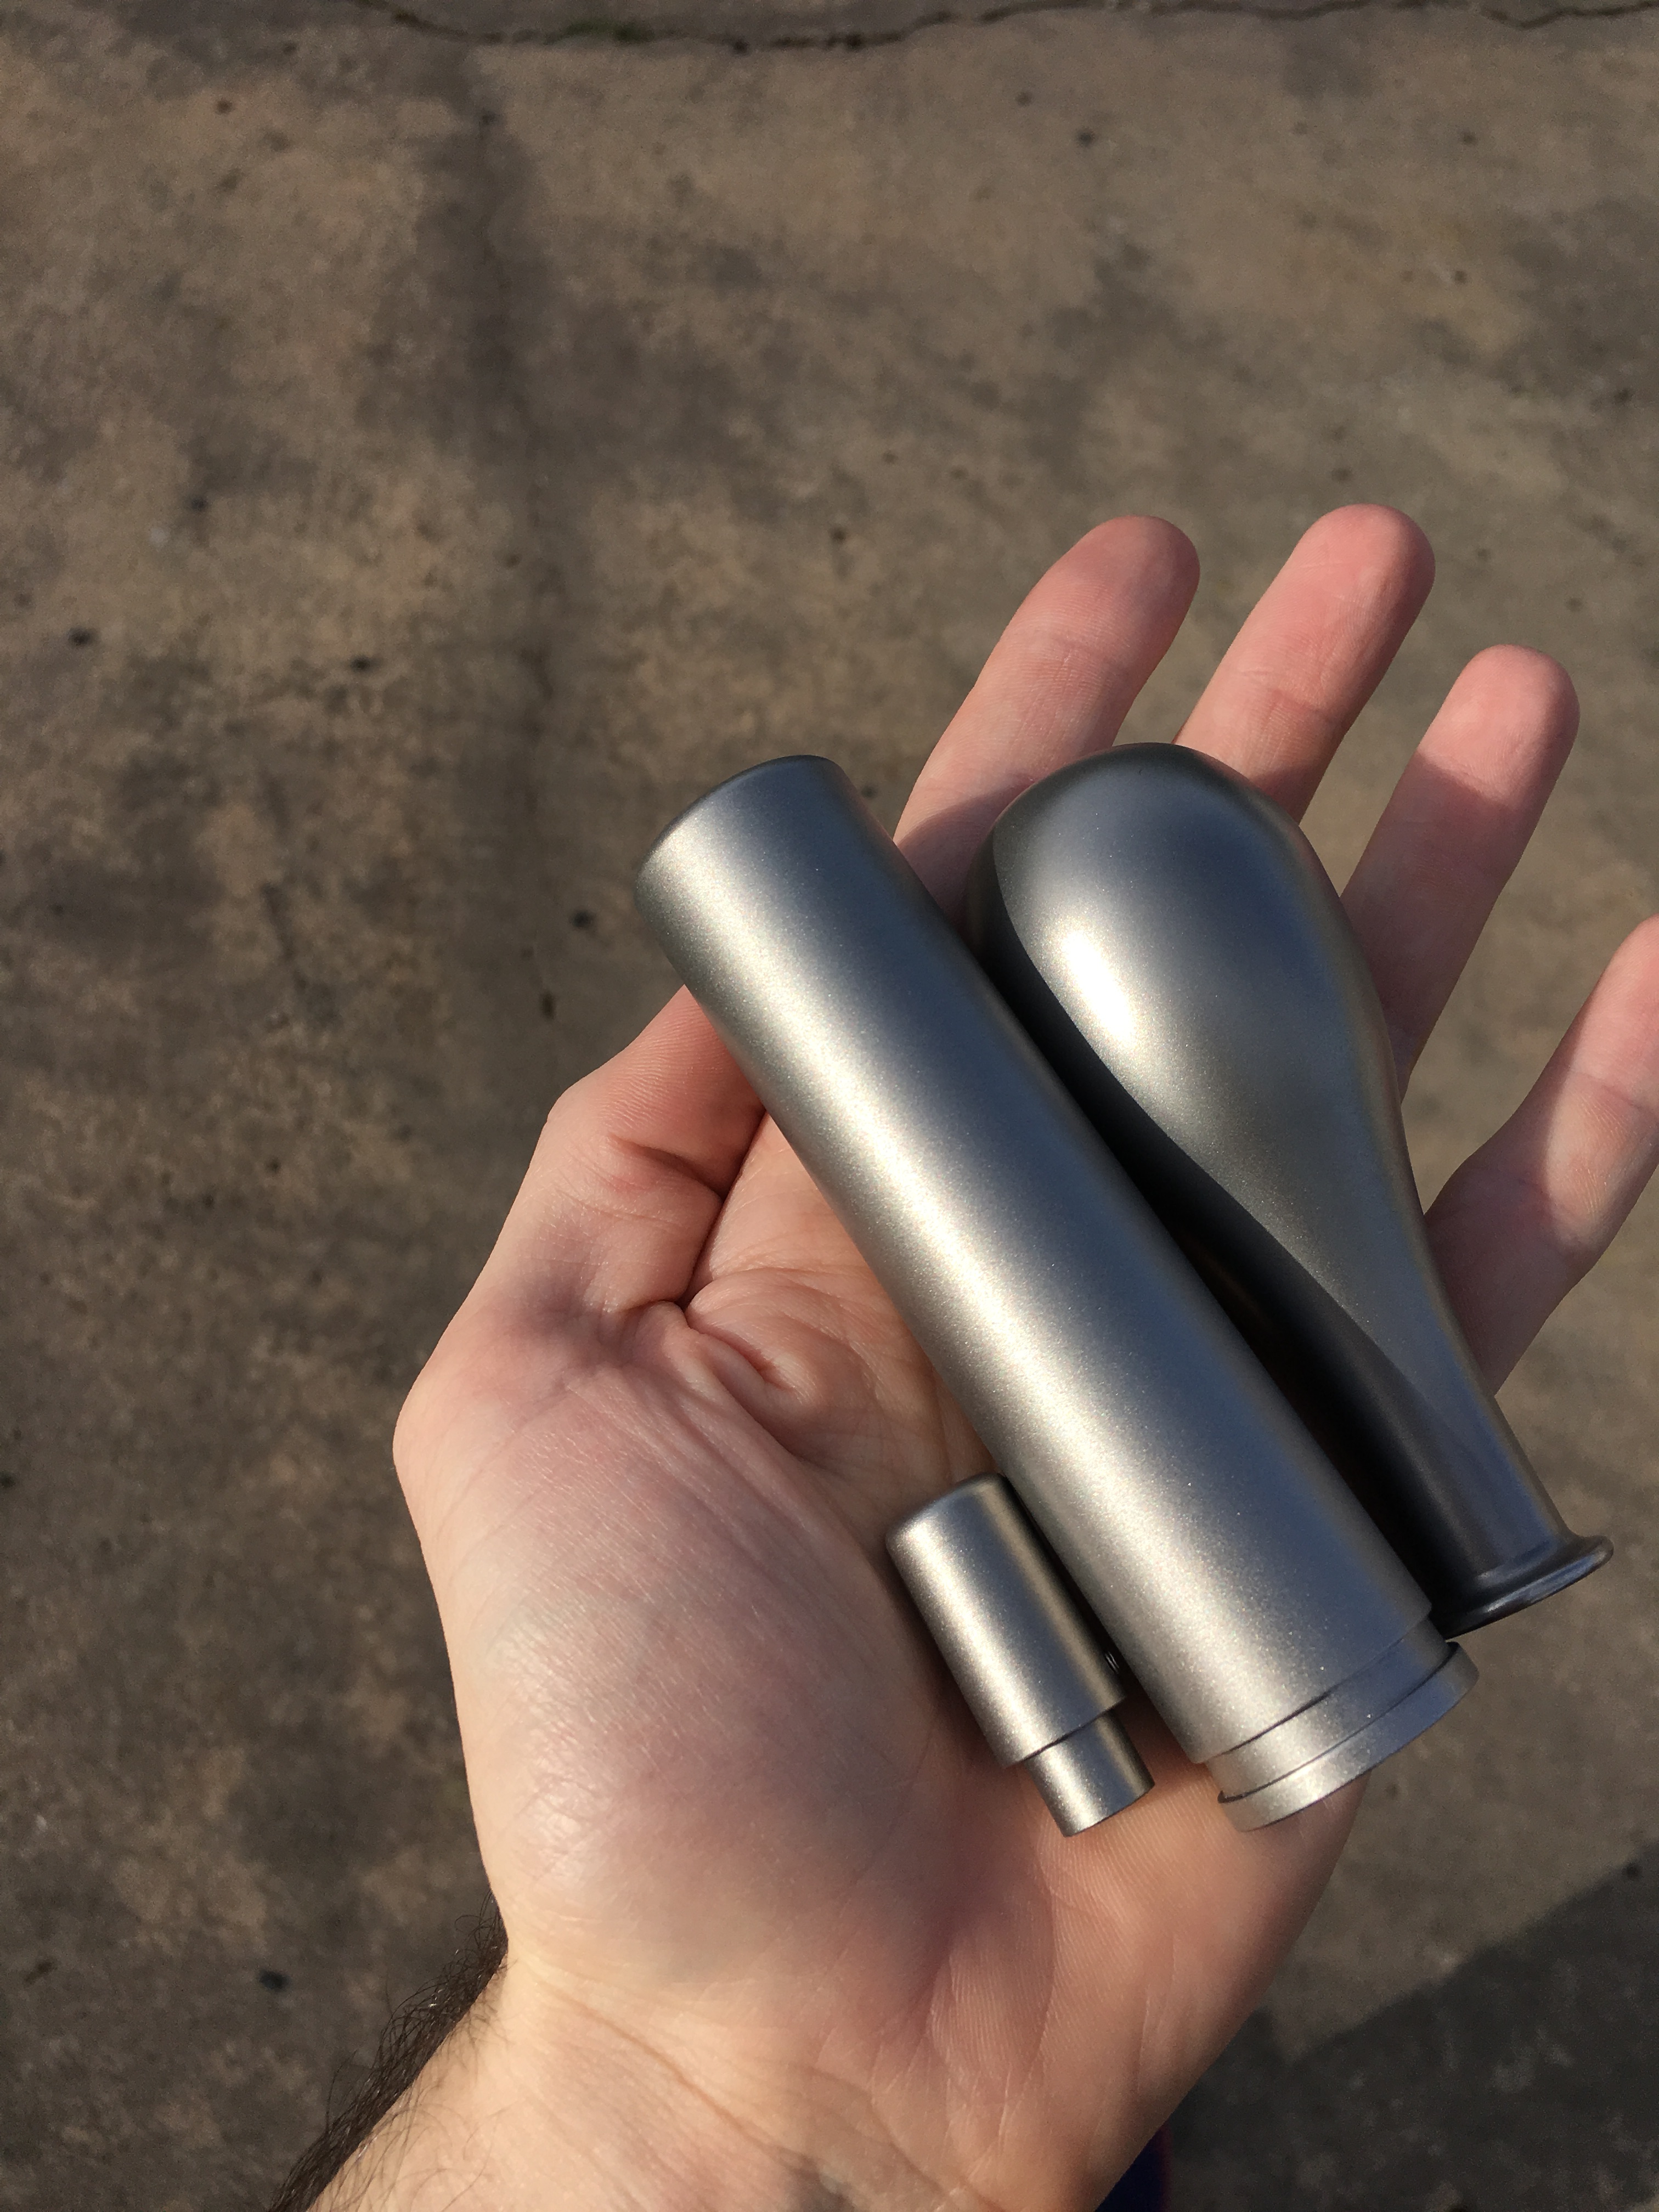
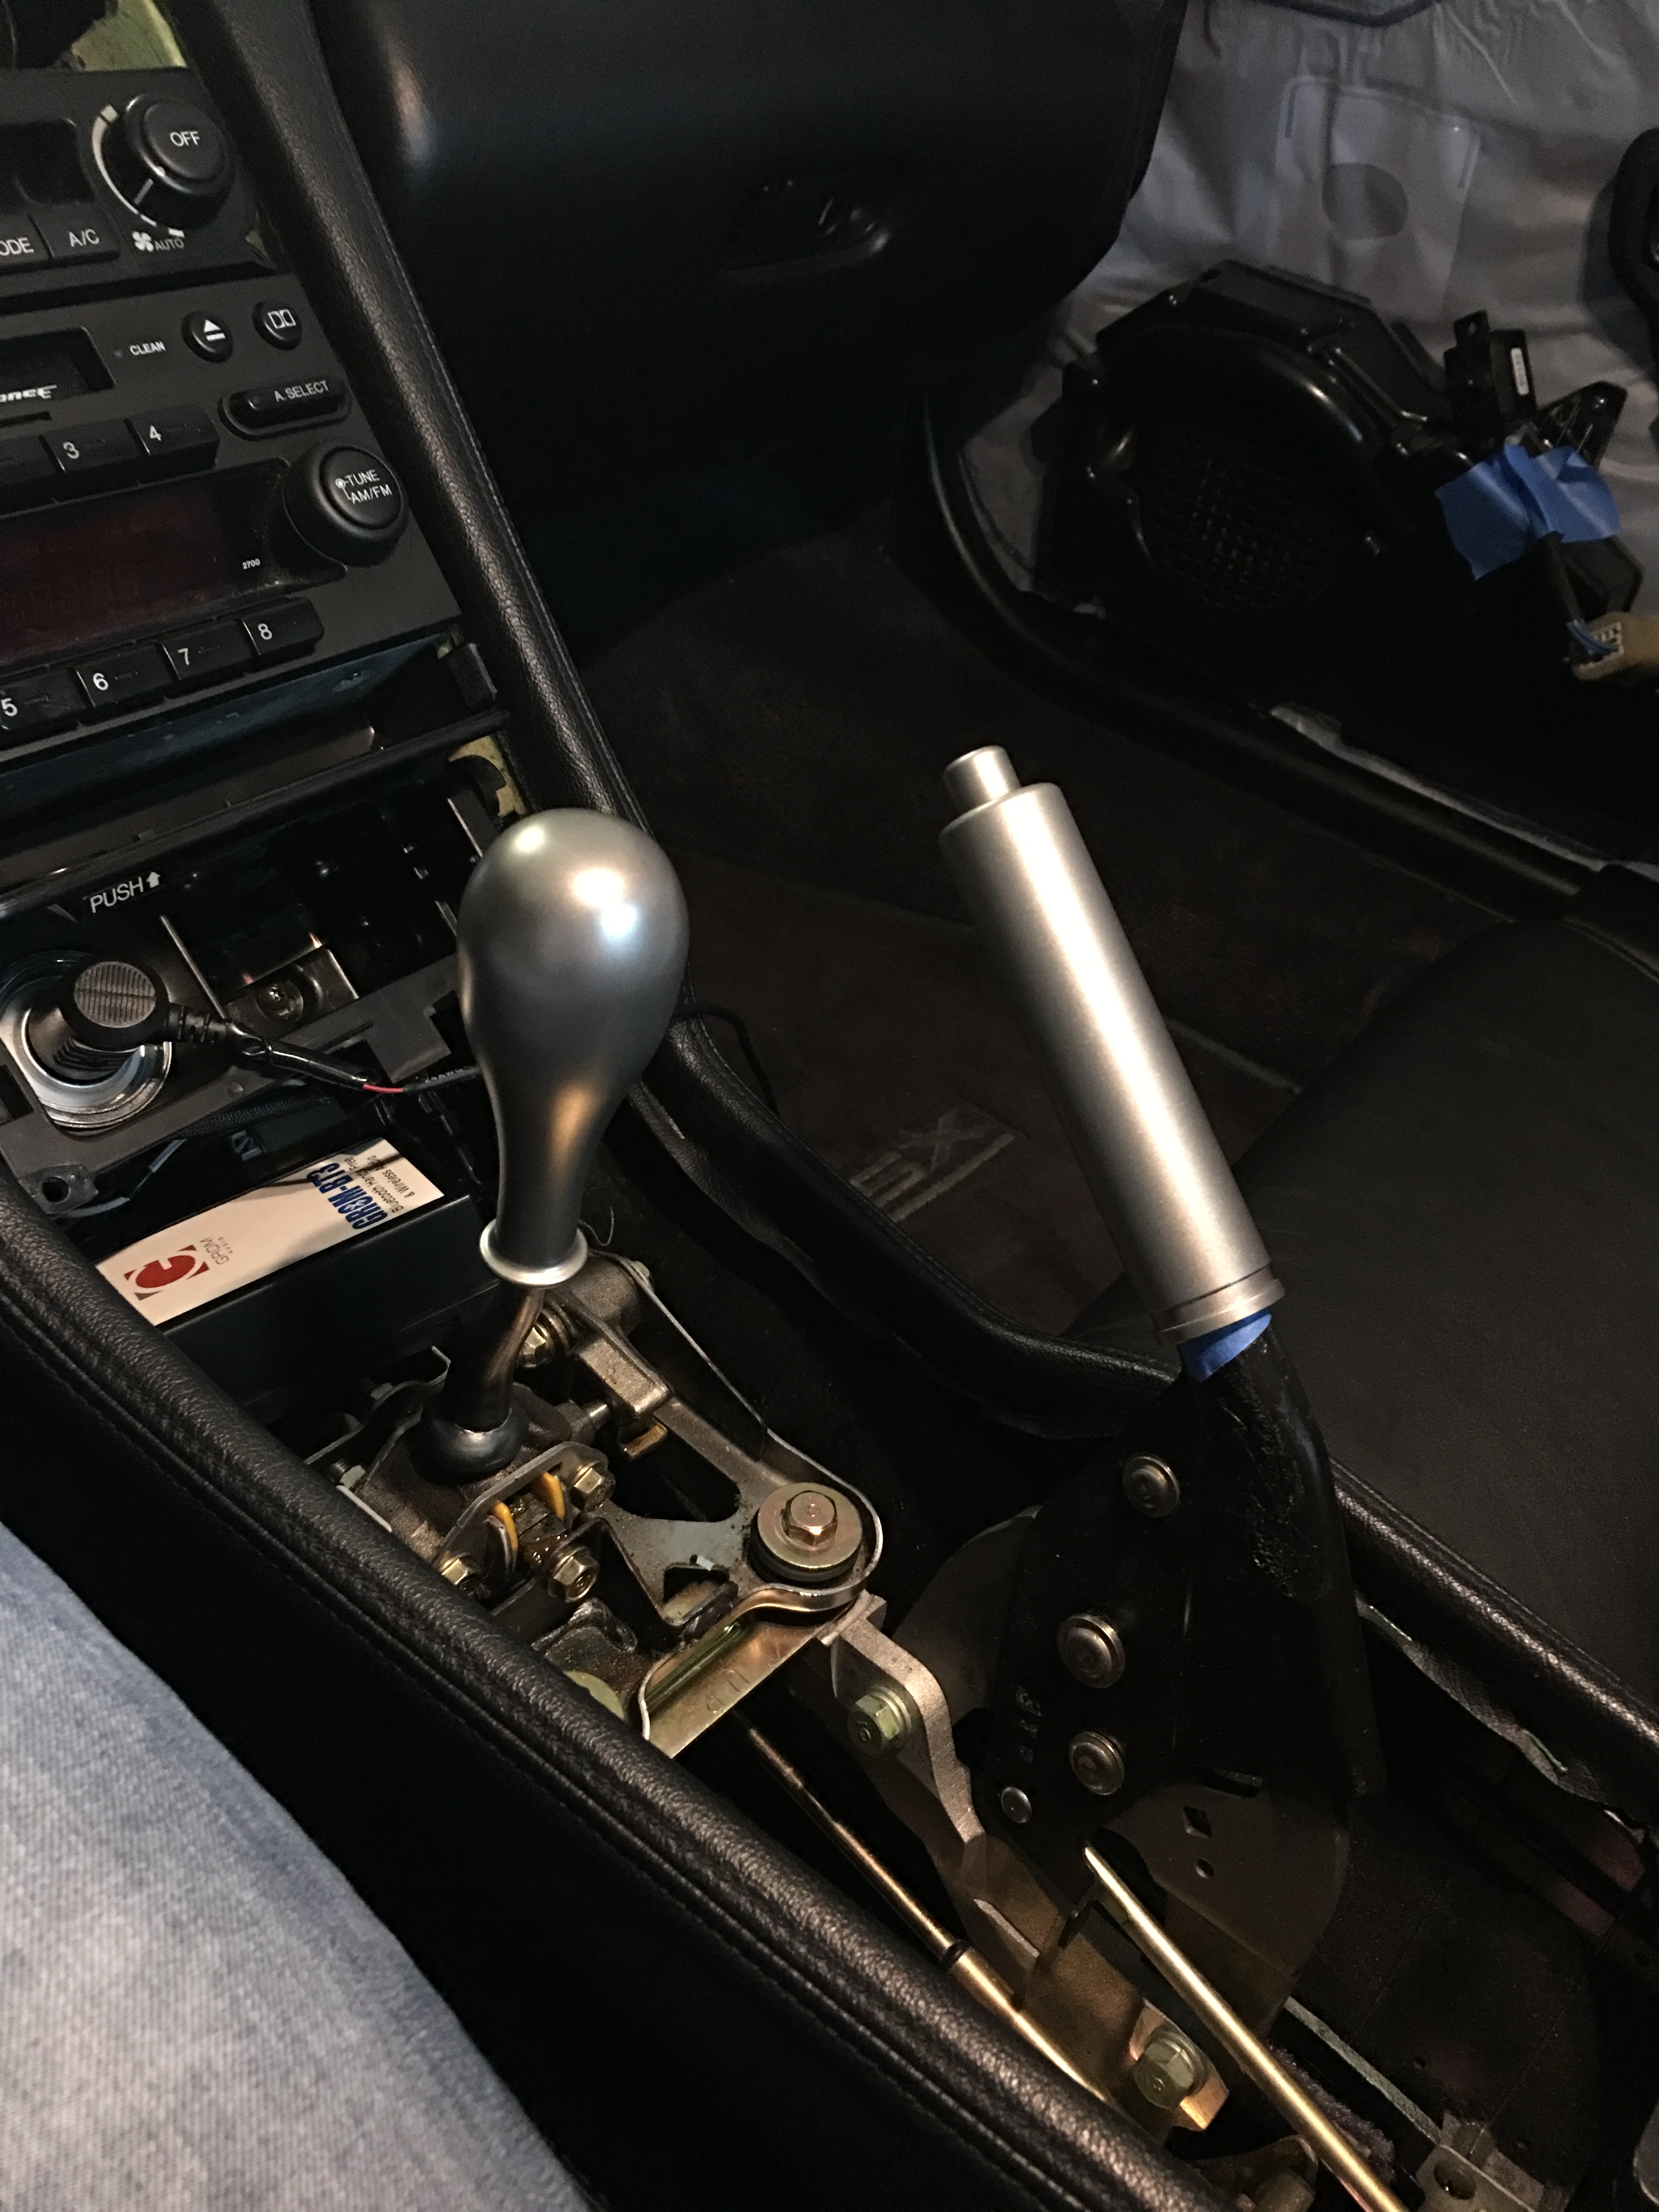
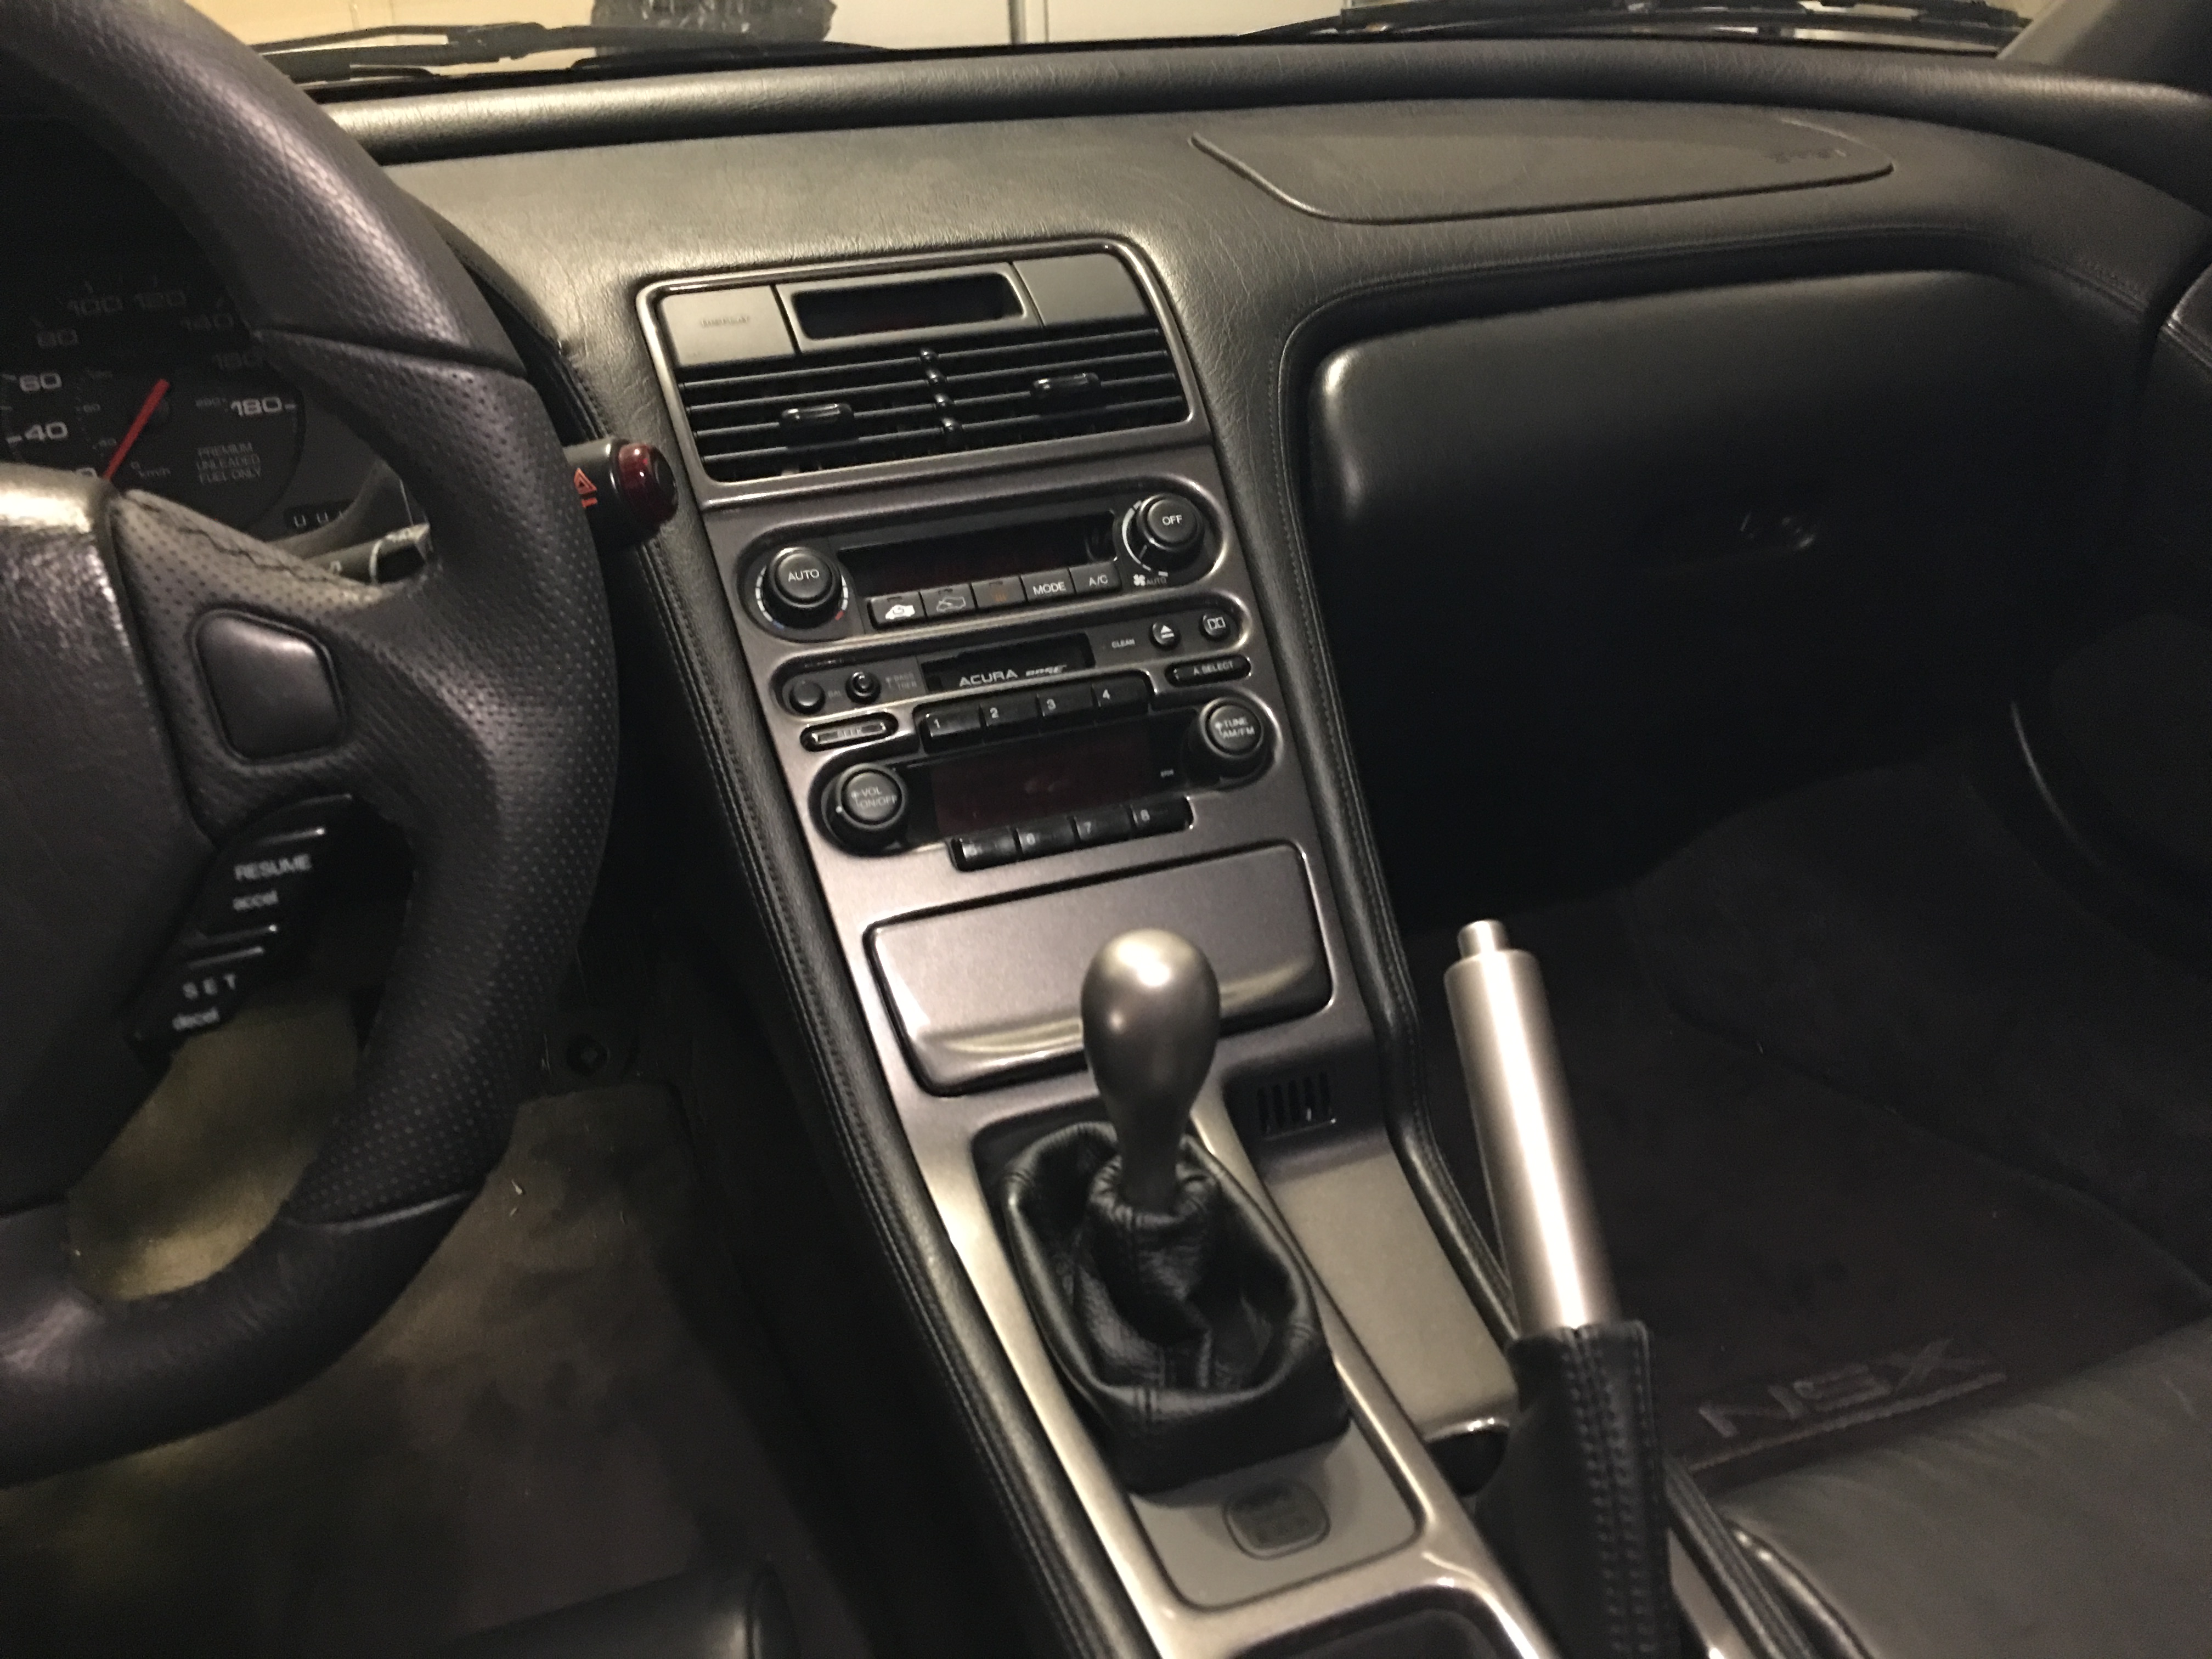
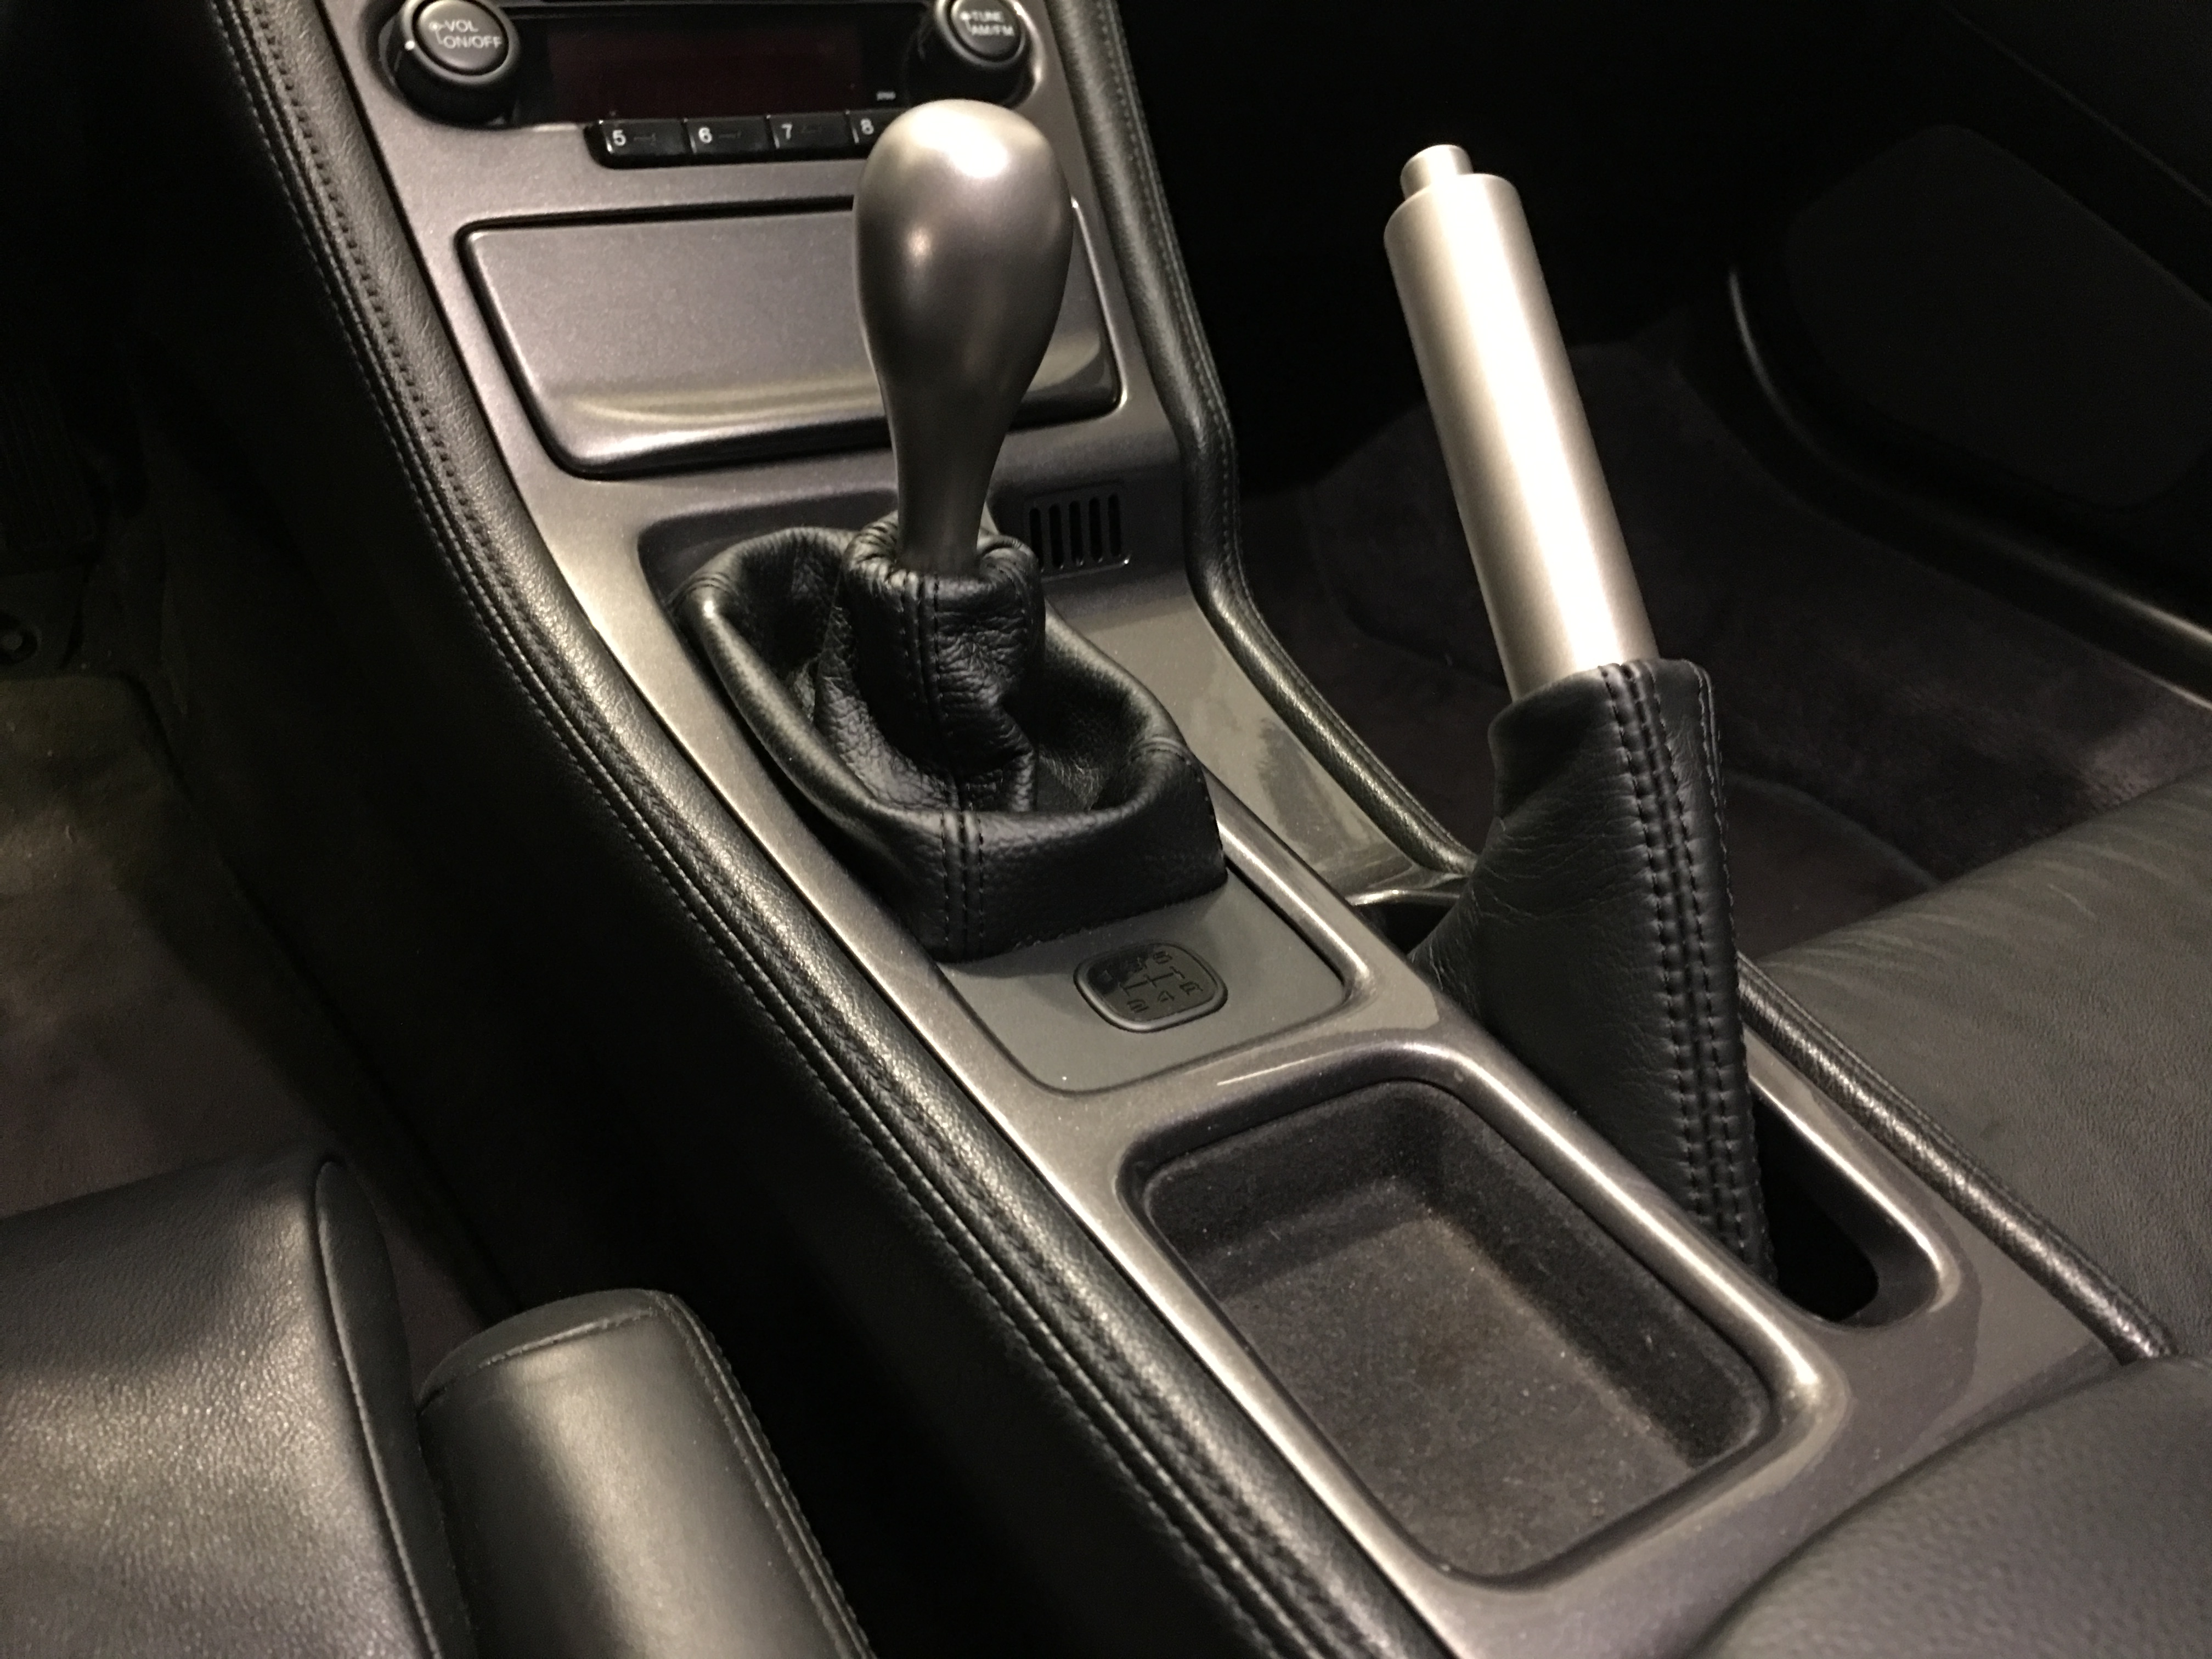
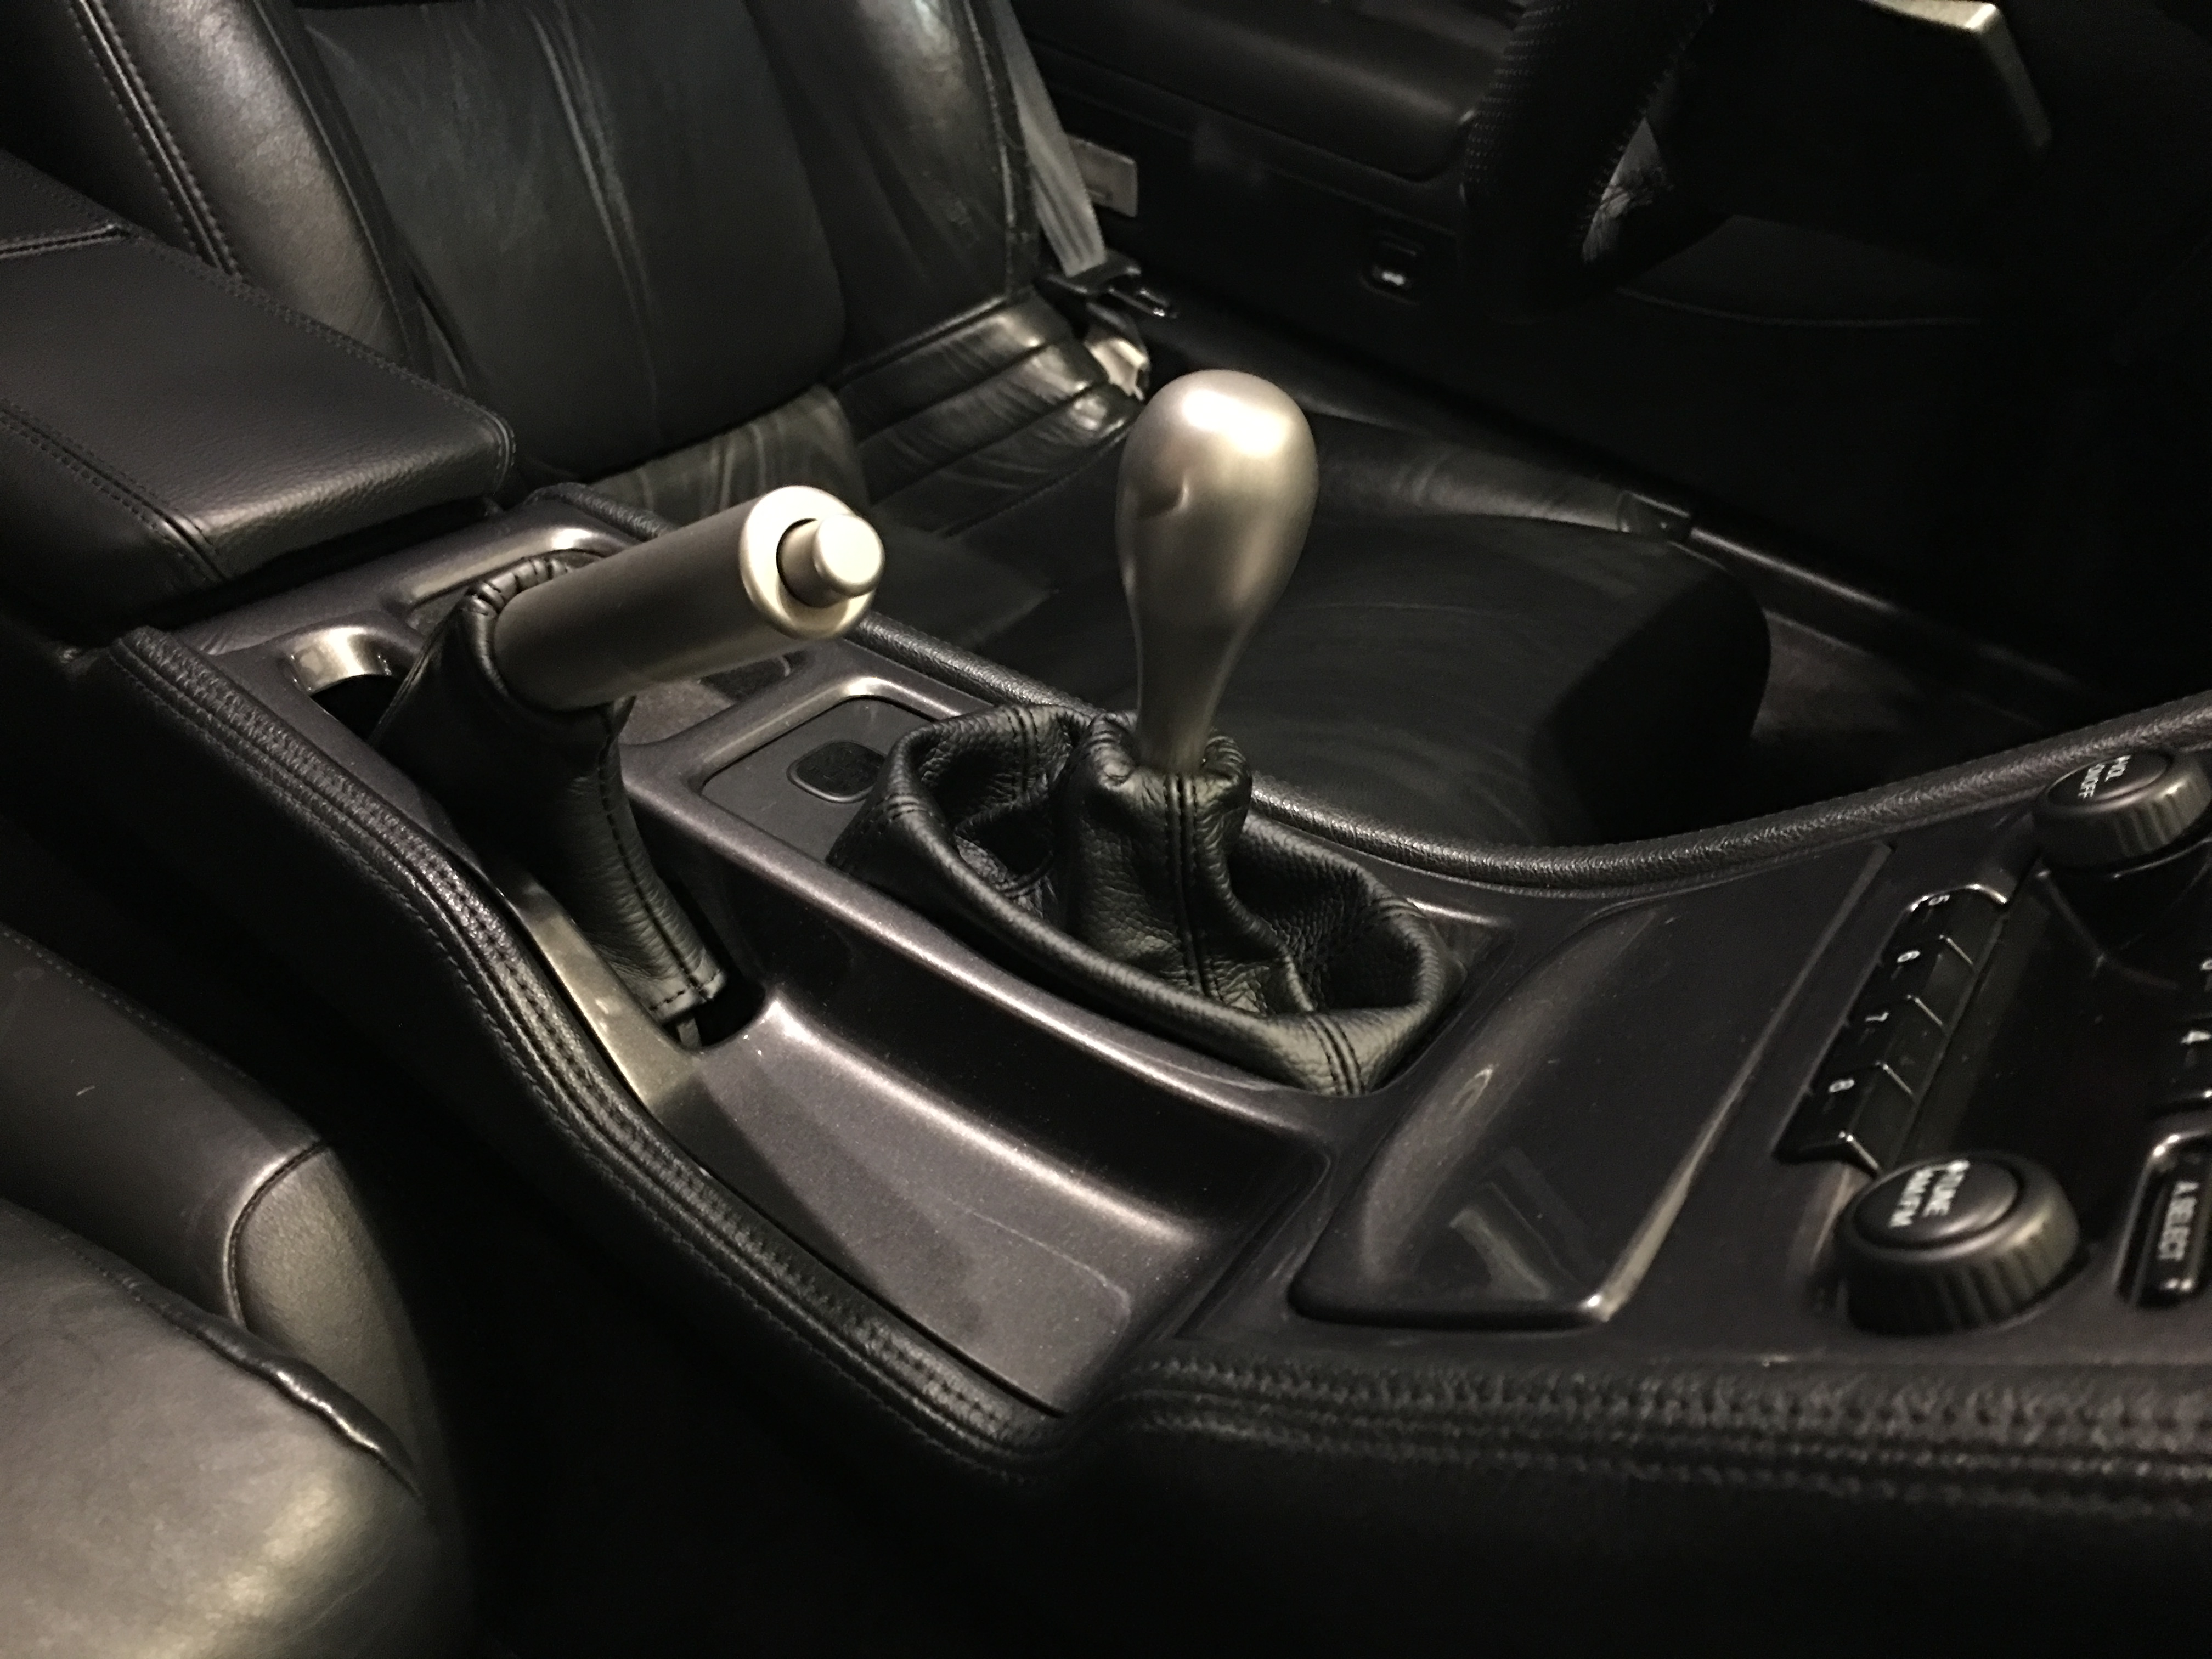
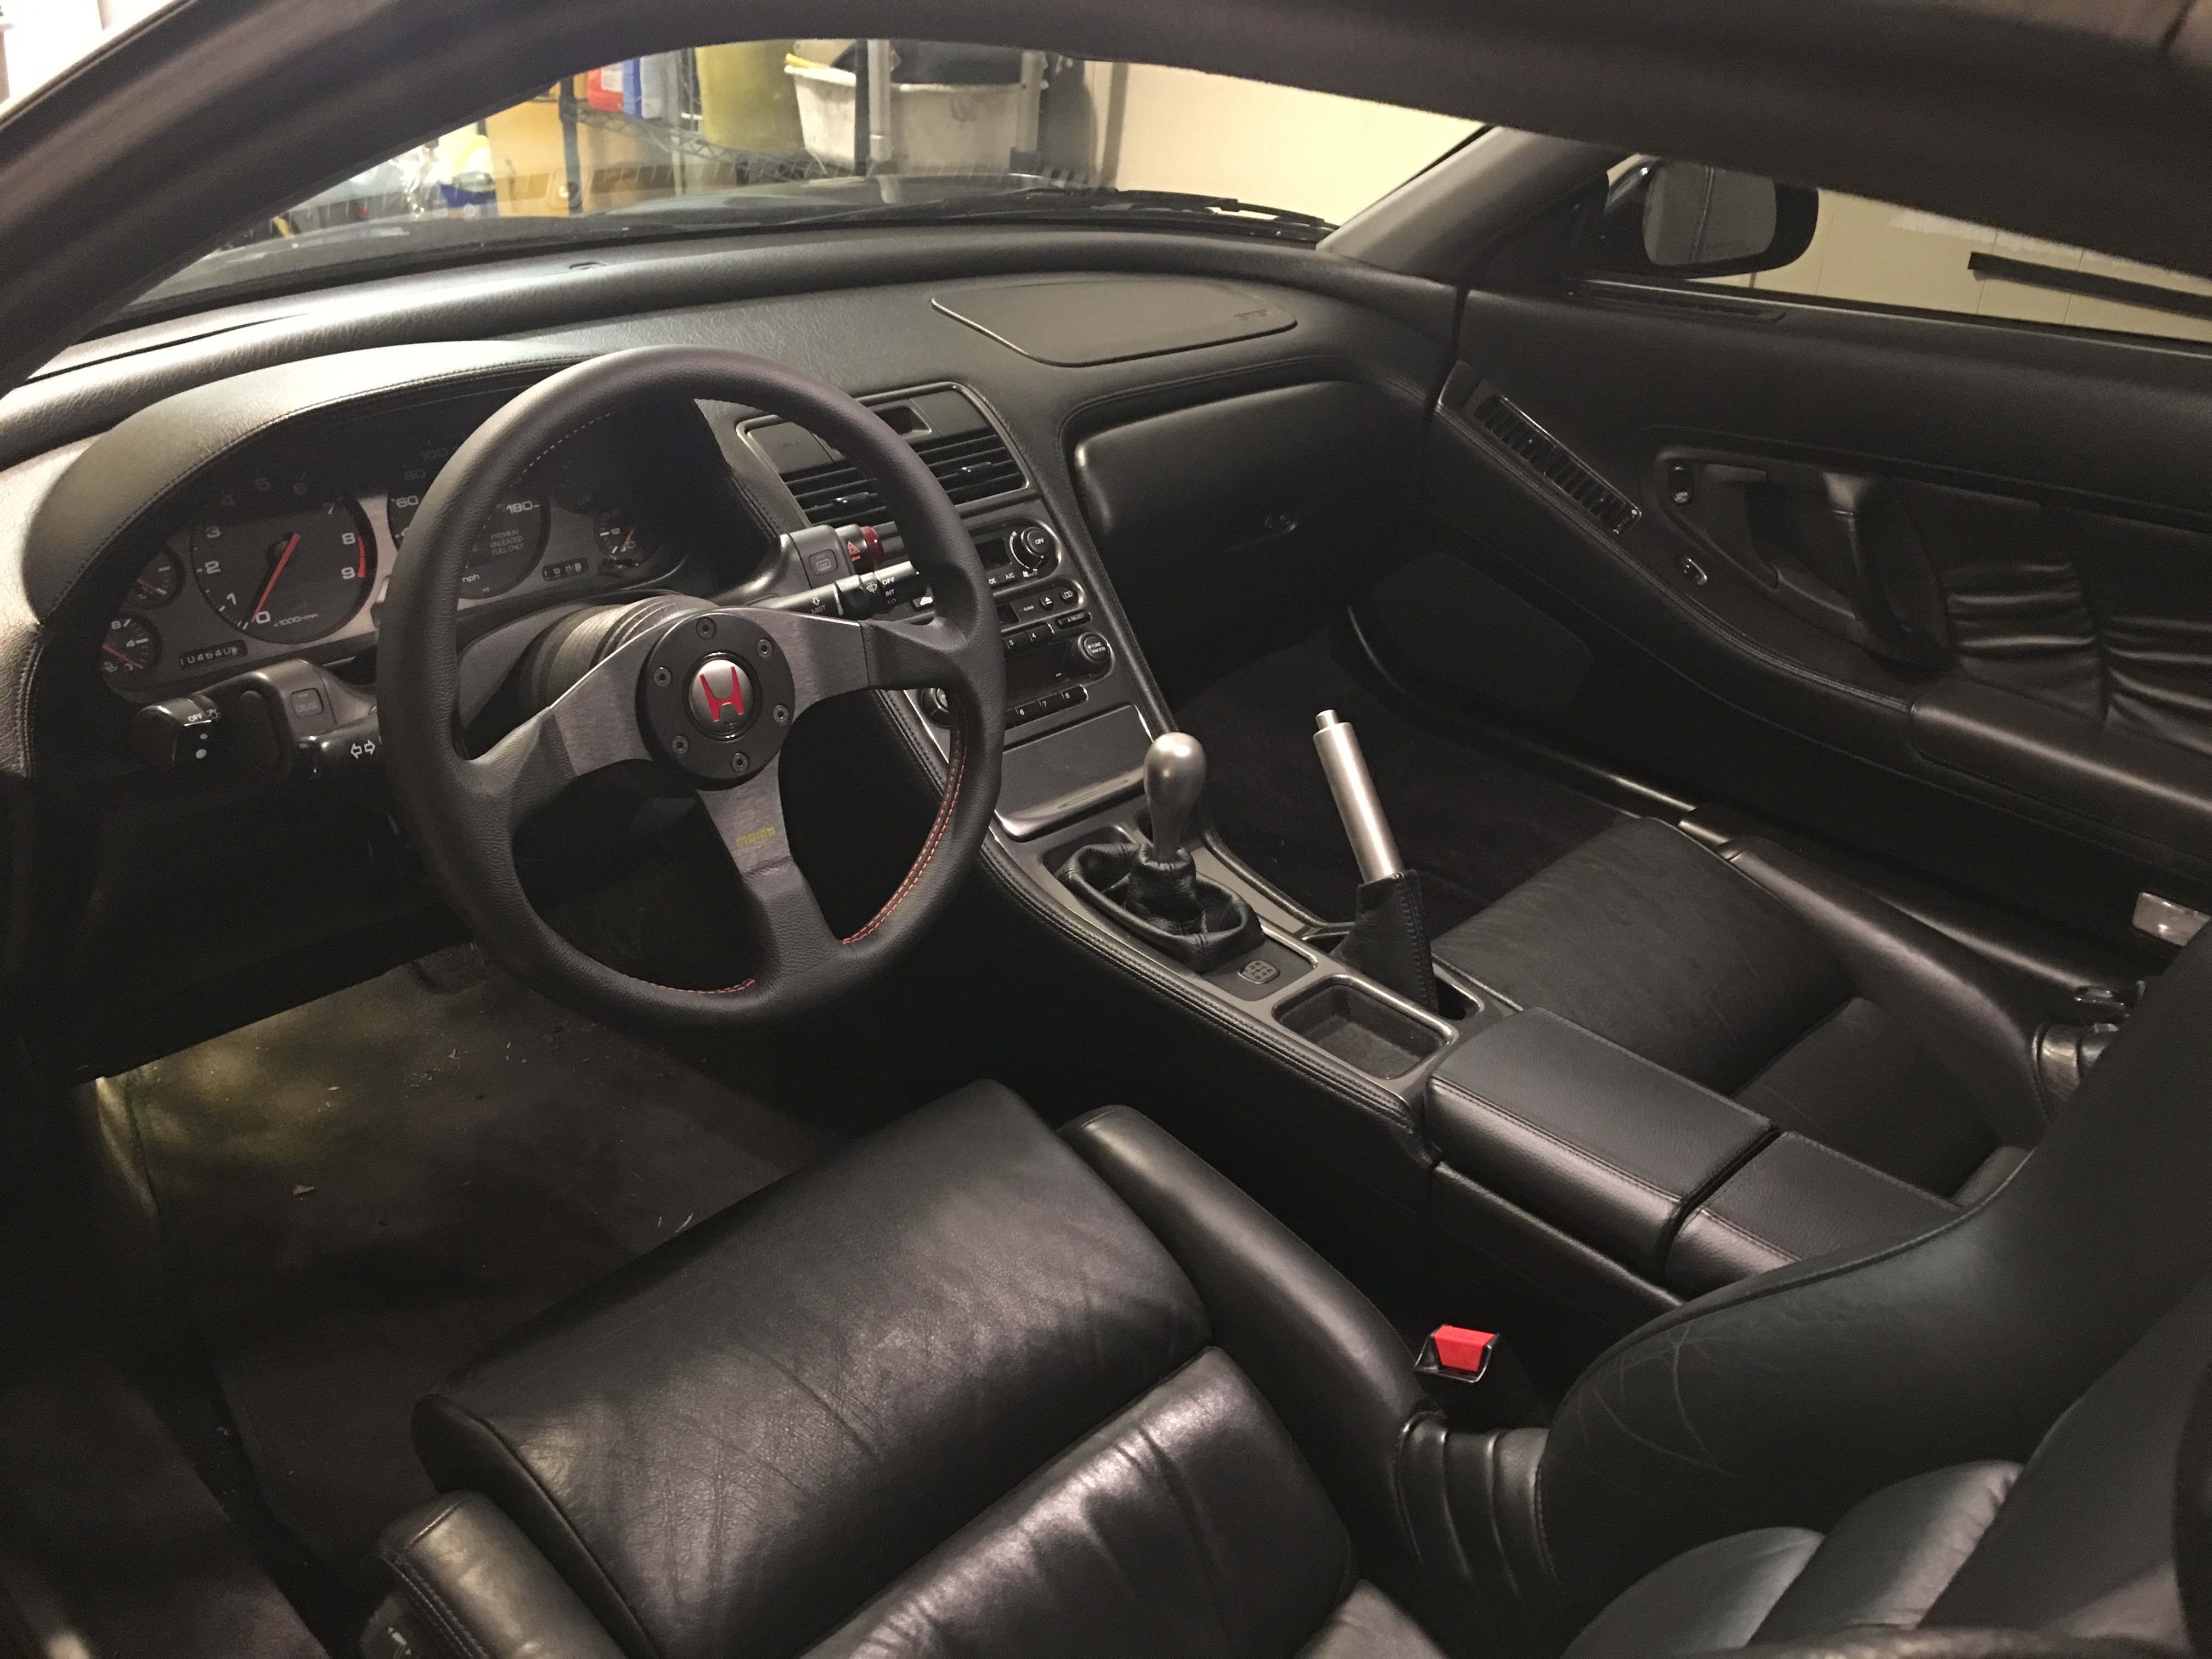
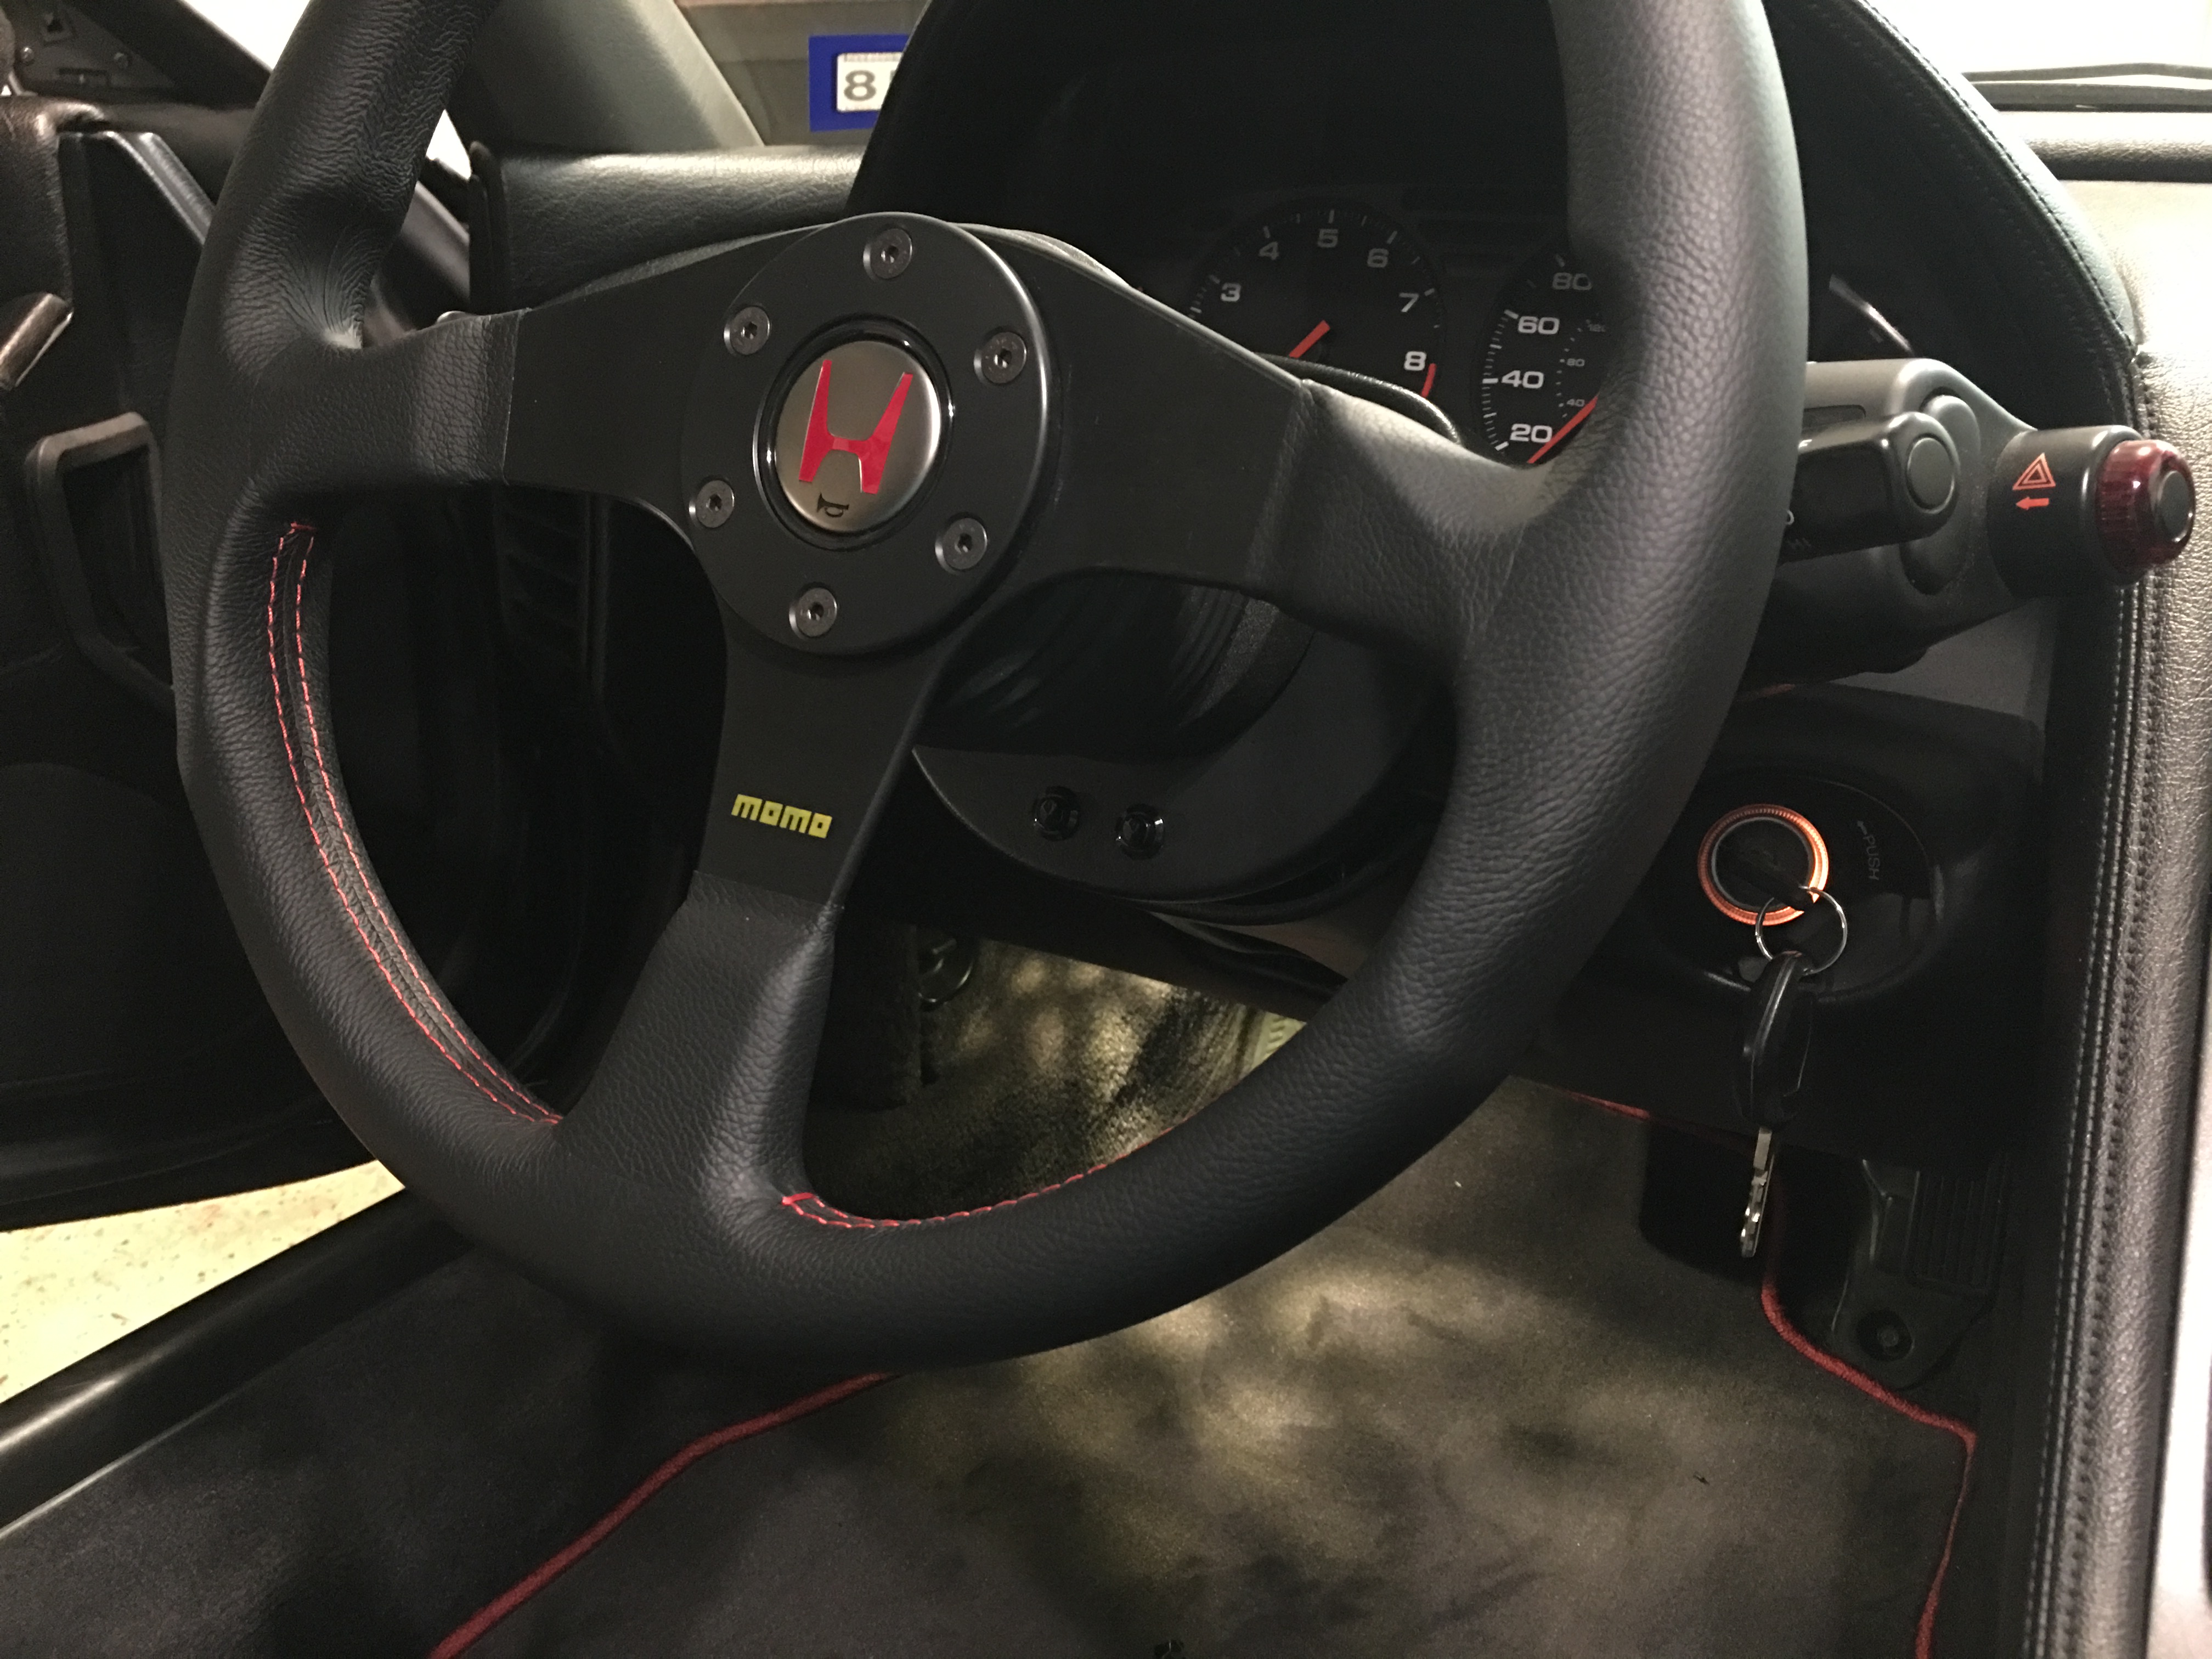
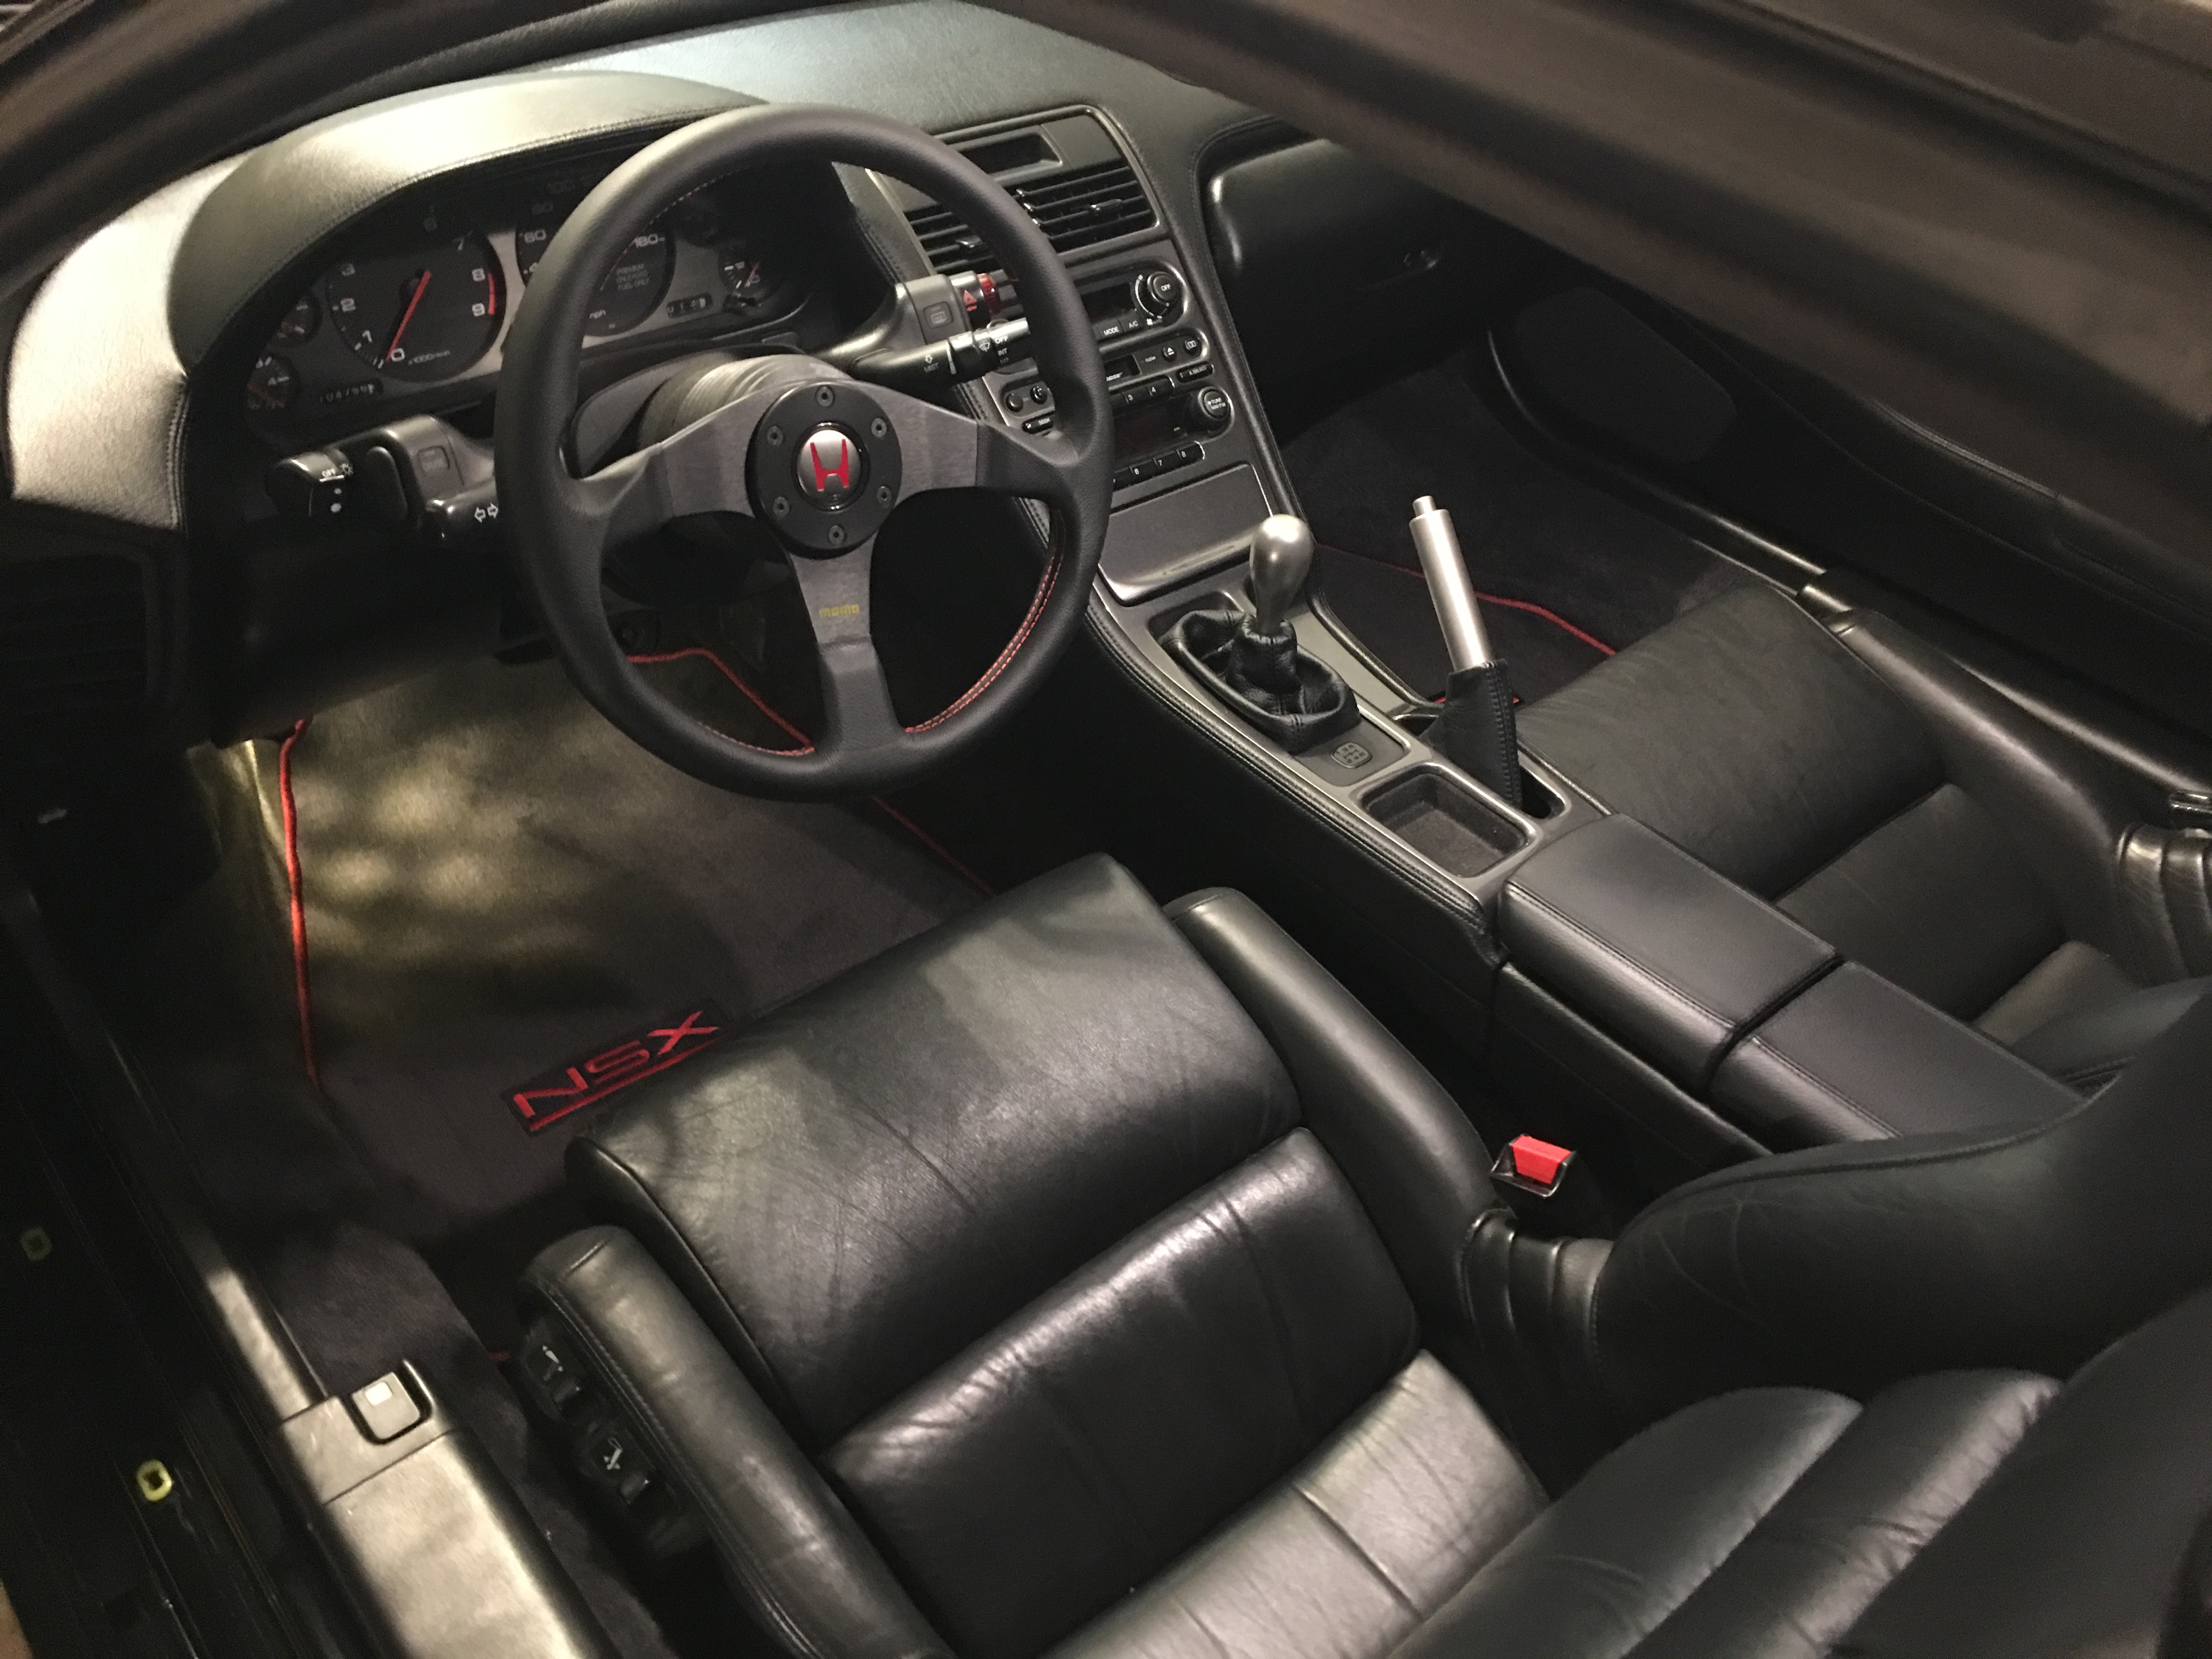
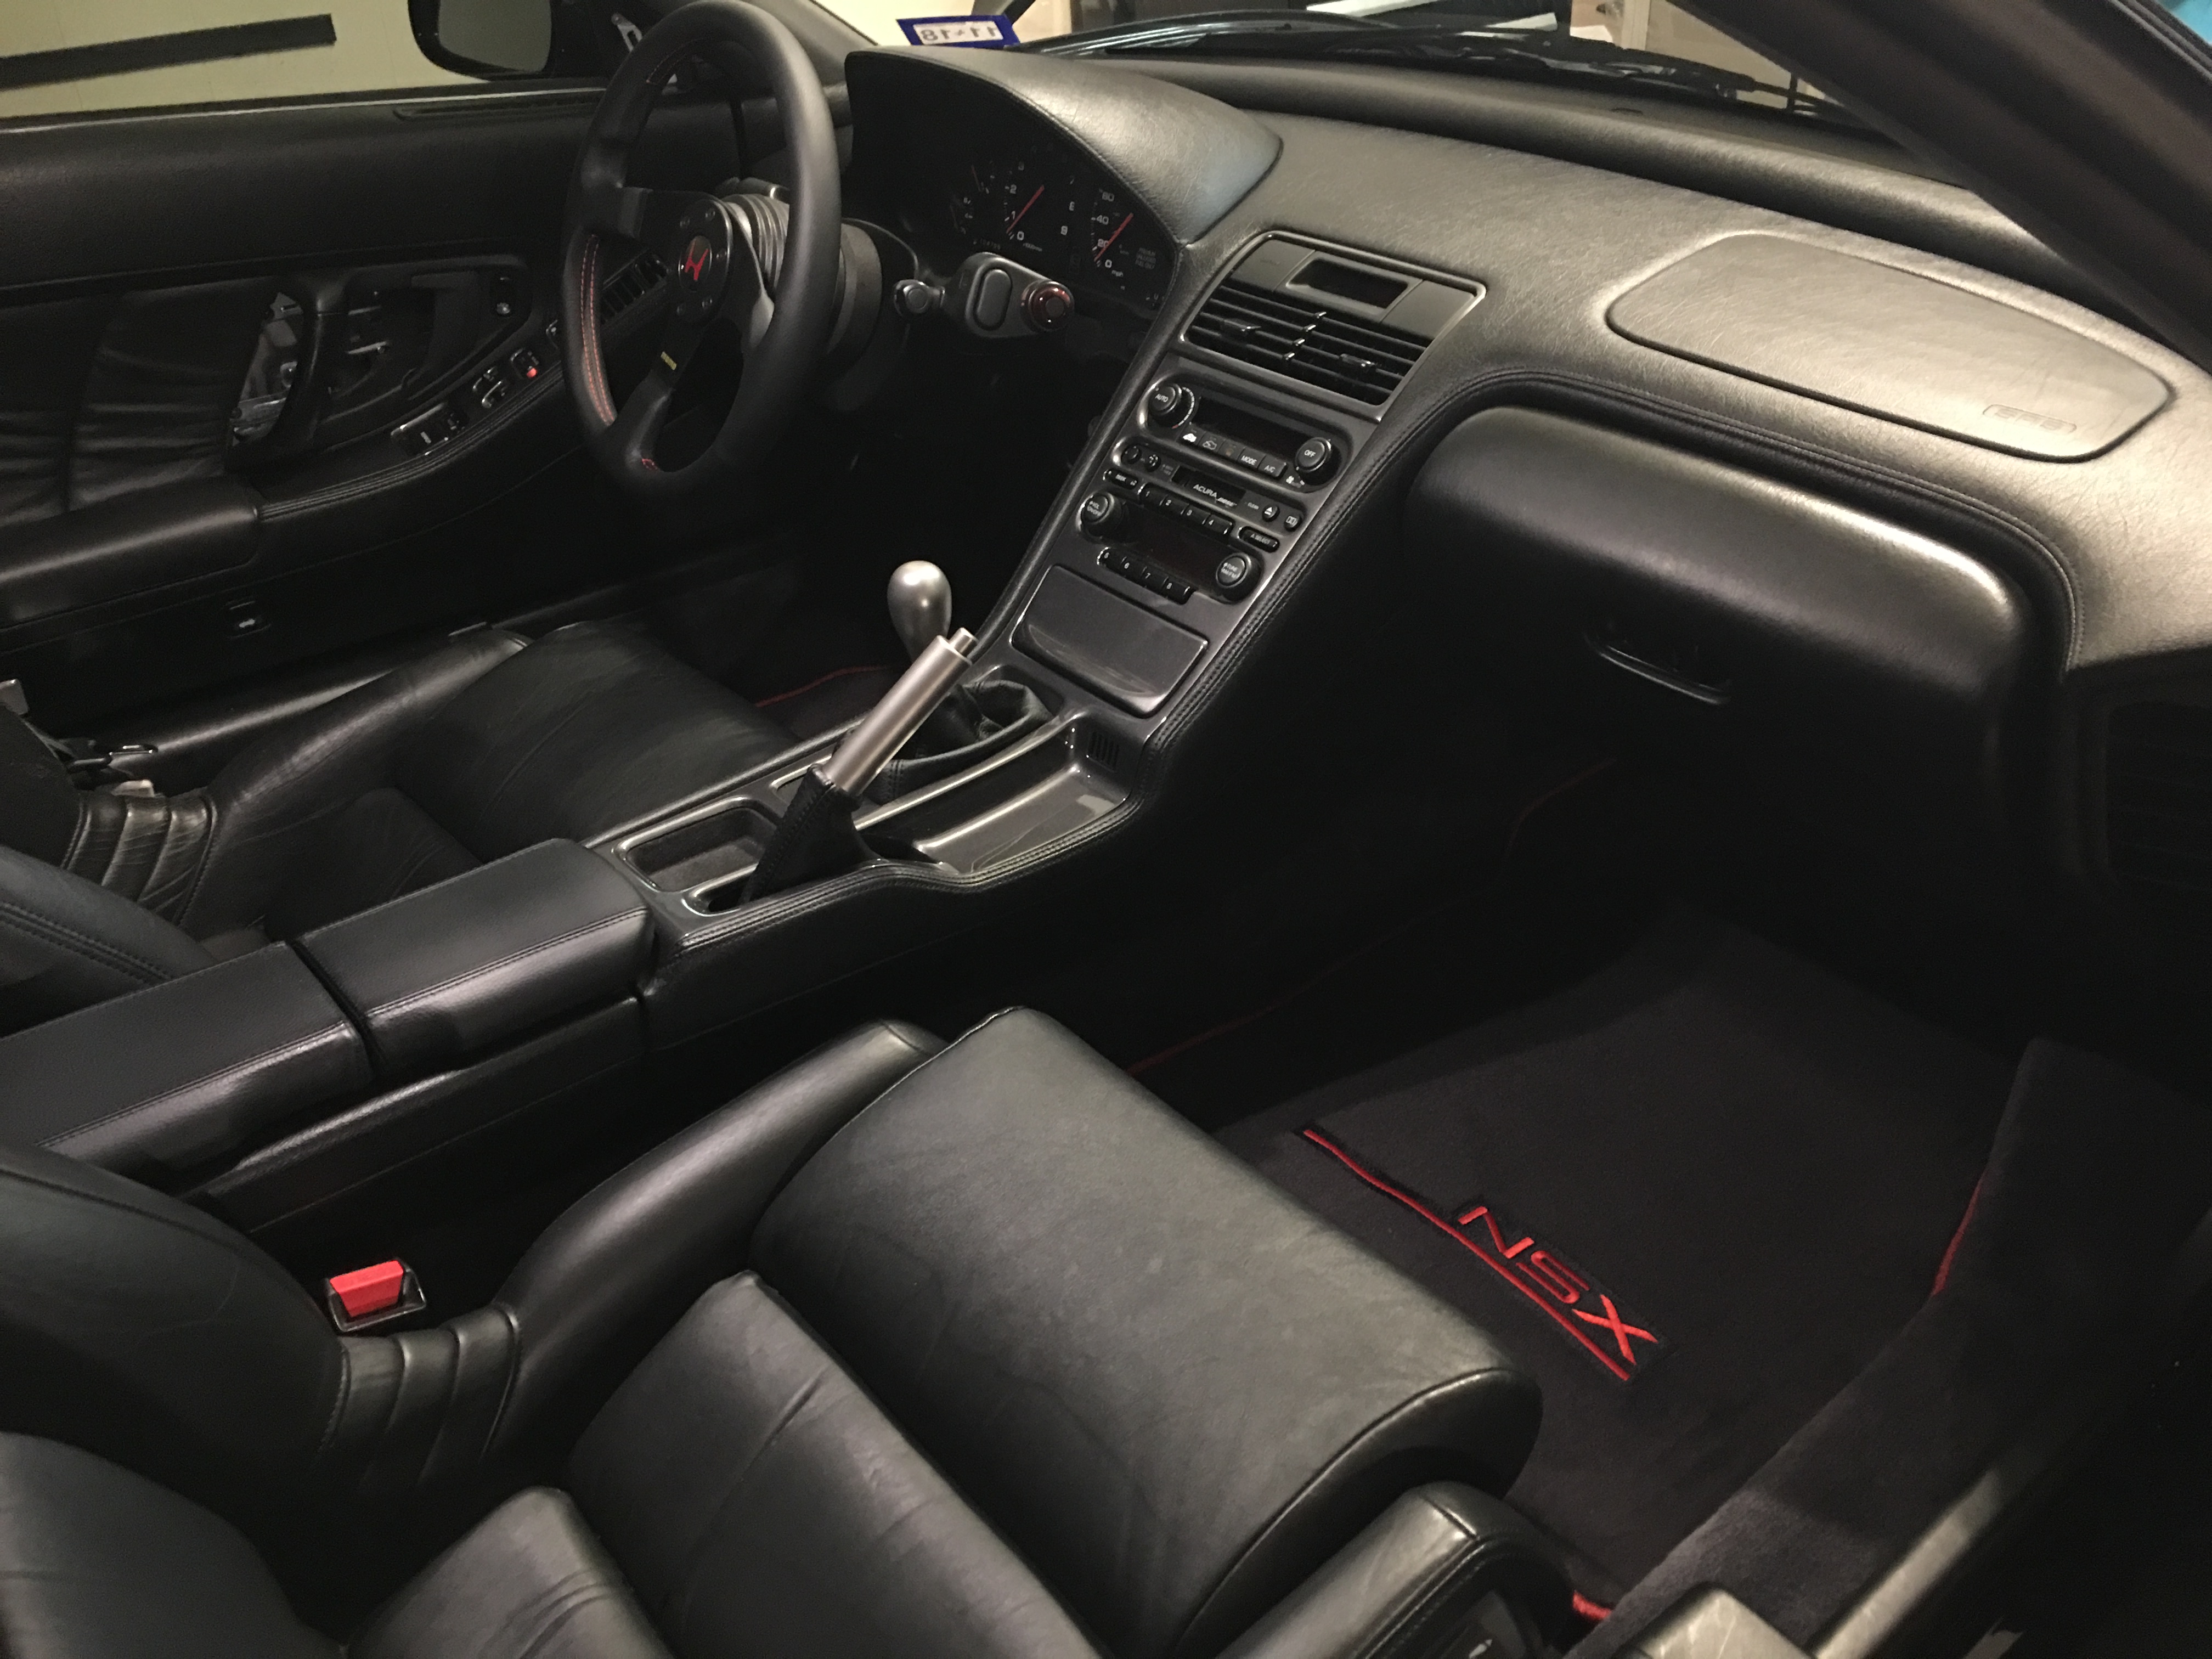
And done! The finish on the horn button almost perfectly matches the shift knob and hand brake, I love the way it turned out.


IMG_1153.jpg


Next up is an HID retrofit with clear lenses and Morimoto Mini H1 projectors.
 
I installed cruise control buttons over the weekend. I wanted to keep CC since I use it pretty much all the time, but I also didn't want the buttons sticking out of the steering wheel like this since it just looks awful in anything but a stripped out racecar.


015NE982%20Press.jpg


So I devised my own solution. After searching Digikey for buttons, I came across some small black buttons that would blend in with the black steering column. I'm not a fan of drilling holes in factory trim pieces, but I made an exception in this case since the holes would be covered up by the stock steering wheel if I ever lose my mind and put it back in for some reason. Here they are installed in the lower steering column with wiring attached and ready to be plugged into the wiring harness I made for the airbag and horn button.


IMG_1189.jpg


Everything connected inside the steering column. There is enough slack in the wires and they are routed in a way that still lets the steering column be fully adjustable up and down and in and out without pinching/pulling/kinking anything. The first time I installed it, I wrongly assumed that the CC signals are shorted to ground like the horn signal is, but when it didn't work I went back and did some searching and realized that the horn signal is pulled up to battery voltage, and that battery voltage is used for the CC signals. It was an easy fix, I just moved the tab for the CC common wire from ground to the horn wire.


IMG_1190.jpg


You can barely see the cruise control buttons with everything back together but they are still fairly easy to reach. The left one is set/decel and the right is resume/accel, I didn't label them to keep it subdued.


IMG_1190_2.jpg


I also got a new set of red-trimmed Zanardi floor mats to replace the old and fraying originals. It came with an anchor point which is nice, and to install it you just lift up a little flap in the carpet and screw it on, and no more floor mat shifting. I really like the slight red accents on the steering wheel and floor mats. The funny thing is Zanardi floor mats are $75 for a set, whereas any other NSX floor mats are $350+ for a set....


IMG_1190_3.jpg


IMG_1191.jpg


IMG_1192.jpg
 
I started on the LMA job over the weekend, and when it came time to pull the rocker shafts out, disaster struck. One of the 10mm allen key rocker shaft bolts was pretty stuck from not being touched in 25 years and rounded out, space is tight and I didn't want to risk damage to the cylinder head so the engine is going to have to come out. I'm going to break from tradition and pay someone else to do it since I don't have the equipment needed to lift the car off of the motor and pulling it out the top isn't an option, and since the clutch is original and has over 100k miles on it and is starting to chatter a bit. I'll just have that replaced along with a few other things that are much easier with the engine out and knock out a bunch of stuff at once like all the water hoses, various gaskets, etc. It will be pricey but I'd have to do it sooner or later, so might as well now.

I'm dropping the car off soon to have the engine dropped and the following done, all OEM parts.

- New style LMAs
- Valve stem seals
- Valve cover gaskets
- Cam oil seals
- Cam plugs
- Various O-rings and crush washers
- VTEC solenoid gaskets
- Front main seal
- Rear main seal
- Clutch kit
- Input shaft seal
- Coolant hoses
- Thermostat
- New crank pulley

I did the timing belt/water pump/tensioner less than 2 years ago so I'm not doing that yet, and I also did the clutch master/slave cylinders so not doing those either.

It's going to be weird letting someone else work on my baby but I need to admit when I'm in over my head.
 
Last edited:
From what I've seen in your build thread, you're more than capable doing this yourself if you have the time. The Service Manual literally tells you everything you need to know, and you can always ask questions here if you run into any issues. LarryB, Kaz, and others are a wealth of knowledge and very helpful.

If you're busy or couldn't drive it anyways for the next 3-4 months due to weather (shouldn't apply since you're in TX), then sure, you might send it to someone else. Every shop I've witnessed or have heard of take double the time they initially tell you when it will be finished. Maybe yours has a better reputation, but something to keep in mind if you're contemplating doing this yourself....

Just buy a $250 hoist and some 2x4's for making a nice rear subframe dolly. Get some good torque wrenches, assembly lube, and the valve adjustment tool.

If you just replace the LMAs, crank seals, clutch, input shaft seal, and other stuff you have listed (besides the valve stem seals) then that should be relatively simple. The only thing potentially tricky would be your desire to replace the valve stem seals without removing the heads. You can do it, but at that point, I would just prefer pulling the heads, replacing the HGs with the better MLS gasket, and going with studs instead of the Honda bolts. I don't know how many miles you have, but my engine with 120k miles had the valve seals replaced since they were removed and it's simple/cheap, but the valve guides had zero wear and we left those alone. So, if you have low miles and no problems, I would just leave the heads alone (besides the LMAs).

Finally, if you have everything at your home, you can most likely do a much better cleaning job yourself than the person you're paying (engine, transmission, and engine bay).

My $0.02.

Good luck!
 
Hi Motormouth93,

love the build so far! just read it from start to now! I really like your upgrade in adding the CC back in the car. I also have the MOMO Tuner wheel and would really like to have my CC back. do you have the part number I could reference on Digikey? I was on their site but there are thousands of different button options!!! lol... I would want to do this upgrade as well.

again great job on your build!

Thanks
 
From what I've seen in your build thread, you're more than capable doing this yourself if you have the time. The Service Manual literally tells you everything you need to know, and you can always ask questions here if you run into any issues. LarryB, Kaz, and others are a wealth of knowledge and very helpful.

If I had access to a 2 post lift I definitely would do it myself, but I have a one car garage and a cherry picker type hoist. I know it's technically possible with that setup, and I could probably pull it off, but frankly I just don't feel comfortable doing it that way.

Edit: I just went back to one of my posts from about 6 months ago in the FB owners group about using a quick jack to drop the motor....with the SUV adapters I could probably do it. Hmmmm... https://www.facebook.com/groups/nsxowners/permalink/817784031750342/
 
Last edited:
Hi Motormouth93,

love the build so far! just read it from start to now! I really like your upgrade in adding the CC back in the car. I also have the MOMO Tuner wheel and would really like to have my CC back. do you have the part number I could reference on Digikey? I was on their site but there are thousands of different button options!!! lol... I would want to do this upgrade as well.

again great job on your build!

Thanks

Thanks!

This is the digikey part I used: https://www.digikey.com/product-detail/en/e-switch/RP3502ABLK/EG1900-ND/280446
 
Back
Top