• Protip: Profile posts are public! Use Conversations to message other members privately. Everyone can see the content of a profile post.

MotorMouth93's 1994 Berlina Black NSX Thread

Unfortunately, I accidentally tossed the paper where I had written the exact values written down. For some reason I used a piece of loose junk mail for it instead of the notebook where I usually write this sort of thing down.

I made a mistake on my Digikey order and ended up not changing out two of the smaller caps because I didn't feel like making another order, so I can't use the order for reference because I don't remember which parts were the wrong ones.

Basically, I have no way of giving you an accurate parts list. I'm sorry I can't be more helpful. :/

When I go back and replace those two that I didn't do the first time I'll post a full parts list.


Sure, no worries. I'm planning on doing mine maybe this fall, and if you don't get around to it I'll post something up.
 
IMG_0332.JPG

Wait wait. I'm the the process of stripping my center console right now.... how in the heck did you strip it so perfectly? The coating on the top is almost like thin metal.... very annoying :x

EDIT: just noticed the Ferric Chloride post.
 
Last edited:
Wait wait. I'm the the process of stripping my center console right now.... how in the heck did you strip it so perfectly? The coating on the top is almost like thin metal.... very annoying :x

EDIT: just noticed the Ferric Chloride post.

Yup, ferric chloride (after stripping off the outer layer with aircraft stripper). Just let the parts sit in it for a few days and all the metallic stuff will be gone. The tricky part was figuring out how to submerge weirdly shaped parts without buying multiple gallons of the stuff.
 
The shoddy dealer work is bothering me too much so at this point I'm just yanking the motor and redoing everything myself. The plan is to pull it the last weekend of June.

A guy on the NSX Prime Facebook group was selling replica's of the Acura subframe dolly so I went ahead and bought one. Very nicely made and I think it will make dealing with a detached motor/subframe much easier when I pull the motor in a few weeks.

IMG_2126.JPG


I also located a set of used SoS headers for a good price. They're a bit rusty but for my purposes that's fine.

IMG_2202.JPG


I dropped the headers off at Enigma Coatings in Leander, TX to have them blasted and ceramic coated bronze. These guys do insanely good powder coat and ceramic coating work, some of the best in the state. I ordered new gaskets from SoS and had an extra set of bungs welded in before coating for wideband O2 sensors.

IMG_2309.JPG


IMG_2318.JPG


I also found myself at a wedding in Phoenix, so during some down time I drove 30 minutes to the ScienceOfSpeed shop to pick up a few things I'd been wanting, it wasn't too busy at the time so they even gave us a short tour!

IMG_2356.JPG


IMG_2354.JPG


I've been wanting the billet door handles for over a year at this point but never pulled the trigger because I wasn't sure how the different color options would look in person. I didn't want the satin aluminum because it wouldn't match my hand brake/shift knob/horn button, and black just looks like stock, but it turns out the titanium ceramic coat color is a VERY close match for the Type S titanium shift knob, so close that you really don't notice the difference unless the parts are right next to each other. Needless to say I bought them and I am very happy with my choice.

IMG_2368.JPG


The details on these are really cool.

IMG_2363.JPG


Overall I'm really happy with the way they look and feel. Much nicer than the factory plastic door handles and the fit is perfect.

IMG_2369.JPG
 
Last edited:
Engine is out, it only took 3 trips to Lowes, one trip to Home Depot, and one trip to Harbor Freight over the span of 36 hours. We started the day off by rounding out a very stuck phillips head screw holding a plastic wire cover onto the glass hatch, but fortunately things went a bit more smoothly after that.


IMG_2466.JPG


I didn't really know how big the whole thing was until we got it out, I suspect the drivetrain weighs between 700 and 900 lbs but I have no way to accurately measure.


IMG_2468.JPG


To get it out, we used a 2 ton hoist (thanks Hazard Fraught) that I didn't realize I needed until we tried to use my 1 ton hoist and found that it was too small to reach. First we put the car up on wheel stands in the front and jack stands in the rear, then bolted up the subframe dolly, lowered the subframe to the ground, then used the hoist to lift the back end of the car up enough to wheel the subframe out. It was a scary 5 minutes having the back end of the car nearly 6 feet in the air but no one died and overall it went fairly smoothly with no hiccups. I didn't take any pictures because I was in a bit of a hurry for that part of the process. To connect the car to the hoist I made tabs out of 1/8"x1 1/4" steel stock with a 1/2" hole for the subframe bolt and a 1/2" hole for the chain to attach to. Some rough napkin math puts lifting capacity for these tabs at about 5000lbs each, and since the back end of the car sans drivetrain weighs about 1000lbs I think that's a healthy margin for safety.


IMG_2471.JPG


IMG_2470.JPG


IMG_2469.JPG


The car has completely taken over my living room at this point, all the stuff I had to remove is stacked up to the point that it's more or less unusable.


Anyways, here's the subframe dolly in use. Some of the holes were about 1/4" off and had to be widened but otherwise it worked great.


IMG_2474.JPG


Here is part of the reason the engine came out, the dealership tech used a whole tube of Hondabond on the cam plugs which are supposed to go in dry per the service manual.


IMG_2502.JPG


Here is another part of the reason, the factory NA1 NSX headers are dogshit. Aftermarket headers are good for an instant 20-30whp depending on the header because the stock ones are really that bad. They're going in the trash.


IMG_2503.JPG


Also taking care of lots of little forgotten O-rings and such, VTEC solenoid gaskets, water manifold O-rings, crossover pipe O-rings, thermostat, etc. So satisfying to swap all these parts out, also cleaned up some corroded pipe nipples.


IMG_2507.JPG


I'm currently blocked because the dealer apparently massively overtightened the crank pulley bolt and I can't get it off with my 1200lbft Mac air impact, so I'm waiting on a weighted socket to arrive before I can pull the timing stuff off and get to the cam plugs, cam seals, and oil pump to replace them. Basically I'm replacing every seal and gasket you can get to without separating the heads from the block to hopefully be completely leak free for the next 6 years or so until the next timing belt service. I'm also waiting on another oil pan, I bought a brand new one from Acura but the flange got bent pretty badly in shipping so I can't use it. I think I'll have to eat the loss though because by the time I noticed the extent of the warping I already had a baffle welded in. At first I thought it might have been warped from welding, then I saw the bottom of the box, that smashed in corner was holding the very bent corner shown in the photo.


IMG_2522.JPG


IMG_2533.JPG


With the delay I'm really tempted to have my valve covers powder coated a bright blue similar to this Feels blue color. My original black covers are in fine shape but at this point I'm so far from stock that I might as well just mod to my hearts content. Also thoughts on EGR delete? I can completely code it out of the ECU easily, and I'm of the opinion that simplifying things on a car this old is good for longevity. Same train of thought for the little engine bay fan by the fuel filter, the later NA2 cars didn't even have it and I don't think I've ever seen mine come on.


IMG_2506.JPG


More updates to come over the next week or so.
 
This post will be a long one.


But anyways, started off by using my new thick walled impact socket to get the crank pulley off and remove the timing covers. This is so much easier with the engine out of the car. Also the thick wall sockets are amazing, took the pulley off instantly whereas my normal socket just rattled feebly.


IMG_2542.JPG


I pulled the cams and was not happy with what I found. Very extreme wear for an engine with only 100k miles, my BMW engine with similar miles had a valvetrain that looked nearly brand new. The caps and journals were scratched up pretty badly and very unevenly, I've never seen anything like it.


IMG_2547.JPG


IMG_2549.JPG


IMG_2550.JPG


IMG_2552.JPG


A lot less wear on the heads, but still some.


IMG_2553.JPG


In this photo you can see some of the miserable job the dealership tech did installing the cam caps. I have new SoS billet O-ring caps on the way.


IMG_2555.JPG


IMG_2560.JPG


IMG_2563.JPG


IMG_2565.JPG


After talking to a local machinist who specializes in cylinder head repair he recommended that I just plastigage to check clearances and reassemble if it's close, as there isn't much to be done that doesn't involve spending huge amounts of money at shops with special equipment that are a minimum of 3 hours away. I was delighted to find all of the cam journal clearances within the factory service limit.


IMG_2594.JPG


I reinstalled the cams using factory plugs before ultimatedly deciding to go with SoS billet plugs so I wasted a bunch of time and ended up buying a bunch of new cam seals as well since my OCD self won't let me reuse them for fear of leaks since they way they get clamped into the heads deforms them slightly.


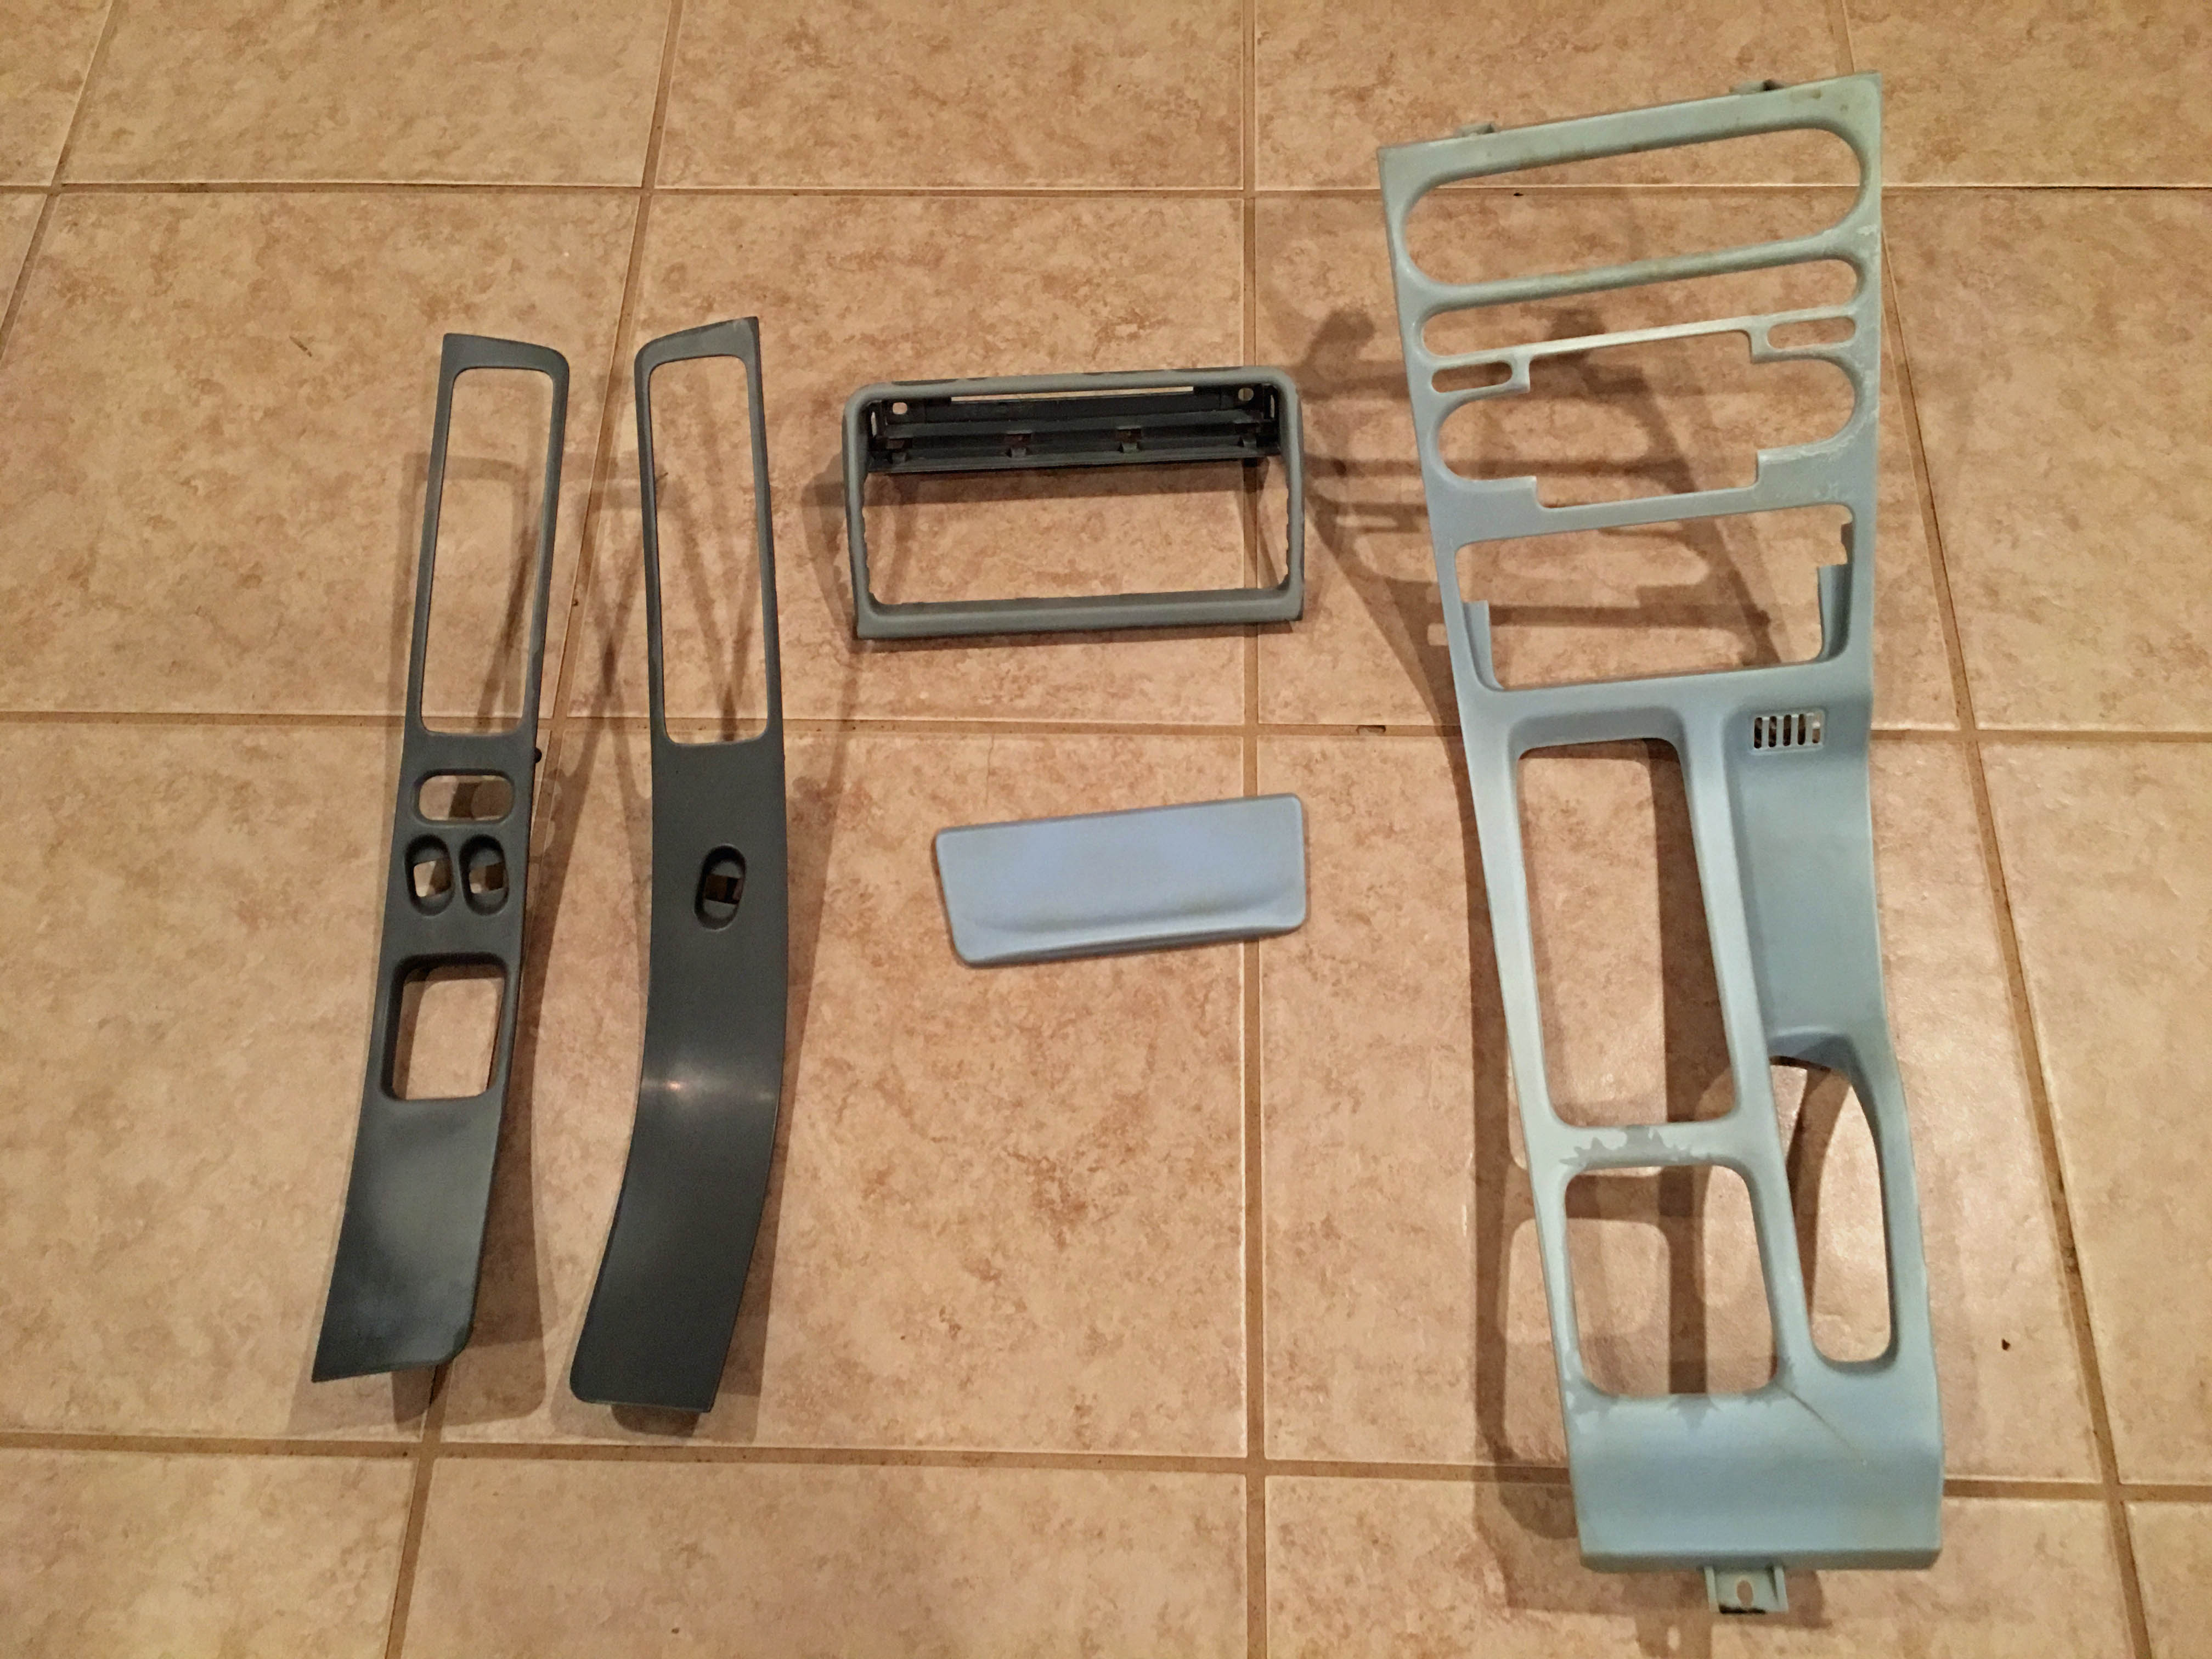
Replacing various vacuum tubes with new OEM tubing. The number of vacuum lines in this car is insane, might as well replace them before they can start leaking.


IMG_2602.JPG


My replacement oil pan showed up so I put reflectagold tape on the bottom where the exhaust goes since my aftermarket headers don't have heat shields.


IMG_2621.JPG


I removed the old oil pan and found this. The entire rear of the oil pan gasket was absolutely covered in sealant from when the dealership worked on the car. This is unbelievable, they didn't even need to touch any of this. I guess they pulled the whole rear seal plate instead of just popping the seal out and installing a new one and rather than do it right and drop the pan they just used a whole tube of Hondabond to seal it back up.


IMG_2636.JPG


-----------------------------------------------------------------------------------------------------------------------------------------------------------------------------


And now we come to the root cause of the cylinder head wear, and really the root cause of every problem I've had with the car over the past year.


About 14 months ago, a rock fell off of a truck in front of me and it knocked my oil pan. I was on the way home from the machine shop after trying to get the BMW flywheel resurfaced. When I got home I inspected the underside of the car and the only damage I could find was a very minor dent in the bottom of the oil pan. People drive around Civics with oil pans that look like they got run over by a truck and banged back into shape with a sledgehammer, so I assumed the barely visible bend was nothing to worry about.


IMG_2640.JPG


I was wrong, not worrying about the dent in the pan is arguably my worst automotive fuckup to date. That minor bend was in just the right place and just severe enough to push the bottom of the pan up into the oil pickup.


IMG_2638.JPG


Apparently the oil pickup has 1/8-3/16 inch clearance with the bottom of the pan. I never connected the dots until now, but somewhere within a few weeks of that incident was when I first noticed the LMA ticking sound, and also when I noticed my factory oil pressure gauge reading a bit low. Both of those things were just plain old oil starvation as opposed to the rather common benign causes of each. The factory oil pressure spec in the service manual of 10psi at idle and 50psi at 3000rpm are blanket numbers used for pretty much every 90s Honda and not really based in reality, I was seeing 15psi at idle and 65psi at 3000rpm with an AEM electronic gauge so I just assumed the factory gauge was being crappy as they are known to be and didn't worry about it anymore. The valvetrain noise was probably due to lack of lubrication in the heads and not sticky LMAs since it did not go away after having them replaced at the dealership. I was tipped off about the oil pressure after a conversation with a fellow NSX owner who was seeing 20-25psi at idle and over 100psi high in the rev range, my car topped out at 80-85psi and that conversation was what ultimately led to me pulling the motor.


After finding this, I realized that I needed to pull the crank bearings for inspection now rather than wait for the motor to start knocking and likely ruin the crank in the process. In the process of tearing into the block I installed a new oil pump for good measure. Side note, the front seal was replaced by the dealer last year, it was installed noticeably crooked.


IMG_2639.JPG


IMG_2645.JPG


Then removed the engine from the subframe and separated it from the transmission.


IMG_2646.JPG


This was one of the most miserable tasks I've done so far. It was brutally hot that day and the transmission just would not come off. The NSX uses a twin disk clutch so the input shaft is very long and binds very easily if the angles aren't just right, it took a friend and I an hour or two just to pull the thing off.


Afterwards though I pulled the rear main seal plate to redo it due to the huge mess of Hondabond mentioned earlier. With the transmission off it was even worse.


IMG_2650.JPG


Globs of the stuff everywhere, even on the inside.


IMG_2655.JPG


Taping up the crank and bearing so I don't contaminate them during the cleaning process.


IMG_2657.JPG


Everything cleaned, new seal installed, sealed back to the block with an APPROPRIATE amount of Hondabond.


IMG_2659.JPG


Engine stand plate bolted up. I like how Honda uses a small number of giant bolts instead of lots of small bolts like BMW, makes things easier. Honestly the way Honda engines go together is just so much nicer, things fit right, they don't leak all the time, etc.


Engine on the stand, so much nicer to work on this way. Getting it out of the subframe was a huge pain but everything will be easier this way especially since I need to tear into the bottom end.


IMG_2662.JPG


Bottoms up, oil pan off. Pictures of the insides of a C30A are fairly hard to come by so doing this was kind of cool.


IMG_2663.JPG


Crank girdle removed. I didn't know this before, but this engine uses 6 bolt mains.


IMG_2664.JPG


Rod bearing cap removed, so far so good.


IMG_2665.JPG


Cap bearing looks fine too.


IMG_2666.JPG


Factory spec for rod bearing clearance dictates 0.04-0.06mm with a maximum allowable clearance of 0.06mm. Plastigage says right around 0.04mm, so nearly perfect results. You have no idea how much relief I felt after seeing this.


IMG_2669.JPG


I checked one from each row all with the same results, clearances are all at the tight end of the allowable range. Perfect. Looks like the bottom end survived this ordeal.


IMG_2670.JPG


I suppose it makes sense, looking at the oil flow diagram in the manual, 100% of oil from the pump goes straight to the main bearings, then everything else gets oil from the main bearing channels. Since the rod bearings are okay I'm not going to bother with the mains since they are extremely difficult to remove and should be fine if the rod bearings are okay. I can finally start putting things back together instead of taking them apart, right after I place a couple more orders for parts I didn't know I needed lul.
 
Well, just think of the feeling of pride and accomplishment you'll have once it's back on the road....

I think I mentioned this somewhere else but a few things to consider while it's apart:

* Replace the knock sensors and the TW coolant sensor (the one that sends the coolant temp back to the ECM). It's easy to do now!
* Clean the teeth on the cam gears real well. My old kevlar belt left a lot of deposits and it looks like you might have some buildup on your teeth too from the OEM belt.
* Rebuild the axles now and the intermediate shaft. I should have done that when I had my subframe out. It saves time later and everything is easy to get to now.
* If the cam caps aren't back on yet, perhaps consider buffing out some of the scratches?
* For the first startup with a new oil pump and everything drained, there's no good way to prelube as the pump is crankshaft driven (as you know). I kept the spark plugs out (to reduce load on the rod and main bearings with little compression) and cranked the engine with the injectors disabled to circulate the oil and clean out some of the assembly lube on my first startup.

Kaz has some good videos on the proper TB tension. It seems like it took me hours to align and get my tension set perfectly. It also took hours to get the valve clearances set. I think Kaz has mentioned about four hours for his rebuilds... so just take your time and check everything.

In the past I've cringed when people set their C-engines on the oil pan once it's out of the car for the reason that it can do enough damage to the pickup/pan gap that's hard to tell with the eye. Sucks but it could have been a lot worse!
http://www.nsxprime.com/forum/showthread.php/188047-Engine-cradle-for-pulling?
 
Last edited:
Well, just think of the feeling of pride and accomplishment you'll have once it's back on the road....

I think I mentioned this somewhere else but a few things to consider while it's apart:

* Replace the knock sensors and the TW coolant sensor (the one that sends the coolant temp back to the ECM). It's easy to do now!
* Clean the teeth on the cam gears real well. My old kevlar belt left a lot of deposits and it looks like you might have some buildup on your teeth too from the OEM belt.
* Rebuild the axles now and the intermediate shaft. I should have done that when I had my subframe out. It saves time later and everything is easy to get to now.
* If the cam caps aren't back on yet, perhaps consider buffing out some of the scratches?
* For the first startup with a new oil pump and everything drained, there's no good way to prelube as the pump is crankshaft driven (as you know). I kept the spark plugs out (to reduce load on the rod and main bearings with little compression) and cranked the engine with the injectors disabled to circulate the oil and clean out some of the assembly lube on my first startup.

Kaz has some good videos on the proper TB tension. It seems like it took me hours to align and get my tension set perfectly. It also took hours to get the valve clearances set. I think Kaz has mentioned about four hours for his rebuilds... so just take your time and check everything.

In the past I've cringed when people set their C-engines on the oil pan once it's out of the car for the reason that it can do enough damage to the pickup/pan gap that's hard to tell with the eye. Sucks but it could have been a lot worse!
http://www.nsxprime.com/forum/showthread.php/188047-Engine-cradle-for-pulling?

Thanks for the tips!

I'm currently waiting on crank girdle O-rings which are back-ordered so I have some time to get another order in, I'll probably grab the knock sensors and coolant sensor. What is the best source for knock sensors? NTK sensors are $100 from RockAuto and as far as I know NTK is reputable but OEM Matsushita sensors are almost double that from Acura, if it's worth the extra money I have no problems paying it though.

I have the rebuild kits for the axles on the way already along with a tub of Redline CV grease.

As far as trying to buff the scratches on the cams, my machinist seemed to think the best course of action was just to reassemble as-is and watch for excess iron or aluminum in future oil changes.

Yup, I'm planning on cranking for a while to get oil flowing before startup, as well as applying assembly lube on the cam and crank journals that I've had apart.

I did the timing belt/WP/tensioner about 2 years ago and I don't recall any issues setting the tension or getting the belt installed but I'll look up what Kaz has to say about it, more knowledge never hurt anyone! I've also adjusted the valves several times and you are right about it being time consuming, the first time when I did the timing belt and then again after I got the car back from the dealership since apparently they didn't bother to check clearances.

My oil pan is garbage at this point so I'm not too worried about the engine sitting on it, but I will make sure to avoid that once the new pan and pickup are installed sometime next week. My engine never sat on the ground with the oil pickup installed, I removed it before removing the engine from the subframe/cradle assembly.
 
Good work on the diligent engine work. I also have a similar thought on trying to simplify things on this car. Mainly to lose weight (reduce wear and tear) and ease maintenance (less components obstructing). Currently considering removing my SRS unit since my srs light is on and I have a feeling the capacitors are leaking inside. Figure while I am at it I will probably replace the steering wheel with a type r replica. Then there's the thought of removing the cruise control system, and stereo system.
 
[MENTION=33247]MotorMouth93[/MENTION]

My general warning was just to others when resting the engine on the oil pan - I could see from your pics that it didn't look like you were doing it!

The NTK sensors should work well, but I actually used Airtek ones that are a bit cheaper and still from a huge, known aftermarket supplier. The link below might help with the replacement torque setting (since it's apparently not in the SM) and also provides a purchase link to the Airtek ones and another link generally discussing the various sensors if you're interested:
http://www.nsxprime.com/forum/showthread.php/204386-Knock-Sensor-Torque-Setting

As far as the axles, you'll need one package of the Redline stuff (14 oz tube or container) per axle. Hope you have a total of 28 oz coming....

The assembly lube will help a bit on what you've removed, but on an almost completely dry engine without oil in the block passageways and pump, I like to remove as much load as possible on the crank and rod bearings while oil is reaching those places. Maybe it's just me, but waiting to install the plugs until after you've got the engine in place and ready to fire up is cheap insurance. Let the engine crank over without the injectors firing and the plugs out to build oil pressure and put fuel in the lines. Then install the plugs, reconnect the injector resistor bank, and fire it up!
 
Well...I did rest the engine on it's oil pan at one point, so your warning was definitely relevant. :)

Thanks for that link, I hadn't seen that thread before.

Also, I did only order one 14oz tub, I will go order another right now.

Yeah I agree, reducing load on the crank bearings is a very good idea for getting oil circulating before startup, I will remove the plugs.

Edit: More grease, knock sensors, and coolant temp sensor ordered. Hopefully the back ordered crank girdle O-rings won't take too long to show up so I can get the bottom end buttoned back up.
 
Last edited:
I was inspecting my engine with a flashlight and I noticed this exact same thing happening on my engine: http://www.nsxprime.com/forum/showthread.php/210504-Advice-needed-head-gasket

My head gaskets are seeping a bit of coolant, and since I plan on driving the crap out of this car over the next 10 years looks like I'm doing those too. My plan is to take the heads to my machinist and see if he thinks they should be resurfaced. If so, I'll go with MLS gaskets, if not, then I'll just swap the factory composite gaskets for a new set. I don't want to have the heads resurfaced yet if I don't have to, I'd rather kick that bucket down the road to the eventual rebuild in 10-15 years.

I also noticed some oily residue on a couple of the exhaust valve guides so looks like dealership dipshit botched a few valve stem seals too, so I'll be redoing all of those as well.
 
Last edited:
LoL $15 and a few hours later... you say it so casually. I would have just paid someone to rebuild it or get it replaced.

Your patience and attention to detail is uncanny!

Those seats look great!
 
Lol, I've been soldering on stuff since I was in high school so I don't mind doing that sort of thing myself, it's so satisfying to see it work right again afterwards. Also saves me money and saves Brian K time.

But anyways, this gasket refresh and fix dealer screwup project has turned into a full on engine rebuild. I'll probably start a separate thread for that because it alone will be a pretty huge undertaking and I'm doing everything myself except for the machining. I've never rebuilt an engine before but I have a couple friends who've done it multiple times and will likely be tired of my questions soon.

The gist of it is I pulled the heads to do the head gaskets and found that someone had already done them once and brutalized the head and block decks in the process of cleaning them, probably in 2012 based on writing on the subframe. They were already leaking again 9 years later. Nearly all of the cylinder head bolts that don't double as oil pathways had water on them, and one of the dowel pins was wet and had corroded itself to the head and the block to the point that separating them took over an hour, then another hour or so to get the pin out of the block using a slide hammer. The cylinder walls were also absolutely trashed, cross hatching very visible in some places and 100% scoring in other places, a good amount of pitted in rust spots, and a couple nasty score marks that easily catch a nail. The rust must have been from the car sitting for very long periods of time with the previous owner.

The good news is that neither the heads or block decks have been machined before, and both of them are perfectly straight and true with no signs of warping or excessive overheating. I've dropped the heads off at a local machine shop that only works on cylinder heads and is very well known for it in the area, they're just getting a basic valve job, guides if necessary, valve stem seals, and shaved a few 0.0001" to create a good surface for the new MLS gaskets to seal to.

The block is going to be trickier, I want it bored over 0.5mm for SoS forged pistons and have the decks shaved a few 0.0001" for MLS as well, but there aren't too many good shops around for that, and the ones that are good usually politely tell you to leave if you show up with anything but a domestic V8. Then there's the issue of tooling, even shops that will work on it don't have the right torque plates or the right equipment to properly mount it in the surfacing machine. I want this rebuild to last and I don't want to do it again so I'm willing to pay what it takes to have it done right, if anyone knows of a shop that has experience working on NSX engines in Texas I'd greatly appreciate it, Endyn in DFW is my only local lead and I'll give them a call tomorrow. The best option would probably be to send the bare block to SoS for machining but I don't know if they'll agree to that and there's the rather substantial risk of damage in transit.
 
Oh man, i feel for you. Just reading this last passage is hard. But you are going about it the right way. I would think there has to be a shop in your state that can do what you are looking for. Keep up the great work.
 
At this point the block is completely stripped down, literally every removable part has been taken off, bagged, and labeled, hopefully to not be lost forever. I'm waiting on a set of custom ordered 4032 alloy full skirt forged pistons from Wiseco before I can have the block machined which will probably be 4-5 weeks. I'm keeping the stock compression ratio and using 4032 pistons instead of the much more common 2618 due to the better long-term wear characteristics of 4032, the downside is that it has less tolerance for detonation and poor tuning than 2618 if I ever decide to supercharge, but is still much stronger than the stock cast pistons and nearly none of the drawbacks of 2618.

For the block work I settled on Engineered Performance in DFW, I called Endyn and they redirected me here for the block work. They build four digit hp GT-Rs on the regular so I think they can handle some basic block work and they have the right torque plates and such.


First head off. There were no clear failures despite the head bolts being wet and small bits of coolant residue around the gasket.


IMG_2704.JPG


Water got into one of the dowel pin bolt holes of the 2nd head and corroded the pin to both the head and block, getting it off required lots of patience and PB blaster and slowly prying the head up evenly. Then to get the stuck dowel pin out of the block I threaded a big bolt into it, clamped down with vice grips, and went at it with a slide hammer. Eventually it came out without damaging anything.


IMG_2711.JPG


At this point I hadn't decided on a full rebuild yet so I got to work cleaning the deck surfaces. There is lots of awful, awful information about how to do this online, lots of suggestions involve abrasives like green scotch brite pads (aluminum oxide particles), roloc disks, and sandpaper. The problem with abrasives is that it's impossible to keep it out of the block 100% because it just goes everywhere and floats in the air and settles, and if it gets in the cylinder walls or bearings it will tear them up.


My solution to this problem was to plug up all the holes in the deck and use a brass bristle brush, solvent gasket remover, and WD40. To seal off the cylinders I cut cardboard circles to fit, pushed them into the cylinders, then smeared thick grease around the edges of the cardboard to completely seal the cylinders from any particles that could otherwise get stuck between the pistons and the cylinder walls and get into the rings. For the oil pathways I just wadded up paper towels and stuffed them down the holes.


IMG_2738.JPG


It worked great, the brass bristle brush didn't damage the aluminum at all and I was able to get both decks nearly perfectly clean minus a bit of staining from the graphite gaskets and without contaminating anything. Darn shame I'm just going to have the block decked....


IMG_2751.JPG


IMG_2754.JPG


After cleaning I examined the cylinders more closely. Between pulling the heads and finishing cleaning the decks I never rotated the crankshaft so I could be 100% sure no debris got trapped in the cylinders and scraped into the walls. I made this mistake once on the BMW engine and I'm not making that mistake again. Before turning it over I checked all of the piston/cylinder grooves for dirt or debris and vacuumed out each cylinder.


The #1 piston was at TDC when I started, it was hiding this fun score mark that is deep enough to catch a nail at the top. From there it got worse, there's lots of pitted in rust and pretty bad scoring in most of the cylinders. Yeah the engine ran fine before but for how long? I've been wanting to rebuild an engine anyways so might as well do it now and not have this constantly in the back of my mind.


IMG_2753.JPG


IMG_2759.JPG


IMG_2760.JPG


IMG_2762.JPG


IMG_2763.JPG


Removing pistons from the block, paper wrapped around the rod studs to keep them from tearing up the crank on the way out.


IMG_2780.JPG


Rods/pistons out, then finally crankshaft out.


IMG_2784.JPG


IMG_2785.JPG


The rod bearings all looked nearly perfect and all of the crank journals look fine but there's some odd markings on one or two of the main bearings so I'm going to have the crank checked out and polished and probably magnafluxed for good measure.
 
When I dropped the valve covers off for coating I was lazy and didn't feel like taking the baffles out, so I did that after getting them back. Underneath the baffles was pretty nasty so I spent some time cleaning it out and cleaning off all the old RTV. The shop media-blasted the valve covers prior to coating and I used scotch brite pads to clean the insides to I made sure to wash everything thoroughly several times to ensure all grit was gone from the various nooks and crannies.


IMG_2895.JPG


IMG_2919.JPG


IMG_2920.JPG


Reassembled, I decided not to use Hondabond for reassembly because I don't really see the point, the baffles just keep oil from splashing up into the CCV tubes and they don't need RTV for that. Honda has no spec listed for the little bolts so I went with 89 inch pounds along with blue loctite so I can be sure those bolts won't back out on me and fall into the valvetrain. BMW uses 89 as their spec for M6 whereas Honda uses 108 usually, but since the covers are magnesium I wanted to err on the side of caution.


IMG_2923.JPG


Some better photos along with my headers. I think the color combo should be nice.


IMG_2899.JPG


IMG_2903.JPG


IMG_2900.JPG


If I ever supercharge, I'll need larger injectors, so to fit newer style Honda injectors such as those from an RDX the intake manifold injector pockets need to be drilled out a bit larger for the O-ring to seat properly. I want to be 100% sure aluminum shavings don't get sucked into my engine so I took the whole intake manifold apart so I could clean it out really well after drilling. I bought one of the kits from @OLDMNSX, thanks again!


IMG_2906.JPG


IMG_2910.JPG


There are lots of sharp edges from machining (or stress risers) in the crankcase and sharp edges are more prone to cracking than smooth edges so I used a small file to carefully file down the sharp edges, then fine sandpaper to smooth out the filed edges to a near mirror finish. It's slow and tedious work, but should ultimately help with the reliability of the block. Huge thanks to @Mac Attack for all his helpful advice during this process.


IMG_2940.JPG


IMG_2941.JPG


The guy doing my cylinder heads happened to have the right timesert kit for my block so I installed thread inserts for all the head studs too. Since the timesert-provided alignment tool sucks and won't fit in an NSX block I had a custom one machined and it worked perfectly. The job took 5-6 hours since it's very tedious and I was being careful.


IMG_2956.jpg


IMG_2996.jpg


You can see here that whoever did the head gaskets in the past did a real number on the block deck. I found a few gouges along with the scratches you see here. Oh well, it's getting resurfaced.

IMG_2997.jpg


IMG_2995.jpg


I also found a decent deal on a set of Spoon Aero mirrors here on Prime, so those will be going on as soon as they get painted. I like the look a lot more than factory, worth losing power mirrors for IMO. Thanks @james0933!


IMG_3004.JPG


IMG_3005.JPG


IMG_3006.JPG


They were second-hand but had never been painted or installed, and even came in the original box.


IMG_3003.jpg


With any luck, my pistons will be here Friday and I'll be able to drop the block off this weekend.
 
Last edited:
You probably know this already but you will need to know exactly how much material will be removed from the heads and block. ANY amount removed must be "made up" by using a thicker head gasket to compensate. The reason is any change in that dimension will cause your timing to be off when you go to reassemble. The good news is there are variable thickness head gaskets available.
 
That's something I haven't been able to find a clear answer on and was going to run by my machinist, but I'll ask here too.

I checked for warping on both the heads and block and there is none, I just want a perfect finish for the MLS gaskets to seal to, so theoretically only a few thousands will need to be taken off total. Is that enough to require a thicker HG? If so I have no problem ordering thicker HGs from Cometic, I just can't find any clear info on the subject.

There is no need for thicker custom HGs if you are only removing a couple of thousandths required to obtain the smooth mating surface.

I have custom thickness Cometic HG's made, but that was because my original machinist screwed up and removed too much material. The limiting factor wasn't timing, it was the piston-to-head clearance that I had to painstakingly measure and calculate. If you research this on your own, keep in mind that our Ti rods that have a different modulus of elasticity vs the common steel rods. So, you need an extra bit of clearance than what you might read for typical engines. You don't want excessive clearance to render the combustion squish ineffective, but you need to ensure you have enough for our Ti rods so you won't make contact at 9k RPMs if you're like some.

Something else to consider about the timing aspect: The OEM cams and pulleys are held relative to each other by keyways. The keyway "slop" has a much larger impact on timing differences than milling the heads and block each a couple of thousandths. All kinds of little re-assembly factors and engine builder tricks add up and go beyond even common "blueprinting." Hence the power differences between the same production engines!

Thanks! I'm going to wait and see what I hear from my machinist on how much material was removed and if it's too much I'll order custom HGs.

I dropped the block off at Engineered Performance near Dallas today, should be ready in a few weeks and I can start the shortblock assembly assuming the bearing clearances and everything check out good.
 
What an awesome thread! I'll be referencing it in the future for sure. I'd love to get one of those sub frame dollies, I assume they aren't being made any more?

Just my $0.02, it seems like Kaz uses liquid gasket to seal the cam plugs, you mentioned earlier that the FSM says to put them in dry.

http://www.nsxcb.co.uk/entry.php?2385-Eng-Refresh-Cooling-Sys-etc-22

This has been a matter of debate over many years. On the one hand, Larry Bastanza puts them in dry without issues over the timing belt service interval. His reasoning is that Honda put them in dry from the factory (at least on the early cars). He's had a lot of success with that on hundreds of U.S. NSXs- including on my first NSX. Kaz is one of the original NSX team engineers and also went through Honda's NSX Refresh Center formal training. He uses liquid gasket and has pointed out that later cars came with sealant from the factory. I think you're ok either way. The critical piece either way is to make sure that the mating surfaces are totally clean of old sealant and oil. [MENTION=33247]MotorMouth93[/MENTION] knows what he is doing and his prep has been immaculate thus far- I'm sure he will have a leak free service interval after he is done.
 
What an awesome thread! I'll be referencing it in the future for sure. I'd love to get one of those sub frame dollies, I assume they aren't being made any more?

Just my $0.02, it seems like Kaz uses liquid gasket to seal the cam plugs, you mentioned earlier that the FSM says to put them in dry.

http://www.nsxcb.co.uk/entry.php?2385-Eng-Refresh-Cooling-Sys-etc-22
@Chase_acura had a small run of subframe dolly clones made a few months ago and I bought one from him, you could message him and see if he has any more available, I doubt Honda makes them anymore though.

Larry B recommends dry like the early FSMs recommend, and Kaz does them with sealant like the later manuals suggest. I don't really think you can go wrong either way but I have a set of SoS billet plugs I'll probably use instead.

For your viewing pleasure, the only set of 4032 alloy NSX pistons I've ever heard of, thanks to @ScienceofSpeed (and their willingness to bend over backwards to help customers) and Wiseco. It took nearly 2 months to have these custom-ordered. SoS initially told me they didn't offer a 4032 option, so I contacted WiseCo, who then told me SoS had contacted them about the same thing that very day and that I would be better off going through SoS since the price was roughly the same and they were the experts.

IMG_3025.jpg


IMG_3026.jpg


Also I had SoS remove the stock wrist pins and bush the titanium connecting rods for floating wrist pins. An NSX without titanium rods isn't really an NSX anymore.

IMG_3027.jpg


And Cometic MLS gaskets and SoS ARP head studs.

IMG_3028.jpg


IMG_3039.jpg


I shipped everything to the shop and the block should be ready to go in 2 weeks or so. Since I've never rebuilt an engine before, in addition to doing the machining, I'm having them check the bearing clearances too for peace of mind and so I don't have to rely solely on plastigage.
 
Last edited:
Back
Top