
Prime member sparky has been doing some testing regarding the battery and we think everyone be aware of the fact that the battery is 36AH equivalent in CCAs, not necessarily in capacity. I was not aware of that at the time of creating the group buy. That being said, in real world testing with this battery, I have been able to easily go 10 days between startups and TURBO2GO has seen 16 days between startups, although I don't recommend waiting that long. I am still confident that you will like the battery and tray combo. Just use a tender if you don't start your car weekly.
-
Protip: Profile posts are public! Use Conversations to message other members privately. Everyone can see the content of a profile post.
You are using an out of date browser. It may not display this or other websites correctly.
You should upgrade or use an alternative browser.
You should upgrade or use an alternative browser.
Group Buy Shorai Battery and CNC Machined Battery Tray Package - 7 pound setup - Direct bolt on
- Thread starter phryxis
- Start date
-
- Tags
- battery lightweight shorai
I keep my car on a tender always when parked. Tenders are one of those great little mods that once you use one you're hooked for life and keep it on any car you plan on storing or not driving everyday/week.
Thanks Colin!
Good things come in small lightweight packages :biggrin:
Installation was a breeze, took 20min. to lose 20lbs. If not for my DF under-tray, it would have taken half that time.


Good things come in small lightweight packages :biggrin:
Installation was a breeze, took 20min. to lose 20lbs. If not for my DF under-tray, it would have taken half that time.


- Joined
- 13 September 2009
- Messages
- 672
looks great
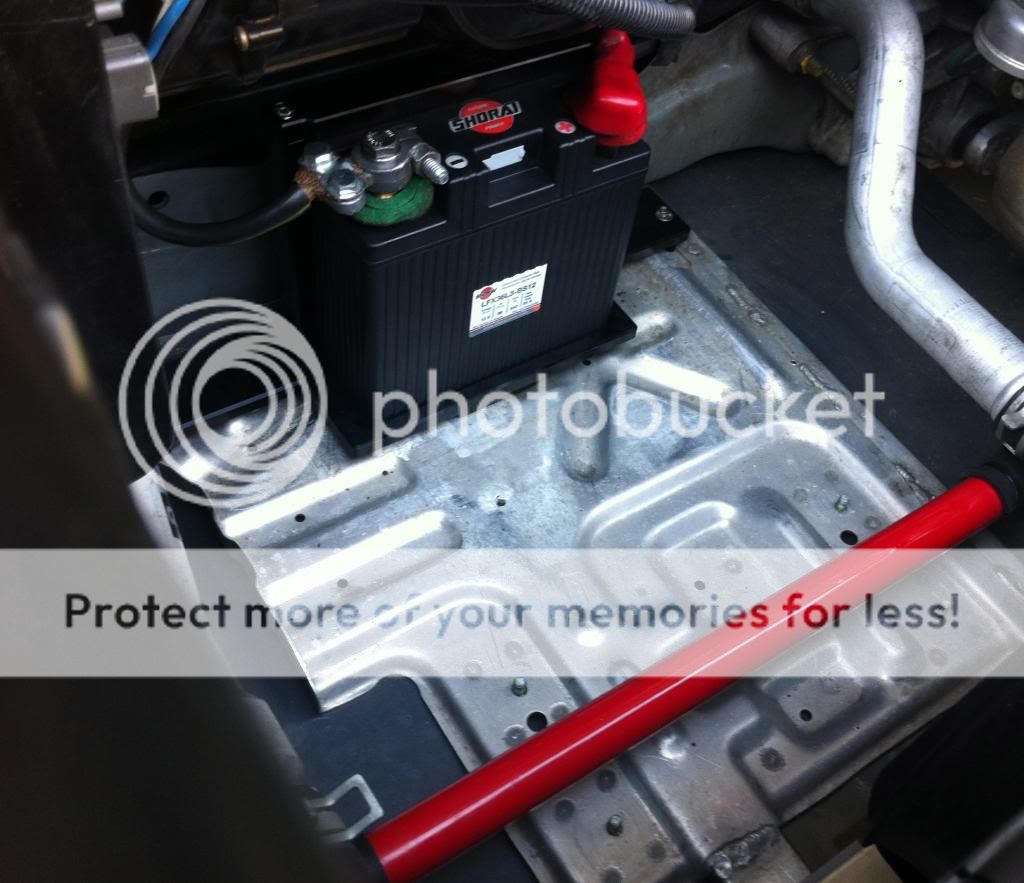
You need to put washers between those bolts and posts. It will hold it down a lot better or, use the supplied post extenders. The top hold-down bar is ground. I don't like the proximity and angle of your + cable to it. You are touching. The only thing between you and a fatal sort and/or fire is the wire jacket. You also really don't need those rings.
Last edited:
Besides Battery Tender charger , I can use this one ....http://www.amazon.com/Schumacher-SE...75338490&sr=1-22&keywords=car+battery+charger
Last edited:
Fixed! :biggrin:You need to put washers between those bolts and posts. It will hold it down a lot better or, use the supplied post extenders. The top hold-down bar is ground. I don't like the proximity and angle of your + cable to it. You are touching. The only thing between you and a fatal sort and/or fire is the wire jacket. You also really don't need those rings.
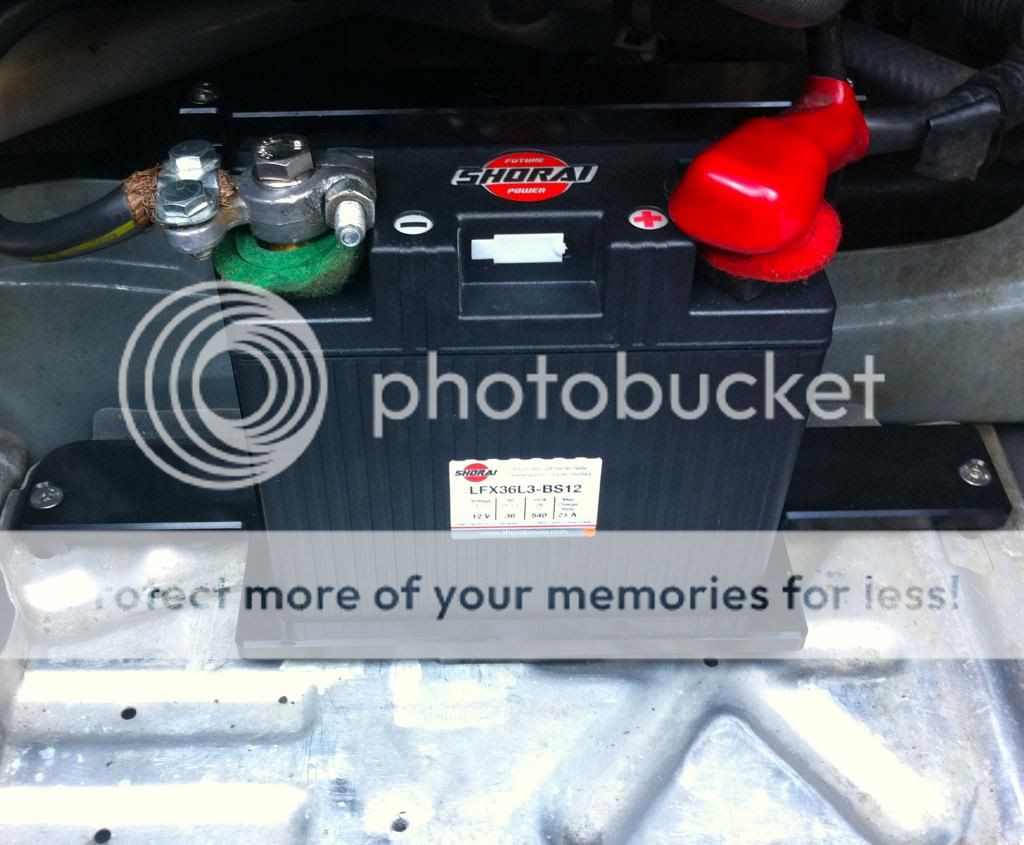
BTW Dave, if you look at the 2nd page of this thread, your teminals are making the same kind of contact that mine were... Just sayin


^^ do you think those terminals will come loose? I was thinking of putting some medium strength loctite on those 10mm Phillips screws holding in those terminal brackets.
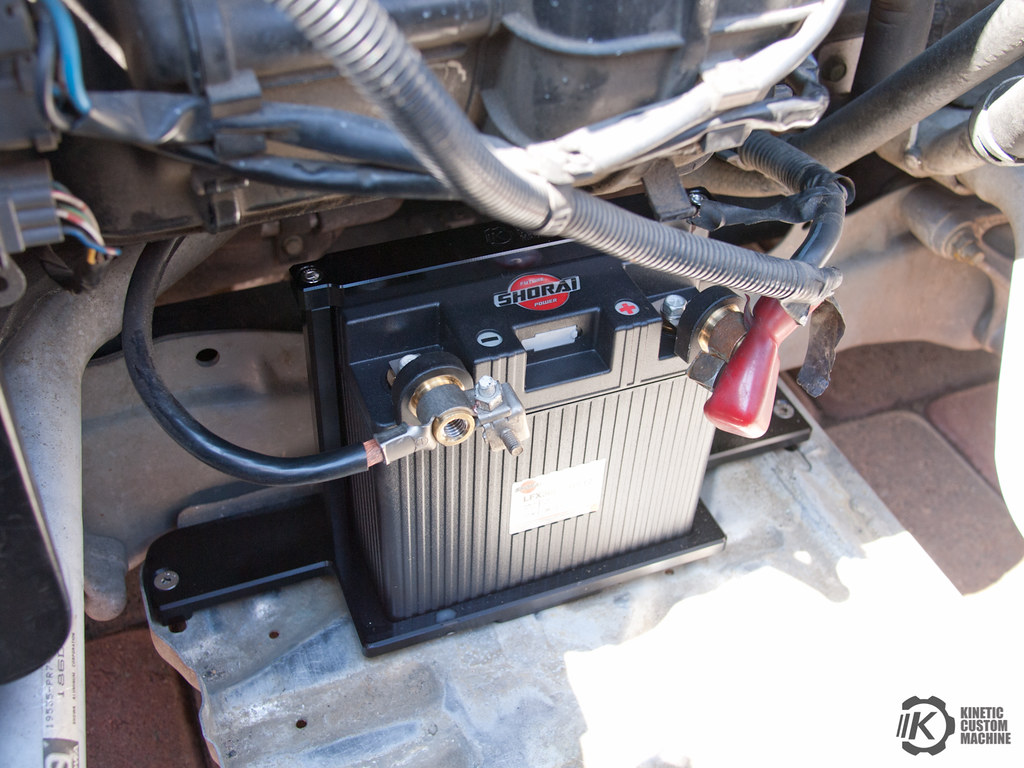
I'll be checking periodically. I also used red Locktite on all fasteners.


Of course Colin.Thanks for the great pics Robert! Care to give some initial impressions on how the battery performs?
I have not had the time to take her out for a thorough shake-down and since its well over 100 degrees here I'm not driving her unless absolutely necessary. I have taken her out for a couple of errand runs and she fires up just as good as she did with my 30lb. boat anchor battery. No issues what so ever. So far I am a very happy customer :biggrin:
Last edited:
^^ do you think those terminals will come loose? I was thinking of putting some medium strength loctite on those 10mm Phillips screws holding in those terminal brackets.
No they won't come loose. I am starting to think you are a little OCD Regan... LOL... which has its pluses of course...
Last edited:
Reflection on the install...
Favorite part: Assembling the new battery and bracket, then picking up the whole assembly using just a thumb and one finger :smile:
Least favorite part: Lifting out the old battery. Everything else was a walk in the park.
Thanks, Colin. Looking forward to more NSX products from KC Machine.
P.S. Love the Ti license plate bolts, too!
Colin, just received my battery, mount, and charger. Will install later, but I just wanted you to know! Thank you and Kinetic Custom Machine for doing this for the NSX community!
Rec'd the battery and mount and have to say that I was pleasantly surprised:
- the battery and light are a magnitude lighter than the stock battery.
- the fit and finish of each component is top notch. Each piece is precisely machined.
- once assembled the entire unit is very sturdy.
Very well done and a great entry into the NSX aftermarket community. Highly recommended.
My only minor negative is that I rec'd mismatching bolts (one longer than the other) for the bottom portion of the tray. Colin, you have PM.
Those mis-matched bolts were spot-on on my car. When you install the battery tray to your cars tray you will see that there is method to Colin's madness.My only minor negative is that I rec'd mismatching bolts (one longer than the other) for the bottom portion of the tray. Colin, you have PM.
Reflection on the install...
Favorite part: Assembling the new battery and bracket, then picking up the whole assembly using just a thumb and one finger :smile:
Least favorite part: Lifting out the old battery. Everything else was a walk in the park.
Thanks, Colin. Looking forward to more NSX products from KC Machine.
P.S. Love the Ti license plate bolts, too!
Haha yeah, lifting the stock battery out is quite a chore. It's a funny angle. Glad you're enjoying the package!
Colin, just received my battery, mount, and charger. Will install later, but I just wanted you to know! Thank you and Kinetic Custom Machine for doing this for the NSX community!
Awesome, thanks Bob! Looking forward to hearing your impressions.
Rec'd the battery and mount and have to say that I was pleasantly surprised:
- the battery and light are a magnitude lighter than the stock battery.
- the fit and finish of each component is top notch. Each piece is precisely machined.
- once assembled the entire unit is very sturdy.
Very well done and a great entry into the NSX aftermarket community. Highly recommended.
My only minor negative is that I rec'd mismatching bolts (one longer than the other) for the bottom portion of the tray. Colin, you have PM.
Thanks for the great initial review!
And yes, as Robert and my pm said, there is a method to my madness, and the mismatched lengths will make sense once installed.
Thanks, Colin, for installing the battery-tray-charger combo. Battery is amazingly light, and the billet aluminum tray is a piece of art. But the best part was your customer service. Kudos to you, Sir!
Thanks Ted! And thanks for bringing Albert by, it was fun hanging out with you guys.
- - - Updated - - -
Install instructions:
NA1
Tools:
5mm Hex
4mm Hex
Large screw driver
Small screw driver
10mm box wrench
The kit should contain:
Tray
2 x standoffs
top bar
2 x 16mm Flathead hex screw
2 x 12mm Socket head cap screw
1 x 40mm Flathead hex screw
1 x 25mm Flathead hex screw
2 x 6mm serrated flange nuts
Can be done without jacking up car
- Prepare the battery
- Put on battery bar
- Put on 90 degree brackets (install small screws first)
- Put on terminals


- Prepare the tray
- Screw standoffs onto tray
- Put battery in
- Screw on top bar

- Remove spare tire
- Remove bracket
- Remove OEM battery (Remove negative terminal first)
- Clean the tray where the battery sat
- Install tray (longer screw goes on the right)
- Connect battery cables (Install negative terminal last)
NA2
Tools:
5mm Hex
4mm Hex
Large screw driver
Small screw driver
10mm box wrench
The kit should contain:
Tray
2 x standoff
top bar
2 x 16mm Flathead hex screw
2 x 12mm Socket head cap screw
2 x 20mm Flathead hex screw
2 x 6mm serrated flange nuts
Car must be jacked up on one side
- Prepare the battery
- Put on battery bar
- Put on 90 degree brackets (install small screws first)
- Put on terminals
- Prepare the tray
- Screw standoffs onto tray
- Remove spare tire
- Remove bracket
- Remove OEM battery (Remove negative terminal first)
- Clean the tray where the battery sat
- Install tray
- Put battery in
- Screw on top bar
- Connect battery cables (Install negative terminal last)

Last edited:
Installed mine today just before I got the instructions PM
It's a very straightforward install and looks fantastic. Thanks!
It's a very straightforward install and looks fantastic. Thanks!
Very well engineered and machined bracket. Nice job Colin.
It's astonishing how light it is (the whole package). Even compared to the Odyssey 680 battery.
It's astonishing how light it is (the whole package). Even compared to the Odyssey 680 battery.
LMR swung by and is now 30 pounds lighter!


Awesome, glad you like it!
Thanks Jeff! Yes, it is quite a bit lighter than the 680, which really feels like a lead weight as compared to the Shorai.
Installed mine today just before I got the instructions PM
It's a very straightforward install and looks fantastic. Thanks!
Awesome, glad you like it!
Very well engineered and machined bracket. Nice job Colin.
It's astonishing how light it is (the whole package). Even compared to the Odyssey 680 battery.
Thanks Jeff! Yes, it is quite a bit lighter than the 680, which really feels like a lead weight as compared to the Shorai.
interested in getting this, can you tell me if i can use my current battery charger with the shorai?
http://smartercharger.com/products/batterychargers/ctek-multi-us-3300/
http://smartercharger.com/products/batterychargers/ctek-multi-us-3300/
interested in getting this, can you tell me if i can use my current battery charger with the shorai?
http://smartercharger.com/products/batterychargers/ctek-multi-us-3300/
I don't think it's compatible because it has a desulphation function.
Similar threads
- Replies
- 5
- Views
- 280
- Replies
- 21
- Views
- 3K
- Replies
- 0
- Views
- 816