• Protip: Profile posts are public! Use Conversations to message other members privately. Everyone can see the content of a profile post.

A dream come true..... daily (history of a proud ownership)

Hi,

Nuno, nice progress!

How about a 02+ rear valence?

eahehhea... you must have like a telepatic mind or something :biggrin::biggrin::biggrin:

already have it here...along with 02+ side skirts (with door pieces)...
i bought from Jetz already painted Formula Red...but i'm yet to install them
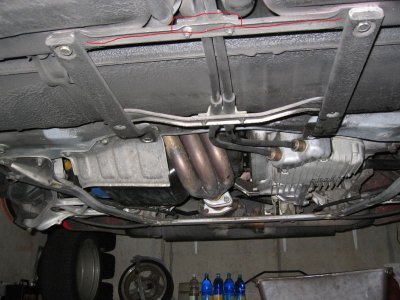
as it's been difficult to find time and the short time i had, i used to fix the coolant leaks (which are not over :frown:) and try to find the source of a weird noise on the rear wheels.

02+ exterior conversion related, i only need to buy the front end parts... everything else is already here :biggrin:

Thanks,
Nuno
 
Looks like you've done what I've been doing/thinking about. :)

Still coolant leaks after changing everything of the system?
 
Hi,

Looks like you've done what I've been doing/thinking about. :)
we have similar tastes... good ones :tongue::tongue:

Still coolant leaks after changing everything of the system?

man... this is a nightmare....a wet nightmare :eek:

- coolant vanishing
- inspection showed the 2 big hoses under the car had severe leaks.
- a closer inspection showed also that the aluminium pipes that go from under the car to the engine bay, had a leak, because the heatshield behind the fuel tank was scratching the pipes..
- replaced all 22 hoses above and that aluminium pipes (had to remove the tank)... and there is still a leak
- another inspection reveals a leak hidden until now, 2 of the 3 front aluminium pipes also have leaks.. the small that goes to the heater core and the big one to the passenger side.

i found the big one from a friend here localy (Hugabuga) but i need also to find the other 2 (which are welded together).

This last leaks only appeared after replaced all the other stuff... probably replacing them all, increased the pressure in the system, which caused this leaks to appear...don't know...i only know i have to fix it now.

Thanks,
Nuno

PS - and i can't use Honda coolant here...as Honda in Portugal asks me $75 for each 5 liter can :eek::eek::eek::eek: i need 4 of them :frown::frown: and can't justify $300 in coolant no matter how bad i want to use the real deal
 
Really a nightmare. :eek:

What heatshield behind the fueltank are you referring to? I don't recall a heatshield there. I'm astonished that the alu pipes develeloped leaks. Where did they leak? Cracked? Corrosion? Too much pressure on them during installing the new hoses? Do you have a picture of them?
 
Hi,

What heatshield behind the fueltank are you referring to? I don't recall a heatshield there.
perhaps i named it heatshield incorrectly...

imagine your NSX in a lift and you under it facing the front with your head under the fuel tank.

then look straight up and you see where the tunnel ends and the aluminium pipes start to go vertical behind the fuel tank... after the bends, when they are already going vertical, they go behind a metal plate that is screwed to the chassi and it's placed between the pipes and the fuel tank.
The lower edge of that plate was touching the pipes... and with all the vibrations of driving, it was metal on aluminium scrapping for years... = leak.

I'm astonished that the alu pipes develeloped leaks. Where did they leak? Cracked? Corrosion? Too much pressure on them during installing the new hoses? Do you have a picture of them?
Hard to explain where... but i will take pictures of the leaks... the rear pipes are already off the car, but i will take pictures of the front ones before removal and after removal... with the green think all over to show the leaks...

i don't thing the leaks was caused by pressure because it wasn't gashes.. it's tinny holes...so i think it was caused by corrosion...

what puzzles me, is that the pipes are aluminium, and i assumed salt wouldn't corrode alumium, as the car was german before comming to my hands...

and also, the pipes don't show any signs of outer corrosion, so i suspect the previous owner used some nasty coolant... in the photos you will see why i say this :wink:

Thanks,
Nuno
 
Do you mean the metal plate in the picture (marked red). There's a bolt up there for the hoses which should prevent the alu hoses to touch anything during driving.

I agree with you on the nasty coolant which may be used by the former owner. :(
 

Attachments

  • IMG_6285(2).JPG
    IMG_6285(2).JPG
    87.2 KB · Views: 731
Hi,

not what you highlighted in red... this plate i'm talking about is vertical and is almost a square with 1 bolt in each corner... it closes the "vertical" tunel behind the fuel tank...it's where the pipes are already going up.

Nuno
 
Having chased coolant issues all over my car for the past 6 months myself....

-How have you been measuring your coolant loss? Has it been leaving puddles?

-It's VERY strange that the aluminum pipes would leak at all. Are you absolutely certain the leaks are from the pipes and not, in fact, a leak higher up that is just running down or pooling on the pipes?

The causes I've found for leaks have included:
-Insufficient hose engagement onto the pipe (i.e. the hose wasn't pushed on far enough to seal well)
-Insufficient hose clamp pressure
-Faulty hose clamp
-Heater core bleed pipe had been broken and epoxied back together by previous owner
-Cracked coolant tank
-faulty pressure cap allowing coolant loss via overflow tube (small hose that comes off the neck of the coolant bottle, and would just dump coolant on the road if it vented.
-Apparently the radiator drain/fill plug O-Rings can also flatten out and not seal well.

-I used a pressure tester like THIS ONE to pressurize the system cold to ~15 lbs, then left it for a short time and then came back, got under the car with a flashlight and figured out where the leaks were dripping, then traced back from there with the system still under pressure so I could see it welling up at a hose joint, or split in the coolant tank.

A note if you use this method. Clean and dry the pipes and hoses as much as possible, then, if nothing become apparent within an hour or so (i.e. a big leak), leave it under pressure over night or a similar stretch of several hours. This is the only way you'll be able to really notice a very small leak.

Hope that helps.
 
Hi,

Having chased coolant issues all over my car for the past 6 months myself....

-How have you been measuring your coolant loss? Has it been leaving puddles?
- it dissapears from the expansion tank consistently... i level it up again and it loweres again... this after long flushs
- those green dry signs of it running arround appear
- at the tiny holes, a little white salt-like-grains show that is where the leak is.


-It's VERY strange that the aluminum pipes would leak at all. Are you absolutely certain the leaks are from the pipes and not, in fact, a leak higher up that is just running down or pooling on the pipes?
well.. i will investigate further, but the source of the lines are very visible. When i can take photos and show you guys, you will understand.


The causes I've found for leaks have included:
-Insufficient hose engagement onto the pipe (i.e. the hose wasn't pushed on far enough to seal well)
When i replaced the hoses, i already knew that they would have to be installed all the way, so this was already covered

-Insufficient hose clamp pressure
-Faulty hose clamp
i think i will buy new clamps for the main six big hoses... i used some screw in type, but they seem to loose a bit in short time, so i think i better buy new OEM ones. Despite this, there isn't any evidence of coolant leaking from the hoses edges.

-Heater core bleed pipe had been broken and epoxied back together by previous owner
not the case... it's as it should: intact

-Cracked coolant tank
when i did the hose job, i replaced it with a new OEM one, and checked the old one, and there was no crack anywhere... just more yellow milky looking than the new one.

-faulty pressure cap allowing coolant loss via overflow tube (small hose that comes off the neck of the coolant bottle, and would just dump coolant on the road if it vented.
can be... but i already have here a brand new NSX-R one that i will install (it's the same than OEM, but black)

-Apparently the radiator drain/fill plug O-Rings can also flatten out and not seal well.
was not the case, but i replaces everything there was to be replaced: both radiator o-rings (bleeder and drain) and both drain washers and bolts under the car. I did not replaced the engine bleeders and the heater core bleeder, because they don't show any signs of leakage... look brand new.

-I used a pressure tester like THIS ONE to pressurize the system cold to ~15 lbs, then left it for a short time and then came back, got under the car with a flashlight and figured out where the leaks were dripping, then traced back from there with the system still under pressure so I could see it welling up at a hose joint, or split in the coolant tank.
that will be my last resort... for now, i will fiz all visible issues...if all visible issues are fixed and coolant keeps vanishing, then i need to do that.

A note if you use this method. Clean and dry the pipes and hoses as much as possible, then, if nothing become apparent within an hour or so (i.e. a big leak), leave it under pressure over night or a similar stretch of several hours. This is the only way you'll be able to really notice a very small leak.
i already do this... i have to, or i wouldn't know if it is a present leak or signs of a old and fixed one.

Hope that helps.
sure do... thanks....

Nuno
 
^ almost... i can say that i'm only missing headlights, front bumper and hood... everything else is already here :biggrin:

i have to update this thread...a lot have been done to it...not very visible stuff (aside from sideskirts and rear valence) but updates anyway :wink:
 
awesome work, people like you are always a fantastic addition to any online community as you appreciate the need for clear concise and detailed information. its great!

Wanted to ask as well. In the NSX-R cluster, it appears there are shift lights integrated, is that the case?
 
Hi,

awesome work, people like you are always a fantastic addition to any online community as you appreciate the need for clear concise and detailed information. its great!
thanks for the complimments :wink:

Wanted to ask as well. In the NSX-R cluster, it appears there are shift lights integrated, is that the case?
as you see above, i didn't bought the complete NSX-R cluster, only the gauge pods and faceplate... the OEM shift-lights are integrated on the back circuit, using the same location for the Auto transmission lights... i don't have those, as i'm using my OEM circuit boards... but even if i had the NSX-R circuit boards, the shift-lights still didn't work, because they are controlled by the NSX-R OEM ECU.

Hope i helped you.

Thanks,
Nuno
 
It's really nice to read a bit about one of the few NSX's in Portugal. I'd love to see one live, it's one of the cars of my dreams that I still have to see!
Yours is amazing, NA1s are my favorites!

Please, update us! :biggrin:
 
Hi guys,

sorry for this huge time with no updates, but lately i've been hyper stressed with somethings in life...everything is calming down, so one of the first things will be bring this thread up-to-date (02+ brake update, 02+ rear valence and 02+ sideskirts)

Thanks,
Nuno
 
sweet! take your time hope all works out.

Hi guys,

sorry for this huge time with no updates, but lately i've been hyper stressed with somethings in life...everything is calming down, so one of the first things will be bring this thread up-to-date (02+ brake update, 02+ rear valence and 02+ sideskirts)

Thanks,
Nuno
 
Procar Specials Front CF Beam

Hi,

well... better later than ever.... but sorry for this huge time without update reports.

This update lacks some photos, but i only remembered that i didn't took any Installed photos once everything was in place.... when i have to remove the front bumper to install some stuff i ahve to, i'll do my best to remember to take some.

Here it is, the mighty Procar Specials Front CF Beam:


and here it is compared to my OEM one:


and the usual weight savings table :wink:

20090820_-_weight.jpg


Notes:

- The Horns and JDM Fog lights brackets are still attached to the OEM beam in the comparison photos.
- The windshield water tank is still off the car, but will be back in there, and i'll update the weights in a new table then.
 
Last edited:
Brakes refurbish to brand new condition

Hi,

here is another update, this one is flooded with pics.... tons of pics (beware :biggrin:)

This is my Brakes refurbish up to 97+ specs

I used:

- 02+ OEM calipers and brackets i bought from swerve (thanks man)
- RB 2 piece rotors in 97+ sizes on all 4 corners
- RB rear caliper brackets to use on 97+ rotors
- Project Mu 900i pads on all 4 corners
- RB black SS brake lines (Dang...forgot to take photos of these)
- TiSpeed Titanium shims for front pads
- ATE Super Blue brake fluid (will use Project Mu one on 02+ ABS conversion)
- New OEM Brackets to Knucke bolts
- New OEM Calipers to Brackets bolts

First, let's compare every angle of both the 02+ calipers (bright red) and my 91-96 ones (really dirty ones)

Here they are:


Some observations:
- You can notice why you need spacers when you use 02+ wheels with 91-96 calipers: The 91-96 brackets have the outter arch way further out. This was corrected on 97+ brackets
- If you look closely, both new and odler calipers have the same writings despite the piston size differences: "16CL 15VN"
- Because of the bigger rotor, the 97+ caliper brackets position the pad and caliper 9.5mm further out than the 91-96 ones


Using one of the rear calipers, let's see it from dirty to clean (and compare dirty vs clean):


Some observations:
- You can see the huge number of parts that are in there because of the handbrake builtin functionality :wink:
- You can see a redish faint tone on the clean parts, that is rust dust due to the long time they sat while i worked on the other parts (i took months to complete this whole work)


Hub Center dirty/clean (painted is further down):


Now let's see the crazy jig i made to paint all 4 calipers: :biggrin:


Let's see the parts (beside calipers) that i used in this project:


Here is the progressive install of parts on one front wheel:


All 4 wheels:


Final Observations:

- To clean to bare metal i used quite a few Dremel Nylon Abrasive Brush
- The bed i followed was the Stoptech one: 2 series of 10 stops from 120 to 6mph with a 5m interval between them to cool the brakes (i used the "Club Race or Full Race Pads one)
- I used high temperature black spray paint (holds up to 700C), and this paint needs bare metal to stick to (no primer). For the NSX letters i used the same paint but in silver


To finish this report, here is the famous weight saving table:

20100529_-_weight.jpg


Thanks,
Nuno
 
Last edited:
Hi,

i updated all weight tables so they now show the difference on OEM struts vs D2 coilovers (on post #7 above)

Thanks,
Nuno
 
Back
Top