

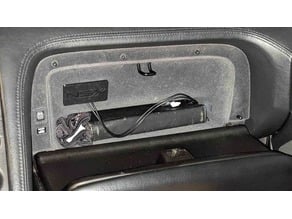
Previous alarm installer drilled fairly unsightly holes in the glovebox. A new glovebox is $350.
Now repaired with this cover, but you can see the hole from the back to imagine what it looked like:
When I installed the GROM, I ran the AUX & USB charger cables through that hole into the Glove box & covered it with this "NSX" cover plate. Perfect for charging my phone while it's in the glovebox. I ran the AUX cable in as well because that's supposed to provide better audio quality, but I can't tell the difference even with the roof on. Also, with the bluetooth connection, I can talk on the phone as well (only with very accomodating people, as it's noisy with the roof off.) Even if you don't already have large holes like this, you'll need fairly large holes to get the USB charger plug through.
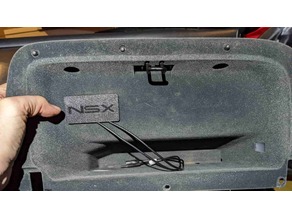
You can print the 2nd through 4th layers in a contrasting colour, but I found red was a bit too much.
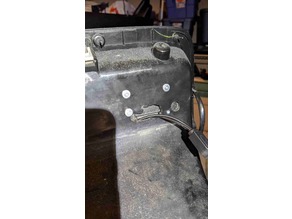
If anyone is thinking about the GROM, I must say I love it. It connected fairly easily to the back of the stereo head unit and fit perfectly oriented vertically, just to the right of the climate control unit.
You can barely see it here, on the right just above the radio:

Details and higher-res pics at https://www.thingiverse.com/thing:5261415
Screws are #4 , 1/2". designed to mount from the back as black screws can be tough to find.
Note: Print it upside-down to get a different texture between the background and the NSX logo. (plate vs. bridging strands) Upside-up will have the same surface texture but needs supports when printing. When it comes time to install, print it upside-up for about 5 layers and then stop the print to get a template for drilling the holes.
Last edited: