Mirror Removal
Removed my mirrors tonight. One of the pieces is pretty fragile so be careful when you take yours apart.
Remove one philips screw here:
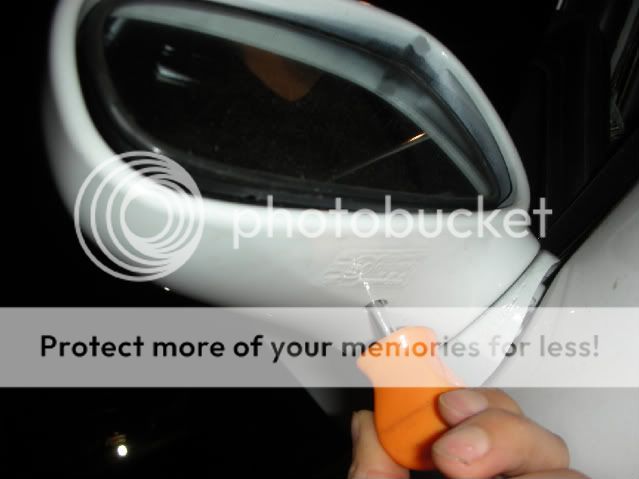
The mirror will then come out, but is still attached by a white plastic ball socket about the size of a BB. This guy is pretty fragile and cannot be purchased as a replacement part without buying the glass, so be careful with it. The best way that I found to remove it was to keep the white piece attached to the mirror. Grab the white piece at it's base and pull straight out from there.
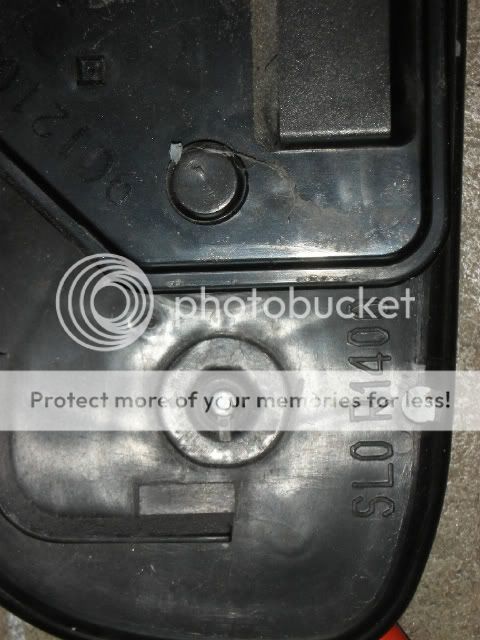
Here's a pic showing the white piece and the "ball". After looking at this some more I think it's easier and safer to remove the white piece from the housing itself rather than trying to detatch the ball side from the mirror. There is also one plug to unplug to complete removal of the mirror glass.
Reinstall
Okay, the mirrors are back and Jaima came by to help out with the install. I'll add the removal instructions here at some point.
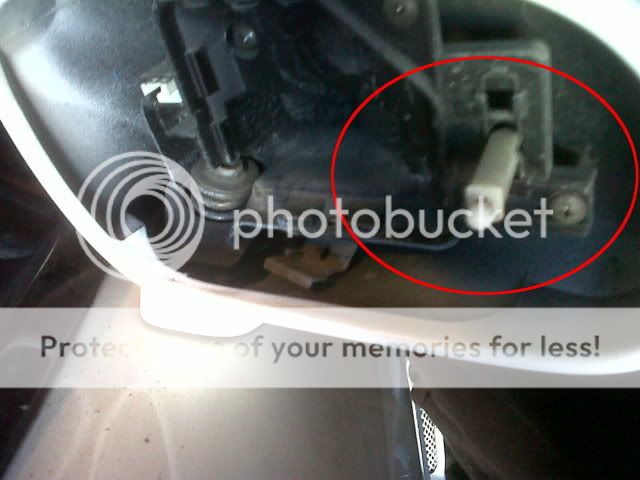
The actual glass replacement was done by Jaima beforehand so I don't have any firsthand experience with that. He did say that the motor needs to be removed from the glass casing by pulling out the square piece and then pulling out the pin in the picture below.
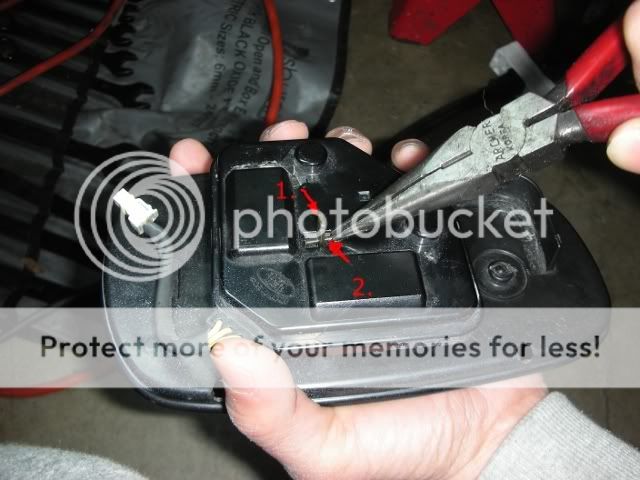
Then either boil or heat the casing and replace the glass in the same way that it's done for the S2000 (I'll find a link for this later when s2ki is back up). I've done this before on the S2000 and it was surprisingly simple. Bring water to nearly a boil (when small bubbles start to float to the top that's good enough), toss the whole mirror glass and black casing (without the motor!) into the water and it will eventually loosen up to the point where you can remove and replace the glass.
[edit] Here is that link
http://webcache.googleusercontent.c...d=3&hl=en&ct=clnk&gl=us&source=www.google.com
Step 3. outlined in the above link from the s2k forums. If you boil, it doesn't need to be actually boiling and you dip for a short period of time. Less than a minute is probably enough.
As my disclaimer, I didn't do this part of the install myself on the NSX, but it worked fine on an S2k and should be the same here. Also don't put the motor in the water. Shouldn't have to say that though I think, but one never knows...
A note from Jaima *** Some people try to apply pressure to the new glass in the center. This is the weakest part of the glass since it's convex in shape so be aware of this when you push and press on the glass ***
Next replace the motor onto the casing. If you removed the "white" pivot like I said not to in a previous post, now is the time to re-install it. Using a heat gun is the way to go here. I also put some silicone grease on the ball end, but that's really unecessary I think, just don't try to force it back in without heat.
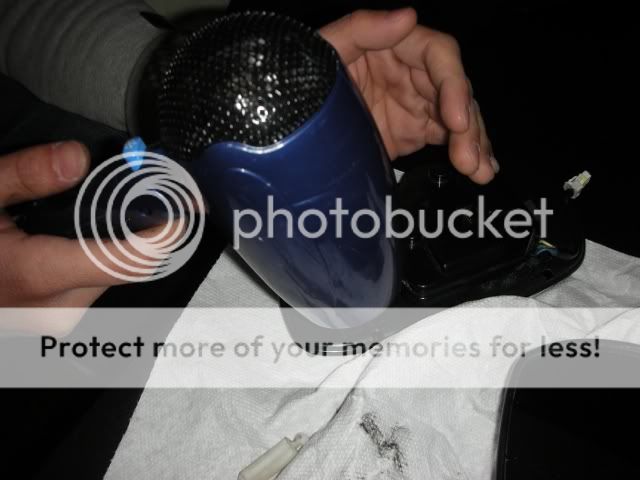
Once it's back in, it should look like this
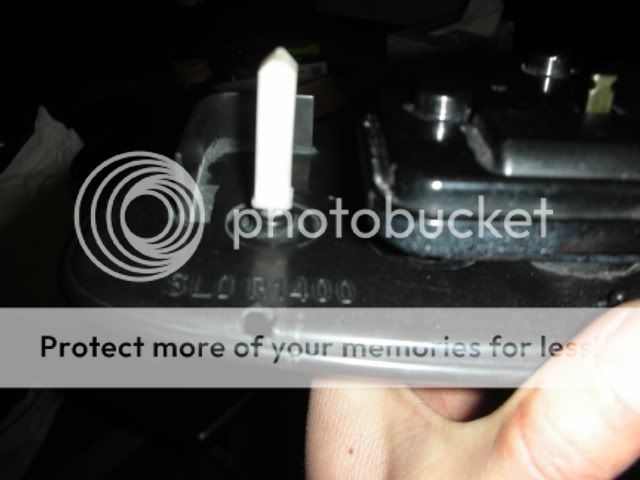
Next go back to the car and loosely replace the lower mounting plate and screw that you removed during the uninstall. Just thread the screw in enough to where you know it won't fall out and orient the plate so that it will accept the mirror and clamp it in place when the screw is tightened (ie the same way it was before you removed it in the first place). Don't mind that the white part is installed in the mirror in the picture below, yours should not be (it should be installed on the glass casing as shown above)
Now plug in the connector
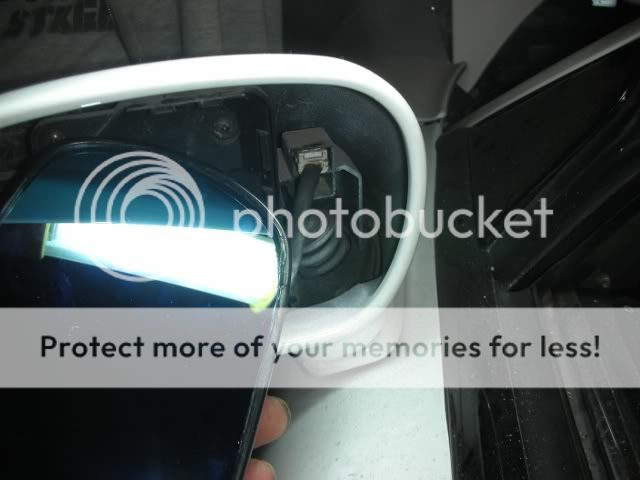
Now place the white part back into it's hole and shove that guy in. The best way to do this I found was to support the glass by it's edges at the casing and push on the casing. It doesn't need anywhere near as much force to re-install as it did to remove it
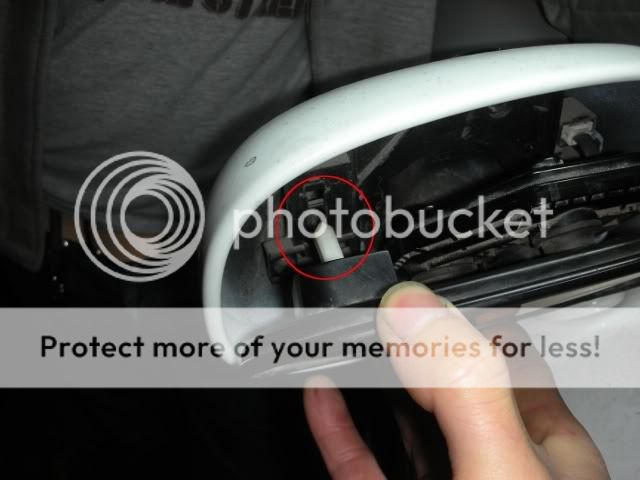
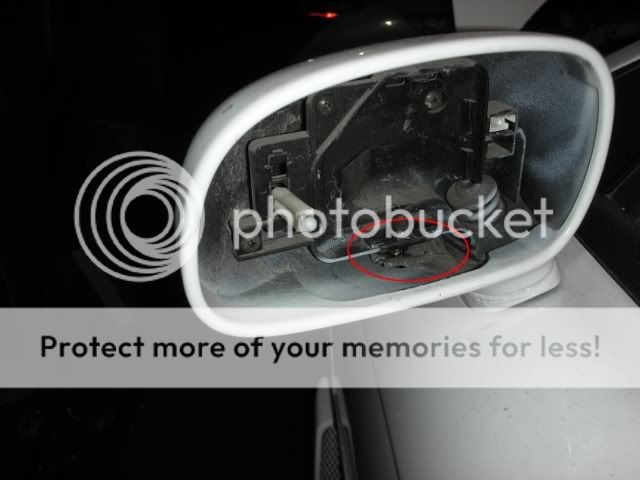
With the hard part out of the way, tuck the top of the motor on the back of the casing under these ears circled below
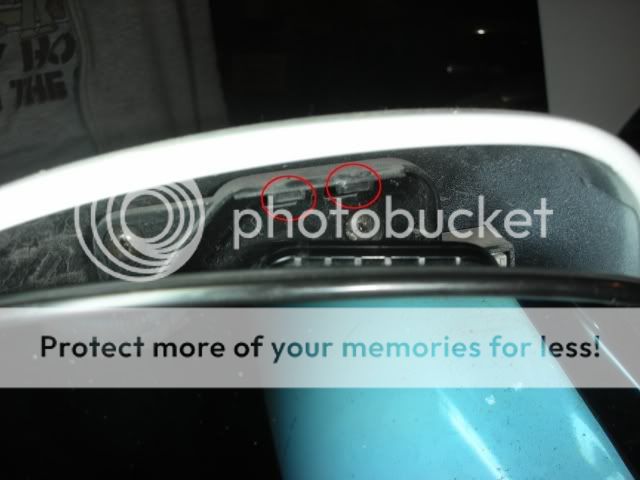
and the push the bottom of the glass into place. While holding it there, tighten the screw at the bottom. This will cinch up the plate that you oriented in a previous step and lock the glass in place
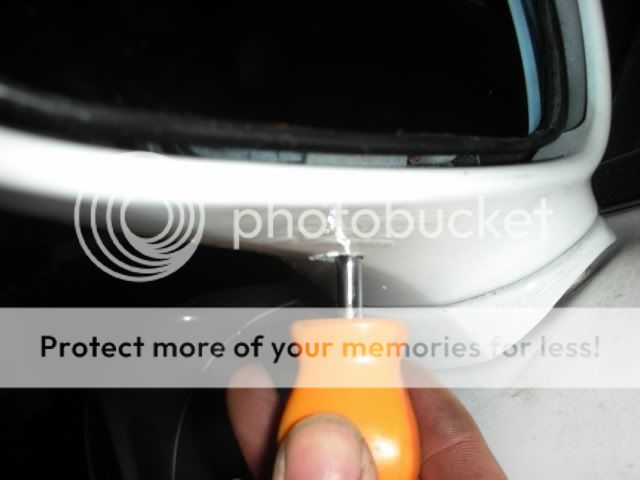
That's it! It should look something like this:
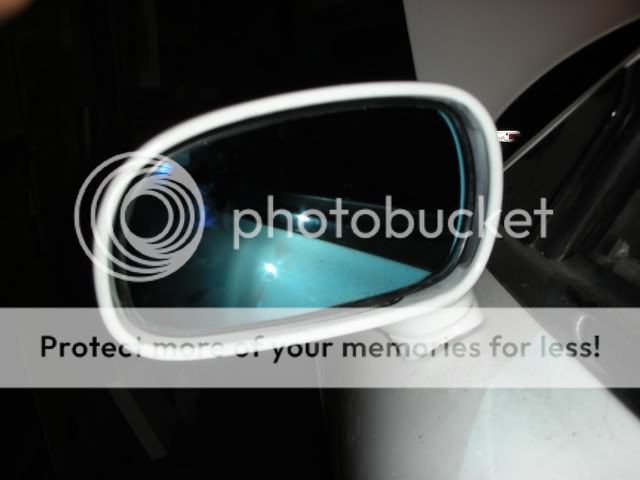
Here's a pic showing how the mirrors are made with the absolute maximum amount of curve that will still fit into the stock casing (difference between stock is between the two red lines).
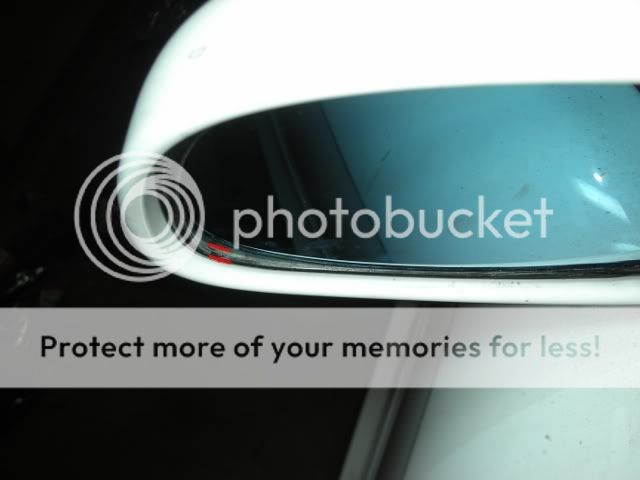
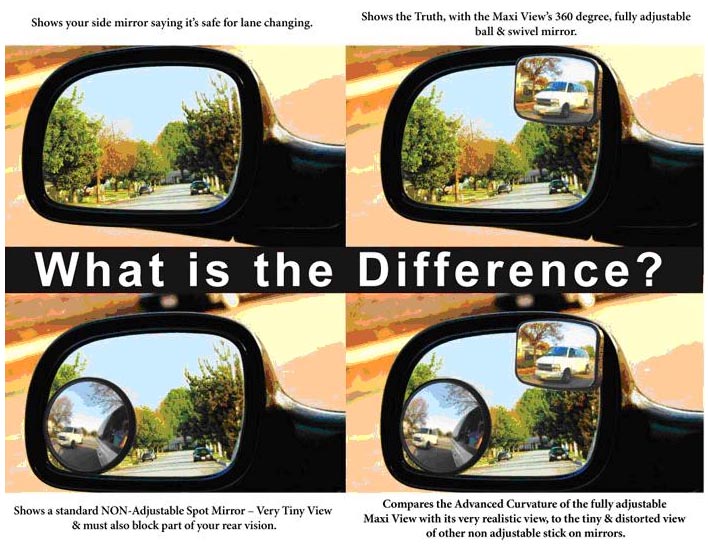
I haven't had a chance to drive around with these, but they are the same as what I have on my S2000. The first time you look in the mirror it will be slightly disorienting, but once you get used to it, goodbye blind spots! This also helps to see the curb on the passenger side too when parallel parking.
Removed my mirrors tonight. One of the pieces is pretty fragile so be careful when you take yours apart.
Remove one philips screw here:

The mirror will then come out, but is still attached by a white plastic ball socket about the size of a BB. This guy is pretty fragile and cannot be purchased as a replacement part without buying the glass, so be careful with it. The best way that I found to remove it was to keep the white piece attached to the mirror. Grab the white piece at it's base and pull straight out from there.

Here's a pic showing the white piece and the "ball". After looking at this some more I think it's easier and safer to remove the white piece from the housing itself rather than trying to detatch the ball side from the mirror. There is also one plug to unplug to complete removal of the mirror glass.

Reinstall
Okay, the mirrors are back and Jaima came by to help out with the install. I'll add the removal instructions here at some point.
The actual glass replacement was done by Jaima beforehand so I don't have any firsthand experience with that. He did say that the motor needs to be removed from the glass casing by pulling out the square piece and then pulling out the pin in the picture below.

Then either boil or heat the casing and replace the glass in the same way that it's done for the S2000 (I'll find a link for this later when s2ki is back up). I've done this before on the S2000 and it was surprisingly simple. Bring water to nearly a boil (when small bubbles start to float to the top that's good enough), toss the whole mirror glass and black casing (without the motor!) into the water and it will eventually loosen up to the point where you can remove and replace the glass.
[edit] Here is that link
http://webcache.googleusercontent.c...d=3&hl=en&ct=clnk&gl=us&source=www.google.com
Step 3. outlined in the above link from the s2k forums. If you boil, it doesn't need to be actually boiling and you dip for a short period of time. Less than a minute is probably enough.
As my disclaimer, I didn't do this part of the install myself on the NSX, but it worked fine on an S2k and should be the same here. Also don't put the motor in the water. Shouldn't have to say that though I think, but one never knows...
A note from Jaima *** Some people try to apply pressure to the new glass in the center. This is the weakest part of the glass since it's convex in shape so be aware of this when you push and press on the glass ***
Next replace the motor onto the casing. If you removed the "white" pivot like I said not to in a previous post, now is the time to re-install it. Using a heat gun is the way to go here. I also put some silicone grease on the ball end, but that's really unecessary I think, just don't try to force it back in without heat.

Once it's back in, it should look like this

Next go back to the car and loosely replace the lower mounting plate and screw that you removed during the uninstall. Just thread the screw in enough to where you know it won't fall out and orient the plate so that it will accept the mirror and clamp it in place when the screw is tightened (ie the same way it was before you removed it in the first place). Don't mind that the white part is installed in the mirror in the picture below, yours should not be (it should be installed on the glass casing as shown above)

Now plug in the connector

Now place the white part back into it's hole and shove that guy in. The best way to do this I found was to support the glass by it's edges at the casing and push on the casing. It doesn't need anywhere near as much force to re-install as it did to remove it

With the hard part out of the way, tuck the top of the motor on the back of the casing under these ears circled below

and the push the bottom of the glass into place. While holding it there, tighten the screw at the bottom. This will cinch up the plate that you oriented in a previous step and lock the glass in place

That's it! It should look something like this:

Here's a pic showing how the mirrors are made with the absolute maximum amount of curve that will still fit into the stock casing (difference between stock is between the two red lines).

I haven't had a chance to drive around with these, but they are the same as what I have on my S2000. The first time you look in the mirror it will be slightly disorienting, but once you get used to it, goodbye blind spots! This also helps to see the curb on the passenger side too when parallel parking.
Last edited:


