Be careful and hopefully you have better luck than when I did this. 
You are using an out of date browser. It may not display this or other websites correctly.
You should upgrade or use an alternative browser.
You should upgrade or use an alternative browser.
DIY: Gauge Cluster/Tripmeter Removal
- Thread starter jbum
- Start date
- Joined
- 27 June 2003
- Messages
- 4,618
Be careful and hopefully you have better luck than when I did this.
uh oh what did you do?
Replacing the capacitors would also be a good idea when you have it apart.
This was helpful, thanks!
Any way we can get the pictures updated? Photobucket may not host them anymore. All I see are grainy, out-of-focus pics with the photobucket watermark.
Any way we can get the pictures updated? Photobucket may not host them anymore. All I see are grainy, out-of-focus pics with the photobucket watermark.
I'll need to find a host for the pictures. May take a few days before I get this updated.
I’m happy to host them if you PM me
Thanks for offering to host the pictures. I was able to move them but I'm now trying to figure out how to edit my original post to update the picture references.
anyone know how to do that?
anyone know how to do that?
Does anyone know how to get a hold of the moderator/admin? I PM'ed RSO 34 (listed as a moderator) but haven't heard back. I have the images available now but need to edit the post to reference them (the post is locked).
FWIW, I just did this in a right hand drive NSX and it was slightly easier than the 1991 Acura FSM lets on though I did have a removable steering wheel. There are fewer switches to unplug from the lower panel on a Japanese car and the two main 30 pin connectors going into the cluster itself came apart fairly easily with the push clips being accessible.
FSM pages 23-128 and 23-129
FSM pages 23-128 and 23-129
Folks - We're back in business! Thanks to RSO34 for helping me update the images.
Thanks- now i need 2 aspirin!

Here is my contribution to the forum. I recently had to replace my tripmeter which was stuck clicking. Hopefully the step-by-step pictures will help others with their projects.
This was on annoying task. The NSX is great to sit in when driving but not great at all for crouching down around the foot well.
- First remove the foot well panel
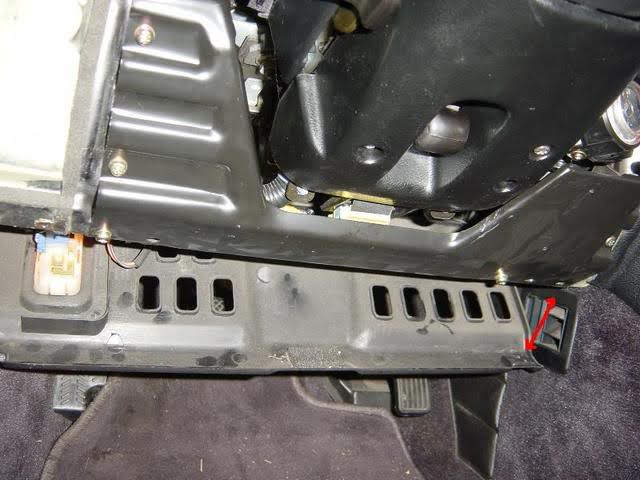
- Remove the dashboard lower center panel. After removing the screw near the foot well, you have to pull the top portion out. It's clipped in at the top so don't twist or bend too much.
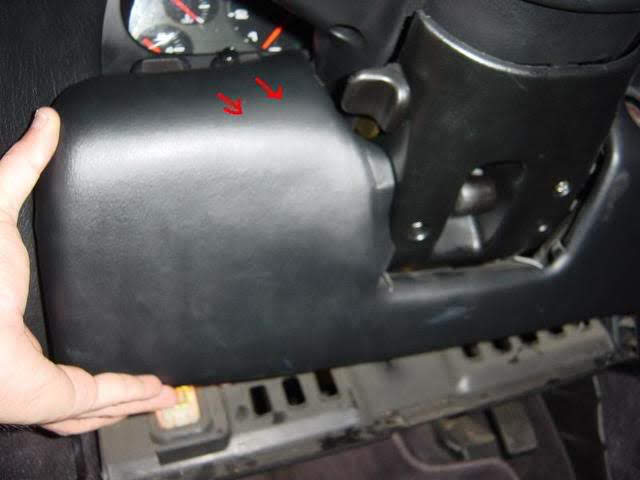
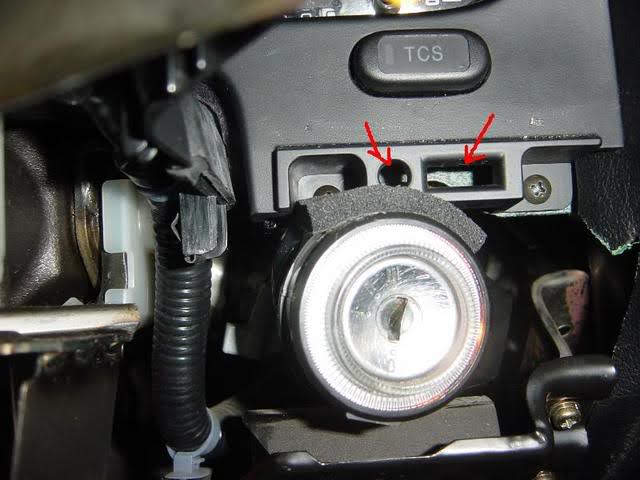
- Now you have to remove the tilt cover. There are three screws I believe. Once you remove them, you have to jiggle it out and lower it as much as you can to make room for later.
If you can remove the steel panel screws (red arrows pointing), you can have an easier time disconnecting the electrical connectors later on. I tried to remove mine but they wouldn't budge and I almost stripped one.
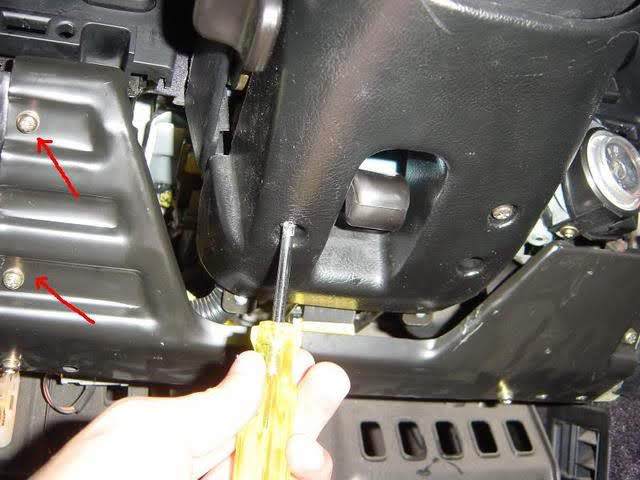
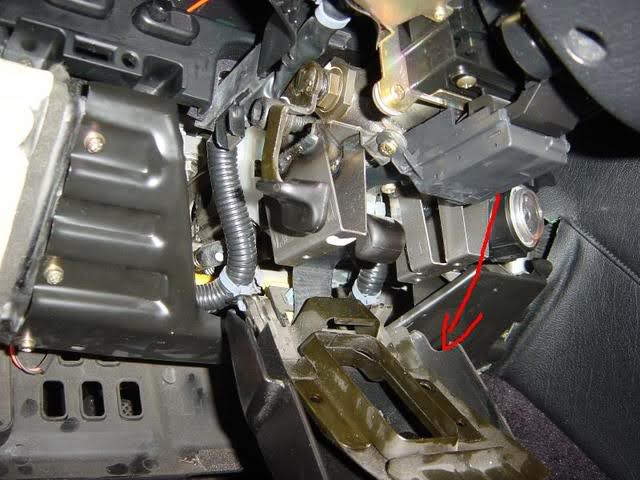
- Next is the lower steering column cover. The manual said that both the upper and lower covers should be removed. Getting the upper cover off makes it easier to remove the gauge cluster. However, after getting the lower cover off, I was unable to get to the screw holding on to the upper cover. For me it was in an impossible position.
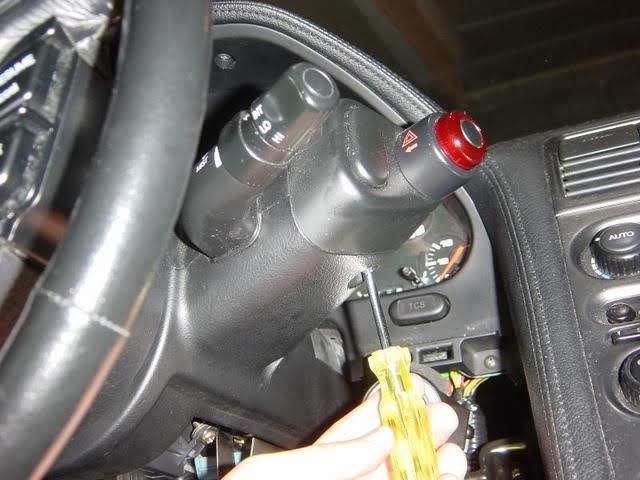
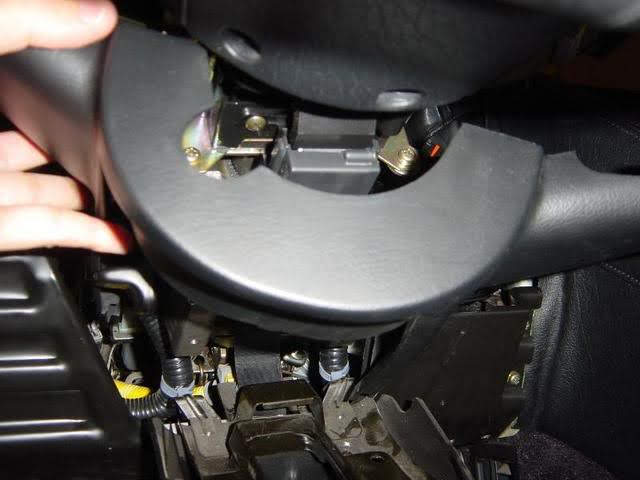
- I moved on to the cluster panel frame. You need to remove all the screws, including the two at the top.
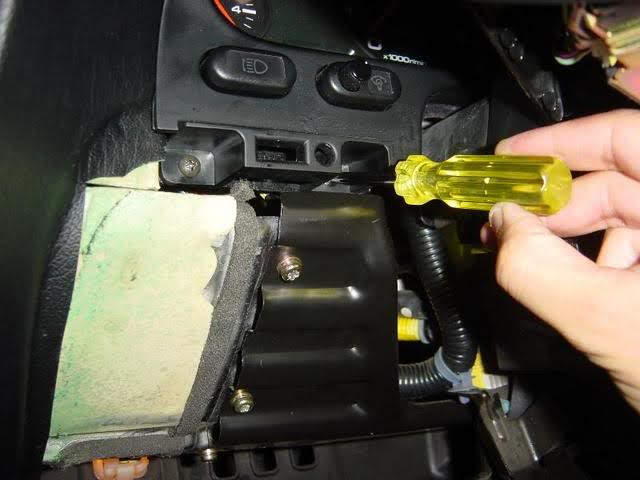
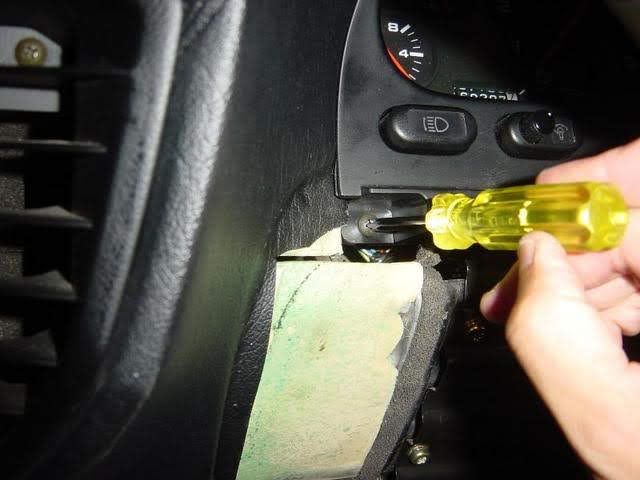
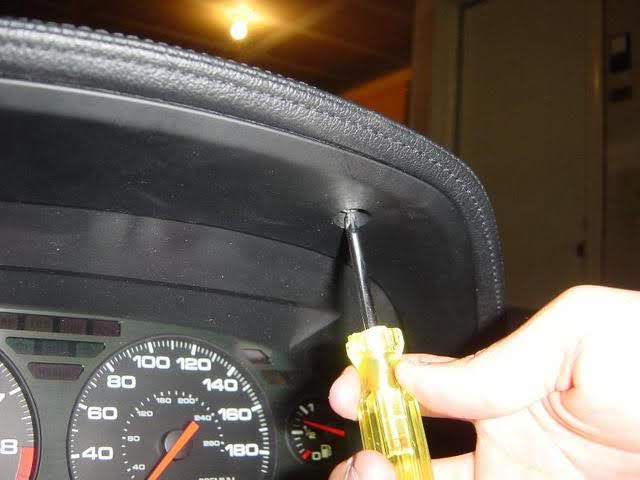
- Even when you have all the screws off, you still can't remove the frame. The two bottom ends are connected with the headlight/interior light and tcs connectors.
If you were able to remove the steel panel near the foot well, you might have an easier time getting to these connectors. I wasn't so I had to wriggle my fingers in as much as I could. This part took forever as I didn't know where the connectors were at first and how they were attached.
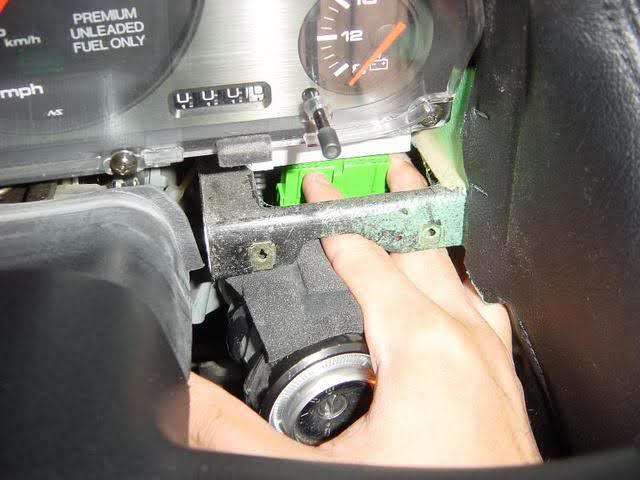
The connectors have a little tab that you need to press to release it. Hopefully this little tid bit will help you waste less time than I did.
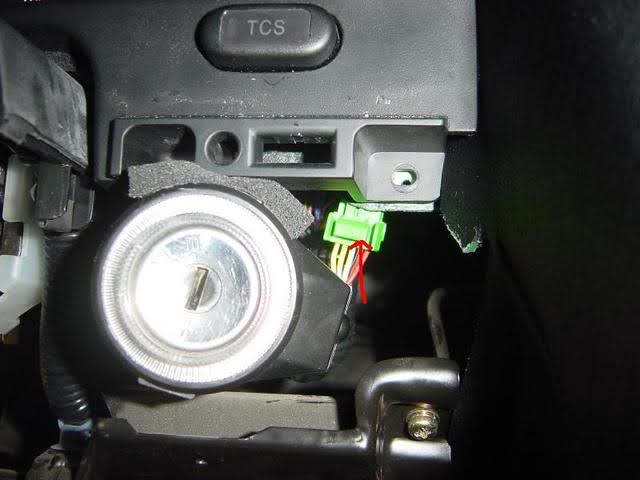
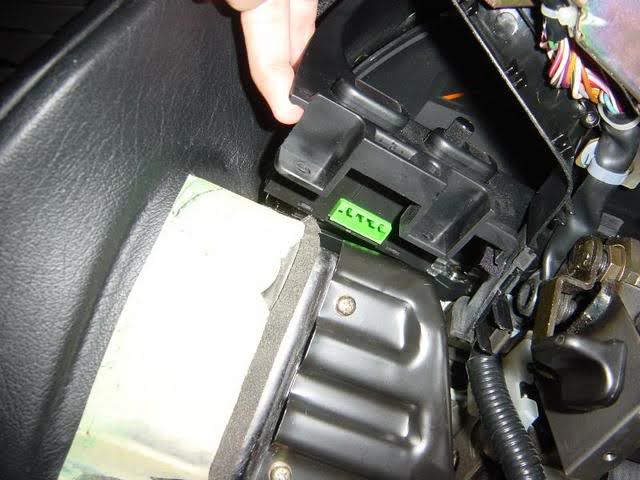
- Now the panel frame can come out. If you have trouble, you may want to use the telescopic and tilt levers to move the steering column out of the way.
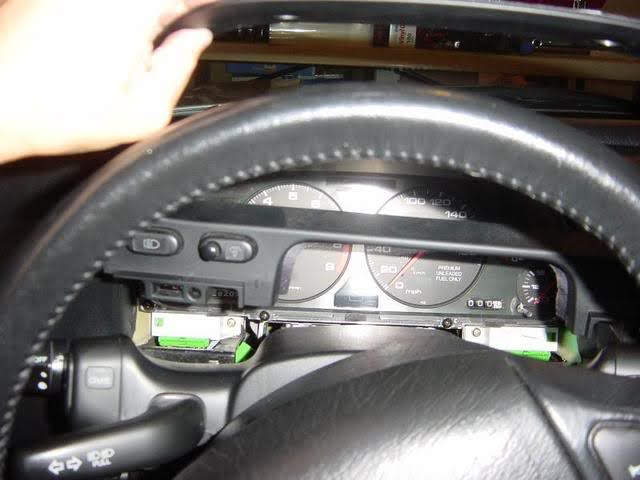
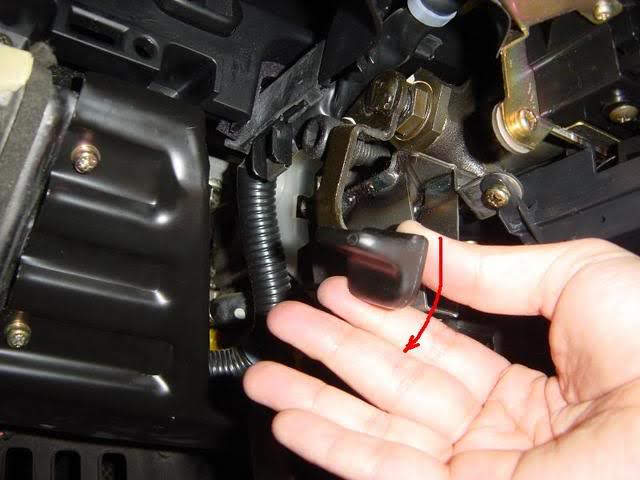
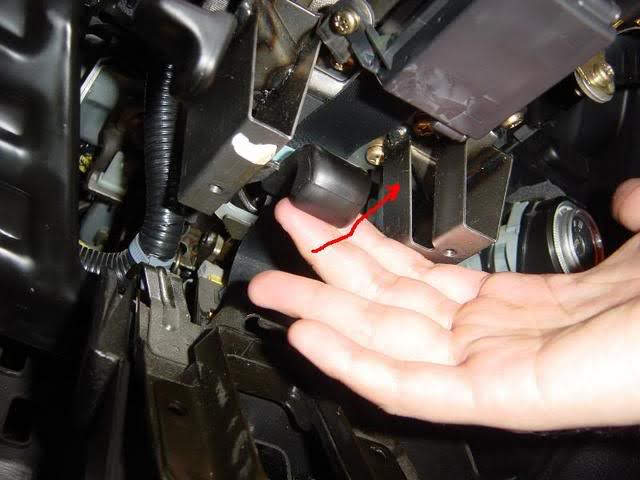
- You're almost there now. The gauge cluster is pretty easy to remove. There are several screws that hold it down.
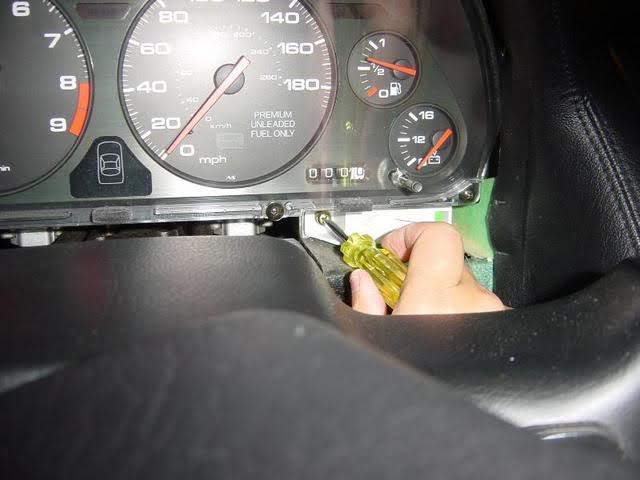
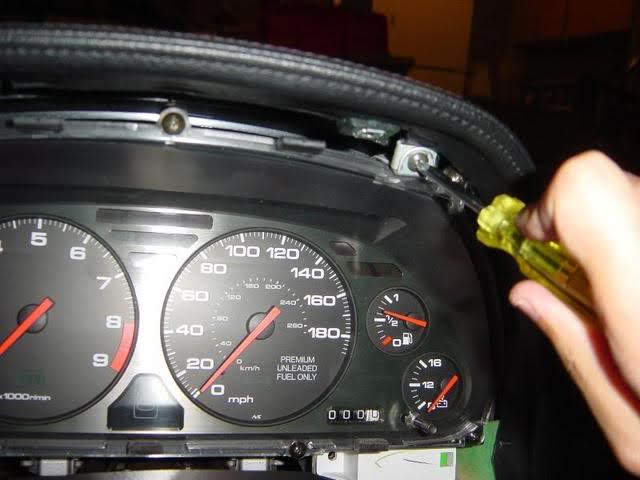
- Be careful not to lose these rubber protectors.
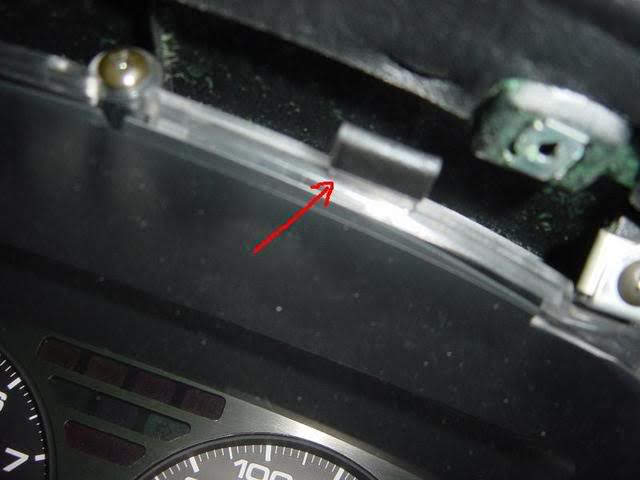
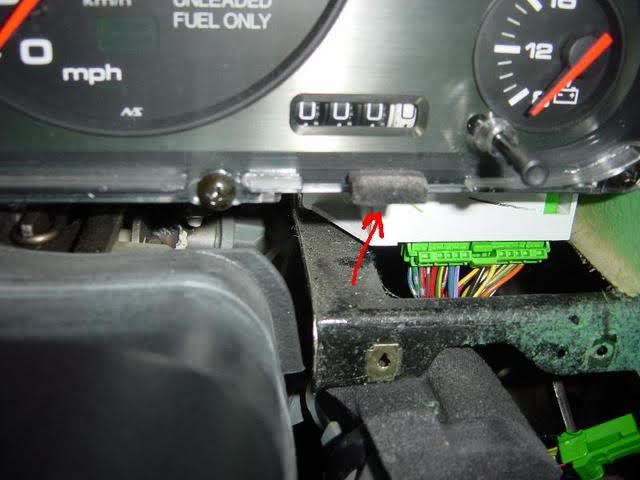
- Similar to the panel frame, the gauge cluster assembly will not come out because it has two 30P connectors at the two ends on the bottom.
Again, I had very little space to get in there. These connectors also have a tab that let you release them.
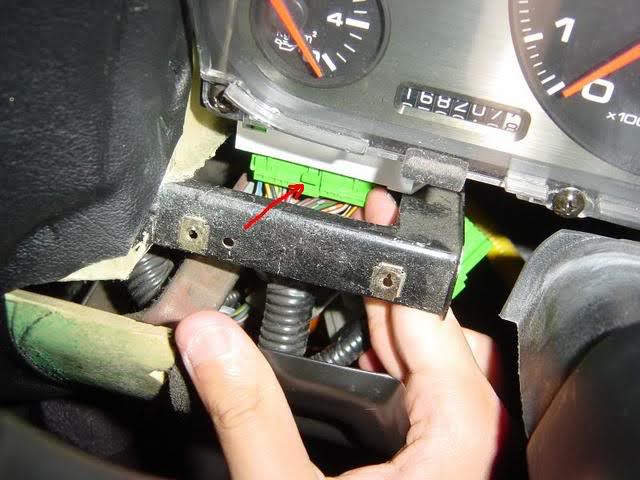
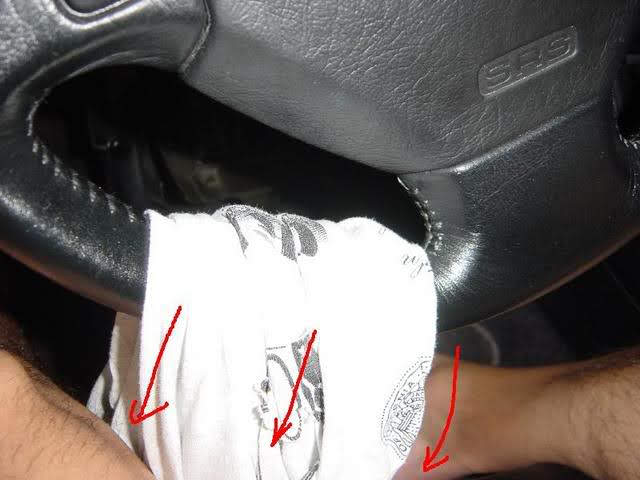
- Now, you're almost ready. To make the most room, I pulled out the steering wheel using the telescopic lever. To get it to tilt in the lowest angle possible, I decided to use one of my t-shirts as a strap to keep the steering wheel pulled down as low as possible. When you use the tilt lever to tilt the column down, the column clicks into different position. The last possible clicked in position doesn't offer enough room for the cluster assembly to come out. Fortunately, there is a bit more movement "after" the last clicked position, but you hav e to hold it down yourself.
- Place a towel or something soft, but not too thick, on top of the upper steering column cover. Otherwise, you may end up scratching the clear plastic gauge cover.
Gently, pull out the cluster assembly. You will probably need to flex the top of the dash and wiggle the cluster out. I chose to pull it out towards the left.
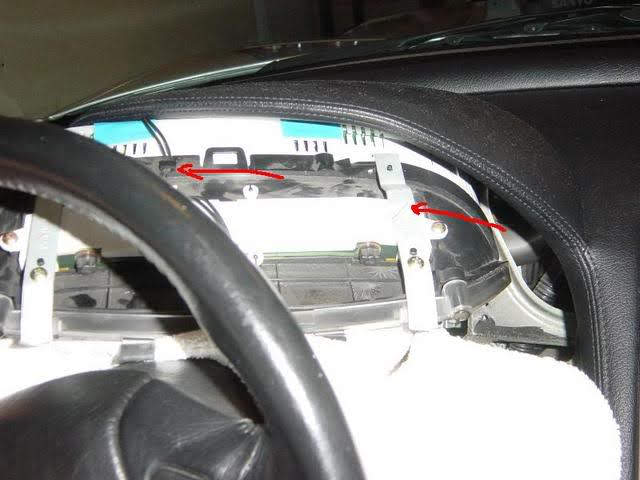
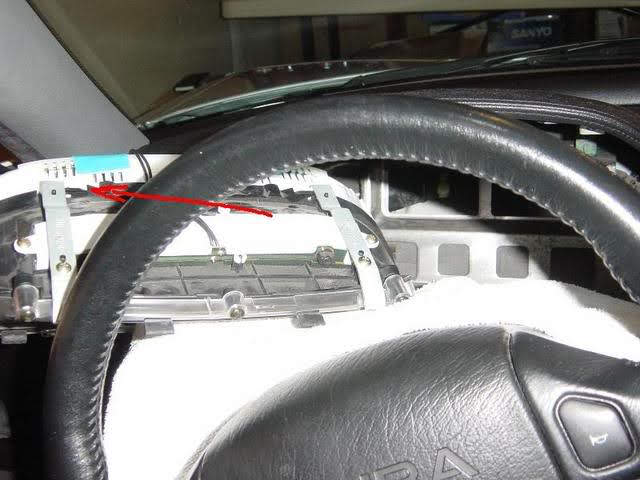
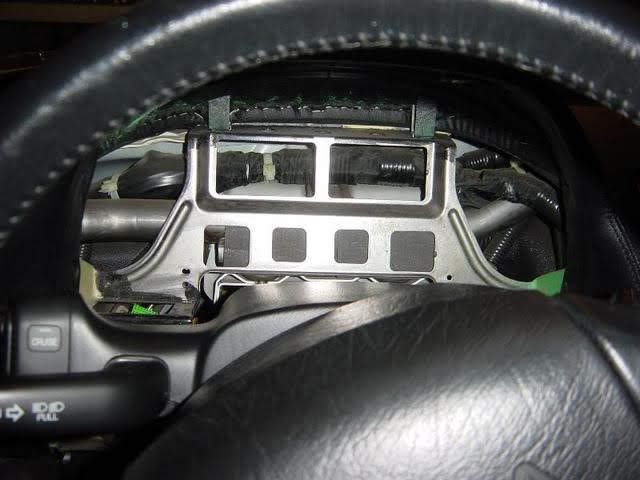
- At last, the assembly is now out but I'm exhausted after being hunched over for a long time.
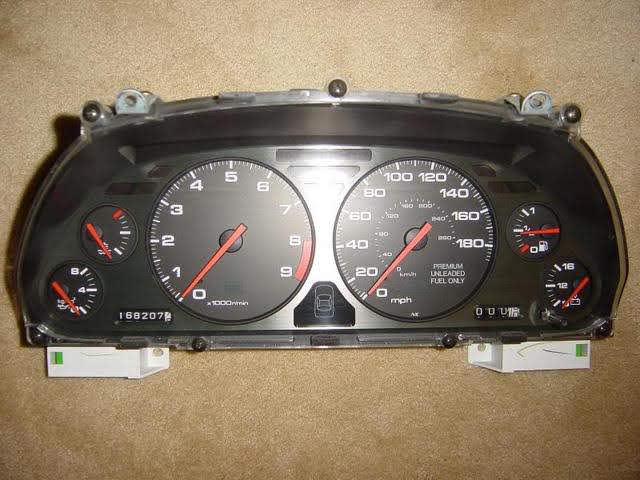
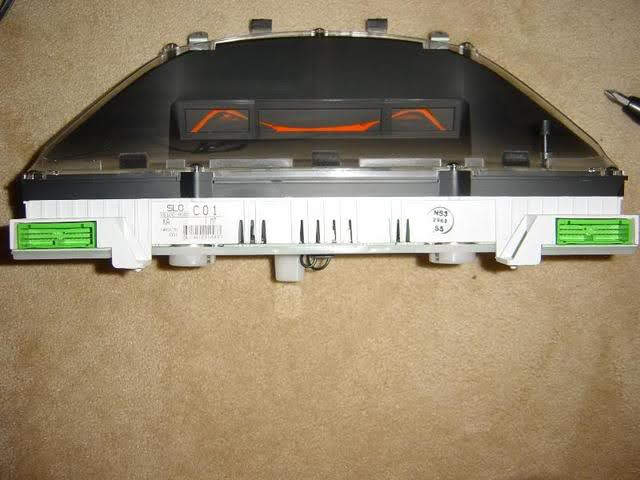
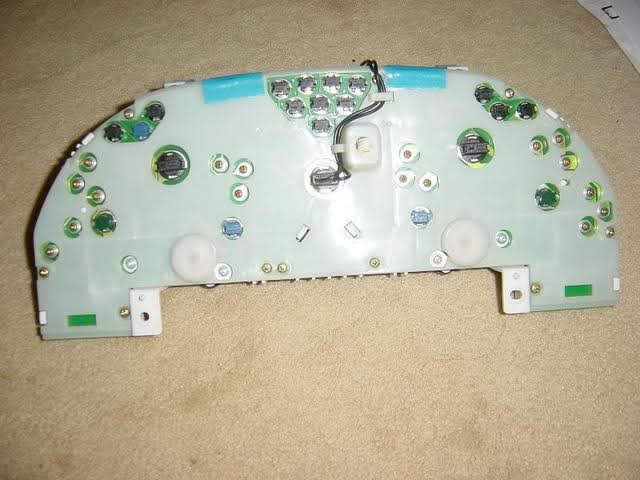
- Now start out by removing the background light and removing the back panel screws.
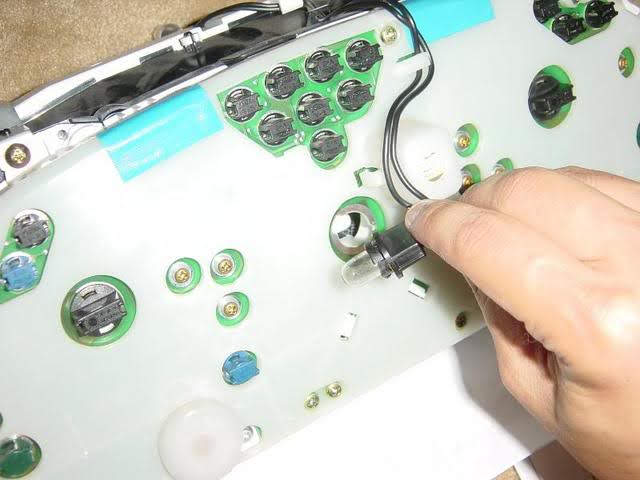
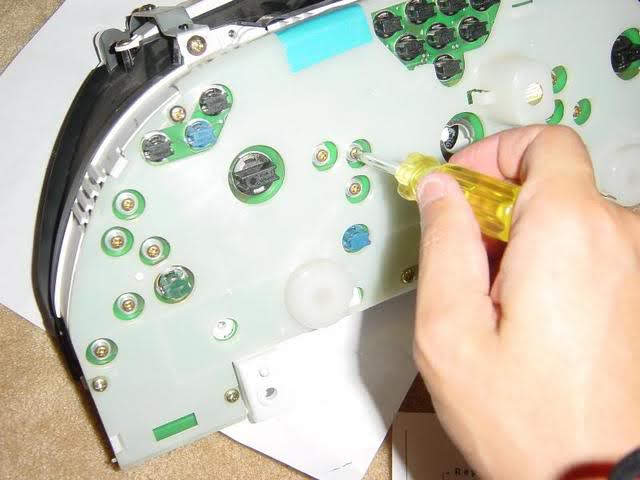

- The tripmeter is on the left side of the assembly when looking from the back. The circuit board on the back is actually split into two parts. Before removing the left circuit board, you have to remove a connector that's holding the circuit board.
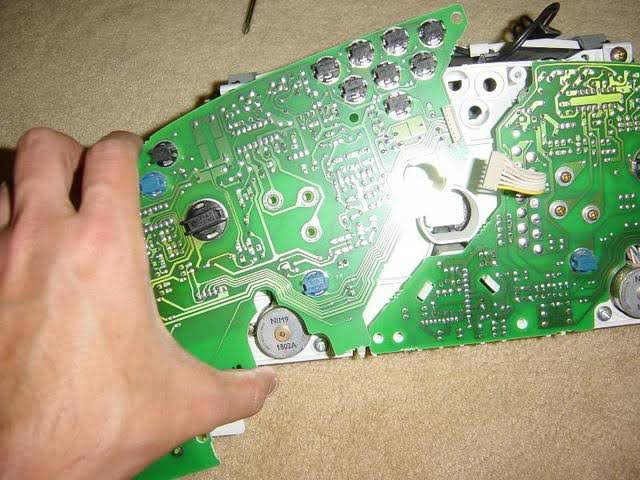
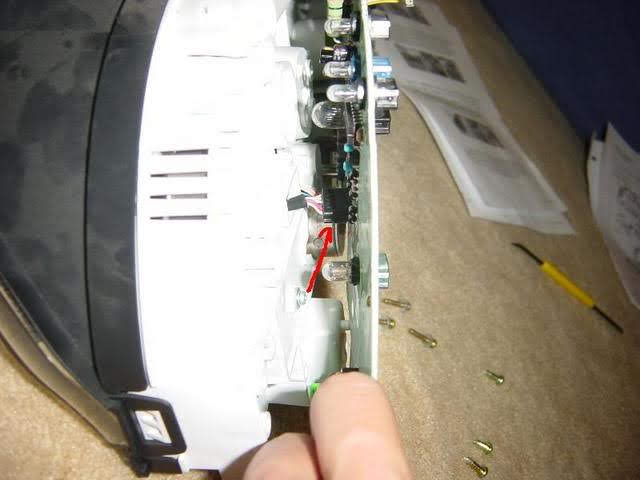
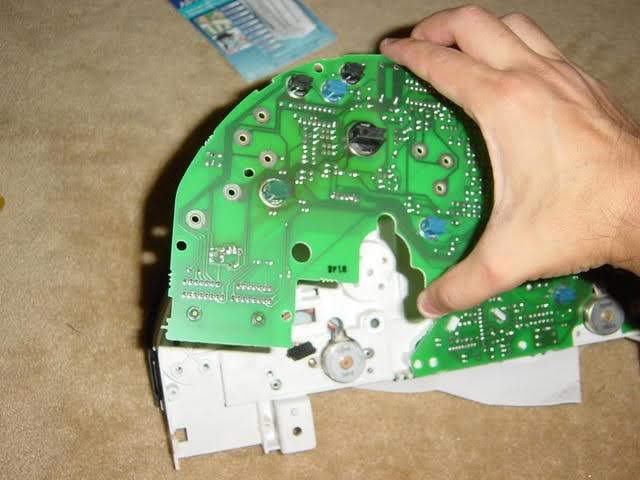
- Cool! Now to get to the tripmeter you have to take apart the assembly. You need to remove the back assembly housing (light colored plastic piece).
First remove the bracket screws.
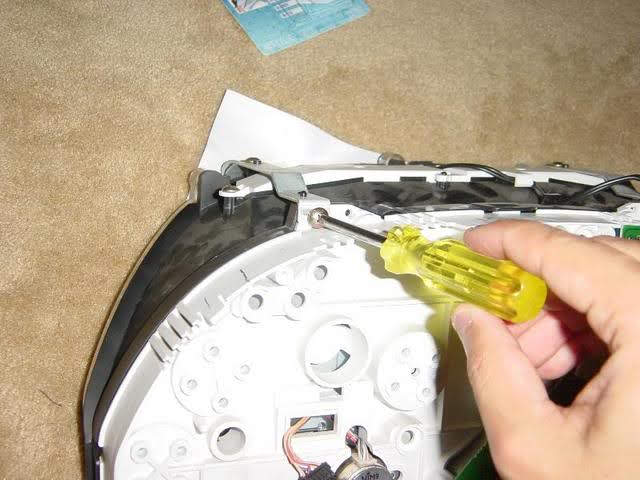
- Now, flip to the front and remove the bottom screws. Also, remember to remove the rubber tip on the tripmeter.
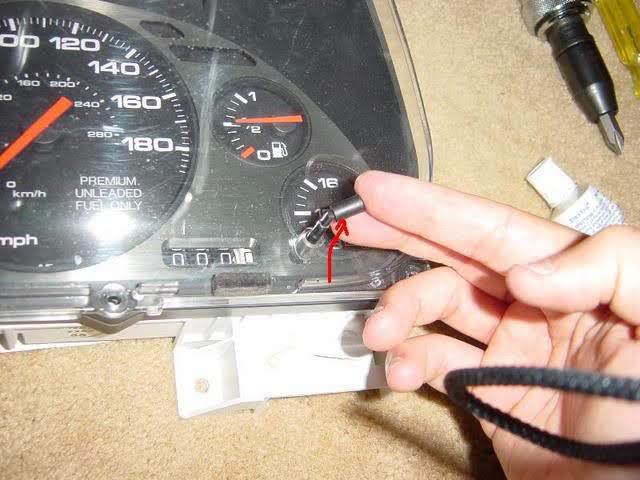
- Finish it up by moving aside the brackets and remove the housing. Take care to place the assembly on its back when remove the housing. Otherwise the cluster components may fall out (and break?).
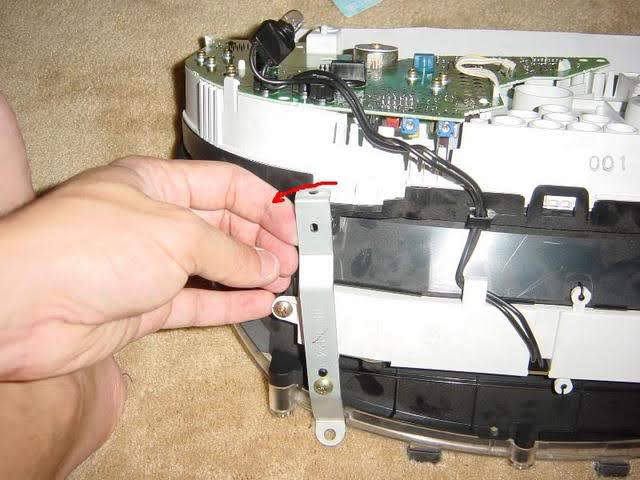
- All you have to do now is pull out the speedometer, fuel/voltage gauge, and tripmeter. There you have it!!!
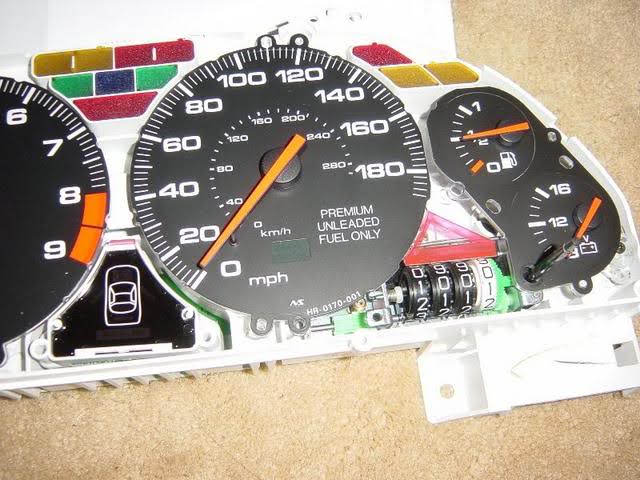
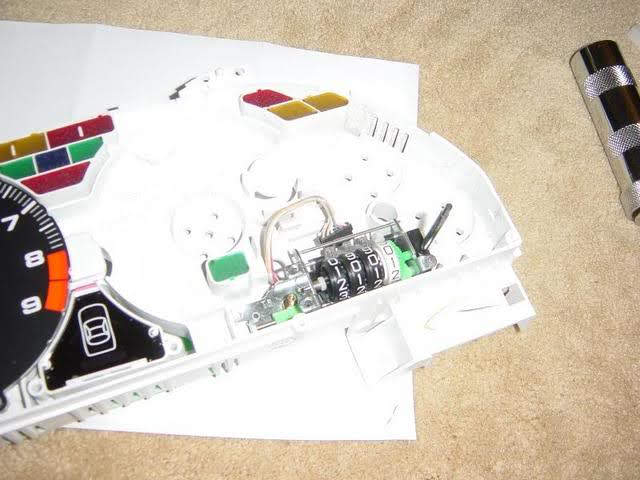
- Here is my stuck tripmeter and the new replacement.
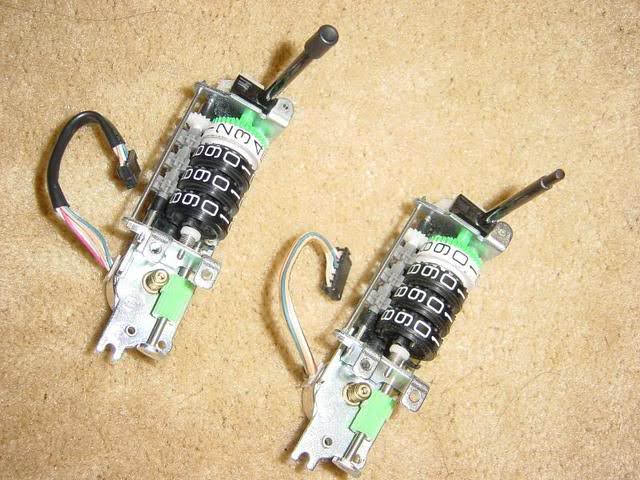
Just follow these steps in reverse to put it back. Make sure to keep track of all the screws and where they go. It's really easy to forget what goes where.
Please take care not to over-tighten the screws that go on the circuit board. They attach to the posts inside the speedometer/voltmeter/fuel meter. Over turning the screws (like I did) can rip the tiny hair-thin wires that make up the coil in the meters. My speedometer died because one of the wire were disconnected and I had to redo everything and solder the wires.
Hope you find this helpful.
Thanks.
Where did you buy your new replacement 'trip meter' from? Can you please provide a part number, if possible? Thanks
Trip- and odo- meters are only available with the purchase of a new tach or speedo, US$500.
The stepper motor for a the meters can be repaired and replaced with other Honda clusters of that era.
Post some pictures of the trip meter as it might be helpful to provide a solution.
I have a bunch of Honda clusters if you need parts.
The stepper motor for a the meters can be repaired and replaced with other Honda clusters of that era.
Post some pictures of the trip meter as it might be helpful to provide a solution.
I have a bunch of Honda clusters if you need parts.
Similar threads
- Replies
- 8
- Views
- 321
- Replies
- 4
- Views
- 154
- Replies
- 29
- Views
- 605


