• Protip: Profile posts are public! Use Conversations to message other members privately. Everyone can see the content of a profile post.

Down Under Trackday NSX

Spent more than that. The rest of the stuff to go with it was at least another $ 1000 USD but for us it's worth it. The car is way too low when run on the track to be able to easily get it off the ground....... having the airjacks means we can have the car off the ground in 10 seconds which makes a big difference with the amount of gear we need to take too and from the track, but also time wise it means we can get the car off the ground, make and change and get back out in a few minutes........ otherwise it would take at least 4 small ramps to drive the car up on first and 2 trolley jacks and even then you'd have to go side by side....... this way it's a no brainer.

The Palestini jacks are really well priced relative to others.......... doesn't make sense for road cars, but for a track car it's already paid itself back in time saved.

Just to make sure I I understand, you've spent over $11,000 to do this. $2500 a piece for 4 air jacks and $1000 for other parts plus installation time. I've seen other jacks for around $500 each why are these $2500 each?
 
$2500 USD is about the price for the kit of 4 with the push fittings and piping as well as the usual "wand" fitting that you see in Indycar and the like when an mechanic comes up to the car and pushes a high pressure line onto the car and up it goes. I also paid a little bit more and go the safety stands which are definitely worth having so they can be locked when working under it.

- - - Updated - - -

yep, that exhaust is definitely pure SEX :biggrin:

fast and rather loud I expect !

It's still loud, but quieter than it was before !! And much deeper sound.
 
Last edited:
do you have a link to the stands? I must be reading the website wrong. I think it was $2500/4 not one.
 
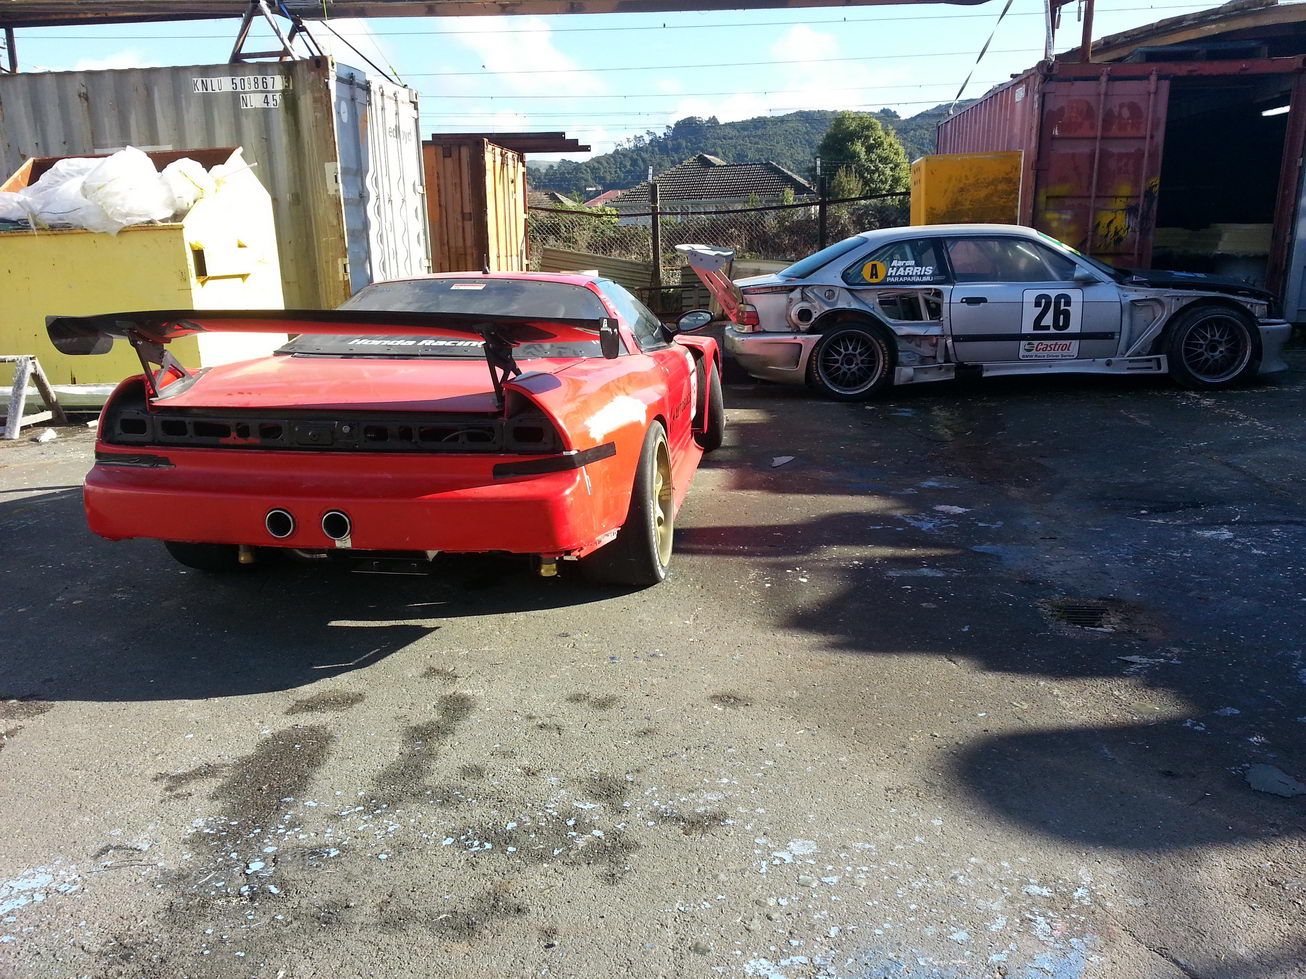
I love how your pictures always look like screen shots from some movie called "fast and furious kiwi's" but I can never find the actual movie...

This is the scene where Paul Fraser was helping Cock Diesel prep the cars for trasportation in the shipping containers for the midnight "Stolen Iphone5 down under" run from sydney to melborne... flash flare bombs will be installed under the exterior panels of the BMW to allow Paul Fraser an insurance policy it they get a tail on them... we hope he remembers to download google maps on his iphone... apple maps could lead them down roads that dont exsist and if they dont make it there first they will get stuck with prepaid flip phones without app download capabilities

The team needs to install special kiwi style brake lights that only be seen by the teams other cars so they can navigate with each other at night without blowing thier cover with traditional brake lights

They really need to get the phone deal done cause they need the cash because they are behind on the Mclareon F1 build and its impairative they make it to the race in that car or they will have no chance to compete to win the golden kiwi which sets up the next "fast and furious kiwi's" called "fast and furious kiwi's 2"

look for it on netflix
 
^^ holy crap. Back from the dead. LOL
 
He's baaaaack, lookout forum flame suit time.......
Fast & Furious too slow to be in a Kiwi movie, Ross you should know that
 
Crack smoker !! :tongue:

No one can ever accuse you of having no imagination mate !!

Ross is smoking hot A$$ crack!:tongue:
 
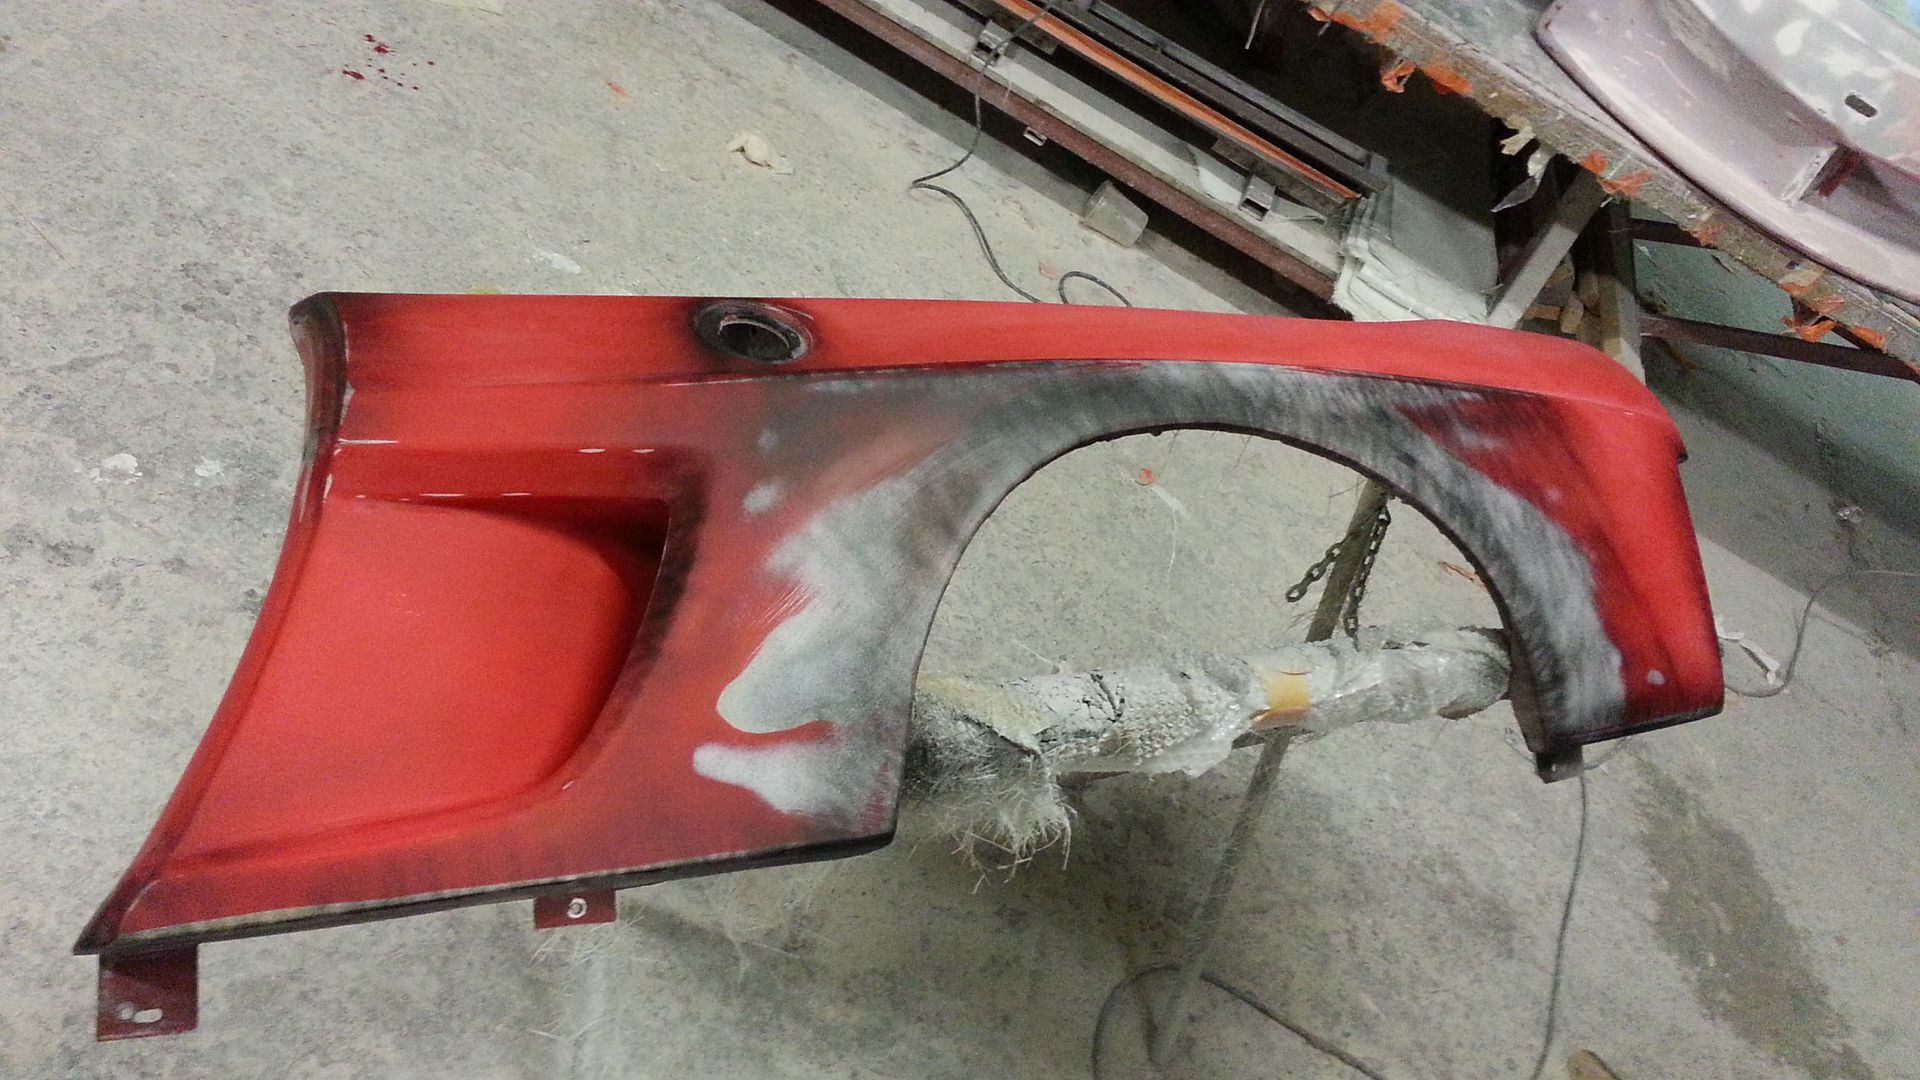
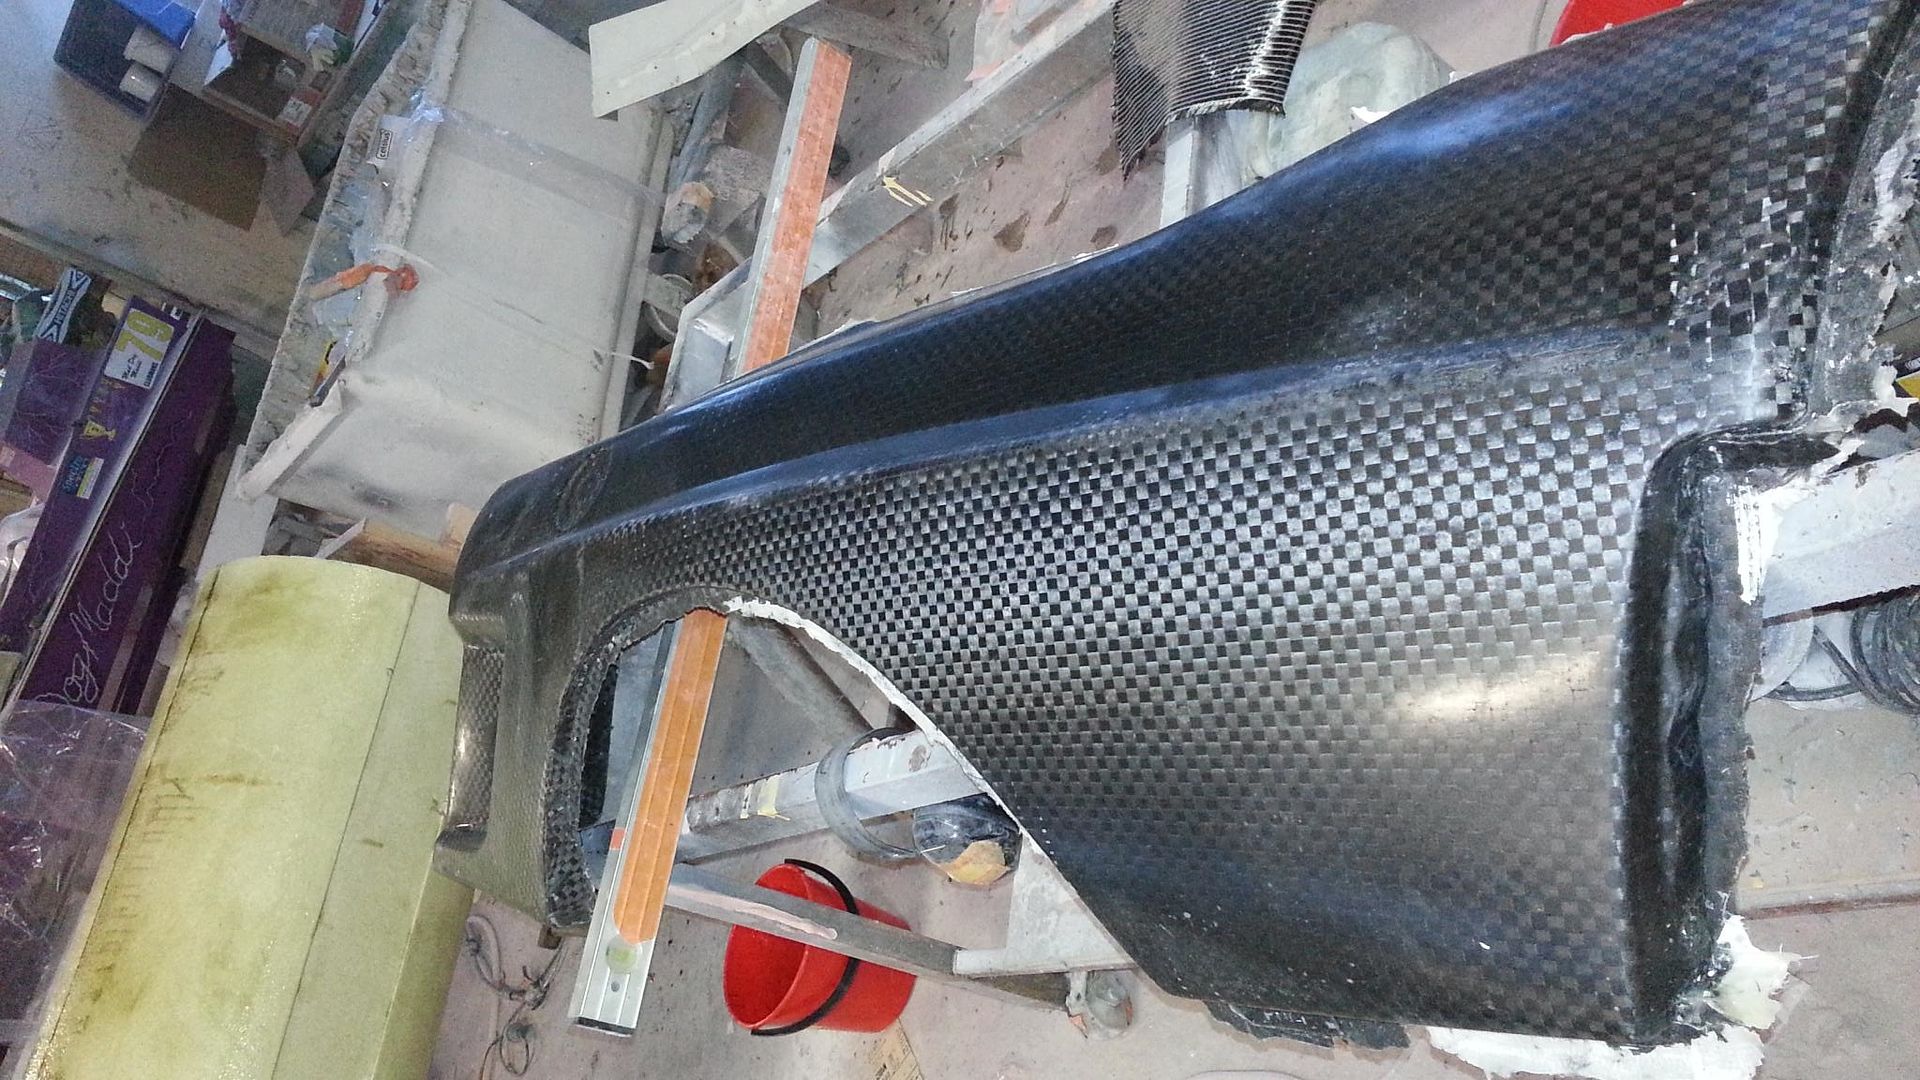
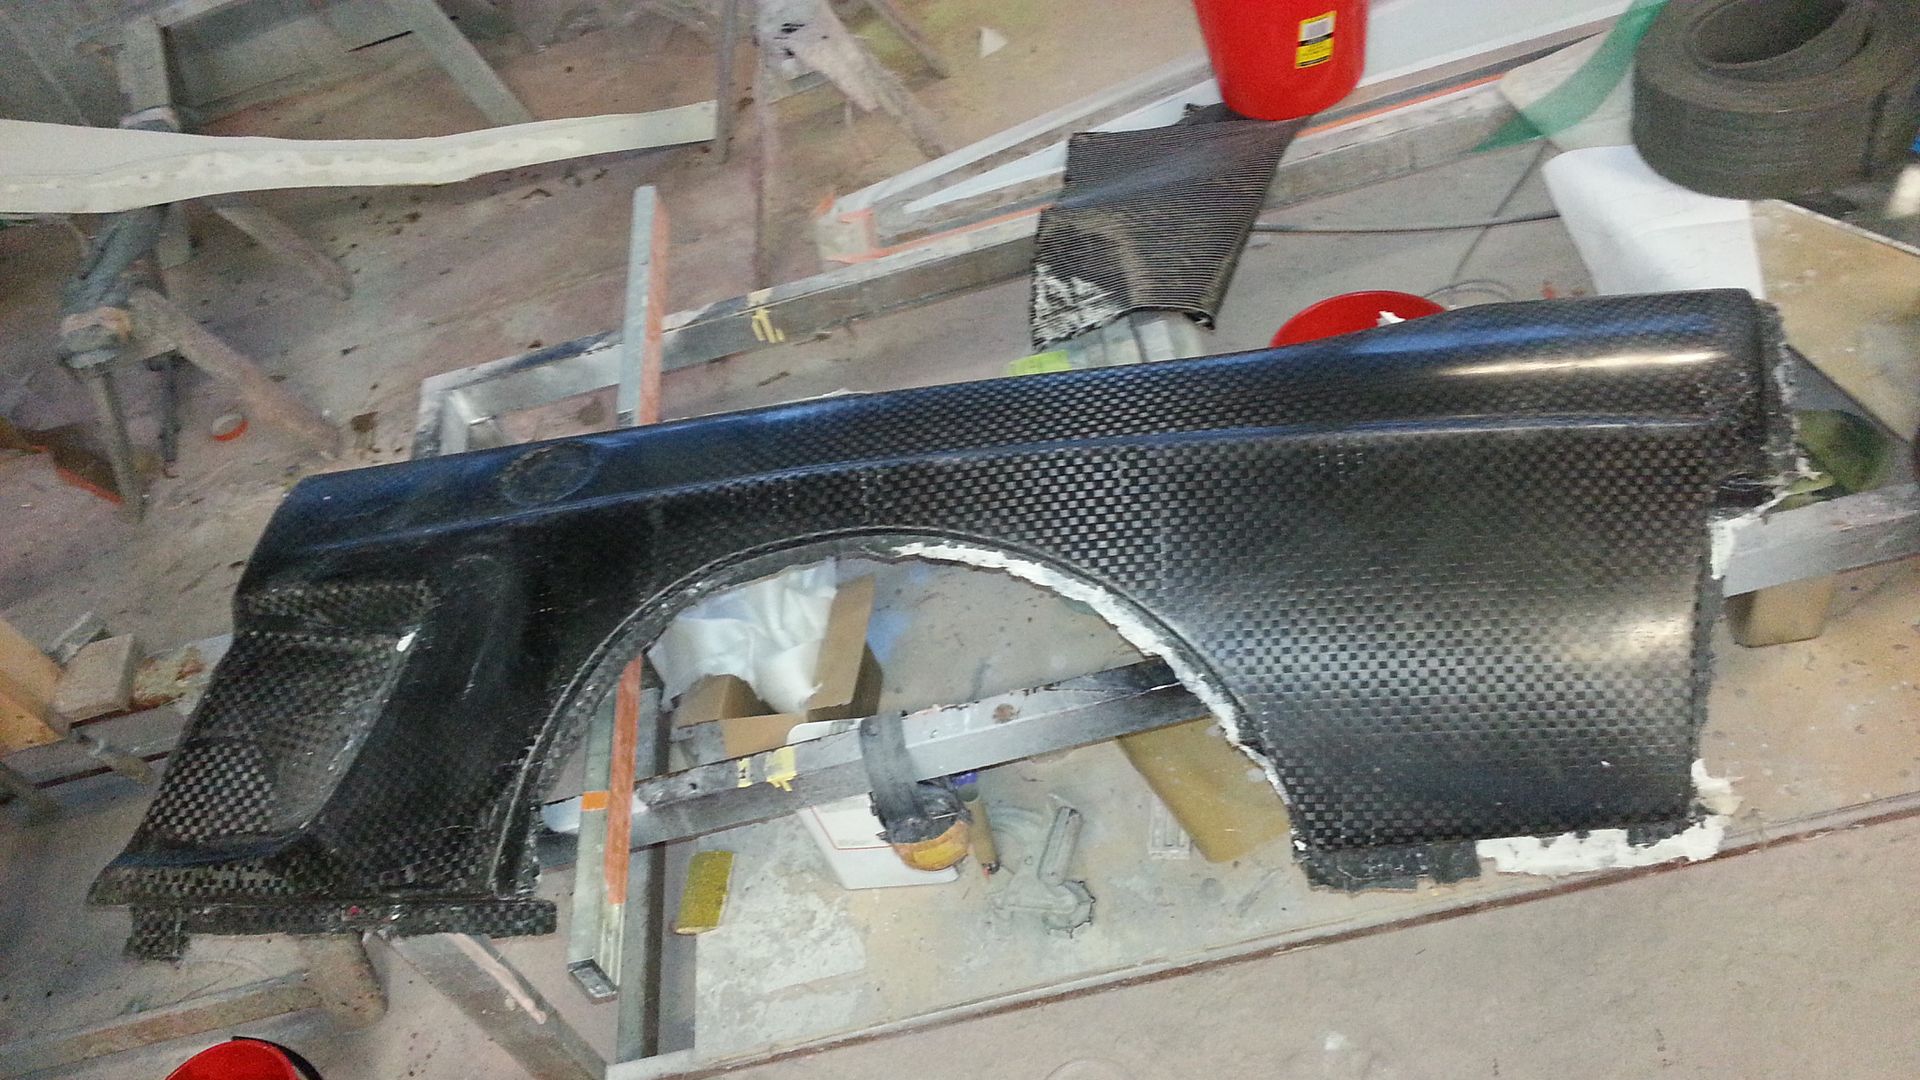
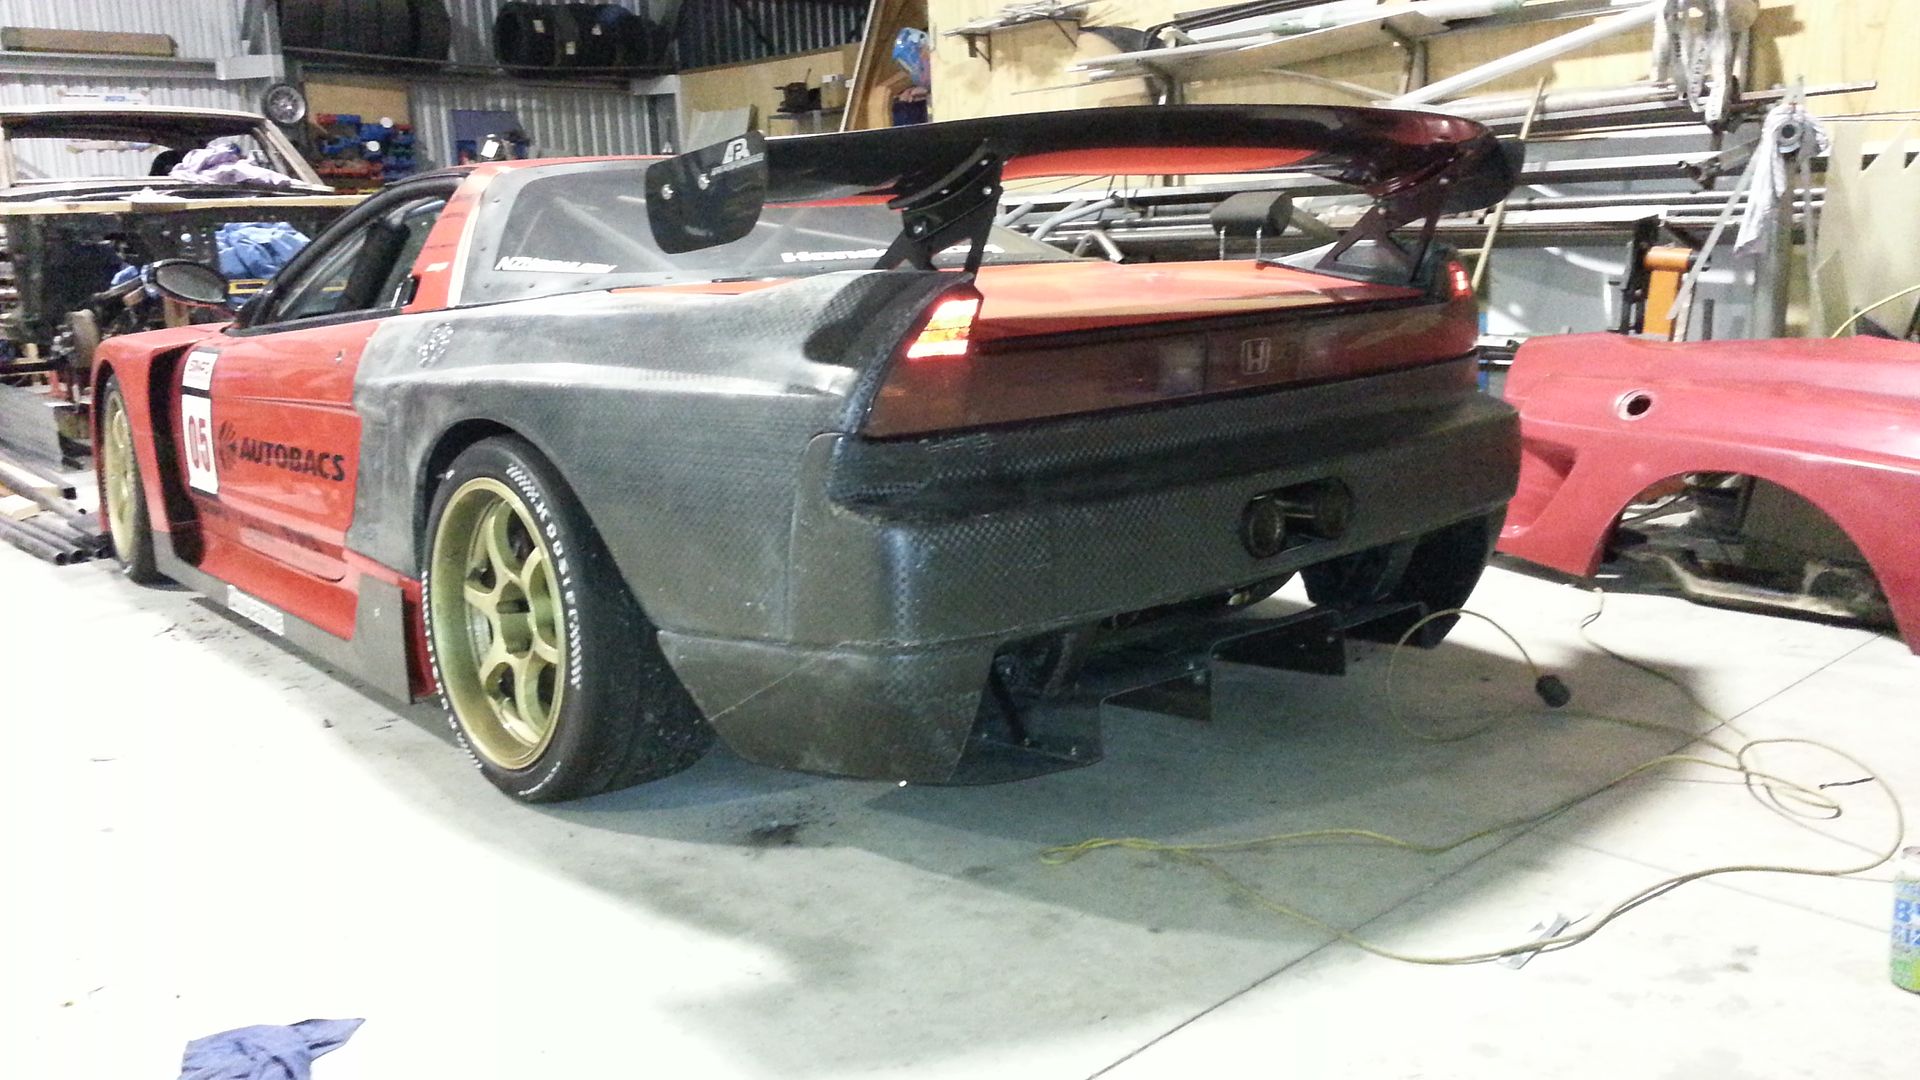
Well I finally managed to get some time to get the NSX back on track as far as getting the rear guards finished so we can take moulds and make some new light weight bits !

So off to Zac's I went to find that he's been slowly making progress with them anyhow and they were basically ready to paint and then prep for taking a mould so that was awesome.......... not sure where we'd be without Zac............ well actually I do, we wouldn't even have finished the first time if it wasn't for his efforts so thanks heaps Zac.

So hopefully over the next couple of months (before the new chassis for the supercar project (FZ12) arrives) we will get chance to get the new panels made or at least make a really good start on getting them all done and then we can move this thing to the next stage and test it again 100KG ish lighter and see how it's affected things. Then it'll be a matter of whether funds go to the FZ12 project or to a twin turbo setup for the NSX................ or both !


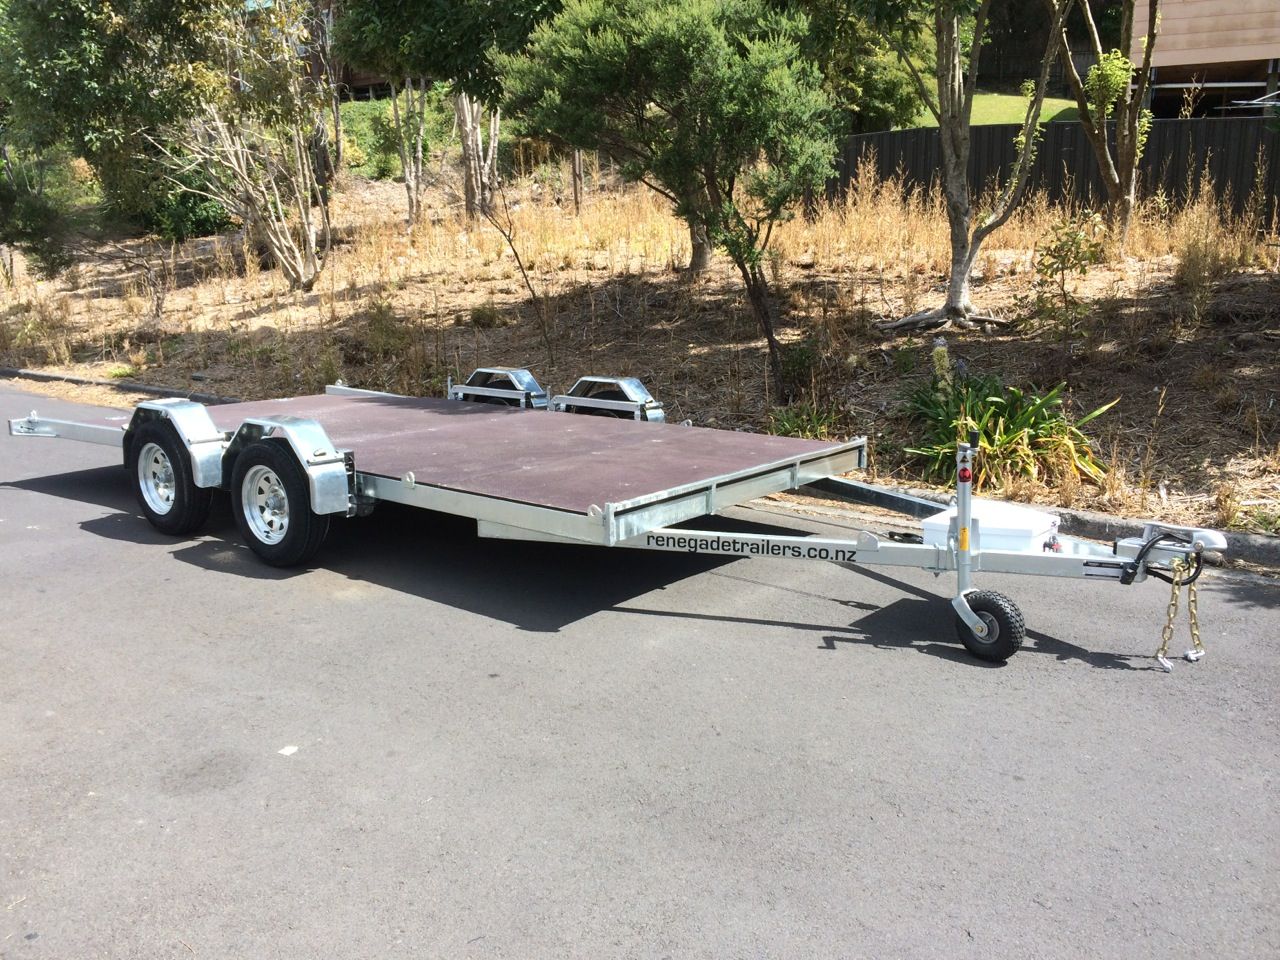
Well not exactly NSX news today, but kinda as our race trailer finally turned up........... !

We've been borrowing a mates ever since we built the car, but I needed to get my own !! The problem is that the NSX is 1.95m wide so your average trailer simply doesn't fit ..... this is made to our the maximum our laws allow at 2.5m wide but by the time you take off the width of the guards, wheels and tyres etc it only allows for 1.98m of trailer bed so it's going to be tight but should do the trick.

The trailer looks like a normal trailer, but in fact sits flat on the ground for loading........ pretty simple but cool and very very helpful !

trailer_zps0888b63f.jpg


Here's a video of it showing the process......
http://www.youtube.com/watch?v=5XejIY-NB-s

In other news our new project car FZ12 turned up today after 18 months of waiting ! But I'll leave that for the other FZ12 specific thread at http://forum.autoclique.co.nz/showthread.php/550-World-first-Our-FZ12-Supercar/page3
 
that trailer's neat trick is a dream come true Fraser - wow!
So dare I ask ... can I ask ... how much ?
 
It was just under $ 10,000 NZD. So about $ 9400 AUD and $ 8600 USD.........

It's a pretty simple design and we had intended to make our own, but the reality of having to run my business, renovate my house to keep the Mrs happy and finish the NSX development whilst also making the FZ12 meant that the reality of trying to design and build our own trailer became unrealistic.

This is on finance so it's costing me like $ 900 a month for 12 months or just a little less .......... We will add onto it at some point, but at least it means now I don't have to rely on borrowing my mates trailer to get it around.......

Going to enclose it with fibreglass at some point and put a tire rack on it etc. Also have a small air tank and compressor I bought originally for the NSX airjacks we'll put on board so we have an air supply whilst at the track....... will be very handy I think !
 
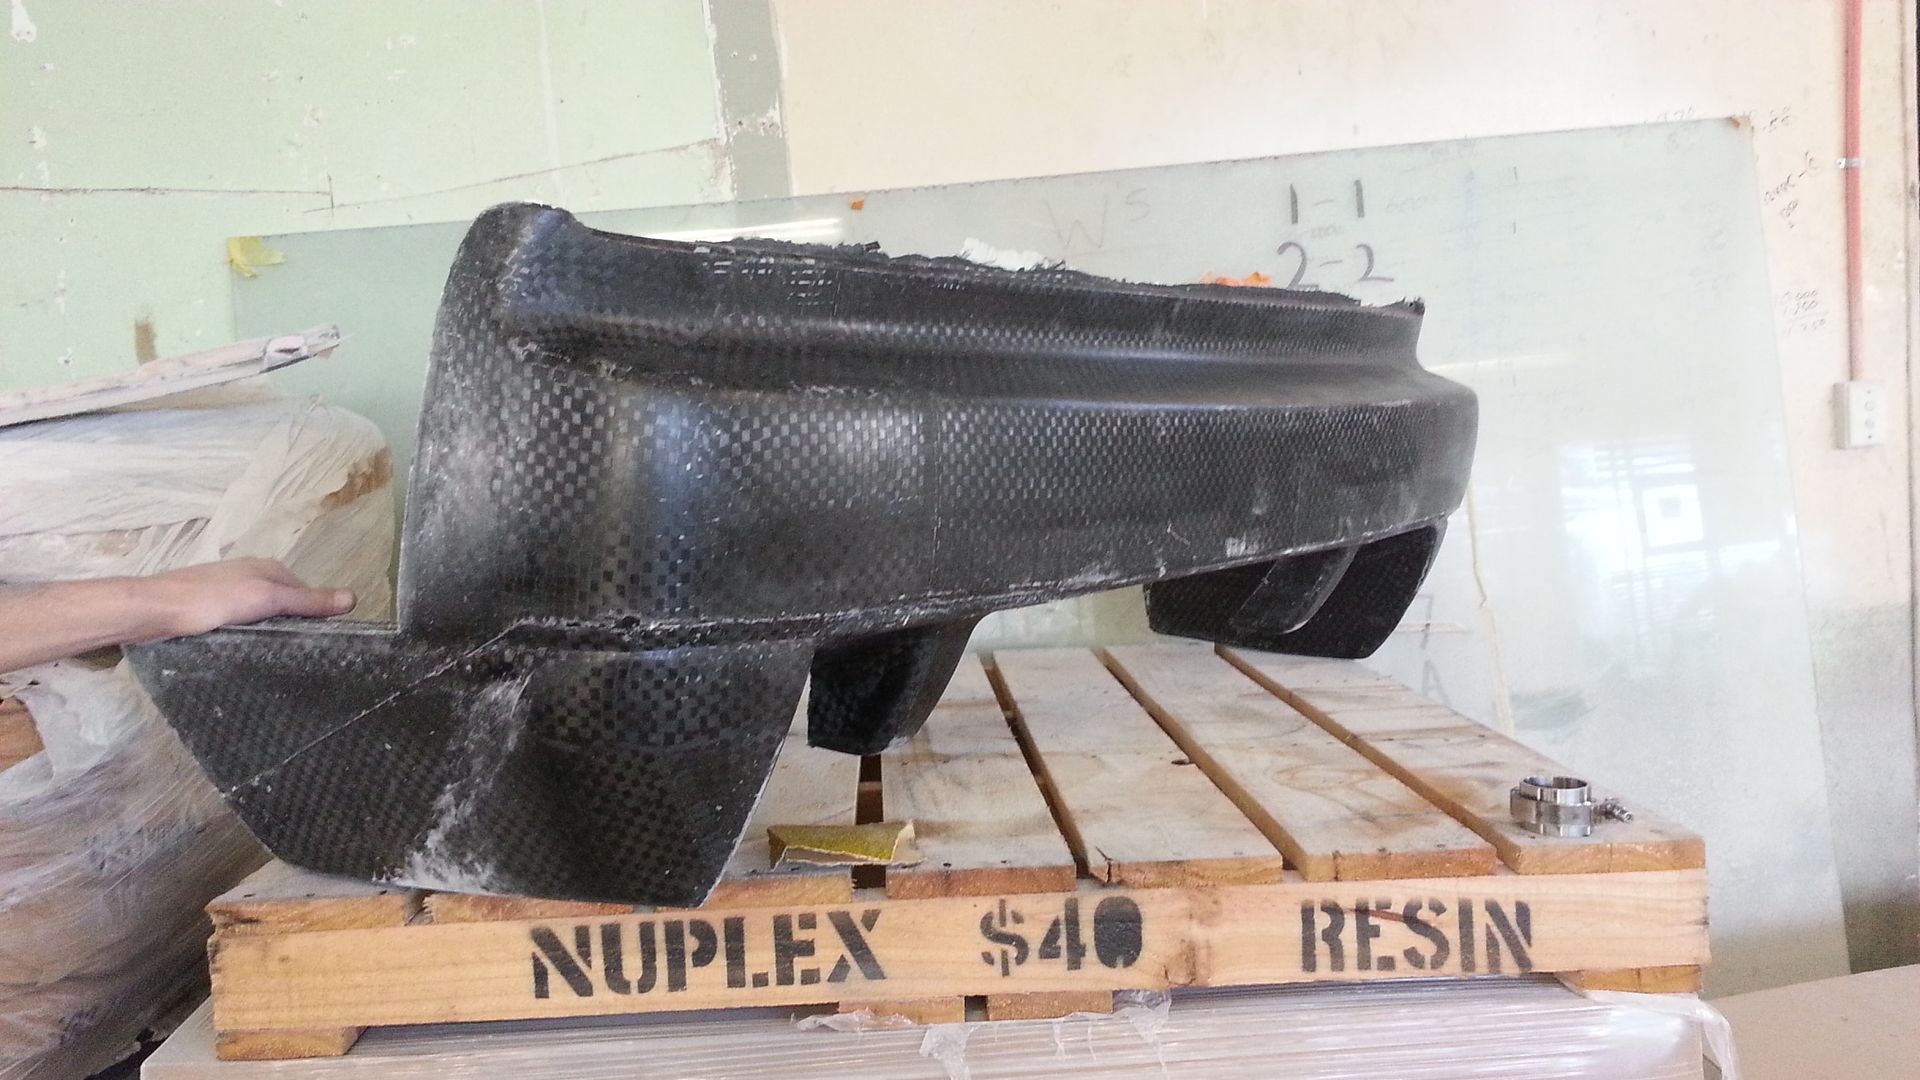
Well Zac and I finally got some time away from hectic workloads in our daily jobs to get the moulds finished for the rear guards and then prep the rear bumper mould we made some time ago and get a carbon part made.

Here's the final result fresh from the mould and still to be trimmed, but came in at exactly 2.0KG !!! We expect that to drop to 1.8-1.9KG once we've trimmed it........ !!


Not bad considering that the original factory bumper with all it's mounting brackets and crash bars as well as the add-ons we had made to it made it nearly 25KG !!!! So that means we've managed to save 20+KG just on this one part as it won't need all that factory bracing and brackets since it's so light !!!

Next will be to make new rear guards and work our way forward over time.......

Big thanks to Zac as always with this stuff as the whole project would probably still be a pipedream without his skills. Also thanks to Jason from Carboglass who helped Zac with the infusion process and just generally being a good bloke :)
 
That entire thing is one piece? How much lighter can it be than the oem plastic? I understand you've saved a lot but your re also counting the bumper beam removal, right? So a pound or two on brackets, and another 2-4 pounds maybe on going to carbon from the factory cover?

It does look like it came out real nice. Good to see this thread back on.

- - - Updated - - -

And shit man, I totally forgot, do you still want those springs? I am so sorry. I just remembered.
 
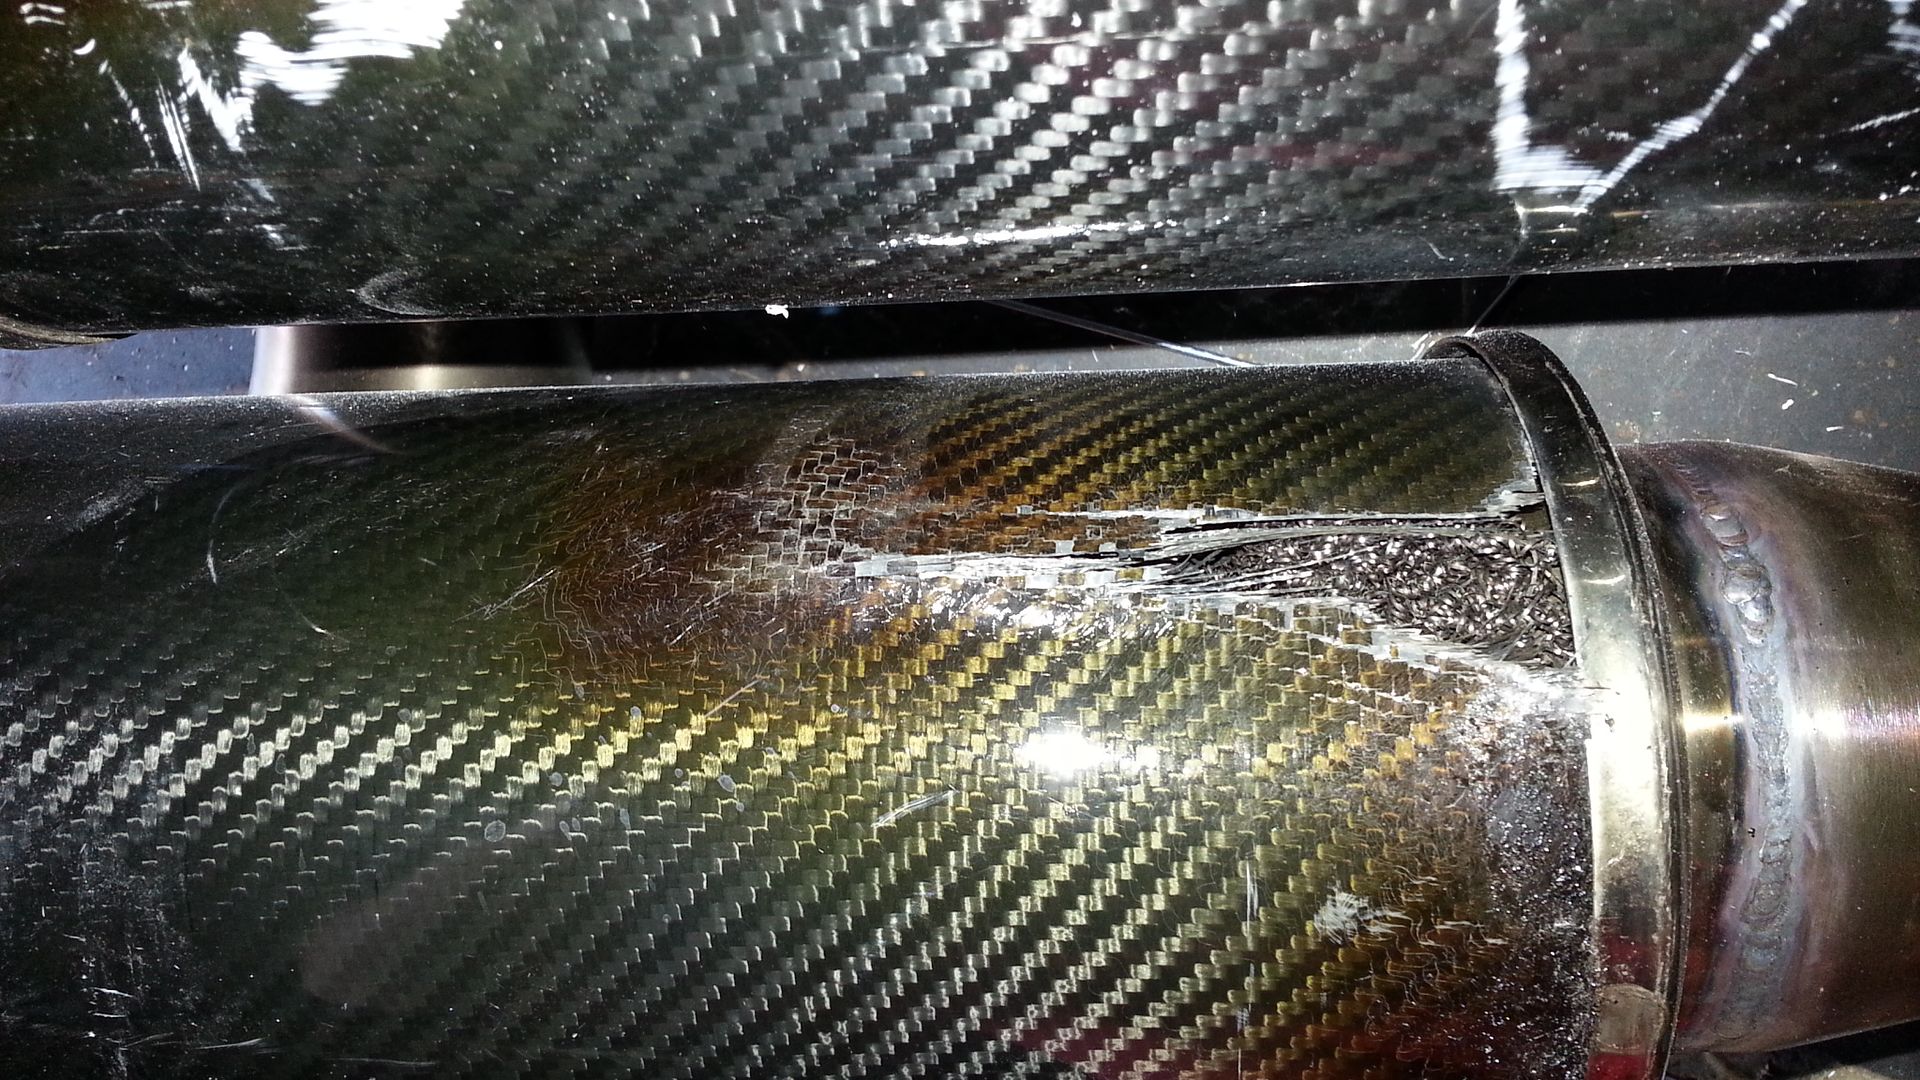
Question - Why should you not buy carbon mufflers for your NSX race car exhaust system without thinking about the extra high exhaust temps ???

Answer -
20140522_113532_zpsced3d48f.jpg

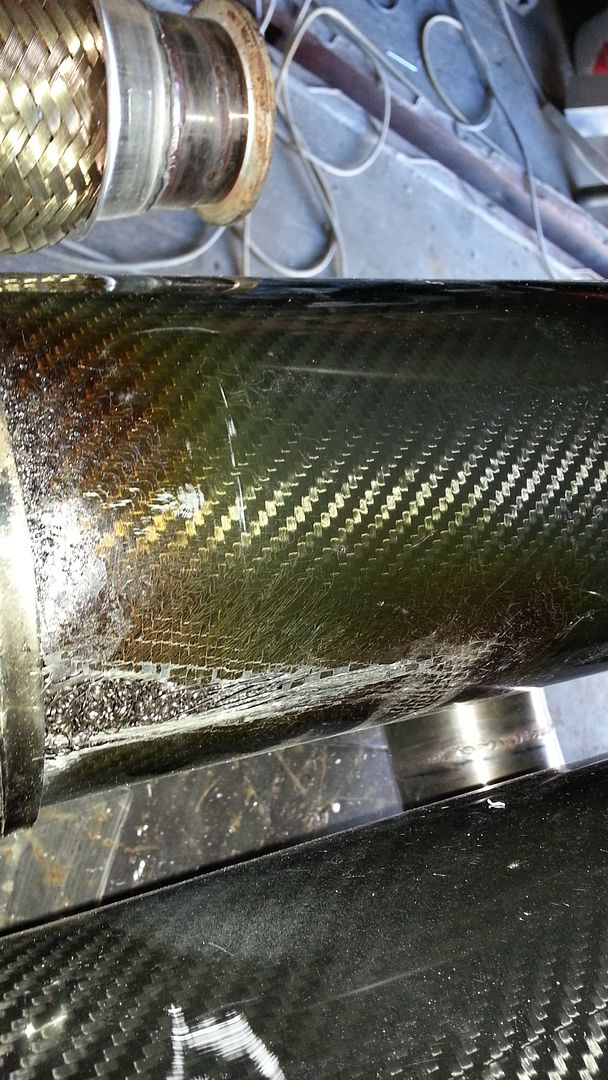
This was after it's first ever run under serious load on the dyno !!! so we hadn't picked up that it wasn't up to the task !!

20140522_113549_zps49a2252f.jpg


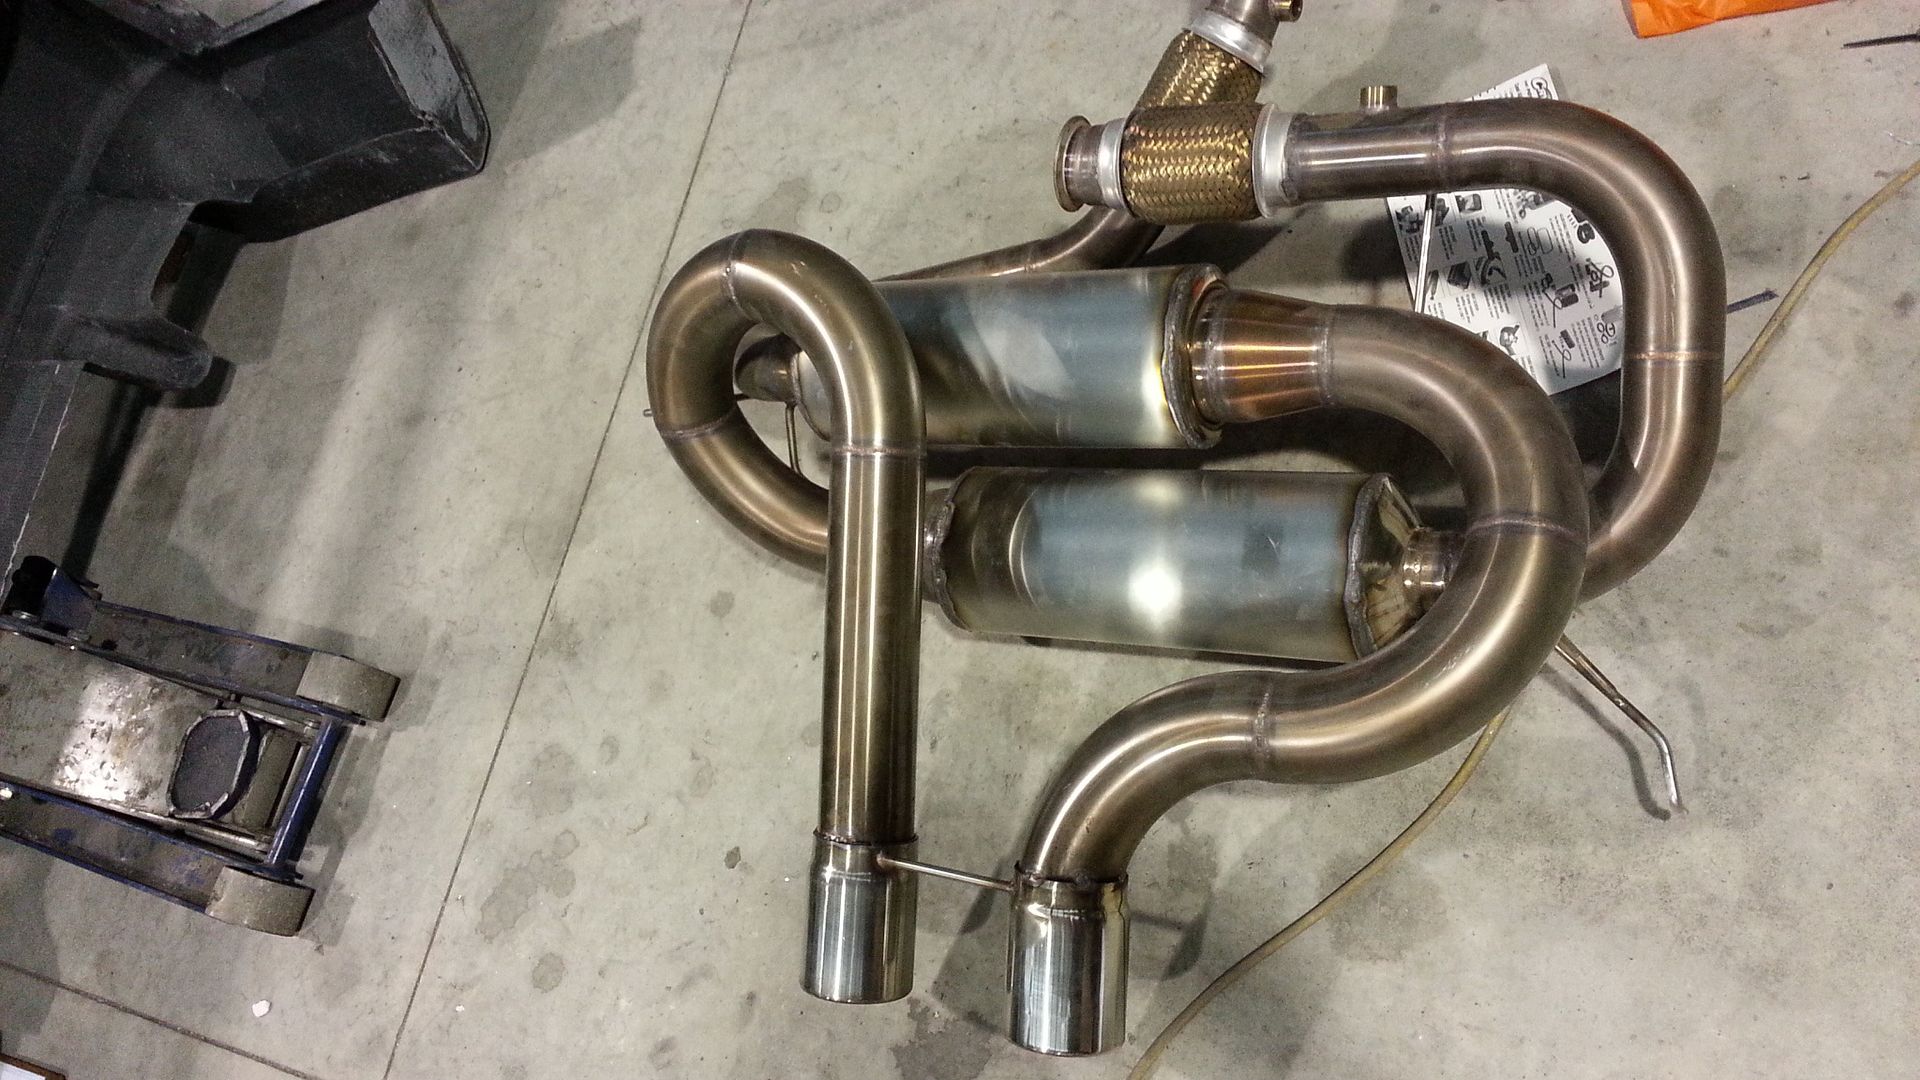
Question - What the hell do you do with melted carbon mufflers when you've only got one day before it's meant to be used in anger on the track ????

Answer - Get the awesome guys at our local engineering company to roll some thin stainless sheet up so we can replace the carbon with stainless......... then convince Zac that he should use his lunch hour, smoko break and some sneaky work time to weld the stainless in place !!! Thanks Zac !

20140522_163924_zpsfed6bbe3.jpg


Came out awesome I think !!

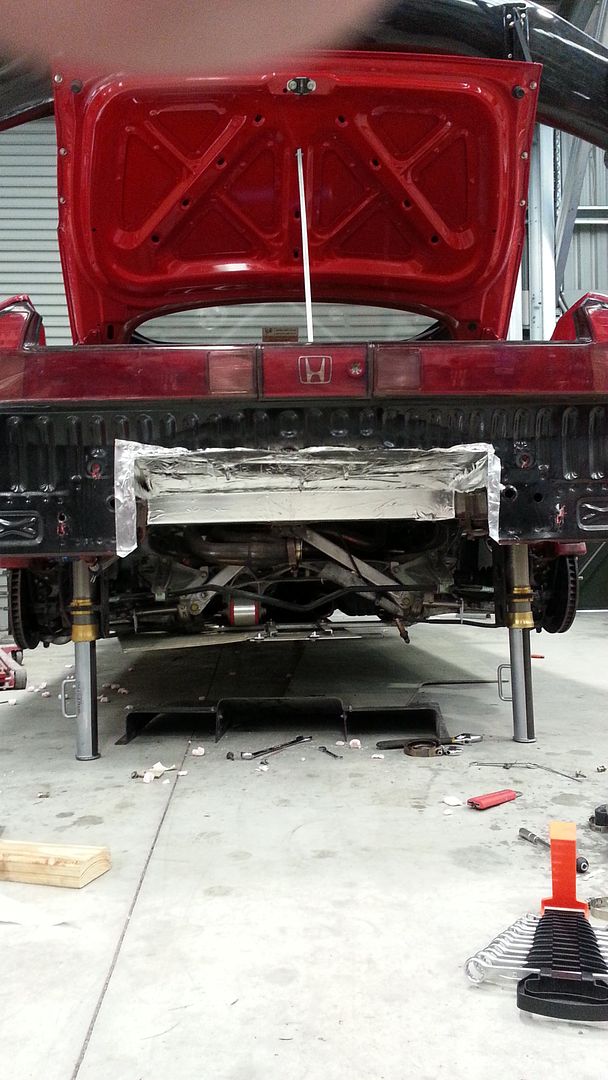
Then added some extra heatshield under the car to be super sure since the accusump and surge tank are in the boot !!

20140522_132908_zps1b050226.jpg


Put it all back together and it's great to see the old girl back and ready to run once again !!! First time in over a year !!!

 
All enthused with the progress of the car and the success of the new light bumper, we've made a push to get the rear guards done as well.......

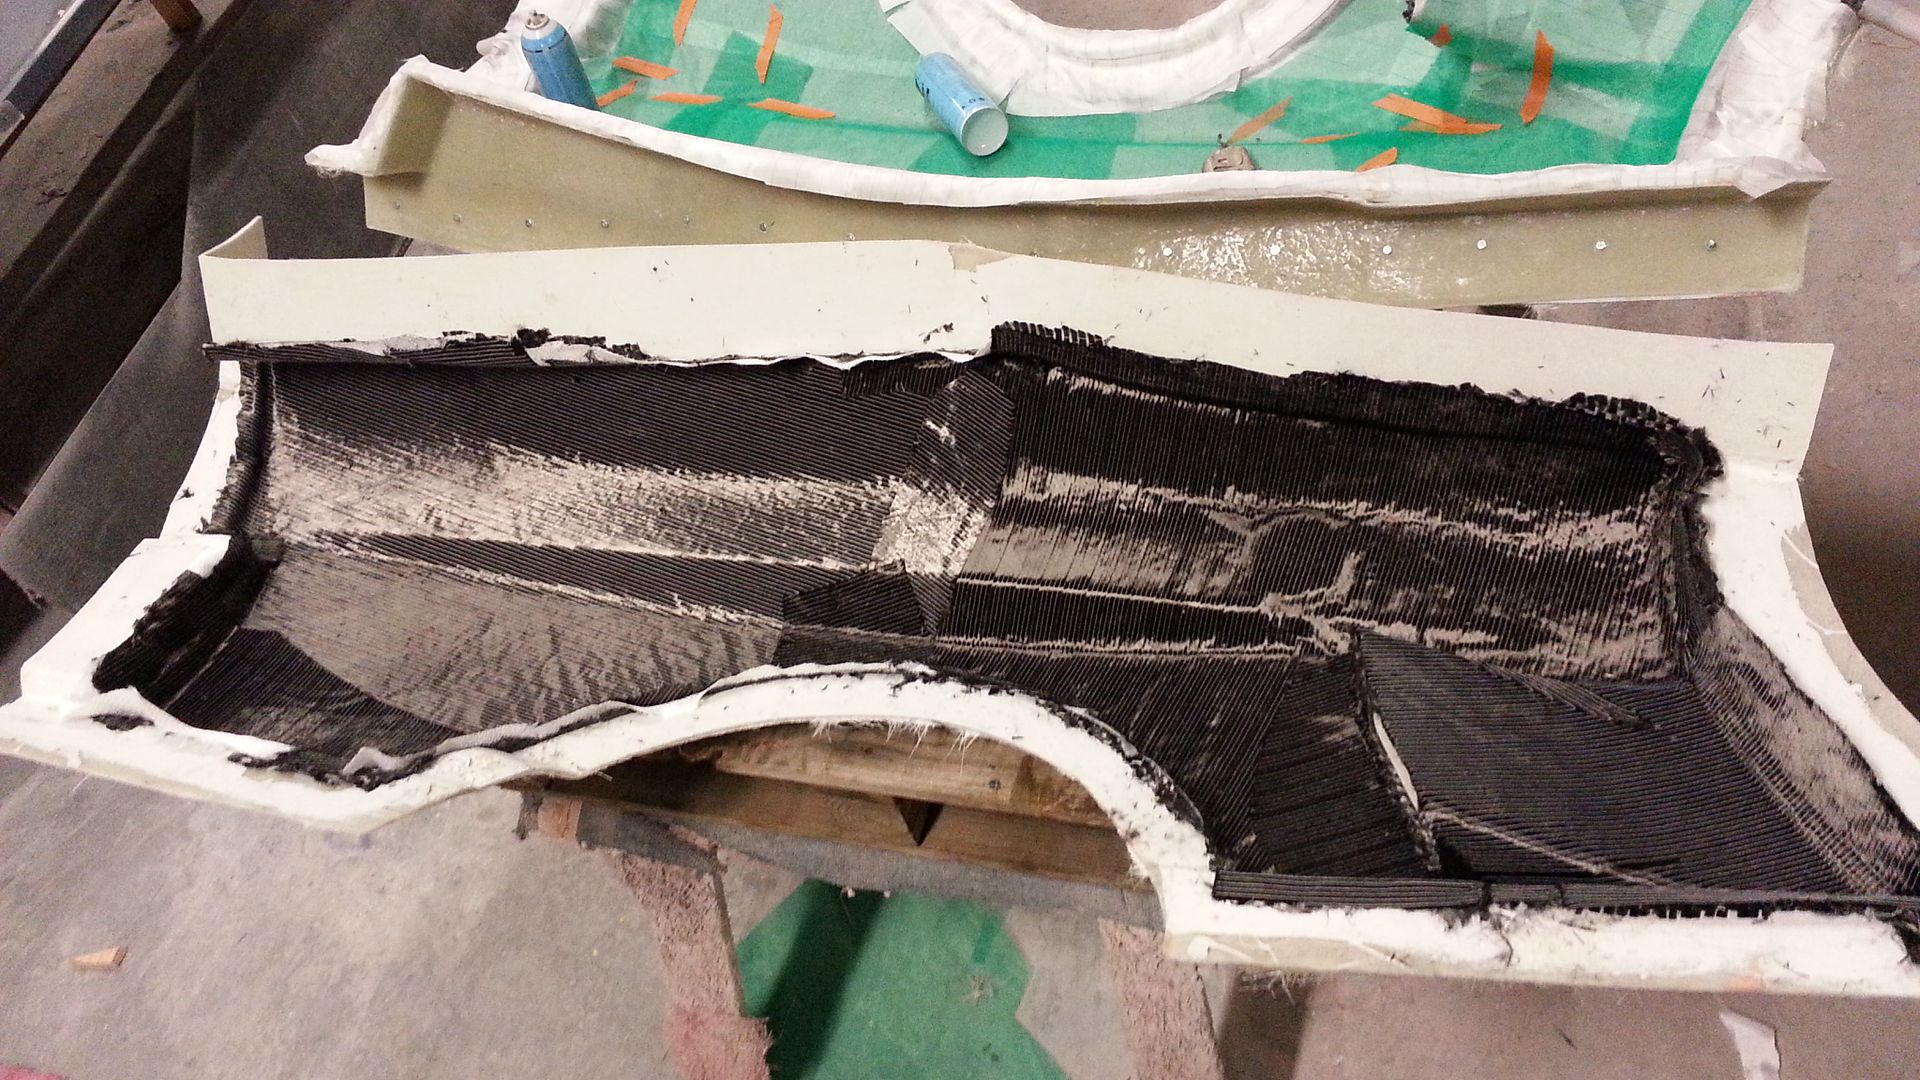
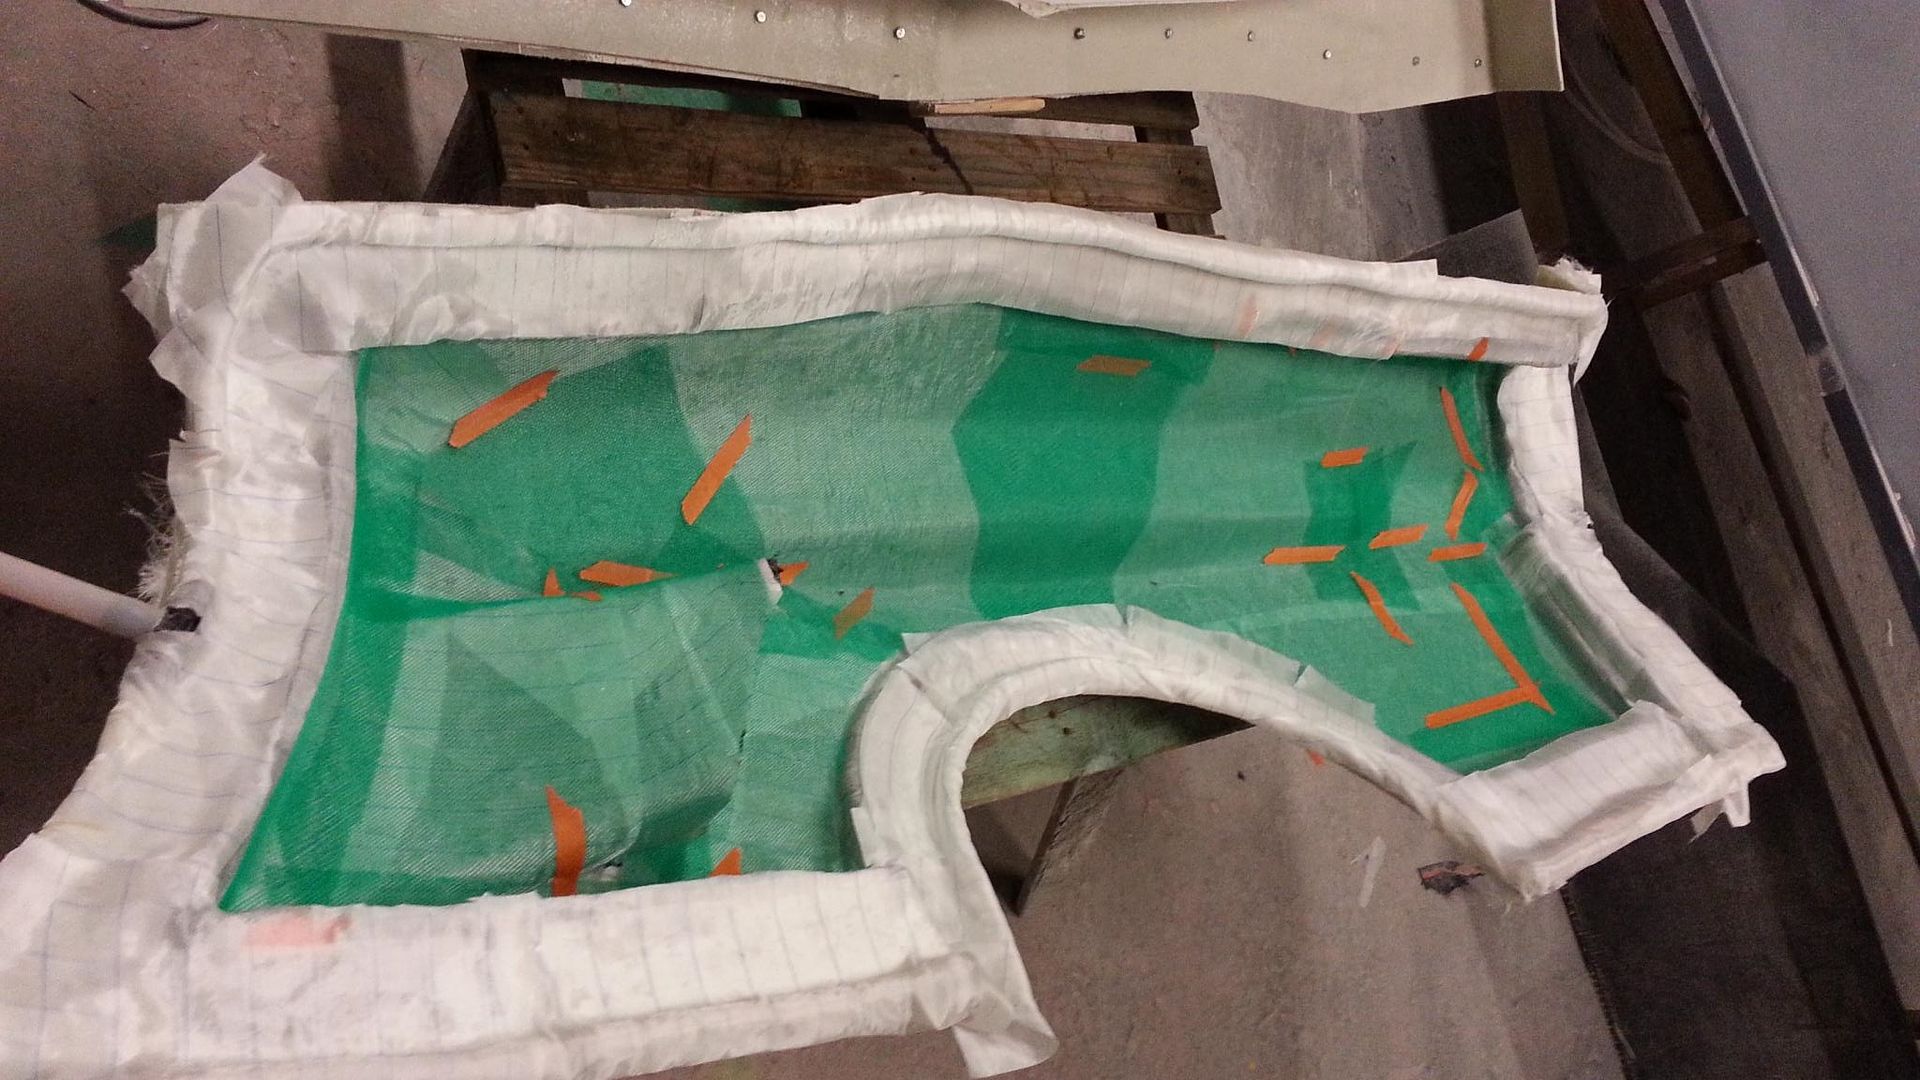
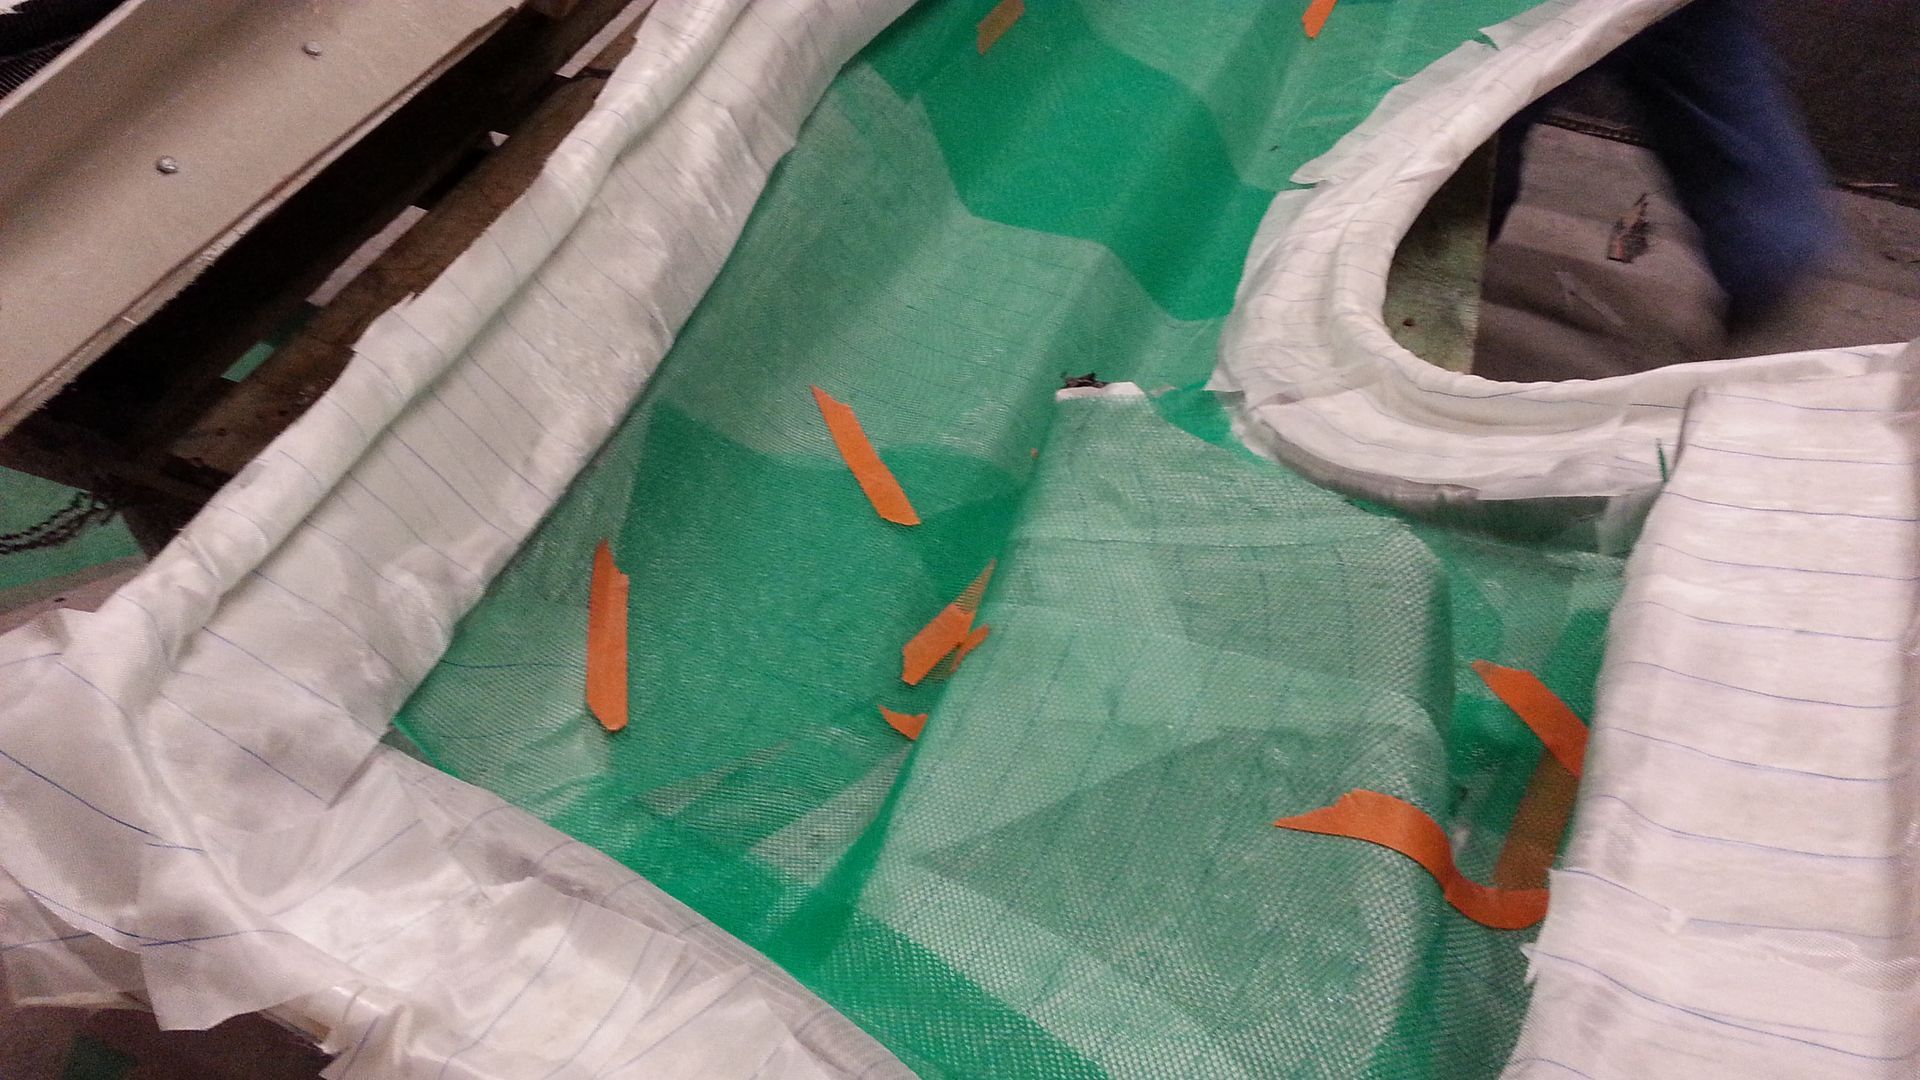
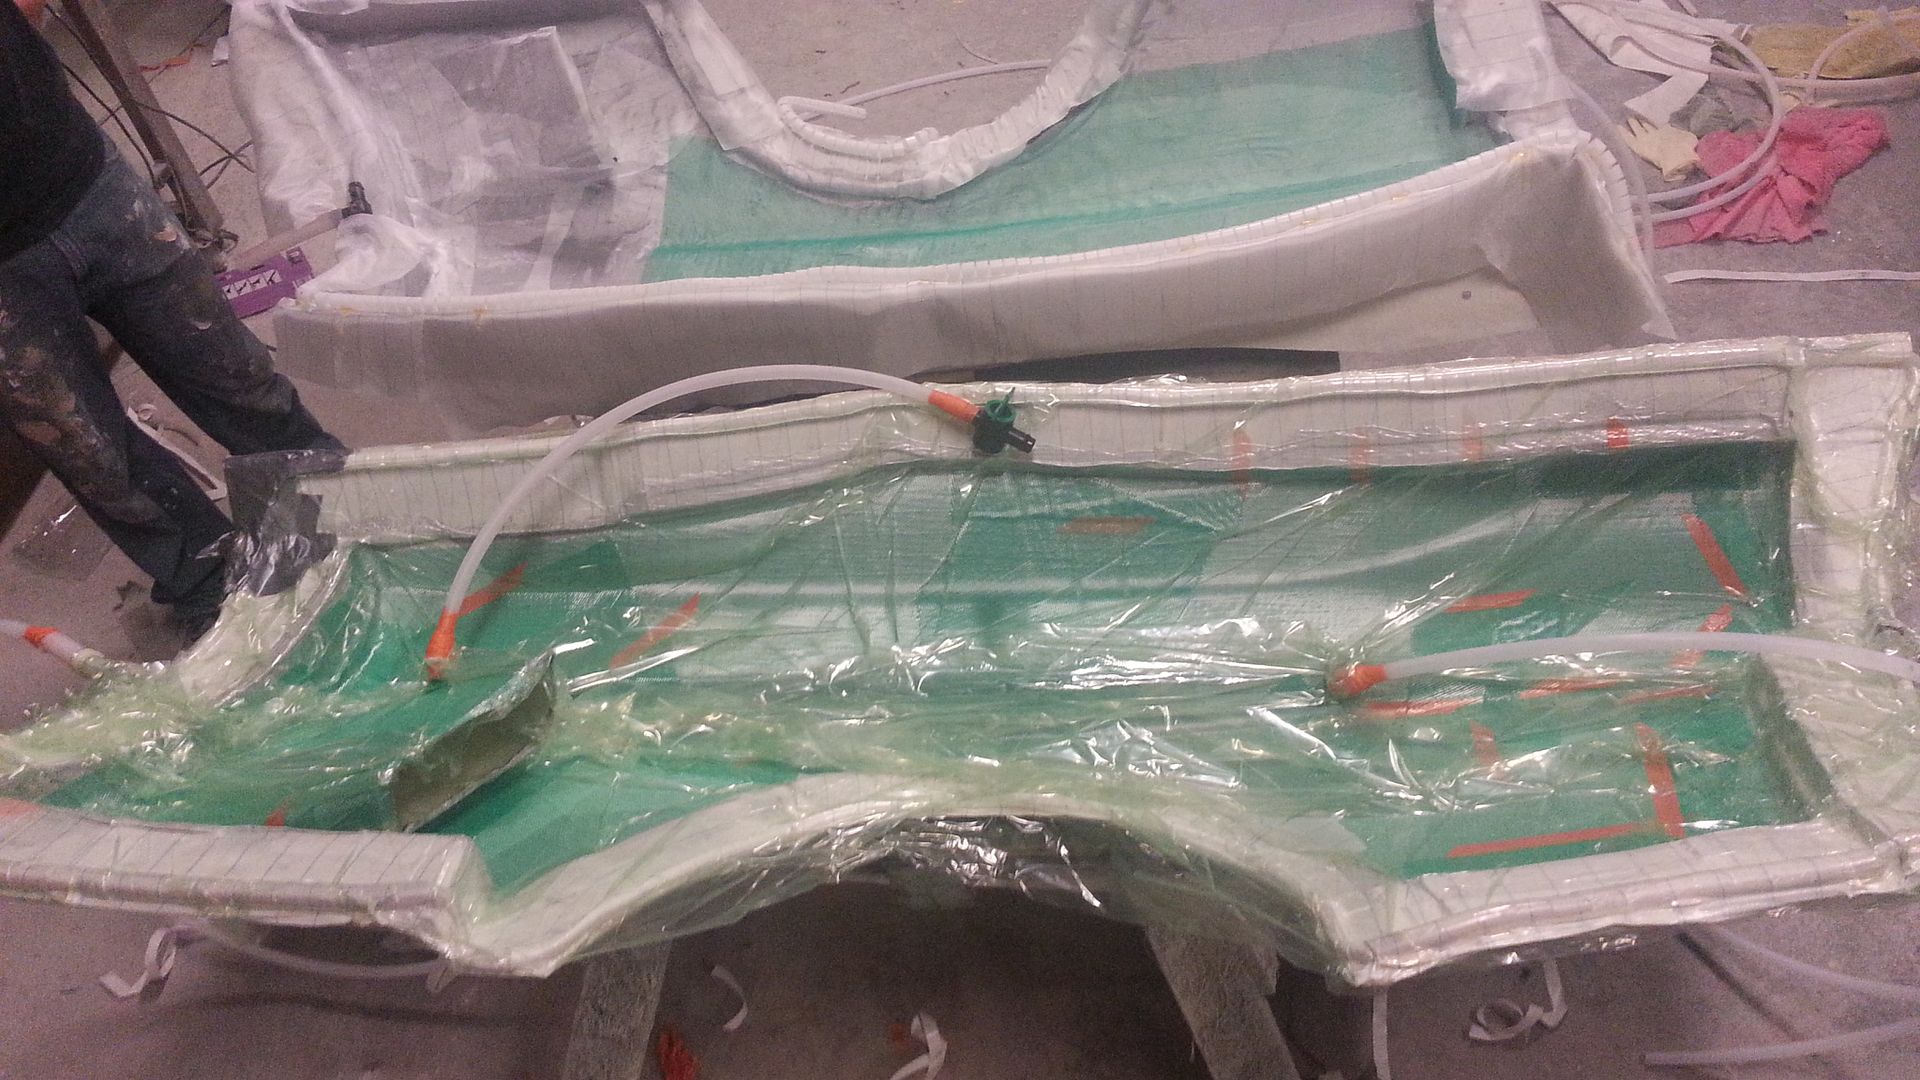
Thought you might all like to see some of the steps to understand that it's not a quick process to get these things made !!! I think just doing rough numbers there's probably close to 10 man hours per panel to make a part using the infusing method I've showed here....

3 layers, 1 x 1200 carbon, 1 x Kevlar type layer (Zac will be able to give the correct spelling), and the final layer of a different type of carbon.


White material is called 'peel ply' and essentially soaks up spare resin and stops the bag from sticking and is removed from the panel once things are set. Green material is also removed at the end of the process and is there to allow the resin to flow through the composites easier than without it.


Bagged up ready to have a vacuum applied to suck the resin into the part........... a lot of setup work involved in all of the above pictures.


Hopefully finished parts will get "cooked" tomorrow and we can get them unmoulded on Friday for fitting......... then I'm off to the track on Sunday !!! Fingers crossed !!!
 
After baking all day and some fiddly de-moulding....... Zac finally got a nearly finished part out !!! Looks awesome !


We've already got a plan for the boot now to get some more weight out before we move forward through the rest of the panels.

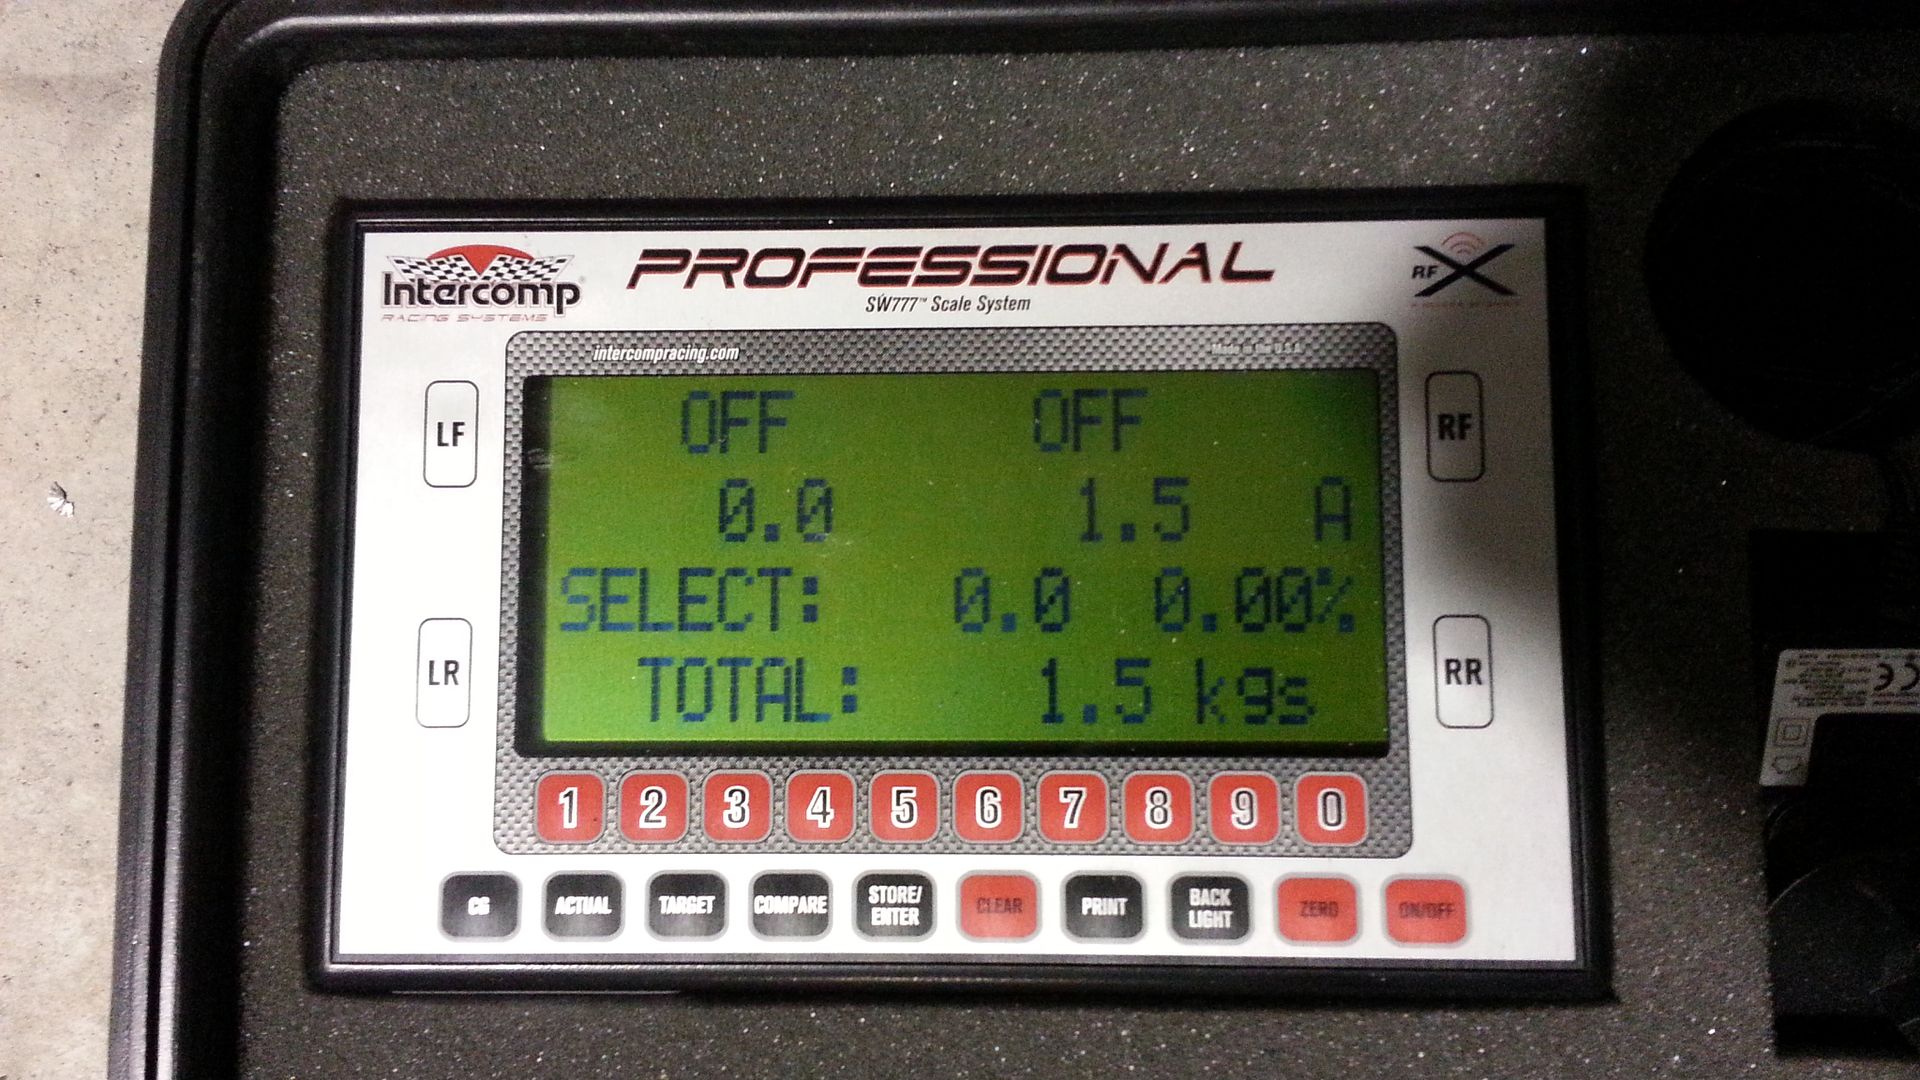
Oh yeah, forgot the best part........... less than 1.4KG !! That's a 300% saving over factory guards which are stupidly light anyhow....... super thin alloy. As mentioned earlier, out old guards are a lot heavier than factory guards so we'll make even bigger savings over what we have now......... going to weigh the old ones tomorrow to know exactly, but I think they're at least 8KG each..
 
Last edited:
awesome job, taking mine to the track Monday pity you aren't up this way so we can get them out together
 
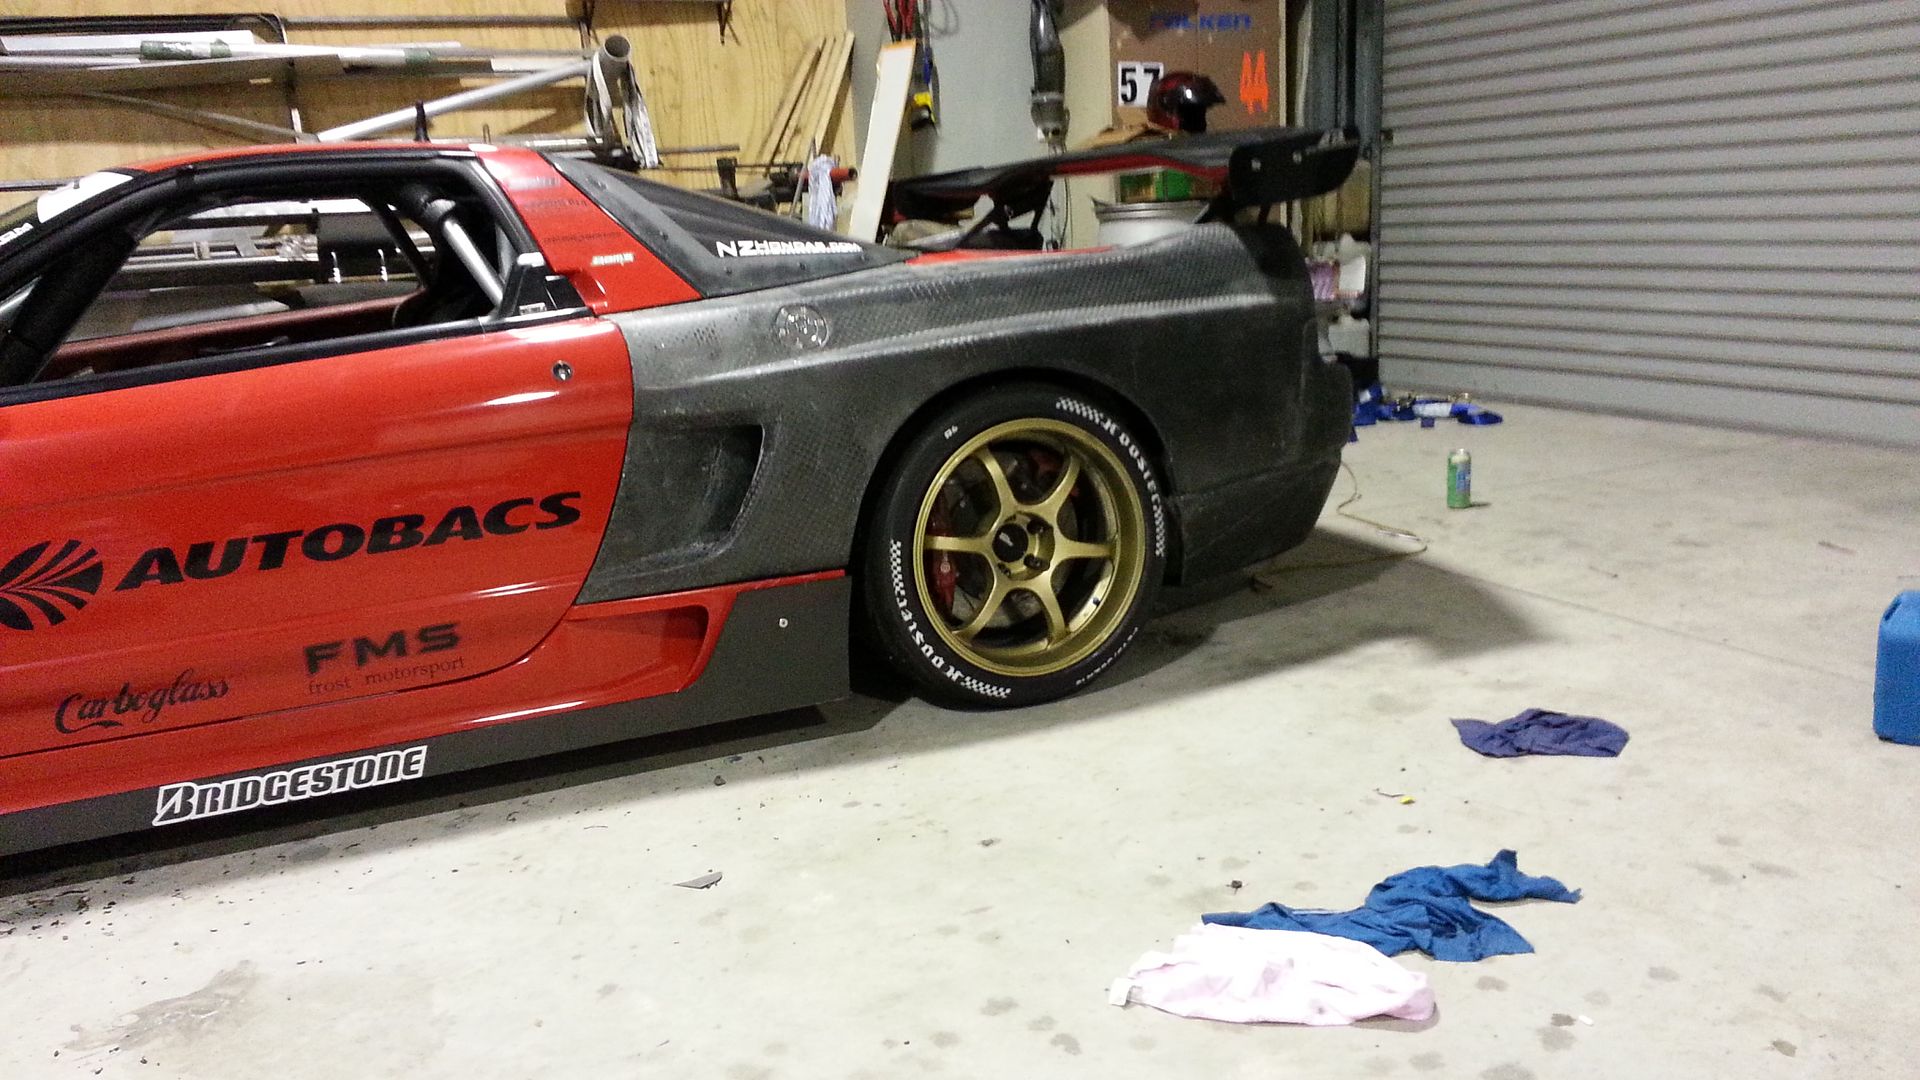
Finally got to take the old rear guards off today and put on the new ones. Weighted the old ones........... they were lighter than I thought, but still bloody heavy !!


New panels....... weight is actually wrong, but the scales I was using here only round to the nearest 0.5KG....... they were actually 1.35kg each when we measured them at Zacs...


Finished result mounted.......


Last edited:
Back
Top