
Well the weight saving, new brake pads (Endless N45s) and some more enthusiasm from me is starting to show in the laptimes....... I went over half a second faster than the car did with a pro driver so can only imagine how it would go once we get the rest of the weight out of the car......... not to mention weight out of the drivers seat !! LOL
-
Protip: Profile posts are public! Use Conversations to message other members privately. Everyone can see the content of a profile post.
You are using an out of date browser. It may not display this or other websites correctly.
You should upgrade or use an alternative browser.
You should upgrade or use an alternative browser.
Down Under Trackday NSX
- Thread starter f1racr
- Start date
So we've decided to push on with our weight saving program now we've started !!
These bits are a bit of a cheat as they're a lot less work than the other panels have been.......... less gain too overall, but relative percentage wise just as good......
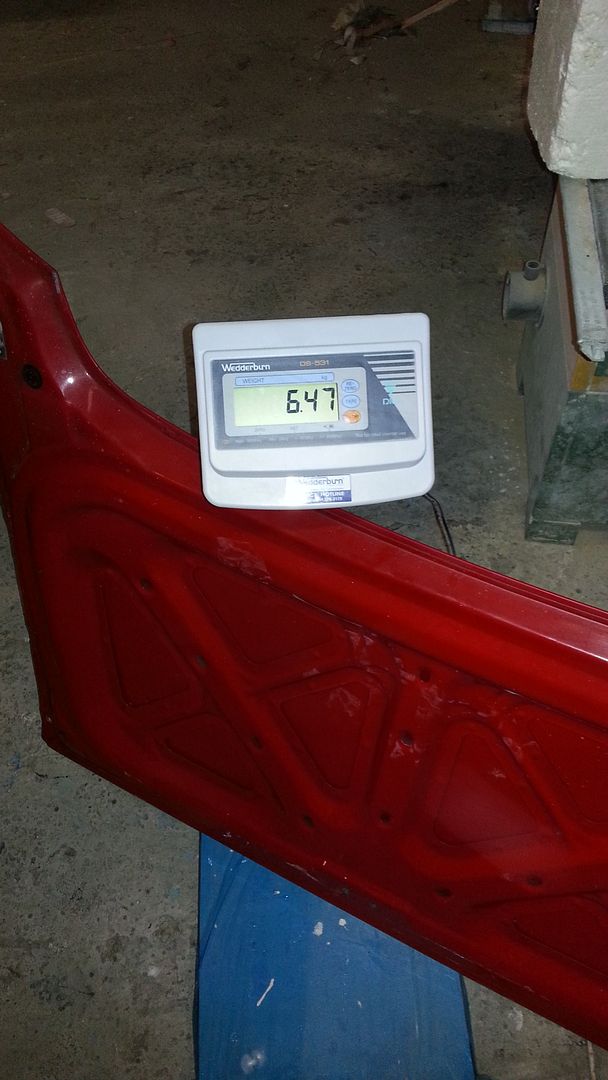
Trunk / boot lid minus hinges, latches and gas struts - 6.47KG
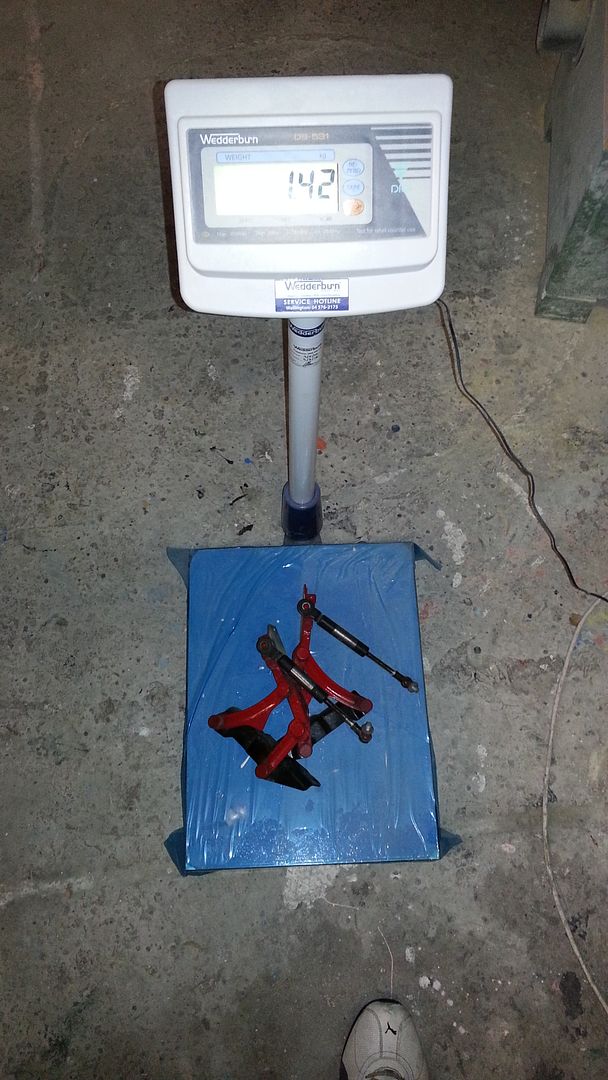
Trunk / boot hinges and gas struts - 1.42KG
B-pillar alloy covers...... these are actually lighter than I thought they were, but still over a kilo each where as the carbon replacements are likely to be 100-150grams so we'll still save nearly an easy 2KG in total

Overall the bootlid and it's associated hardware is over 8KG as I haven't weighted the boot latch and associated hardware and I'm sure there's another 300-500grams there so lets say it's 8.5KG for the boot lit in total as it comes from factory..... we expect the new one to be less than 2KG....... we plan on hard mounting the rear wing to the chassis rather than mounted on the boot lid as it is from factory......
These bits are a bit of a cheat as they're a lot less work than the other panels have been.......... less gain too overall, but relative percentage wise just as good......
Trunk / boot lid minus hinges, latches and gas struts - 6.47KG

Trunk / boot hinges and gas struts - 1.42KG

B-pillar alloy covers...... these are actually lighter than I thought they were, but still over a kilo each where as the carbon replacements are likely to be 100-150grams so we'll still save nearly an easy 2KG in total

Overall the bootlid and it's associated hardware is over 8KG as I haven't weighted the boot latch and associated hardware and I'm sure there's another 300-500grams there so lets say it's 8.5KG for the boot lit in total as it comes from factory..... we expect the new one to be less than 2KG....... we plan on hard mounting the rear wing to the chassis rather than mounted on the boot lid as it is from factory......
Yeah there will be a bracket of sorts so it will slide in from the engine cover backwards into the latch to hold it in place and then we will use aero catches to hold the front part.
I wouldn't normally do this, but I've got a vested interest of sorts here ")
The guys from Autoclique are making a series of short films that will document the build of our FZ12 car and part of that is a teaser for the NSX they filmed recently........... all you have to do is like them on Facebook and we can all see the rest of the video they've shot...... I haven't seen anything other than this either so I'm trying to get as many people as possible as quickly as possible to like them !! LOL
They have some great content and they are great guys............ so you won't regret it if you're into cars.....
https://www.facebook.com/AutoCliqueNZ?fref=nf
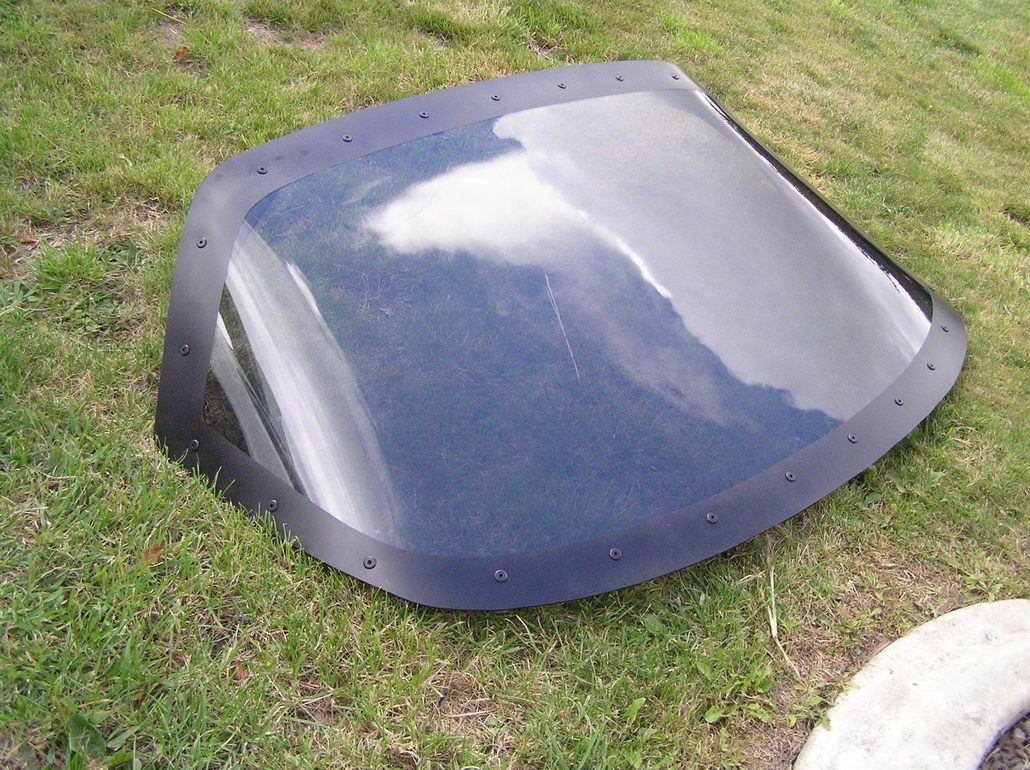
Boot lid is done............. came out better than we expected and lighter too which is always awesome......................
1.3KG........ factory item with brackets etc etc was over 8KG so that's a good saving relative to the amount of work........... just going to keep at it over the next few weeks and so B Pillar parts are next as there's a couple of kilos to save there for little effort and then the side skirts will be the next as they're over 5KG each believe it or not !

1.3KG........ factory item with brackets etc etc was over 8KG so that's a good saving relative to the amount of work........... just going to keep at it over the next few weeks and so B Pillar parts are next as there's a couple of kilos to save there for little effort and then the side skirts will be the next as they're over 5KG each believe it or not !


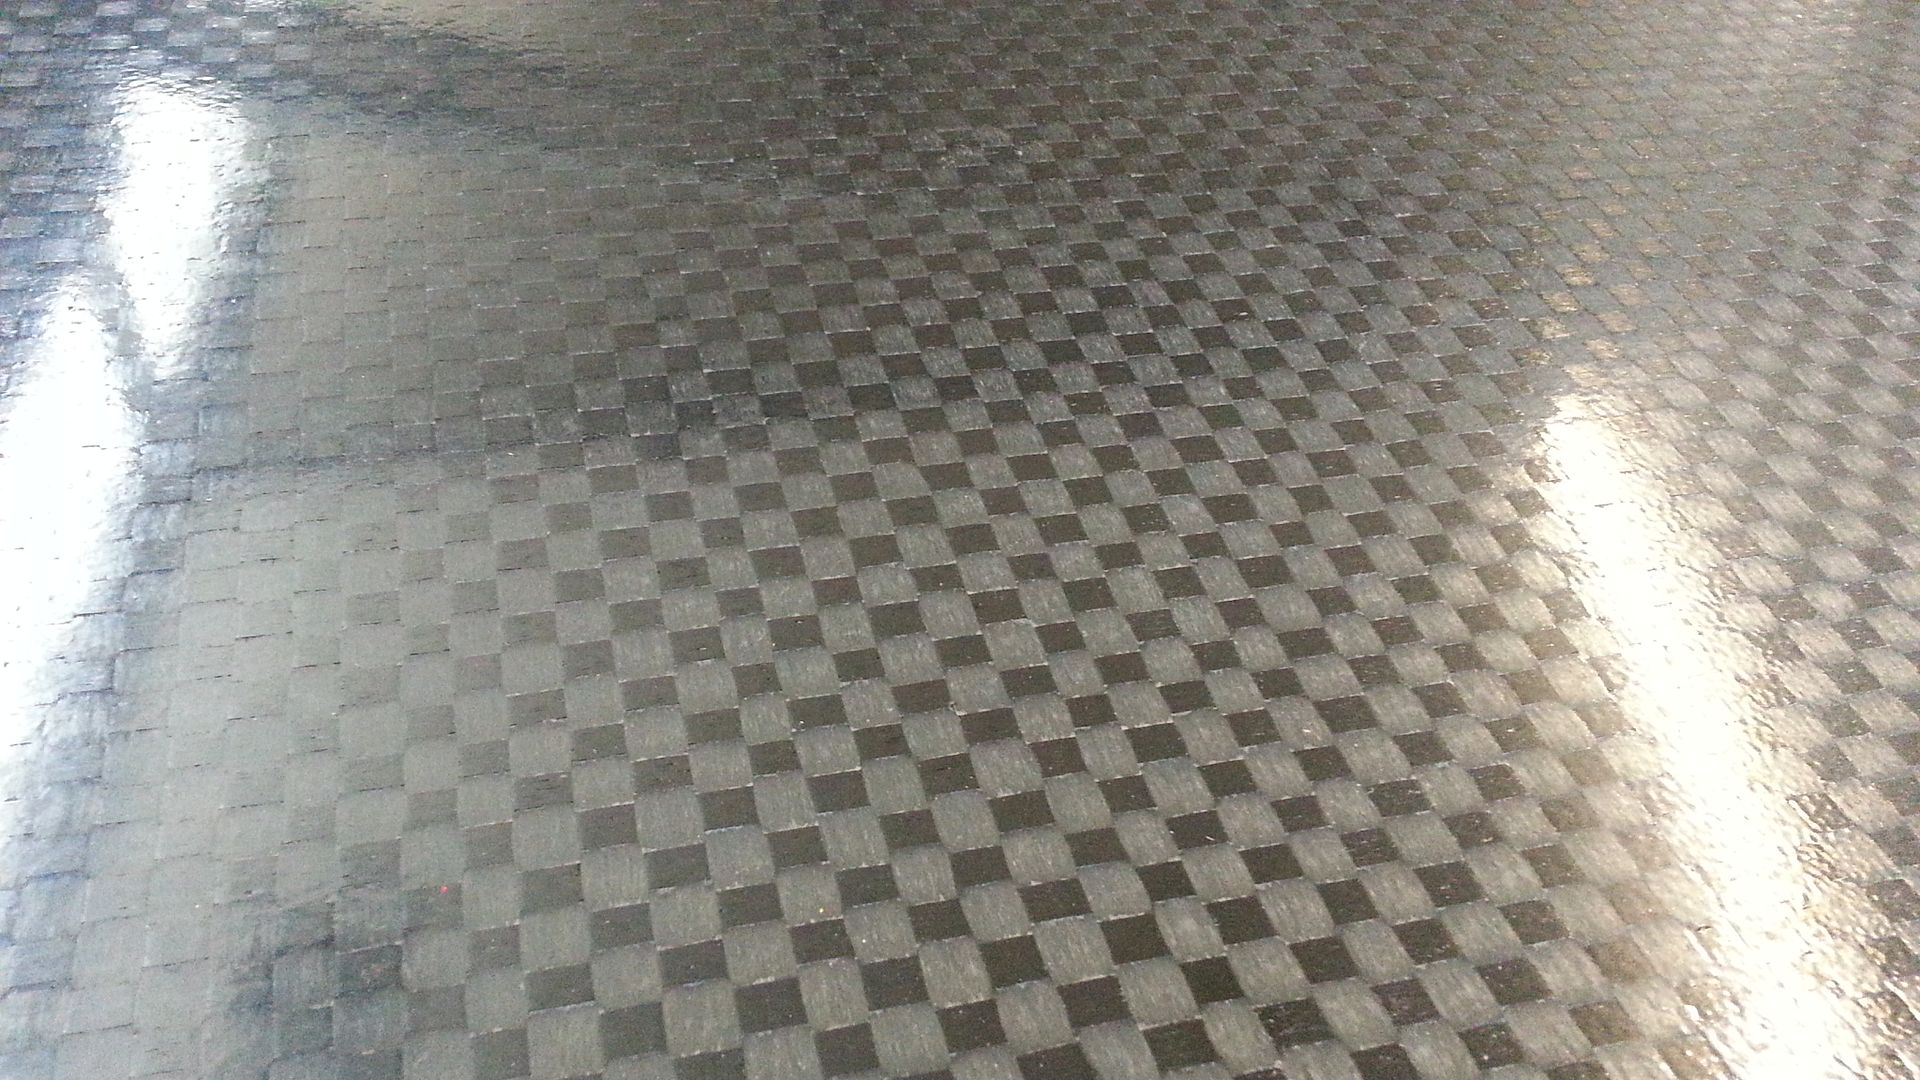
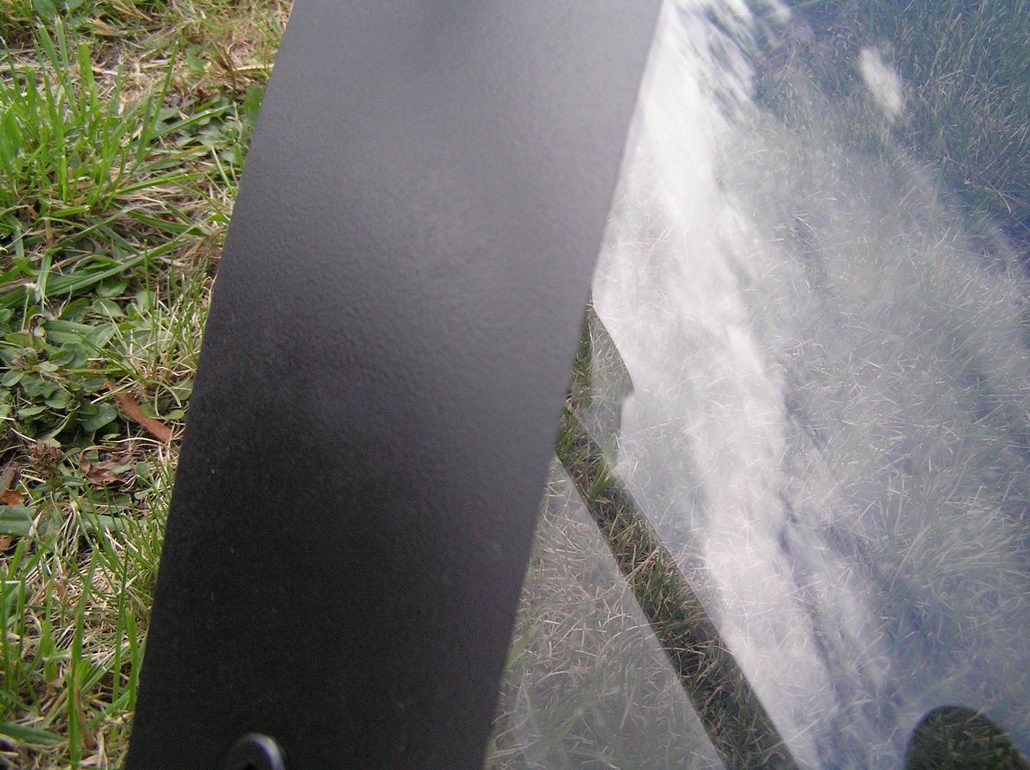
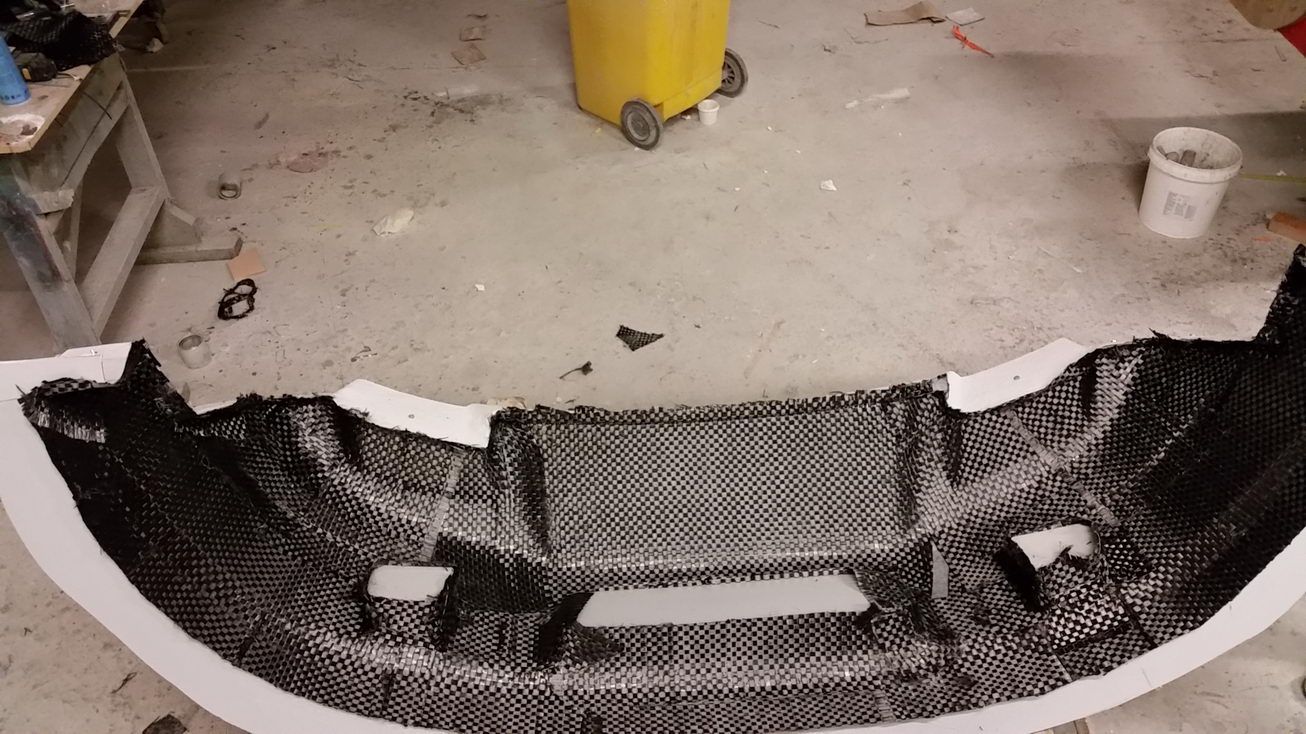
It's 1200 twill carbon on top and bottom with nomex in between and that finish is literally as it was when it was demoulded........... we were surprised how well it came out....
Yeah nomex is certainly not abnormal, however there are other things we could have used, but the nomex was available to us so we went down that path. Yep we will be clear coating one side, but not the bottom as it's not needed....... we're going to be painting them with a thin layer of paint once we've got all the panels made....... want that "F40" look where you can see the weave through the paint.
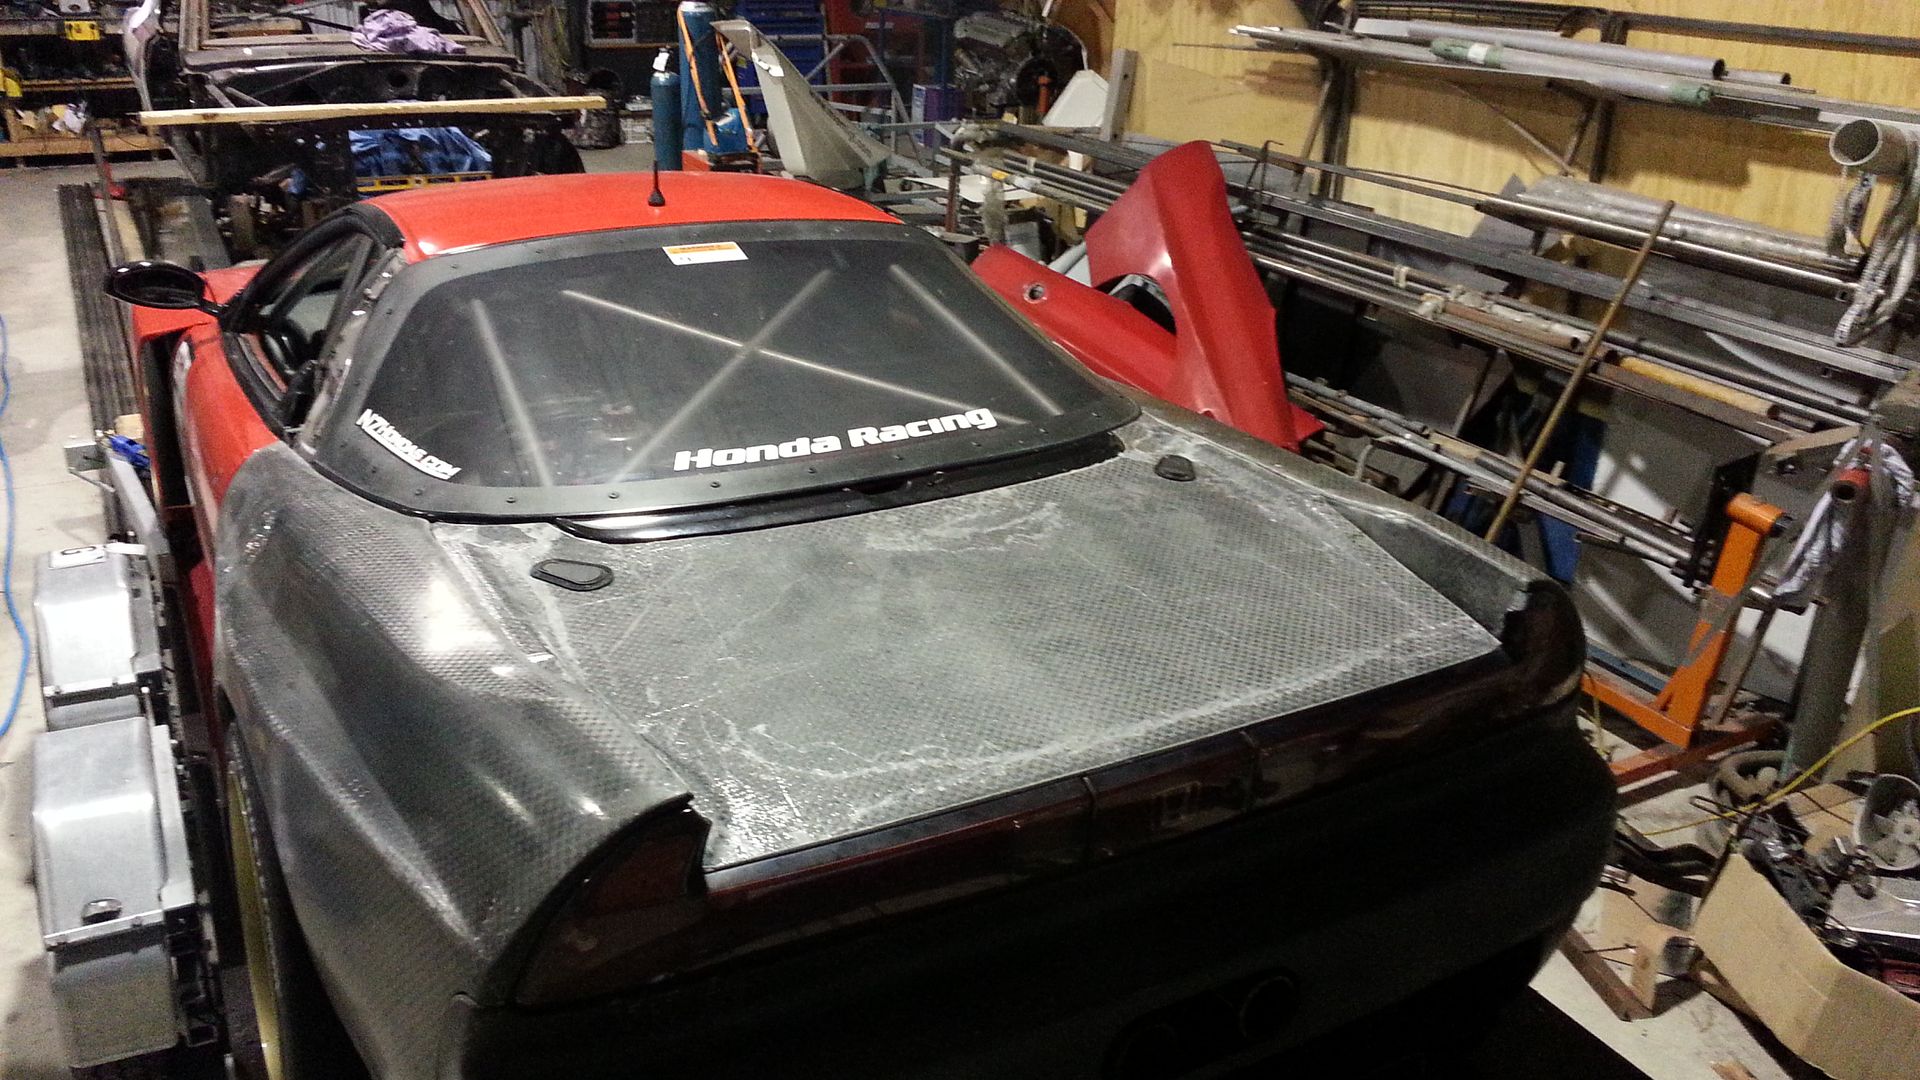
Not my greatest camera work......... yes............. but tonight we fitted the new boot lid and we didn't even need to do any extra trimming....... perfect fit.
Just mounted the pins and aero catches and viola !..... just need to make the mounts now so that the wing is actually mounted directly to the body of the car and not the boot lid as the factory setup is.

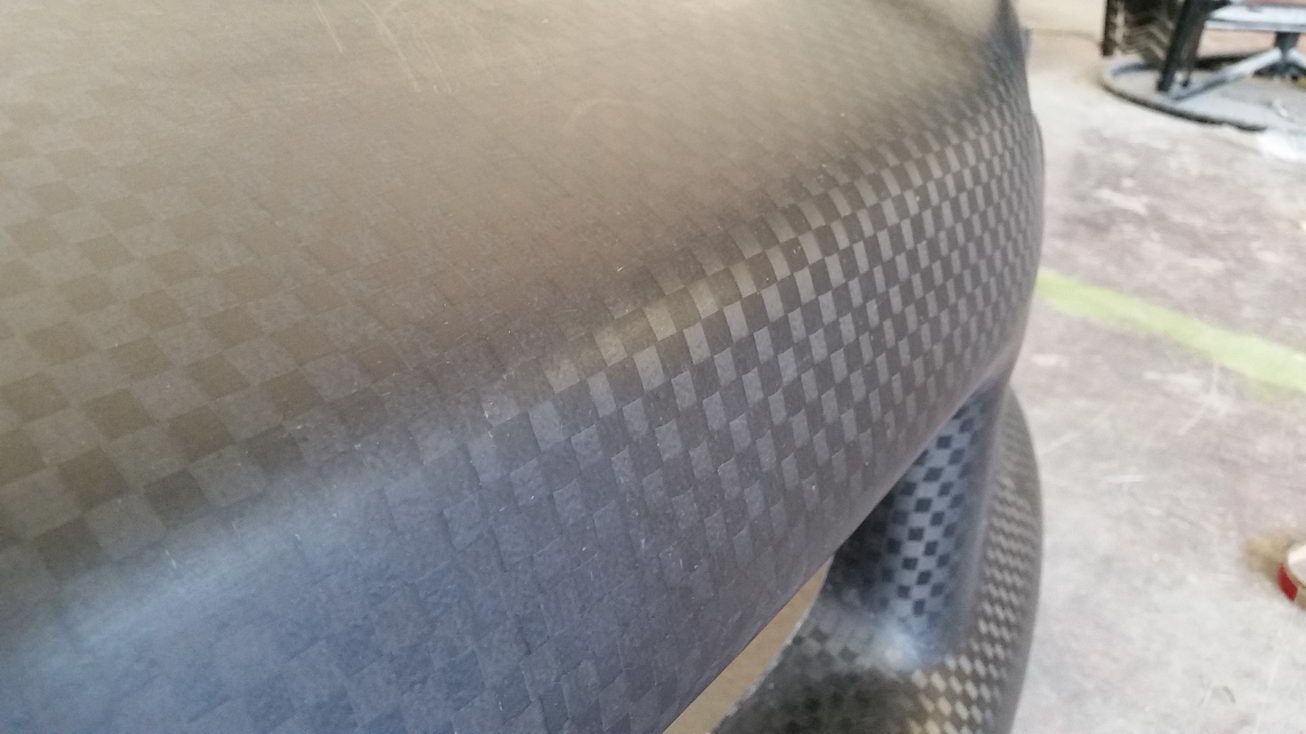
The finish on the topside is covered with a protective film to stop grease and stuff getting into the part before we get chance to seal it so don't worry about that
The previous posts show the finish.
Fraser I have three questions for you:
1) Do you want my 1200/900 springs still? you didn't answer me before
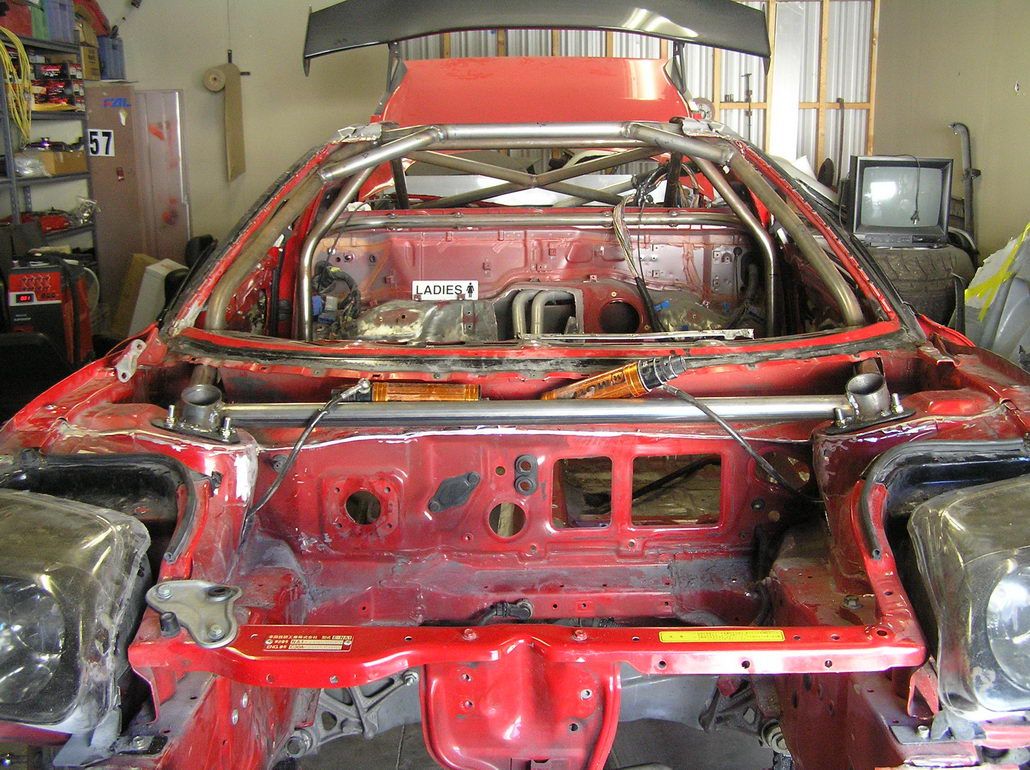
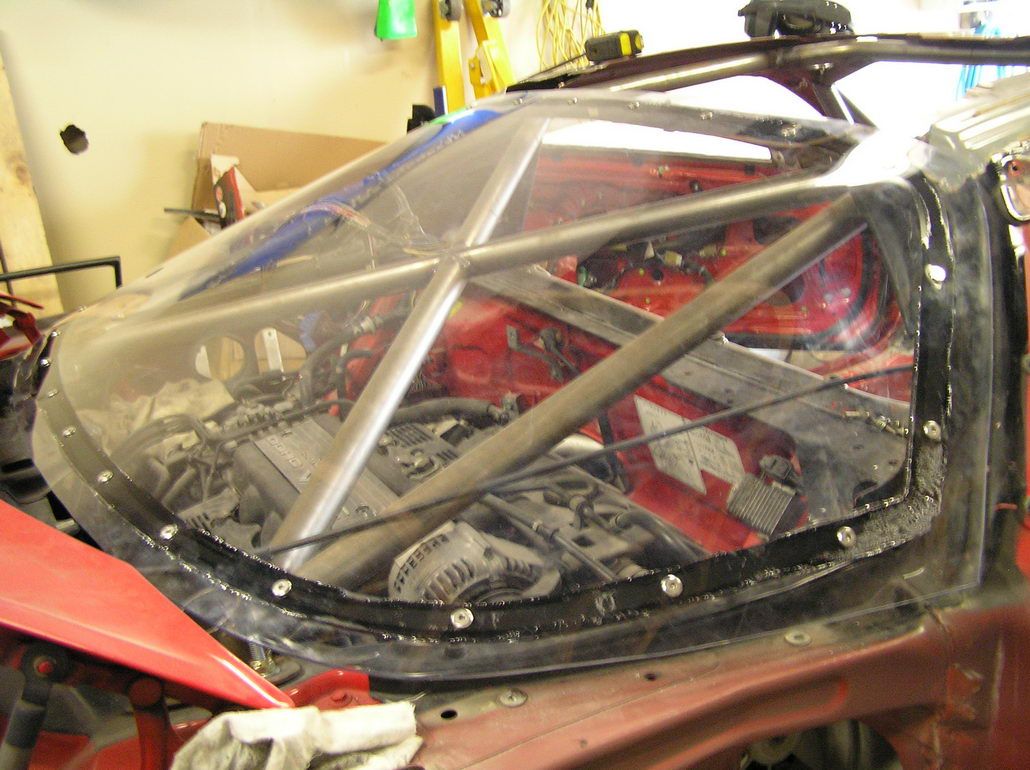
2) How do you service the engine with that X brace on the cage? Is that removable? If so, so you have any details of how it is bolted together? Also is the cage riveted or bonded to that chassis at any spot other than the mounting points?
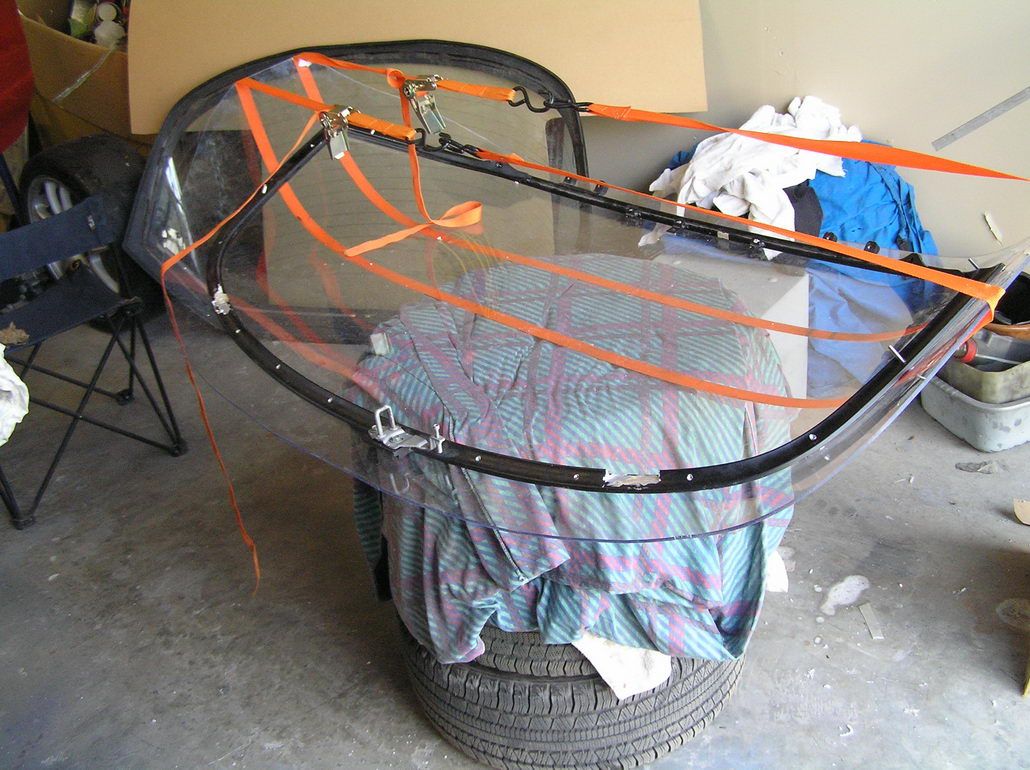
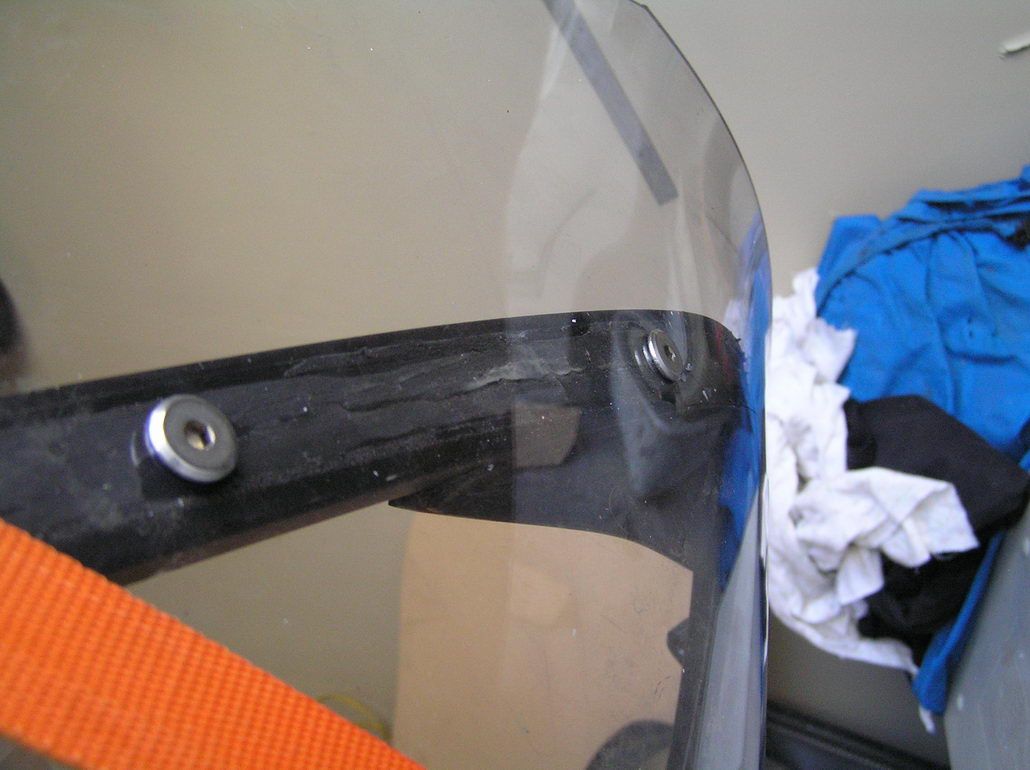
3) I am doing a lexan hatch, looks like yours is riveted or bolted. Mine is only bonded. Did it come like that? If not, what did you use to secure it? I was starting to look for some titanium hardware to do this with.
1) Do you want my 1200/900 springs still? you didn't answer me before
2) How do you service the engine with that X brace on the cage? Is that removable? If so, so you have any details of how it is bolted together? Also is the cage riveted or bonded to that chassis at any spot other than the mounting points?
3) I am doing a lexan hatch, looks like yours is riveted or bolted. Mine is only bonded. Did it come like that? If not, what did you use to secure it? I was starting to look for some titanium hardware to do this with.
1) sent you a PM back but maybe you didn't get it so I've just sent again........... I don't get e-mails from forum when new posts are here or when I get PM's so something odd going on there......
2) Yes we service the engine with it in place as it's not removable........ has never caused any hassles to be honest other than it being a bit more awkward..... hasn't stopped us doing anything we wanted and of course most major stuff is done from underneath. Cage is only bonded and bolted at the base of the main hoop and the base of the front windscreen bar, then it's bolted to plates at every strut tower front and rear so is totally tied into the chassis...........

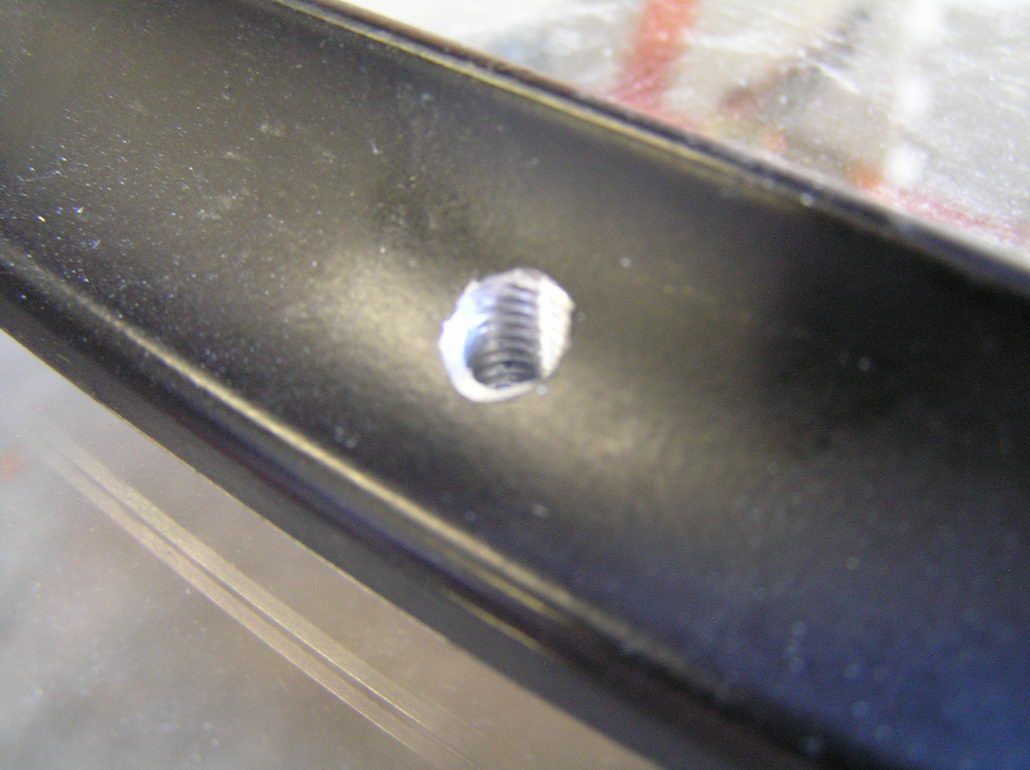
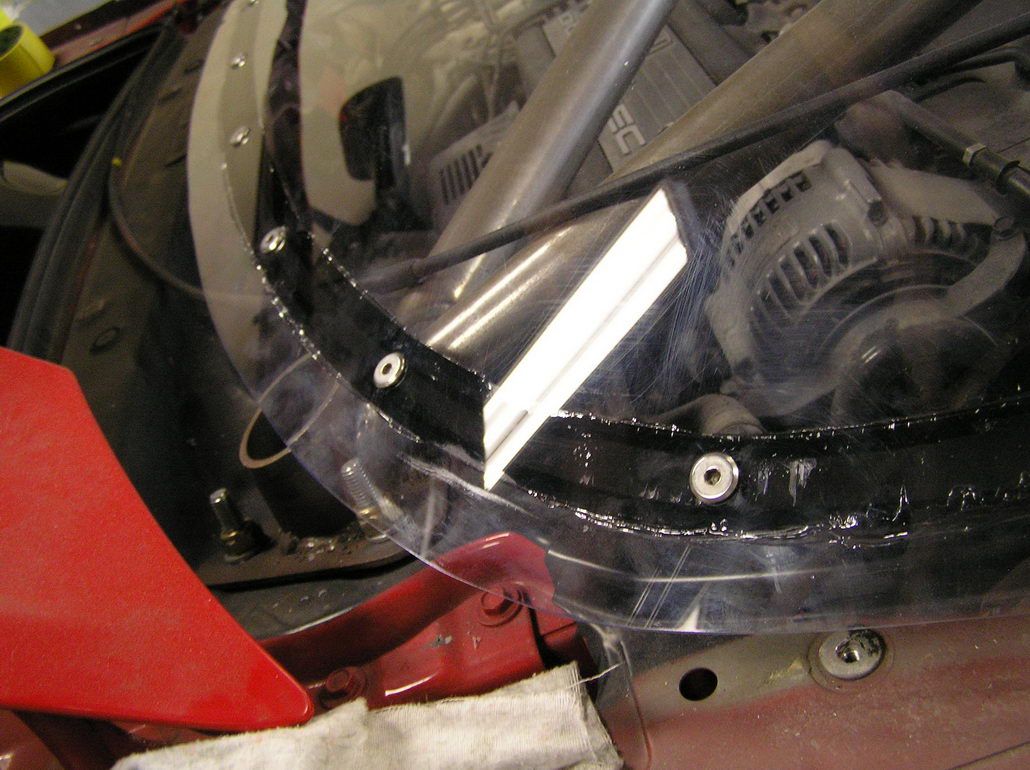
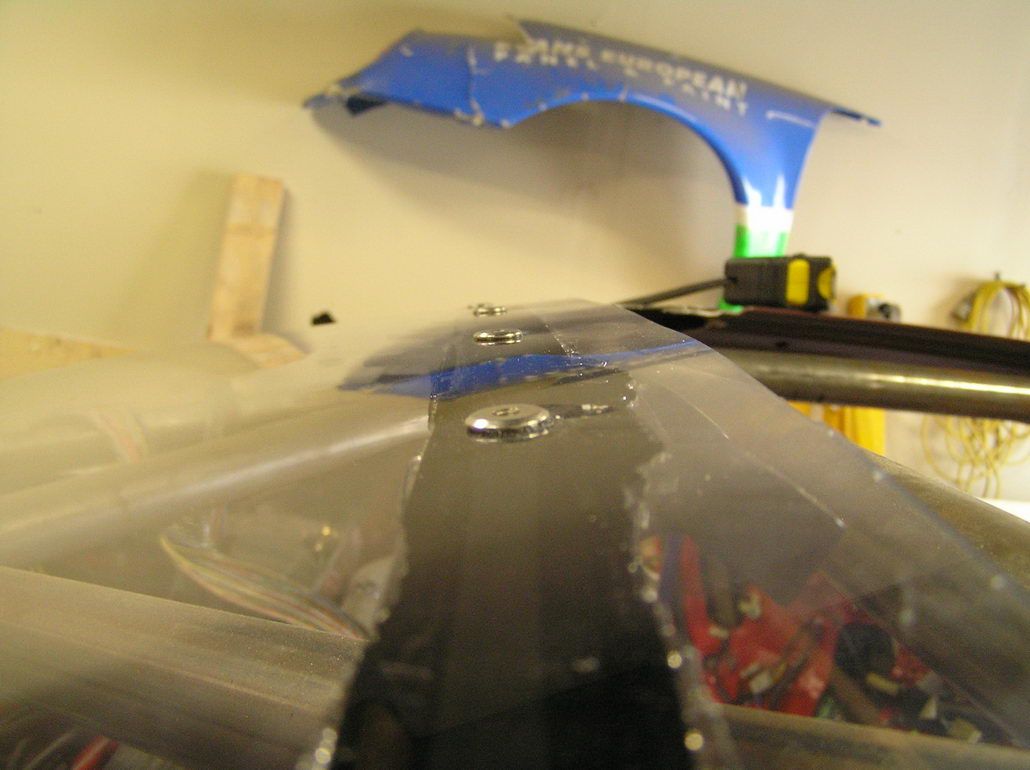
3) I just drilled and threaded holes around the OEM aluminium frame and then laid the polycarbonate over the frame and held in place with a ratchet strap and then drilled holes into the polycarbonate to match..... then I used urethane to stick the polycarbonate to the frame and then bolted to hold it in place. Just the bolts alone would have cracked over time so you need more support with the urethane. We had to use 5mm thick stuff to meet motorsport regulations, but ideally it should be thinner, like 3 mm....
The best way is to get something moulded to the OEM screen shape first so it's not trying to pull itself off the frame.... we didn't we used a flat sheet, but it was a pain in the arse....
2) Yes we service the engine with it in place as it's not removable........ has never caused any hassles to be honest other than it being a bit more awkward..... hasn't stopped us doing anything we wanted and of course most major stuff is done from underneath. Cage is only bonded and bolted at the base of the main hoop and the base of the front windscreen bar, then it's bolted to plates at every strut tower front and rear so is totally tied into the chassis...........


3) I just drilled and threaded holes around the OEM aluminium frame and then laid the polycarbonate over the frame and held in place with a ratchet strap and then drilled holes into the polycarbonate to match..... then I used urethane to stick the polycarbonate to the frame and then bolted to hold it in place. Just the bolts alone would have cracked over time so you need more support with the urethane. We had to use 5mm thick stuff to meet motorsport regulations, but ideally it should be thinner, like 3 mm....
The best way is to get something moulded to the OEM screen shape first so it's not trying to pull itself off the frame.... we didn't we used a flat sheet, but it was a pain in the arse....


Last edited:
Fraser this is awesome, it's great you have all these photos. Really helpful thanks for answering all my questions in such detail. My lexan hatch is moulded, it is from FAL. The OEM glass is only bonded too, but I would feel better with some bolts. I actually like the slightly industrial look of the bolts. I will do the same, tap and thread. My issue was that there was some double sided tape on the glass that was a few mm thick, this lifts the glass up and off the frame a bit. I used some other stuff to achieve the same goal, but that tape started to pull apart. I am re-doing the entire thing. I will find those springs for you.
Ph and I like the 'ladies' sticker in the cabin. LOL
Ph and I like the 'ladies' sticker in the cabin. LOL
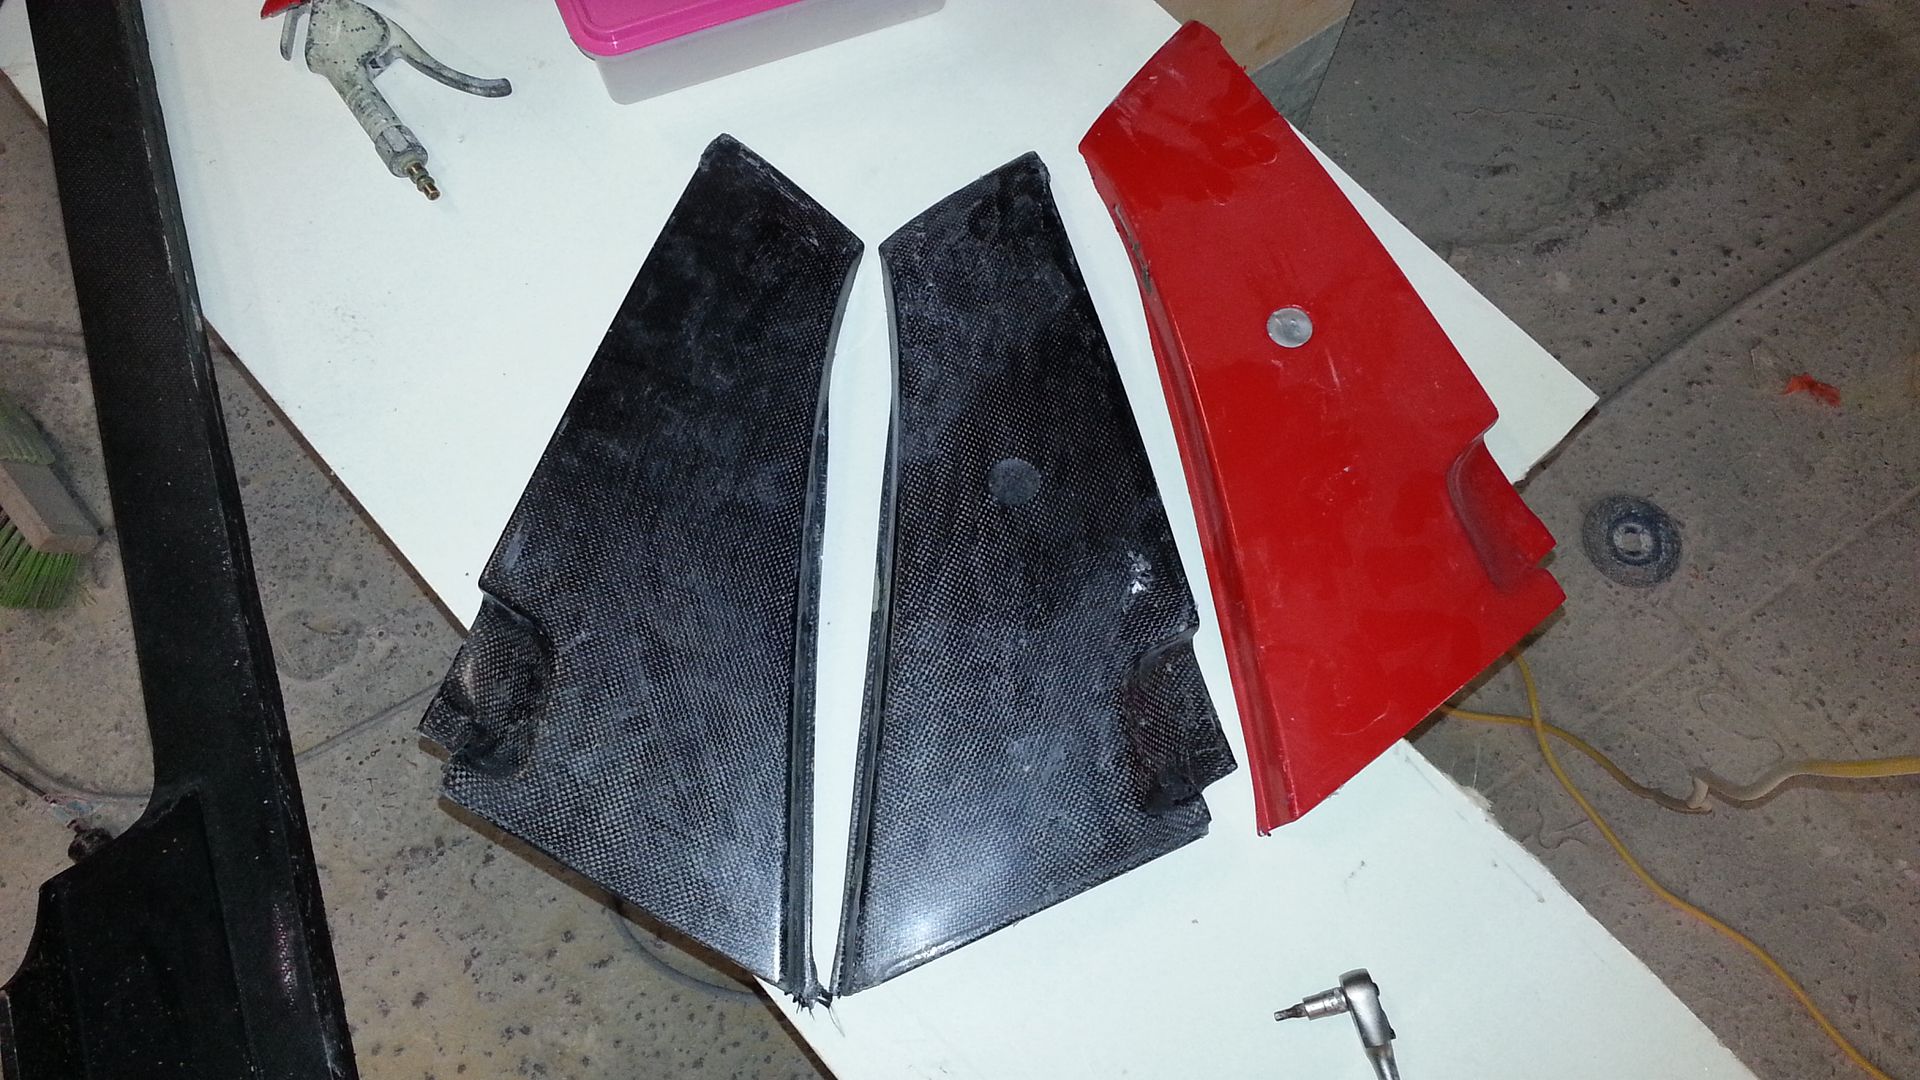
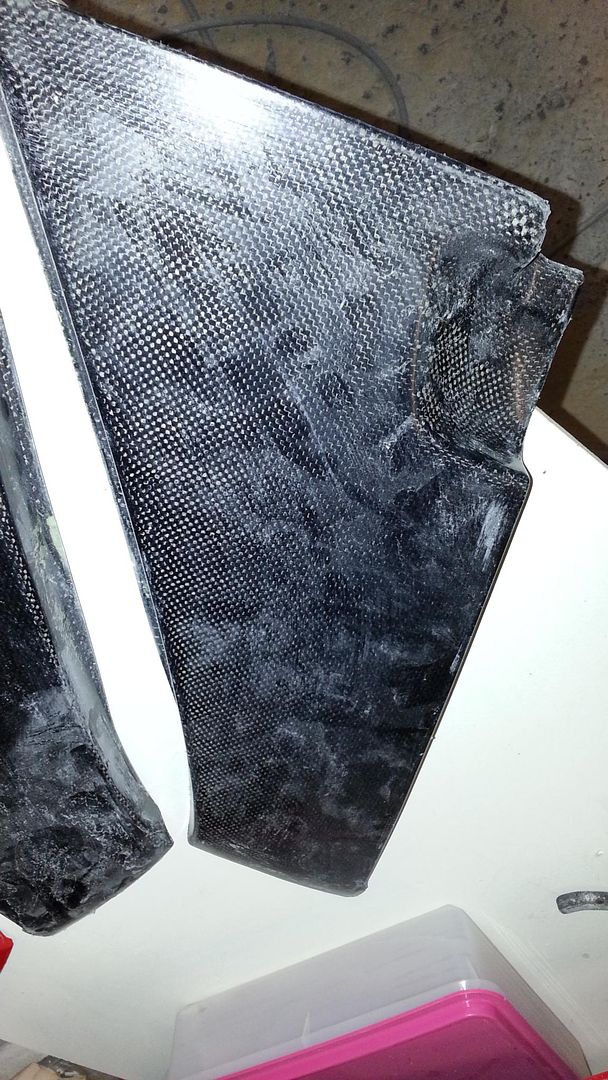
So after a little bit of a break due to "real" work taking over Zac has managed to get the b pillar parts made and they came out great once again. And although the weight saving isn't massive in the scale of the whole car it's been the highest percentage saved so far.........
OEM part is 1.1KG........... Our part.......... 70 grams !!! or 1500% saving !


We also made a start on modifying the side skirts before we made new light weight parts. We always wanted to make this modification but were on a time crunch when we made the originals so we just saved it for now. It's basically just curving them into the front wheel well to aid the clearing of air from inside the front wheel arch........
Zac has just fibreglassed over what is shown above and then we'll get it sanded and painted, then we can take a mould and make parts......... These skirts are bloody heavy so we expect to save close to 10KG in total from both sides...... !!
OEM part is 1.1KG........... Our part.......... 70 grams !!! or 1500% saving !


We also made a start on modifying the side skirts before we made new light weight parts. We always wanted to make this modification but were on a time crunch when we made the originals so we just saved it for now. It's basically just curving them into the front wheel well to aid the clearing of air from inside the front wheel arch........

Zac has just fibreglassed over what is shown above and then we'll get it sanded and painted, then we can take a mould and make parts......... These skirts are bloody heavy so we expect to save close to 10KG in total from both sides...... !!

Yeah yeah I know........... slow update pace but life keeps taking over so we can only do a little bit here and there !
But we've progressed a little bit and we are currently laying up the carbon work for the front bumper (well Zac is) and so it won't be long before we've got a new front bumper. We're going to change the mounting system for this bumper also to make it quick and easy to get on and off. We don't have to do that a lot, but it's a pain to get the current one off when we do need so it's a good time to change the setup.
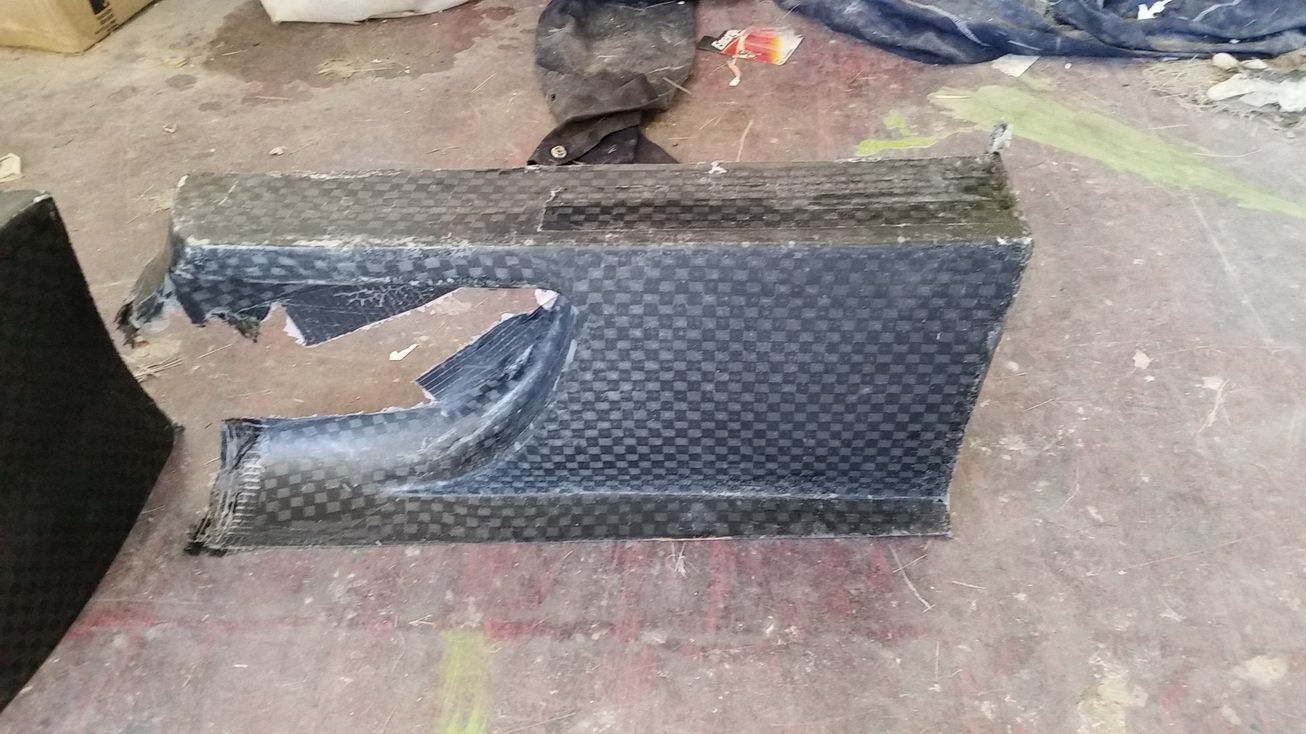
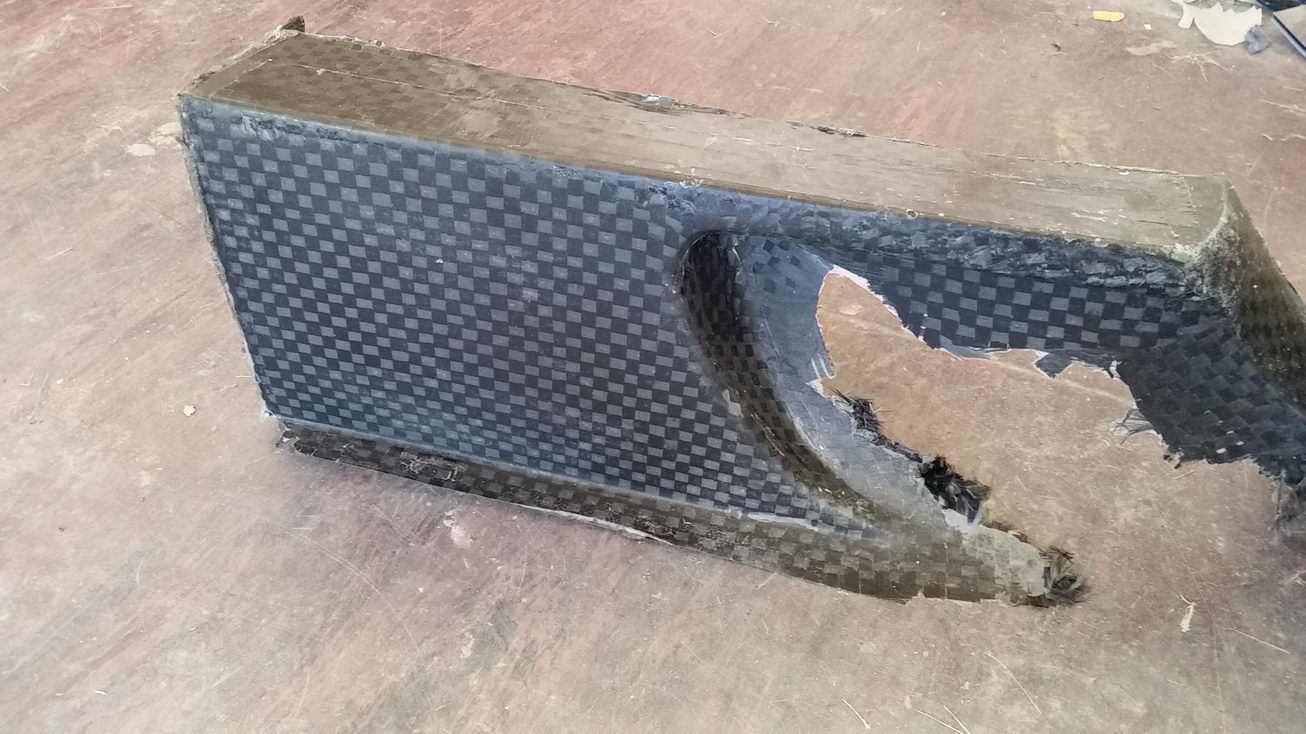
Also we're going to have new lighter side skirts, same design, just carbon......... current weight is 5.5KG each ! Full of filler and thick fibreglass at the moment so we're looking to save close to 9 KG with the new ones and the front bumper we're not sure what we'll save there, but I think 10KG or more also.
But we've progressed a little bit and we are currently laying up the carbon work for the front bumper (well Zac is) and so it won't be long before we've got a new front bumper. We're going to change the mounting system for this bumper also to make it quick and easy to get on and off. We don't have to do that a lot, but it's a pain to get the current one off when we do need so it's a good time to change the setup.
Also we're going to have new lighter side skirts, same design, just carbon......... current weight is 5.5KG each ! Full of filler and thick fibreglass at the moment so we're looking to save close to 9 KG with the new ones and the front bumper we're not sure what we'll save there, but I think 10KG or more also.

I love the carbon fiber work!
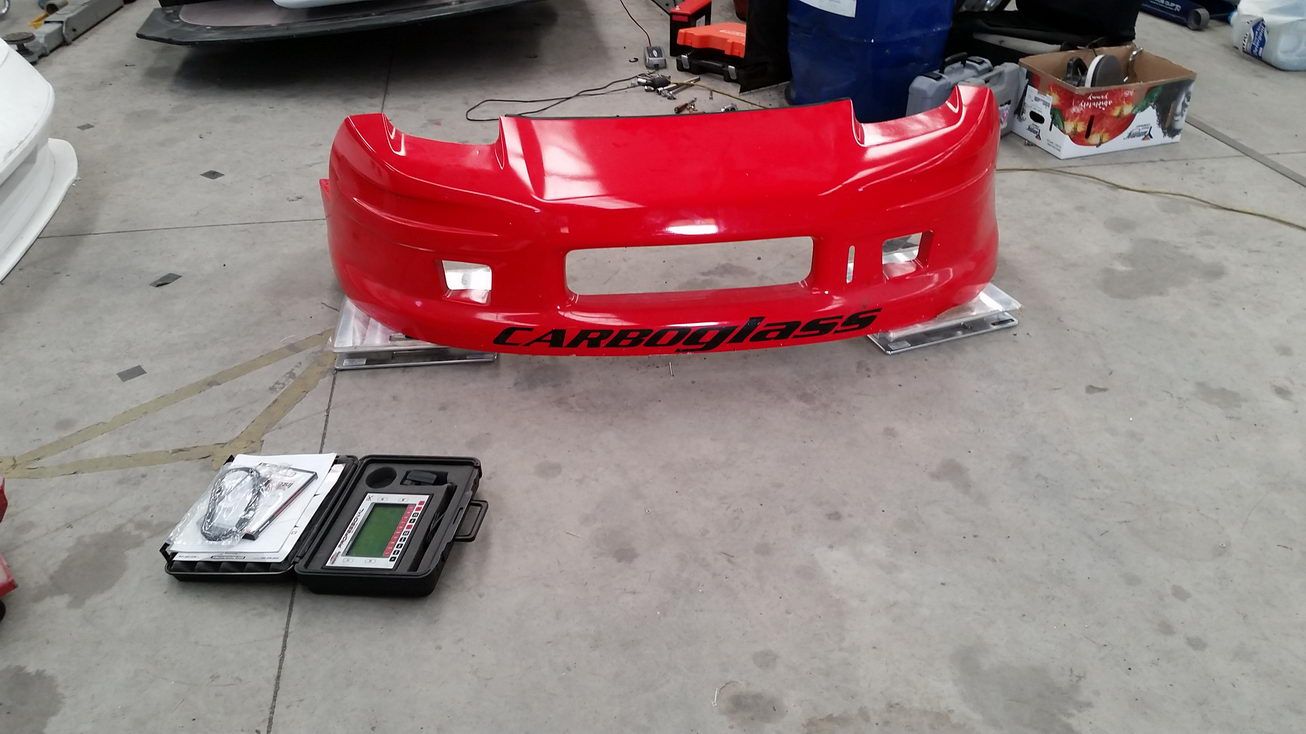
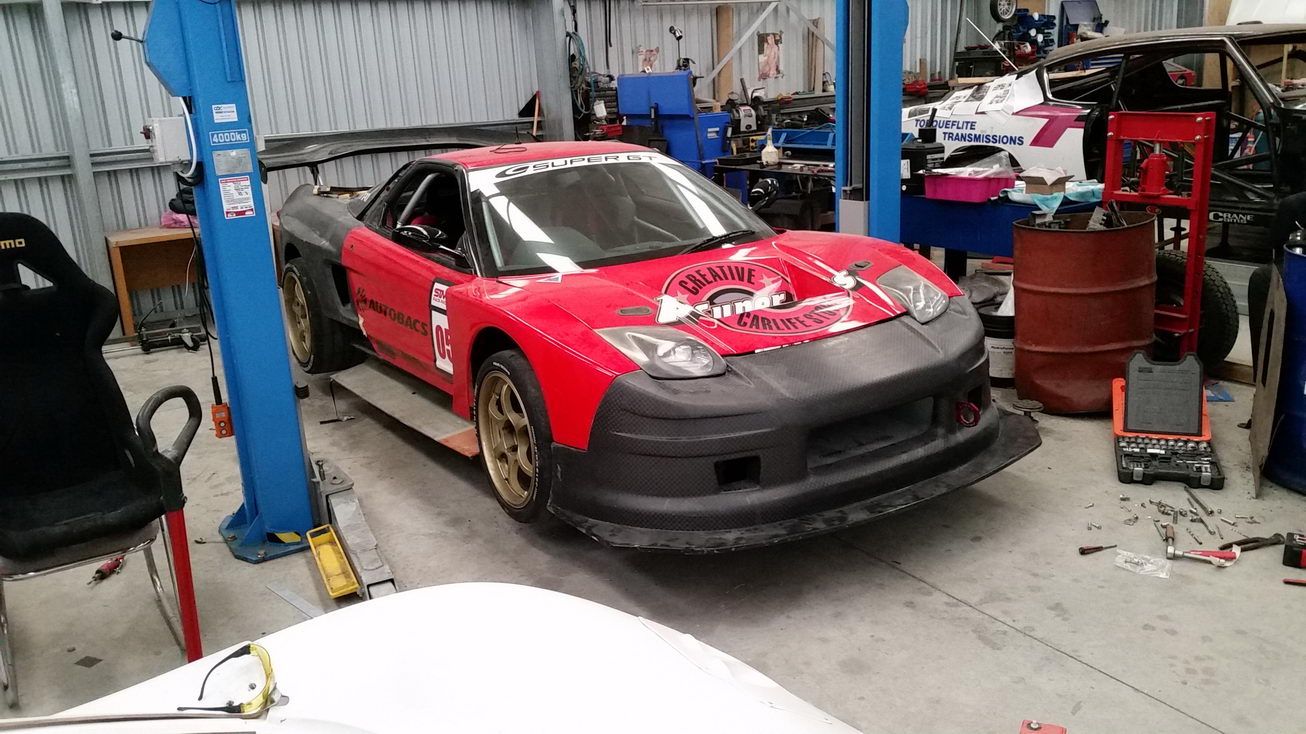
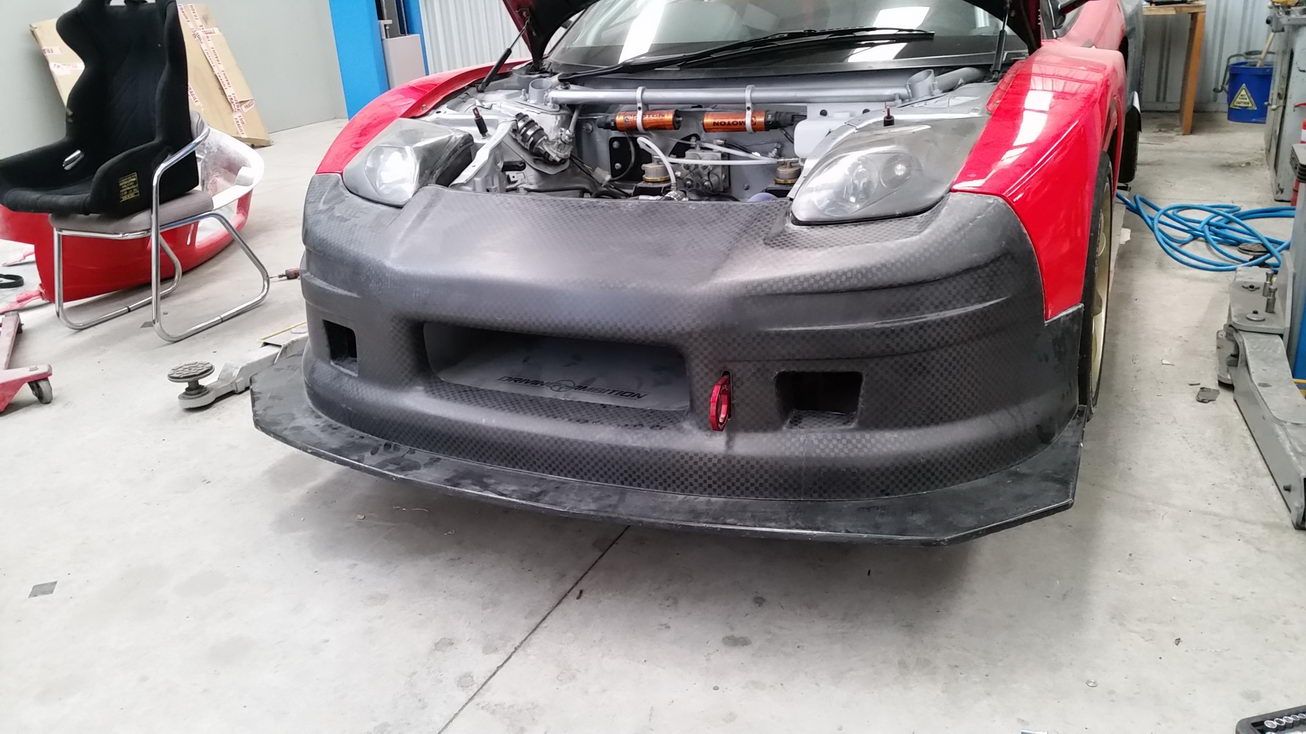
New front bumper came out great.......... best finish yet due to the use of a new clear gel coat that we wanted to use for the rear bumper and other parts but couldn't get at the time.......
Really happy with it. 2.37KG...........also got to weigh the old front bumper for the first time too.......... 13KG ! so over 10KG saved ...... magic.


We also managed to make part of the new side skirts also. These are the outer parts and will be trimmed and then bonded onto the inner part of the sideskirt that we're still making. These are only 200grams and we expect the inner part to weight around 1.2-1.3KG so 1.5KG in total per side and current skirts are 5.5KG so we're looking to save close to 8KG on the side skirts also.


Last edited:
Well as always, we've been busy working on little bits here and there and it's all starting to come together before our test day next weekend.
I haven't got photo's (will take some soon) but I had made some templates for some new wing stays. The old wing stays were mounted to the boot lid, however with the downforce that the larger wing creates it's not ideal so I made a template for some that were much taller so that we could mount them directly onto the chassis and it's also raised the wing up from where it was before and back further too to help keep the airflow attached to the wing. It's taken a while to get those made in aluminium but they're finally done and it works well.
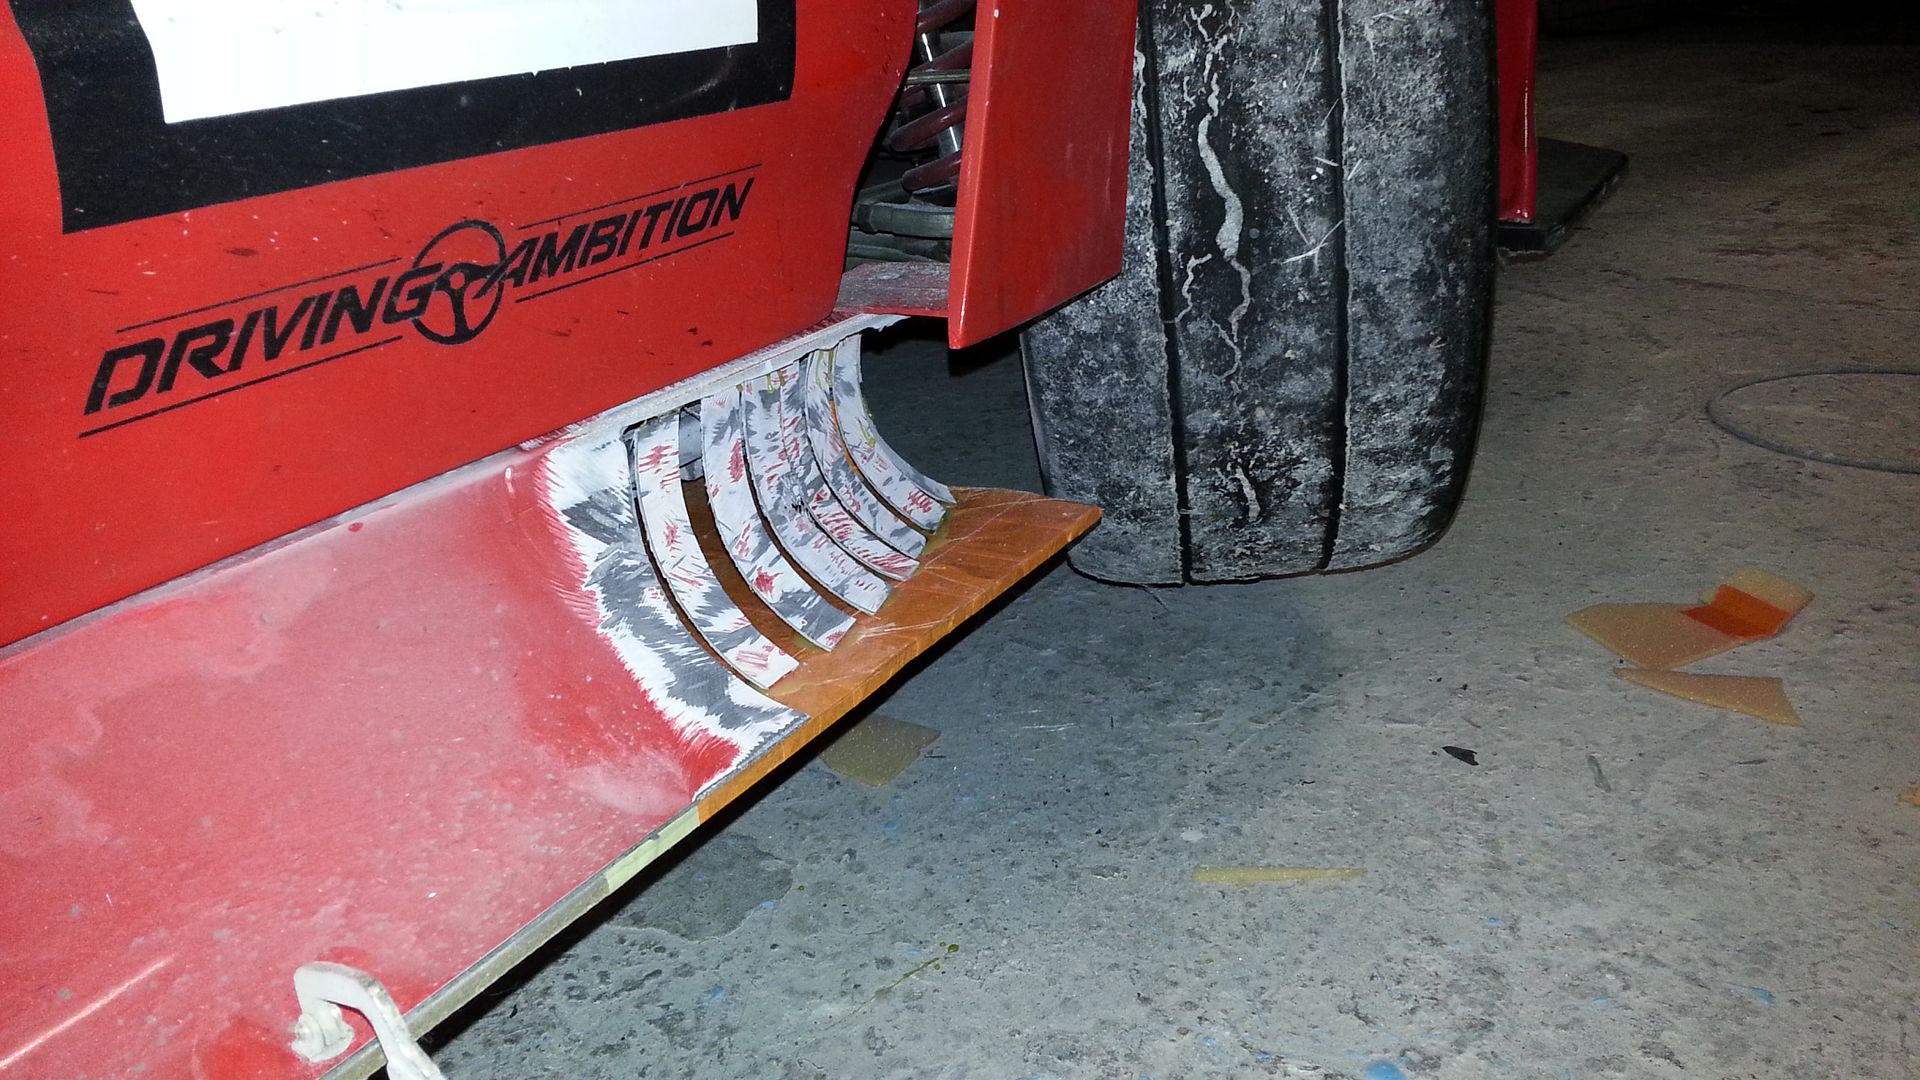
Next we finally have the front bumper loosely mounted. We've changed how the front splitter was mounted. Previously it was just mounted with 2 bolts at the rear and then mounted from underneath around the front and up into the front bumper. That however means the front bumper is taking a lot of the load and more importantly means that to remove the front bumper was a major exercise. Now what we have is the same 2 bolts at the rear coming down through the front battery tray and then I've made a couple of stays that come down from the end of the front chassis rail down to the top of the tray. This means that the front bumper is essentially just sitting on top of the tray and then we'll just use some quick release clips to hold it in position. That means that if we need to remove the bumper it will only be a matter of a few quick release clips ....... it also allows us to make the front bumper much lighter..... double bonus !!
The photo's don't show it fully mounted, but give you the idea.......
Zac is continuing to work on the new side skirts so hopefully by mid next week we'll have those to add to the car and it'll be ready for action ! Will take some more pics of the rear wing and skirts once we've got them done.
I haven't got photo's (will take some soon) but I had made some templates for some new wing stays. The old wing stays were mounted to the boot lid, however with the downforce that the larger wing creates it's not ideal so I made a template for some that were much taller so that we could mount them directly onto the chassis and it's also raised the wing up from where it was before and back further too to help keep the airflow attached to the wing. It's taken a while to get those made in aluminium but they're finally done and it works well.
Next we finally have the front bumper loosely mounted. We've changed how the front splitter was mounted. Previously it was just mounted with 2 bolts at the rear and then mounted from underneath around the front and up into the front bumper. That however means the front bumper is taking a lot of the load and more importantly means that to remove the front bumper was a major exercise. Now what we have is the same 2 bolts at the rear coming down through the front battery tray and then I've made a couple of stays that come down from the end of the front chassis rail down to the top of the tray. This means that the front bumper is essentially just sitting on top of the tray and then we'll just use some quick release clips to hold it in position. That means that if we need to remove the bumper it will only be a matter of a few quick release clips ....... it also allows us to make the front bumper much lighter..... double bonus !!
The photo's don't show it fully mounted, but give you the idea.......


Zac is continuing to work on the new side skirts so hopefully by mid next week we'll have those to add to the car and it'll be ready for action ! Will take some more pics of the rear wing and skirts once we've got them done.
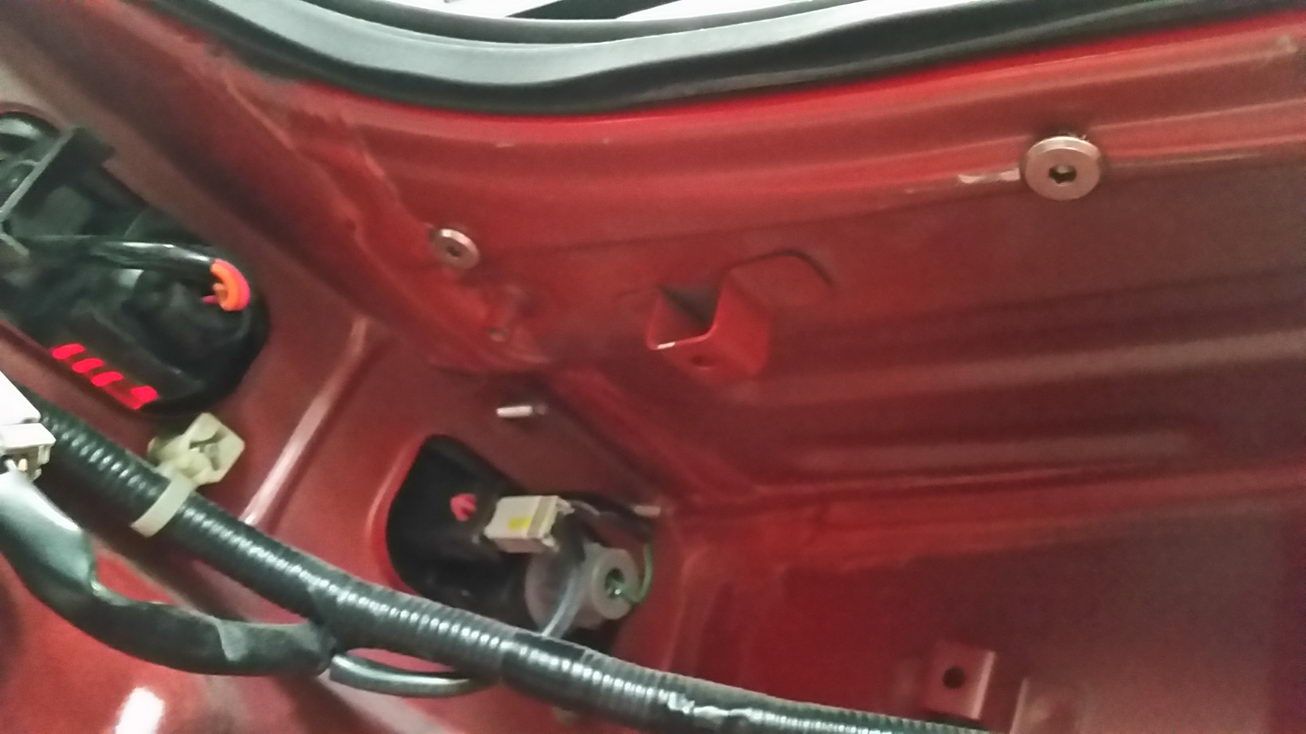
As promised, some more photo's of the new rear wing stands that we made to allow us to hard mount the wing directly to the body rather than having it bolted to the rear boot lid.
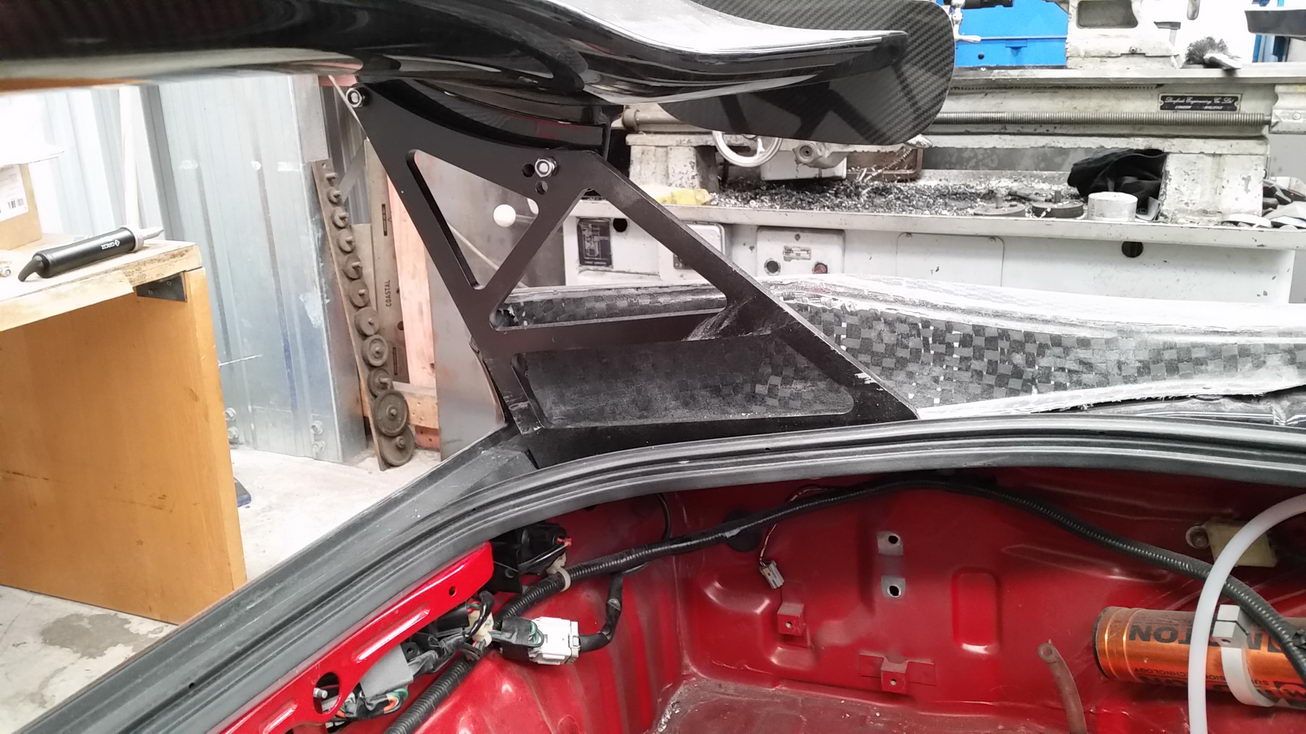
From underneath, just 2 button head bolts go up into a thread in the bottom of the stay. We plan to put an extra strut from the body down to the floor of the boot also to give it more support if we see it's not coping as it is.

Comparison of old and new stay. Even though I've shown them together, the old stays used to sit further forward than where we've mounted the new ones, so the wing sits back quite a bit further than before.

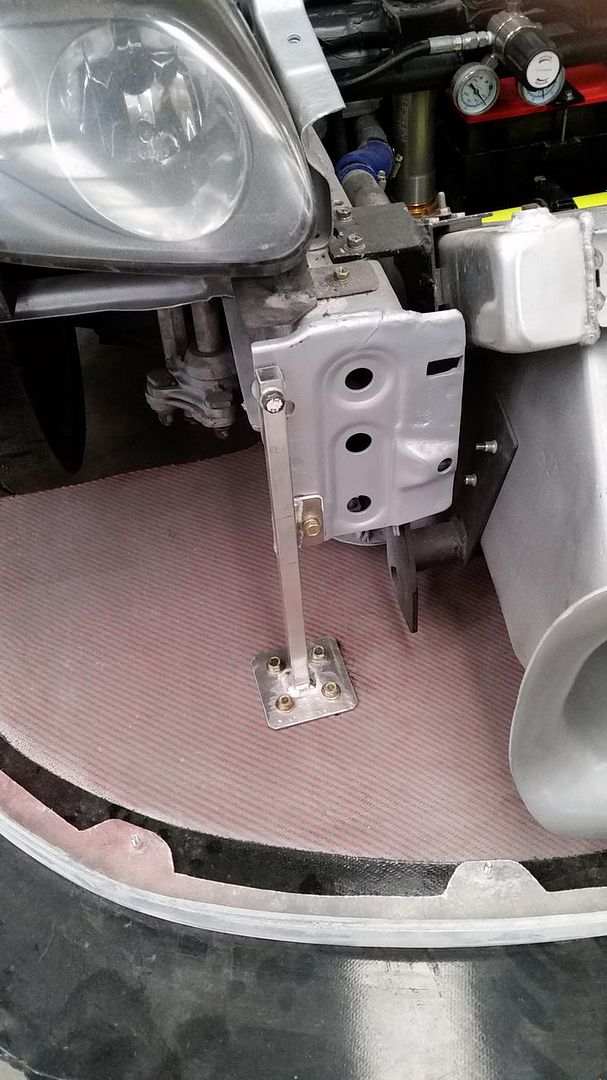
These are the new front stays to hold the front splitter. Its also held at the back by 2 bolts that come down through the battery tray...but these now hold the front of the tray vs the old bumper holding it up.

In other news........ sanded up the side skirt moulds that Zac has been working on most of the week and prepped them with release agent ready for Zac to start making parts over the weekend !! So hopefully mid next week we'll have finished skirts to fit........

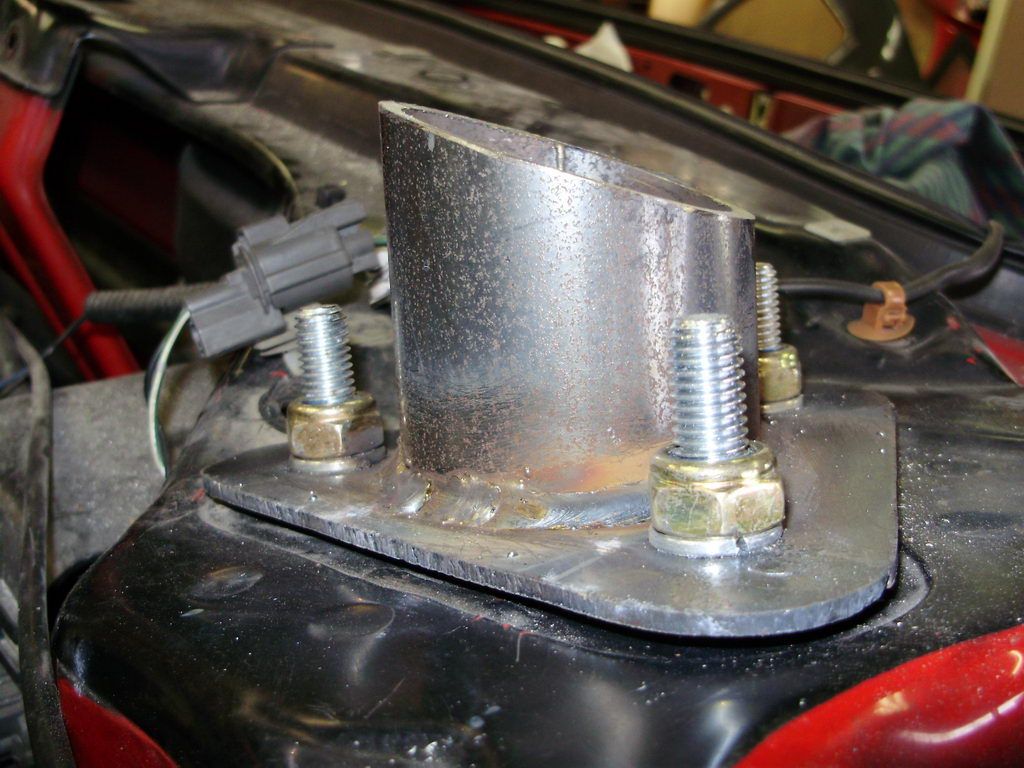
Turbo2Go...... that towhook is aluminium and only weighs just over a pound so not even worth worrying about a cloth one in my book.....

From underneath, just 2 button head bolts go up into a thread in the bottom of the stay. We plan to put an extra strut from the body down to the floor of the boot also to give it more support if we see it's not coping as it is.


Comparison of old and new stay. Even though I've shown them together, the old stays used to sit further forward than where we've mounted the new ones, so the wing sits back quite a bit further than before.

These are the new front stays to hold the front splitter. Its also held at the back by 2 bolts that come down through the battery tray...but these now hold the front of the tray vs the old bumper holding it up.


In other news........ sanded up the side skirt moulds that Zac has been working on most of the week and prepped them with release agent ready for Zac to start making parts over the weekend !! So hopefully mid next week we'll have finished skirts to fit........

Turbo2Go...... that towhook is aluminium and only weighs just over a pound so not even worth worrying about a cloth one in my book.....
Last edited:
Similar threads
- Replies
- 0
- Views
- 212
- Replies
- 1
- Views
- 296