I guess you were asking about the initial flush after newly installed ABS modulator and if that was the case, then as Larry mentioned, there is no special requirement for it.
It’s already done at the manufacture and as the latest ABS consists part of the main brake system (it shares the brake fluid from the master cyl, unlike the classic ABS that has its own separated Hyd sys and reservoir), all solenoids are configured in a way that it can transfer the brake pressure even without the power supply.
If you cut open the Proportioning Valve (PV), you will see NSX PV doesn’t have any bias point before the PV starts reducing the brake pressure at the rear calliper (like on other ordinary production cars) so it will start acting as PV as soon as you apply even small pressure.
Therefore, when bleeding the air, it will save the time and fluid by starting from the front side on later spec ABS.
There is no problem in bleeding the air by following the old school textbook method of starting at the furthest corner from the master cyl. You will be able to bleed the air no problem but may take extra time depending on how far you emptied the system.
I use pressure bleeding so no huge deal.
Regarding the ABS light, if it’s genuine, you should be able to read the error code.
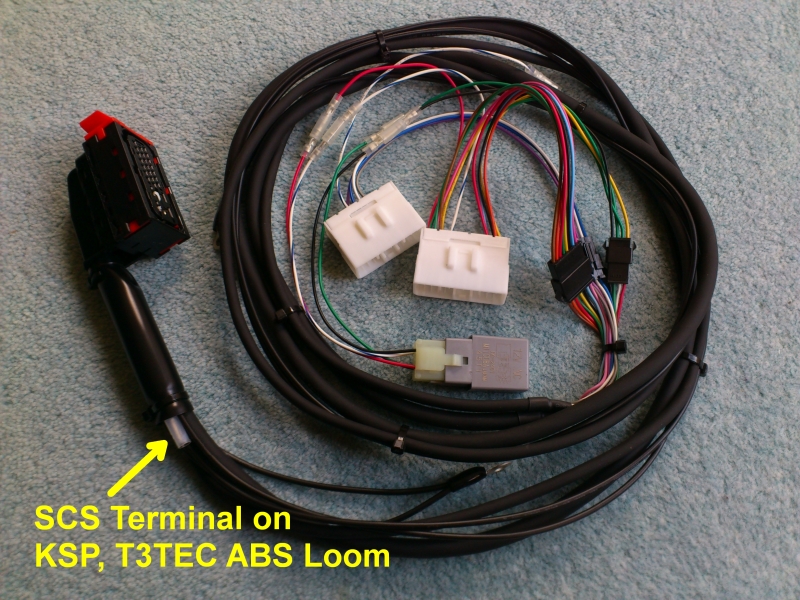
Unless you followed the specific sequence involving the brake pedal, IG key and the SCS terminal, you can’t erase the error code from the later spec ABS.
Unlike the classic ABS, removing the fuse or disconnecting the battery/cable won’t erase the error code.
From your build thread, looks like you upgraded your ABS using the KSP upgrade loom.
You need to change the loom configuration based on the factory ABS warning light circuit (3 different configuration depending on the year models) but from what you wrote, it seems you have done it properly. If done properly, the operation of the ABS light after the upgrade using the KSP loom should follow the same scenarios like on the 99/00+ spec factory ABS loom.
That is;
When you turn the IG key to ON position (P2), the ABS light will stay ON for about 2sec for the light bulb check mode. Then, if you turn the key further to crank the engine (START position, P3), the ABS light will stay OFF until you release the key for stop cranking.
As soon as you release the key and it goes back to P2, the ABS light will come back ON for another 2sec and then switches itself OFF if no errors were stored or depending on the error mode.
The loom from SoS won’t follow the above scheme as their loom uses different power source.
From what you wrote, there is a chance that you are triggering the ABS warning light due to low system voltage under sudden hard braking. If this was the case, you should see code
#61 or 62. For these two codes, the ABS light will distinguish itself once your ACG voltage gets back into the normal operation window.
Or, you have damaged wire, loose connector and triggering the ABS light without actual issues. For this case, you won’t see any codes.
Kaz


") I cannot duplicate/activate it on the street even when stomping on the brakes and forcing ABS to trigger.
I cannot duplicate/activate it on the street even when stomping on the brakes and forcing ABS to trigger.